Blog: Easter Eggs

Happy Easter! Happy Spring!

Happy Easter! Happy Spring! This time of year always gives me a little boost – the air is warming, the parks are greening up, the farmer’s markets will be opening up soon, and flowers are in bloom. I usually also feel more inspired and I am in the mood to create. Are you feeling some new creative energy too? How about a roundup of Spring and Easter themed projects to give you some ideas?

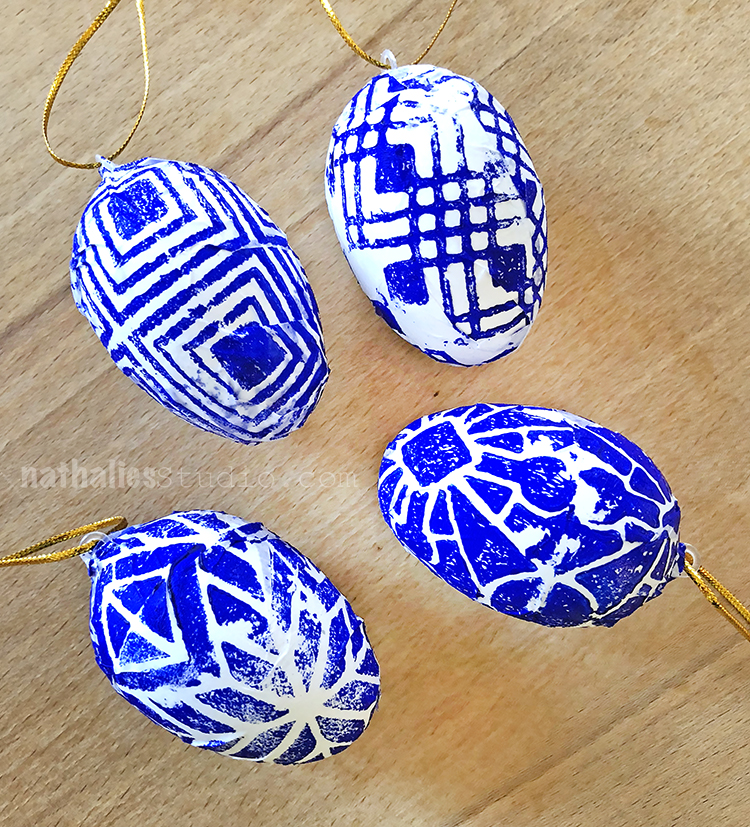
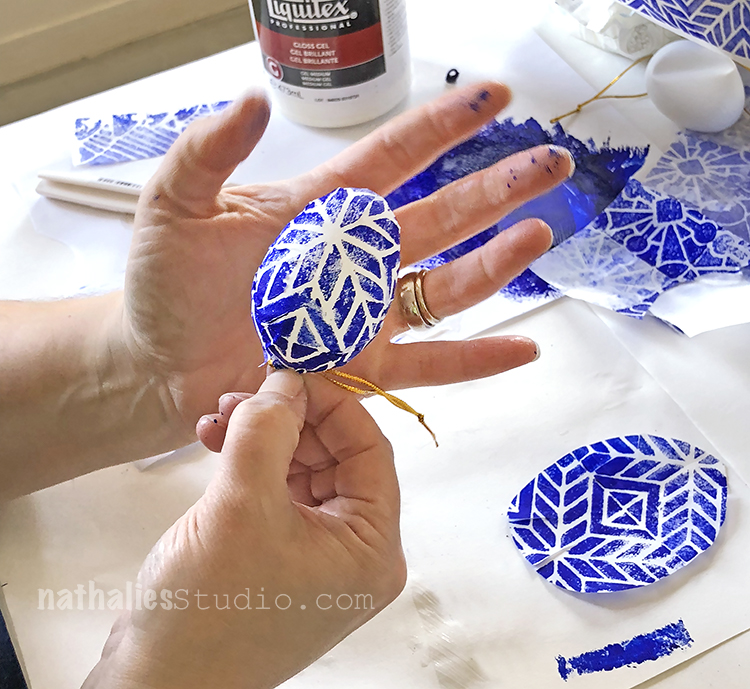
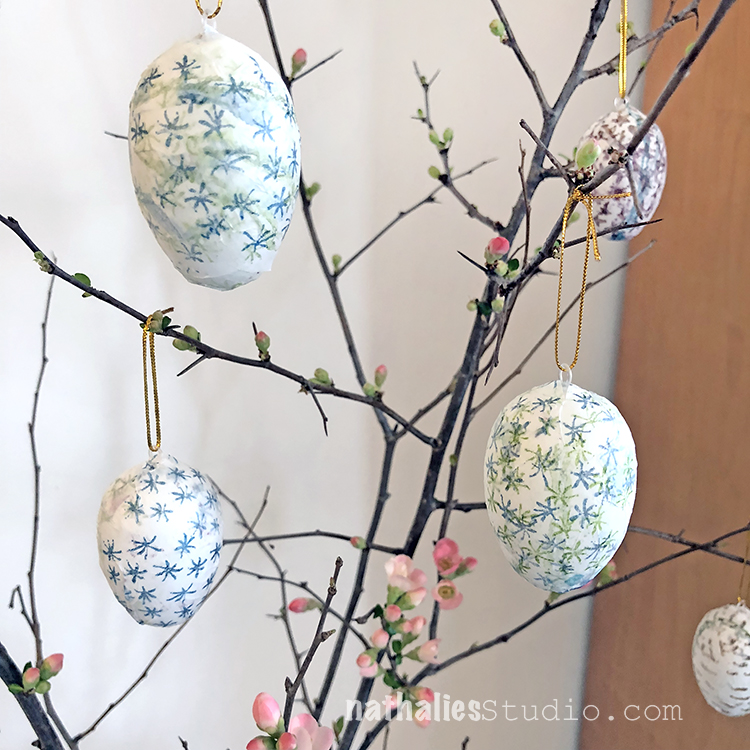
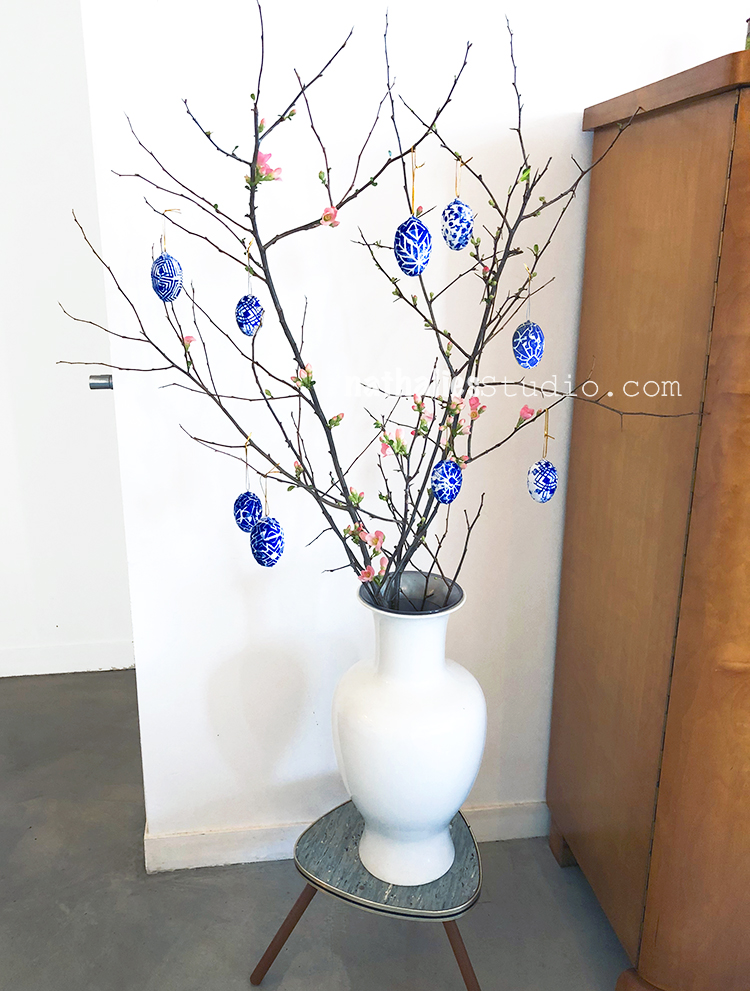
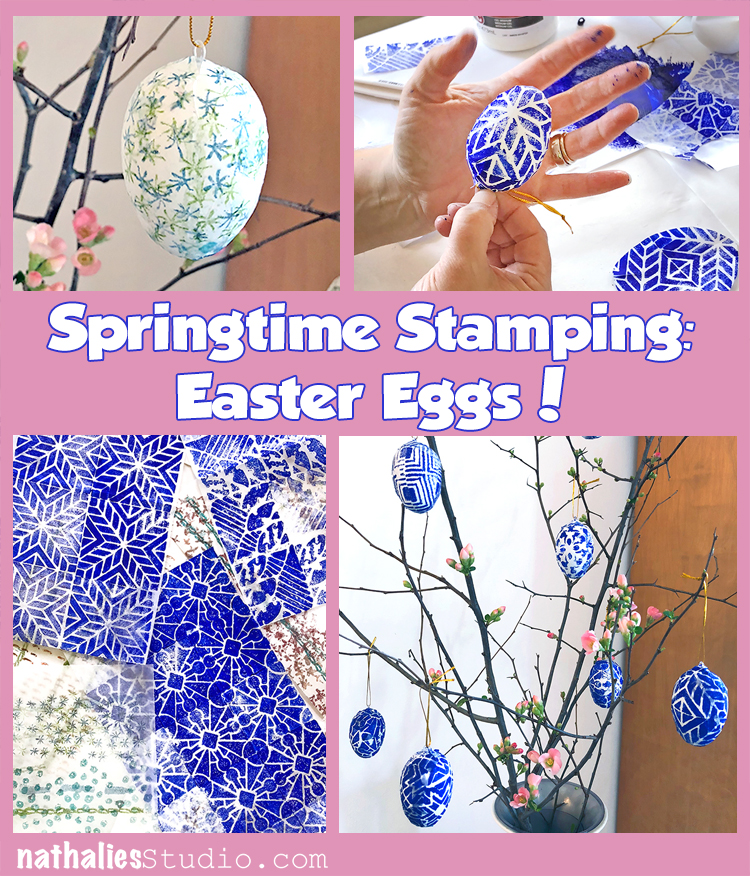
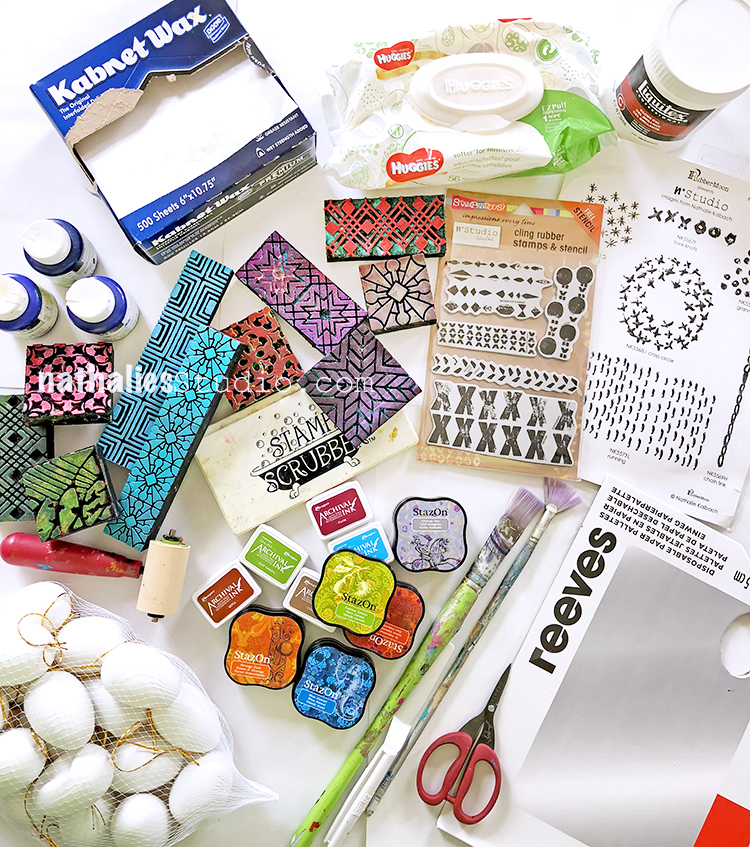
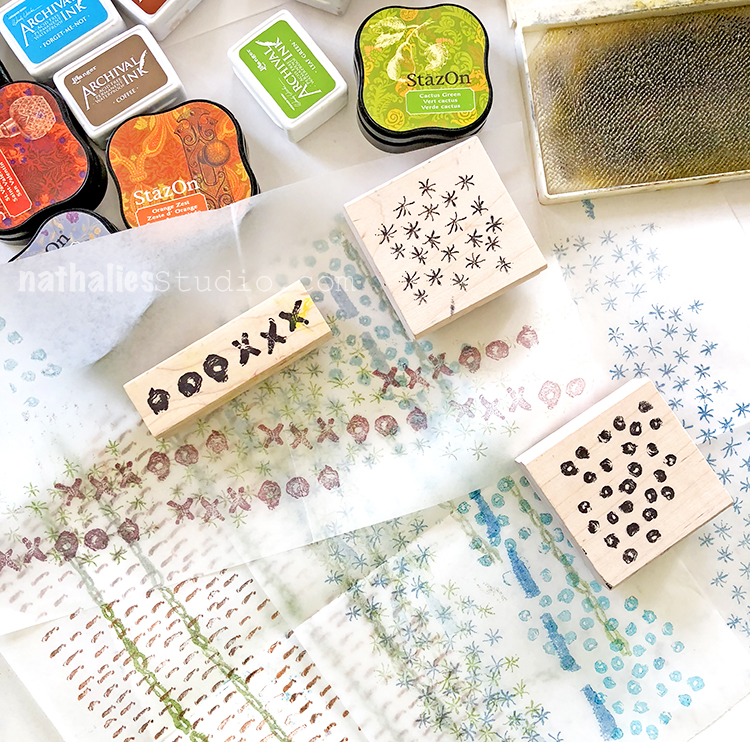
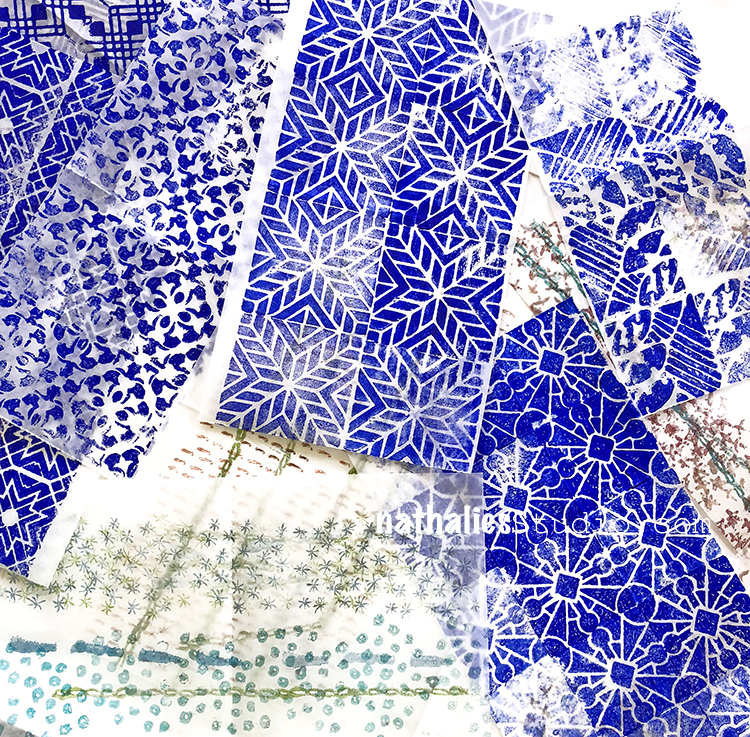
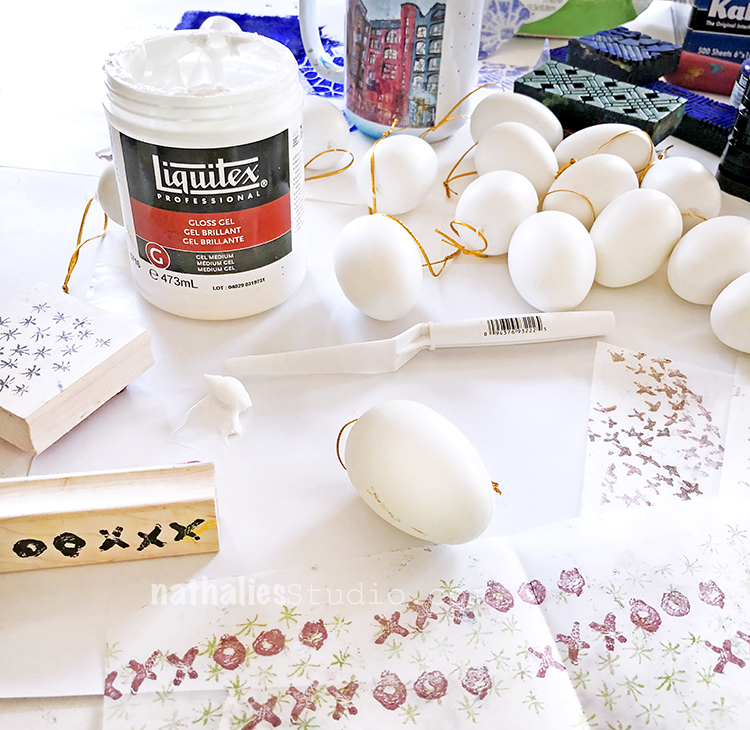
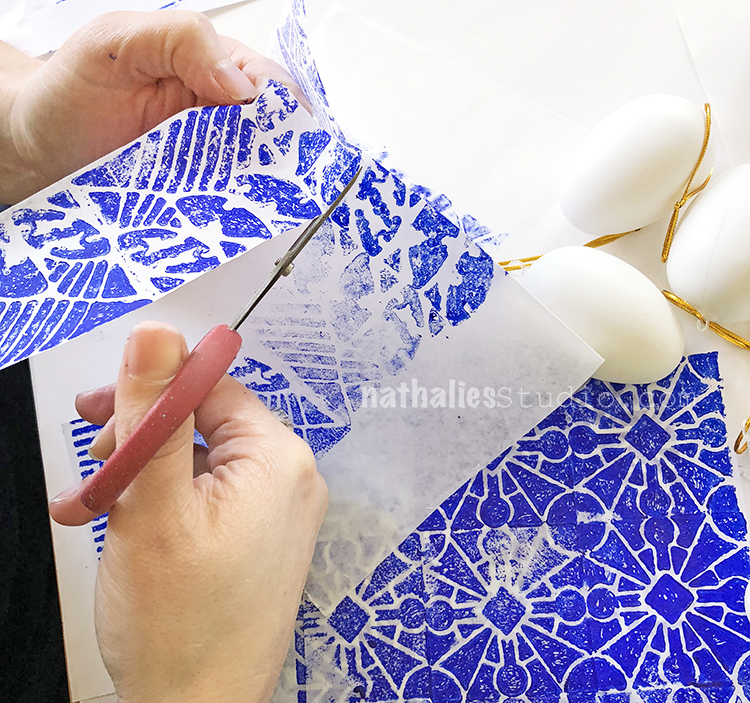
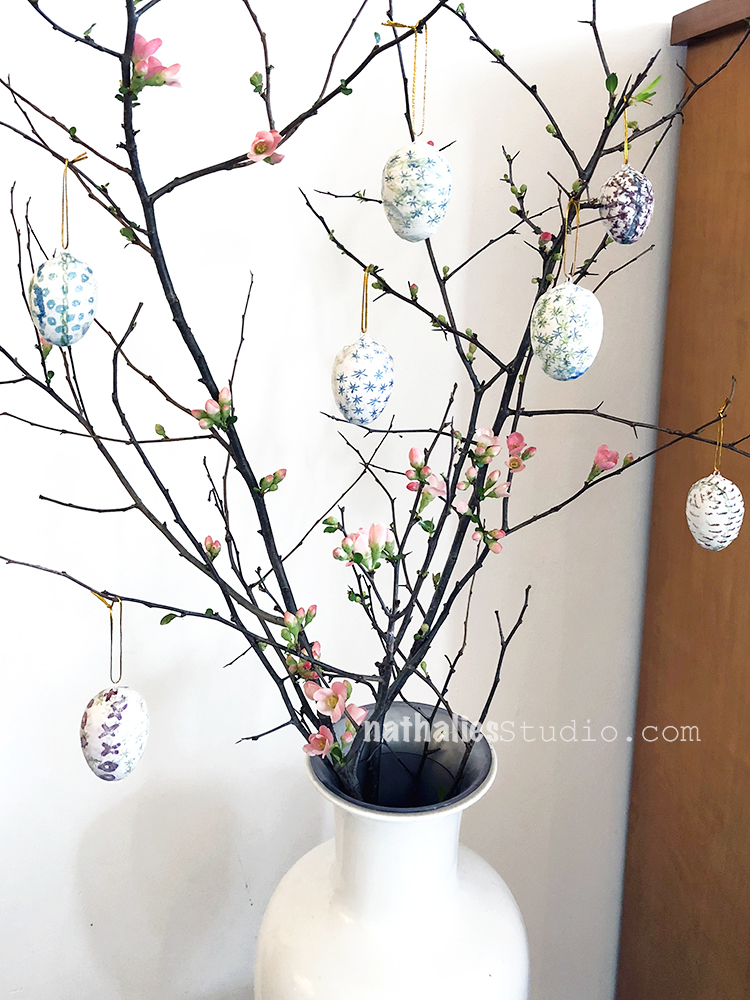
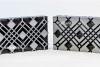
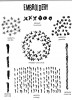
Creating these classic Easter decorations is one way to celebrate the season. In this project we covered hanging eggs with collage papers that we made using my Buenos Aires and Santiago foam stamps and my Embroidery rubber stamps. Store bought hanging plastic eggs can easily be personalized with stamps using color and pattern to suit your style.

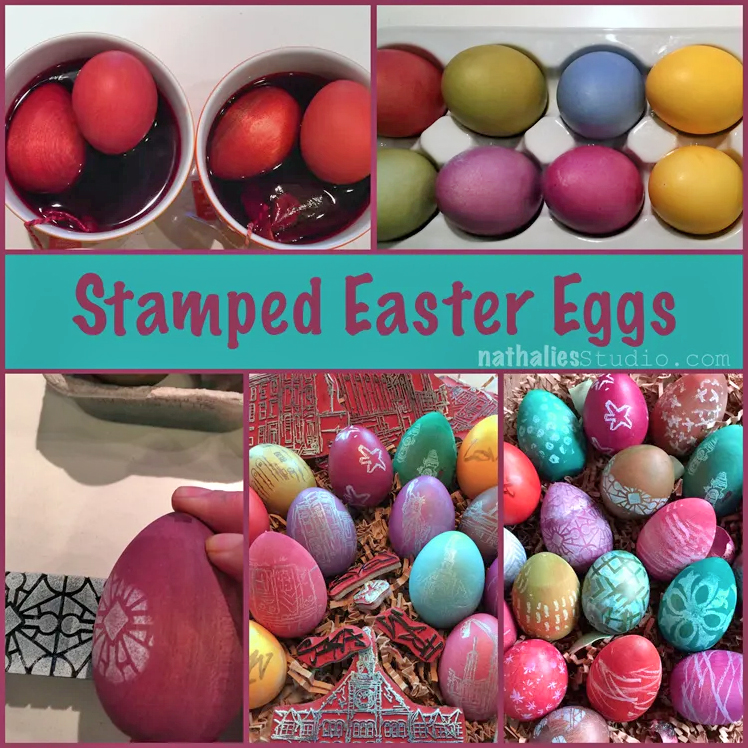
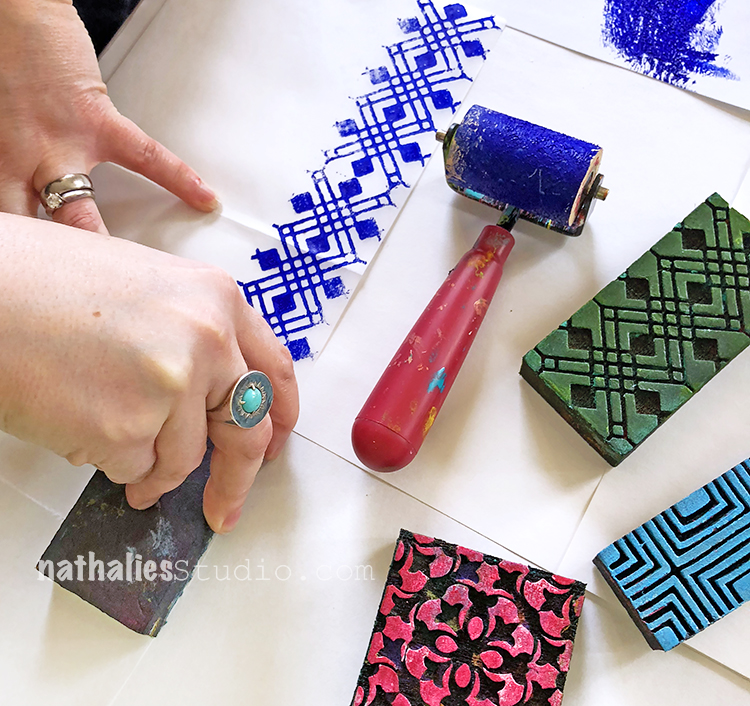
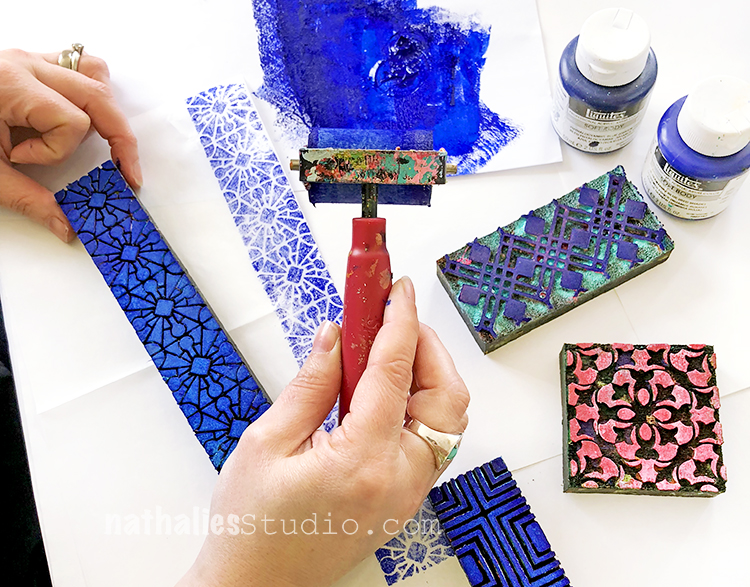
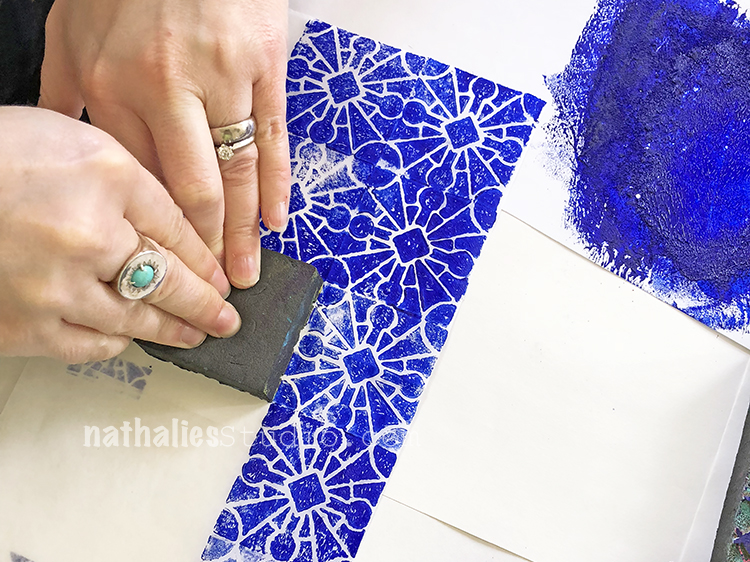
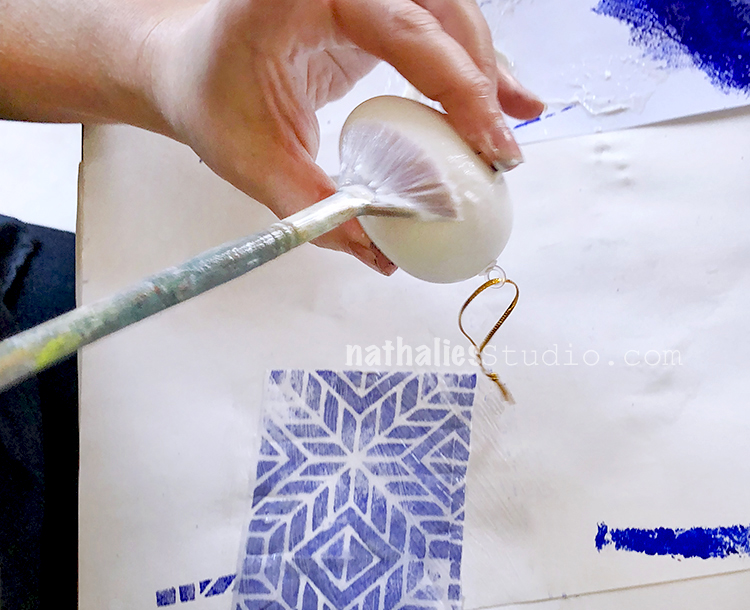
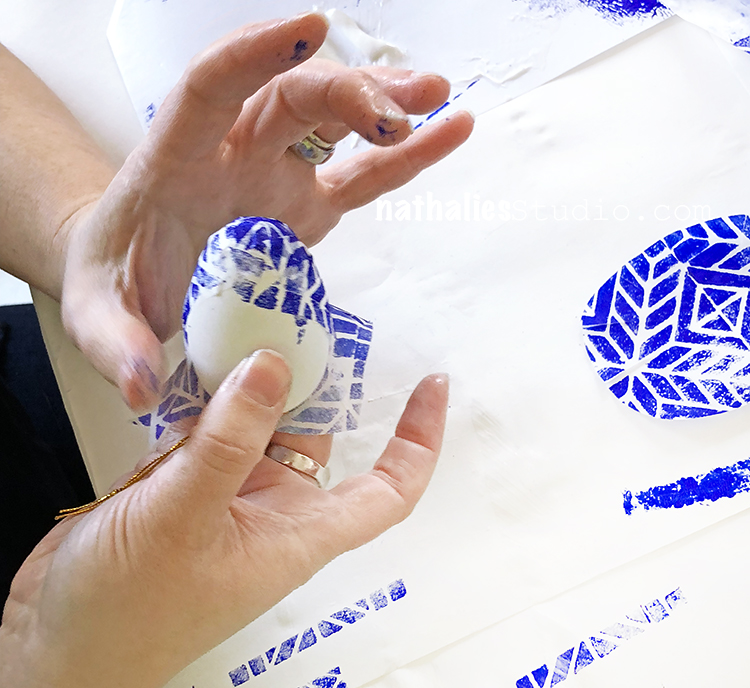
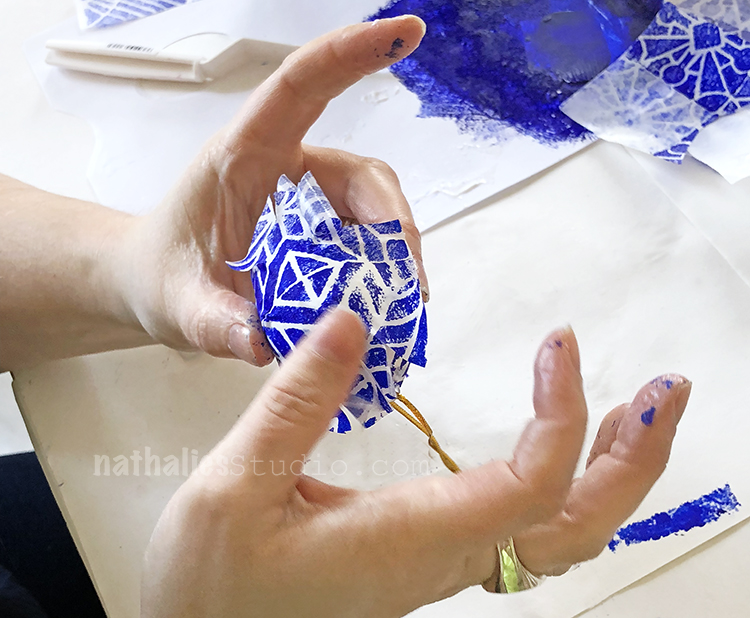
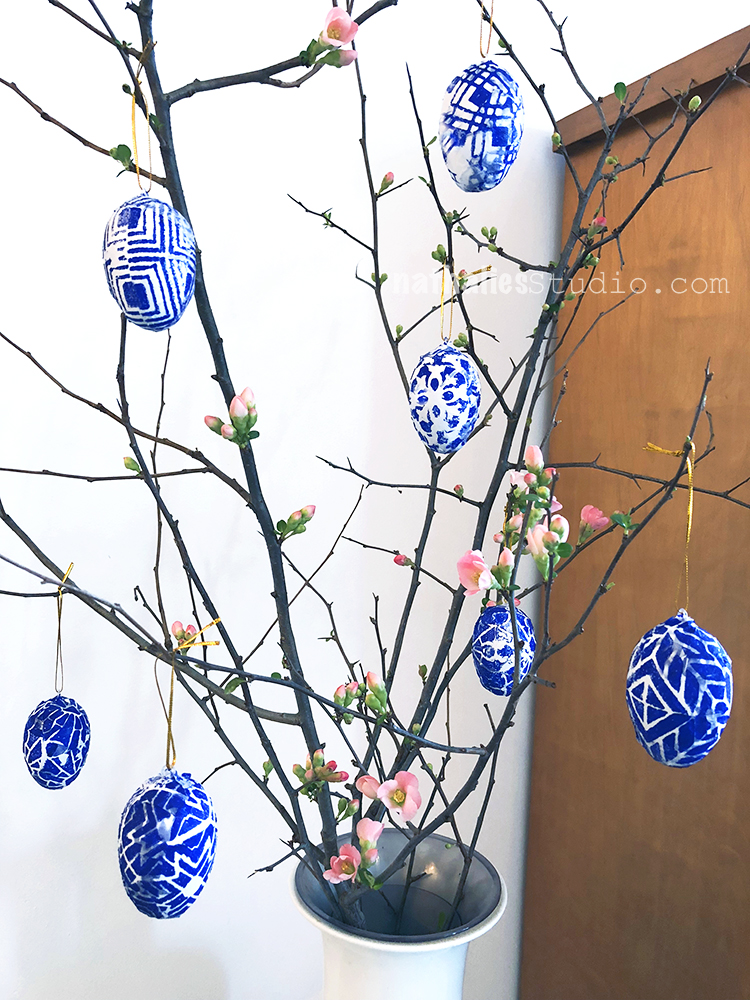
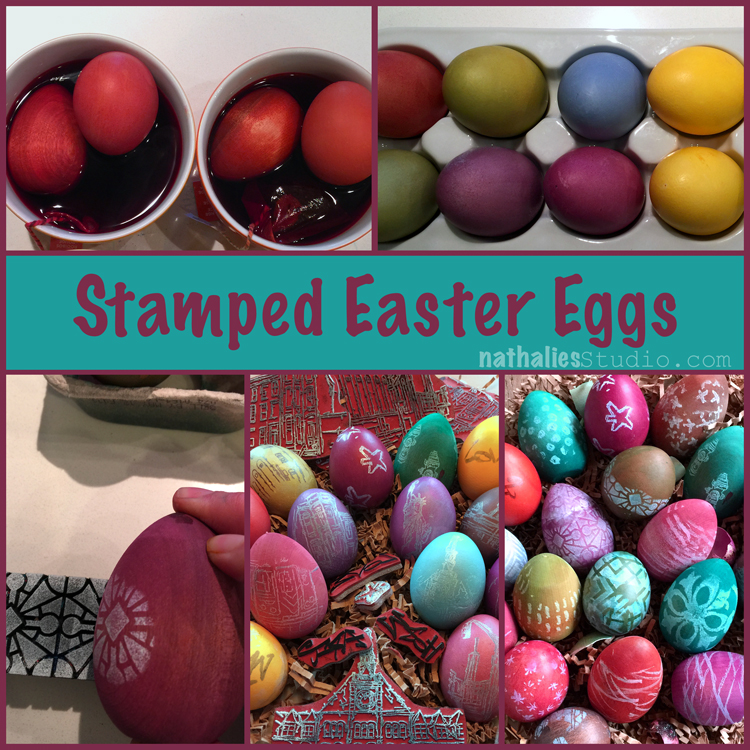
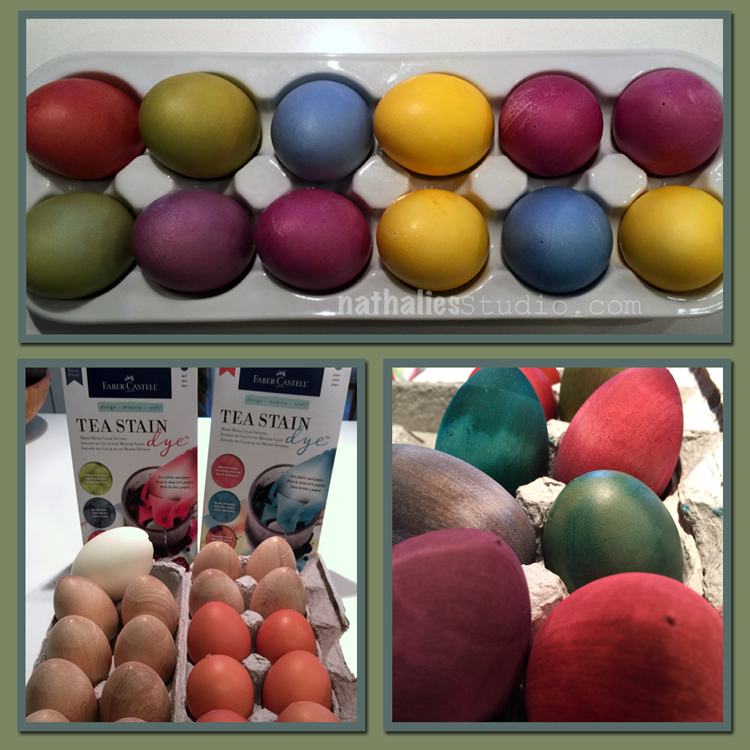
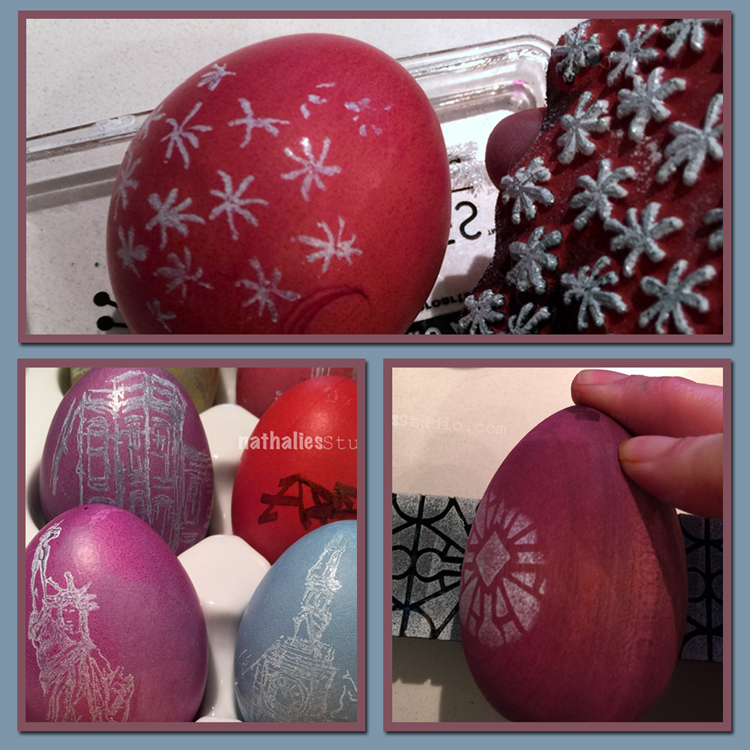
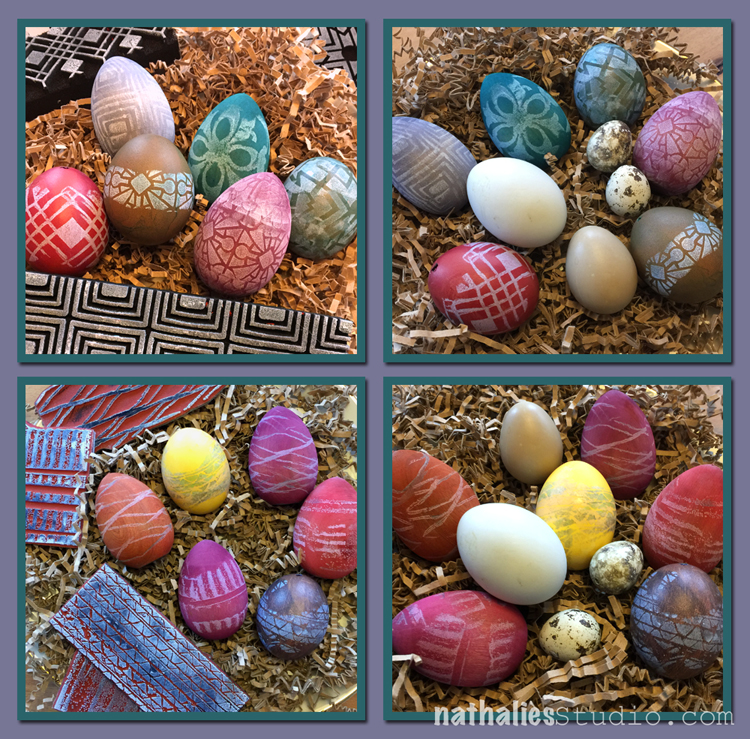
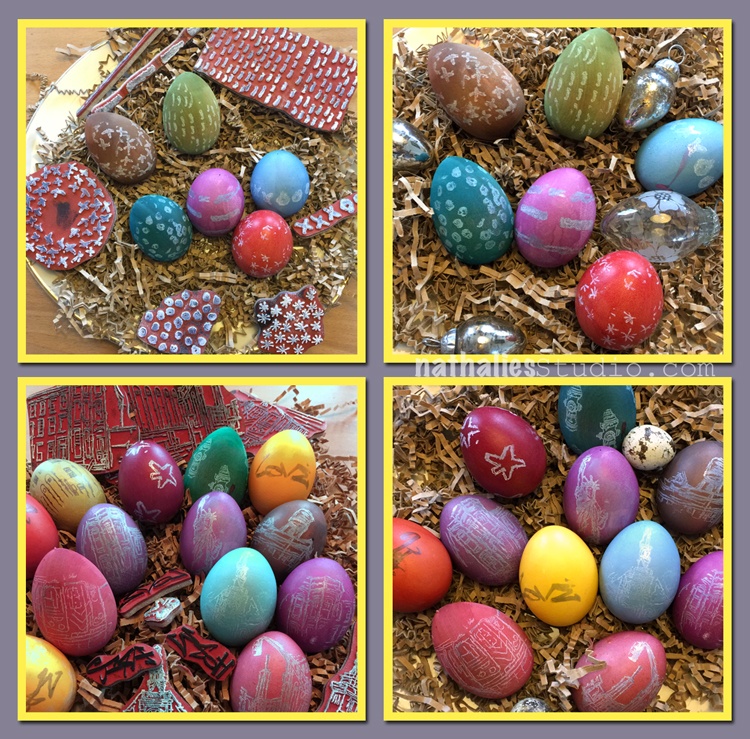
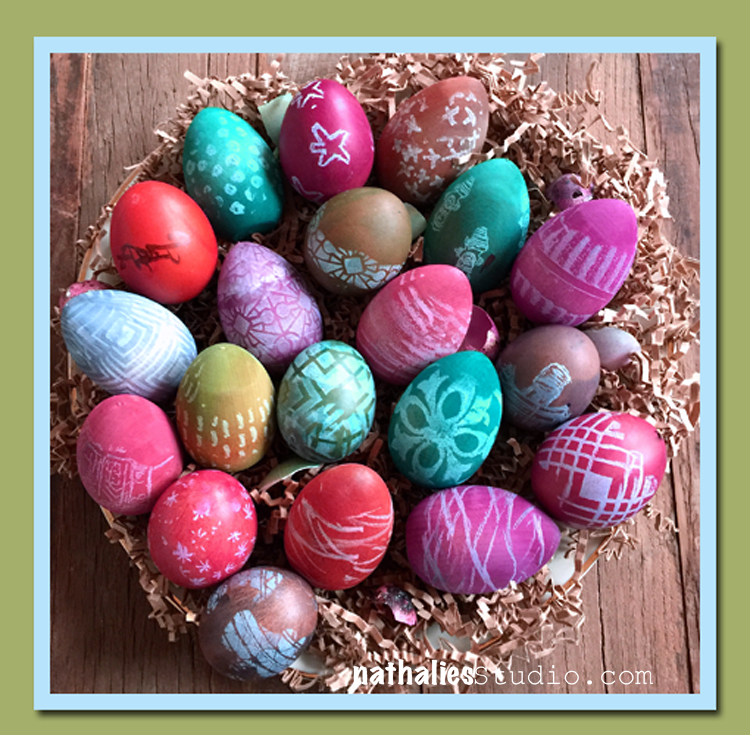
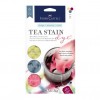
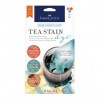
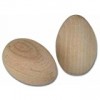
Do you and your family love dyeing Easter Eggs? Take your tradition to the next level and possibly even create future heirlooms with my tips in this post. I show how to decorate wooden eggs, blown out eggs, and hardboiled eggs in beautiful deep colors and contrasting stamped patterns and designs.

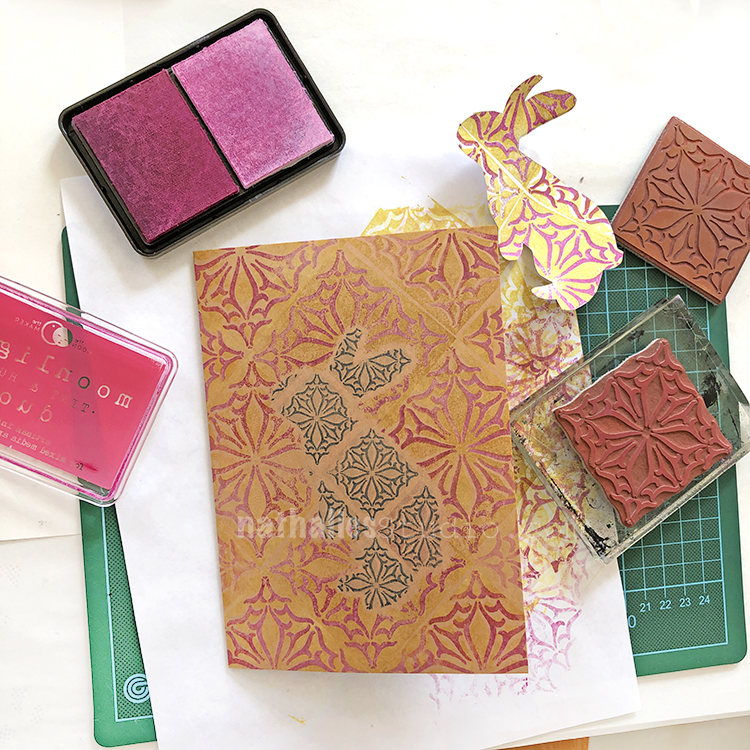
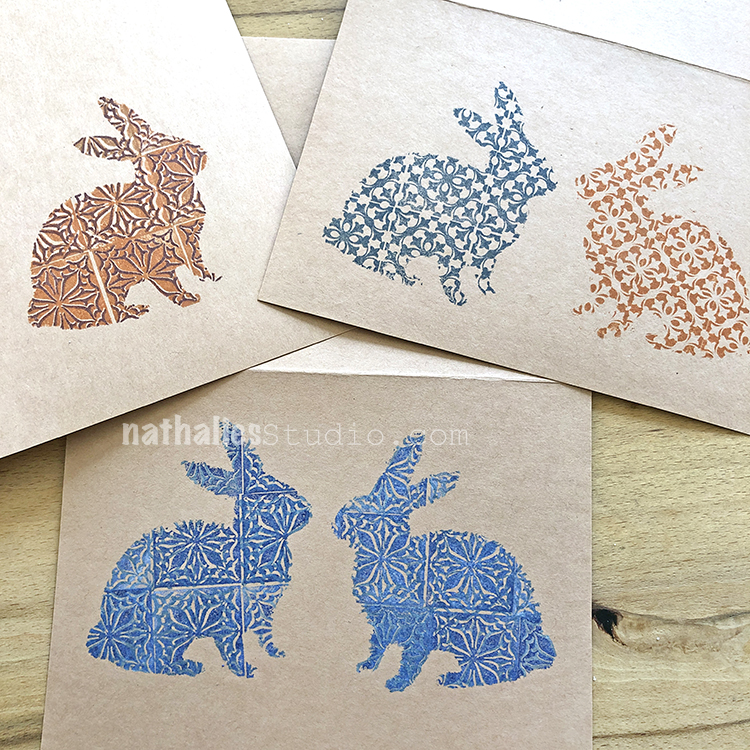
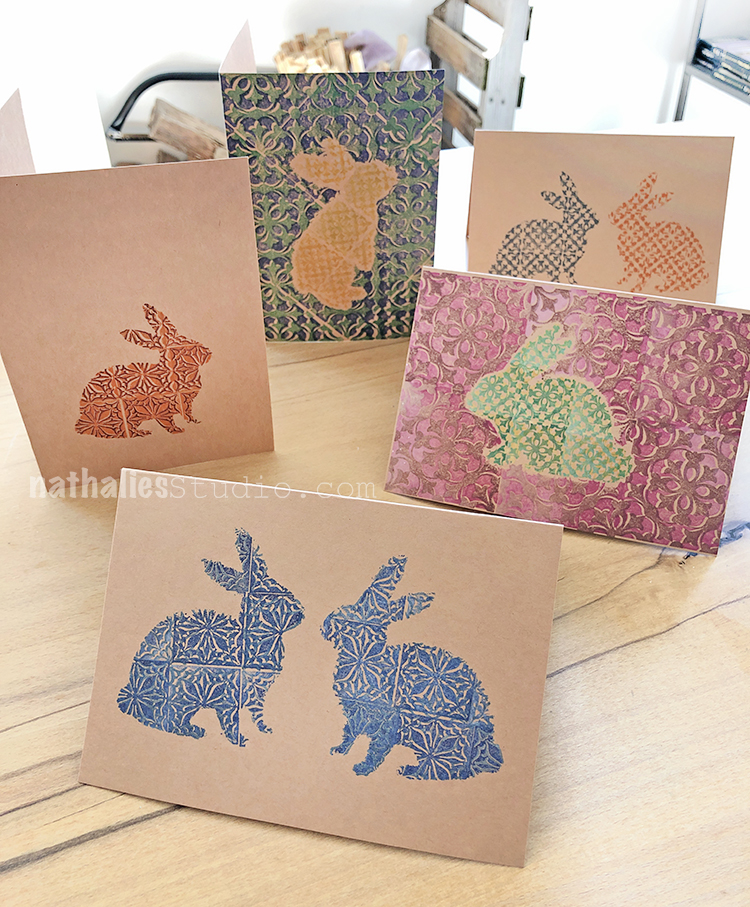
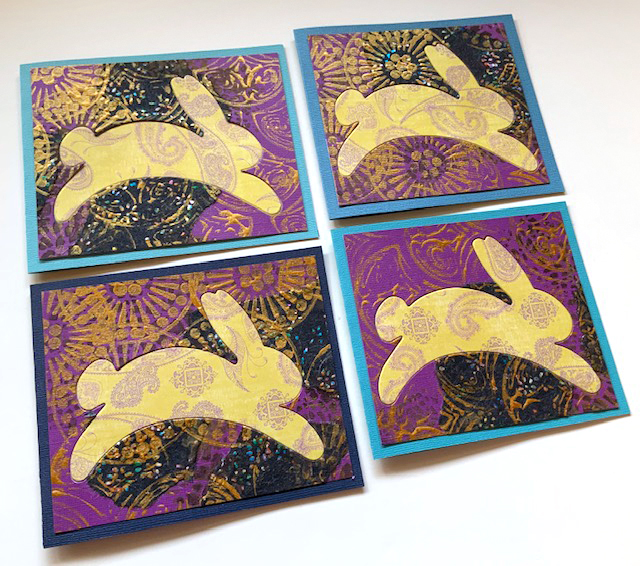
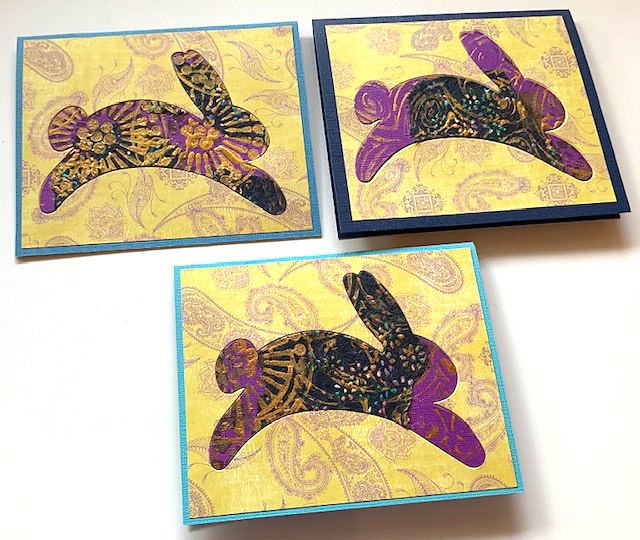
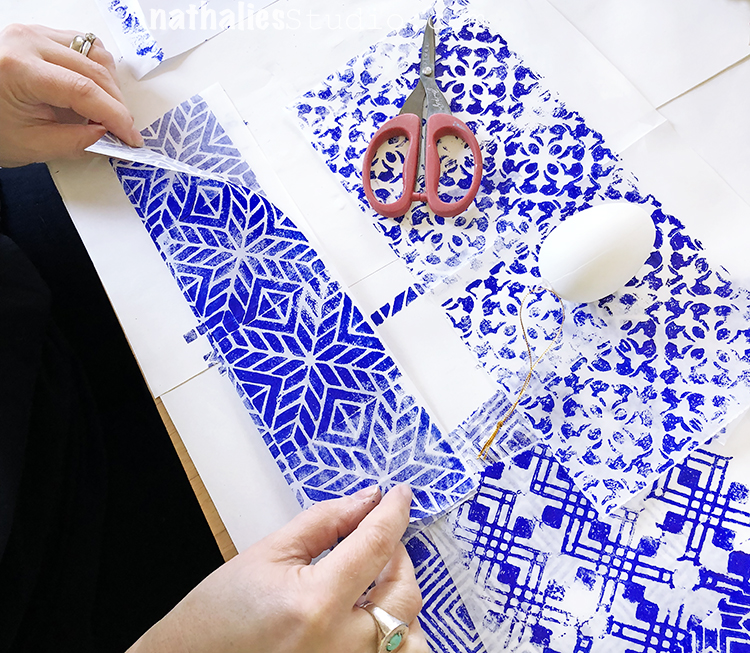
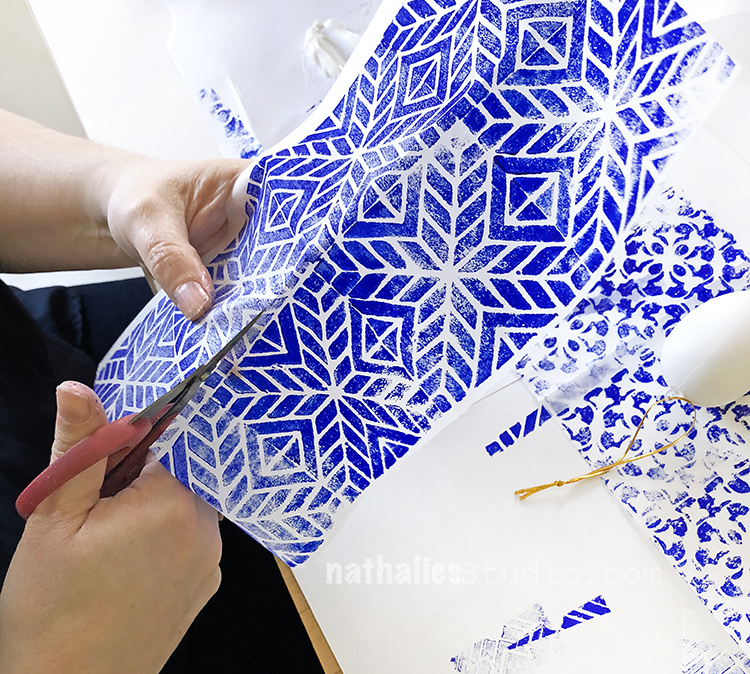
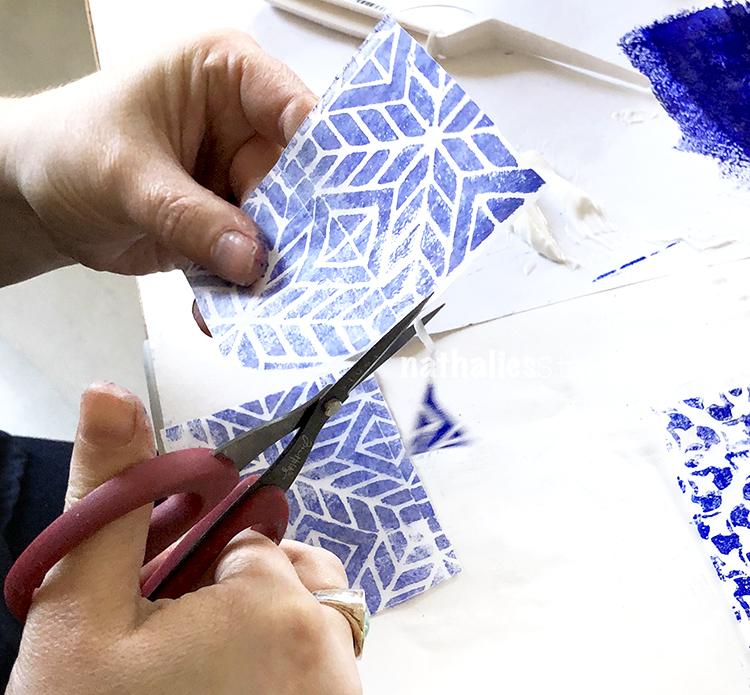
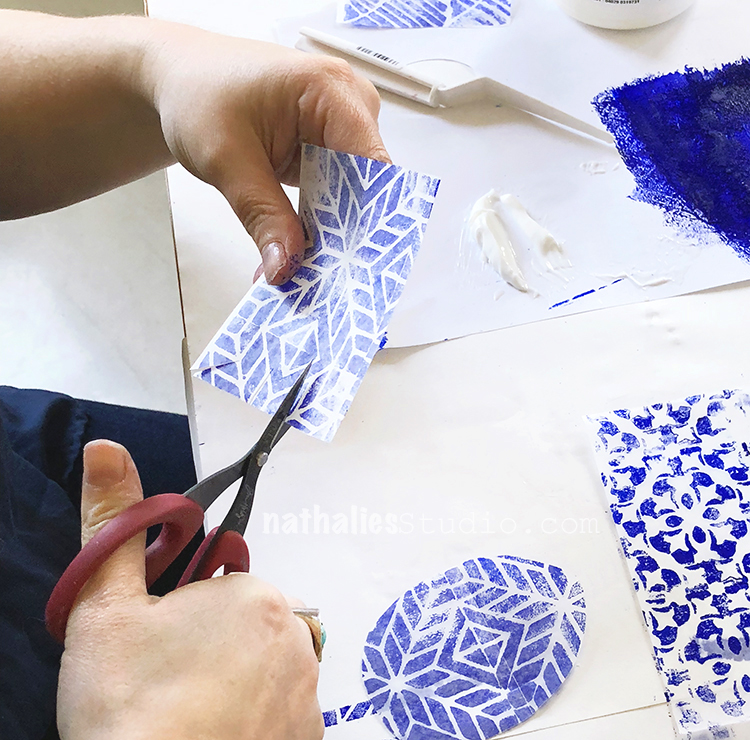
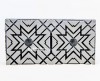
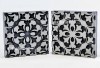
Cards are another way to get creative this time of year. We created bunny silhouettes and turned them into stencils and masks for this stamping project using my Floral Tile Small and Large stamp sets. You need just a few colors of ink and some pattern stamps to fill in the bunny shape.

Our Creative Squad member Judi Kauffman used a bunny die to turn out a whole bunch of stamped Easter cards. See her technique here for stamping with my Grove St foam stamp and using scrapbook papers in seasonal colors.

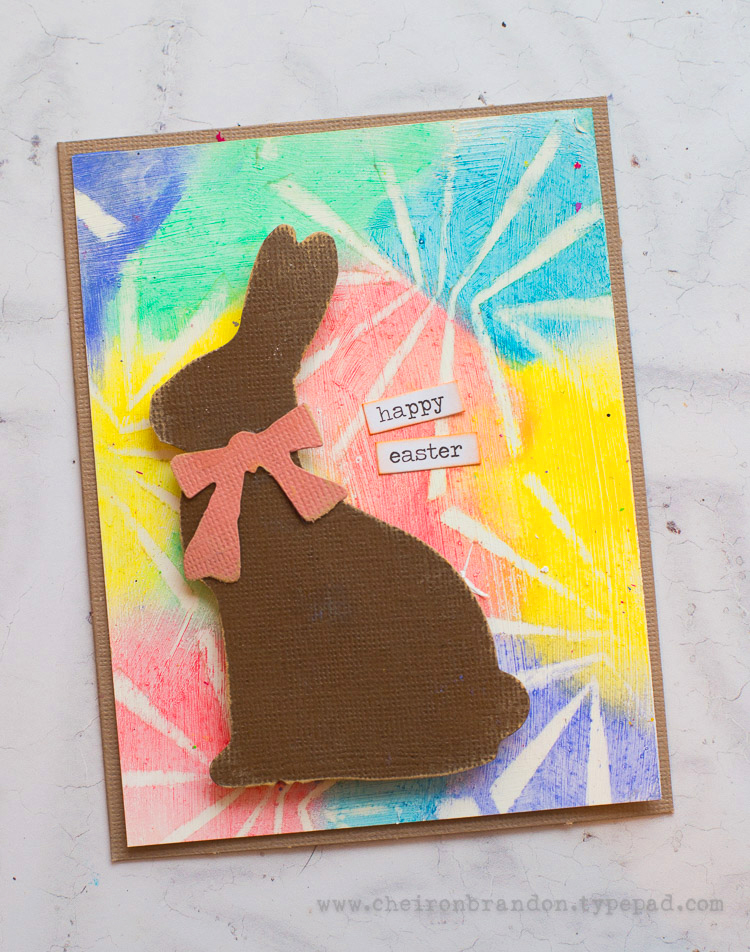
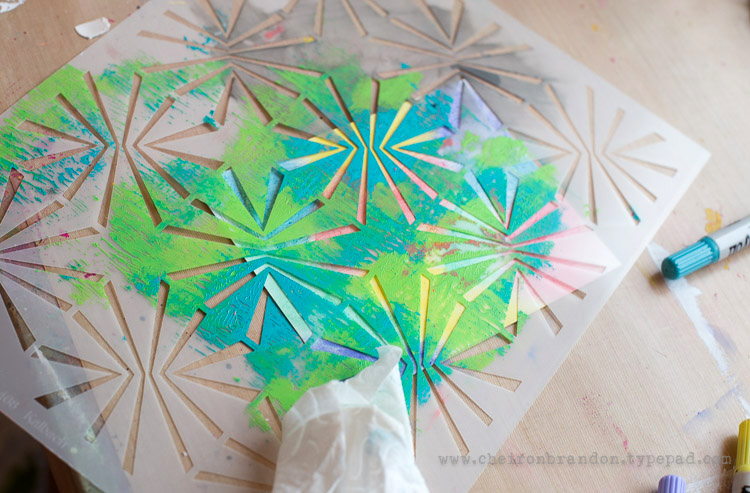
Another Creative Squad member Cheiron Brandon shared this project with us using my Beacon stencil, happy spring colors, and a bunny die cut for her Easter card creation.

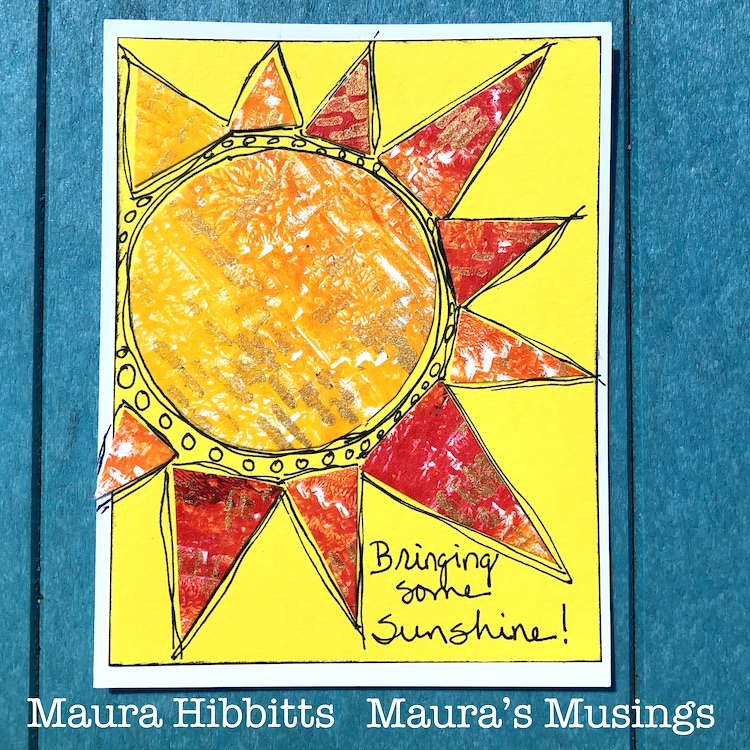
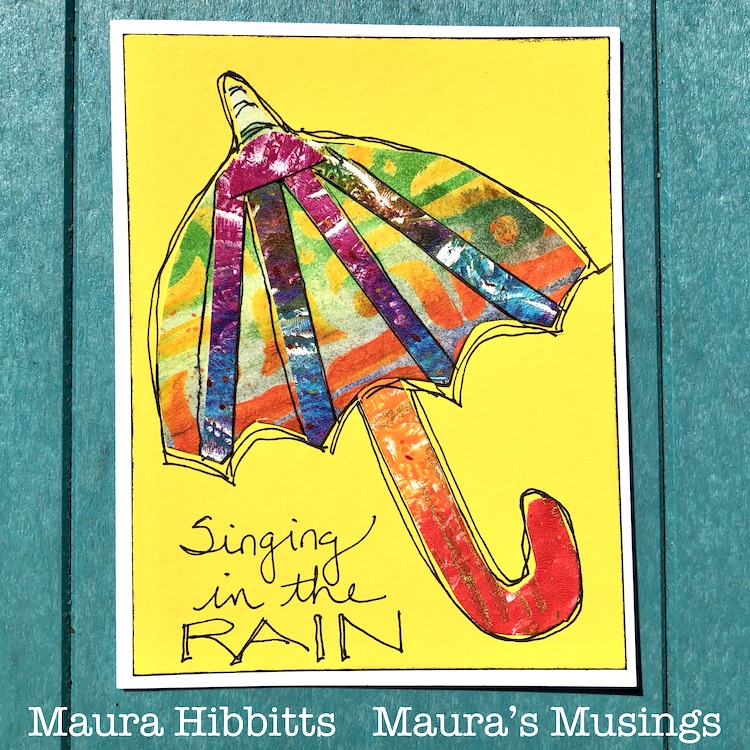
Even if you don’t celebrate Easter, there is plenty to be happy about when it’s Spring. More sunshine and even a rain shower or two mean more flowers, so bring them on as Creative Squad member Maura Hibbitts has in these fun seasonal cards. She’s using my Signals and Amsterdam stencils for all that texture and pattern.

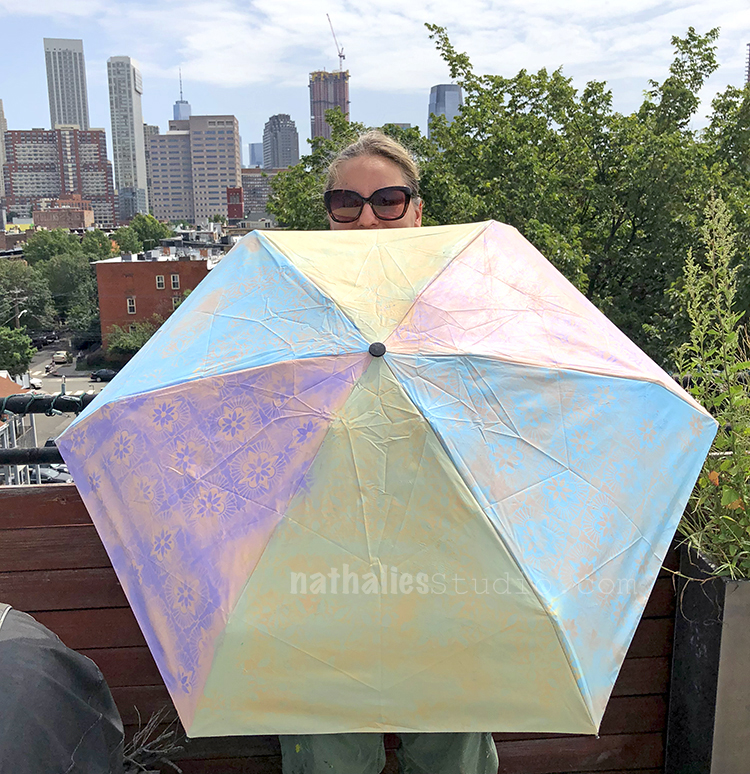
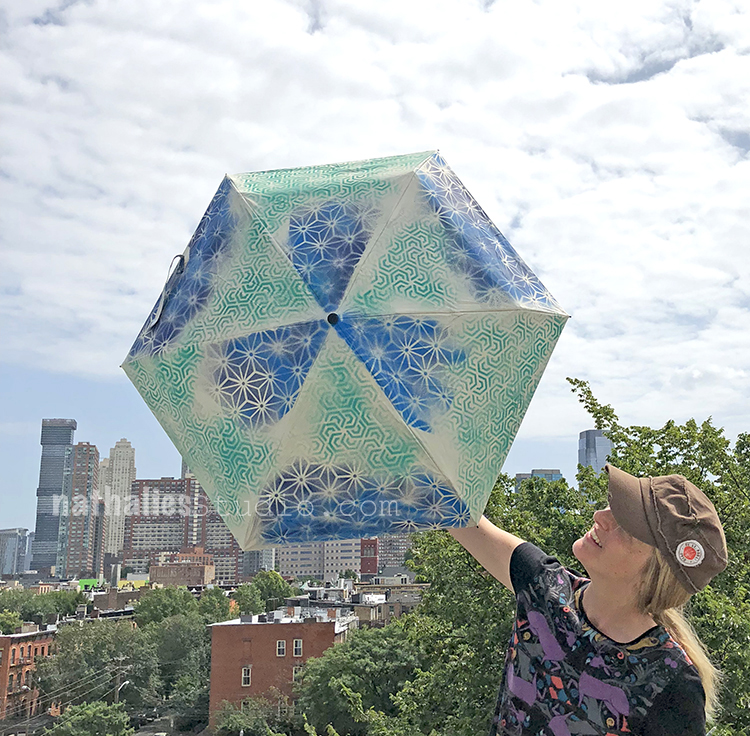
Did someone call for rain? Just another excuse to grab a stenciled umbrella like I made here in this play date with Kim. You can buy plain white umbrellas, or start with any color, and use spray paint and stencils like my Hamilton, Star Struck, and Flower Maze.

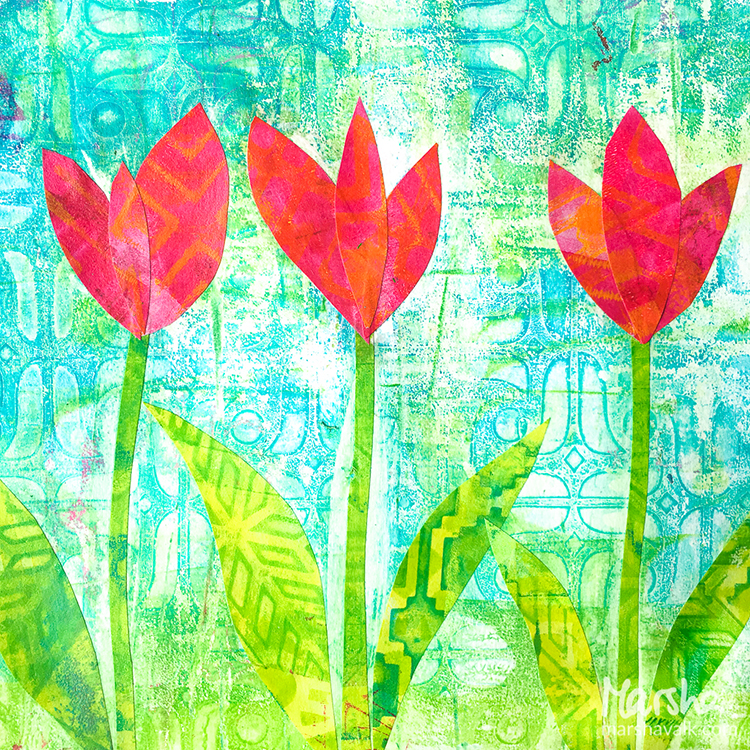
When the sun returns it’s time to head back outside and admire all the blooms out there. Creative Squad alum Marsha Valk created this mixed media piece by collaging some stenciled papers using my Amsterdam, Santiago, and Mesa Verde stencils. There is nothing like brilliantly colored tulips to lift your spirits this time of year.

I hope you enjoyed some of these Easter and Springtime projects and that you feel excited to try a few of the ideas. Happy Easter! Happy Spring!

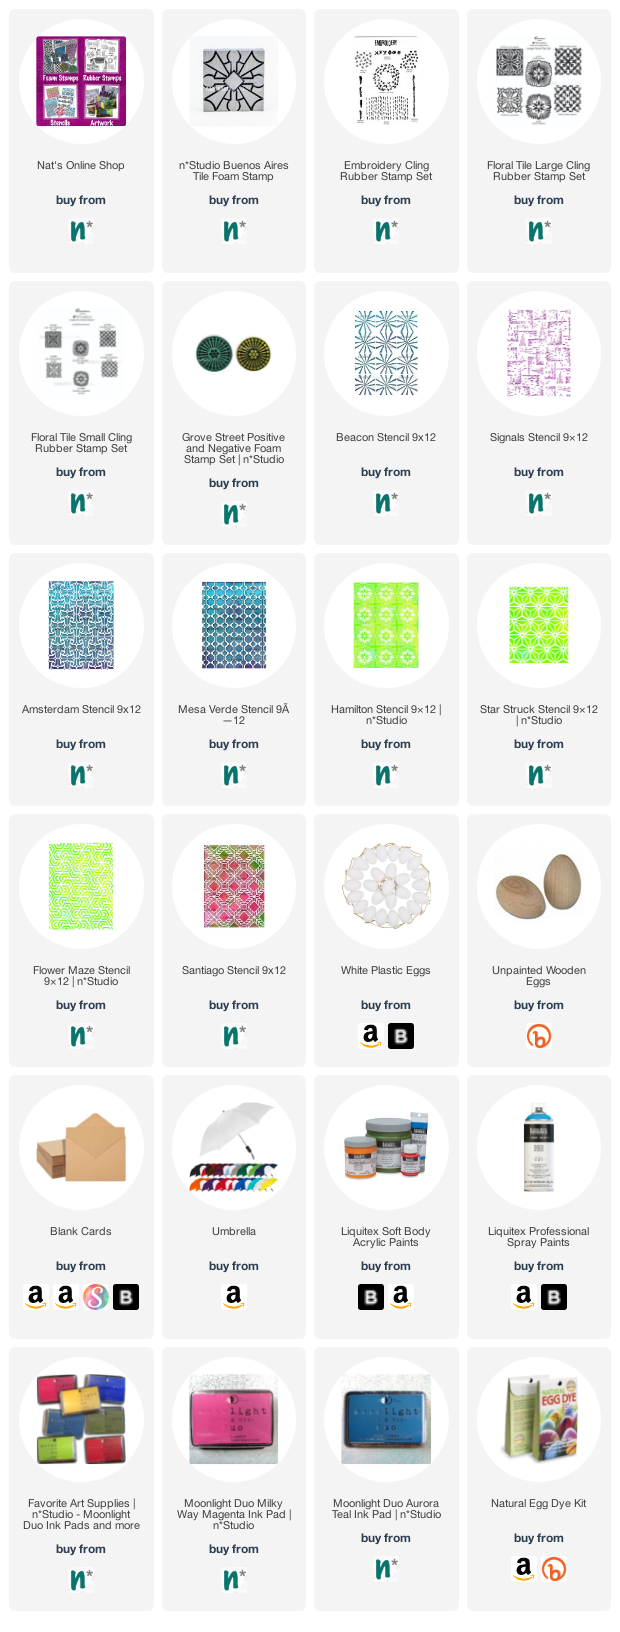
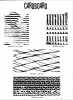
Here are some of the supplies I used for these projects:

Comments (1)

  • Sue Clarke

    |

    I just love the shapes of the bunnies on those cards Nat.
    I used to have cards (purchased) that had the sentiment:
    Happy Easter! Happy Spring! Happy Happy Everything!
    Yes! This time of year promises new hope…and my mood reflects it.

    Reply

Leave a comment

Springtime Stamping: Easter Eggs!

This year I wanted to mix it up with an idea for coloring Easter Eggs and decided that stamping might be fun. So Kim and I had a play date and decorated a bag of plastic hanging eggs with lots of stamped deli papers.

To match my blue and white dinnerware, I decided to use all shades of blue acrylic paint and some of my mini ArtFoamies. Kim chose some cheery colored StazOn and Archival ink pads and stamps from my Embroidery and Marks stamp sets. We found that smaller scale patterns work best for this. This would also be an interesting way to use any collage papers you have been saving that are deli paper or tissue paper – thin paper is easier to decoupage on the eggs.

Then we stamped the full length of the deli paper – our deli paper is 6″x10.75″. Here I am using my Mini Chicago foam stamp set.

Kim used my Chain Link stamp from the Embroidery set.

More blue soft body acrylic and my Buenos Aires Border foam stamp for me…

…and then I used the Mini Buenos Aires Tile. Loving how saturated the blue is…

Kim layered up some rubber stamps – here are Love Knots, Starfish, and Grannies

We stamped up a bunch of papers :)

We used Liquitex Gloss Gel Medium to decoupage onto the eggs.

To figure out the best way to cover the eggs, we had some trial runs. You may need to play around with it depending on how big your eggs are. Here I tried a bit of paper stamped with my Mini Batik Pattern 4 stamp.

To fit our egg size (see the link at the end of the post for what plastic eggs we used), we folded the deli paper in half lengthwise. I chose a paper stamped with my Santiago foam stamp.

And cut it down the fold to make 2 strips, each 3″x10.75″.

I cut off a 4.25″ long piece. This will be the first piece I decoupage on the egg.

And with the leftover I cut a 3.5″ egg shape.

Both the rectangle and the egg shape get .75″ cuts in them, all around the edges and at the corners. This helps the paper conform to the curve of the egg.

The egg and the paper got a coat of gel medium…

…and then the messy task of applying the paper. First put the rectangle with the 3″ edge at the hook end and go around lengthwise until you wrap over the bottom of the egg. You will be overlapping your cut edges so some of the pattern does get obscured along the edges.

The front face of the egg has the pattern nicely. Next up is the egg shaped paper…

After a coat of gel medium on the back of the paper and egg, apply the egg shaped paper over the gap and again, overlap and smooth the cut edges around the sides.

Here are some of the eggs I created, ready to hang. The patterns are (clockwise from top left) Manhattan border, Mini Chicago, Mini Buenos Aires, and Santiago.

I picked up some flowering branches at the local market (not sure if they are dogwood maybe?) and set up a very lovely display in my dining room.

A closer look.

Kim’s set are very pretty too with the delicate patterns.

I like how the Starfish stamp ones turned out.

Here are some of the supplies we used:


Hope you stamp some eggs this year too!

SaveSave

SaveSave

Comments (1)

  • Deb

    |

    Love it! Very clever, fun project. Thanks for sharing.
    I love reading your blog posts and look forward to them in my daily email browse! Always brightens my day.?
    Deb

    Reply

Leave a comment

DIY – Stamped Easter Eggs

For the upcoming Easter Holiday I decided to dye some eggs. I bought some wooden eggs, blew out some brown eggs and cooked some white eggs to have a variety to play with.

I dyed the cooked white eggs with some natural dyes (Yellow/Orange (Annatto extract), Purple (Radish), Blue (Cabbage) – see picture on top of the collage. For the blown out brown eggs and the wooden eggs I wanted to try the new Tea Stain Dyes by Faber Castell, which are not suitable for food. They are meant to dye fabric and paper but I thought it should work with wood and egg shells too. I loved how the colors came out with these dyes, especially on the wooden eggs, the brown eggs were a bit tricky with the light green, but it was all good. Both dyes resulted in colors that I was super happy with.

I stamped the eggs with a white pigment dye stamp pad – using my inked cling rubber stamps by wrapping those carefully around the egg, and using some of my foam stamps by rolling the egg over the inked stamp.

On the top row you see the eggs stamped with my ArtFoamies foam stamps – I love how they turned out- the impression is bold.

On the bottom I used my Cardboard Cling Rubber Stamp Set. I loved especially how the Tread stamp gave a look of rubber bands but I do love ever single one. The yellow of course was a bit tough with white ink …so I used an archival ink on top which made it a bit smudge. Oh well.

Next I tried my Embroidery Cling Stamp Set – ohhhhh- i so loved the look of this. The different stitches came out really well on the eggs.

On the bottom you see eggs used with the Stroll through the Hood Cling Stamp Sets -see the Hydrant pattern – I was geeking out- LOL- I know it is random but I love it.

Here you have a couple of the eggs as decoration on my table. The cooked eggs are in the fridge waiting to be consumed in the next couple days ;) That was super fun to make, so easy ! I hope you like them and give these a try :) Here is the supply list of what I used besides some brown and white organic eggs:


Comments (4)

  • stephanie

    |

    great eggs!

    Reply

  • Joi@RR

    |

    Heheheh – love your EASTER PARADE of EGGS Nat! They are GORGEOUS. Your stamps are perfect on them. Xj.

    Reply

    • nathalie-kalbach

      |

      thank you Joi, I am so glad you like them :) Have a wonderful start into the week! <3

      Reply

Leave a comment