Creative Squad

Pattern Lovers – Marsha Valk


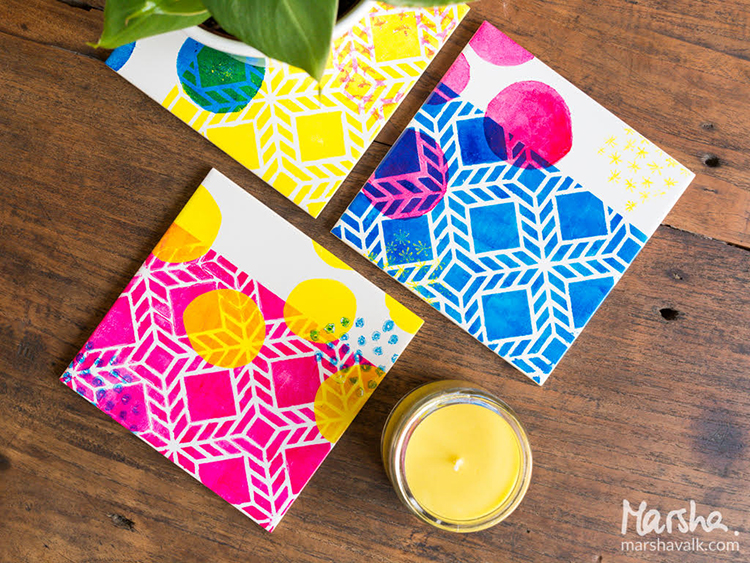
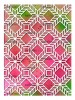
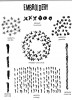
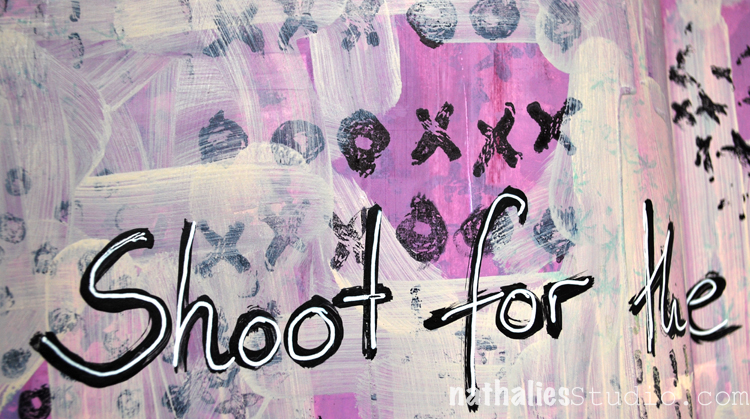
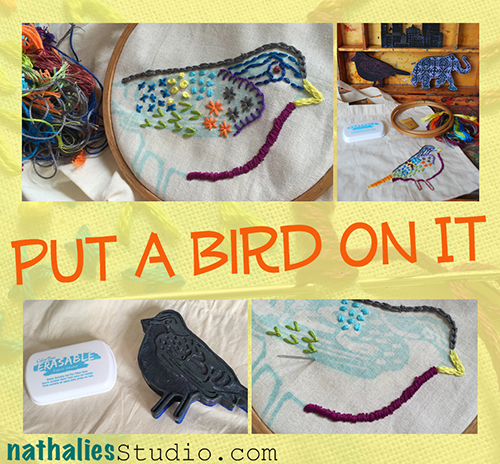
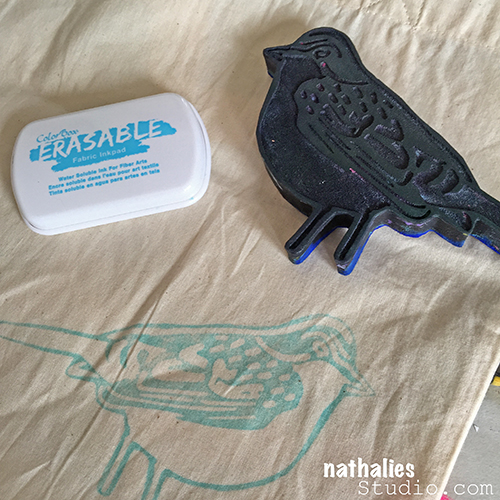
Happy Tuesday from the Creative Squad! Today Marsha Valk brings us a fresh and colorful set of tiles for the home using my  Santiago stencil and my Embroidery stamp set. This month’s theme is: Pattern Lovers Love Patterns: We admit it – sometimes we go a little crazy over cool patterns. We see them everywhere and whether it’s in the human-made stuff all around us or in the designs by Mother Nature, we love them all. So this month we’re playing with pattern and giving it the attention it deserves!


I love patterns! I’m especially drawn to clear, graphic designs and that’s why I love Nat’s stencil designs so much!

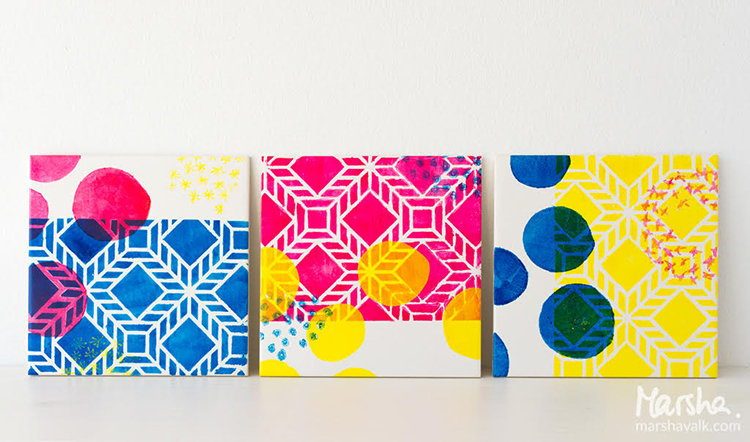
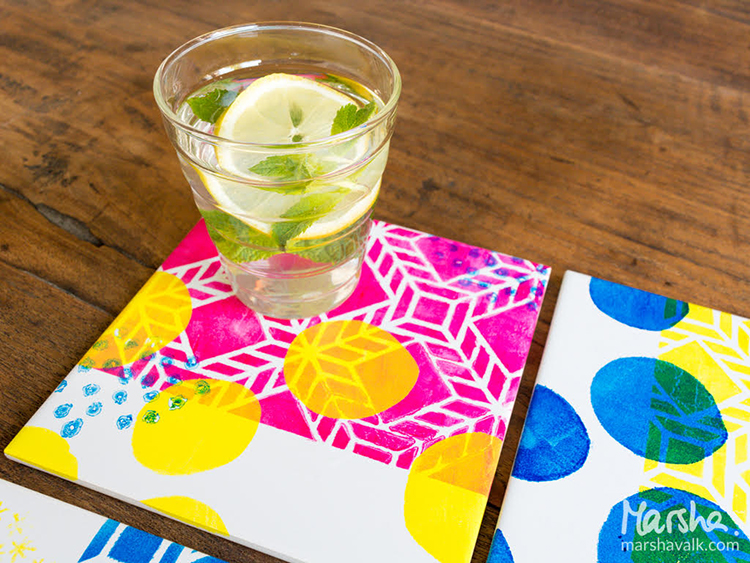
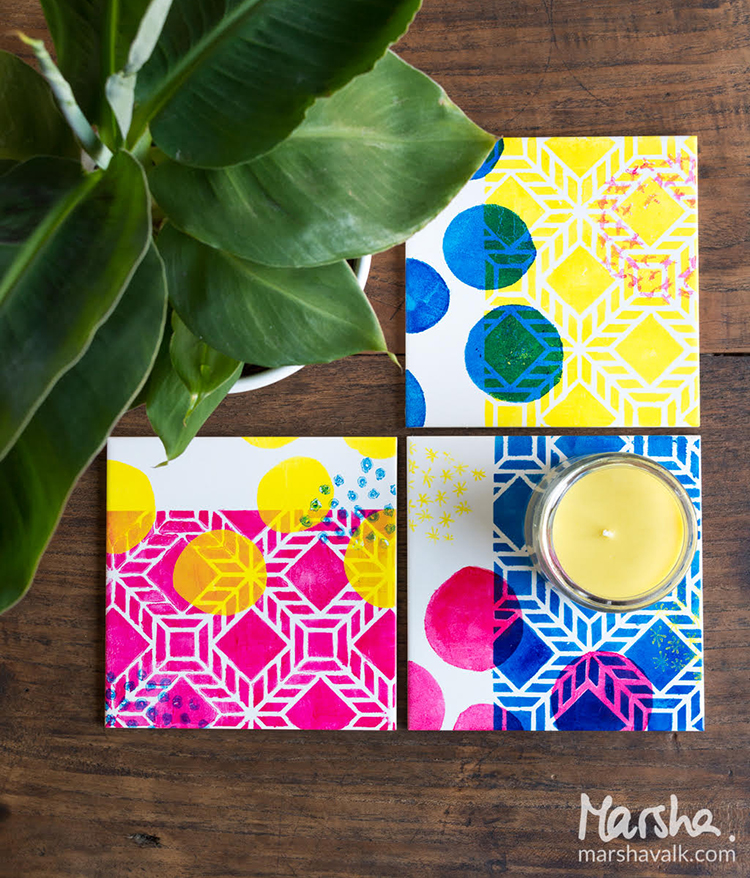
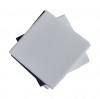
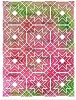
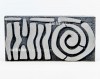
We’re in the middle of painting our living room and I’ve been dying to add a splash of fresh colour to our home decor. So that’s why I decided to decorate a couple of plain white ceramic tiles, that I plan on using as coasters or to put plant pots on.

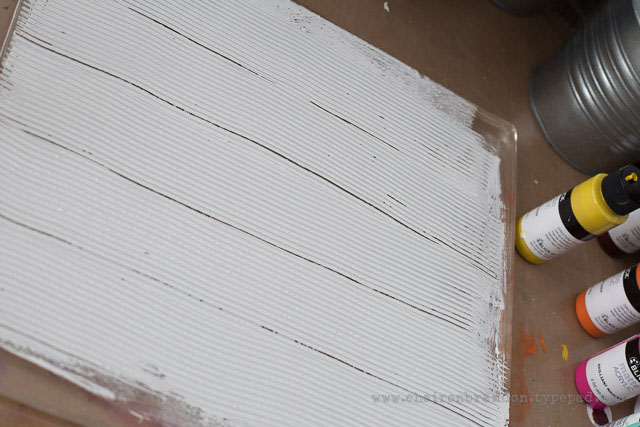
Here are the steps I took: First clean the tiles before you start. They need to be dry and free of grease.

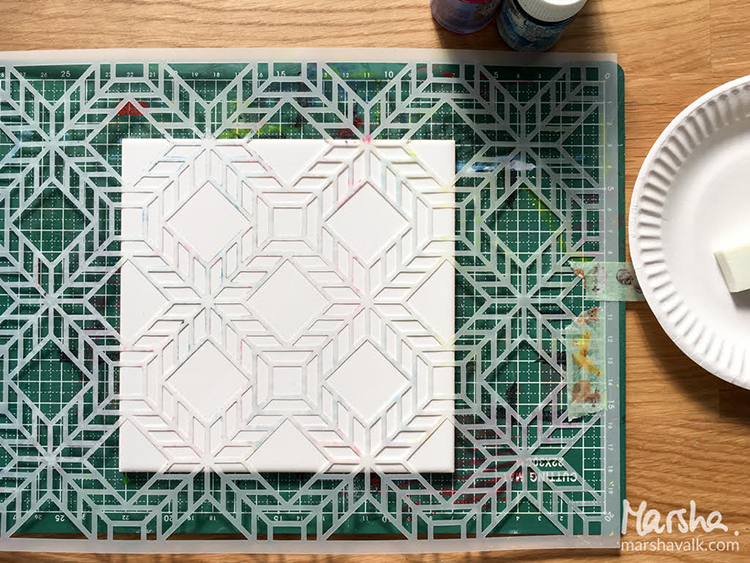
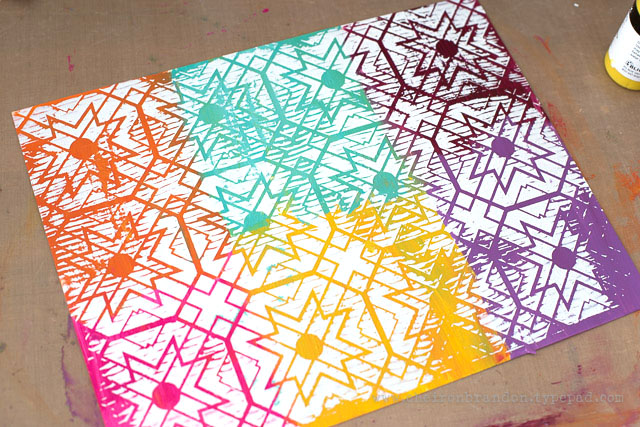
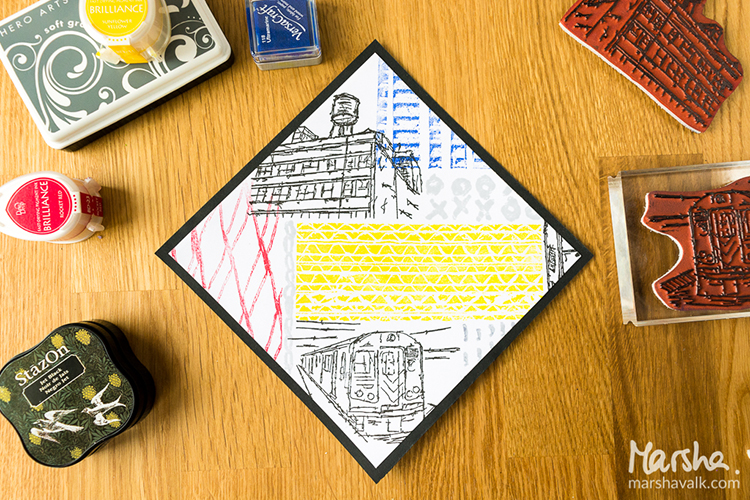
Place the Santiago stencil on top of the tile. Use tape to keep the stencil in place. You can also use washi or masking tape to block off parts of the tile you want to keep white.

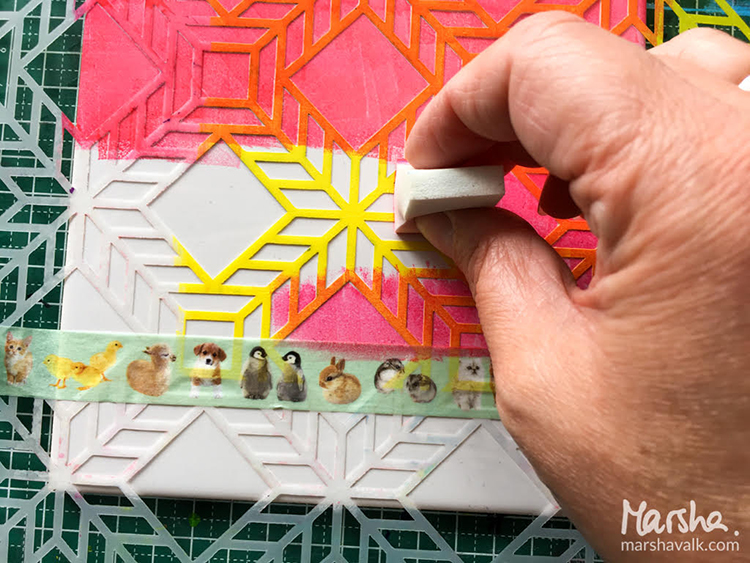
Use a cosmetic sponge to dab porcelain paint through the stencil onto the tile. Dab the cosmetic sponge in the paint and dab the excess paint off before applying it to the tile. Keep the sponge as dry as possible to prevent the paint from seeping under the stencil.

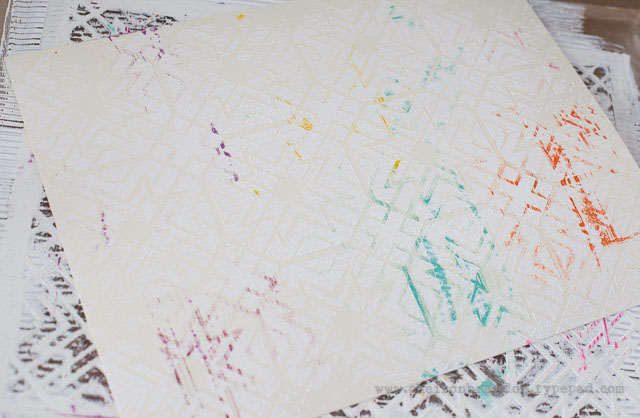
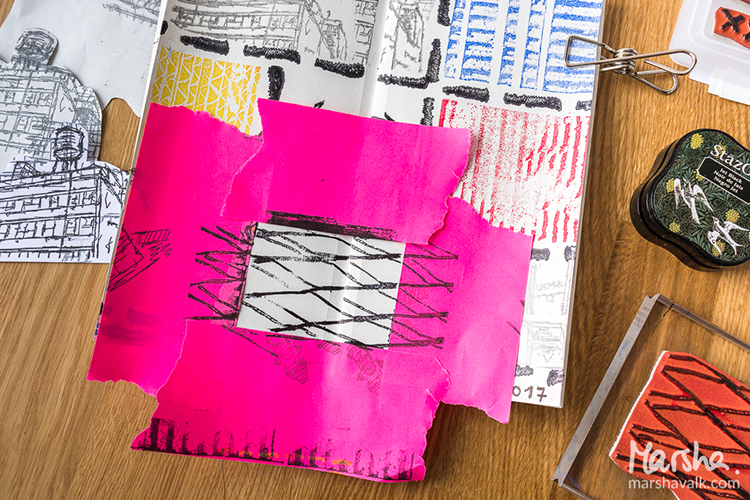
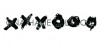
I used a hand-cut stencil to apply the circles onto the tiles.

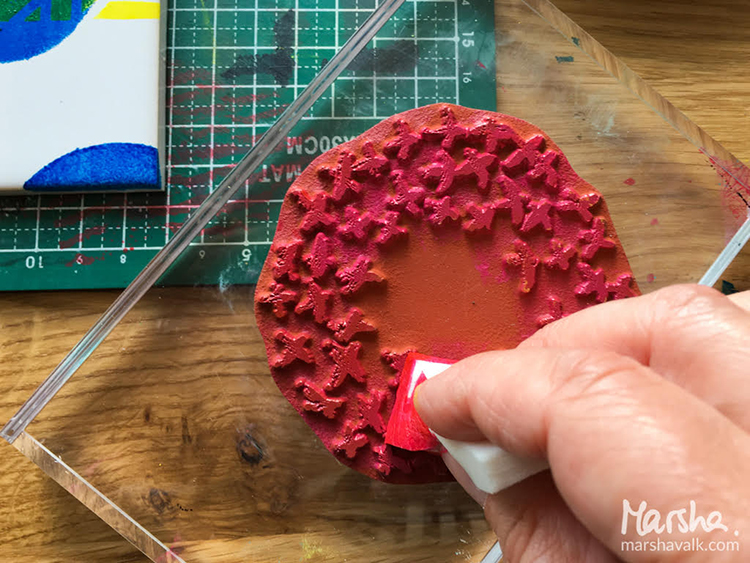
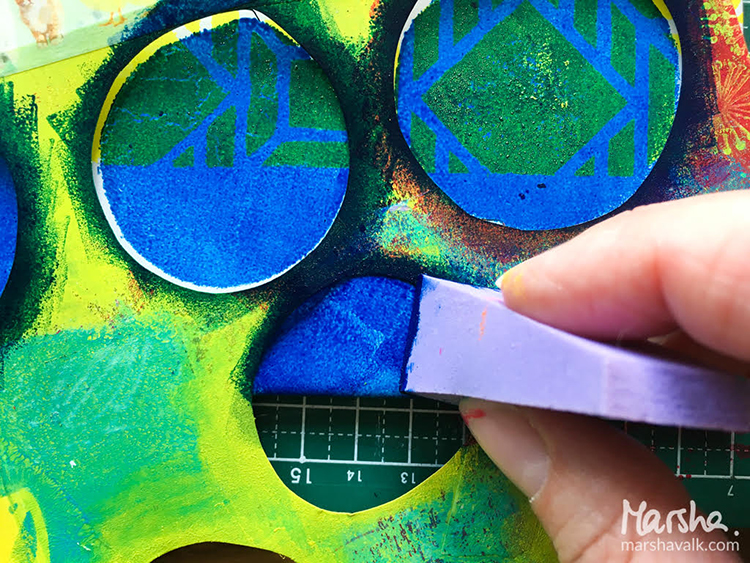
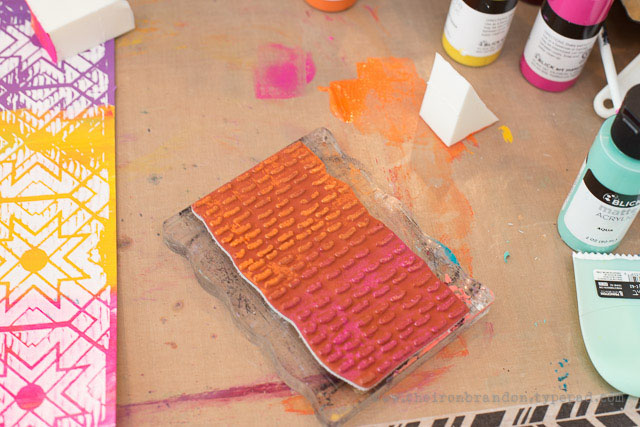
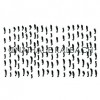
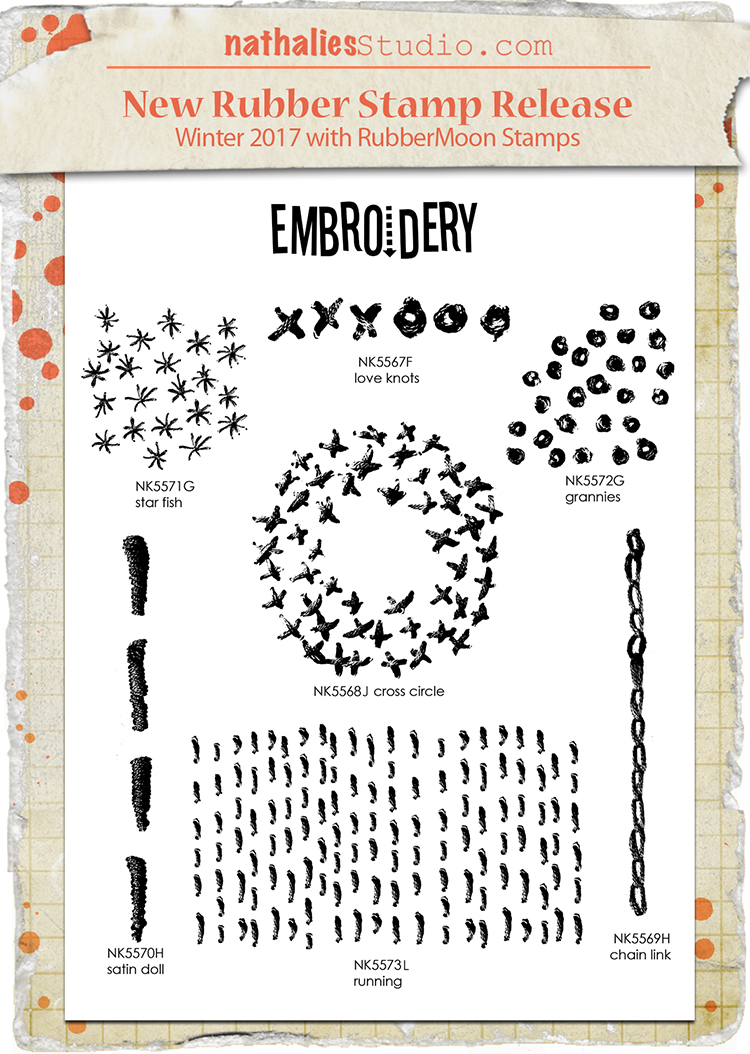
Dab paint onto one of the stamps from the Embroidery set (in this case the Cross Circle stamp) using a cosmetic sponge and stamp the image onto the tile.

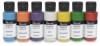
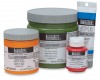
Let the paint dry and then let it harden following the instructions on the porcelain paint you are using. To become wash resistant, the porcelain paint I used needed to harden in an oven at 300F/150ºC for 45 minutes.


Thank you Marsha – these are a great project for the home! Marsha used the following supplies (some are affiliate links):


Play along with us too! I love to see how you interpret our monthly themes. Email me how you used my stencils and stamps with the theme and email me an image – I would love to share your projects in my “n*Spiration From Around the Globe“.

Leave a comment

Pattern Lovers – Cheiron Brandon


Hello from the Creative Squad! Today Cheiron Brandon is sharing a beautiful and colorful art journal page using my Toledo stencil and my Embroidery stamp set. This month’s theme is: Pattern Lovers Love Patterns: We admit it – sometimes we go a little crazy over cool patterns. We see them everywhere and whether it’s in the human-made stuff all around us or in the designs by Mother Nature, we love them all. So this month we’re playing with pattern and giving it the attention it deserves!


Hi there! It’s Cheiron here to share a monthly project with you. For this month’s project I created a journal page. You may notice it’s not actually in a journal, but it will be! I like to create pages outside of my journal, especially when I am using the gelli plate, then tip them back into the journal I am working on. Let me walk you through how I created my page….

To begin my project, I painted some Matte Acrylic paints in various colors. I know it doesn’t look like much, but this will really make the next step pop.

I rolled out some titanium white paint onto my gelli plate, to give some added texture, I went through the paint with a comb tool. Then I laid my Toledo stencil on the gelli plate and pressed my already colored panel into the white paint that has been covered with the stencil.

This is what it will look like. That colorful background really makes the white pop!

I never like to waste paint, so I pulled off the stencil and placed another piece of paper into the paint that was left.

This will leave you with a nice textured piece of paper. Since it’s white paint, you could always use this as a resist with ink too.

To add even more pattern to my page, I stamped with the RunningStar Fish, and Grannies stamps from the Embroidery set all over the page in coordinating colors.

I cut a tag out of the 2nd white textured piece, and stamped on that too.

I added some letters and the Chain Link stamp from the Embroidery set in black to give the tag some contrast. I also inked around the edges.

I did the same thing on a piece of old ephemera.

I glued everything down with collage medium and added some butterfly dies.

When it was all done, I stamped a few more images from the Embroidery set over the entire page. I hope you enjoyed this tutorial and will try making some easy patterns with stencils on your own!


Thank you Cheiron! In addition to a piece of ephemera, Cheiron used the following supplies (some are affiliate links):


Play along with us this month and join the 30 day Artful Adventures Stroll Challenge! I love to see how you interpret our monthly themes. Email me how you used my stencils and stamps with the theme and email me an image – I would love to share your projects in my “n*Spiration From Around the Globe“.

Comments (1)

  • Stephanie

    |

    Great project jump start technique! Thanks.

    Reply

Leave a comment

Denim Mending at the Textile Arts Center in NYC

A couple weeks ago I took a class at the Textile Arts Center in NYC: Denim Mending.

The TAC is located in Brooklyn but has a great small studio space in Manhattan with tons of classes at different times of the day and since I totally into embroidery for a while now, I thought this would be a perfect class. And it was :)

We got to work with all kinds of fun dyed fabric (they offer a variety of amazing dying classes as well) .

and started out with some basic stitches , applique stitches and back applique (in the picture another student’s practicing samples- I looooveee the polka dot fabric with the blanket stitch so much!)

Later in the class we got a short intro to Shashiko which means little stabs and is a form of Japanese embroidery originating in the Edo period (1615-1868)

These are some samples- – I fell in love instantly …although it does kinda like tell you to do neat and straight stitches – LOL- which you know…is not me ;)

But here is my first try in Shashiko

Not too shabby – I like it and oh man- now I want all kinds of Jeans being ripped so that I can start mending them and I bought all kinds of supplies of course  – and is it bad if I bought some shirts that I just want to do this on?  I am ready LOL

It was a fantastic class by Jennie Maydew -(check out her website with beautiful textiles and artwork too). I learned heaps, and it inspired me and I am full of ideas how to incorporate what I learned into my own artwork – I am so glad I went. A great example yet again how good it is to sometimes take classes that are totally different from what you usually do :) If you are in NYC – check out the TAC – what a gem place to take classes.

Comments (3)

  • Tara

    |

    I made a commitment this year to be more creative. I spent the past few months collecting different products and materials and watching a lot of tutorials online. I find myself gravitating towards collage and mixed media. Your books sounds incredible and would be helpful for me to learn technique. I would love your book to enhance my budding art technique library. Thanks for hosting the giveaway!

    Reply

  • Sue Clarke

    |

    IF you seriously want ripped jeans I can send you some Nat.
    I have one pair with a floral print (lightly in the background).

    Reply

    • nathalie-kalbach

      |

      LOL. thank you Sue for the offer. i will patiently rip my jeans and spice them up I guess …meanwhile I am playing on denim swatches – also fun :)

      Reply

Leave a comment

Out and About – Marsha Valk


Hello my friends!  This month the Creative Squad is playing along with my Stroll Challenge and today Marsha Valk is sharing some super cool cards. She’s using my Stroll Through the Hood #1 & #2Cardboard, and Embroidery stamp sets, and working with the prompt word Pattern and the theme Out and About – Sometimes it’s hard to see all the cool and inspiring stuff that’s right under our noses. This month we hope you will join us in our 30 day Stroll Challenge and get Out and About where you live, and find some local inspiration.


Merriam-Webster has 11(!) definitions for the word ‘Pattern’. One of these is:
3: an artistic, musical, literary, or mechanical design or form, the geometrical pattern of the carpet, the strict pattern of rhythm and rhyme for a sonnet — Gigi Marino

…and it’s super fitting for the pattern I saw whilst Out and About.

I see patterns everywhere and all the time: tiles, bricks, grids, shadows, on flora and fauna… and I have quite a library of photos of patterns found right here where I live in Amersfoort, the Netherlands. But… there is a different pattern plastered all over my city right now and this particular pattern ties my place of residence to New York. And as my assignment was to combine today’s Stroll Challenge prompt with the Stroll #2 stamps, going with this pattern made sense to me.

2017 has been declared the national year of De Stijl, because the art group was founded a hundred years ago, in 1917. Amersfoort is taking this opportunity to celebrate one of its most famous former residents: Piet Mondriaan (or: Mondrian).

Mondriaan was born in Amersfoort in 1872 and he died in Manhattan in 1944. He lived in Amersfoort until 1880, when his family moved to another part of the Netherlands.

His birth house in now a museum where you can see some of his early (still naturalist) works and learn about his life.

Now onto the project!

I started out playing in the journal I keep for the Stroll Challenge prompts and then moved on to square and rectangle pieces of cardstock. I didn’t have to think about colours. I searched my stash for suitable stamping inks in the De Stijl colour palette: red, yellow, blue, black, grey and white. I covered each base with gesso first because I felt the plain white paper was too flat and stark.

And then I just stamped my compositions on top, starting with the grids and then filling in the spaces with colour and pattern, using post-it tape and scraps of paper to mask off and protect parts of the design whilst stamping. I’m not sure why, but I didn’t feel that the compositions with straight lines looked right. So I tried some more on a diagonal square piece of cardstock, which I liked much better.

But then it occurred to me that having the paper diagonal wasn’t very practical for, for instance, making cards. So I continued to play with diagonal lines and blocks of colour and left the paper straight.

Once the ink was dry, I adhered the cards I liked best onto black folded notecards.


Conclusion: creating pleasing compositions with just blocks of colour and lines is much harder than you might think. I hope you try it too. It’s an interesting and fun exercise!


Thank you Marsha – these rock! And so cool that your ‘hood is celebrating such an important artist! Marsha used the following supplies (some are affiliate links):


Play along with us this month and join the 30 day Artful Adventures Stroll Challenge! I love to see how you interpret our monthly themes. Email me how you used my stencils and stamps with the theme and email me an image – I would love to share your projects in my “n*Spiration From Around the Globe“.

Comments (2)

  • jbonomo

    |

    thank you for the inspiration today! Love the transition from the physical idea to paper. I will have to try this.

    Reply

  • Michelle

    |

    This is so much fun. I’m from The Hague (also in the Netherlands) and my city is also covered in Mondriaan prints. The “gemeentemuseum” has a year long Mondriaan exhibit.

    I love your interpretation of all this and how you translated it into your own art, Marsha!

    Xx Michelle

    Reply

Leave a comment

Let’s Go Somewhere – Cheiron Brandon

Happy Valentine’s Day Everyone! Today is Tuesday and time for a post by my Creative Squad . Cheiron Brandon is sharing a beautiful Art Journal spread using the Batik 1 and Batik 2 Foam Stamps as well as the Embroidery and Stroll Through the Hood #1 Stamp Sets and this month’s theme: Let’s Go Somewhere. We’re in the depths of winter here in the Northern Hemisphere and looking for an escape! This month let’s reminisce about past vacations and plan future adventures to help us get through these gray days.


Hi there! Cheiron here with my monthly post. This month’s theme is Let’s Go Somewhere! I always love warm weather, but I am not opposed to snow an winter either. As we are approaching Valentine’s day my thoughts for my journal page drifted to Paris and the romantic pinks and blacks. I wouldn’t mind wandering through Paris in the snow and stopping to warm up every so often with some warm food and wine…

I created this page by laying down a foundation of gesso, then stamping with paint  to create lots of layers using the Batik Pattern 1 and 2 ArtFoamies and stenciled using the Beacon Stencil. I partially applied paint to the shapes I wanted by using a foam blending tool. I used lots of stamps from the new Mixed Media Stamps Embroidery Set and the awesome graffiti style love from the Stroll Through The Hood #1 Set.

To finish off the page, I added some splatter in coordinating colors. I can tell that these new stamps are going to be a staple in my art journal. I hope you are having a great day, whether its warm or cold where you are, and if you are planning a vacation or just dreaming of one!


Thank you so much Cheiron! I love how she used bits and pieces of the Foam Stamps instead of using them as a whole image and I also love the grungy feel of this page and the wonderful colors. Now I want to go to Paris too :)

Here are the supplies Cheiron used in her post- some links are affiliate links:


Play along with us! I love to see how you interpret our monthly themes. Email me how you used my stencils and stamps with the theme and email me an image – I would love to share your projects in my “n*Spiration From Around the Globe“.

Comments (3)

  • Michelle Rydell

    |

    Cheiron your page is beautiful! I love how you used the stamps, and those colors are yummy!

    Reply

  • Sherri Scott

    |

    Hey Nat! Of course you would have a Creative Squad. I’m glad Cheiron is a member. I have always enjoyed her work, it’s light, colorful and nice to look at.

    Reply

    • nathalie-kalbach

      |

      Sherri – so good to see you here :) Yes- I love Cheiron and her work! I hope I see you soon again my friend!!!! have a great rest of the week, Nat

      Reply

Leave a comment

Shoot for the Moon – Art Journal Page

For this quick art journal spread I stamped some of the Embroidery Stamps onto the blank background and then painted over the background, alternating between a thin transparent layer and an opaque purple layer. I stamped again on top of the dried paint with different stamps and archival ink. For the border I used the Satin Stamp – it is a great border stamp.

I used the Chain Link stamp to create pattern on the magazine image dress.

For the journaling I used a fude pen in black and then wrote on top of it in white with a signo pen. I love stamping and covering up – repeating – the process – as I feel it makes it more interesting if you don’t know where a stamp was applied or how.

Here is a supply list – some links are affiliate links:


Do you use stamps in your art and craft?

Have a wonderful day!

Comments (1)

  • Jill

    |

    Love this journal page! I’m participating in the #ArtMarks30DayChallenge with Rae Missigman and am loving working in my journal each day. I really haven’t made time enough to do that in the past so one of my 2017 resolutions is to get more journaling in. Love your work. You are an inspiration, Nathalie!

    Reply

Leave a comment

Love Tag

This grungy love tag was created using my new Embroidery Stamps. I scraped off some acrylic paints and white gesso to a big shipping tag with an old gift card to get a weathered look. After the paint dried I stamped with several of the Embroidery Stamp Set stamps with archival ink.

I stamped with the Love Tag Stamp from the Stroll Through the Hood set onto a piece of left over canvas and then fringed the edges and applied it with Gel Medium to the tag.

To enhance the tag a bit further I added some embroidery by using the stamped imagery as a guide and trigger for the different stitches.

I love how the flat stamped embroidery and the dimension of the actual embroidery play together.

Here are the supplies I used for this tag- some links are affiliate links:


Do you incorporate stitching or sewing into your projects?

Have a beautiful day

Comments (3)

  • molly

    |

    Very cool! I just got some tags for a Christmas gift. This gives me some ideas of ways to enhance … and use … them! YAY! Thanks.

    Reply

  • Beth in IL

    |

    I love this tag. The stitching adds so much to the tag.

    Reply

Leave a comment

Happy New Year Announcement – New n*Studio and RubberMoon Stamps

Happy New Year to all of you!!!

I am so excited to start this New Year with lots of fun things. Here is one of my biggest secret the last couple months

RubberMoon is a wonderful company in the USA owned by the amazing Kae Pea. RubberMoon creates hand crafted, red rubber stamps. I am so over the moon that we teamed up and here are the four sets of stamps I designed and RubberMoon made, which are available as cling stamp sets, single wood mounted stamps and single cling stamps:

The Stroll Through the Hood stamps are inspired by places and objects in my neighborhood of Jersey City, as well as by my blog series of the same name. I gather inspiration as I sketch and photograph on my strolls, and I am attracted to the historic architecture, forgotten landmarks, and the street art that I pass along the way. These original hand sketched stamp designs are reminiscent of things you might find in towns and cities across the US.

The stamps come in two sets – and as separate cling stamps as well.

here are some samples created with the Stroll Through the Hood stamps:

The Embroidery series of stamps are inspired by the art and design of the needle crafts.  I was always attracted to the combination of mixed media and fiber arts, and have recently begun some projects that focus heavily on embroidery and stitching as the end goal. In addition to adding faux elements of embroidery to projects, these stamps can also be used as pattern making tools and guides on which to stitch upon.

Here are some samples with the Embroidery Set

The Cardboard series of stamps are inspired by the interesting patterns and surfaces I observed while playing with cardboard packaging materials in my studio.  These stamps capture my love for found objects, repurposing materials, and that grungy edge I love to add in my work.

And a sample with the Cardboard set

All of the sets and all of the single stamps are available as red rubber cling stamps from my store as well as from RubberMoon direct. RubberMoon also sells all of the stamps as wood mounted stamps.

I hope you like these new stamps- I am so so excited about them and cannot stop playing with them.

If you wanna hear and see more about them watch the recording of my  Facebook Live Kaffeeklatsch with Nat from my  Facebook Page

Have a wonderful start into the new year today

Loves

Comments (18)

  • jean marmo

    |

    Congrats! These are fabulous!!!!

    Reply

  • robynseaniger

    |

    These stamps are really cool Nat, will they be available in Australia (Rachel Greigg, Darkroom Door)? Or do I purchase them from the US? Happy 2017 xox

    Reply

    • nathalie-kalbach

      |

      Robyn, I do n’t know yet- I might find out more in a couple weeks- I would hope that they will be ordered by a store in Australia :)

      Reply

  • gwenlafleur

    |

    Oh how cool! These are awesome Nat… congrats!

    Reply

  • Dee Spillane

    |

    Love your new stamps. See you live in a few!

    Reply

    • nathalie-kalbach

      |

      Awe- thank you so much Dee! Thank you so much for joining, it was fun to see you there :)

      Reply

  • Maura

    |

    Awesome news! I’ll be getting these in the store real soon I hope! Texture stamps are always great and cityscapes are always good too!

    Reply

    • nathalie-kalbach

      |

      Wohooo! Let me know when you have them in store and I am happy to shout it out :)

      Reply

  • Louise DeRagon

    |

    Love the cardboard stamps. I am a member of the rubber moon stamp club. Looking forward to your products arrival.

    Reply

    • nathalie-kalbach

      |

      thank you so much Louise! I am so happy to be part of RubberMoon’s Artists now- their stamps are amazing!

      Reply

  • Jane Chang

    |

    Oooooh! These are so inspiring! I haven’t stamped in ages and have been thinking I need to make time to get back to it. These might be the nudge I need.

    Reply

    • nathalie-kalbach

      |

      Thank you Jane, so happy you like them! Happy New Year!

      Reply

  • Tina Walker

    |

    Congrats! These stamps are fabulous!

    Reply

    • nathalie-kalbach

      |

      Thank you Tina! Cannot wait to see you work you magic with those ;)

      Reply

Leave a comment

Put a Bird on It – Embroidering with Stamps

KalbachPutaBirdCollage

I have been doing some embroidery stitching samplers the past couple months and when I was talking to my friend Judi, she told me about the Erasable Fabric InkPad by ColorBox and I was hooked and I bought it right away so I could try it out with my Foam and Rubber stamps. I took a light canvas tote bag and my Bird Foam Stamp and stamped on top of the bag. And yes …I should have ironed the bag – but honestly- I just don’t like ironing ;)

KalbachPutaBird03

Next I stretched the fabric over an embroidery hoop -see – already less wrinkles- hehehe.

KalbachPutaBird04

I wanted to treat the bird image like a stitching sampler – so I used all kinds of different embroidery stitches and color. The grey thread is a done with a chain stitch, the yellow are two rows of split stitches, the magenta is a satin stitch , the light blue a seed stitch and the light green is a fly stitch.

KalbachPutaBird05

The dark purple is a blanket stitch, the dark blue and lighter blue over the eye is a laced running stitch, the grey and purple in the wing is  star stitch. Around the eye a backstitch and the yellow thread and the eye are french knots.

KalbachPutaBird06

I had so much fun – I am easily bored when I do things that are too repetitive and so this was a great way to keep me excited and interested and I could not stop.

KalbachPutaBird08

I used the stamped image sometimes to stitch right on top and sometimes just as a placement guideline for the stitches. It was super helpful and so easy.

KalbachPutaBird07

Here is a close up once I was finished


KalbachPutaBird09

And then I just washed the ink with cold water right off and all traces are gone .

KalbachPutaBird01

I cannot wait to do something similar with my Urban Scribble Foam Stamp and the Elephant Foam Stamp!

KalbachPutaBird02

Here are all the supplies I used – some of the links are affiliate links.

SuppliesCJS


Do you embroider? What have you embroidered and have you mixed it up with other art forms?

Comments (5)

  • Jean Goza

    |

    Love the bird. Inspires me to drag out my embroidery goodies and work on a new project. You are so inspirational. Thanks for sharing…

    Reply

  • Joi @RR

    |

    Heheheh – LOVE THIS Nat! I used to have so much fun embroidering. You have inspired me to play with it again. I still have a bag with thread and hoops!!! Your bird looks SPECTACULAR!!! What a great idea! SUPER FINE! Xj.

    Reply

  • Karen D

    |

    I love this idea of embroidering over the stamped image. I have used erasable marking pens before, but did not know about the erasable stamp pad. I used to do quite a lot of embroidery and have incorporated it with a painted background on some fabric. But lately I am working on an artwork and have embroidered over some of my daughter’s handwriting. Embroidery adds another dimension to your artwork and it can be very relaxing.

    Reply

  • judi kauffman

    |

    I knew you’d have fun with that ink, Nathalie, and I’m so glad you embroidered the bird. Is the bag big enough for a whole flock???

    Reply

  • Sue Clarke

    |

    It’s been a number of years since I’ve embroidered but this looks great and I never would have thought of using stamps as a guide this way. Thanks for sharing Nat.

    Reply

Leave a comment