Creative Squad

Creative Squad: Celebrate the Season – Maura Hibbitts

Hello from my Creative Squad! Today we have a gorgeous card idea from Maura Hibbitts using my Church foam stamp and getting us into the season with our theme: Celebrate the Season – Many cultures celebrate in December so let’s do some celebrating ourselves with our favorite art supplies and the holidays that make this season so festive.


May I wish you a joyous and blessed holiday season. We share diverse beliefs and ideas, and celebrate in a multitude of ways, but for many of us, this time of year is special. Share the season with family and friends and enjoy the celebrations!

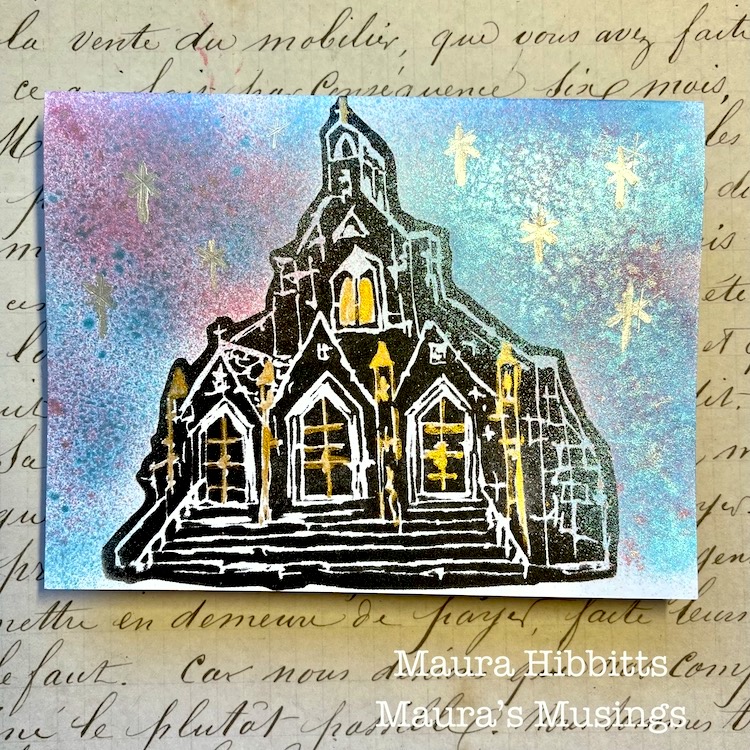
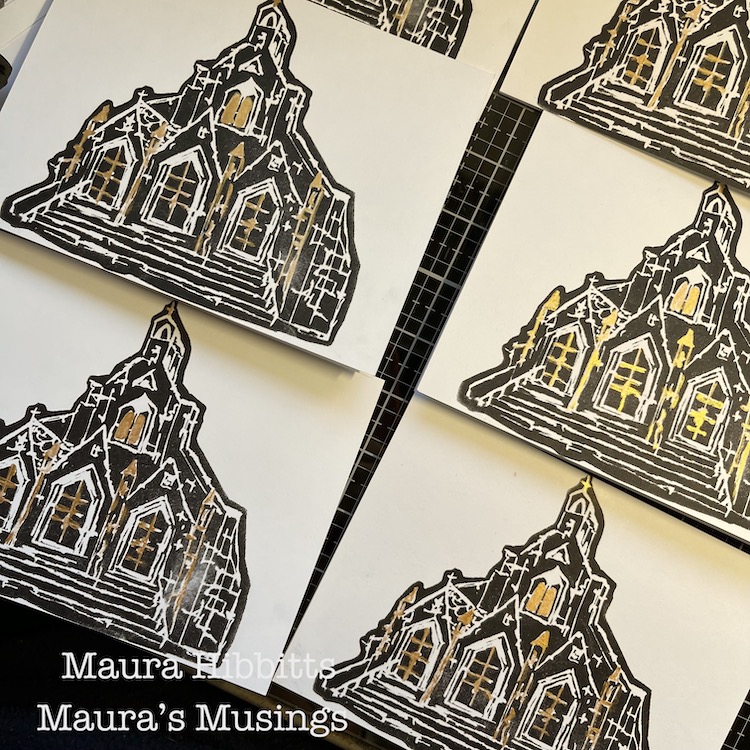
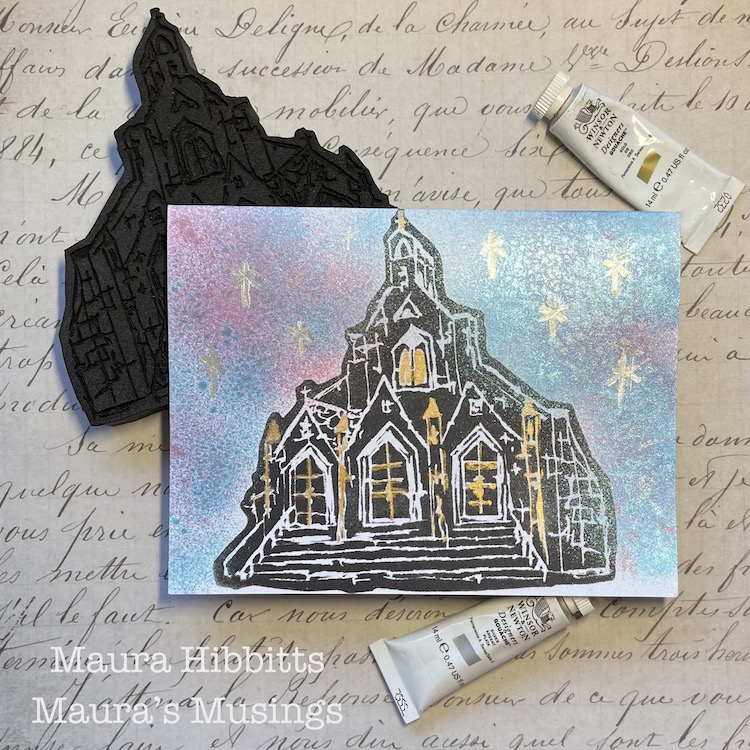
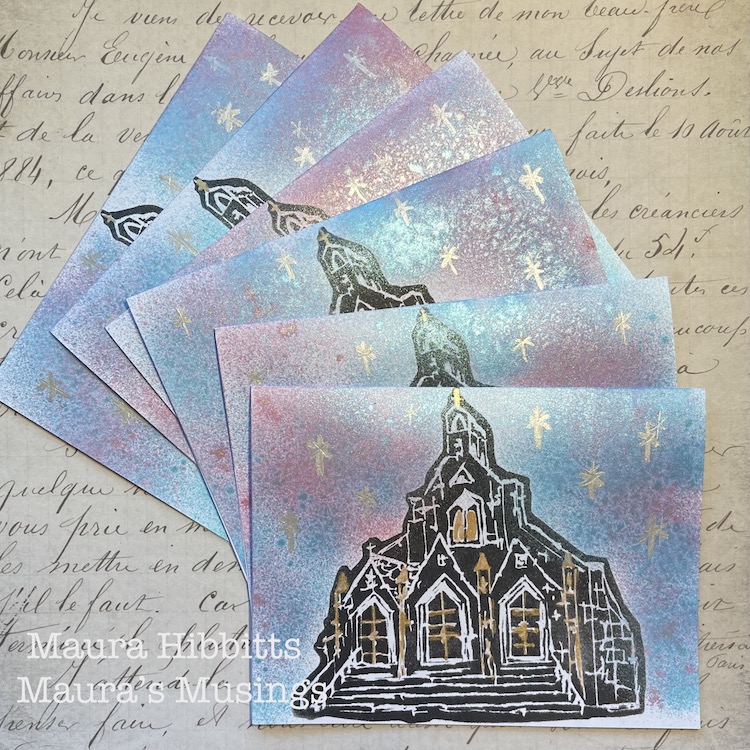
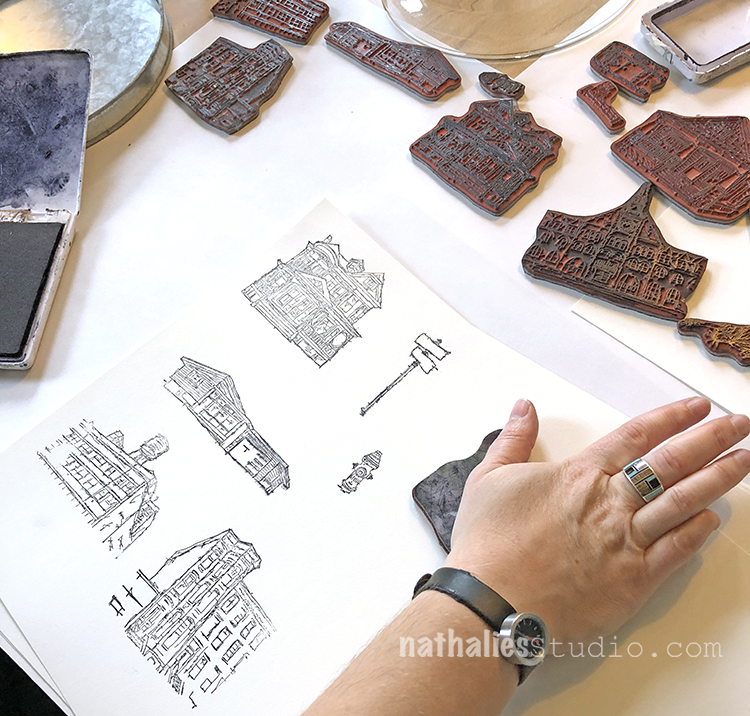
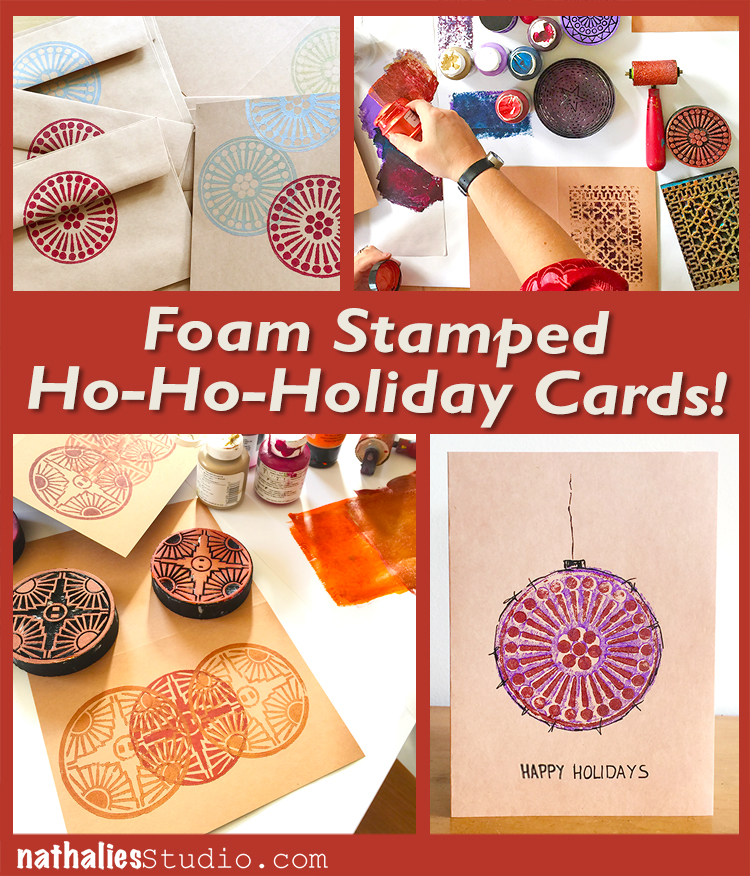
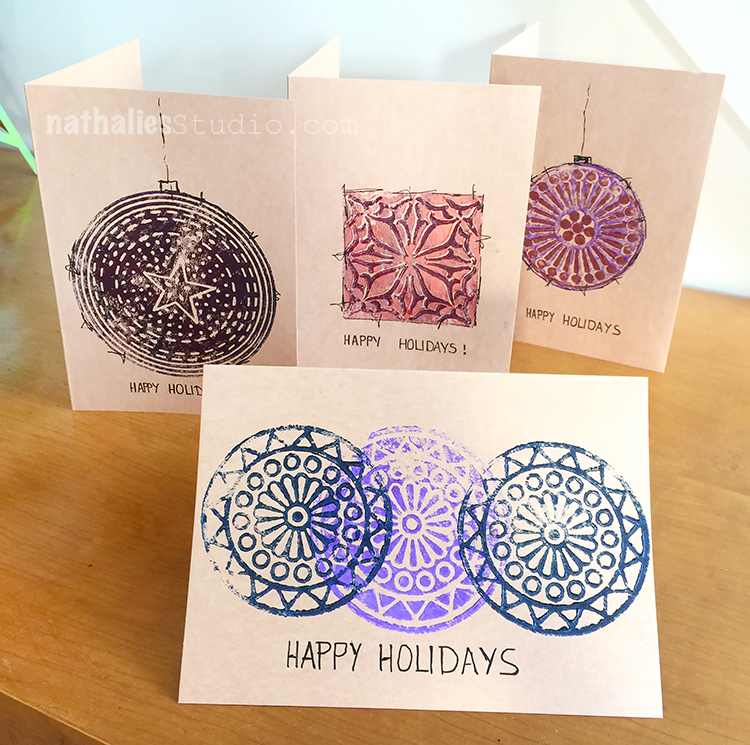
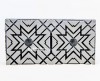
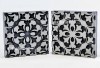
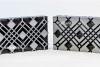
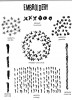
I like to make cards for Christmas and send them out with a note to friends and family. I’ve made a simple set of cards with Nathalie’s ArtFoamies Church stamp.

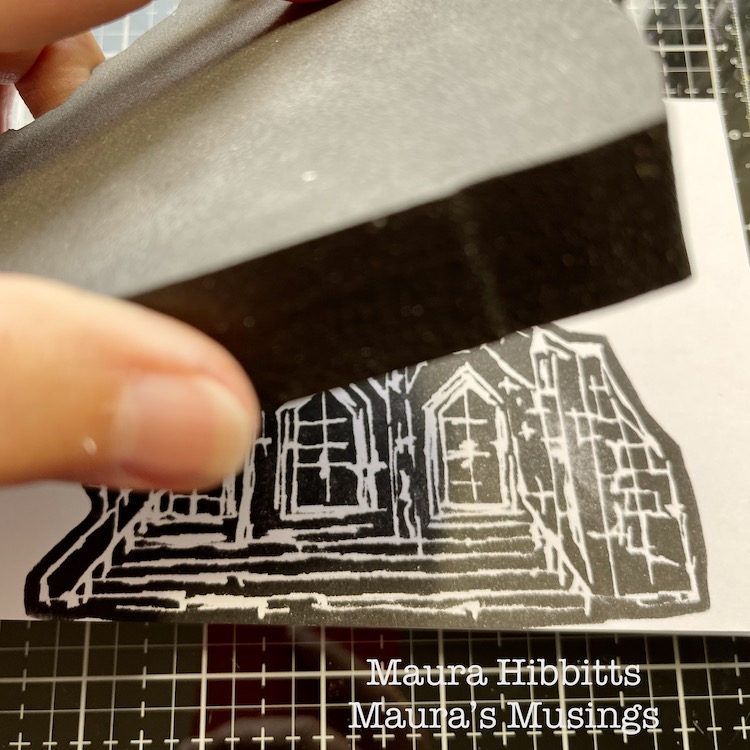
Start by stamping the church image onto A7 cards with black ink and let dry. Of course, you can use any color ink you wish for the image.

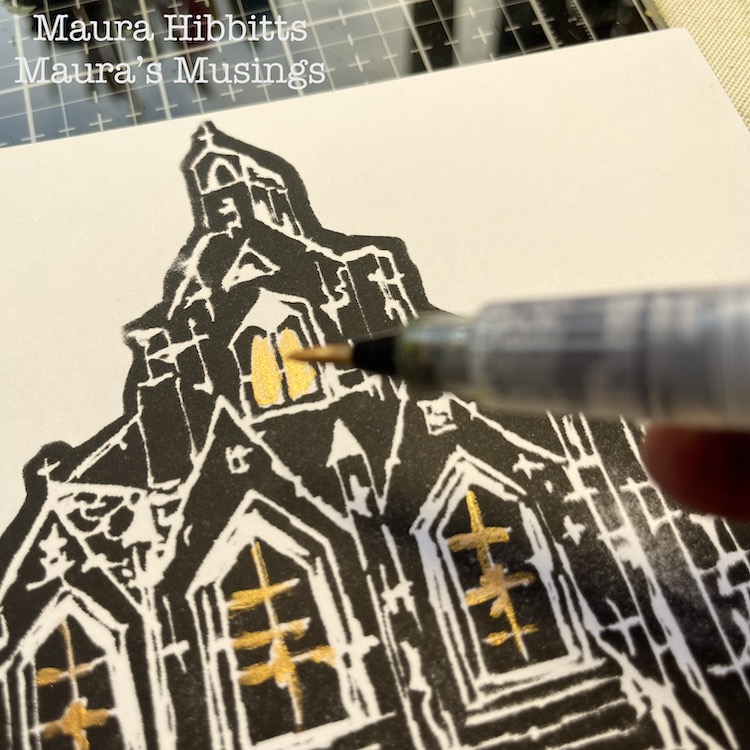
Add gold details to the image with a water brush and gold gouache. I squeeze out a bit of the gouache onto a craft sheet and pick up a bit with a detailed water brush.

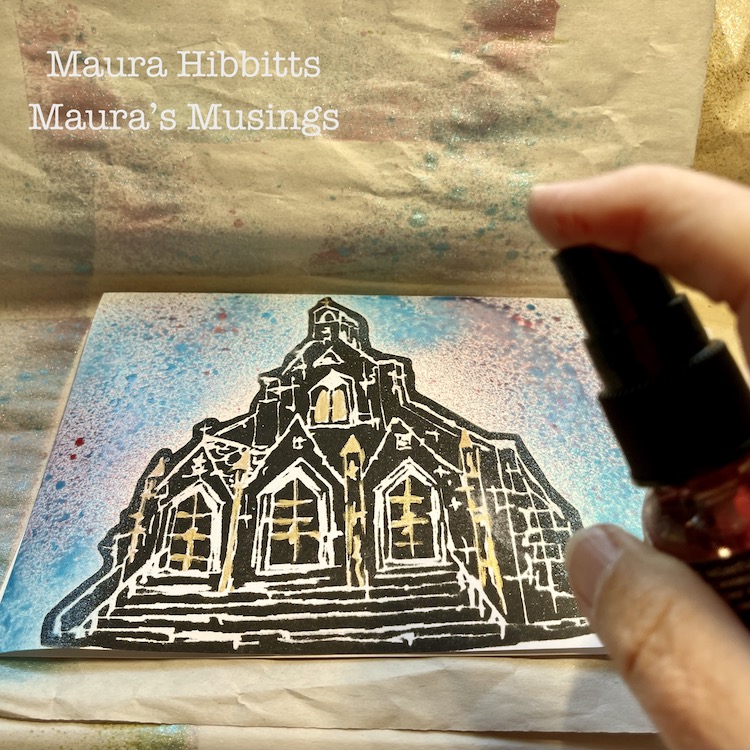
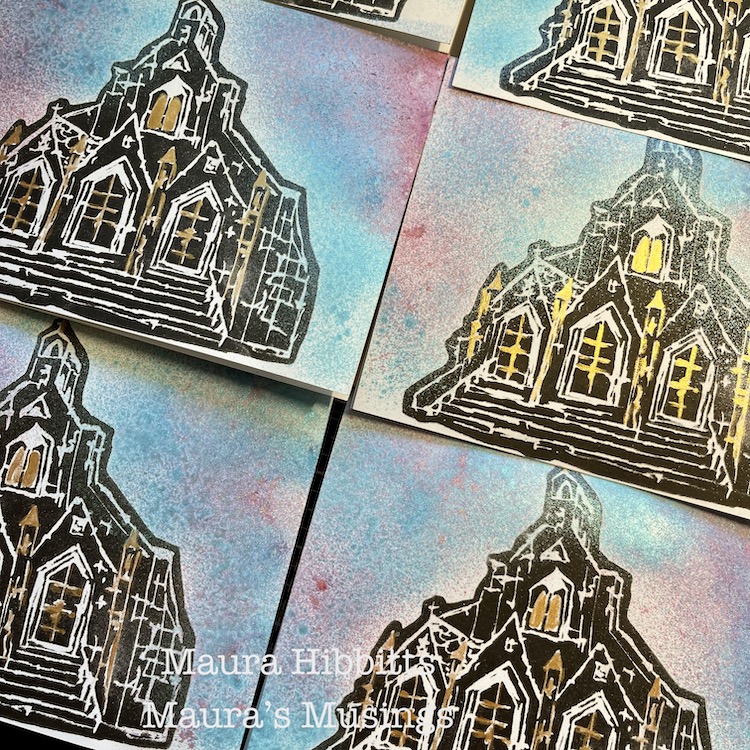
Set up an area to add some sprays. I like to use a paper bag, or packing paper for this. Spritz on the mica stains around the church image and let dry.

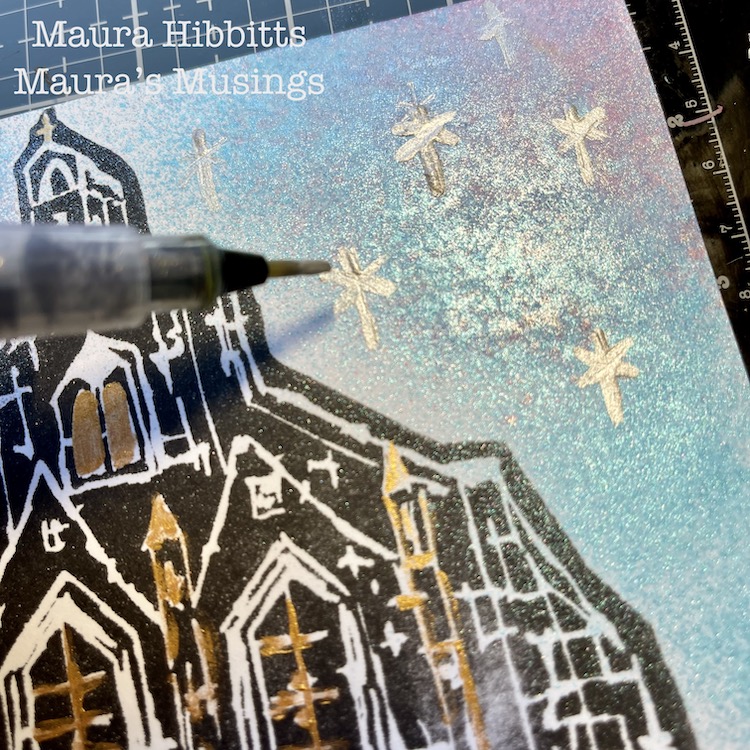
Once the mica stains have dried, use your water brush and silver gouache to add in some “stars”. I make these by painting a longer line, then an x shape across the line near the top.

Sometimes it is really nice to create simple cards with just a few products. I’ve been struggling with vision problems this year which has made it more difficult for me to work on complex or detailed projects. I’ve also had difficulty keeping my creative flow these past couple of years, so it helps to keep work simple and just enjoy what you can do. Maybe you have struggled with health issues and creativity too, and I hope you find keeping things simple helpful.

I have a set of cards ready to add notes and greetings and mail out. I wish you each a wonderful holiday season!

– Maura


Thank you Maura for this beautiful project idea and you are so right – sometimes we have things in our lives that can make creating more difficult, and a great way to handle that is to just do what you can. That way you still get to do what you love and feed your creative spirit :)

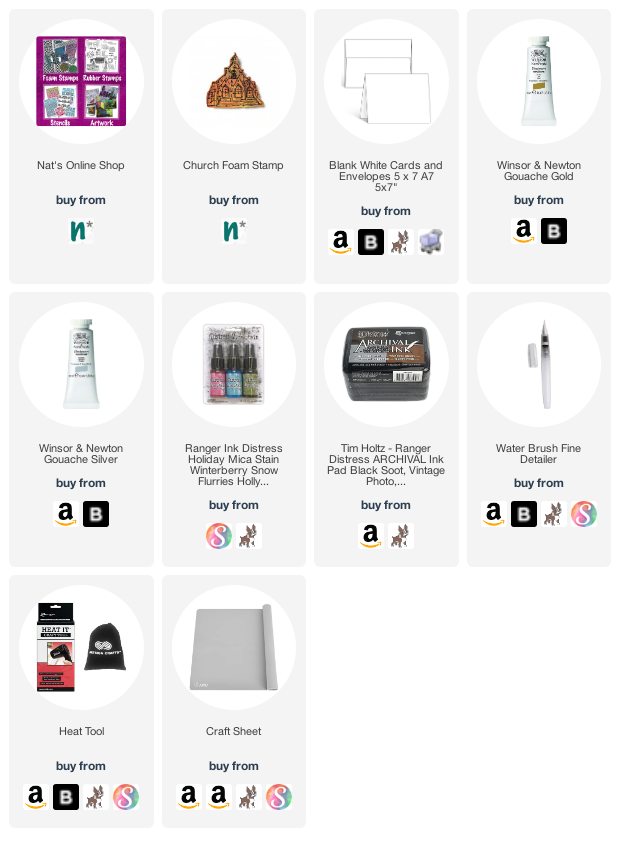
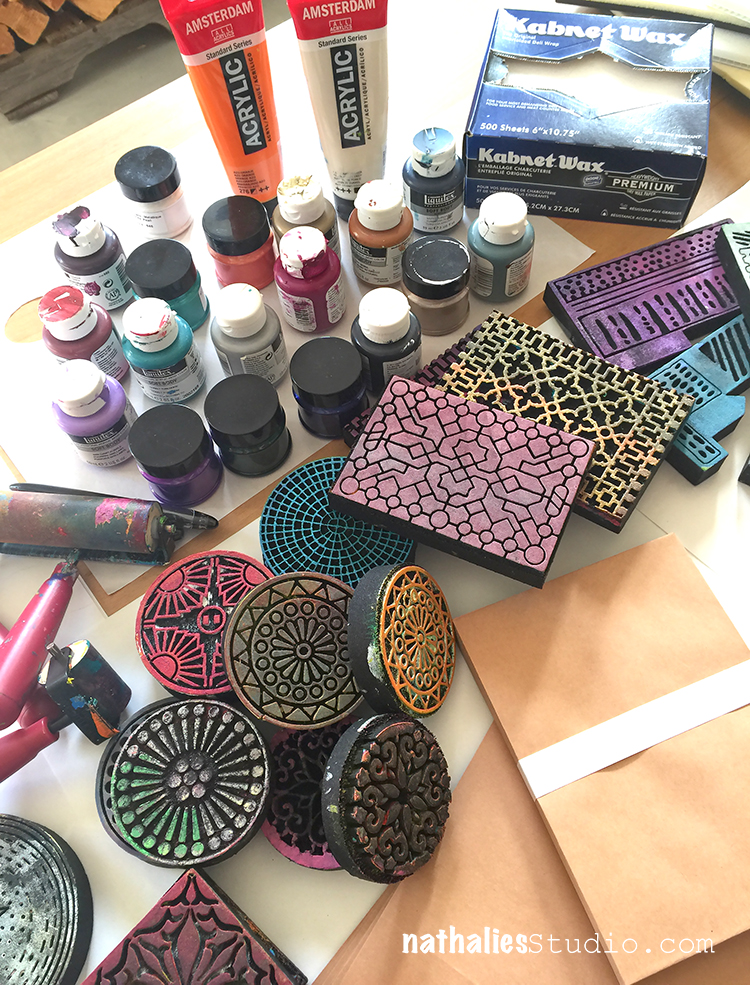
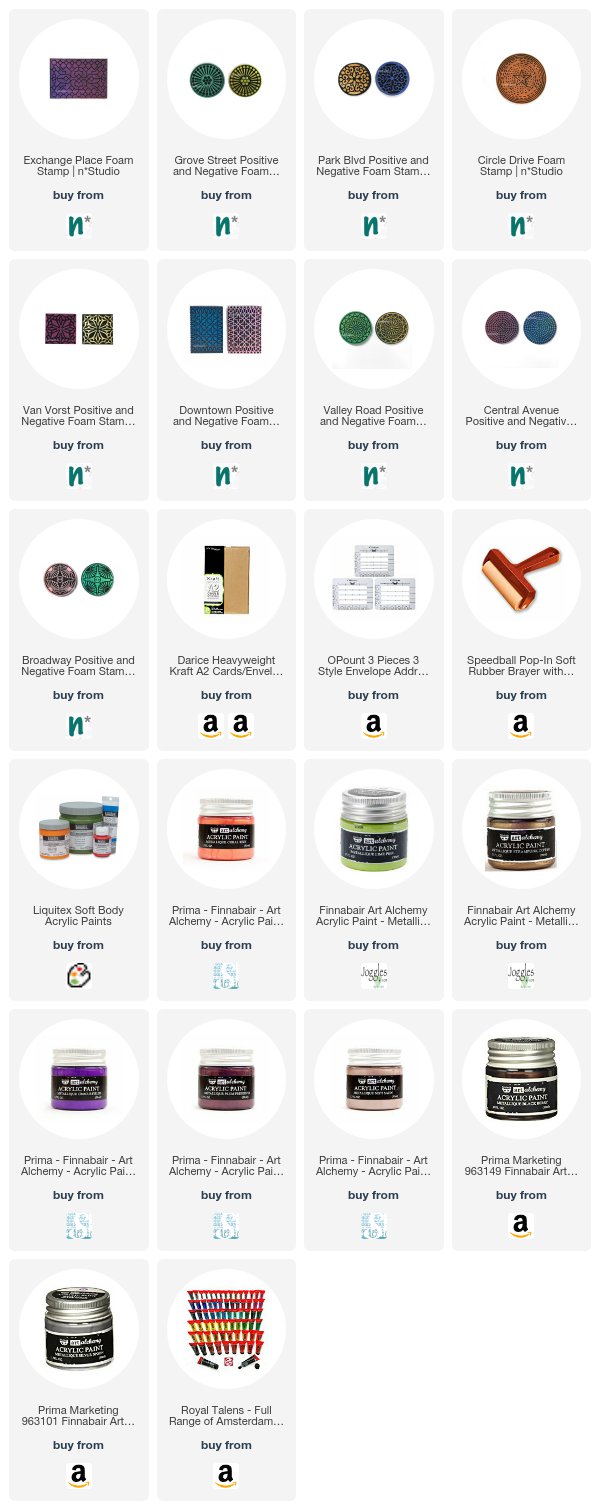
Give it a try: you can find all my Foam Stamps in my Online Shop and here are some of the supplies Maura used:

Looking for more inspiration from the Creative Squad? Follow them on Instagram here.

Leave a comment

1,2,3 Easy Peasy Quick Holiday Cards

I love handmade holiday cards but let’s face it – it is tough at this time of the year to spend a ton of time to make them.

So, when I designed the Circle Jumble Rubber Stamps I wanted to make sure they are versatile and can be used all year long but added a little topper for the circles that can either be used on it’s own or for exactly what I did here. Create little holiday ornaments :)

I love how the tiny ones with the Small Circle Jumble Set turned out  in black and white

But I am also in love with the Large Circle Jumble Cards


Look I sneaked a little colorful one in here :)

Here are the supplies I used for these cards:


Comments (2)

Leave a comment

Rubber Stamped Waterless Snow Globes – DIY Playdate

This is my favorite Play Date with Kim yet!!! Seriously, I geeked out on this and had too much fun making a little Winter Wonderland under glass. We knew we wanted to do snow globes and waterless is the way to go – easy peasy and sooooooo cute! Here we go – waterless snow globes filled with little rubber stamped scenes to warm your heart this holiday season and into the winter beyond.

You’ll need a jar or cool glass cheese dome like I found. The size of the jar and lid will determine what rubber stamps you can use. We went right for my Stroll Around the Block house stamps, and the little street elements and buildings in my My Home is my CastleStroll Through the Hood 1 and 2 sets. Then we got some fake snow, some tiny trees and tiny people, heavy card stock, archival ink, colored pencils and ink blocks to color our stamped images, scotch tape, a hot glue gun and scissors. How many accessories you want to add is up to you – there are so many choices when it comes to miniature scenery – plants, animals, different people, etc.

My cheese dome was wide enough to have a little city scene in it, so I played with various arrangements to see what fit. Here I am testing out my Powerhouse, Queen Anne, and Brownstone stamps. You can use the stamps to see what will actually fit in your jars.

Kim had a canning jar that she found the Art Deco image would fit right into.

And another smaller jelly jar for a Lady Liberty snow scene :)

If you have small jars like baby food jars, you can choose small stamps like my Hydrant, Snail Mail, Mailbox, or Street Sign stamps.

Ok time to stamp! I’m using a few different stamps to build my snow globe neighborhood.

Next you cut them out, leaving a “foot” at the bottom to fold over and tape onto the lid. You can cut them out before or after you color them.

Color your stamped images with watercolor pencils – after all these snow globes won’t have any water :)

Kim added some seasonal details to the Street Sign stamp.

I love to use Derwent Inktense blocks with water and a brush, almost as watercolors to color in my stamps. They have beautiful rich colors and you can use a fine brush to get very detailed with them. Here I am adding some color to my Powerhouse stamp.

I chose a lot of different colors for my snow globe scene.

Use some tape to tape the image into the lid. Here is Lady Liberty, ready for winter I hope lol

She just fits.

Here is my scene and SQUEEEEEEL it is coming together so amazing!!! This was a test to make sure the lid fit.

Now I glued in some trees and shrubs with hot glue.

And people to bring your snow globe to life.

Kim put together 3 scenes.

Time for the blizzard!!!

Just spoon some snow into the jars.

Or gently spoon around the elements in the cheese dome.

On goes the lid

Kim assembled her North Pole snow globe :)

This is where we realized that for lidded jars, you may want to build your scene up a bit so it sits above the bumpy rim at the bottom of the jars. You could cut out a cardboard circle and paint it white and stick it in the lid first, then put buildings etc on top. We would definitely do that next time. Also if your jar has a colored lid, you may want to paint it with gesso before you begin.

But oh WOW this was sooooo fun! And looksie at my little winter wonderland!!! What a success and done in under 2 hours.

Take a stroll through my snow dome :)

Kim’s waterless snow globes – waaaaay cute!

That guy in the bottom cracks me up!

And for even more fun, I added a small battery operated tea light into the back of my snow globe so now it glows at night. Ooooooo!

I hope you try this project and I hope you have as much fun as we did. It’s a nifty way to get into the holiday spirit :)

In addition to my Rubber Stamps from my Online Shop, here are some of the supplies that we used:


Comments (4)

  • Sue Clarke

    |

    Love love love these Nat!
    Now maybe make some on shrinky material and you can use water too???
    Super fun project that you and Kim made.

    Reply

    • nathalie-kalbach

      |

      Great Idea Sue! We really wanted to have no glycerin or water involved – it was so much easier and gives more possibilities to add candles and use a cheese dome too :) It was so quick and I bet it is fun to make with kids too!

      Reply

  • stresso

    |

    oh my gosh – how fun!!!

    Reply

Leave a comment

Foam Stamped Ho-Ho-Holiday Cards

Last week Kim and I got into the holiday spirit a little early and made some stamped cards with my newest ArtFoamies.

We had some craft paper card and envelope sets, my ArtFoamies foam stamps, a whole bunch of acrylic paint, brayers, and some deli paper or palette paper.

First Kim used my Broadway Positive Negative foam stamps and made a few cards for Thanksgiving – one of my favorite upcoming holidays (hosting again this year woot woot!).

We didn’t limit ourselves to the typical holiday colors – here I am doing a card with my Valley Road Positive Negative set and just decided to go with purple. Why not?

We overlapped and mixed colors and here used my Central Avenue Positive Negative stamps for a modern card. Maybe it’s a snowflake or Christmas ornaments or just festive and fun :)

We went a little nuts and both made enough cards for just about everyone on our lists. Here I layered up the Downtown Positive Negative stamps and used a bit of metallic paint.

I love how intricate this design is. Maybe I will go back to this card as I got a bit too much paint on the stamp. It will not go to waste.

Kim chose an unusual arrangement for this card using my Exchange Place stamp and some mauve and purple paint. She could write a personalized message in the corner when she’s ready to send.

It was easy to stamp out a bunch at a time.

Kim lined up the edges of a few cards and stamped them at once to get the designs moving off the edge of the paper.

In the end I decided to add a message on this one (stamped with my Van Vorst Positive Negative stamps), using an Opount envelope addressing guide.

I dressed this one (used the Grove Street Positive Negative stamps) up with a bit of black pen to look like an ornament.

At the end of our play date we had made a bunch of cards for all the upcoming holidays! It was quick and easy and took a little of the stress of the season away knowing we have them ready to go!

Here are some of the supplies we used (some are affiliate links):


Hope you enjoyed our HO-HO-Holiday playdate :) We already have some fun project lined up for the December one.

Comments (2)

  • Sue Clarke

    |

    I especially love the one that is a purple ornament.
    Fun fun fun creating right there!

    Reply

    • nathalie-kalbach

      |

      Thank you Sue- it was super fun and so easy too – stress free holiday card making in this case :)

      Reply

Leave a comment

DIY – Stamped Easter Eggs

For the upcoming Easter Holiday I decided to dye some eggs. I bought some wooden eggs, blew out some brown eggs and cooked some white eggs to have a variety to play with.

I dyed the cooked white eggs with some natural dyes (Yellow/Orange (Annatto extract), Purple (Radish), Blue (Cabbage) – see picture on top of the collage. For the blown out brown eggs and the wooden eggs I wanted to try the new Tea Stain Dyes by Faber Castell, which are not suitable for food. They are meant to dye fabric and paper but I thought it should work with wood and egg shells too. I loved how the colors came out with these dyes, especially on the wooden eggs, the brown eggs were a bit tricky with the light green, but it was all good. Both dyes resulted in colors that I was super happy with.

I stamped the eggs with a white pigment dye stamp pad – using my inked cling rubber stamps by wrapping those carefully around the egg, and using some of my foam stamps by rolling the egg over the inked stamp.

On the top row you see the eggs stamped with my ArtFoamies foam stamps – I love how they turned out- the impression is bold.

On the bottom I used my Cardboard Cling Rubber Stamp Set. I loved especially how the Tread stamp gave a look of rubber bands but I do love ever single one. The yellow of course was a bit tough with white ink …so I used an archival ink on top which made it a bit smudge. Oh well.

Next I tried my Embroidery Cling Stamp Set – ohhhhh- i so loved the look of this. The different stitches came out really well on the eggs.

On the bottom you see eggs used with the Stroll through the Hood Cling Stamp Sets -see the Hydrant pattern – I was geeking out- LOL- I know it is random but I love it.

Here you have a couple of the eggs as decoration on my table. The cooked eggs are in the fridge waiting to be consumed in the next couple days ;) That was super fun to make, so easy ! I hope you like them and give these a try :) Here is the supply list of what I used besides some brown and white organic eggs:


Comments (4)

  • stephanie

    |

    great eggs!

    Reply

  • Joi@RR

    |

    Heheheh – love your EASTER PARADE of EGGS Nat! They are GORGEOUS. Your stamps are perfect on them. Xj.

    Reply

    • nathalie-kalbach

      |

      thank you Joi, I am so glad you like them :) Have a wonderful start into the week! <3

      Reply

Leave a comment