Blog: Pan Pastel

A Look Back – Cool Stuff You May Have Missed 10

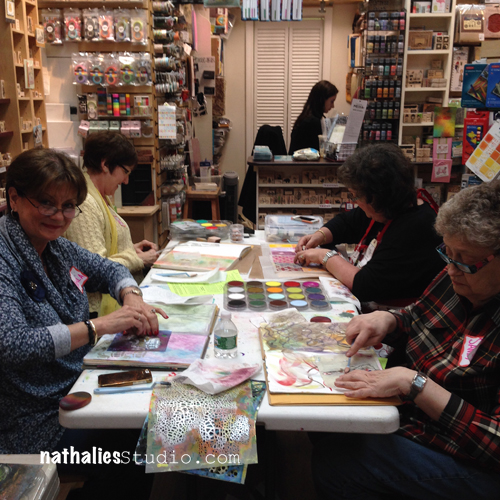
A Look Back – a blog series to show you some projects and posts that you may have missed – sometimes going WAY back in the archive. I think it will be fun to revisit a few ideas that we haven’t seen for a while. I’m excited to see how a little look back might inspire something new in the future :)

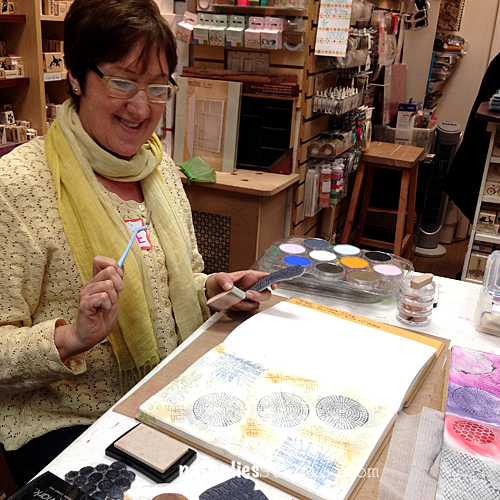
This time I’m looking at Pan Pastels – a medium I have been playing with for years and always find myself returning to on occasion. Here’s a look back at some of the ways I’ve used them over the years. Enjoy!


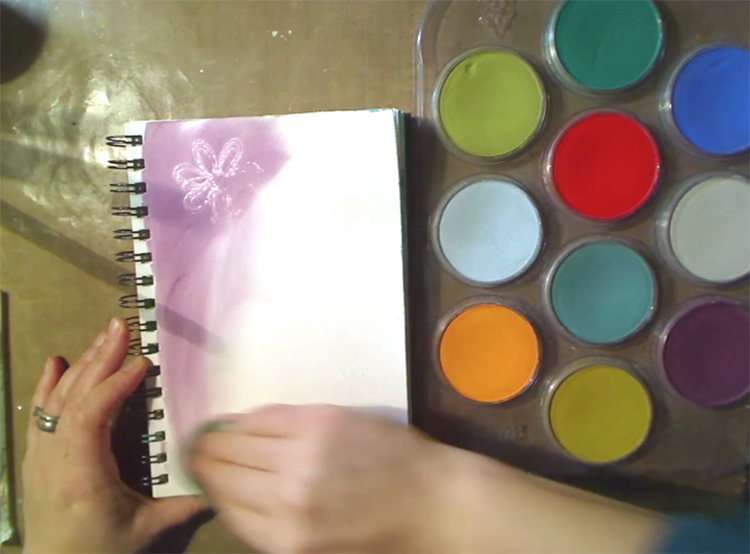
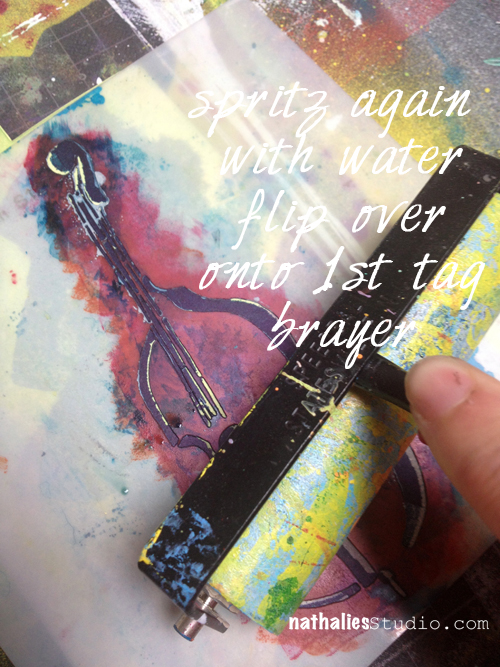
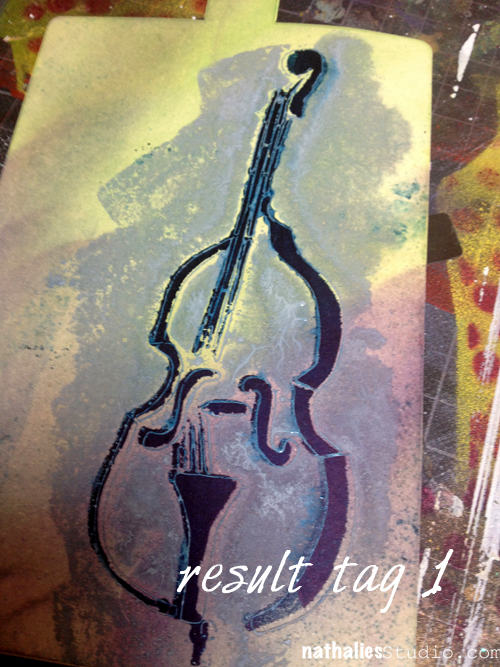
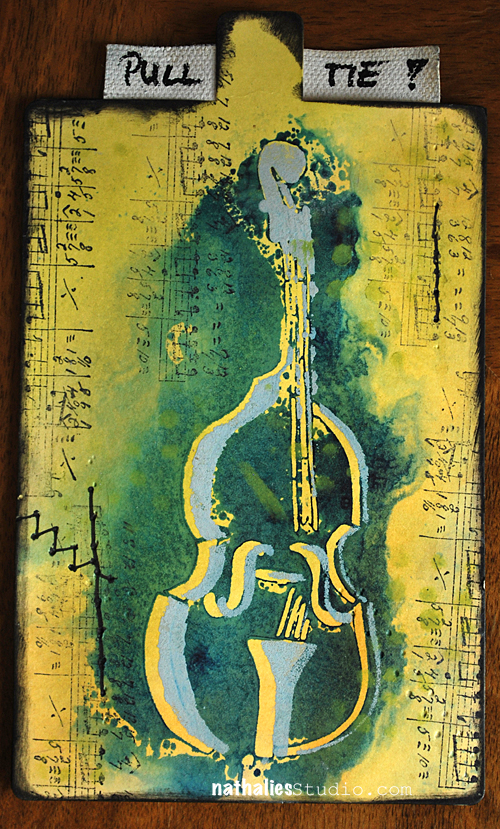
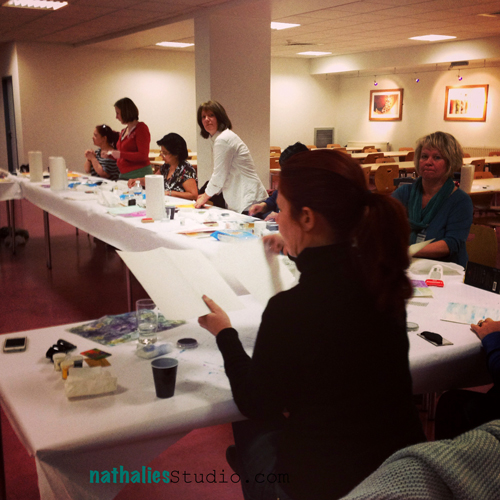
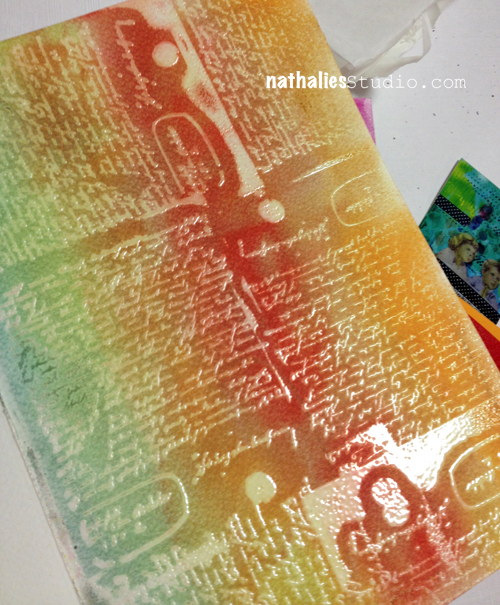
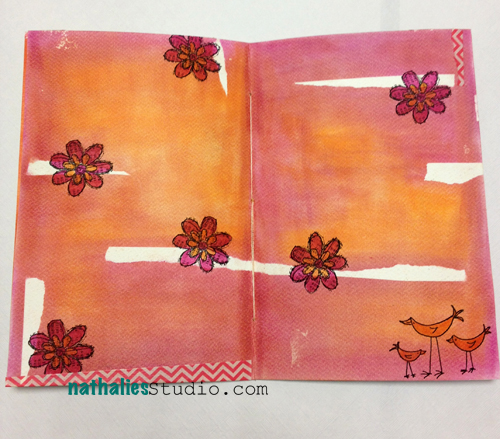
First up is a resist technique I show in a video from 2013. I use rubber stamps, embossing powder, and pan pastels. Check it out here.

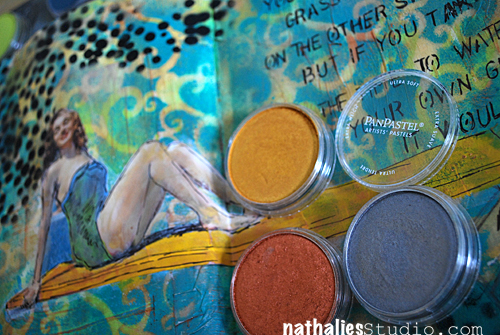
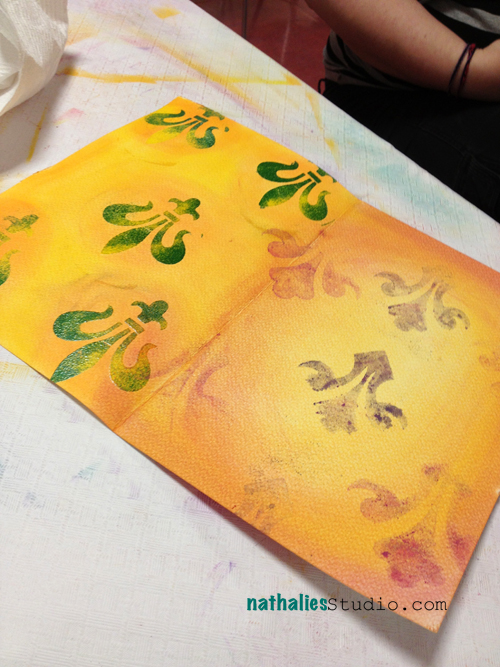
Also from 2013 is this art journal page where I experimented with some metallic pan pastels for a little sparkle here and there. 

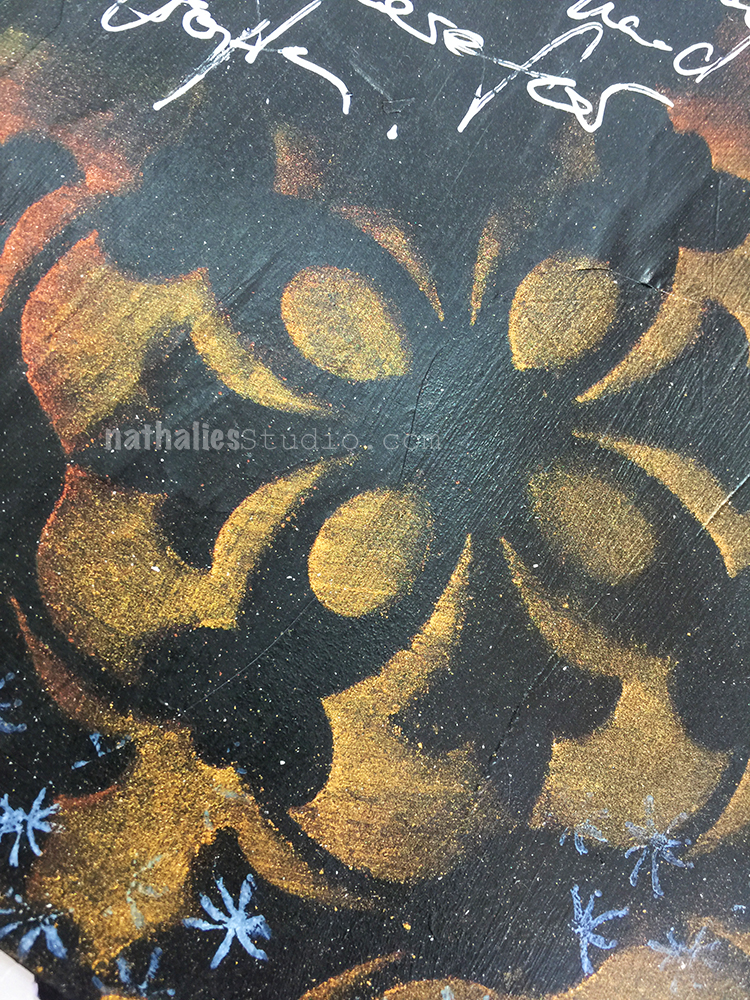
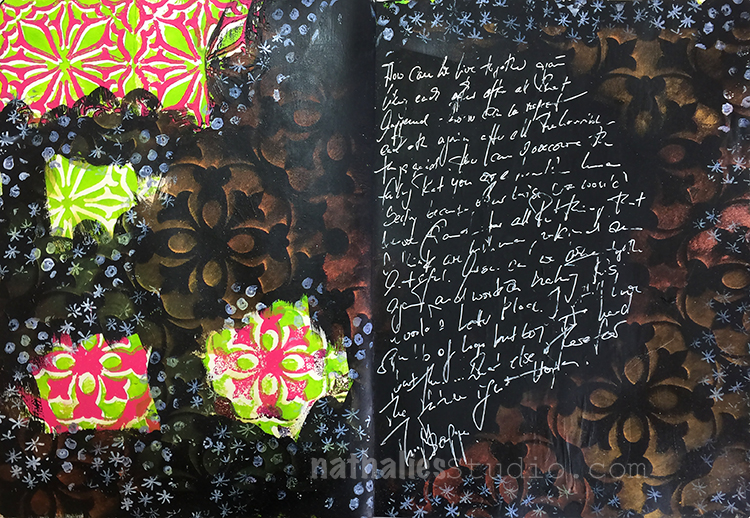
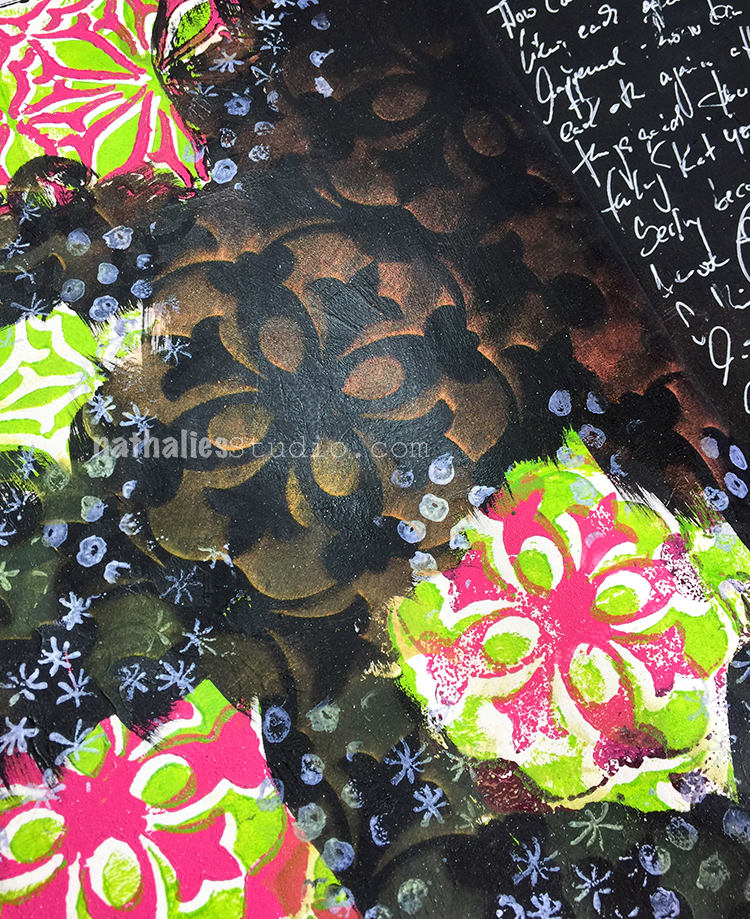
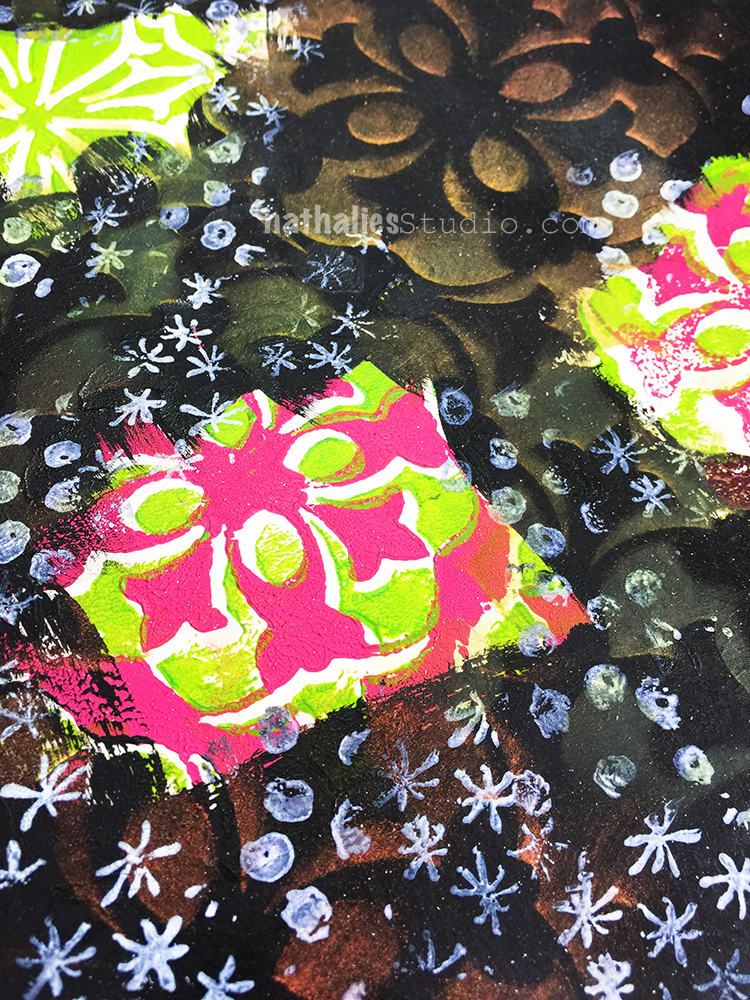
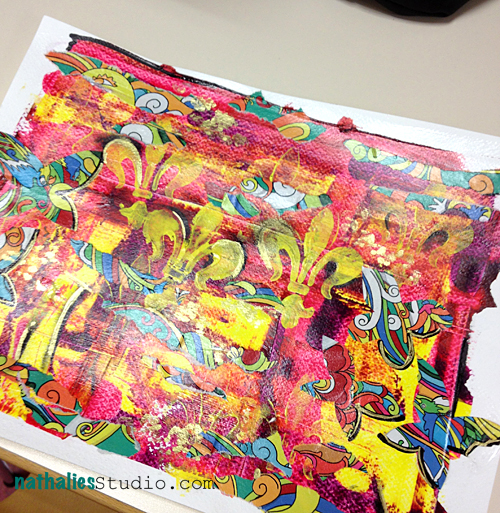
Jumping forward to 2018, I also used metallic pan pastels – this time with my Versailles stencil on a black background for some real drama :) You can check out the full post here.

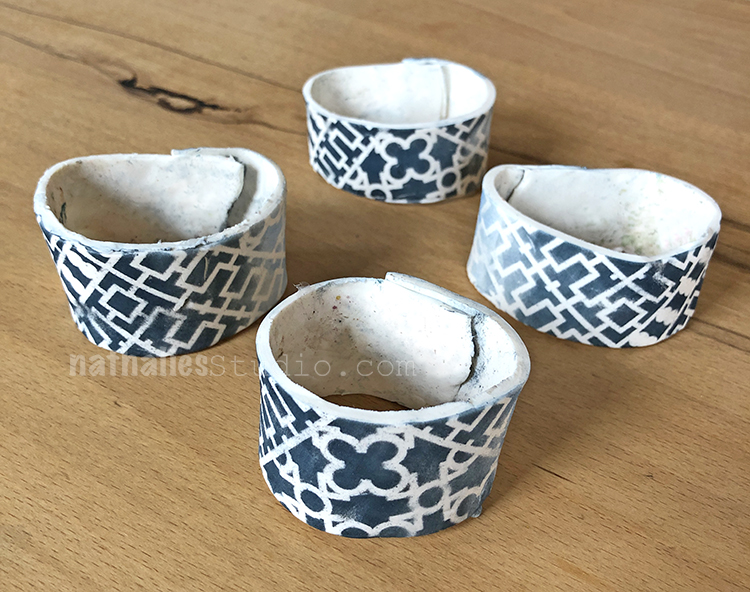
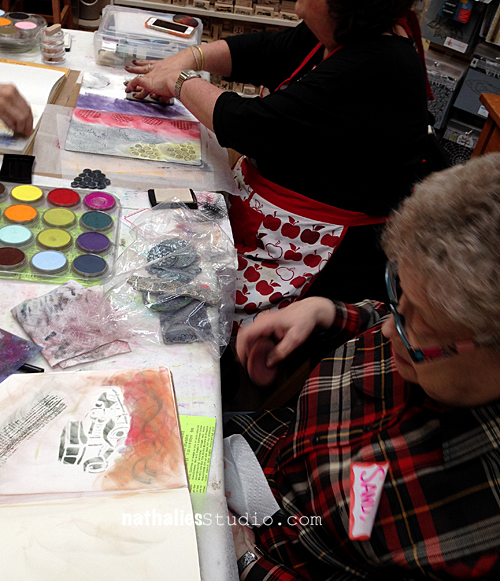
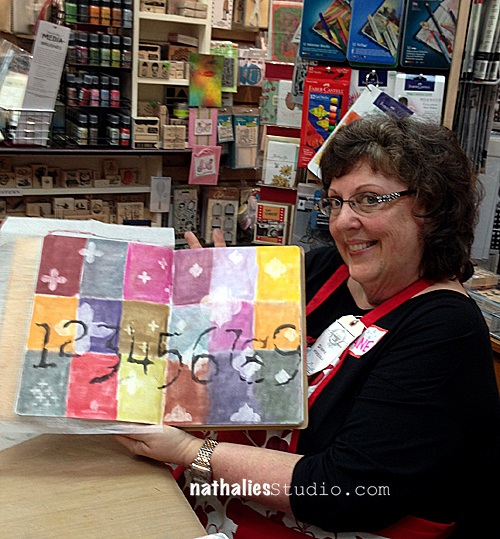
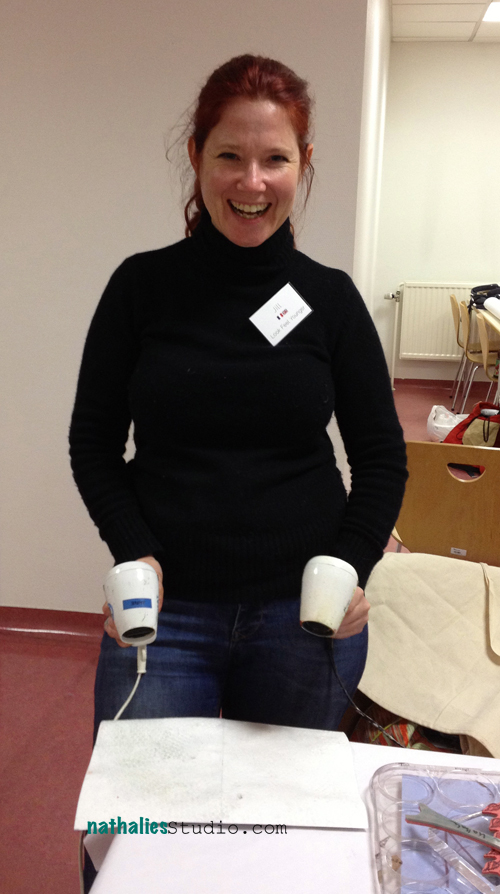
Later that year I had a playdate with Kim and we used pan pastels with stencils (here my Downtown stencil) on paper clay for some napkin rings – that was a pretty cool and simple project. See how we did it and check out our gorgeous tablescapes in the original post.

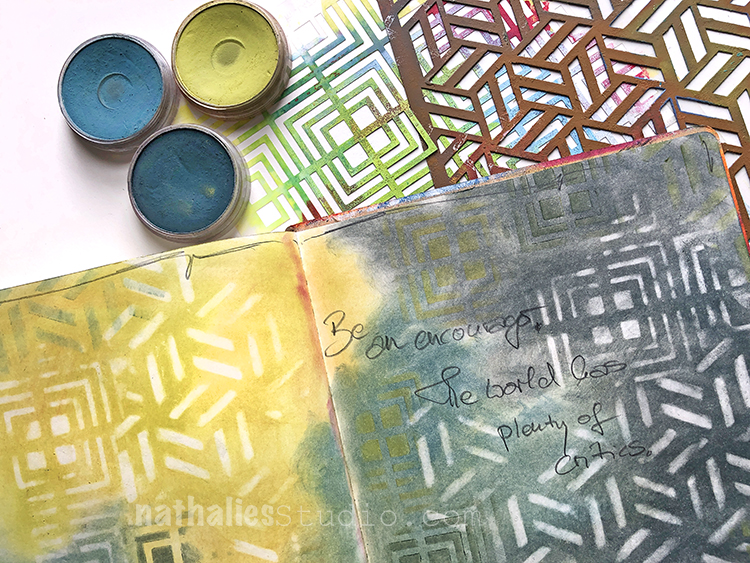
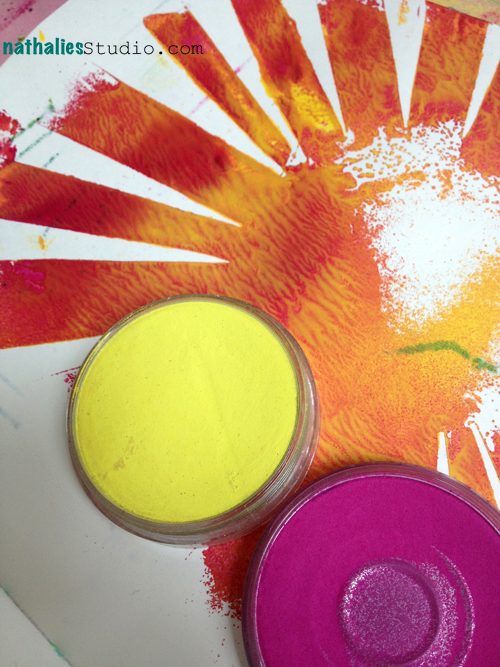
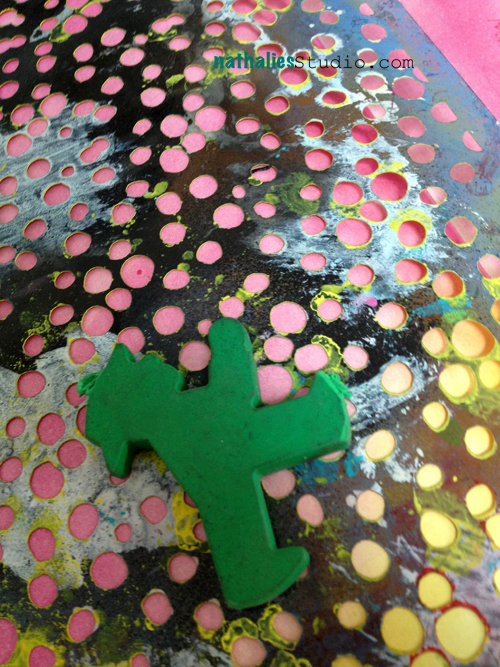
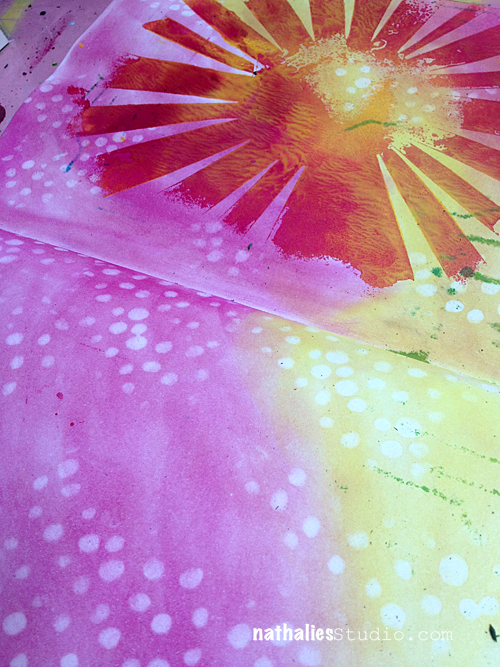
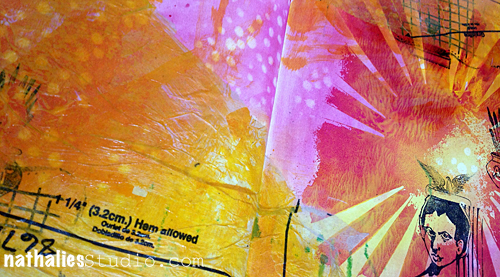
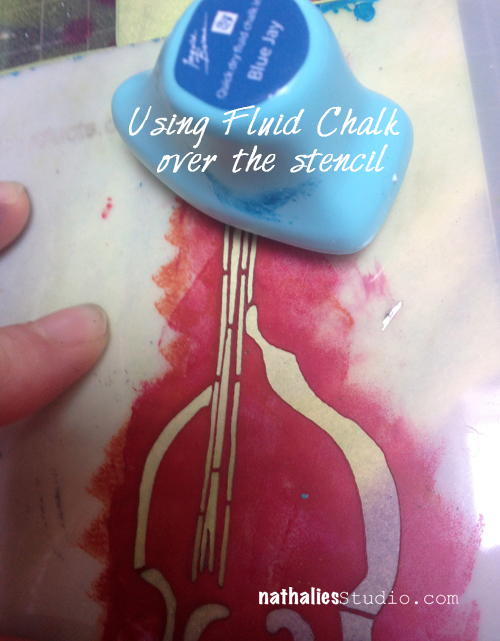
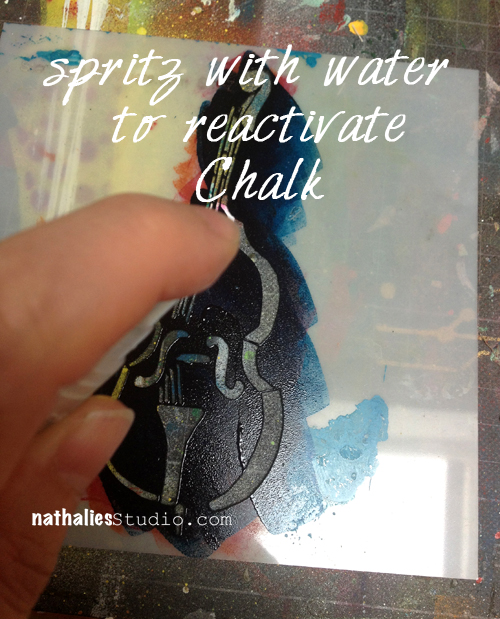
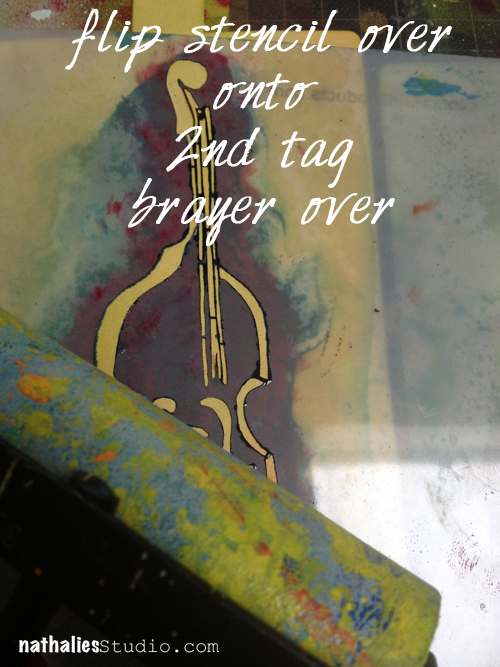
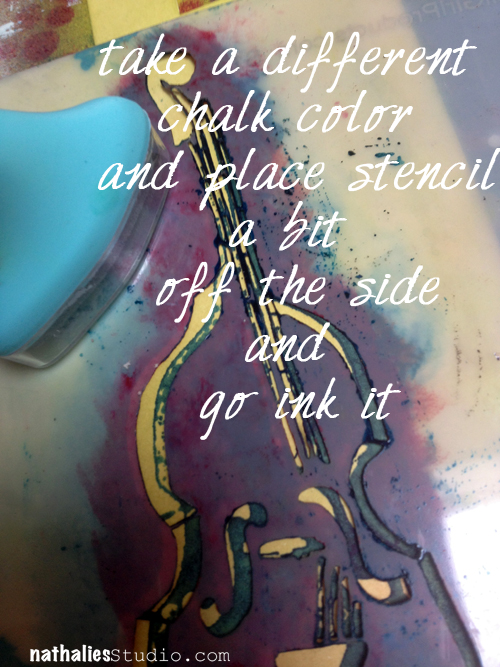
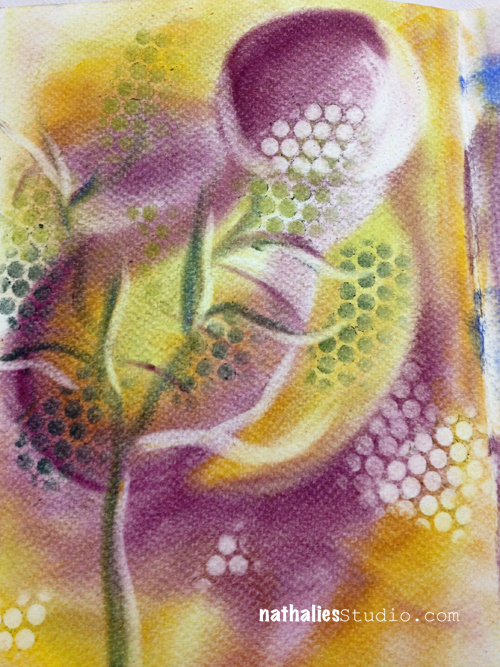
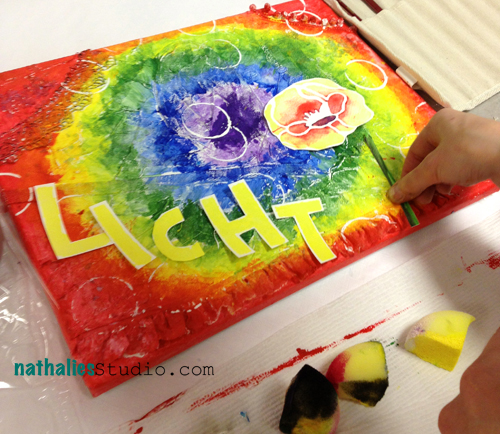
Finally just this past August for my Stencilbop Challenge, I show the simple joy of using pan pastels with your stencils – they make it easy to blend colors and patterns for such gorgeous results. Here I was using my Manhattan stencil and my Kassel stencil.


I hope you enjoyed A Look Back through my archive and maybe you are inspired to try some different things now too.

Here are some of the supplies I used in these posts:

Leave a comment

Thoughts on Paper – Art Journal

After watching Tina Walker’s Creative JumpStart Video I was inspired to pull out my PanPastels. Her video wasn’t about using PanPastels but she had used them in a little part of her video and that made me pay extra attention. I used to use them all the time and also teach with them and then somehow I really neglected those little pans full of pigment joy! So it was time to dust the pans off and get them out.

I had covered up some of the background with black gesso which I had stamped with my Versailles Positive & Negative Foam Stamp Set and my Van Vorst Positive and Negative Foam Stamp Set.

I used gold and bronze PanPastel over black gesso using my Versailles Stencil. I always love how black gesso makes the pastels really pop.

I also stamped with the white side of RubberMoon’s new awesome Moonlight Duo Ink Pads. Each ink pad has a white pad next to the initial color for creating tints and I just love the white by itself. It dries permanent – yeahhhh!!! I used my Embroidery Stamp Rubber Stamp set. This page was really more a bit of a play but I had fun and I put some thoughts down as well – and it served a couple of really good purposes:

  • I pulled out my PanPastels again and I realized I need to use them more again!
  • I tried the white ink pad side of my RubberMoon ink pads and know this will be a staple in my mixed media art
  • I actually did something creative on a day which was filled with computer work and non creative to-do’s and that prevented grumpiness
  • I once more realized that I do not like the look of light green and metallic color next to each other – yeah – sometimes even that is a thing to discover- LOL

I hope you are part of Creative JumpStart as well – it is such a great and supporting community and looking at everyone’s project based on the daily videos is another wonderful source of inspiration. If you haven’t joined yet- you can still do it – sign up for Creative JumpStart 2018 !

Here are some of the supplies I used for this spread:


Comments (7)

  • florenceturnour

    |

    Lol hairspray. Does it smell perfumed? I guess workable fixative doesn’t smell all that nice. I love that you are writing white on black. I’m going to have to give that a try too!

    Reply

    • nathalie-kalbach

      |

      LOL- all I head. Fixative is actually smelling worse and most you have to apply. That wasn’t an option with the cold here anyway- LOL

      Reply

  • cathsheard

    |

    Oooh, those metallic PanPastels – wow! They look fab….

    Reply

  • Catherine

    |

    Nathalie, I really like these journal pages! I love using Pan Pastels, but never quite know how to affix them to the page! Did you use anything so they won’t rub off? Thanks!

    Reply

    • nathalie-kalbach

      |

      thank you Catherine. yes they def. need to be fixative either with a fixative or in this case just with hairspray.. hairspray might change the color but i can live with this in my art journal

      Reply

      • Catherine

        |

        Thanks, Nathalie! I think that would be the easiest! Will try it!

        Reply

Leave a comment

Artvergnugen: PanPastel WS at The Ink Pad Photos

NatkalbachWSInkPad_Artvergnugen

This friday I had the pleasure of teaching anotherArtvergnugen Workshop at The Ink Pad in New York City. Artvergnugen is an ongoing Evening Art Journaling Class – once a month I teach with a different medium or tool and it is loads of fun. I love our little group of girls! This time I showed all kinds of techniques and ways on how to use PanPastel, a wonderful pastel medium, in your art journal.

NatKalbach_Artvergnugen01

As you can tell I am very enthusiastic about PanPastels and the girls looked at me first as if I am a bit goo-goo..well I am ..but ha- I got them excited too ;) (Thank you Pamela Young for letting me use the picture)

NatKalbach_ArtVergnugen02

Soon they were playing and trying all kinds of applications and techniques

NatKalbach_ArtVergnugen03

Pamela loved how she could layer all kinds of different techniques to build up a page

NatKalbach_ArtVergnugen04

Wendy obviously loved playing with the Versamark Techniques I showed ;)

NatKalbach_ArtVergnugen05

Jane loved the Stamping Techniques :)

NatKalbach_ArtVergnugen06

Lisa loved playing with Stencils and PanPastel

NatKalbach_ArtVergnugen07

Sandra really liked being photographed ;) just kidding- she liked the stenciling best too I think :)

NatKalbach_ArtVergnugen08

And Sandy loved the vibrancy of the colors

NatKalbach_ArtVergnugen09

Ana loved how you could blend the colors and also the stenciling

NatKalbach_ArtVergnugen10

And finally Diane really loved her page with all kinds of different techniques ..and I love it too :)

NatKalbach_ArtVergnugen11

The next and last Artvergnugen is on June 27 – I believe there is one seat left – the theme will be Oilpastels/Artbars – I would love to see you :)

If you would like to learn the techniques and actually many many more  then what I taught in The Ink Pad on how to use PanPastels, sign up for my Online PanPastel Class. 

In five lessons you will learn the basics, all kinds of surfaces and techniques you can use the PanPastels with and I will show you several projects including a nice wooden canvas and a scrapbooking layout using them too. And you don’t have to travel to New York for this…although…it would be fun, right? You can take the class in your Jammies, whereever you are , whenever you want :) More details on the class here

Wishing you a wonderful day

Nat

LogoBlogSignature

Leave a comment

PanPastel Resist Technique

CJSUberMediaOWSLOGO

Those of you who were part of the Creative JumpStart 2013 saw the videos that me and my artist friends posted on my website throughout January 2013.  The videos are not available here anymore, since CJS 2013 was only available till June,  but I thought it would be nice to repost my 10 technique videos over the next couple weeks- so that you have access to them whenever you want and see what CJS 2013 was all about.

And now let’s jump to the video Number 8 in my Über*Media Creative JumpStart 2013 Workshop which was the PanPastel Resist Technique :)

If you have no external speakers on your pc – turn up the volume a lot (the audio is very low in this video)

CJS 2013 Technique 8 Pastel Resist from Nathalie Kalbach on Vimeo.

As you might have seen I just proposed Creative JumpStart 2014!

CJS2014Lable

It will work slightly different this year and has some major improvements like a forum and an easier access- and I can tell you already the line up of artists and the videos are AWESOmE!!! For 20 Dollars -that is less than 1 Dollar per video (23 videos by 21 artists) it is a great deal! Check out the information here :)

I would love to have you!

And here are my supplies I used for the PanPastel Resist Video above:

nSupplies

Have a gorgeous and wonderful day!
hugs
nat

LogoBlogSignature

Leave a comment

Stencil Blog Hop – What’s The Point Stencil

NatKalbachStencilbloghop


Welcome to my 6th Stencil  Blog Hop! This time I invited 5 wonderful artist friends to hop along with me and show case my StencilGirl Product What’s The Point Stencil. It is a 9×12 inch stencil.

WhatsthepointKalbach


And I give away one What’s The Point Stencil! Comment here for an entry into this giveaway! And if you also comment on all the other listed blogs I will  give you an entry into the giveaway for each blog you comment on–how cool is that! You have six chances to win it. Leave a comment on each of the listed blogs and on my blog  and let us know how you like the projects and I will pick randomly one lucky winner. You have time to comment till September 3, 2013 – midnight EST.

 Edited on September 23, 2013: Congratulations to Jean A Marmo- you win the stencil- please contact me till October 10, 2013 with your snail mail addy so I can have this send out to you :) – Nat

Here are my friends joining me this time :

Jamie Dougherty: my wonderful mixed media artist friend from California- check also out her latest painted skateboards…too die for!

Carolyn Dube: who rocked the StandUp Bass last week already!

Andrea Gomoll: my super talented German friend from Berlin – we taught and organized a couple workshops together and she is one of my old Craft Mafia Gang Memberfriends;)

Marsha Valk: from The Netherlands who does AMAZING projects and photos and who I know pretty long now too :)

Maria McGuire: Let’s see what this talented lady does this week- she always surprises me with out of the box and cool projects!!!


What’s the point about this stencil? Man…there is never enough dots- LOL. I love dots – and I use them all the time to tie things together – and I love the possibility of a nice background with it.  Check out some samples here:

Bildschirmfoto 2013-08-14 um 16.25.12


Here is what I created for today:

NathalieKalbach_Whatsthep01


I played a bit in my art journal -first creating a background with PanPastels.

NathalieKalbach_Whatsthep02


Then I placed the stencil on top of the panpastel background and used an eraser through the stencil.

NathalieKalbach_Whatsthep03


Here you can see how this erased the panpastel through the stencil. I fixated the background afterwards.

NathalieKalbach_Whatsthep04


Then I added some old sewing pattern paper on top here and there and blended that in with some acrylic inks- as you can see..this lets the dots still shine through.

NathalieKalbach_Whatsthep05


After spicing it up a bit here and there with stamps I used some Heavy Body Paint and applied this for texture over the Stencil too.

NathalieKalbach_Whatsthep06


So much fun to layer it with different media to get some depth on an art journal page

NathalieKalbach_Whatsthep07


Here are the supplies I used:

nSupplies

Now hop on over to my friends and check what they did and comment for some changes to win the stencil :)

Jamie Dougherty

Carolyn Dube

Andrea Gomoll

Marsha Valk

Maria McGuire


Have a wonderful day

hugs

nat


LogoBlogSignature


Comments (71)

  • Susan Brannon

    |

    So simple..and so cool..lots of uses..Thanks!

    Reply

  • Nancy Lee

    |

    This is really a super stencil. Love your piece.

    Reply

  • Tricia

    |

    Great project, Nat – love this stencil and the colors!

    Reply

  • Marilyn Kaye

    |

    Love the layering you created with your stencil. The bright colors are right up my alley!

    Reply

  • JudyG

    |

    I agree! There are never enough dots!

    Reply

  • Barbara I.

    |

    Wow! I so LOVE this stencil. Thanks for a chance to win it and for sharing how you used it to create your journal page. Awesome techniques. I like the use of the Heavy Body Paint. Crossing my fingers!

    Reply

  • angi eharis

    |

    love these circles, especially everything you did with them! tx for the chance to win them, aloha, angi in hana

    Reply

  • Nancy Sapp

    |

    Nat – Would LOVE to win 1 of your stencils!! And we can never have enough DOTS in our lives!

    DOTS of love!
    Grandma Nancy Sapp

    Reply

  • Cat

    |

    I love the way you used the What’s the Point stencil on your journal page! And, the color are awesome! Now I have to own this one as well. If you keep introducing me to more stencils, it’s going to start taking a serious bite out of my paycheck!.

    Reply

  • Ivonne

    |

    Super!

    Reply

  • Kathy

    |

    Love the bright colors! Question: did you use fixative to set the Pan Pastels before adding paint? I rarely incorporate Pan Pastels because of the mess, although I love them. I’m inspired to use them!

    Reply

  • Trena in Naperville

    |

    Very cool design Nathalie! Love your colors and how to you add splashes of color.

    Take care and STAY POSITIVE!

    Reply

  • Jeannette

    |

    Sorry for THE weird comment. Autocomplete made THE stringent words …

    Reply

  • Jeannette van Dongen

    |

    Love THE work you did urinegewogen thuis stencil! Hope to win one ….

    Reply

  • Jeannette van Dongen

    |

    Love THE work you did urinegewogen thuis stencil! Hope to win one ….

    Reply

  • Gillian Pearce

    |

    Love the look of that super heavy body paint. I’ve never seen it before. Looks perfect for stencils.

    Reply

  • ina

    |

    I’m just starting out with stencils. Love this one!

    Reply

  • Lissa

    |

    Love it! You can never have enough colors or stencils!

    Reply

  • Lissa

    |

    Love it! You can never have enough colors or stencils!

    Reply

Leave a comment

Stencil Blog Hop – Stand Up Bass

NatKalbachStencilbloghop


Welcome to my 5th Stencil  Blog Hop! This time I invited 5 wonderful artist friends to hop along with me and show case my 6×6 inch StencilGirl Products StandUp Bass Stencil.

StandUpBass Stencil


And I give away one StandUp Bass Stencil! Comment here for an entry into this giveaway! And if you also comment on all the other listed blogs I will  give you an entry into the giveaway for each blog you comment on–how cool is that! You have six chances to win it. Leave a comment on each of the listed blogs and on my blog  and let us know how you like the projects and I will pick randomly one lucky winner. You have time to comment till August 27, 2013 – midnight EST.

Edited on August 31, 2013: The winner is Cyndi from CeeCee Studio, Congratulations. Cindy, please email me with your postal address so I can get this stencil sent out to you :) , Nat


Edited September 23, 2013: Although I tried hard to get the winner’s addy – I never heard back. I will do a new drawing from a different post soon as I am sure someone else will be happy to receive the stencil :)

Here are my friends joining me this time :

Louise Nelson: My rocking friend from Australia- cannot wait myself to see what she has up her sleeves this time :)

Carmen Sanchez: Cuchy always has the most fun ideas – she is a wonderful artist from Madrid, Spain

Carolyn Dube: rocks the stencils on the StencilGirl Products Creative Team!

Michelle Hernandez: did a wonderful project last week already with my typewriter stencil- I cannot wait what this amazing Scrapbooker is doing this week

Maria McGuire: another stencil queen and the Creative Team Leader at StencilGirl Products


Why a StandUp Bass? Well…that is what I see when I walk into my husband’s music room next to my studio. I love this instrument. It is massive and beautiful and I love the sound of it too. I thought it can represent so many things like music, art, harmony, it is a good birthday card theme etc.

Here is what I created for today:

NatKalbach_StandupBass11

This is a gift card holder. I created it using two manila tags and here is how:

NatKalbach_StandupBass01


Starting with Tag 1

NatKalbach_StandupBass02


After you used the chalk through the stencil on tag one- you have a lot of access of chalk on top of the stencil

NatKalbach_StandupBass04

NatKalbach_StandupBass05


NatKalbach_StandupBass06

NatKalbach_StandupBass07

NatKalbach_StandupBass08


NatKalbach_StandupBass09

NatKalbach_StandupBass10


and here is the other side of the gift card holder after spicing it up with some fun stamps etc.

NatKalbach_StandupBass12


Here are the supplies I used:

nSupplies

Now hop on over to my friends and check what they did and comment for some changes to win the stencil :)

Louise Nelson

Carmen Sanchez

Carolyn Dube

Michelle Hernandez

Maria McGuire


Have Fun

Nat

LogoBlogSignature

Comments (55)

  • Nancy Sapp

    |

    Nat – LOVE your stencils! You’re so talented. Would LOVE to win any of them! I hope U pick my name…
    Grandma Nancy Sapp

    Reply

  • Carmen Lucero

    |

    Nat, it looks like I just commented, but it was back in August. Thanks for the second chance to win the cello. I love the technique you used of double stenciling!

    Carmen L
    cal8007 at aol dot com

    Reply

  • Susan Stimson

    |

    Love the techniques! I especially like how the bass looks when using a second color and offsetting it a little and stamping.

    Reply

  • Carmen Lucero

    |

    What an amazing technique, Nat! I believe in not wasting anything! Love the gift tag and the stencil for what it stands for!

    Hugs,
    Carmen L

    Reply

Leave a comment

Workshops at J.P. Morgan in Luxembourg

Last weekend I had the pleasure to teach 3 workshops at J.P. Morgan in Luxembourg. I was invited by the Social Committee and it was so much fun. It was an amazing crowd of people- very international and with lot’s of languages involved. I was sticking to my two- English and German…my attempt to learn Luxembourgish was poor ;)

Luxembourg01_NatKalbach

We had a really great room…the canteen- which was PERFECT for a workshop – lot’s of light, lot’s of tables, lot’s space, lot’s of yummie snacks ;)

Luxembourg02_NatKalbach

The first class was my Yawp PanPastel Class on Saturday afternoon and we dabbled into a lot of techniques and the students loved playing with the different yummie colors and techniques.

Luxembourg03_NatKalbach

Luxembourg04_NatKalbach

Luxembourg05_NatKalbach

Luxembourg06_NatKalbach

Luxembourg07_NatKalbach

Heating guns were used in wild west style to get the techniques rolling ;)

Luxembourg08_NatKalbach

Sunday morning I taught the Über*Media Acrylic Paint Class first. We covered lots of techniques and made a big pile of background pages for art journals. Not many pictures here- obviously I forgot to take pictures

Luxembourg09_NatKalbach

Luxembourg10_NatKalbach

Next up was the Season /Texture Canvas Class. It was awesome. Most of the students never worked with Acrylic Paints..some even stated to never have held a paint brush in their hand (hard to believe- I know) and they had so much creative fun!


Everyone was very open to try out things, but the best was…they had no finished picture in their head when they started, which made them more open to try new things – I loved that.

So we had a little Monet inspiration going on here

Luxembourg12_NatKalbach

and some Pearl Jam inspired texture galore here

Luxembourg13_NatKalbach

and some rainbow light fun here

Luxembourg14_NatKalbach

and awesome texture flower bouquet inspiration here

Luxembourg15_NatKalbach

some real awesome flower application/transformation here

Luxembourg17_NatKalbach

beautiful text textured flowers here

Luxembourg18_NatKalbach

and a whimsical flower spin here

Luxembourg19_NatKalbach

Here is a group shot with the happy ladies- some had to leave earlier- so there is a lot missing on the photo

Luxembourg20_NatKalbach

Thank you so much everyone who took the classes- it was a wonderful weekend with you and you inspired me a lot too :)

Thank you also to the J.P. Morgan Social Committee for inviting me and to Lydia for inviting me to her home and taking more than good care of me ! You are fab!

I will show you some of my sightseeing pictures in Luxembourg next…what a beautiful little country!

BTW – if you are interested in having me come and teach at your event, store or for a certain private or company group – please feel free to contact me !

You can also check out my In -Person Workshops here and see if I am close soon to where you live or check out my Online Workshops here to take classes whenever you want.

Have a gorgeous day

hugs

Nat

Comments (6)

Leave a comment

Workshops in Sweden – Stockholm August 31-September 1, 2013

liten logga

Wohooo – so happy to come back to Sweden this year to teach at the Creative Moments Event organized by Scrap-Perra.

I will teach 3 workshops – here they are

Season Canvas: 
In this Workshop with Nathalie Kalbach, you will create a stunning and unique canvas that will be a wonderful home décor item.Learn how to create dimension and texture with tissue paper, items of daily life, acrylic paint, lace, burlap, and gesso.

Learn how to reveal the interesting and eye catching texture with acrylic paints and acrylic inks and add some fun stamping techniques on top.

We will be adding lots of layers and dimension to make this a spring, summer, fall or winter canvas… just as you like. All the techniques can easily be applied to future projects.

Classtime is 4 hours.

Über-Media Acrylic Paint: 
In this workshop you learn how to use Acrylic Paints in your Art Journal. This class shows all kinds of possibilities using Acrylic Paints with different media.We will start with the basics then make our way up to more advanced techniques. Everything will be taught in an art journal.

I will share with you my favorites, whether it be how to build up interesting backgrounds, resist techniques or incorporating other paint media for stunning layers. I will share with you why I’m doing things, how I got the idea, and what works and what doesn’t seem to work.

Join the uber-fun in this class!

Class is at least 4 hours.

Yawp: 
Are you ready to dive into art journaling? Let’s sound a barbaric YAWP over the rooftops of the world and get ready for a lot of creative freedom. I will teach you how to create your own easy to create art journal using wonderful PanPastels.Learn mixing, blending, painting and drawing with those soft pastels. Learn how to get stunning results with different resist techniques and fun stamping tricks using embossing powders and other paint media.

You can easily apply all of the learned techniques to later projects whether it be art journals, mixed media and even scrapbooking projects.

Looking forward to yawp along with you in this 3 1/2 hour-long class.

I am so thrilled to teach with also my sweet friends Birgit Koopsen and Janna Werner and to meet Asa Danielsson.

Officiell logga webshop

it is going to be lot’s of fun!

If you want to know where else I am teaching this year- you can check my in-person Workshop schedule! Hope to meet you!!!

Have a gorgeous day

Nat

Comments (6)

Leave a comment