Creative Squad

From Small Beginnings – Cheiron Brandon

CS September Theme 2

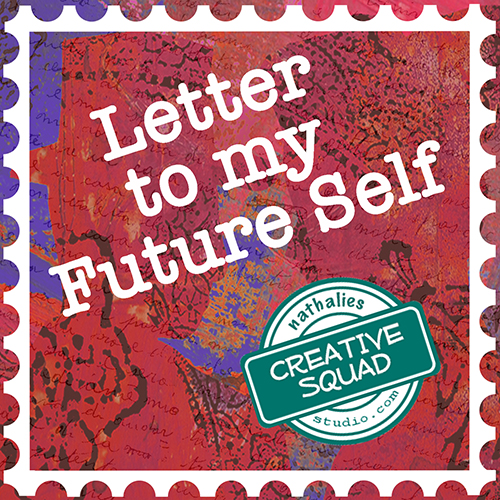
It’s Tuesday and time for my Creative Squad to share a project with you with this month’s theme: “From Small Beginnings”. Throughout the month of September, the team will be using my n*Studio Stamps to interpret the theme. The change in seasons and the childhood ritual of Back to School in September has me thinking about starting new things – new projects, learning new things, and meeting new people, and all the excitement and challenges that come with all of these “new”s. For this theme, From Small Beginnings, my Squad will think about the process of starting something new and the very first steps they took. I’ll ask them, how did you experience a Beginning?

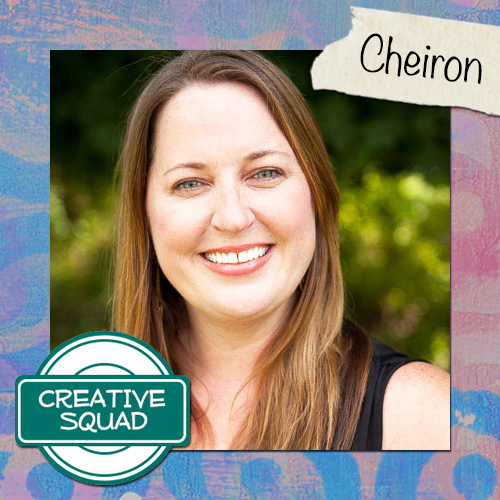
So this week we have 3 different card designs from Cheiron Brandon to celebrate her love of cardmaking – the thing that got her started in the creative life :)

—————————————————————————————————

Cheiron September Headshot

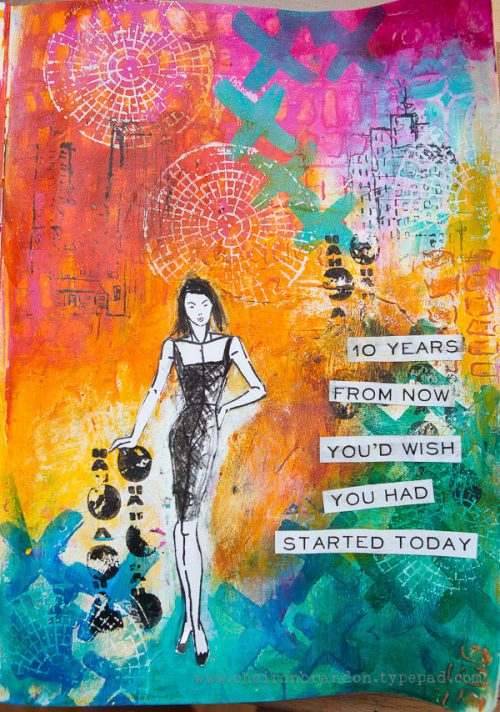
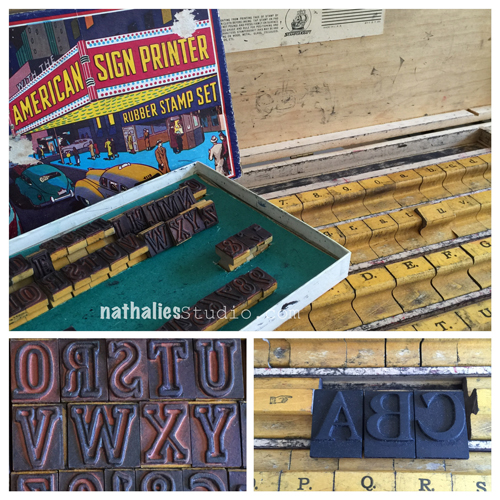
Hi there! It’s Cheiron here with my September project. When I initially thought of the theme From Small Beginnings, I thought back to how I got started in art, crafting and art journaling as an adult. About 12 years ago, I moved back to NJ and there was a small stamp shop that opened right down the street from me. I was always interested in making things and I remember making watercolor cards in high school and putting simple messages on them. Rubber stamps opened a whole new world to me. In the past several years, I have had the opportunity to work with several stamp companies and design teams, the most recent being a part of the N*Studio squad.

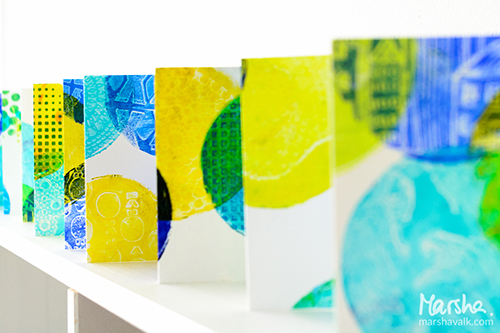
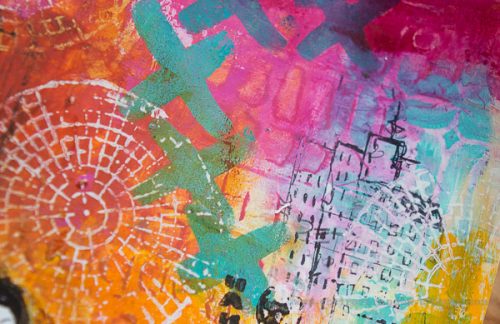
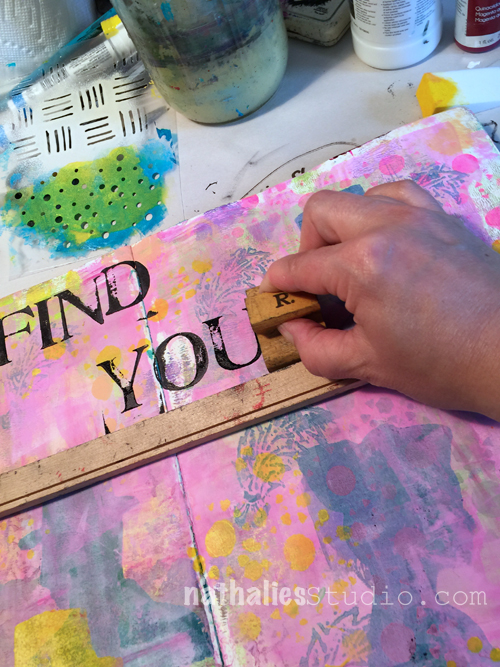
I am grateful for having art, stamping and especially card making in my life. In the past 10 years I have amassed a HUGE collection of supplies, but I always find for me that the cards I love to make are the most basic. I am sharing 3 simple cards with you today, each was made with only one stamp and a sentiment or word pulled from a giant bin of stickers I still have. I made all three of these cards in under an hour and now have some happy mail to send to friends!

cheiron-simple-stamped-cards-with-n_studio

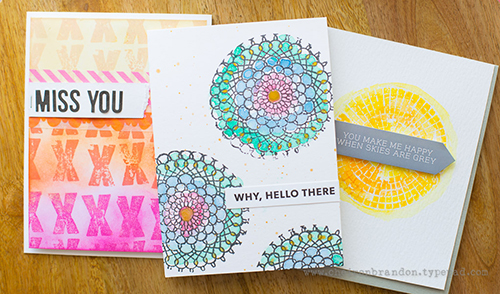
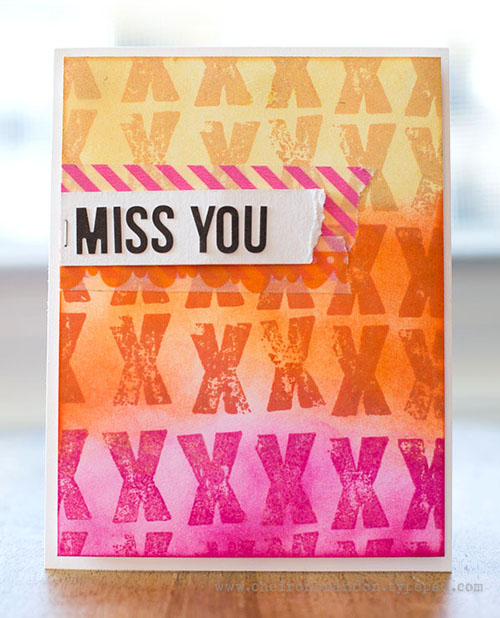
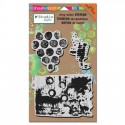
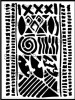
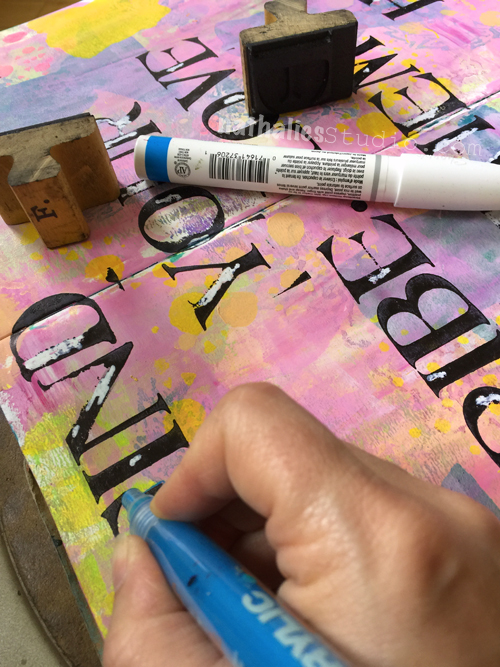
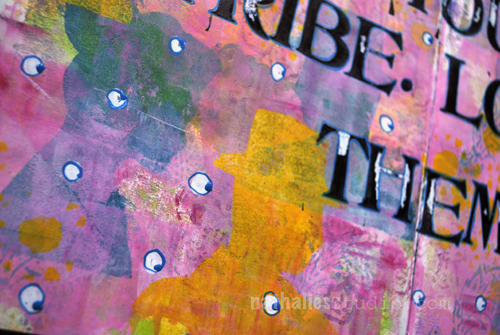
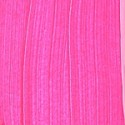
This first card is made with a stamp from the Marks stamp set. I love these X’s and stamped them in 3 different colors then went over each section with an ink blending tool with the same color. A few letter stickers, pieces of washi tape and a staple with my tiny attacher, and voila!

cheiron-miss-you-with-n_studio

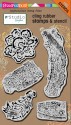
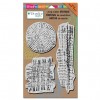
The second card was even easier…a few stamped images from the Kaffee Klatsch stamp set colored in with watercolors, and a little gold splatter and one simple sentiment sticker.

cheiron-why-hello-there-with-n_studio

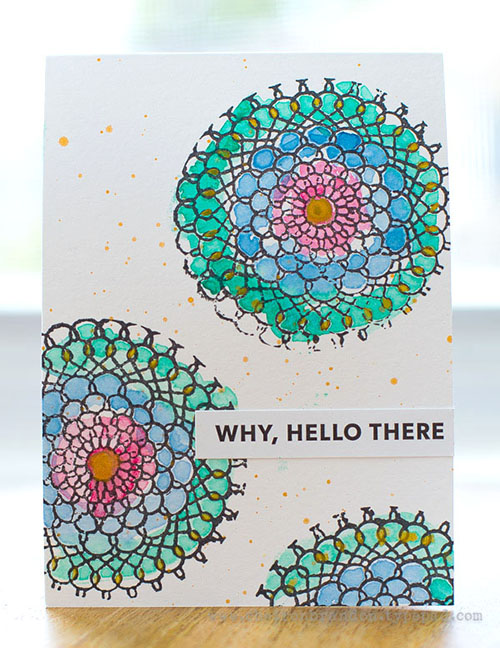
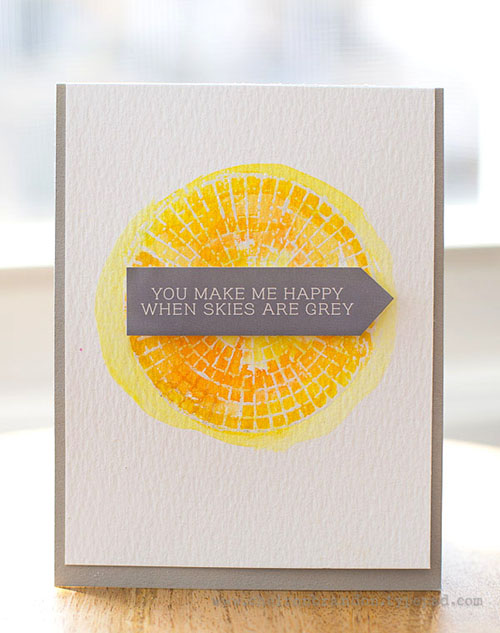
For the final card, I used a stamp from the Mish Mesh stamp set as a sunshine, and painted it loosely with watercolor, another sentiment and it’s good to go.

cheiron-you-make-me-happy-with-n_studio

I hope these cards remind you of why you got started with this hobby, and what initially brought you joy. I had so much fun making these quick cards and sharing them with you :)

—————————————————————————————————

I love Cheiron’s story of her “beginning” and the cards are simply beautiful.  I think everyone would like to be on her mailing list!

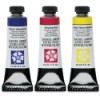
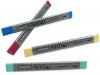
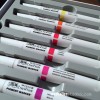
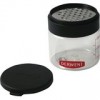
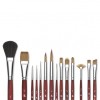
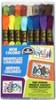
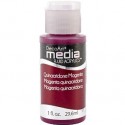
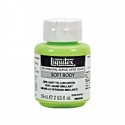
In addition to washi tape and various word stickers from her stash, Cheiron used the supplies listed below (some are affiliate links):

SuppliesCJS

Maybe you will even play along with us -I would love to see how you interpret our monthly themes. Email me how you used my stencils and stamps with the theme and email me an image – I would love to share your projects in my next “n*Spiration From Around the Globe“.

See you next Tuesday for another project from the Creative Squad!

Comments (2)

  • ,Mary Holshouser

    |

    Love the card with the XXXXX
    I have that stamps and will be using that
    idea.
    A pretty, colorful card.
    thanks for sharing.

    Reply

  • Brenda

    |

    These cards are so colorful. Makes me want to go make some. Did you emboss in white on the last card?

    Reply

Leave a comment

Say Yes to New Adventures – Marsha Valk

CS August Say Yes

It’s Tuesday and time for my Creative Squad to share a project with you with this month’s theme: “Say Yes to New Adventures”. Throughout the month of August, the team will use any of my n*Studio Stamps and Stencils they would like to use to interpret the theme. Here in the northern hemisphere, summer is coming to a close and it’s about time to seize the days and go on a little adventure before hibernation! With this in mind, the team will create something that celebrates the spirit of adventure.

This week we bring you Marsha Valk and her adventure with a new tool and the gorgeous accordion book that resulted from her journey!

—————————————————————————————————

Marsha August Headshot

MarshaValk_nSCS_SayYesToNewAdventures-1

I go on new adventures all the time. I’m on new adventures as we speak. But the problem with new adventures is that it’s not always easy to talk about them. Because they’re new… and I’m only just getting used to the idea… and I don’t yet know how I feel and what I think about it.

MarshaValk_nSCS_SayYesToNewAdventures-7

MarshaValk_nSCS_SayYesToNewAdventures-6

So for this month’s theme I took a simpler approach: I wanted to use something from my stash that I hadn’t used before. I decided to go with the round mini gel printing plate. And I just started printing on a A4 sized sheets of paper: adding paint to the little plate, making marks with my n*Studio Cling Stamps and using some stencils too. The outcome was sometimes unpredictable and messier than I had hoped, but that’s what happens when you go on an adventure!

MarshaValk_nSCS_SayYesToNewAdventures-5

MarshaValk_nSCS_SayYesToNewAdventures-4

MarshaValk_nSCS_SayYesToNewAdventures-3

Once I had a couple of prints, I thought about what I wanted to do with them. I didn’t know. So I thought about how sometimes things get better when you cut them up and I started to cut each print in half.

MarshaValk_nSCS_SayYesToNewAdventures-2

Then I thought: these prints would make nice simple cards. But once I had folded them into cards I thought: or maybe this could be a mini book or mini art journal. So I decided to fold the cards up like accordions and I glued each far left panel behind the far right panel of the previous accordion card.

MarshaValk_nSCS_SayYesToNewAdventures-10

MarshaValk_nSCS_SayYesToNewAdventures-9

MarshaValk_nSCS_SayYesToNewAdventures-8

I haven’t decided if I want to keep it like this or to glue the backs together to make an actual little book. I figure that it will be easier to work on it in this state, so I decided to just embellish the front a bit more and leave the rest blank (and unglued) for now. It’s small and light, so it’s ideal to just doodle in whilst watching TV or to take with me when I have to go on a long train ride. I’m ready to take it on another new adventure!

MarshaValk_nSCS_SayYesToNewAdventures-11

—————————————————————————————————

Marsha’s accordion book is stunning.  I love the super fresh color palette she chose and her bold move to cut the prints in half and reimagine the whole thing.  And of course, look at all those stamps!

Marsha used the supplies listed below (some are affiliate links) as well as Toga Alphabet Stickers:

SuppliesCJS

Maybe you will even play along with us -I would love to see how you interpret our monthly themes. Email me how you used my stencils and stamps with the theme and email me an image – I would love to share your projects in my next “n*Spiration From Around the Globe“.

See you next Tuesday for another project from the Creative Squad!

Comments (2)

  • Joi@RR

    |

    Your new adventure is sooooo FUN Marsha. Love all the white space, all the wonderful stamps/stencils and the colors. What a great idea to put them together in such a fun way. I hope you will share your doodles when you get them finished. j.

    Reply

Leave a comment

Demos at The Ink Pad in NYC

KalbachInkPadCollage

Last month I had a fun afternoon demoing with my stamps at one of my favorite stores – The Ink Pad in New York.

KalbachInkPad01

I showed some easy and fun Gelli-Printing tricks with acrylic paints and foam stamps

KalbachInkPad05

having lot’s of fun with a round plate and using dye inks

KalbachInkPad04

playing with small round printing plates

KalbachInkPad06

having an Elephant in the room

KalbachInkPad02

doing some collage fun

KalbachInkPad03

and stenciling

KalbachInkPad07

and of course taking over the whole store and making a big mess :)


We did a FB Live Stream right from the store on my Facebook Page of some fun techniques – you can see the store, some wonderful people and the store in action if you want :) It was a lot of fun and thank you to all that came, the people who watched the video and joined and Anna and Jane from the InkPad!!!

Comments (4)

  • Julie B

    |

    Looking forward to meeting you in Cali in a couple of months! Thank you for the video/tutorials.

    Reply

    • nathalie-kalbach

      |

      Yeah- so looking forward meeting you in Cali too- it is going to be loads of fun!

      Reply

  • Linda Faber

    |

    Thanks, Natalie, for the great demos! Just what I needed, a refresher lesson on using my gelli plate. I will definitely have to visit that NY store!

    Reply

    • nathalie-kalbach

      |

      Glad you liked it Linda- and yes yes – The Ink Pad is worth a visit in NY :)

      Reply

Leave a comment

Rule of Three – #3 – Three Ways to color with Stamps

Here is another episode of my new series of mini-videos: “Rule of Three”. As we all know all good things come in three and these mini-tutorial-videos will show you all kinds of fun and practical things and techniques coming in three.

+ Expand this article
4comments

Comments (4)

  • Dara Hale

    |

    Love the Rule of 3 series with the stamp sets!!!! I own two and love trying different mediums to play with :) Thank you for sharing with us Nathalie :)

    Reply

    • nathalie-kalbach

      |

      Dara, so glad you enjoyed the video and that you have fun playing with different media and the stamp sets :) Share with me what you did with them – I would love to see :)

      Reply

  • Joi @RR

    |

    Ahhh – loved beginning my Sunday with you Nat! Really professional and informative video. HIGH FIVE!!! Loved seeing all three techniques and your fab stamps too. Xj.

    Reply

    • nathalie-kalbach

      |

      So glad you enjoyed the video Joi! Have a gorgeous rest of the sunday :) Nat

      Reply

Leave a comment

Put a Bird on It – Embroidering with Stamps

KalbachPutaBirdCollage

I have been doing some embroidery stitching samplers the past couple months and when I was talking to my friend Judi, she told me about the Erasable Fabric InkPad by ColorBox and I was hooked and I bought it right away so I could try it out with my Foam and Rubber stamps. I took a light canvas tote bag and my Bird Foam Stamp and stamped on top of the bag. And yes …I should have ironed the bag – but honestly- I just don’t like ironing ;)

KalbachPutaBird03

Next I stretched the fabric over an embroidery hoop -see – already less wrinkles- hehehe.

KalbachPutaBird04

I wanted to treat the bird image like a stitching sampler – so I used all kinds of different embroidery stitches and color. The grey thread is a done with a chain stitch, the yellow are two rows of split stitches, the magenta is a satin stitch , the light blue a seed stitch and the light green is a fly stitch.

KalbachPutaBird05

The dark purple is a blanket stitch, the dark blue and lighter blue over the eye is a laced running stitch, the grey and purple in the wing is  star stitch. Around the eye a backstitch and the yellow thread and the eye are french knots.

KalbachPutaBird06

I had so much fun – I am easily bored when I do things that are too repetitive and so this was a great way to keep me excited and interested and I could not stop.

KalbachPutaBird08

I used the stamped image sometimes to stitch right on top and sometimes just as a placement guideline for the stitches. It was super helpful and so easy.

KalbachPutaBird07

Here is a close up once I was finished


KalbachPutaBird09

And then I just washed the ink with cold water right off and all traces are gone .

KalbachPutaBird01

I cannot wait to do something similar with my Urban Scribble Foam Stamp and the Elephant Foam Stamp!

KalbachPutaBird02

Here are all the supplies I used – some of the links are affiliate links.

SuppliesCJS


Do you embroider? What have you embroidered and have you mixed it up with other art forms?

Comments (5)

  • Jean Goza

    |

    Love the bird. Inspires me to drag out my embroidery goodies and work on a new project. You are so inspirational. Thanks for sharing…

    Reply

  • Joi @RR

    |

    Heheheh – LOVE THIS Nat! I used to have so much fun embroidering. You have inspired me to play with it again. I still have a bag with thread and hoops!!! Your bird looks SPECTACULAR!!! What a great idea! SUPER FINE! Xj.

    Reply

  • Karen D

    |

    I love this idea of embroidering over the stamped image. I have used erasable marking pens before, but did not know about the erasable stamp pad. I used to do quite a lot of embroidery and have incorporated it with a painted background on some fabric. But lately I am working on an artwork and have embroidered over some of my daughter’s handwriting. Embroidery adds another dimension to your artwork and it can be very relaxing.

    Reply

  • judi kauffman

    |

    I knew you’d have fun with that ink, Nathalie, and I’m so glad you embroidered the bird. Is the bag big enough for a whole flock???

    Reply

  • Sue Clarke

    |

    It’s been a number of years since I’ve embroidered but this looks great and I never would have thought of using stamps as a guide this way. Thanks for sharing Nat.

    Reply

Leave a comment

Letter to My Future Self – Cheiron Brandon

CS July Letter

It’s Tuesday again and time for my Creative Squad to share a project with you with this month’s theme: “Letter to my Future Self”. Throughout the month of July, the team will use any of my n*Studio Stamps and Stencils they would like to use to interpret the theme. This month’s theme is in honor of my recent 10 year (!) blog anniversary- which we will celebrate later this month!  I asked the team to create something that they’d like to tell themselves in 10 years. Like a mixed media time capsule. This theme flips the “If only I knew then what I know now” sentiment up-side-down.

This week Cheiron Brandon shows you her amazing and colorful layered art journal page with a pretty good advice :)

—————————————————————————————————

Cheiron June Headshot

Hi everyone, Cheiron here with my monthly post. When I got the theme for this month “Letter to My Future Self” I got nervous. Was I going to have to write an actual letter? What AM I going to write that will be important to know in the next 10 years. Will this have to go in my journal for everyone to see it? Writing in a journal is not for me, I don’t like to share my thoughts in writing. For me my art journal represents a place to play and experiment with color, texture, new stamps and stencils.

cheiron- 10 years art journal 2

When I started out on this page, I decided instead to not get nervous about writing a letter and just play with some new paint colors and layers. I did think about some personal plans for the next 10 years, and what I would like to tell myself whether I achieve these things or not. I have included some imagery that represents some of the things in my plan, including starting off my page with a piece of a house blueprint. When I do think of plans for the long term like health, finances and career there is no better advice I can give myself than to get started now. So I added the quote “10 YEARS FROM NOW YOU’D WISH YOU HAD STARTED TODAY”. I think that advice rings true at any point in our lives, and I am sure it will be just as relevant if I pull this journal out again in 10 years.

cheiron- 10 years art journal_

—————————————————————————————————

I love love love the color combination in Cheiron’s art journal spread and the way how she layered and combined all stamps and stencils!

Cheiron used the supplies listed below (some are affiliate links):

SuppliesCJS


Maybe you will even play along with us -I would love to see how you interpret our monthly themes. Email me how you used my stencils and stamps with the theme and email me an image – I would love to share your projects in my next “n*Spiration From Around the Globe“.

See you next Tuesday for another project from the Creative Squad!

Comments (2)

  • Joi@RR

    |

    Oh sooo vivid and splendid Cheiron. What a great idea to use part of a house plan in the background. Your work is so INTRICATELY STUNNING and my eyes loved roaming over it to see all the different ‘Nat toys’ you incorporated! Perfect sentiment. Thank you for the inspiration. j.

    Reply

  • Michelle Rydell

    |

    Those layers and colors are gorgeous Cheiron! I love your page!

    Reply

Leave a comment

Scenes from the n*Studio and Demo at The InkPad

ScenesNatStudioJuly

A little peek into my studio

top row: Berlin Tacheles Painting, Embroidery Sampler, Beginning of a new Flatiron Building Painting

middle row: gathering and sorting the supplies for my book photo shoot, playing with paint and stamps and deli paper

bottom row: 4th July card with a hand carved stamp, packing up my artwork for my book for the photoshoot


And I hope you will join us either in person or on facebook !

Inkpaddemo

Come on down to The Ink Pad in New York City to meet me on
Tuesday July 19, 2016 from 4pm – 7 pm
I will do a free demo with my Rubber & Foam “Stamp and Stencil Sets” from Stampendous!. And I will sign my new DVD’s with ArtistsNetwork.com. And …if you cannot make it to the shop, join us for a Live Facebook Peek into the fun around 5pm from my Nathalie Kalbach n*Studio facebook page !

Have a wonderful day

Comments (2)

  • Joi@RR

    |

    Loved seeing the ‘scenes’ from your studio Nat. The paintings look wonderful – love your city paintings – always! Congratulations on the fun things you are doing ie: book, dvd etc. Sooooo excited for you and so enjoy watching you climbing towards your dreams. XXj.

    Reply

    • nathalie-kalbach

      |

      Awe- thank you Joi – you always write the sweetest and encouraging comments. Thank you for your support <3

      Reply

Leave a comment

Letter to My Future Self – Gwen Lafleur

CS July Letter

It’s Tuesday again and time for my Creative Squad to share a project with you with this month’s theme: “Letter to my Future Self”. Throughout the month of July, the team will use any of my n*Studio Stamps and Stencils they would like to use to interpret the theme. This month’s theme is in honor of my recent 10 year (!) blog anniversary- which we will celebrate later this month!  I asked the team to create something that they’d like to tell themselves in 10 years. Like a mixed media time capsule. This theme flips the “If only I knew then what I know now” sentiment up-side-down.

This week we show you Gwen Lafleur‘s amazing mini book and the advice she would hope she will have followed in the next ten years !

—————————————————————————————————

Gwen July Headshot

For this month’s theme, I thought it would be fun to get creative with the “letter” part of the letter to my future self theme. I love to make books, so I decided that instead of writing a traditional letter and including it in my art journal (or regular journal,) that I would make a mini journal that would be the actual letter. I took a little time to think of my top five pieces of advice that I would hope that 10 years from now, my future self will have followed, and then created this book around them.
Letter to Future Self - Mini Art Journal Inside Pages - Gwen Lafleur
To start, I took watercolor paper and cut enough that after it was all attached, I’d have a strip that was 3″ tall by 24″ wide. I scored the paper every 2″ so that when it was done, I’d have a 2″x3″ book with 6 spreads. I pulled out some acrylic inks and just painted the background. (I did the whole thing at once instead of making each spread individually; I like the effect when you take a larger piece of art and break it down into pieces and I thought that would work well here.) I started with reds and oranges on one end and blues on the other and let them blend in the middle. Then I used more inks to add lots of blobs and splatters. I let that dry, then I used Nathalie’s Art Deco Wallpaper stencil and some gold pigment ink to start adding layers of color and pattern.
I followed that up with some stamping using designs from the Grunge and Marks stamp sets with burgundy and gray StazOn inks. I just used parts of each stamp to get some texture onto the page since I was going for an abstract look.
Letter to Future Self - Mini Art Journal Steps 1-4 - Gwen Lafleur
Next up, I grabbed the rubber stamp from the Urban Scribble set and used it with black ink. I moved it around as I went so that parts of the buildings would stamp. I liked this stamp set for this project because even though I wasn’t trying to add buildings into my design, the stamps have lots of great lines and pattern that are perfect for building up layers of texture. In the end you won’t even be able to tell what the original stamp was!
I followed that up by stippling some white paint through stencil that comes with the Urban Scribble set, then I used copper paint on the detailed side of the foam stamp – I only painted and stamped part of it because once again, I just wanted the lines. I stamped it in different directions to get some really cool effects!
Letter to Future Self - Mini Art Journal Steps 5-8 - Gwen Lafleur
Once that was done and dry, all of my background layering was done – next it was time to add the text. Since the backgrounds were so busy, I took some matte finish paint in a very light and fairly opaque color (matte makes it much easier to write on) and dry-brushed the center section on what would become the right-hand side of every spread. Once that was dry, I wrote out the advice to myself and added a scribbly frame around each section of text.
Last but not least, I made the covers. I basically followed the exact same process on these as I did to make the backgrounds – the only difference was that since I was using chipboard, I gesso’d them first. I also only added layering on one side of each cover; I painted the other sides with Payne’s Gray since they’d be covered up when I assembled the book.
Letter to Future Self - Mini Art Journal Steps 9-11 - Gwen Lafleur
I took a strip of sari yarn and laid it across the back of the front cover and glued it in place, then assembled the book. I just took my long strip (the text block) and accordion folded it and used the first and last flaps as the end papers – those got adhered to the inside of each cover. You could actually make this a 2-sided book and do each side of the paper strip, but instead I glued the back sides together so that it would function like a book with pages that turn. The sari yarn just wraps around the book when it’s closed so I can keep it secret and tucked away until future me is ready to read it.
Letter to Future Self - Mini Art Journal Covers - Gwen Lafleur
So that’s it! I hope you enjoyed today’s project and that you’re feeling inspired to find a creative way to write your own letter to your future self!

Letter-to-Future-Self---Mini-Art-Journal---Gwen-Lafleur

—————————————————————————————————

Gwen’s book is so adorable and amazing – I love this idea and I love how she used elements of all the stamps and stencils to make it create some great design elements!

Gwen used the supplies listed below (some are affiliate links) as well as aStrathmore 400 Series cold-pressed watercolor paper (6″x18″ pad), Copper Distress Paint,scrap chipboard, calligraphy pen, sari yarn (from Darn Good Yarn.):

SuppliesCJS


Maybe you will even play along with us -I would love to see how you interpret our monthly themes. Email me how you used my stencils and stamps with the theme and email me an image – I would love to share your projects in my next “n*Spiration From Around the Globe“.

See you next Tuesday for another project from the Creative Squad!

Comments (4)

  • Joi @RR

    |

    Precious and creative! j.

    Reply

  • Michelle Rydell

    |

    Wow! What a creative take on the theme! I LOVE this! So beautiful and textured! What a cute size for a journal too!

    Reply

    • gwenlafleur

      |

      Thanks… I have to admit, I had a lot of fun with this one :D I’ve been wanting to make a journal this size for a while – perfect opportunity!

      Reply

Leave a comment

Find Your Tribe or … In My Art Journal Today

NatKalbachFindYourTribe_01

Find your Tribe. Love them Hard.

I truly believe in this :) There are so many amazing people out there and they just get you, or your art or your passion and when you find them…love them, lift them up and be with them.

NatKalbachFindYourTribe_02

For this art journal spread I used mostly my stamps and the stencil with the man and woman silhouette in my Fiesta Stencil. I stamped and stenciled with a dark and light acrylic paint green.  Once it was dried I mixed some gesso with magenta acrylic paint and scraped it in a thin layer using the Catalyst tool over most of the spread to achieve a glaze and change the color. This also creates some texture.

NatKalbachFindYourTribe_03

Next I used some yellow which I also mixed with a tiny bit of gesso to make it more opaque and stenciled again with the Stencil in the Fiesta set. I love the lady and the gent – they are so versatile :)

NatKalbachFindYourTribe_04

I wanted the under layer peak a bit through but cover most of it- hence the gesso in the yellow.

NatKalbachFindYourTribe_05

Next I used this stamp set- which I scored a couple weeks ago at a Jazz festival. Yes, you heard right. I went to a jazz festival and there was a tent with some antique stuff for sale and of course I was instantly drawn to these old sign marker sets. The smaller one with the colorful box is from the 50s and other one is a big set with lower case and upper case letters in a huge wooden box and is from the 20s – I am so over the moon – and I tried it out for the first time on the spread.

NatKalbachFindYourTribe_06

The set has a little wooden stick which is meant to be used as a guide to stamp evenly- as you can see…that only works when you do not move the stick (note to self: don’t move the stick ! ;) )

NatKalbachFindYourTribe_07

I added some white sharpie marks into the letters and outlined them with a fine acrylic markers. Added some dots- and voila …done :)

NatKalbachFindYourTribe_08

It was a great morning session which didn’t take too long but made me instantly happy as I played with paint, stamps, stencils and even new treasures.

NatKalbachFindYourTribe_09

Did you find your tribe yet? 

Here are the links to the supplies I used for the art journal spread -(some are affiliate links):

SuppliesCJS


Have a gorgeous day!!!

Comments (6)

  • Tracy Welham

    |

    Wow, I love this! Great sentiment, fab colours and layout. Creative Blessings, Tracy x

    Reply

  • Stampendous Stamps

    |

    Gorgeous page, Nathalie! Just love that stencil/template, those gorgeous, versatile, flippable heads are so perfect for so many projects! And the lace is just wonderful. Thanks for sharing!

    Reply

  • stephanie

    |

    I’ve got a small tribe. Working to nurture it. That type is SOO awesome.

    Reply

    • nathalie-kalbach

      |

      YEah- glad to hear. and yes the type is pretty cool – I am not sure how often one can find those sets, but I think they are not super rare, so maybe you score one too :)

      Reply

  • Sue Clarke

    |

    YES, I have found my tribe (or two) and I just love those words.
    I think that they’ll be perfect for a canvas that I’m working on right now.

    Reply

    • nathalie-kalbach

      |

      yeah for finding your tribe and I love the idea to put this on canvas!!!

      Reply

Leave a comment