Blog: Van Vorst

Interesting Book – Art Journal

“Tomorrow will be a new chapter in my life. This book is getting very interesting.”

For the background I used the Van Vorst and Versailles rubber stamps from my Floral Tile Large set. Then I went back in with water color to bring out certain areas of the pattern.

The red was spray paint that I had on a stencil and cleaned off on the page before getting started. I loved the little snippets of the paint as random marks.

Here are some of the supplies that I used:


Leave a comment

Let’s Jump with the Creative Squad – Tania Ahmed


Happy New Year from the Creative Squad! This month we have a special edition of projects from the team as they are playing along with the Creative JumpStart workshop that just kicked off yesterday! Here is Tania Ahmed with a gorgeous canvas using my Van Vorst stencil and the theme: Let’s Jump! – The Creative Squad is joining the fun of Creative JumpStart 2019 this month. They’re creating objects for the home, inspired by the CJS19 theme My Home is My Castle.


Hi Everyone!

The theme for this month is the same as Creative Jumpstart: My home is My Castle, and we were challenged to create a mixed media home decor piece. I am really into creating canvases these days, so when I found out that the product focus for this month was for us to use stencils, I knew this was my chance! I got busy and made a highly texturized mixed media canvas and I have made a video with a voice over how I made it.

My inspiration was rusty, copper patina, textured and worn surfaces. I really love how materials (especially metal) age and oxidise over time and I wanted to try and emulate that or at least take inspiration from the effect.

I used moulding paste by Golden and Brusho pigment inks, along with different pencils and mediums to add shading and highlights. I used it with one of Nat’s Stencils that I have been itching to use called Van Vorst which is a very detailed stencil which actually reminds me of hand hammered metal work plates.

I hope you enjoyed my video and are taking part in Creative Jumpstart! Thank you so much for dropping by and I hope you are having a great start to the New Year!


Thank you Tania – such a beautiful surface!!! You can find all my Stencils in my Online Shop. Here are some of the other supplies that Tania used:


Feel inspired? Working on something yourself that you’d like to share?  I love to see how you interpret our monthly themes. Email me how you used my stencils and stamps with the theme and email me an image – I would love to share your projects in my next  “n*Spiration From Around the Globe“.

Leave a comment

Warm Wishes – Maura Hibbitts


Happy Holidays from the Creative Squad and Maura Hibbitts! Today Maura brings us a wonderfully charming seasonal project just in case you need a last minute ornament or gift tag idea. She uses my Park Blvd 4×4, Toledo 9×12, and Toledo 4×4 stencils and my Diamond Hex, Antique Tile, and my Van Vorst foam stamps to bring us a project that will surely warm you up this season :) The theme this month is: Warm Wishes – For many cultures around the world, December is a holiday season filled with celebrations and good cheer. The Creative Squad is taking this month to send Warm Wishes to all our readers!


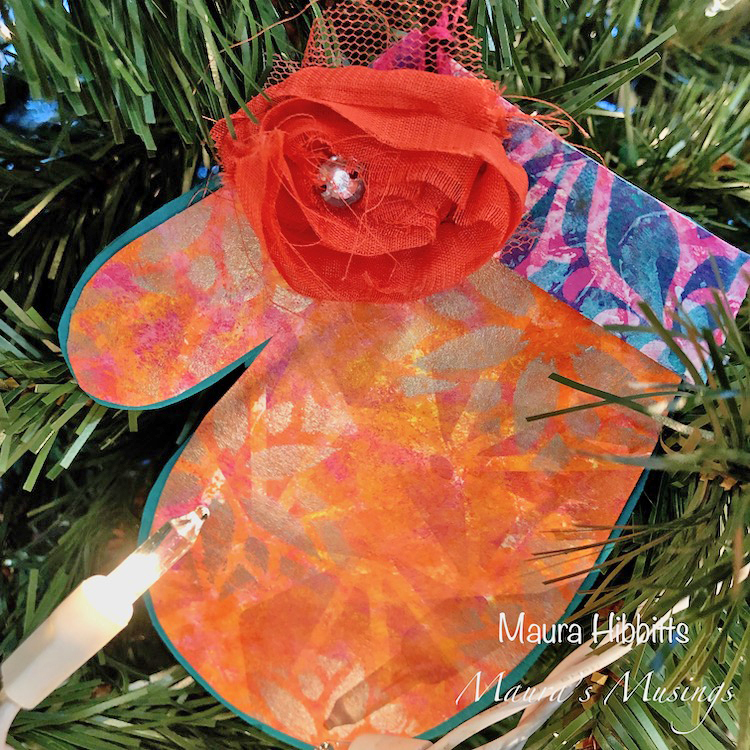
Tis the season, right? Winter has arrived on the calendar, we’ve celebrated the Winter Solstice, and tomorrow is Christmas for all who celebrate. Happy Solstice! Merry Christmas! Happy New Year! My winter started early this year in November with snow and cold, so staying warm is a priority. I headed for warm colors in my project and sketched out a mitten pattern to use as I rarely head outdoors these days without my mittens or gloves.

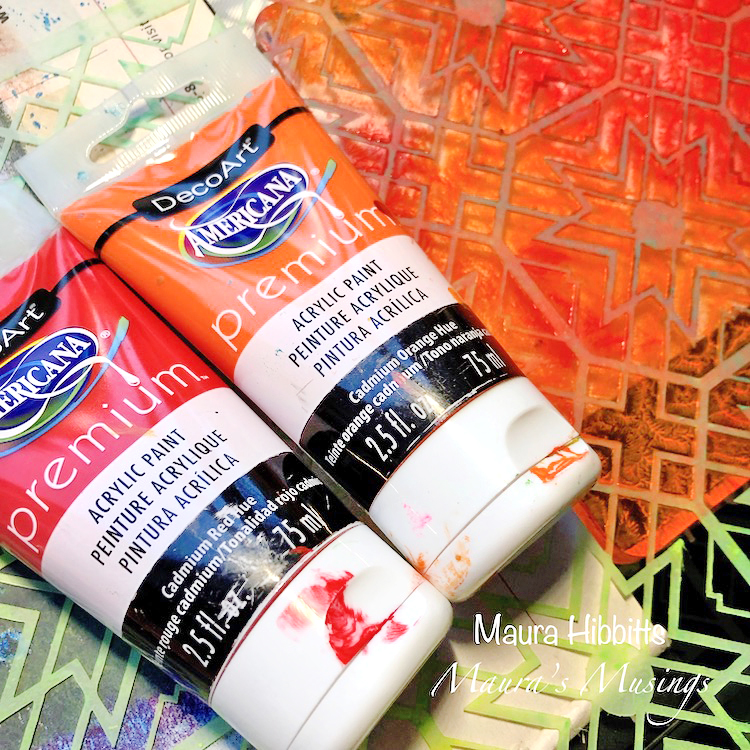
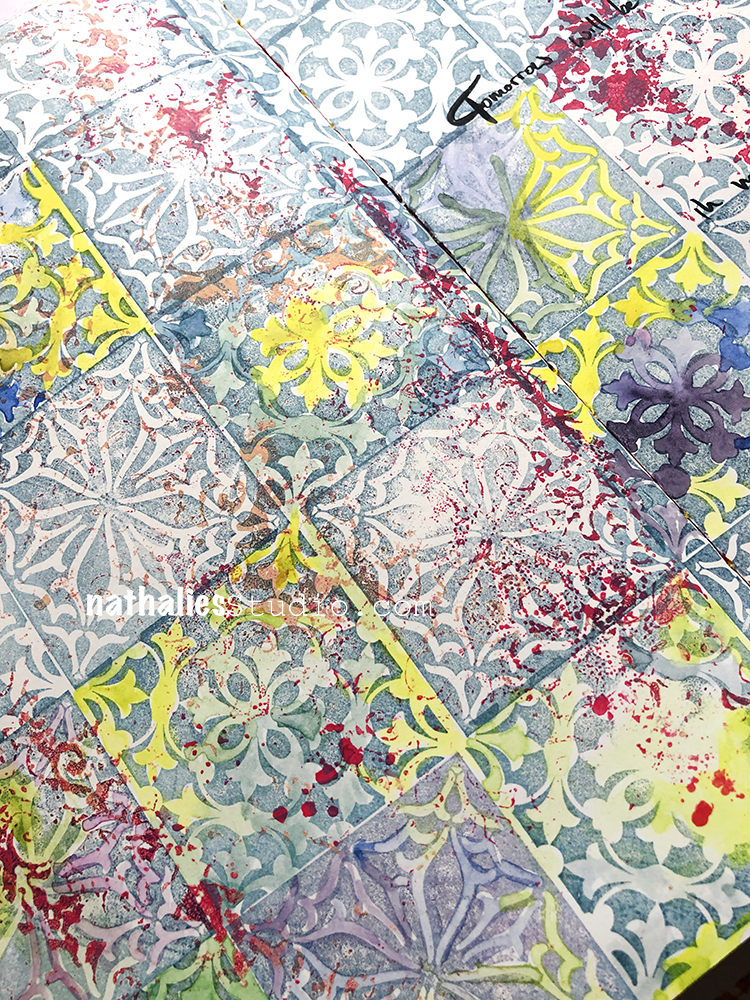
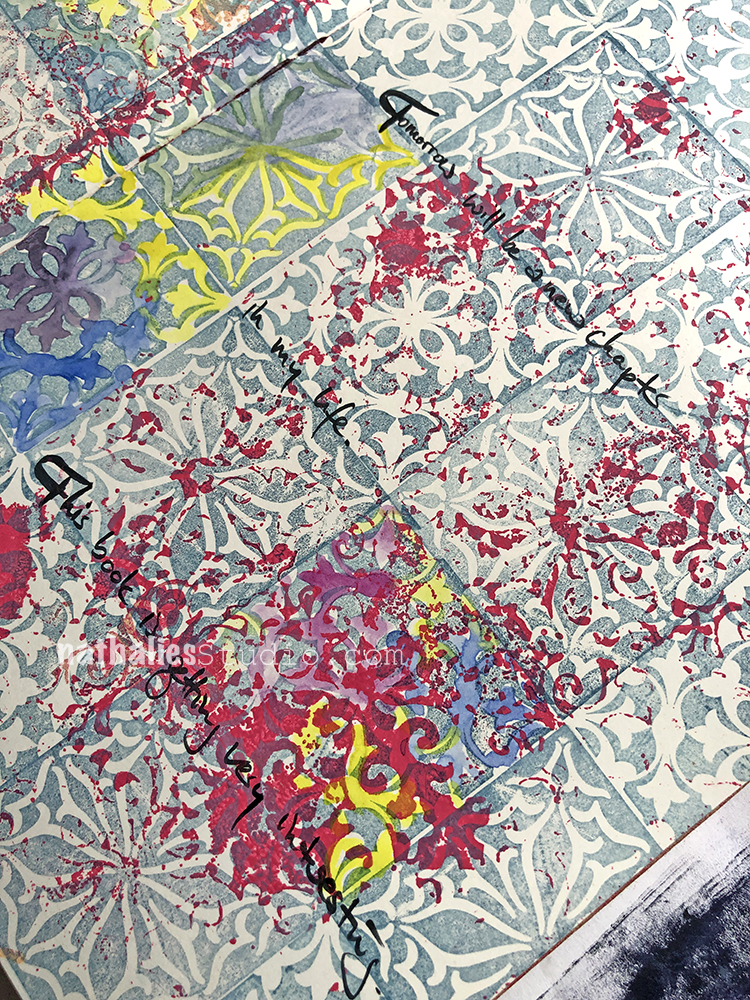
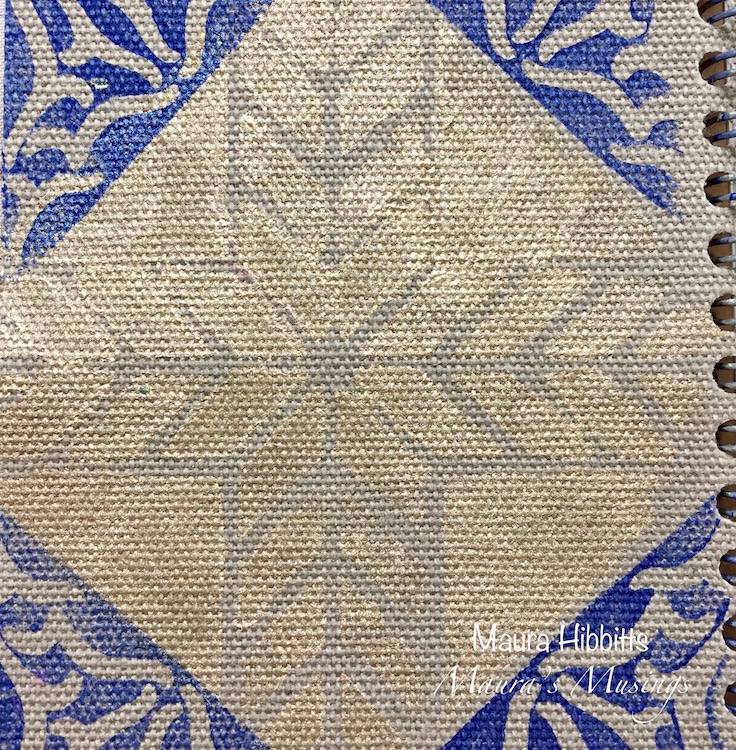
I have a small workspace, so my 6 x 6 gel plate works well with many projects. I started with a mix of Cadmium Red Hue and Cadmium Orange Hue and blended them on the plate with the brayer. I laid the large Toledo stencil on the gel plate and pressed my watercolor paper onto it for one print, lifted the stencil to print another, then printed again on the gel plate without the stencil.

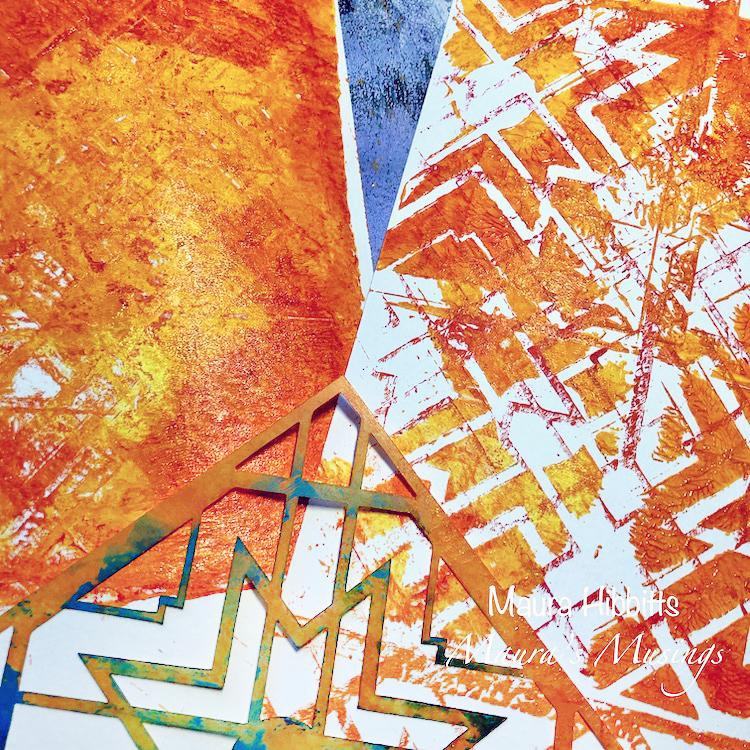
Next, I blended Diarylide Yellow, Cadmium Yellow Hue, and Primary Yellow on the gel plate with the brayer, and used the Toledo Small stencil on the plate. I printed the next layer of color and design onto my sheets.

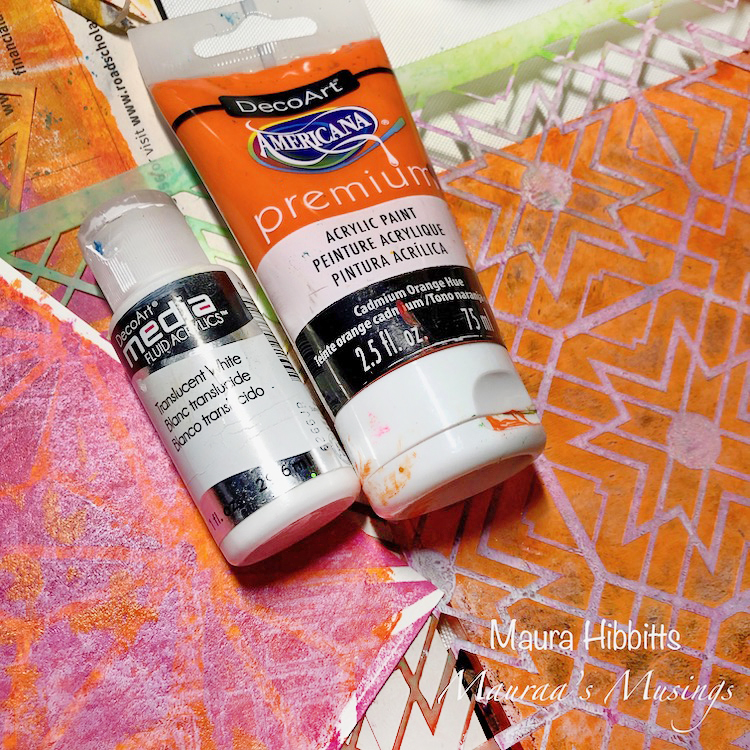
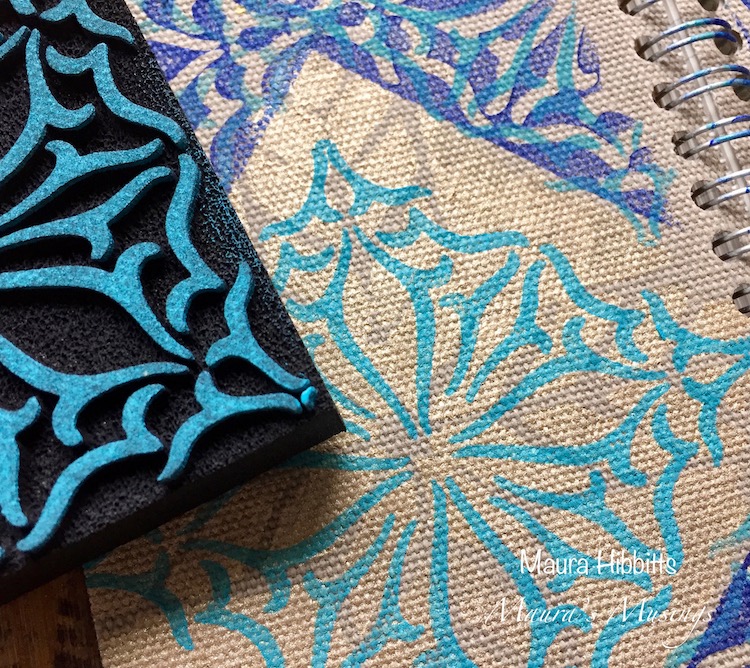
Time to add another bright, warm layer to my papers with a blend of Translucent White and Quinacridone Magenta. Once again, I used the gel plate and brayer to blend, and then stamped the Diamond Hex stamp into the paint, then on to my papers.

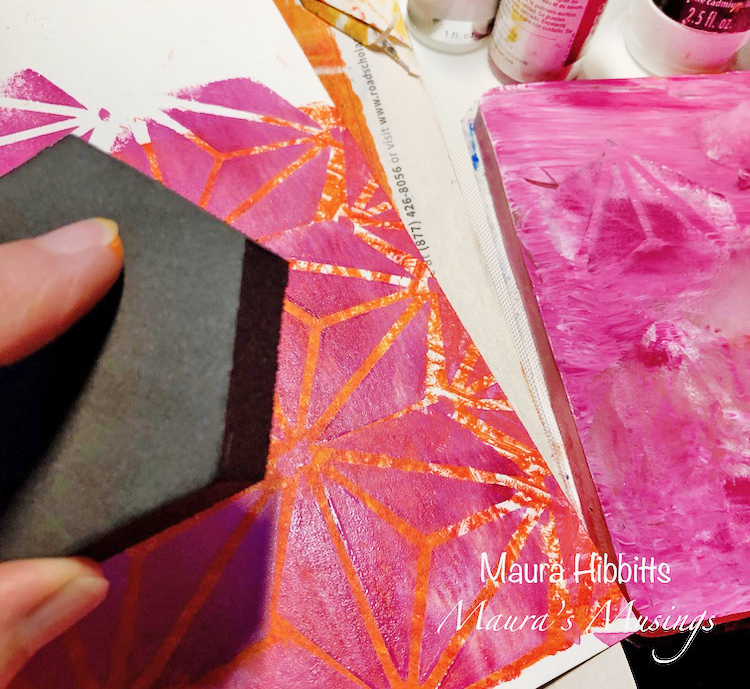
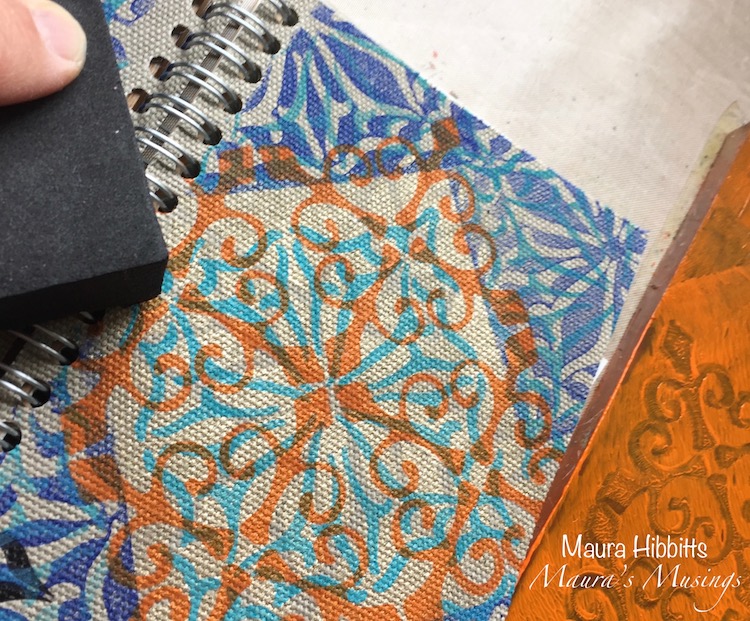
As you can guess, I like to build up layers, so went in for another one using the Translucent White and Quinacridone Magenta on the gel plate, then laid the large Toledo stencil down on it again. This time, I randomly pressed some areas of the paper into the paint.

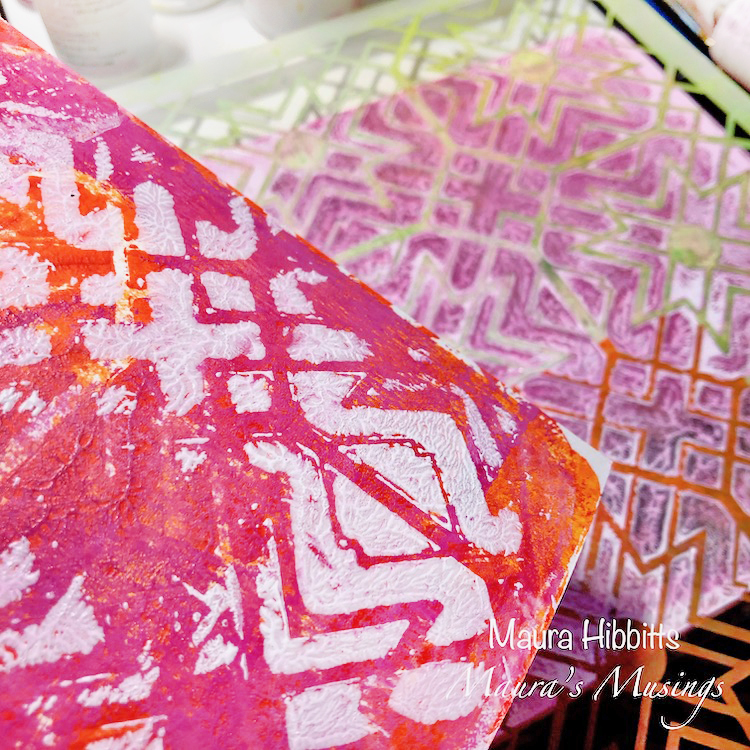
I repeated the previous step with Translucent White and Cadmium Orange Hue.

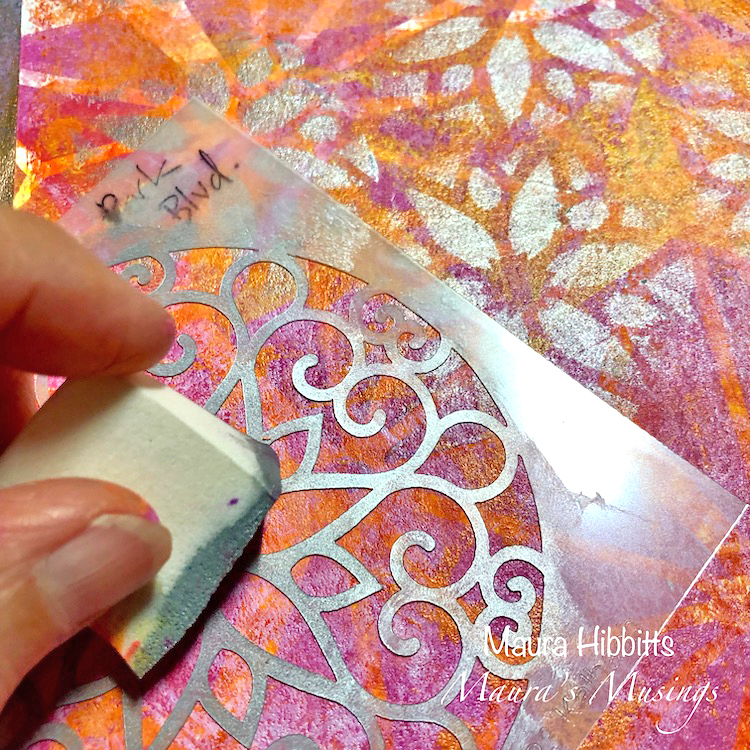
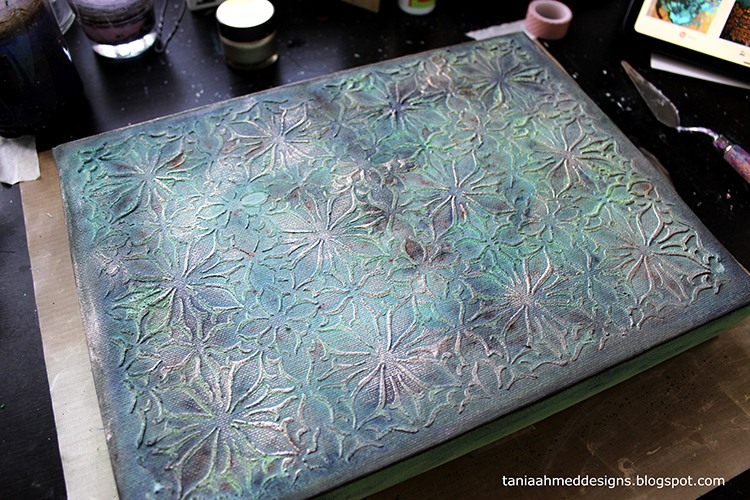
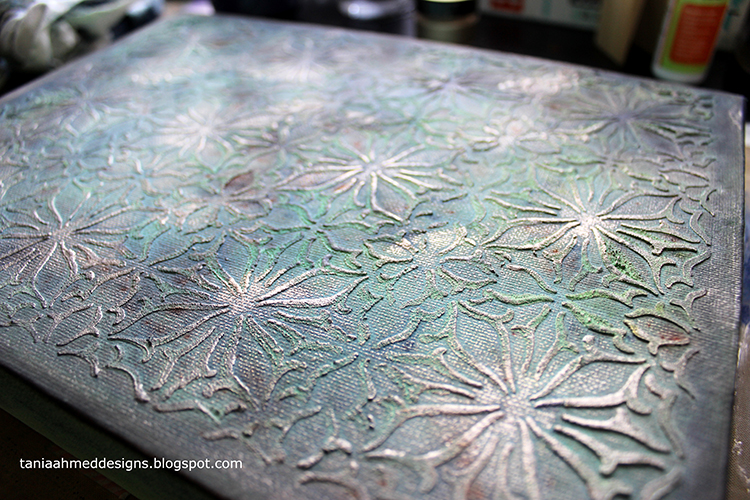
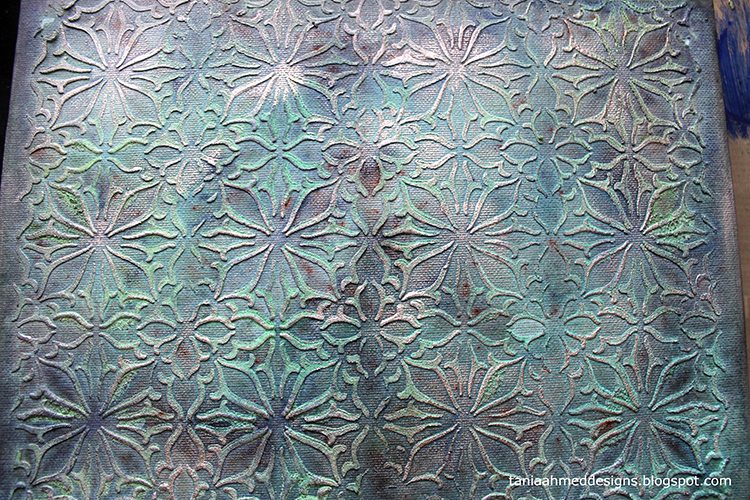
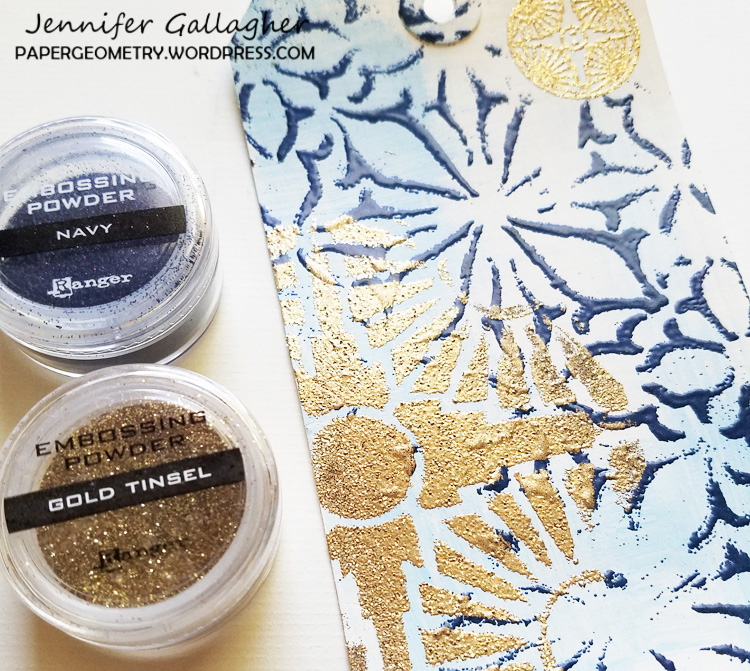
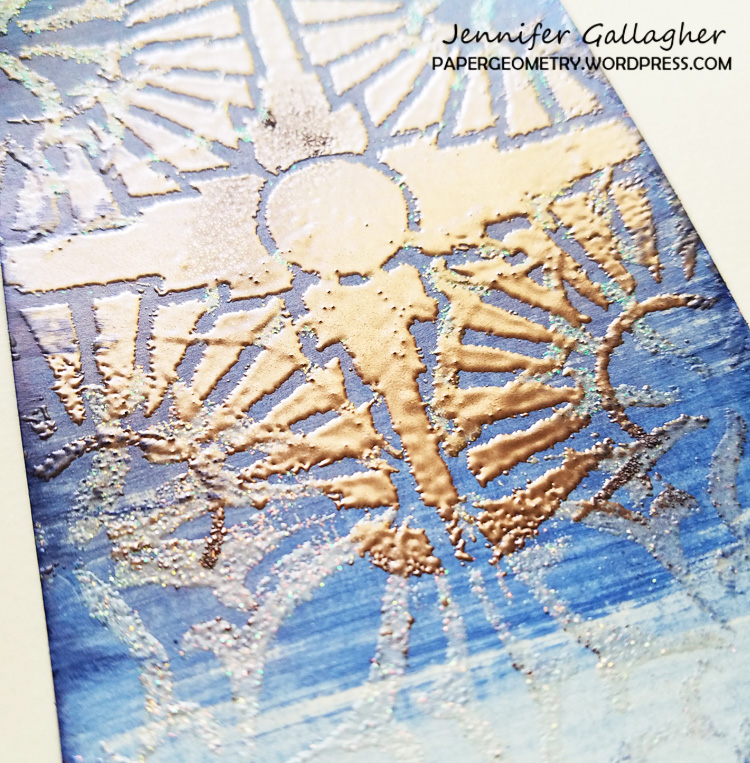
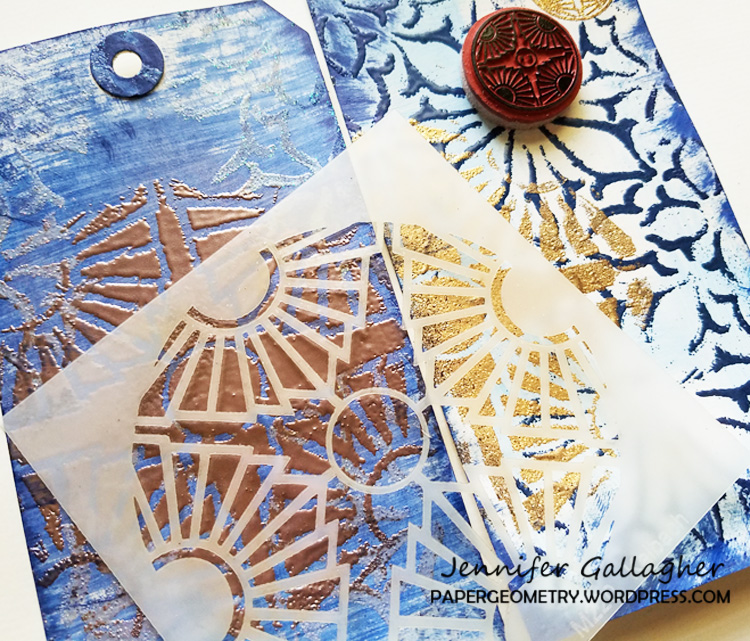
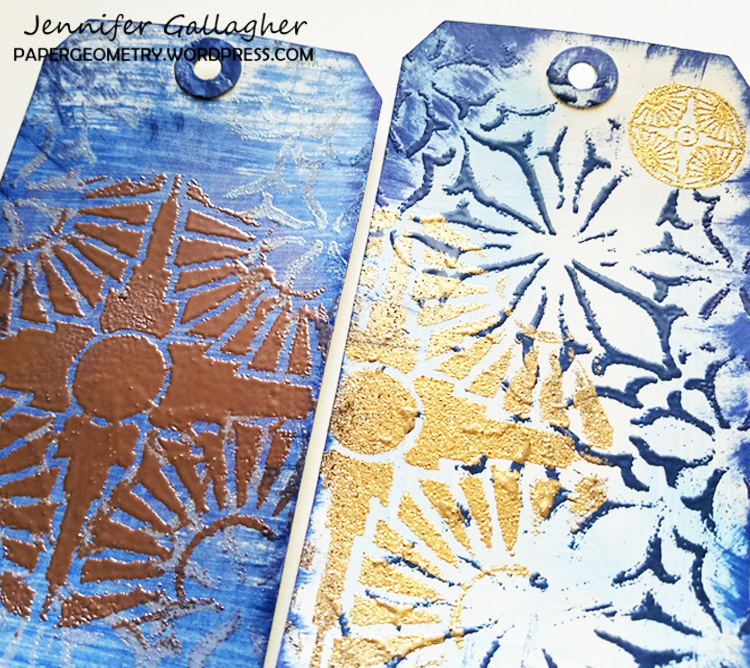
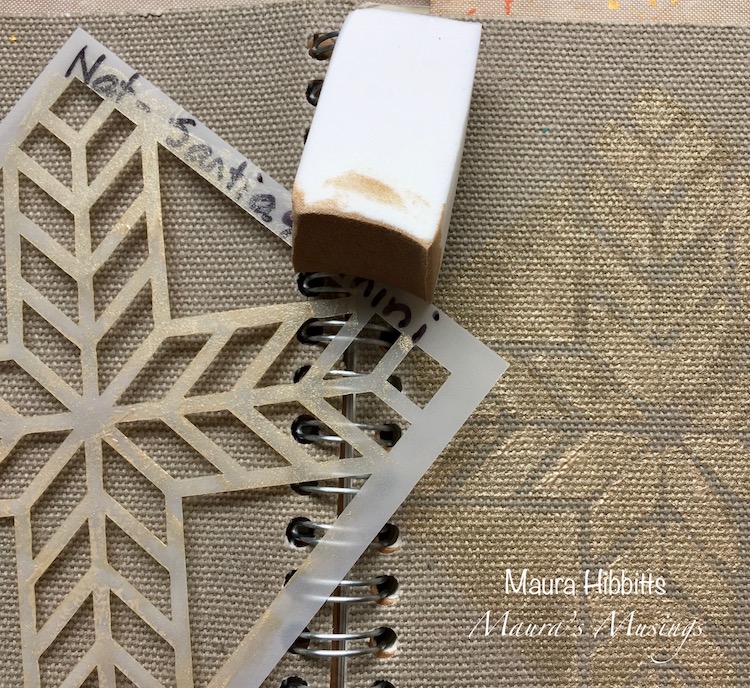
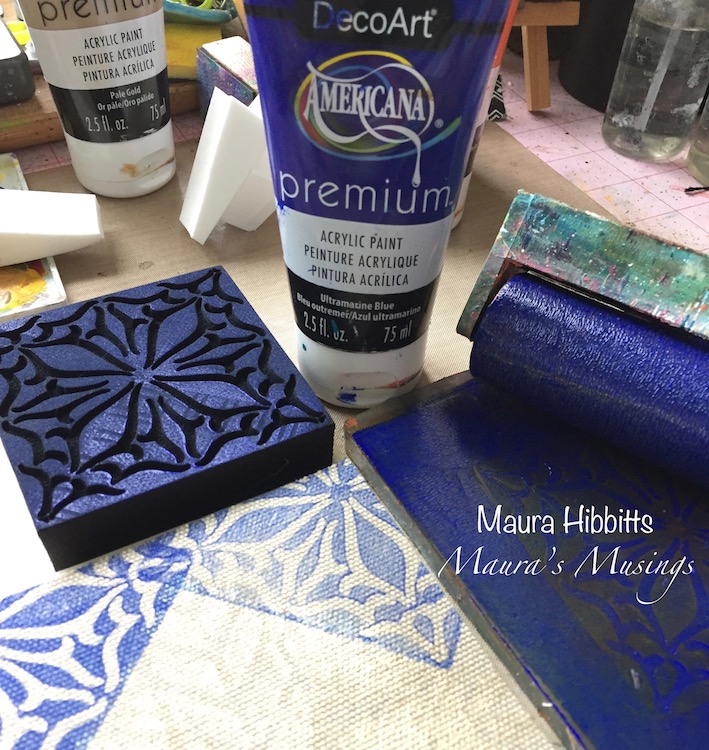
I decided to add some shimmer to my papers with the Park Boulevard stencil and Shimmering Silver paint. I used a sponge and dabbed the center of the stencil (it reminded me of a flower or snowflake) randomly over my papers.

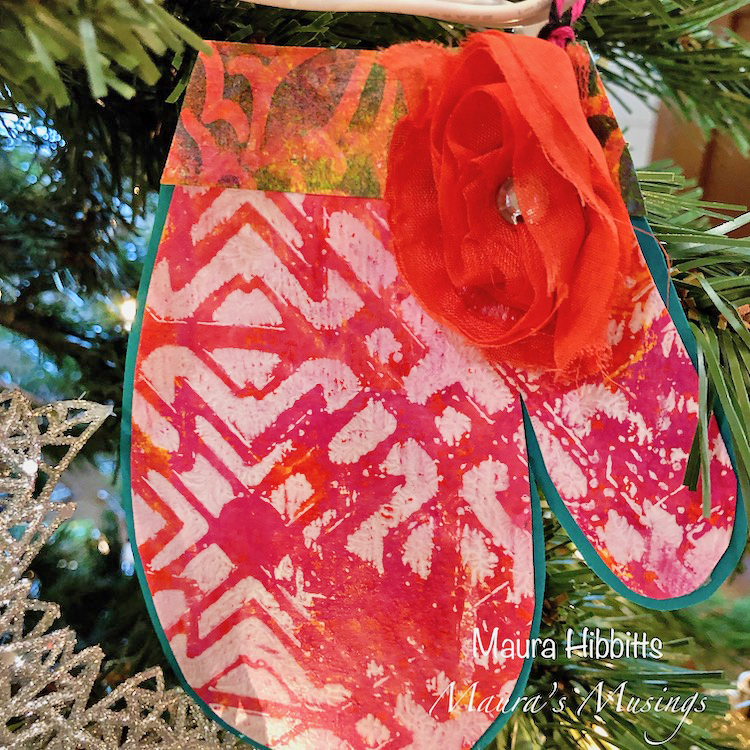
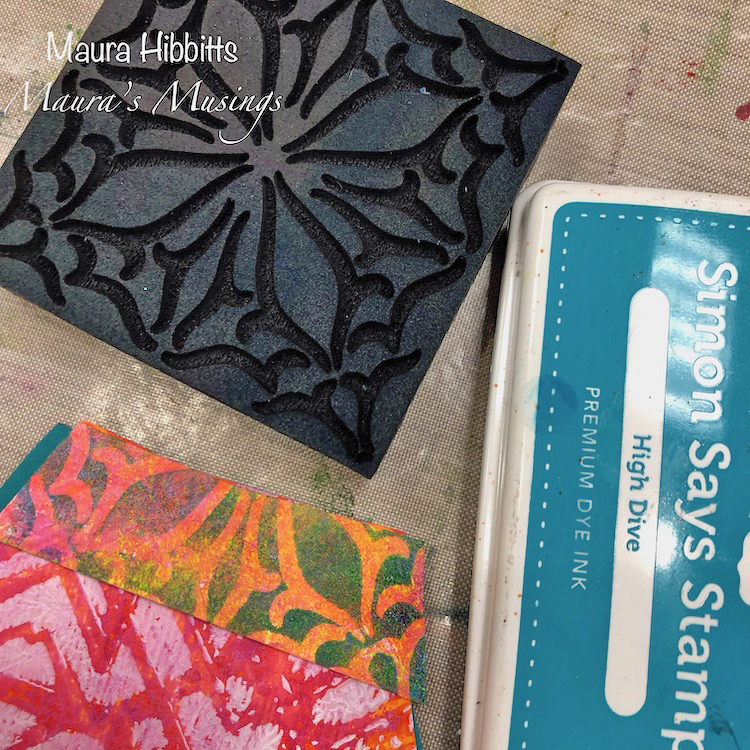
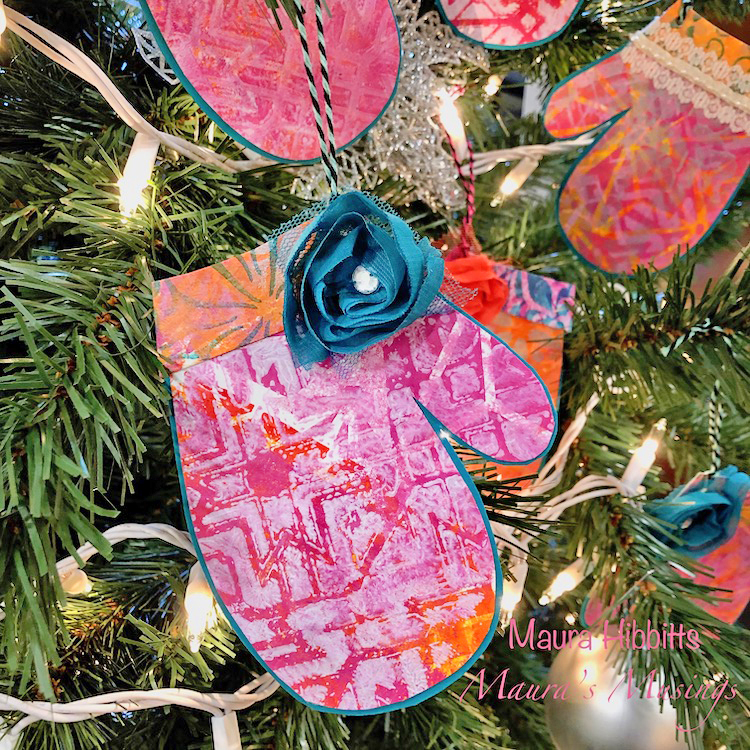
Now that my papers are created, it is time to cut out my mittens. I sketched my mitten onto scrap paper and used this to cut my mittens. Then I used a slightly larger mitten shape to cut out my background with the Peacock Teal card stock. I cut a cuff for each mitten and stamped another design onto the cuffs with the Antique Tile and VanVorst stamps and blue ink.

I adhered the patterned mitten to the teal card stock, added the cuff and decorated with ribbons. Then I punched a hole and tied on some bakers twine to hang these. They can be used as tags on a gift or ornaments for the tree.

Stay warm this winter with warm colors and mittens! Peace and Joy! – Maura


Seasons greetings to you Maura and thank you for this definitely super cute holiday idea! Maura used the following supplies:


Feel inspired? Working on something yourself that you’d like to share?  I love to see how you interpret our monthly themes. Email me how you used my stencils and stamps with the theme and email me an image – I would love to share your projects in my next  “n*Spiration From Around the Globe“.

Leave a comment

True Blue – Jennifer Gallagher


Hello from my Creative Squad! Today we have some gorgeous tags from Jennifer Gallagher that show just how well stencils work with embossing powder. Jennifer is using my new Van Vorst and Broadway stencils and my Small Circle Jumble rubber stamp set. This month’s theme is: True Blue – Blue is the color of honesty and serenity. It’s calming and has even been shown to promote healing. It reminds us of the water and the sky. Let’s slow things down this month and bask in the tranquility of the color blue.


Blue is one of my favorite colors so I was very excited to see that the creative squad would be focusing our creations on it this month. The color blue makes me think of cold weather, snowy mountain scenes and holiday time with family. These quick and easy tags would be perfect for holiday gift tags.

Begin by brushing on a thin layer of light blue paint and white paint onto your tag with a dry brush. We want to get a distressed look so try not to apply too much paint. Leaving areas unpainted will also add to the interest and texture of the tag.

Next, place your Van Vorst stencil down onto your tag and press the perfect medium through the stencil.

Sprinkle the navy embossing powder over the perfect medium. Use a small soft bristled brush to knock off any areas you do not want the embossing powder or to clean up any mistakes. Apply heat from your heat tool to melt the powder and set it. Let it cool.

Lay the 4×4 inch Broadway stencil on the tag and repeat the same process with gold tinsel embossing powder. Then stamp the coordinating small Broadway stamp from Nat’s Small Circle Jumble stamp set with perfect medium in the top corner of your tag. Emboss it in gold tinsel as well.

Lastly, take your cobalt stamping pad and edge around your tag, smearing a bit of ink from the edge onto the tag. This will add additional interest and texture.

I created a second tag switching up the colors a bit. I painted the tag with real navy, embossed Van Vorst with bridal tinsel embossing powder, and embossed Broadway with rose gold embossing powder.

I hope you find these tips useful for creating your own beautiful holiday tags. You can also change up your background color and embossing powders to create non-holiday versions. Have fun and be sure to share your projects with us.


Thank you Jennifer – I just love how that gold embossed pattern looks! You can find all my stencils and stamps in my Online Shop. Here are some of the other supplies that Jennifer used:


Feel inspired? Working on something yourself that you’d like to share?  I love to see how you interpret our monthly themes. Email me how you used my stencils and stamps with the theme and email me an image – I would love to share your projects in my next  “n*Spiration From Around the Globe“.

Leave a comment

Stenciled Umbrellas for a Rainy Day – DIY Play Date

Did you know you can stencil on an umbrella and turn it into a work of art? You can and it is a fun project. Kim and I got together on a sunny day to transform a couple umbrellas into something that will brighten any rainy day we encounter.

We chose white umbrellas as our “blank canvas” and some of Nat’s new stencil designs. We worked outside with acrylic spray paint (and proper protection – face mask) and each tried a different way to approach the project.

I began by painting my umbrella with heavy body paint to create a new background color.

I chose three different colors to alternate on the panels. This is a great way to make your umbrella any color you want.  BUT I learned the paint definitely stiffens the fabric and makes the umbrella hard to wrap up when you are all finished. I could almost not get the velcro tie around it in the end. Oops. It’s still doable, but tight.

Kim decided to spray paint directly on the fabric. She taped down the stencil and some paper as a mask. She began with my new Star Struck stencil and some blue paint.

The 9×12 stencils are a nice size to cover a large area with color and pattern.

She covered the top of 3 alternating panels with a couple colors of blue. The Star Struck stencil almost looks like umbrellas so it works nicely.

She then moved to the bottom to add more.

I chose my new Hamilton stencil – absolutely loving this pattern!!! I used a buff color on the blue panels.

I lined up the pattern and covered the whole panel with the design.

On some panels I used Hamilton and on others I used my new Van Vorst stencil – both are beautiful and delicate designs.

Here is my umbrella with the patterns. I might add more to the yellow panels – I chose a very subtle color for that one and it’s hard to see it once it dried.

Kim added green with my new Flower Maze stencil and just blended one pattern into the other.

Peekaboo :)

Looks great and all ready to brighten up a dreary day!

So you have lots of options when you start with a white umbrella. You could choose colors and coordinate it with your rain coat or rain boots or you could just aim to make something that makes you smile on a rainy day :)

You can find my new stencils in my shop here, as well as all my other products. Here are some of the supplies that we used:


Comments (4)

  • LindaLubovich

    |

    If you add textile medium to the acrylic paint you’ll avoid the stiffness you experienced when you base-coated your umbrella. Hi from San Jose.

    Reply

    • nathalie-kalbach

      |

      Great tip Linda, thank you! In this case on of the main problems was that I used heavy body paint which just made a too thick of a coating so that the string to tie it together became to short. Kim didn’t have the same problems using just spray paint.

      Reply

  • Sue Clarke

    |

    Clever and colorful…did you put anything on to preserve the paint…so it doesn’t run in the rain?

    Reply

    • nathalie-kalbach

      |

      thank you Sue. Since Acrylic paint is water proof I did nothing else to it- it should be stay as is :)

      Reply

Leave a comment

Raiders of the Lost Stash – Maura Hibbitts


Hello from the Creative Squad! Today we have a post from Maura Hibbitts who is sharing a beautiful little notebook that she has personalized using a collection of supplies from her stash, as well as my Van Vorst foam stamp, Antique Tile foam stamp, Santiago stencil, and Small Circle Jumble rubber stamps. This month’s theme is: Raiders of the Lost Stash – It’s time to raid your stash of art making stuff. Pick a few things you’ve tucked away for later and use them NOW. Maybe you have some leftover scraps or deli papers that you couldn’t bear to part with. Maybe you’ve squirreled away a new product that you’ve been meaning to try. The time is now! Raid your stash and try it :)


I’m feeling a bit like Indiana Jones this month with our theme! First, I raided my stash to find something to work on – I was looking for a notebook I could alter, and found a small canvas covered one I use for notes on projects.  Then, because I was channeling Indiana Jones, I wanted to find something exotic to use, and came up with some great trims from India, Turkmen jewelry pieces and an head that reminds me of a deity.

I started by stenciling both covers with the mini Santiago stencil, using Pale Gold paint and a cosmetic sponge for a very subtle layer.

Next I added Ultramarine Blue to the gel plate and rolled it out with a brayer, so I could stamp on it to pick up the paint. I angled the Van Vorst Negative around all corners of the notebook.

I attempted to line up the positive Van Vorst Art Foamie with a corner section, and was totally off kilter, so decided to go with imperfection. I also stamped this image in the center of each cover over the gold, using the Cobalt Teal Hue.

Time for a contrasting color, so once again, I rolled out the paint on the gel plate with a brayer (this is a great way to “ink” up the art foamie stamps) and stamped the orange into the center using the Antique Tile pattern.

Now that I feel like I am on a global journey with my notebook it’s time to add in some more gold. I have found that gold adds a hint of the mysterious and exotic, so I stamped more onto the canvas using the Grove Street Small Circle stamp.

I tied bits of sari ribbon onto the notebook spiral.

Now that my background is done, it’s time to add the cover embellishments. I glued down the fabric trims, added the dangly bits to the metal piece, and glued that in place with the head. It’s almost like having a small shrine on my notebook.

Since I use this notebook for jotting down ideas, perhaps my little shrine will act like my muse and keep sending me creative vibes. It will certainly be colorful and fun to pull out and use!


Thank you Maura – I love the idea of creating a notebook that is a shrine to creativity! And this certainly is one that is so lovely to look at :) You can find the foam stamps, stencils, and rubber stamps that Maura used in her project right here in my online shop. And in addition to the canvas notebook and various embellishments from her stash, here are some of the other supplies that Maura used:


Be sure to check out all the Creative Squad projects on the Creative Squad webpage and if you feel inspired, share your projects with us! We love to see what you’re working on. I post projects almost every month in my Inspiration From Around the Globe posts!

Comments (2)

  • Claudia

    |

    Love the stamping and stencilling on the rough fabric cover, Maura, and the beautiful layers you have created! It all comes together so beautifully!

    Claudia xxx

    Reply

Leave a comment

My Fire Burns Bright – Shilpa Nagaonkar


Hello my friends during this busy holiday season! Today we have a lovely art journal spread from Creative Squad member Shilpa Nagaonkar. This will be Shilpa’s final project with the squad and we thank her for her brilliant work and we wish her all the best in 2018 and beyond! Today, Shilpa is using my Circle Drive and Van Vorst ArtFoamies and my Santa Fe stencil, along with this month’s theme – My Fire Burns Bright – Creativity is a passion that can come from deep within the heart and soul of the maker. Sometimes this fire gets ignited by an event or an influential person in our lives, and other times it can be ignited by a love for a material or just simply the enjoyment that comes from making. What makes your creative fire burn bright?


Hello Everyone,  Hope you are enjoying the beautiful art by the Creative Squad this month, we are making with the theme – “My Fire burns Bright”.  My everyday life has great impact on my creative journey. … and that keeps my fire bright. I have a journal page to share with you today, in which I have created an abstract city scape as I was thinking about my previous home. .. so here we go…

Here was my process:

To start with I applied various layers of acrylic paints in greens and blues.. I have used Dylusion paints here.

I stamped beautiful texture using Nathallie’s Circle Drive stamp set and blue acrylic paint, randomly on the surface.

Further I created stencil texture with Nathallie’s Santa Fe stencil and paints.

For creating my imaginary buildings, I adhered dictionary papers on card stock and colored them in pink and red acrylic colors. I stamped the beautiful Van Vorst design on it using Black Archival ink. Next I cut them into building shapes and adhered them on the page.

I used a white Gelli roll pen to add more details, I also wrote create, inspire and love with black pens to finish my journal page.

Thank you so much for stopping by.


Thank you Shilpa – I just love this happy color combination and the mix of patterns! In addition to dictionary paper, Shilpa used the following supplies (some are affiliate links):


Play along with us too: I love to see how you interpret our monthly themes. Email me how you used my stencils and stamps with the theme and email me an image – I would love to share your projects in my next  “n*Spiration From Around the Globe“.

SaveSave

Comments (1)

  • Sue Clarke

    |

    Thank you for the step by step tut Shilpa.
    Great and inspiring colors as well.

    Reply

Leave a comment

You Belong Somewhere Where You Feel Free!

Don’t we all? Loved playing with blue and gold – I am on a weird gold- high – not sure why, as it is not my favorite color, but I guess trends have gotten me too ;)

I stamped with my new Van Vorst Positive and Negative ArtFoamies in blue and gold for the tile background effect. For the city scape I used my new Midtown ArtFoamies set and applied rubbed lightly some Artgraf Chalks on top of the foamstamps. The Artgraf Chalks are water-soluble and make a gorgeous watercolor like effect when stamping. To activate the pigments and have them come off the foam stamp, I slightly sprayed a layer of water on top and then just stamped ahead.

Love how the colors blend. I added some marks with Neopastels and a charcoal pen and wrote the journaling with a blue and white acrylic marker.

Here are some of the supplies that I used for this spread


Leave a comment