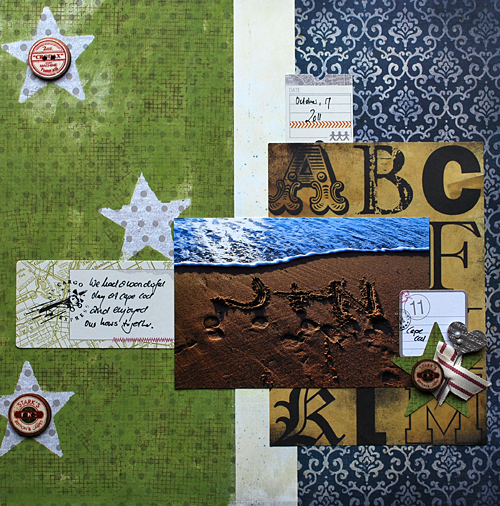
This weekend we had a crop at Cocoa Daisy and I showed three ways on how to do your own Silk Screens and I wanted to share those with you too :)


Silk Screening is such a wonderful craft – I love the look of it- the crafty selfmade look on fabric. When I see home decor or clothing created with silk screening I get instantly drawn to it. I have thought of a couple things on how to incoporate silk screening into my paper art and I thought I would share three techniques with you today, because you can do it too and you can make your own screens.
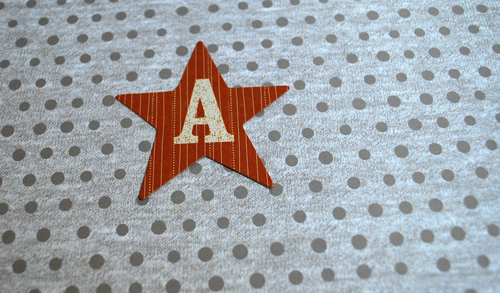
Let’s start with an easy technique – I call it
FAUX SCREEN PRINTING
One of the things that are so intriguing with the silk screening is the texture of fabric and the imperfection and we…can fake it just with some shapes and our amazing Cocoa Daisy stamps
Supplies:
Shape – DieCut – Star, Circle etc.
Scrapbooking Paper from your Cocoa Daisy Kit
Non-Permanent double -sided Tape- for example MyStik Non Permanent by Scrapbook Adhesives by 3L
Cocoa Daisy Background Stamp – for example November Kit
Ink Pad- for example Distress Ink or Maya Road Ink pad from October Kit
Archival Ink
Step by Step:
Take a piece of Scrapbooking Paper- here from the wonderful November Kit and a Die Cut Shape.
Take the Cocoa Daisy Stamp and Archival Ink (permanent)
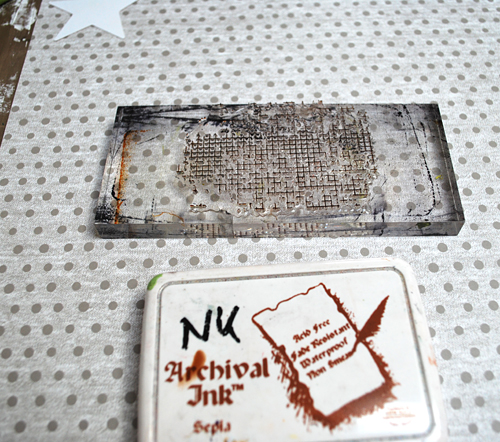
Apply some non permant tape onto the shape- here the star and put it down onto the paper. Stamp over with the stamp
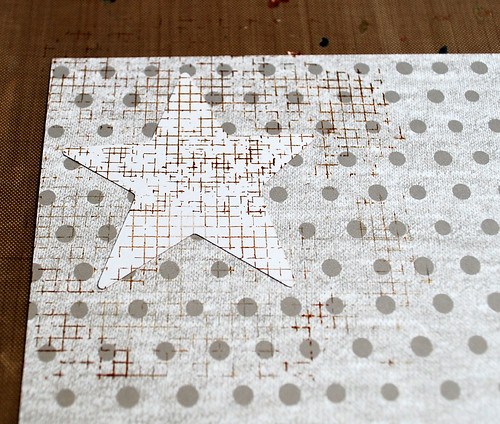
Go over with an ink pad -for example the Maya Road Ink Pad that was included in the October Kit.
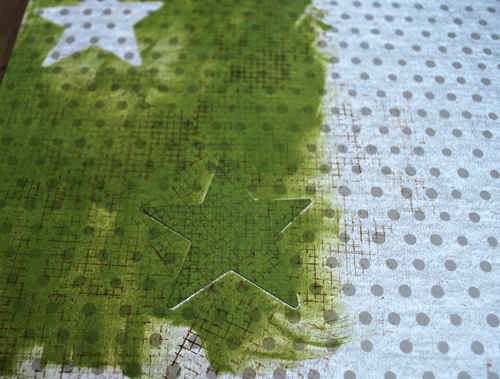
Take off the shape- if you have more then one then you can just use them all in one setting- but with one this is the way to go. Repeat all steps. It doesn’t matter if you stamp first or ink first.
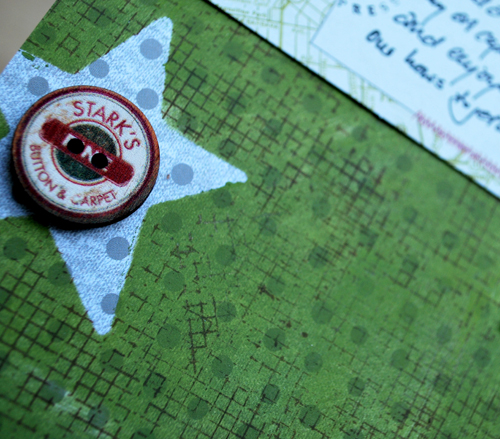
You can even use the shape you used- either with the treated side or the side you inked and stamped on as an embellishment
next up is a technique that is often used on making you own T-Shirts
FREEZER PAPER SCREEN PRINTING
Supplies:
Freezer Paper
Scissor
Cutting Tool
Cutting Mat
Iron
Brayer and/or Brush
Acrylic Paint
Scrapbooking Paper- for example the wonderful Amy Tan American Crafts Paper in the November Kit
Step by Step:
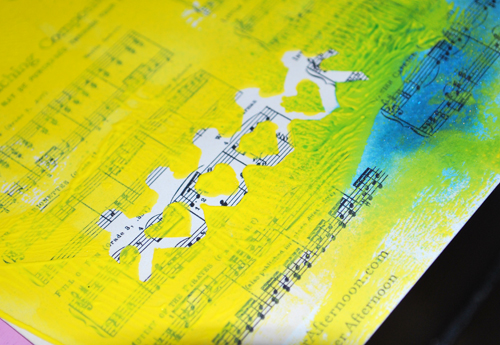
Take a paper and put some Freezer paper on top – shiny side onto the paper and the paper side up – and trace the pattern – or just make your own pattern if you want.
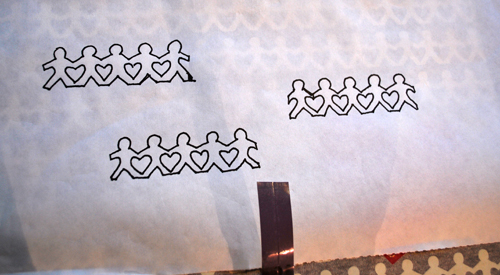
Place the Freezer paper now on a cutting mat and start cutting out the patterns. Keep the insides- here the hearts- you can use them
you actually have two patters after you are done- that you can use
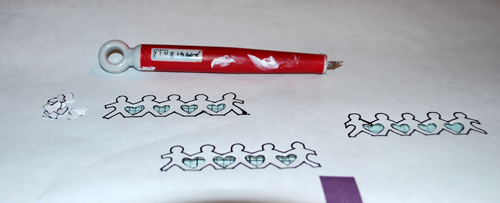
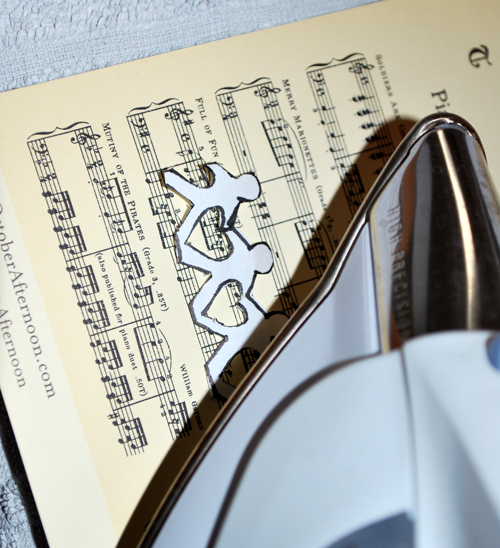
Now you can iron on the first cut out piece stencil onto the Scrapbooking Paper
You can now either brayer some acrylic paint over the stencil or just dab some acrylic paint around. Let dry
Peel off the stencil and voila
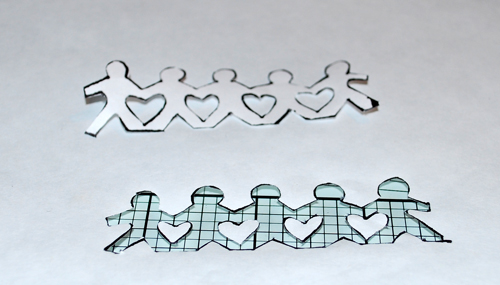
Let’s take it up a notch and put the other mask on top and iron it – you will need also the little cut out middle pieces- in this case the hearts
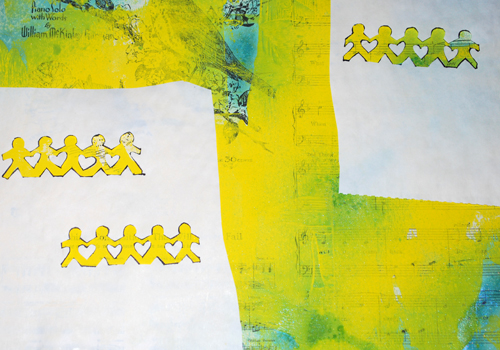
dab over acrylic paint, let dry and lift the freezer paper – and voila you have the reverse print of the one before
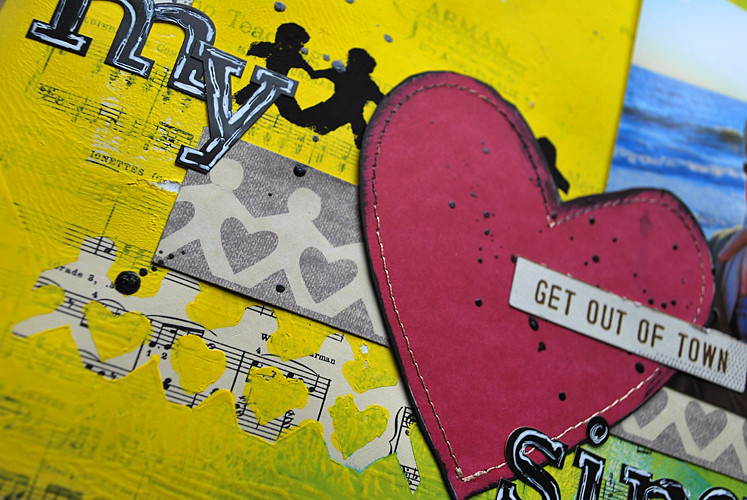
It is so much fun to incorporate this technique with the actual paper you traced as you can see here- it ties the design together by repeating the pattern:
And last but not least I throw in a video about a technique that I have shown long time ago – so for those of you who want to get even a bit more adventureous – you can do this too
SCREEN PRINTING
Materials and tools you’ll need:
• A surface to work on–cardboard or canvas
• Paint brush
• An embroidery hoop (You can get this at most craft supply stores, but you might also
get a cheap one at one of the kid’s toy stores.)
• Acrylic paint
• A gel medium or fluid mask gel
• Sheer curtain material, such as a tulle or old silk pieces,
• An image, either a print-out or hand drawn
here is the video, which is a bit goofy and was for a competition in 2008 – so I changed a bit….not in the goofiness though- LOL:

I hope this gives you some ideas on how to incorporate some easy Silk Printing in your art work – I would love to see your projects if you try one of these techniques
Have a wonderful day
nat
![]()
Comments (5)
Joan Gilmore
| #
Wonderful techniques, Nat! Love what you’re doing!
Reply
Jenny Petricek
| #
Hi Nathalie! I’m so happy to be back to visit your site, after several months of easing into full-time work again; I haven’t had the time I used to, to check out the great sites belonging to my blogging buddies.:-(
At any rate, thanks so much for sharing these great techniques! I’ve started exoerimenting with masking lately (when I actually have the time to create art), and your freezer paper process is one I definitely need to add to my repertoire!
Reply
Cynthia Lloréns
| #
Wow!!!!!!!!!!!!Those are stunning yechniques I just love to learn news technique!!!!
I love the way you mix so different styles.
Thanks so muvh for sharing.You inspired a lot.
Kisses and huges from Brazil
Cynthia
Reply
Isabel LopezDel RinconTroussel
| #
Hi Nat!
Awesome ideas… although, for technique #2 freezer paper is required… I don’t know if it’s easy to find in Germany… in Spain (and I’m guessing in most european countries too) not so much! I’m a quilter (freezer paper is largely used in quilting), and have friends in the US, where those rolls are so inexpensive (here, when you can find the paper, in a quilting store, of course, it’s usually sold by the sheet or by the meter and is quite pricey), but I’ve learned from Spanish friends that you can substitute freezer paper for the paper that covers the printer/copy paper stacks: the inside would be the “tacky” side you iron face down. I’m not sure I’m being very clear here, but I just wanted to share this idea for those of us who don’t have access to freezer paper (if they have access to a computer, they probably also own a printer and the paper used in it, or even work in an office where those papers are just thrown away – and where paper stacks are used much faster that at home!)
Thanks for sharing those techniques with us… I think I’ll try them this week
Isabel
Reply
Kim S
| #
I remember the Bambi one – loved it then as much as I love it now. The other two examples a re fabulous too!
Reply