Stencilbop Challenge
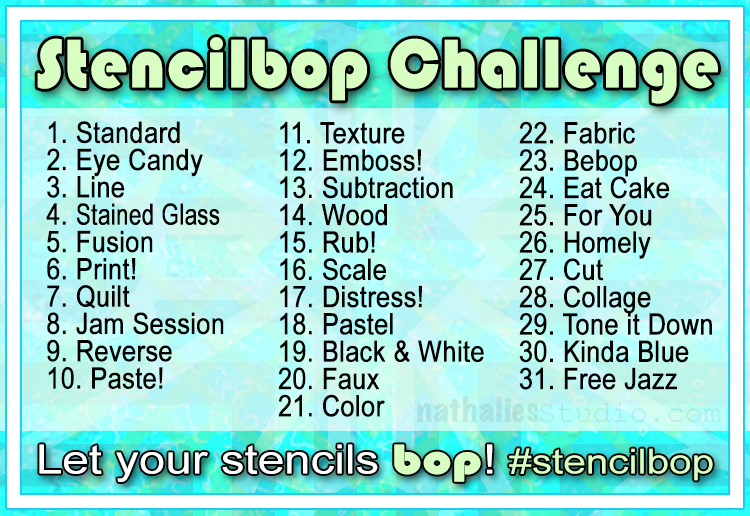
Let your stencils bop with the Stencilbop Challenge! I love working with stencils and often we overlook just how versatile they are. In August 2019 I put together this month long challenge to delve deep into the magic that is stencils :)
Play along and get inspired with 31 unique ways to use your stencils. The prompt list is above and a full recap of tips, visuals, and info is below.
Don’t forget to share what you make and use the hashtags #stencilbop and #natkalbach
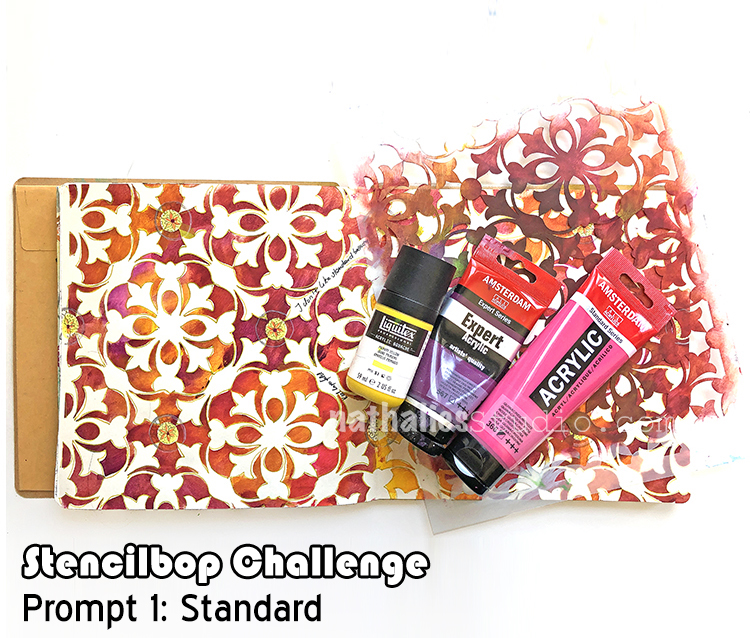
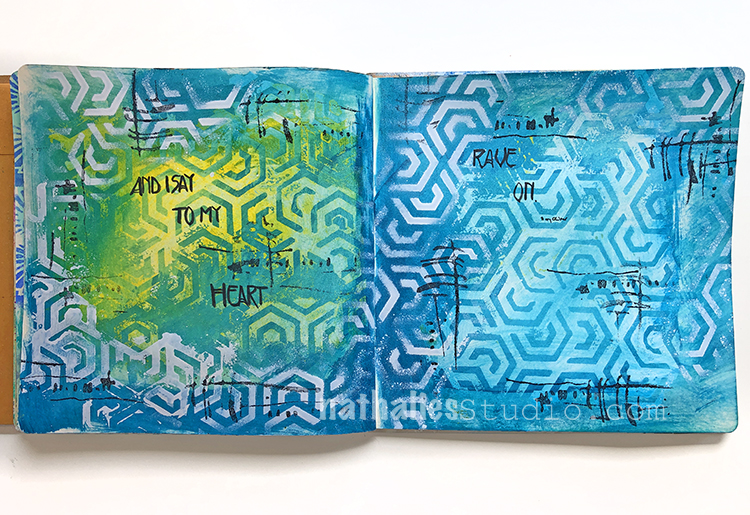
Day 1 – Standard
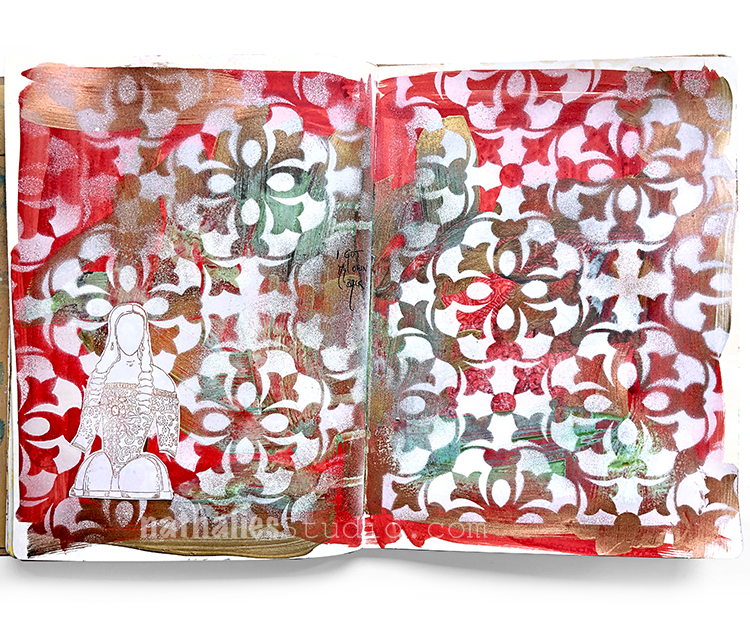
Let’s start with my standard way to use my stencils – with acrylic paints. The reason I love using acrylic paints is that there are so many fun ways to apply different colors and blend them or mix them up making for some awesome backgrounds or even just small stenciled areas of a page.
My preferred way to apply acrylic paint is using a soft cosmetic sponge or a foam wedge and dab into the paint, then dab off the excess paint and dab over the stencil. The trick is to not have too much paint on your applicator otherwise you won’t get crisp lines and the paint just seeps underneath your stencil.
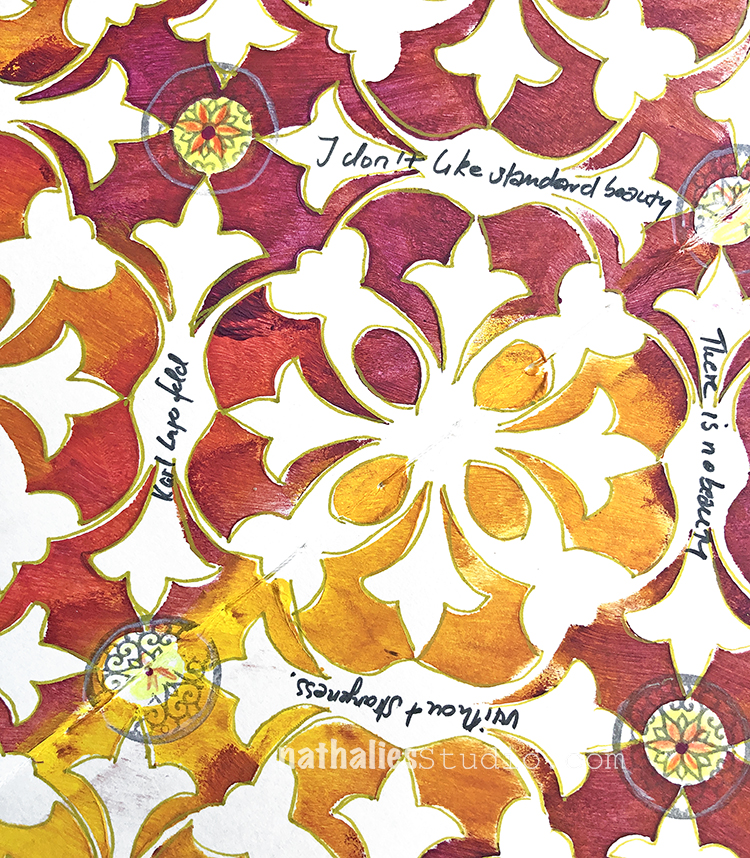
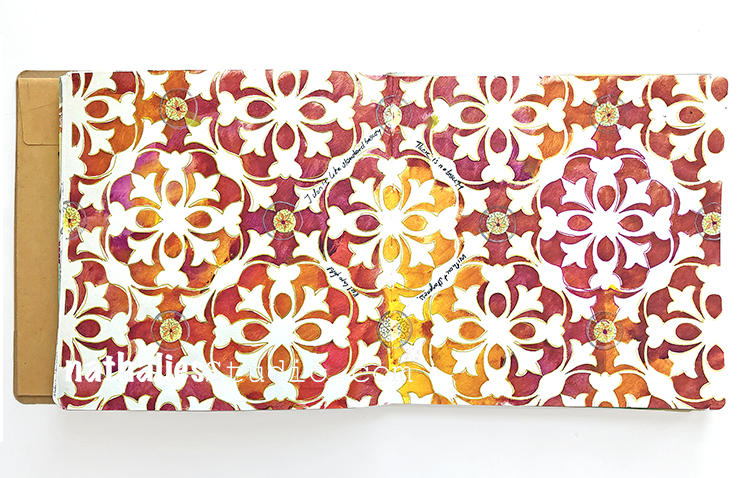
For the art journal spread here I used three different colors and lined them up next to each other and mixed them up through my Versailles Stencil. Since the application is quite thin it also doesn’t become too muddy and I love how this pops and came out. I just added a little bit of journaling and some of my circle stamps and there you go – an easy peasy art journaling page.
Day 2 – Eye Candy
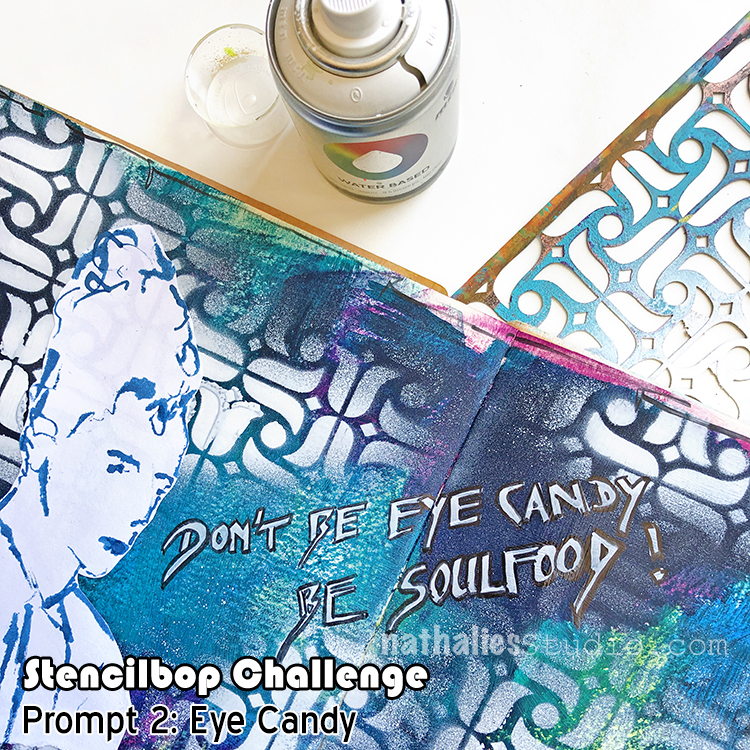
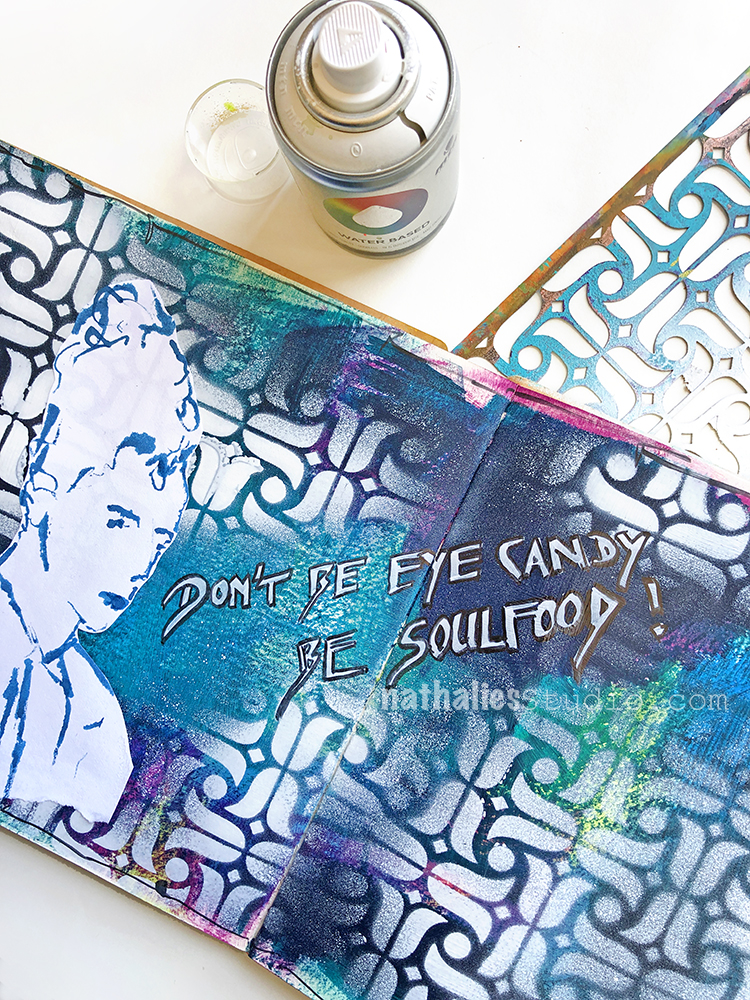
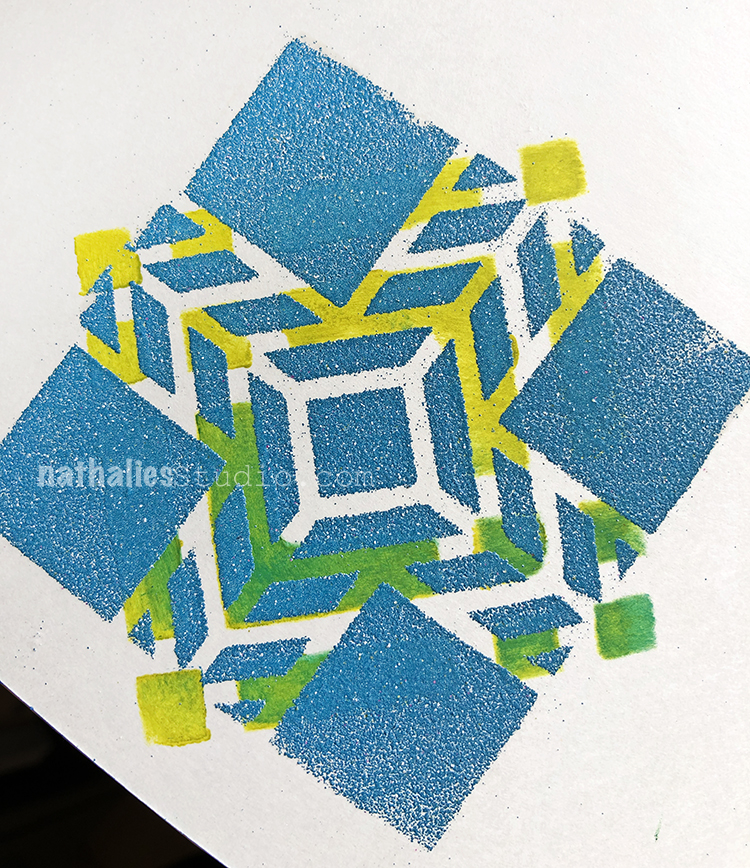
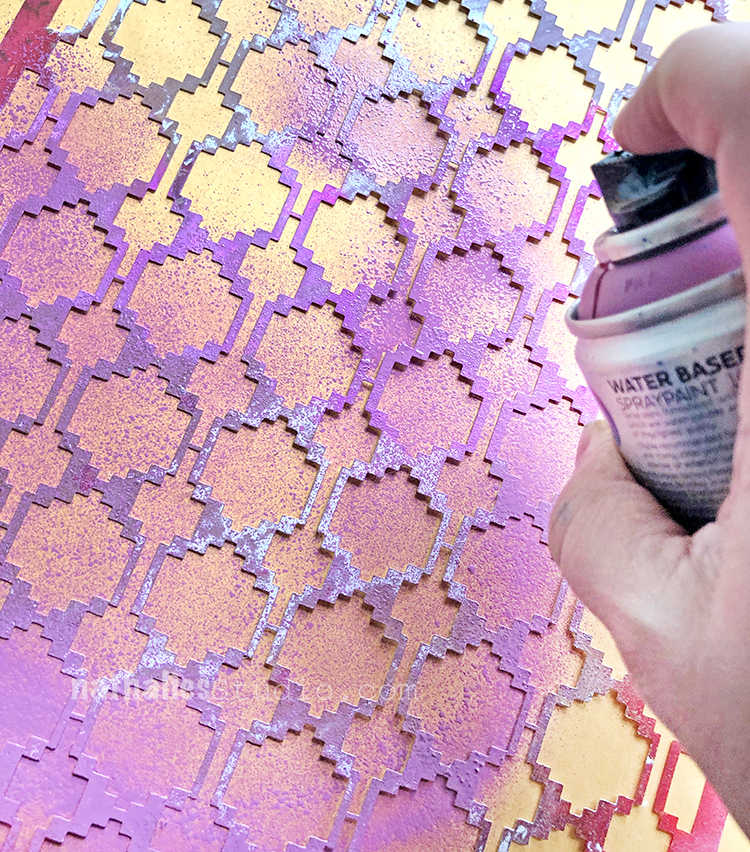
Well to be honest I think anything with stencils looks like eye candy – LOL- but I especially love the way how spray paints applied of stencils look like and how you can apply different colors in different areas.
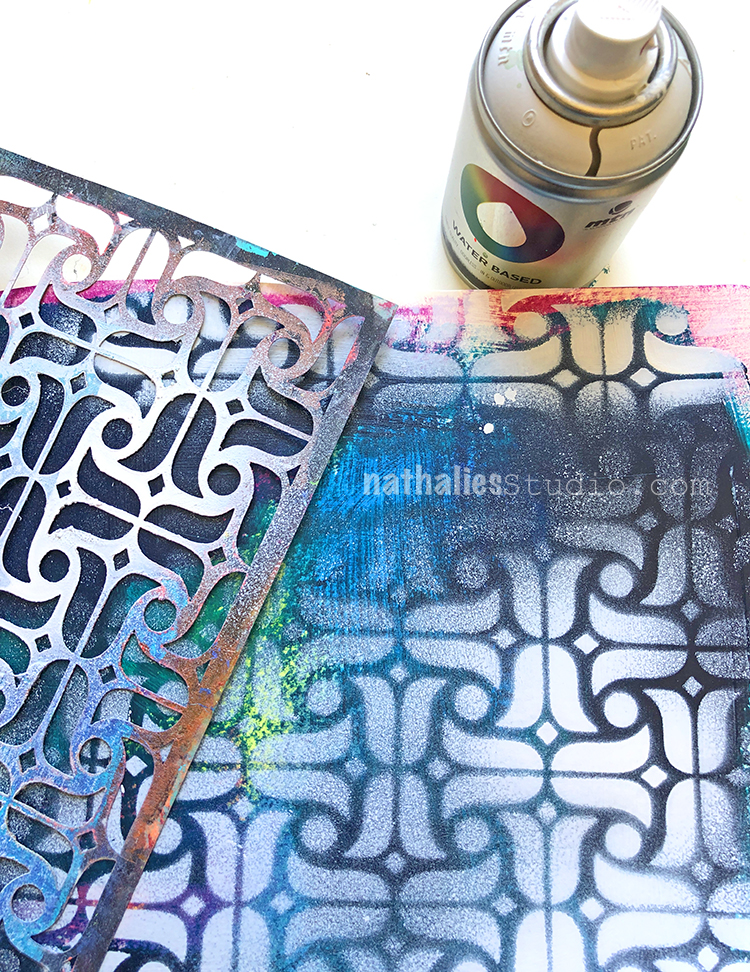
Since I spray a lot inside I mostly use low odor acrylic spray paints in a well-ventilated room. If I spray a lot I actually wear a mask. The trick is to hold the stencil nice and firmly down – sometimes I use different brush ends to add extra fingers and hold down my stencil and then spray evenly and not too close. Always start spraying off the page to make sure the cap is not clocked or weird things are happening.
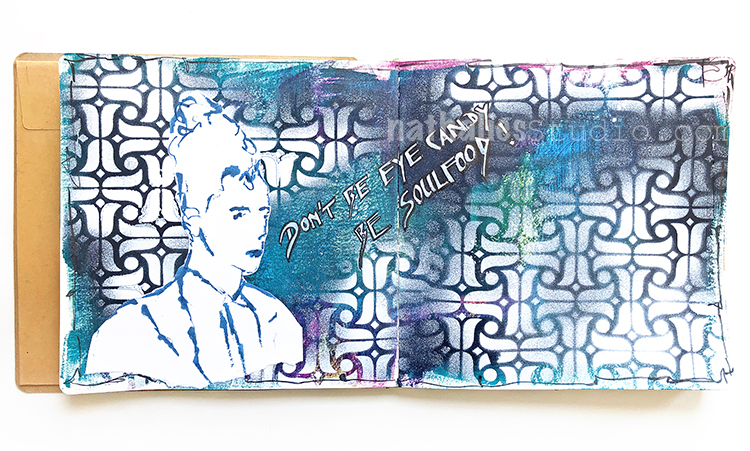
Here I used white with my Amsterdam Stencil on a background I had painted with acrylic paint- I love how the the white makes everything pop.
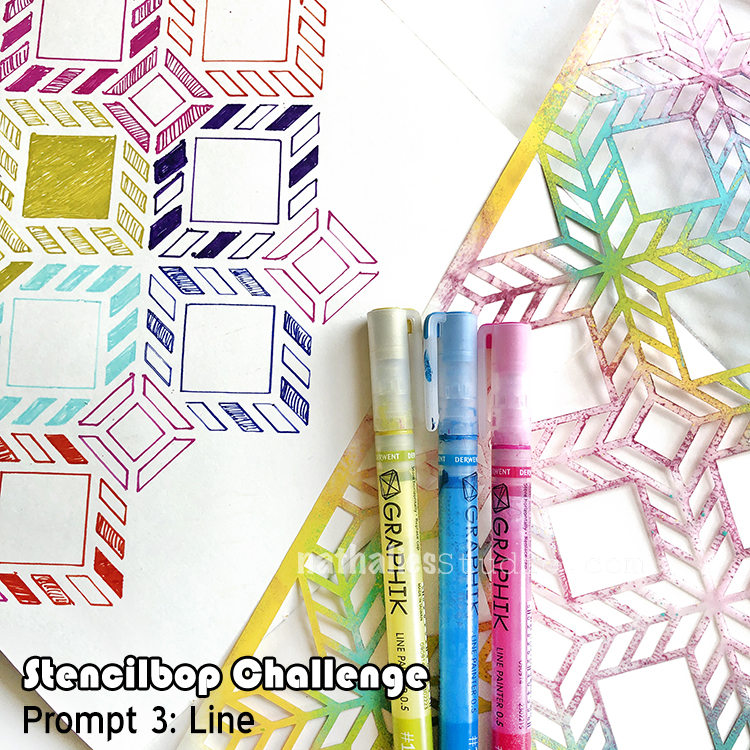
Day 3 – Line
I love using my stencils with markers and create different variations of lines- it is a total zen approach – better than a coloring book in my opinion ;)
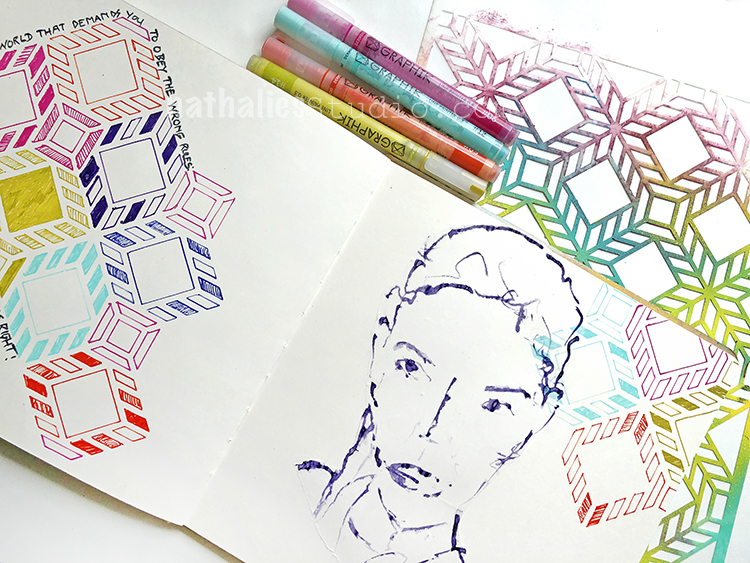
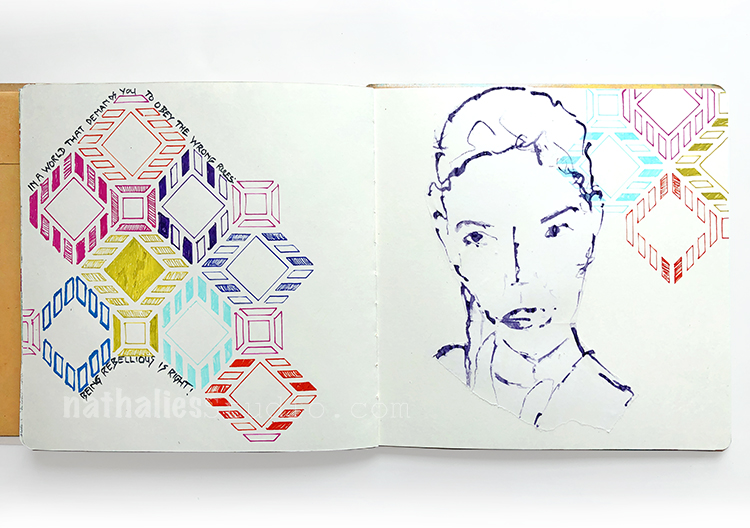
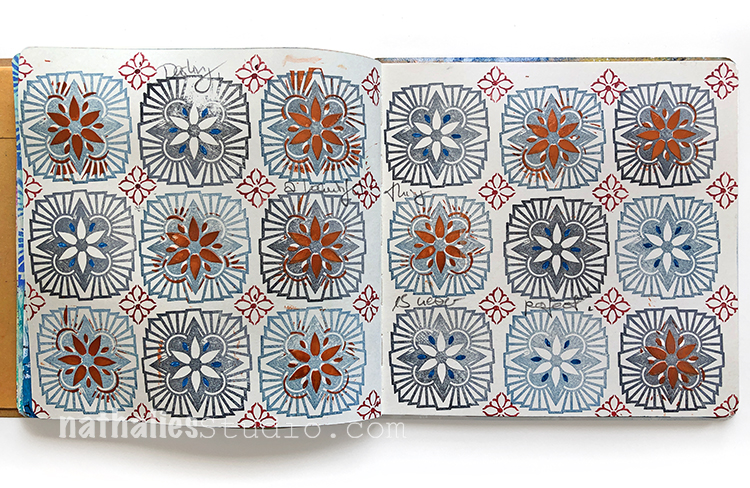
Here I used my Santiago Stencil and some Derwent Graphik Liners and just lined up some colors – pun intended ;)
Easy peasy but don’t be fooled …this takes a while.
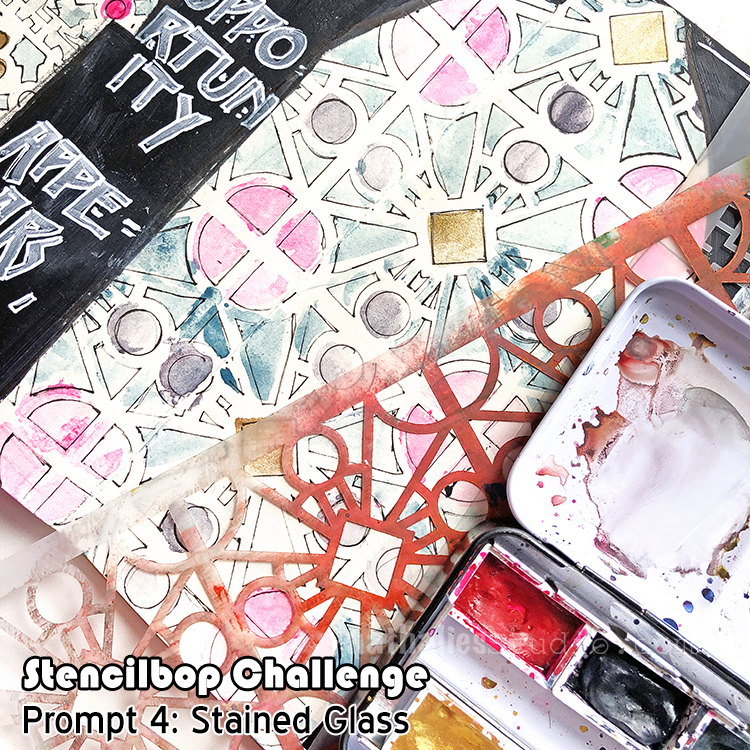
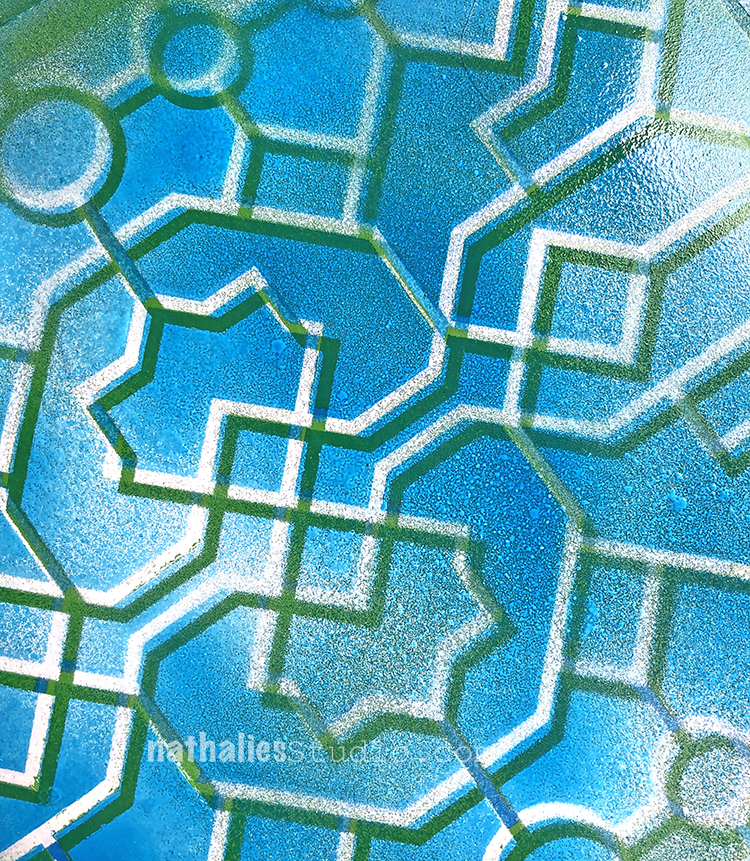
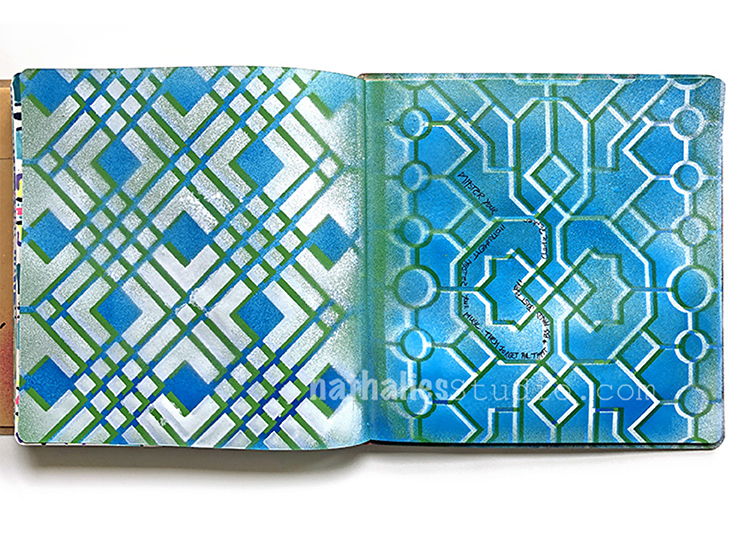
Day 4 – Stained Glass
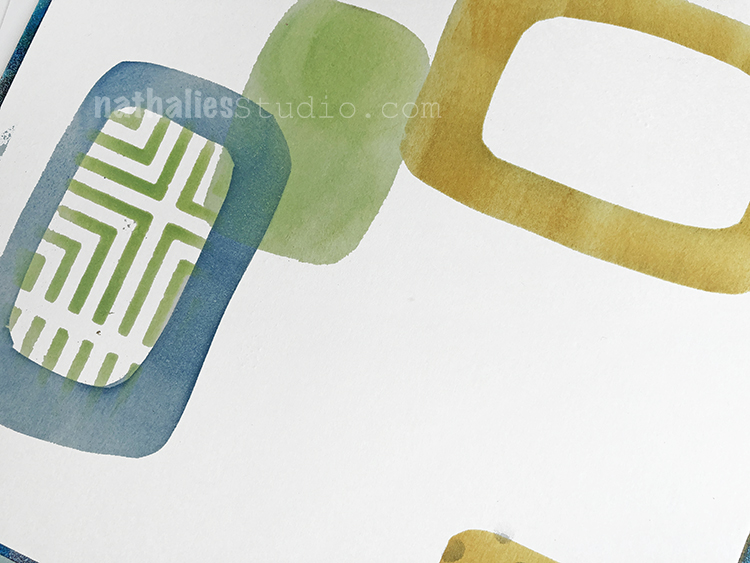
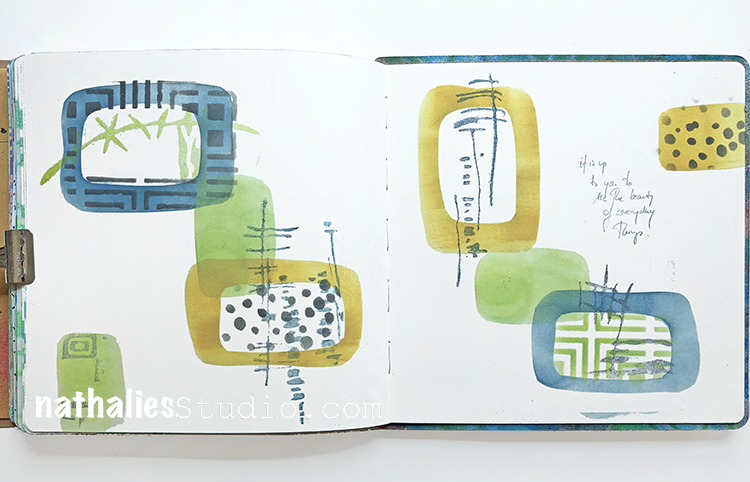
Watercolor might not be the first medium to use with stencils that comes to mind but I do love the stained glass effect.
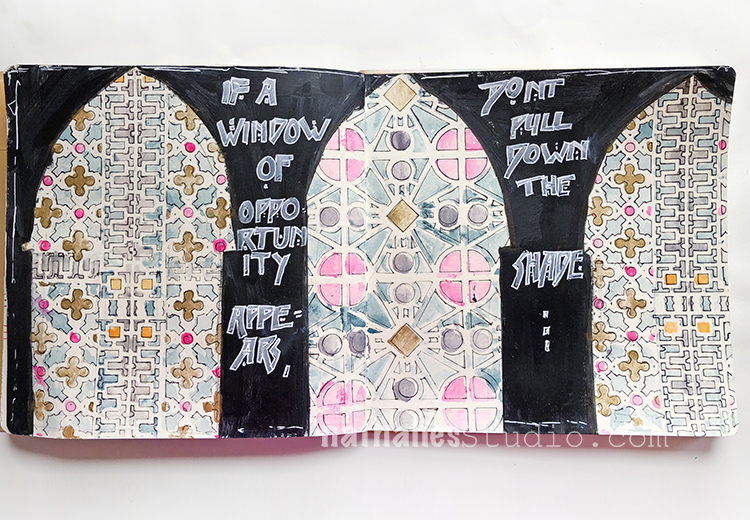
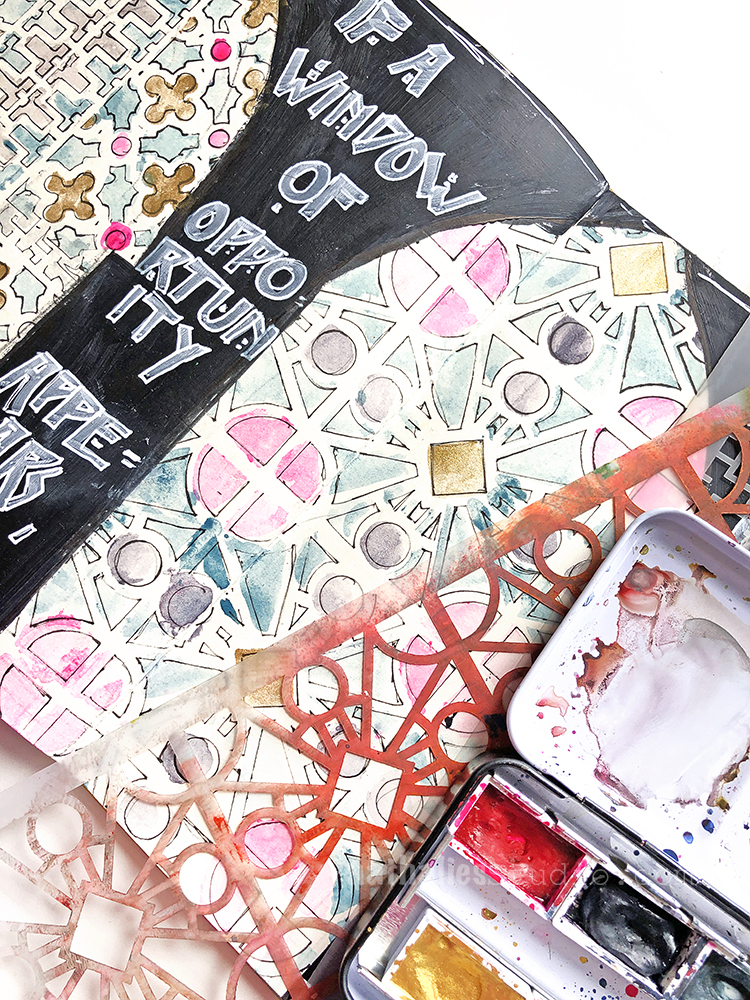
For this journal spread I added some watercolor very loosely through the Downtown and through my Buenos Aires Stencil – I didn’t care too much about crisp lines but always started spreading the paint out from the middle of the opening towards the edges of the stencil.
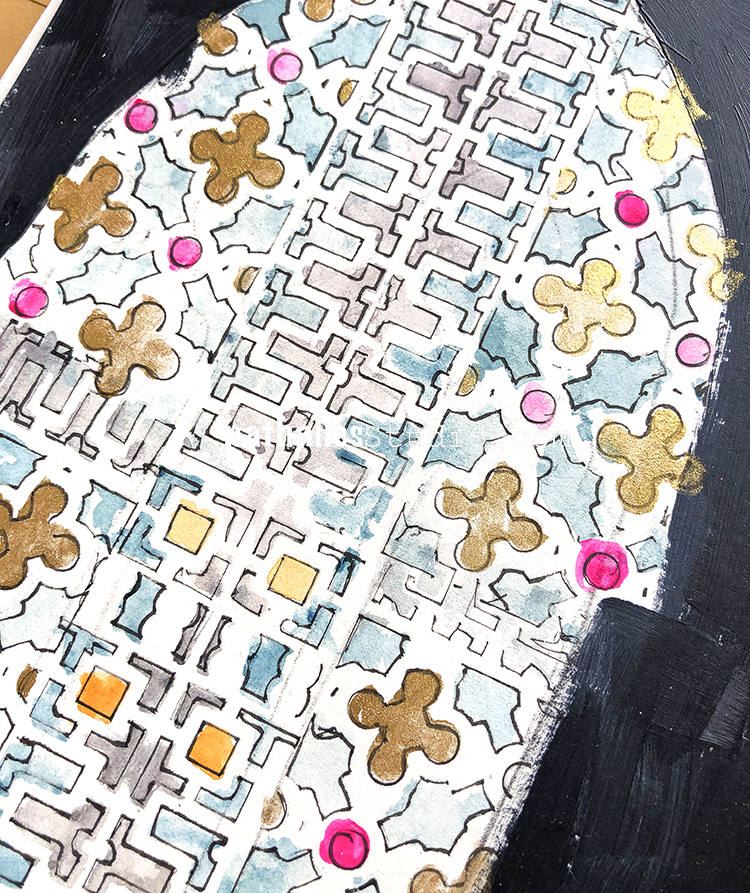
Later I defined the stencil pattern by using a thin black micron pen.
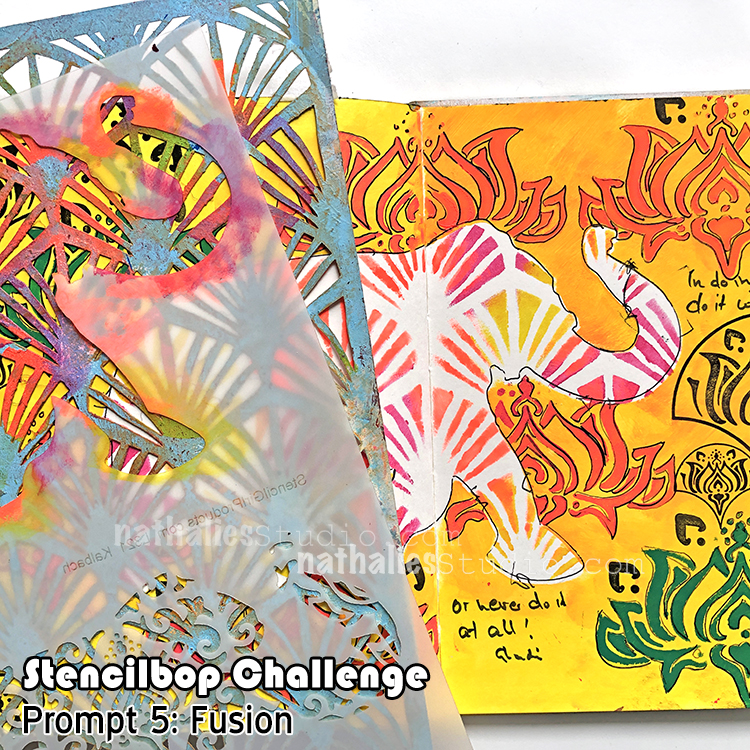
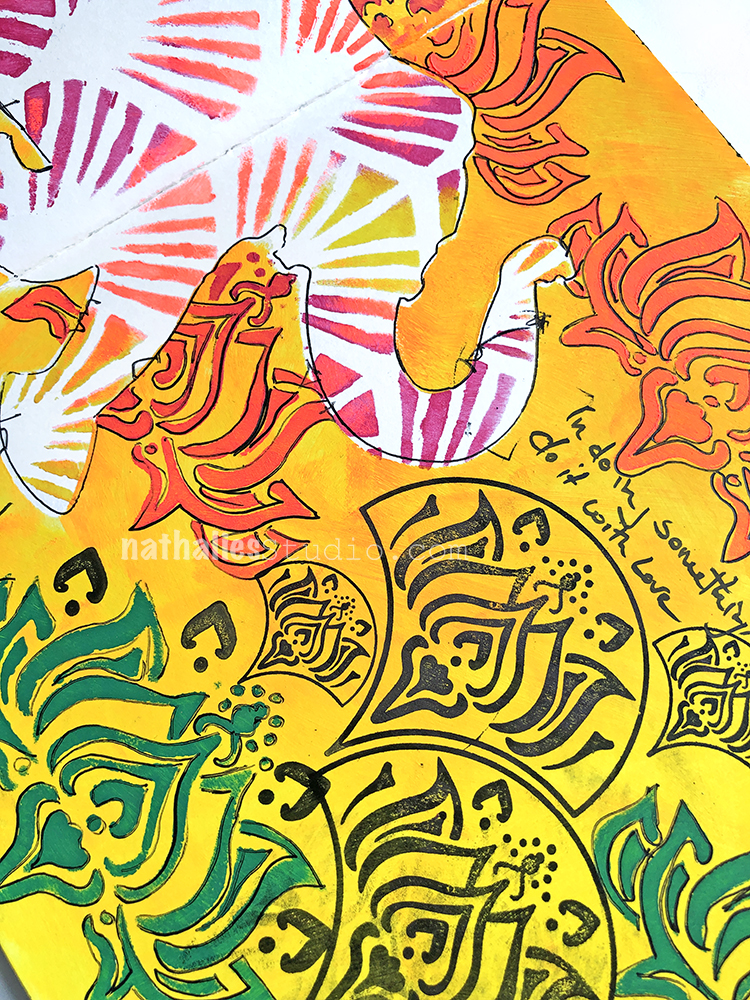
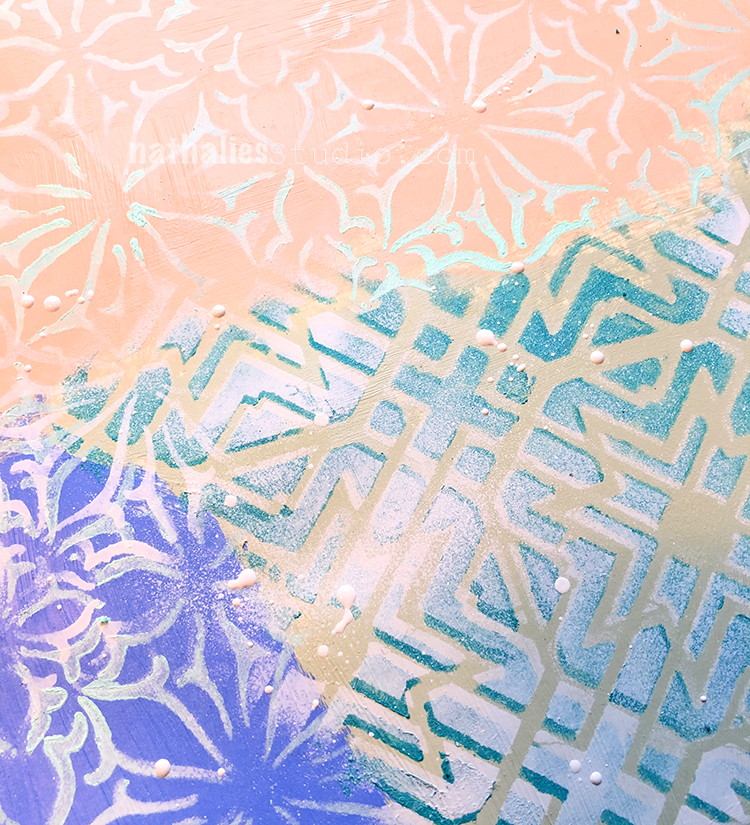
Day 5 – Fusion
I love layering stencils with bigger openings with small pattern stencils. For this art journaling spread I used my Elephant Parade Stencil on top of my Art Deco Wallpaper stencil.
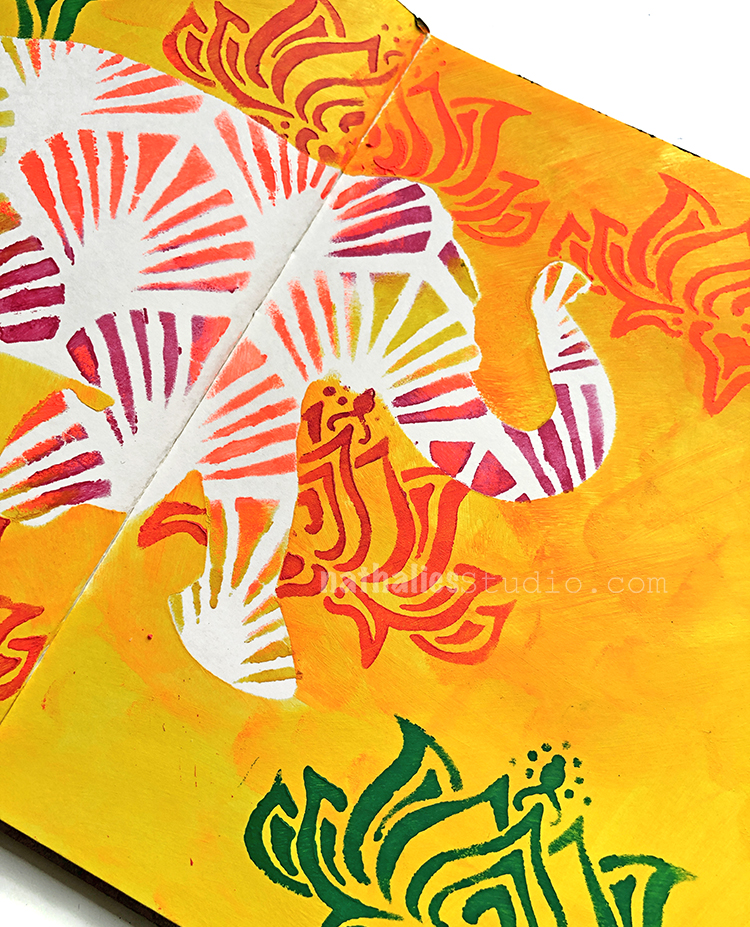
It is such an easy way to combine or fuse stencils.
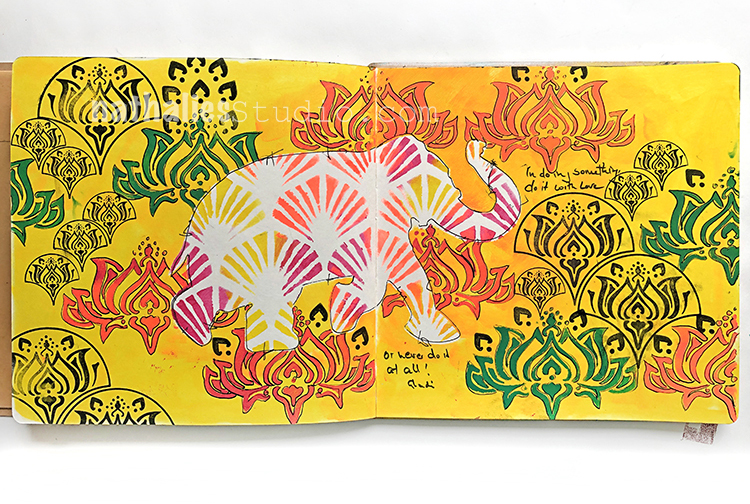
Later I used the mask of the elephant, which is also included in this stencils to trace the elephant and also to stencil with my Lily Wallpaper Stencil for the background.
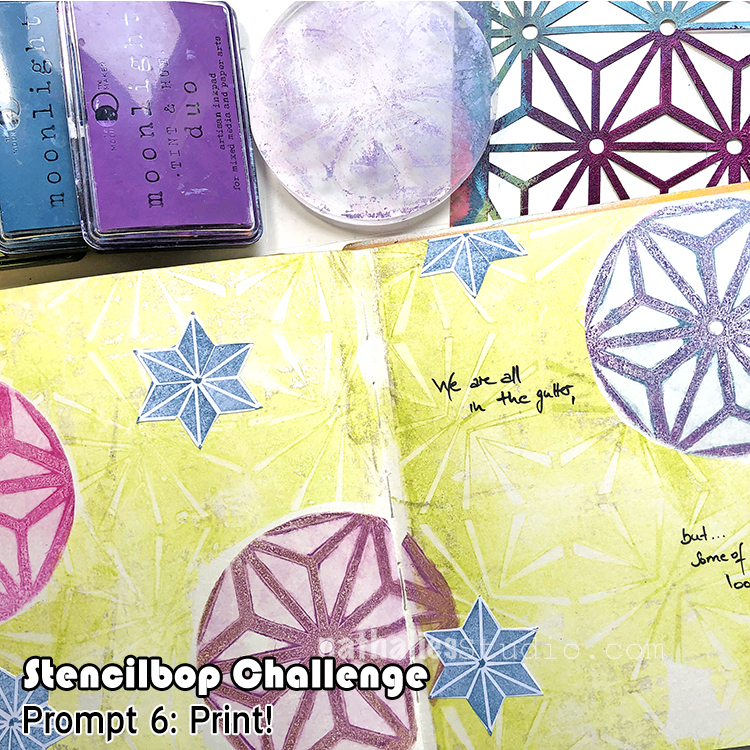
Day 6 – Print!
Using stencils with a printing plate like the Gelli Plate is super fun. One technique I do enjoy a lot is using different plates and inkpads with stencils and then print into my art journal.
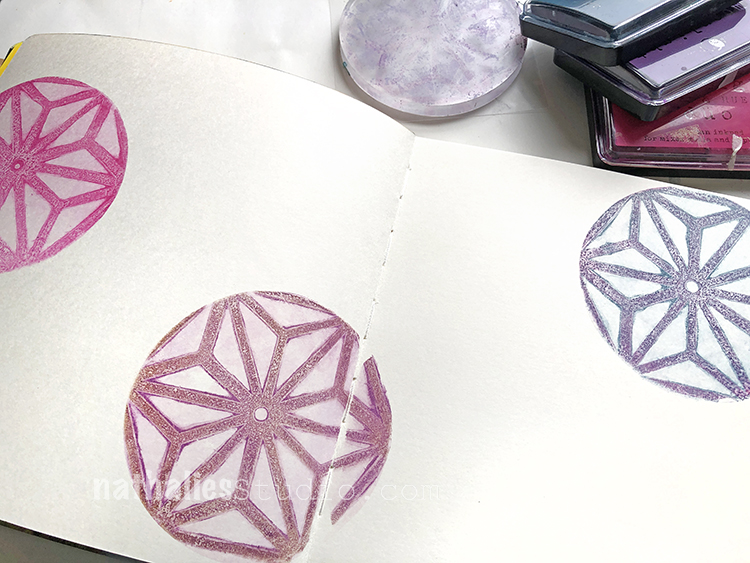
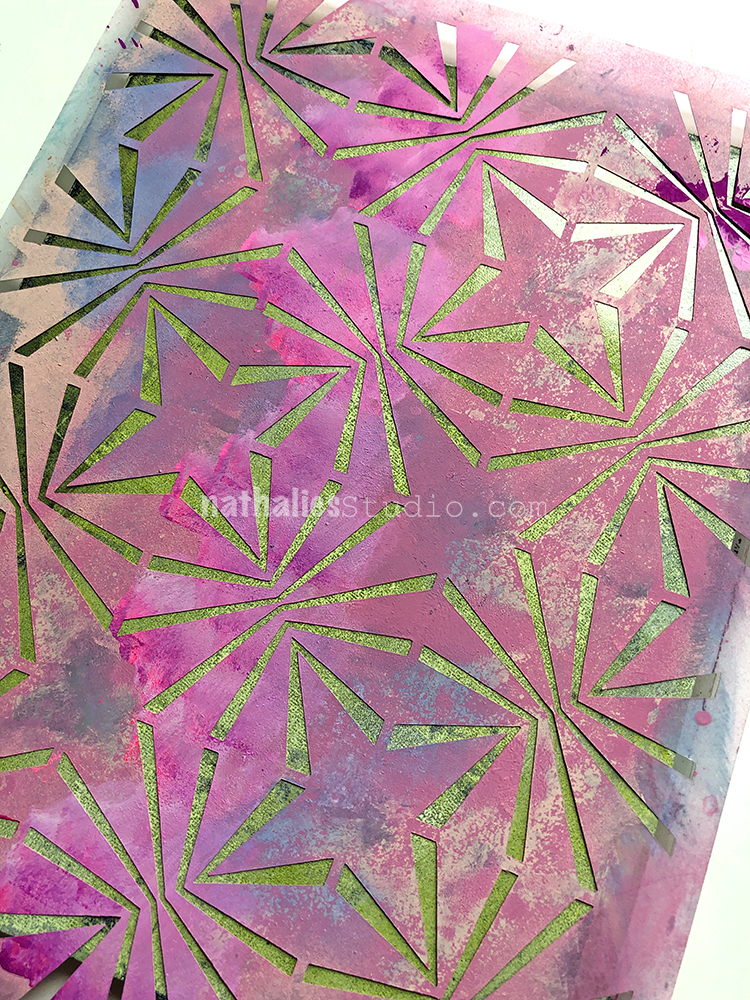
For this spread I used a small round gel plate and first added some ink onto the plate. I used a hybrid inkpad by Moonlight Duo which doesn’t dry too fast, it also creates some nice gradients in color due to its dual pads. I applied my Star Struck Stencil, and printed off to another piece of paper (you can make cards or use those prints as collage paper). Then I lifted the stencil and turned the plate around to print on top of my journal page.
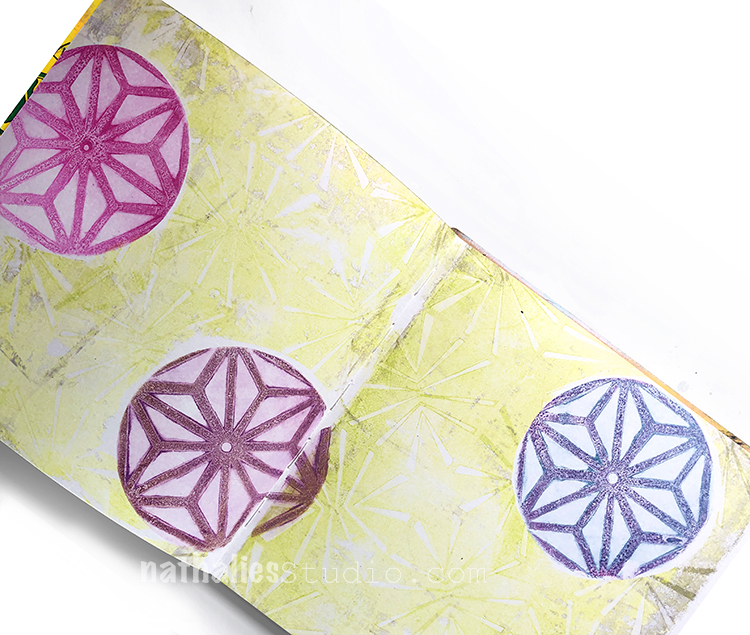
I did this in different colors and then masked off those areas in my art journal – repeating the same process with a bigger gel plate and my Beacon Stencil.
Here is the finished page:

Day 7 – Quilt
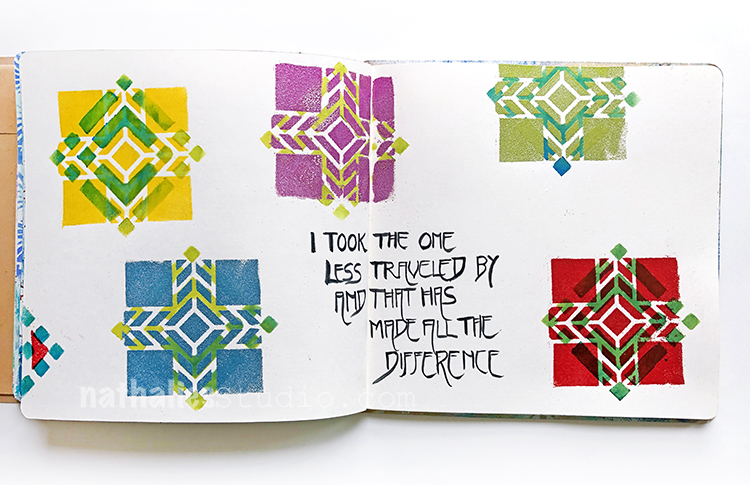
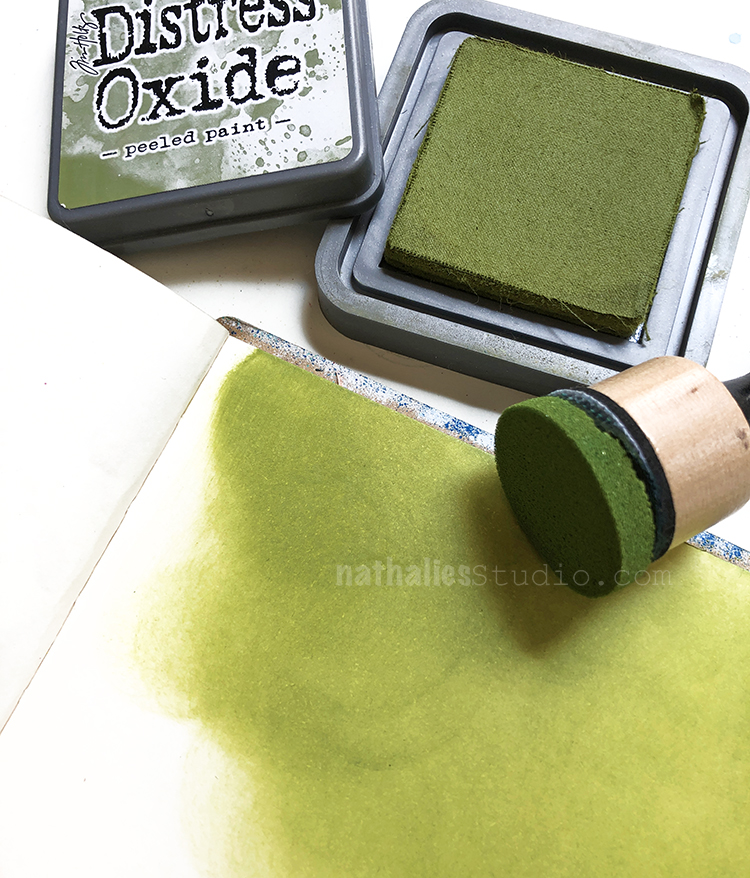
Now I cannot sew very well …might have to do with my dislike of rulers and measurements ;) But inspired by the different colors and patterns quilts are often made of, I use this process quite often in my art journals.
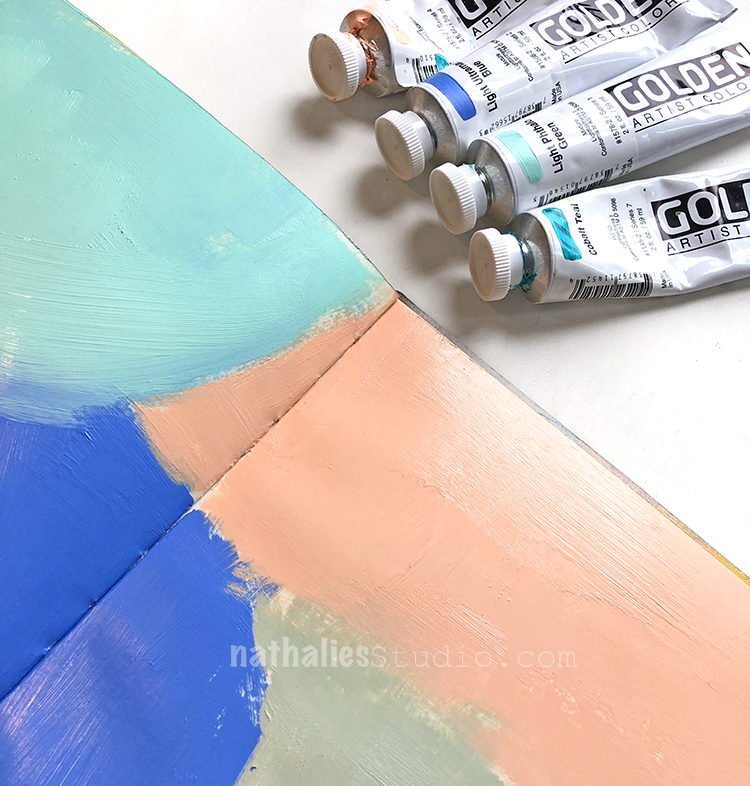
I paint the background in different color swatches…
and then apply different stencils on top of those swatches using any of the other colors that I had used before. Here I used my Hamilton, Van Vorst, and Toledo 9×12 stencils.
This way I make sure the repetition of color ties the design together. A fun and easy way to create the foundation for an art journal spread.
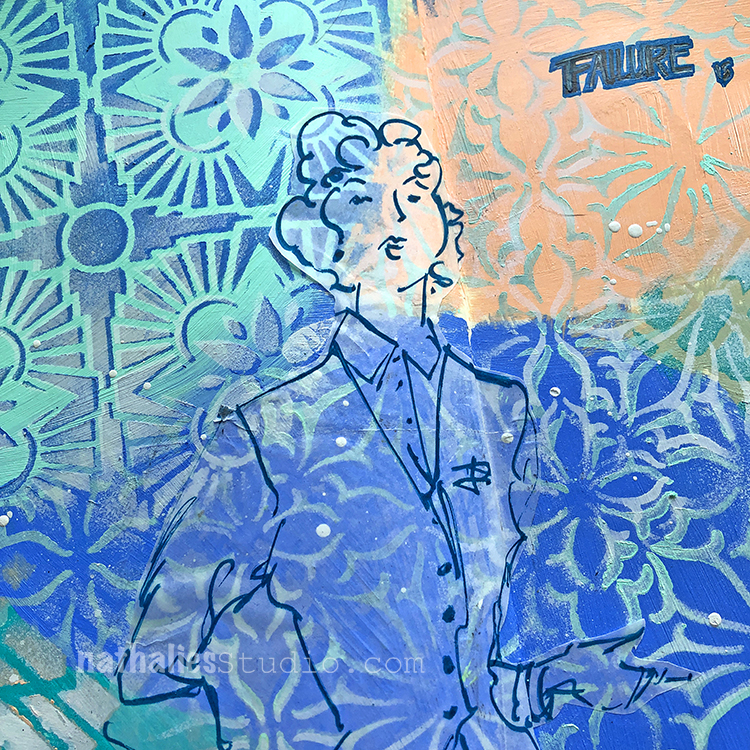
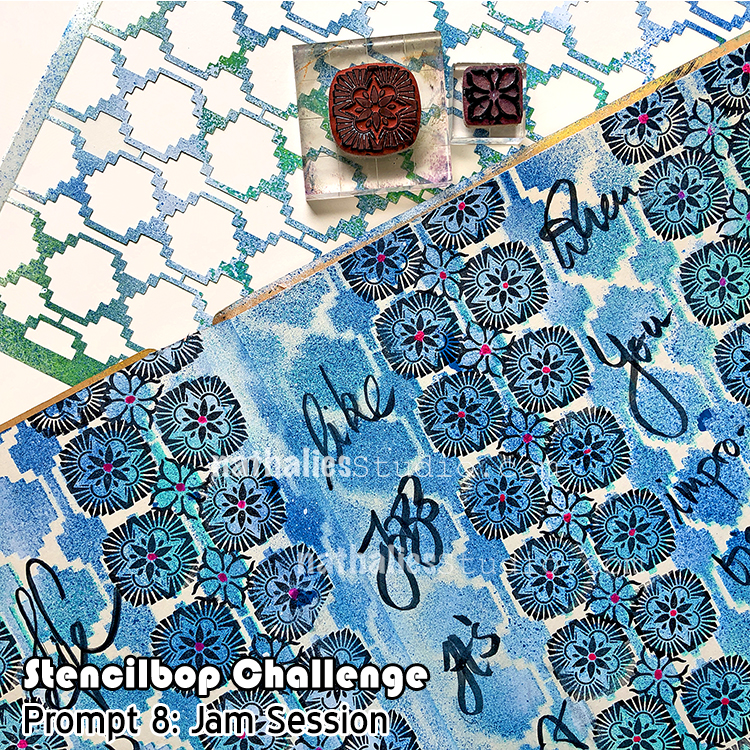
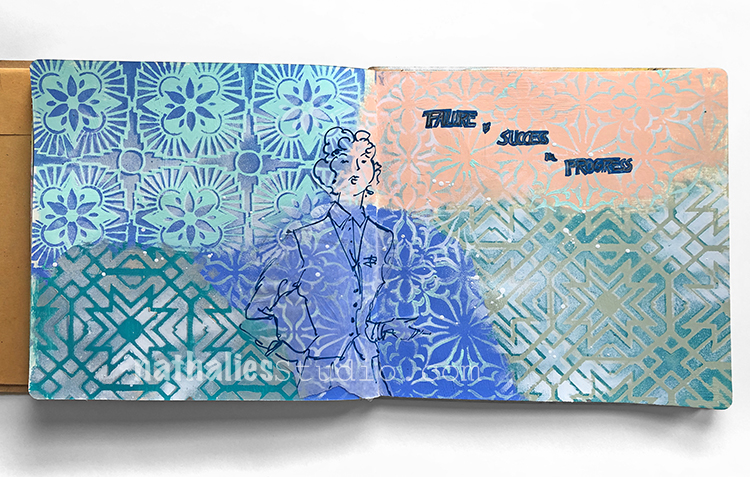
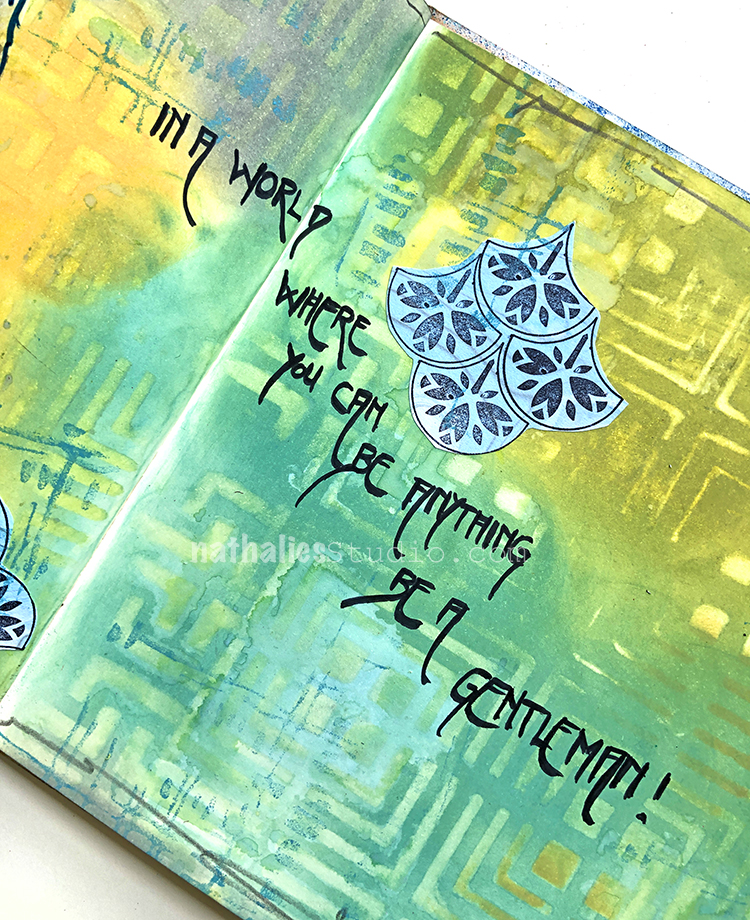
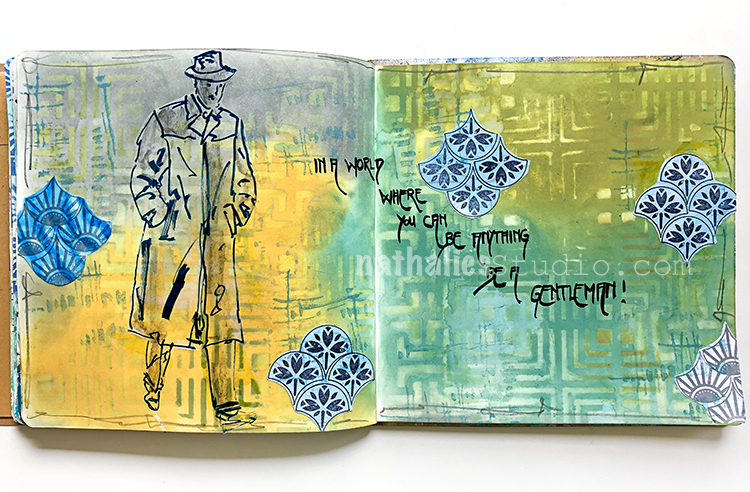
Day 8 – Jam Session
Mixed Media always has been my super love – mixing different materials, paint media and tools is just my jam.
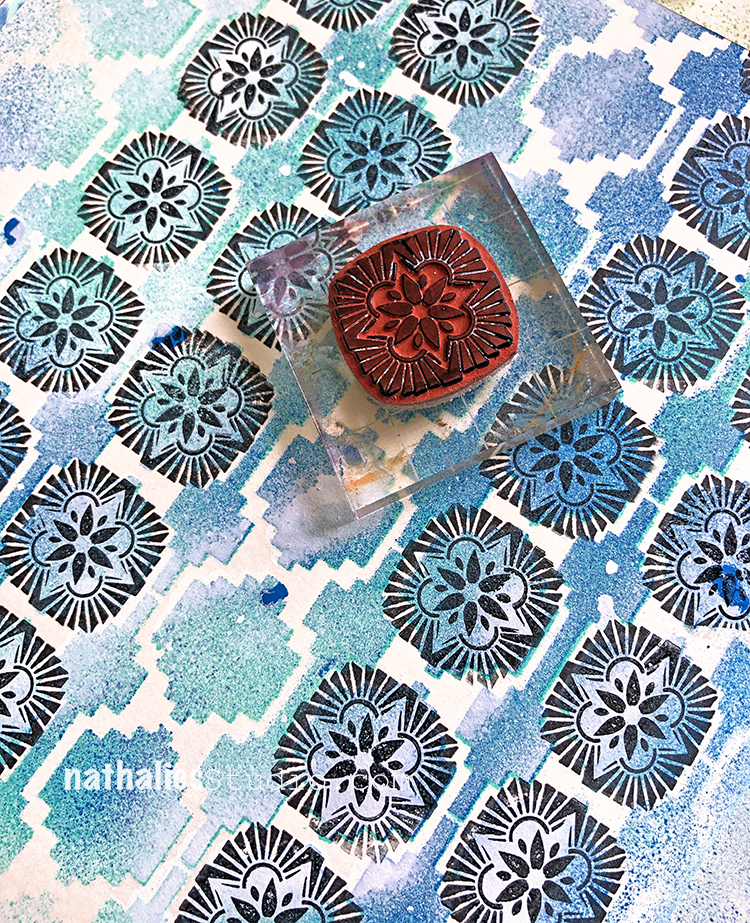
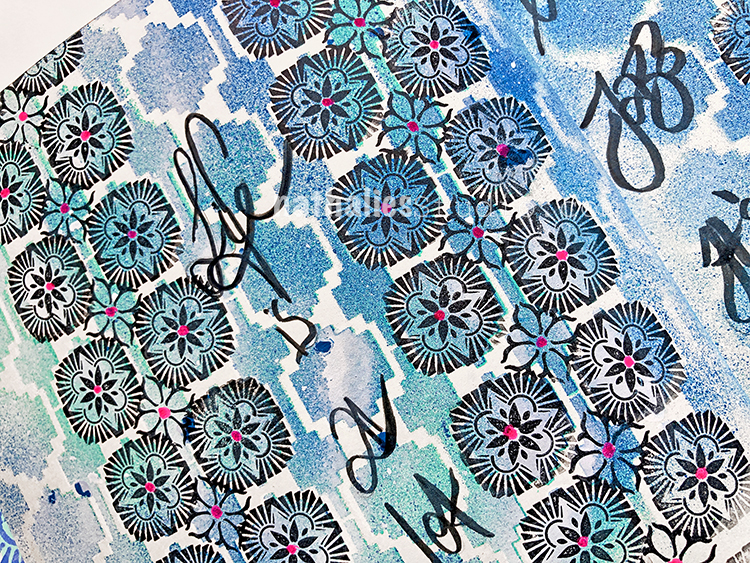
Besides looking for which paint media work together with a stencil , I love to go on a hunt and see which of my stamps fit with my stencils to get to a total new pattern. Here is combined my Mesa Verde Stencil with one of my Floral Tile rubber stamps and Fan-Fare Rubber stamps.
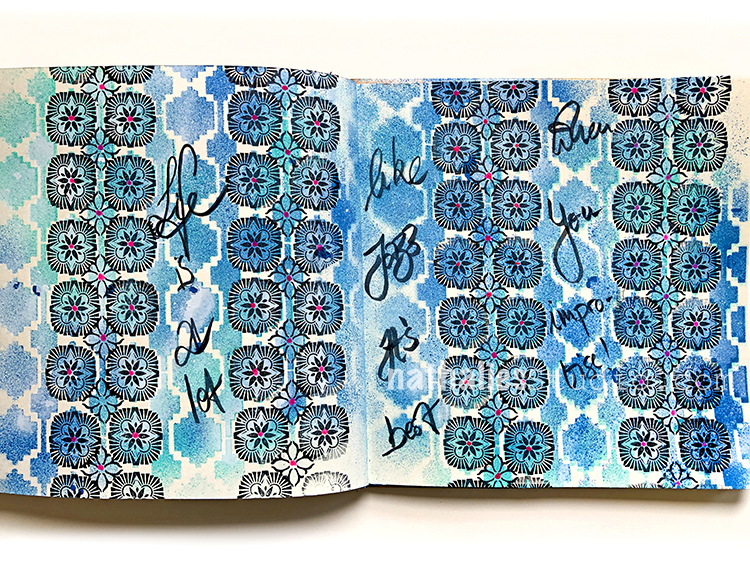
I love how this came together. As for paint media, I used Spray paint over the stencil, an inkpad for the stamping and an acrylic ink marker for the little dots.
Can’t wait to see how you interpret the theme Jam Session.
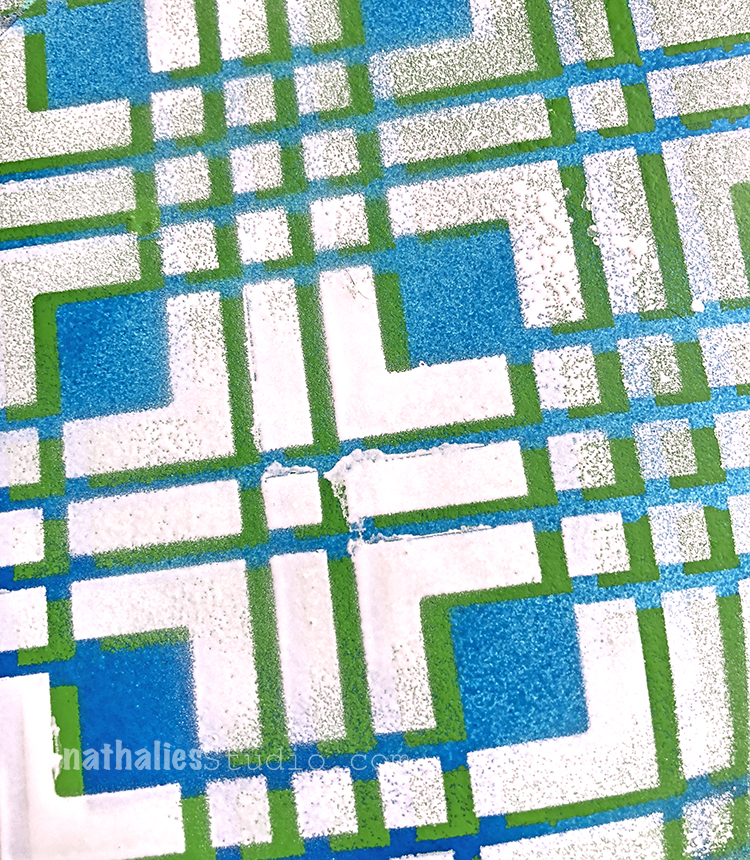
Day 9 – Reverse
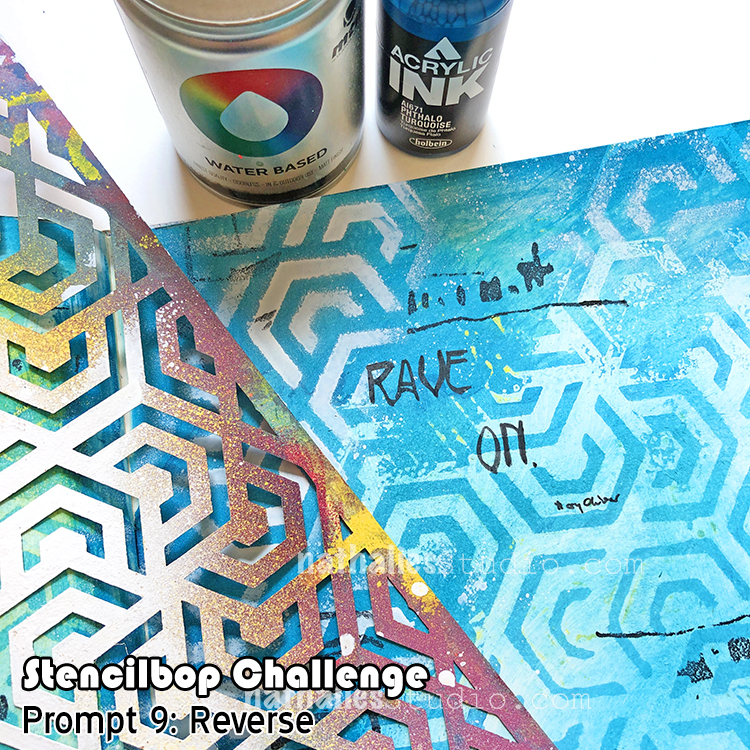
I love using the reverse of the stencil – meaning the opposite of what the stencil usually shows when applying paint media over it. Sometimes that can be archived by stenciling and then taking the stencil that still has some paint on top and printing with it.
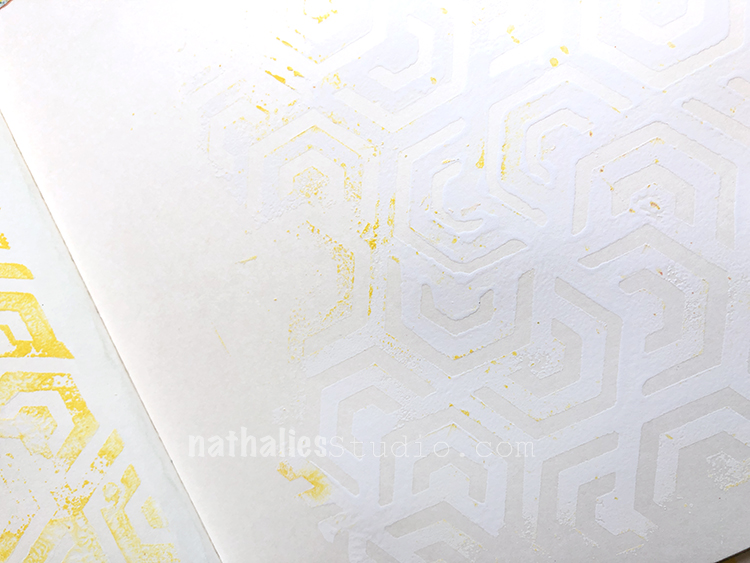
For this spread I sprayed over my Flower Maze stencil on a different piece of substrate and then flipped the stencil over and printed onto my art journal. I love using white as well as other colors.
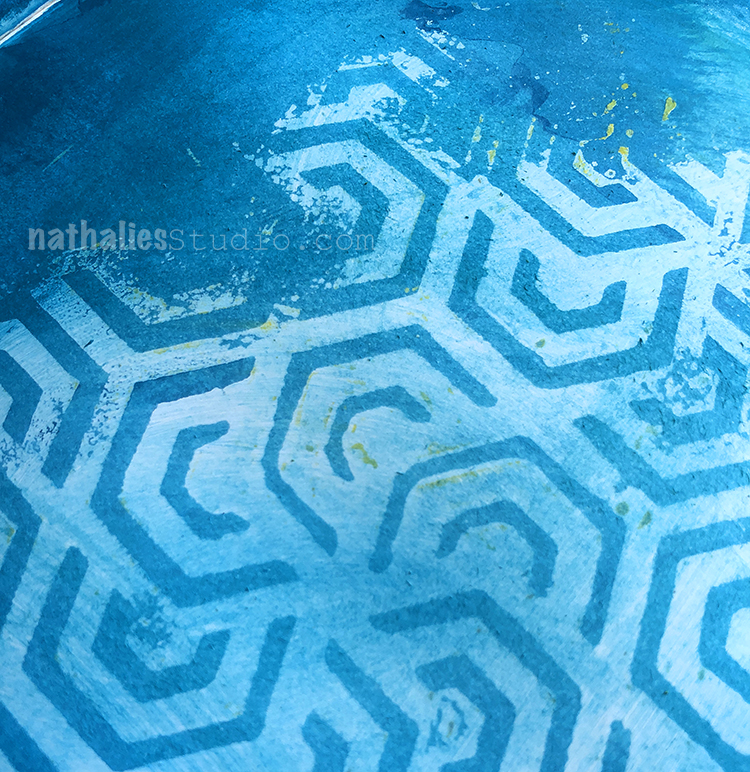
The reason I love to use spray paint is that the pattern is applied in a nice thick “plasticky” way, which actually is perfect when you apply thin paint or ink on top. The spray painted pattern will resist the ink longer and can be wiped off the pattern making for a nice and really cool effect.
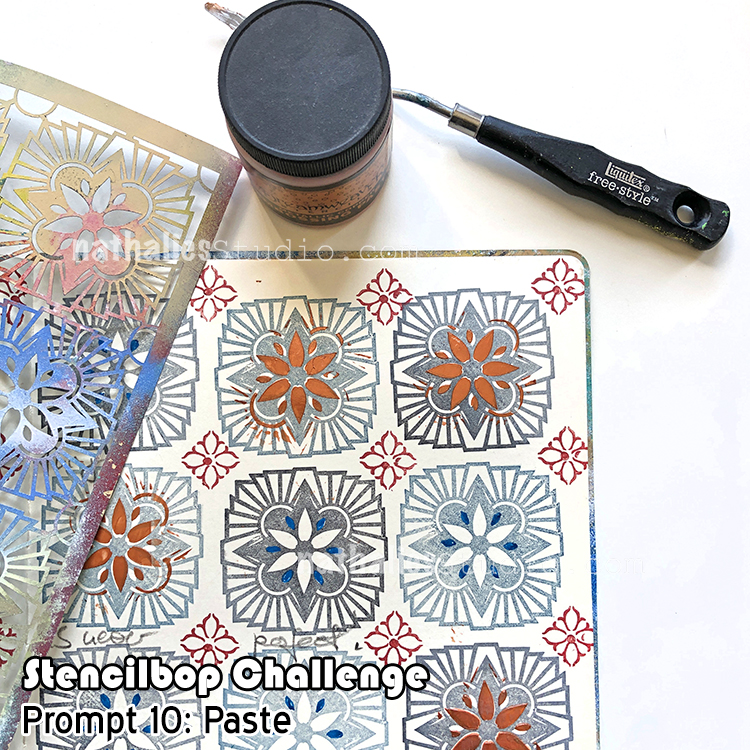
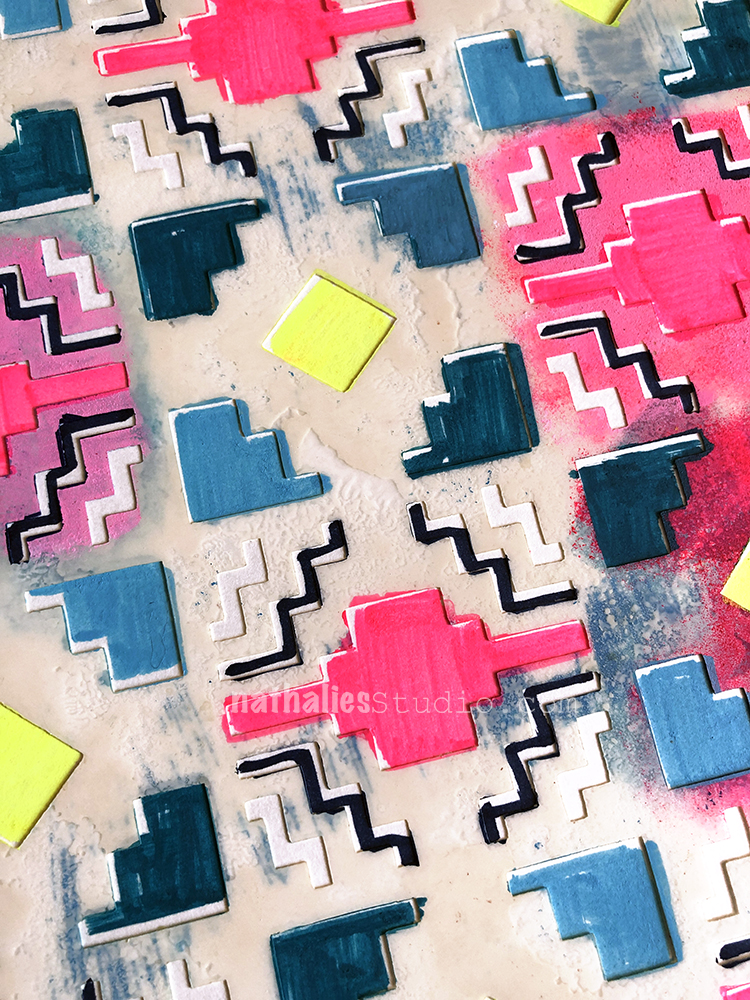
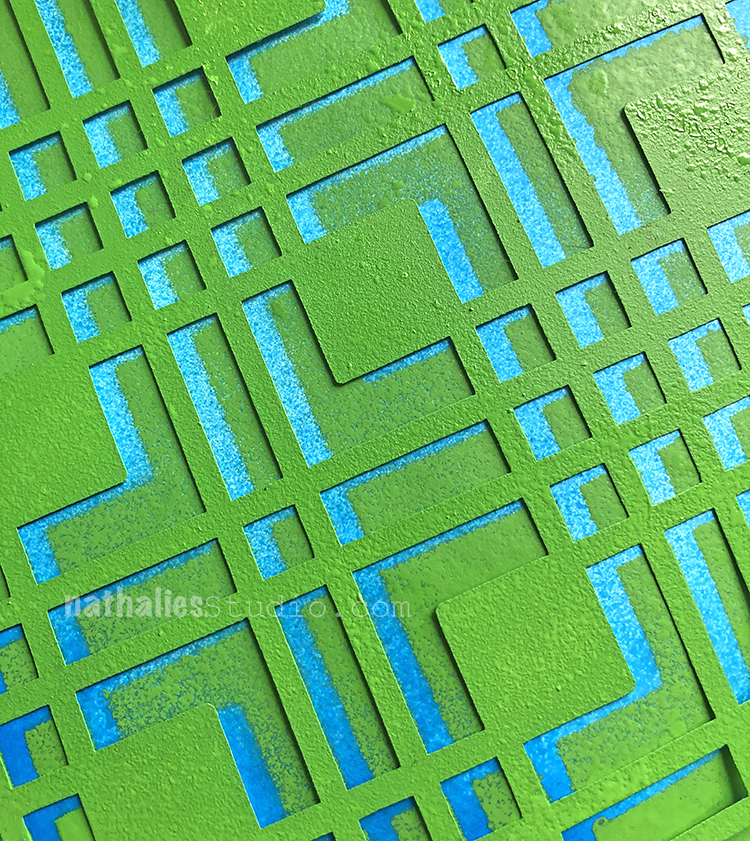
Day 10 – Paste
There is something utterly satisfying about spreading modeling paste or embossing paste through a stencil and create a nice small crisp raised pattern on top of a flat surface ….or it might be that I am just weird. But try it yourself ;)
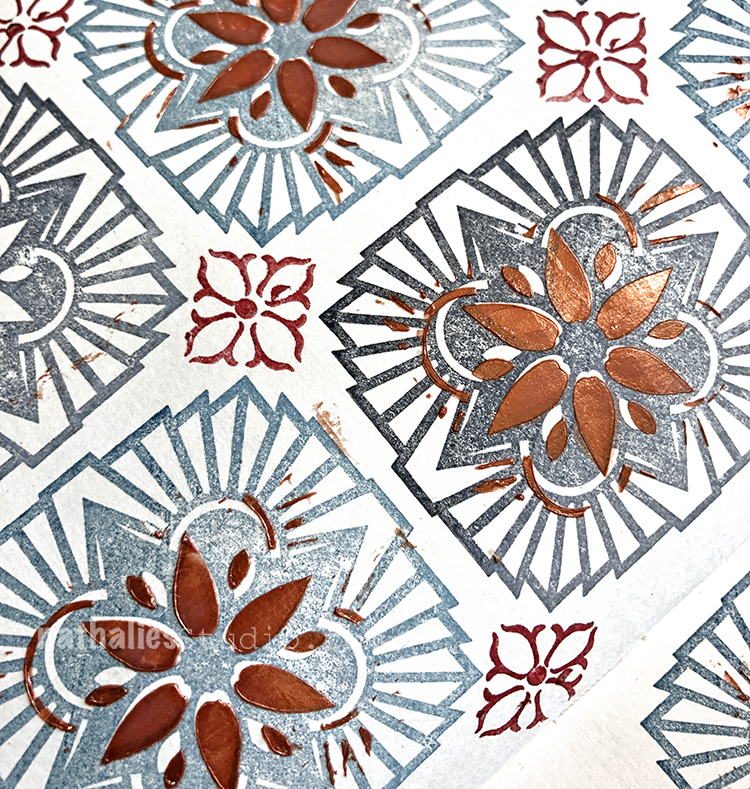
I used my Hamilton stencil on top of my Hamilton stamp – the middle part is almost identical in size. I found some metallic embossing paste in my stash and applied it with a palette knife over the middle.
I love how this turned out. A little bit of sparkle and a little bit of texture- nom!
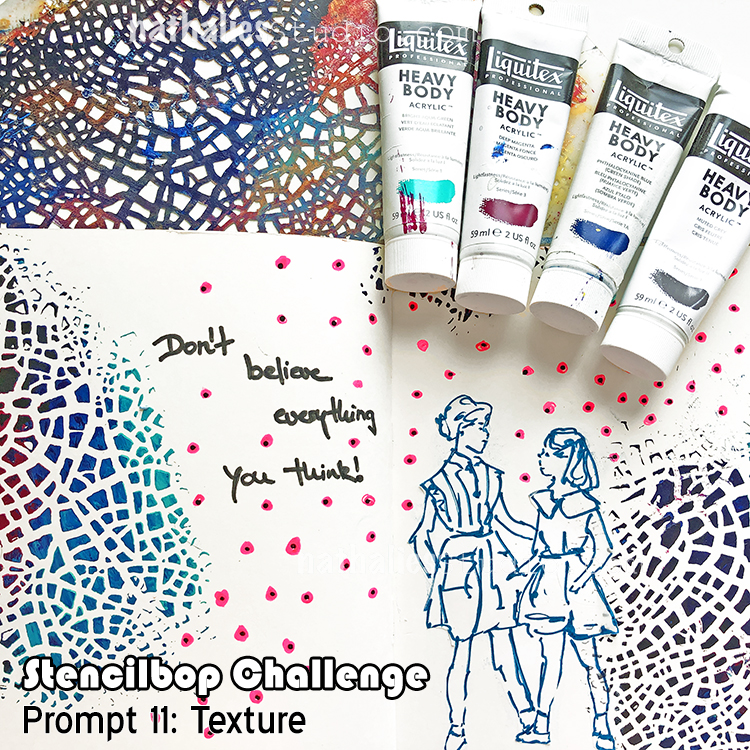
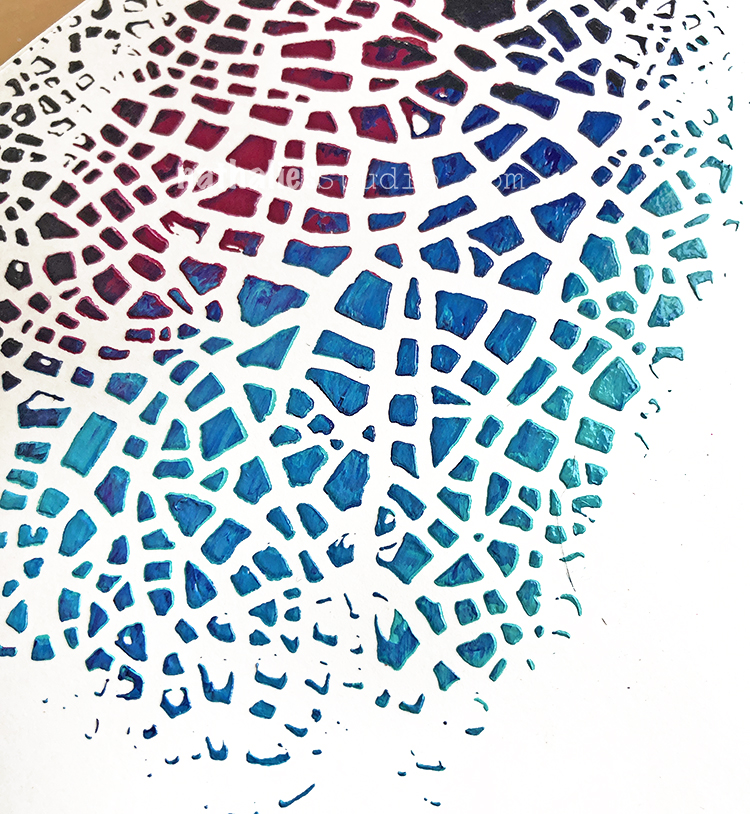
Day 11 – Texture
Texture is – besides Color – one of my favorite elements to use in my artwork and it is no coincidence that one of my very first stencils I designed in 2013 was my Crackle Stencil.
I loved adding crackle texture to my artwork but boy did I dislike how long the different applications with mediums took – or how messy it was with some of the “old school” ways like Vaseline and acrylic paint. And so I was dreaming of a Crackle stencil – there was none out there and I am so glad Stencil Girl liked my idea and design.
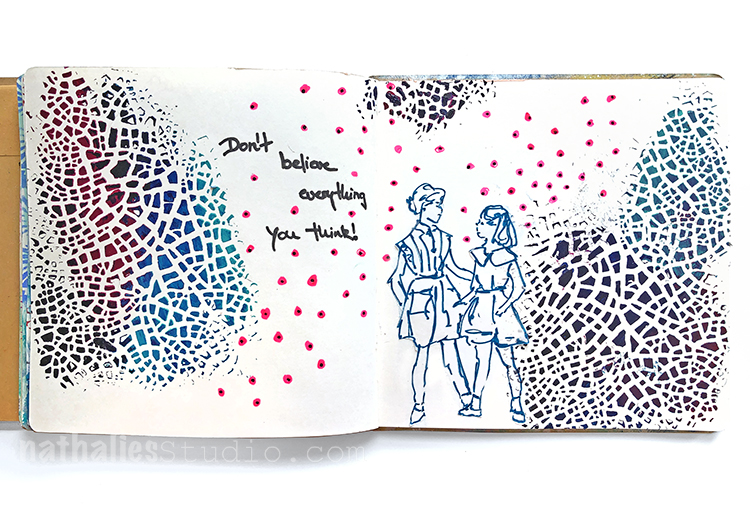
To this day it is one of my favorite and apparently one of your favorite stencils of mine as well. It has found a home more than any other stencils of mine. One of my favorite ways to this day to use the Crackle stencils is with heavy bodied acrylic paint. Simply spread over the stencil with a palette knife- let dry and there crackle bliss!
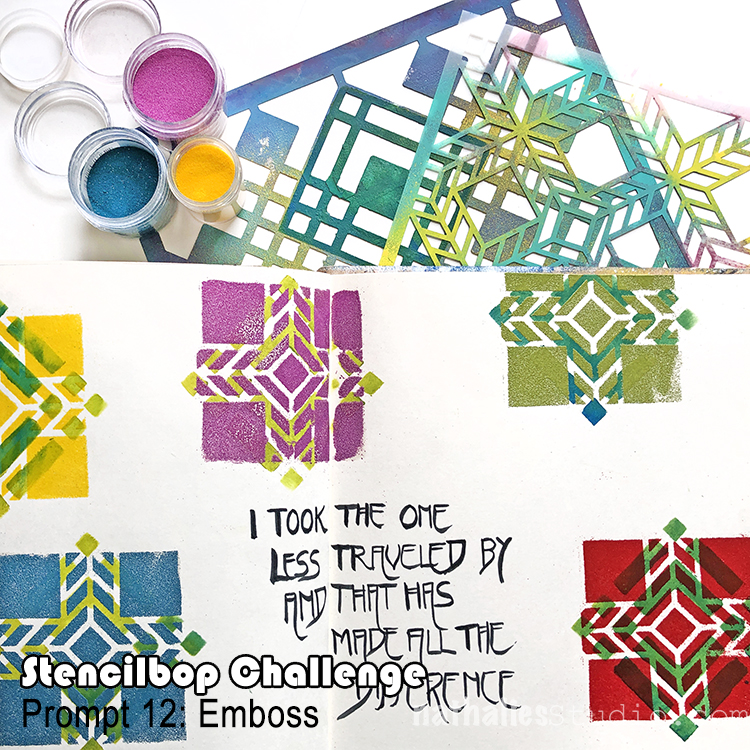
Day 12 – Emboss!
Heat embossing has always been a way to add texture to my mixed media and art journaling – seeing the embossing powder turn into a glossy plastic haptic surface is pretty fun!
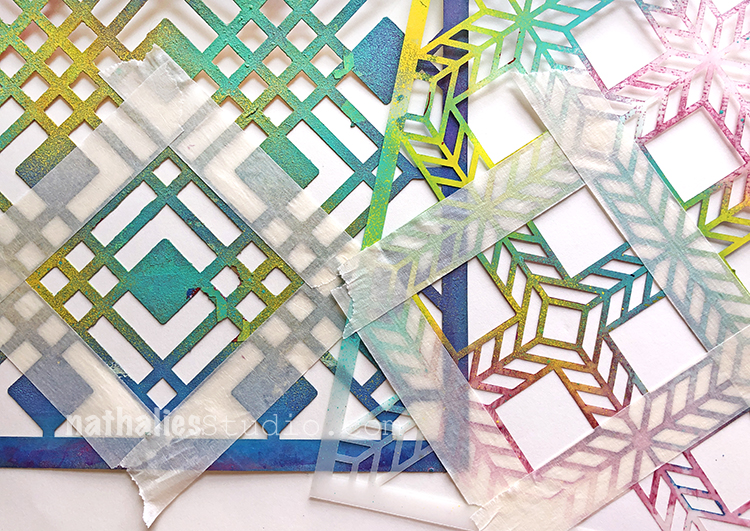
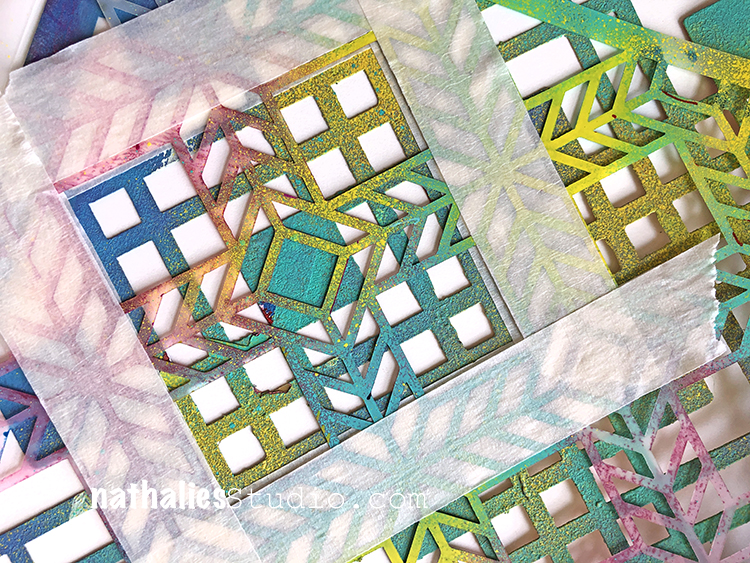
For this spread I used my Chicago and my Santiago Stencil and defined a big square by taping the edges of the design with masking tape.
I used acrylic paint through the square off part of my Chicago stencil. Then I layered the squared off area of the Santiago stencil on top and applied embossing ink through the opening. I sprinkled embossing powder on top- used the heat gun and voila.
Fun to try out different color combinations!
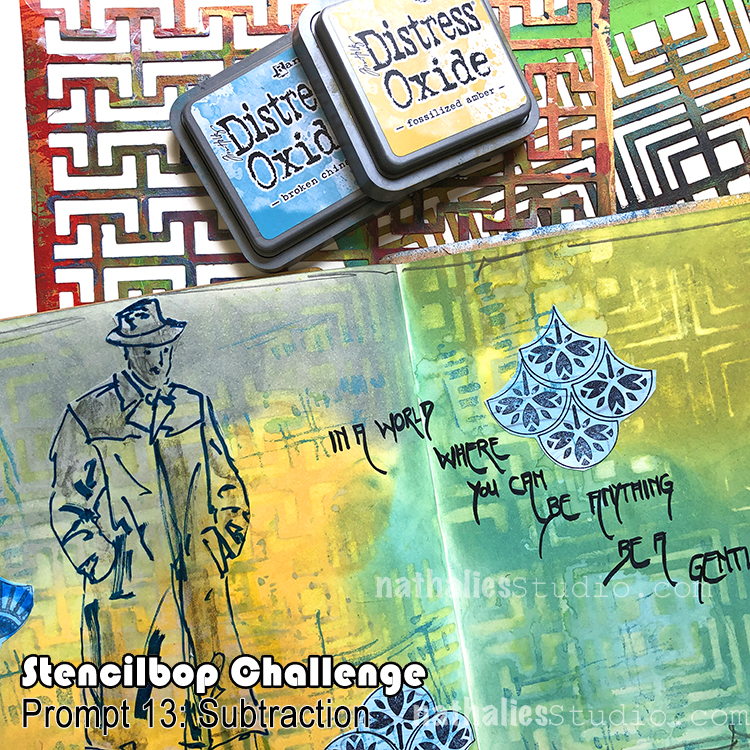
Day 13 – Subtraction
Usually paint gets applied through a stencil to create a pattern but you can also take paint off through a stencil to create a pattern.
When you do so with acrylic paint you usually layer the stencil on top of still wet acrylic paint and then take the paint off through the stencil. Here I applied some Distress Oxide inks on top of the paper.

Since those can be reactivated with water, I used a slightly moist rag and rubbed the ink off through the Manhattan and Hamburg stencils.
The result is subtle but so effective especially when you then also add some areas of the usual way of stenciling to create a reverse/non reverse effect.
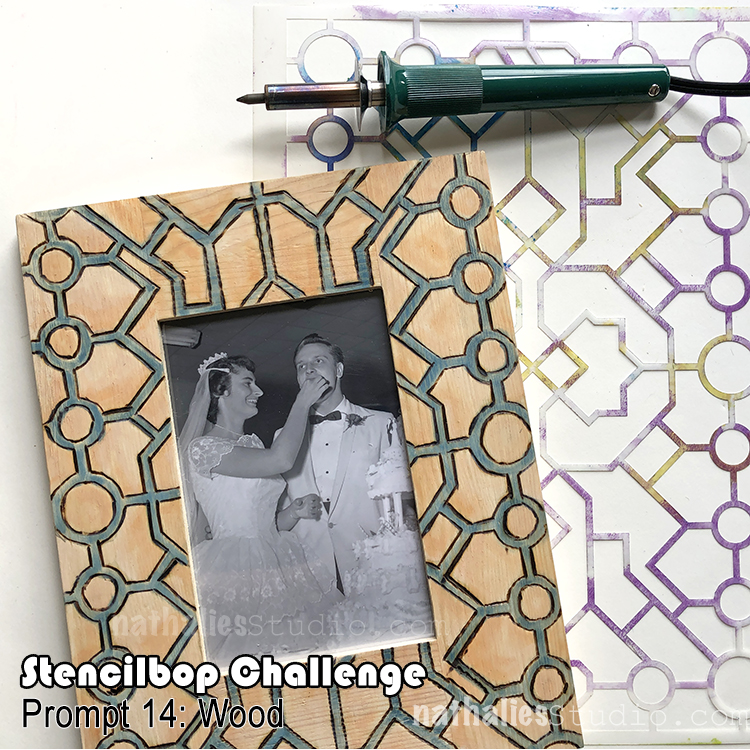
Day 14 – Wood
Leaving the art journal for this one. My parents in law are celebrating their wedding anniversary next week and I thought it would be fun to create a fun pattern on a wooden frame using my Exchange Place Stencil.

I love the stencil and it is perfect with it’s bigger opening for this project. I traced the pattern through the stencil with a pencil onto the frame.
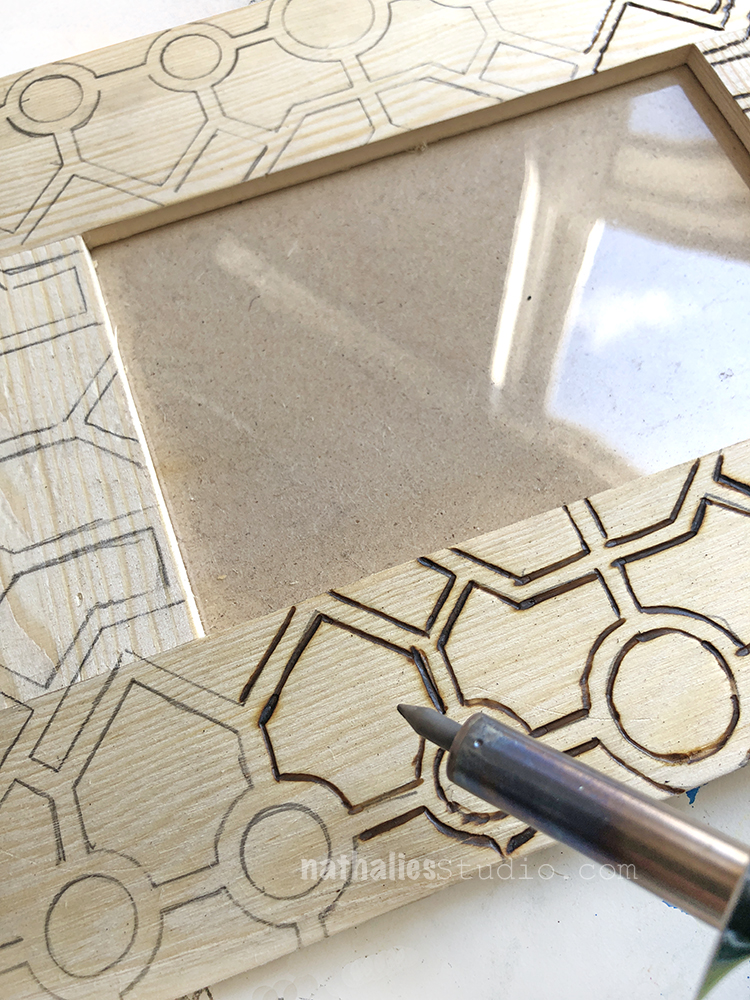
Then I simply followed the line with my wood burning tool.
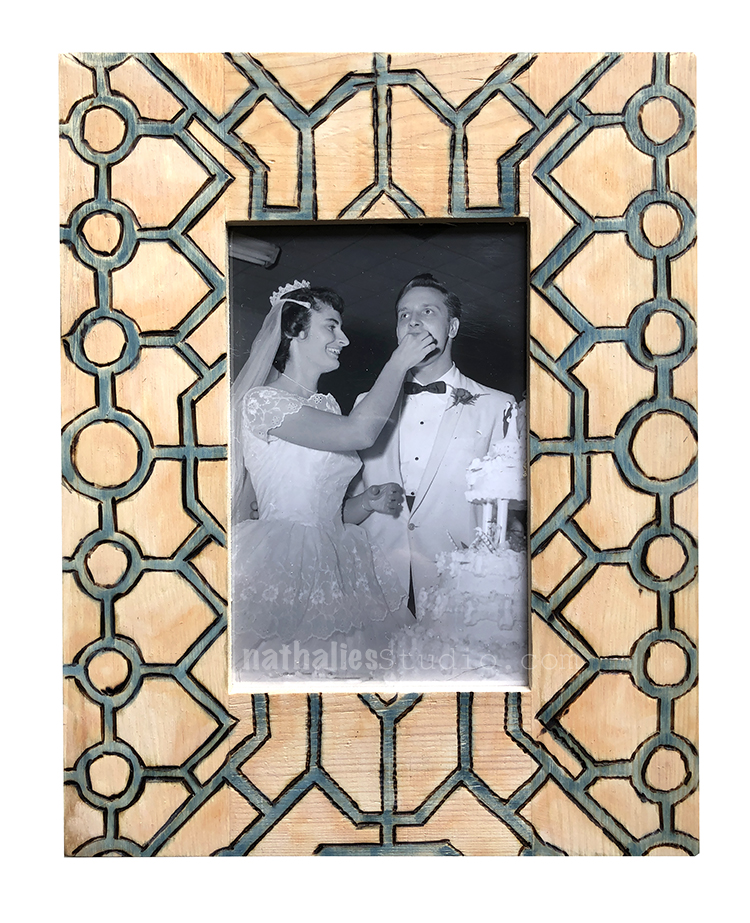
I used some ink pads to add a little bit of color to the pattern but to not loose the wood effect.
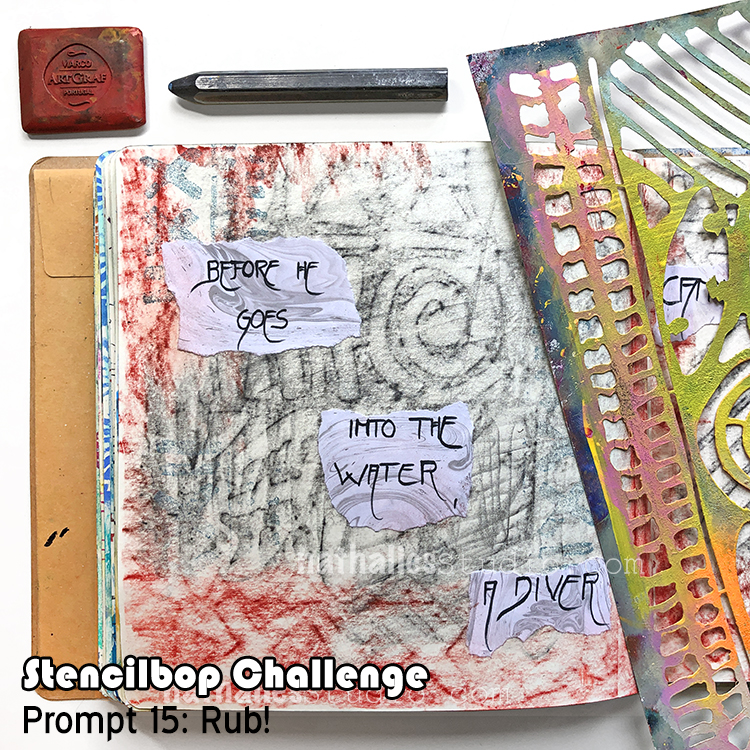
Day 15 – Rub!
Max Ernst used plants or texture of wood planks and other items in the house to create some wonderful artwork and the technique is called Frottage.
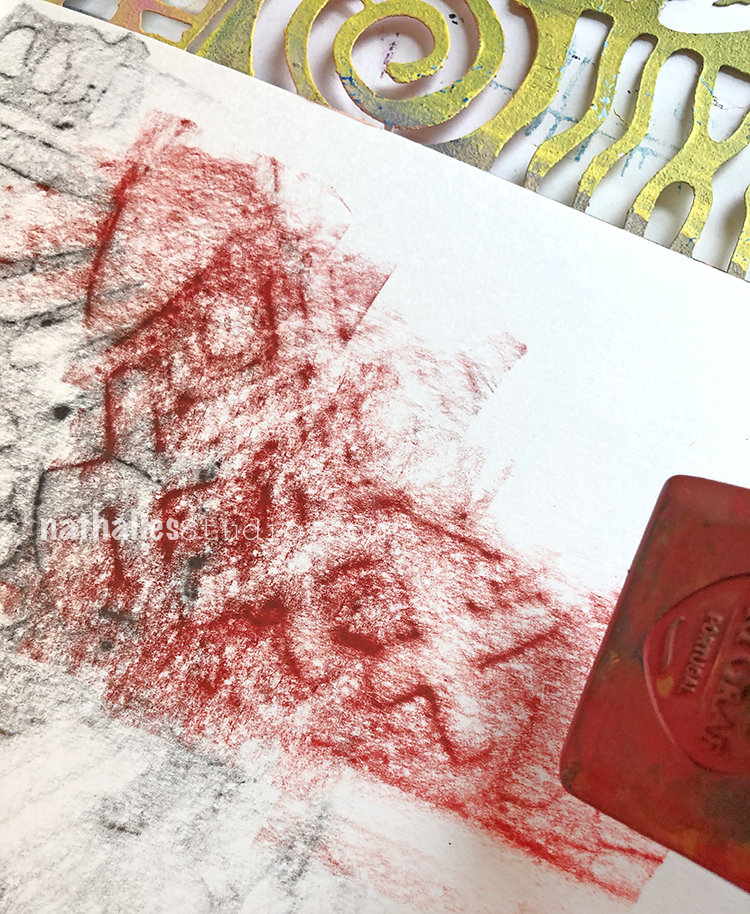
For this art journal spread I layed my Batik Stencil underneath the art journal page and with the flat side of a graphite pencil and tailor chalk shaped graphite block I rubbed over the paper to reveal the texture of the pencil.
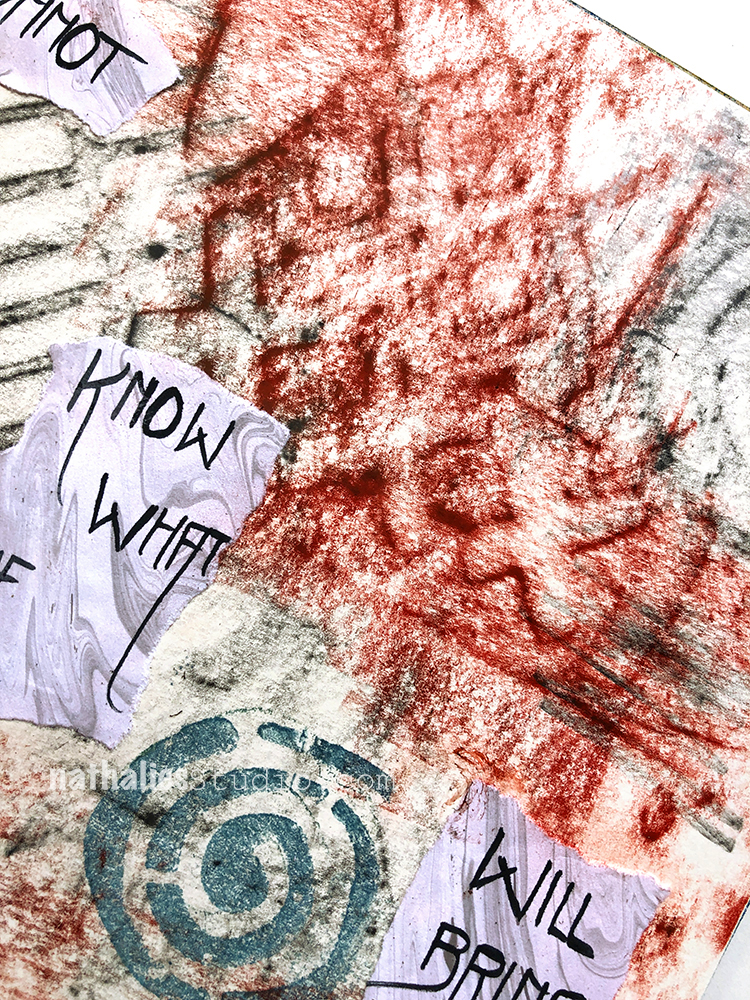
I moved the stencil around to repeat certain elements of the stencil at specific areas of the journal spread.
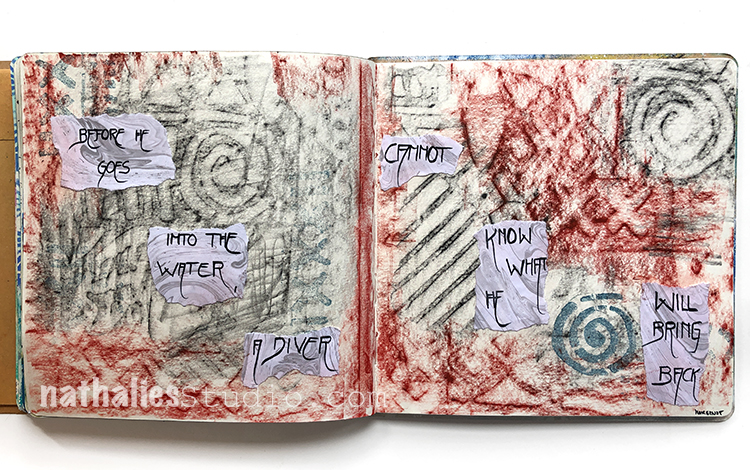
To repeat some of the pattern I stamped on top with my Batik foam stamps.
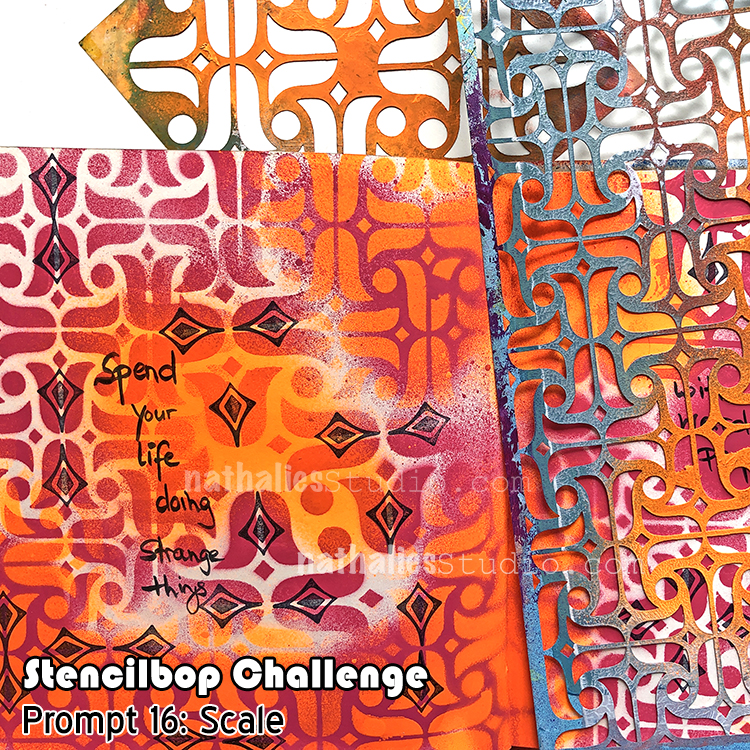
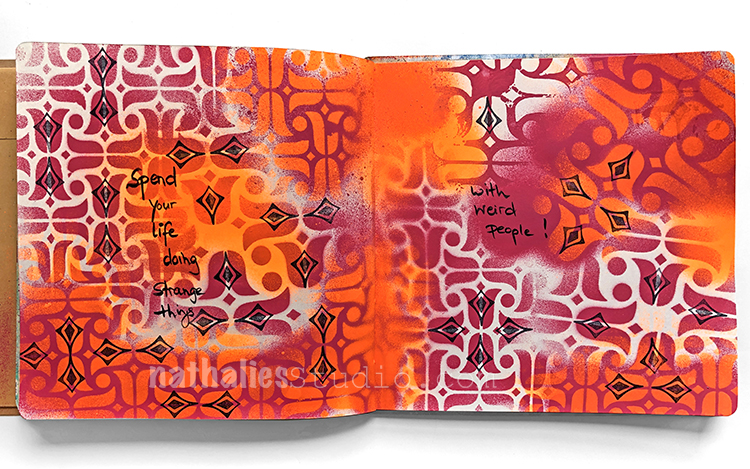
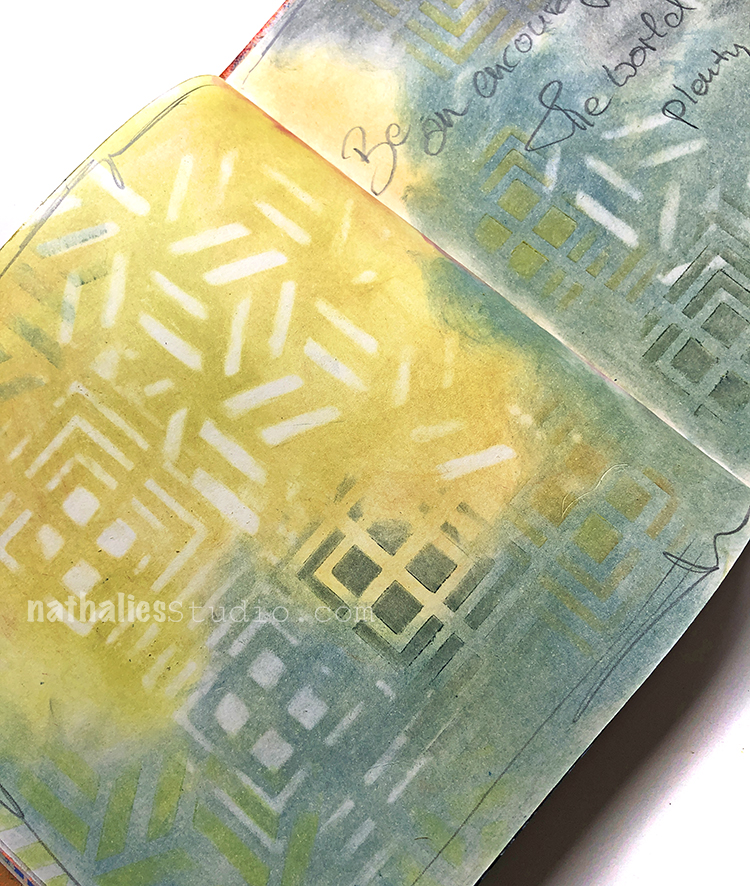
Day 16 – Scale
Some of my stencils and stamps that are similar in pattern but different in size can be used together as repetition and scale are great ways to create beautiful and cohesive backgrounds.
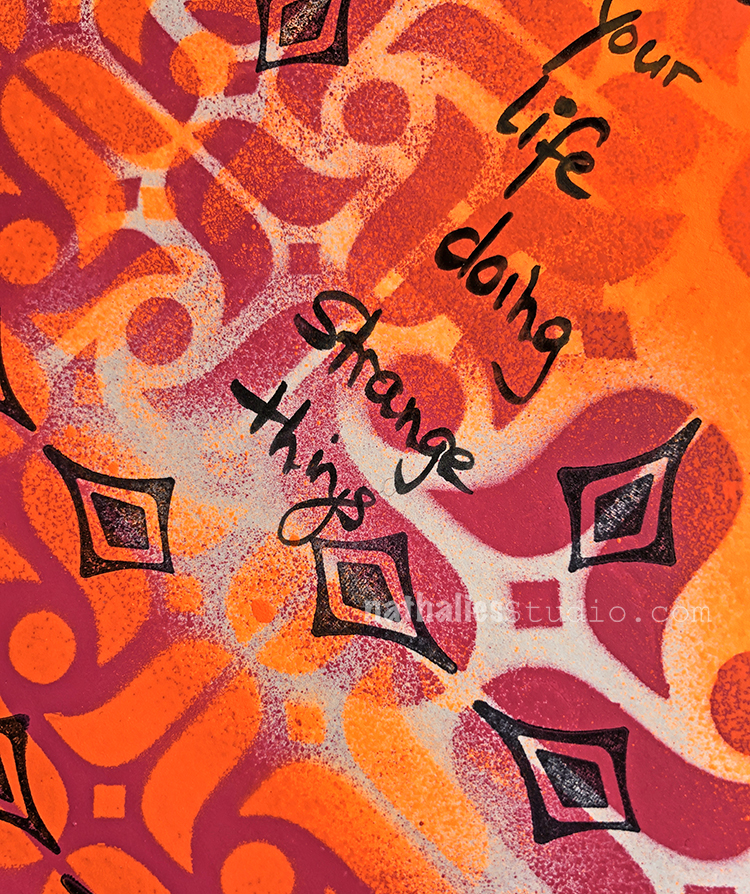
For this art journal spread I used my Amsterdam 9×12 and my Amsterdam 6×6 Stencil. While the design element of the tulips are the same – the layout and size of them are different in each stencil making for a great way to use them together and layer them up like I did on this art journal spread with acrylic spray paint.
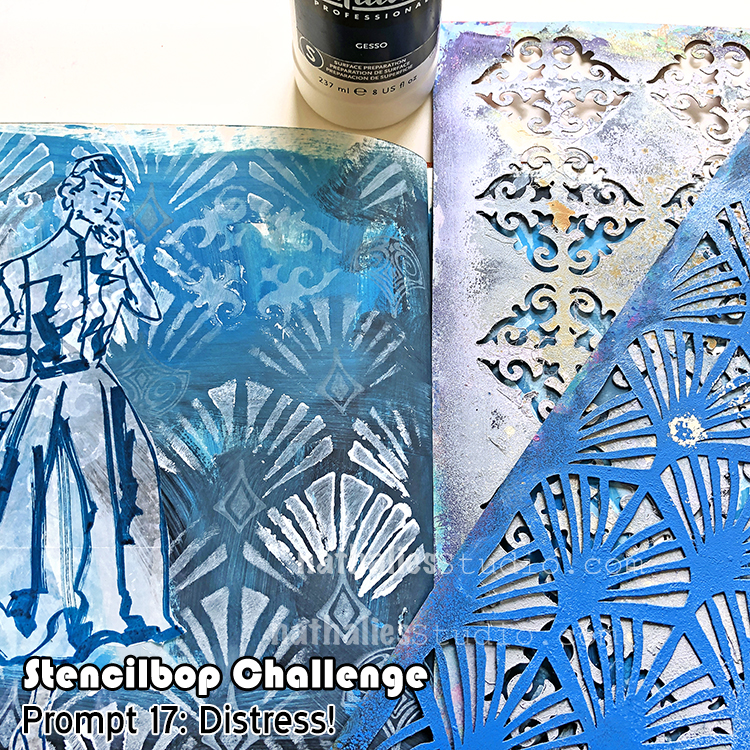
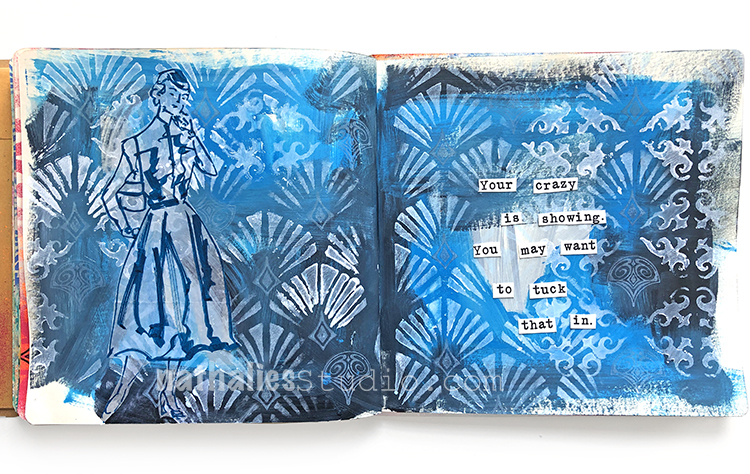
Day 17 – Distress!
I love the soft and chalky- kind of shabby chic ;) look of white gesso.
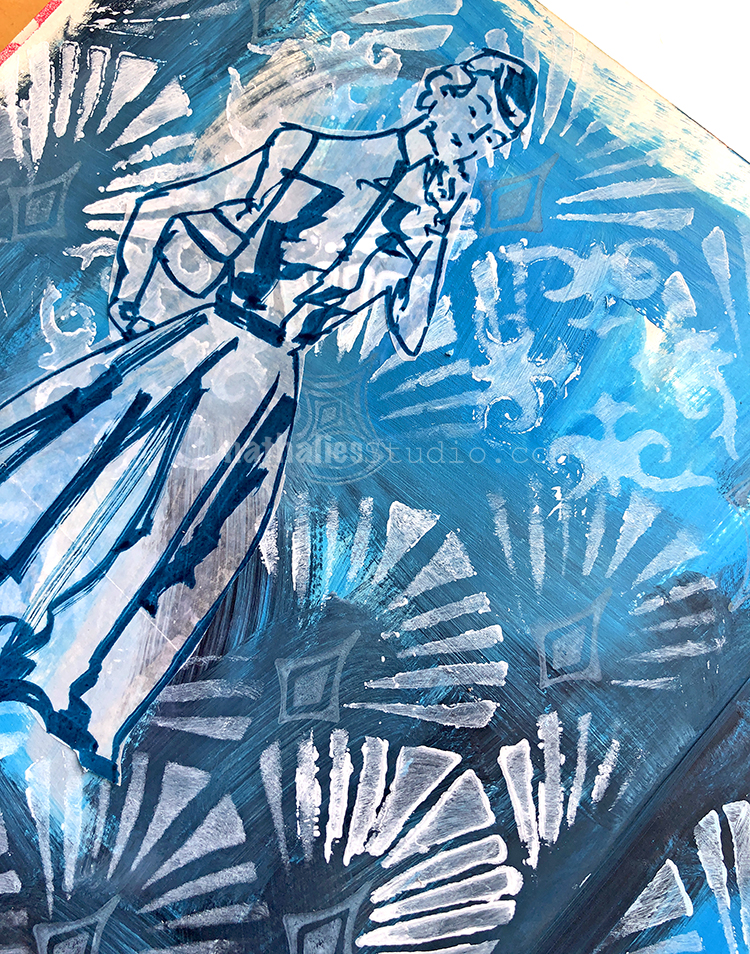
So I used white gesso on a sponge to dab through my Art Deco and Ornament Wallpaper Stencils. I also used some of my rubber stamps with white ink to add to the fan of the Art Deco Stencil.
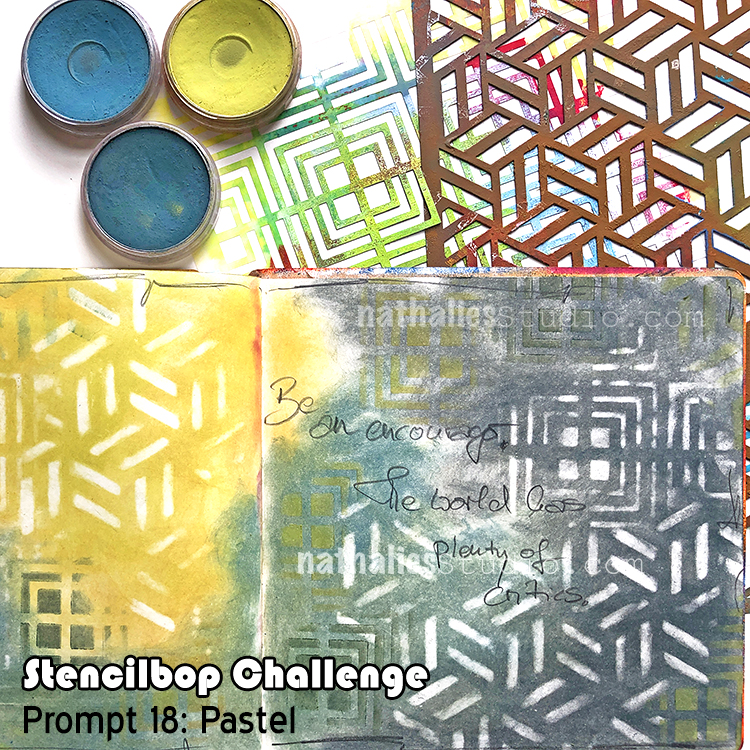
Day 18 – Pastel
I love pastels – especially pan pastels and they are perfect to use with stencils.
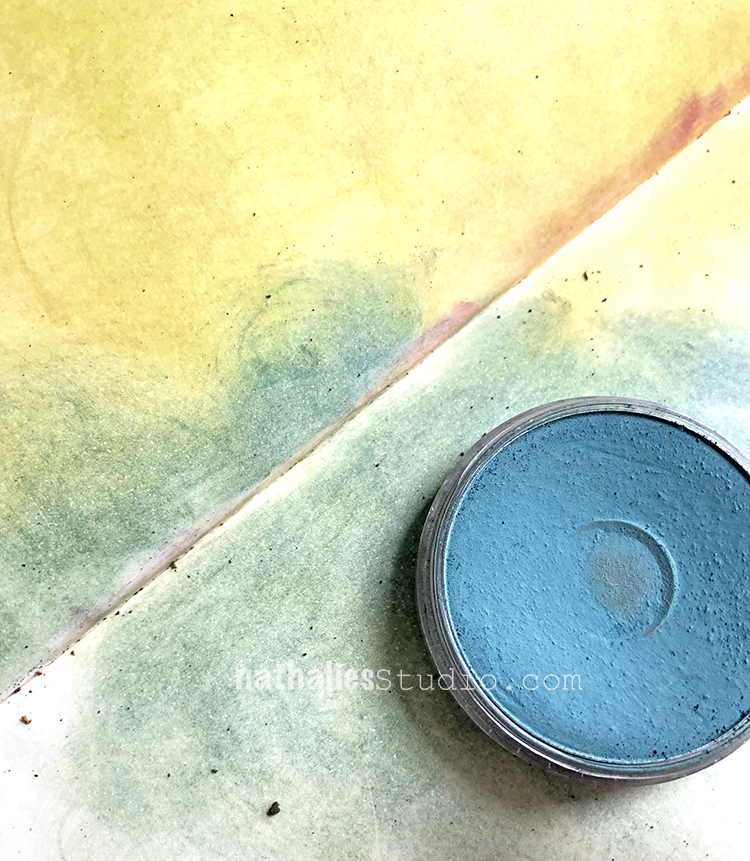
For this art journal spread I first applied a layer of different pan pastels to the background.
Then I used my Manhattan and my Kassel Stencil on top of the background and alternated between erasing the pan pastel through the stencil and apply a different color of pan pastel through the stencil.

Pan Pastels are another perfect medium to play with Subtraction and Addition :) …see math is a good skill even for an artist LOL
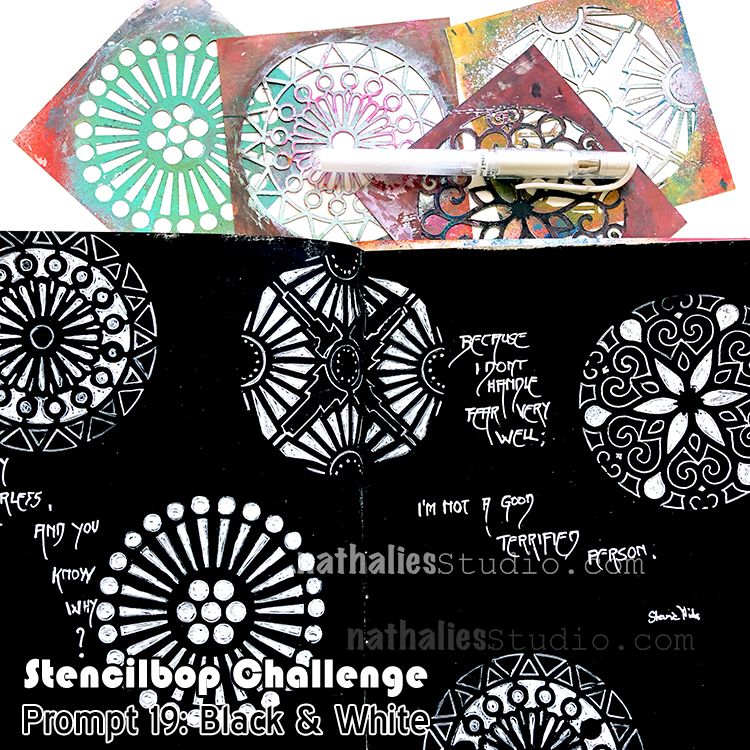
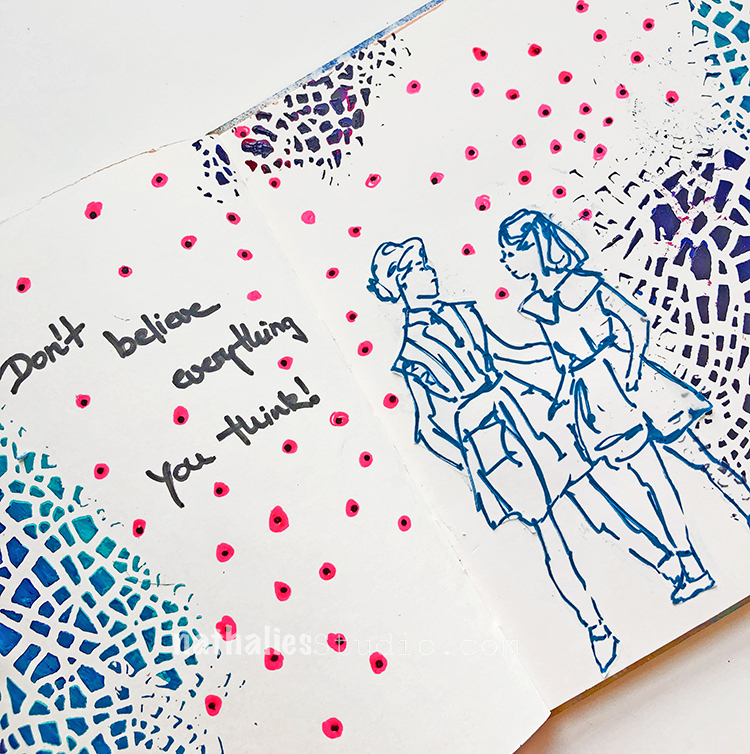
Day 19 – Black & White
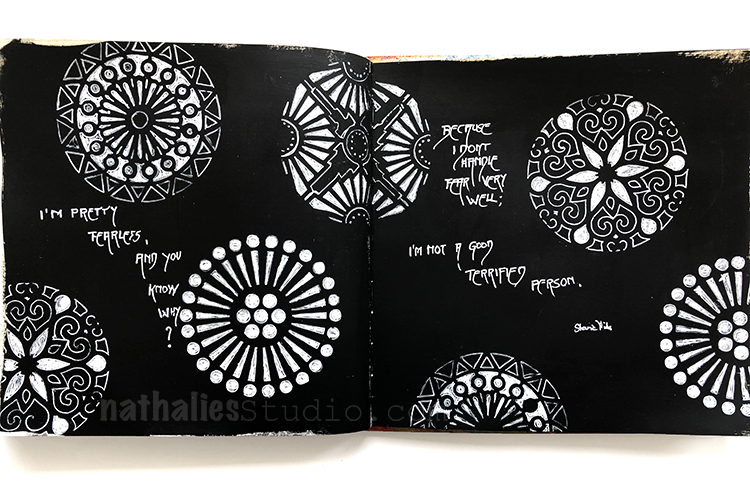
Always classy – I love painting the background with black gesso and then using a white signo pen through my stencils. Best way for anger management too ;) Totally calming and with a happy making result.
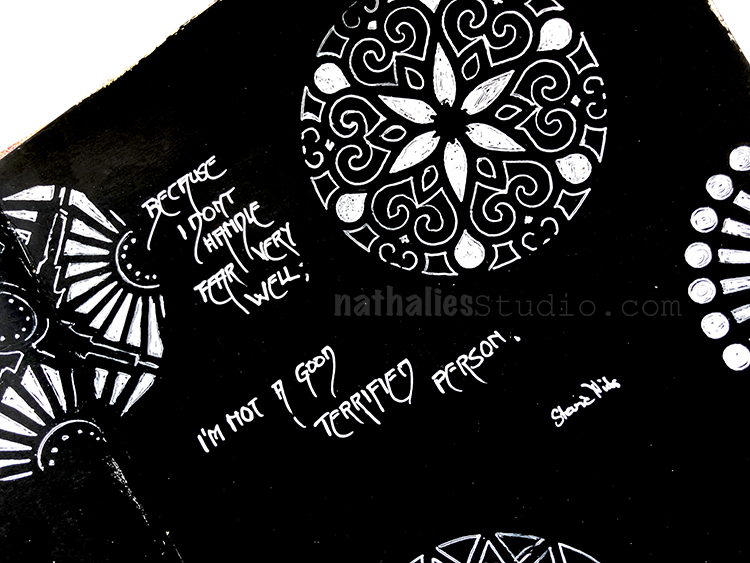
I used a couple of my round small 4×4 stencils here. Cannot wait to see your black & white takes.
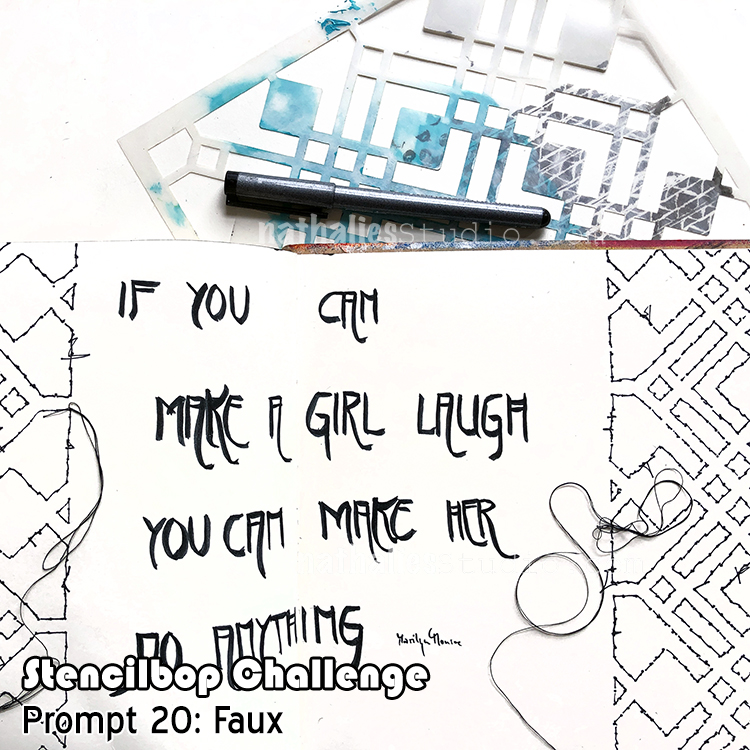
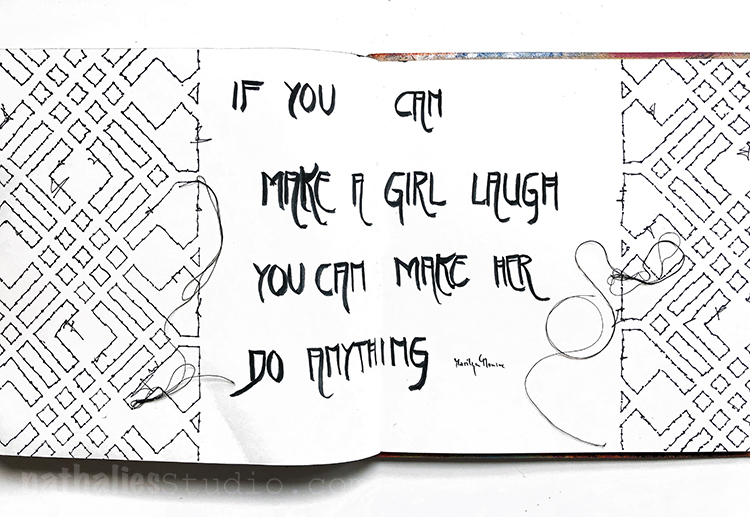
Day 20 – Faux
Stitching on paper was always something I loved to do but I haven’t used my sewing machine in ages- and to be honest part of it is just the dread of having to set it up and then pack it away again after just a couple minutes of fun.
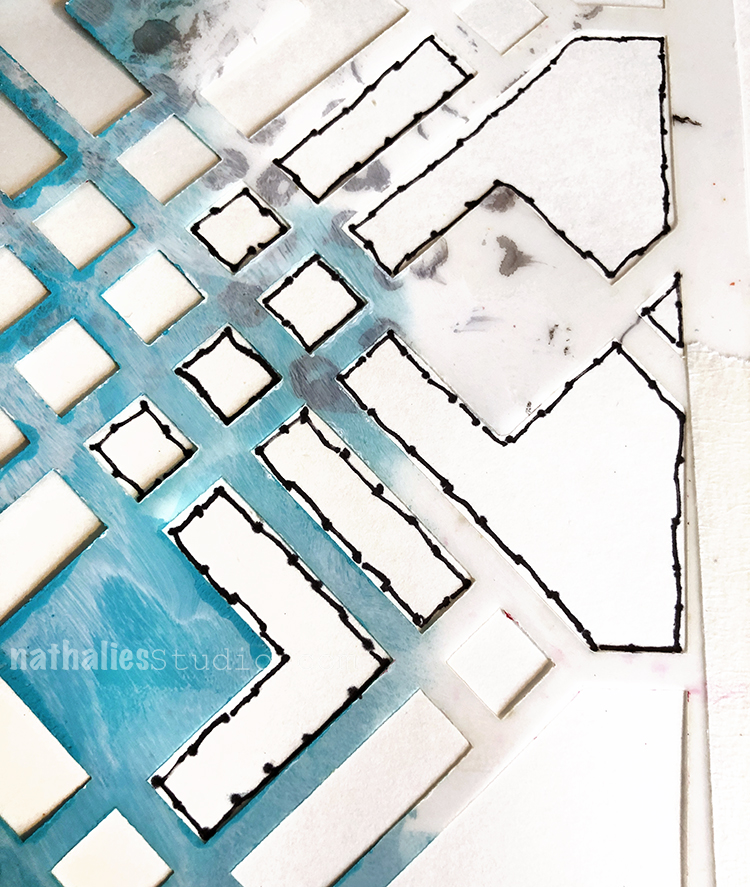
So I thought for this prompt I would do a bit of faux stitching – using my Chicago Stencil as a template. I just created little dots along the stencil and then added some loose lines with the pen from dot to dot.
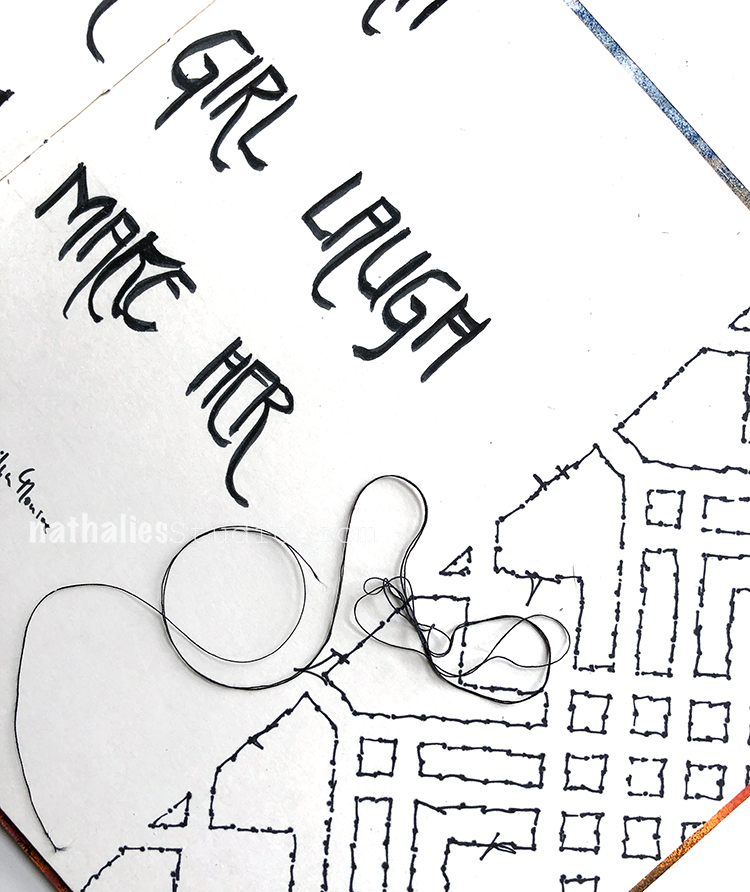
I glued down some actual thread and voila – wouldn’t fool anyone hahahah- but hey it was fun.

Day 21 – Color
Ha that is a good one – right ?
I thought I would just go with some nice bright colors and I used different colored acrylic markers to fill out and add elements to my Santa Fe Stencil.
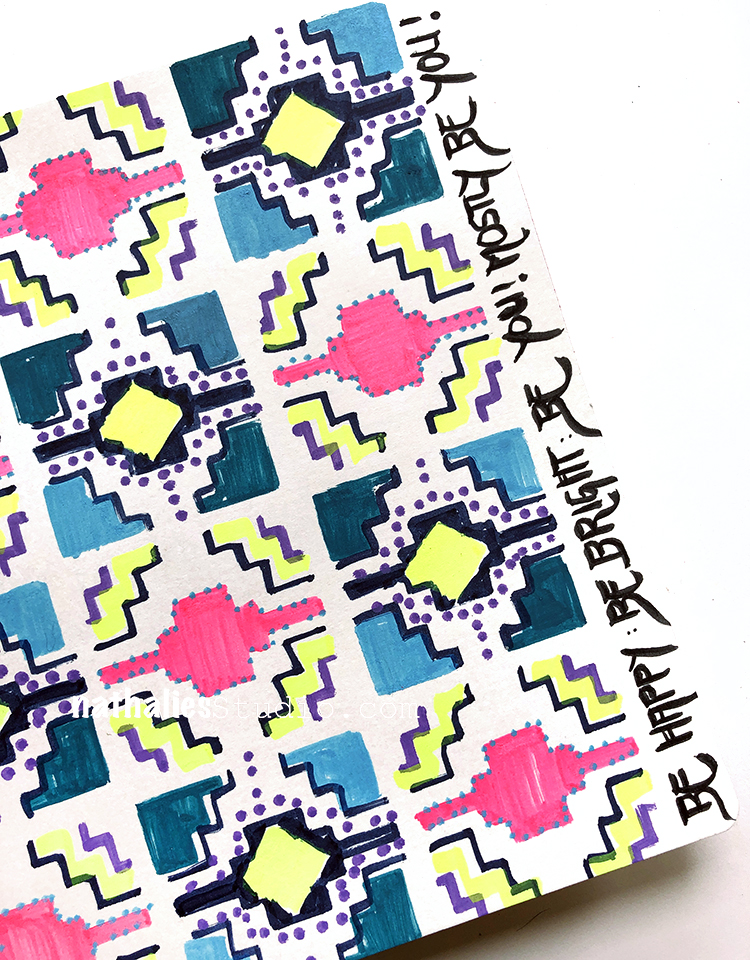
I love how this came out – I def. will use the markers with stencils more. It is such a fun way to add some stenciling to a journal or sketchbook while traveling and they are part of my Art-On-The-Go- Kit anyway.


Day 22 – Fabric
For this one I thought it would be fun to get out of the Art Journal again.
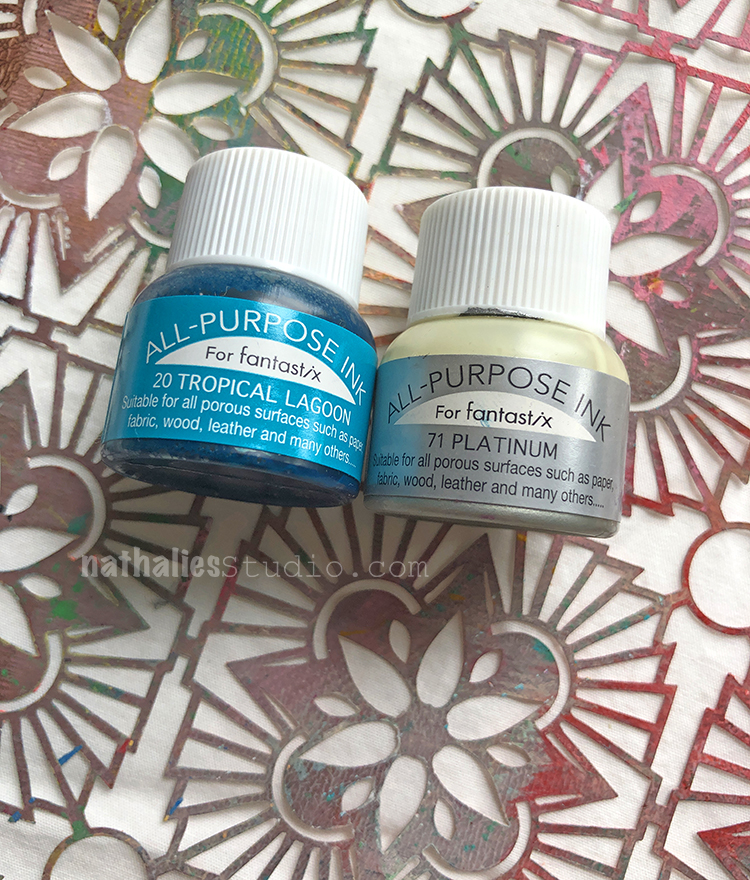
I played with some new fabric ink as well as with my Hamilton Stencil on a tote bag.
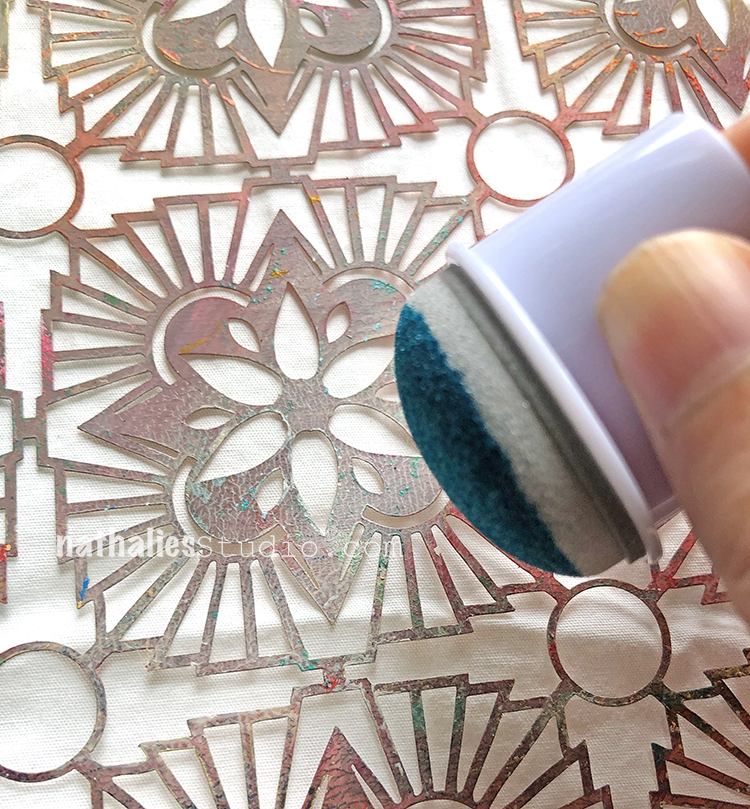
The ink was a little bit hard to control with a sponge as it would spread sometimes quite a bit.
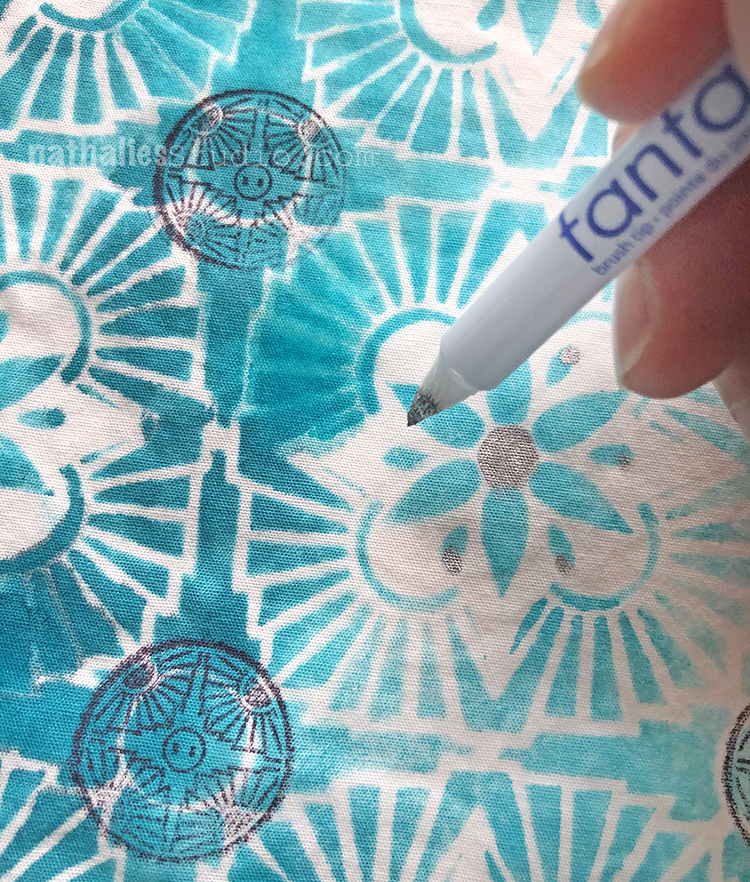
I added to the design with my Circle Jumble Small rubber stamps and some silver ink details.
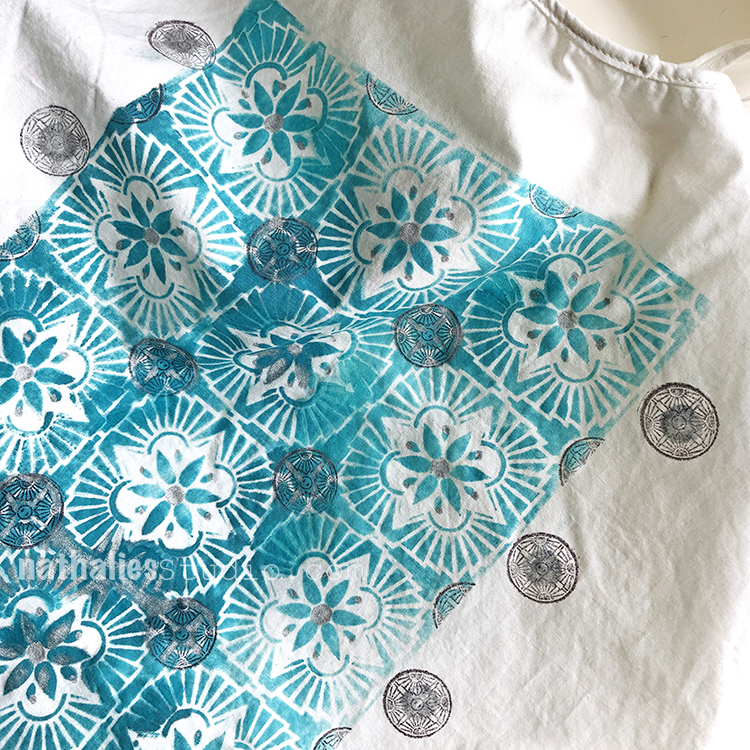
This bag is ready to go shopping :)
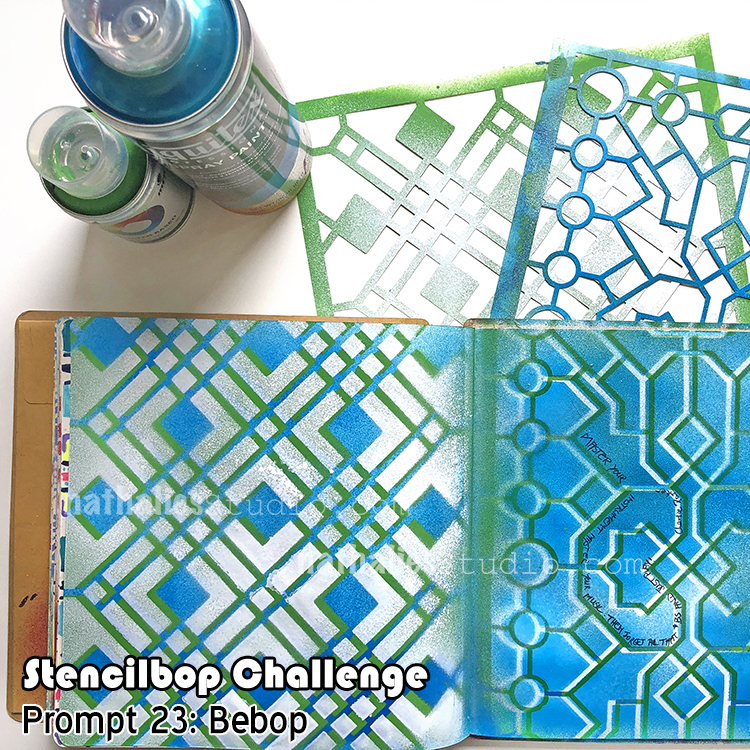
Day 23 – Bebop
Did this one give you a headache? I hope not :)
Dance the Stencilbop with me by applying paint through a stencil like maybe my Chicago stencil here…
… then move it slightly to the left or right and apply a different color.
You can do this with any paint media but by far the most bopping results come with acrylic spray paint –I love the dimension this gives. This one is my Exchange Place stencil.
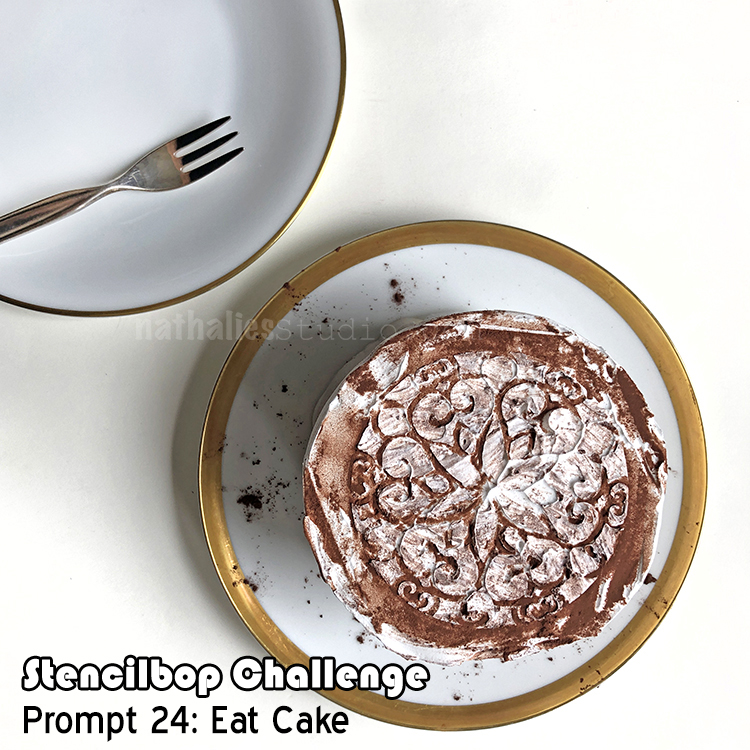
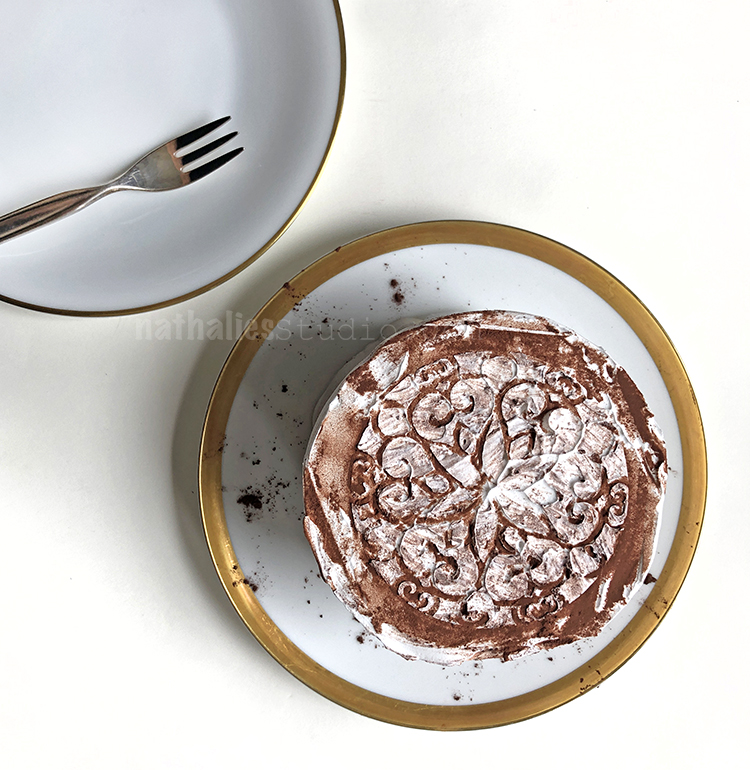
Day 24 – Eat Cake
Oh boy- this one could easily be renamed into “Eat Cake and Keep Calm” See I thought oh gorgeous idea, I am going get a wonderful plain ice cream cake from my favorite local ice cream shop Torico’s here in Jersey City…

…and then use one of my small 4×4 stencils (I used the Park Blvd stencil here) with cacao powder to decorate on top myself.
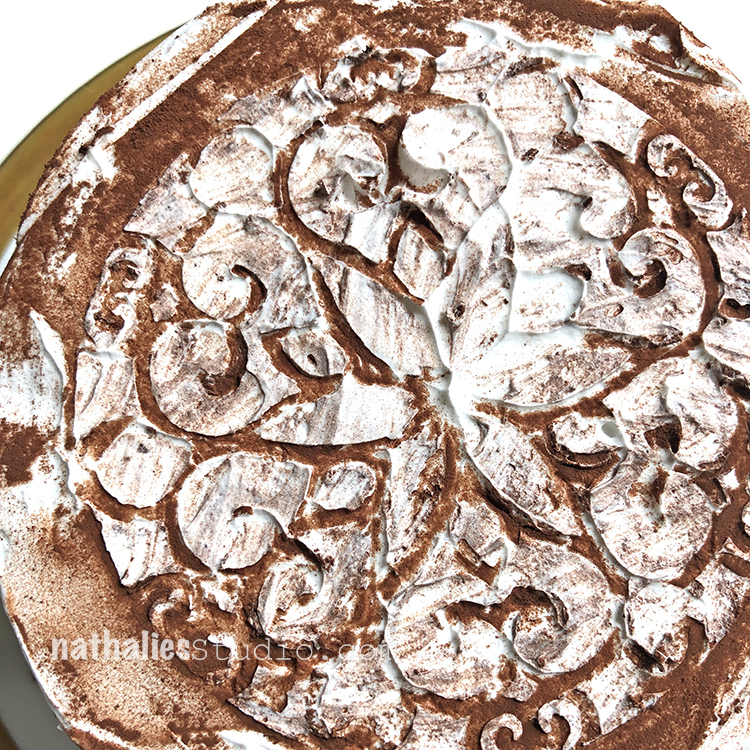
Now – I am not a cake decorator and there is a simple reason for that ….hahahaha- I screwed it up. I looked at it and thought “oh maybe this is a sign and I need another one” –but I decided , nah that would be cheating and in the future I might leave the decorating to the awesome peeps at Torico’s as well . Anyway – LOL- here is the result with a little bit of a scrapping action using my Park Blvd Stencil. Just so you know…no ice cream cake was harmed during this prompt –it was delicious as always and has been devoured soon after ;)
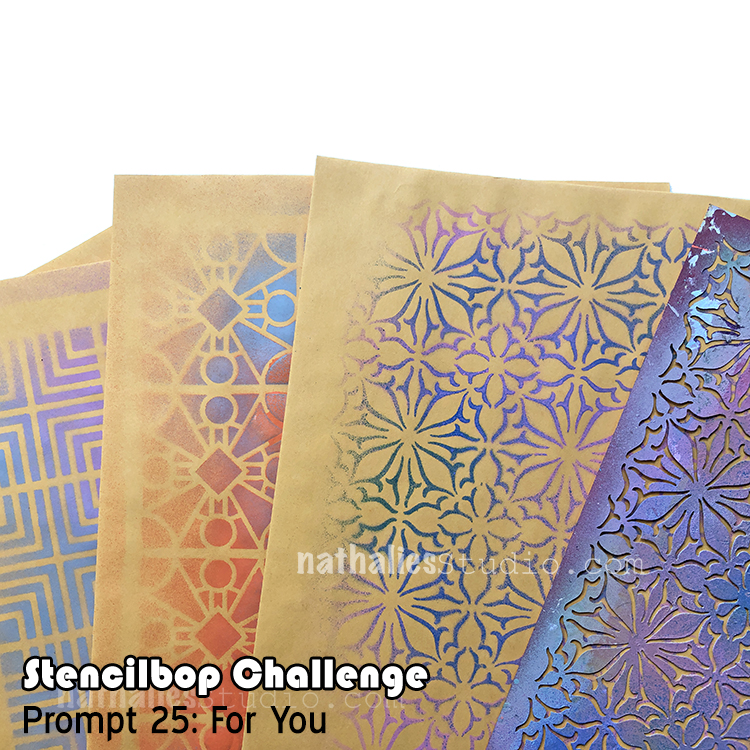
Day 25 – For You
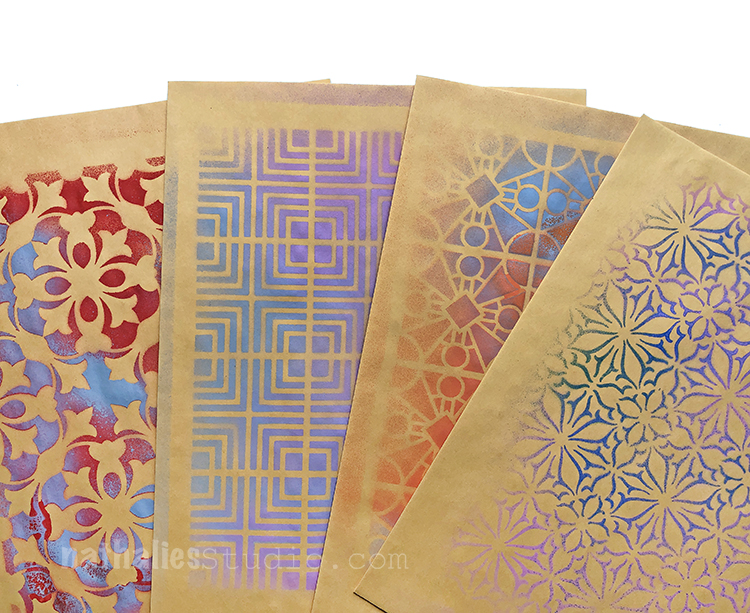
For me stencils are a great way to add a special personal touch to kraft envelopes, which I use for shipping out my products.
Sometimes when I am about to finish up a spray paint session I just grab a couple envelopes and add some color to them.
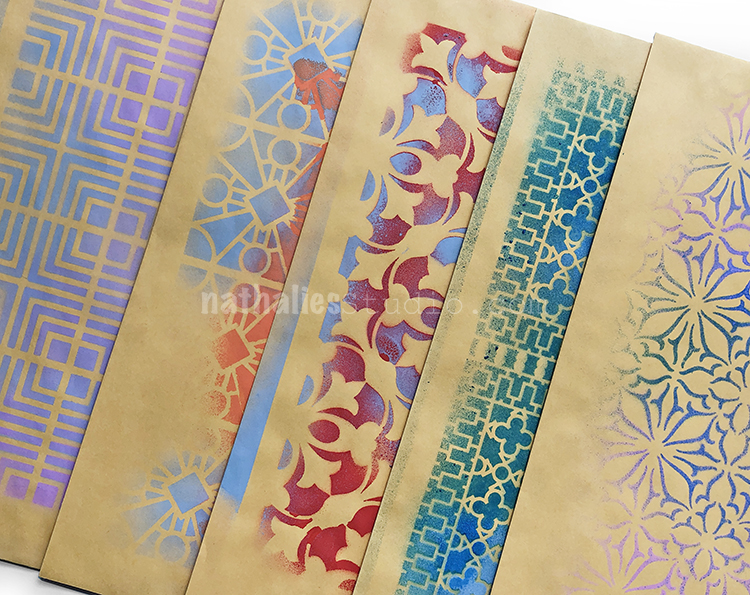
Hope these make someone happy :)
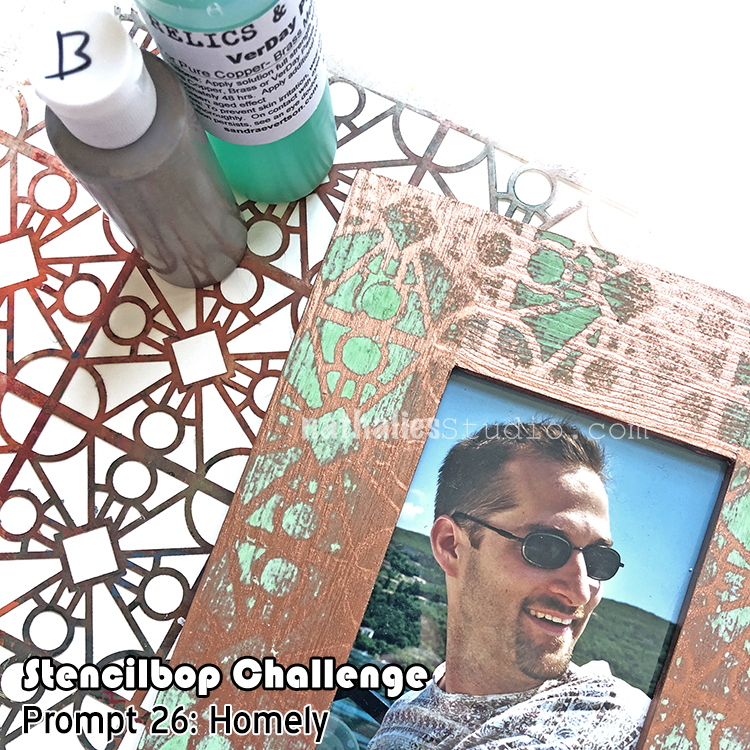
Day 26 – Homely
I just recently purchased an awesome VerDay Metal Paint kit by Relics and Artifacts which let’s you create different patinas on a variety of surfaces.
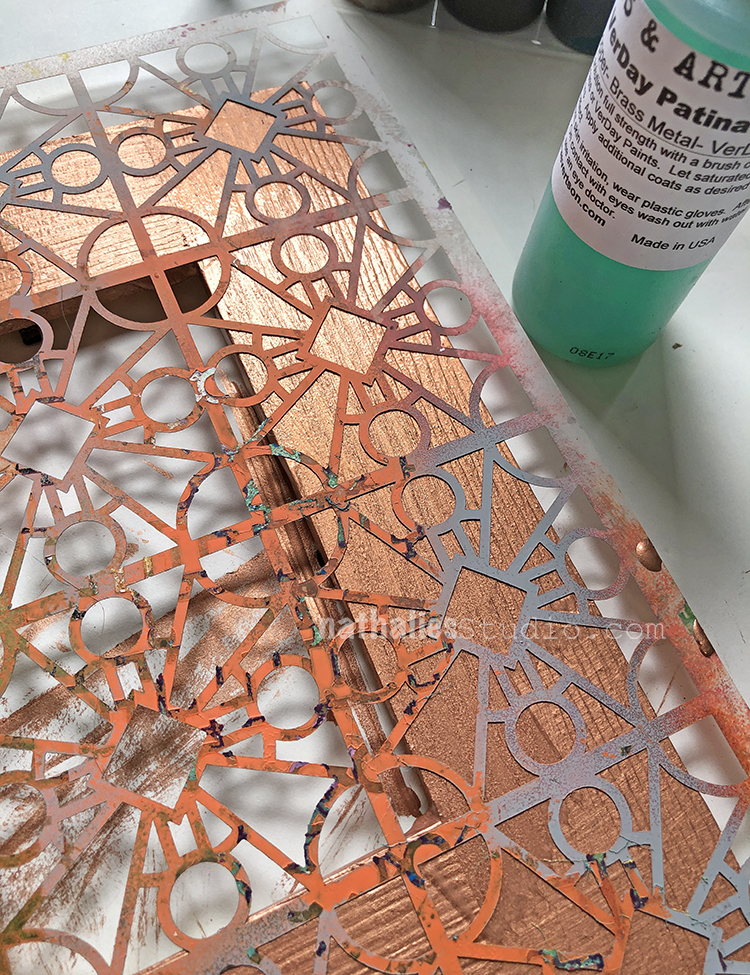
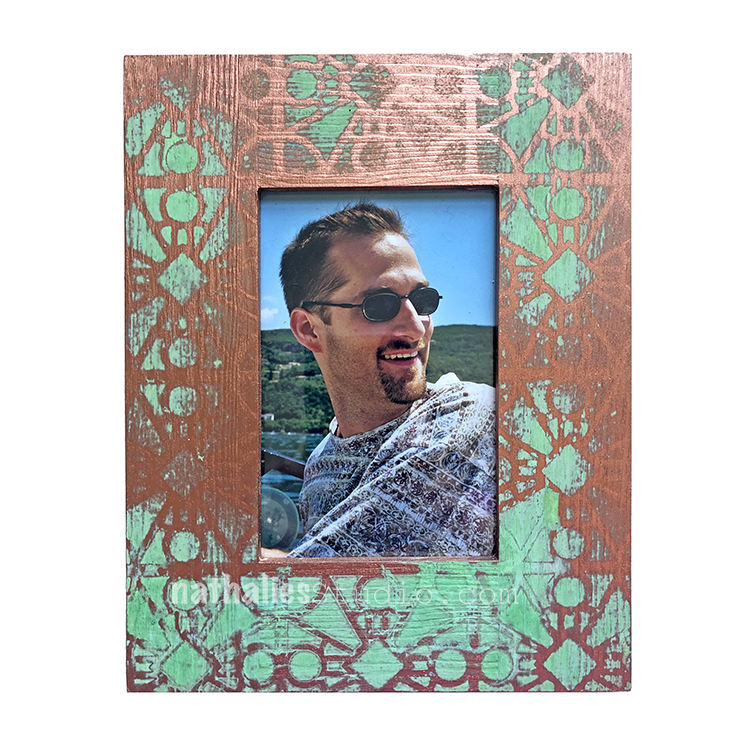
I thought it would be fun to use Bronze and create patina with my Buenos Aires Stencil. I painted the frame in Bronze, let it dry, repainted it, then added the stencil on top and sprayed with the patina solution over the stencil.
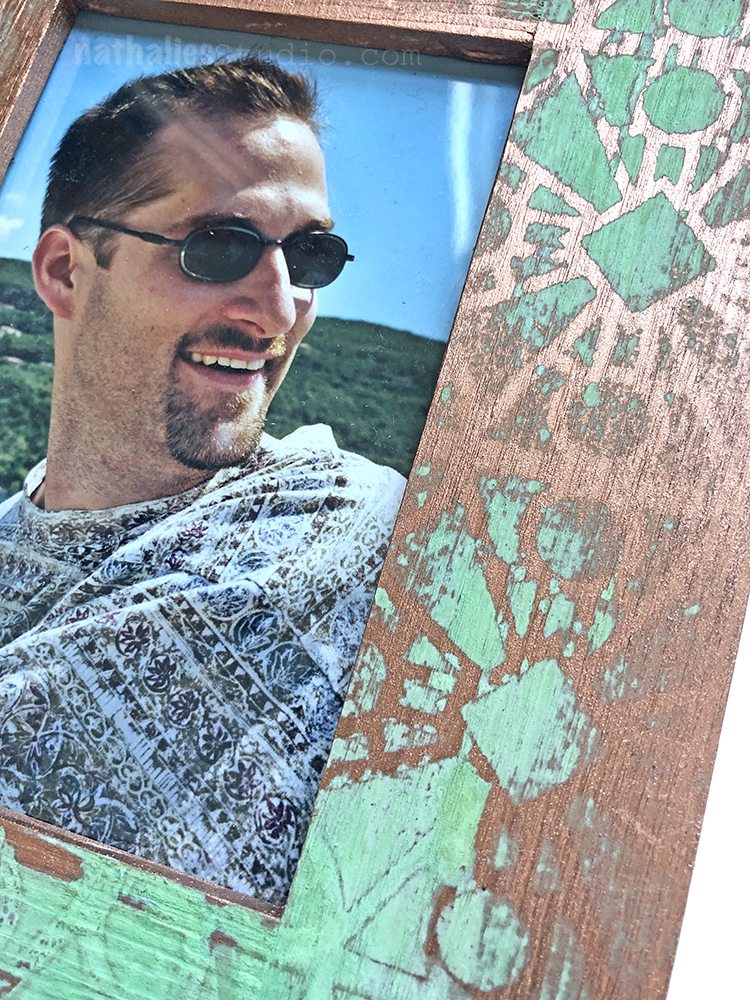
After a couple hours the reaction was complete and I love the out come on the frame. I added a picture of my other half and cannot wait to put the frame onto my new studio mantle.
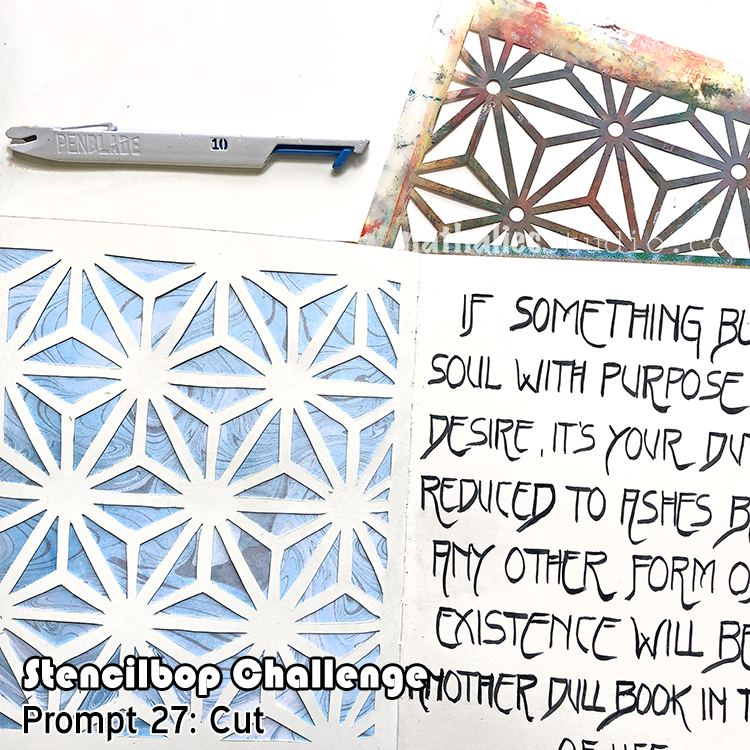
Day 27 – Cut
It’s so much fun to use Stencils as a cutting template in your art journal.
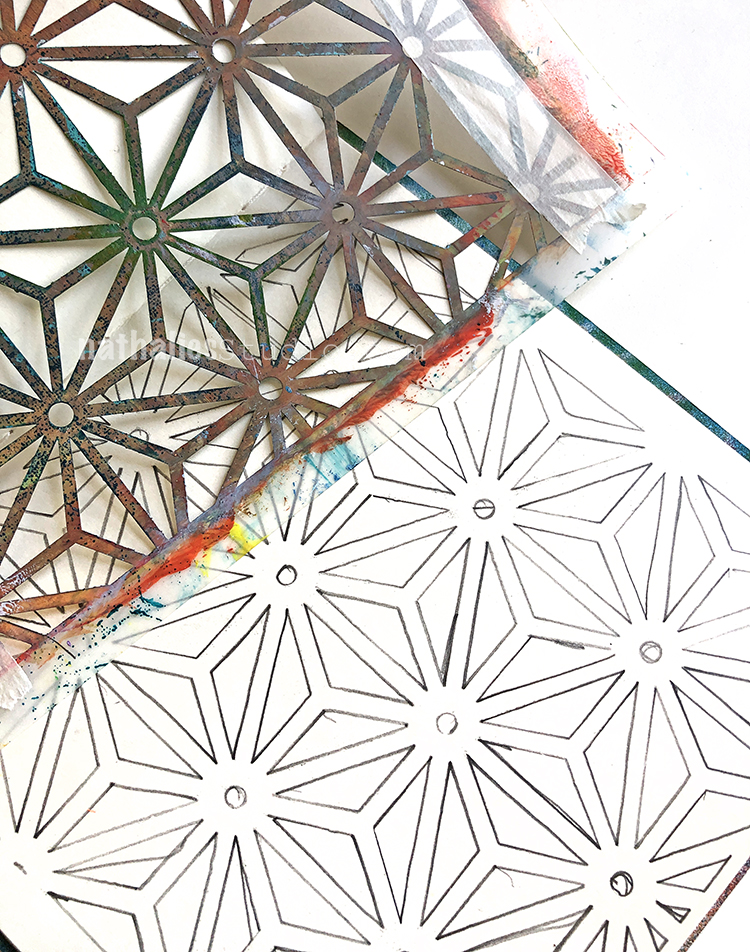
For this art journal spread I used my Star Struck Stencil and traced it into my journal.
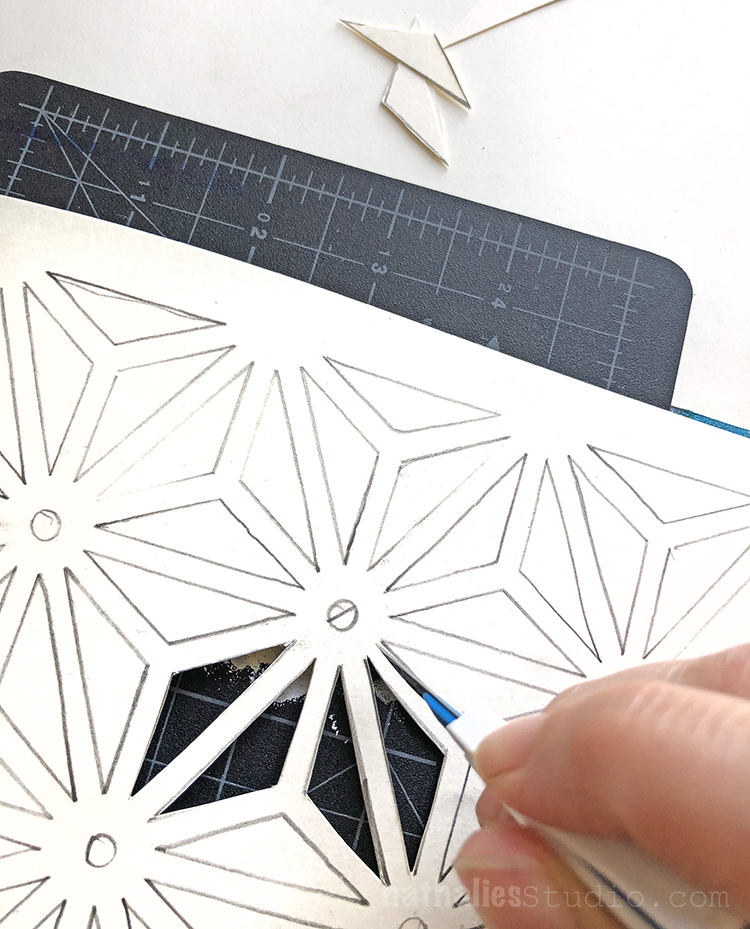
Then I cut the openings out of the paper with a craft knife…
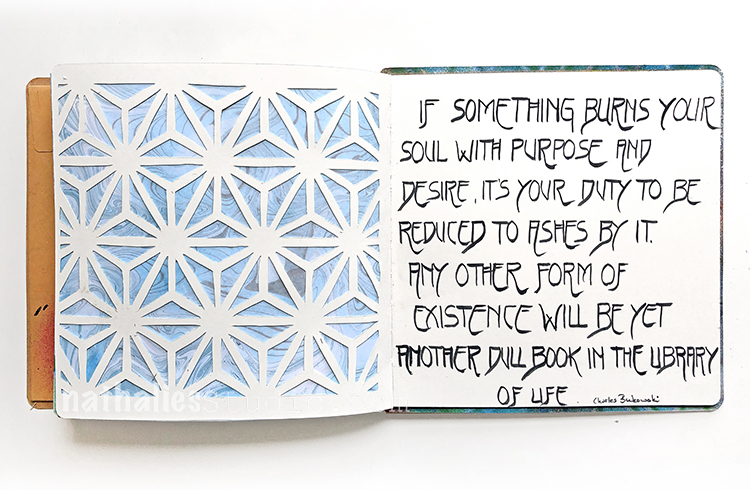
…and mounted one of the Suminagashi papers that I printed a while ago behind it.
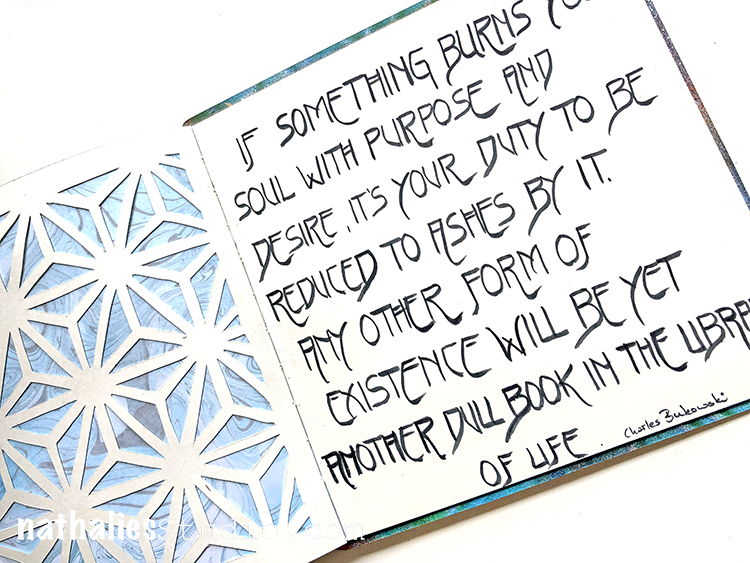
I really like the simple look of this.
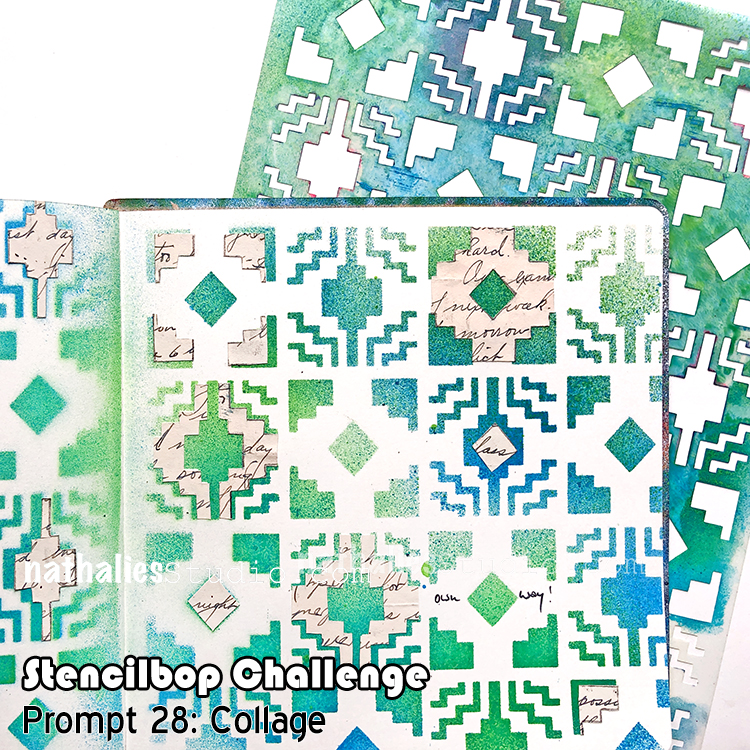
Day 28 – Collage
Collage is such a classic artmaking technique. I wanted to combine it with the use of stencils.
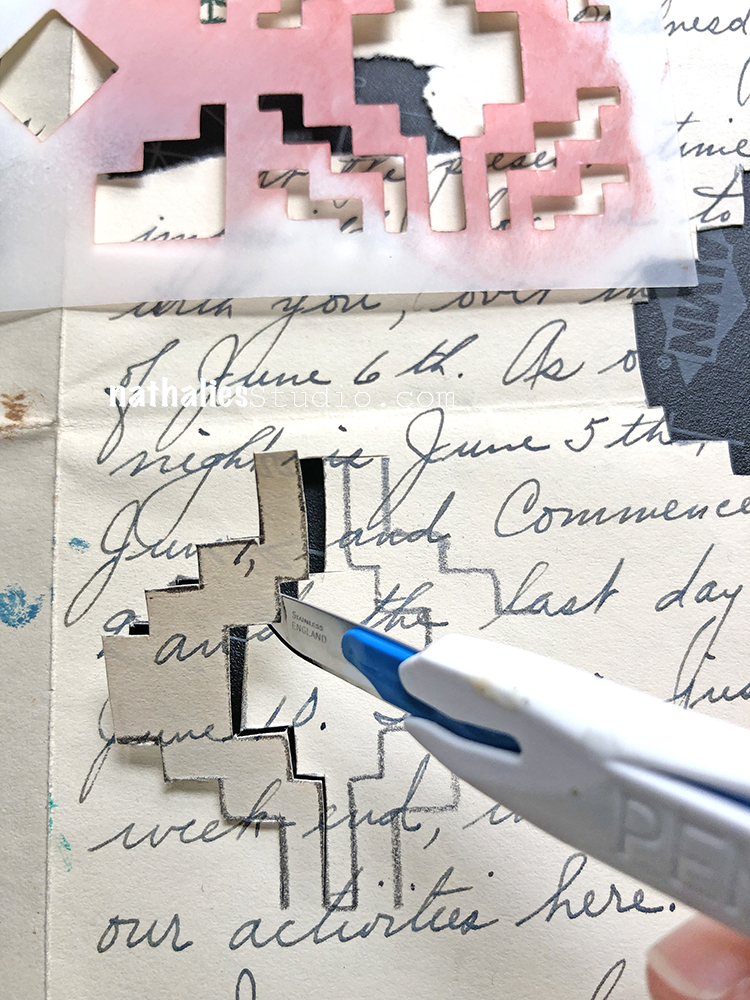
For this art journal spread I used some spraypaint through my Santa Fe stencil and then traced some of the elements of the stencil onto an old letter that I had found in an antique store.
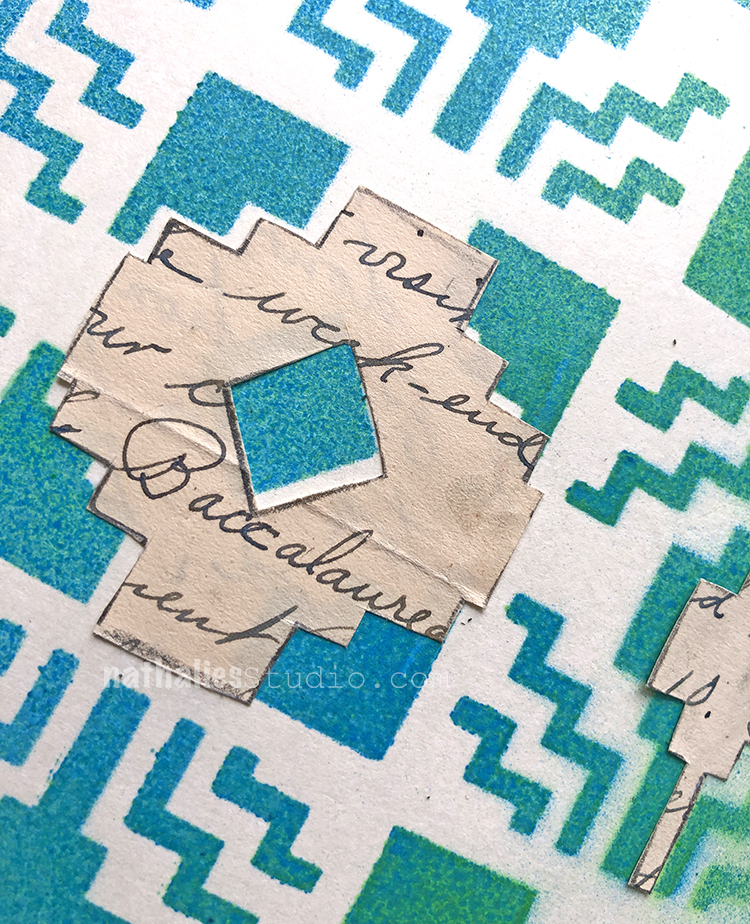
I cut the pattern elements out and applied them- sometimes offset with a glue stick to the spraypainted pattern.
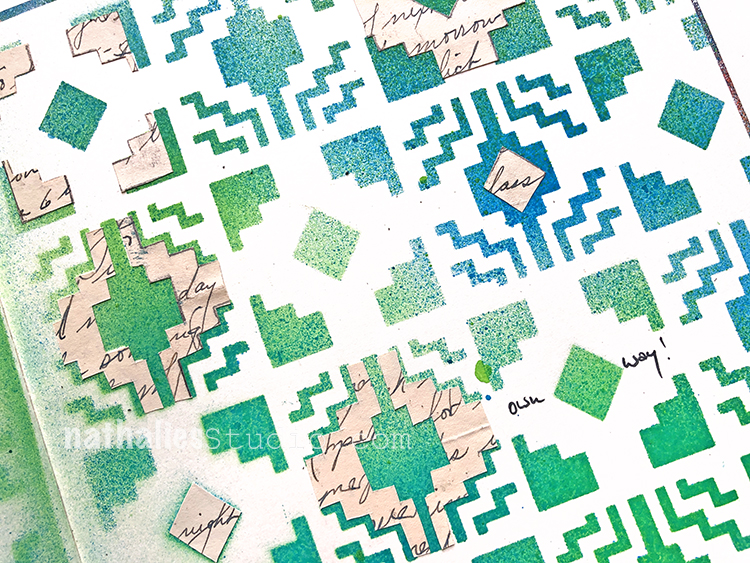
Another fun and easy way to use stencils.
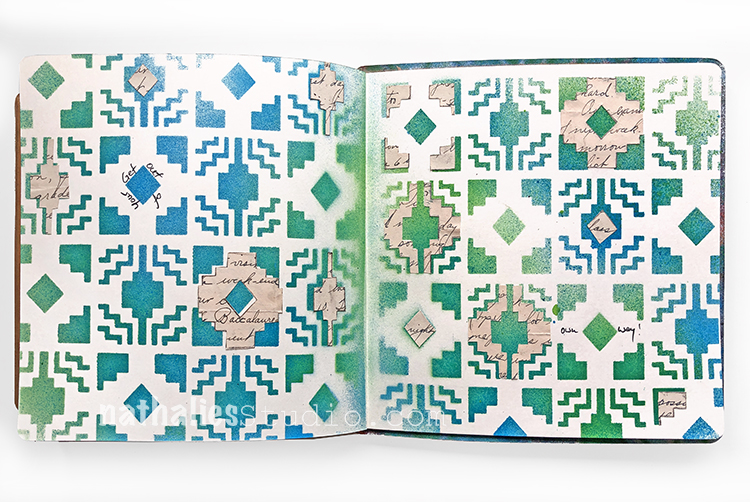
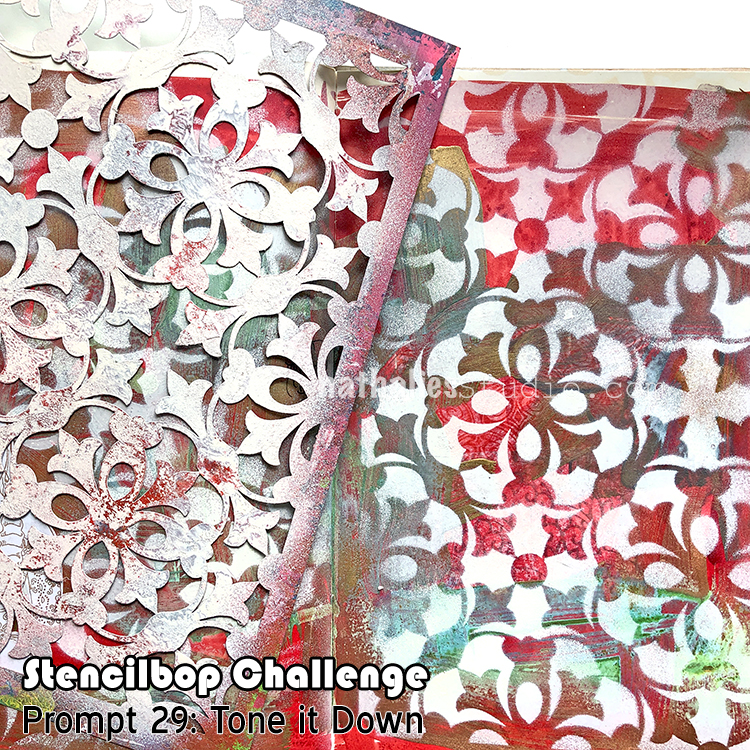
Day 29 – Tone it Down
Often times I use my left over page in a second art journal or try new things out and the spread then looks kind of crazy but also kind of interesting.
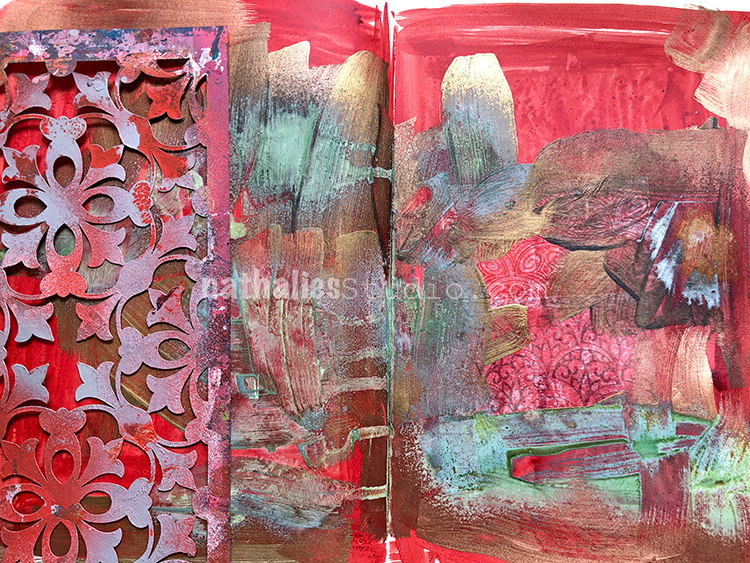
Instead of painting over the spread I love to tone it down with a stencil – usually using one with bigger openings and a lighter color paint.
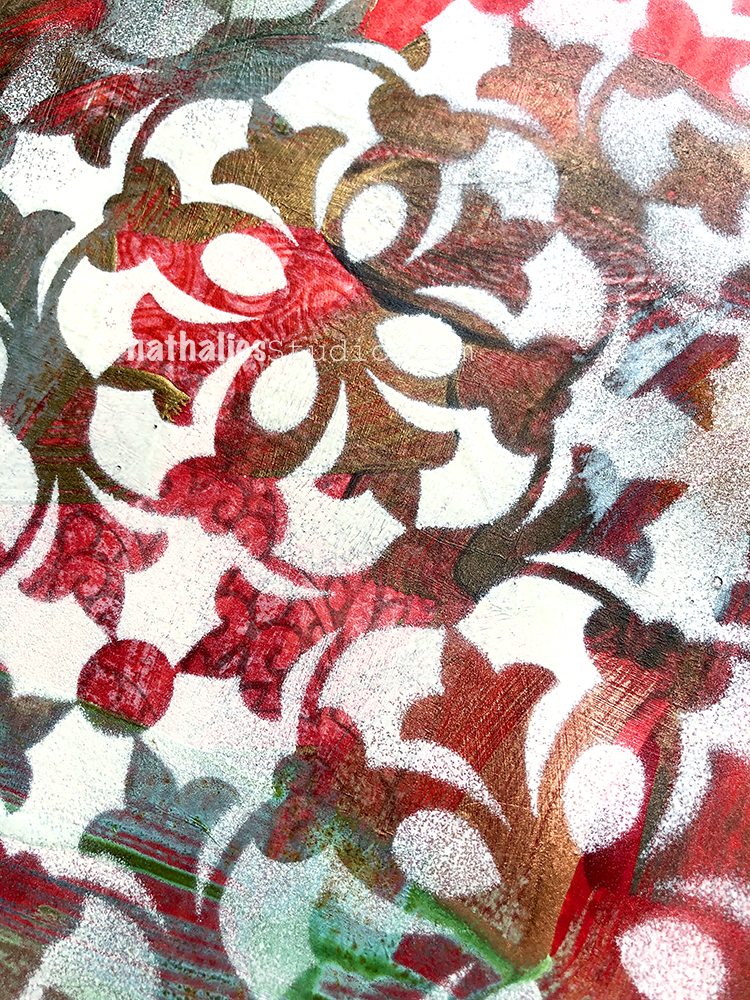
Here I used the Versailles Stencil with white spray paint.
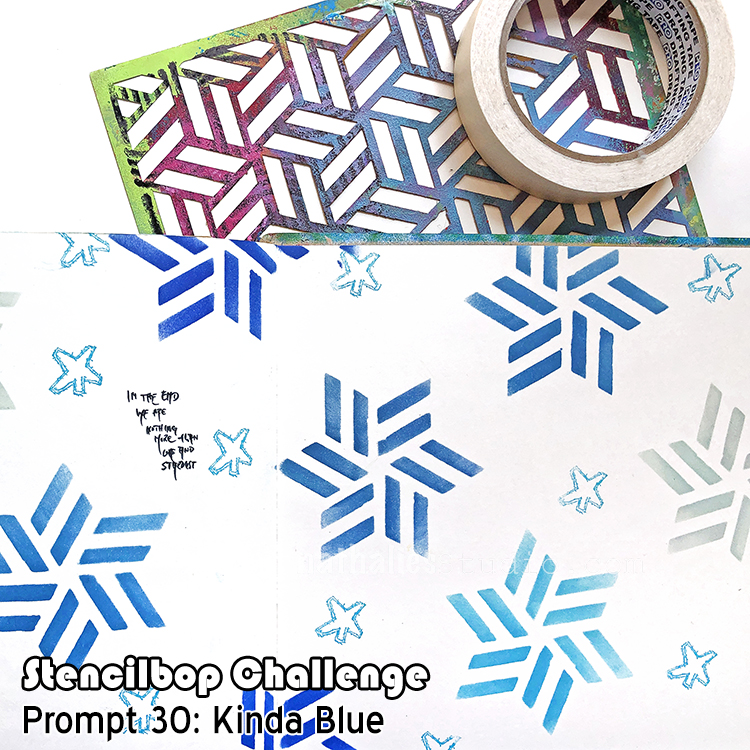
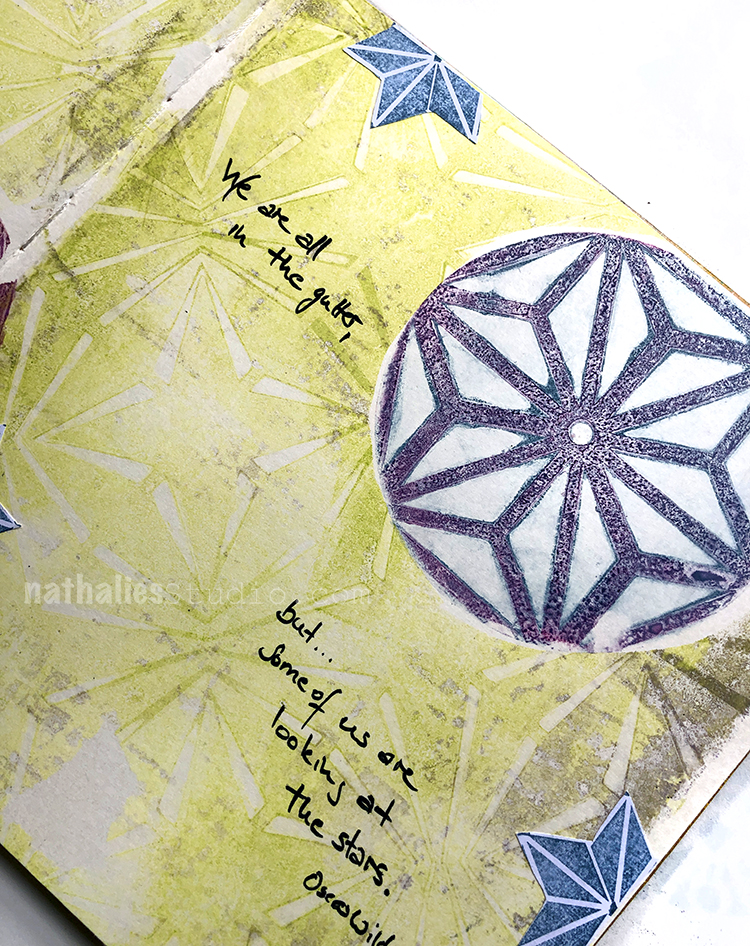
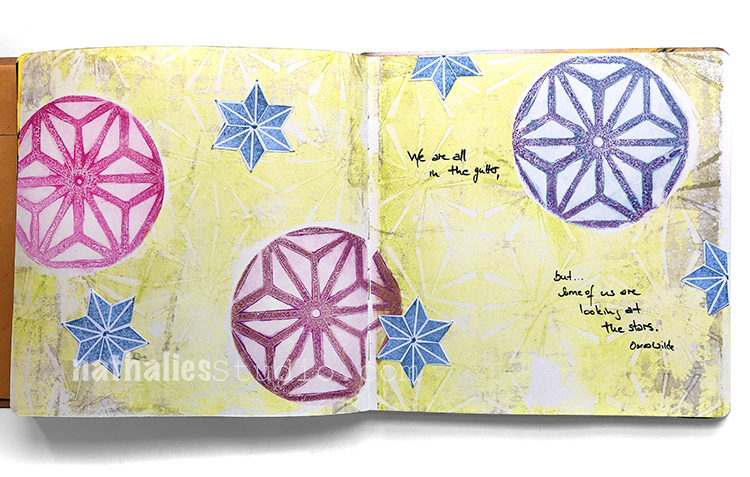
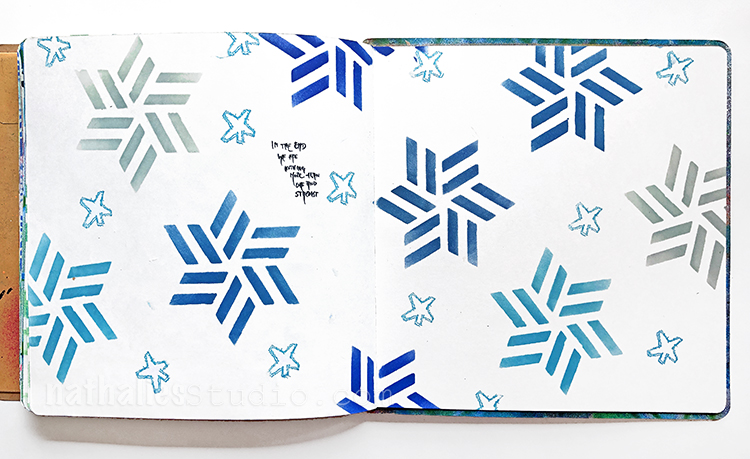
Day 30 – Kinda Blue
While I love using my stencils in it’s entirety I also love looking at parts of the stencil that make up a shape or pattern.
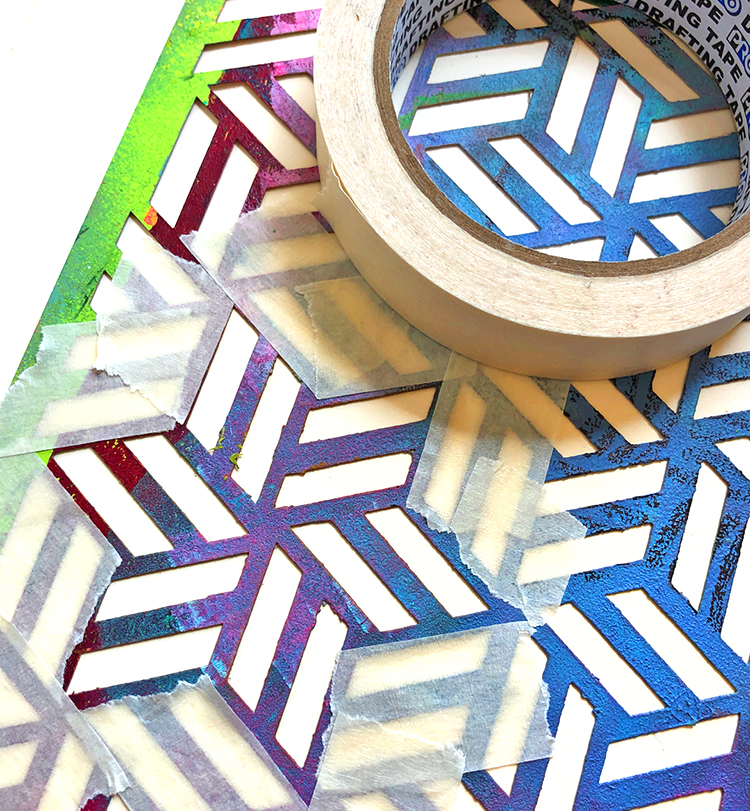
I often use masking tape to define the area I want to stencil – Like here the star shape I masked off in my Kassel Stencil.
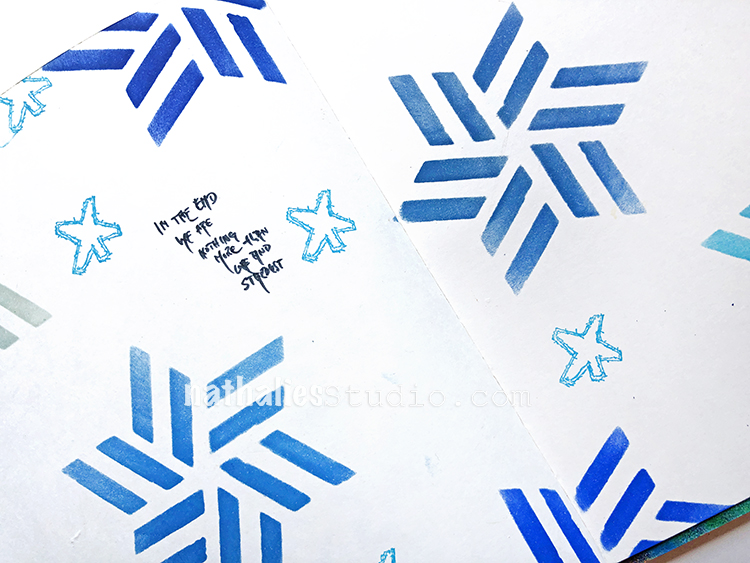
I used different blue ink pads and a blending tool to add the star to my art journal background. I filled in with my little Star Tag rubber stamp too.
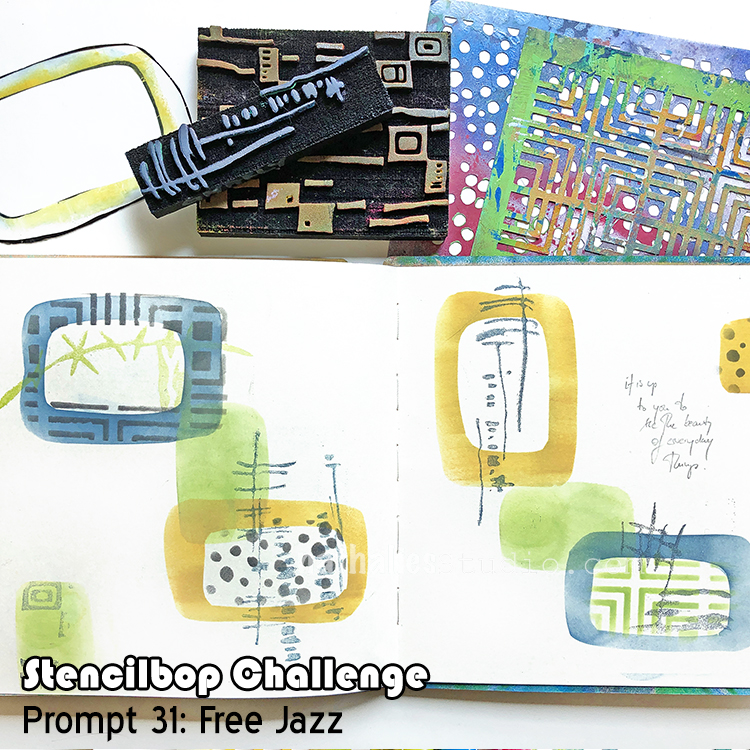
Day 31 – Free Jazz
For our last prompt, I thought this would be a good one to really let loose – I cannot wait to see what you came up with. I chose to mix my manufactured stencil design with some hand cut free form stencils and masks.
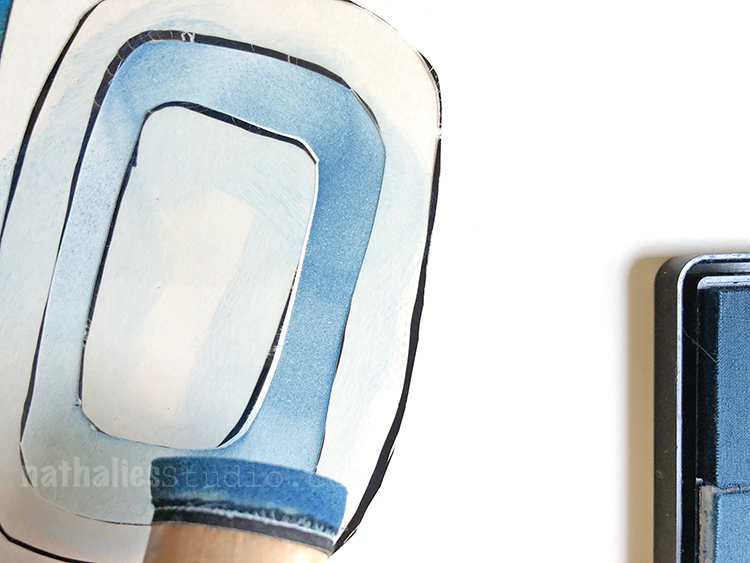
I used an acetate sheet and just created some oval shaped forms and cut those out. I used a blending tool and some stamping inks to transfer and stencil into my artjournal.
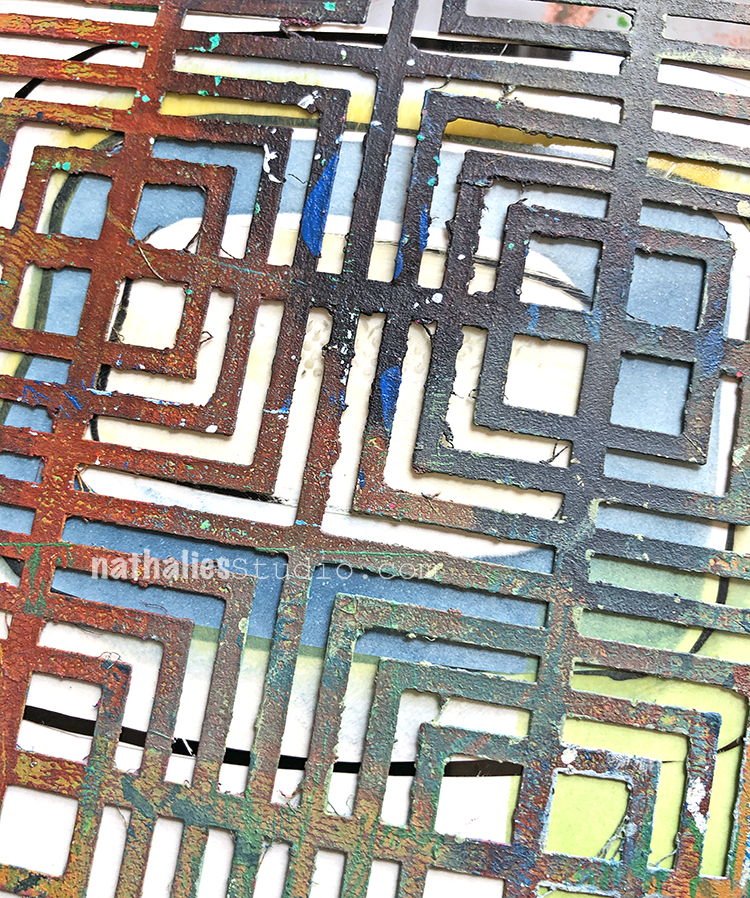
I used some of the stencils and masks to determine the area to stencil over with my Stencil Girl Products stencils. Here I am applying the Manhattan stencil.
I also added some of my foam stamps as I thought they would go really well with it overall.
Free cutting some stencils is a great way to personalize your art journal pages and give them that extra oomph.
I hope you enjoyed this Stencilbop challenge- thank you so much for being part of it- that was super fun!
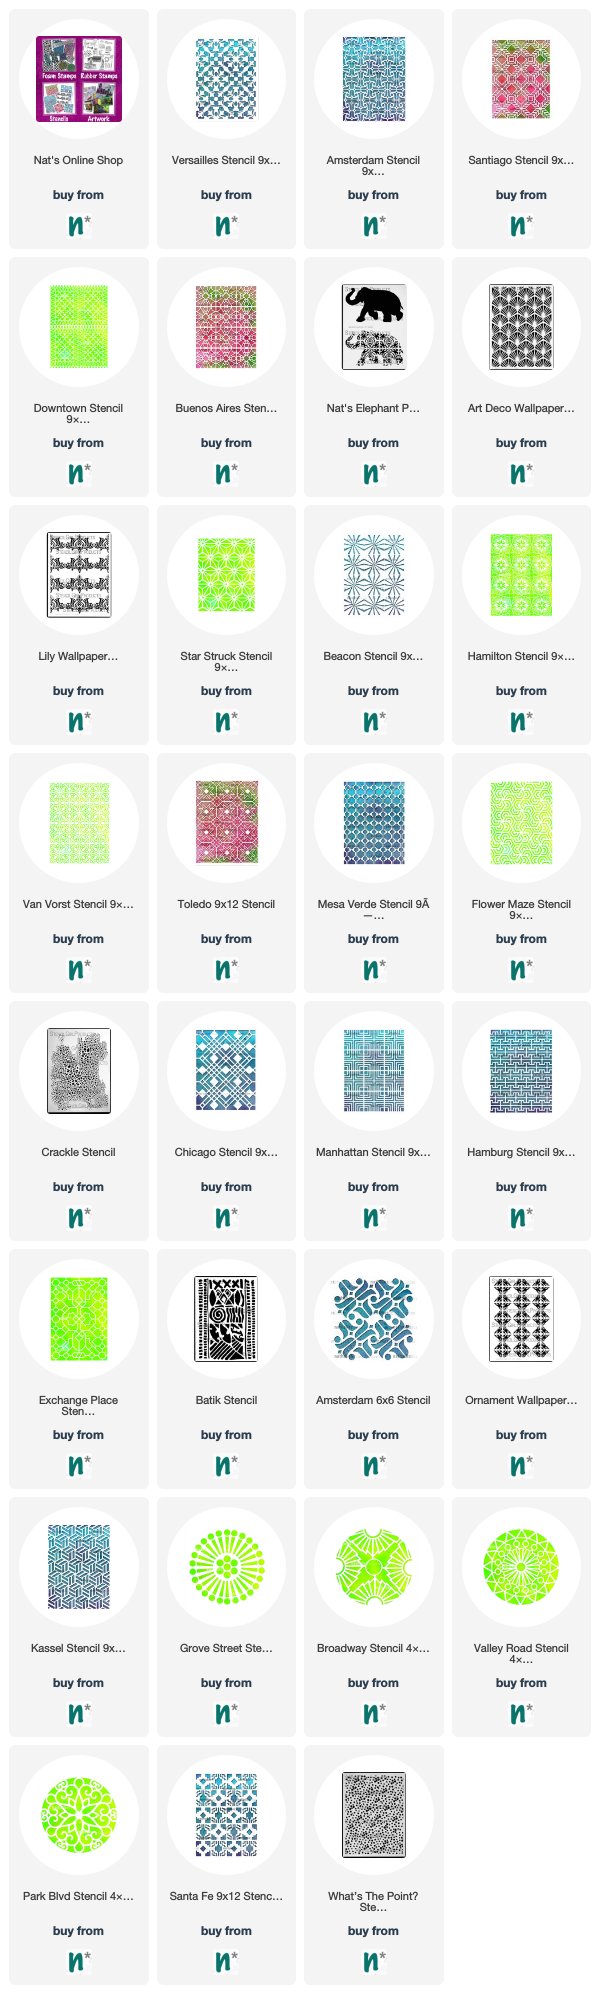
Here are some of the stencils that we used in this challenge: