Foam Stamplifier Challenge
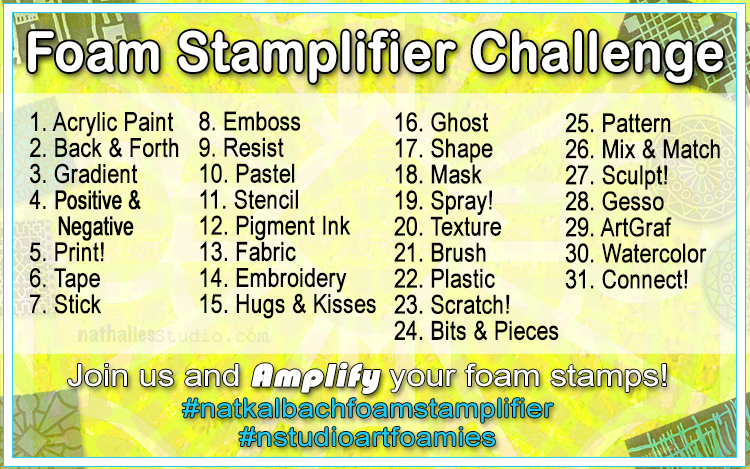
Amplify your foam stamps and try my Foam Stamplifier Challenge! I love the versatility of foam stamps – one of the reasons why having my own line of foam stamps was always a big dream of mine – and I even offered an Online Class in 2012 called “Foam Stamplifier”. In March 2019 I picked up the theme and name again and pushed it even further with this Challenge for you.
Play along and get inspired with 31 unique ways to use your Foam Stamps. The prompt list is above and a full recap of tips, visuals, and info is below.
Don’t forget to share what you make and use the hashtags #foamstamplifierchallenge, #nstudioartfoamies, and #natkalbachfoamstamplifier
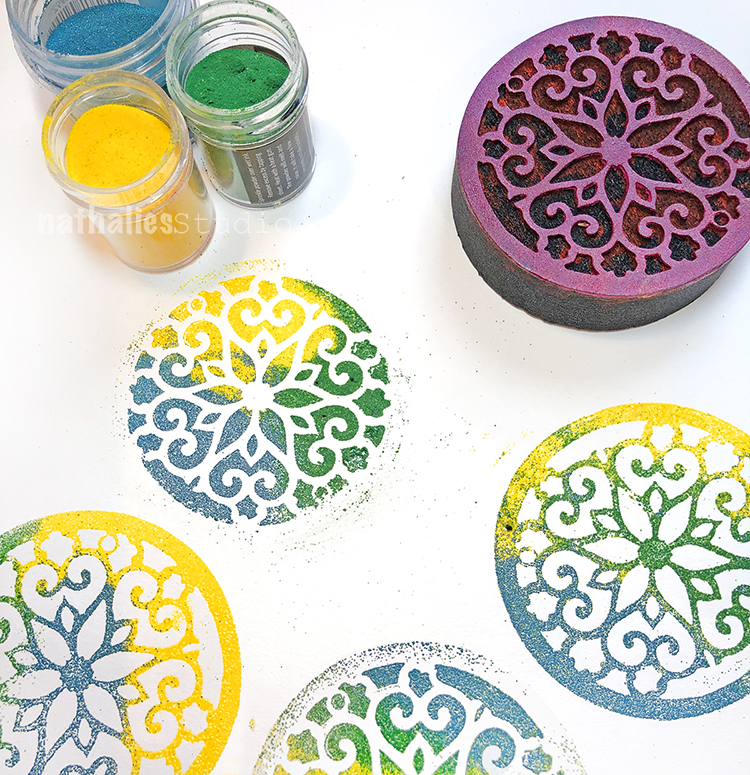
Day 1 – Acrylic Paint
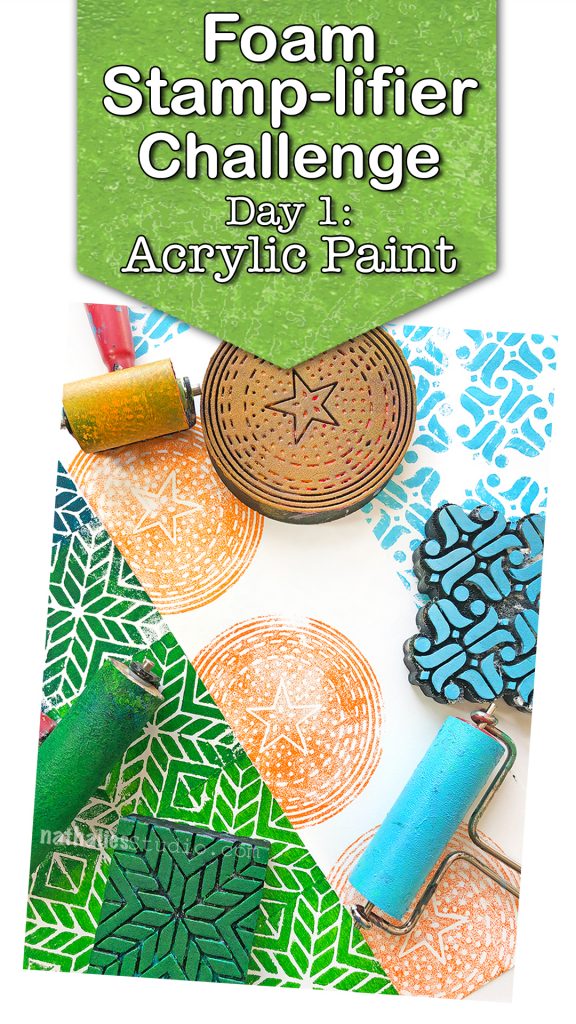
Yeahhh easy one- but hey- the reason why I am so in Love with foam stamps. I do love acrylic paint and I do love stamps. I usually just roll out some acrylic paint on a palette with a rubber brayer.
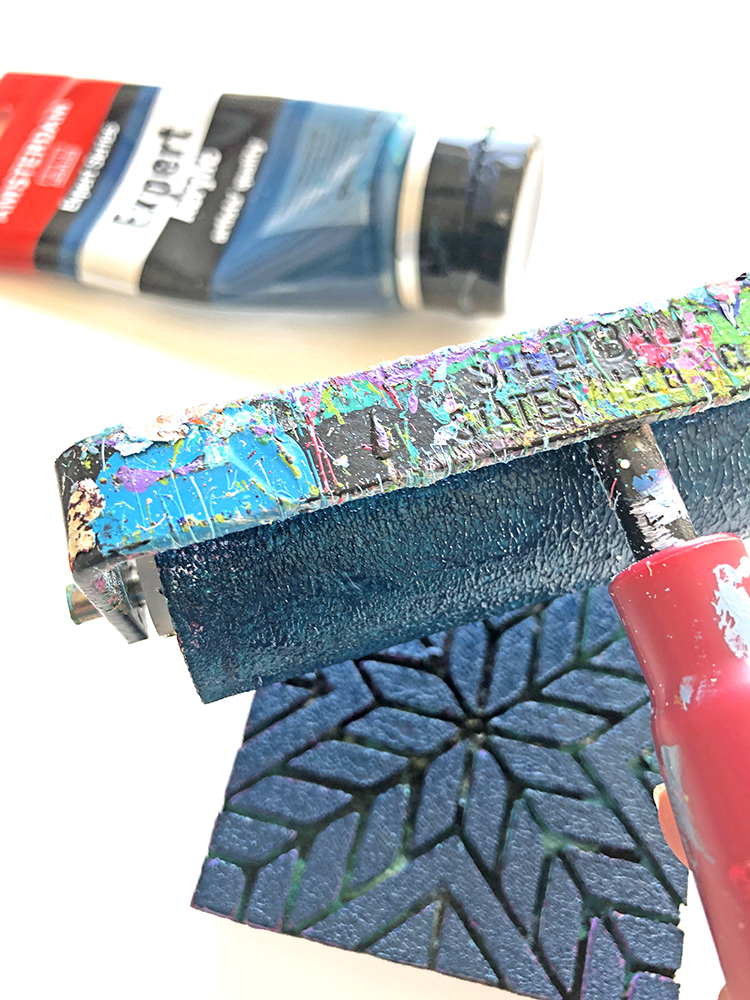
Making sure I cover the whole role of the brayer with my paint. I then transfer the paint on my brayer onto my foam stamp making sure that I cover the whole design evenly.

And then I start stamping.
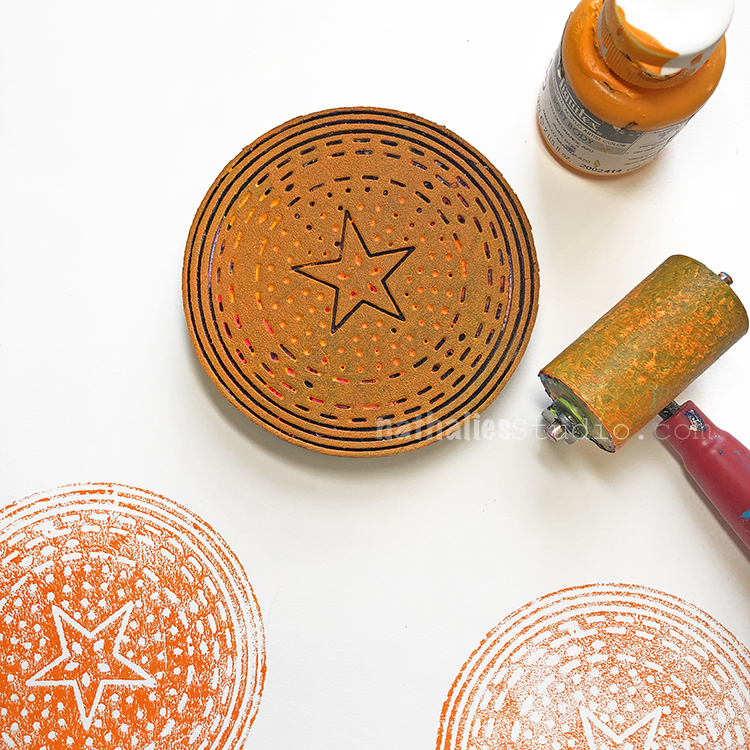
I love the texture that the foam stamps due to their softness create with the paint and that not every single image is the exact same.
Now do I clean my foam stamps? Nope …I gave up. But do I recommend for you to clean them? Yep :)Here is a little video where I talk about it. But in short: Just rinse them under some water – in between steps “park” them on a piece of wet cloth a or a moist baby wipe and if you want to a be a bit more thorough, use a super soft veggie brush. Why you ask? Fair question, well you know they are foam stamps and they can be amplified in so many ways due to their softness and structure but if you just keep adding acrylic paint on top over and over again and gunk them up with basicially sheets of plastic, they get harder and harder and loose the properties of a foam stamp. It also gets harder to stamp good images as they “smoosh” easier over the paper if they are covered with acrylic paint. But …hey up to you – you are the Boss Applesauce!
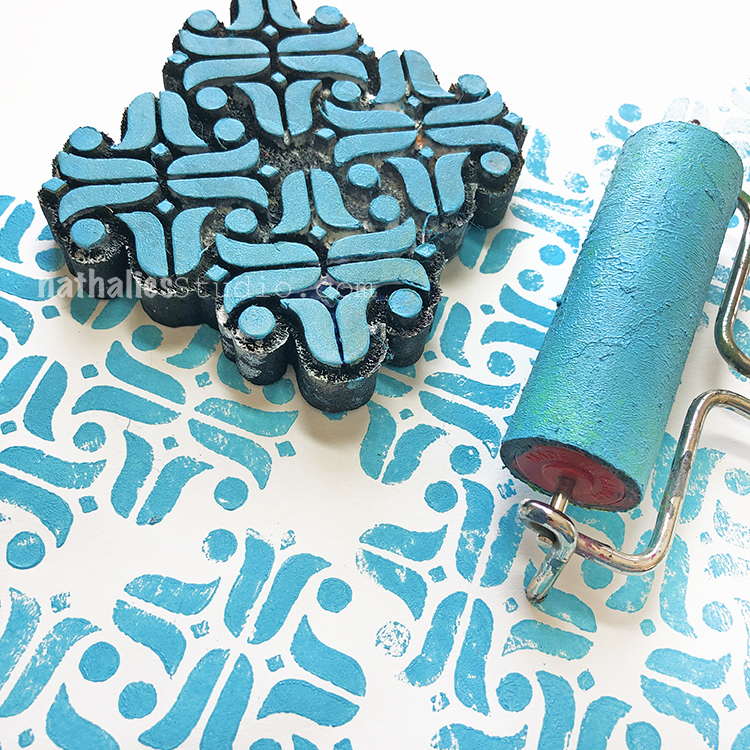
Day 2 – Back & Forth
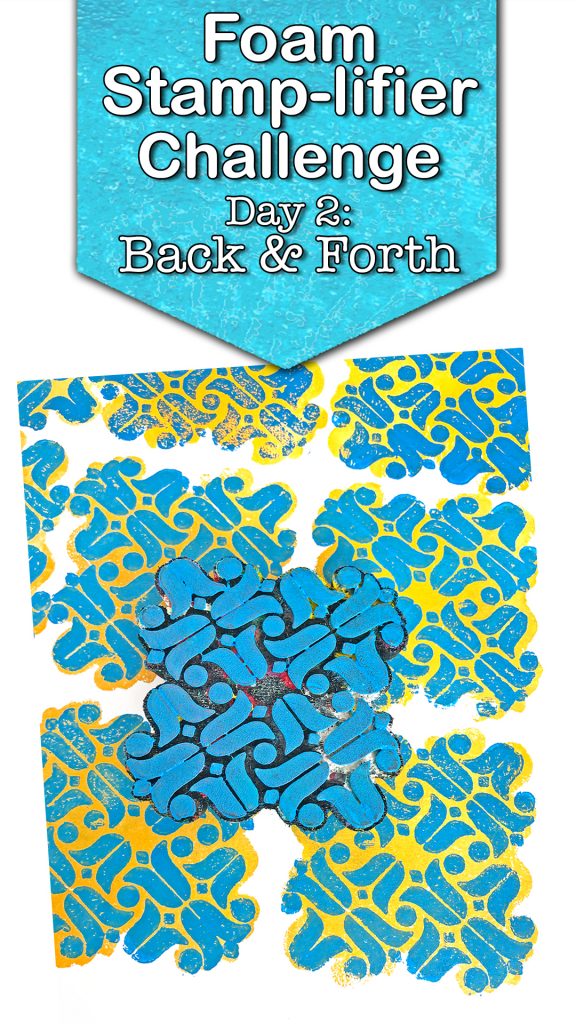
I love to amplify my Foam Stamps by also using the backs of the stamps.
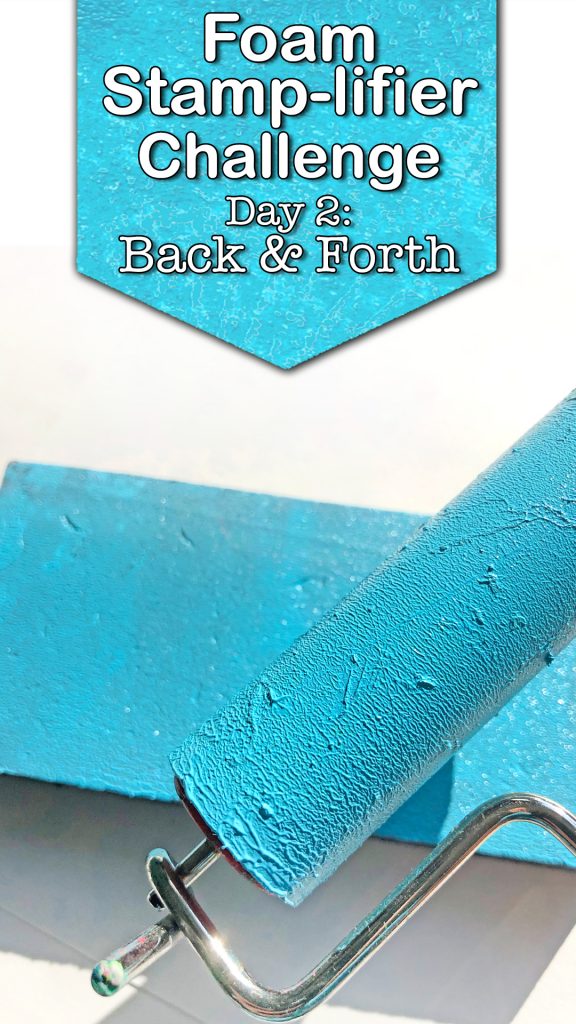
I apply the acrylic paint to the solid back side of the stamp – often choosing a nice corresponding color –
stamp and then flip the stamp to the pattern side, apply the paint there and stamp over the previously solid stamped shape.
This works with all the rectangles, squares,
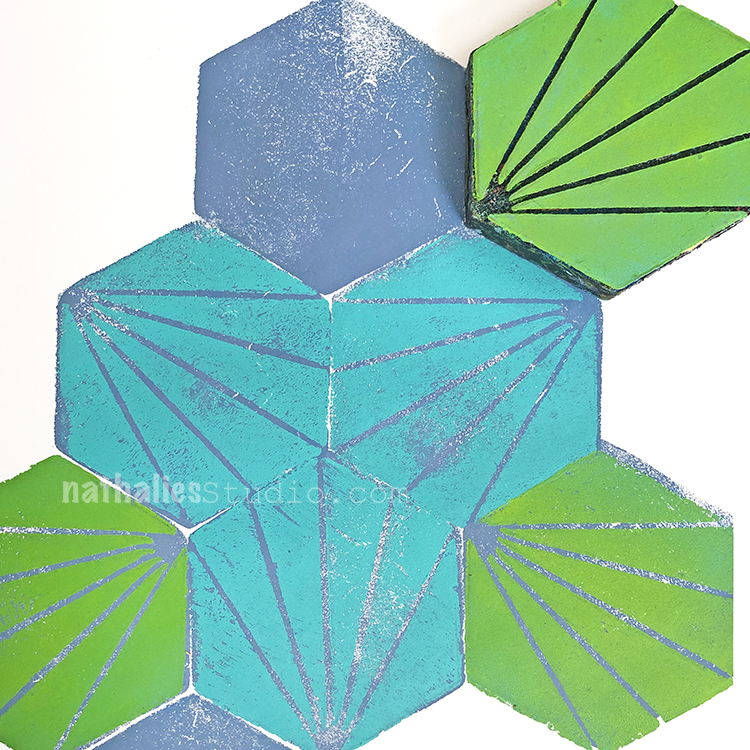
hexagons but even with other shapes like the oddly shaped Amsterdam Stamp as long as the shape is symmetric.
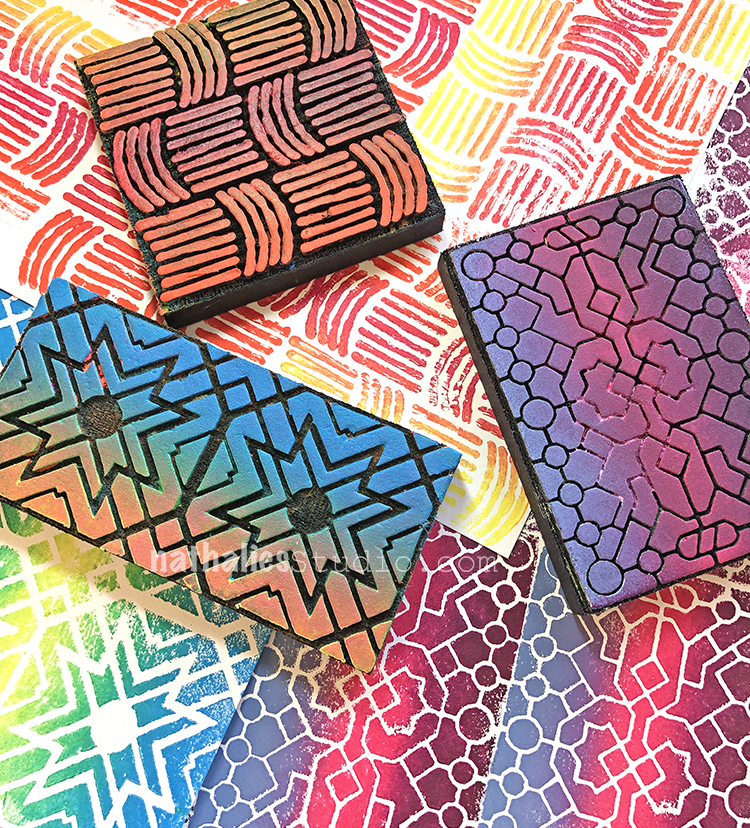
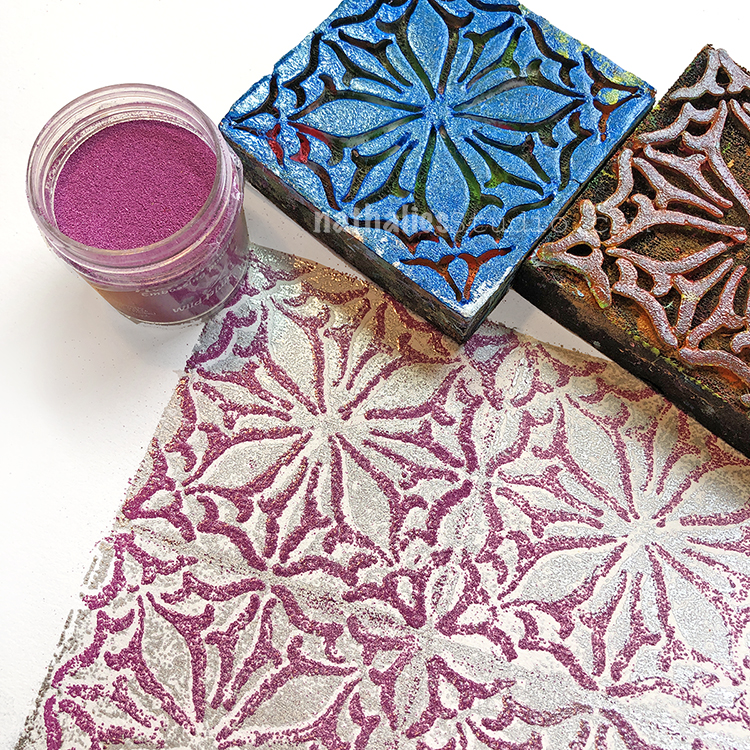
Day 3 – Gradient
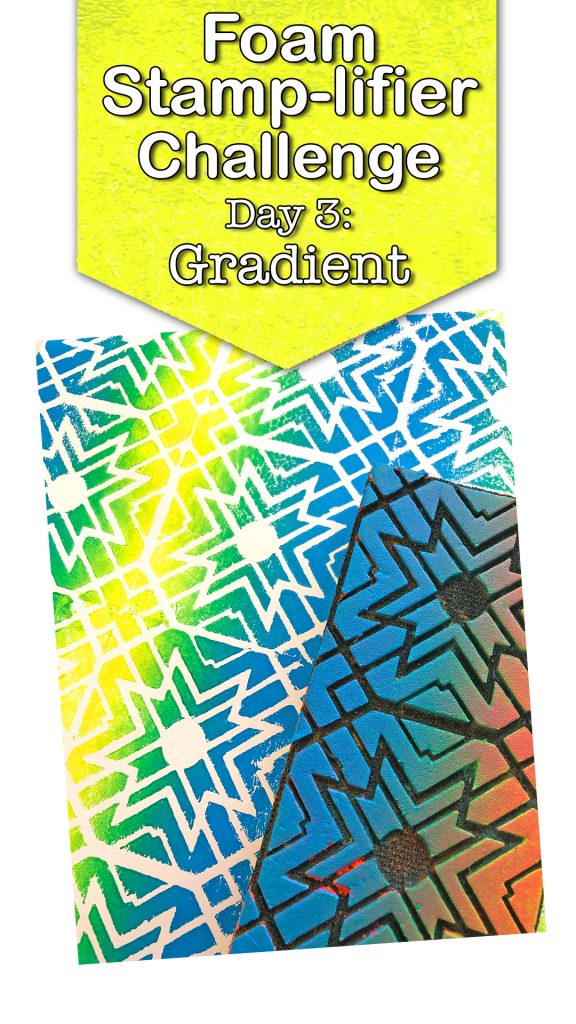
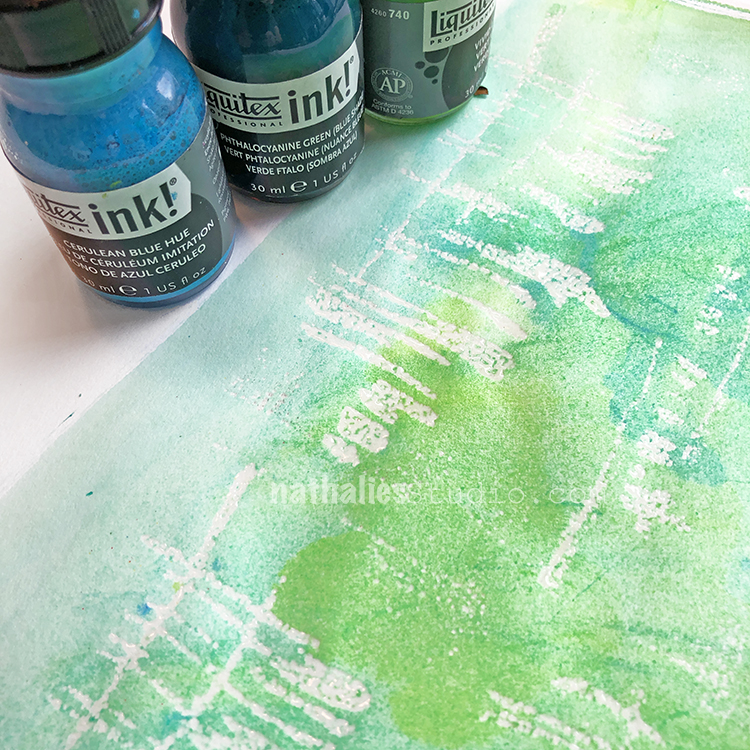
Now I hope this one makes you as happy as me- because I am a total color junkie and having the possibility to easily apply some color oomph with my stamp makes me just all smiles :)
I love to use 3 colors that either mix well or are in the same color family. Using the length of my brayer as a guideline I add three colors in stripes next to each other on the top of a palette.
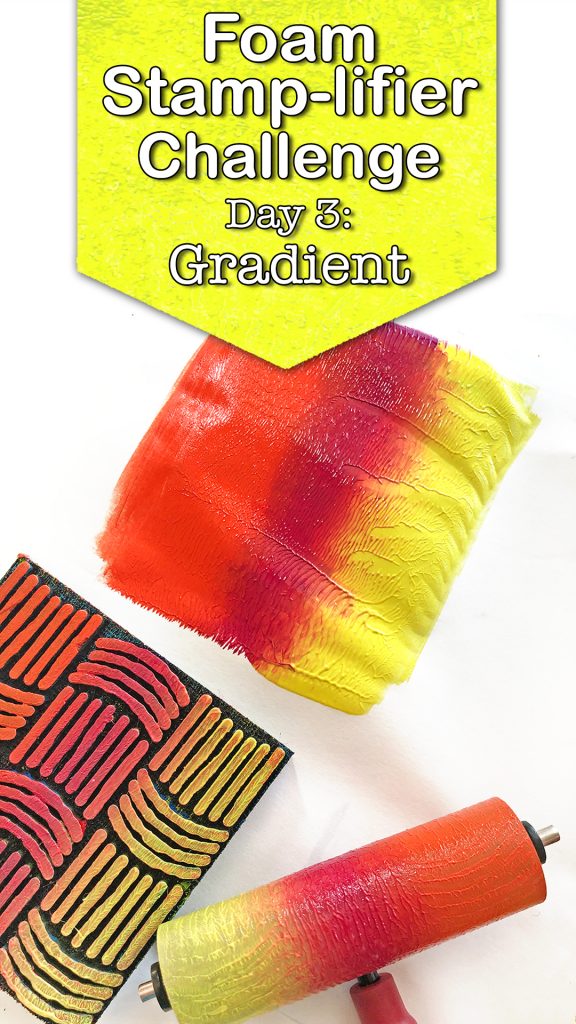
Then I roll the colors out downwards – lifting the brayer and going back up until the brayer is evenly covered. At the same time I also shift the brayer slightly to the left and right (really just a tiny bit) to blend the colors and mix them as well.
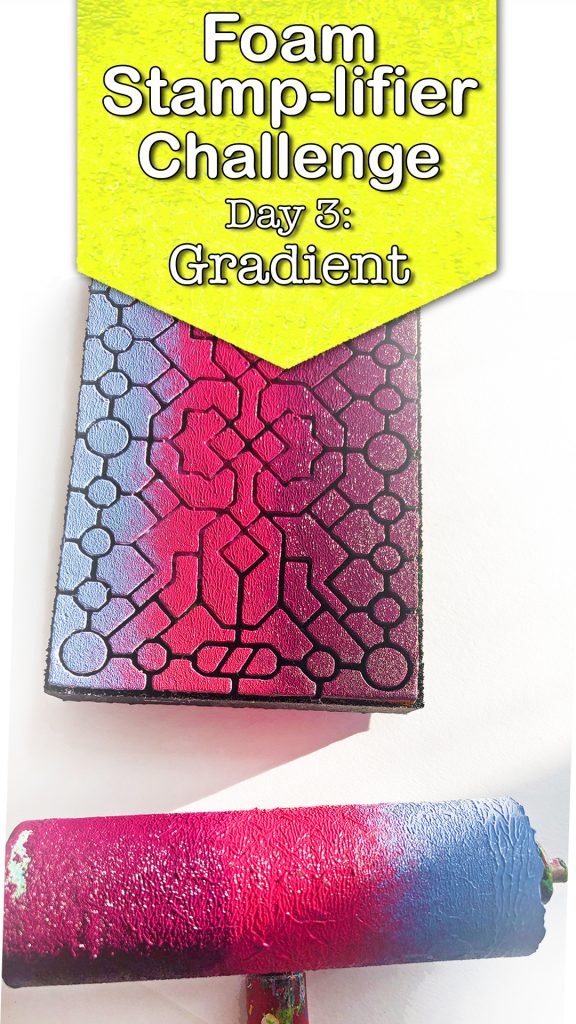
And then I just apply the paint to the stamp and make sure that with every new stamped image I apply the paint to the same area of the stamp. So much fun!
Day 4 – Positive & Negative
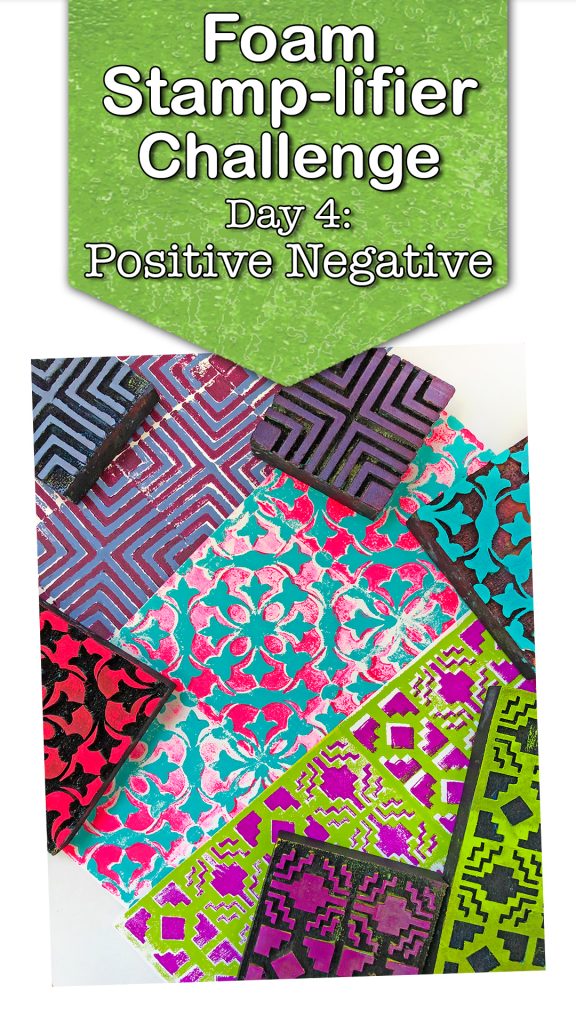
I love how having sets of positive and negative stamp designs can totally amplify your designs. You can use each stamp individually – you can use the back and front as I showed in Prompt 2 but you can also stamp them with different colors on top of each other.
And as you can see the outline of the foam stamp from the side- it is so easy to line them up :) My favorite is when they are not perfectly lined up on top of each other – so they add a bit of dimension as well. Super fun!
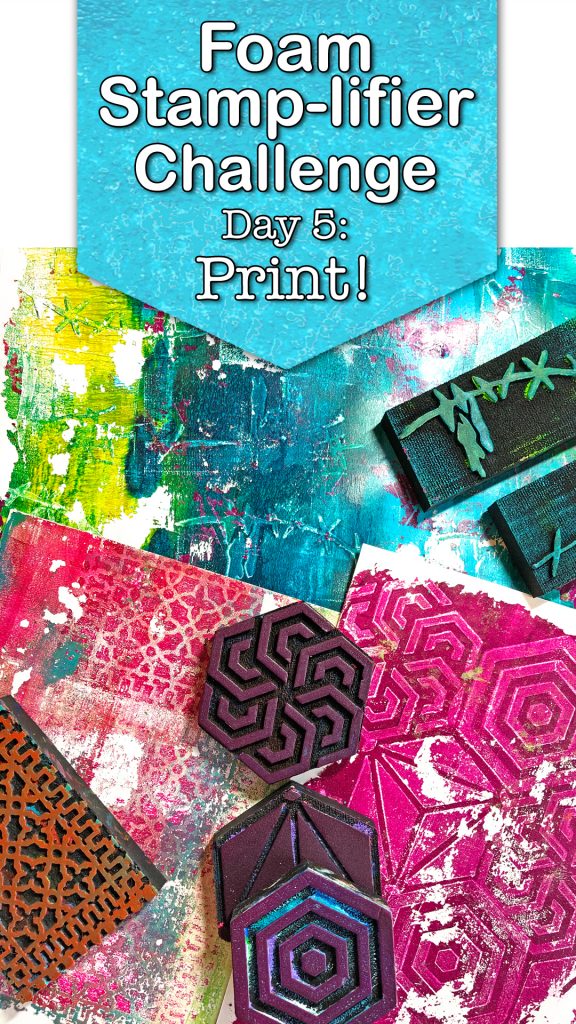
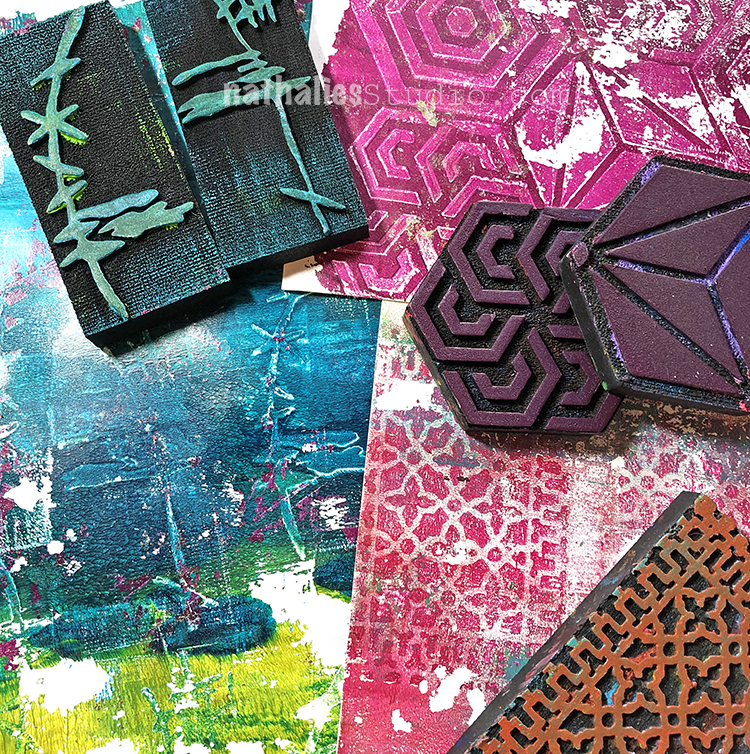
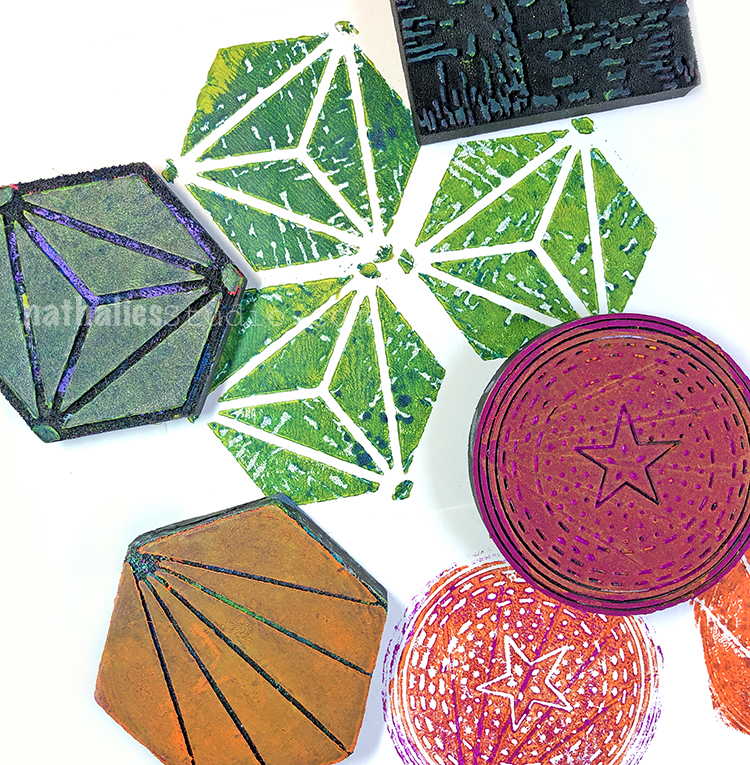
Day 5 – Print!
So much fun to use foam stamps for Monoprinting techniques.
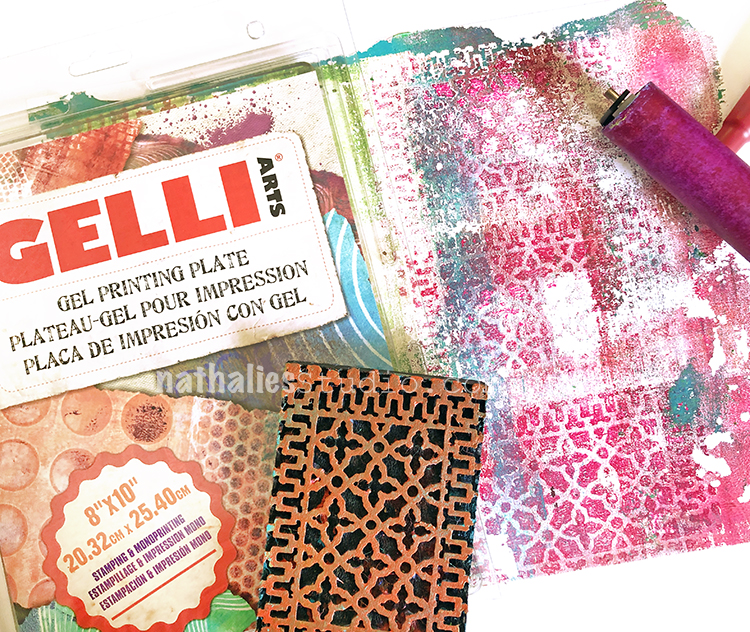
I love the ghostlike image they leave on the prints.
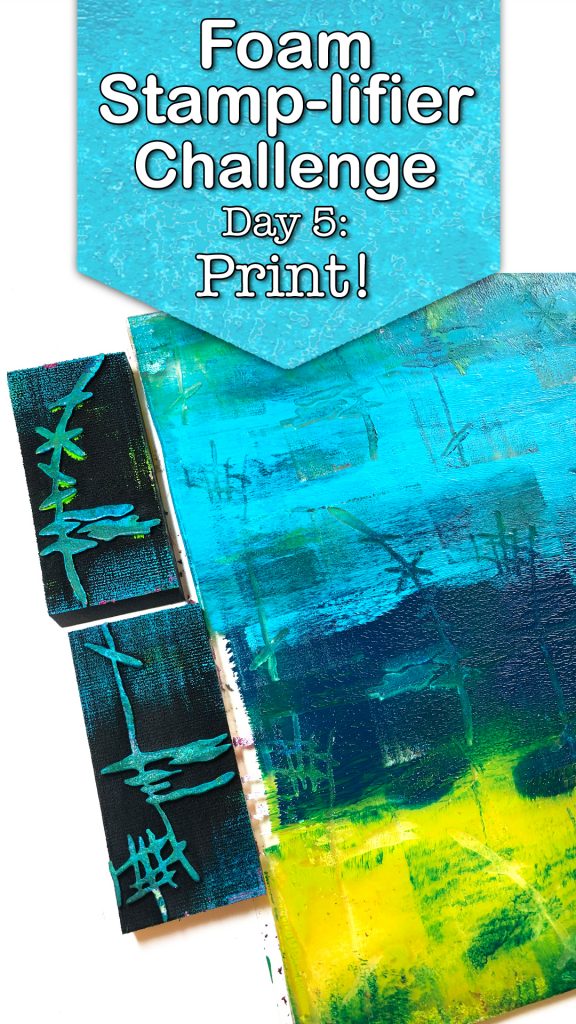
Simply roll out a thin layer of one, two or more colors onto your Gel Plate and stamp into the paint.
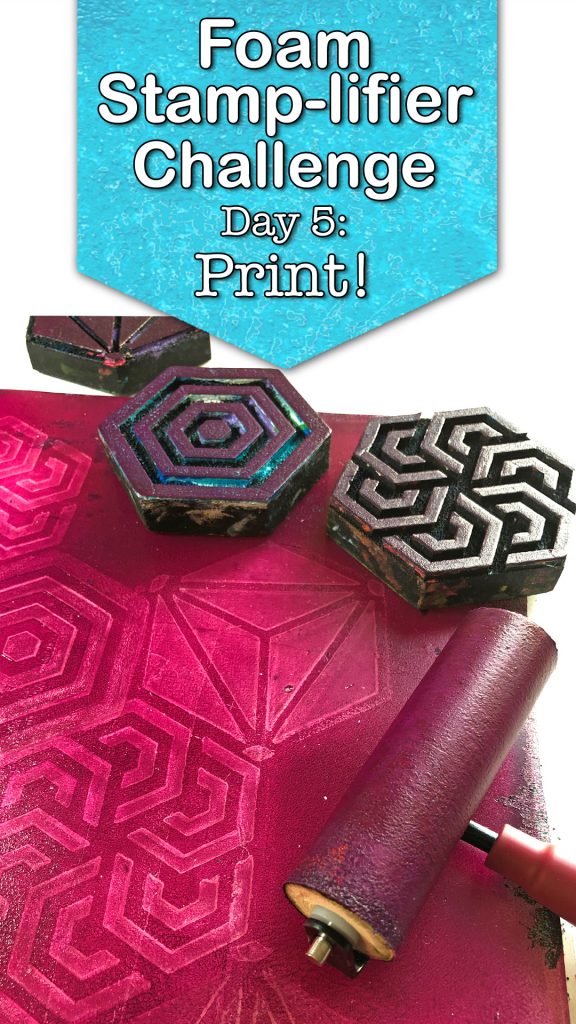
I usually print off to another sheet of paper and then go back into the paint on the plate. If your paint already dried on the plate, don’t worry, just add a layer of white paint on top and print – you will peel off the dried layer as well and get a nice grungy effect.
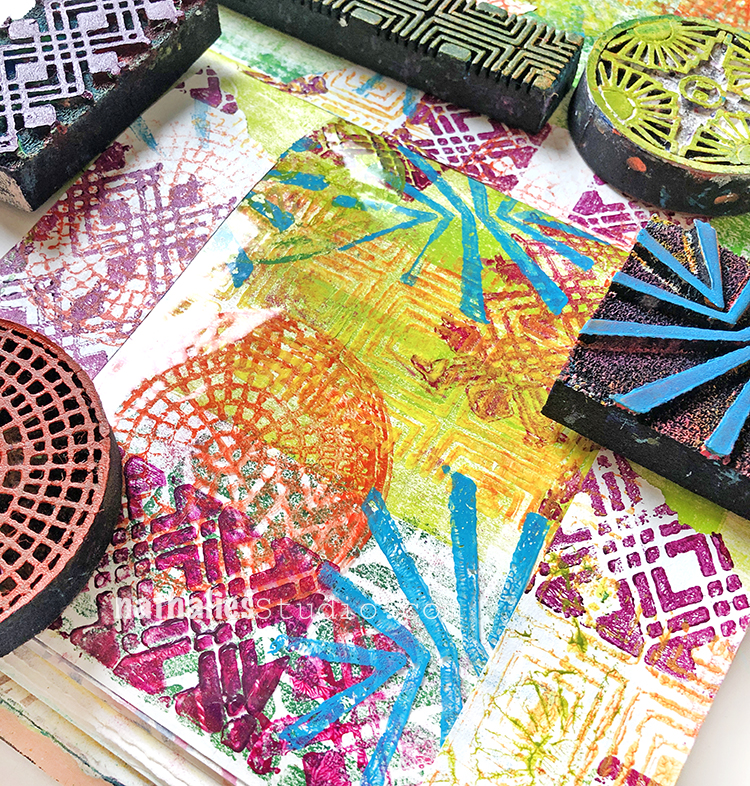
Day 6 – Tape
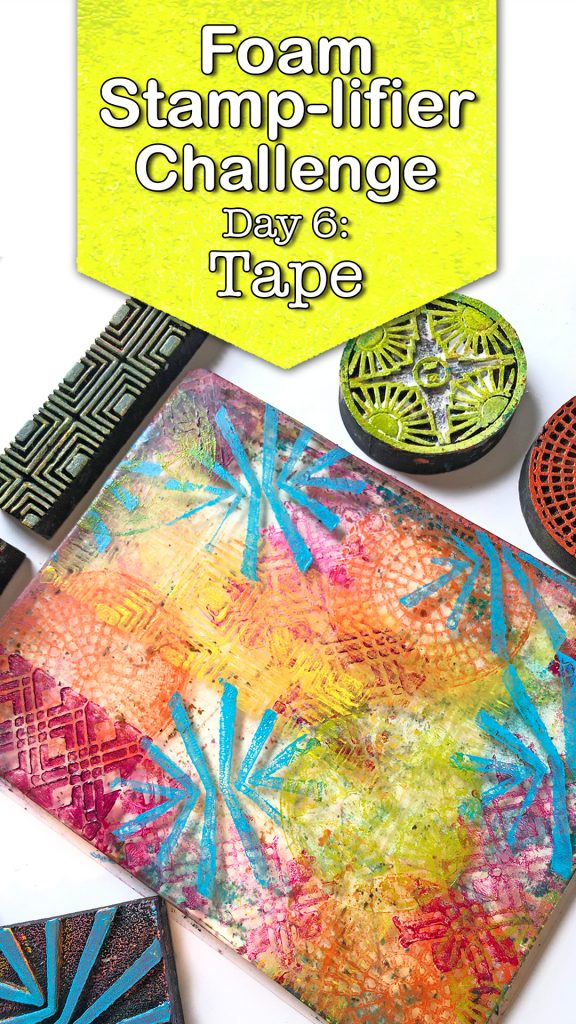
I love including my own printed tape into my artwork whether it be in my art journals or on canvas.There are two ways I love to create tape.
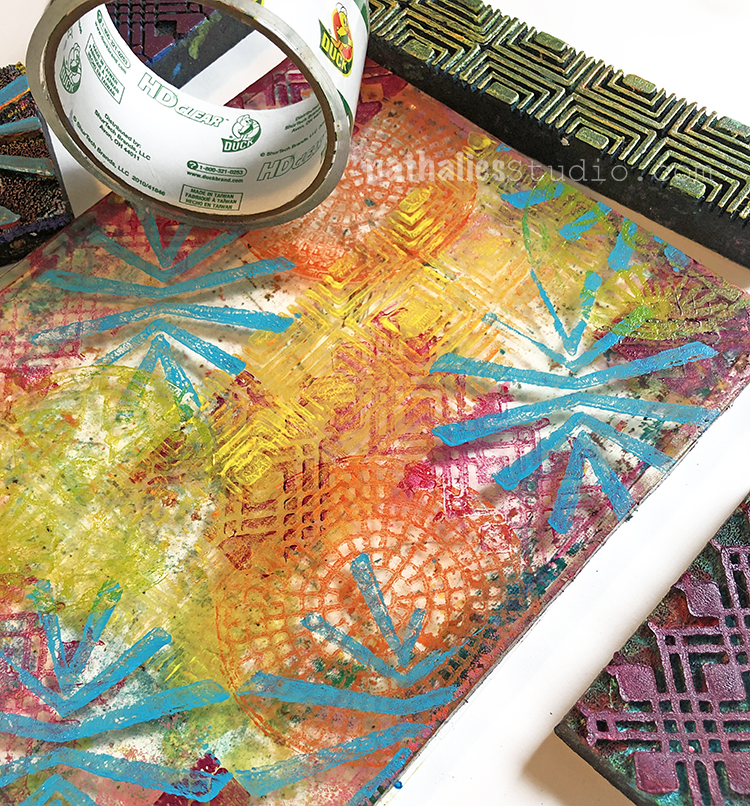
One is to print with different patterned foam stamps and colors onto my gel printing plate leaving some areas clear and letting the paint totally dry on the plate. Then I just add stripes of clear packing tape on top of the plate and burnish the tape carefully to the plate. When you lift the packing tape off you will also lift off the pattern – your plate will be clean again. Depending on how tacky it still is, either apply as is to a paper surface or by adding a thin layer of Gel Medium underneath.
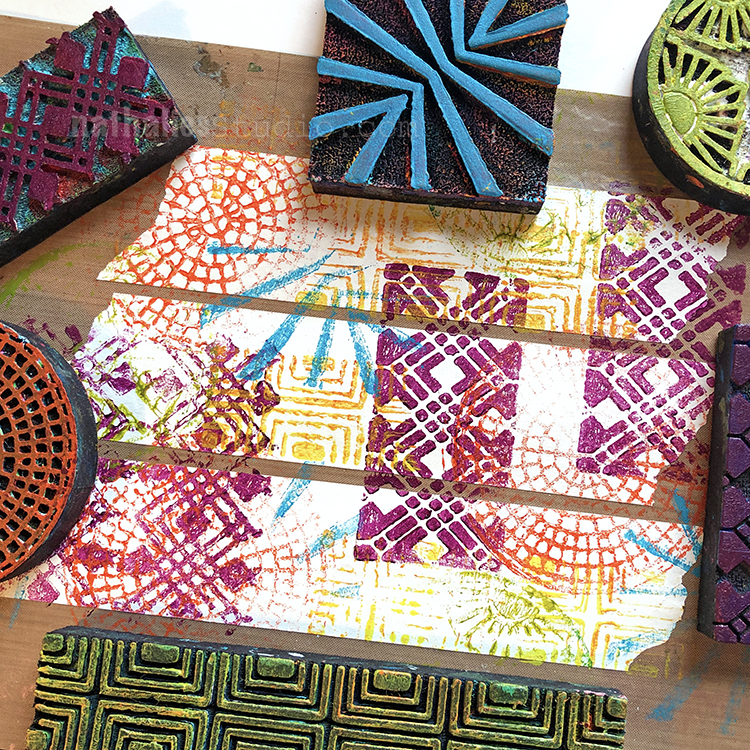
I also love to create my own masking tape by adding strips of tape to a Teflon or craft sheet. Then I stamp over the masking tape strips with different foam stamps and leave the tape strips on the sheet until I actually need them in a project. It is a great way to use up some left over paint with your foam stamps as well.
Day 7 – Stick
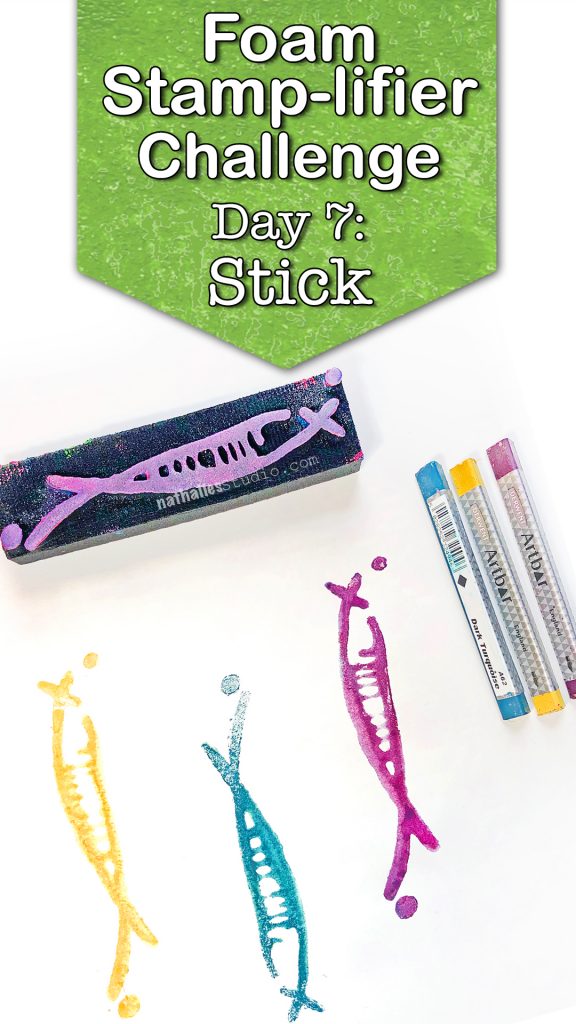
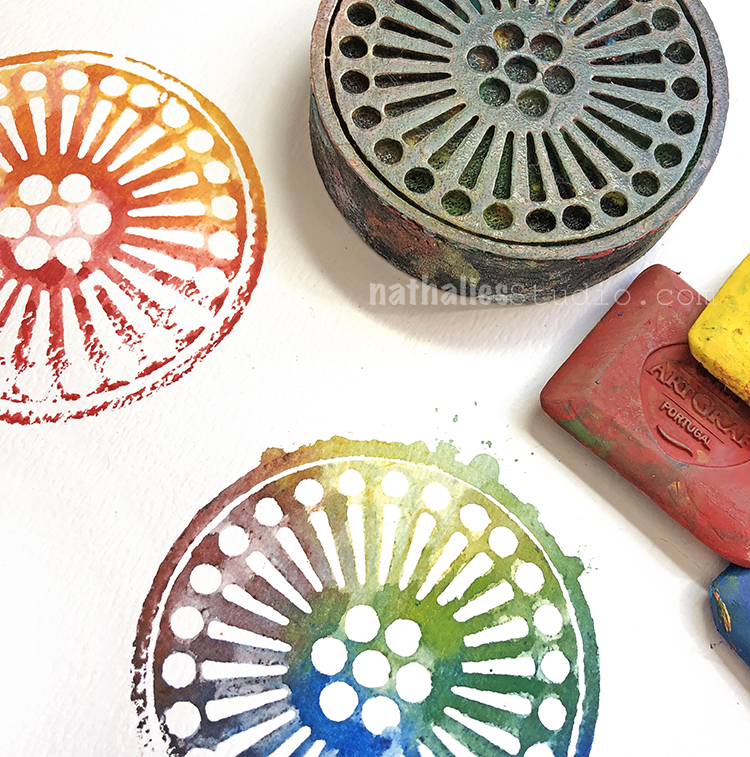
The fact that foam stamps can be used with all kinds of paint media is for me the true amplifier effect. One of my favorite paint media to use with them are all kinds of paint sticks- like Scribble Sticks, or water-soluble wax crayons.
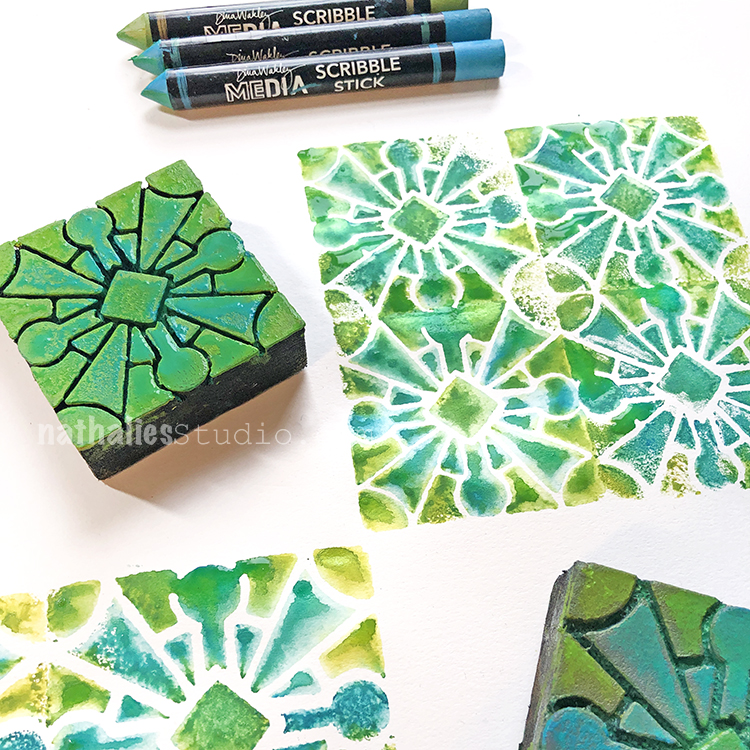
For best results spray a little bit of water onto the foam stamp so that the foam is moist. Then apply the paint sticks and rub them over the raised pattern area. I love that you have a lot of control to blend different colors or create certain color fields to different parts of the stamps. Then simply mist the foam stamp again so that the pigments get reactivated and stamp onto your surface.
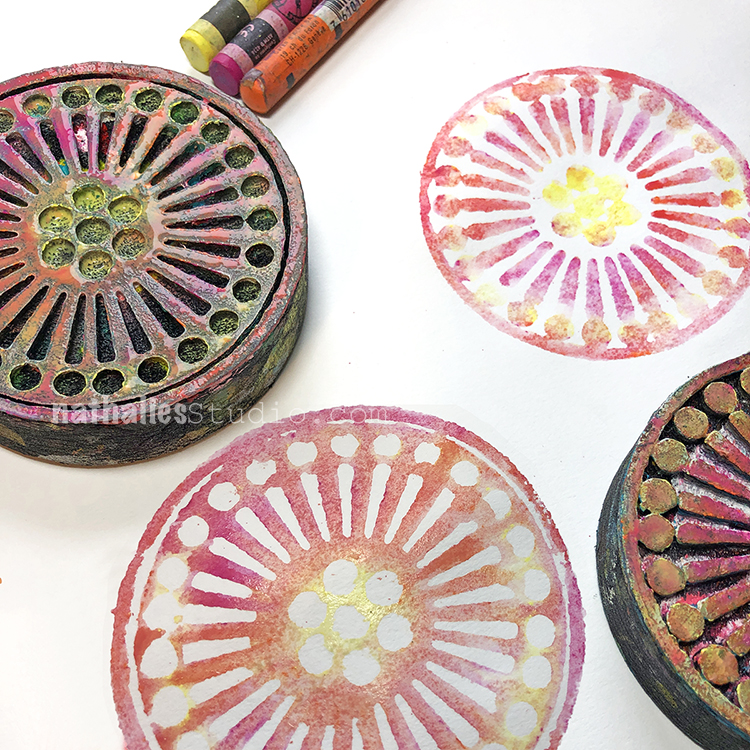
Often times the paint sticks are so highly pigmented that you can even stamp more than once. The result is a beautiful watercolor-like stamped image. To clean the stamp use a baby wipe or wet cloth and gently rub the remaining color off.
Day 8 – Emboss
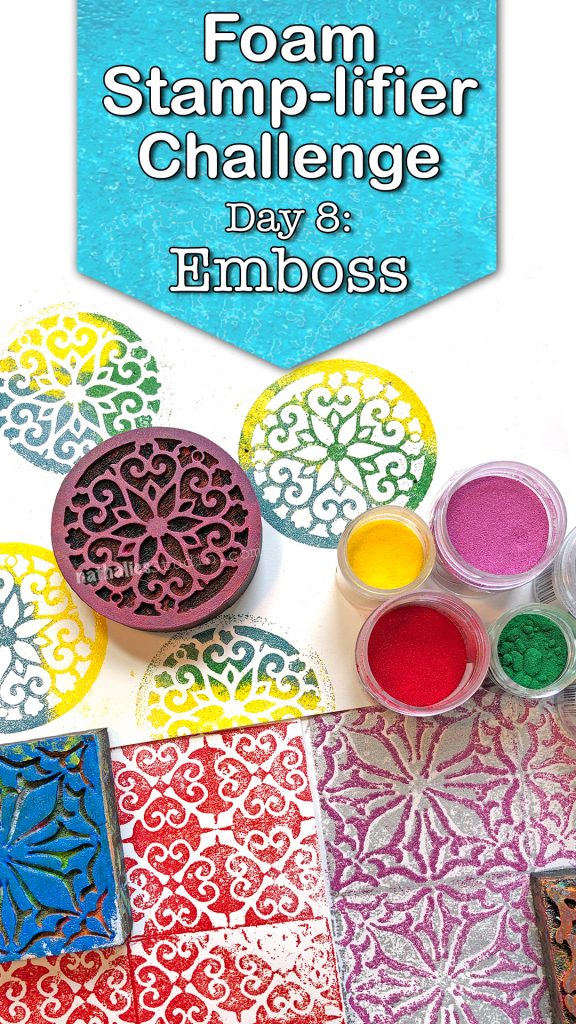
I love to emboss with my foam stamps. The foam surface creates some added texture even if you use super fine embossing powder.
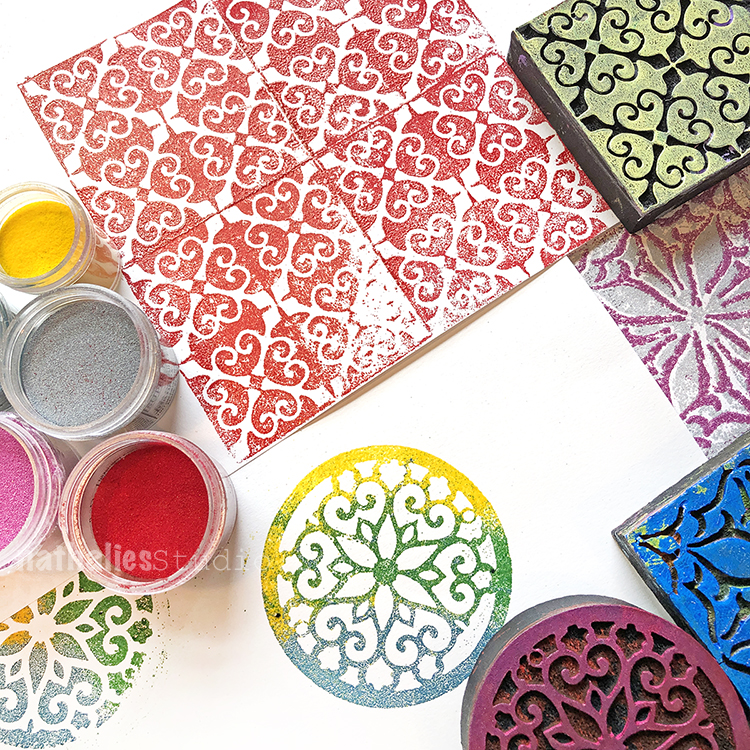
Simply press the clear embossing pad onto the foam stamp and then stamp on paper. You can add just one solid color of embossing powder to your image and then heat emboss.
Or for even more fun, add several different colors of embossing powder and heat emboss one after the other.
Another fun way to use embossing powder is to use the positive and negative sets and layer the embossing. I hope you try it
Day 9 – Resist
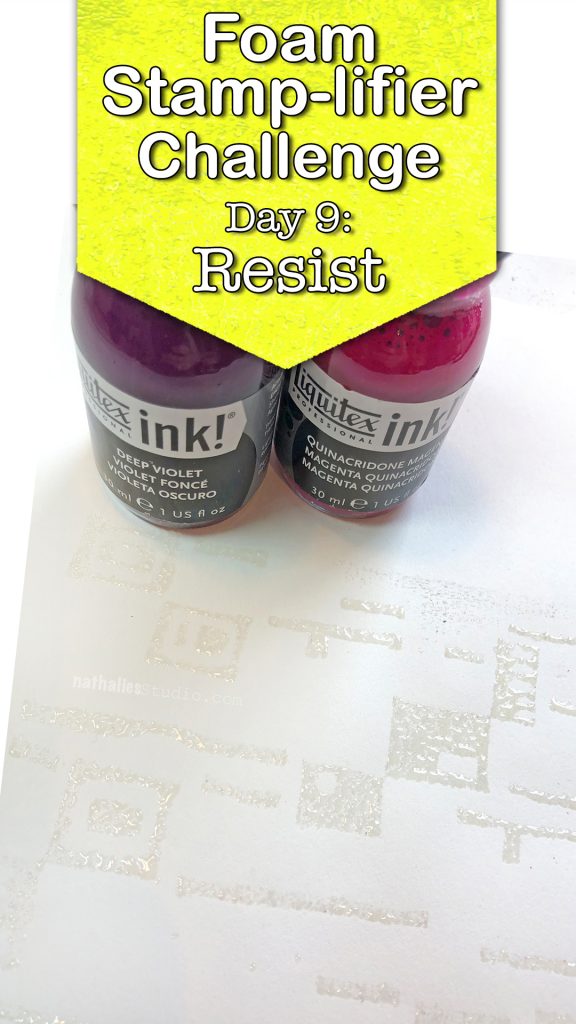
I am a huge fan of resist techniques and this has always been one of my favorite ones.
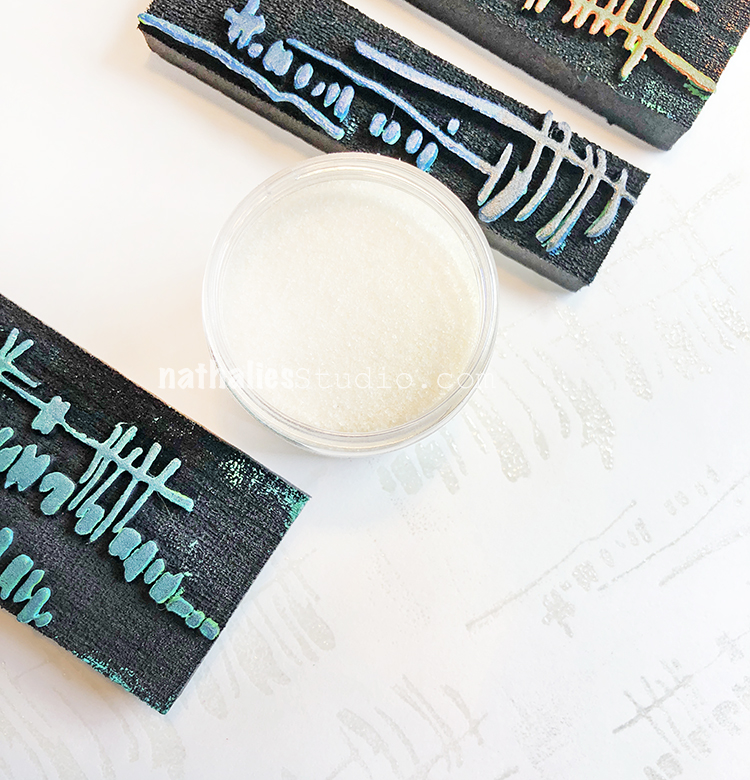
Apply clear embossing ink to your foam stamp. Stamp onto paper. Sprinkle UTEE (ultra thick embossing powder) on top and heat emboss. Let cool and then apply a very thin layer of acrylic paint or acrylic ink over the surface.
The paint or ink will dry slower on top of the UTEE as that area will resist the paint. Use a moist rag or a baby wipe and gently wipe over the raised UTEE pattern to remove the paint.
What remains is a wonderfully textured clear pattern.
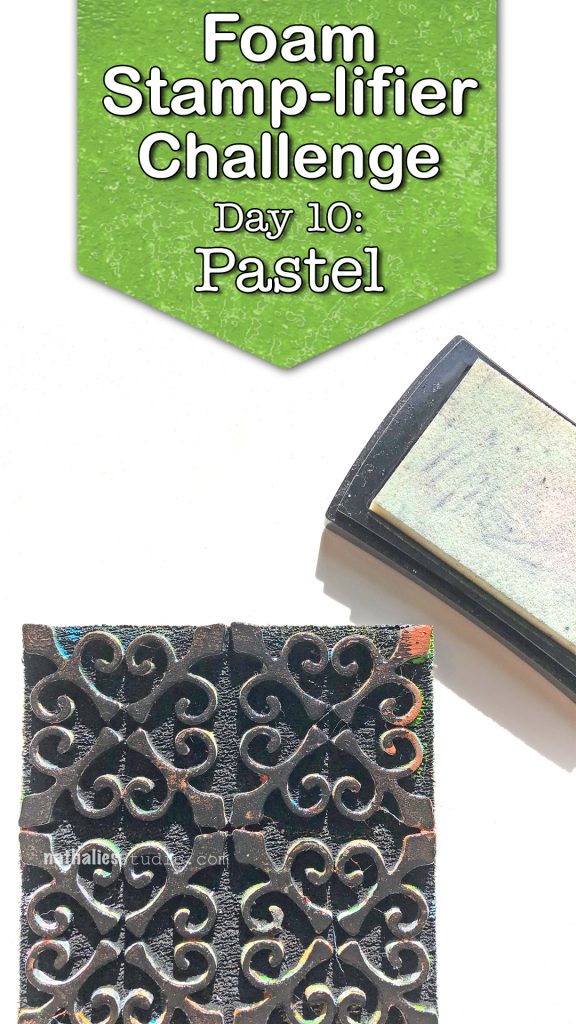
Day 10 – Pastel
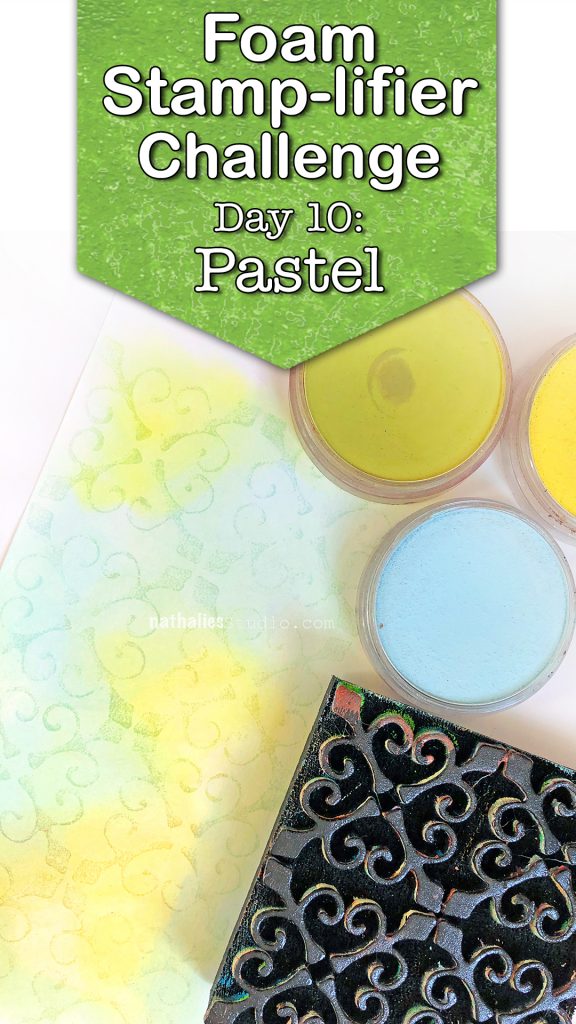
I love using Pastels with my foam stamps. In order to make the pigments stick you need a little trick though. I usually use a clear embossing ink pad and apply it to the stamp, then I stamp onto paper.
My favorite pastels are PanPastels but you can use other pastels as well.
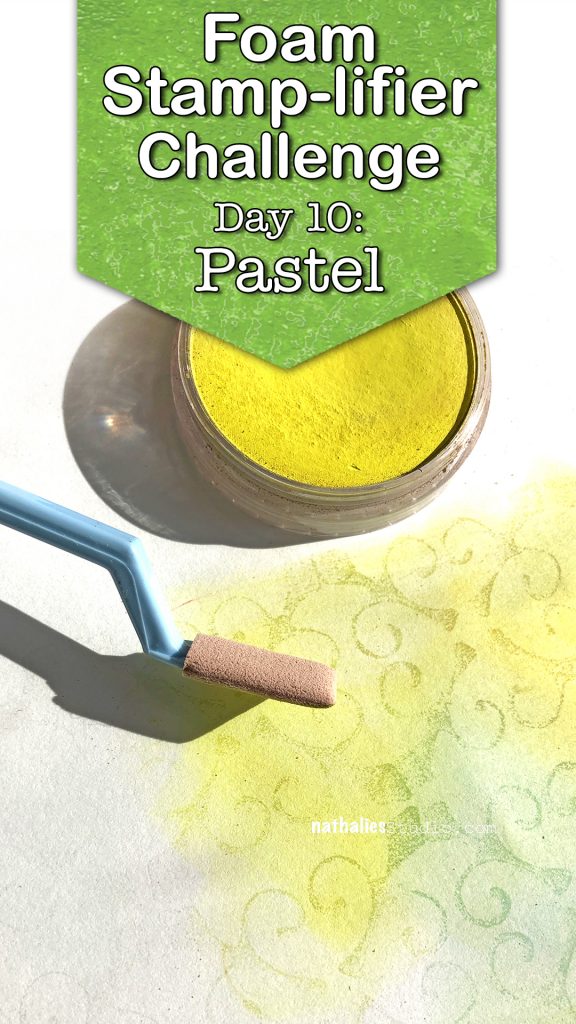
I apply the pastel with a tool over the stamped surface and wherever the embossing ink is on the paper the pastel will accumulate more and collect more of the pastel.
The stamped design will appear darker.
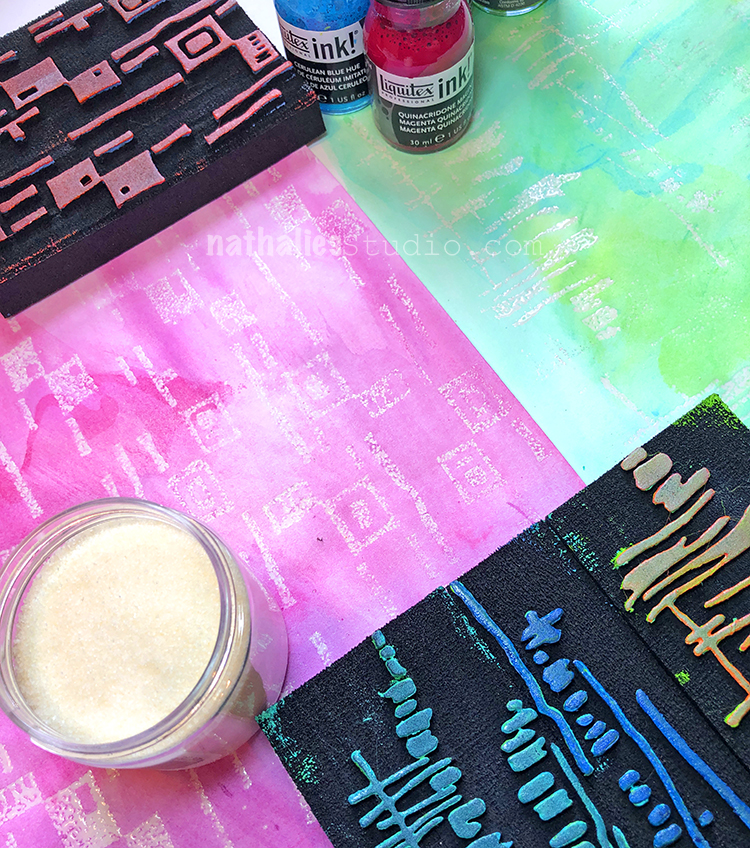
Day 11 – Stencil
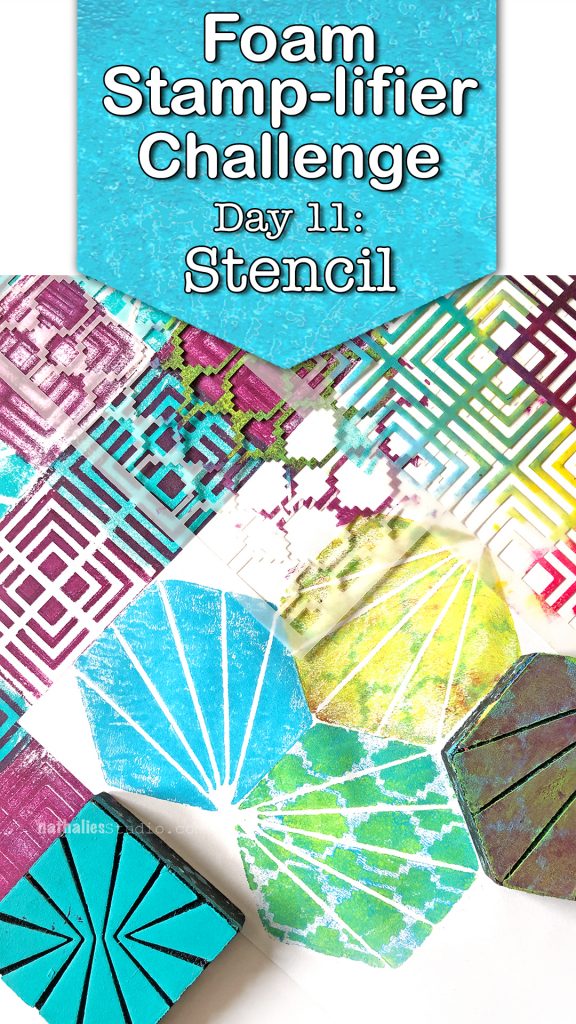
No surprise if you know me…I also love stencils and stencils are perfect amplifying tools for your foam stamps.
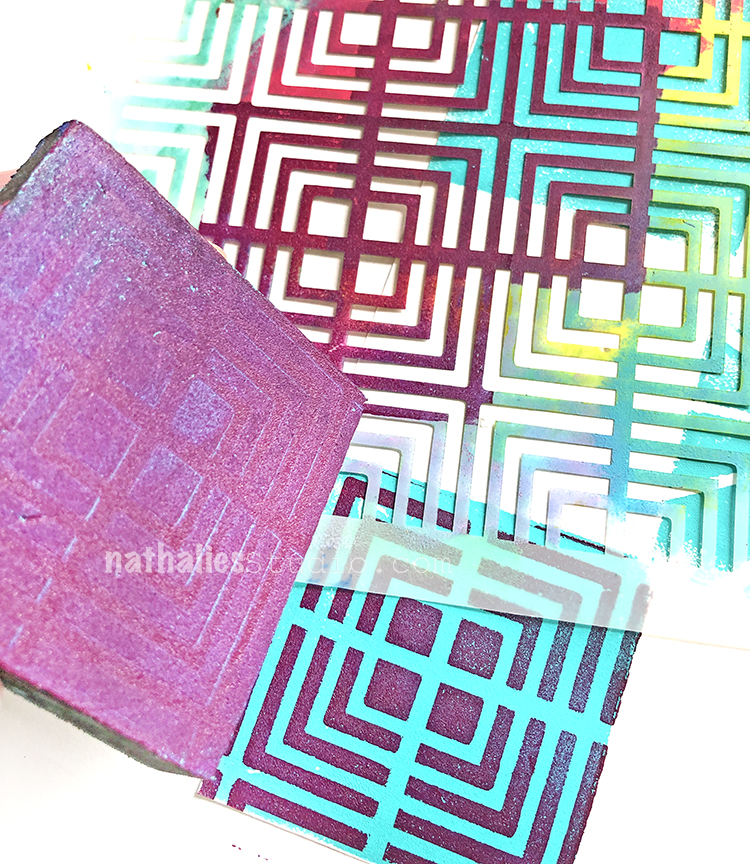
You can add paint to the solid back side of your foam stamps and then stamp through a stencil.

Lift the stencil and stamp right away again to receive a second but inverted print. You can also use foam stamps that have a more solid pattern – and stamp with the pattern side through the stencil. Another favorite of mine is to roll out a color onto the foam stamp with a more solid design and then put the stencil on top and add a different color with a cosmetic sponge on top of it.
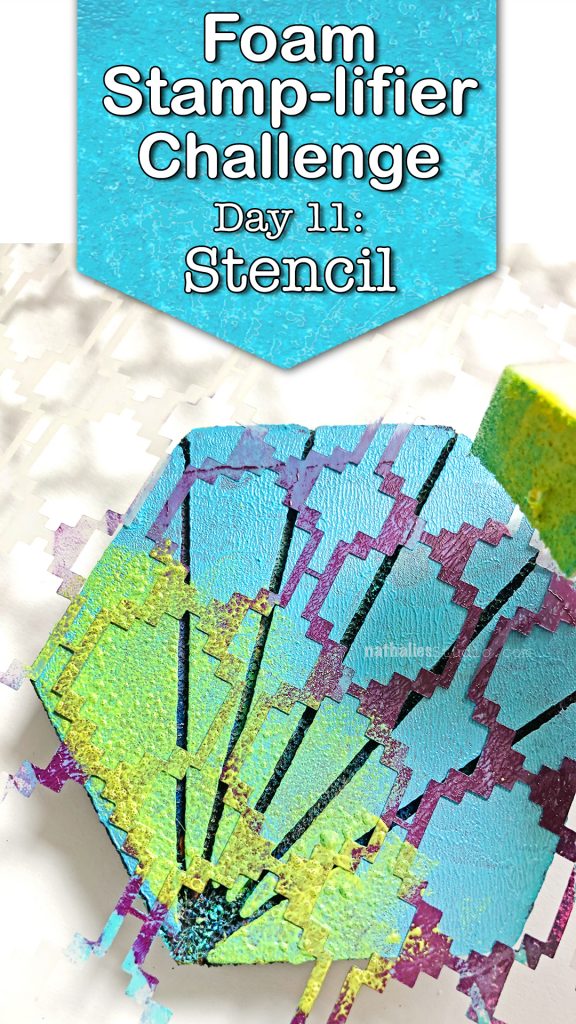
It gives you so many more and unique possibilities with your foam stamps and for that matter also for your stencil.
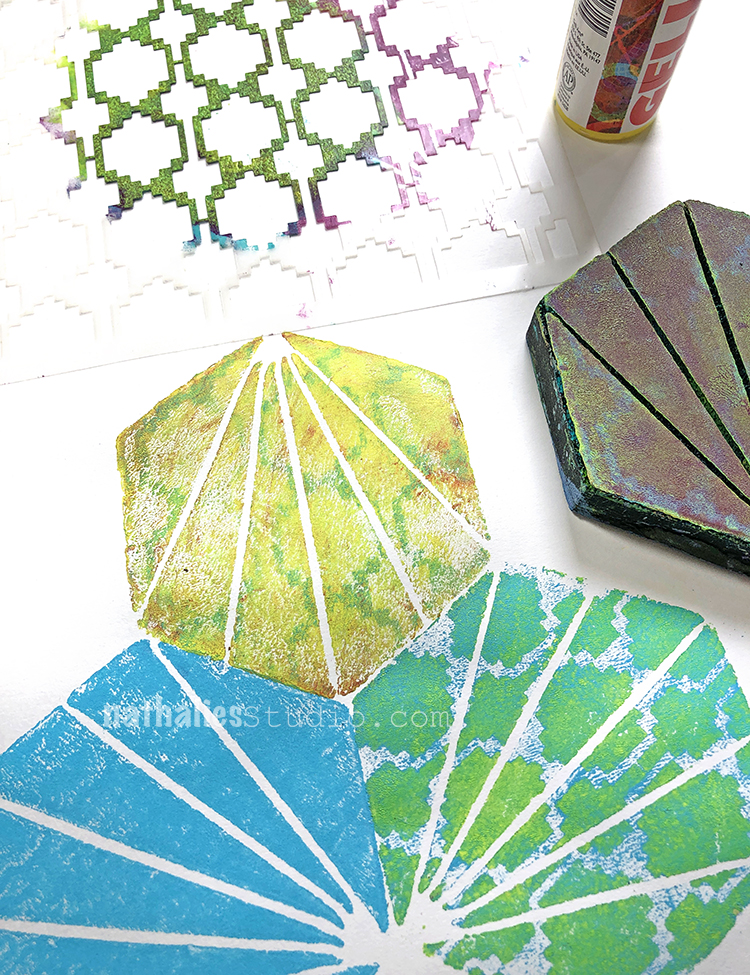
Now that’s what I called amplified.
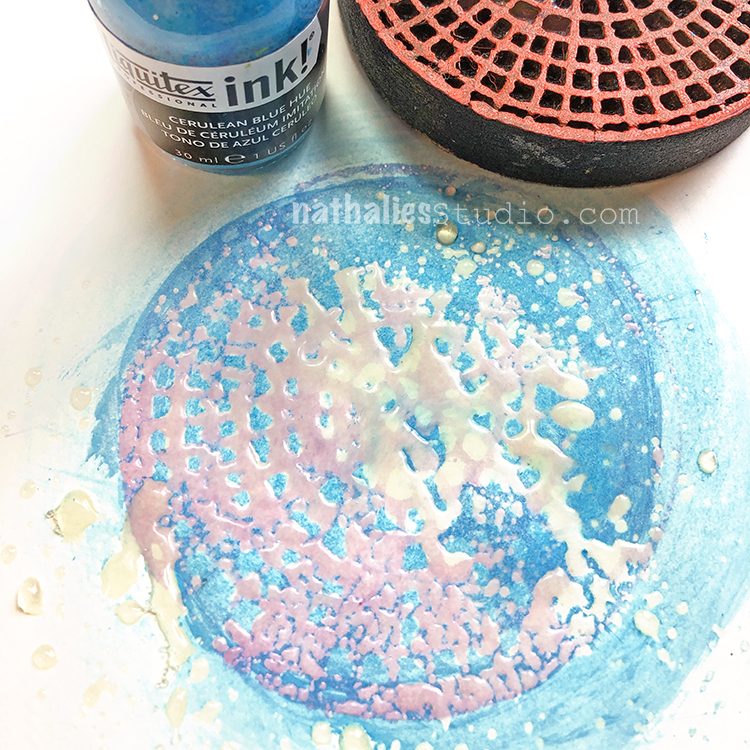
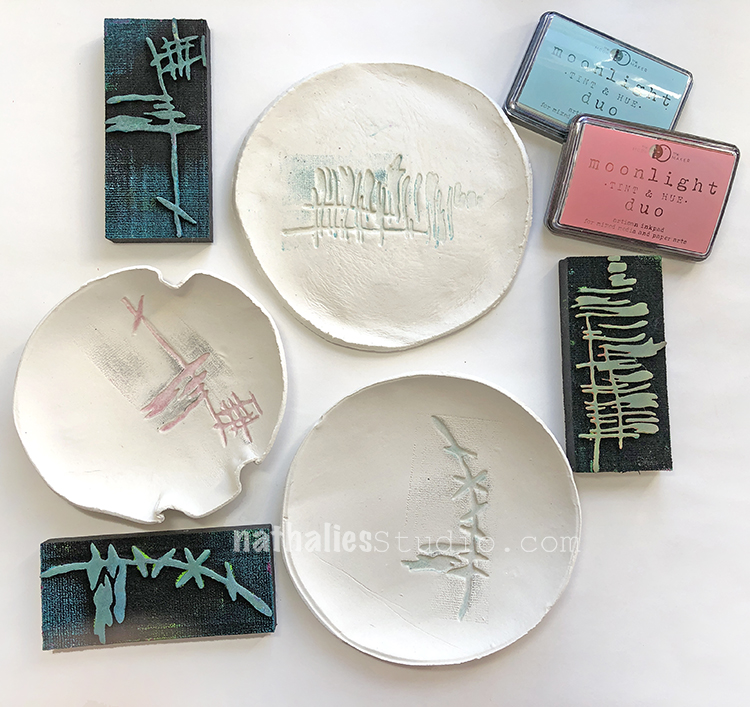
Day 12 – Pigment Ink
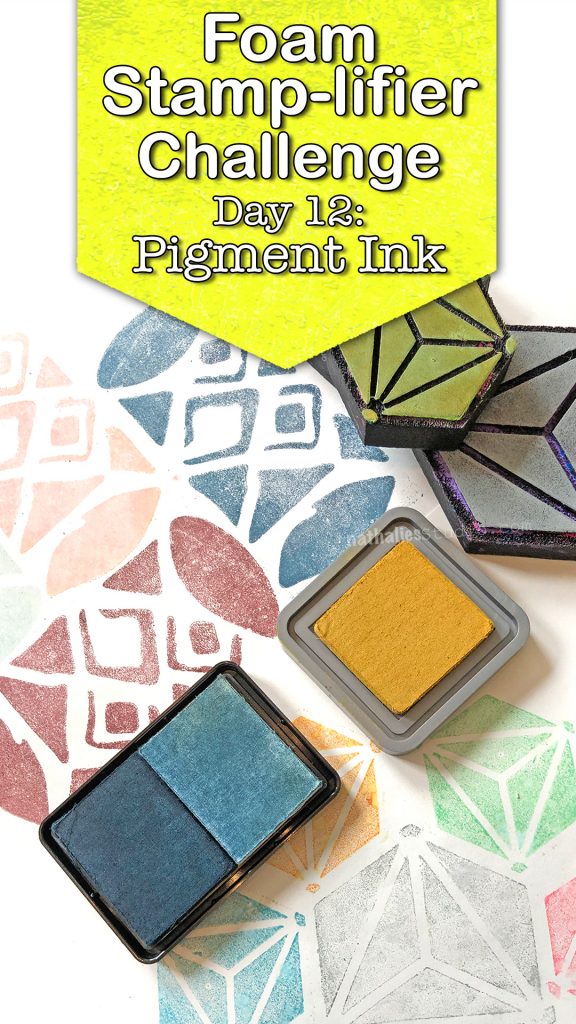
Love love love using my foam stamps also with pigment inks. I love how the foam creates some soft texture in combination with the inks and you can easily clean them after use with some water and a rag or a baby wipe.
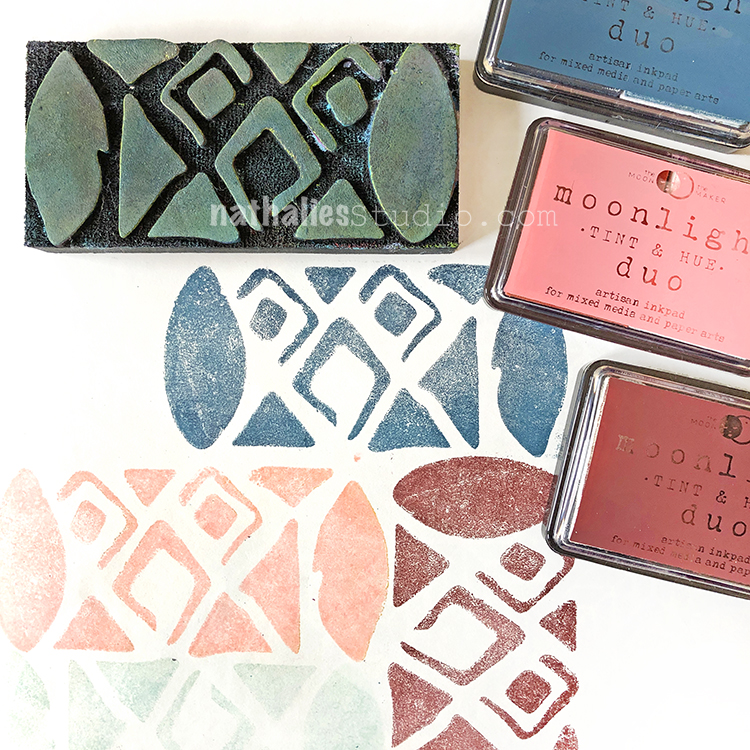
Moonlight Duos by RubberMoon are a great hybrid ink and their colors are just sooo amazing. I also love using Distress Oxides and sprinkle the stamped image with water drops to lift off some of the ink with a paper towel and create even more visual texture.
So much fun and another medium you can easily use with your foam stamps.
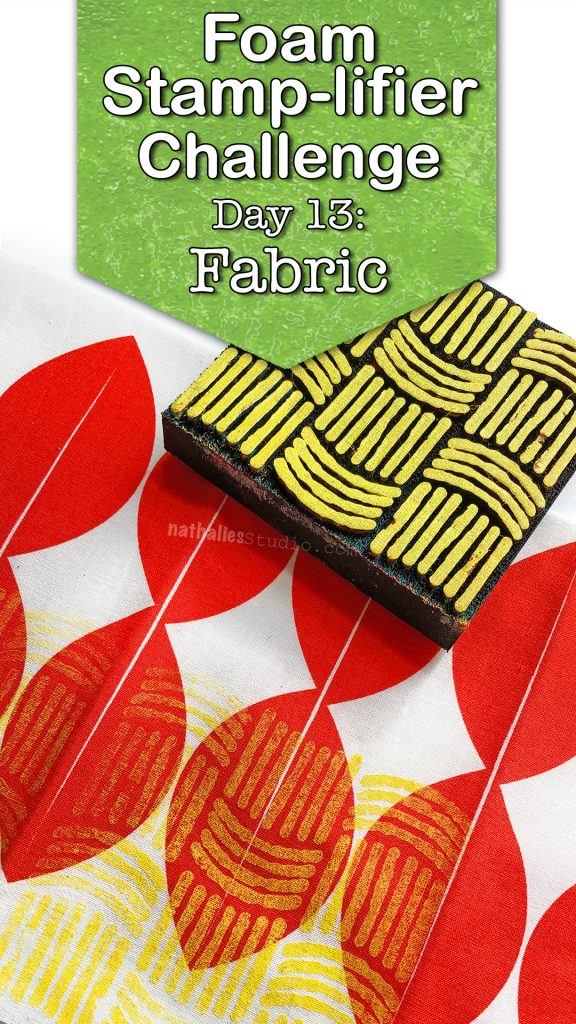
Day 13 – Fabric
Can you say perfect relationship? Foam Stamps and Fabric love each other.
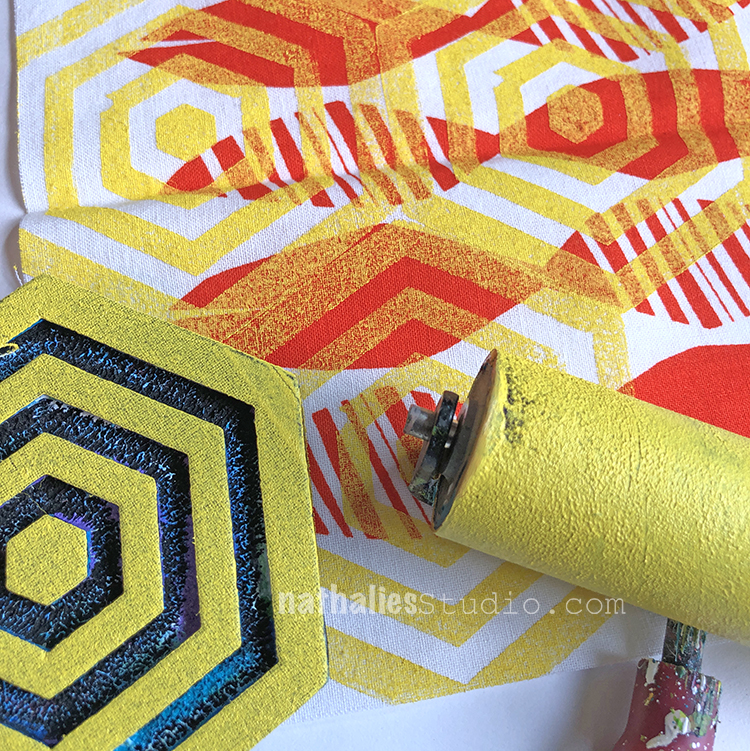
You can use acrylic paint, but for fabric I want to wear or when I want to keep the fabric soft I use fabric paint. Besides using the foam stamps on a solid colored piece of fabric, using it on a piece that already has a pattern is my total geek out fun.
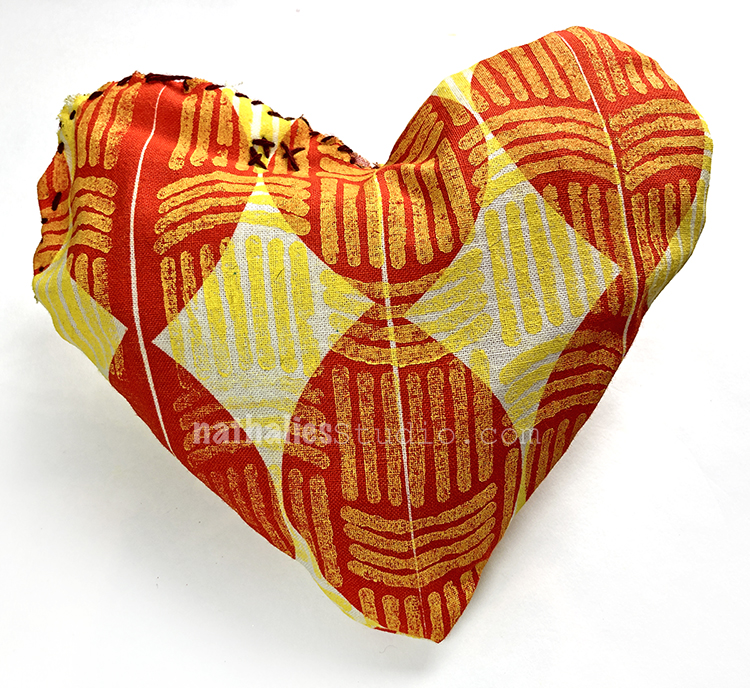
You can use the fabric many many ways- but here…I give you my heart :)
Day 14 – Embroidery
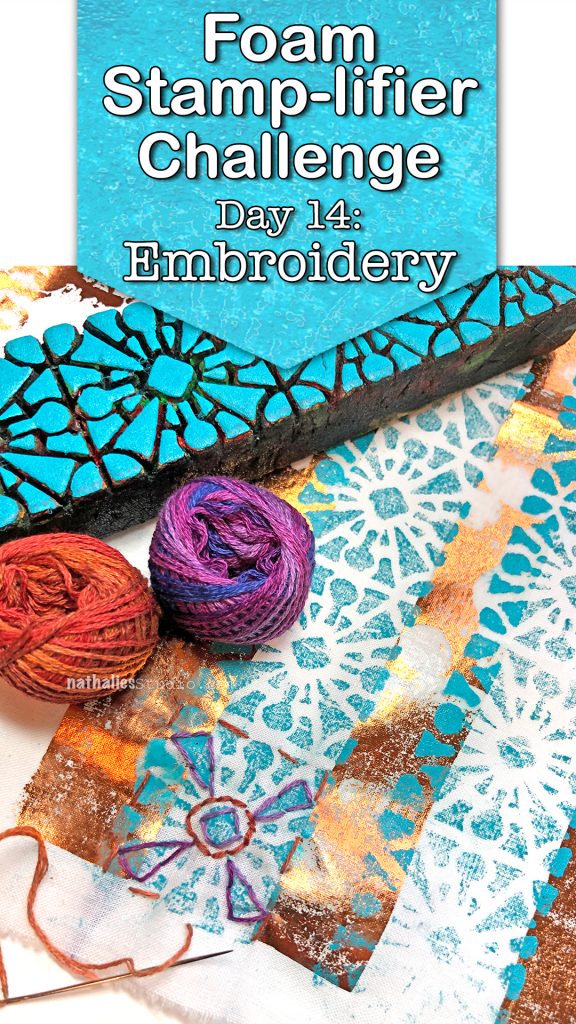
Oomphing up your foam stamped image by adding some embroidery on top of the image is super fun! You can either just add some accents with certain embroidery stitches or fill in the entire design with satin stitches.
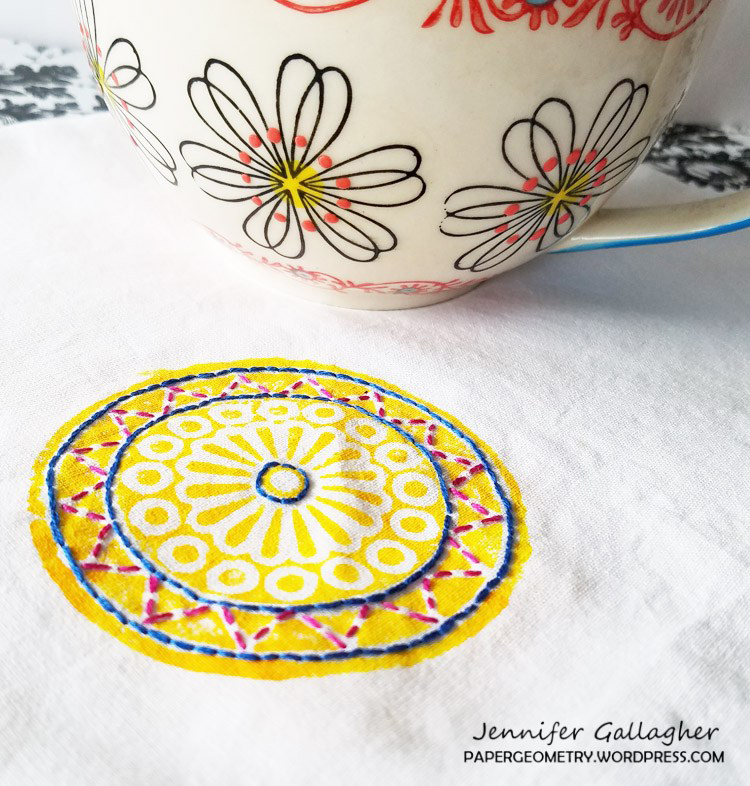
My Creative Squad Member Jennifer did a wonderful job creating some napkins with embroidered foam stamping and they are so beautiful. So many possibilities by combining foam stamping and embroidery.
Day 15 – Hugs & Kisses
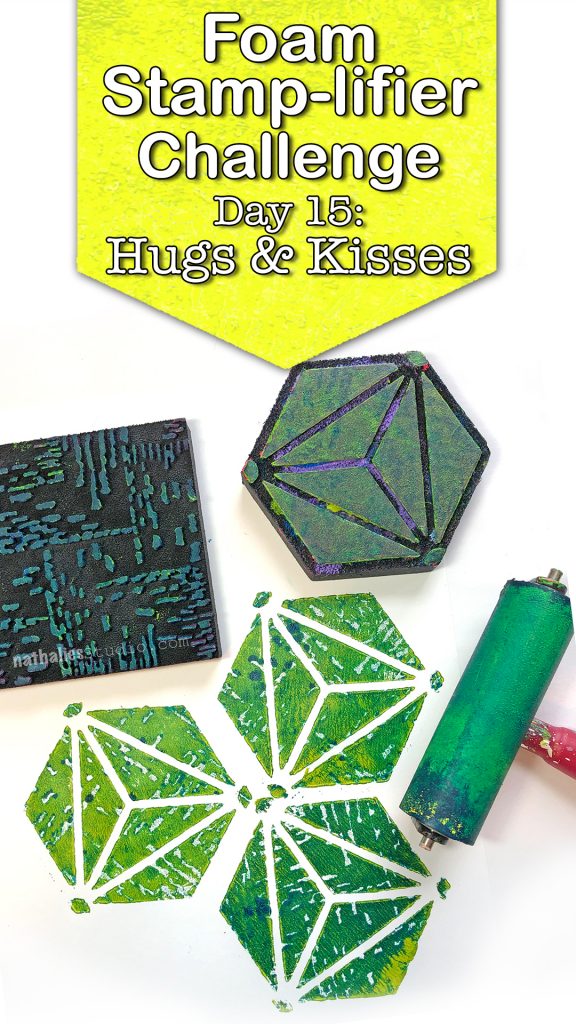
I think the right term is stampkissing but I think Hugs & Kisses is perfectly adequate for this foam stamplifier technique. Use two different foam stamps- one that is more solid and one with a small pattern, apply different colors to each of them and then stamp them together face to face – lift and stamp the more solid patterned foam stamp.
You can stamp off the other stamp on a different paper and get a nice color scheme. Make sure to use colors that mix well together.
Day 16 – Ghost
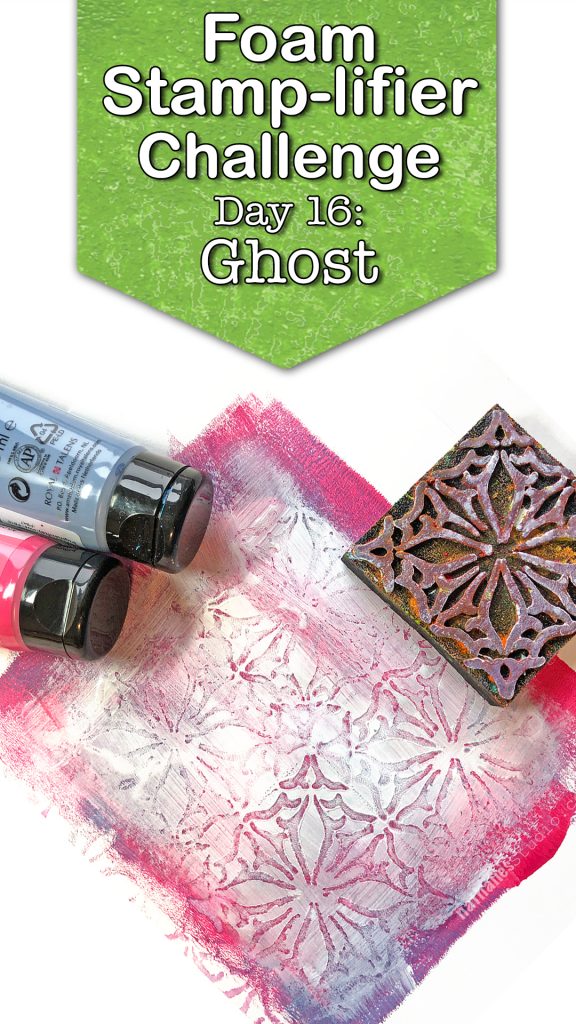
No, no, don’t be scared- this is a friendly Ghost prompt. I love to apply paint on top of a dried paint layer and while the second layer is still wet, I take my slightly wet foam stamp and press it into the paint and lift it.
This will remove the second layer paint partly and create texture making for a subtle and nice imprint and revealing the color underneath. My favorite second color for this is white- it just gives a nice antique plaster effect.
Day 17 – Shape
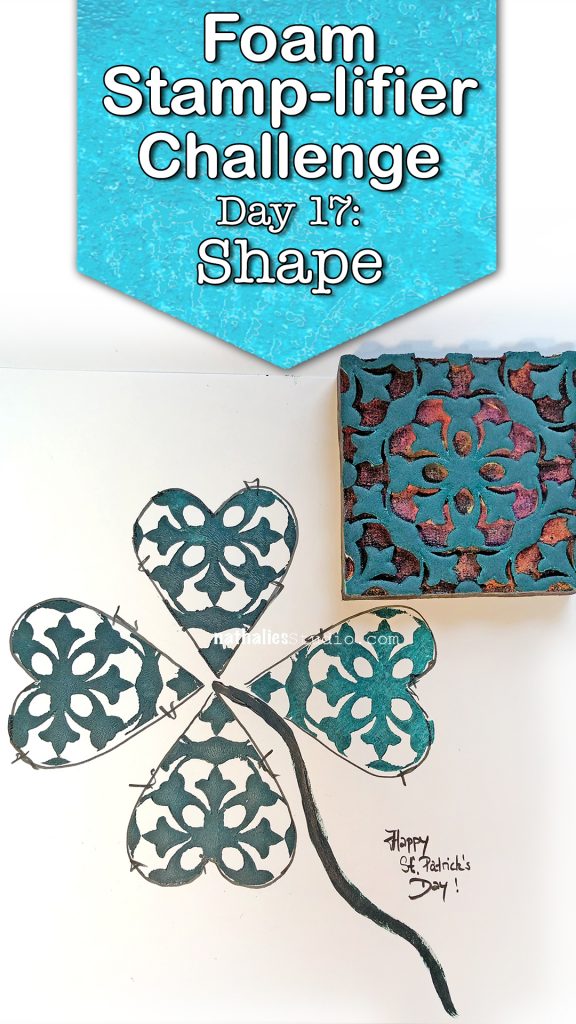
Happy St. Patrick’s Day. I thought this would be a great day to amplifier your stamps using them to stamp out a shape…like a shamrock. Although …I guess I messed it up since a shamrock is a three-leaf clover ….oh well…you can tell I am not Irish- LOL – but hey, I tried.
Anyway you can use any shape of course and you can cut it out of a piece of paper or like I do out of a piece of deli paper. Basically you are creating a stencil.
Then just fill in the opening with either one or more foam stamp patterns, and lift the stencil- the filled in area defining the actual shape.
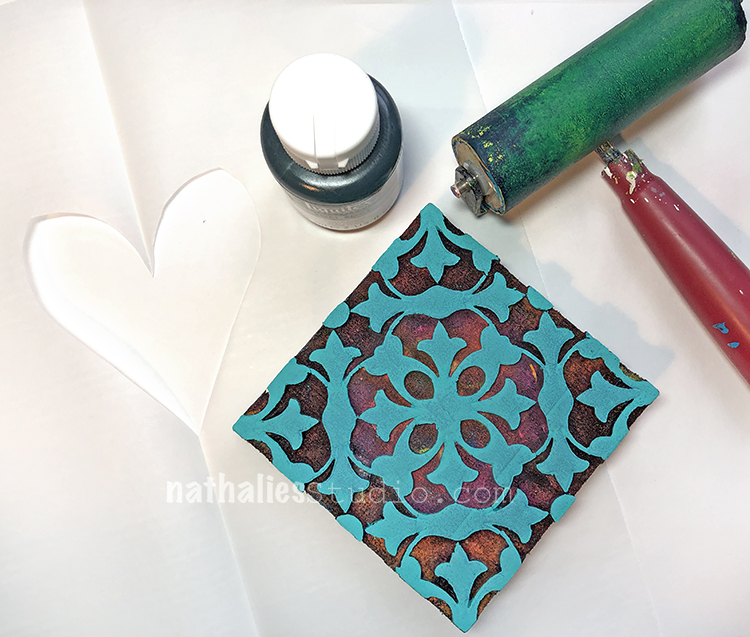
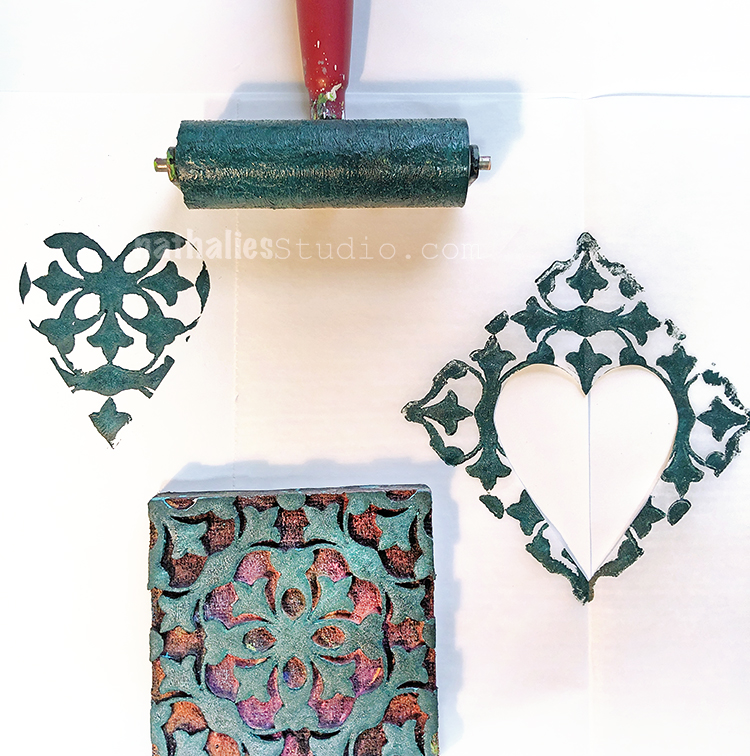
Day 18 – Mask
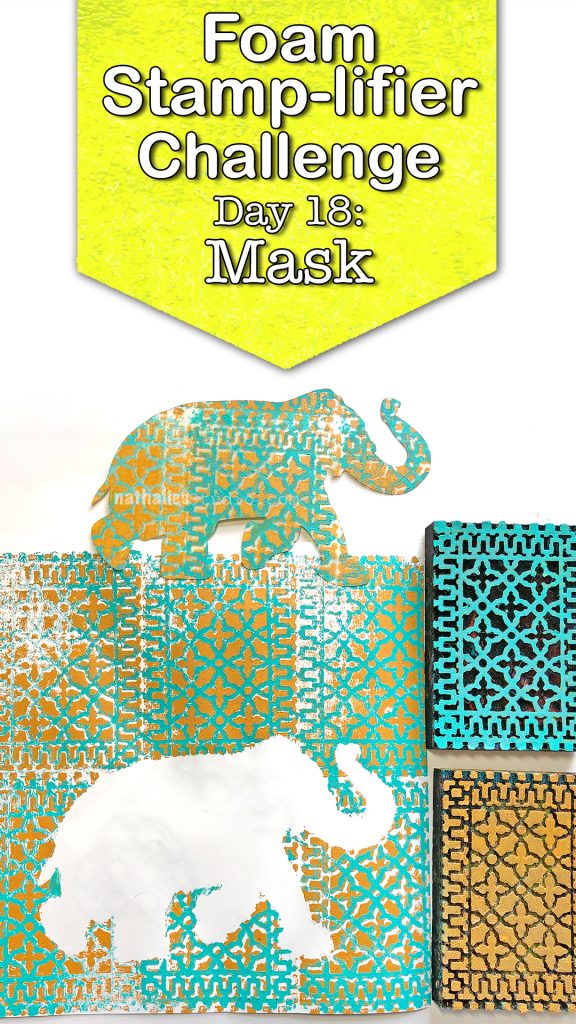
Now of course you can also mask an area off and then define that area by stamping over the mask. Here I used one of my beloved Elephant Masks and my Downtown positive and negative Foam stamps.
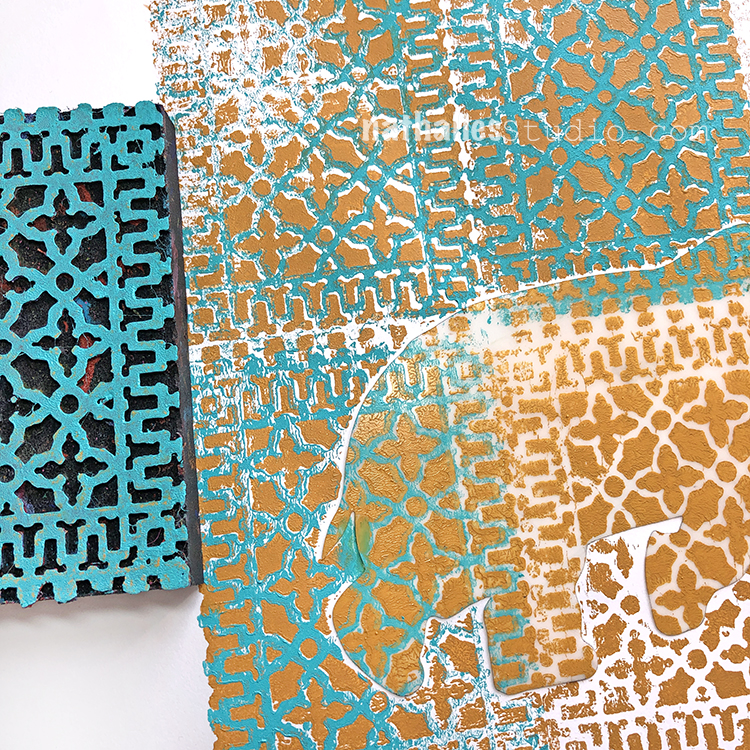
You can easily cut out your own mask of course. And voila …there you have a it – love the background. So many options with this.
Day 19 – Spray
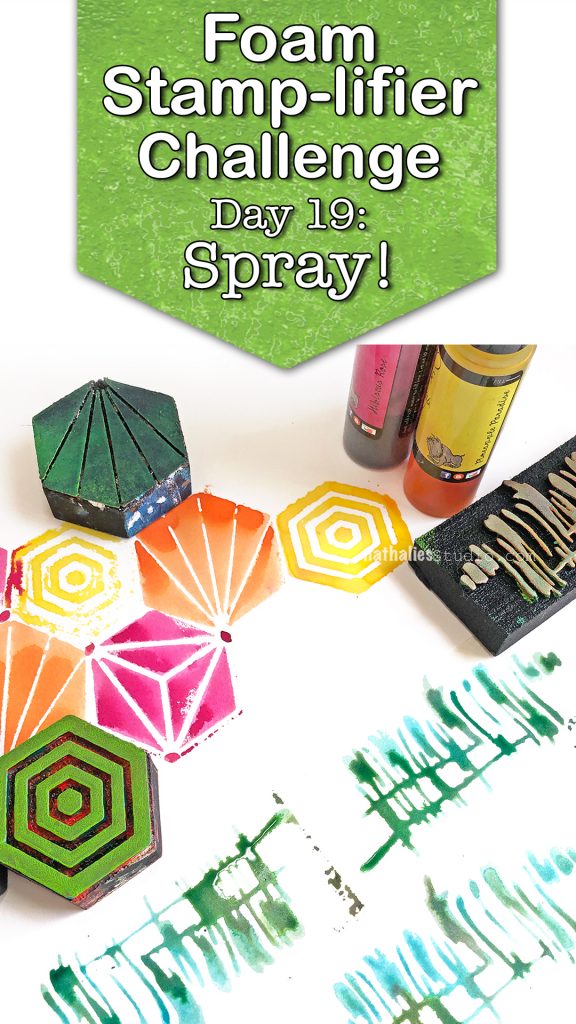
Another one of my super favorite foam stamplifier techniques is to use dye or ink sprays with my foam stamps.
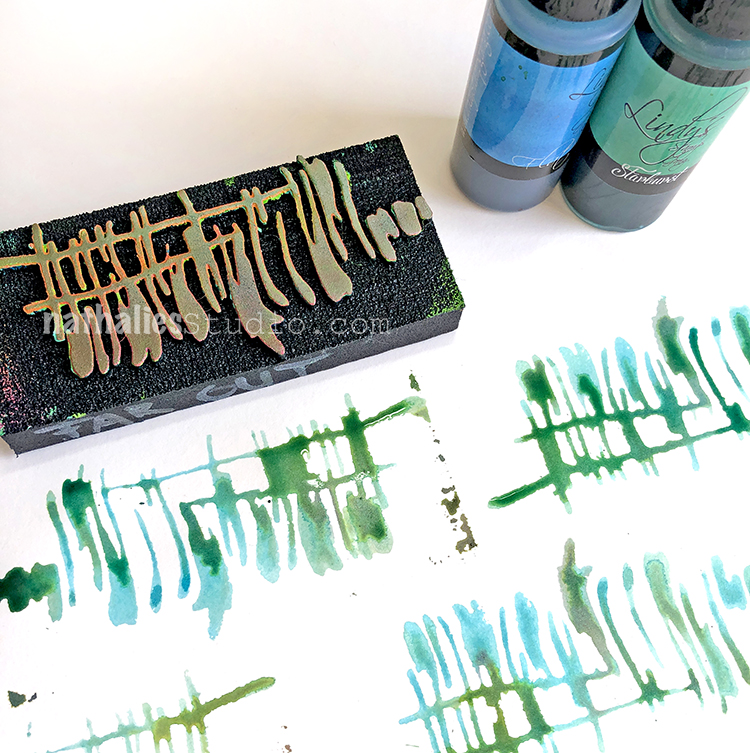
Spray onto the stamps and print – I love the super vibrant watercolor effect this gives. So easy and yet so effective!
Day 20 – Texture
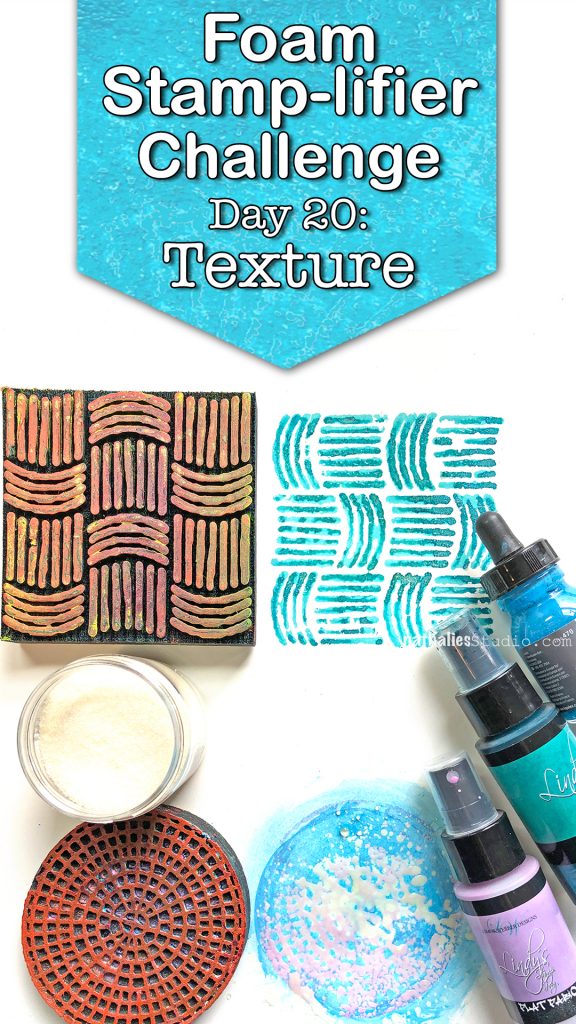
Another one of my old foam stamplify favorites. Use the spray paint we used yesterday as an embossing agent and create some nice grungy texture.
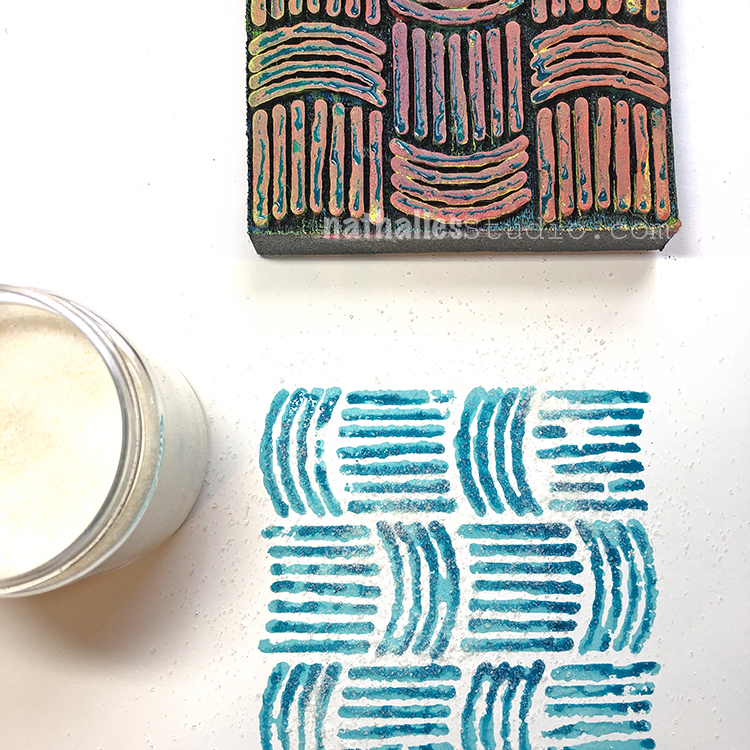
Spray your foam stamp with dye ink and stamp and while the ink is still wet sprinkle some UTEE or ultra thick embossing powder on top and then heat emboss it.
I love the raised water drop like texture this creates.
Day 21 – Brush
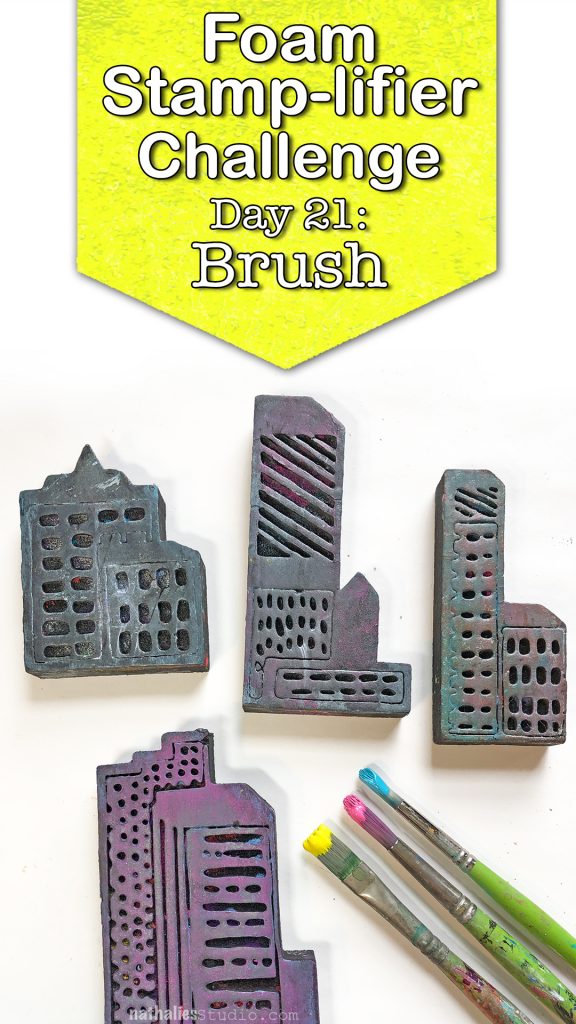
Using a brush to color in certain areas of a foam stamp is also a cool way to amplify the stamps.
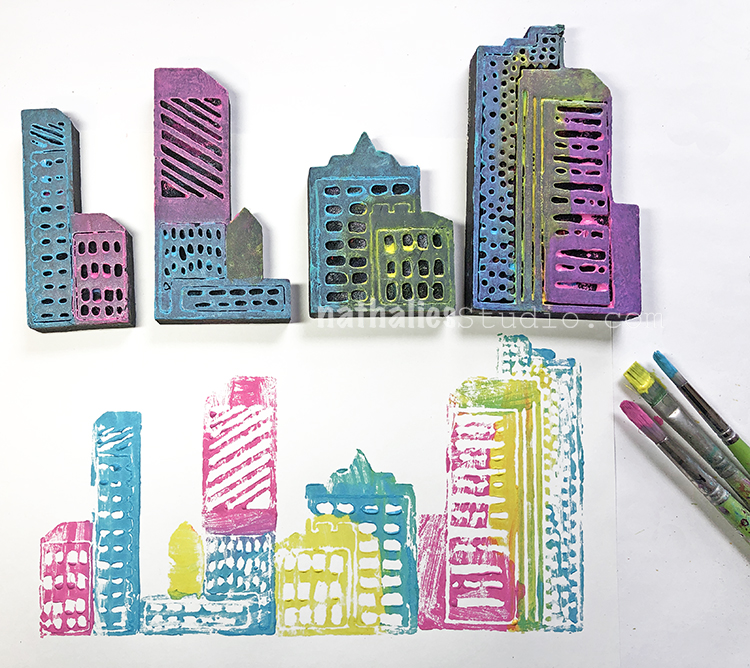
When working with acrylic paint you either have to work fairly quick in order to prevent the paints from drying too fast or you can use a little bit of retarder with your paints to extend the drying time a bit.
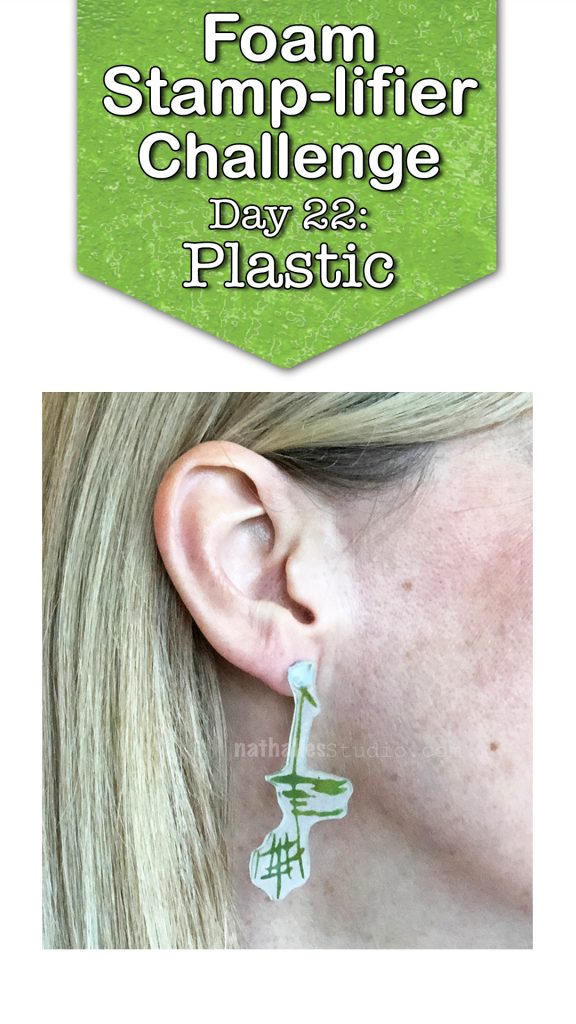
Day 22 – Plastic
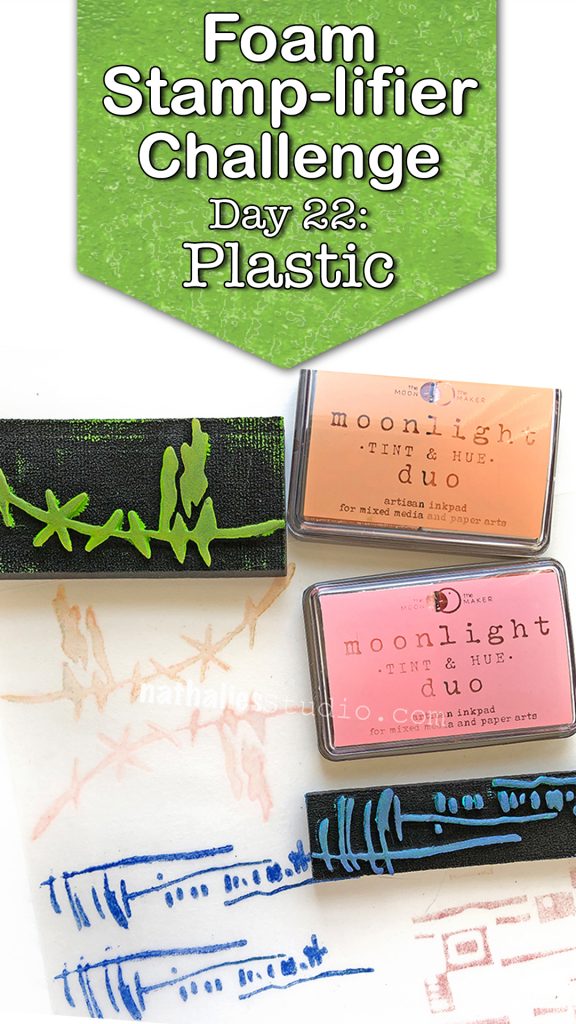
Printing on top of plastic sheets or overhead foils is a fun way to create transparent elements for your work or nice dividers for your art journal but my favorite of all must be using Shrink Plastic. From wine charms, to embellishments to earrings. Using the foam stamps with inkpads of your choice, stamp your desired images.
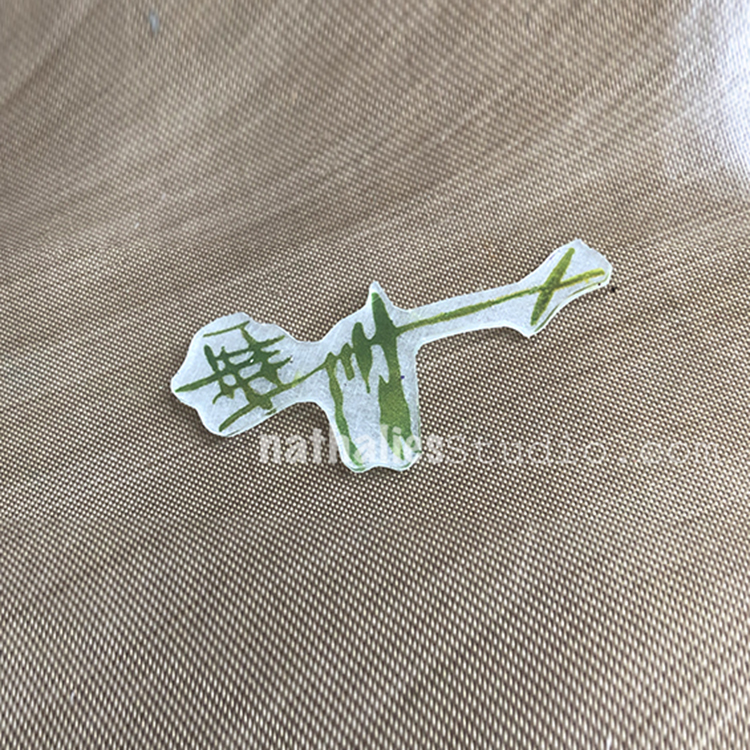
Then heat the shrink film up as the manufacturer recommends and you will get a tiny version of your stamped image. Too cute! Here is a sample where I used the shrink film to create myself some new fancy earrings.
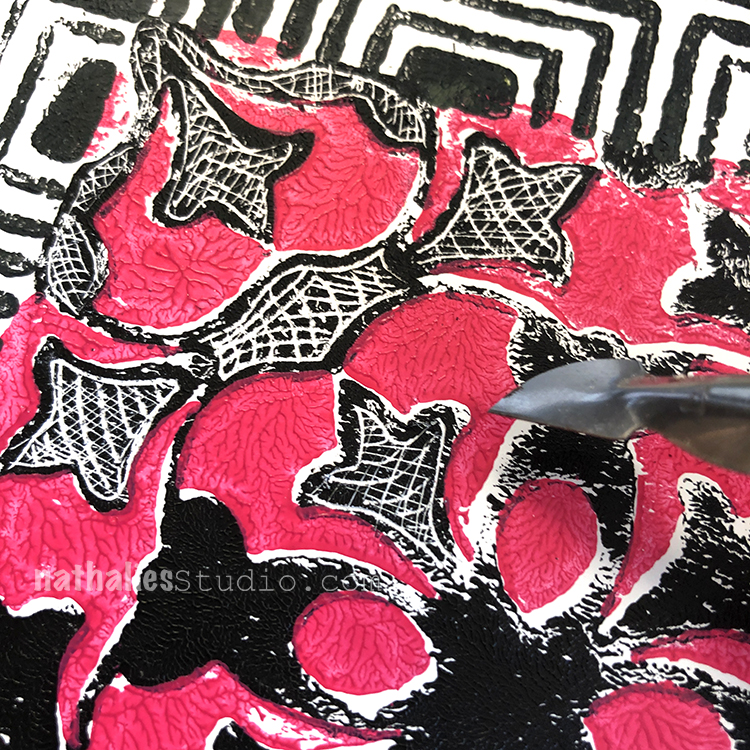
Day 23 – Scratch!
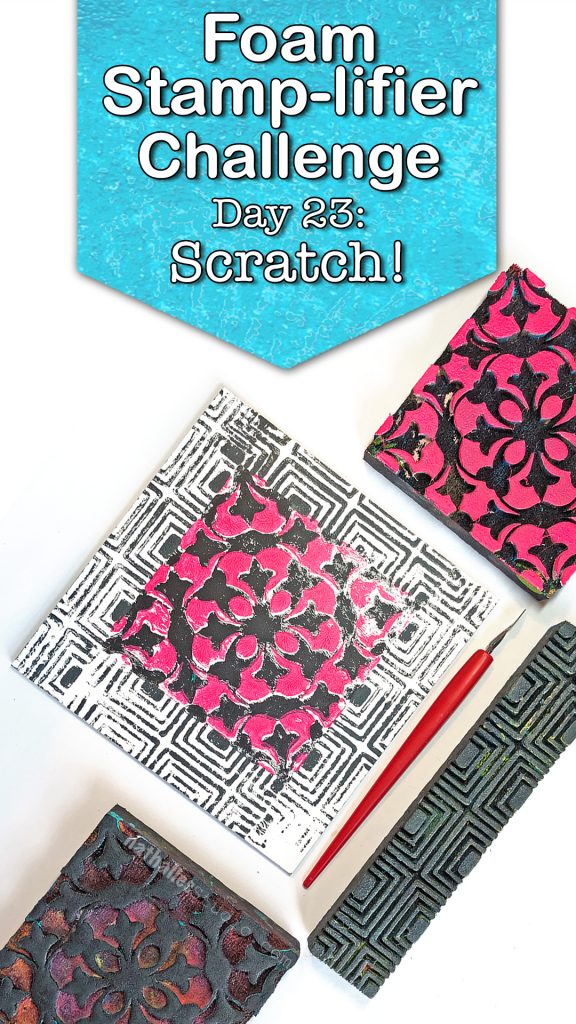
Another fun way to use Foam Stamps is to stamp onto some Ampersand Clayboard to create some great textured designs.

Stamp on top of the clay board with acrylic paint or spray ink or inks and then start scratching into the design. It is like doodling by scratching- better then coloring books- trust me!
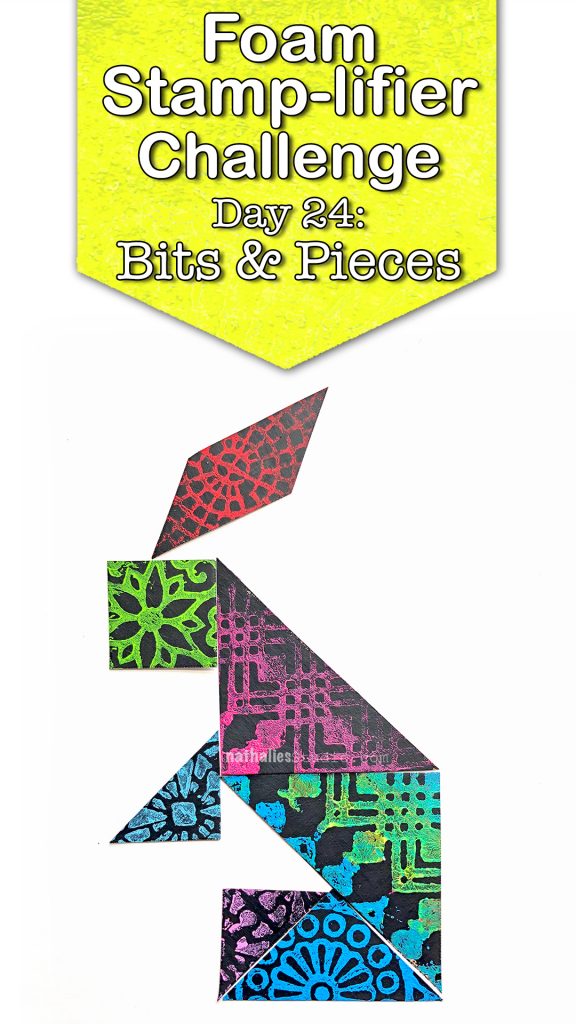
Day 24 – Bits & Pieces
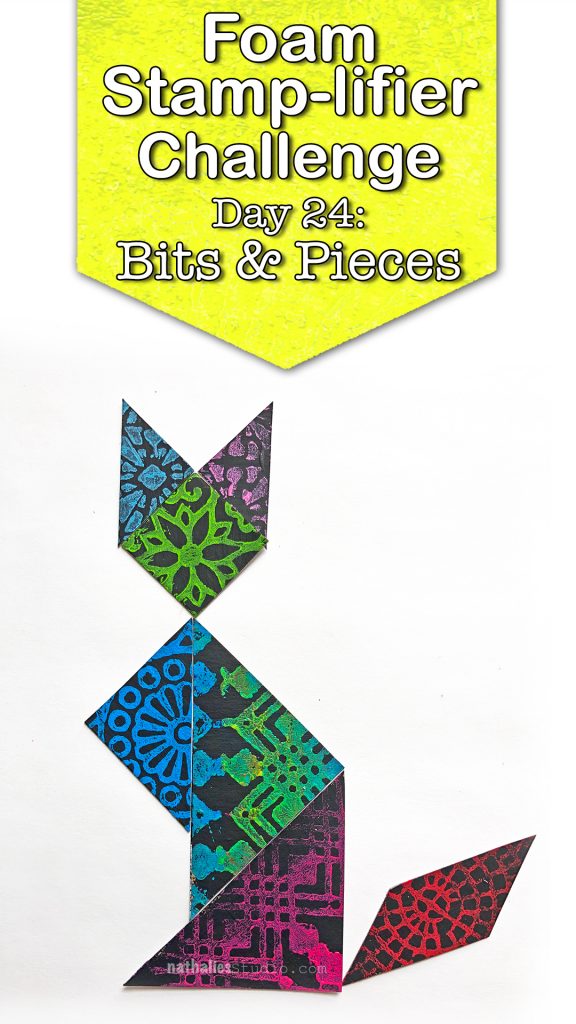
How about using bits and pieces of foam stamped paper to create something new?
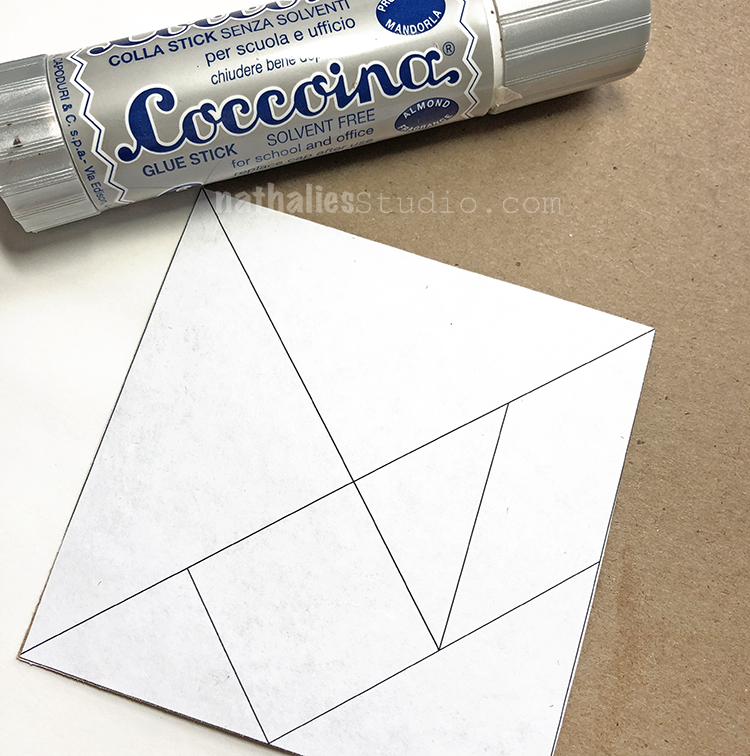
You could create a tangram which is a puzzle which consists of 7 flat geometric shapes which put together can create a new shape.
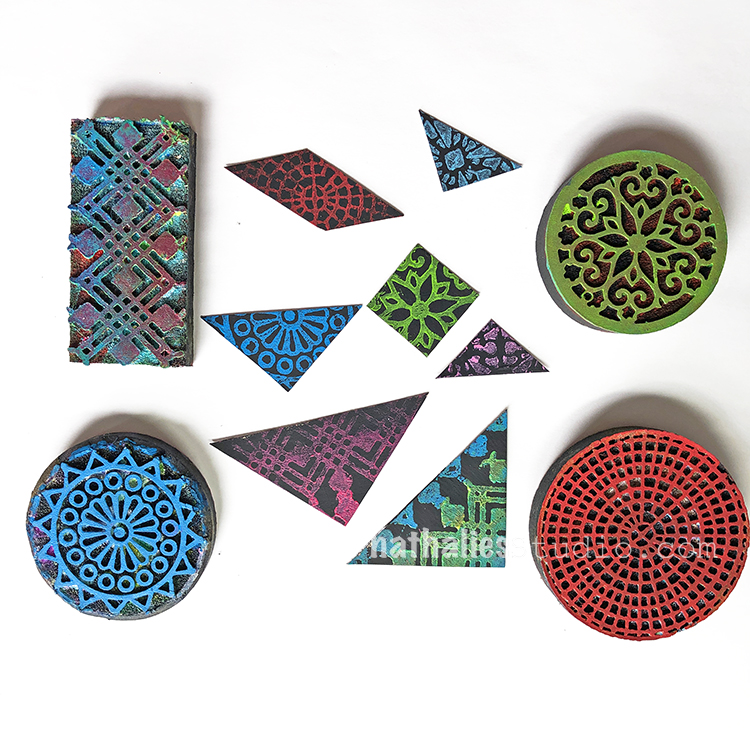
Simply google tangram, print out the template, glue it on some white or black paper, start stamping with your foam stamps and cut it.
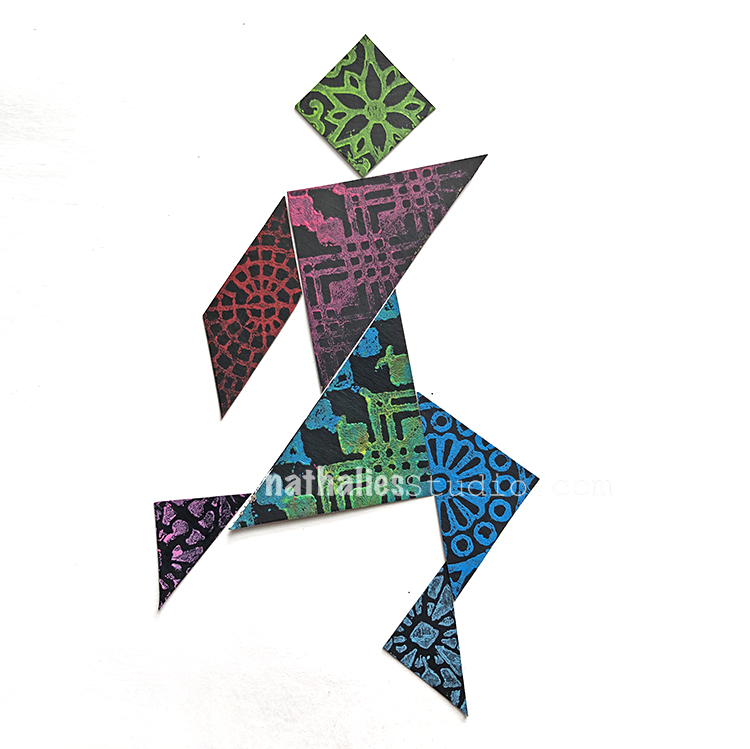
And then go and play …
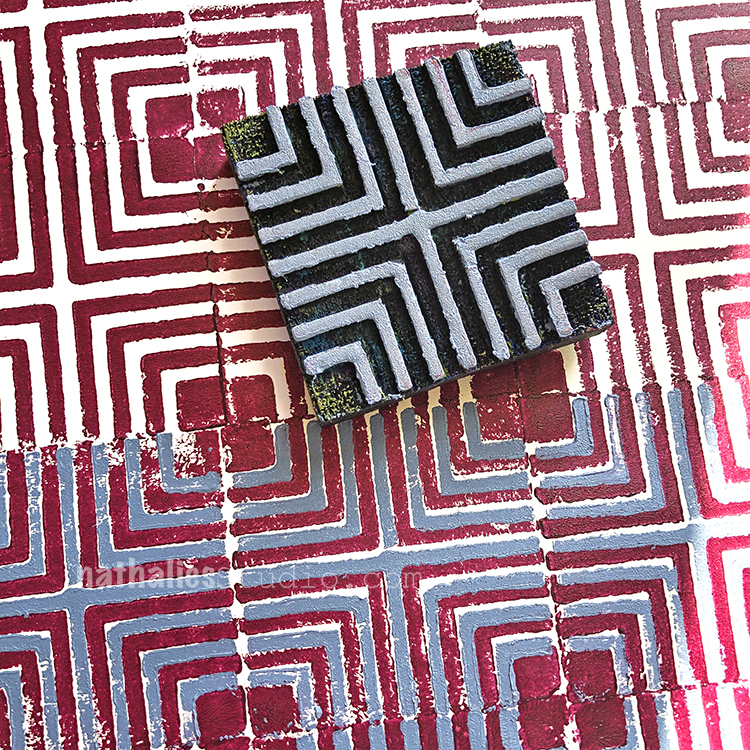
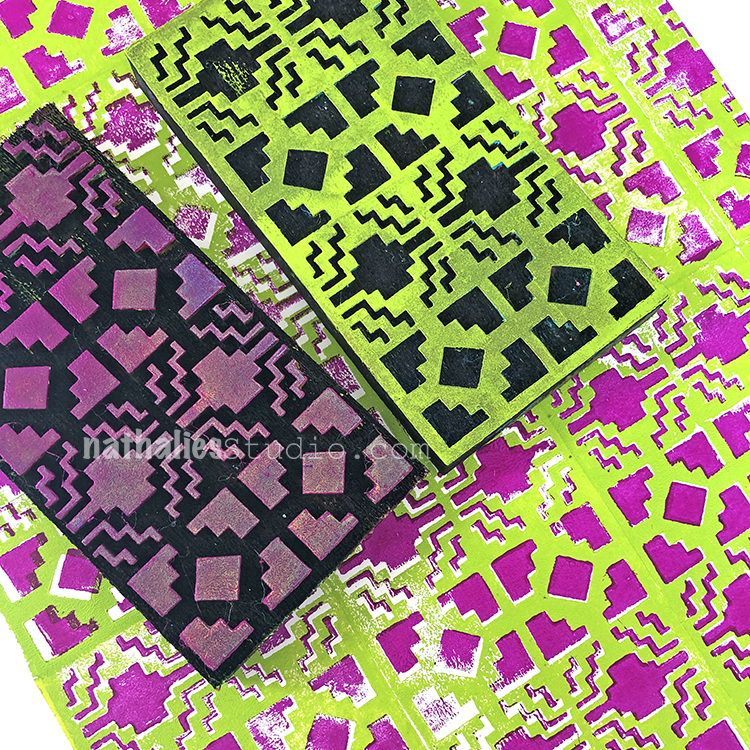
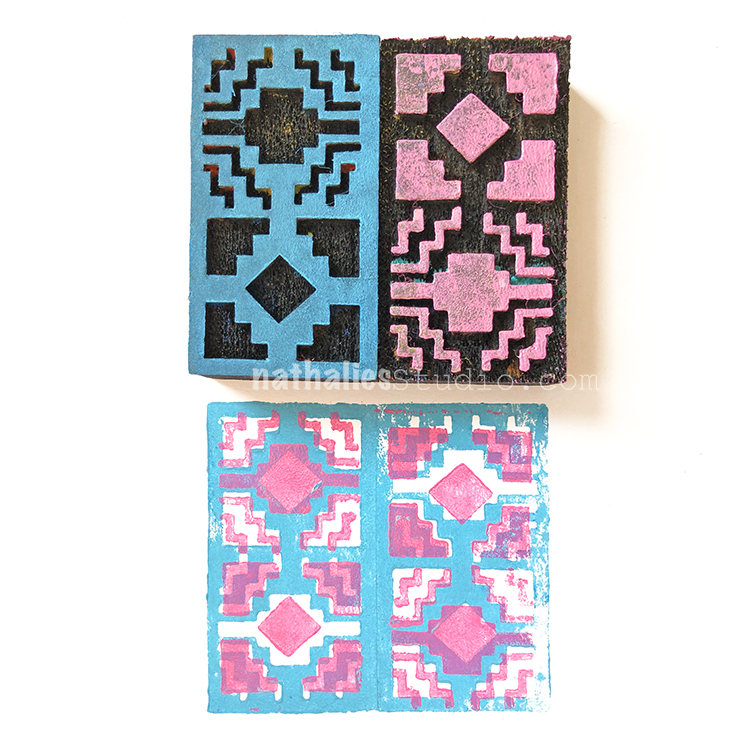
Day 25 – Pattern
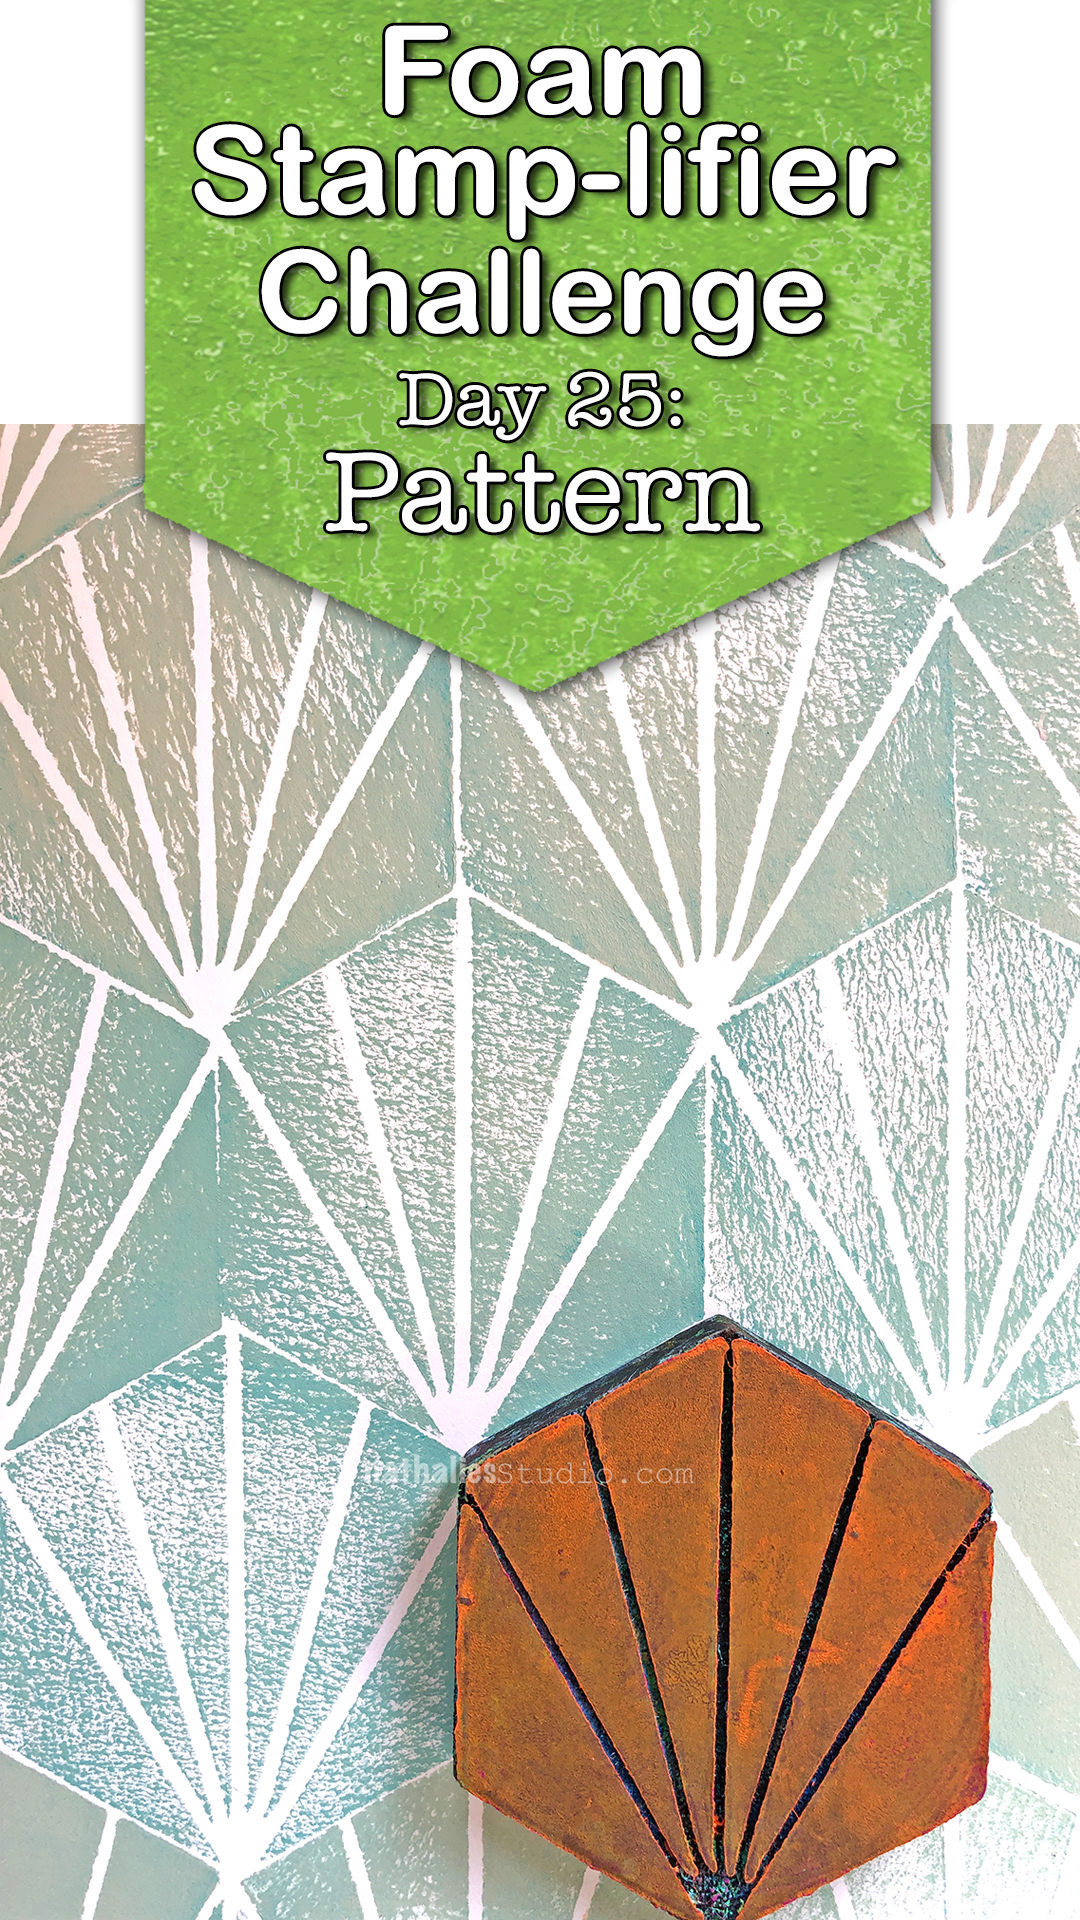
It is so much fun to create pattern with Foam Stamps- there are so many ways to use them to do that. Sometimes lining up the same stamp next to each other in different directions creates different patterns. Sometimes combining different foam stamps create a nice cohesive pattern like my new mid century patterned foam stamps.

I also love creating tile patterns with my stamps and just thinking of the ways I can amplify one foam stamp and create different outcomes makes me all giddy.
Day 26 – Mix & Match
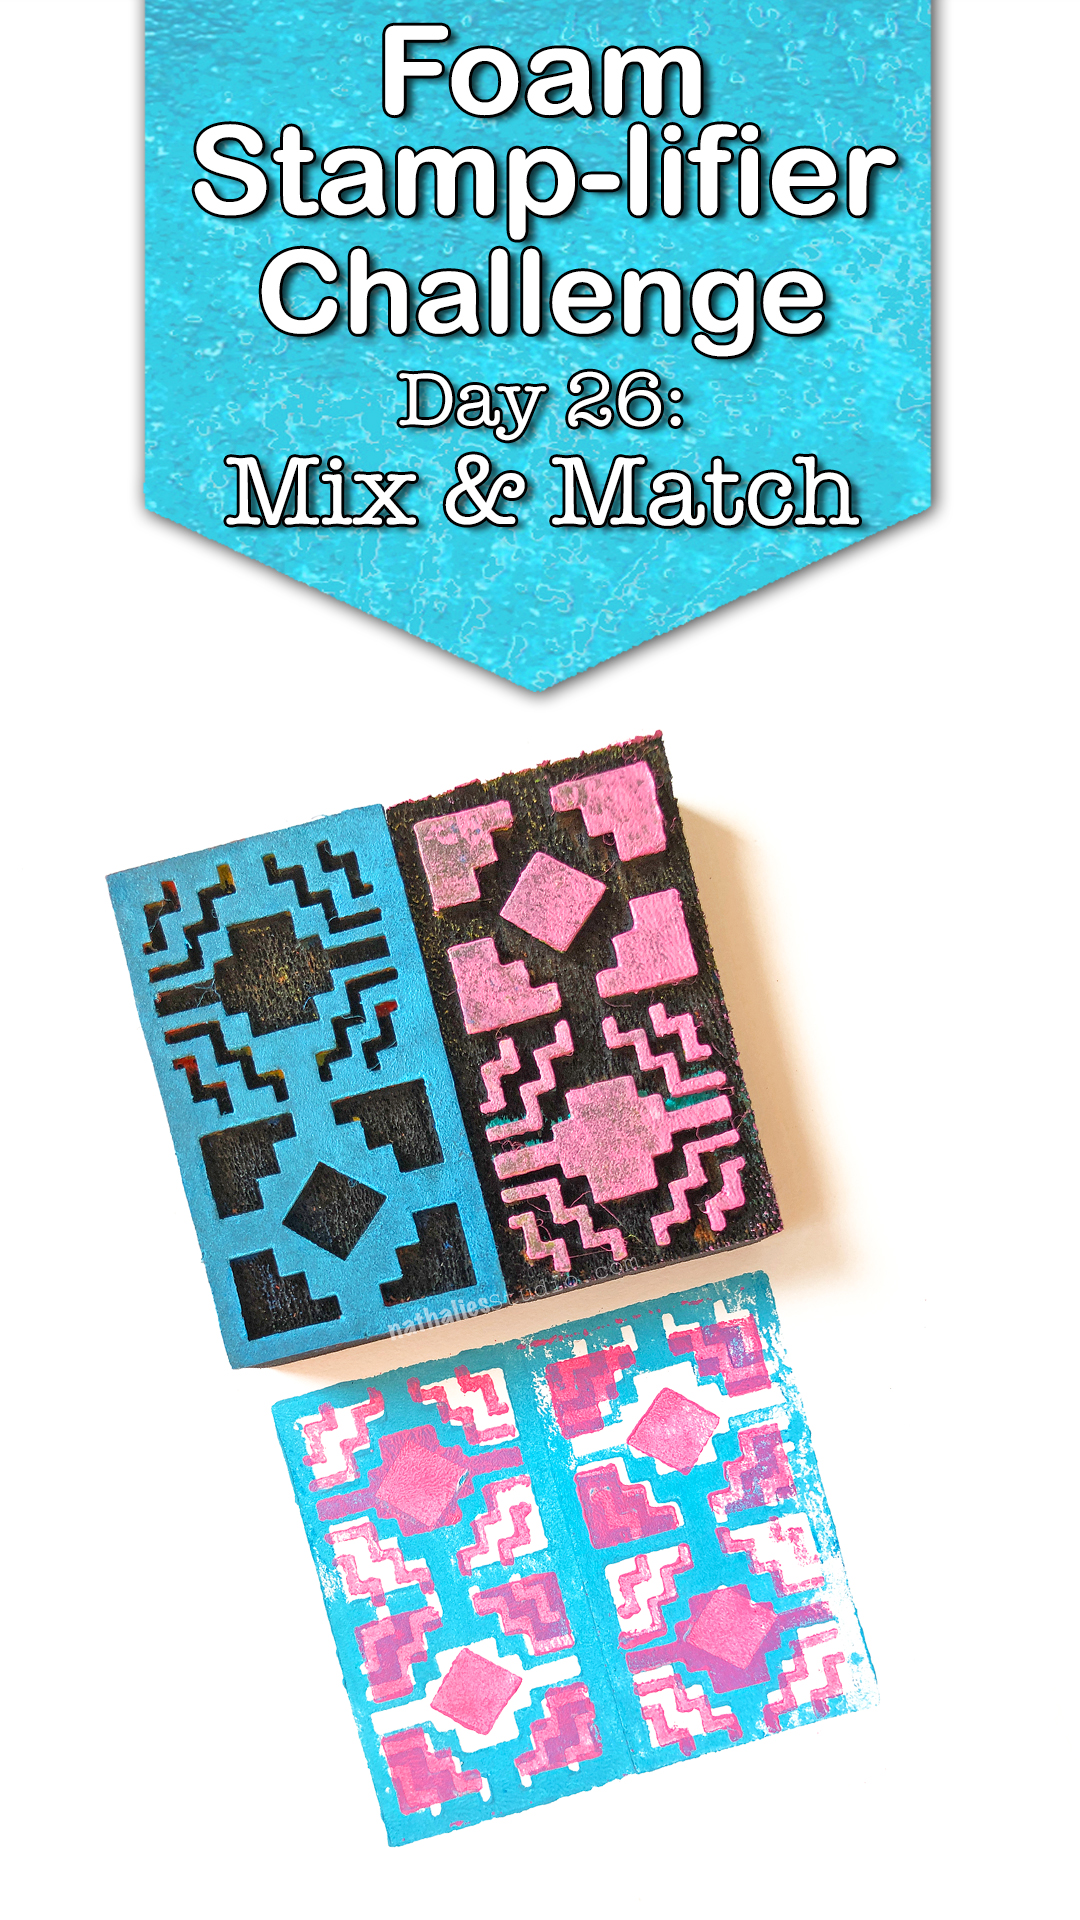
Another way to use the foam stamp is to layer different foam stamp patterns on top of each other.
I love to use the same pattern as a big and small pattern to layer on top of each other.
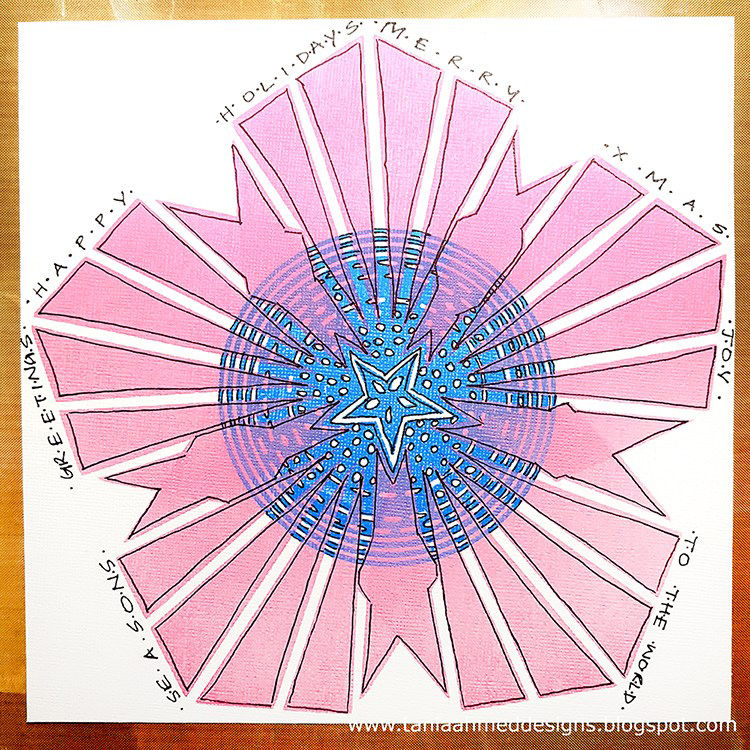
Or as you can see my Creative Squad member Tania created a really cool layered Holiday card by printing the Clam Hex Stamp next to each other and then layering the Circle Drive stamp in the middle – I just love what she did there.
Or sometimes just stamping the positive and negative stamps- like the Santa Fe stamp on top of each other by layering them in opposite directions will create a fun new layered design. Just play with it.
Day 27 – Sculpt
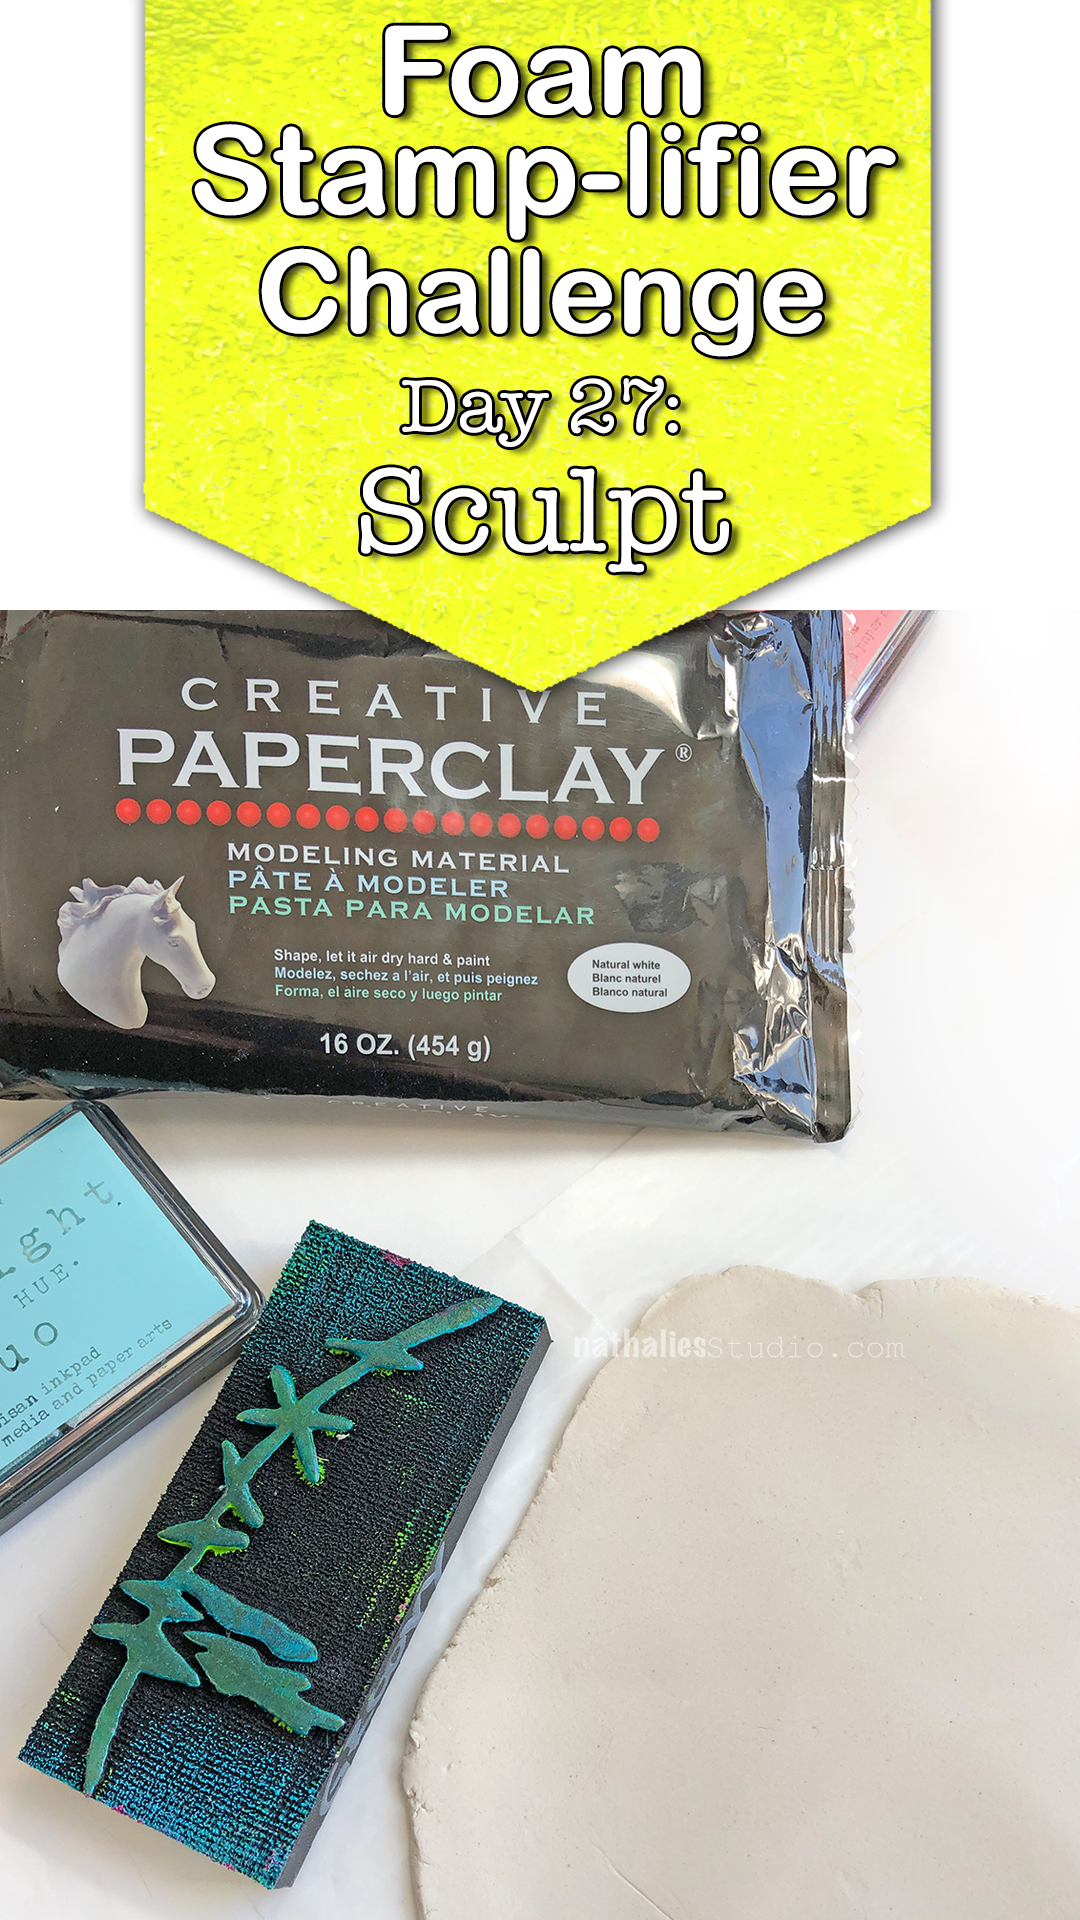
I love using my foam stamps when sculpting little plates or bowls with air-drying paper clay. I rolled out my paper clay as you would roll out dough, put a plate or bowl of my desired size on top and then cut the clay around the edges.
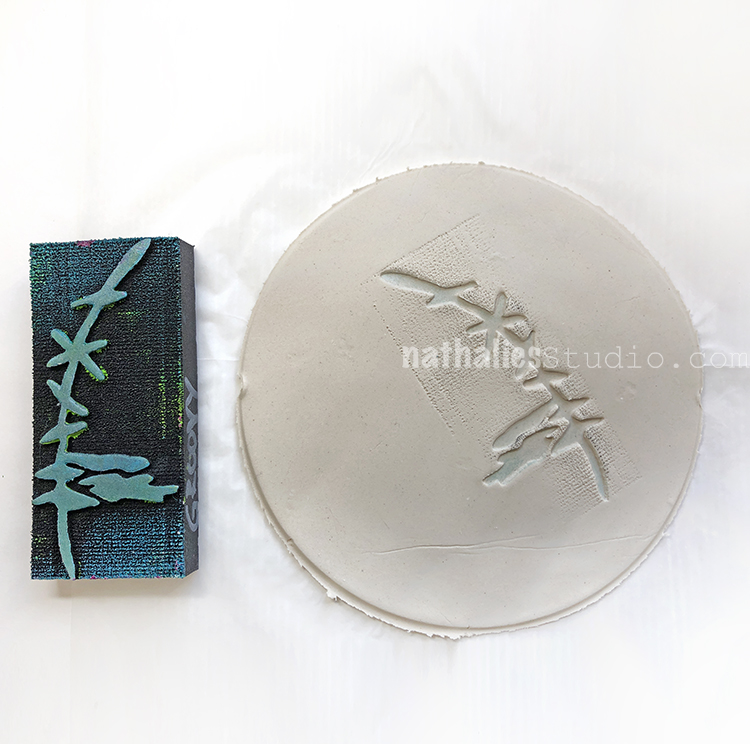
I then pressed my inked up foam stamps into the clay to create texture and pattern with a faint hint of color. For the bowl shapes, I put the clay disk into the bowl, shaped it to my liking and then let it dry overnight. I love these little pieces; they make great gifts and can be used to hold jewelry or other little tidbits.
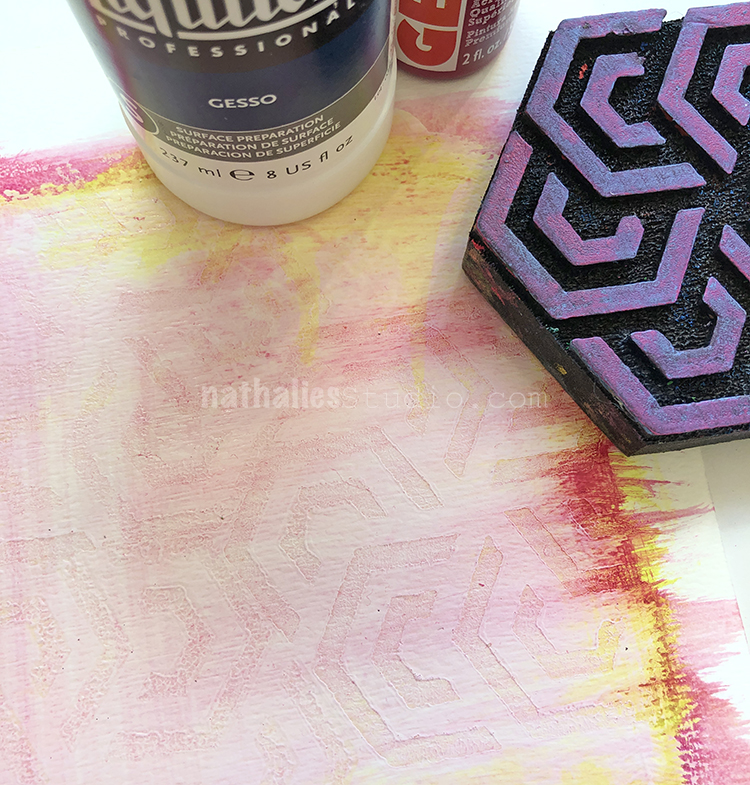
Day 28 – Gesso
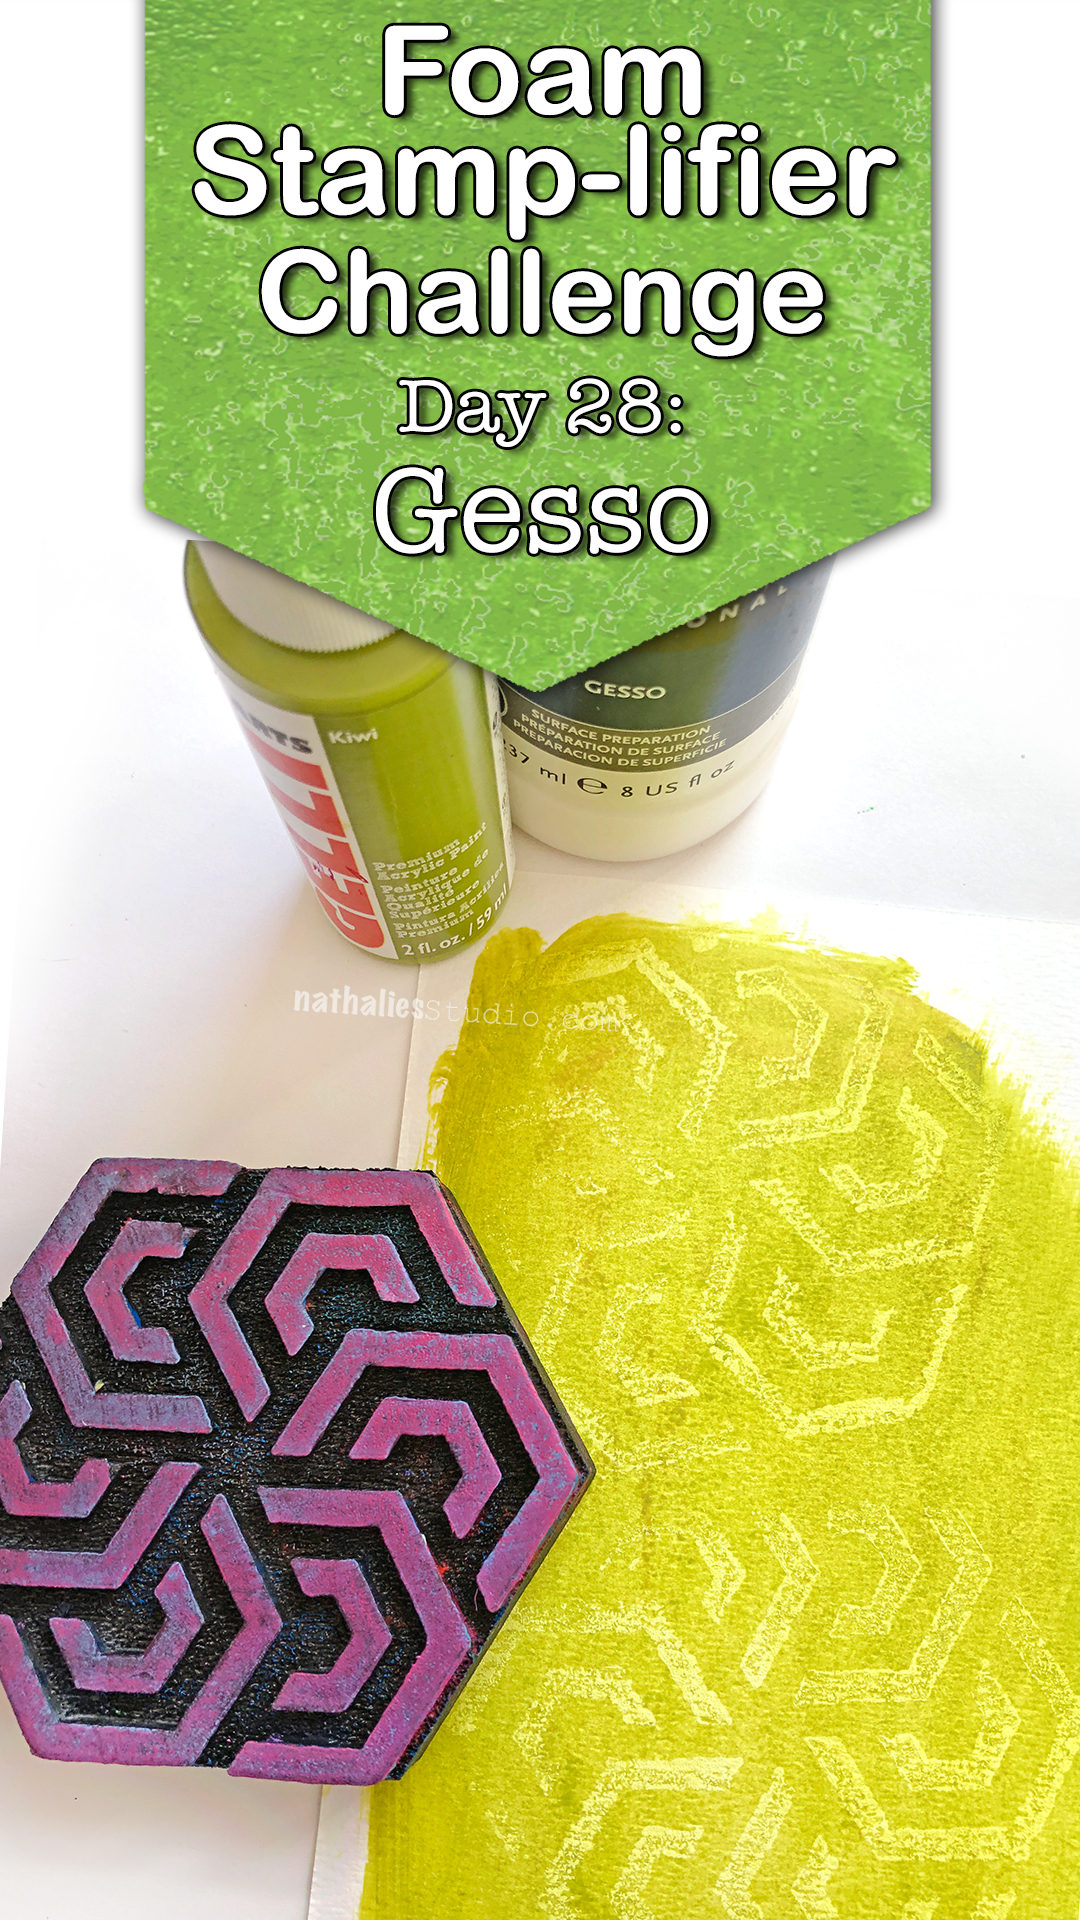
Gesso is such an awesome medium. One of my favorite techniques with Gesso and foam stamps is to paint a layer with gesso, and then press the stamp into the gesso while the gesso is still wet.

Remove the gesso from the foam stamp after each print. Then let the imprinted surface dry. The magic starts when you add a thin layer of acrylic paint on top of the surface.
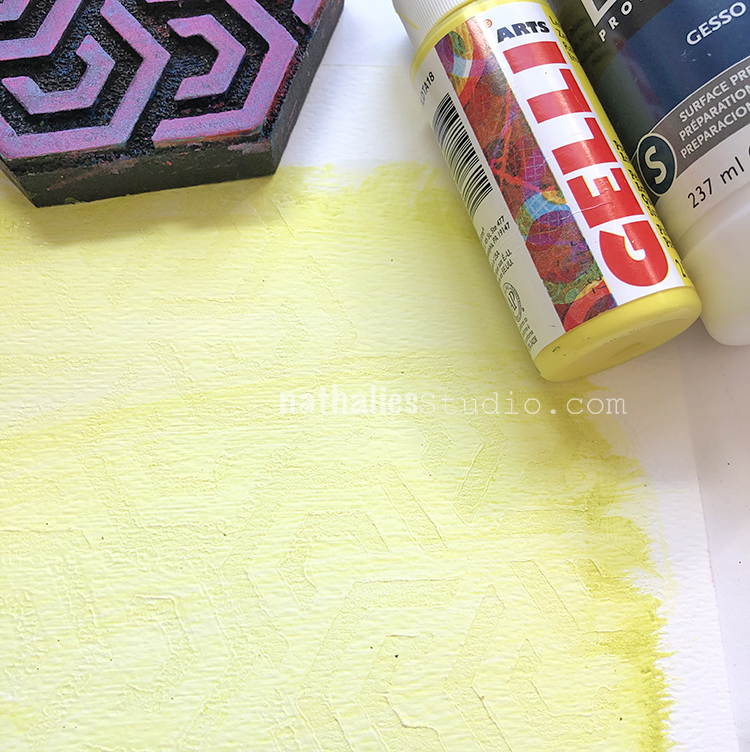
The paint gets more resisted on the raised gesso areas and accumulates in the grooves revealing the pattern and texture in a really beautiful way. Sometimes I let the paint dry and even add another different color – again needs to be fairly thinned down! – on top.
Day 29 – ArtGraf

If you have taken a class with me in the past couple years, I have surely “forced” you to try ArtGrafs ;) No, seriously those little watercolor graphites are one of my favorite things to use with foam stamps.
Simply wet the foam stamp a little bit, rub the water-soluble graphite on top and stamp. You can use different colors and blend them as well. Take note that this doesn’t work with any graphite- it needs to be like this one: water-soluble.

The ArtGrafs are so crazily pigmented that you can stamp several times, simply spritz some water in between on the foam stamp and check if you cannot get yet another wonderful image stamped off.
Day 30 – Watercolor

Oh Yes! You heard right – use your foam stamps with watercolor! For this I use a little trick:

I add my watercolor out of the tube on top of a gel plate and then add water and thin it down then press my stamp into the paint and stamp on paper.

The plate acts as a palette and inkpad and helps that the watercolor doesn’t dry too quick. For dry watercolor in pans, simply load your wet brush and watercolor and try to apply directly to your stamp. If that doesn’t work, try to add the paint first to the palette and then stamp into it. Trust me it is fun to try
Day 31- Connect

There are many ways you can “connect” the prompts of the last days- either use several different techniques on one art journal spread, create layers, or like I did create an Art Journal. I bound my own art journal –based on my online workshop BYOAJ – Bind Your Own Art Journal.
For the cover I printed on some fabric and then I chose my favorite Foam Stamplifier pages and made them into signatures for my book. They will provide great starting prompts when I want to art journal and remind me of the different techniques.
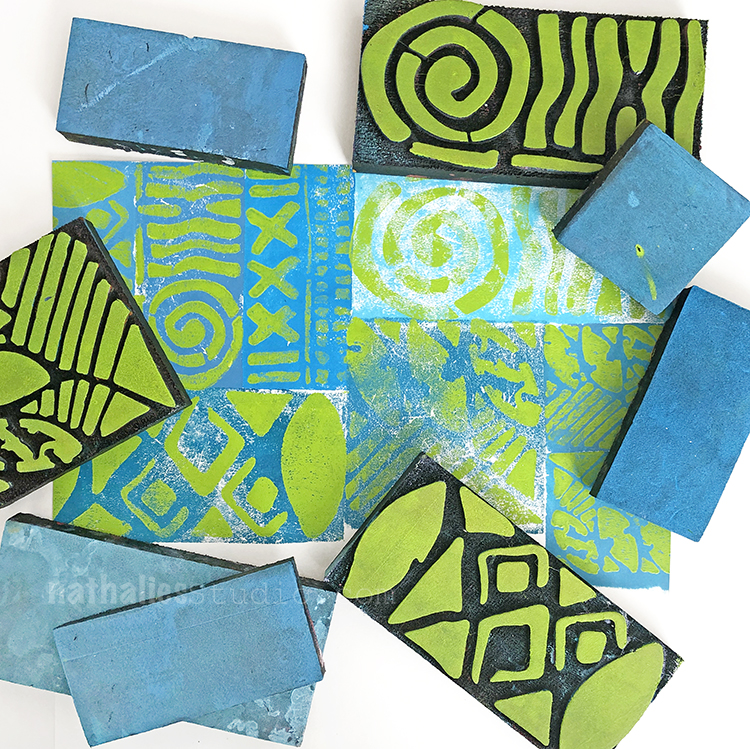
Here are the foam stamps that I used throughout this challenge:
