Hello from my Creative Squad! Today we have a post from Robin Seiz who is sharing a beautiful bevy of ATCs using my ATC Mixup stencil and our theme this month: Time for Texture – Visual texture or actual texture is an element that can give dimension, depth, and touchable interest to any piece of art. Let’s play with texture in a series of ATCs and see what emerges!
Hello friends, The theme for this month, ATCs with texture, is something that really gets me excited. I LOVE texture, of all sorts, and I also love working small. ATCs are such fun because they can be a quick and easy project (or more complex if you want it to be) and they make great happy mail. ATCs are also easy to swap with your artist friends.
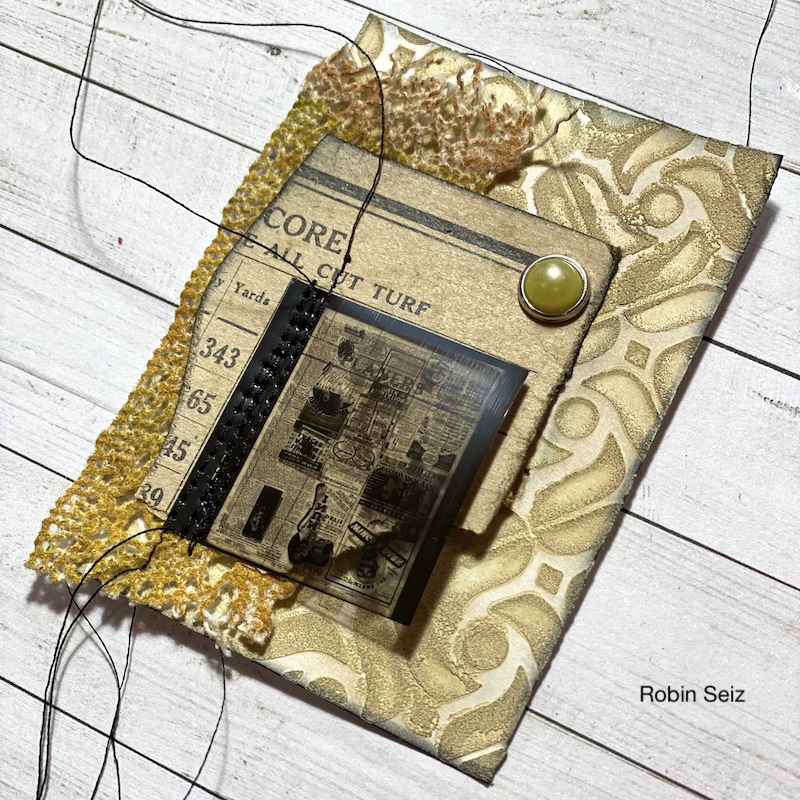
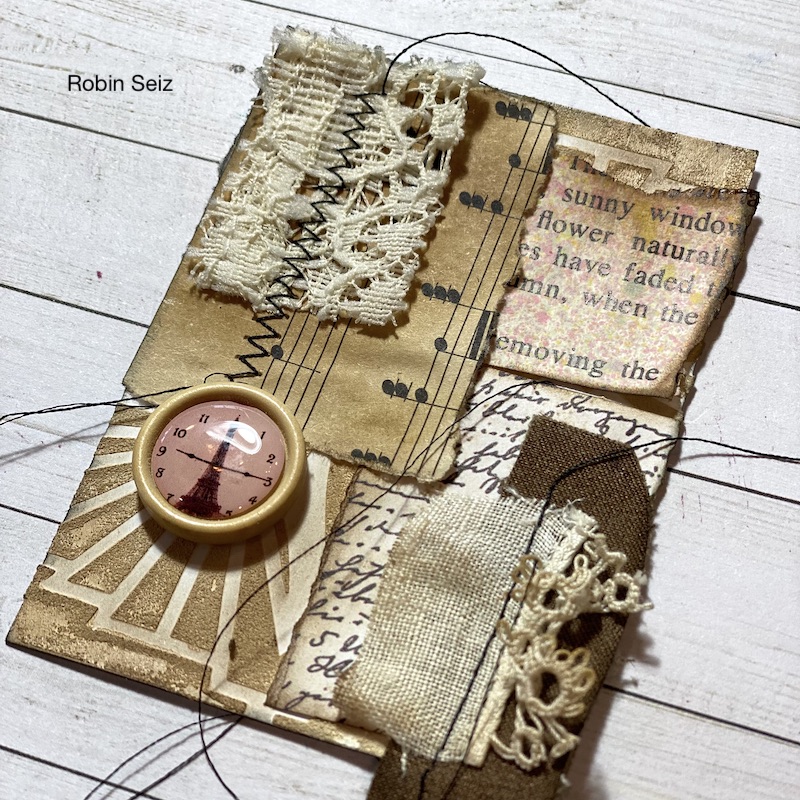
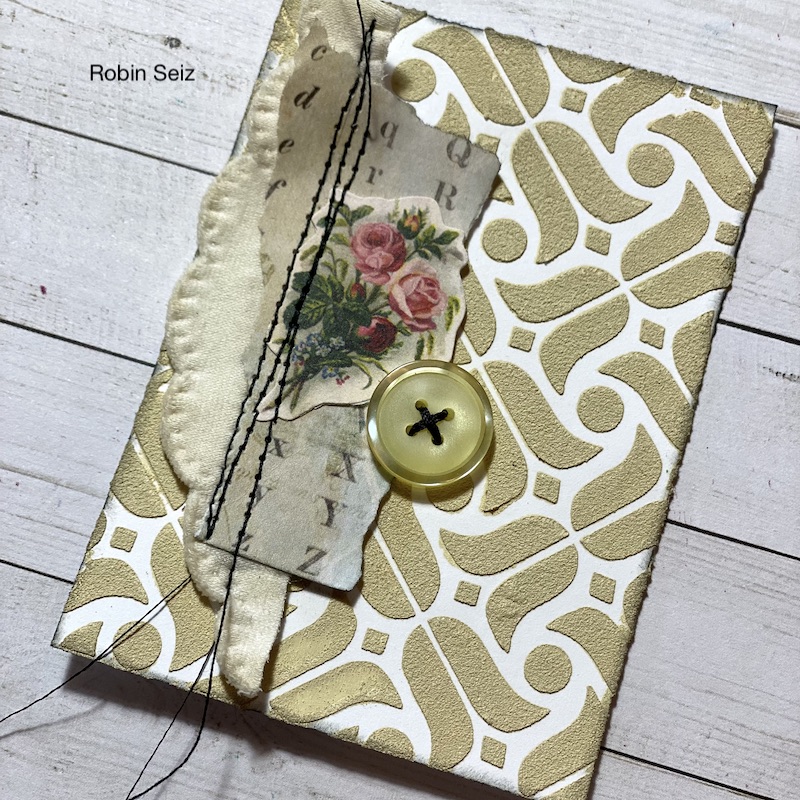
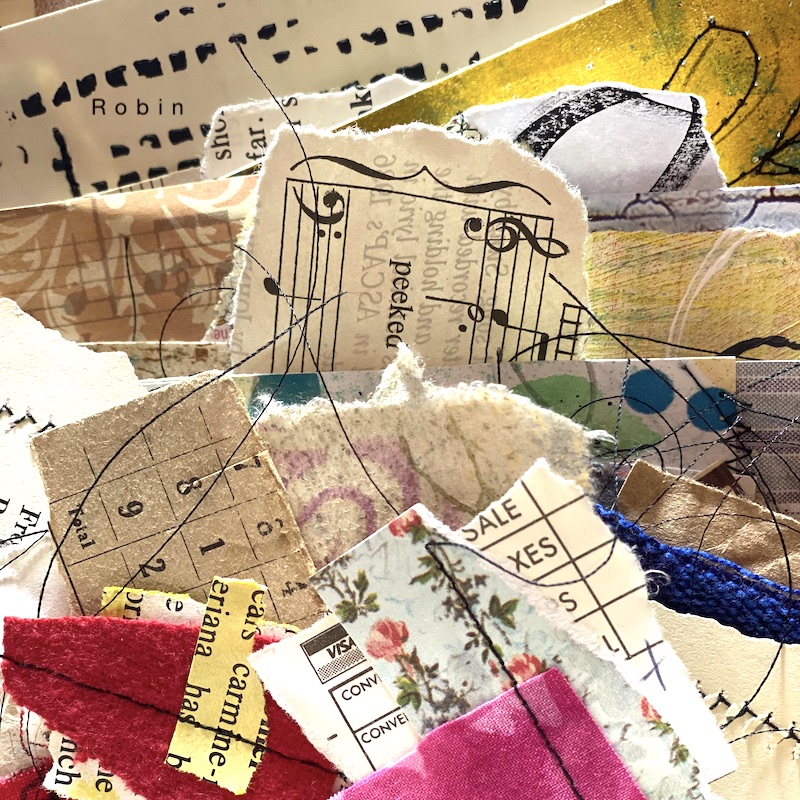
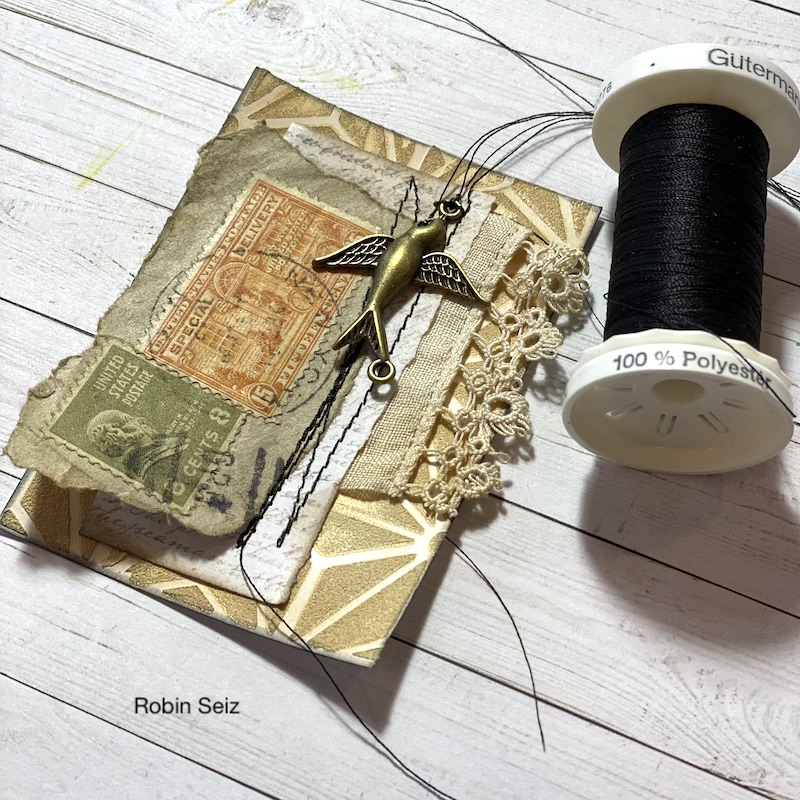
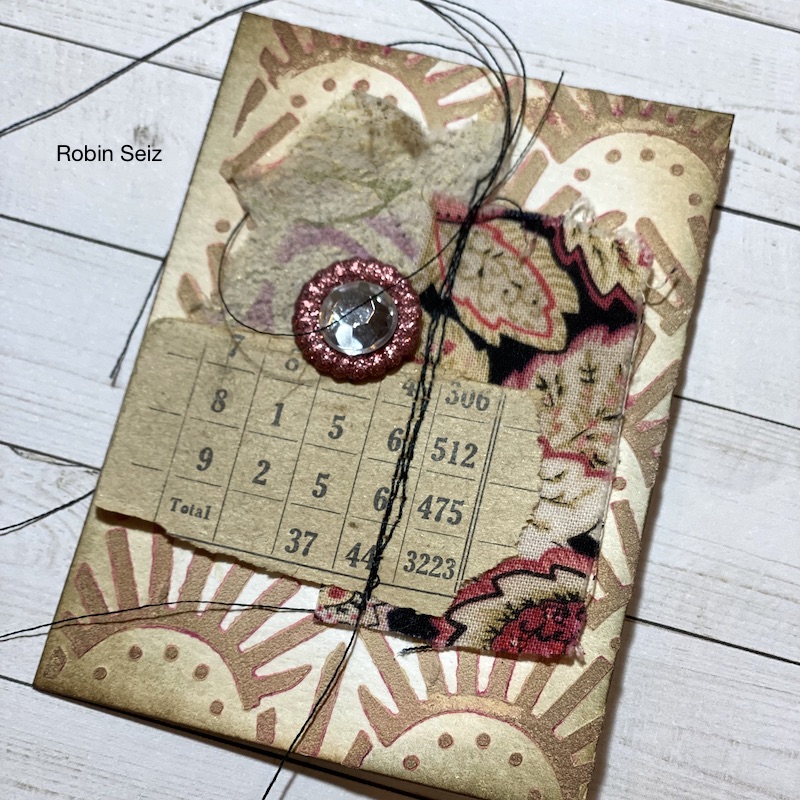
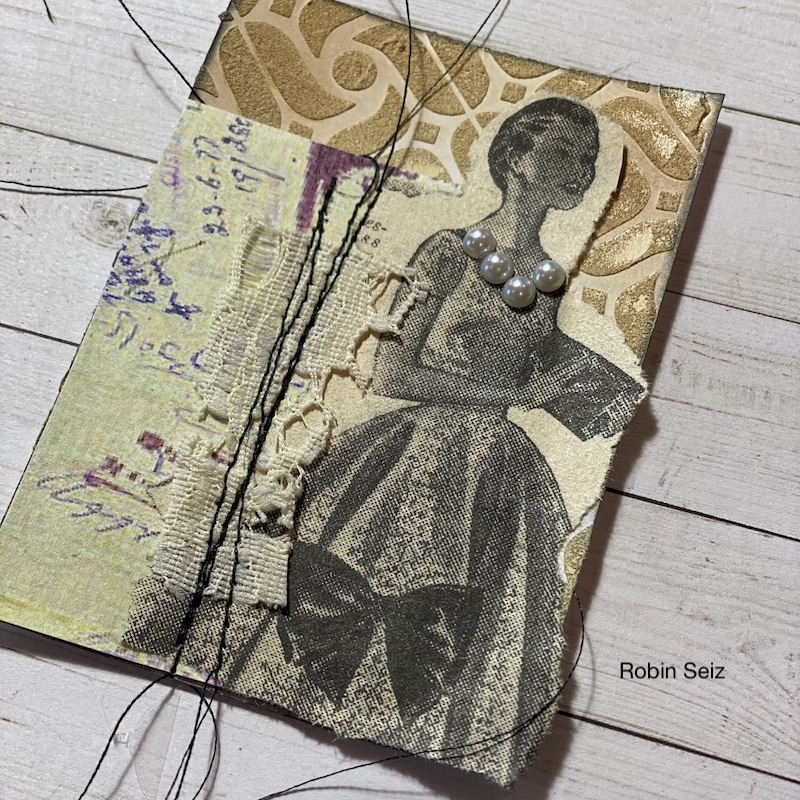
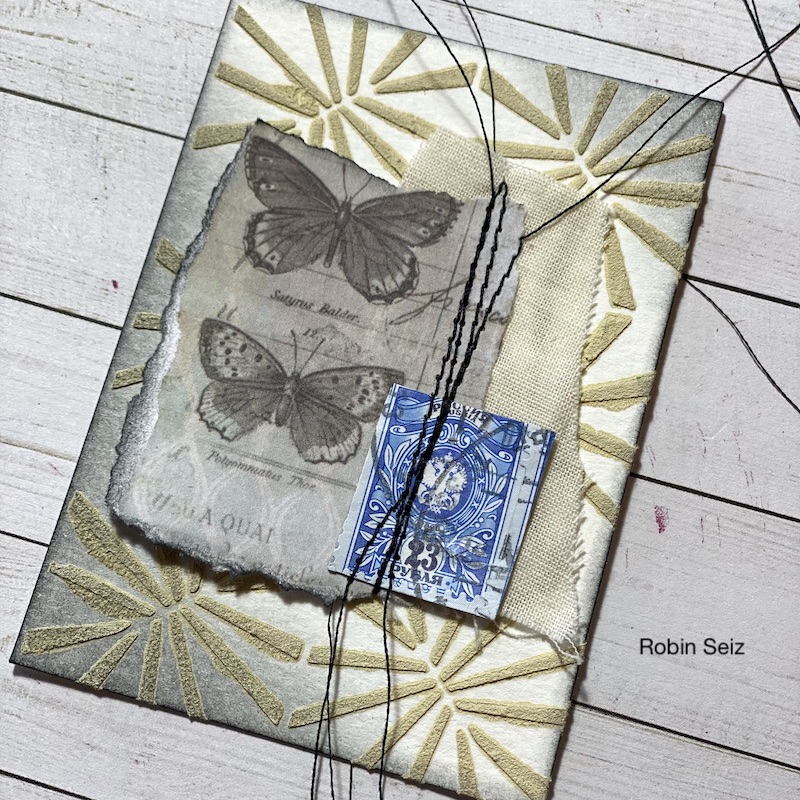
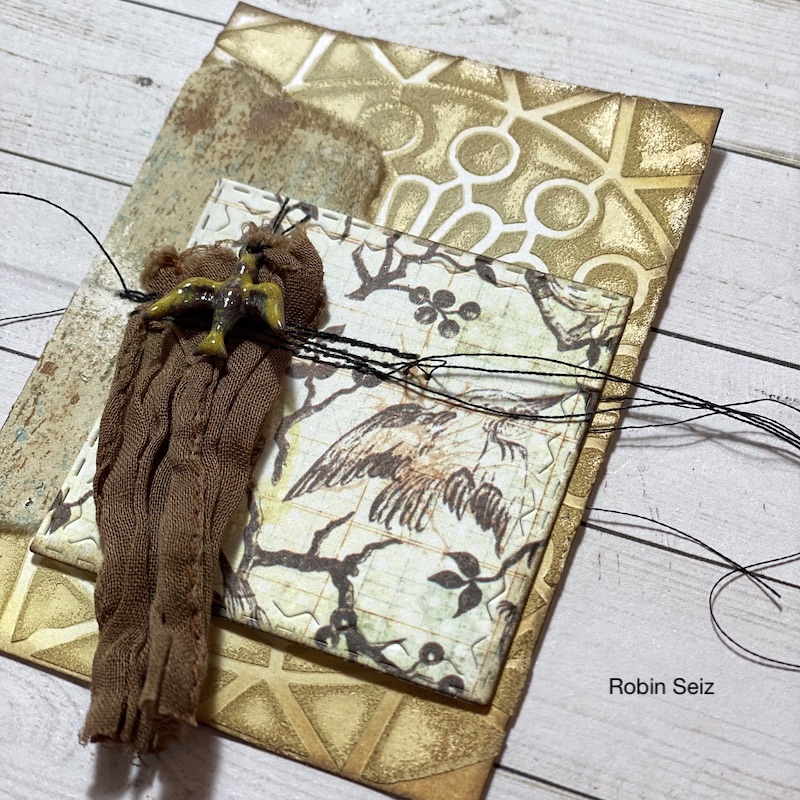
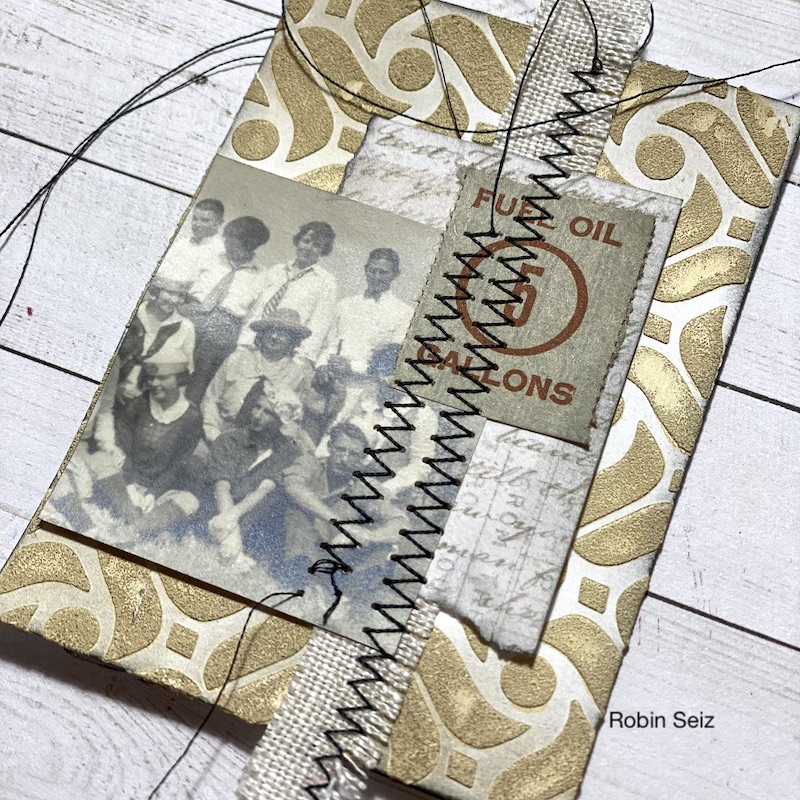
For this project, I wanted to use some of the “bits and bobs” that I have stashed away and rarely use. You’ll see tiny stick-on pearls on one card, a piece of an old movie reel, an old stamp, and a few random jewelry pieces from my jewelry making days on others. I find it satisfying to incorporate what I have; it challenges me to think creatively about a project.
I knew I wanted a vintage theme for my cards. With the wonders of mixed media, almost anything can be made to look vintage with a little distressed ink or unbleached titanium paint!
There are days when I want to work on something in the studio, but just can’t get going. On those days, I sit down with my paper scraps, my fabric scraps, and old books, or music and my sewing machine and create little “collages” to use at some point in the future in a journal, on a card, or whatever calls me. I can get lost making these little pieces and before you know it there are 20 or so on my table. I keep all of these in a basket for future projects. When I thought about this project and creating texture, these little gems immediately came to mind.
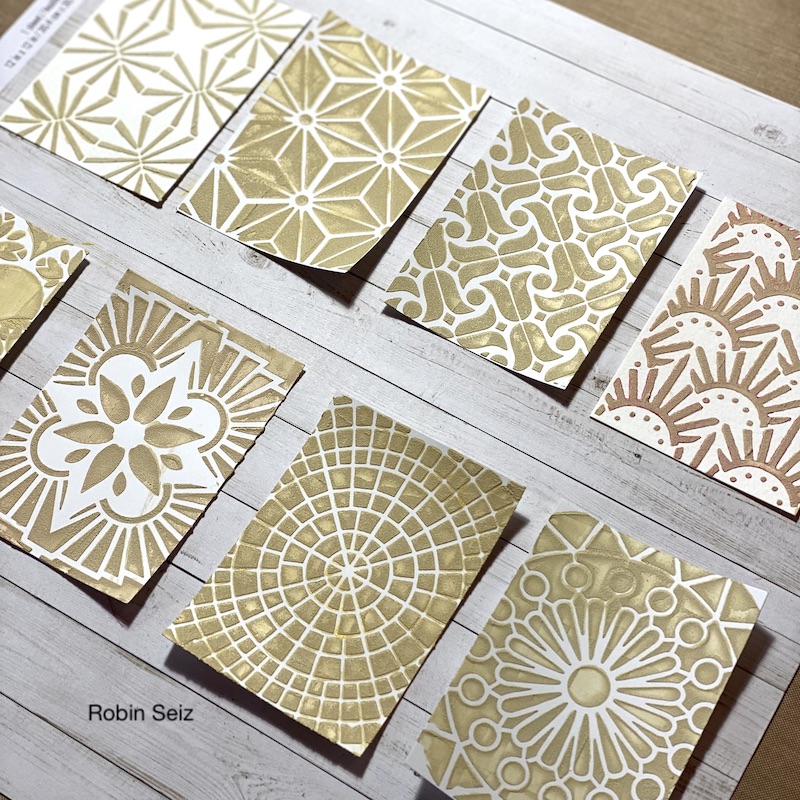
I started by cutting the ATCs (2 1/2 x 3 1/2, the standard size) out of card stock. Next I mixed Liquitex Unbleached Titanium paint and Golden light molding paste together to make a gritty textured paste. I laid Nathalie’s ATC Mixup stencils down on the blank ATC cards and using a pallet knife, I spread the paste through the stencil. I used the same background color for each ATC card. The texture is so yummy and gritty! One note of caution, make sure you wash your knife and the stencils right away; if the paste dries, it’s almost impossible to get off.

Once the paste had a chance to dry, I began pulling all my elements together. This was an intuitive process. I started by choosing from the basket of scraps and began building a story on each ATC. When all the elements were chosen, I auditioned them for placement on the card. For the final vintage touch I used distressed inks to rub over the texture paste and around the edges of the card and on some of the elements. I suggest you just play and see what feels right to you. In some cases, I sewed the elements to the card, others I glued.
I hope these inspire you to have fun, use your imagination, and your supplies! – Robin
Thank you Robin – love hearing your process for getting started in your studio and seeing how the final creations came together. They are each so unique and beautiful but all tied together too.
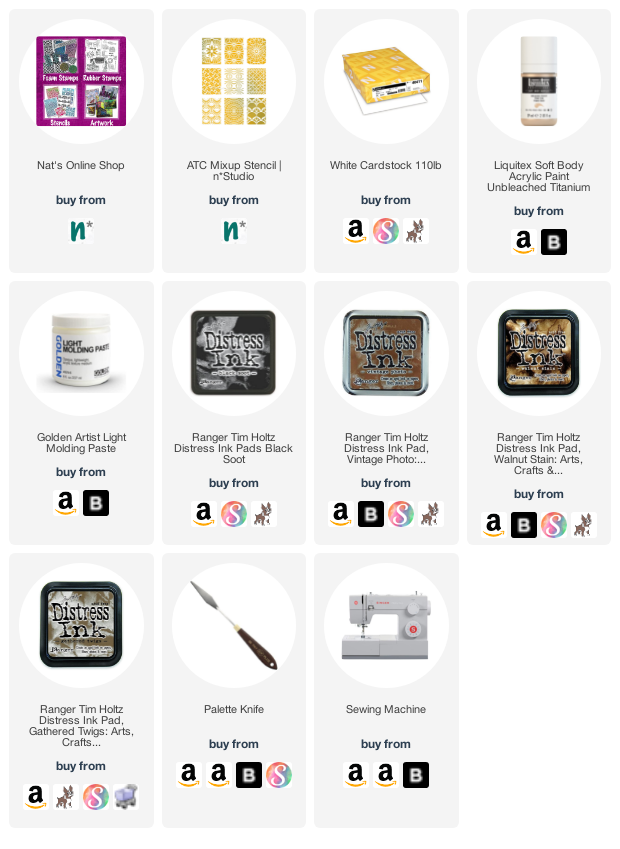
Give it a try: you can find all my Stencils in my Online Shop and in addition to a selection of bits and bobs and collage material from her stash, here are some of the supplies Robin used:
Looking for more projects? Follow the Creative Squad on Instagram here.
Comments (1)
Sue Clarke
| #
Robin, the texture and stitching is terrific. It makes me happy just to look at them…imagine how fun it would be to touch them!
Reply