

Hello from my Creative Squad! Today we are with Emilie Murphy and a page from her art journal, in hopes of ensuring sweet dreams. She is using my Mini Motifs and my Wabi Sabi stamp sets along with our theme: In My Dreams – A lot of folks are having crazy dreams these days. What visions do you see at night? Are you sleeping at all? Let us get a peek into your nocturnal adventures through your art.
Hi there! Hope you are doing well.
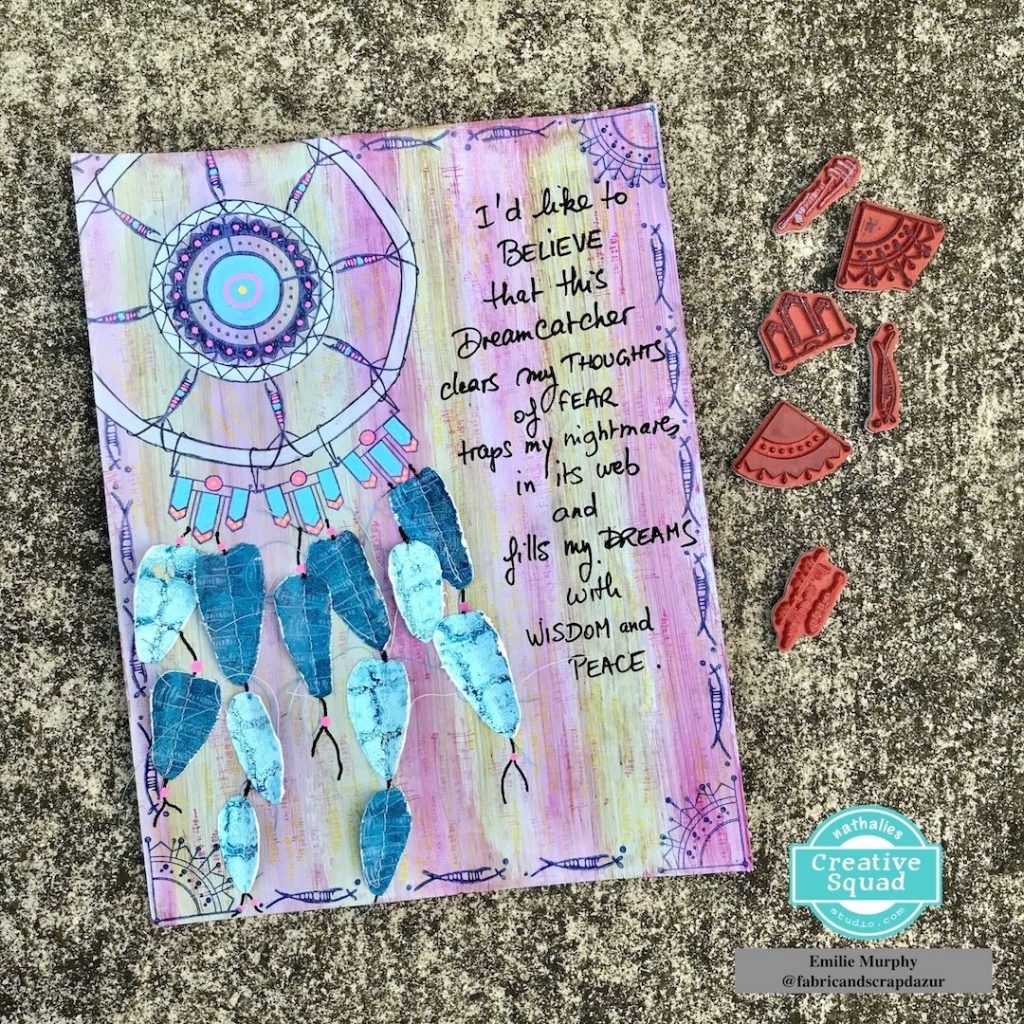
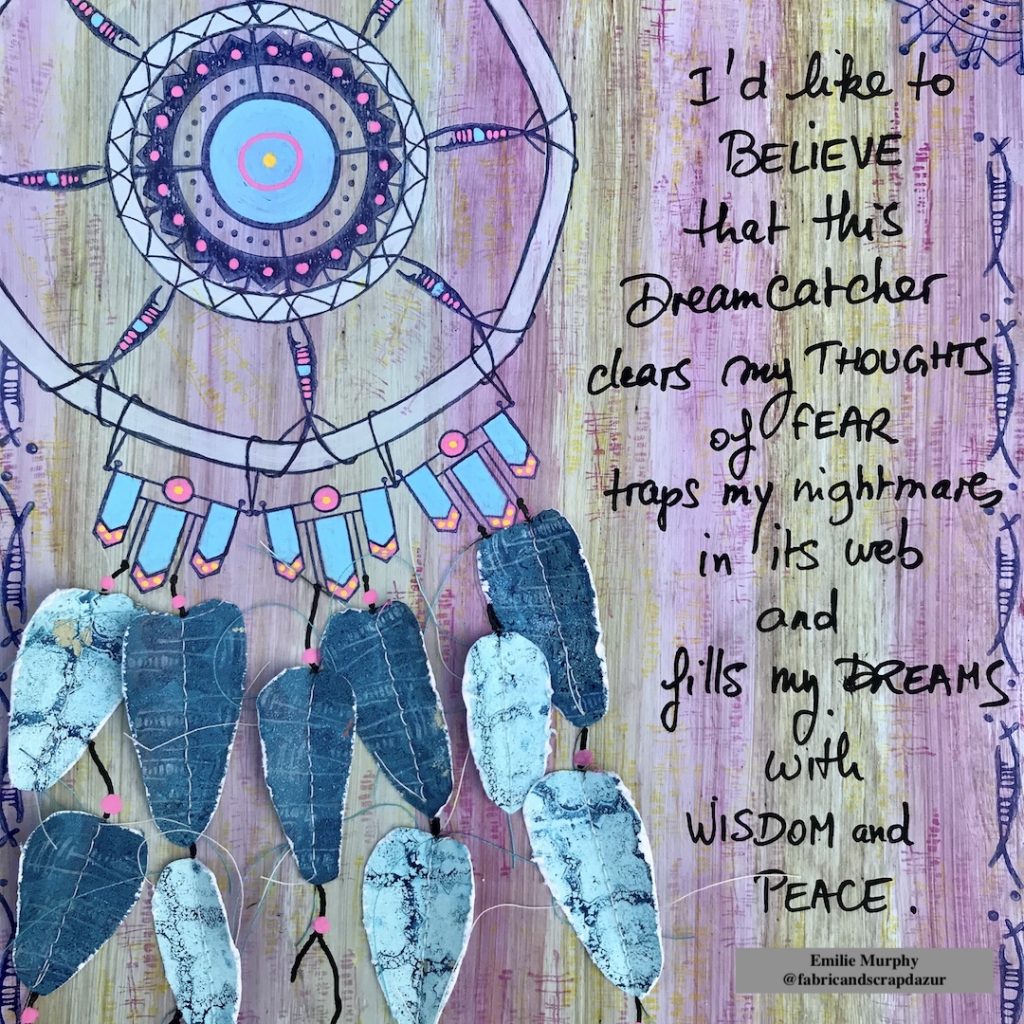
I was wondering how l could talk to you about what’s in my dreams. The first idea I had was to let you enter in to my dreams through a Dreamcatcher. In Native American culture, Dreamcatchers symbolize the entry point of dreams. It’s believed that they trap nightmares in their web. I just love this idea. I have few at my home where one is hanging on my bedroom door nob.
In this tumultuous time where we are currently living in, I think, that symbols and other culture referrals can ease our fear if we simply dare to get interested in them.
Let me guide you through my process about how I made this art journal page and let you in to my dreams. For this project, I decided to work on a piece of 8.5 x 11 inches cardboard (Kraft color). I like to reuse some material I get when I order art supplies. Since it’s a journal page, you can work on whatever surface you like.
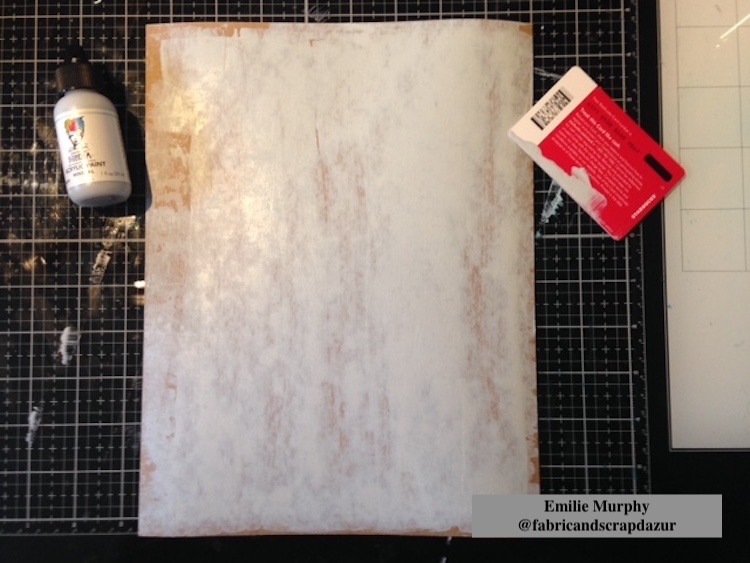
I first applied a coat of “mineral” acrylic paint in order to get a non-porous surface. I chose an off-white color because I didn’t want something too bright. I also wanted more of a vintage look. I let it dry completely.
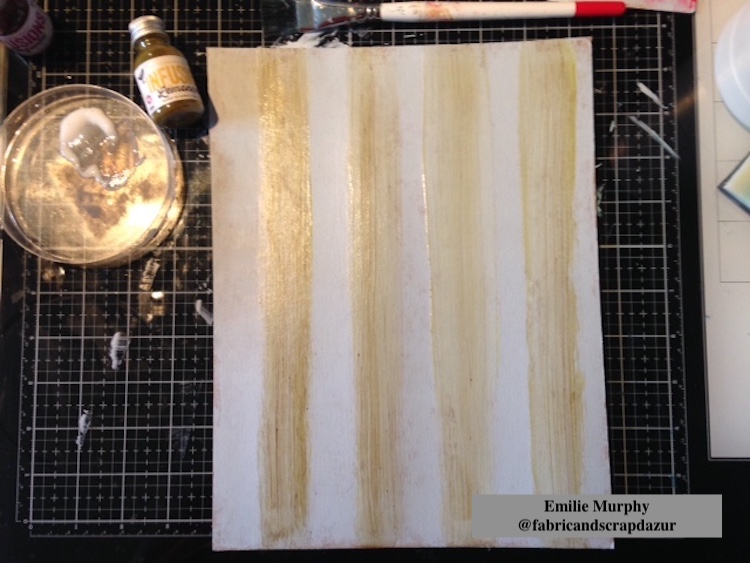
Then, I used some infusion pigment powders to color my background. I sprinkled a little powder on the top of my cardboard and brushed the powder from top to bottom with gel medium to make some strips. I started with “Lemoncello” infusion powder.
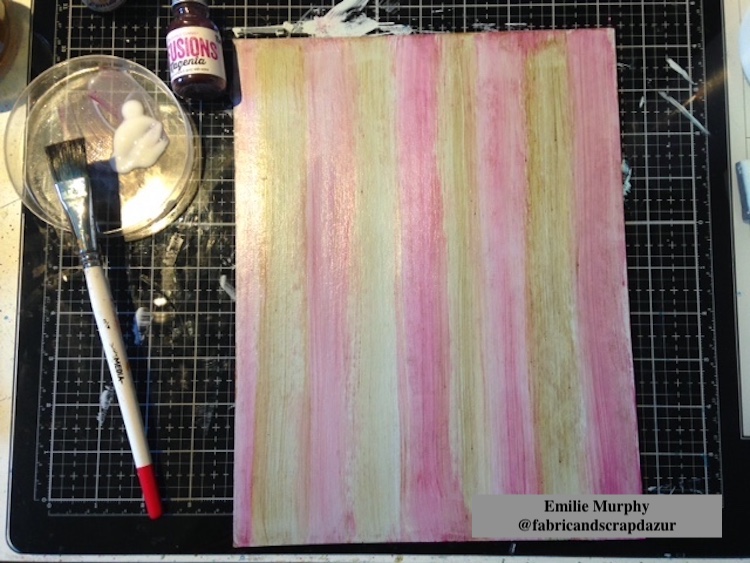
I did the same thing with “Magenta” infusion powder.
The reason why I used gel medium is because it avoids smearing the color or moving it again and makes this layer permanent.
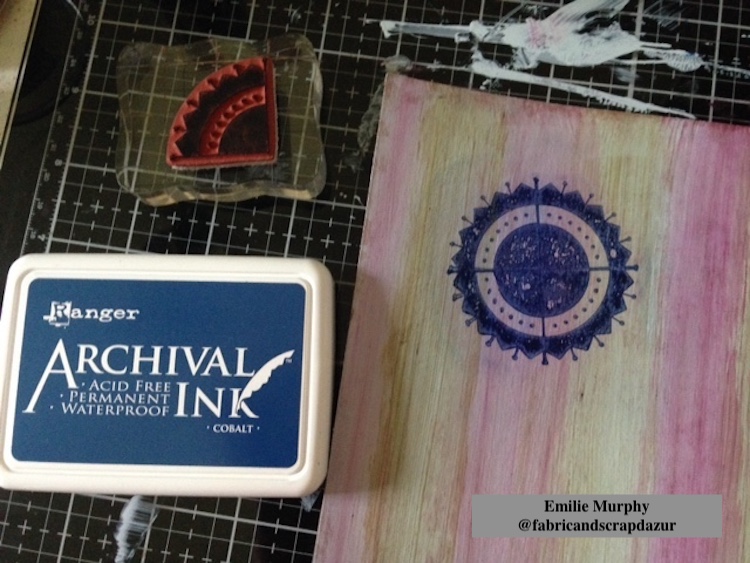
I started to build my Dreamcatcher by stamping the center with the Arts & Craft Mini Motif stamp with “cobalt blue”archival ink.
Tip: I used a gridded acrylic block to be able to stamp the motif and make an even circle. I first practiced on simple printer paper. If you are not satisfied with your stamping, you can wipe it off with some alcohol as I used gel medium that makes the surface non-porous and protects your layer background.
The next two pictures are showing you the step-by-step instructions on how I built my Dreamcatcher.
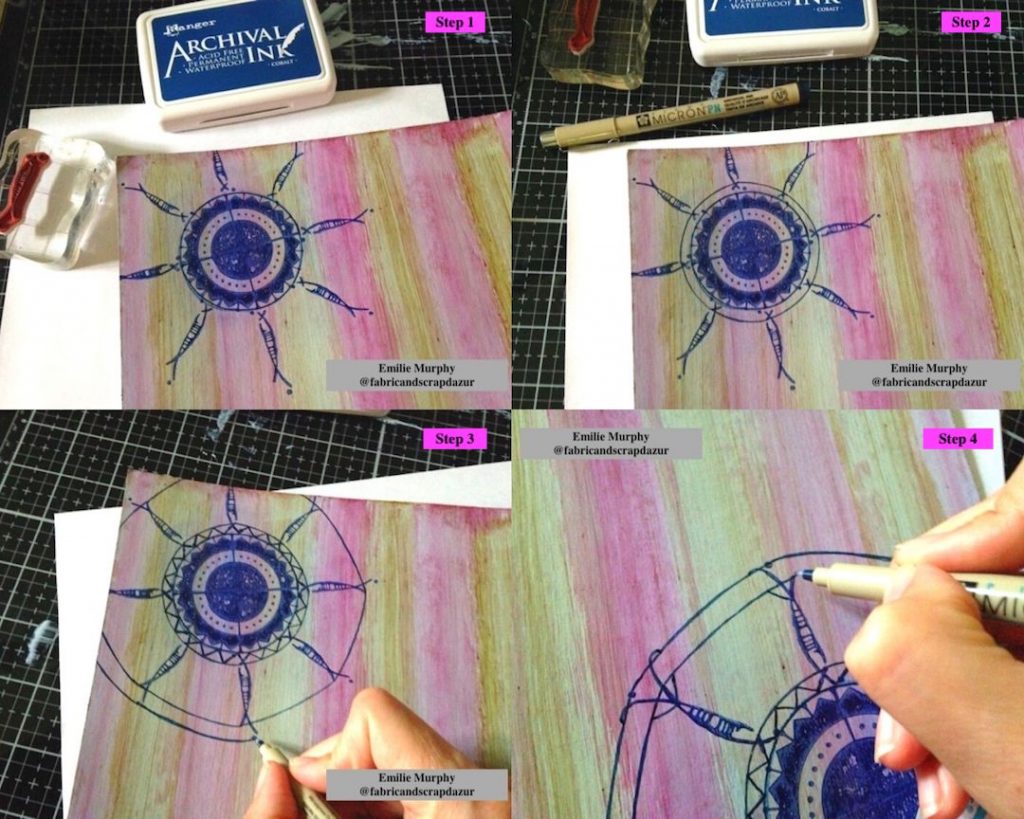
Step 1: I drew a circle and stamped it with Nat’s Neato stamp from the Wabi Sabi set around my circle.
Step 2: I drew another circle to join the Neato stamping and made an inner ring.
Step 3: I doodled a zigzag inside the inner ring and drew an outer ring joining the opposite side of the Neato stamping.
Step 4: I drew some loops to look like “thread or string.”
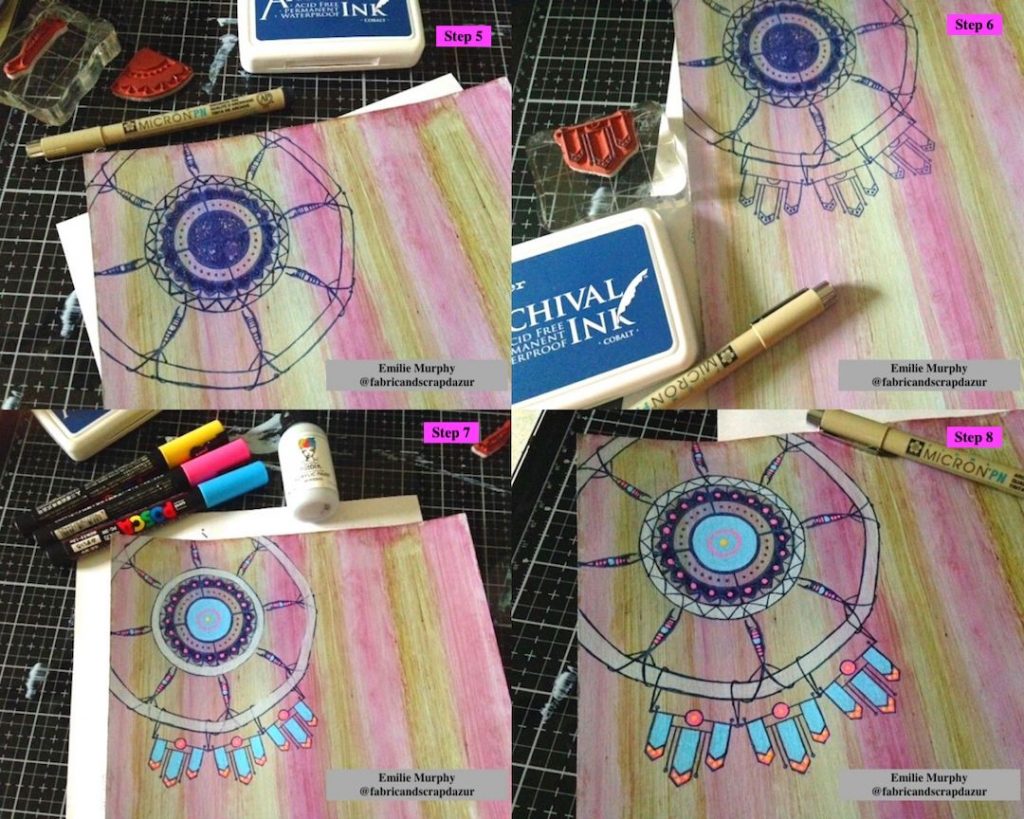
Step 5: I finished the web of the Dreamcatcher
Step 6: I had some outside embellishment stamping with the Craftsman Mini Motif stamp and drew some loops to attach them to the outer ring.
Step 7: I painted the inner and outer rings with some “minerals” acrylic paint (same I used for the background). I colored my dreamcatcher with some posca pens.
Step 8: I traced again the lines that faded away with my micron pen over the paint.
The structure of Dreamcatcher is now done.
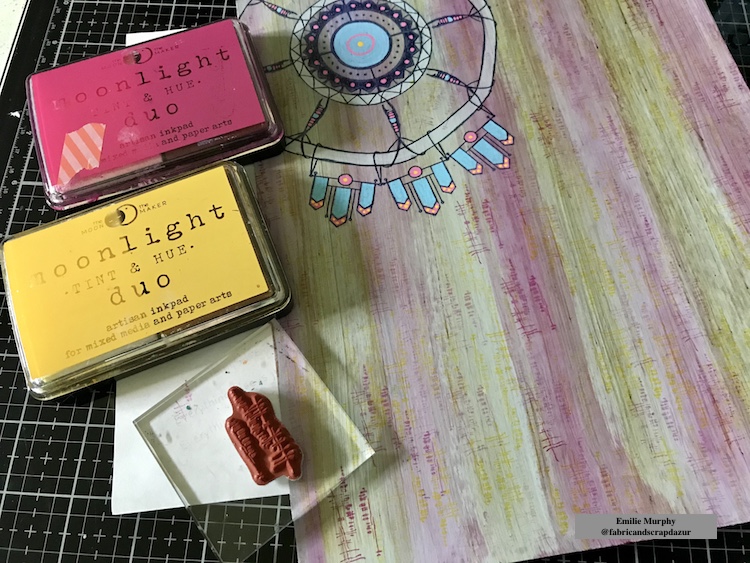
At that point, the background needed some texture. I stamped the Funky stamp from the Wabi Sabi set with “Sunshine Yellow” and “Milky Way Magenta” inks to match the colors of the infusions powders. As you can see, the stamping is not bright and crisp because I wanted a subtle effect. To achieve this, I first stamped on some scrap paper and then I stamped on the background with the rest of the ink remaining on my stamp.
The next steps show you how I made the feathers.
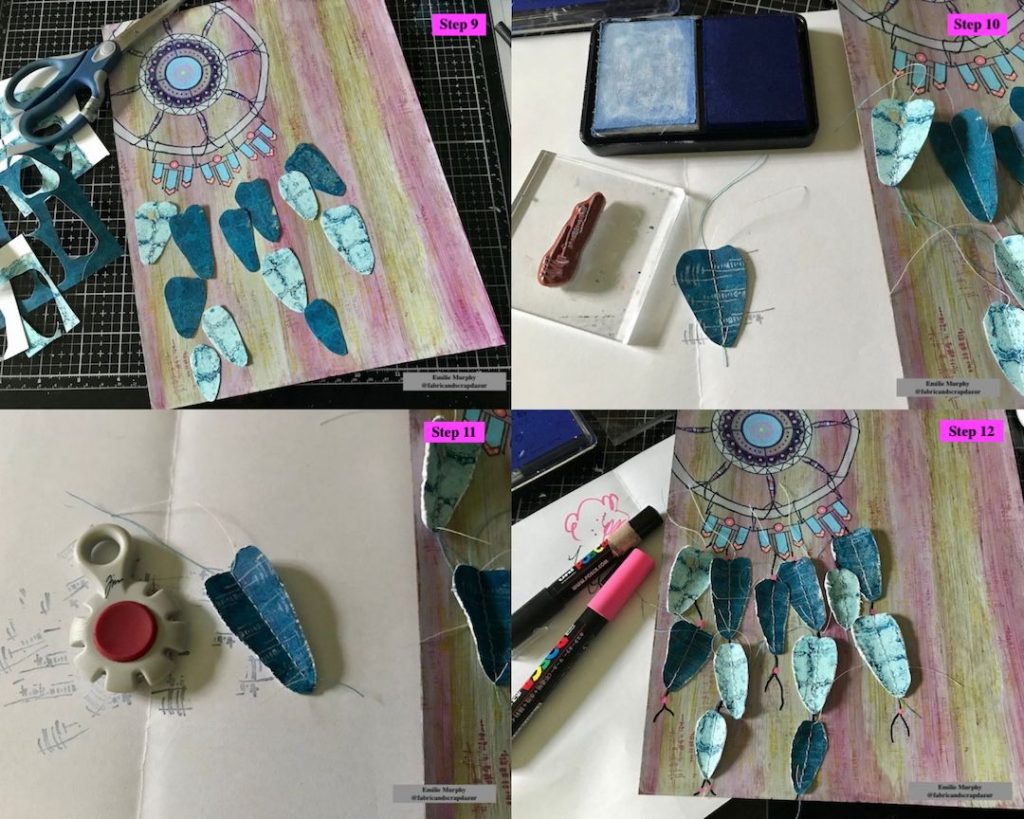
Step 9: I used some pieces of scrap paper I had made for my cards project in June to cut some kind of “feather” shapes.
Step 10: I stitched the center of each feather with my sewing machine. This step is optional. You can also just draw a line with a marker. Then I stamped with the white portion ink of my Moonlight duo inkpad, the Gnarly stamp from the Wabi Sabi set, to add a design to my feathers.
Step 11: I used a Paper Distresser tool to give texture to the edges of the feathers.
Step 12: I drew some lines and dots between the feathers with a posca pen to represent strings and beads.
My Dreamcatcher is finally done!
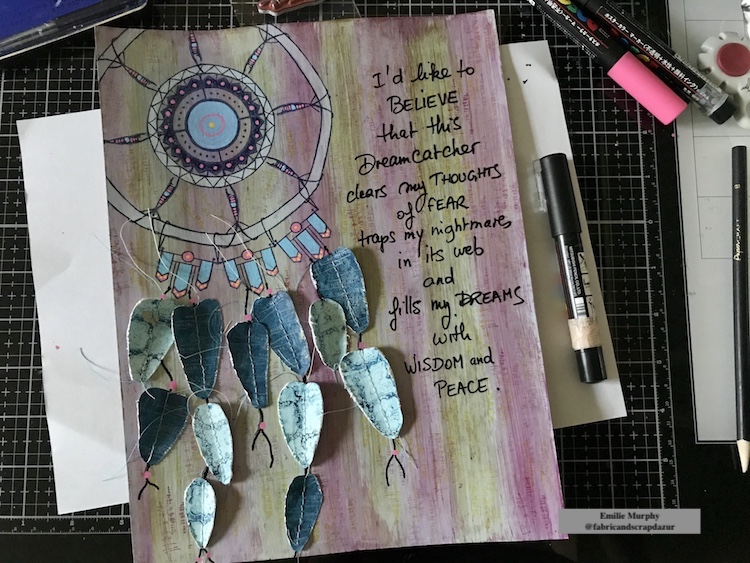
Next, I wrote down my quote.
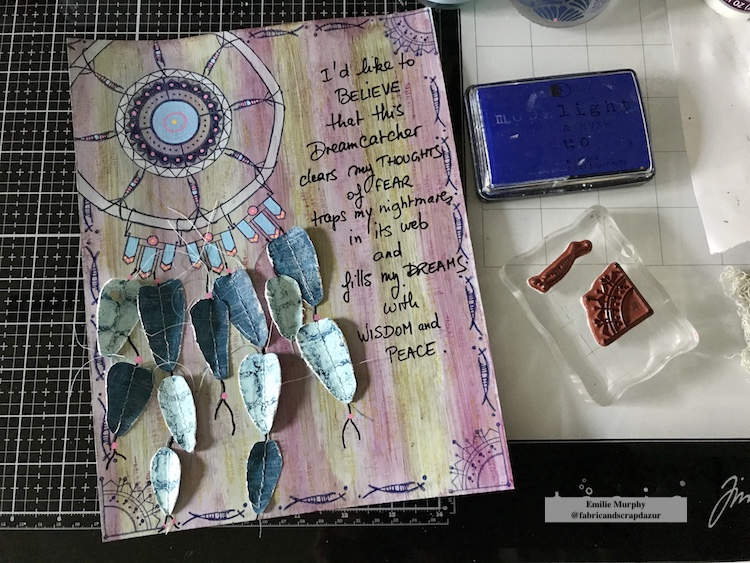
To finish up my page, I first stamped the corners with the Jugendstil Mini Motif stamp. I then created a border by stamping all around the edges with the Neato stamp with “Deep Space Blue” Moonlight Duo Ink pad.
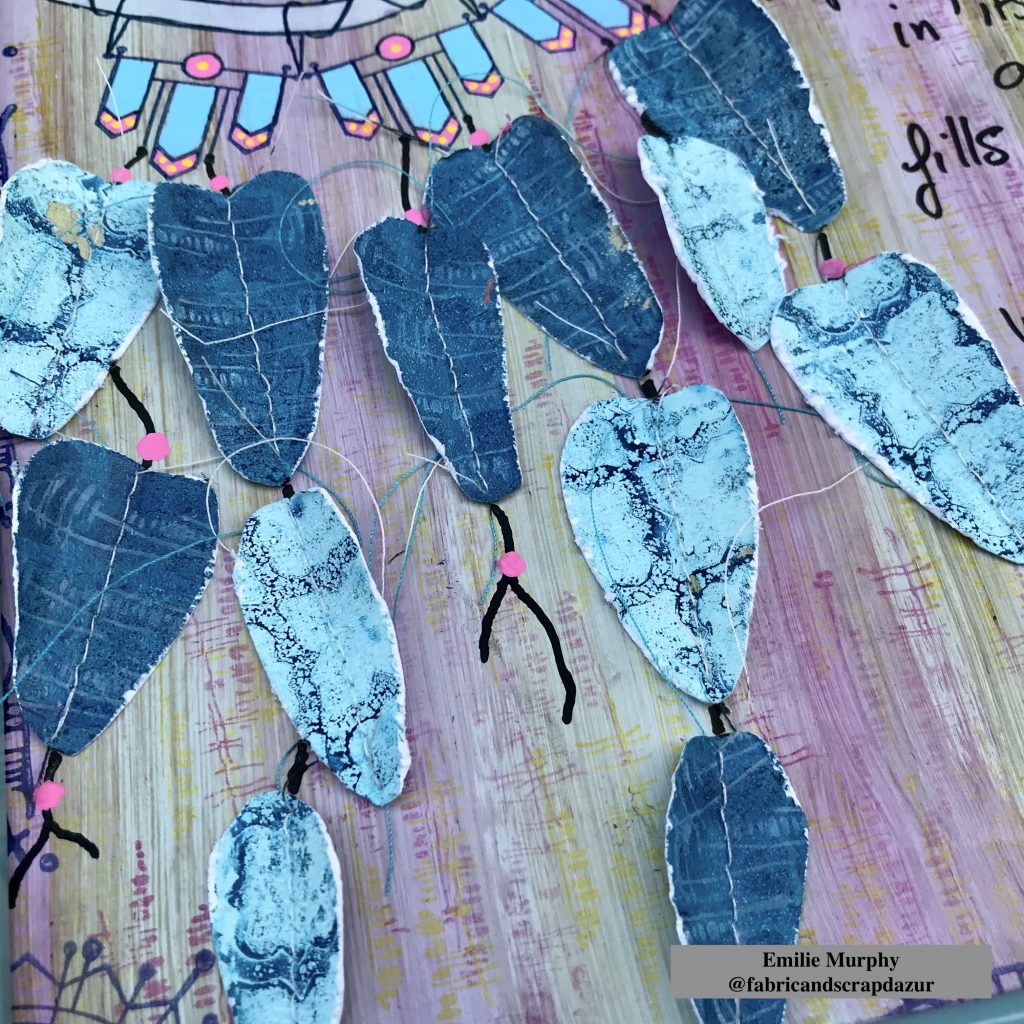
Below are some close up pictures.
I hope you have enjoyed this tutorial and got inspired to create your own Dreamcatcher.
Personally, I had a lot of fun playing with Nat’s Mini Motif and Wabi Sabi stamps sets. It shows you how versatile these stamps sets can be. Just let your imagination and creativity go!
Have a great rest of the week! See you next month! – Emilie
Thank you Emilie! I love the idea of dreamcatchers and what a great art journal page with so many subtle details in there. Beautiful!!!
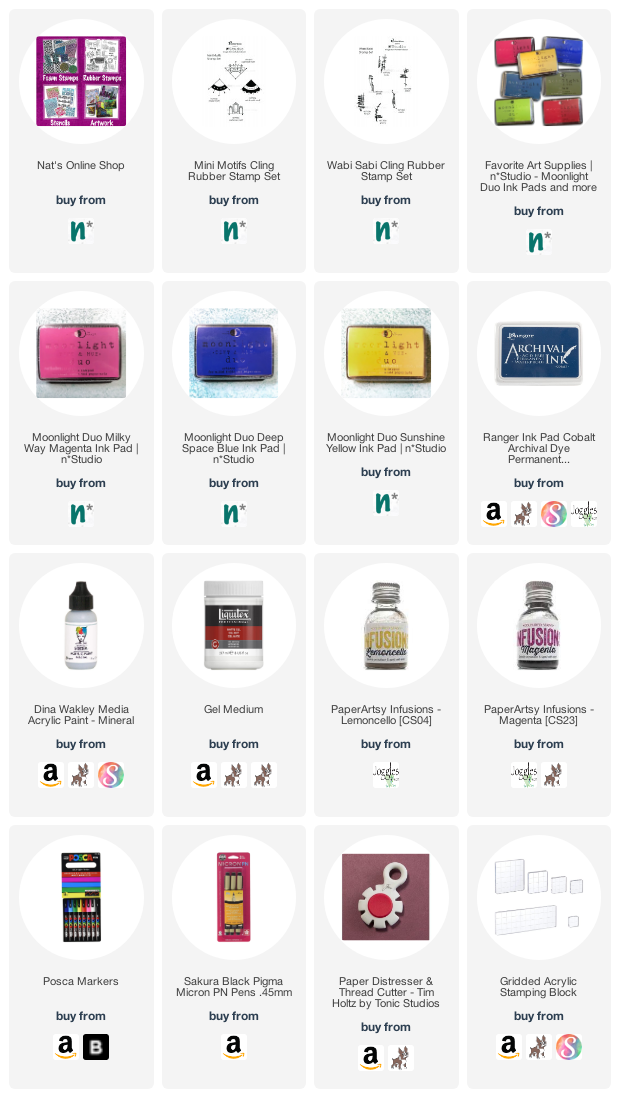
Give it a try: you can find all my Rubber Stamps in my Online Shop and here are some of the other supplies Emilie used:
Play along with our monthly themes and weekly projects! Working on something yourself that you’d like to share? Email or tag me #natkalbach how you used my stencils and stamps – I would love to share your projects in my next “n*Spiration From Around the Globe“.
Comments (1)
Sue Clarke
| #
LOVE love LOVE this Emilie!!!
The colors you choose and the dreamcatcher design.
I have several myself and they work (or at least look very pretty).
Reply