

Hello from my Creative Squad and today we have another debut post from our stellar new member Linda Edkins Wyatt who we are so happy to have join our talented group. She is sharing with us a precious little book, using my Fairview Fan foam stamps on fabric – a lovely little keepsake for anyone! This month’s theme is: Your Biggest Fan – Let’s give a shout out to someone who is doing an amazing job. In a world obsessed with Me Me Me it’s important to take a look around sometimes and give some encouraging words to another, and not just in your art and craft making :) Be their Biggest Fan!
Hi! I’m super excited to be part of Nat’s Creative Squad and share my first Squad project with you.
A few months ago, I had the opportunity to take a gelliprint class with Julie Balzer at Ink Pad NYC. I thought I was a terrible gel press printer and couldn’t see what all the excitement was about gelli printing, so I figured if anyone could help me get the hang of it, it would be Julie. Among the many tricks and tips Julie shared, I learned that I was using way, way too much paint. I also learned to use a barren to make sure the gel press transferred the paint to the paper evenly.
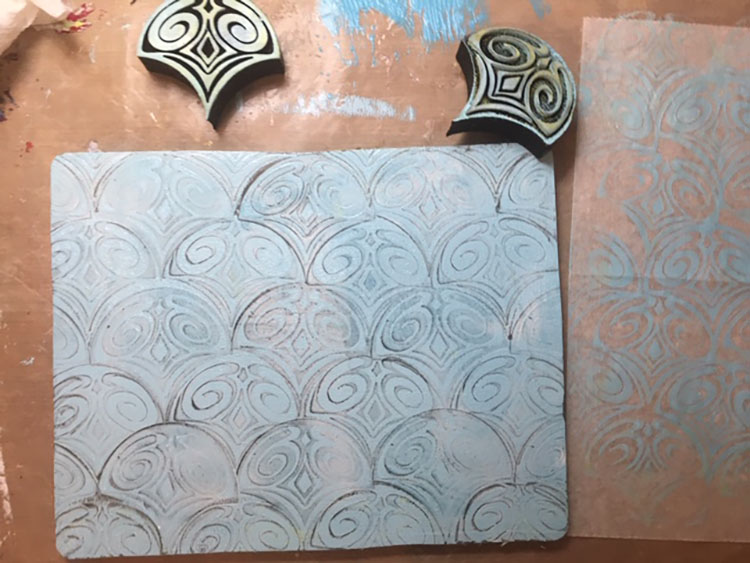
I decided to test my newly developed gel press skills with Nat’s “Fairview” positive/negative fan set. I coated the gel plate with paint and pressed the art foamie Fairview pieces into the color, then printed the excess on a nearby piece of deli paper. After printing a bunch of different colors, I mixed up some light turquoise paint and created a nice design on the gel plate, alternating the positive and negative images until the whole 9”x12” plate was covered. But this time, I thought “let’s try it with fabric!” (I am, by training and inclination, a textile designer, so using fabric, stitch, and creating repeating designs is second nature to me.)
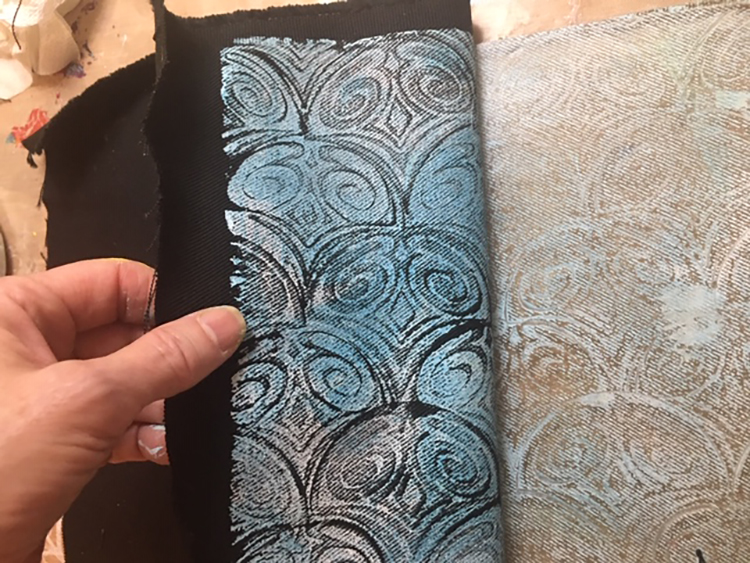
I cut a piece of black fabric to about 12”x14”, pressed it carefully onto my gel plate, applied pressure with my brayer, and gently pulled it off. The fabric had a twill weave which added to the design and gave it a rustic look. I loved it! So, I made a couple more pieces of printed black fabric, trying different arrangements of the fan foamies.
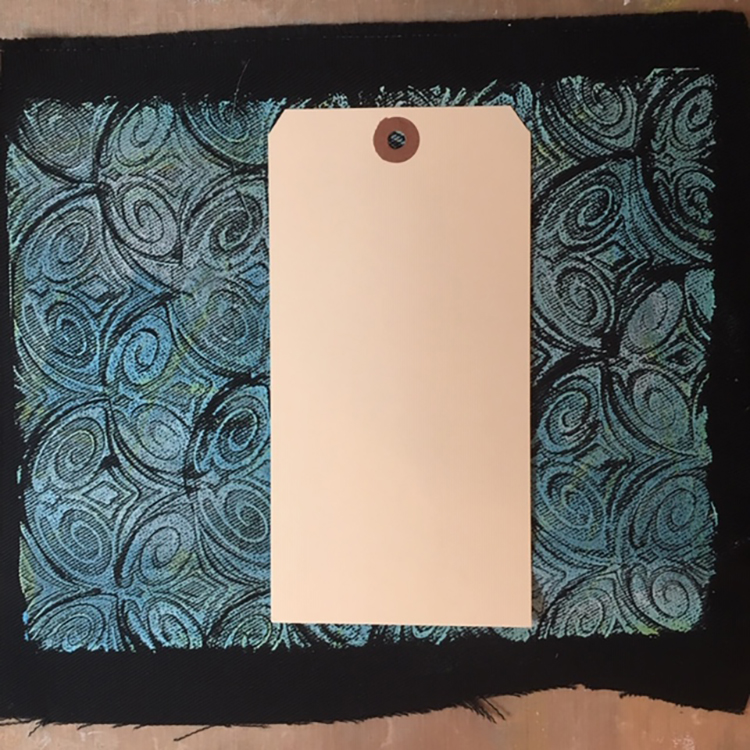
My favorite print was just the right size to fit on an oversized shipping tag, so I decided to create a tag book. I was inspired to start making tag books when I saw a post from a wonderful artist, Ann Sullivan Barnes. I am a big fan of Ann, who artfully combines precision and fine detail with creativity—not an easy feat.
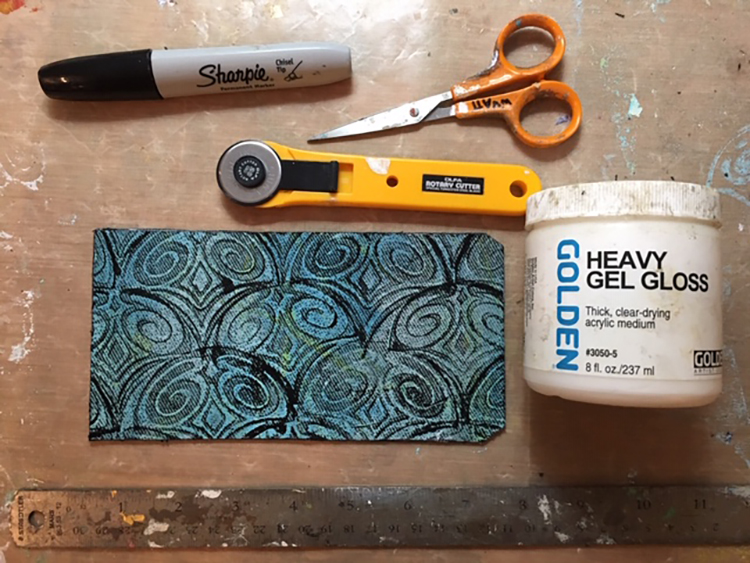
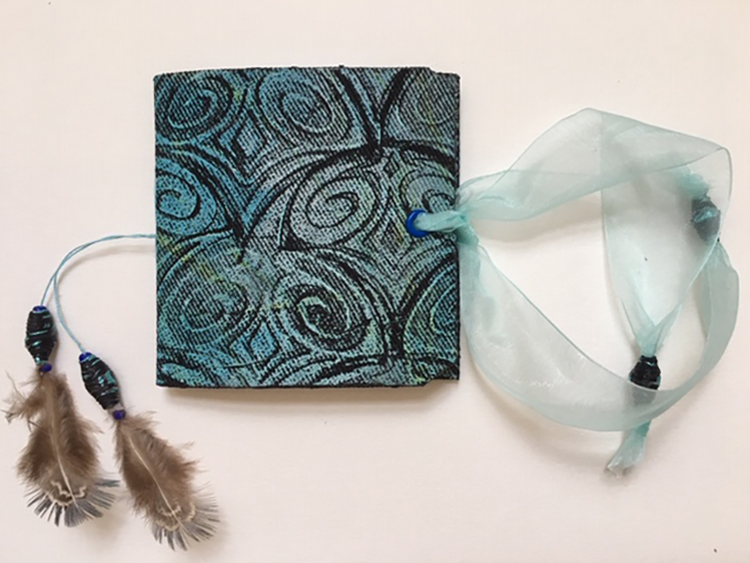
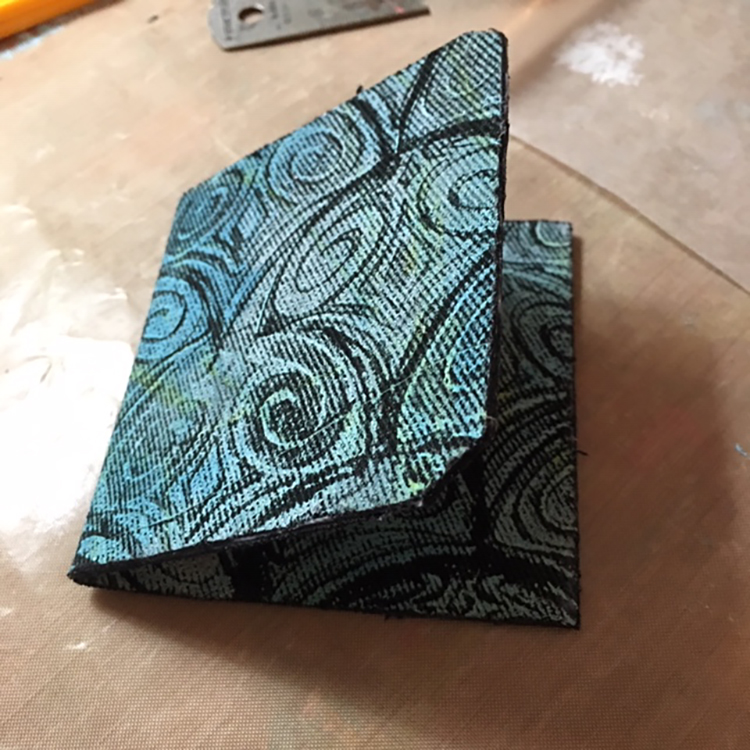
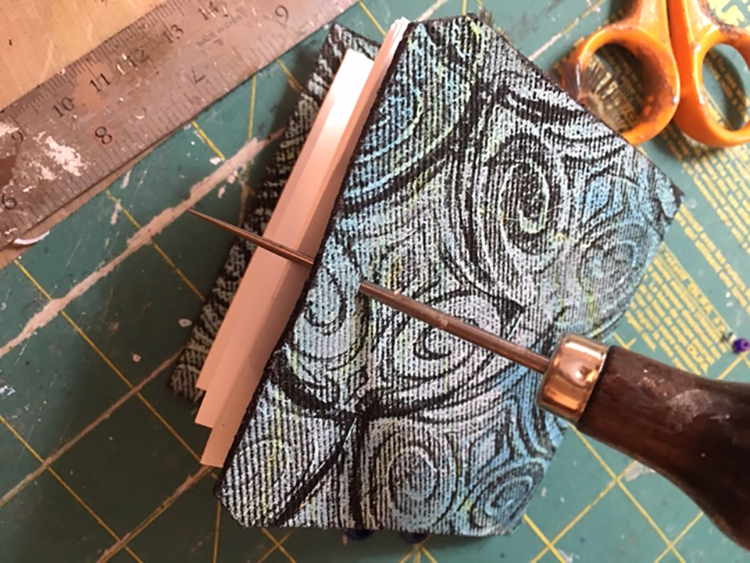
I carefully glued the fabric to both sides of an oversized shipping tag and let it dry. Next, I trimmed the fabric close to the tag edges, added black sharpie to cover the white edges of the tag, and added a thin layer of heavy gel gloss to keep the fabric from fraying. Once the glue had dried, I folded it in half, pressing the fold with my bone folder, then placing the folded tag under a heavy weight for a few hours.
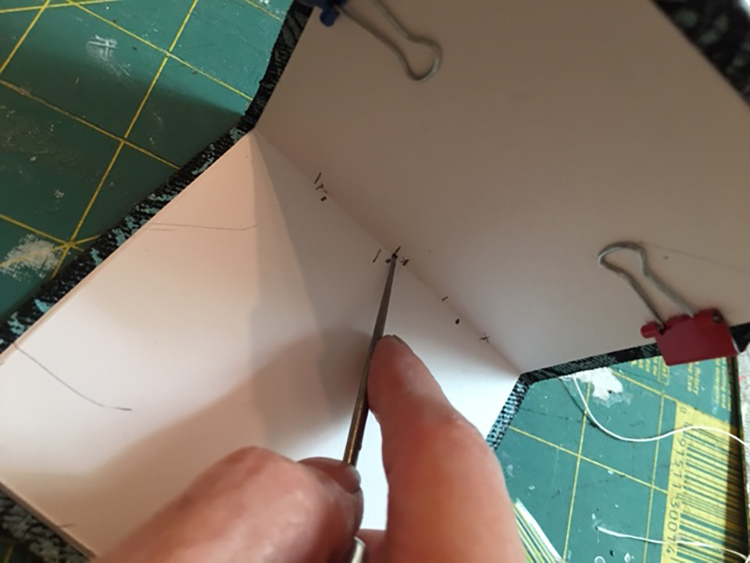
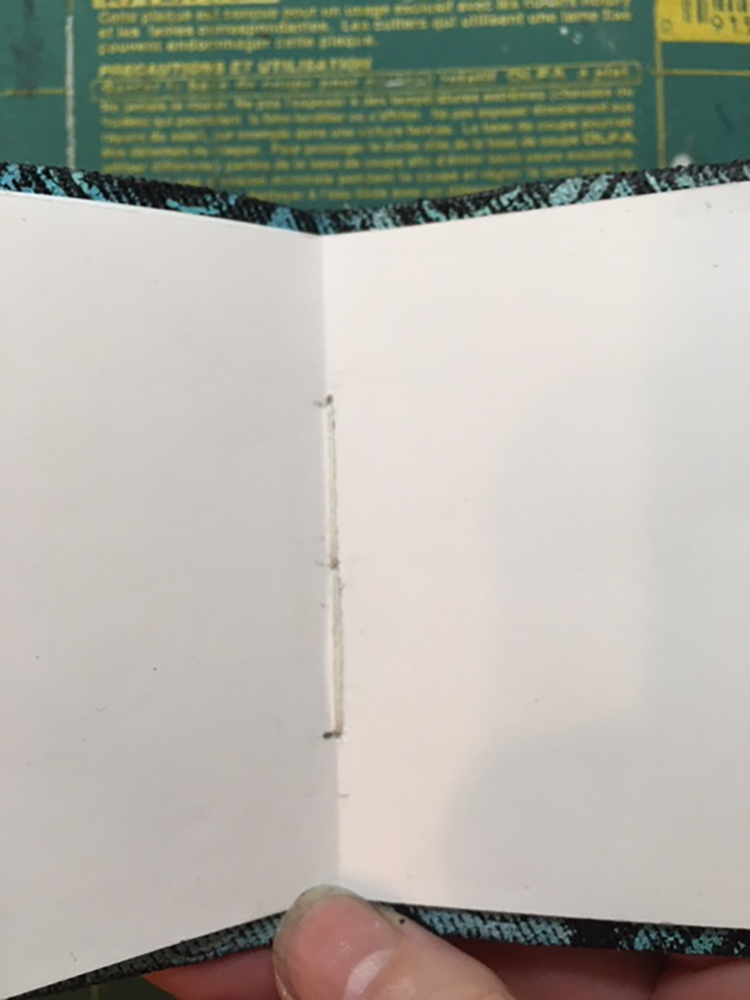
It needed pages, so I cut some heavy white printer paper to fit inside the tag book (I made the pages about 1/8” smaller than the cover) and, using bookbinding thread and a fat needle, stitched the signature in place. I left the strings long with an idea of later adding some kind of decorative beads.
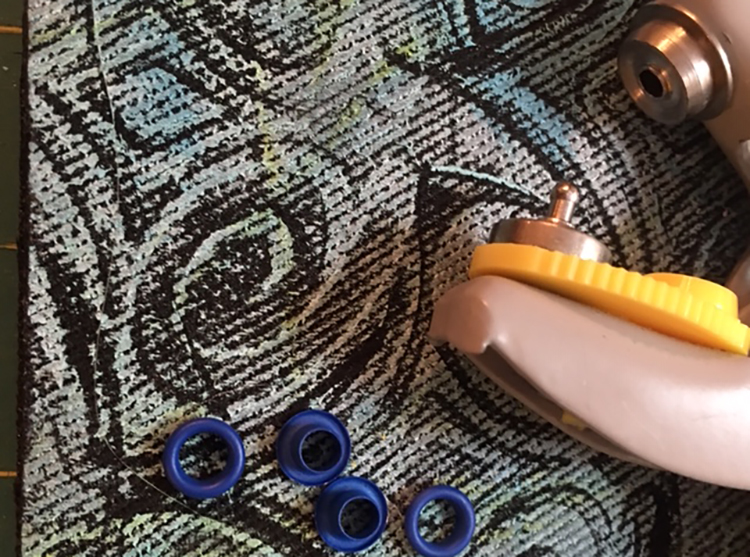
It looked great so far, but then I had to decide what kind of closure and embellishment it needed. I inserted grommets in the tag hole, poked a second hole, and placed another grommet in the back of the book. I chose a simple ribbon closure: I tied a length of sheer aqua ribbon on the inside of each grommet, leaving it long enough to tie the two pieces into a bow closure at the side.
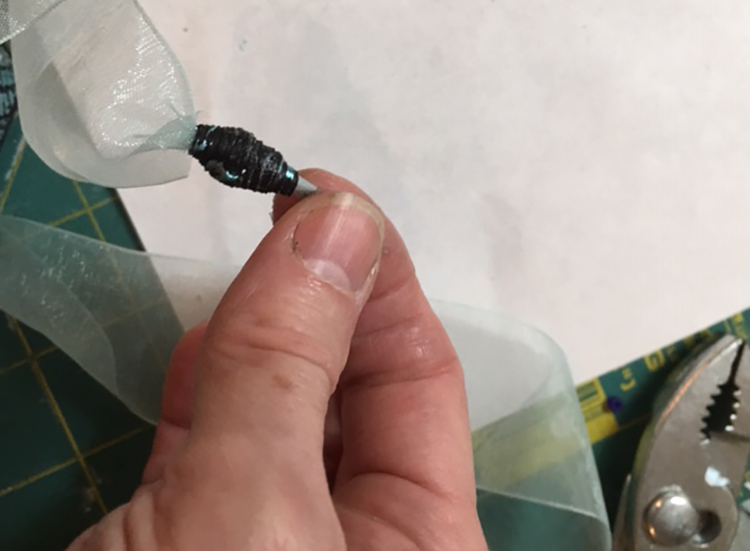
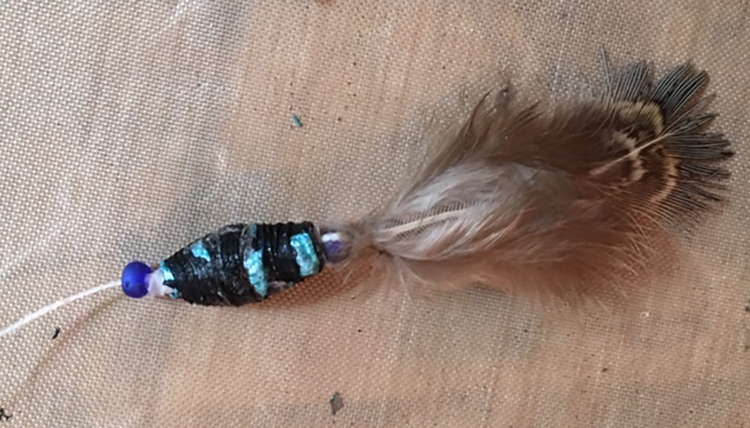
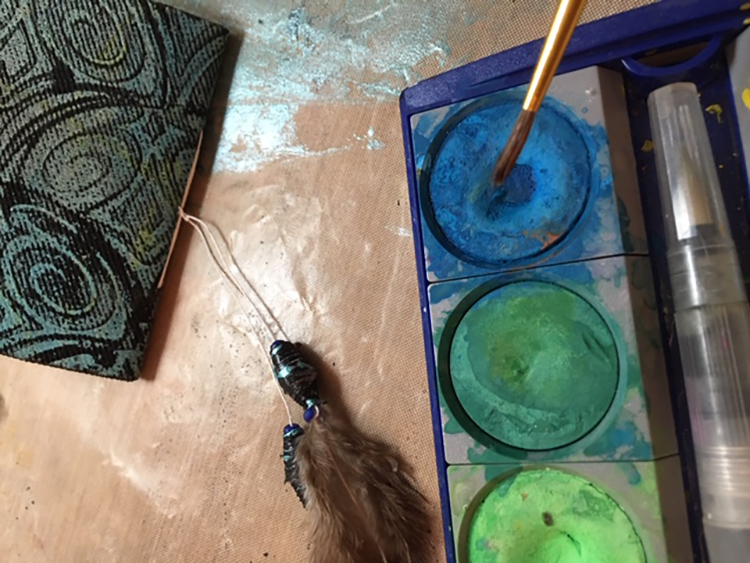
I decided to embellish both the signature’s hanging threads and the ribbon closure with Tyvek beads. I painted some Tyvek black and added splashes of turquoise Lumiere paint. Once it was dry, I cut long triangles, rolled beads, and heated them until the Tyvek melted. I threaded each end of the sheer ribbon through a bead and tied the ends.

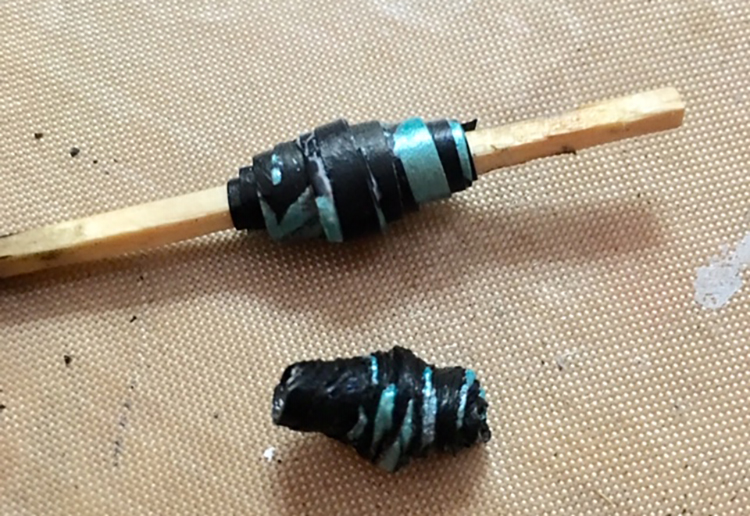
On the long threads of the signature, I got a little fancier. I added a small bead onto the string, then a Tyvek bead, and inserted a small feather into the bead. A few drops of glue on the feather tip held the feather inside the beads. Then I used watercolor to paint the white thread to match the turquoise paint.
The Little Fan Book is a nice small size to fit in a pocket or a purse, and great for writing notes or dashing off a quick sketch. It also could be filled with photos, poetry or inspirational quotes for a very personal and special gift.

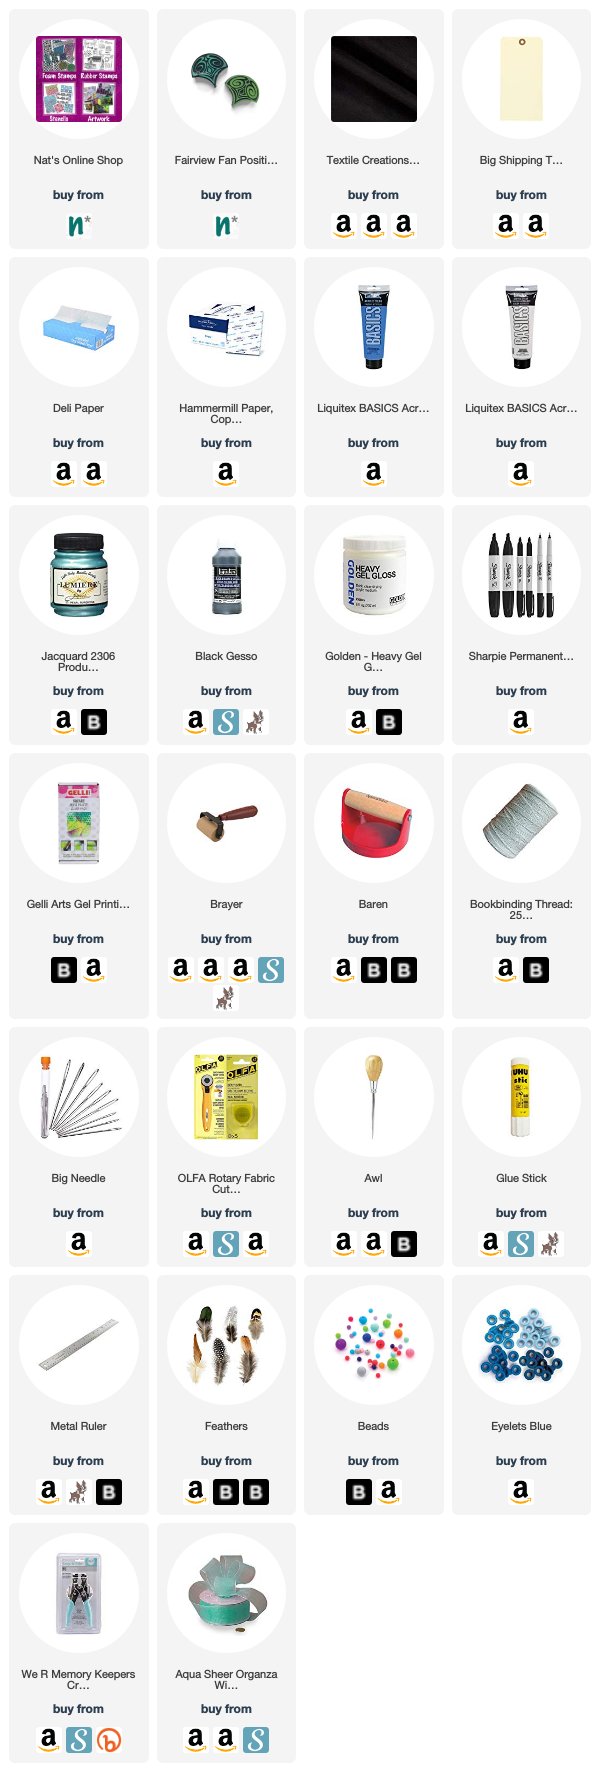
Thank you Linda! I love that you stamped on fabric and then created this gorgeous little treasure with it. Want to give Linda’s project a try? You can find all my Foam Stamps in my Online Shop and here are some of the other supplies she used:
Feel inspired? Working on something yourself that you’d like to share? I love to see how you interpret our monthly themes. Email me or tag me #natkalbach how you used my stencils and stamps – I would love to share your projects in my next “n*Spiration From Around the Globe“.
Comments (2)
Sue Clarke
| #
Wow Linda, I can’t wait to see more of your posts…this one is gorgeous!
Reply
Ann
| #
I am thrilled to see Linda as part of your Creative Squad, she is such a talented artist, and seeing her incorporate her talents in textile design makes me even happier. This is a gorgeous piece. I am honored that Linda is inspired by my work because I truly admire her talents and creations. Fantastic tag book, all the special details bring it to life and that fan stamp design is glorious! ~Ann
Reply