Hello from my Creative Squad! Today we have a post from Judi Kauffman who is sharing a creative way to personalize a notebook cover using my ATC Mixup, Crackle, Hamilton, and What’s the Point stencils and inspired by our theme: Goodnight, Art Journal – Think about the colors, sounds, rituals of night – any aspect of it – and use that as your catalyst to create!
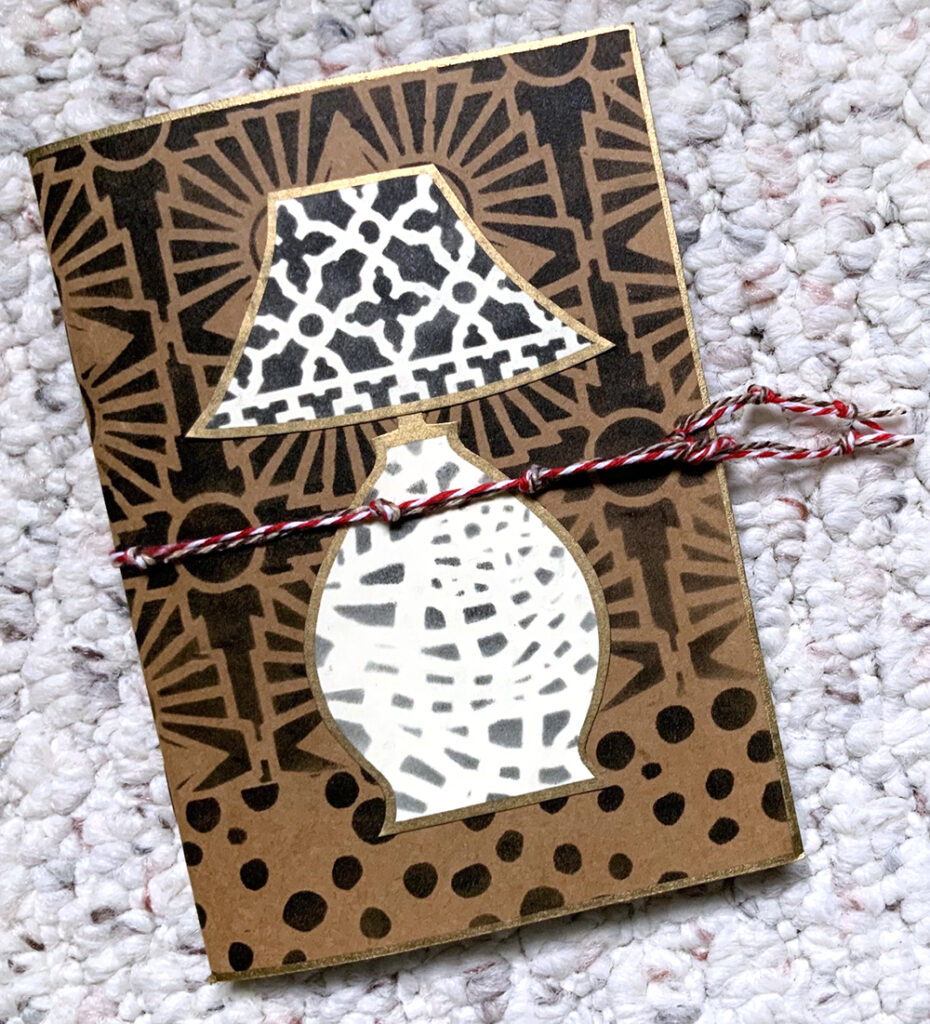
LAMP LIGHT by Judi Kauffman
I don’t keep an art journal – just an over-stuffed Traveler’s Notebook – so my project deviates from this month’s assignment. We’re tasked with using Nathalie’s stencils to create an art journal page inspired by night time. I took a more literal approach to nighttime, the wonderful, lazy part of my day when I am most often in a comfy chair reading by lamp light.
The project itself started with a 4” x 6” blank book with a Kraft brown cover, small enough to sit next to the chair or tuck into a tote. I can record what I’m reading, make shopping lists for books I want to buy or pick up at the library, jot down recommendations from friends. I plan to glue in book reviews from newspapers and magazines, and – of course – I’ll doodle.
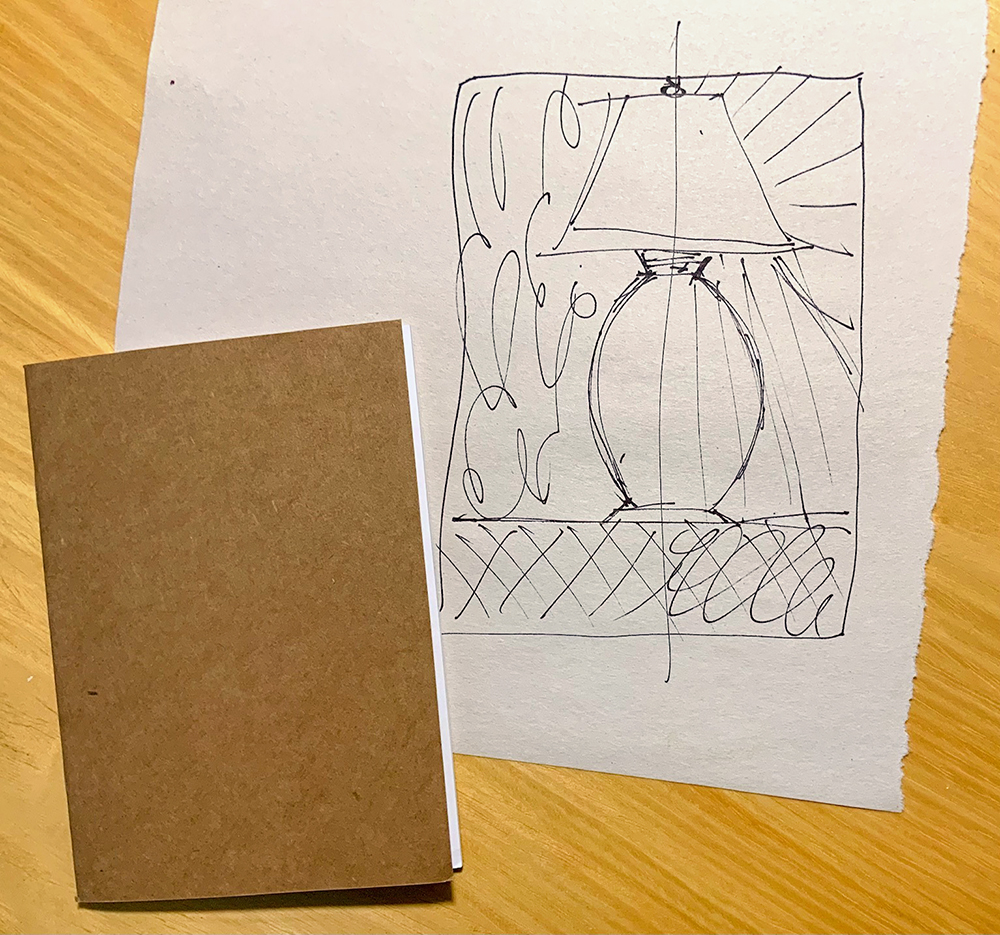
My original idea, shown in the sketch above, was a lamp on a table, divided so that one half was daytime and the other was nighttime – rays at the right showing the nighttime illumination. I knew I wanted a very graphic design with very simple shapes so the stencils would take the starring role.
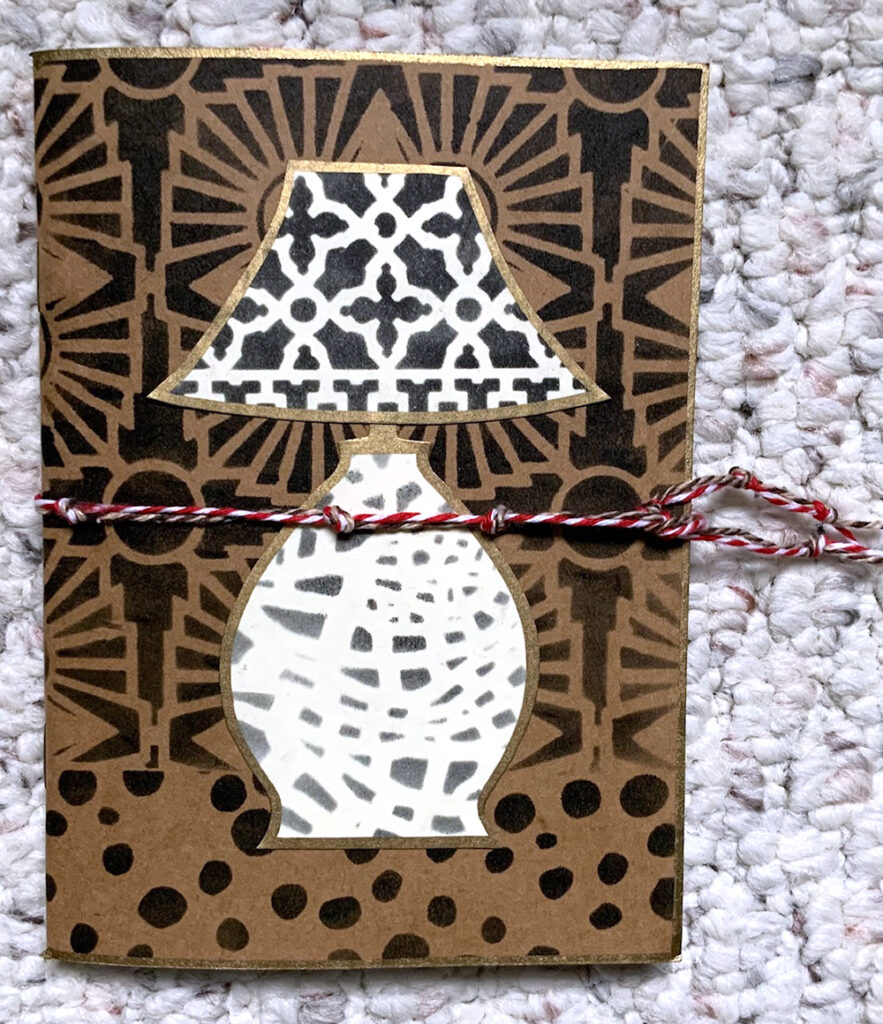
When I spread out Nathalie’s stencils I took a slightly different approach, a simple lamp sitting on a table with one stencil pattern for the tabletop and another stencil for the wallpaper behind the lamp, a third stencil for the lamp shade and a fourth for the base. A nice bonus: the stencil I chose for the wallpaper (Hamilton) also looks like rays of light in a subtle way! Feel free to use this sketch if you prefer that approach to the one I ended up using.
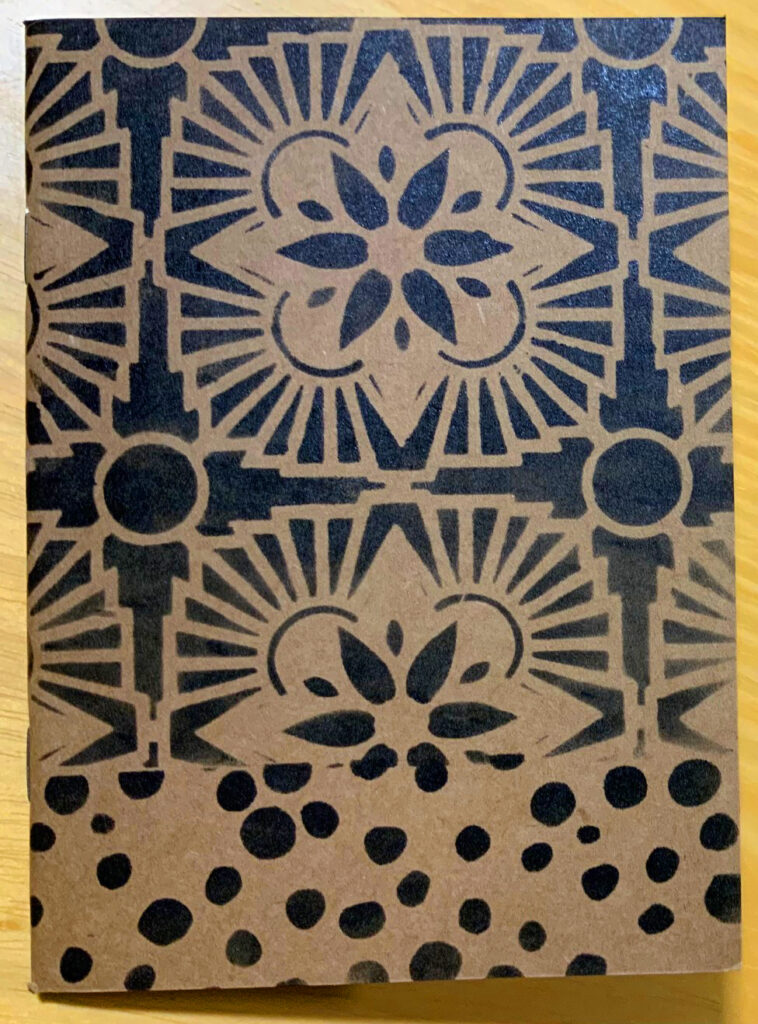
Using black ink or paint or color(s) of choice: Stencil the designs for the wallpaper (here I used Hamilton) and table top (here I used What’s the Point) onto the book cover. Stencil designs for the lamp shade and base onto ivory cardstock (I used the Crackle and ATC Mixup stencils). You’ll only need a few inches of stenciled cardstock for the shade and base.
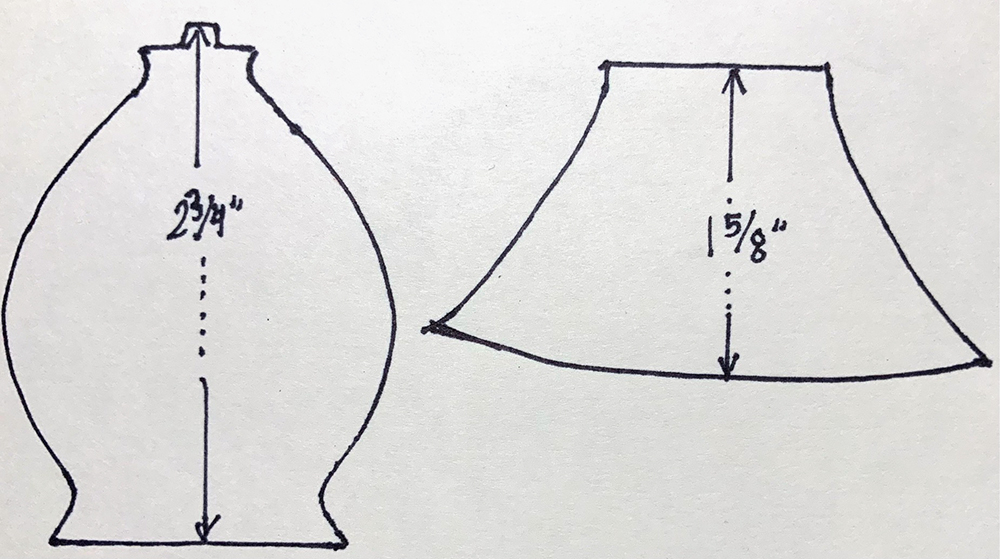
Create cutting patterns for the lamp shade and base by using my drawings or your own preferred lamp as inspiration. Lots of options for free designs on the internet. Cut out the patterns.
Position the cutting patterns onto the stenciled ivory cardstock. Draw around the patterns; cut out the shapes. Design strategy to note: I picked a portion of the crackle pattern for the lamp base that has a rounded look to add dimension to the otherwise flat shape. I carefully centered the pattern on the lamp shade.
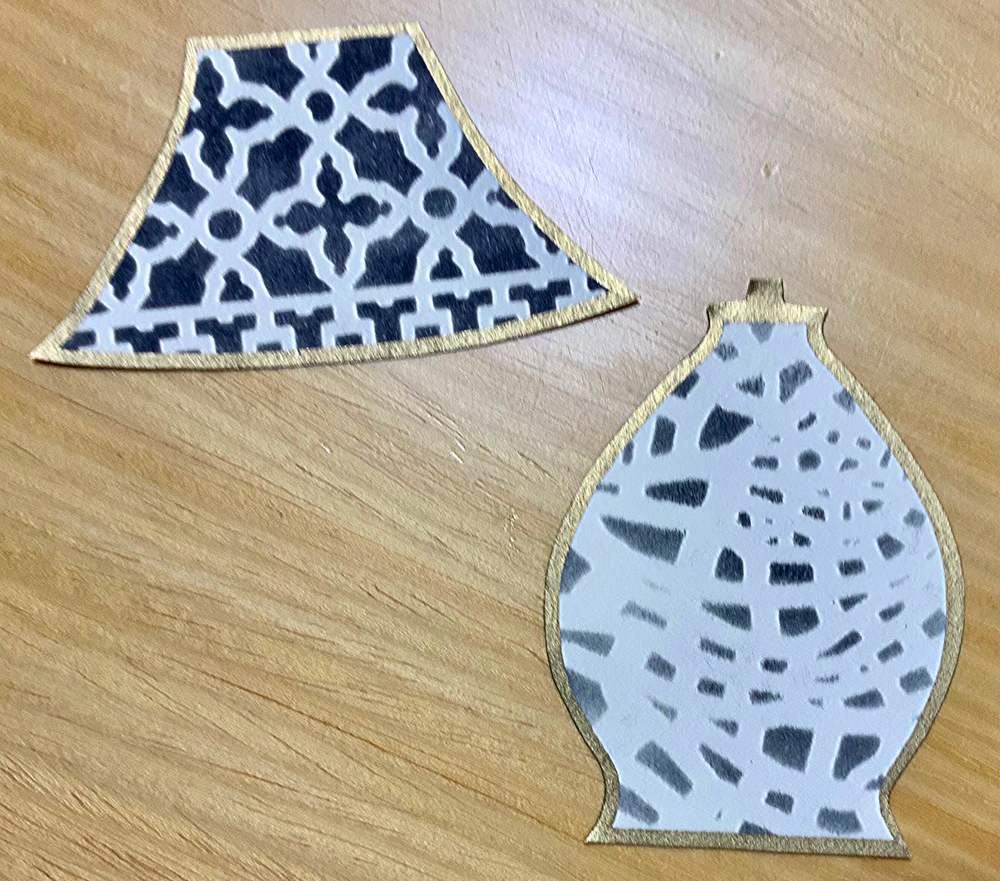
Edge the book cover, lamp shade and base with gold paint pen. Glue the shade and base to the cover.
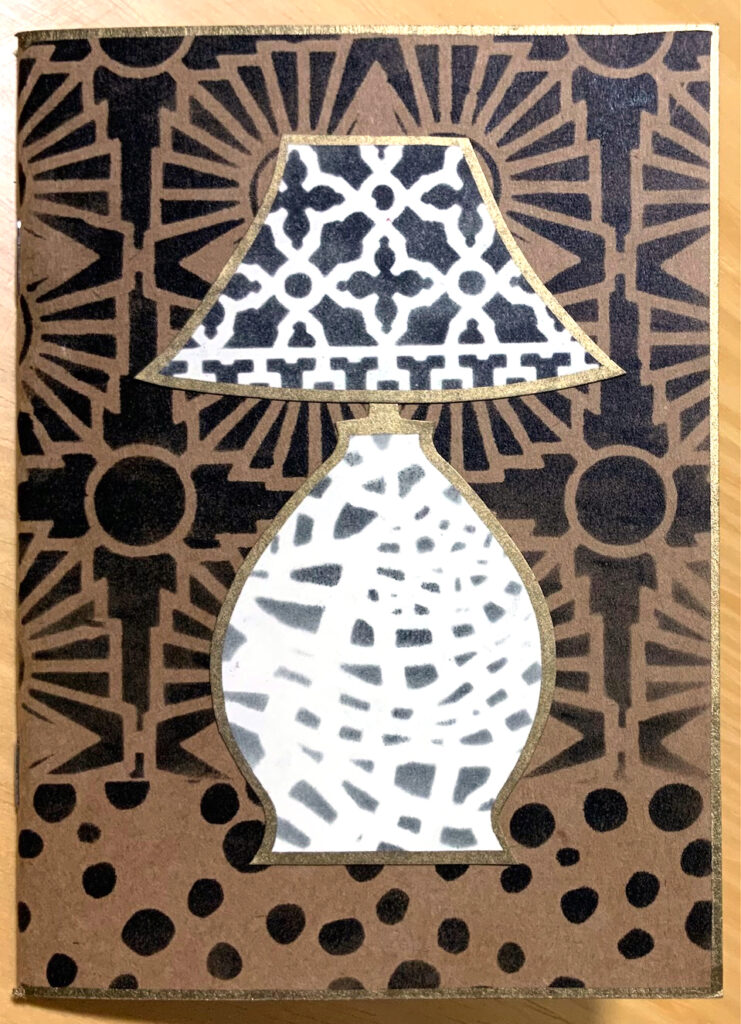
Optional: For a pop of color create a belly band with knotted baker’s twine, ribbon, elastic, or yarn. Make sure the band is loose enough to easily slip on and off or easy to untie and re-tie. (Baker’s twine is tedious so my belly band will remain knotted.)
More Options:
*Start with a photo of your own lamp as the source for the cutting patterns.
*Use a mix of colors instead of only black.
*Make a batch of stenciled cards – this is a very fast and easy project to do ‘assembly line’ style since the shapes are so simple.
*Stencil onto patterned paper instead of solid colors.
*If the finished look is too minimalist for your taste, embellish with pen doodling; add collage or develop dimension with colored pencils.
Thank you Judi! Love the thoughtful positioning of the stencils to suggest light and form!
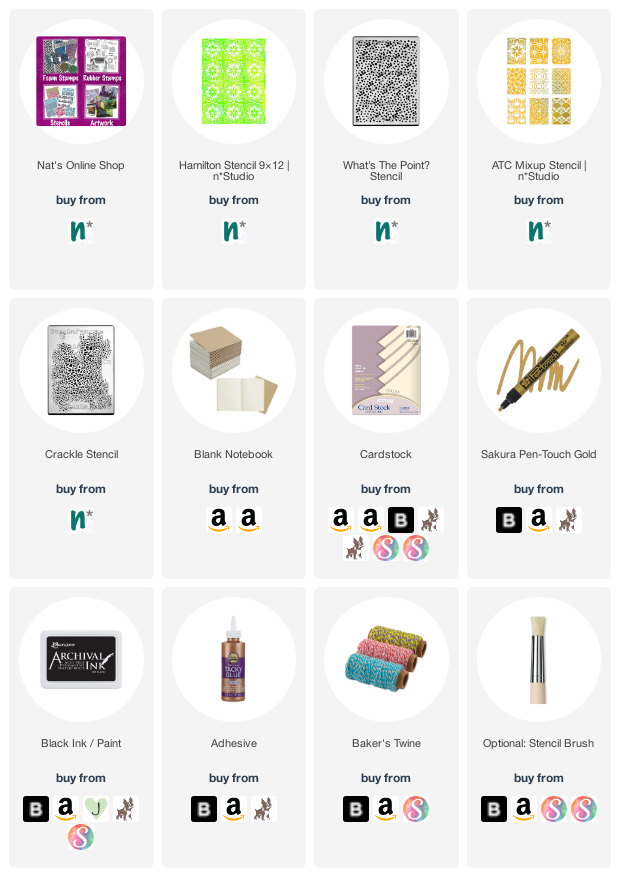
Give it a try: you can find all my Stencils in my Online Shop and here are some of the supplies Judi used:
Looking for more projects? Follow the Creative Squad on Instagram here.
