Hello from my Creative Squad! Today we have some gorgeous tote bags from Judi Kauffman using my Amsterdam and Hamilton stencils and this month’s theme: Life in Bloom – It’s been a long winter where we are and I’m dreaming of flowers and gardens and spring. Indulge us all in a project that focuses on one of Mother Nature’s most exuberant symbols of life: flowers flowers flowers!
I completed my “Life In Bloom” theme projects in late February, a week after getting my first covid vaccine shot. I will have been home for a full year as of March 18, but by the time you read these words I will have had my second shot and will be able to double-mask and head back out into the world – just in time to greet the new season. Spring!

I can’t wait… I can’t wait to see the iris, peonies, begonias, and other hearty perennials peeking up, ready to put in an appearance. And I can’t wait to go to Costco to buy some annuals to fill in the empty spaces. And a rotisserie chicken for dinner…I can almost smell the aroma of that aisle. Gee, I think I missed those trips to Costco more than almost anything else during my time at home.
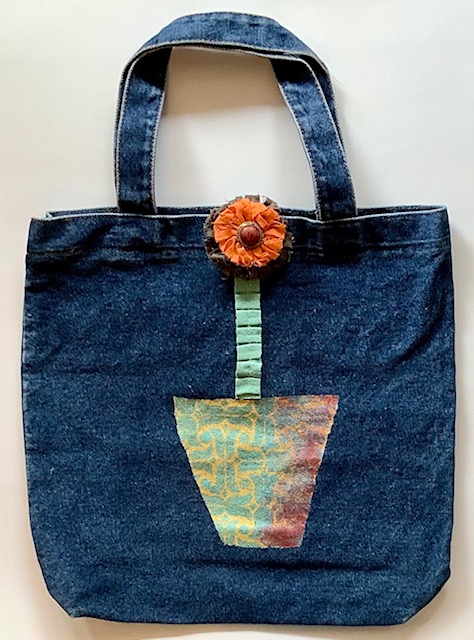
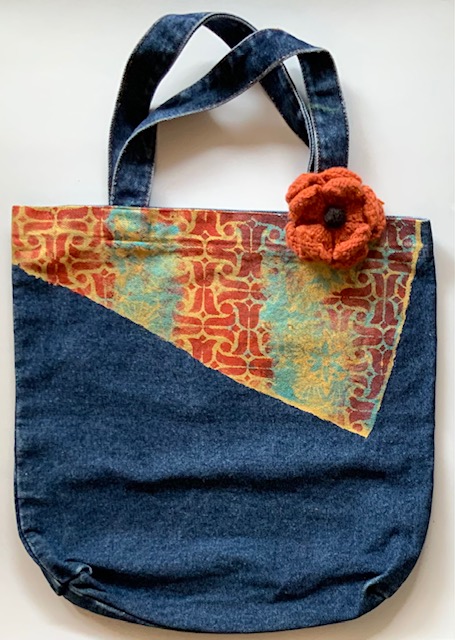
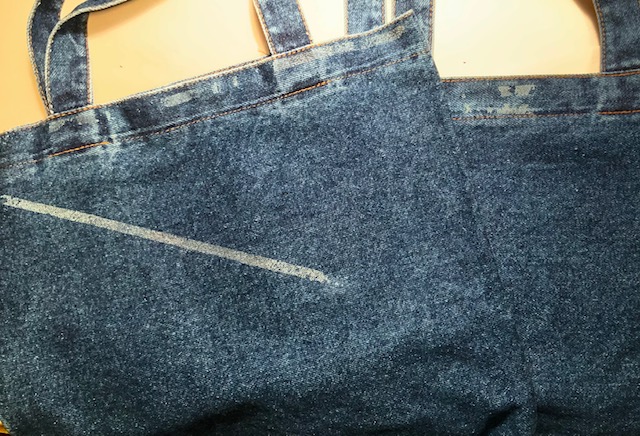
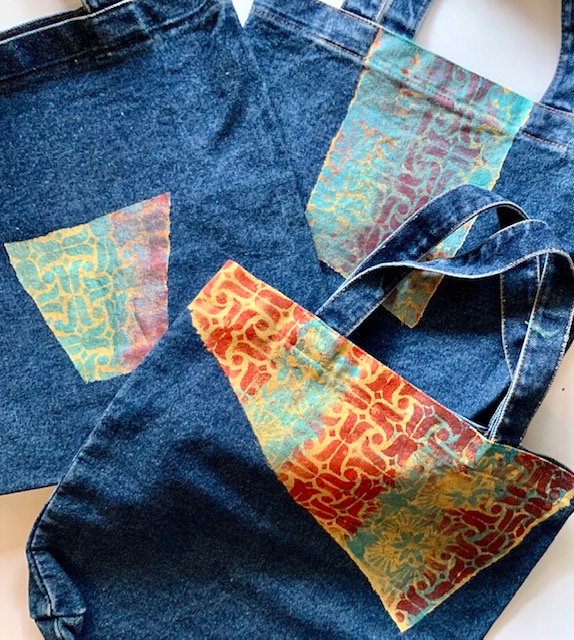
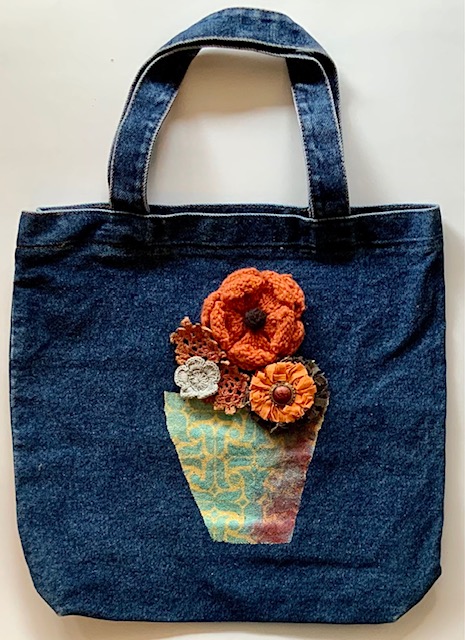
Meanwhile, like many of you I have spent many hours cleaning closets and going through supplies. I found a trio of simple denim totes, two with flawed spots, and thought they’d be a great surface for a stencils-only project. Here’s how they looked when I started:
My concept was to create a flower pot/vase on one of the totes for a literal interpretation of the theme but stenciling the other two with more wonky shapes for a more abstract approach.
INSTRUCTIONS:


Using torn strips of newsprint, mask around the areas earmarked for painting and stenciling.


Using gold metallic or other light color acrylic paint and a wide brush fill the area to be stenciled. Optional: Mix paint with fabric medium.
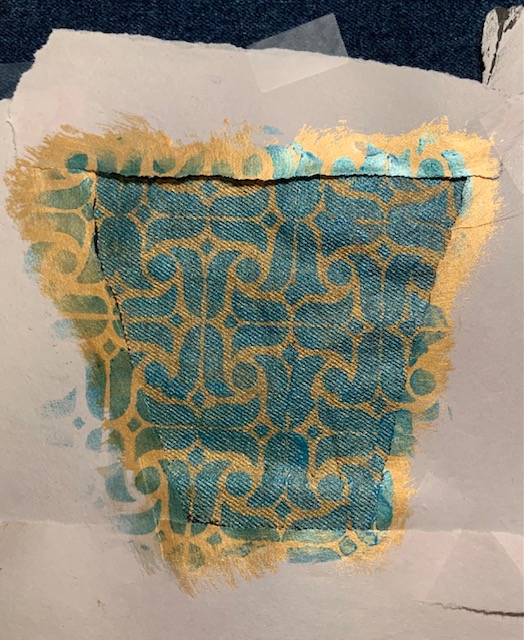
Using a mix of stencils (I used Nat’s Amsterdam and Hamilton stencils) and two darker paints (shown: red and metallic teal) add pattern to the gold areas. Overlap stencils here and there. Allow paint to dry for distinct patterns, work wet-on-wet for less distinct designs (smudge paint at edges to add dimension – note right side of flower pot).


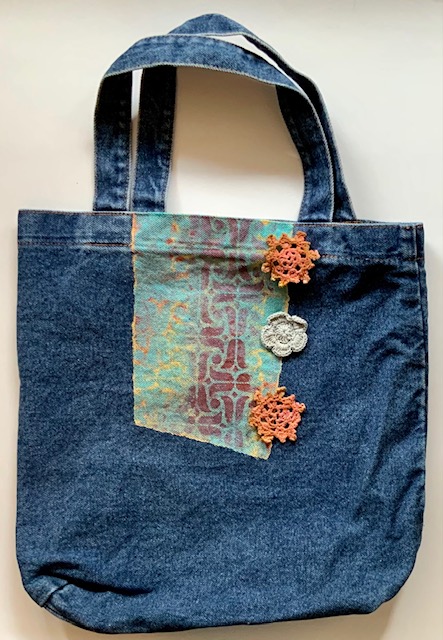
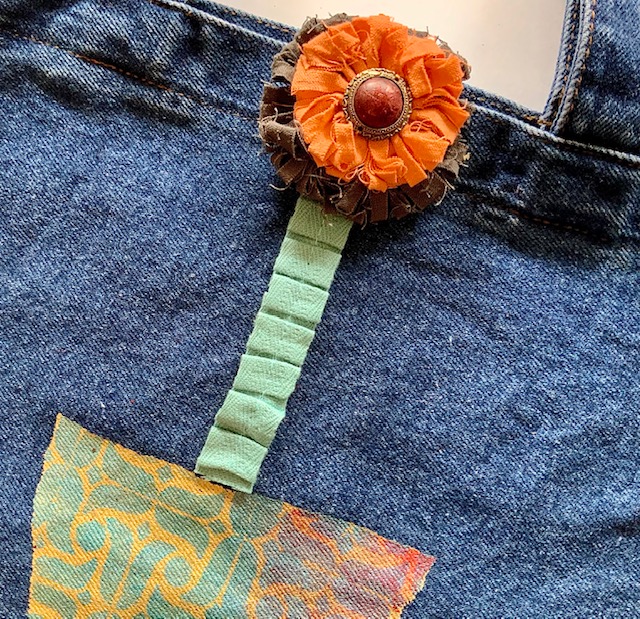
Embellish stenciled totes with knitted, crocheted, and/or frayed fabric flowers. Pleated hem tape makes an interesting stem for a single blossom. Sew in place or use fabric glue to adhere.
NOTE: Embellishments shown are positioned for photography and are being ‘auditioned’ – nothing finalized yet! I plan on adding beads, embroidery, charms and more.


Thank you Judi – absolutely love the idea of bringing these totes to the farmer’s market or garden center!
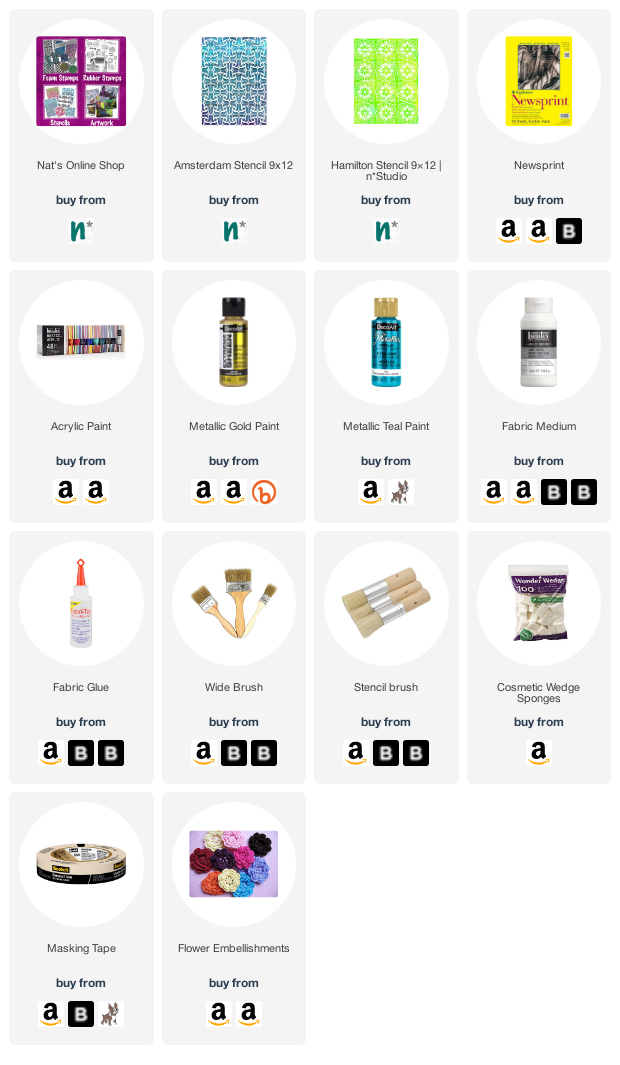
Give it a try: you can find all my Stencils in my Online Shop and in addition to various beads and embellishments, here are some of the supplies Judi used:
Don’t forget to check out Nat’s Creative Squad on Instagram too: Each week we post projects, ideas, and inspiration for mixed media art.
Comments (1)
TIFFANY ARP-DALEO
| #
These are so cool, love the designs!?
Reply