Creative Squad

Creative Squad: On Repeat – Maura Hibbitts

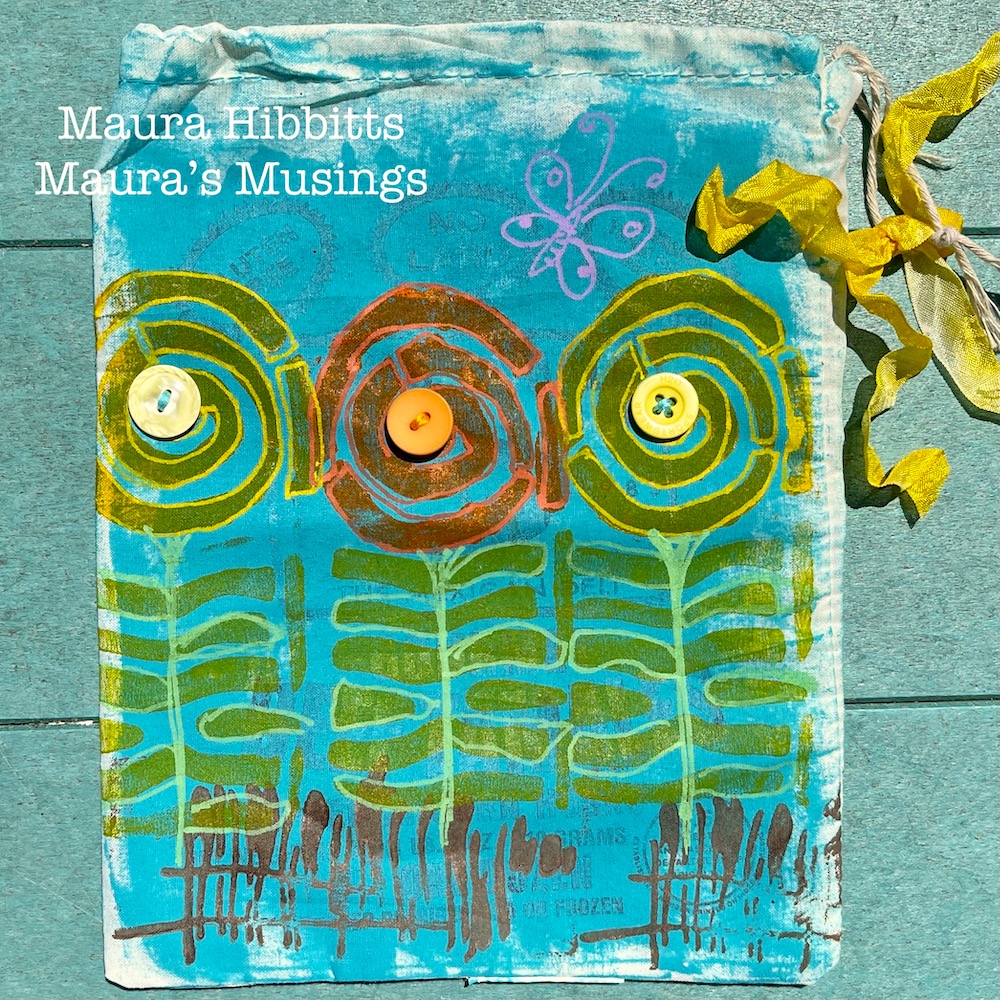
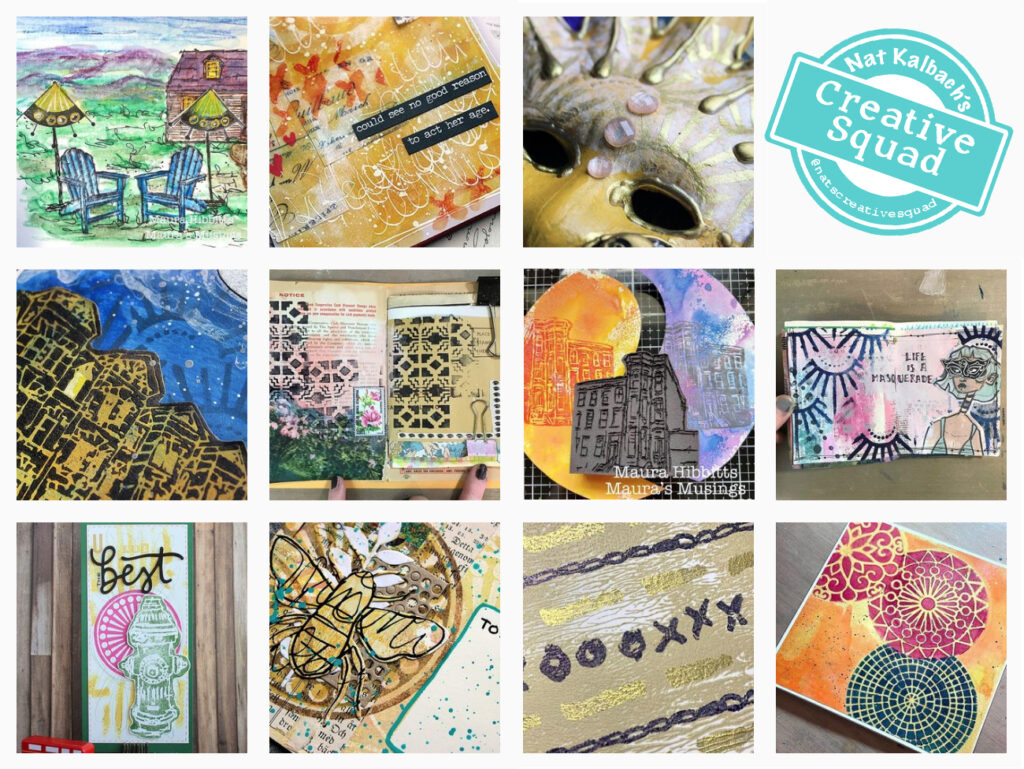
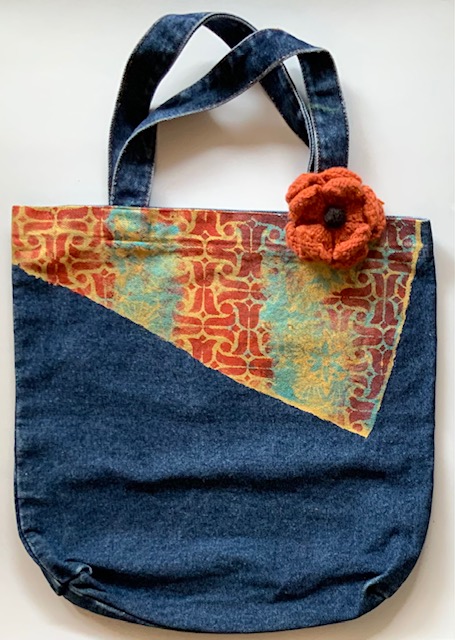
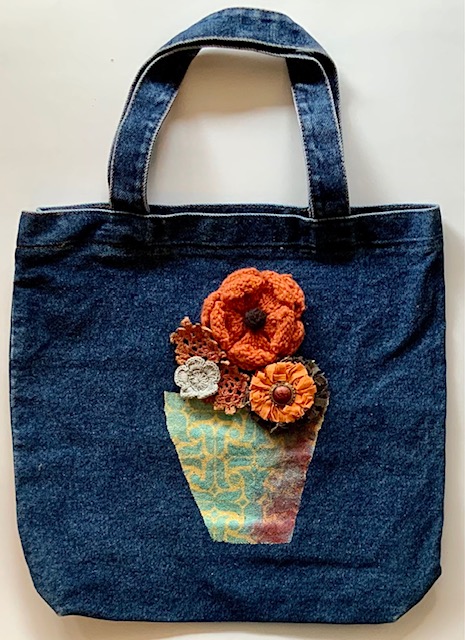
Hello from my Creative Squad! Today we have a cool upcycled project from Maura Hibbitts using a fabric bag, my Batik 2 and Far Out ArtFoamies stamps, and our new theme: On Repeat – Let’s play with patterns! Repeat a design motif or shape to create a pattern-inspired project of your choosing.


When you look at the natural world, do you see repeating patterns of color and design? How about when you look at a garden? My own gardens tend to be a bit on the wild and untidy side, but when I see a well cared for garden, I notice how the flower colors are repeated throughout. I’ve also noticed how leaf shape and size can be repeated for emphasis. I think you will even observe this in a wildflower meadow, nothing is growing in isolation, but it is “on repeat.” These observations led me to create this gift bag with a flower garden theme.

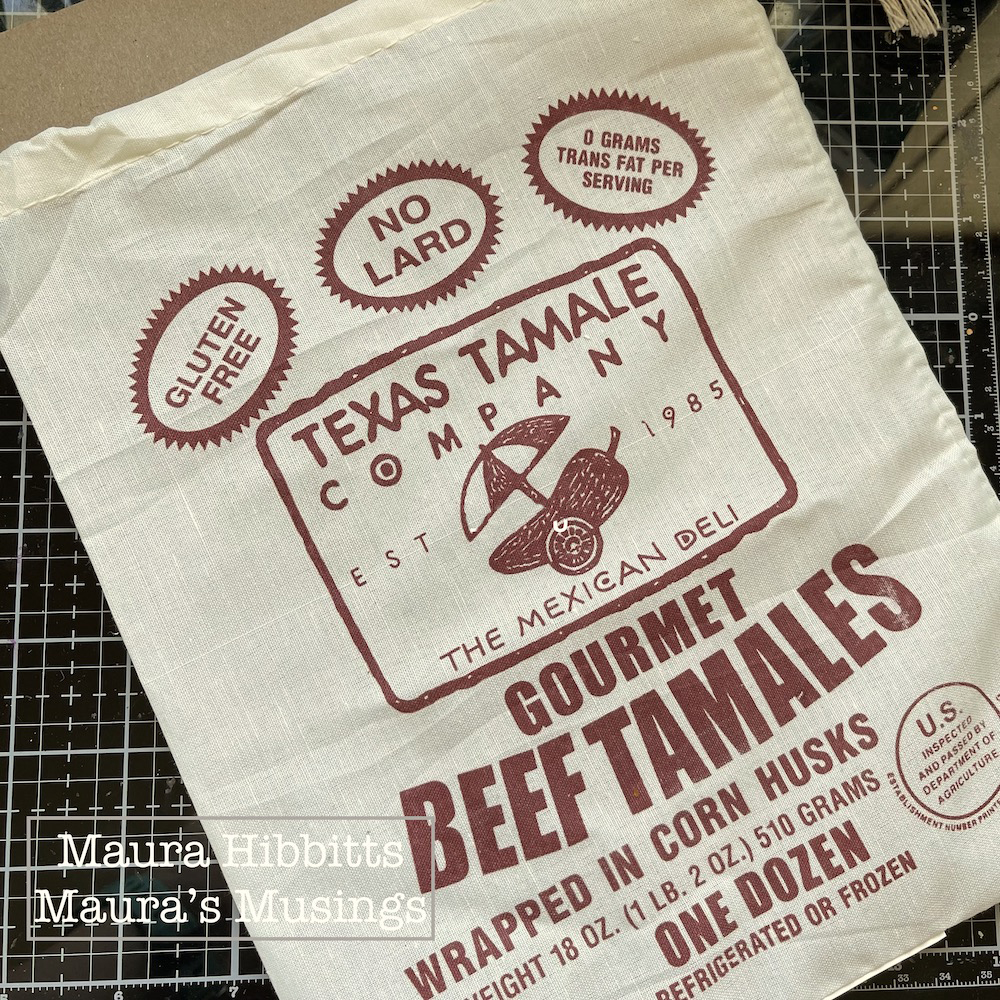
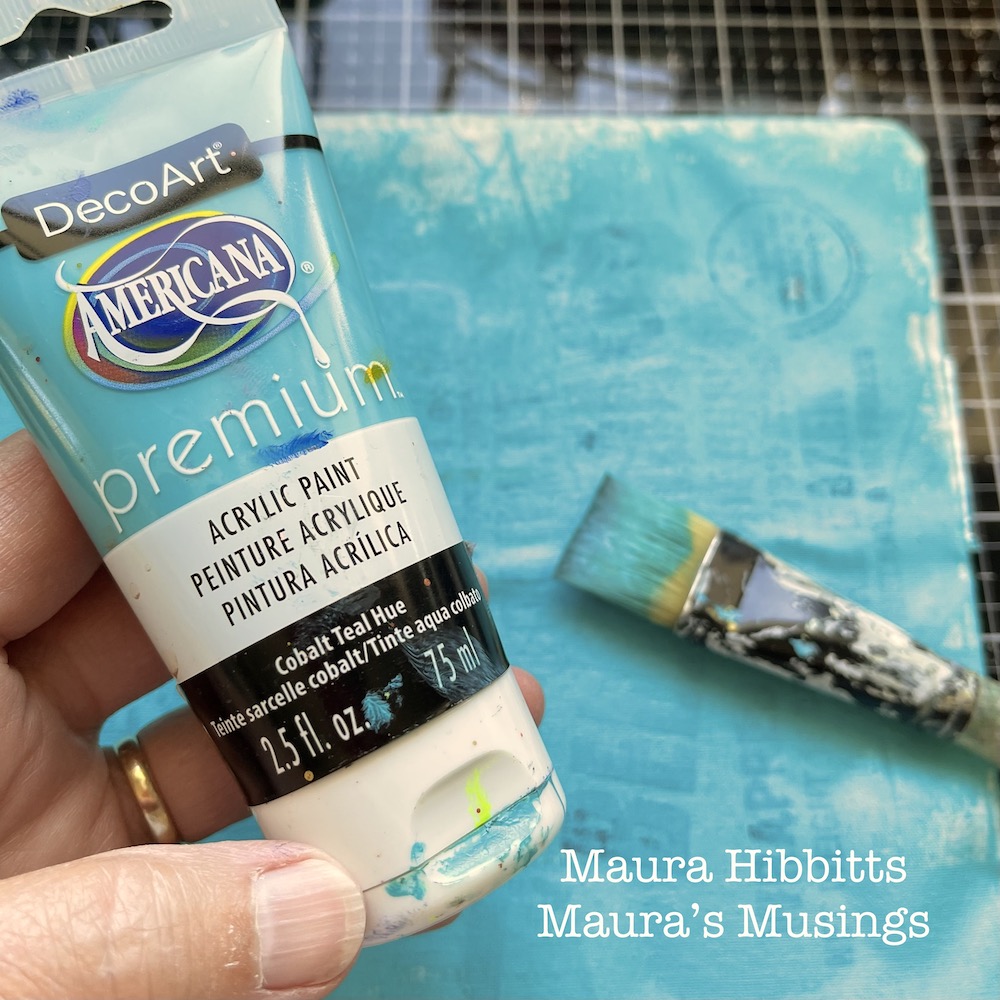
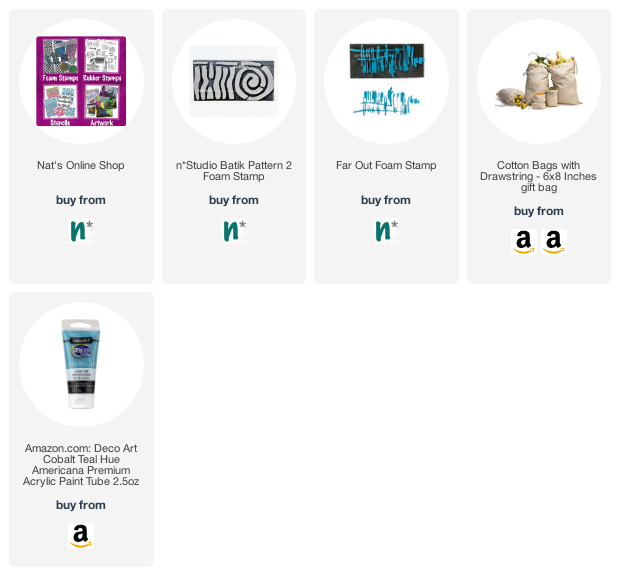
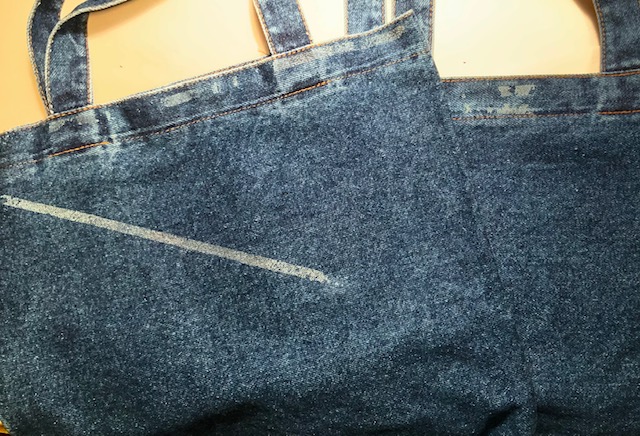
I began with an upcycled cloth bag (Texas Tamales – yum!) and cut a piece of cardboard to fit inside. This keeps the paint from seeping through to the other side. Use an acrylic brush to paint both sides with Cobalt Teal Hue, and don’t worry if you see some of the print coming through, it will add to your design. Use a heat tool to dry it quickly if you wish. 

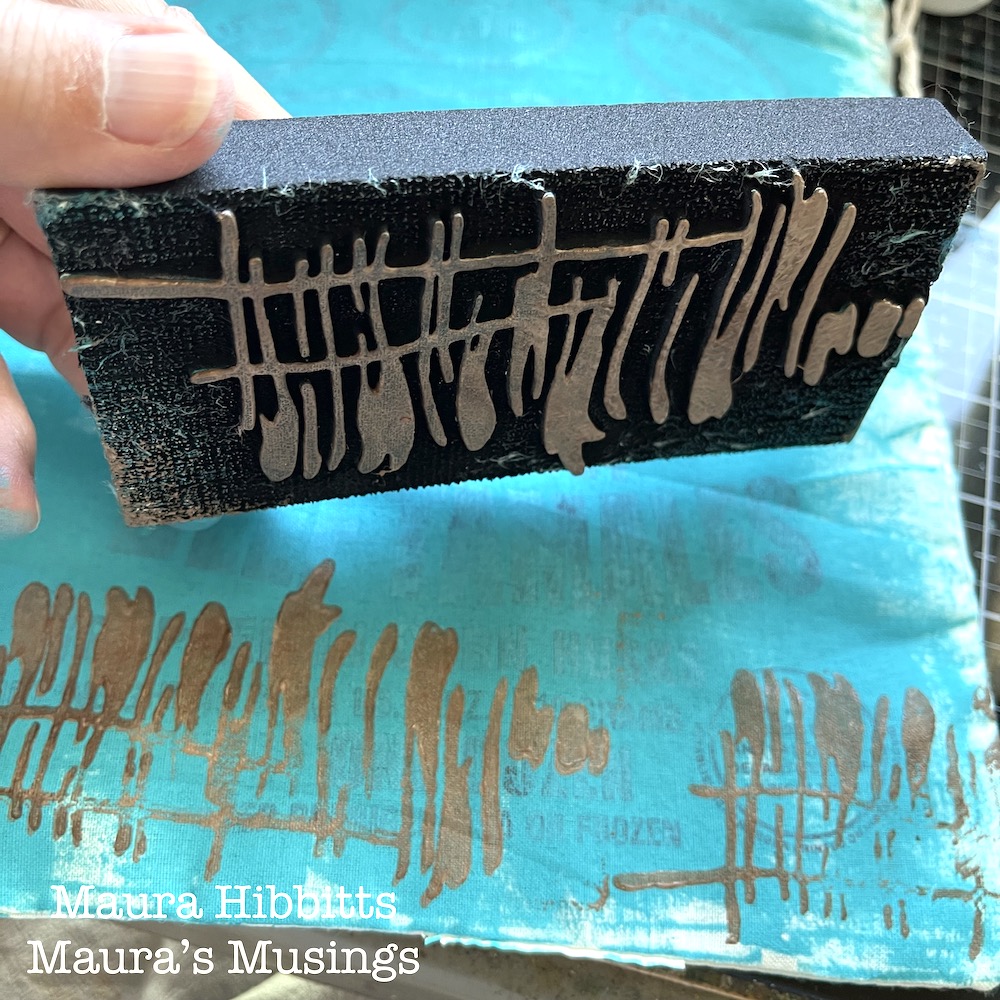
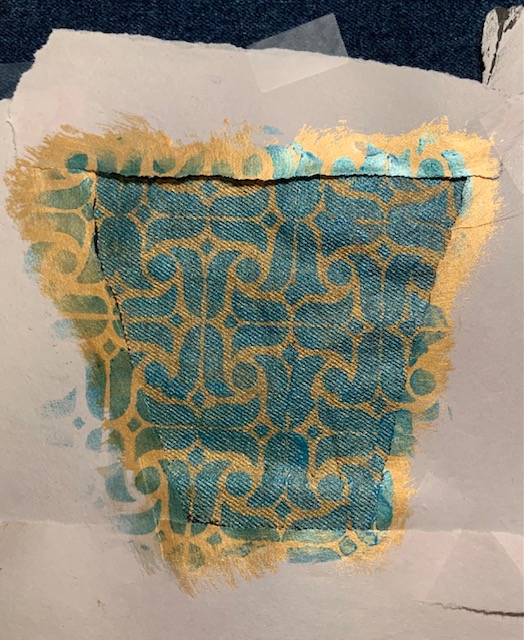
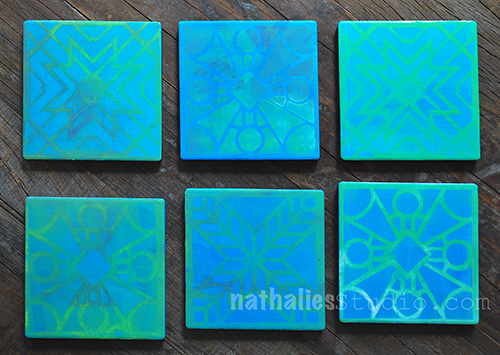
Blend Burnt Umber and Translucent White on the gel plate. Using the brayer, or stamping directly onto the gel plate, transfer the paint to the ArtFoamies Far Out stamp. Stamp a repeated image across the base of the bag on both sides, this will represent the ground or soil.

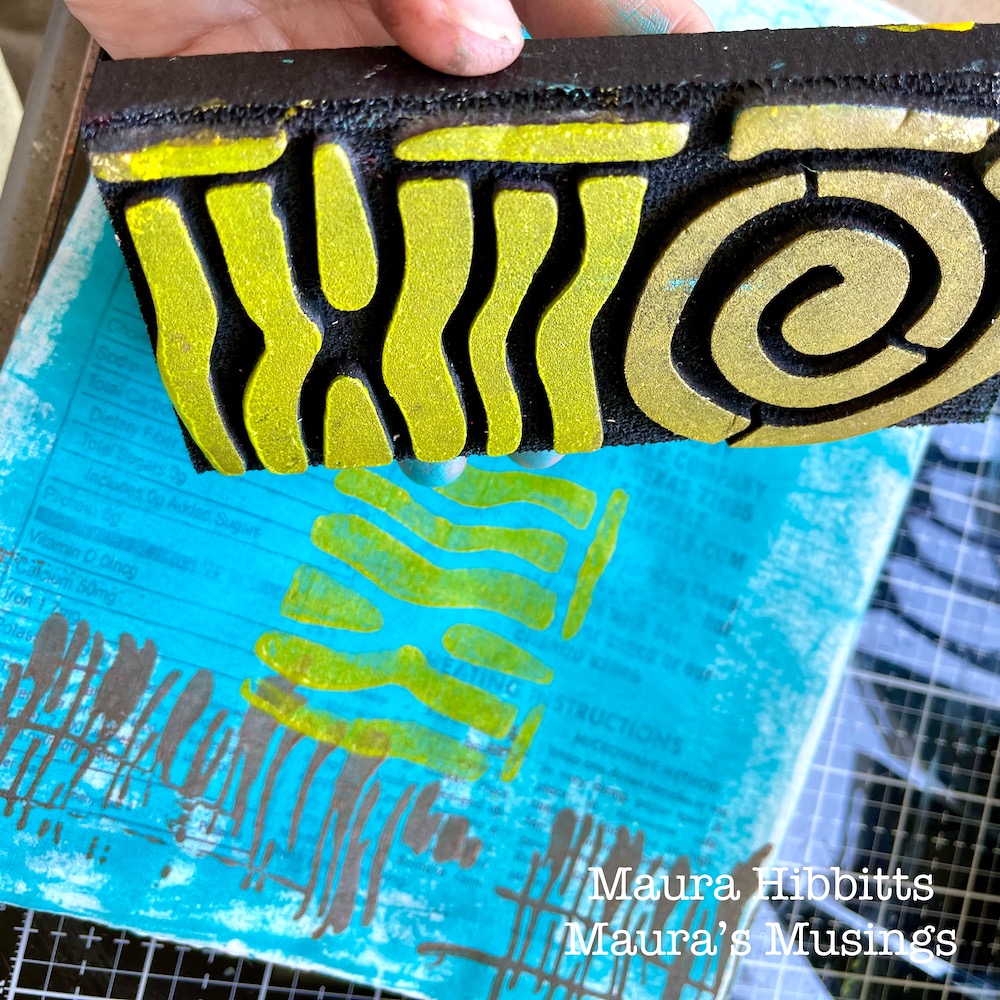
Next, add Green Gold to the clean gel plate. (I use a baby wipe to get the plate clean, or you can wash it.) Use a brayer and apply the paint to the striped section of the Batik 2 ArtFoamie stamp. Now, stamp this in a repeating pattern of three above the Far Out stamped images. Again, repeat this on both sides of the bag.

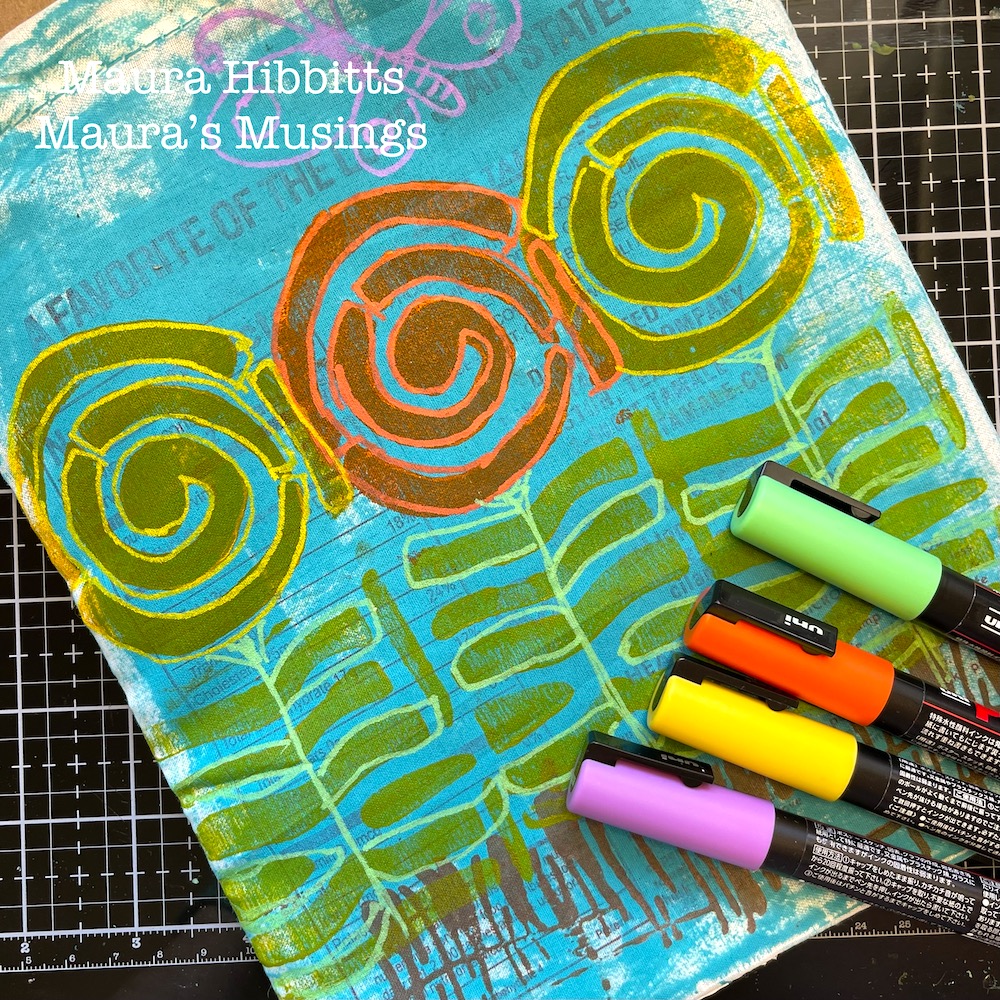
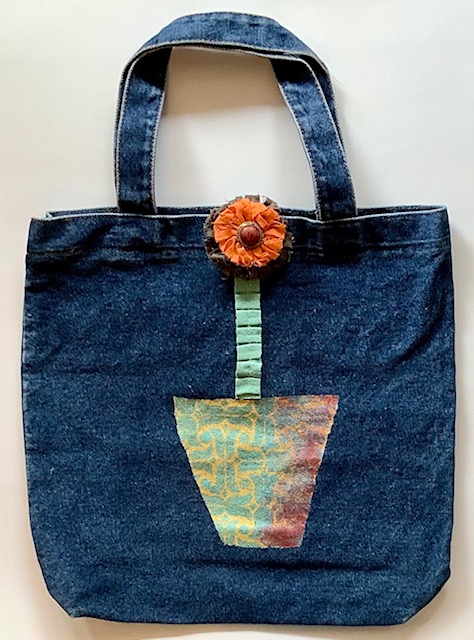
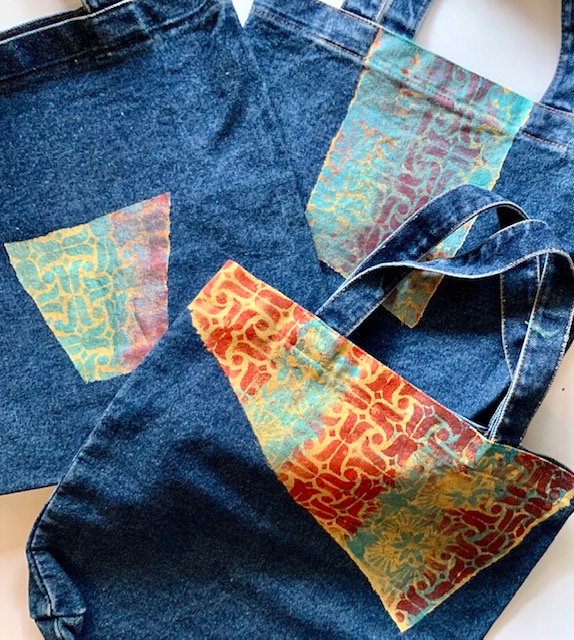
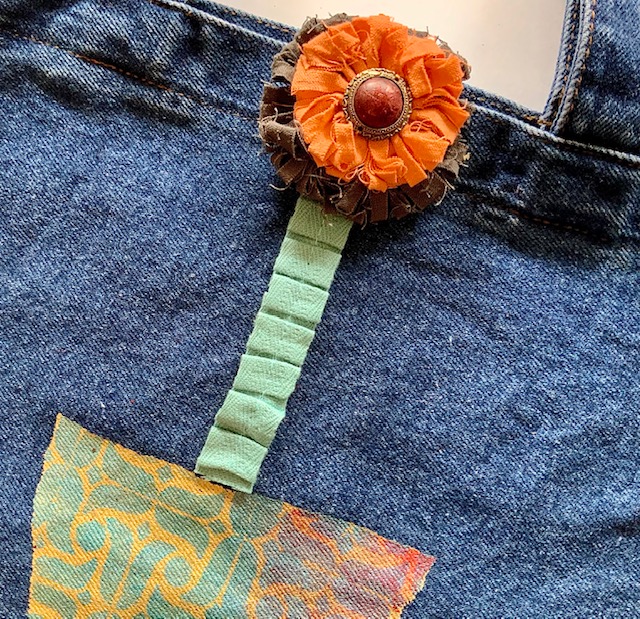
Now, add Cadmium Orange Hue to the clean gel plate, and use the brayer to apply the orange to the circular area of the Batik 2 ArtFoamie. Stamp this color on the center image. Repeat the process using the Diarylide Yellow to either side. Now you have three images across the bag front and back.

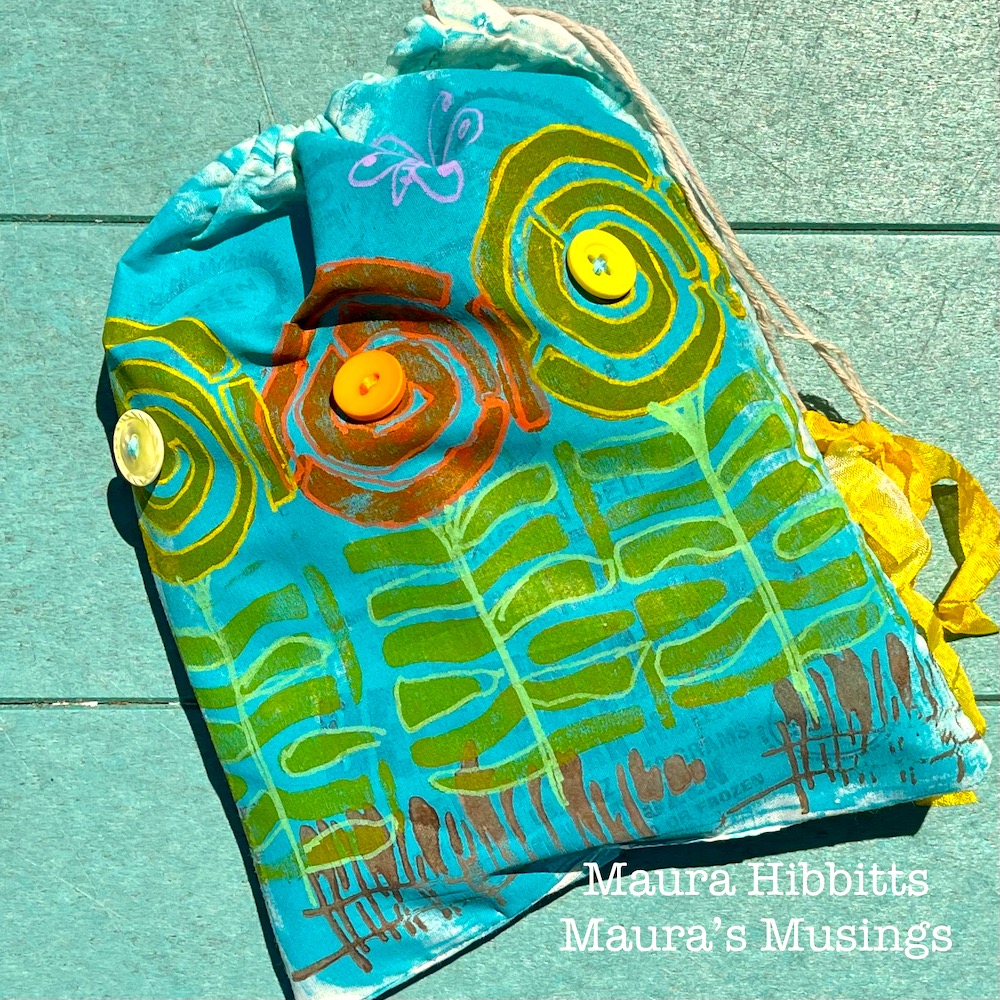
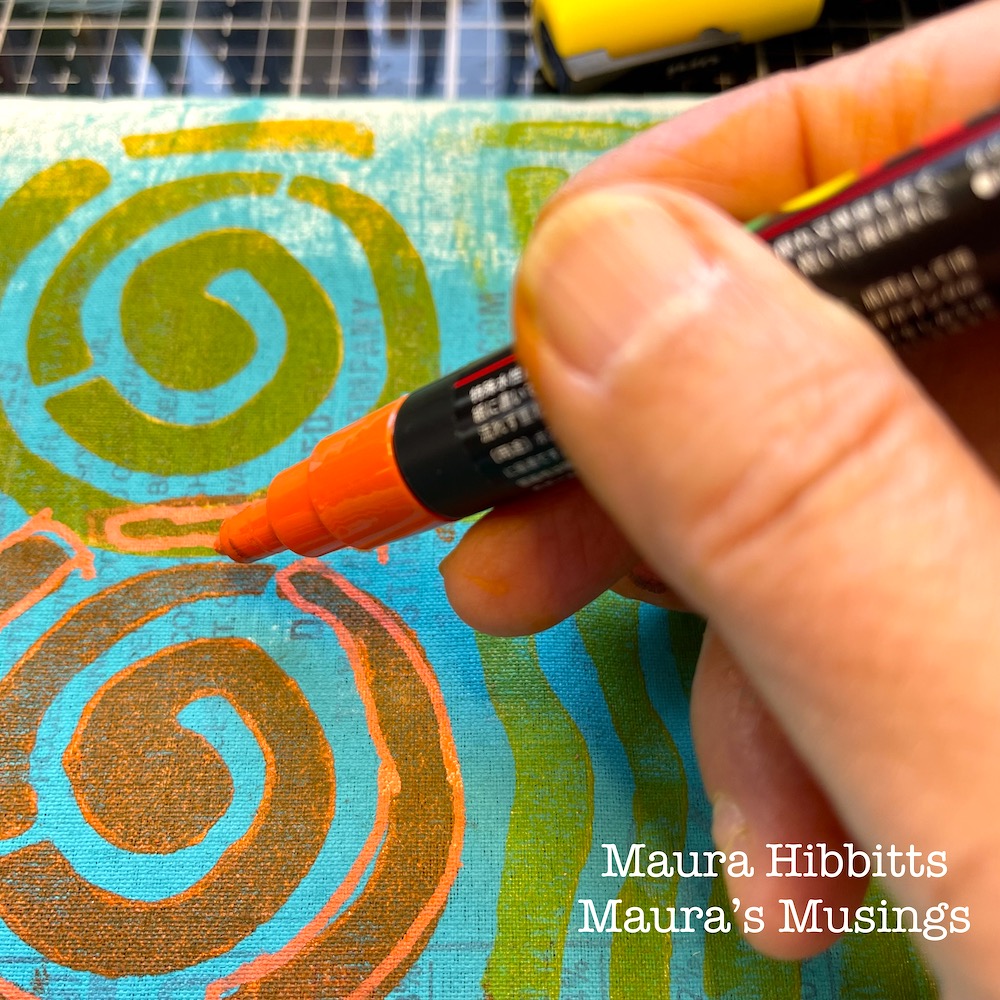
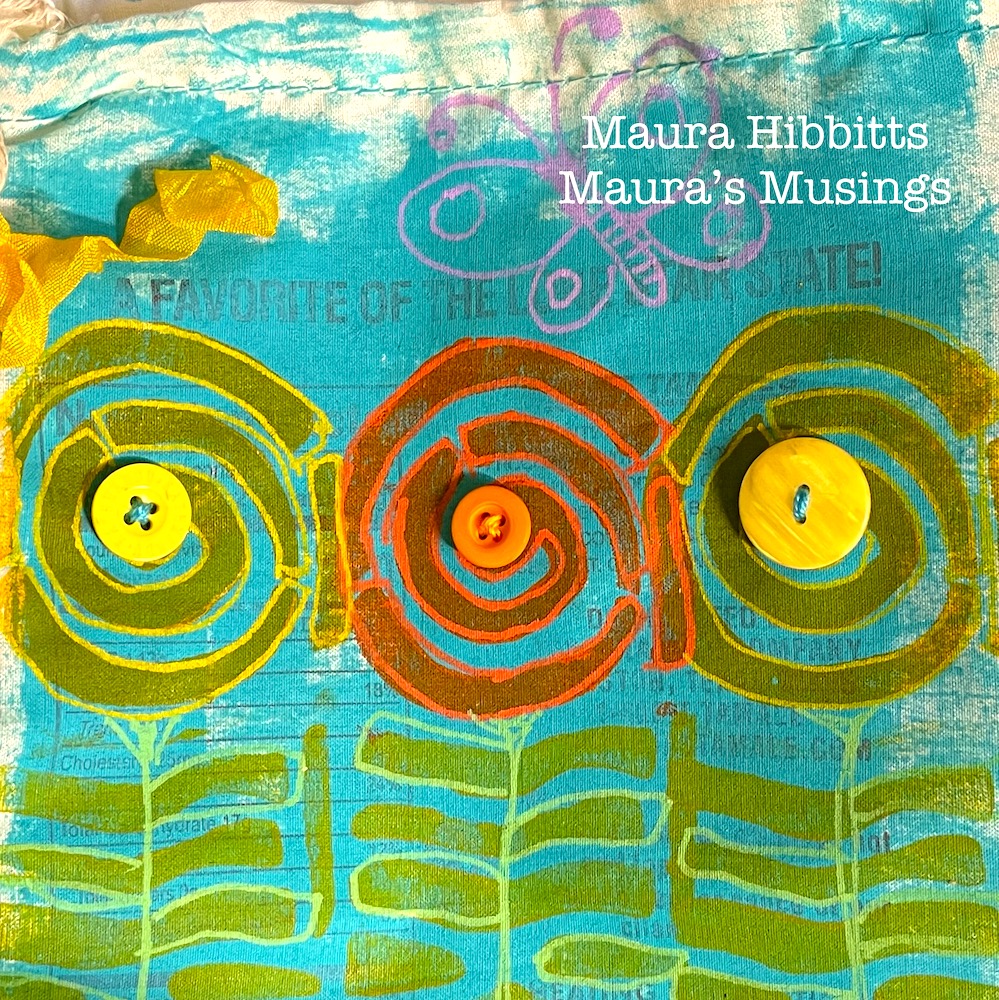
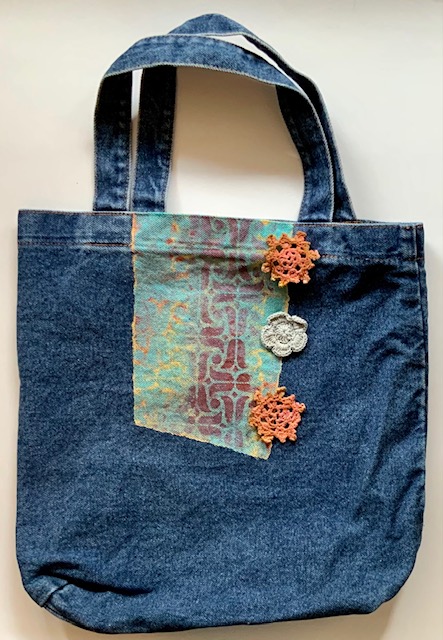
Use Posca Paint pens in coordinating colors and outline the stamped circle images. Draw a stem for the flower, then outline a few leaves in green from the striped area of the Batik 2 images. You can also doodle a butterfly on each side in Lavender if you like. The butterflies have been visiting my garden lately, so I wanted to add some in.

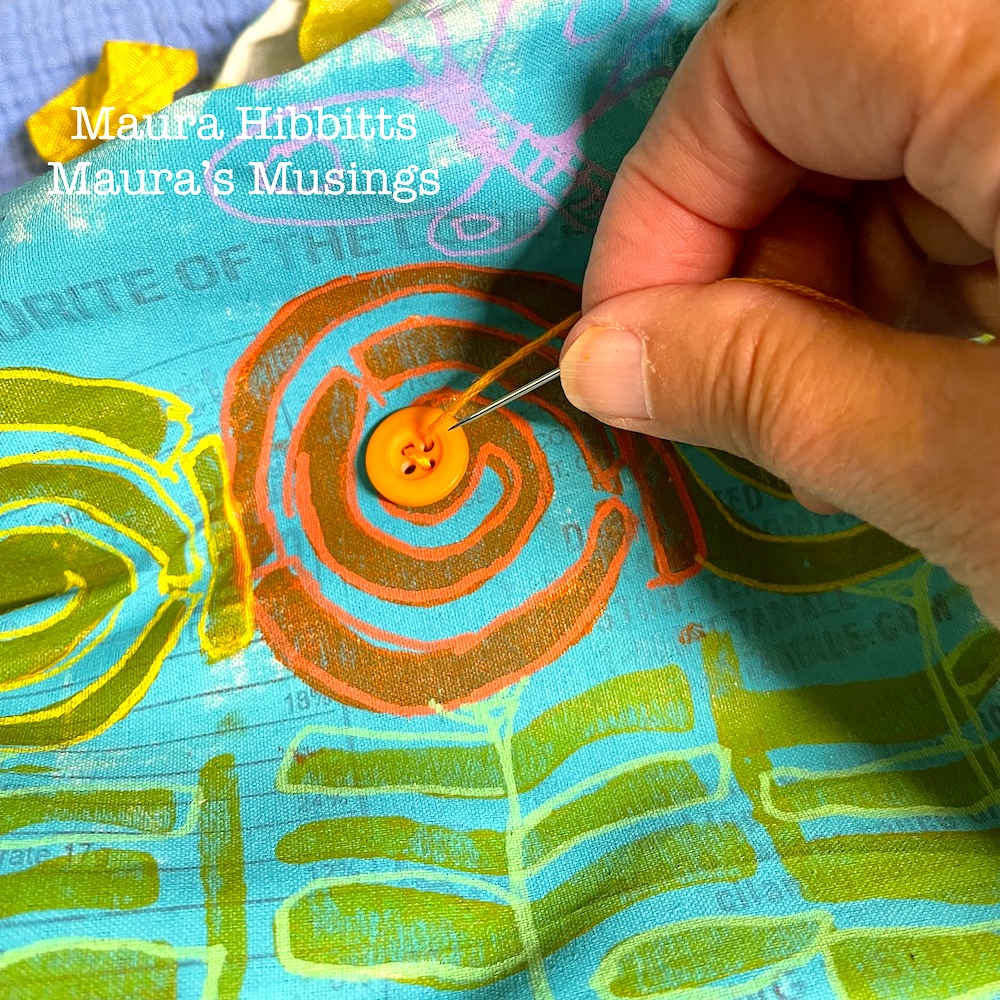
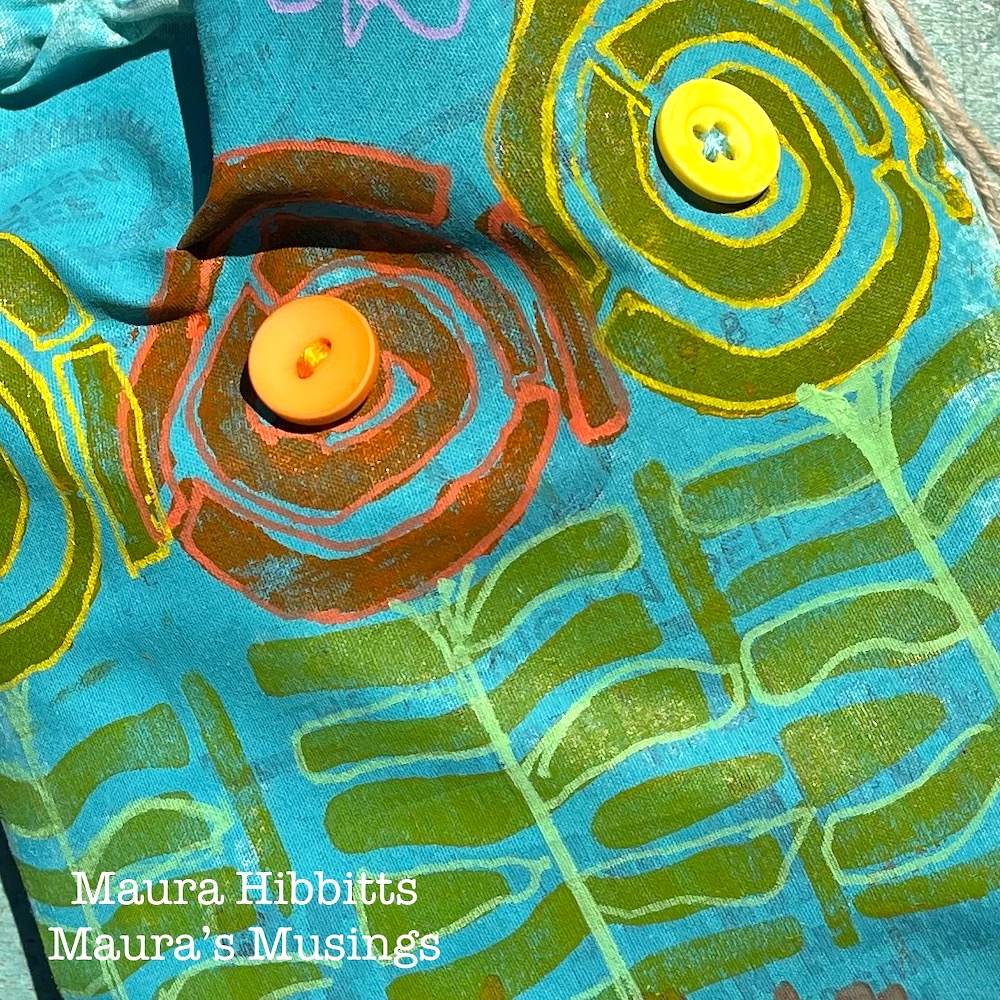
Let the bag dry completely. Sew buttons to the center of the “flower” with embroidery thread, to complete your flower garden gift bag.

Finish the bag by tying on some ribbon. (I used hand dyed ribbon.) You could also add charms or beads. Your handmade bag is a gift in itself, or you could fill it with seed packets, teas, a few crafty supplies…the ideas are endless.

Repetition is all around us – from our daily routine, to architecture, to patterns in the natural world, like our gardens. Enjoy the repeating moments and have fun expressing them in your art! – Maura


Thank you Maura. I absolutely love how you reimagined the Batik 2 stamp as a flower – looks awesome with the Posca details and a button center!

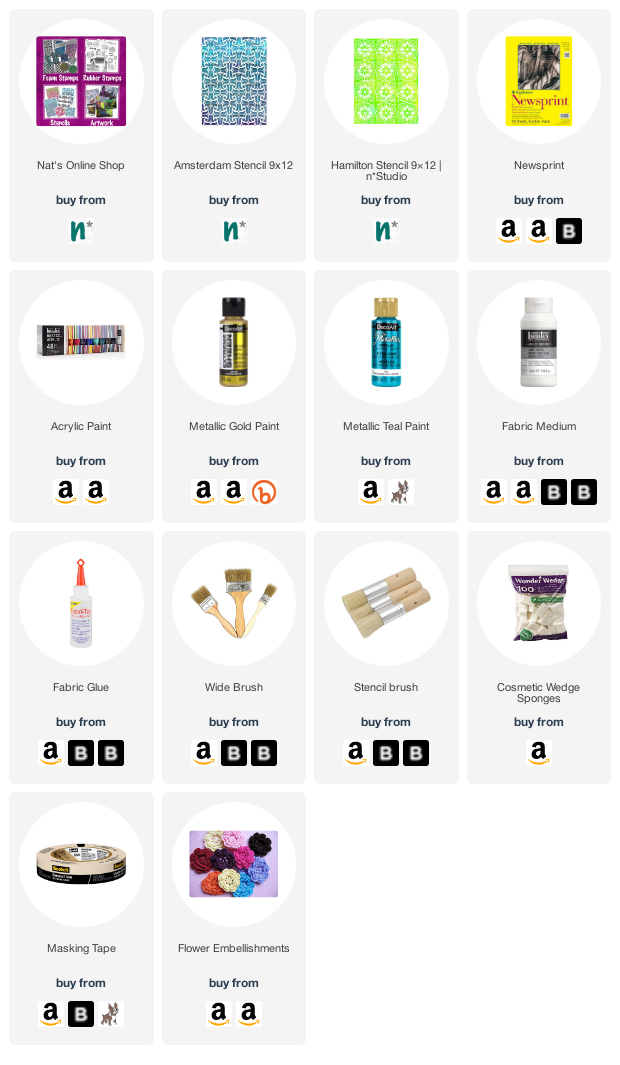
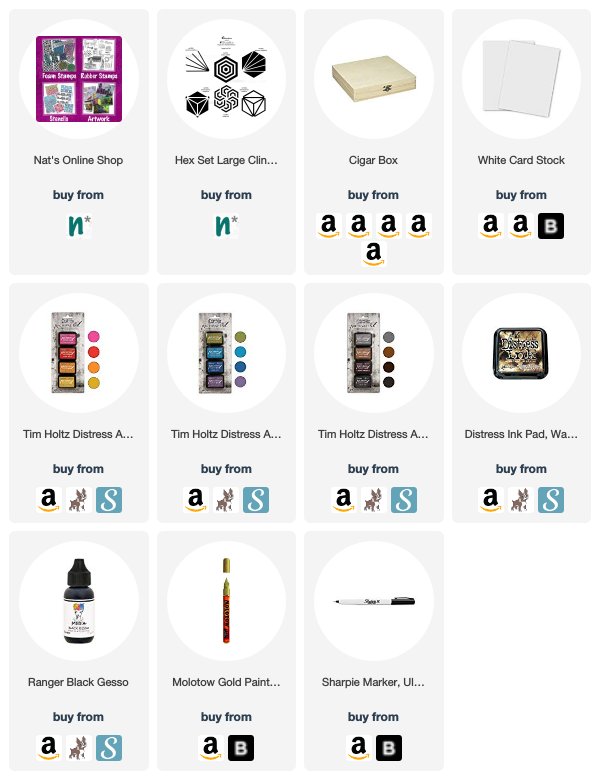
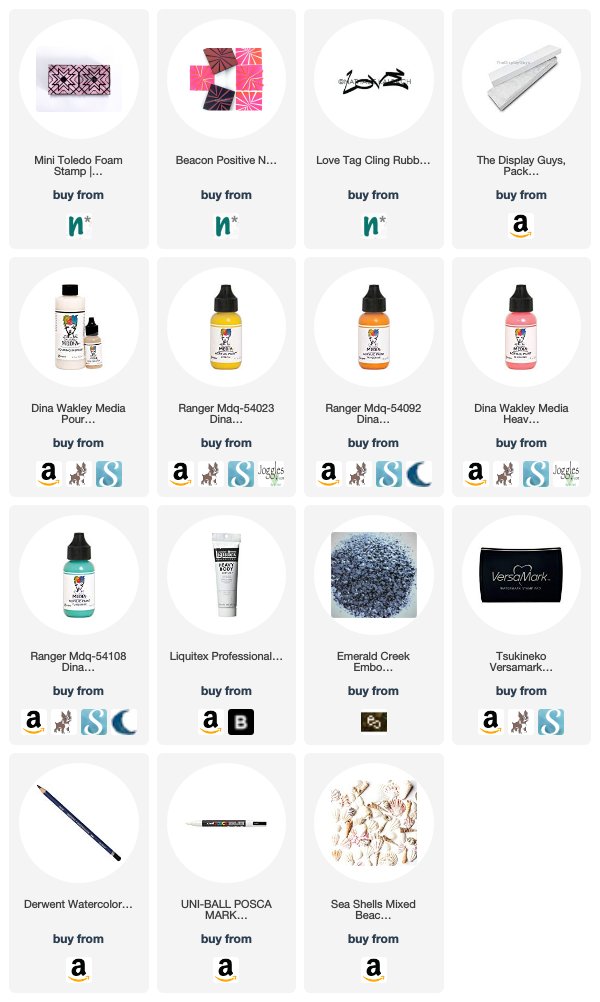
Give it a try: you can find all my Foam Stamps in my Online Shop and in addition to an upcycled fabric bag, here are some of the supplies Maura used:

Looking for more projects? Follow the Creative Squad on Instagram here.

Leave a comment

A Look Back – Spring DIY Ideas – Cool Stuff You May Have Missed 25

A Look Back – This time I’m looking at some Spring DIY Ideas that are great ways to get creative and make a few lovely things for this time of year. A stenciled umbrella to help you chase away those springtime showers in style? Yes. A vertical garden using your favorite rubber stamps? You betcha. A paper wreath project that the whole family can make? Read on and enjoy!

A Look Back is a blog series to show you some projects and posts that you may have missed – sometimes going WAY back in the archive. I think it will be fun to revisit a few ideas that we haven’t seen for a while. I’m excited to see how a little look back might inspire something new in the future :)


Spring showers got you down? No problem – grab a boring old umbrella and give it a little style with stencils and spray paint. I loved decorating a simple white umbrella in colors and patterns that made me happy no matter what the weather. And bonus – this little compact white umbrella was great in the summer to keep the sun off on particularly hot days in the city. Check out the full tutorial here.


Every year the weather warms up and I long to be outside and to see flowers! And while those little plants are growing bigger, I love to have colorful pots adding pops here and there in the garden. I painted and used rubber stamps to make some simple terra cotta pots a lot more fun. Read the DIY steps here.


I’m a pattern junky as you know, so this DIY was a no-brainer. Tote bags get a ton of use so why shouldn’t they be just as cool as the rest of your stuff? I used rubber stamps and fabric ink to stamp my shopping bags with bold patterns. See my inspiration and step-by-step instructions here. And then take your lovely new bags and go support a small business in your hood!


What do you get when you combine plain fabric scarves with stencils and fabric markers? Beautiful watercolor-like patterns and a one-of-a-kind wardrobe staple. This is an easy project with just a few supplies. See the instructions here.


Here is a spring project that the whole family can do together. I used colorful paper and rubber stamps to make the “leaves” and then glued them to a cardboard ring that I cut from an old box. Read all about it here.

I hope this list of Spring DIY Ideas inspires you to try some new things and get creative. Here are some of the supplies I used:

Leave a comment

Creative Squad: Life in Bloom – Judi Kauffman

Hello from my Creative Squad! Today we have some gorgeous tote bags from Judi Kauffman using my Amsterdam and Hamilton stencils and this month’s theme: Life in Bloom – It’s been a long winter where we are and I’m dreaming of flowers and gardens and spring. Indulge us all in a project that focuses on one of Mother Nature’s most exuberant symbols of life: flowers flowers flowers!


I completed my “Life In Bloom” theme projects in late February, a week after getting my first covid vaccine shot. I will have been home for a full year as of March 18, but by the time you read these words I will have had my second shot and will be able to double-mask and head back out into the world – just in time to greet the new season. Spring!

I can’t wait… I can’t wait to see the iris, peonies, begonias, and other hearty perennials peeking up, ready to put in an appearance. And I can’t wait to go to Costco to buy some annuals to fill in the empty spaces. And a rotisserie chicken for dinner…I can almost smell the aroma of that aisle. Gee, I think I missed those trips to Costco more than almost anything else during my time at home.

Meanwhile, like many of you I have spent many hours cleaning closets and going through supplies. I found a trio of simple denim totes, two with flawed spots, and thought they’d be a great surface for a stencils-only project. Here’s how they looked when I started:

My concept was to create a flower pot/vase on one of the totes for a literal interpretation of the theme but stenciling the other two with more wonky shapes for a more abstract approach.

INSTRUCTIONS:

Using torn strips of newsprint, mask around the areas earmarked for painting and stenciling.

Using gold metallic or other light color acrylic paint and a wide brush fill the area to be stenciled. Optional: Mix paint with fabric medium.

Using a mix of stencils (I used Nat’s Amsterdam and Hamilton stencils) and two darker paints (shown: red and metallic teal) add pattern to the gold areas. Overlap stencils here and there. Allow paint to dry for distinct patterns, work wet-on-wet for less distinct designs (smudge paint at edges to add dimension – note right side of flower pot).

Embellish stenciled totes with knitted, crocheted, and/or frayed fabric flowers. Pleated hem tape makes an interesting stem for a single blossom. Sew in place or use fabric glue to adhere.  

NOTE: Embellishments shown are positioned for photography and are being ‘auditioned’ – nothing finalized yet! I plan on adding beads, embroidery, charms and more.


Thank you Judi – absolutely love the idea of bringing these totes to the farmer’s market or garden center!

Give it a try: you can find all my Stencils in my Online Shop and in addition to various beads and embellishments, here are some of the supplies Judi used:

Don’t forget to check out Nat’s Creative Squad on Instagram too: Each week we post projects, ideas, and inspiration for mixed media art.

Comments (1)

Leave a comment

A Look Back – Cool Stuff You May Have Missed 14

A Look Back – This time I’m looking at Upcycled or Recycled Stuff – giving old things or maybe something you aren’t that keen on, a new life! I am a big fan or making use of things and not sending them to the landfill, and sometimes it can be a great creative exercise to give something a new look or purpose. Here are some projects that do just that :)

A Look Back is a blog series to show you some projects and posts that you may have missed – sometimes going WAY back in the archive. I think it will be fun to revisit a few ideas that we haven’t seen for a while. I’m excited to see how a little look back might inspire something new in the future :)


First up is this recycled embroidery loop that I dressed up in this 2015 blog post. I used some stencils and stamps and created something that was a bit more my style as a wall piece.

Next is a series of coasters that I upcycled in this 2016 blog post. They were originally a set of not so great looking coasters with a floral motif on them. Using some acrylic paint and my Santiago, Buenos Aires, and Toledo stencils I gave them new life and even gifted them to a family member who loves them.

Here is a fun and whimsical project that Kim and I did back in 2017 that made use of a bunch of collage papers that I had on hand, as well as some scrap embroidery thread and driftwood sticks that were lying around: leaf mobiles! These were relaxing to put together and would definitely be a good kid-friendly activity too.

Here is a sweet upcycled birdhouse from Creative Squad alum Tania Ahmed. She gussied up the wood piece that was languishing in her stash with my Clam Hex and Exchange Place foam stamps. 

Finally here is a memory game created using my foam stamps and just a cheap memory set bought on amazon. Pretty easy to transform a really cheesy set into something unique and personalized.


I hope you enjoyed A Look Back through my archive and maybe you are inspired to try some different things now too.

Here are some of the supplies I used in these posts:

Join me tomorrow, Friday March 20th on Facebook for a new little thing I’m calling Kaffeeklatsch Get Together! I’ll be doing a live broadcast at 2pm EST, sharing what I’ve been working on, saying hi to all of you, and just taking some time to have a little get together. Let’s chat about what artsy stuff we are working on and have some fun hanging out.

Leave a comment

Hex Marks the Spot – Tania Ahmed

Welcome to a post from my Creative Squad! This week we have an upcycling project from Tania Ahmed using my Hex Set Large rubber stamps. She dresses up a storage container, drawing inspiration from this month’s new theme: Hex Marks the Spot –In the days of pirates and lost treasure, a map would lead you to gold and jewels. Today we treasure all sorts of things – our family, friends, experiences, meaningful objects, accomplishments, etc. Think about what you treasure and how you found your way there.


My project for the day is a quick and easy project that I made to house my mini Distress Archival Inks which I love but keep losing! I stashed them in a cigar box that I had rescued from being thrown away which I have upcycled many times over the years. I decided it was time to revamp it to keep my inks in! 

I scraped off as much of the paint and paste that I could off the box first and covered the whole thing with black gesso to give it a matt black finish. 

On a piece of cards stock I stamped my Hex pattern with Distress Archival Inks, inspired by the Instagram hashtag #ihavethisthingwithtiles and added some shading with Walnut Stain Distress Oxide. 

I then added some additional details with my Gold Molotow Acrylic Marker and some sketchy lines with a fine sharpie marker. I glued the cardstock panel to my dried cigar case and added my Mini ink pads to the box! 

This was a quick project to put together and it gives me great joy knowing that my inks have somewhere to “live” :) 

Thank you so much for stopping by and have a great day!


Thank you Tania – love your box of treasure :) You can find all of my rubber stamps in my online shop. Here are some of the other supplies Tania used:


Feel inspired? Working on something yourself that you’d like to share?  I love to see how you interpret our monthly themes. Email me how you used my stencils and stamps with the theme and email me an image – I would love to share your projects in my next  “n*Spiration From Around the Globe“.

Leave a comment

Raiders of the Lost Stash – Josefine Fouarge


Happy Tuesday from the Creative Squad! Today we have a cool upcycled jewelry box – something I know we all have in a drawer or closet somewhere just waiting for a new life – from Josefine Fouarge. Josefine is using my Beacon and Mini Toledo foam stamps, my Love Tag rubber stamp, and this month’s theme: Raiders of the Lost Stash – It’s time to raid your stash of art making stuff. Pick a few things you’ve tucked away for later and use them NOW. Maybe you have some leftover scraps or deli papers that you couldn’t bear to part with. Maybe you’ve squirreled away a new product that you’ve been meaning to try. The time is now! Raid your stash and try it :)


Wow, what a topic. I knew that I have a lot of “lost stash” but because we are renovating our house, there is even more that has come back to the surface. So, over the last weeks, I put aside a some of those lost items, thinking that they would be perfect for this theme – and I’m telling you, that stash was a hodge podge of stuff ;)

I really like this topic though. It gets you digging and you find some really neat things. For my project for the “Raiders of the lost stash” theme, I decorated a jewelry box. My idea was to do some paint pouring and then add a few of the little items all over it. Because paint pouring is so fun to watch and because I already knew that the decorating part would be a hot mess, I recorded everything. That probably makes it a lot easier to follow the process.

You might have seen more than two hands during the pouring process. These were my husband’s hands. He got into paint pouring a few months backs and we wanted to try the new Ranger pouring medium together. Everything afterwards is just me :)

As you can see in the close ups, the embossing powder melted beautifully and helped with creating a fuzzy outline of Nathalie’s Mini Toledo stamp. This way it looks old, as if this box has been through a tough time.

I also like the subtle pattern that the Toledo stamp left on the wood pieces. It looks like there is something going on, but only with a close look you get an idea of the pattern.

The “lost” gel print perfectly fits as a centerpiece in the middle of the jewelry box. It’s the right amount of contrast and different patterns to add to the entire look. I love contrasts and the entire box is a big contrast of everything.

I kept the bottom part simple though. At the end, you don’t see it as much and because of the pouring medium, it was already difficult to close the lids. So, I simply stamped the negative Beacon stamp all over it using a contrasting color.

I hope you enjoyed my little experiment. Don’t forget to look through your own drawers and boxes, I bet you have some amazing decorative pieces, leftover scraps, paints, pens and more laying around that just want to be tested and played with.


Thank you Josefine – I love watching you play in your video (and hubby too – so cool he was interested in trying out the pouring medium)! Here are some supplies that Josefine used and for my foam stamps and rubber stamps, be sure to stop by my online shop.


Feel inspired? Working on something yourself that you’d like to share?  I love to see how you interpret our monthly themes. Email me how you used my stencils and stamps with the theme and email me an image – I would love to share your projects in my next  “n*Spiration From Around the Globe“.

Leave a comment

Currently Digging – August 2018 AIT

Once in a while I thought I would share with you some nifty finds – like an Artist who’s work caught my eye…, some Inspiration or the what, when and where that caught my eye and got my creative juices flowing, and Tools & Techniques I am currently digging like a new way to use a material or an application that I’m taking away. Hope you enjoy this.

I am taking a watercolor class and my teacher told us in the first lesson to check out John Singer Sargent’s watercolor paintings.

John Singer Sargent, The Bridge of Sighs, c. 1903–04

I loved his work before but looking closer of his works with watercolors just made me swoon. Look at the wonderful light and the movement in his figures. Check out his watercolors – Gorgeous!

YOU :) I love showing some old finds on my instagram story while decluttering my studio and asking you what I should do with certain things I have been storing forever. Recently I showed an old silver cigarette case and you came up with so many fun ideas.

A lot of them were art supply storing ideas and I will show you soon which art supply I will actually store in it. Tip…it won’t be what is in the picture- LOL

As I am working on different Pattern Books for my stencils I have rediscovered my love for spray paints yet again.

I do have some low odor acrylic spray paints and it is such an easy and fast way to create patterns with stencils. Now that I have a bit more space again on my workbench and right in front of the window it is the perfect time to get those yummie spray cans out again.

What are you currently digging? See you soon again with some new finds!

SaveSave

Comments (2)

  • Robin S

    |

    I love it when you post this kind of info; it opens new areas for us to explore. Thank you!!

    Reply

    • nathalie-kalbach

      |

      Robin, I am so glad you enjoy this series. thank you!!!

      Reply

Leave a comment