
We’re Jumping with the Creative Squad today with a post from Judi Kauffman. You can learn more about Judi from our Nice to Meet You blog post featuring her creative story and artwork. Judi is transforming some home decor items for us today and wow what a miraculous transformation indeed :) She is using my Downtown and Crackle stencils and this month’s theme: Let’s Jump! – The Creative Squad is joining the fun of Creative JumpStart 2019 this month. They’re creating objects for the home, inspired by the CJS19 theme My Home is My Castle.
I loved the shape, so I bought a rather garish paper-covered trash can with teddy bears all over it. I tucked it under my sewing machine where it has served me well.
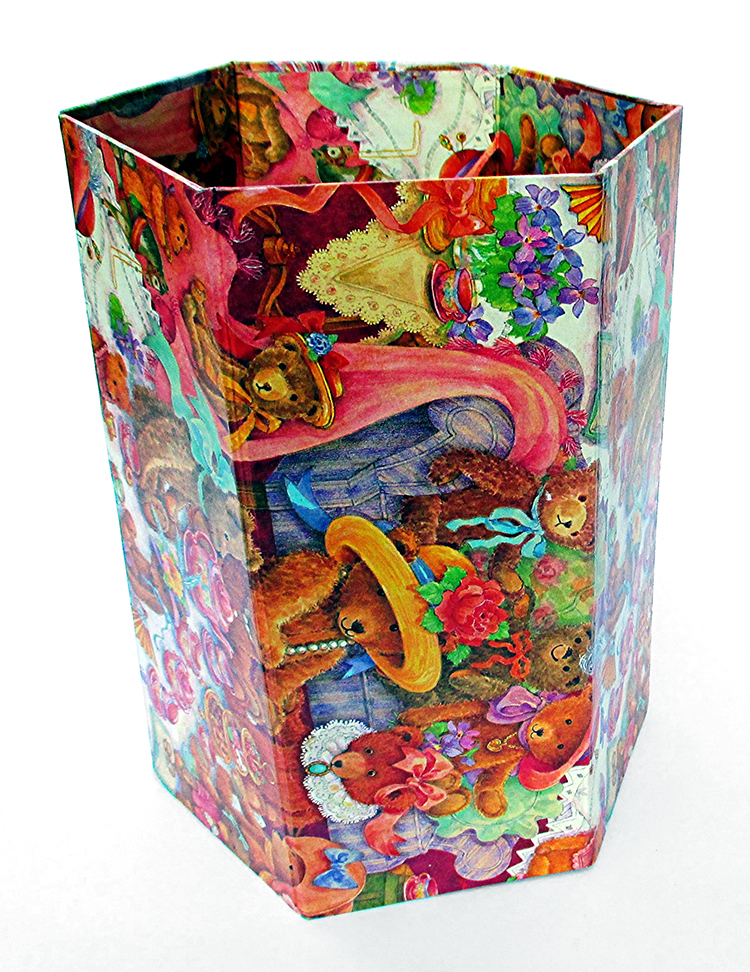
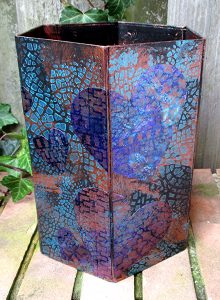
There it sat in all its pink and orange glory until this week, when it was time to start on my Home Décor project for Nathalie’s Creative Squad January Challenge. Bye bye, bears! Hello, Downtown and Crackle stencils!
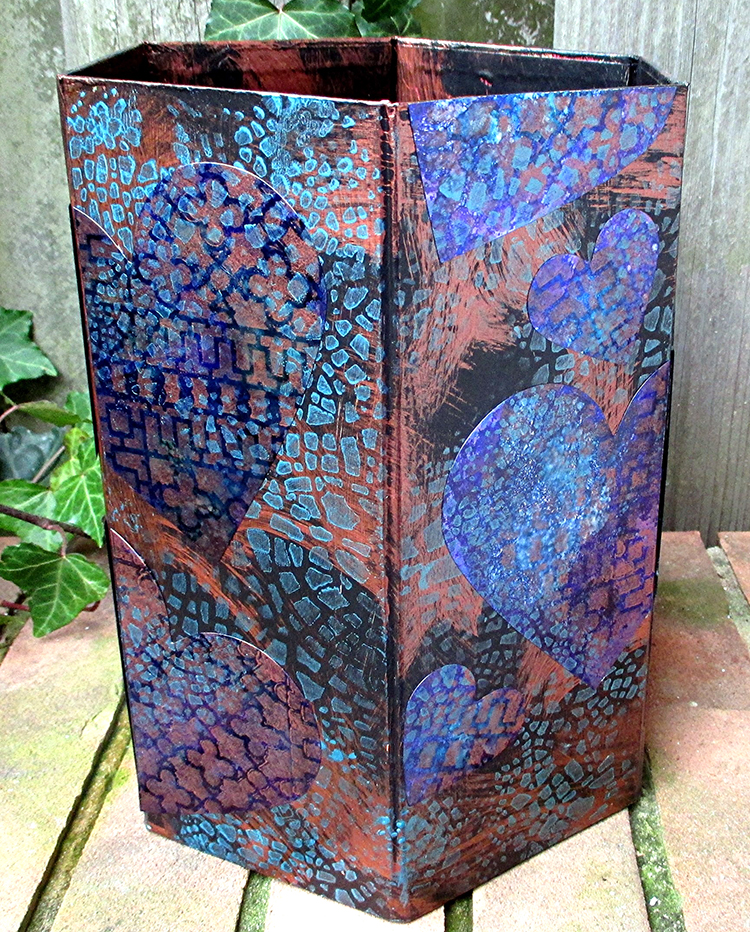
I gave myself a challenge within a challenge – to incorporate hearts, a shape usually thought of for Valentines and weddings, to create an offbeat, upscale, graphic design. Using a deep, rich, unexpected palette and stencils that helped take things to a new level made it easy to accomplish.
The hearts aren’t immediately obvious, the overall effect pleases my eye. I’m almost sorry that the trash can is going right back under the sewing machine. Maybe I should use it for a big bouquet of dried flowers instead!
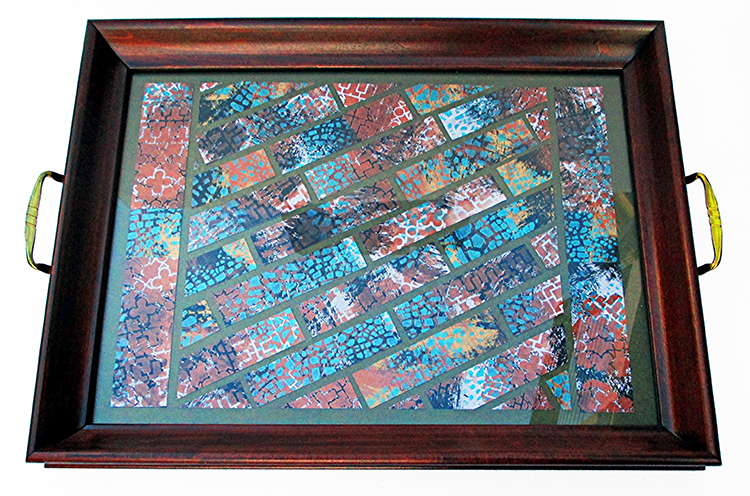
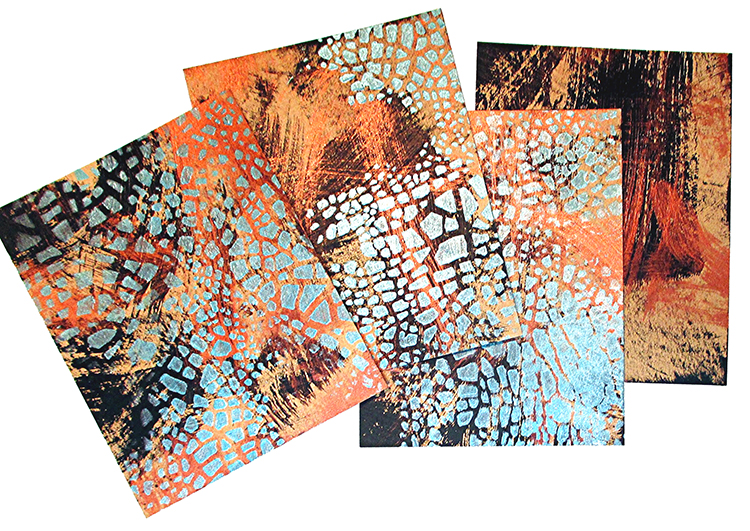
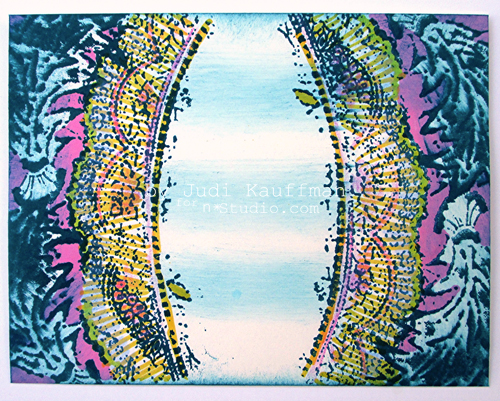
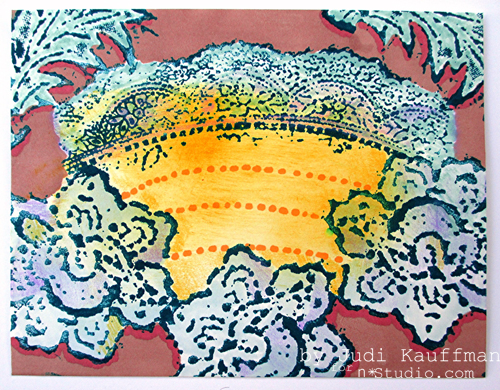
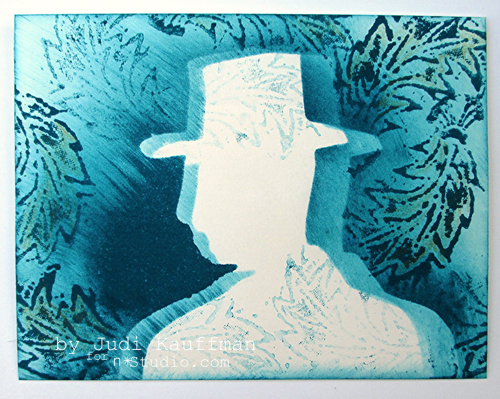
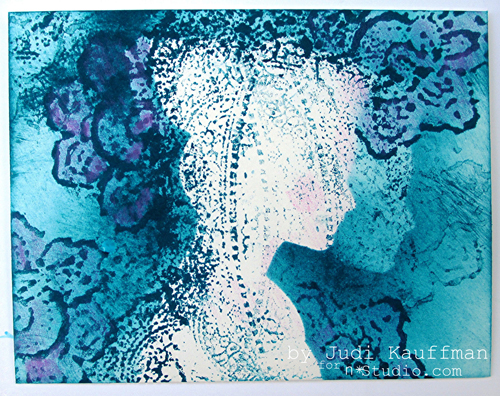
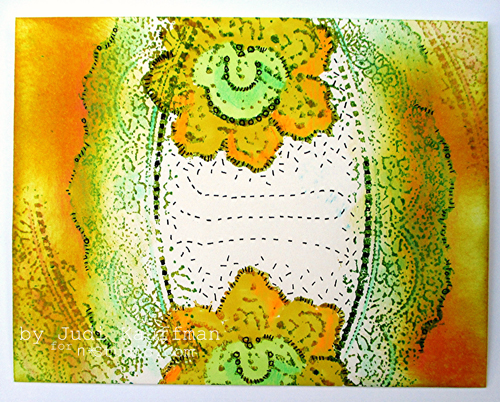
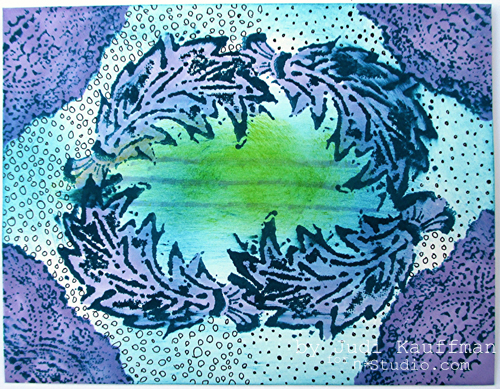
While I was at it, I wiped my brushes onto pieces of cardstock and stenciled on top of the brush marks. That gave me a second project – a mosaic style tray, an extra bonus.
Instructions for Trash Can:
To customize the project, pick a color palette that suits your décor. Alternatively, duplicate the project as shown by using the paints and Shimmer Sheetz that I chose. Either way: You will need two stencils (a graphic pattern plus a crackle pattern), metallic acrylic paint in two colors, black or white gesso, and Shimmer Sheetz that coordinates with the paints and gesso.
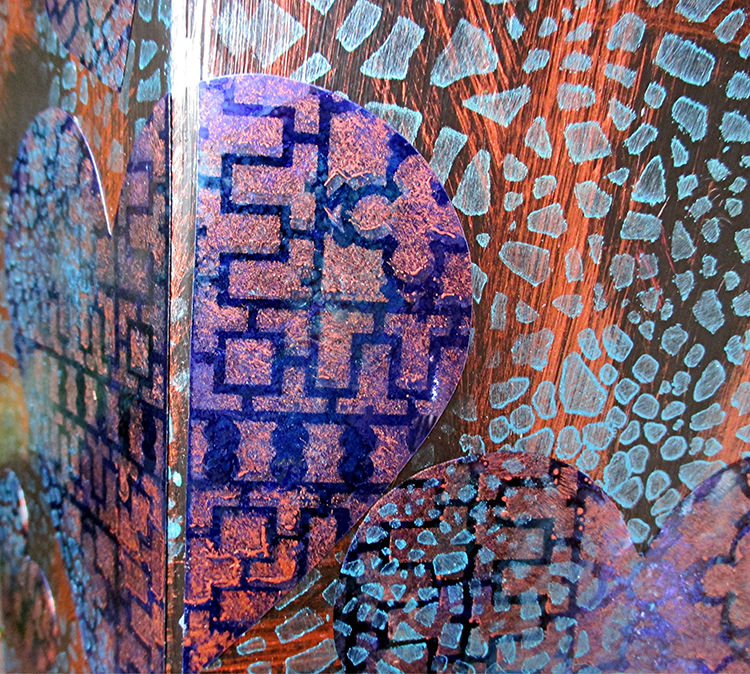
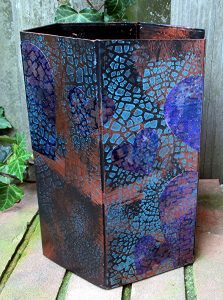
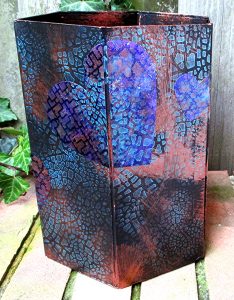
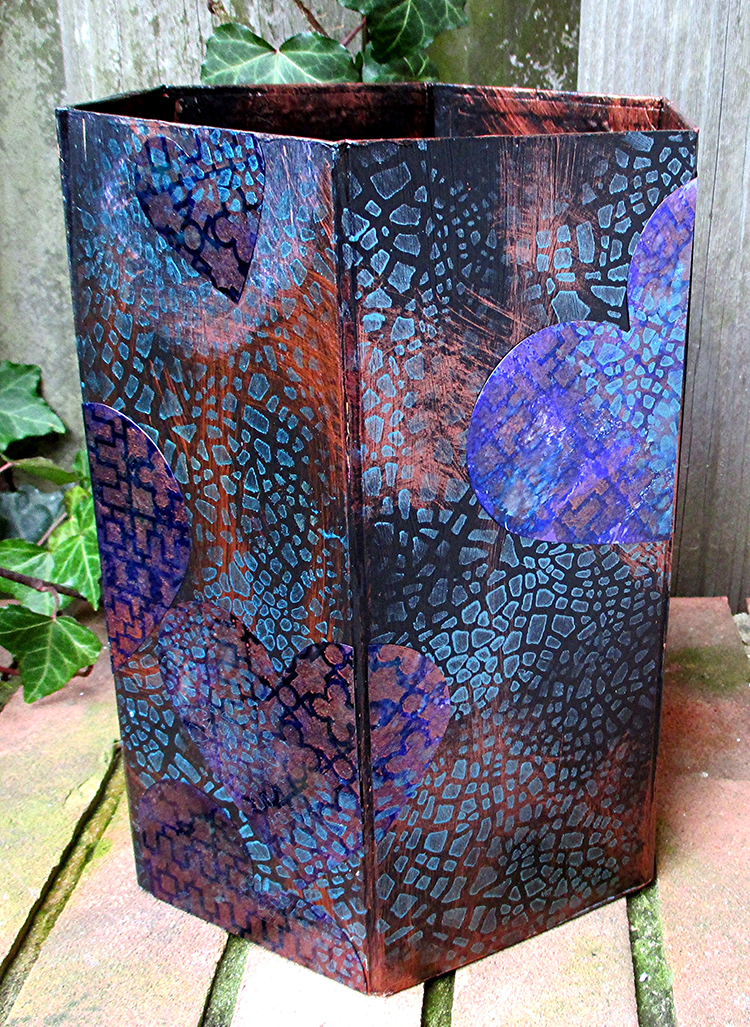
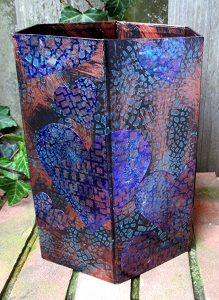
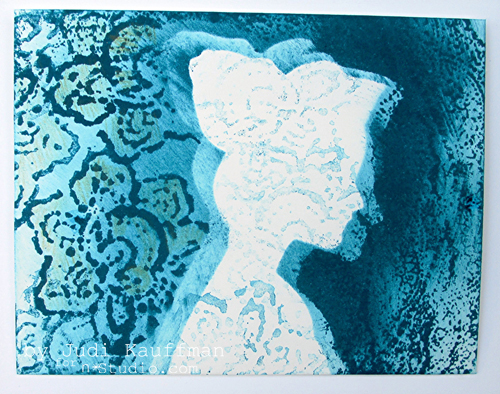
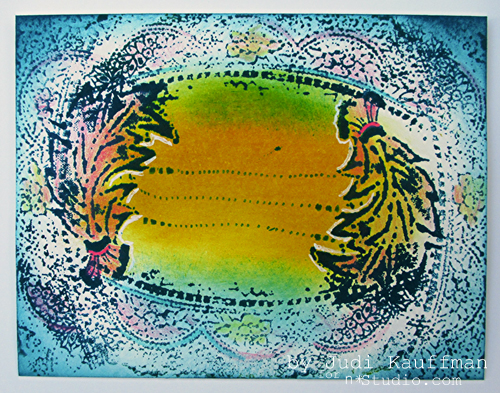
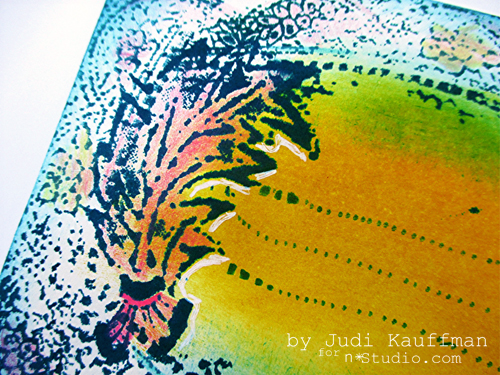
Choose a trash can with smooth sides. Base coat with black gesso. Randomly brush with copper metallic acrylic paint, leaving much of the black visible. Randomly stencil with Crackle pattern in teal metallic acrylic paint. Allow to dry. (Choose paints appropriate for the trash can – mine is paper-covered, but yours may be metal.) *Wipe brushes onto quarter sheets of cardstock before washing them. (8.5” x 11” cut into four pieces.)
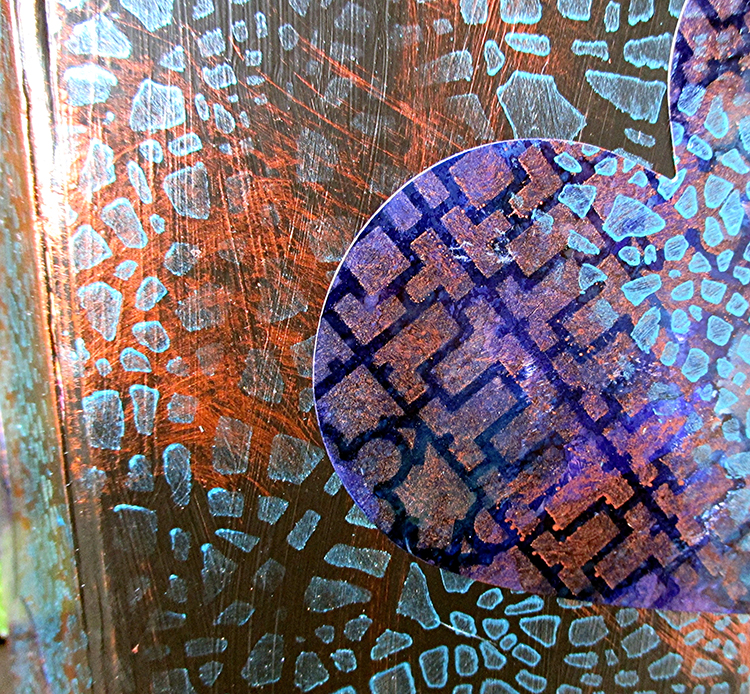
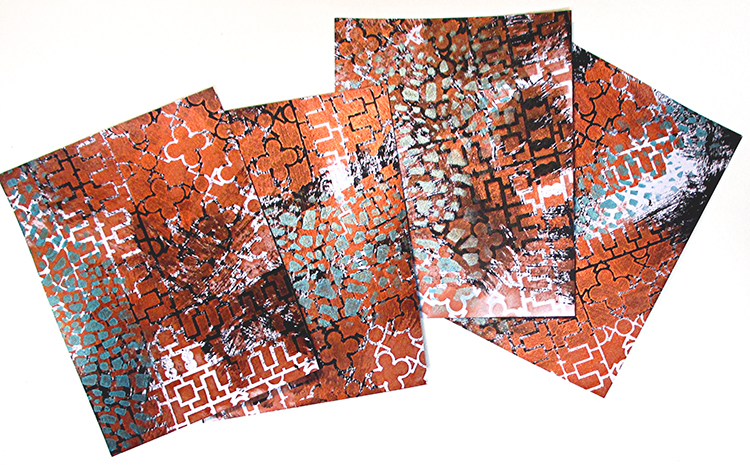
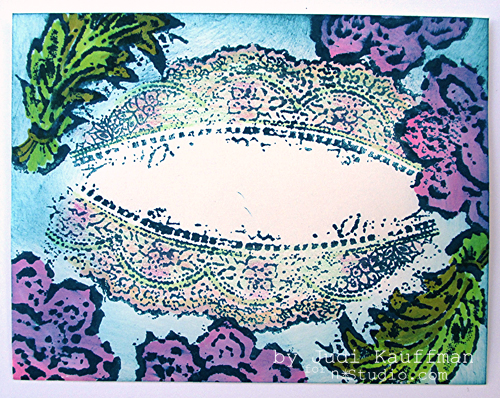
Freehand or die-cut hearts from Amethyst Gemstone Shimmer Sheetz in assorted sizes. Back the Shimmer Sheetz with double-sided adhesive sheet prior to cutting. Size of hearts is determined by the size and shape of the trash can. Keep the scraps for other projects. Note: I used the AccuCut GrandeMARK machine with standard cutting dies. If you use a Big Shot or other personal-size machine with thin dies, a metal adaptor plate is required– follow Els van de Burgt’s YouTube tutorial for this technique. *While you’re at it, stencil onto the cardstock that was wiped with paint in Step 1. Set aside stenciled cardstock to use for Tray.
Stencil the hearts with various sections of the Downtown Stencil using copper metallic acrylic paint. Randomly stencil with Crackle pattern in teal metallic acrylic paint. Allow to dry.
Arrange and adhere the hearts as shown or as you prefer. Note that many of the hearts have been cut where they move from one side of the trash can to the adjacent side, and some are cropped so they appear to extend at the top and bottom edges. This will not be necessary if using a round or oval trash can.
Instructions for Tray:
Find a tray with a glass insert or make one with a frame, handles, glass and sturdy backing. (Shown: Tea Tray from Sudberry House). Cut a background for the tray from metallic finish cardstock, carefully piecing together strips if the tray is larger than a single piece of cardstock.
Cut each piece of stenciled cardstock into four 1” x 4.25” strips and one 1.5” x 4.25” piece. Using the project photo below as a reference, piece together and adhere the 1.5” strips at the right and left sides of the tray, close to the handles. (This hides the seam where I joined bands of background cardstock.) Angle and trim the 1” strips to cover the remainder of the tray, leaving space between the strips for a mosaic effect.
Assemble the tray.
Options:
*Instead of simple strips, cut the cardstock into square mosaic ‘tiles’ or randomly cut mosaic pieces.
*Instead of backing the pieces with glue, adhere them to cardstock that has exposed double-sided adhesive sheet on top. Leave very little space between the pieces; use embossing powder and a heat tool to create the effect of textured grout! (This is time-consuming, but fun.)
Thanks Judi! You really turned that teddy bear trash can into something great to look at! Feel inspired to try dressing up your own home decor items? You can find all my Stencils in my Online Shop. Here are some of the other supplies that Judi used:

Working on something yourself that you’d like to share? I love to see how you interpret our monthly themes. Email me how you used my stencils and stamps with the theme and email me an image – I would love to share your projects in my next “n*Spiration From Around the Globe“.


No, they’re standard poodle puppies, Cheryl.
Reply