Creative Squad

A New Day – Emilie Murphy

Hello from my Creative Squad! Today we have a project from Emilie Murphy that will transform the outside of your art journal. Emilie is using my Buenos Aires Border, Valley Road, Gnarly, and Signals foam stamps and this month’s theme: A New Day – Let’s try something new today :) Although these are tumultuous times and we never know what each new day will bring, it also seems like the perfect time to throw caution to the wind and just jump into something new with both feet. Try a new material or technique or approach. Why not? Today is a new day… and tomorrow is too!


Hi there! Hope you are doing well.

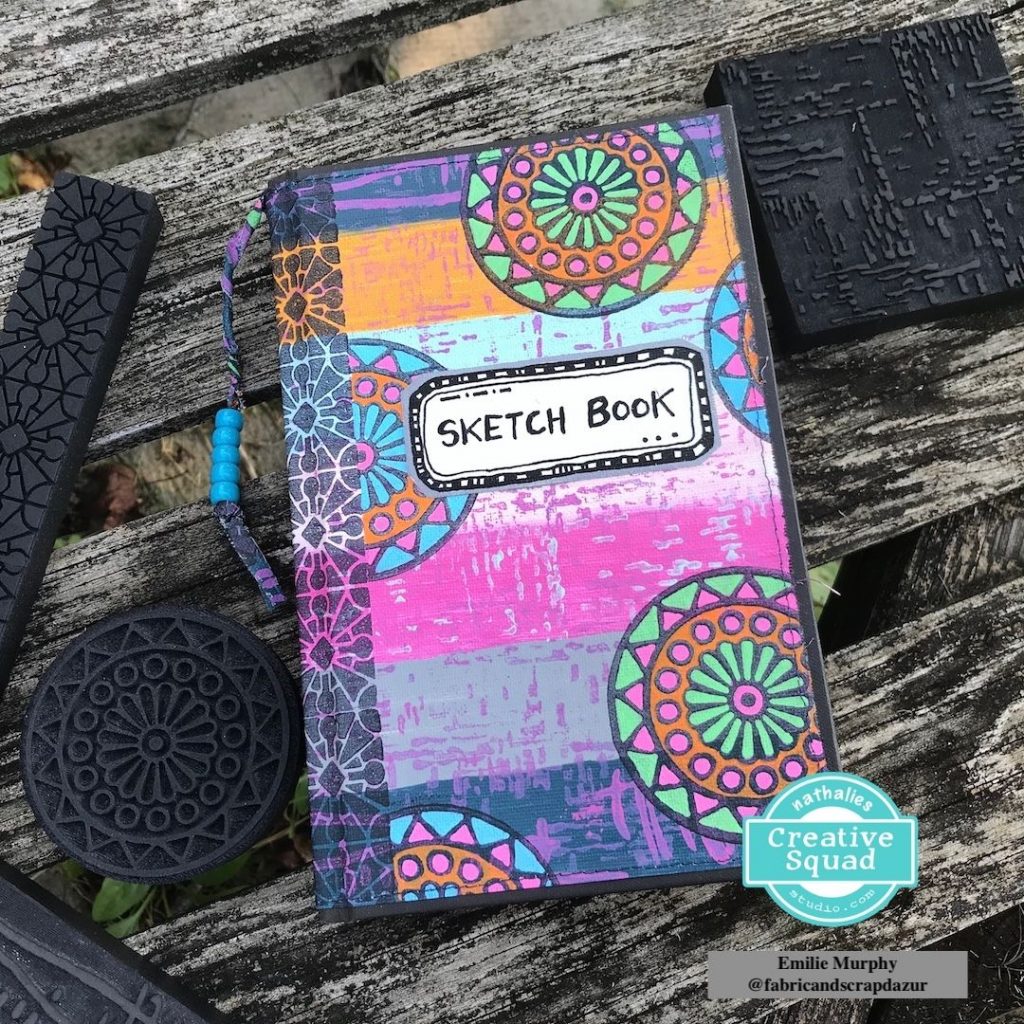
As we have to try something new this month, I decided to make a cover for my sketchbook with a sheet of Canvas. It’s not what I usually do when I make a cover for an art journal or embellish the cover of a notebook that I purchased. Therefore it’s a new technique for me, and I tried using only foam stamps and a single canvas sheet.

Let me show you how quick and easy this technique is. Foam stamps are such great tools for that purpose.

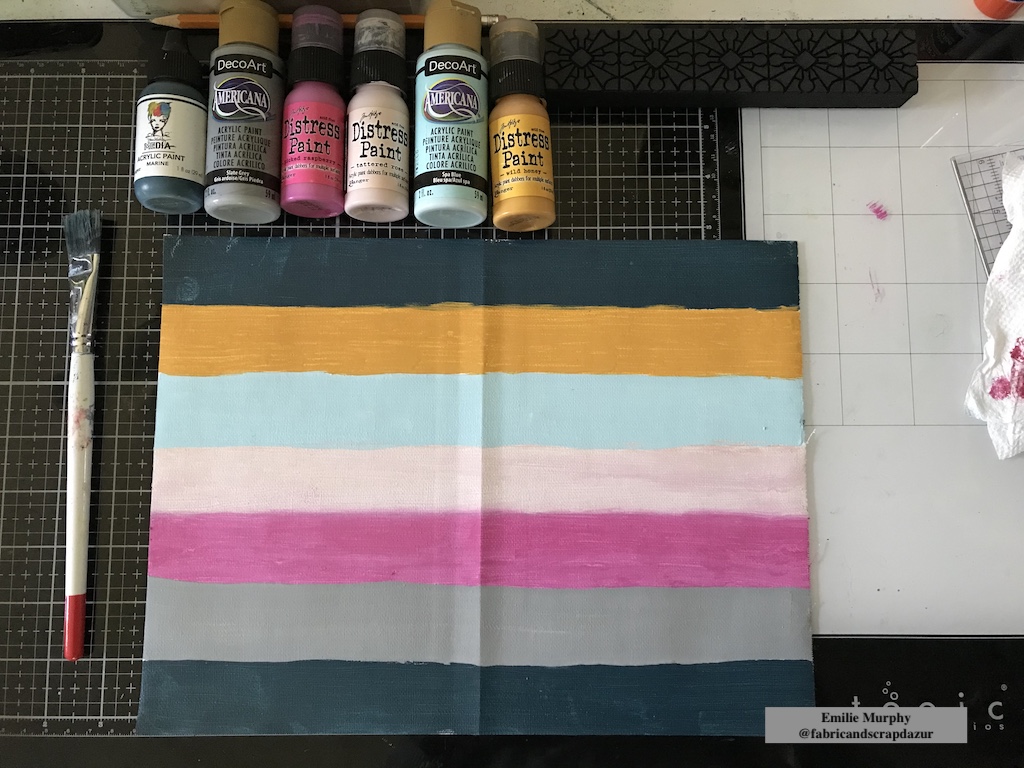
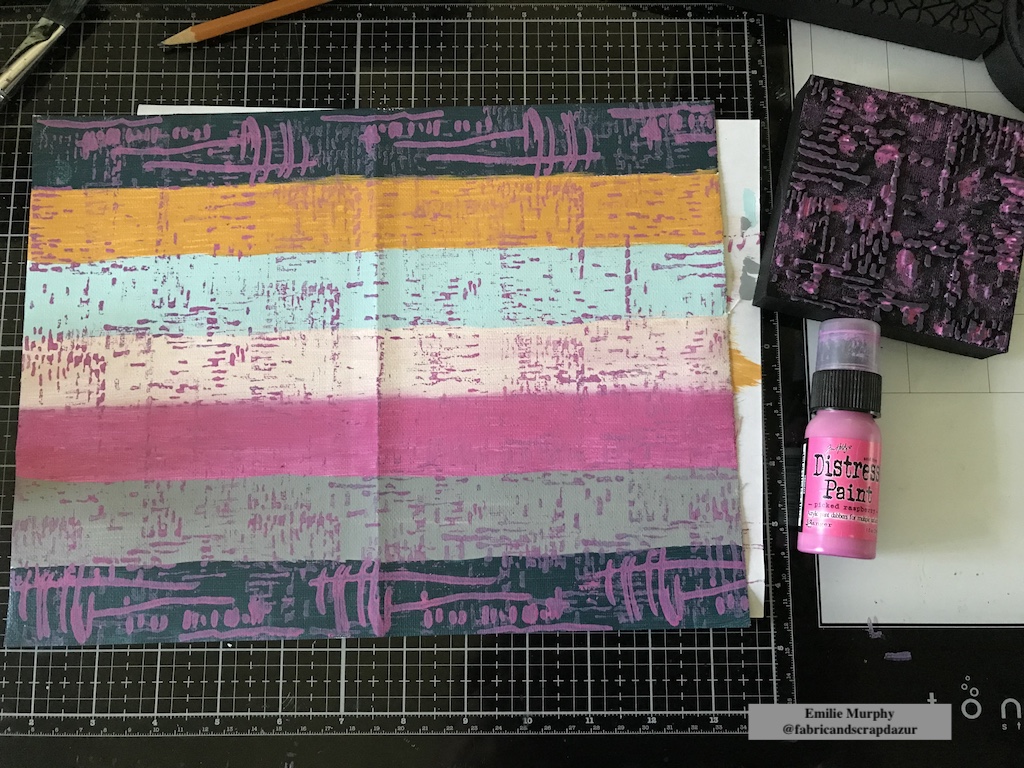
I started to trace lines to get equal strips on a 9×12 canvas sheet. I used the side pre-coated with gesso.

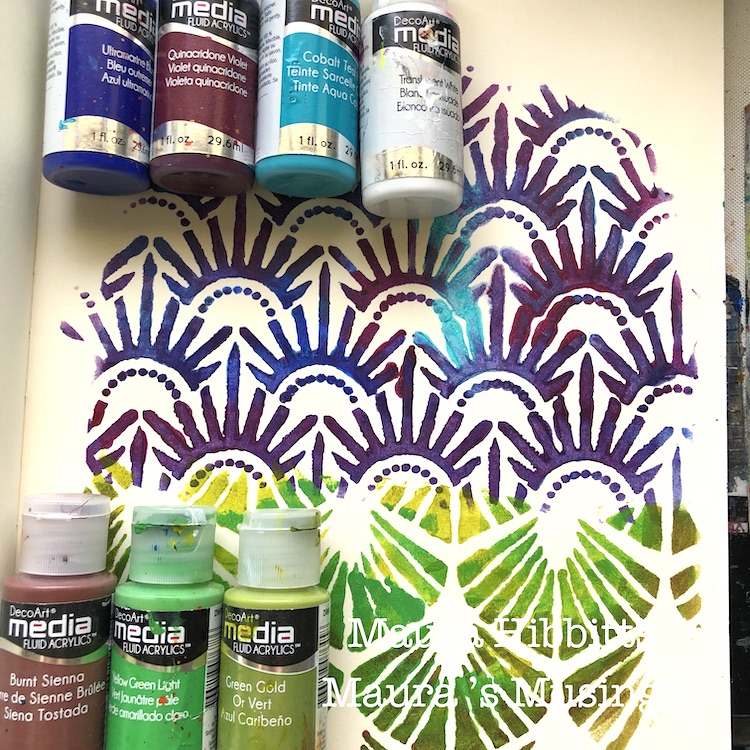
Then, I applied different acrylic paints I have in my stash to color the strips.

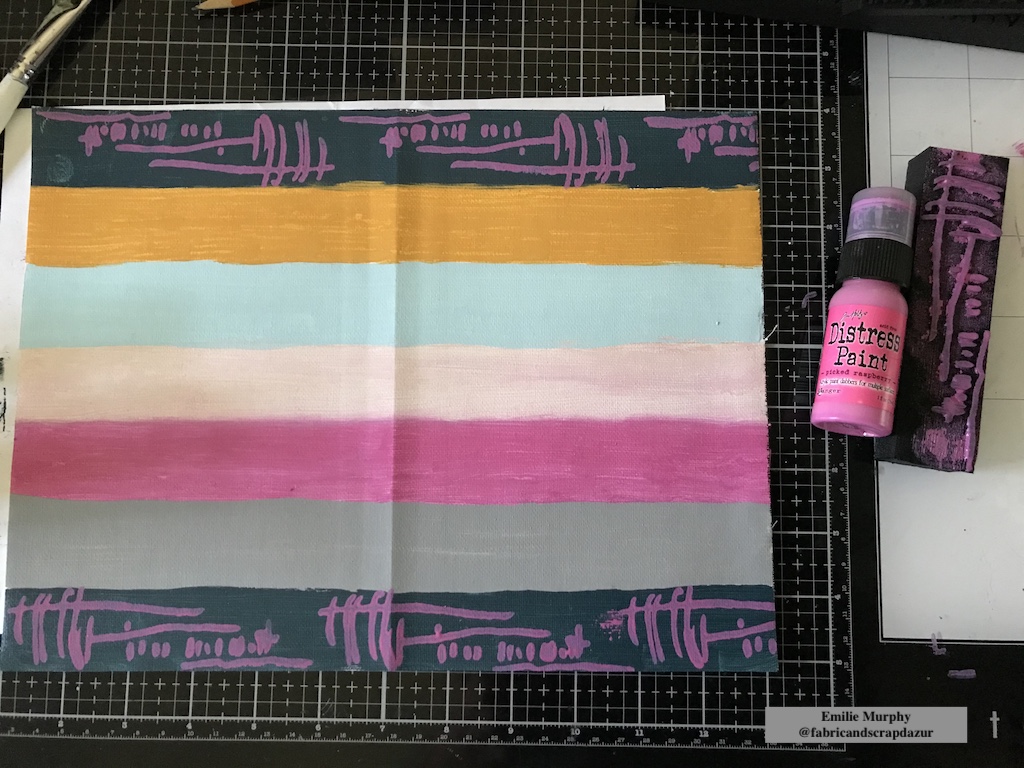
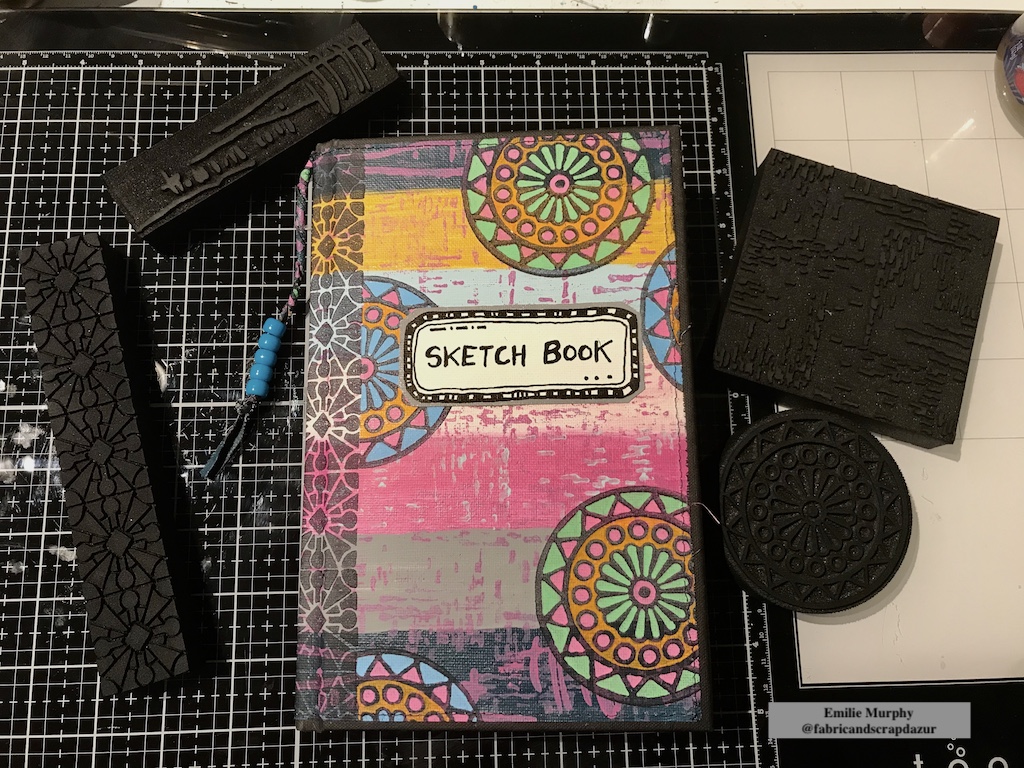
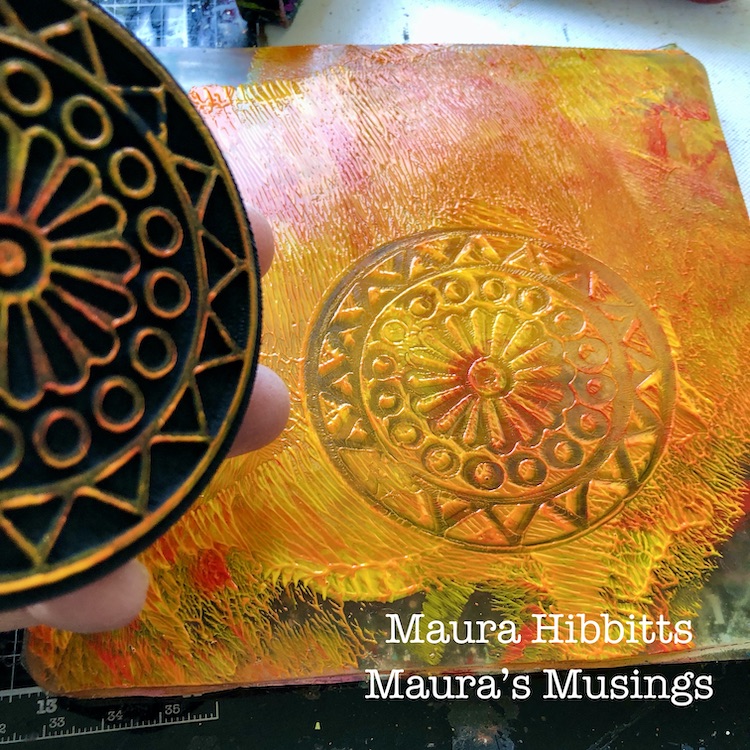
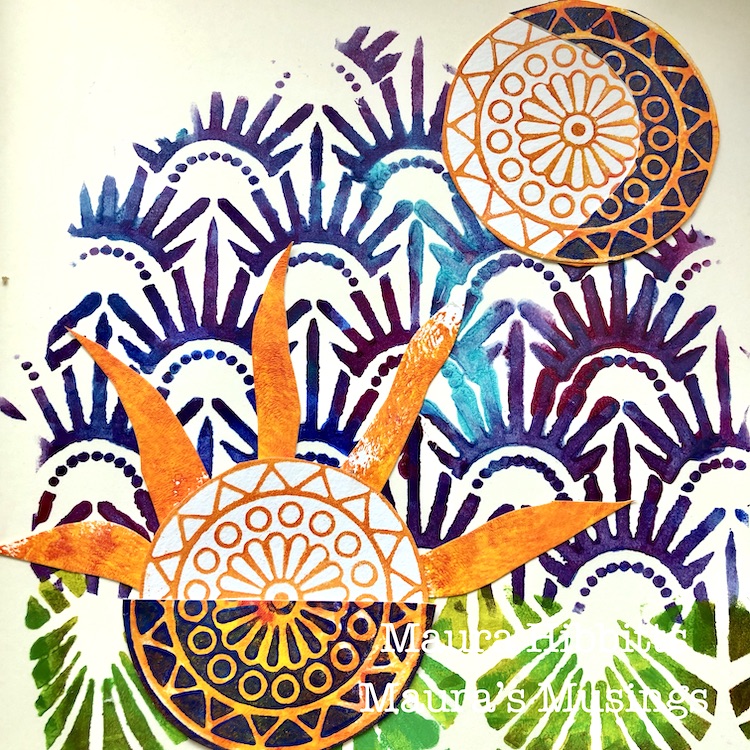
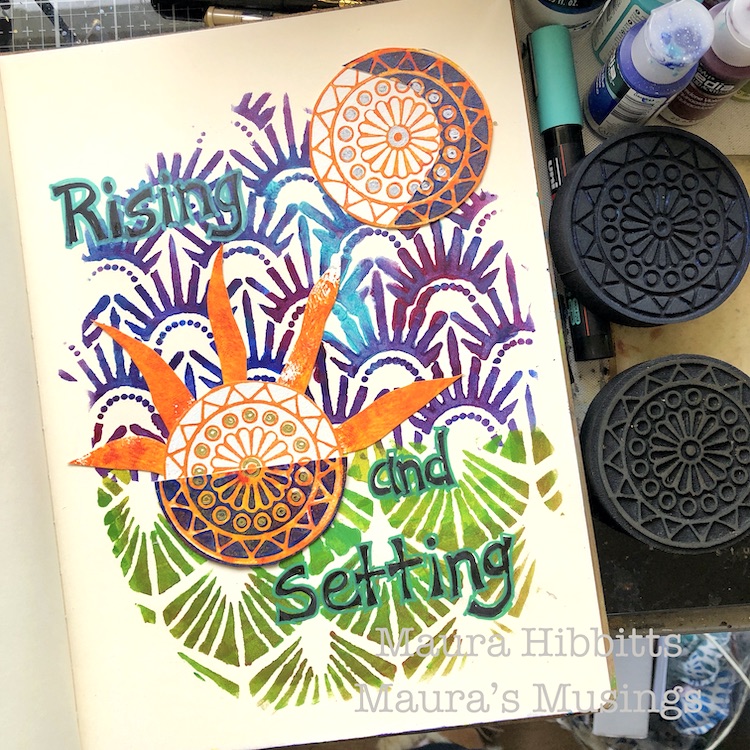
I added some texture with the Gnarly and Signals foam stamps on all the background to unify all the strips together.

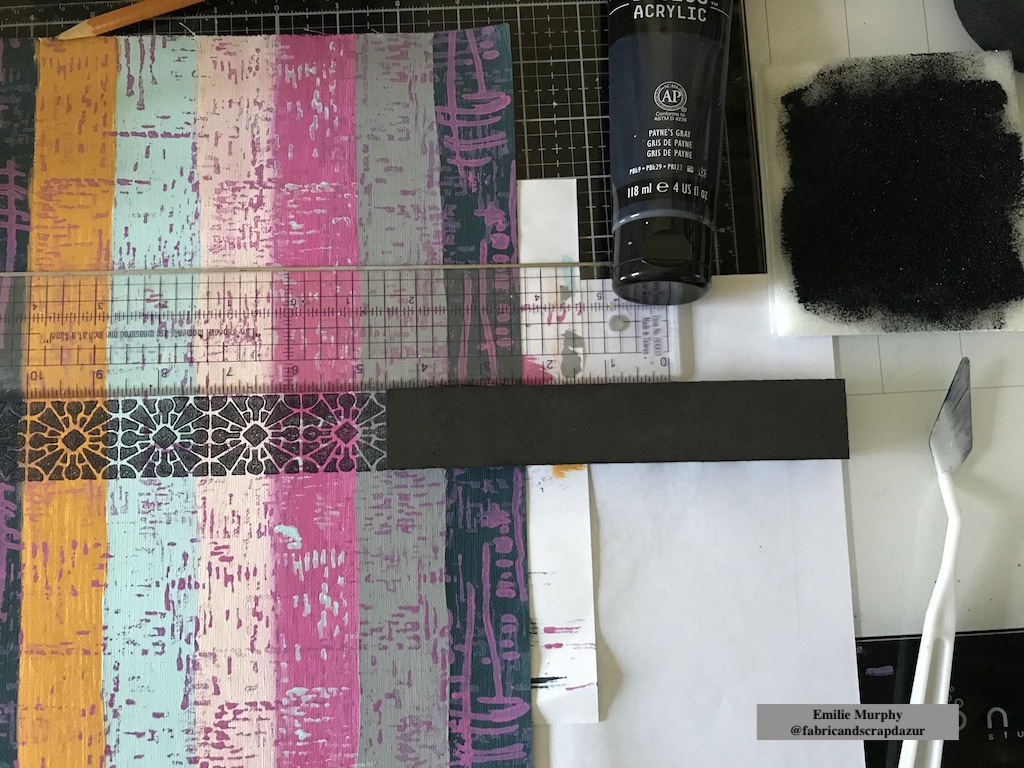
As I wanted to show up an hinge of my sketchbook, I stamped the middle part of the cover with the Buenos Aires Border foam stamp. First, I slightly folded my canvas sheet in half to mark the middle. Then, I used a ruler to be able to stamp straight. I didn’t mind to have an imperfect impression for the background texture but for the hinge part I wanted to get a crisp impression so I used a “stamp buddy” (that can be purchased on the ArtFoamies website) that allows you to apply paint uniformly and smoothly on the stamp.

I could have used a brayer instead but, as none of my brayers are brand new, it leaves some marks than I didn’t like for this purpose.

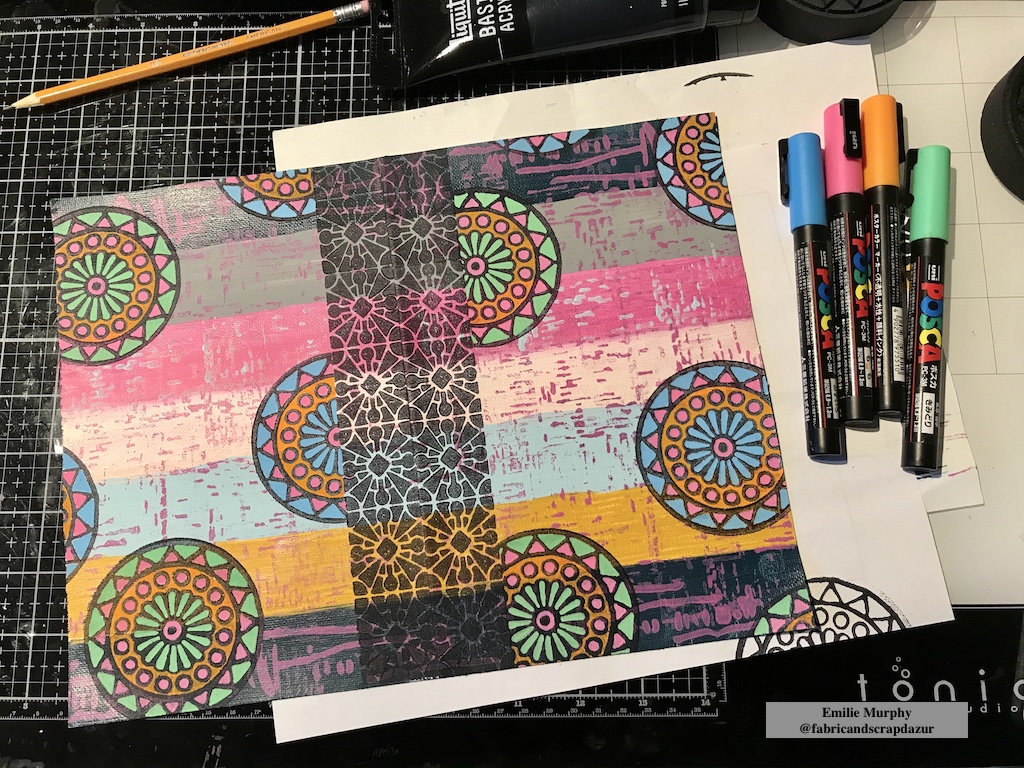
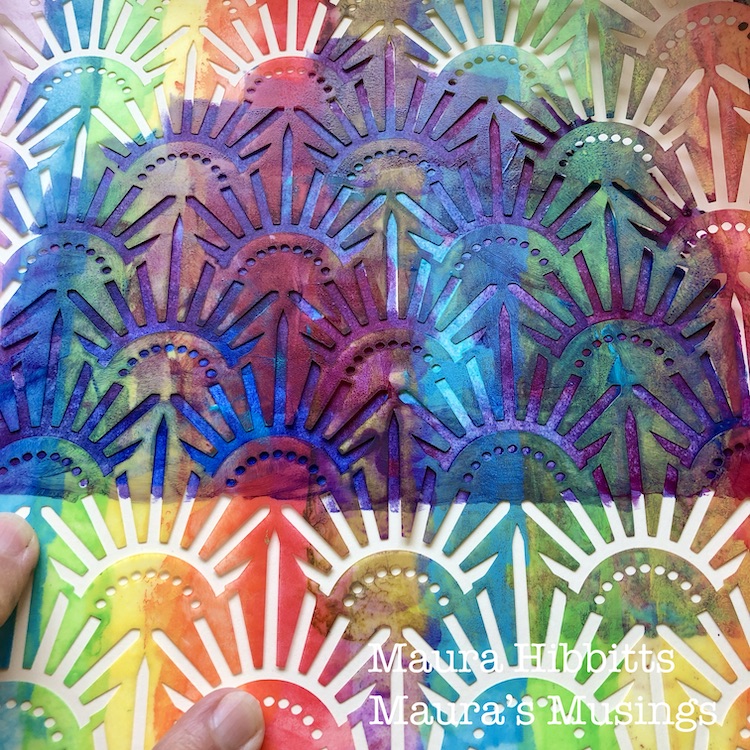
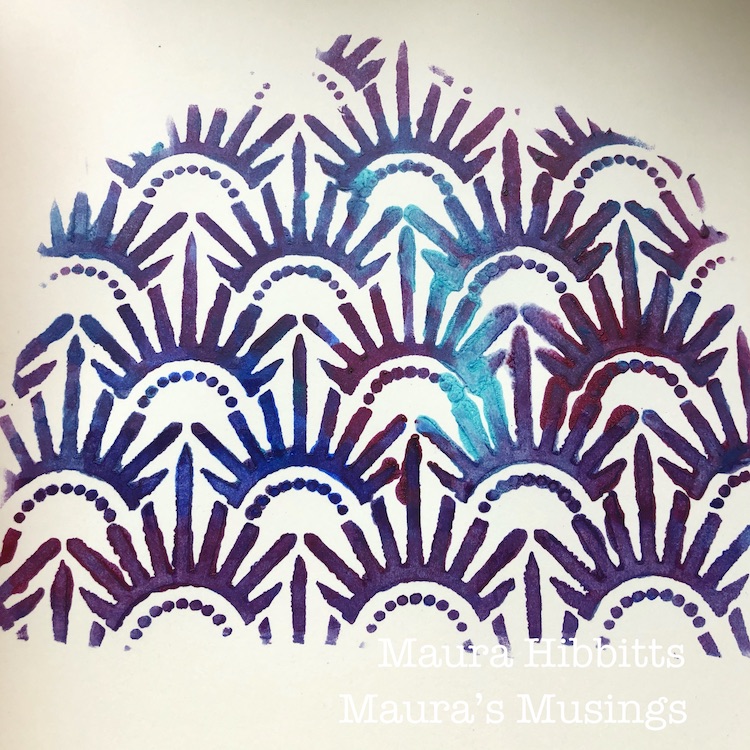
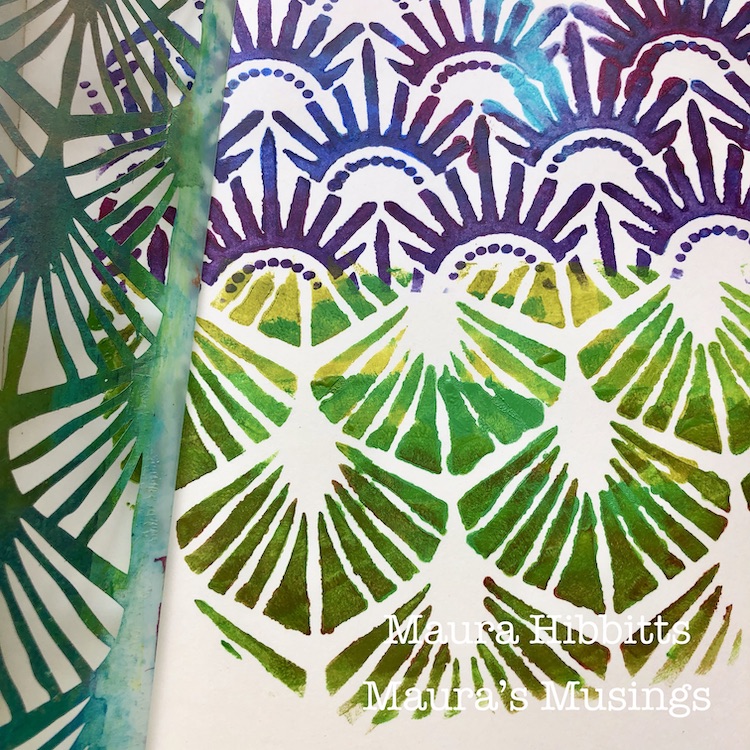
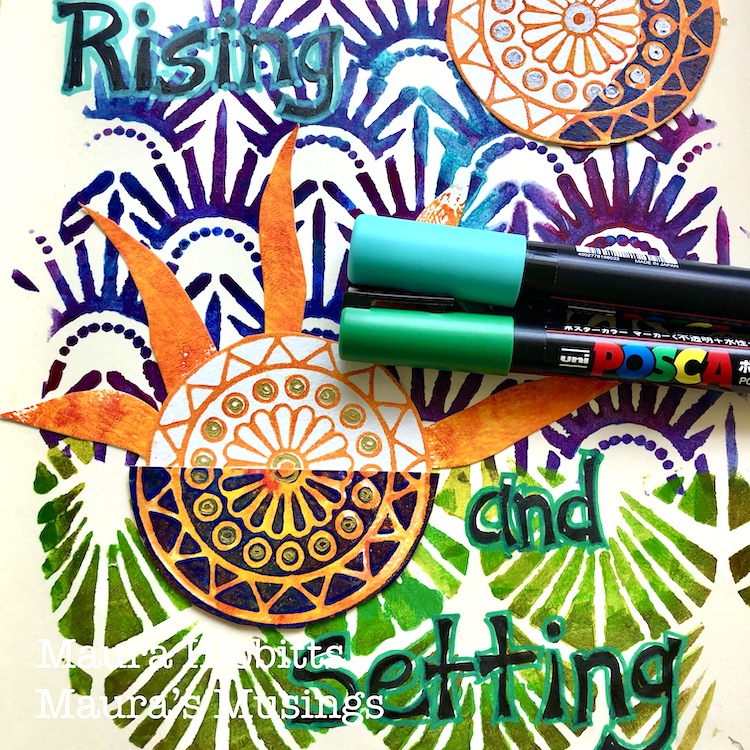
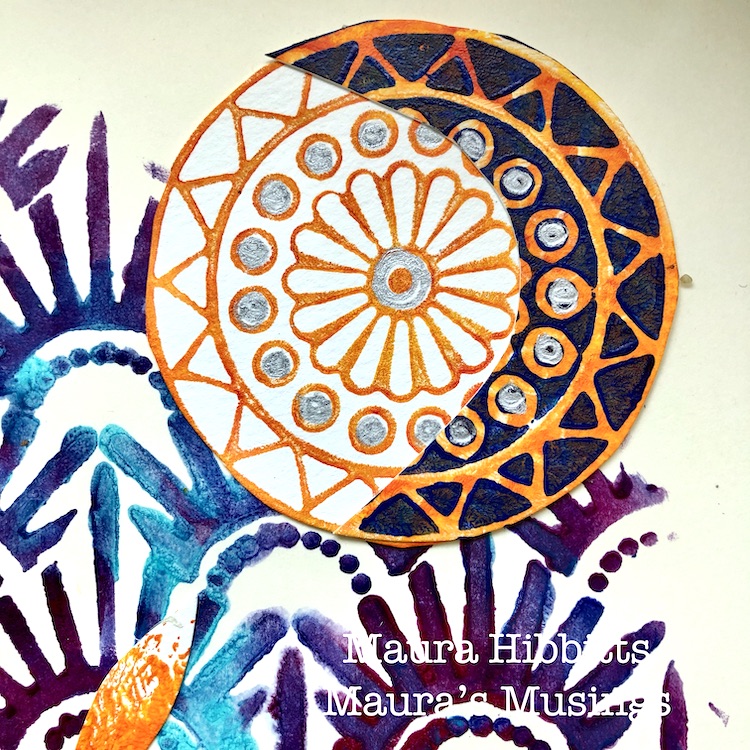
Next, I stamped repeatedly the Valley Road negative stamp to add more interest.  Once again, I used my “stamp buddy” because I wanted a crisp impression.

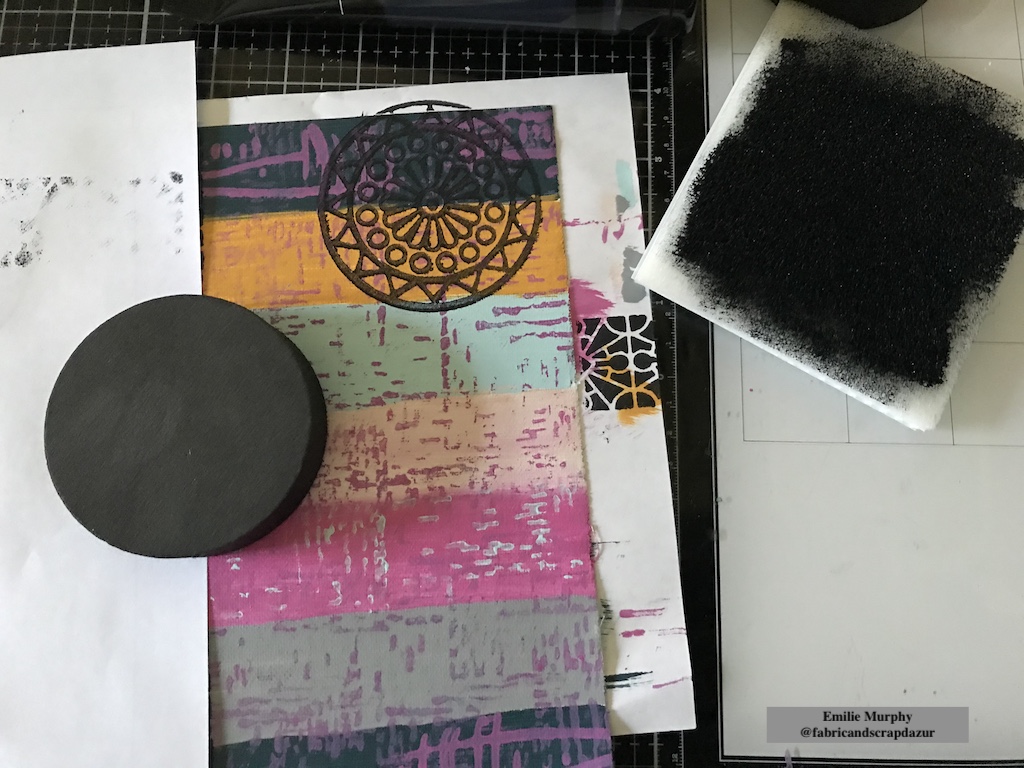
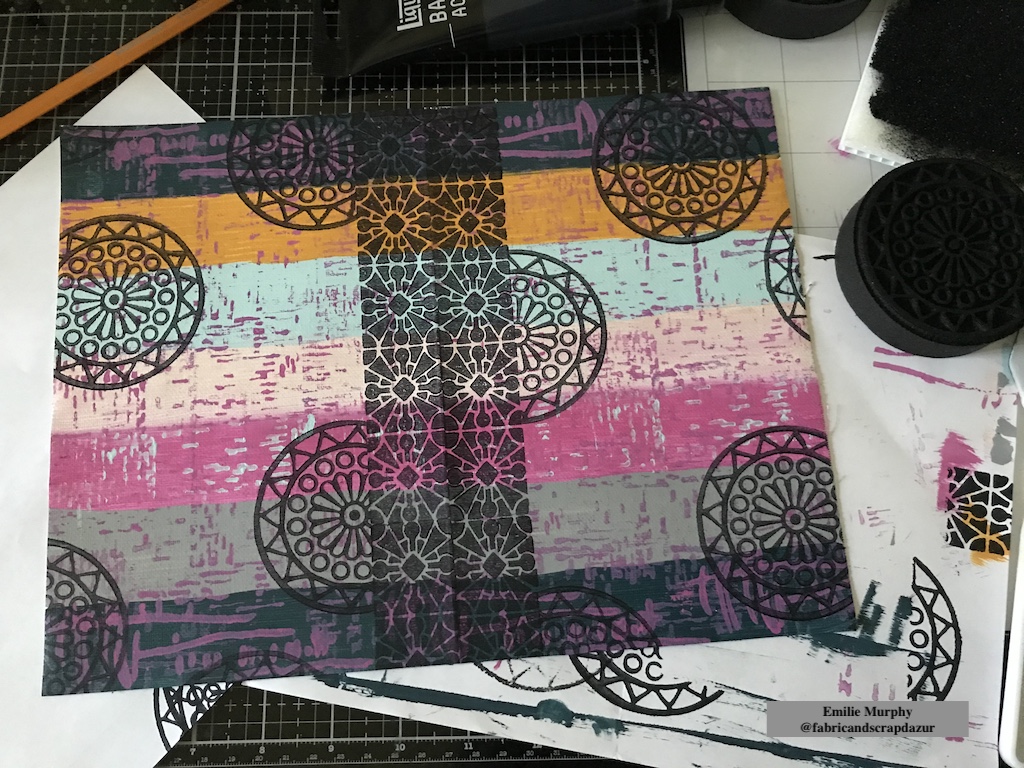
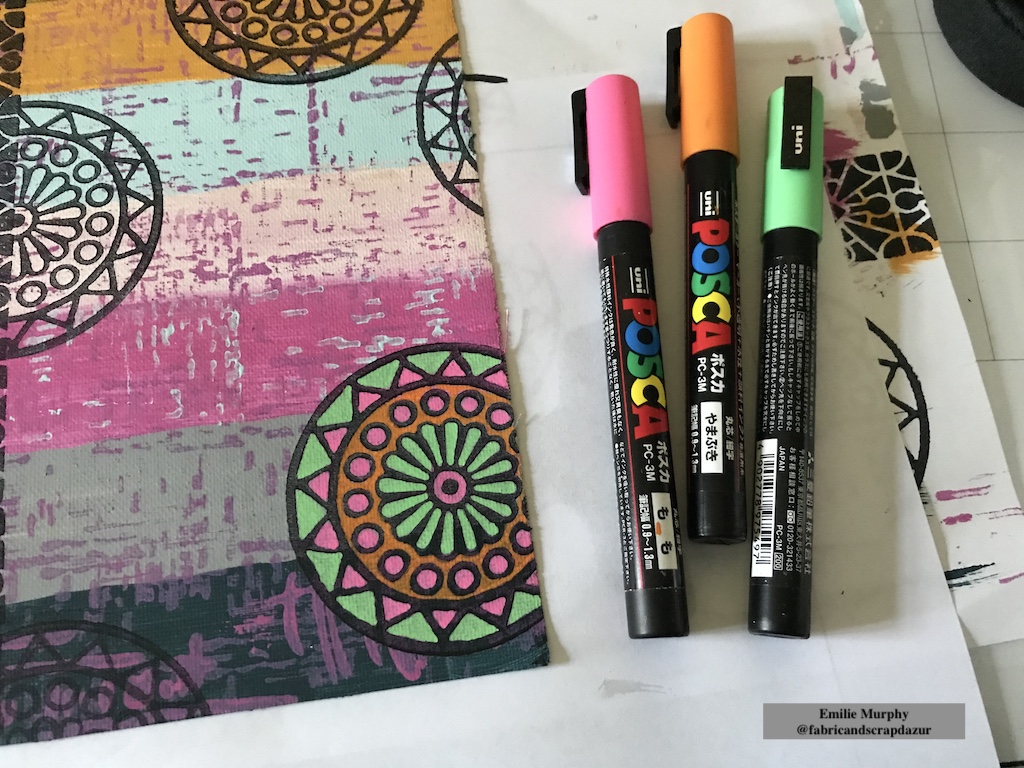
I colored my entire Valley Road motifs with some Posca pens. I just love the way that it allows the Valley Road design to pop out and create some dimension.

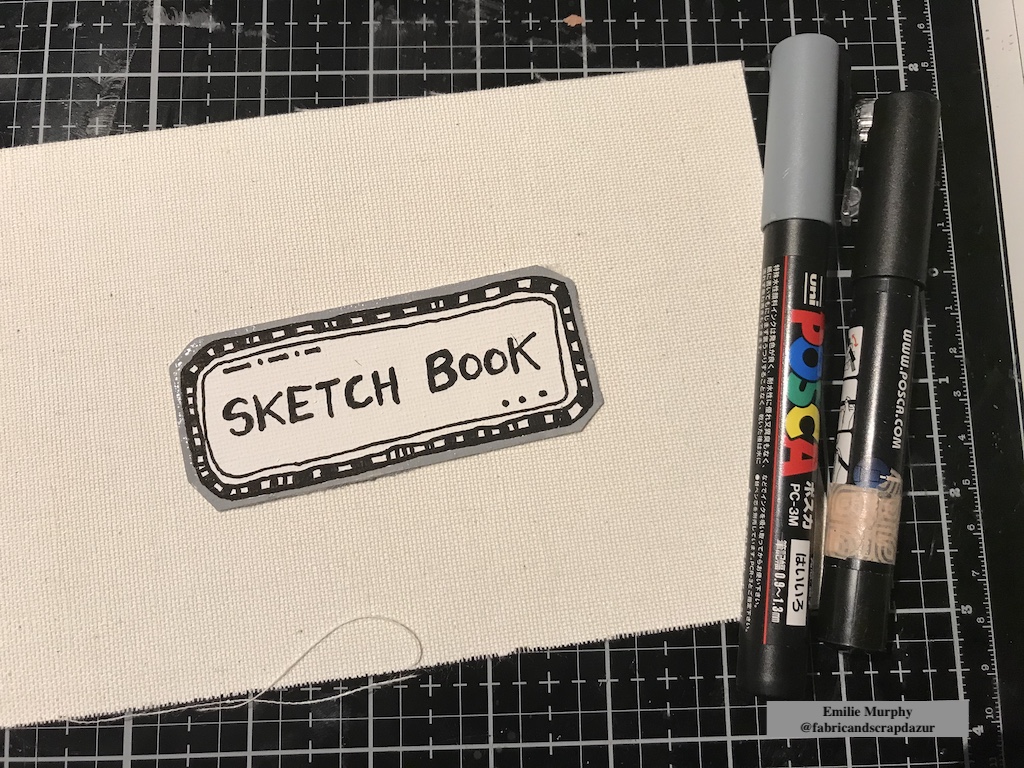
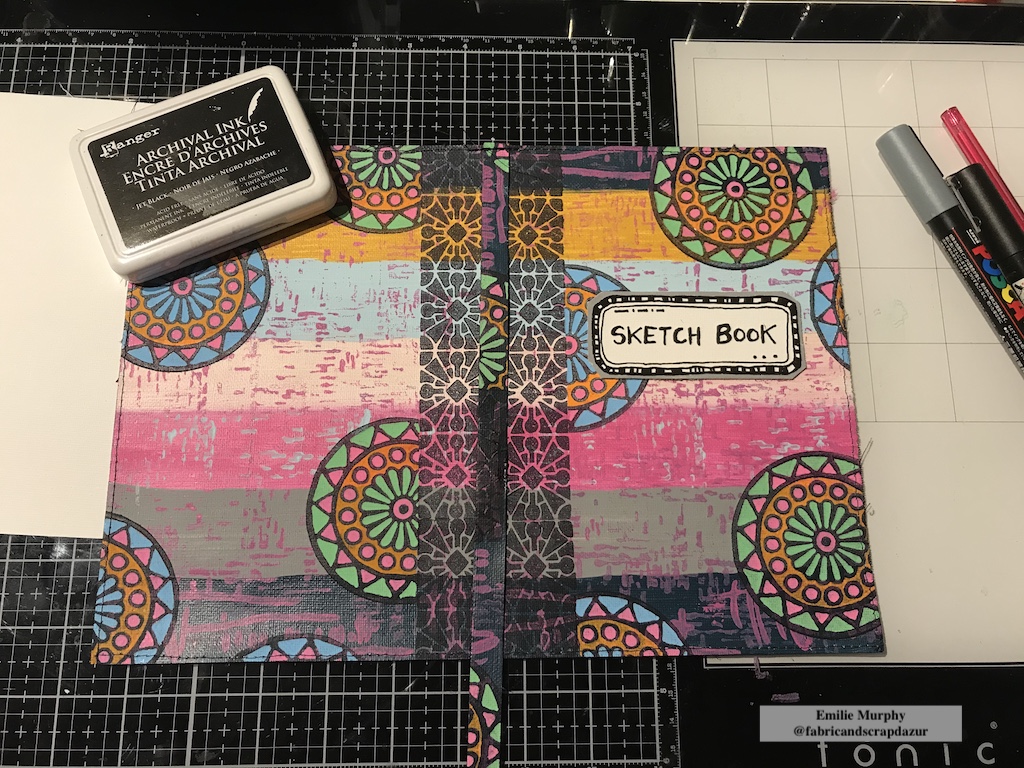
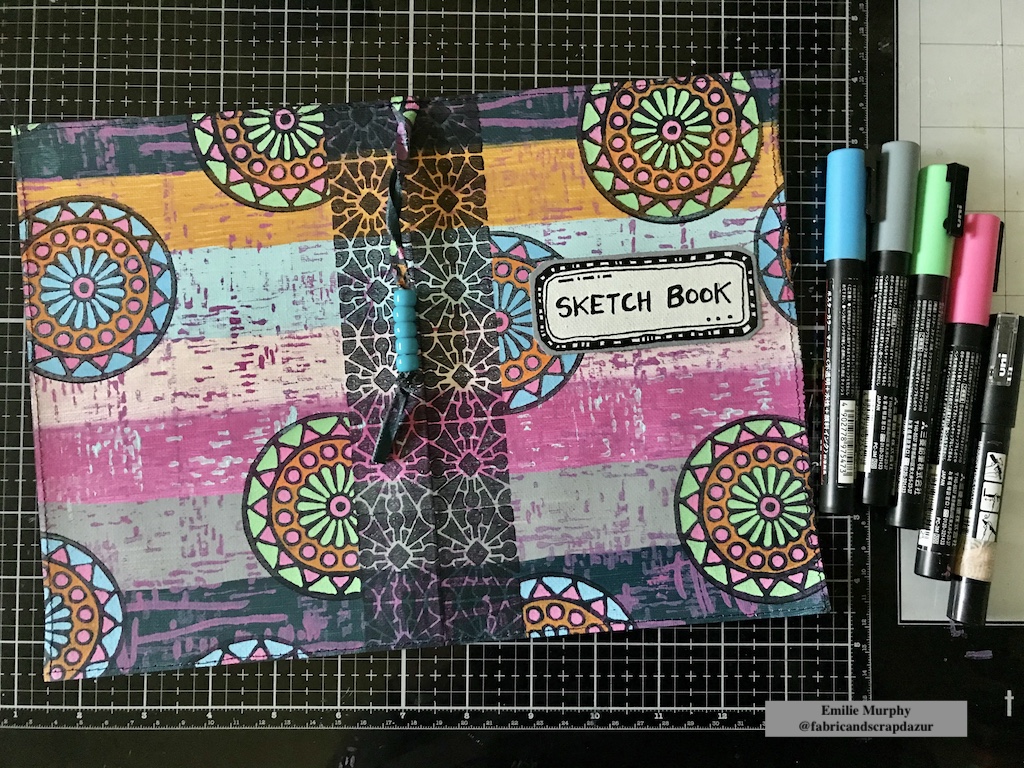
In order to complete my cover, I created a simple label with an extra piece of canvas sheet.

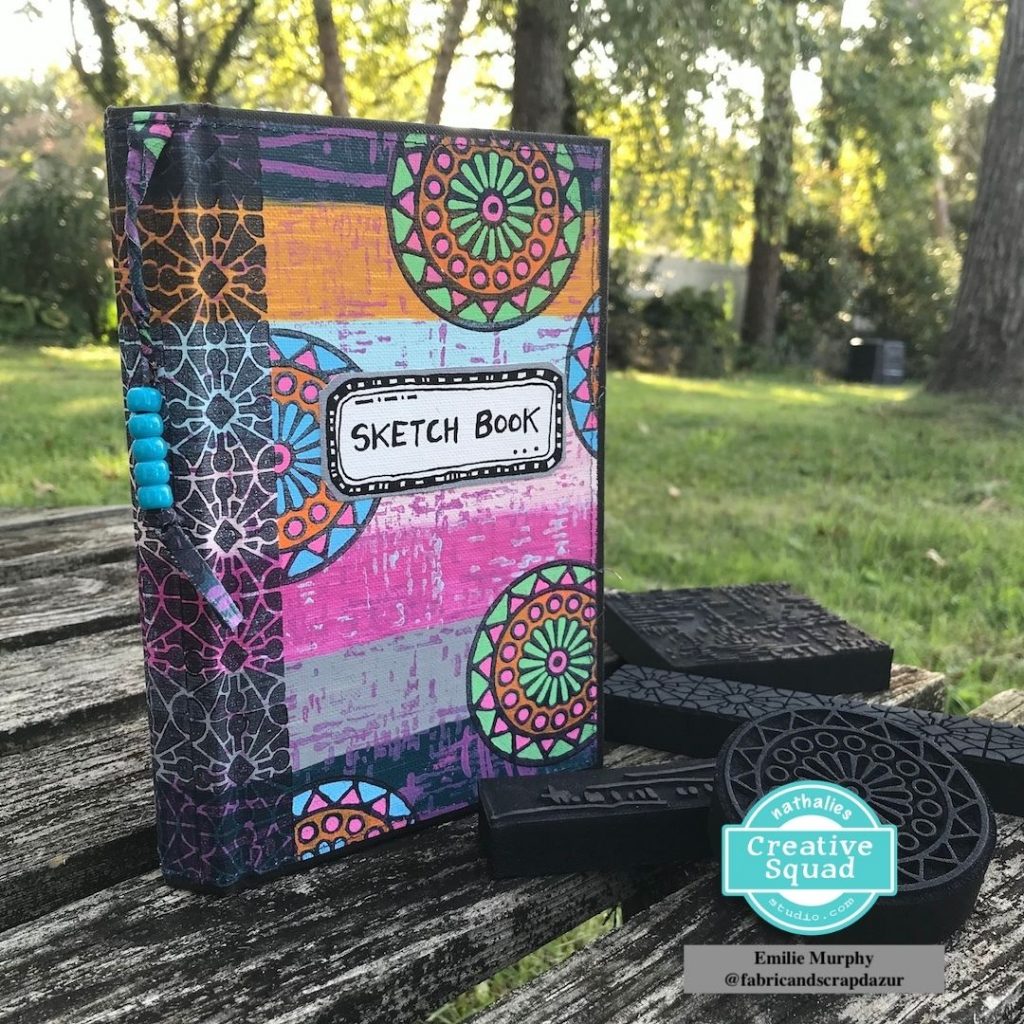
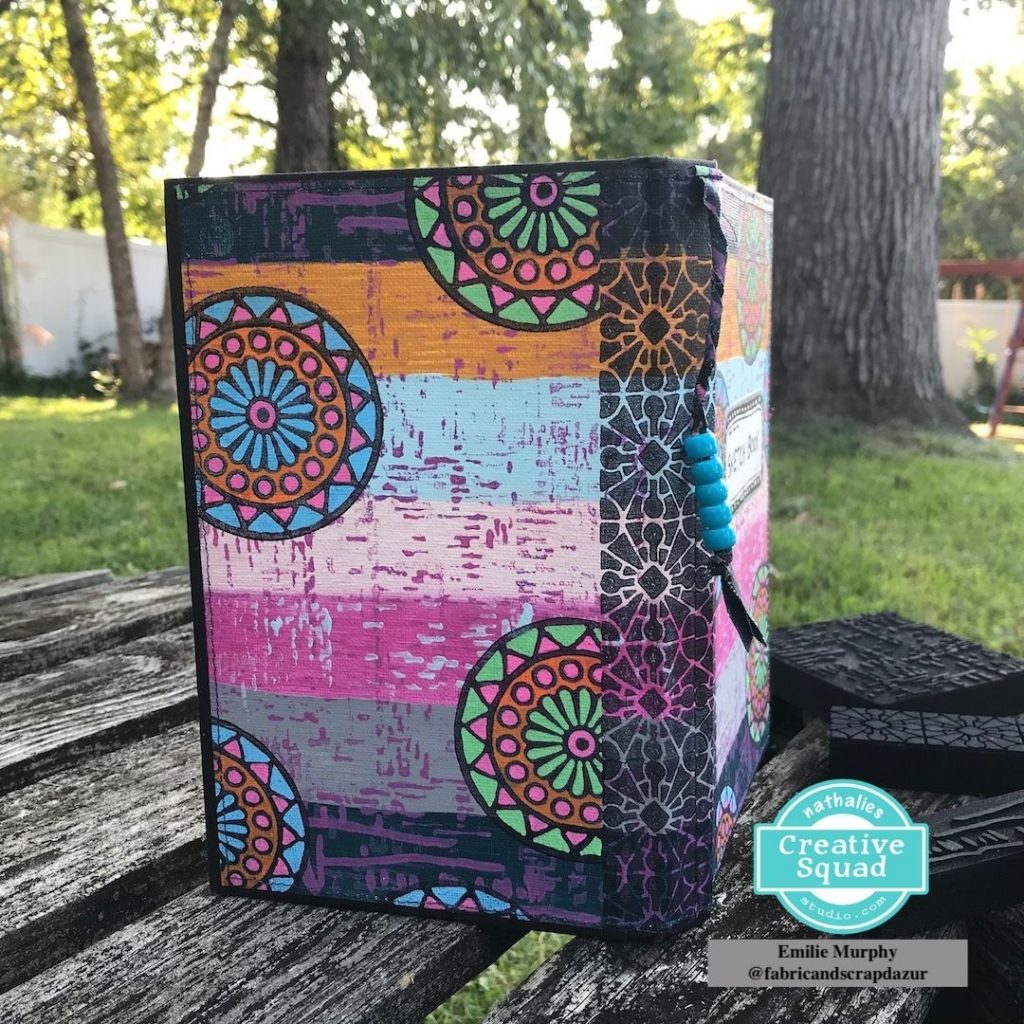
I finished up my cover by machine stitching all around the edges. This step is optional if you don’t like to sew or don’t have any sewing machine.

Tip: You can also simply create a false stitching line with a black maker.

As you can see I also stitched in the middle the remained half-inch strip I got when I cut the canvas sheet to fit the height of my sketchbook.

I embellished the middle strip with some plastic beads. I first twisted the strip and added some dots of glue here and there to keep it in shape. Then I added the beads and tightened a knot to secure it. I think it’s a nice addition to the cover.

Finally I glued down my canvas sheet on my sketchbook. I used PVA glue that I applied uniformly with a brush. I think it is better to use wet glue for this type of project because it allows some time to make adjustments if needed. I first started to apply glue on a half of the cover and burnished it well with a bone folder. Then I glued down the second half. This way the canvas sheet will adhere well. It also removes potential air bubbles and won’t peel off with time.

Personally I enjoyed trying something new this month. Hope you will take the plunge and try something new as well. Foam stamps are so fun to use specially for this kind of project.

Have a great rest of the week!  See you next month!


Thank you Emilie – love how those colors make the foam stamp patterns really pop!

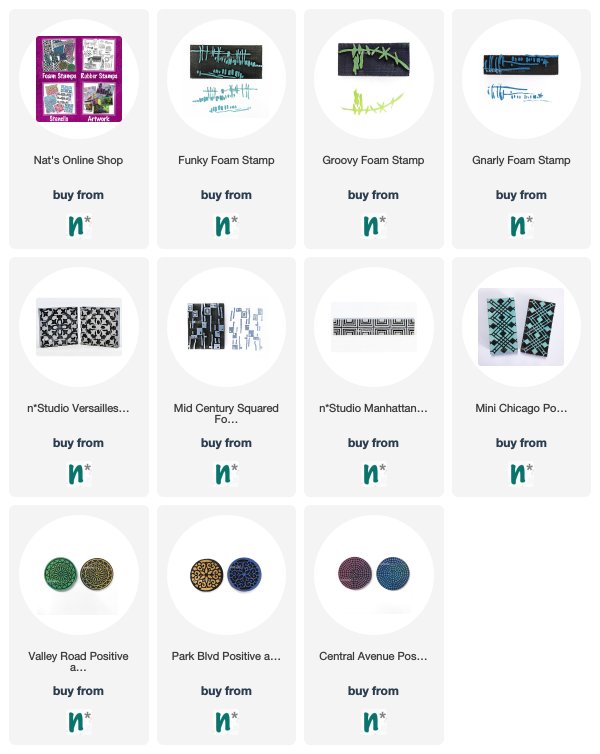
Give it a try: you can find all my Foam Stamps in my Online Shop and here are some of the other supplies Emilie used:

Feel inspired? Working on something yourself that you’d like to share?  I love to see how you interpret our monthly themes. Email me how you used my stencils and stamps with the theme and email me an image – I would love to share your projects in my next  “n*Spiration From Around the Globe“.

Comments (1)

  • Robin

    |

    So vibrant and pretty Emilie. I love this idea!

    Reply

Leave a comment

A New Day – Maura Hibbitts

Hello from our Creative Squad! Today we are kicking a new monthly theme off with a project from Maura Hibbitts. Maura is creating an uplifting celestial inspired art journal page using my Valley Road foam stamps and my Art Deco Wallpaper and Art Deco Empire stencils. And bonus: you get a little science lesson too :) Our theme is: A New Day – Let’s try something new today :) Although these are tumultuous times and we never know what each new day will bring, it also seems like the perfect time to throw caution to the wind and just jump into something new with both feet. Try a new material or technique or approach. Why not? Today is a new day… and tomorrow is too!


I find myself rather fascinated with the cycles of the sun and moon…must be my Earth Science background. So, when I thought about a new day, the setting of the sun and rising of the moon came to mind. We’ve had some glorious sunsets over the summer, so I wanted to pull in that gorgeous orange with my sun, and carry a bit of it into the moon.  Since the moon rises 50 minutes later every day, sometimes the moon is rising as the sun is setting, and other days the moon is visible during the day. Just like the sun and moon, we each have the opportunity to make changes with each new day.

I decided to use my large art journal for more impact. I mixed orange, yellow and red on the gel plate and stamped out the Valley Road Positive ArtFoamie on watercolor paper. I stamped several, and also pressed the paper onto the gel plate for a different image. Sometimes when I work, I have an idea of where I am headed, but it’s fluid.

I repeated the first step with a mix of blues and purple with the Valley Road Negative Art Foamie. I stamped several images onto the watercolor paper, and also over the image on the orange print.

I wanted to create sky and earth with the stencils. I began with the sky and the Art Deco Empire stencil. I sponged in a mix of the blues, purple and a touch of white, with fluid acrylics and a cosmetic sponge.

To create the earth, I used a mix of greens and a touch of brown in fluid acrylics. I used the Art Deco Wallpaper stencil to represent the earth portion. I curved the sky and earth because after all the Earth is round, no matter what those “flat earthers” want to tell you, lol.

Next, I cut out some of the images and free cut some sun rays to assemble the sun and moon. I started out with the moon as just a crescent, but once I tried it on top of the full image, I liked that better.

Final step is to do some pen work. I hand lettered “Rising and Setting” in black, then outlined the words with Posca paint pens. I also added some silver to the moon, and gold to the sun with pens.

To illustrate the idea of the sun setting below the horizon, I had the sun’s rays extending up into the “sky”, and added a half circle of the blue and orange image for the portion below the surface to show the sun sinking below the horizon.

My moon shows a waxing crescent, meaning it is on the path towards the full moon. The moon is always there, even though we only see a portion of it illuminated by the sun. I wanted to show that by placing the crescent over the circle.

Hmm, I guess you just got a bit of a science lesson today with the art. That is the way I often taught my classes, mixing in art and science, as well as a few other subjects. When you stop and think about it, you can see all the connections, like the sun and moon being connected to a new day. My wish for you is that each new day is a better one, filled with love, hope, health and joy. – Maura


Thank you Maura! Love this colorful page but also getting the science lesson too – we forget some of that stuff as time goes on!

Give it a try: you can find all my Foam Stamps and Stencils in my Online Shop and here are some of the other supplies Maura used:

Feel inspired? Working on something yourself that you’d like to share?  I love to see how you interpret our monthly themes. Email me how you used my stencils and stamps with the theme and email me an image – I would love to share your projects in my next  “n*Spiration From Around the Globe“.

Comments (2)

  • Diane

    |

    Loved this post! Particularly loved the description of the thinking behind the process. Thank you.

    Reply

Leave a comment

Foam Stamplifier Challenge Prompts 22-24

Day 22 – Plastic

Printing on top of plastic sheets or overhead foils is a fun way to create transparent elements for your work or nice dividers for your art journal but my favorite of all must be using Shrink Plastic. From wine charms, to embellishments to earrings. Using the foam stamps with inkpads of your choice, stamp your desired images.

Then heat the shrink film up as the manufacturer recommends and you will get a tiny version of your stamped image. Too cute! Here is a sample where I used the shrink film to create myself some new fancy earrings.

Day 23 – Scratch!

Another fun way to use Foam Stamps is to stamp onto some Ampersand Clayboard to create some great textured designs.


Stamp on top of the clay board with acrylic paint or spray ink or inks and then start scratching into the design. It is like doodling by scratching- better then coloring books- trust me!

Day 24 – Bits & Pieces

How about using bits and pieces of foam stamped paper to create something new?

You could create a tangram which is a puzzle which consists of 7 flat geographic shapes which put together can create a new shape.


Simply google tangram, print out the template, glue it on some white or black paper, start stamping with your foam stamps and cut it.

And then go and play …

Here are the different foam stamps I used for these prompts


In case you missed the prompt list  here you go:

Leave a comment