Looking to make an impact in your art journal or current creative project? Think bold pattern! I love a strong pattern element as a background when I really want to grab attention. I like pattern so much in fact that a lot of my stamps are designed with that in mind. My Mini Fan foam stamp set is one example and a pretty fun set to play with.
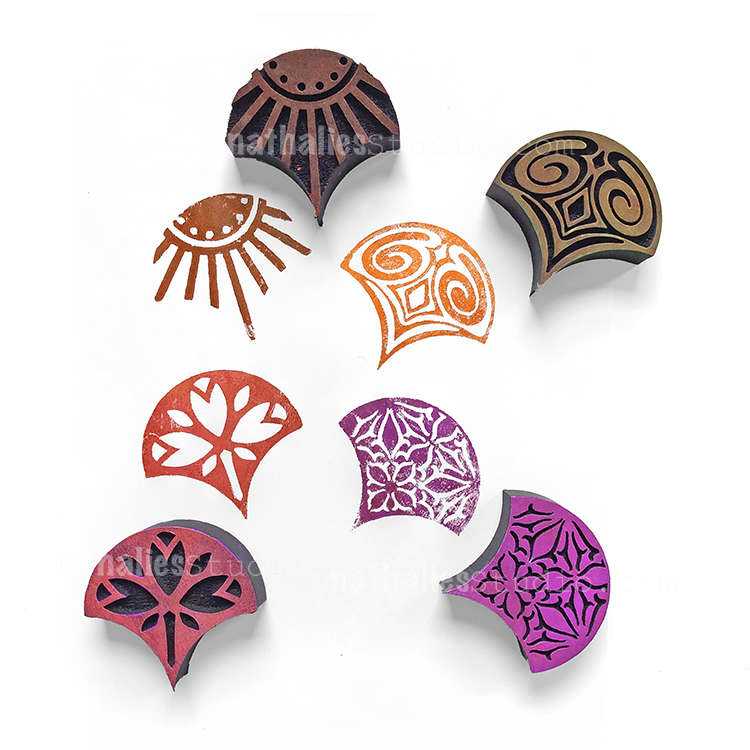
The four different stamps in the set each have a different design inspired by historical architecture and interior motifs that have caught my eye through the years. (My Stroll Through the Hood series is where I get a lot of my inspiration for these types of things.) The set gives you choices and the chance to mix things up too. But first, let’s talk about pattern.
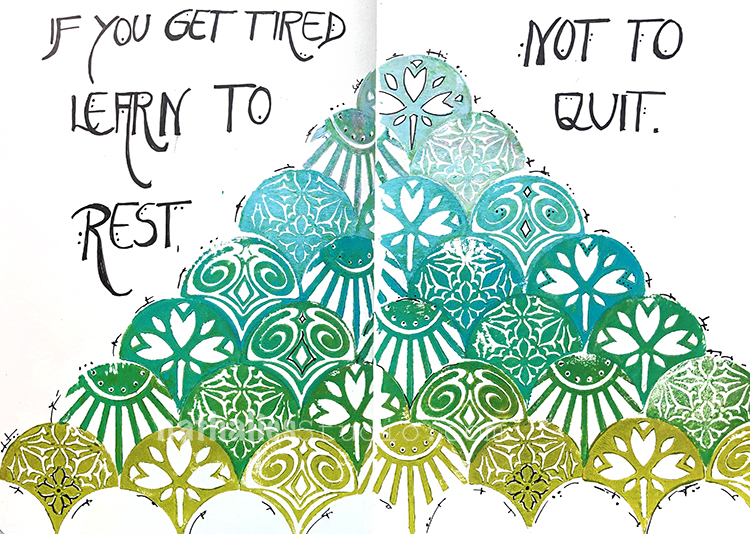
The overall shape of the Mini Fan stamps is designed to fit snugly together and make a continuous field of pattern. You can get wild with color and using all the stamps in the set.
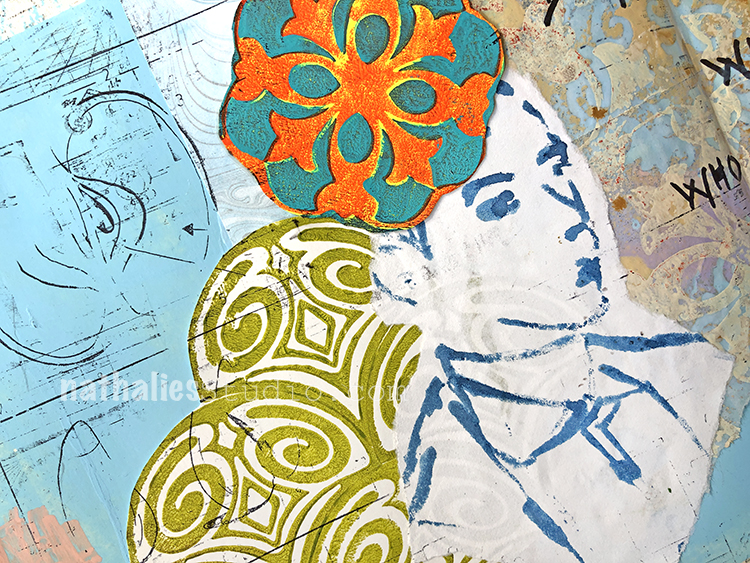
You can also use just one for a bit of intricate pattern in a page. The above stamp is a sinuous, Art Nouveau style that it is just the thing when you want something lovely in there.
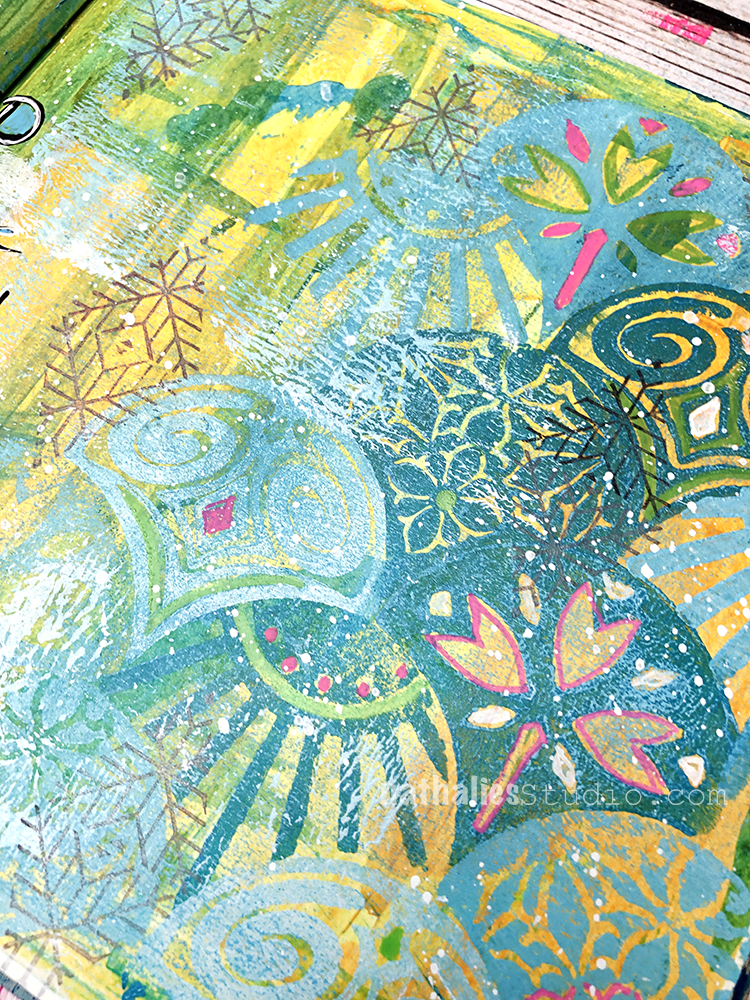
Layering the Mini Fan stamps in a more complex way is another approach. The “more is more” technique is a lot of fun to create and is very impactful with different patterns and colors peeking through. When to stop? LOL that’s the hard question ;)
When you do keep things simple though, these Mini Fan foam stamps are very effective. It’s not an instant pattern like a stencil, but it’s a methodical, zen-like building process that can be a refreshing creative break. And for a project like these Koinobori wind socks, you can’t deny the Mini Fans resemblance to fish scales!
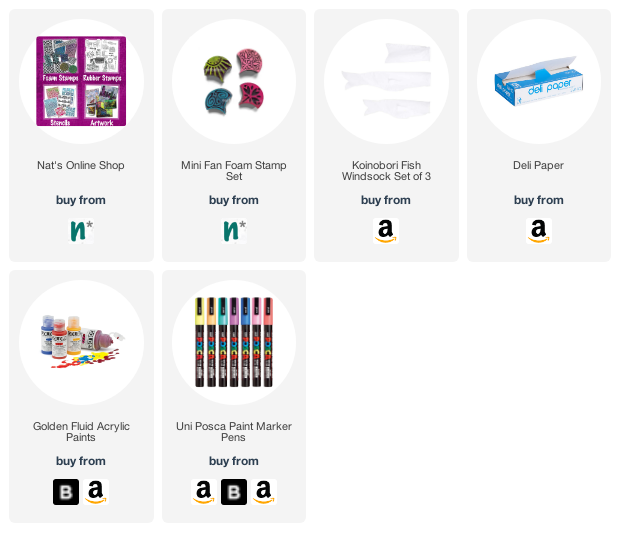
I hope you give some of these ideas a try. Here are some supplies used in these projects:
Hello from my Creative Squad! Today we have a post and video from Riikka Kovasin who has created a beautiful art journal page using my new LOVE foam stamp and inspired by our theme: Creating Connections – We’re playing along with the Creative JumpStart 2022 theme Creating Connections and exploring how our artwork connects us to the world around us, our community, our favorite supplies, or maybe our artmaking choices. Connections are everywhere when we create!
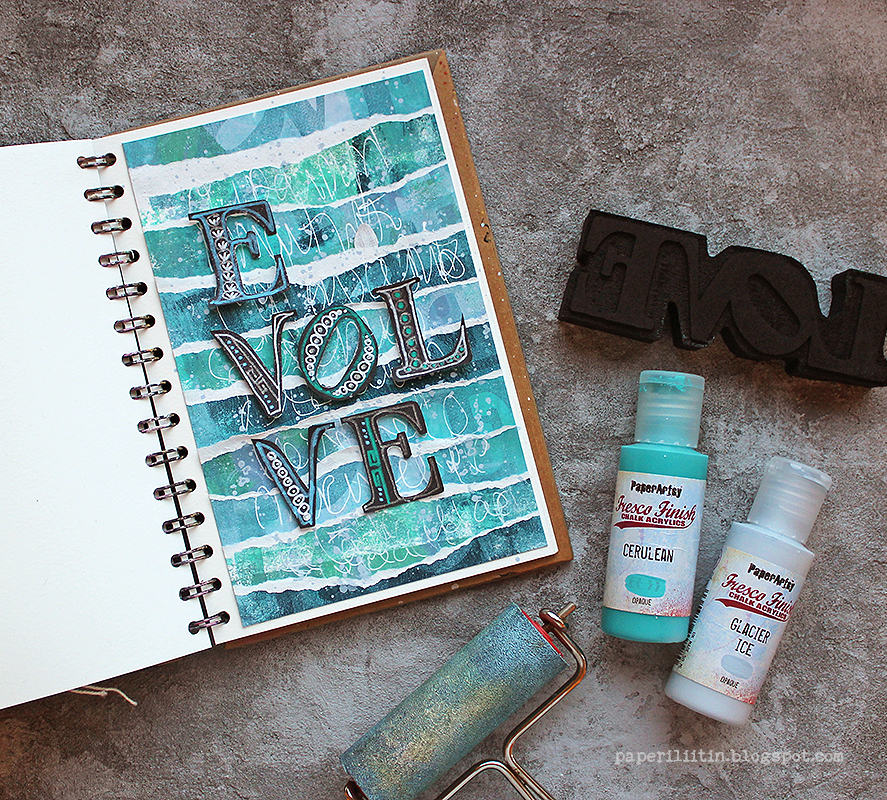
Evolve
Hello! It’s Riikka here today with the first Nathalie’s Creative Squad project of 2022! So exciting – a brand new year to unfold and inspire! As you probably know already, this month we’re drawing inspiration from Creative JumpStart topic “Creating Connections”.
I’m super honored to say that I’m one of the teachers in the CJS22. When Nathalie held the announcement live, I threw an idea about being inspired by your culture, creating a connection to that. Naturally, your culture is a part of you and probably everything you do is connected to you. You see the world though your eyes, your perspective, so your cultural heritage is bound to shine through one way or the other. But for this project I decided to use my culture more clearly, drawing inspiration from the national epic, Kalevala.
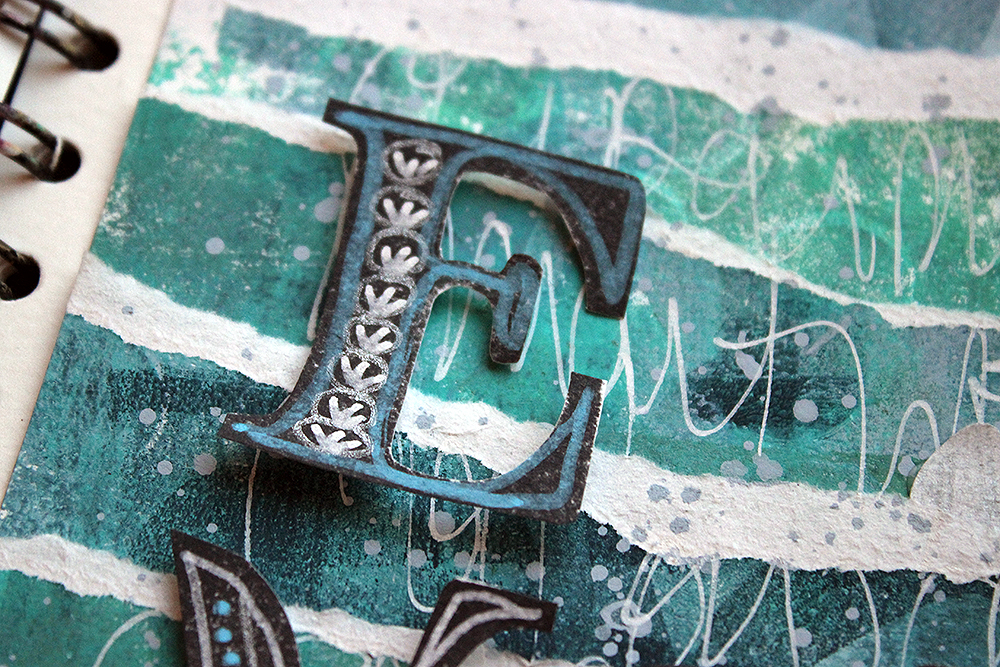
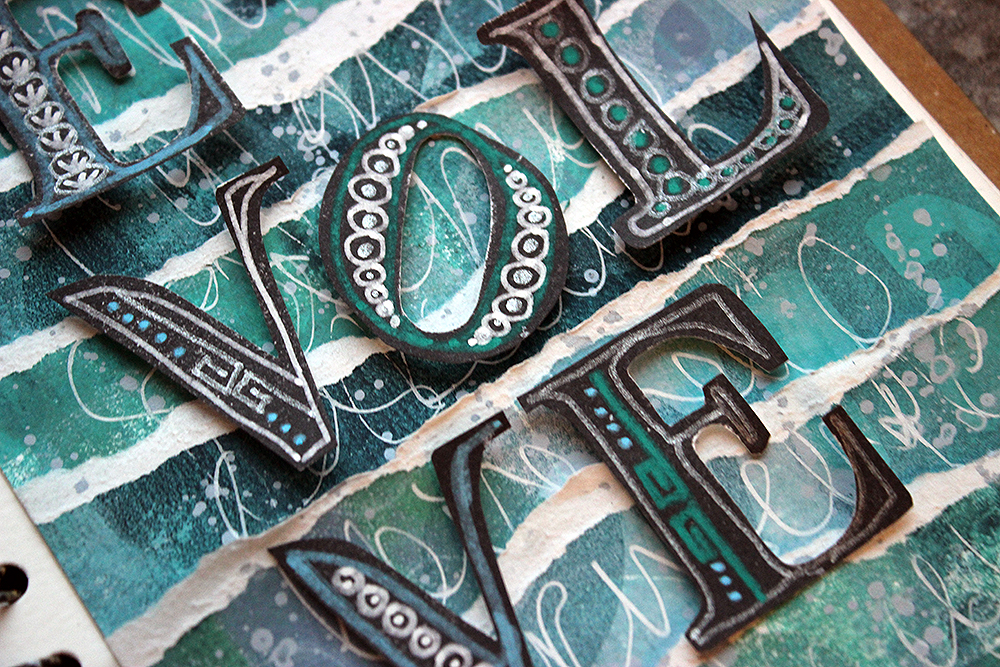
The first thing I did was to see the LOVE stamp with a new pair of eyes, though. I didn’t want to use it as such, to have the title be “Love”. Instead, I thought what other words I could make using the same letters. I pondered both English and Finnish words and finally settled to “evolve” as I could use that so many ways. When I then had the theme word, it was easy to decide which Kalevala part to use. I chose to go with the creation of the world, the primordial sea and Ilmatar, the air maiden.
In the Kalevala the world is created when a spirit of the air, Ilmatar, descends from the skies to the sea to bathe as she’s bored. She becomes pregnant from the wind. She spends quite some time in the ocean and a water bird, a scaup makes a nest on her knee. When Ilmatar then goes into labor, she moves her knee and the eggs fall to the sea. The broken eggs make up the earth, sky and rest of the world. The baby of Ilmatar on the other hand is Väinämöinen. He’s the hero of Kalevala, a skilled sorcerer and one of the main characters of the epic. I find it intriguing that the epic puts the start of the world to the ocean like the scientists nowadays think life started, in the primordial sea. With this on my mind as well, I set out to make a sea.
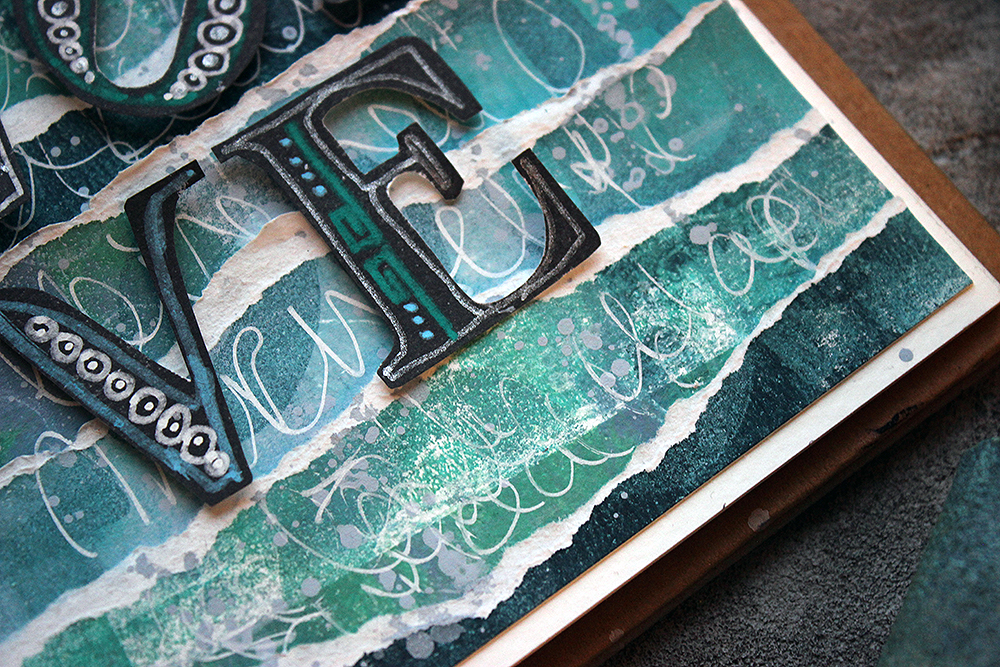
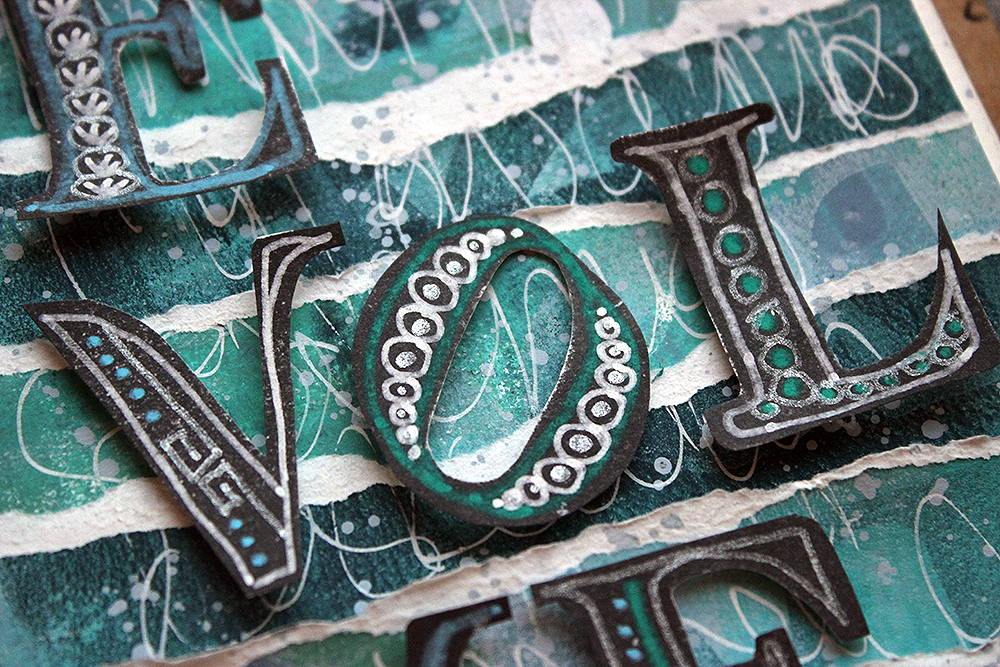
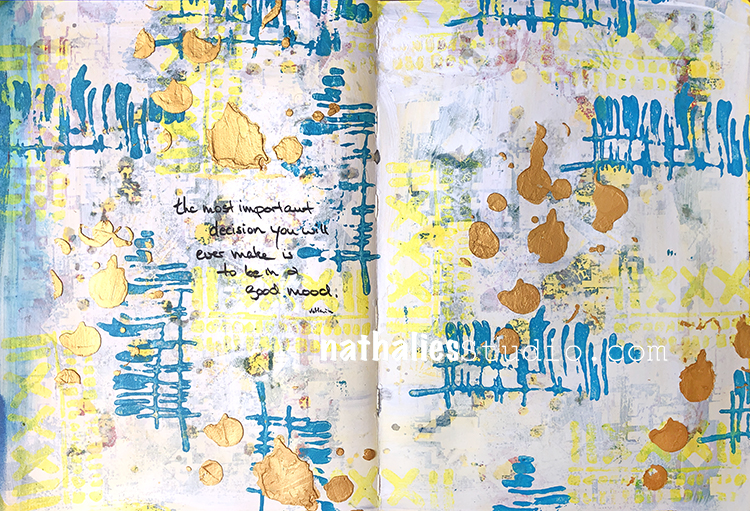
I used a gel printing plate to make myself a stash of blue papers first. For those I used the stamp as it is, spelling “love”. I also patterned the prints with a packaging from glue sticks. I’ve come across of the piece previously and it stayed in my mind as I then failed to gather it to my stash. But now that I happened to run into it again, I took it home. The pattern is really nice and you can use the part two ways, either leaving dots or rings to the plate. I then tore the printed papers in strips and layered them partly on top of each other making a sea with foam on top of the waves. If you want to see yourself how I made it, please see the video underneath.
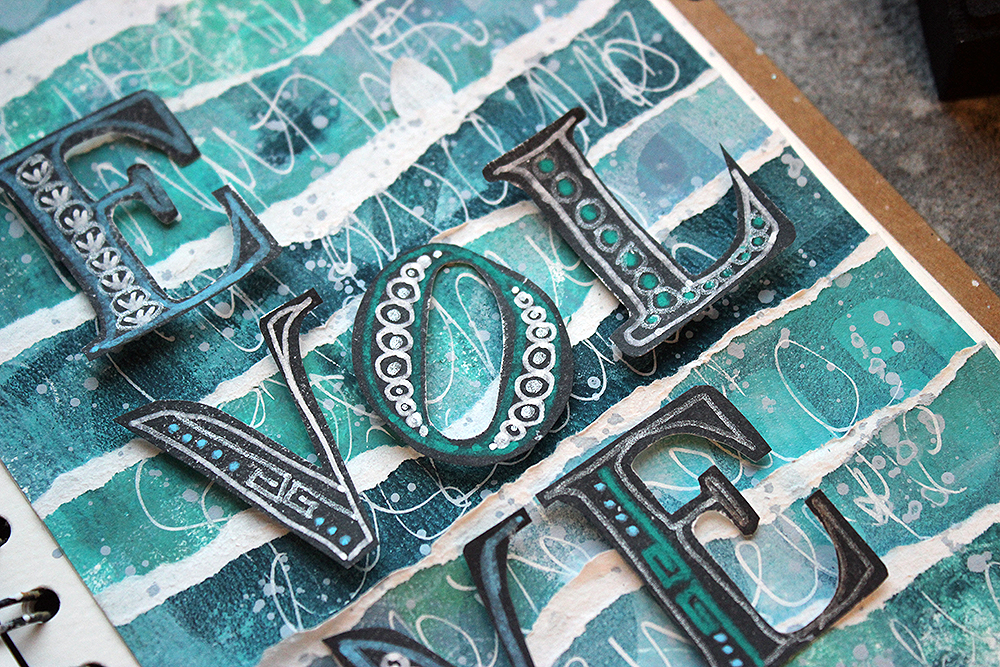
As you could see from the video, I patterned the letters by using paint markers. I chose patterns that I connect to Kalevala, like the joined stylized hands, a pattern a little reminiscent of running dog pattern. It’s another connection created!
Thank you for stopping by today! Wishing you a splendid 2022! Xoxo Riikka
Thank you Riikka – loved learning this legend and seeing how that inspired your page, and seeing how you reconfigured the letters in the foam stamp to create something different!
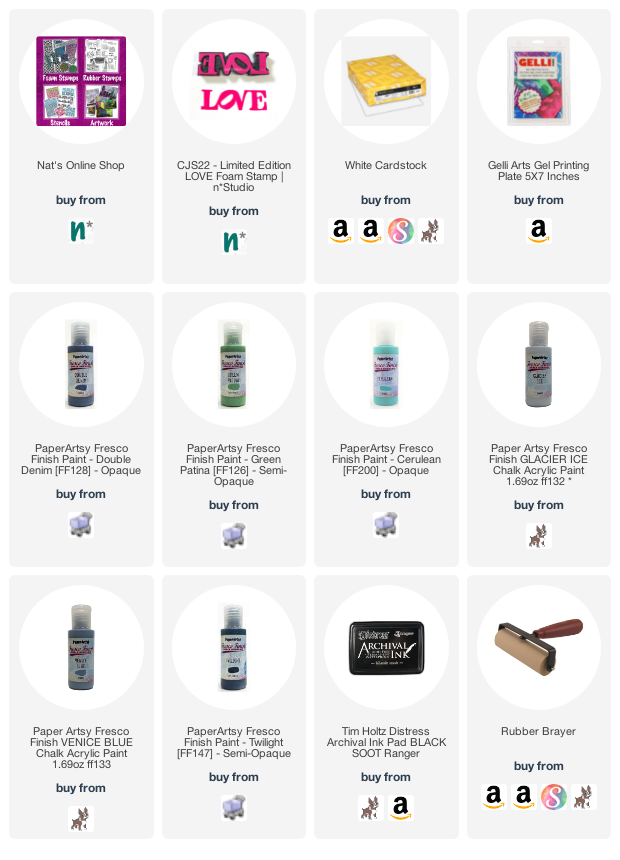
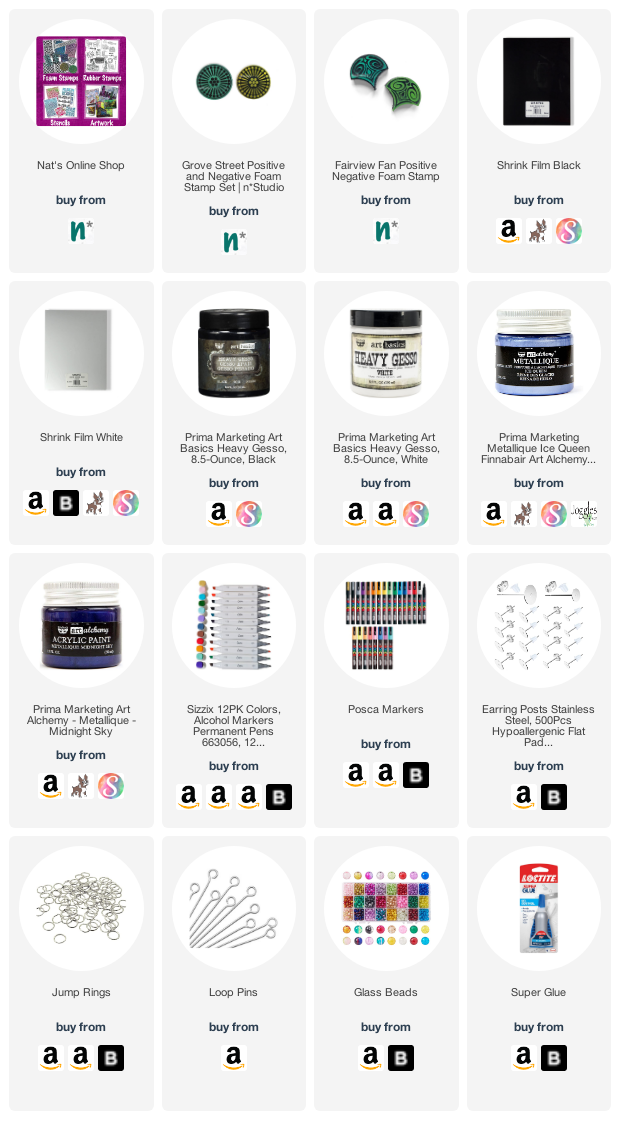
Give it a try: you can find all my Foam Stamps in my Online Shop and in addition to some packaging material, here are some of the supplies Riikka used:
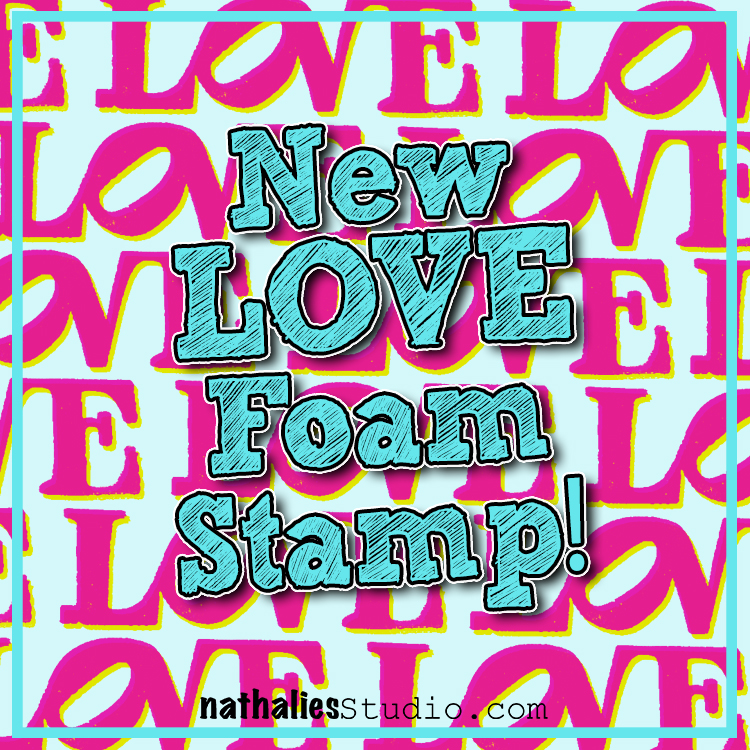
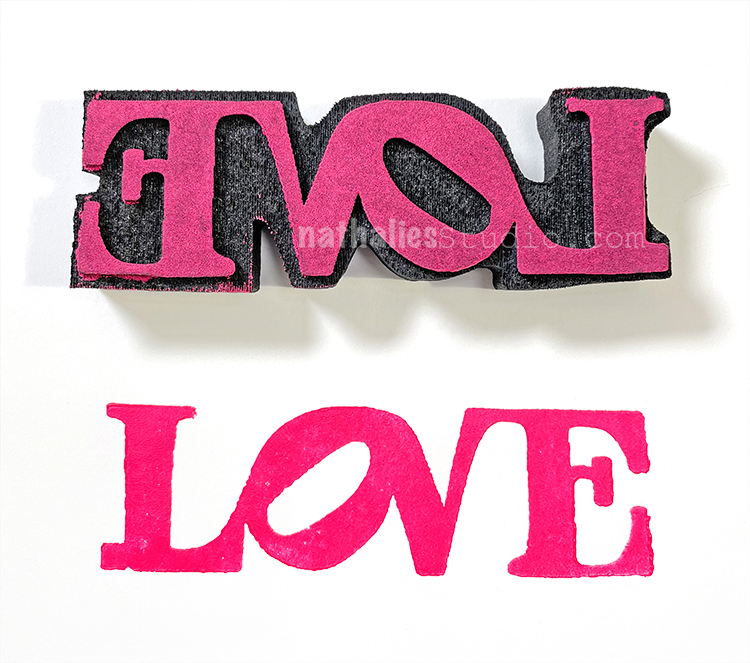
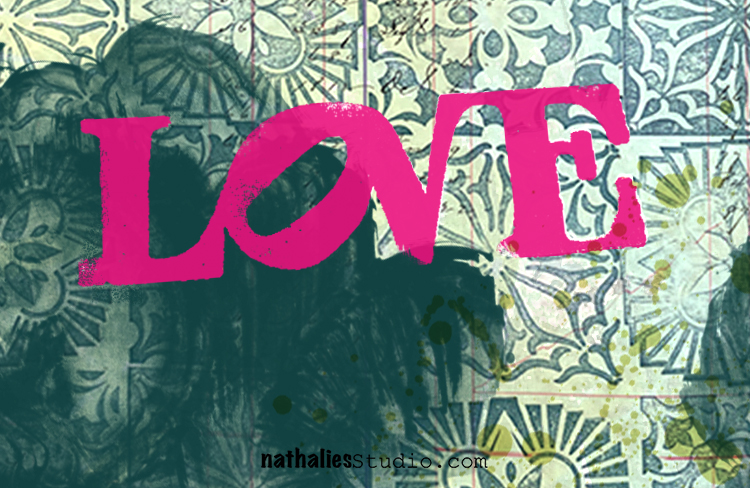
I’ve got some exciting Foam Stamp News! I’ve designed a Limited Edition Foam Stamp for Creative JumpStart 2022 called LOVE. Our theme for CJS22 is Creating Connections and what better connection is there than love?
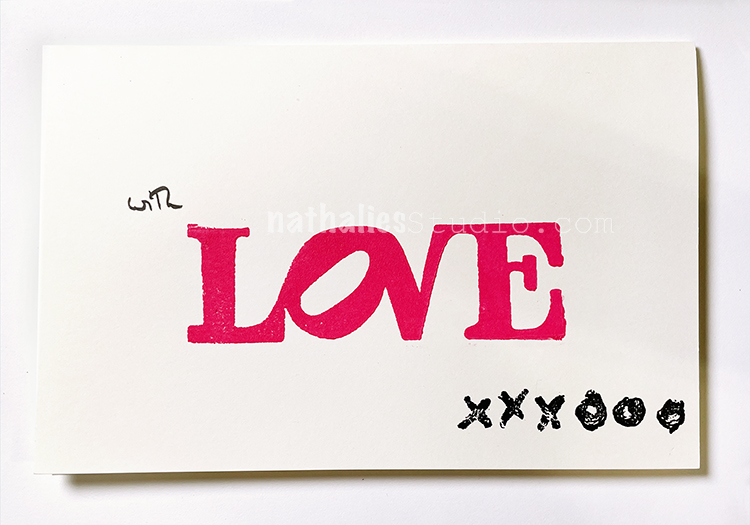
LOVE is of course perfect for cards. I mean, what more need I say? Ok, I did add a little bit more like my Love Knots rubber stamp, but really if you just want to get to the point, LOVE is all you need.
LOVE will be a limited edition release – only available through December 2022 so supplies are limited and when 2023 rolls around they will all be gone… so don’t miss out.
How would you like a little LOVE?
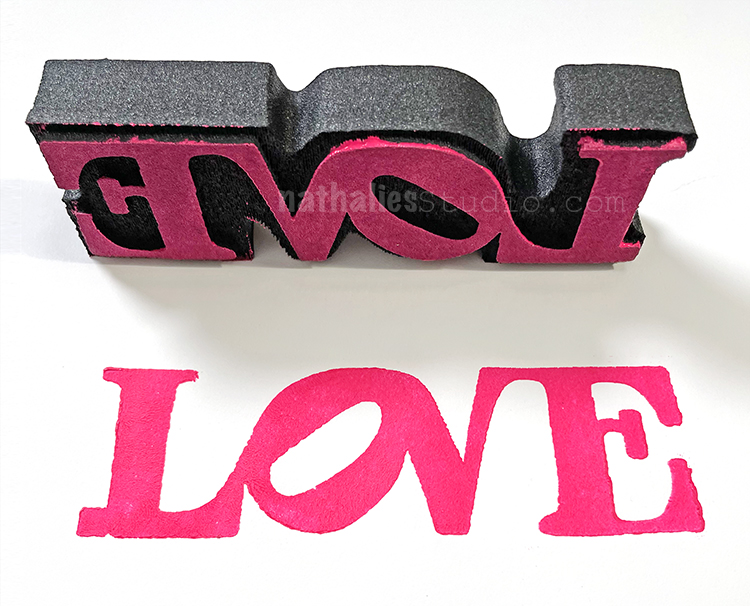
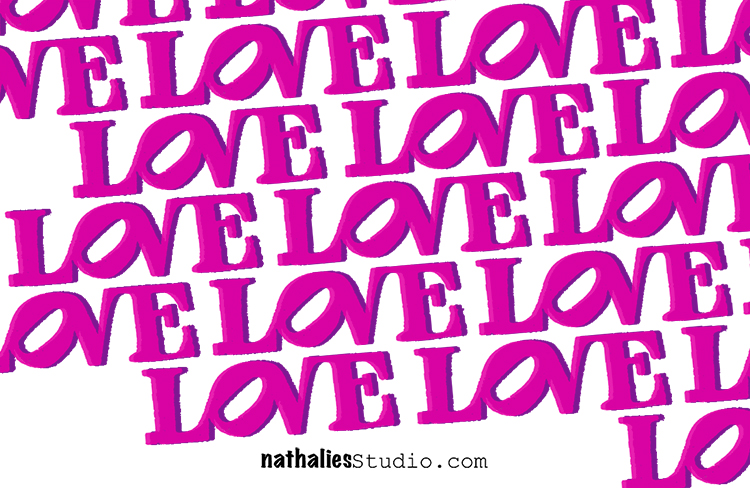
Foam stamps are so versatile – they rock when you need to churn out some quick cards or maybe do a repeating pattern for some giftwrap or a cool background… I especially love layering up two colors to get a nice offset print look.
They’re also excellent with fabric paints and even on the wall if you’re really ambitious. And we can’t forget the possibilities of just letting loose and working in an art journal. Who doesn’t LOVE that?
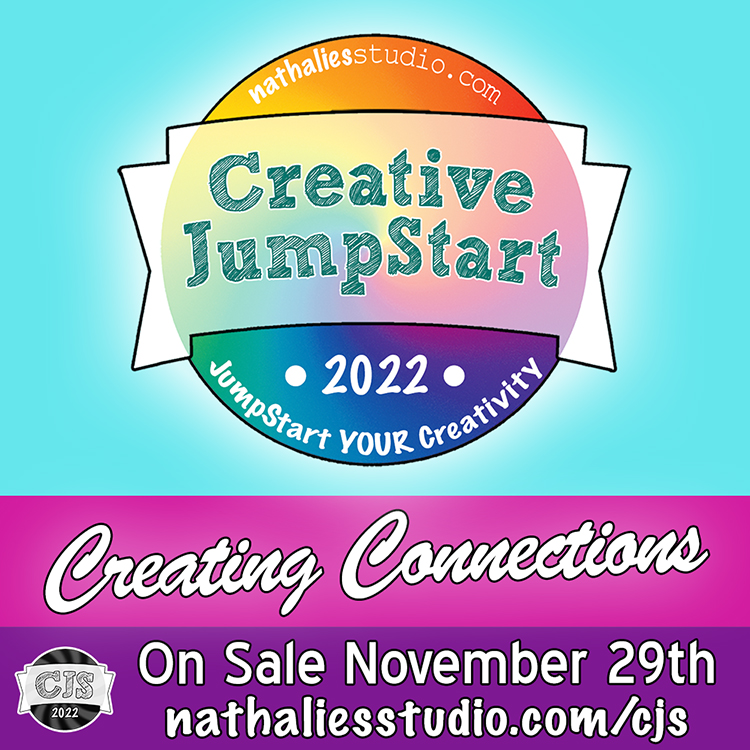
And get ready to use LOVE in Creative JumpStart 2022 Creating Connections edition too! CJS22 goes on sale on Monday, November 29th at 8am and I promise you – Cyber Monday will not disappoint ;)
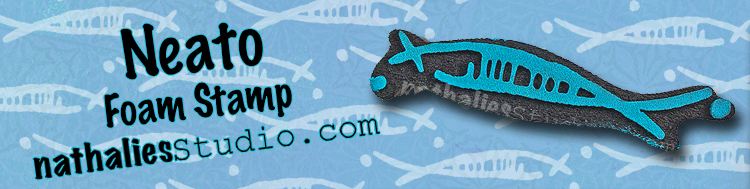
When I designed my Neato foam stamp, it was part of a suite of designs all based on some mid century modern stamp rollers I found in a vintage shop. I named all the patterns after slang words from the 1950’s and for the most part they were pretty abstract designs… except Neato just always reminds me of a fish LOL!
It’s kinda funny when you make a bunch of patterns and they really are just non-representational forms… but the more you work with them and get to know them they start to represent something. This is definitely what happened here and I am not alone either – a lot of you out there have seen the resemblance Neato has to a fish and I love that! We are on some similar mixed media wavelengths here :)
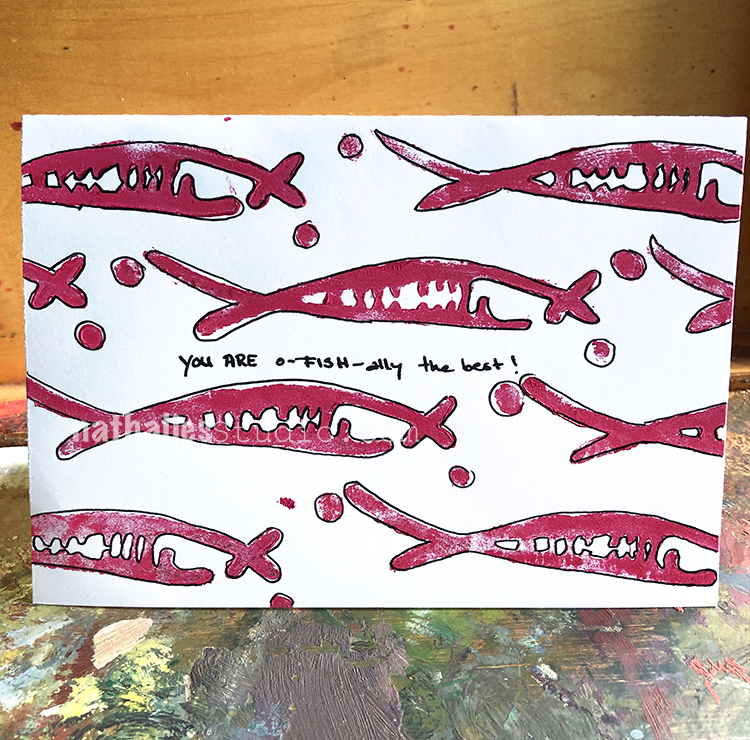
One of the first projects I made with Neato were these fish-themed Valentines. I hope you like puns too because I came up with a surprising amount of them… and I bet there are even more out there!
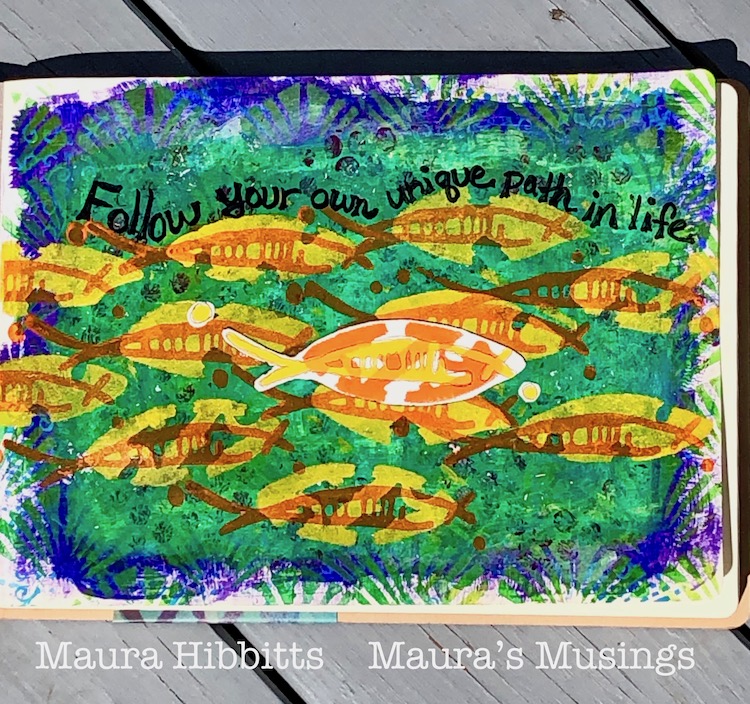
My Creative Squad got in on it too – in this art journal page Maura Hibbitts created an underwater scene using Neato and even an element from my Batik stencil to emphasize that sleek fishy body.
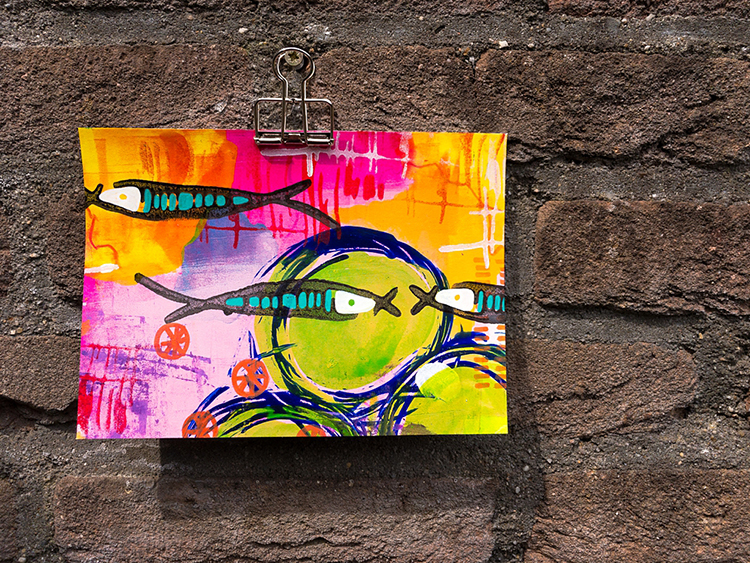
Marsha Valk created a series of cards and collage papers featuring Neato as a fish too, and she admitted it was hard to not add an eye to the stamped design haha.
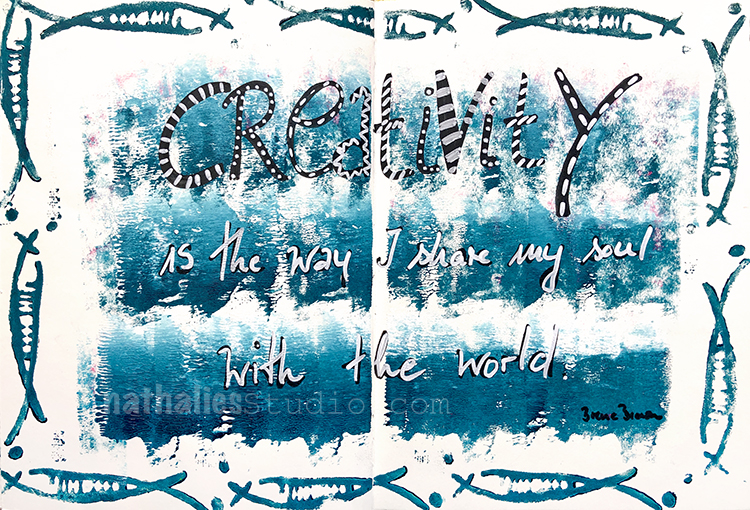
But ok, maybe Neato doesn’t have to be a fish if that’s not what you are looking for… in fact I really like using it as a border in an art journal spread!
Neato can be just another abstract design that you can use as a tool for mark making in your artwork. In the above I combined it with my Far Out and the back of my Space Oddity foam stamps to create a more complex pattern.
And finally here is my friend Kim from one of our playdates where we used Neato and other foam stamps to make shrink film earrings – pretty Neato accessories if I do say so myself.
So whether you see a fish or just a cool looking design, I will of course never get tired of seeing just how you use my Neato foam stamp! Tag me and share your projects with me, fishy or not :)
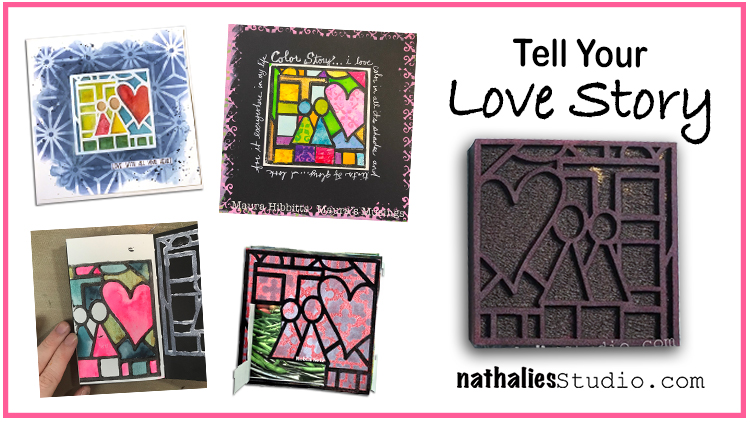
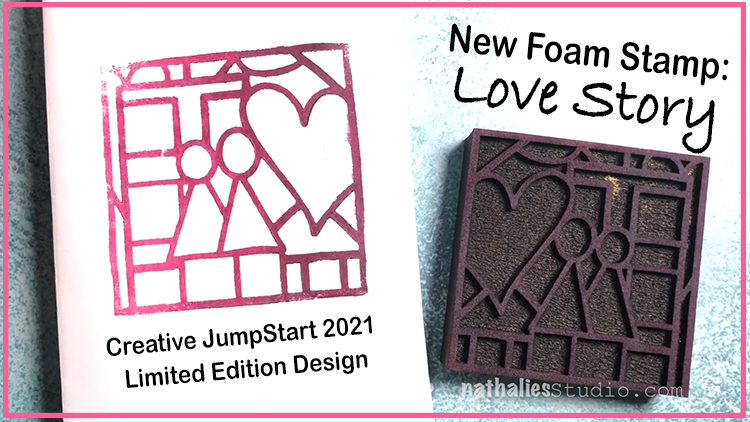
How about a little Love Story? Once upon a time an artist named Nat was introduced to ArtFoamies foam stamps and fell hard for this mixed media tool – she even became a designer of foam stamps and the rest is history!
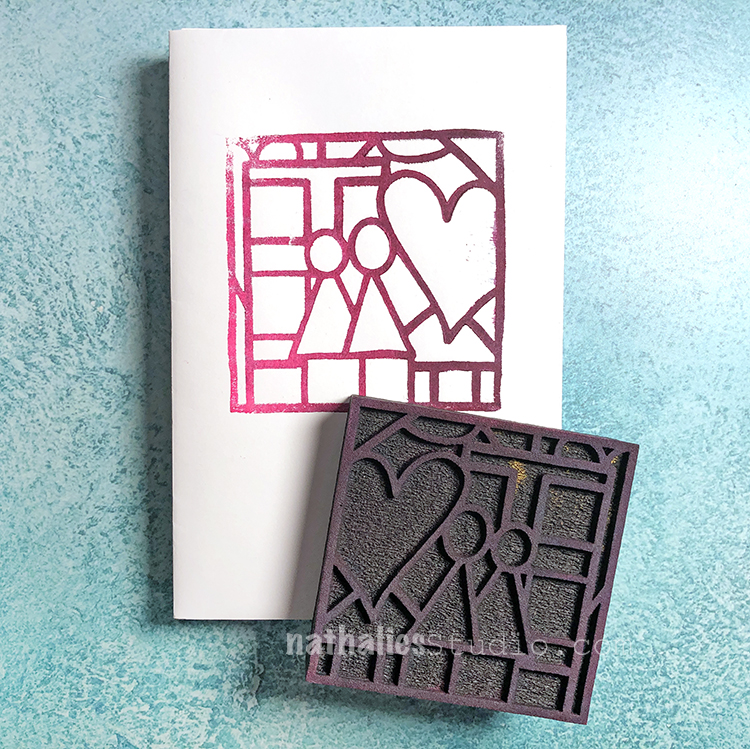
Haha ok that’s just the short version but today I’m here to talk about my special Love Story foam stamp that I made for Creative JumpStart this past year. It’s a limited edition foam stamp and it’s only available through the end of 2021 so time is running out if you haven’t gotten one yet. Let’s see some of the cool projects inspired by it this year:
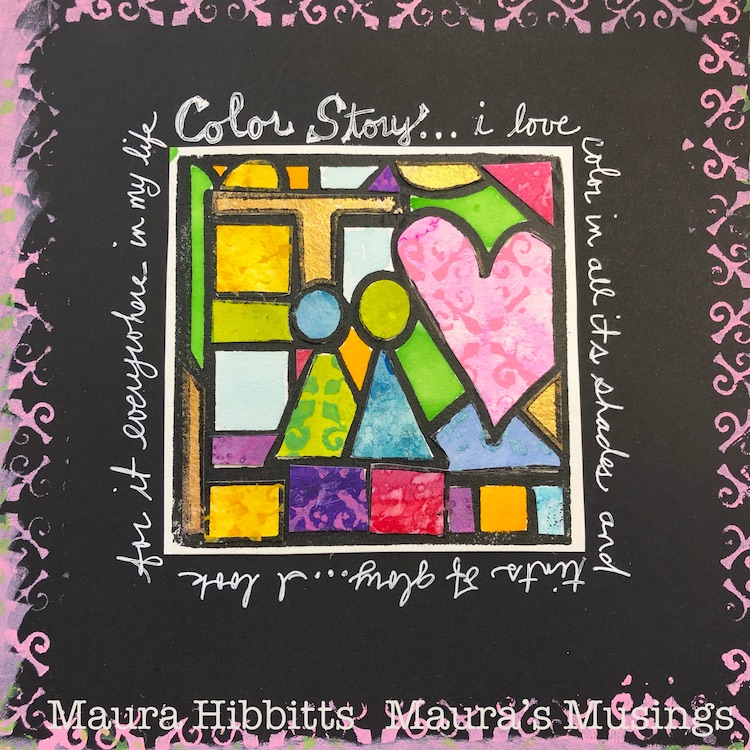
My Creative Squad got to play with this stamp in January this year and I love Maura’s Color Story project here where she used the Love Story foam stamp as if it were stained glass with paint and collage. Pretty cool way to make the design pop and to use up some collage papers too!
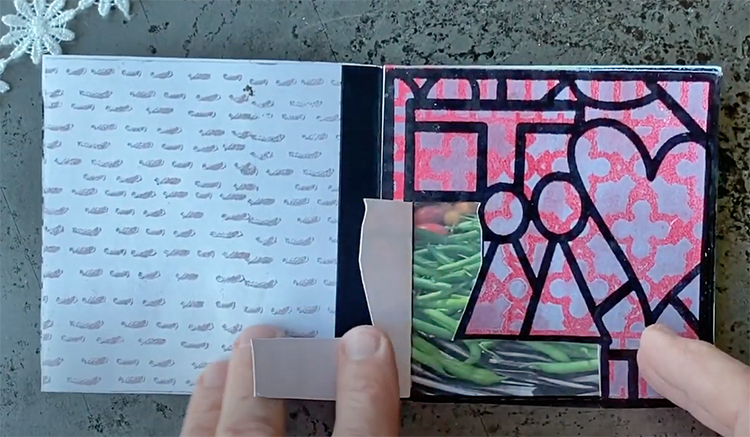
Robin used Love Story to create this mini book project about her love of gardening. She used elements of the stamp as little peek-a-boo doors into her garden and all the wonderful things she grows there.
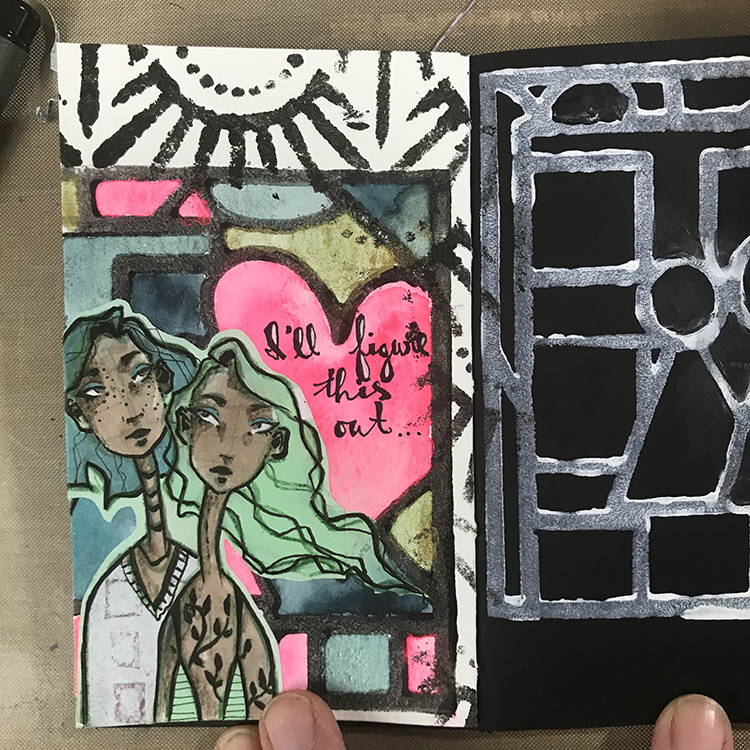
Jordan worked in her art journal and used Love Story as the backdrop and facing page design to help her tell the story of her journey as an artist. You can see how she builds this composition in the original post here.
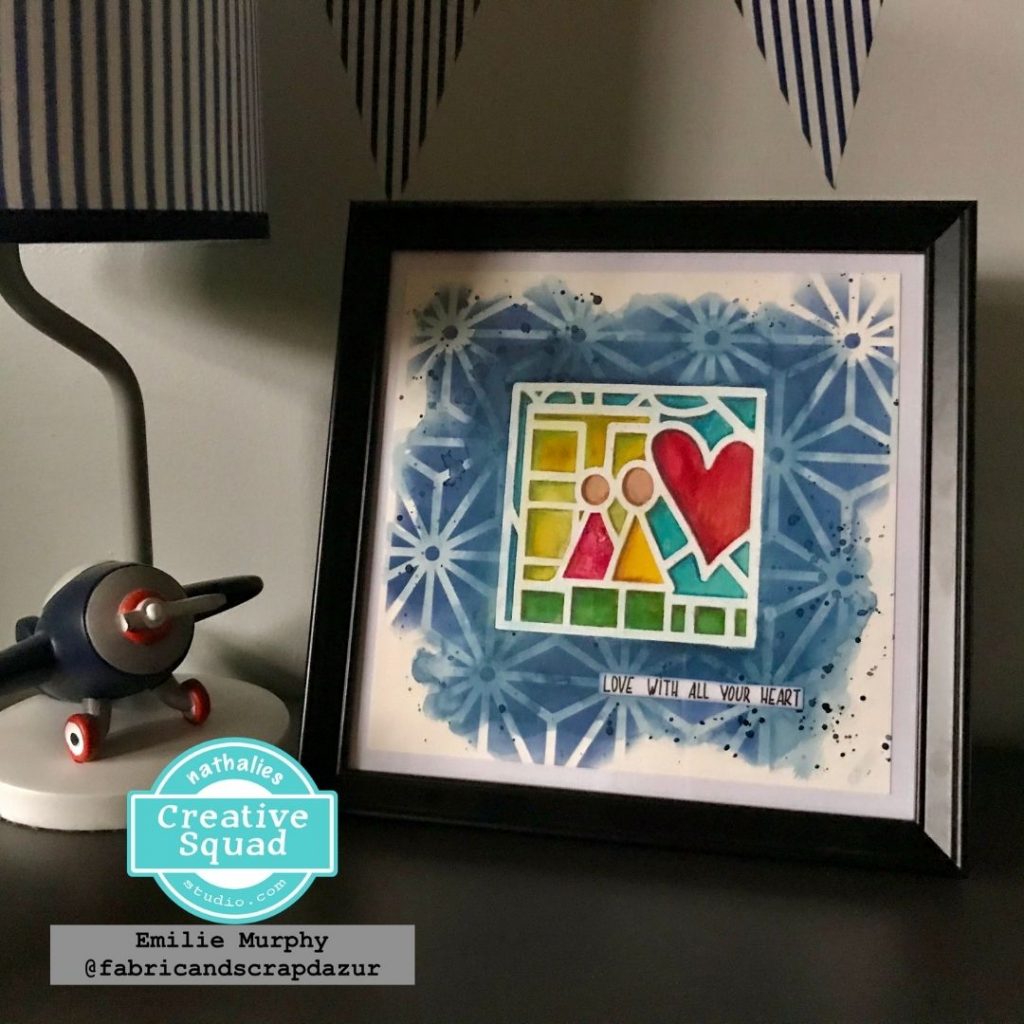
Emilie created a gorgeous piece of art for her son’s room with Love Story and we just love how she used white embossing powder and watercolor with the stamp. See how it comes together in this post.
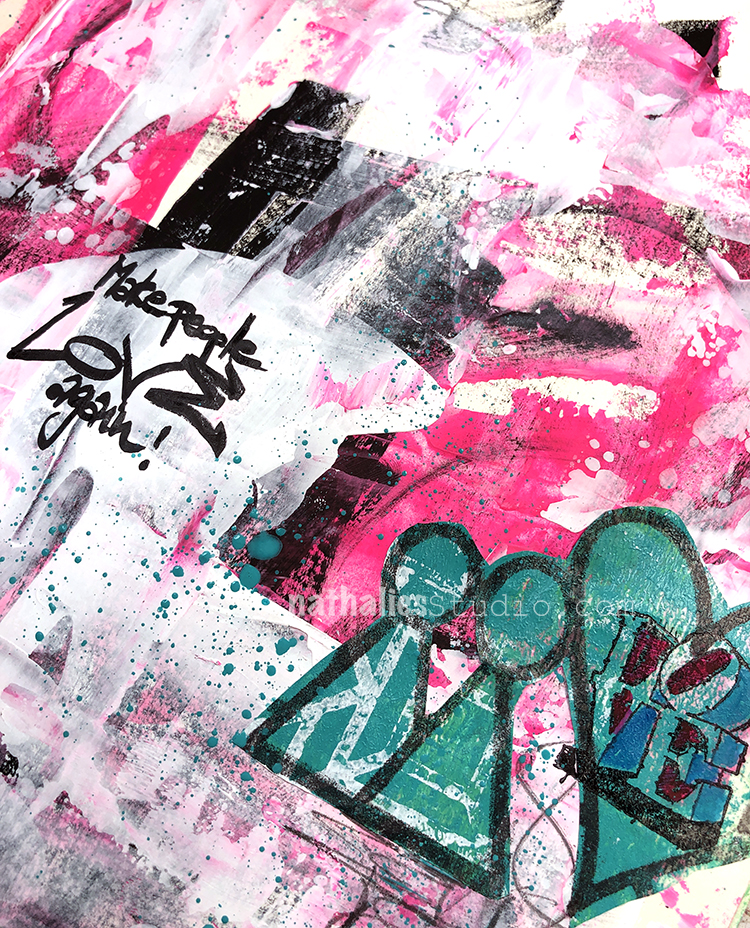
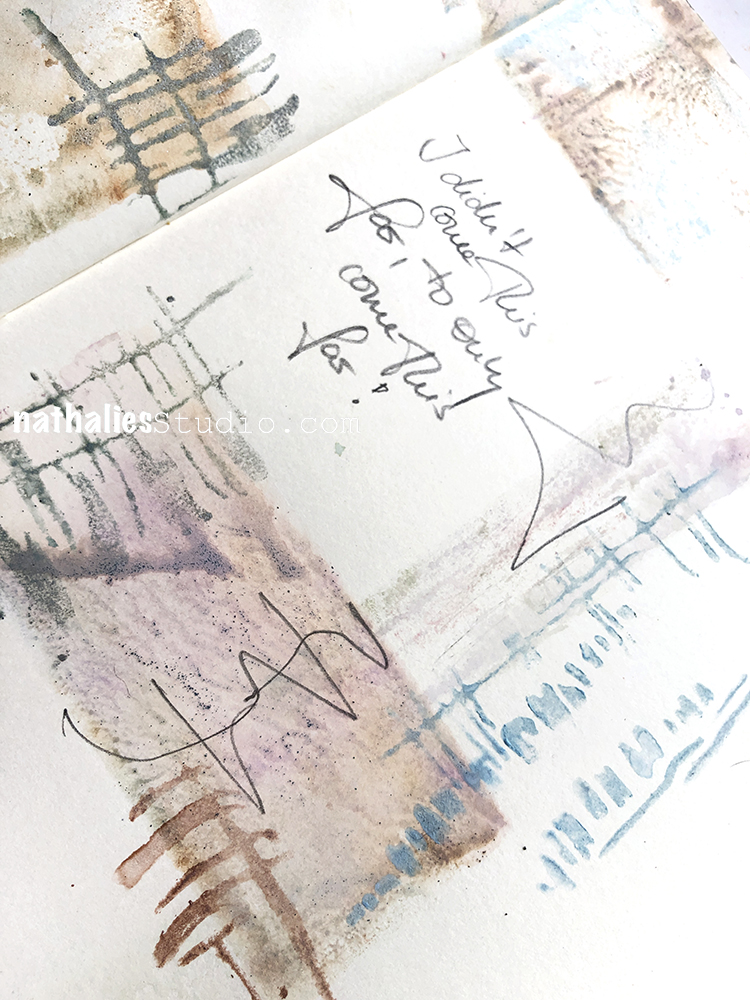
I like to take elements from the Love Story foam stamp and collage them into an art journal page as I have in this spread. Isn’t it crazy how just a few simple shapes can still tell a story?
And finally here is Love Story in a simple but bold arrangement with a couple of my Mini Motifs foam stamps too. Just black ink and water soluble crayons and ta-da – pretty nifty design for this art journal page.
Just a few of these stamps are left here in my shop so hurry in and start telling your Love Story too!
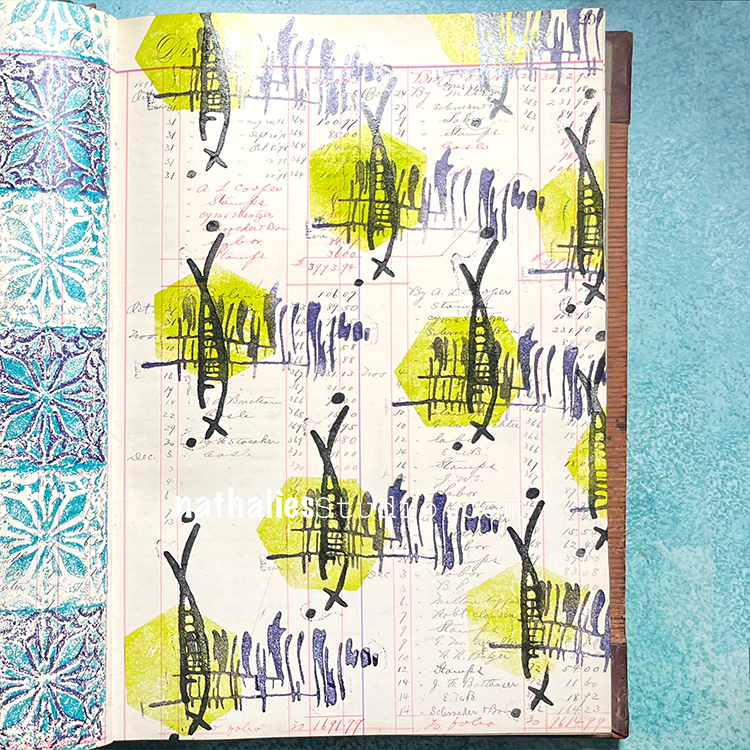
Happy Monday and welcome to another pattern in my big vintage ledger! Today I’m using one of my newest foam stamps – Hydrant! I kept it simple and stamped the front and back – sometimes the back of the stamp is an interesting shape on its own.
Here is a look at the finished pattern and the Hydrant stamp that I used:
Today we have a very special Guest Post from one of our Creative JumpStart 2021 teachers: Riikka Kovasin! She is bringing us 3 different shrink film earring ideas using my Grove Street and Fairview Fan foam stamp sets. Before we get into it though, let’s hear a bit about Riikka:
“Heippa! My name is Riikka Kovasin and I am a mixed media crafter from Finland. I live in Helsinki with my darling husband and our two sweet daughters. Creating is my passion and a way of self-care. Besides family and crafts, my weeks are filled with a full-time job.
I have been doing all sorts of crafts my whole life. I really got into papercrafts after I found scrapbooking when my older daughter was about 6 months old – that’s over 10 years ago. Since then my style has evolved to more and more mixed media direction and nowadays, I tend to go dimensional and do more altered and mixed media pieces than regular layouts.
I absolutely adore getting my hands into paints and mediums! To me the process of creating is equally as important as the finished project.”
We are so excited to share some projects with you from Riikka, and this is the first of a few that will be coming in the next few weeks so check back for more :)
Hi there! It’s Riikka Kovasin here today to share a guest project with you. I actually made a couple projects, so you’ll be seeing me a few times in the course of next weeks.
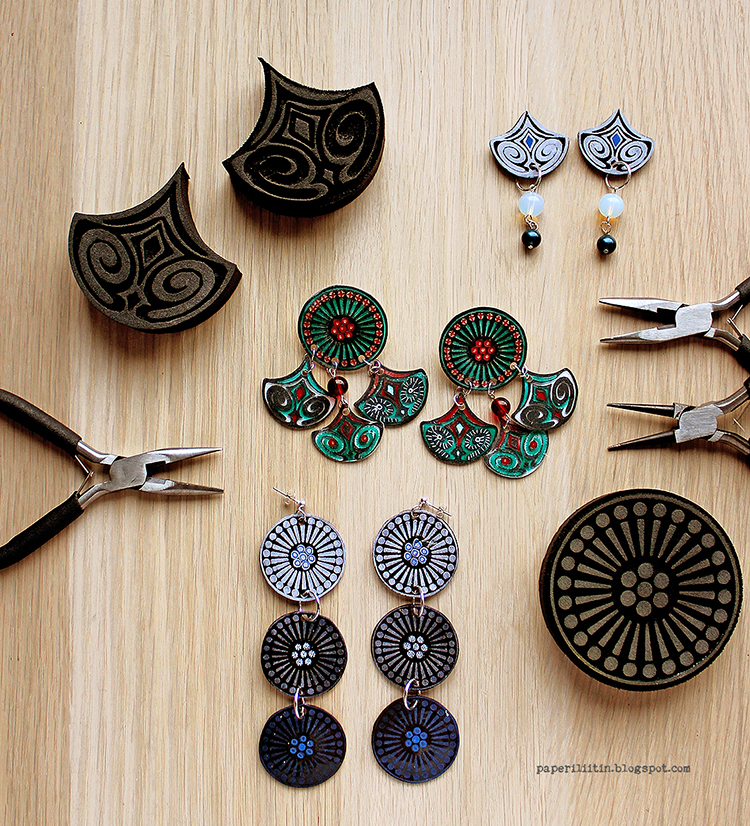
As my first go I made some jewelry pieces. I really love the patterns of the foam stamps and love how satisfying it is to stamp with them, but on their own they are maybe a touch too big to be used as jewelry. As a pendant, maybe, but as I’m more into earrings the images seemed a bit too big. But no worries, I can always use shrink plastic! That way I’m getting the pattern and the feel of the foam stamp, but the finished piece is half the size! So satisfying!
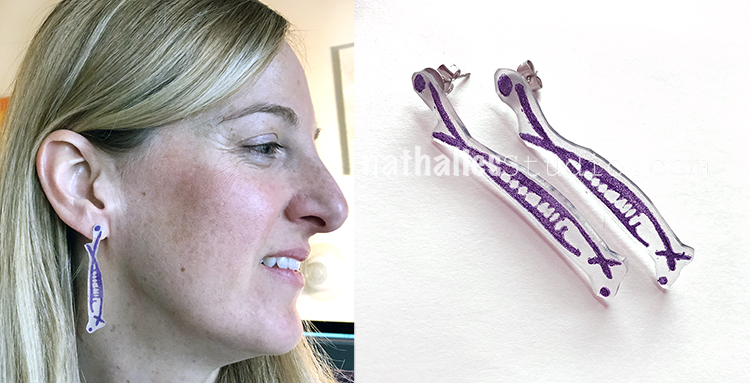
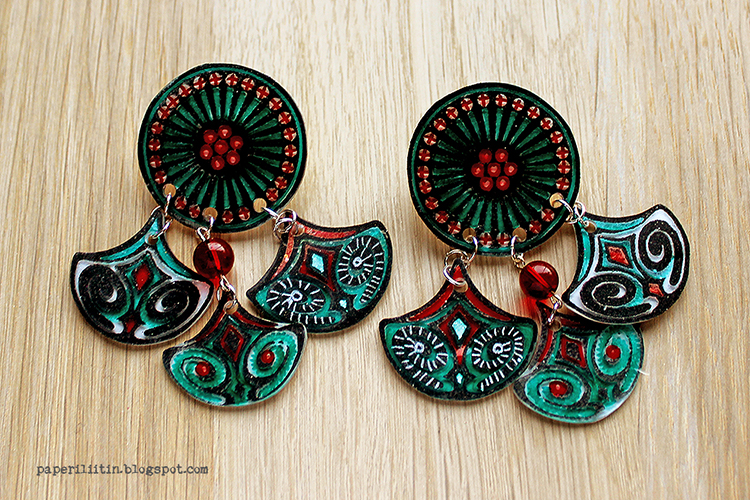
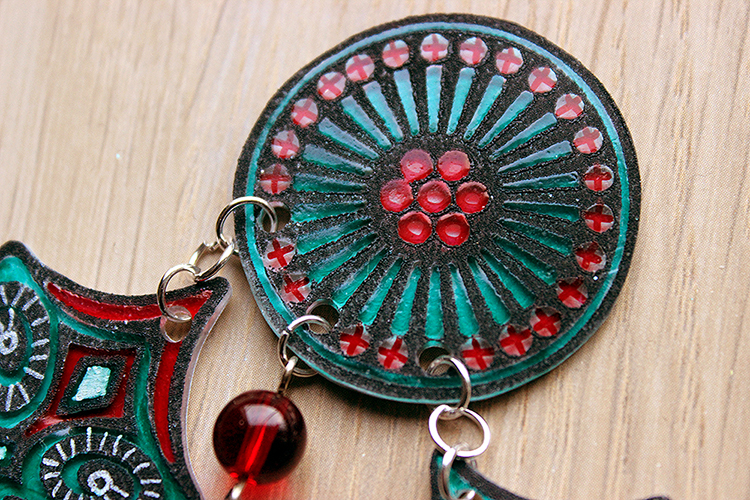
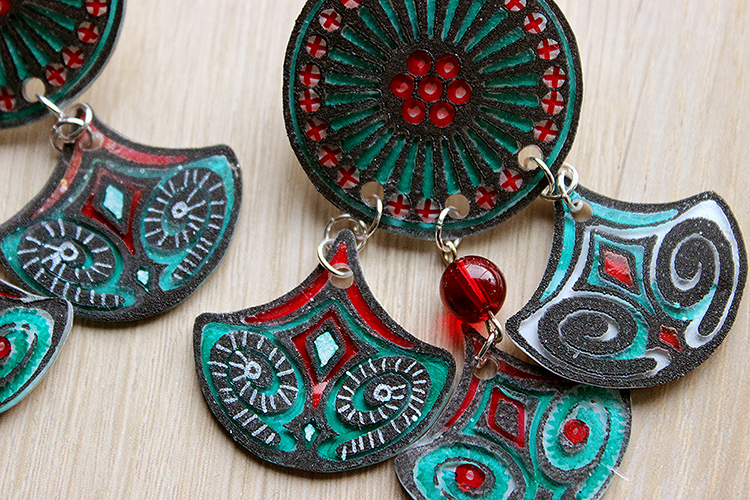
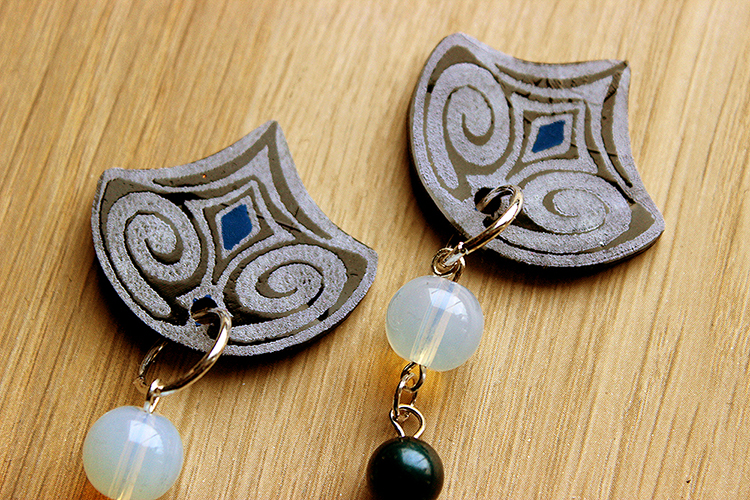
For these three pairs of earrings, I used both white and black shrink plastic. I used acrylic paint to stamp the images and then colored them using alcohol and paint markers. The first pair is made using both the Grove Street and Fairview Fan foam stamp set. The circular piece has an earring stud at the back.
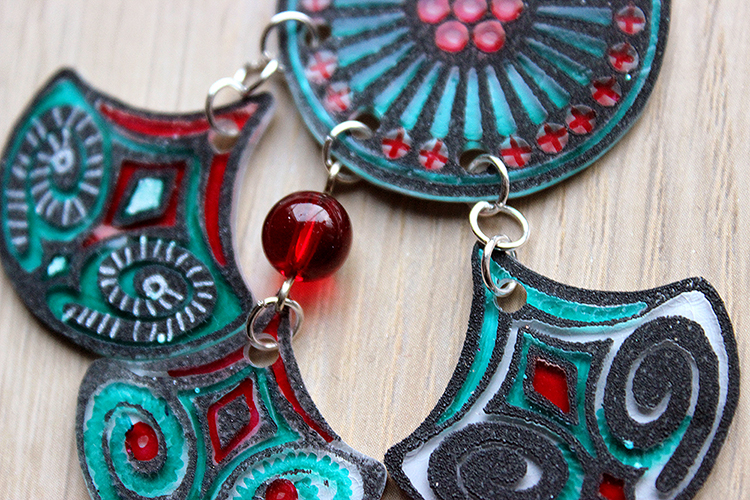
The dangly parts are made using both positive and negative version of the fan stamp set. To make the center fan a little bit longer than the other two I added a red glass bead between the circle and the fan.
The second pair has even more glass beads as there’s just the fans that are stamped. Again, there’s a stud piece at the back.
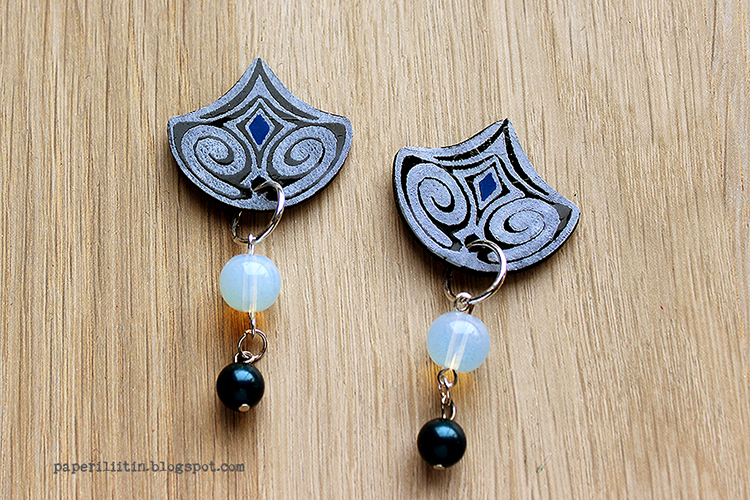
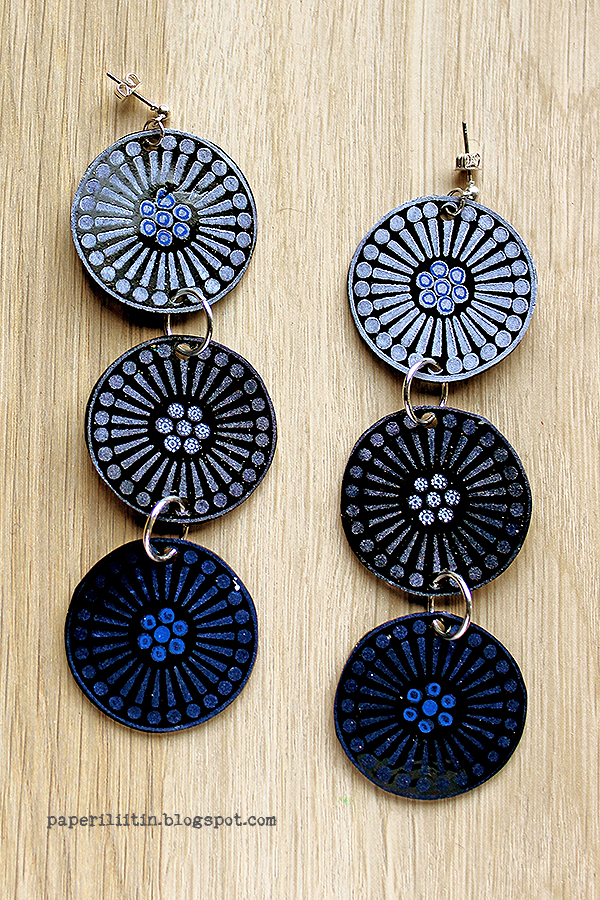
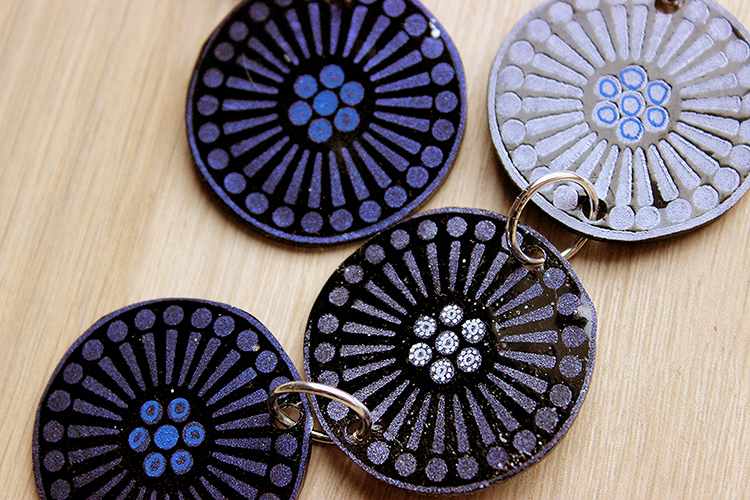
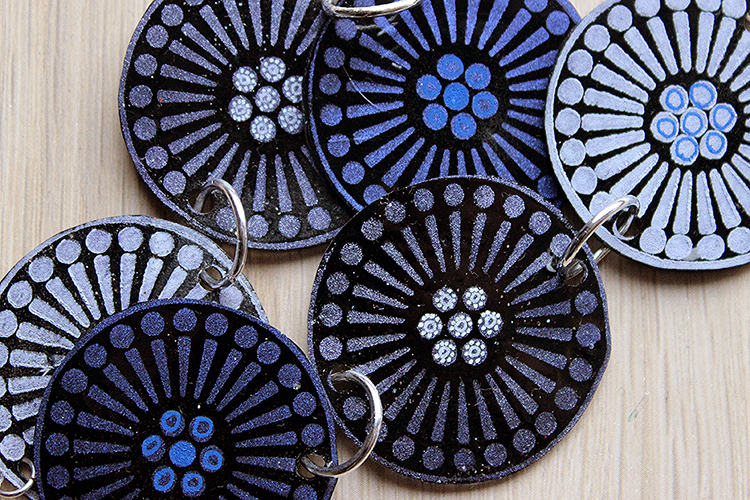
The last, but not least, is maybe my favorite. I made that using the Grove Street stamp, just alternated the color I was using on top of black shrink plastic. The first one is done with inky blue metallic acrylic paint, the second one pale blue metallic acrylic and the one nearest to the ear is then white acrylic paint.
These dangle all the way as I added a stud earring with a little ring on top.
I’m not a jewelry maker but these were so easy to do even I managed them! Now the only trouble is to decide which pair to use!
Stay safe everyone! Xoxo Riikka
Thank you Riikka! Wow who is excited to try foam stamps with shrink film now? I love all three of these possibilities and I love how they could work for a variety of different fashion styles.
Want to give it a try? You can find all my Foam Stamps here in my Online Shop and here are some of the other supplies Riikka used:
Great lesson. Thanks so much… Who even knew there was black shrink plastic?!!!! I really love the effect you get with that! I’m going to add it to the very long list of things I must try.
Thank you Robin! In my craft store they had this selection of four different kinds of shrink plastic sheets in a pack – black, white, glossy transparent and mat transparent :) That was perfect as I didn’t have to choose which color to pick :D
Awesome post. You read mind. I’ve been wanting to make earrings with shrink plastic for the past few weeks but was struggling with drawing a decent image and coloring so that it wasn’t smudged or looked good. Your stamps and the type of paint solved my roadblocks! Beautiful, beautiful earrings that I think I can actually make. One question, did you sand the plastic first?
Hi Kath! I didn’t sand the plastic first so the earrings are bound to get some wear and tear. Sanding helps the paint to grab the surface better. Or then just add more paint when it seems to wear off :D
Thanks for that input. I just seem to smudge the colors. However, I noticed when I sanded, you could see the marks, which I do not like. I can’t remember what people use to glaze the plastics.
I’ll have to check it out. I just love how the paint you used worked with the stamp and it didn’t look like it smudged at all.
The stamps you used are sold out. I’m gonna wait for restock. That’s how much I liked your earrings!
I’m so happy to hear that you liked these so much Kath!.
As you are stamping on top of a sleek surface with a slippery paint, it may slip and smudge. If you look closely to the other of the white stamped circles (with gesso), it’s a bit thicker than the other. A slight slip or turn caused that.
My tips would be to use a heavy body style paint, more gel-like, use just a little of it, and to use light pressure when you lay down the stamp. Another way is to actually put the stamp to the table, pattern side up with the paint added and carefully place the shrink plastic on top.
Hopefully this helps when the stamps have been restocked and you get to make your jewelry pieces!
Love this idea! Rikka…you are always so clever and original, combined with a dose of practical. Thank you both for this “bonus”! It was a nice surprise.
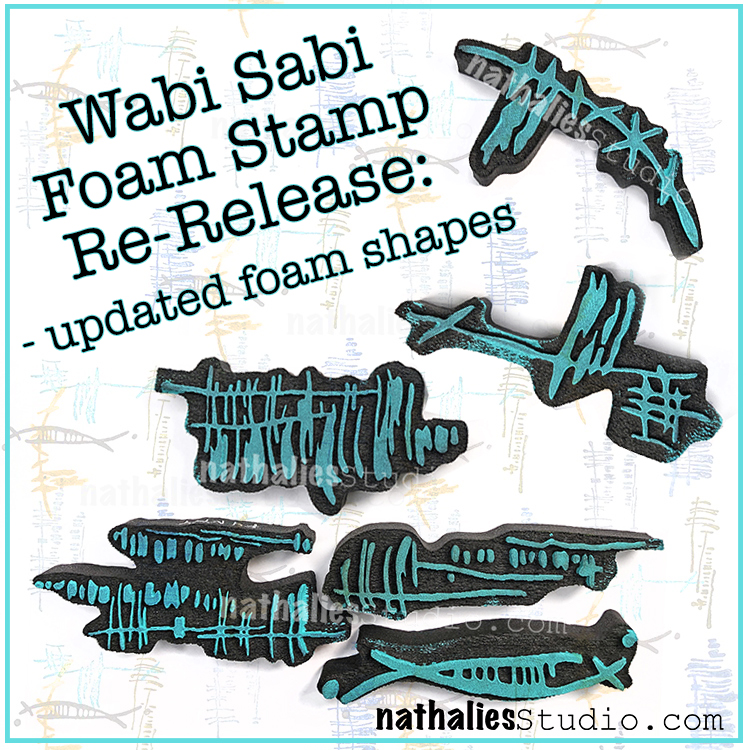
We’ve updated our Wabi Sabi foam stamps and wanted to share the news with you :) You may recall that before the foam surround was just rectangular – well now it’s cut to mirror the design. I find them easier to identify when I’m going through my stamp stash and also – the backsides are now funky abstract shapes that are worthy of stamping too!
Here are some of the stamps in action:
I love to use them for mark making and to add some random line elements to give a background extra interest.
They look great as bold marks too if that is your style…
…or as something more subtle. However you roll today!
Check out all my foam stamps in my online shop – lots have been restocked.
Exciting news! I’ve designed a Limited Edition Foam Stamp for Creative JumpStart 2021 Storyteller edition called Love Story. It represents my love for art and my love for all of you: my artsy community!
This stamp will only be available for purchase through December 2021 so grab yours HERE, and if you haven’t signed up for CJS21 yet, do that HERE so you can access a quick tutorial up in the CJS21 classroom. It shows you three new techniques to use this stamp.
In the tutorial, I show you how to create the world’s easiest accordion fold book (using just some extra envelopes I had laying around) and three stamping techniques to help you use your imagination and tell YOUR Love Story.
Love Story is only available for a limited run so hurry into the shop.
And if you haven’t signed up for Creative JumpStart 2021 yet, there is still time to do that too – check it out here, and get access to the Love Story tutorial.


Rikka,
It’s so awesome that you saw the word love in a totally different way! It’s a beautiful page, I love the colors too.
Robin
Reply