Creative Squad

Your Biggest Fan – Maura Hibbitts

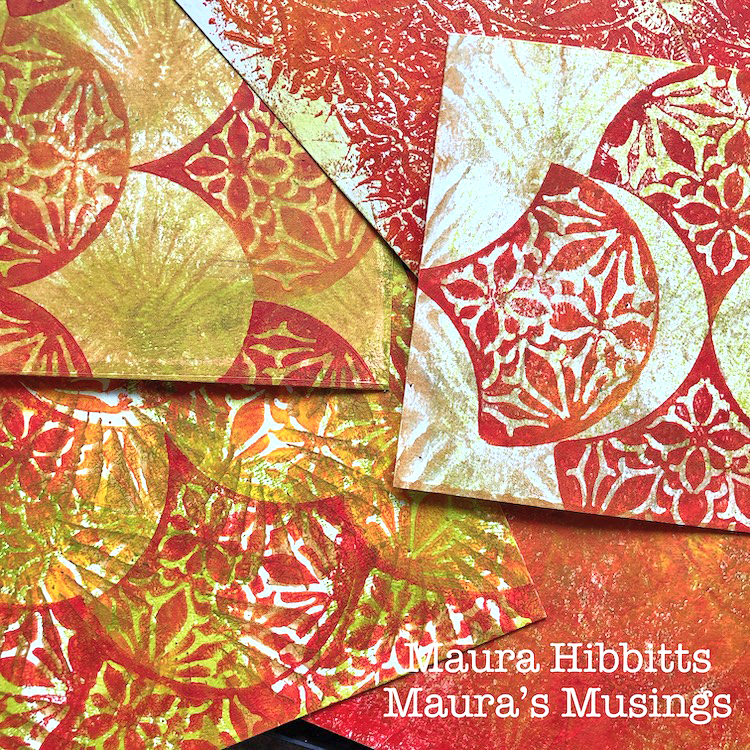
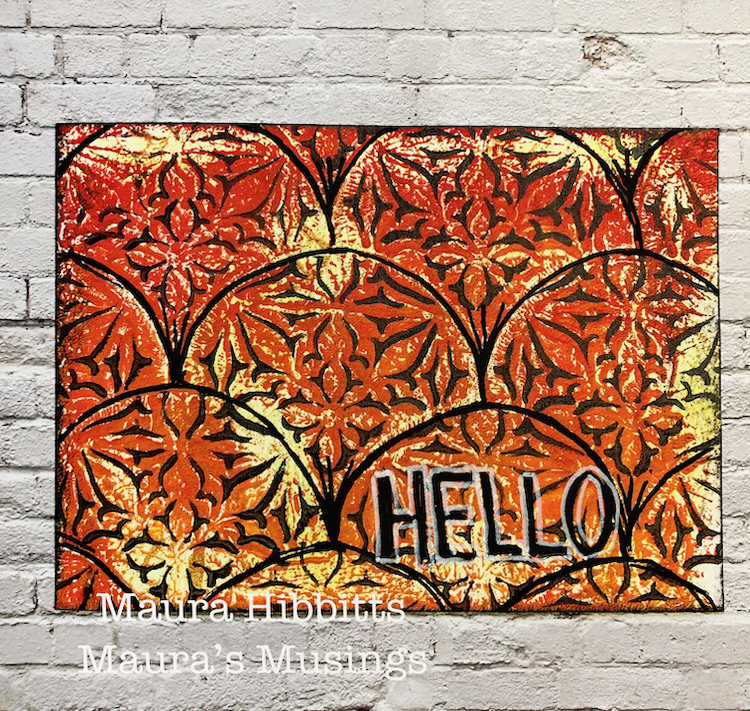
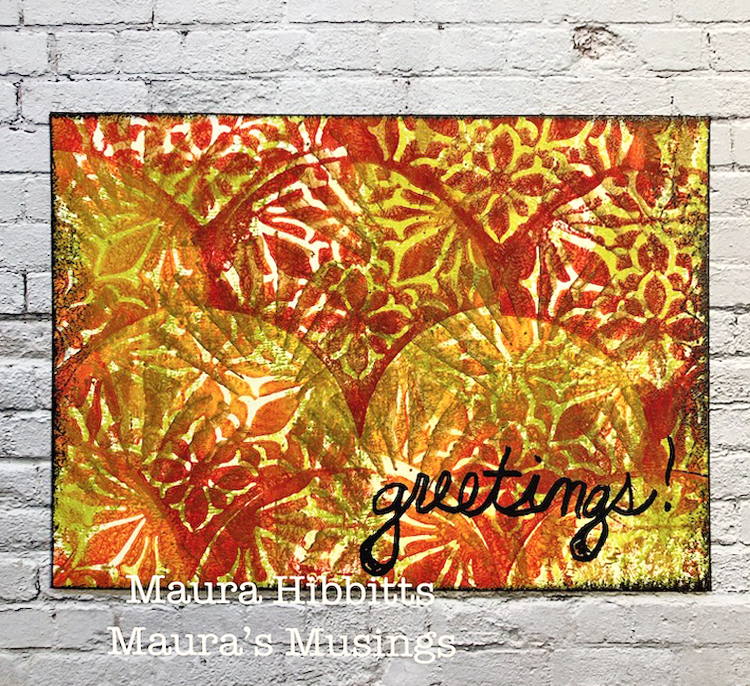
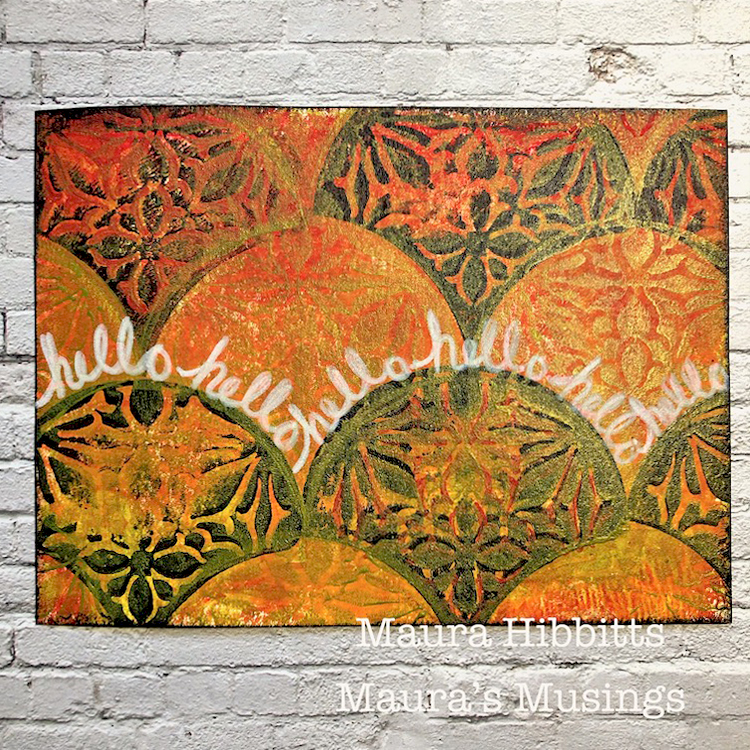
Hello from my Creative Squad! Today we have a series of cards from Maura Hibbitts that will inspire you to send a greeting to everyone in your life :) Maura is using my Van Vorst Fan Positive Negative foam stamps, my Art Deco Wallpaper stencil, and this month’s theme: Your Biggest Fan – Let’s give a shout out to someone who is doing an amazing job. In a world obsessed with Me Me Me it’s important to take a look around sometimes and give some encouraging words to another, and not just in your art and craft making :) Be their Biggest Fan!  
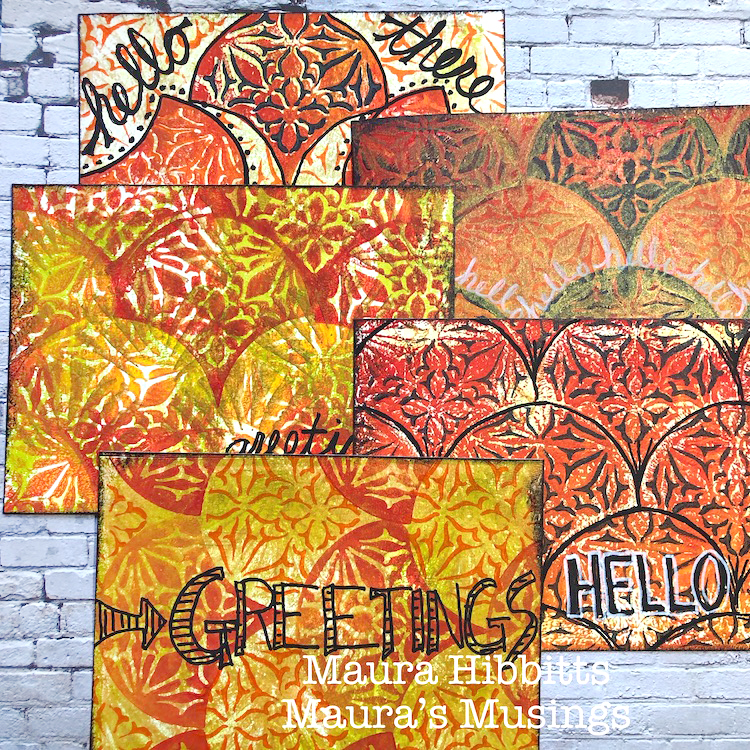

How do you choose the most awesome person in your life, or who has inspired you the most? I would have to include my family, friends, artists, musicians, authors and many more. Some days it might be the barista handing me my much needed coffee, or the mechanic fixing my car so I can get back on the road. Many days it is not even a person, but the natural world…Mother Earth. So I decided instead of focusing on just one person, that I would create some postcards that I can send to a few people and let them know how much they mean to me. The trees are dressing themselves in beautiful autumn colors where I live, and that inspired me to choose my color palette for this project. Happy Fall everyone!

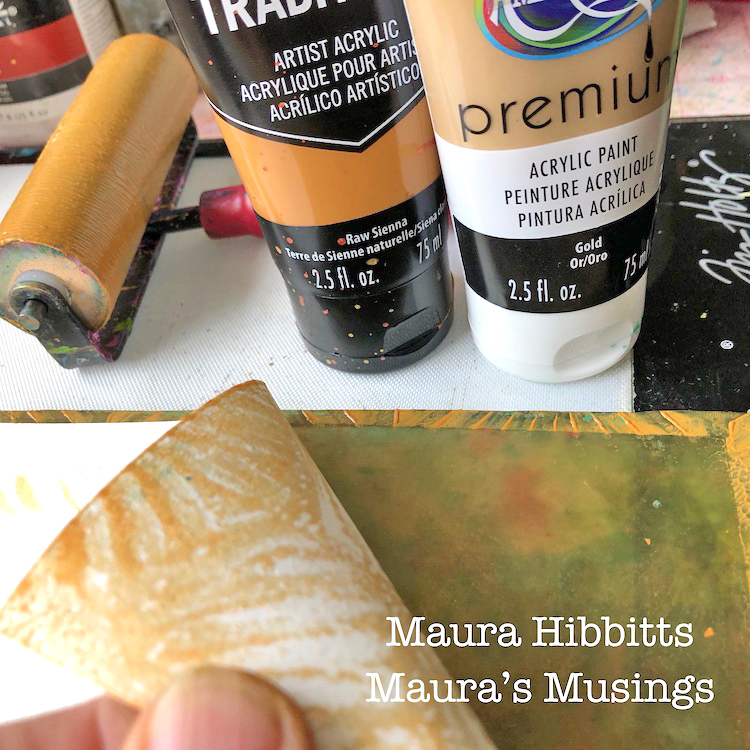
I cut large sheets of watercolor paper into 4.5 x 6 inch rectangles for my post cards. I began by blending Raw Sienna and Gold acrylic paints on my gel plate with the brayer, and laid the Art Deco Wallpaper stencil on top. First pull was a paper over the stencil, then, lifting the stencil and pressing it down on a second sheet. I finished up with several pulls on the gel plate. Check out the wide variety of designs you can get by switching it up just a bit.
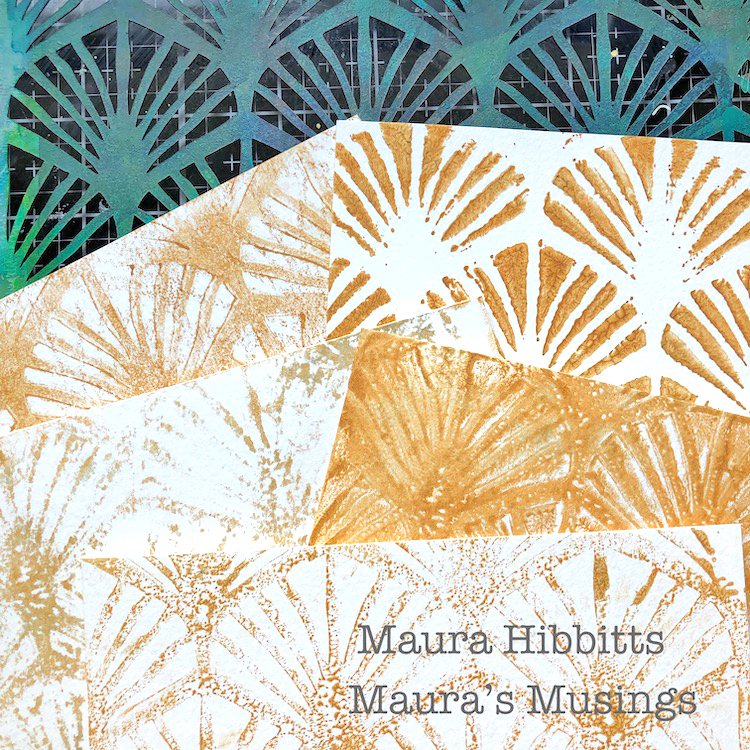
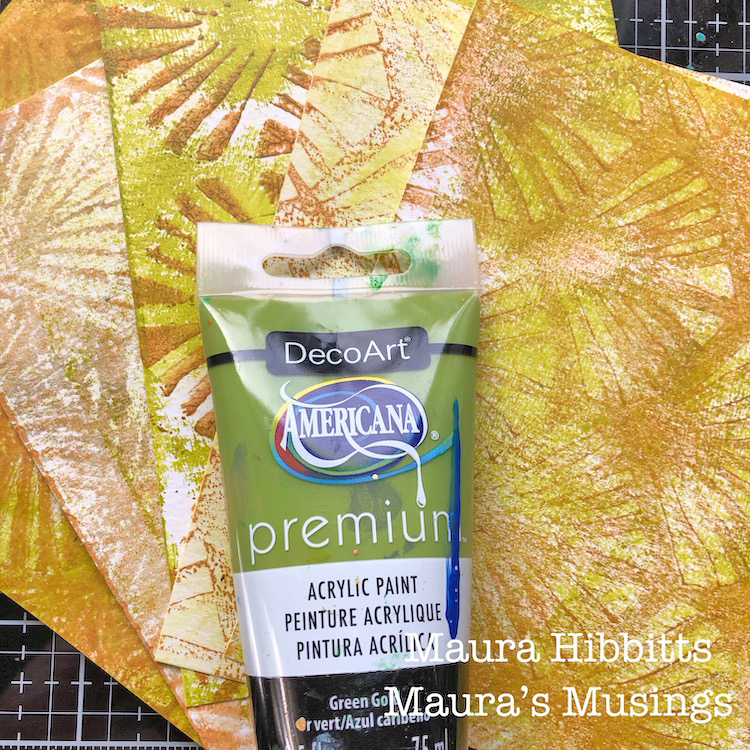
When you look closely at the trees, you can still see the green under a lot of the bright colors, so I wanted to add a bit in. I put a light layer of Green Gold on the gel plate and lightly pressed my papers over it. I also used a baby wipe with the extra paint and blended it in here and there.
Now comes the fun! I put a layer of Napthol Red at the bottom of the gel plate, and a strip of Hansa Yellow at the top, then blended them with the brayer. I stamped into this with the Van Vorst Fan Positive Art Foamie and began stamping my postcards in a variety of patterns. TIP – whenever you stamp with paint, clean the stamp off right away. I use baby wipes, a mister if I need it, and sometimes an old toothbrush if it is not all coming off.
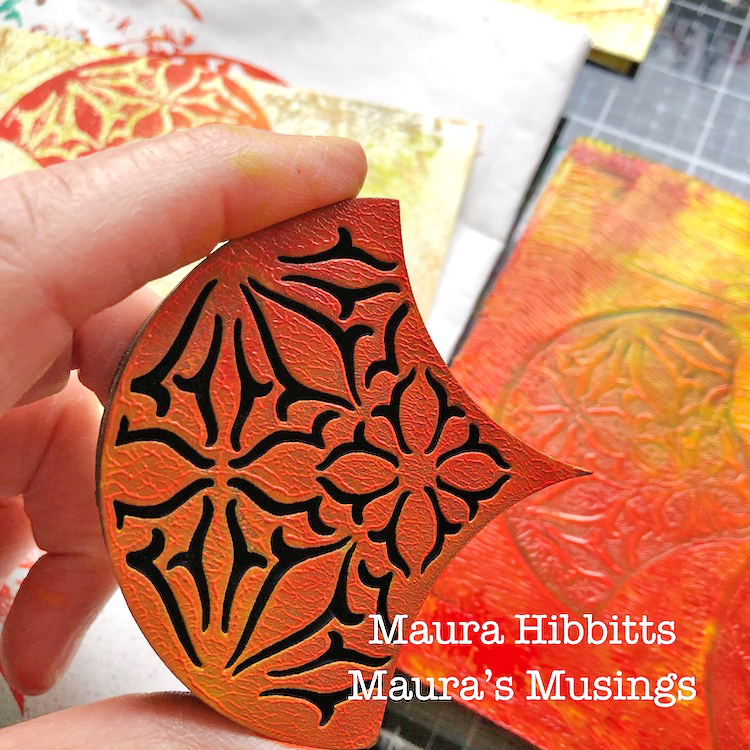
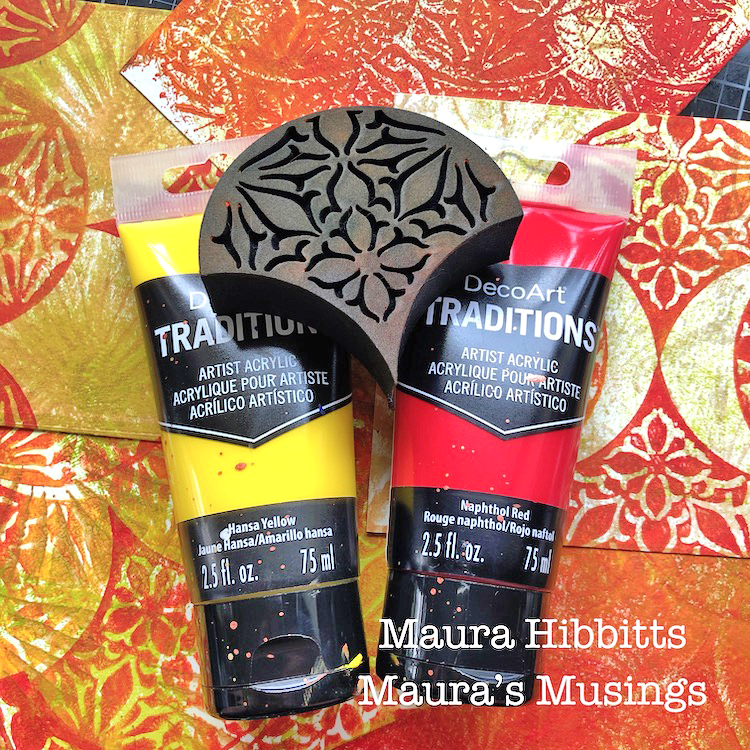
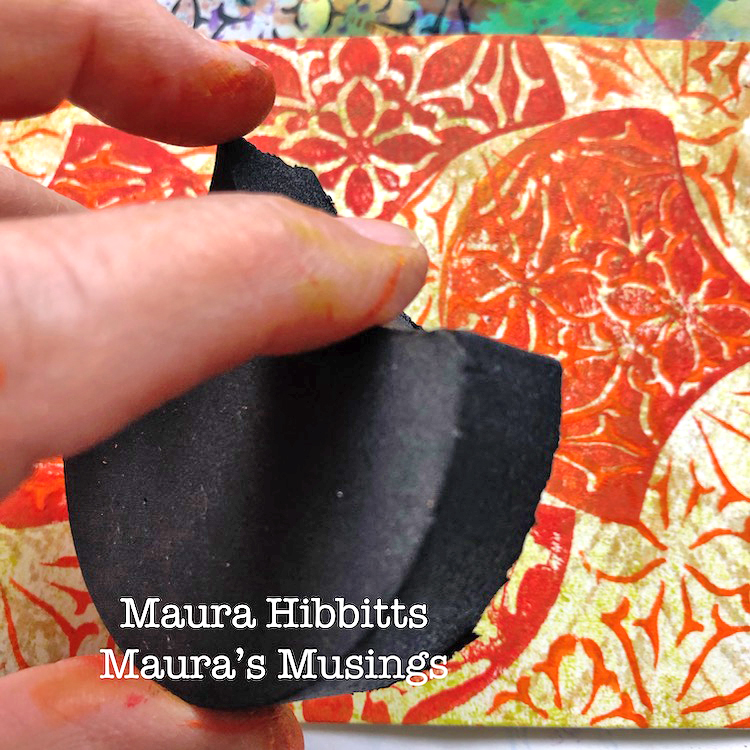
Next up, stamping with the Van Vorst Negative Art Foamie. On some cards, I used Cadmium Orange Hue, on others Payne’s Grey, some I mixed in a bit of Gold, and others I left alone. I wanted a variety. I messed up on one card, so even went back in and stamped the positive with the grey and green gold to “fix” it.
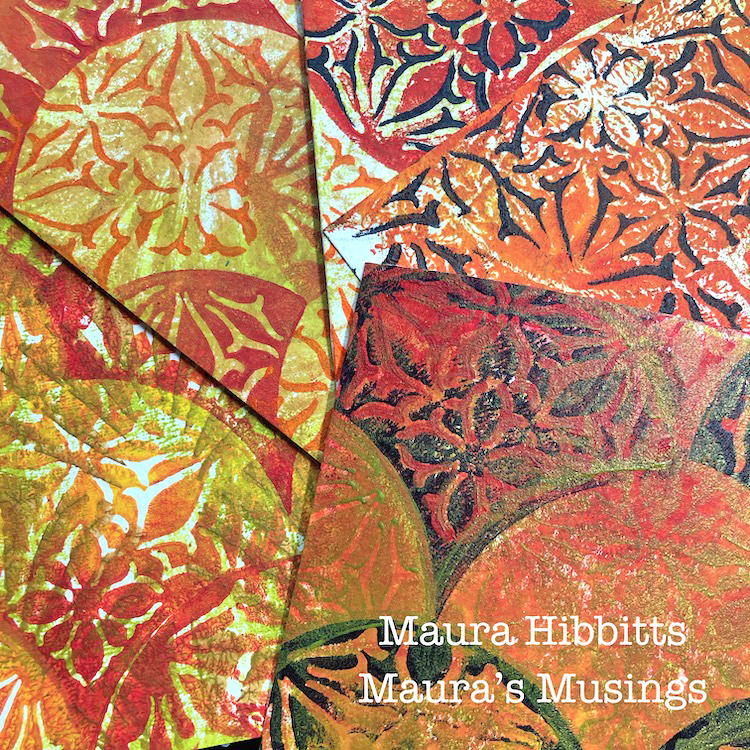
I added detail and words with black and white Posca paint pens, and edged the cards with black archival ink.  I wanted to be sure to use all waterproof materials since these will be going through the post.

Just look at what you can do with two stamps, a stencil and a few paints! I would have a completely different set of postcards if I switched out my materials. Hmmm, I may just have to make a set with my favorite color palette – green, blue and purple. Why not give it a try yourself and make a set of cards or postcards to send to someone you admire?
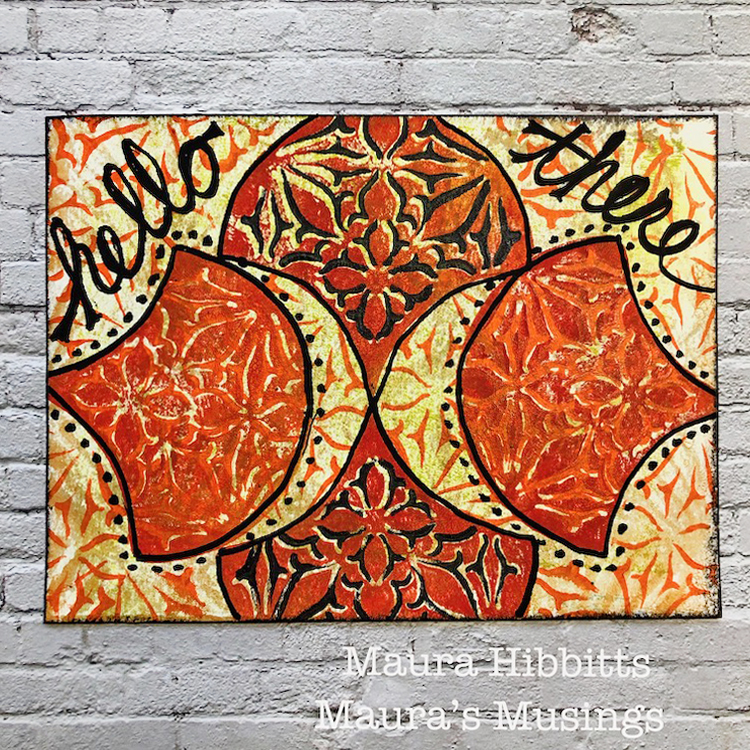
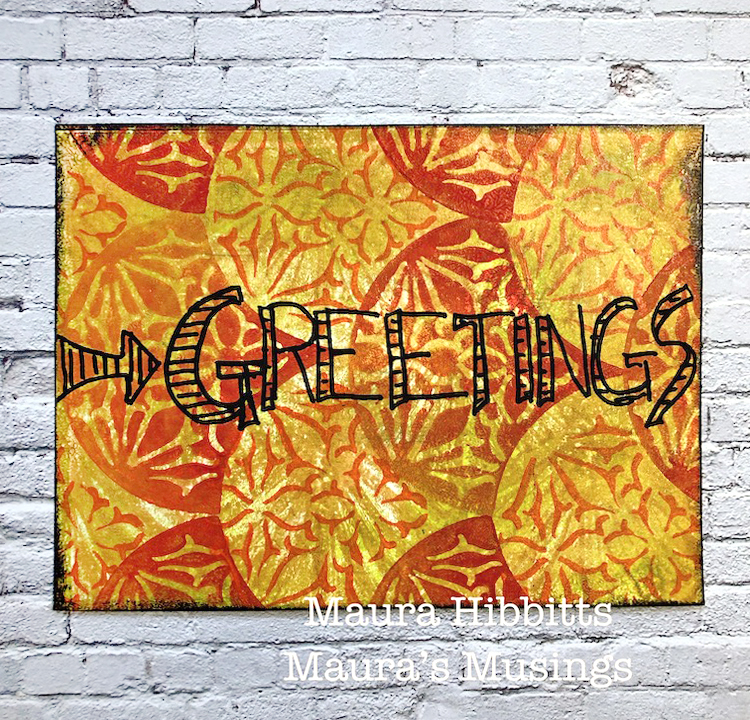
My set of postcards in autumn colors and fun designs are ready for me to tell a few people how much I admire them…after all, I am their biggest fan! (and isn’t the fan shape a perfect tie in to this theme?) I hope you have fun thinking of who you admire, and creating a little something special to let them know! – Maura


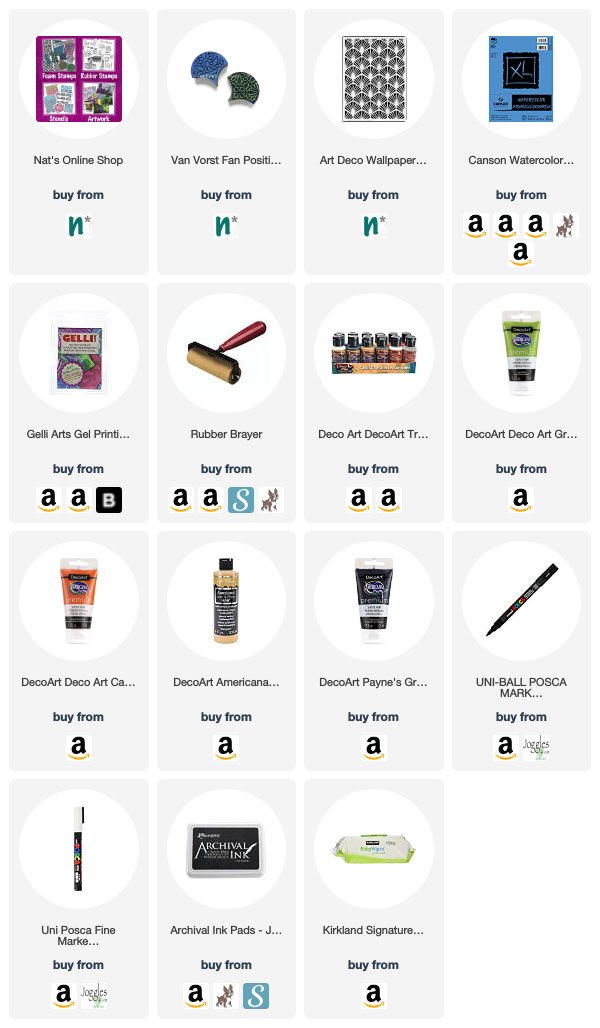
Thank you Maura! We absolutely love these autumn colors and your message :) Want to give Maura’s project a try? You can find all my Foam Stamps and Stencils in my Online Shop and here are some of the other supplies Maura used:
Feel inspired? Working on something yourself that you’d like to share?  I love to see how you interpret our monthly themes. Email me or tag me #natkalbach how you used my stencils and stamps – I would love to share your projects in my next  “n*Spiration From Around the Globe“.

Comments (1)

  • Linda Wyatt

    |

    These are gorgeous! Such beautiful textures and great use of the fan art foamie❤️

    Reply

Leave a comment

Your Biggest Fan – Jennifer Gallagher

Hello there and welcome to a post from my Creative Squad. Today we have Jennifer Gallagher kicking off our projects using my Jewett Fan Positive Negative Foam Stamp set with her heartfelt take on this month’s theme: Your Biggest Fan – Let’s give a shout out to someone who is doing an amazing job. In a world obsessed with Me Me Me it’s important to take a look around sometimes and give some encouraging words to another, and not just in your art and craft making :) Be their Biggest Fan!  


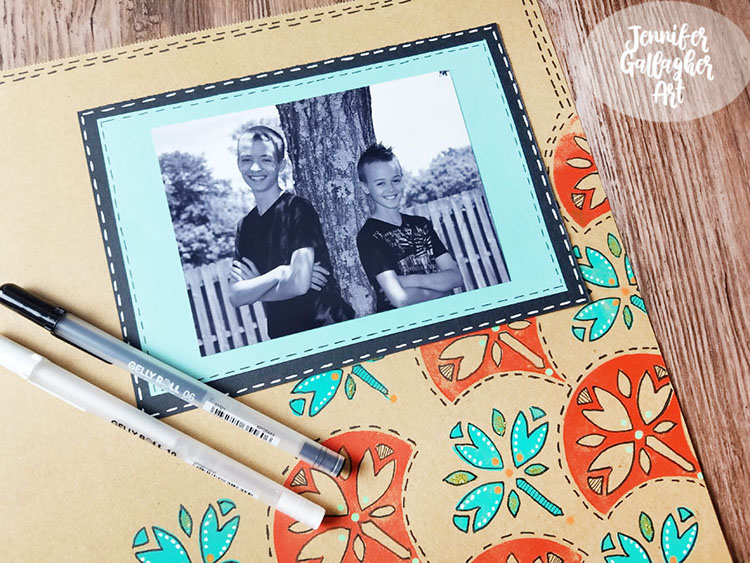
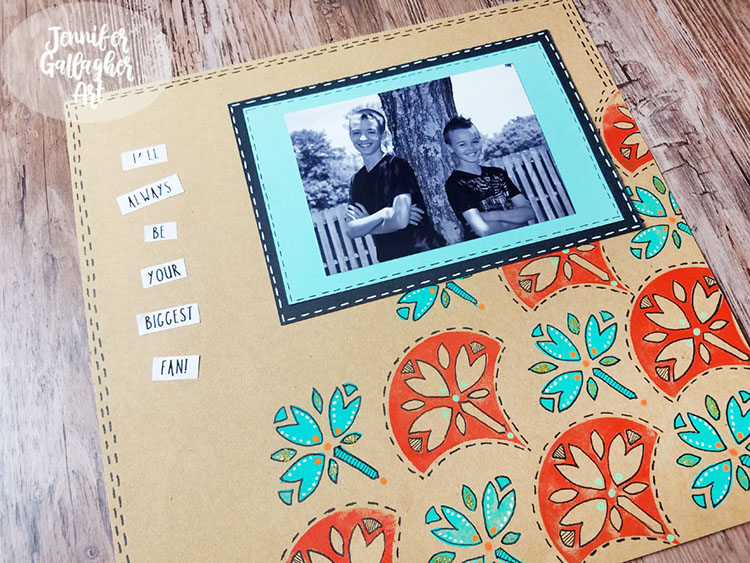
I am so excited to be kicking off the theme for this month’s Creative Squad posts. This month we are giving a shout out to those people in our lives that we want to encourage. We are letting them know we are their biggest fans. I am a Mom to two boys and I am definitely their biggest fan. With them in mind, I’ve prepared a page for my family scrapbook using some of my favorite new n*Studio foam stamps, Nat’s Jewett positive and negative fan foam stamp set.. Let’s get started.

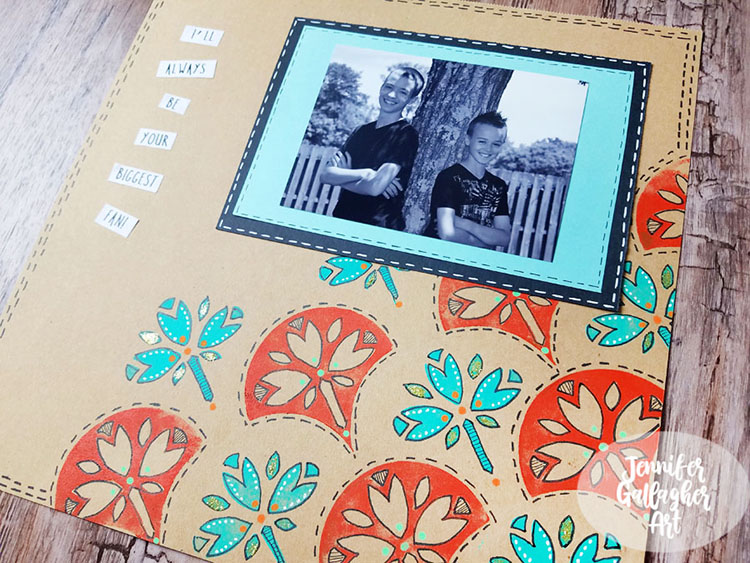
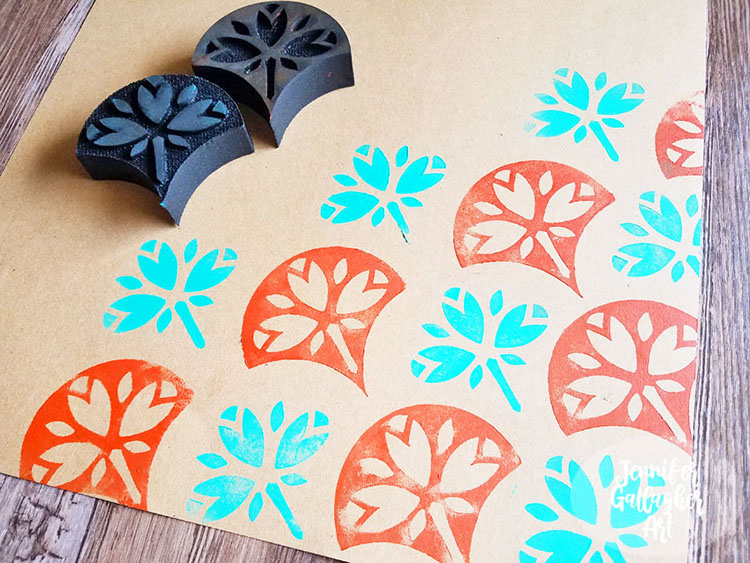
I began with a twelve inch square piece of kraft cardstock. I chose two colors of paint. I went with a complementary color selection – a shade of turquoise blue and an orange. I designated one color for the positive Jewett fan foam stamp and one for the negative fan Jewett foam stamp. I loaded paint onto the stamp (this can be done with either a stamp buddy or brayering onto a gel plate) and pressed it firmly into the bottom right corner to begin my pattern. Alternate your foam stamps to create the pattern. I only went about half-way across the page, but you could fill the entire page if you wish.

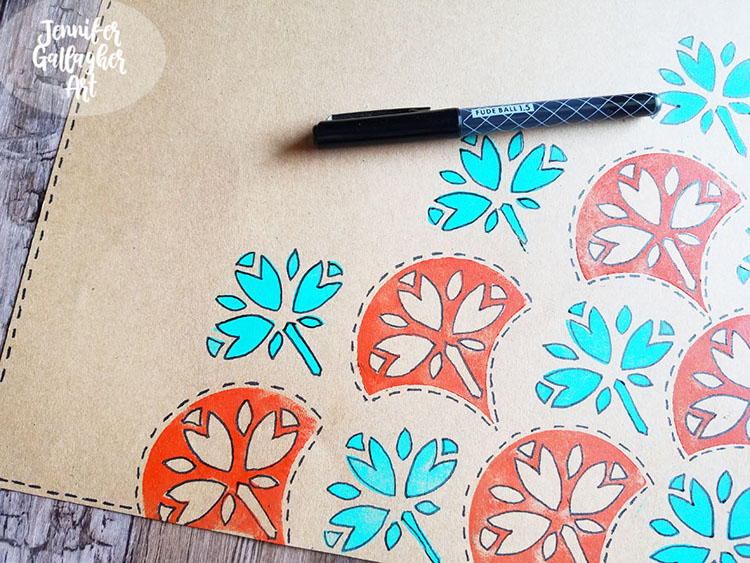
Next, I used a black fude ball pen to go around a lot of the design and add a dashed line around the outside edge.

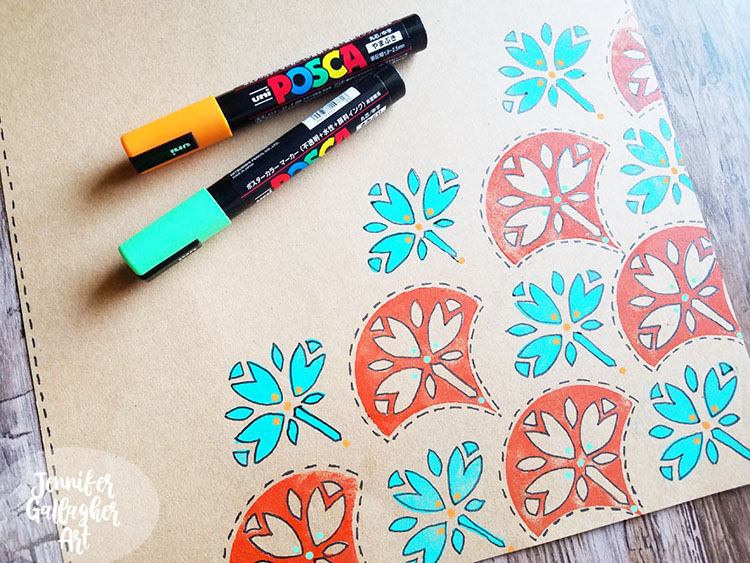
I chose a few posca paint pens that were in the same color family and added additional details.

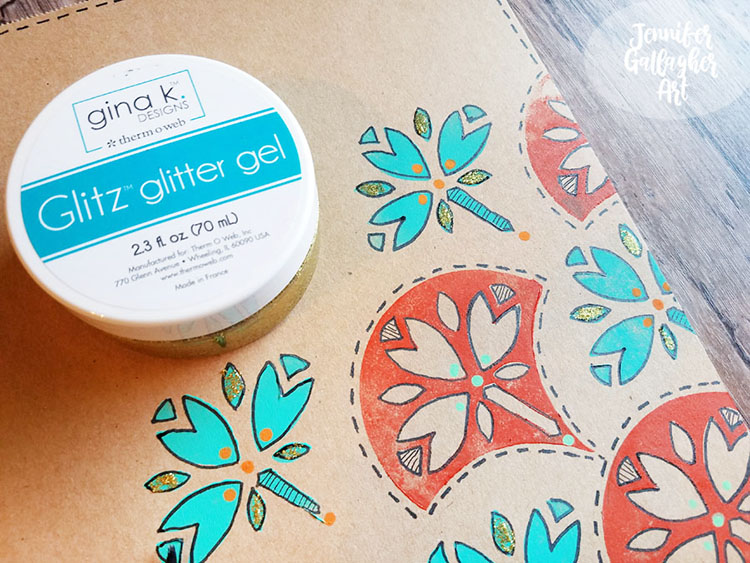
With a small brush, I applied some gold glitz glitter gel.

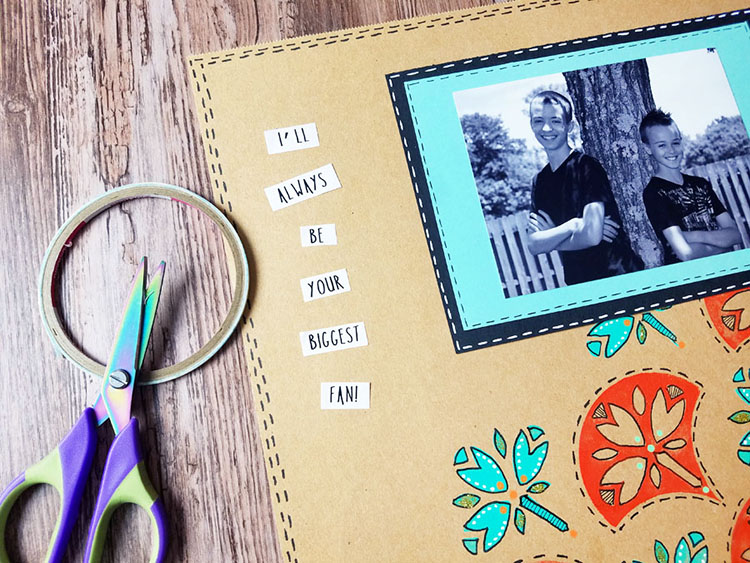
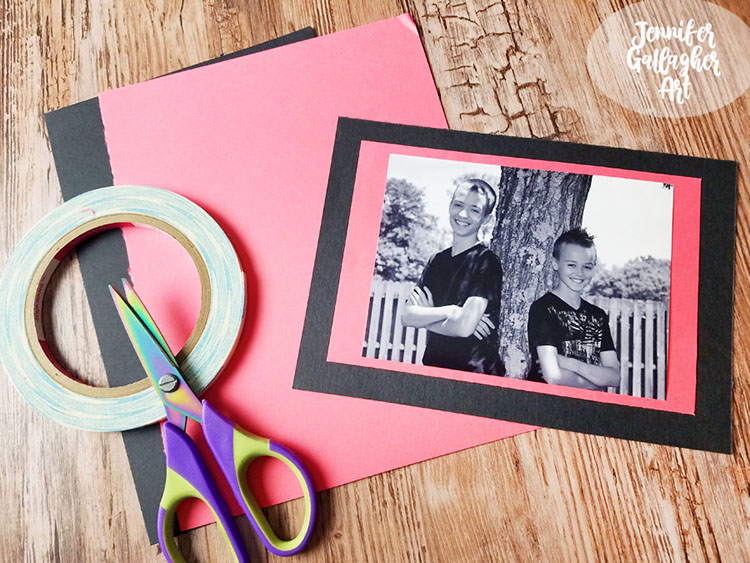
Next, I chose a few pieces of colored cardstock to build a paper frame for my photo to sit on. In the photo I show a salmon color, but in the end I went with a lighter turquoise. Be sure to audition several colors and combinations to find the one you like best. I just eyeballed the size and cut it with my scissors. I adhered each piece with 1/4 inch scor-tape.

I settled on a spot for my photo and adhered it with scor-tape as well. Then, using my black and white gelly roll pens I made some additional dashed lines to carry that theme through. I also added white dots to some of the flowers.

On my computer I printed out a sentiment for the page. What better than, “I will always be your biggest fan!: I attached it with 1/8 inch scor-tape.

It’s just that simple. I had so much fun making this one that I plan on making tons more pages for my family scrapbooks. You can easily use the tools and techniques you employ in card-making and art journaling into scrapbooks too. I hope you have enjoyed this tutorial and will try it out at home using your favorite n*Studio foam stamps.


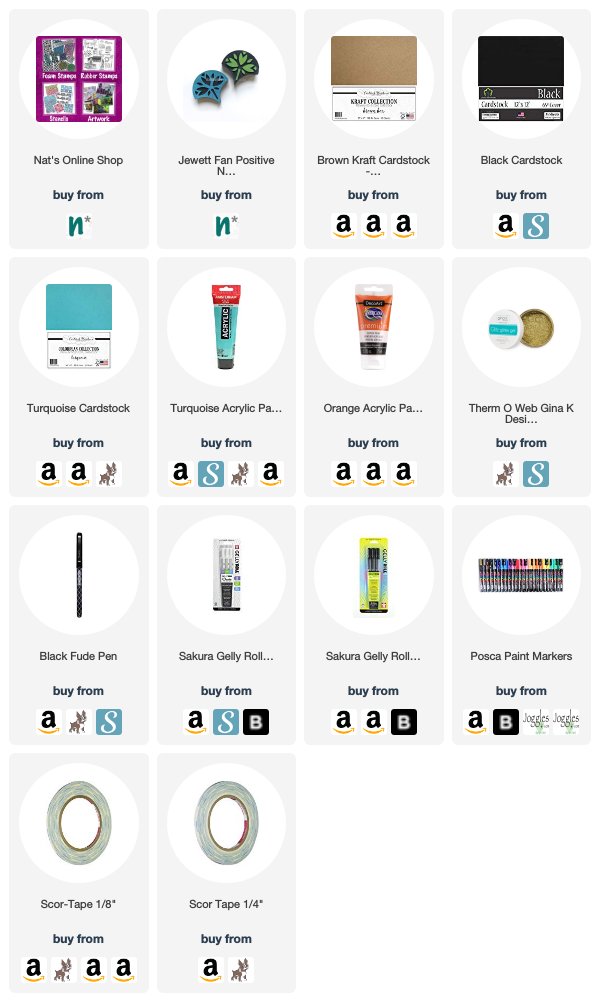
Thank you Jennifer! Love seeing your family and love how those stamps pop on that craft paper! You can find all my Foam Stamps in my Online Shop and here are some of the other supplies Jennifer used:

Feel inspired? Working on something yourself that you’d like to share?  I love to see how you interpret our monthly themes. Email me how you used my stencils and stamps with the theme and email me an image – I would love to share your projects in my next  “n*Spiration From Around the Globe“.
Leave a comment

Little Wonder – Maura Hibbitts

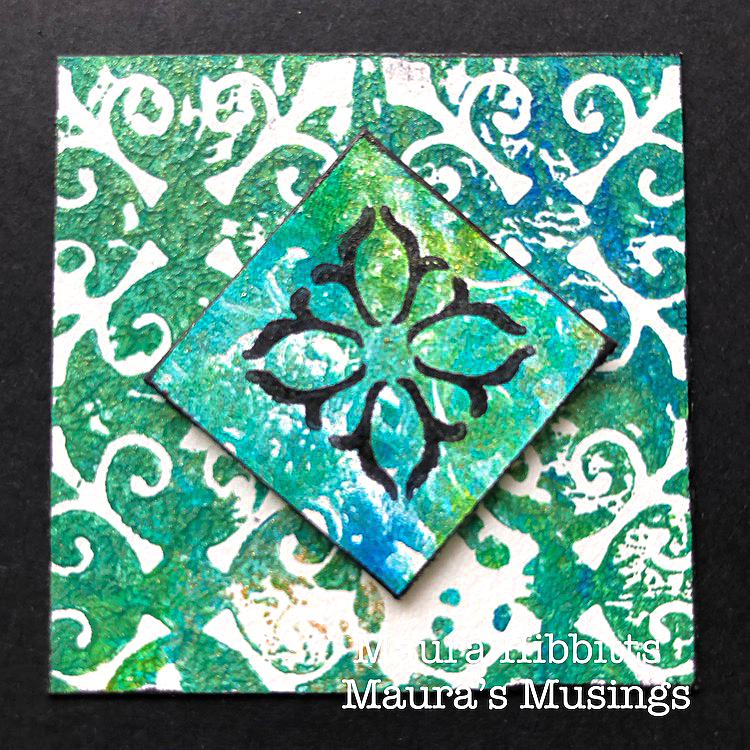
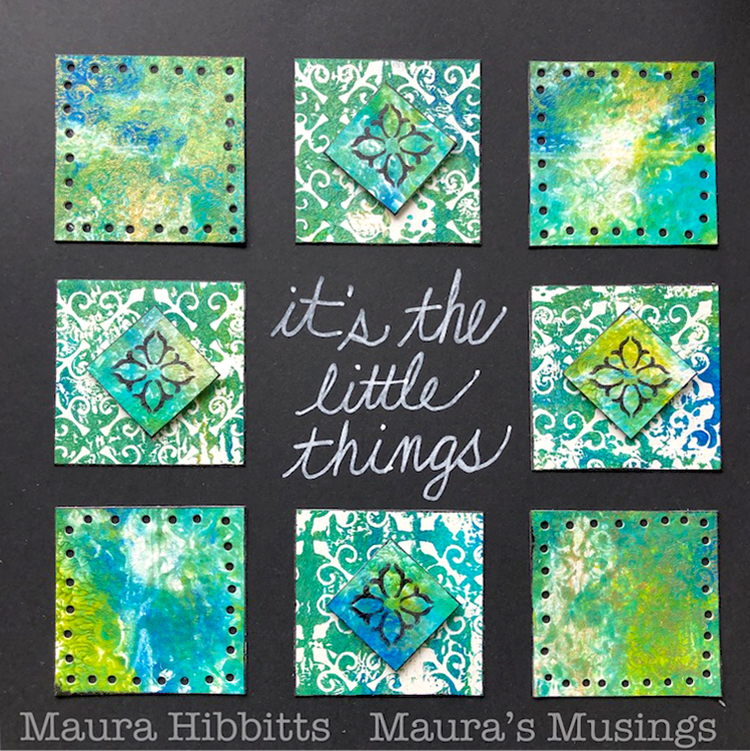
Hello and welcome to another post from the Creative Squad! Here we have an art journal page from Maura Hibbitts using inchies and twinchies (read on to learn more :) Maura is using my New Orleans stencil, one of the stamps from the Fanfare rubber stamp set, and this month’s theme: Little Wonder – We’re thinking small this month and focusing in on a tiny scale, exploring the delicate details, and creating something that is petite and precious.


Isn’t it often the little things that fill our lives with meaning? A smile, a hug, a flower in bloom, the flight of a bird, a good book, quiet moments, a song…to me, these are the little wonders that mean so much. Think about all of the little things that fill your own life to the brim!

I decided to make my little wonders with inchies (1”x1”) and twinchies (2”x2”). You can turn these tiny squares into little works of art, but this time, I’ve kept mine simple. I also decided to keep my supplies simple.

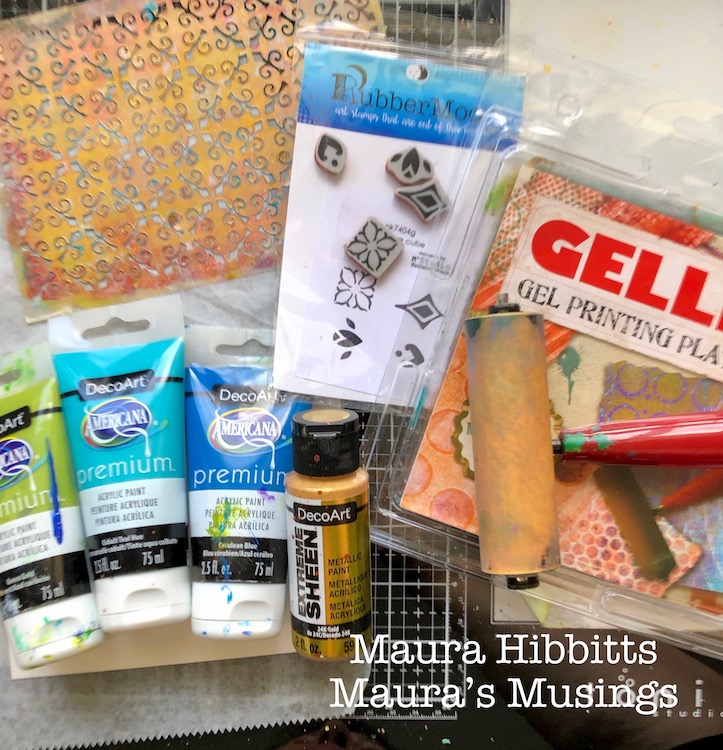
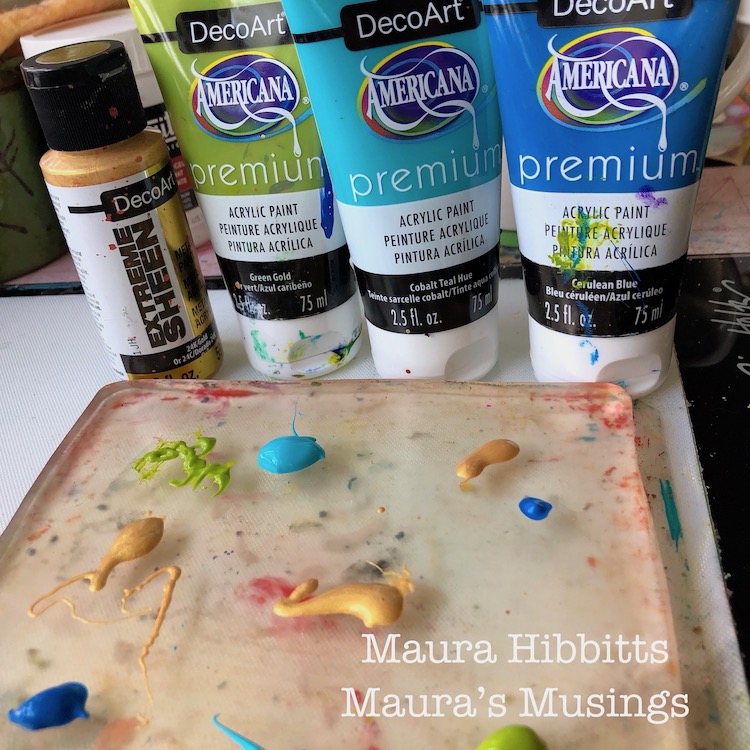
First step is some color blending on the gel plate – Green Gold, Cobalt Teal Hue, Cerulean Blue and Gold. I squirted small amounts of the four colors I am using and blended them with the brayer.

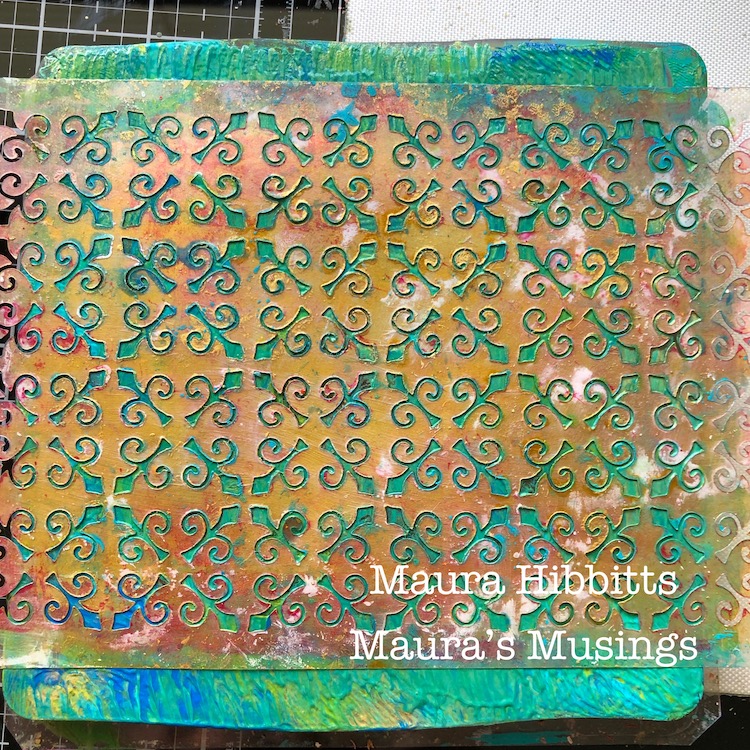
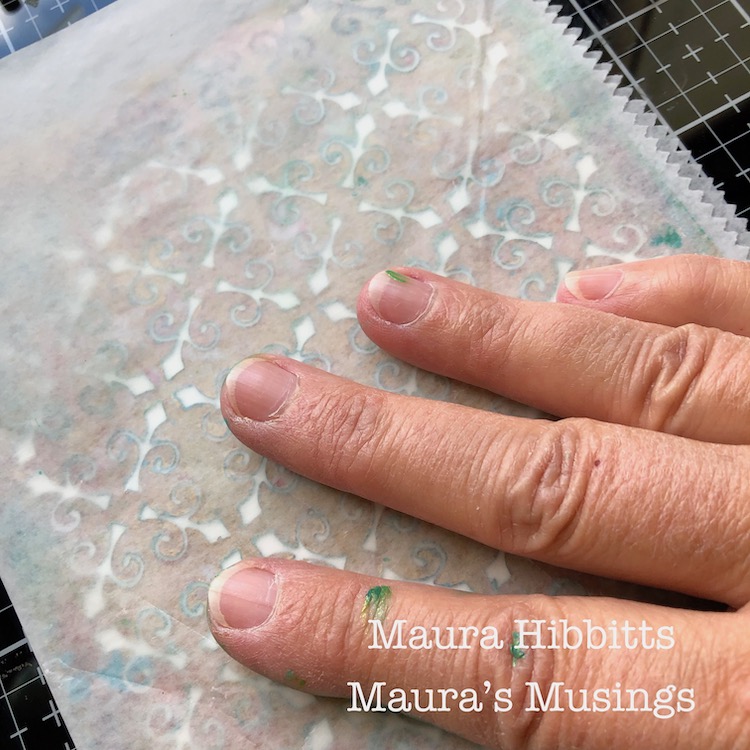
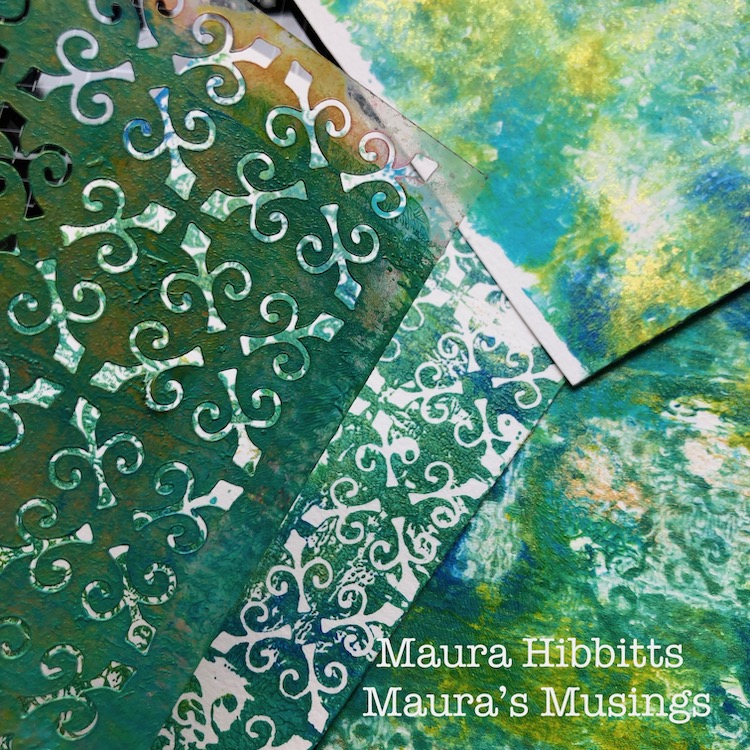
I have to say, I love printing on my gel plate, and once I start, I really having a hard time stopping. Once the paint is blended on the plate with the brayer, I laid the New Orleans stencil down into it, lifted it off with the paint on the stencil and pressed it on the water color paper. Since I still have some paint on the stencil, I laid it between a sheet of deli paper to get the rest off. These extra prints will come in handy in future projects.

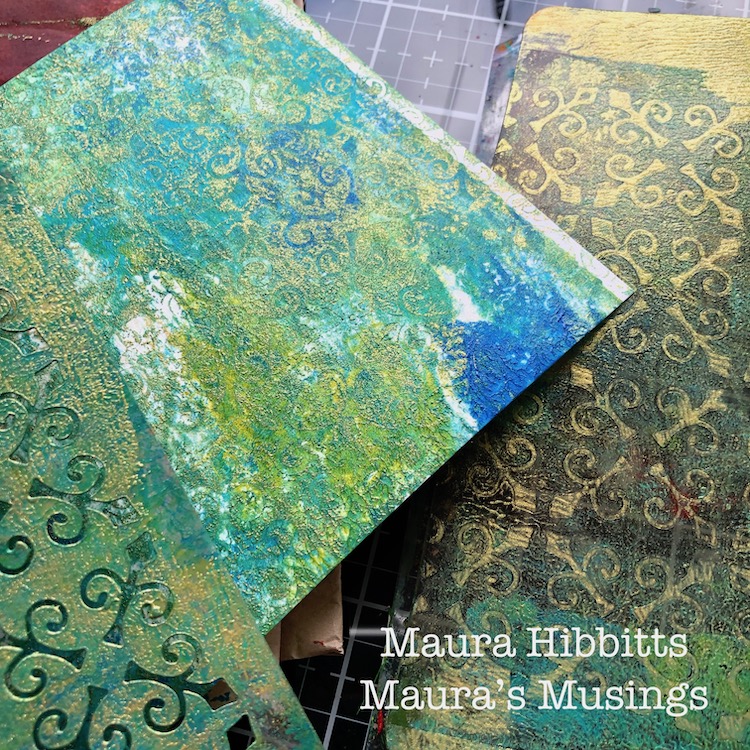
I wanted a mix of designs, so I repeated the process, but this time after laying the stencil in the paint, once I lifted the stencil, I laid the paper on the gel plate.

I decided to add a bit more gold to one of the sheets, so squirted the gold on the gel plate, brayered it, and laid the stencil onto the paint. Then I lifted the stencil and pressed it over one of my painted sheets, just to add another layer.

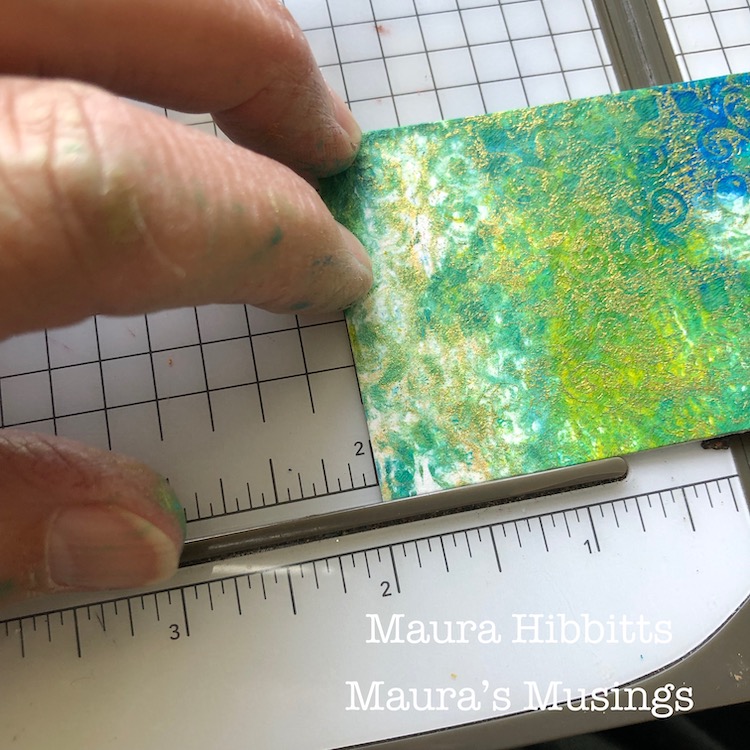
The papers are dry and ready to be cut to size, 8 twinchies (2”x2”) and 4 inchies (1”x1”).

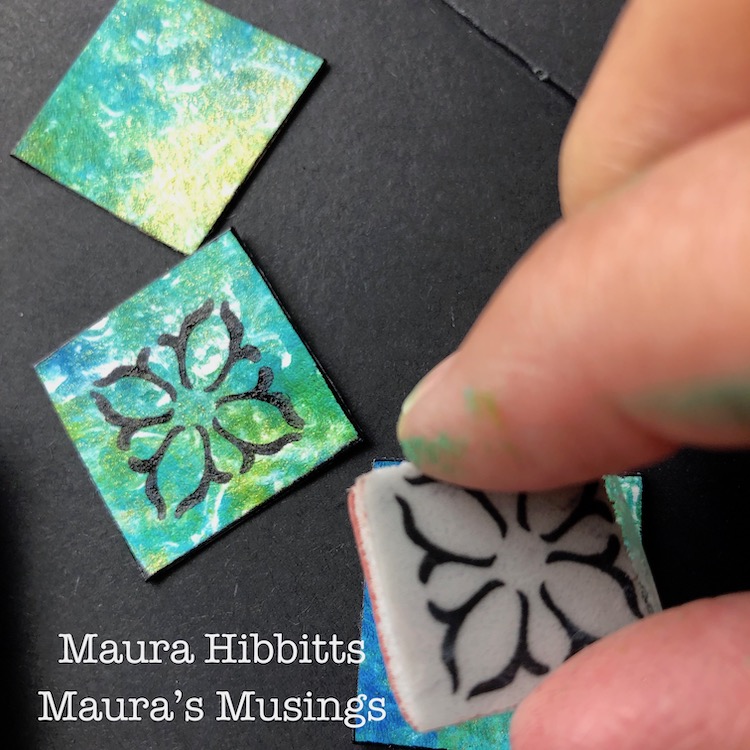
On the inchies, I stamped a design from the Fanfare set with archival black ink. I also edged all the pieces with the black ink.

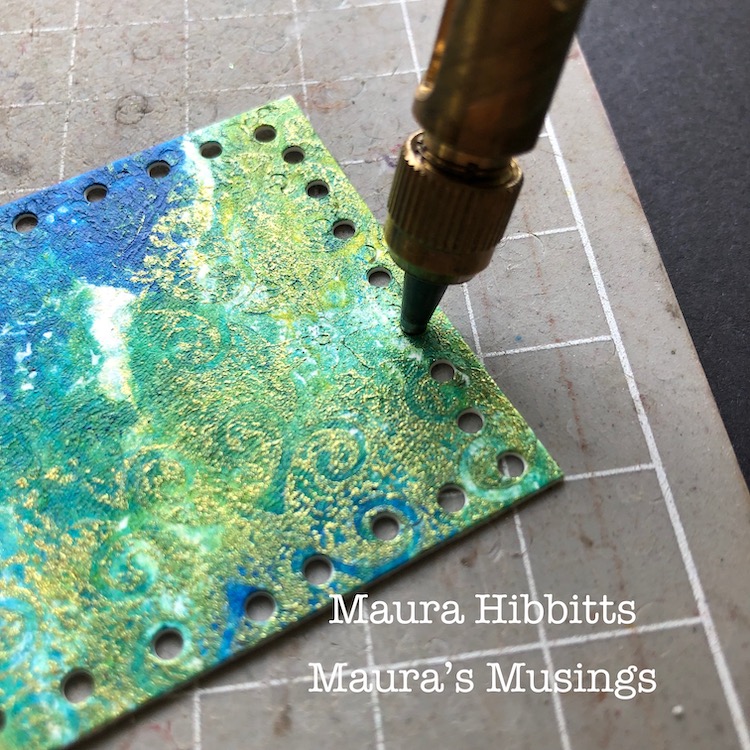
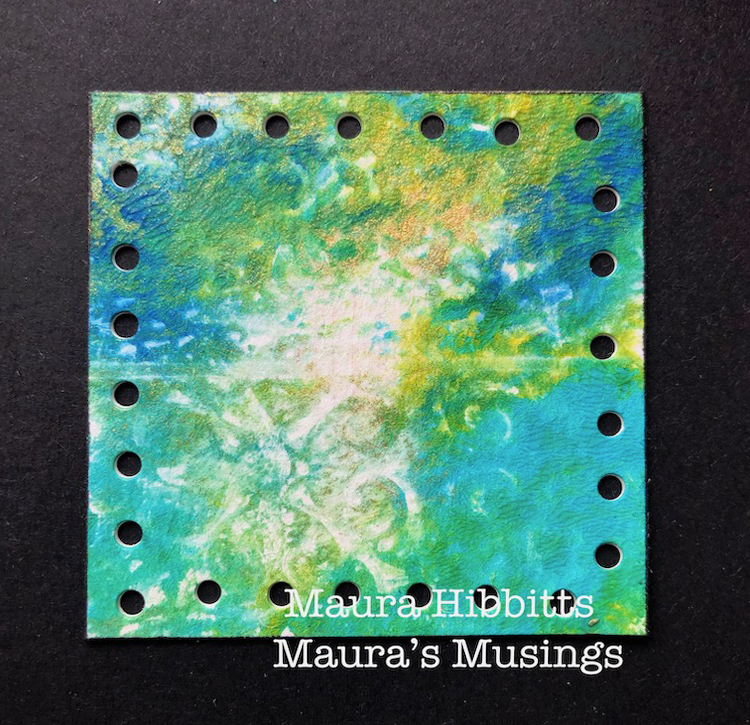
Just to add one more little element to my art journal page, I decided to punch small holes around several of the twinchies with my Japanese awl. I like the contrast between the painted pieces and the black background.

Then, I adhered all twinchies to the art journal page with adhesive, popped up the inchies with foam tape, and wrote my thought in the center with a white paint pen.

It’s the little things…day to day, in art, in nature…that add so much to our lives. Think about all the little wonders in your life, and enjoy each and every one of them! Maura


Thank you Maura and yes, we could not agree more that it is so important to be thankful for the little things in life :) Gorgeous page and gorgeous message!

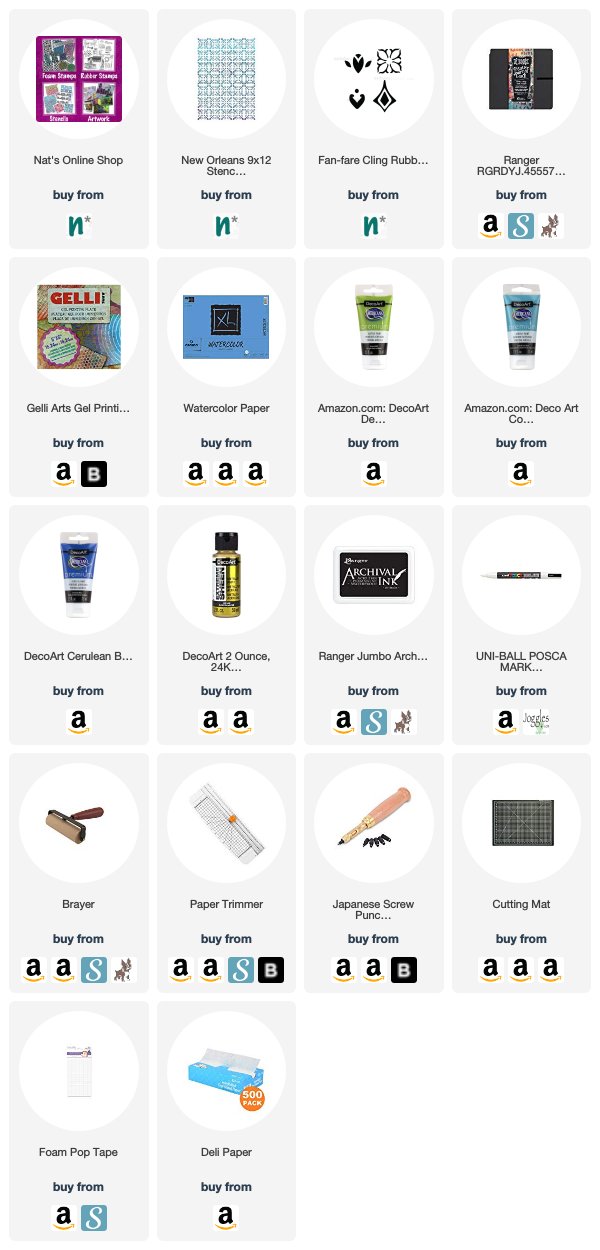
Want to try making something yourself? You can find all my Rubber Stamps and Stencils in my Online Shop and here are some of the other products Maura used:

Feel inspired? Working on something yourself that you’d like to share?  I love to see how you interpret our monthly themes. Email me how you used my stencils and stamps with the theme and email me an image – I would love to share your projects in my next  “n*Spiration From Around the Globe“.
Comments (1)

  • Sue Clarke

    |

    Maura, I just love the message, colors and the page you created. Nice!

    Reply

Leave a comment

Little Wonder – Jennifer Gallagher

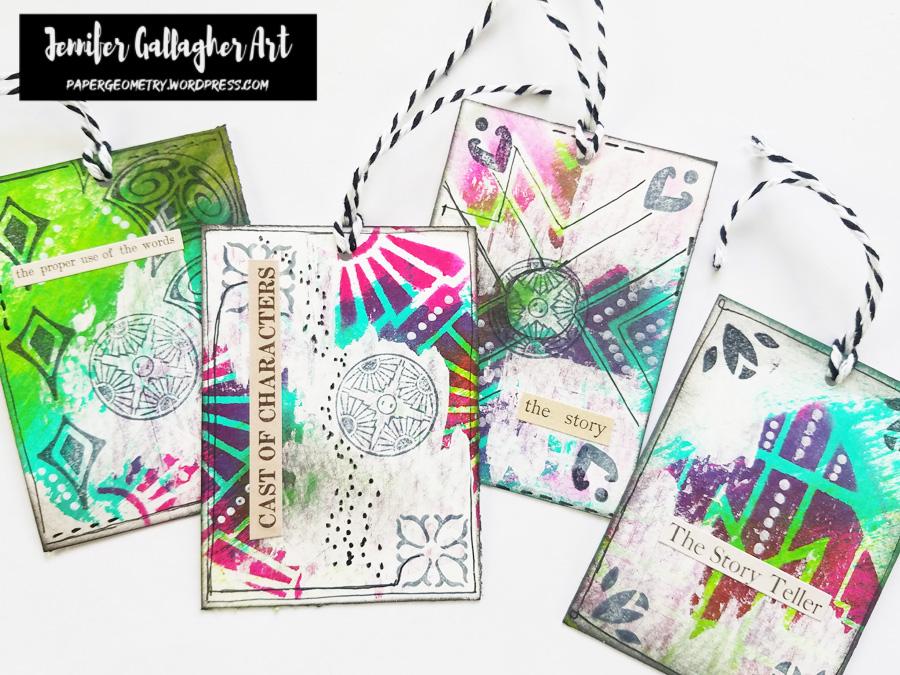
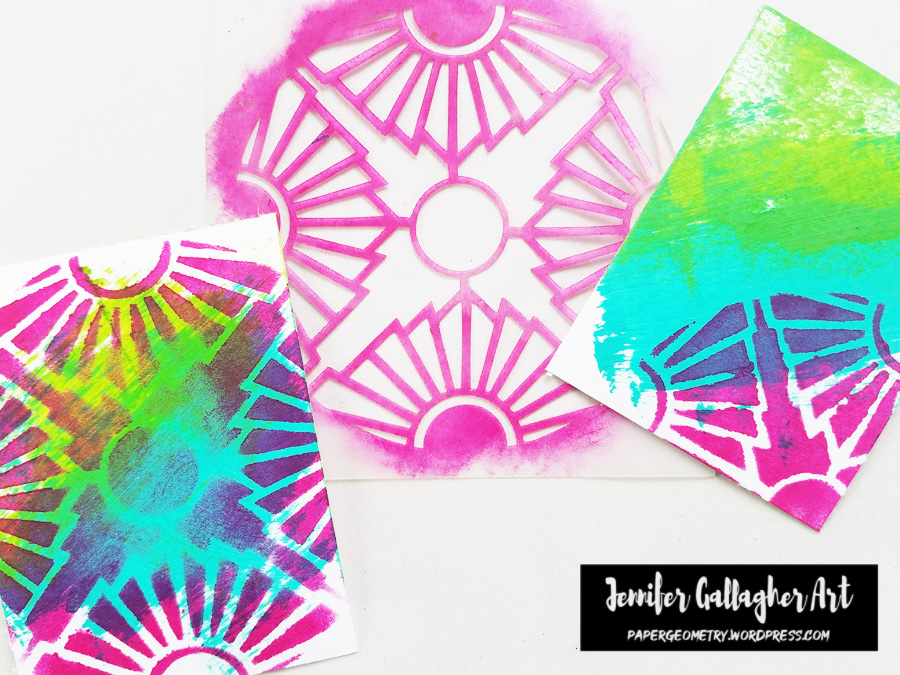
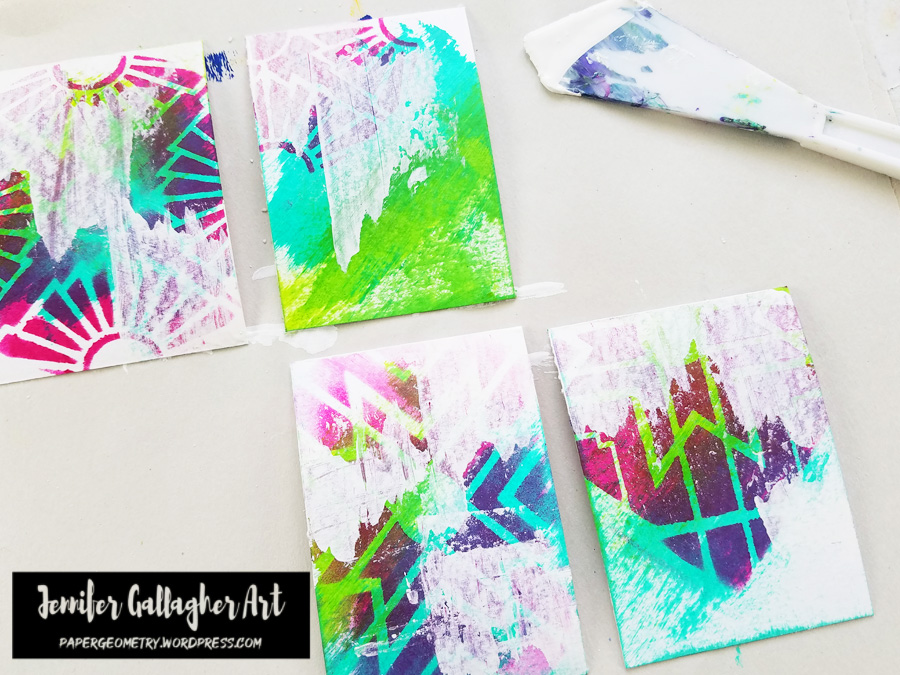
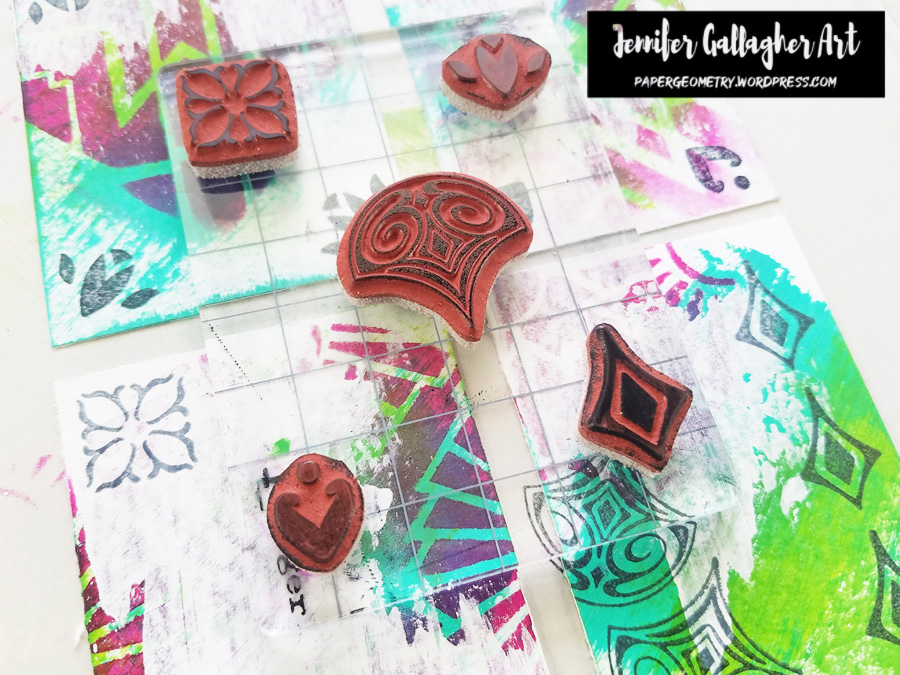
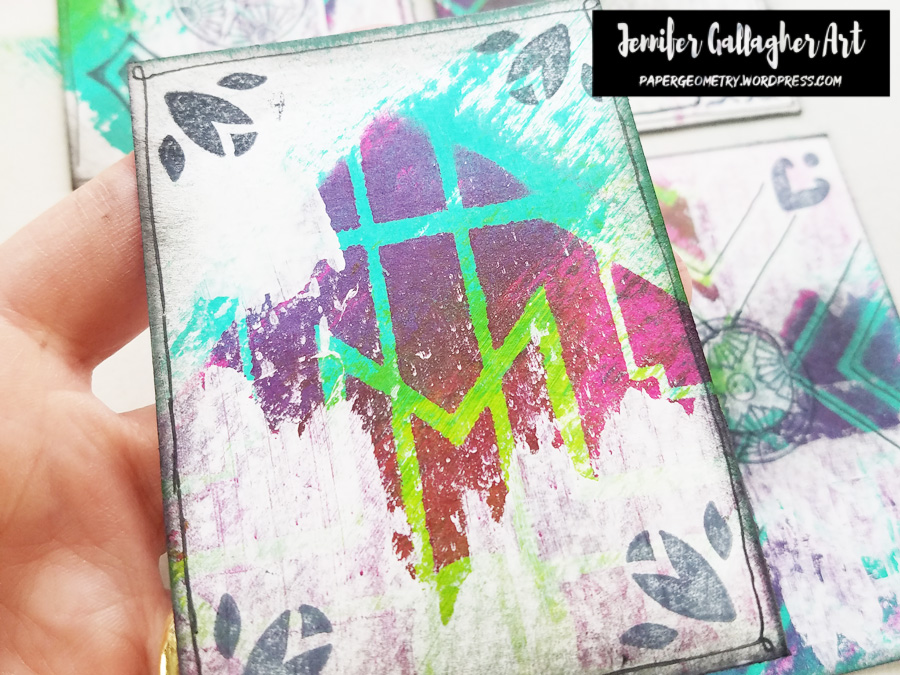
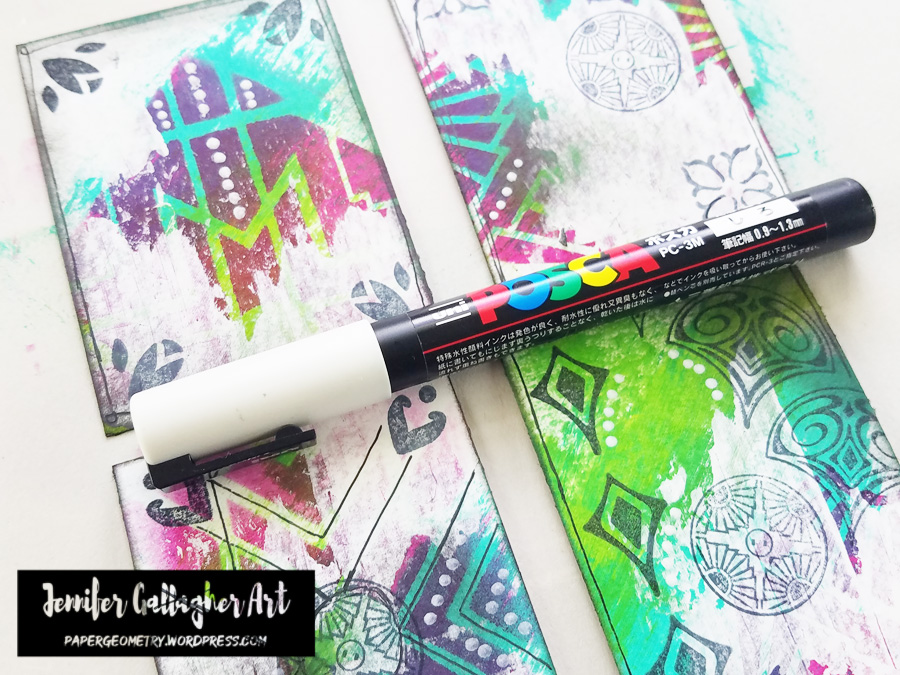
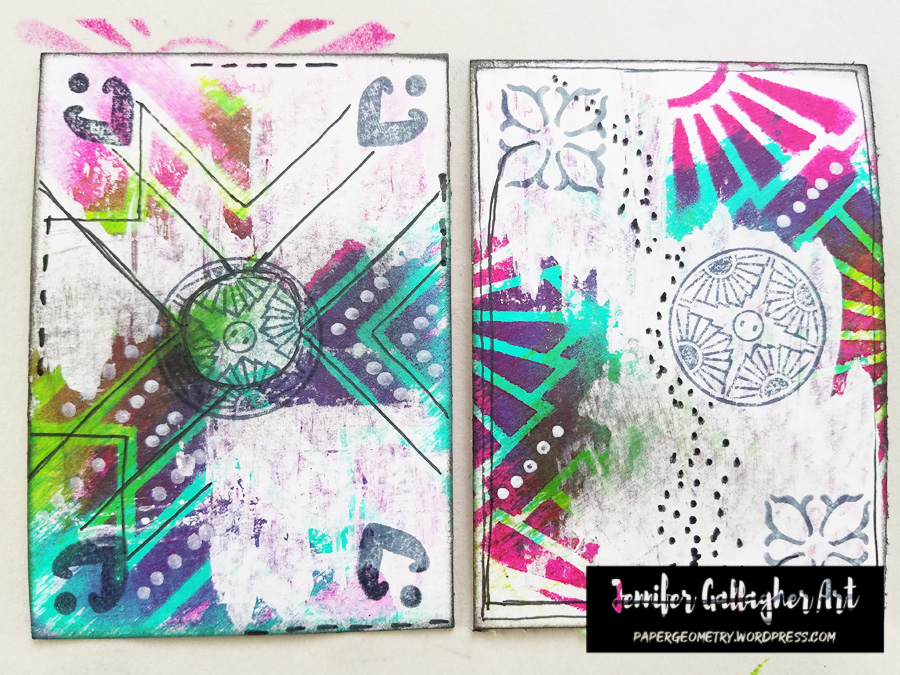
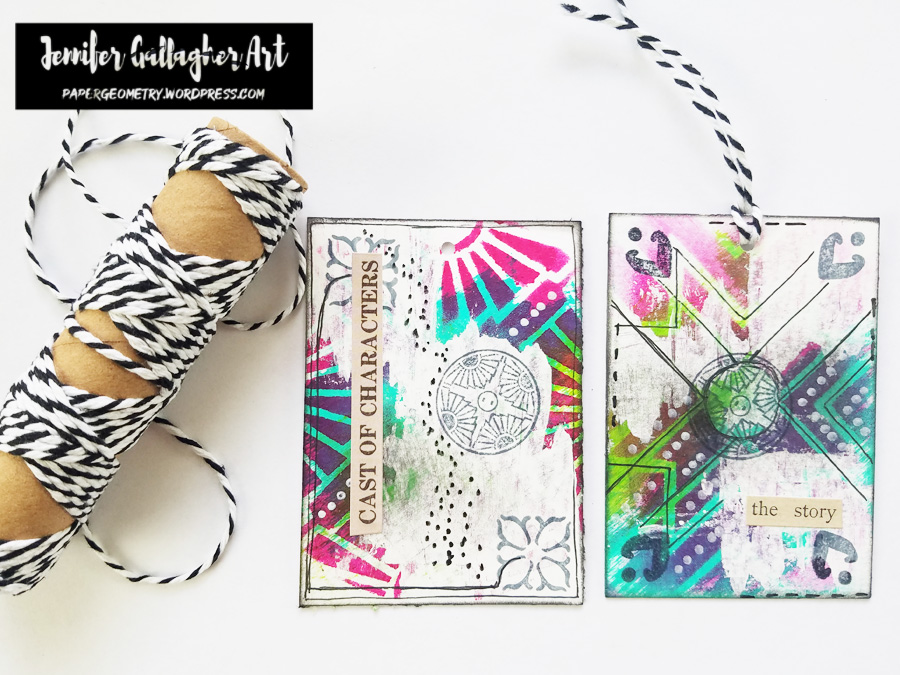
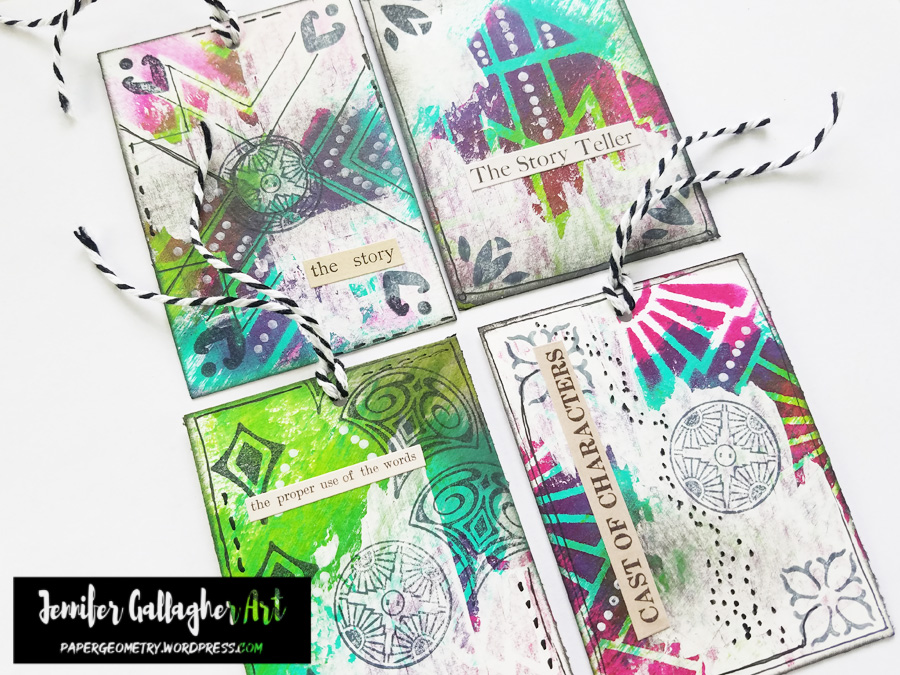
Hello there from the Creative Squad! Here we have Jennifer Gallagher with us sharing a great project that combines two things that are fun to make and delightfully small: artist trading cards and bookmarks! She is using my Broadway and Toledo stencils and my Fantastic Small, Small Circle Jumble, and Fanfare rubber stamps and this month’s theme: Little Wonder – We’re thinking small this month and focusing in on a tiny scale, exploring the delicate details, and creating something that is petite and precious.


I just love working small. Not only is it fun, but it’s a great way to be creative when you’re busy, I’m really excited to share with you a great tutorial for turning artist trading cards into bookmarks. They are small enough to use in your paperbacks, but really pack a visual punch.

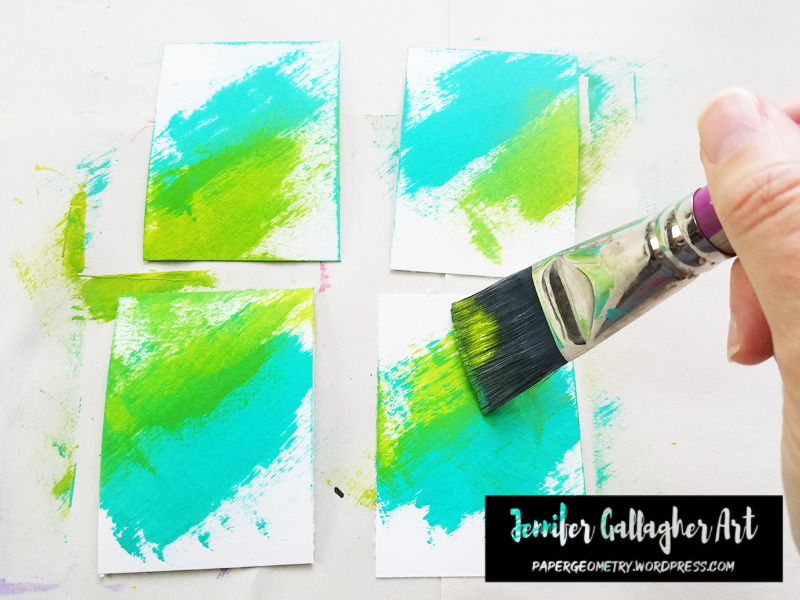
I began by cutting smooth watercolor paper into four pieces that each measure 2.5 by 3.5 inches. Next, I dry-brushed olive green and aqua green onto my artist trading cards. 

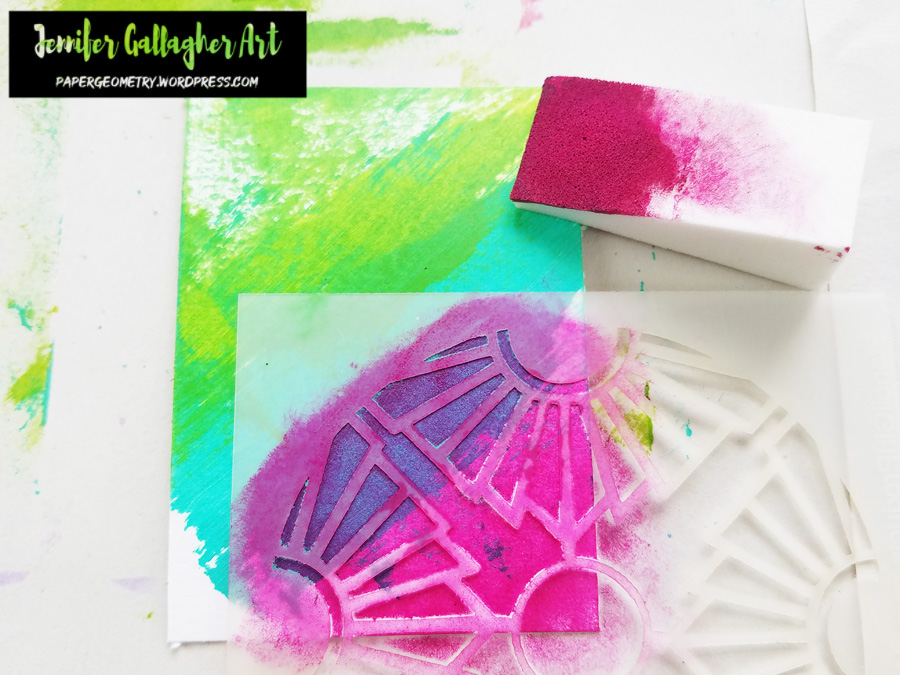
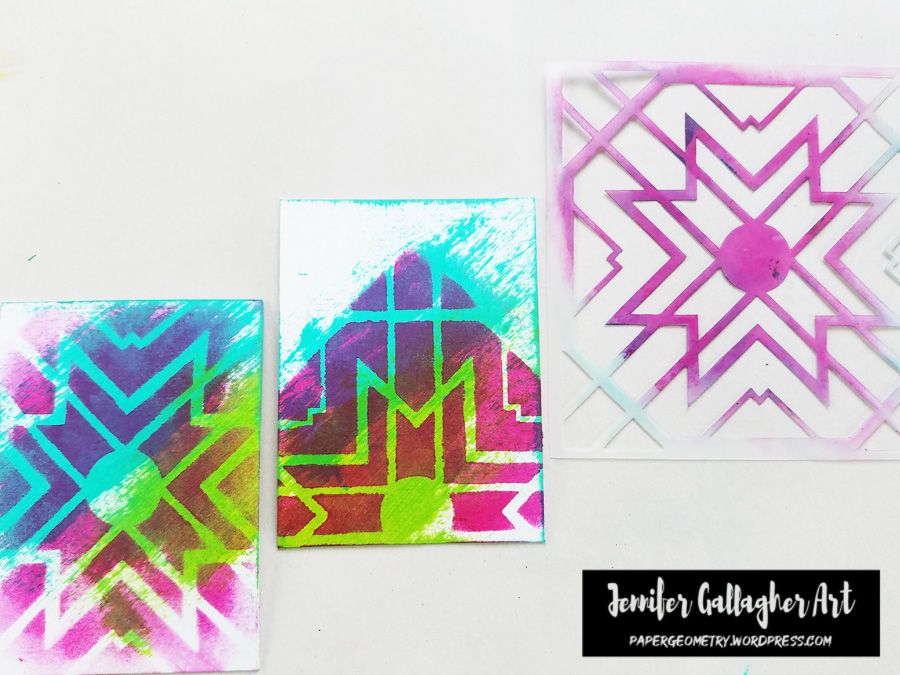
Using a cosmetic sponge I apply quinacridone magenta acrylic paint through two of Nat’s four inch stencils, Broadway and Toledo mini. To keep it interesting, turn your stencils in different directions or only use a portion of it.

To beat back some of the brightness, I dipped a palette knife into white acrylic paint and drug it across the surface of the cards.

Next, using Memento Tuxedo Black ink, I stamped various designs from Nat’s stamps. Keeping with the mini-theme, I used Fantastic small, Fan-fare, and Small Circle Jumble stamps.

To add some additional interest, I doodled on each card using a Sakura Gelly Roll pen in black. Then I added additional mark-making using Posca Pens in black and white.

I felt like they needed some kind of text, so I used my Tim Holtz’s Ideaology clippings stickers. Then, using a hole punch, I placed a hole at the top of each card and added some craft twine.

Working small can be a great way to find time to be creative in the midst of our busy lives. I hope you have enjoyed this tutorial and that it will inspire you to pull out your n*Studio stamps and stencils and spend a few minutes being creative. Be sure to share your creations with us.


Thank you Jennifer! Love each one of these and their inviting layers and colors! 

Want to try making some yourself? You can find all my Rubber Stamps and Stencils in my Online Shop and here are some of the other products Jennifer used:

Feel inspired? Working on something yourself that you’d like to share?  I love to see how you interpret our monthly themes. Email me how you used my stencils and stamps with the theme and email me an image – I would love to share your projects in my next  “n*Spiration From Around the Globe“.
Leave a comment

Nat’s Creative Squad – Introducing our NEW Members

Hello my friends – today we have some VERY exciting news. We have been waiting anxiously to spill the beans here and now is the time: We have 2 new Creative Squad members that we are so happy to welcome to the team and introduce today!!!

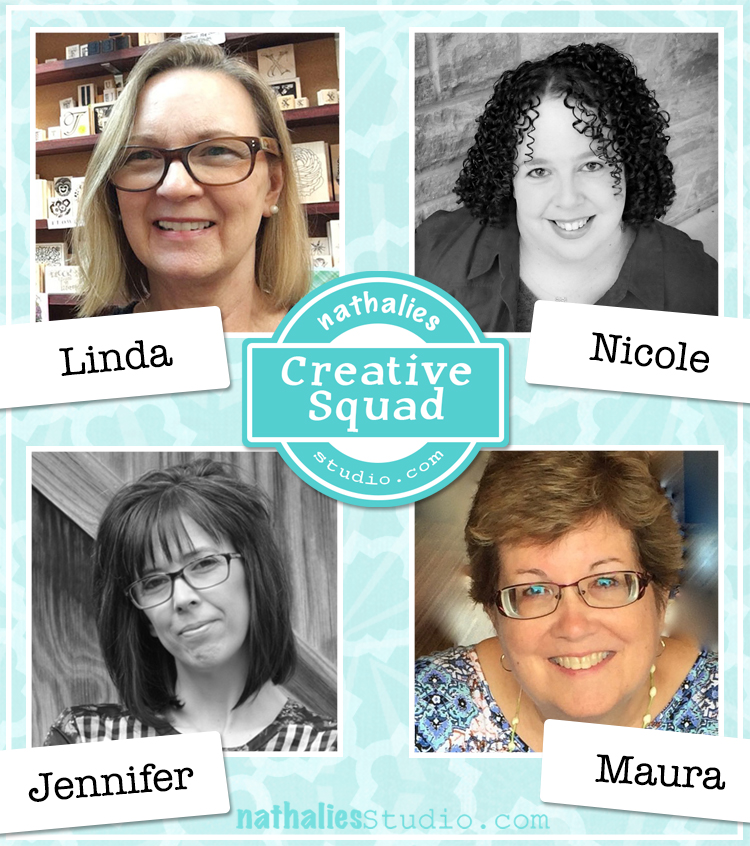
Welcome to Linda Edkins Wyatt and Nicole Watson! We put the call out last month for new Creative Squad members and Linda and Nicole blew us away with their creativity, unique styles, and engagement with their fans on social media. And now we are super stoked to have them on Nat’s Creative Squad.

Here’s a little more about the newbies, and a reintroduction to the rest of the awesome squad too :)  Don’t forget to tune into the blog on Tuesdays for projects and tutorials from Nat’s Creative Squad. You can also explore squad members current and past on the Creative Squad page.


Linda comes to us from New York, NY and you can check her out on her website here. And here is a little bio from her:

Linda Edkins Wyatt has been drawing, painting, sewing, and crafting as long as she can remember. She has spent most of her career in commercial design areas: first working as a textile print stylist in the fashion industry, and later, as a magazine and newspaper layout designer. Over the years, she explored painting, weaving, pottery, sculpture and other art forms and finally, in 2006, discovered mixed media and knew she had found her niche. Linda, who teaches monthly classes at The Ink Pad NYC, never tires of experimenting with new materials and techniques, and loves to incorporate vintage and recycled materials into her artwork.

Nicole is coming from Texas, you can check out her here on her website. Here is her bio:

Hi! I’m Nicole Watson, a Midwest girl who married a Southern boy now living in Austin, Texas. Art has always been part of me … from collecting random bits of paper at a young age, to selling my first painting in high school, then discovering mixed media while studying art and design in college. Other stops along my art journey include scrapbooking, card making, freelance photography, and layout/graphic design. Creating in my studio and sharing my work with others gives me life, purpose, and is healing to my soul.

Jennifer from West Virginia has been with the squad for 2 years and you can learn all about her here on her website. Her bio is:

Jennifer Gallagher is an artist and art instructor currently living in West Virginia with her husband and two sons. She has been involved in the arts her entire life in one way or another. After studying fashion in college, Jennifer found herself drawn to new art forms and techniques. She now enjoys painting, collage, art journaling, and mixed media. Geometric shapes and patterns are her greatest source of inspiration and joy.

Maura from Upstate New York has been with us since January 2018 and you can check her out more here on her website. Here is her bio:

Maura Hibbitts – “I’ve joyously jumped to the right side of my brain to play with color and work in mixed media, sometimes with a steampunk twist, since retiring from teaching science. I’m back to being that kid that sat under the backyard tree and drew for hours. I enjoy life with my family in the Adirondack region of New York, love to travel, read, garden and still find myself fascinated by clouds and rocks from my years of teaching earth science.”

And finally Judi Kauffman – our part time squad member who comes to us from Maryland. Judi likes to fly a little below the radar so you can learn all about her here on my blog post interview with her.

Please check out our Creative Squad posts each Tuesday for fun projects and inspiring techniques – there is always something new from this amazing gang and we are so happy to have them!

Comments (2)

  • Jackie P Neal

    |

    Huge Congratulations to new team members Linda and Nicole!!
    Can’t wait to see what creations your muses unleash ladies!
    I have been a huge fan of Linda’s since I met her online years ago! I have always loved her mixed media projects as well as her fabric designs and am looking forward to what she will create with you and your team Nathalie!
    Congrats to everyone!
    Jackie xo

    Reply

  • Jill McDowell

    |

    Congratulations Linda and Nicole! Looking forward to seeing your creative takes with Nat’s products. Super exciting news.

    Reply

Leave a comment

Little Wonder – Marsha Valk

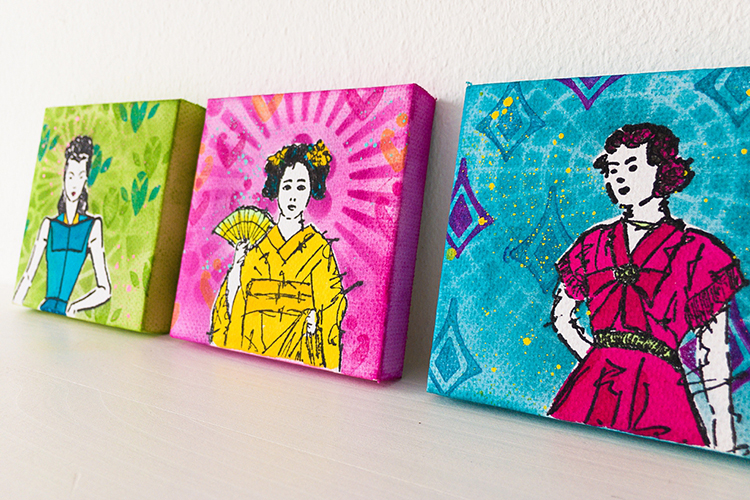
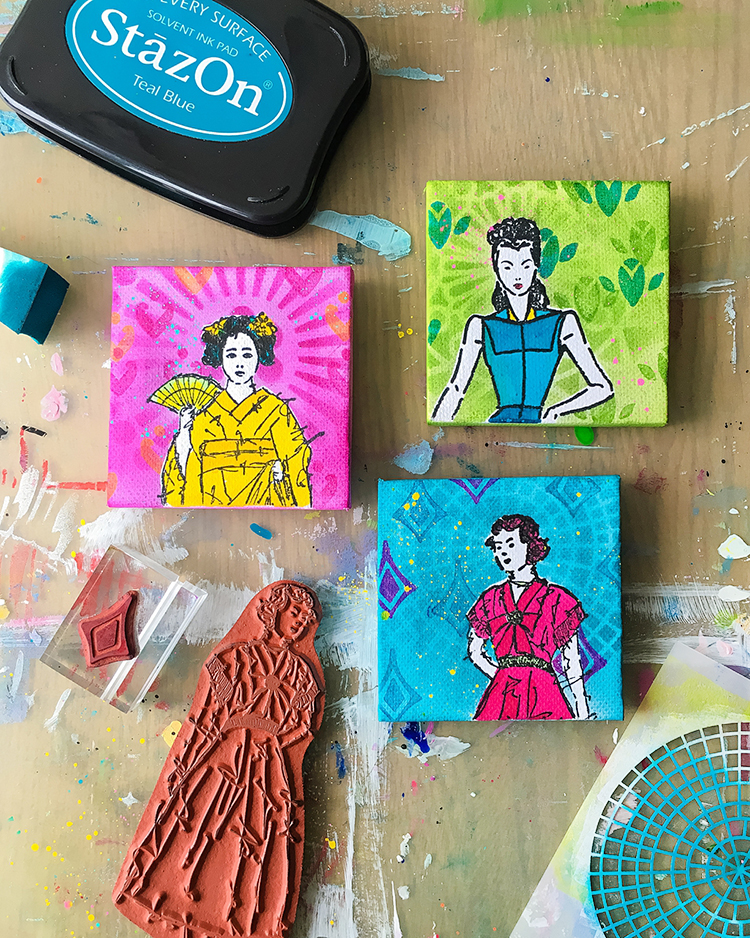
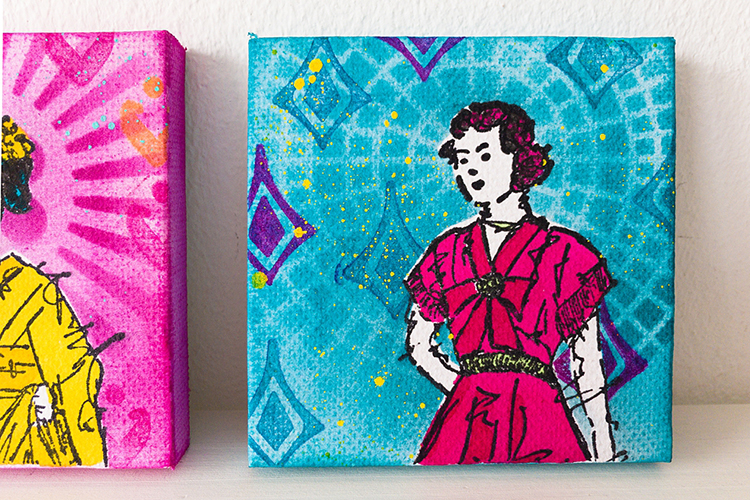
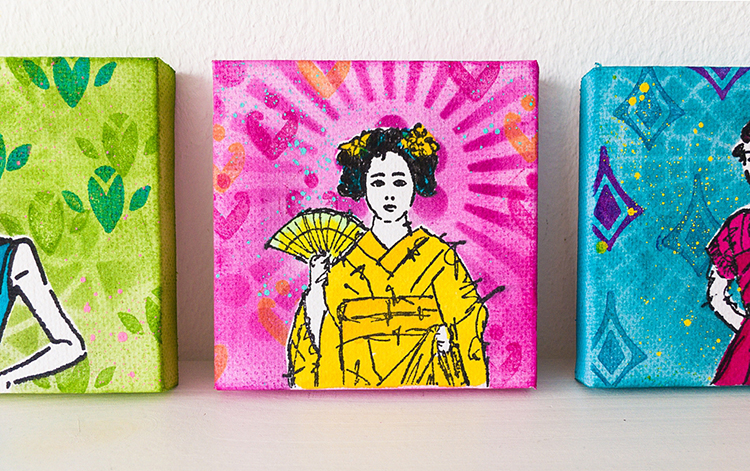
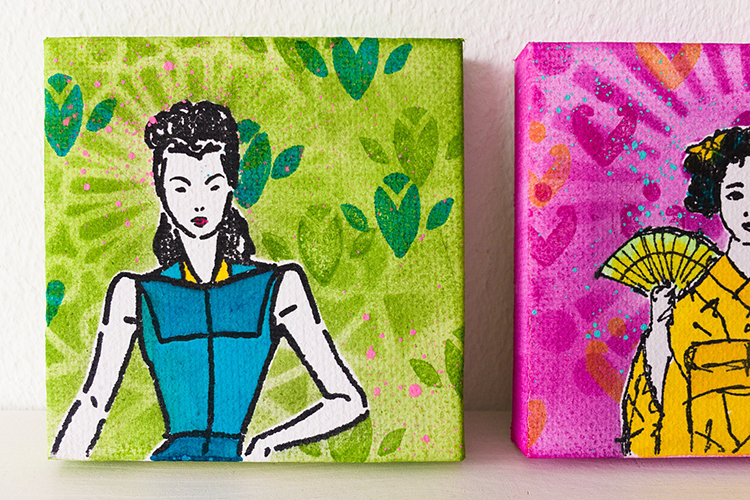
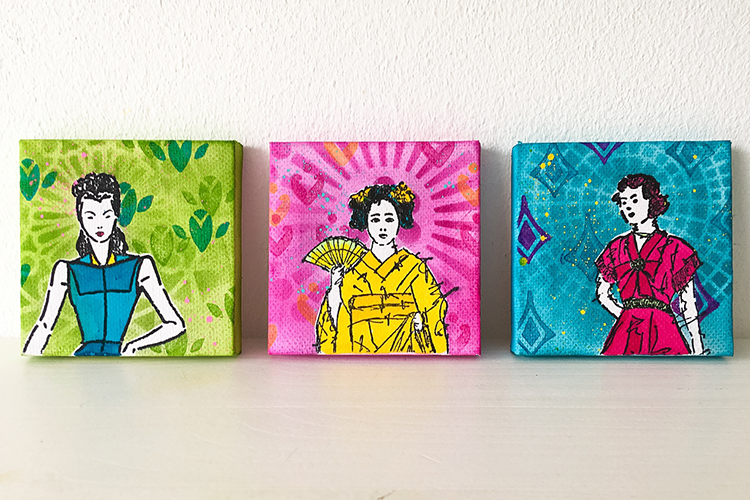
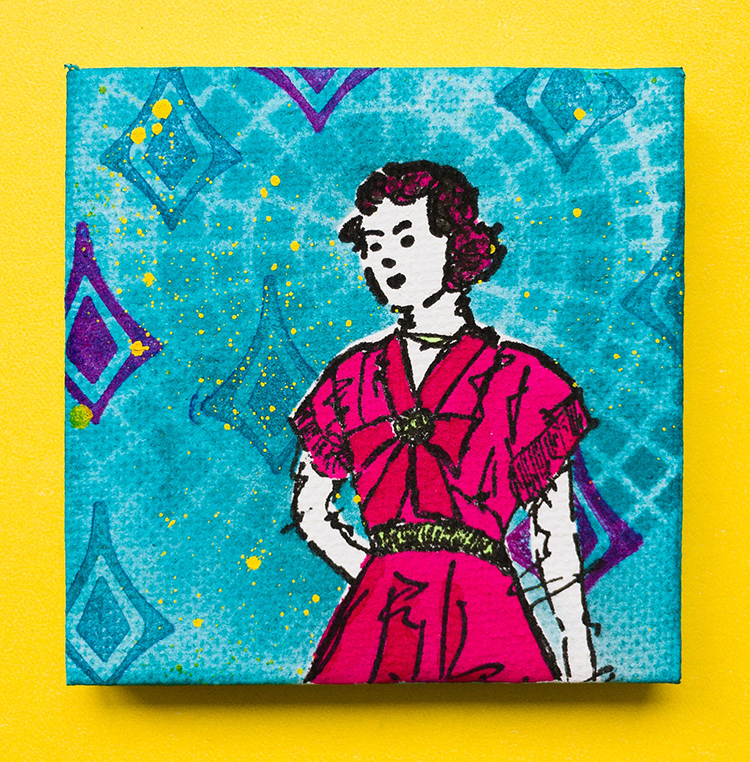
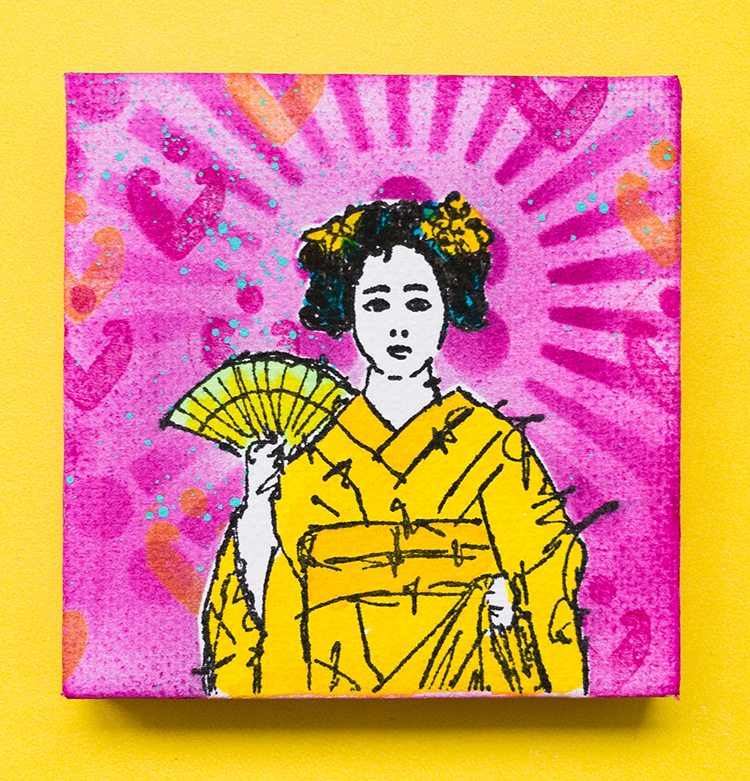
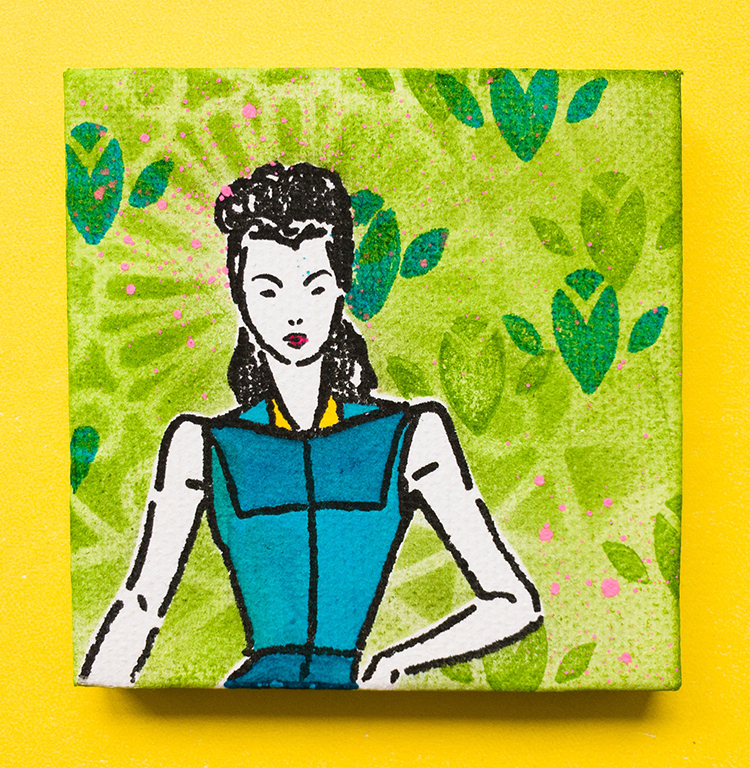
Hello from the Creative Squad and today we have another farewell post – this one from the super talented Marsha Valk! Marsha has been a joy to have on the squad and we will miss her but of course we will still be watching what she’s up to online :) Today Marsha brings us a lovely little trio of mixed media canvases and a how-to video. She’s using my Actually I Can and Fanfare rubber stamp sets and my Central Ave stencil. This month’s theme is: Little Wonder – We’re thinking small this month and focusing in on a tiny scale, exploring the delicate details, and creating something that is petite and precious.


“Wie wat bewaard, die heeft wat” is a saying in Dutch. It translates into: Someone who saves things has something.

On the lookout for ideas for this month’s prompt, I found a pack of four mini canvases while rummaging in my studio cabinet. I have no recollection of buying them, or why. I’m sure I thought they would come in handy one day. And they did!

Our mission this month is to use a small rubber stamp that we haven’t used before and a stencil.

There is no chance of me not having used a stamp in my n*Studio collection. However, I’ve been dying to do a project with the ladies from the Actually I Can Cling Rubber Stamp Set. And, for this special occasion, they will be joined by the Fashion Dame, an old friend from one of Nat’s earliest stamp releases.

Watch the step-by-step video to see how I combined the Millie Cling Rubber stamp with the tiniest set of stamps in n*Studio collection and one of Nat’s 4”x4” stencils.

Wishing you lots of little wonders!

Marsha.


Thank you Marsha! These little canvases just make us smile :) And what a great way to end your time with us here – it has been so much fun sharing your unique creative vision with our readers!

Want to try some mini canvases like Marsha has here? You can find all my Rubber Stamps and Stencils in my Online Shop and here are some of the other products she used:

Feel inspired? Working on something yourself that you’d like to share?  I love to see how you interpret our monthly themes. Email me how you used my stencils and stamps with the theme and email me an image – I would love to share your projects in my next  “n*Spiration From Around the Globe“.
Leave a comment

Little Wonder – Tania Ahmed

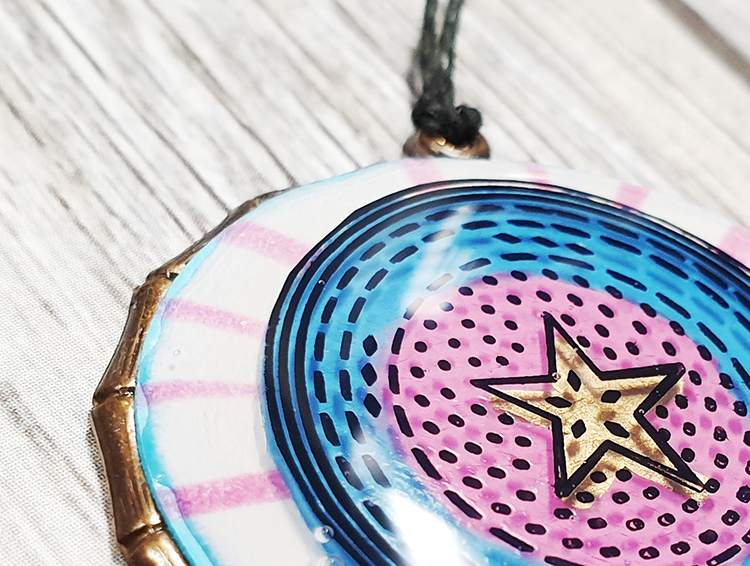
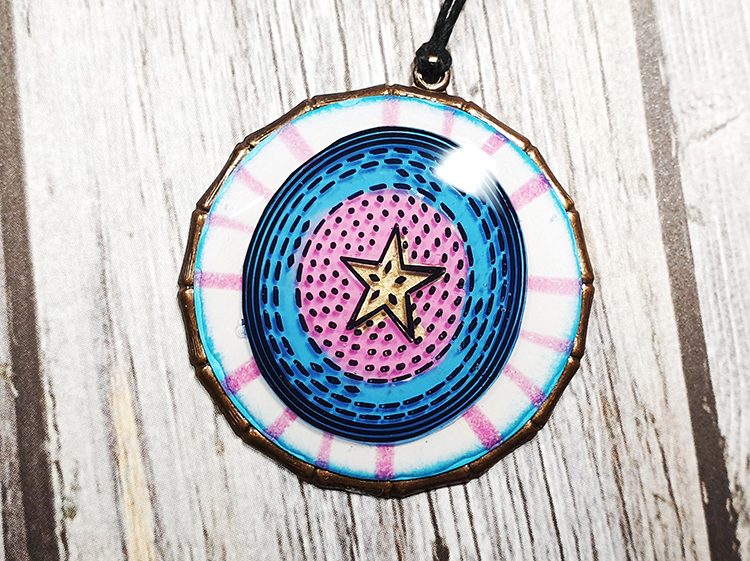
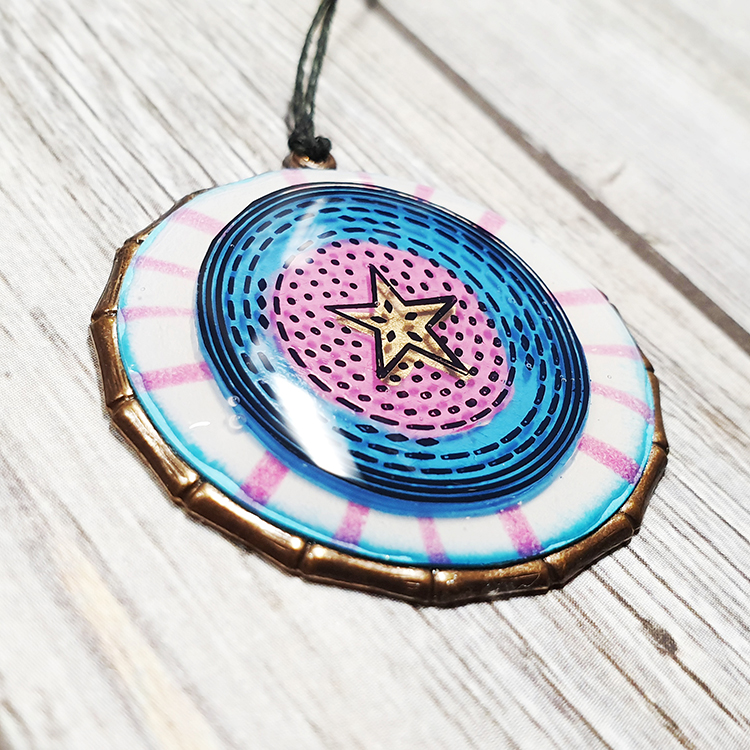
Hello from the Creative Squad and our last post from the amazingly talented Tania Ahmed who will be leaving us next month but who was a joy to have on the squad for her time here. You will be missed Tania! For her final post she presents a tiny little treasure that she’s made using my Large Circle Jumble rubber stamps and my Van Vorst stencil. This month’s theme is: Little Wonder – We’re thinking small this month and focusing in on a tiny scale, exploring the delicate details, and creating something that is petite and precious. 


When working on things on a tiny scale, I always think of Shrink Film which is fun to work with. I’m always fascinated by how much a design shrinks!

I wanted to create a fun mixed media pendant and once I had shrunk and decorated my embellishment, I adhered it to a stencilled design on a pendant that I had been saving *cough hoarding cough * and covered it all with Glossy Accents! This makes me now wish I had some resin in my stash, which could turn into a project for another day ?

Here’s a video of how I made my project:

This will be my last post on Nat’s Creative Squad … A very special thank you to Nat and Kim for all your support and for giving me a chance to join the very amazing Creative Squad and using Nat’s fabulous products! It has been a blast and I will cherish this time. Thank you all so very much ♥️


Thank YOU Tania! It has been such fun to see how your creativity transforms the monthly themes into gorgeous and unique projects. We have loved getting to know you and your stunning artistic talent!

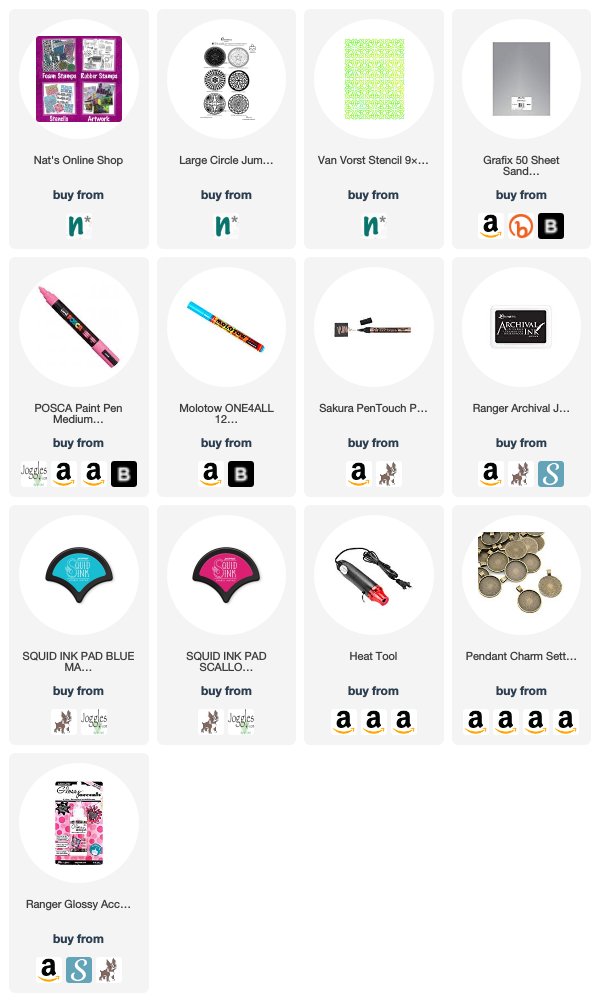
If you’d like to try your hand at making a pendant like Tania’s, you can find all my Rubber Stamps and Stencils in my Online Shop and here are some of the other products she used:

Feel inspired? Working on something yourself that you’d like to share?  I love to see how you interpret our monthly themes. Email me how you used my stencils and stamps with the theme and email me an image – I would love to share your projects in my next  “n*Spiration From Around the Globe“.
Leave a comment

Boldly Going – Maura Hibbitts

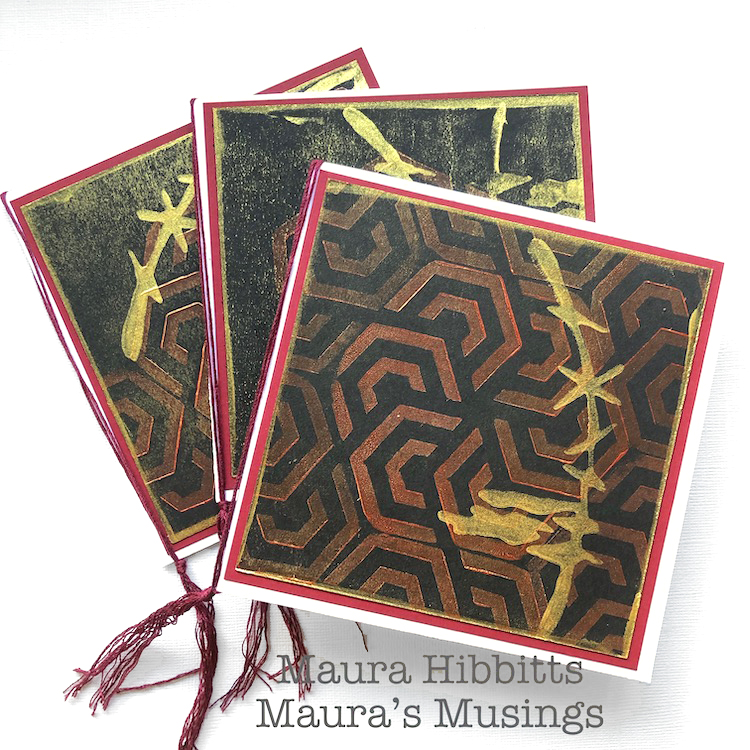
Happy Tuesday from the Creative Squad! Today we have a grouping of handmade cards from Maura Hibbitts that will really catch your eye! They feature bold colors and patterns including my Maze Hex and Groovy foam stamps and are inspired by the theme this month: Boldly Going – Go BOLD with color or pattern this month and really make something that is packed with visual POP! This is no time to be subdued or subtle. Go Bold!!!


Why not make a statement with some bold, handmade cards? There are a lot of cute and pretty cards out there (I know, because I make some too), but every once in awhile, you just need an attention grabber. That’s when going bold with your design can be a lot of fun! I made a trio of square cards, shimmering with possibility.

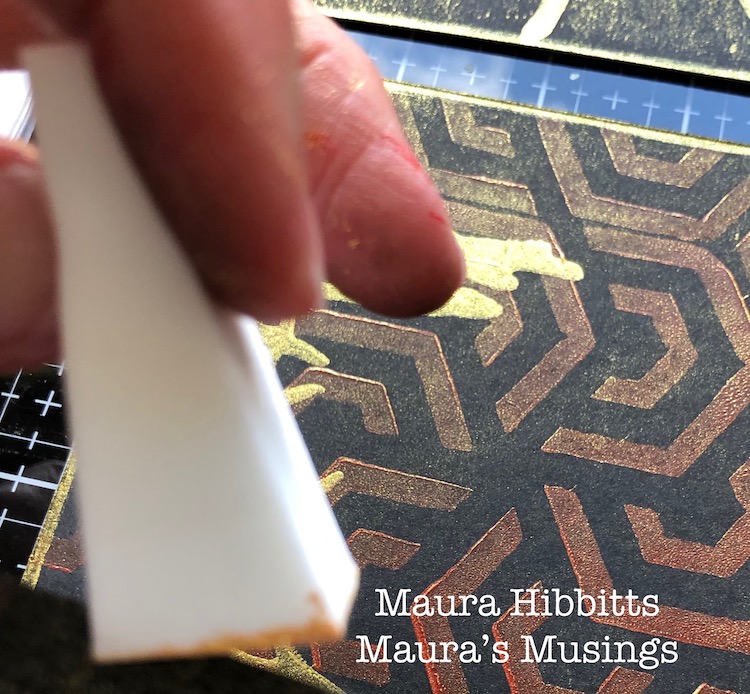
My project uses a few simple materials.  I began by cutting the white card stock into the card base to make a 5.5 inch square card. (5.5” x 11”, and fold in half) The dark red paper is a 5.25 inch square, and the black is a 5 inch square.

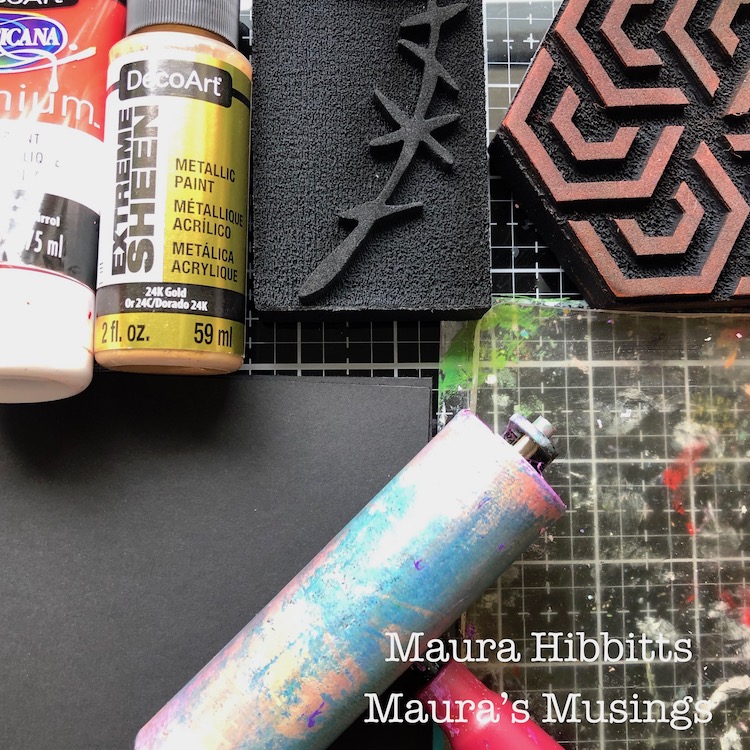
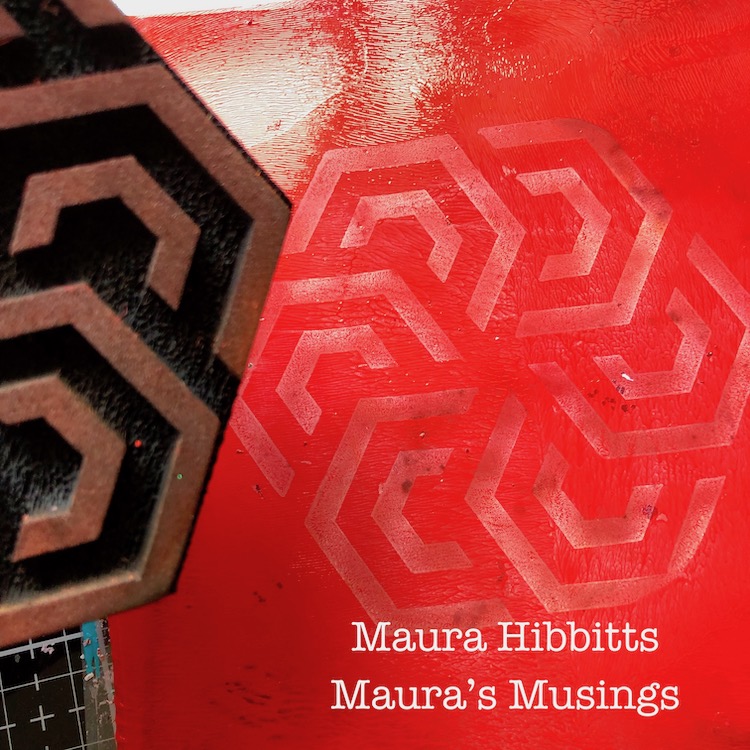
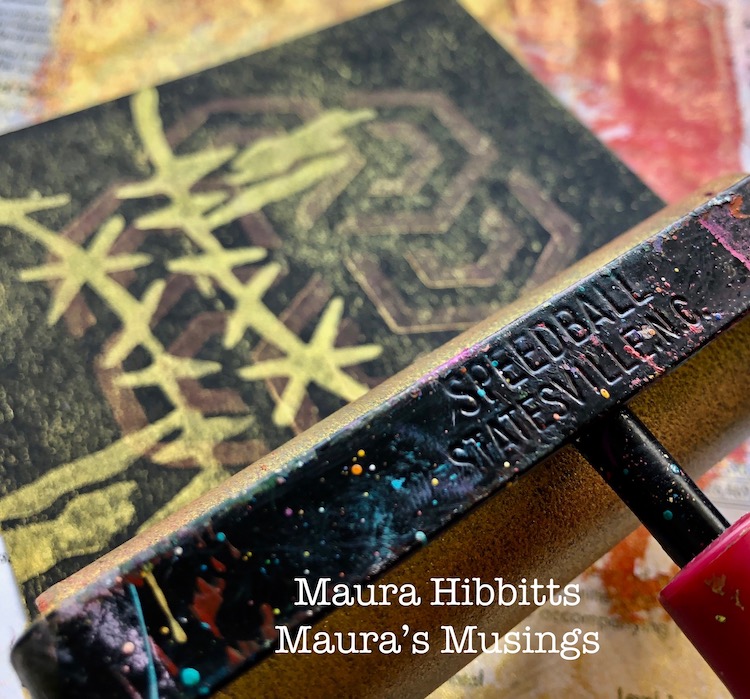
Whenever I am stamping with paint, I reach for a gel plate. This is the perfect tool to lay the paint on and smooth it out with a brayer, then stamp into, to pick up the paint. The foam stamps are amazing with paint, just be sure to clean the paint off right away, using a baby wipe or soap and water.

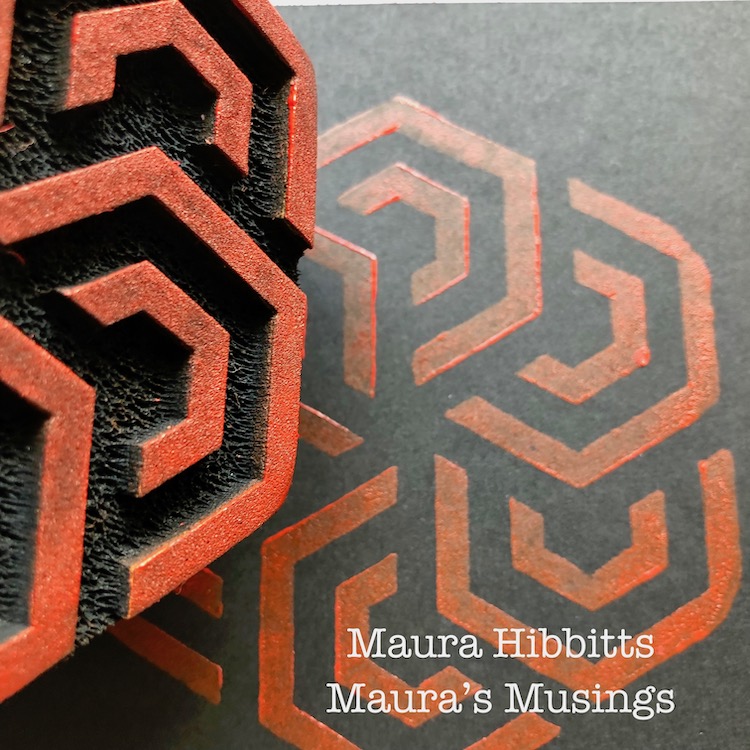
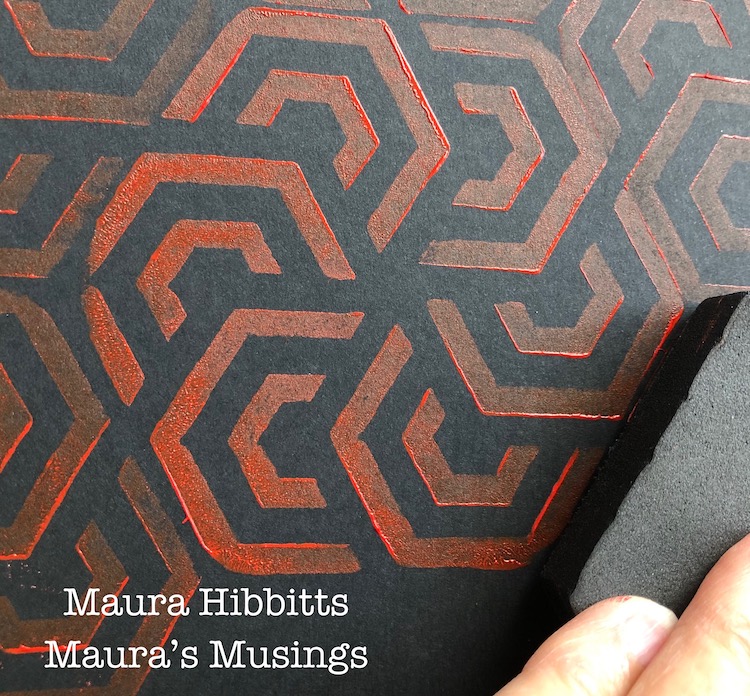
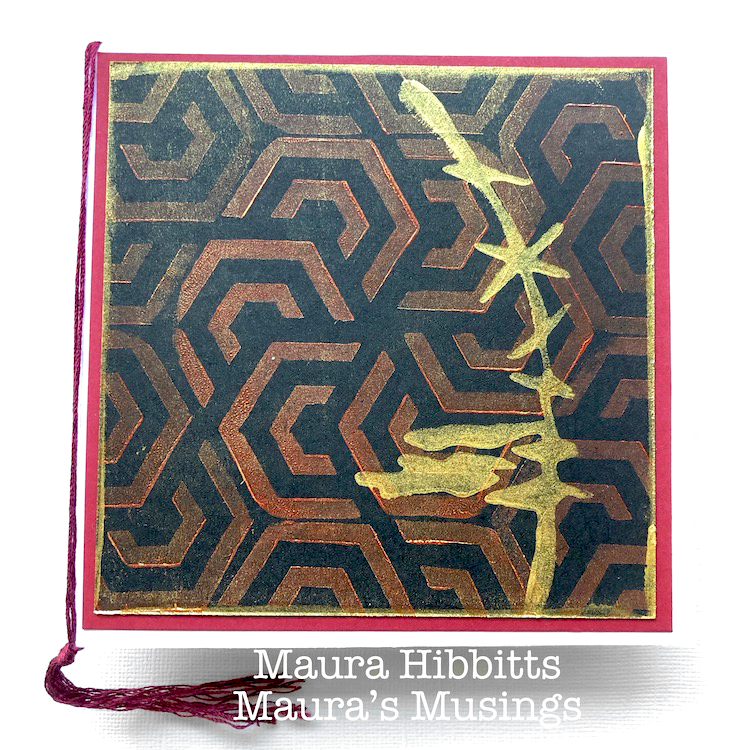
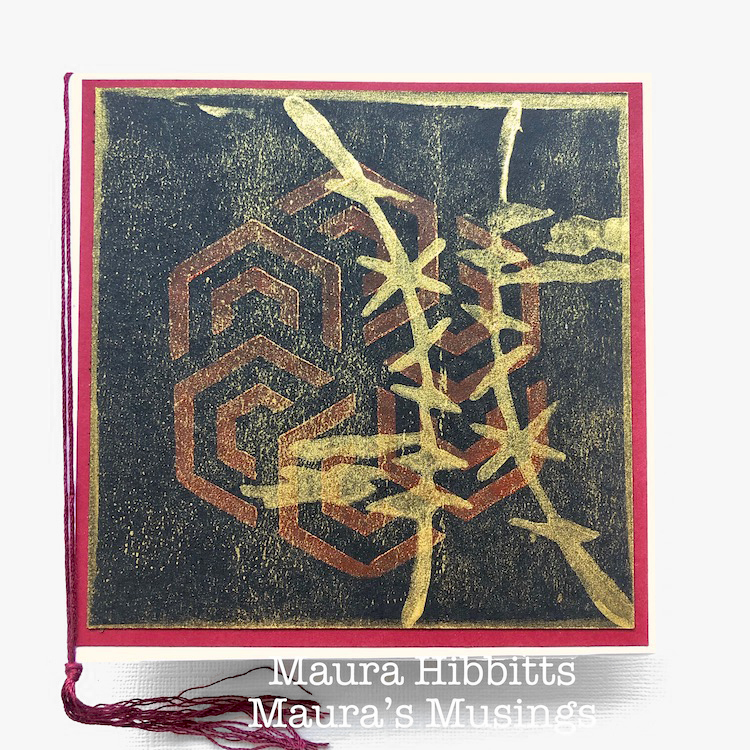
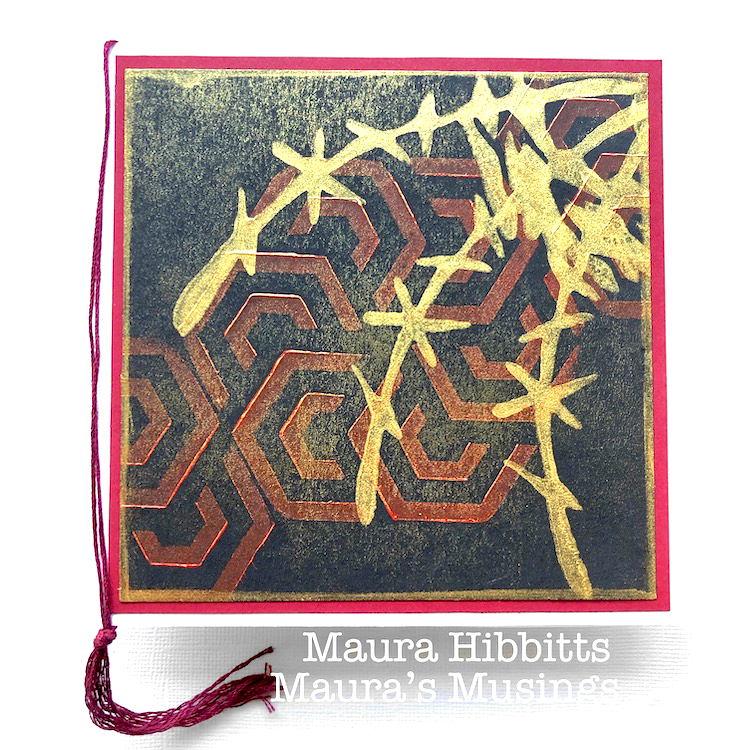
I’m using Pyrrole Red acrylic with the Maze Hex foam stamp. Since I am stamping the red onto black card stock, I got the paint nice and juicy on the stamp, so it would show up against the black. I made a single image on one card, and a diagonal image by stamping two partial prints on the edge. The third card has a central image, and then I stamped partial images all the way around. 

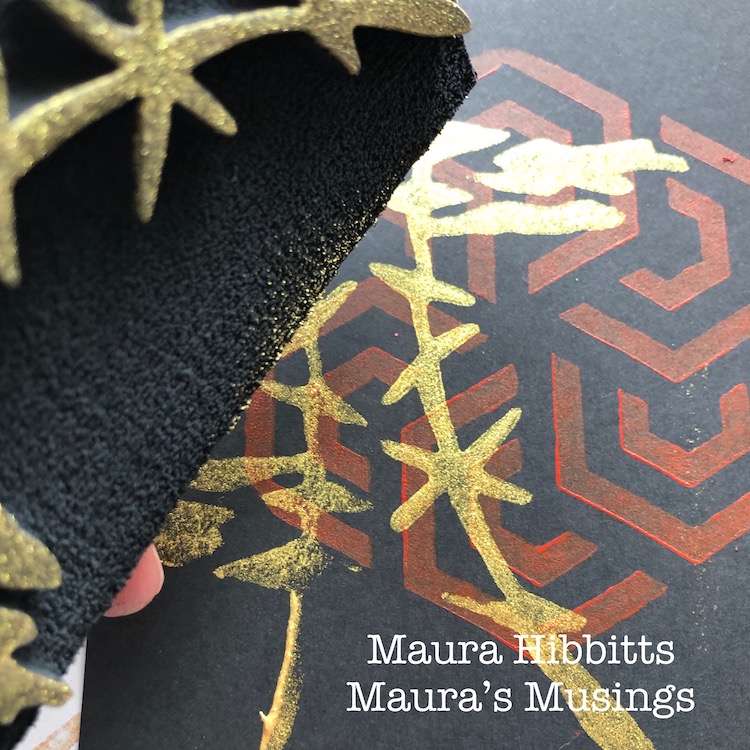
When I look at the Groovy stamp, I see an Asian image or a tree with clouds, which inspired me to stamp with Gold acrylic for a bold statement. Once again, you can brayer the gold onto the gel plate and stamp into it, to pick up a nice even coat of paint. Your other option is to use the brayer and roll it over the stamp. I varied the number of images on each card to create variety.

I had a bit of gold left on the gel plate, so decided to experiment by rolling a very light layer of paint with the brayer over my stamped images. Since, the red paint had some depth to it, edges of the hex design picked up the gold, giving it more definition.

I went around the black card stock with gold paint using a cosmetic sponge to frame the design.

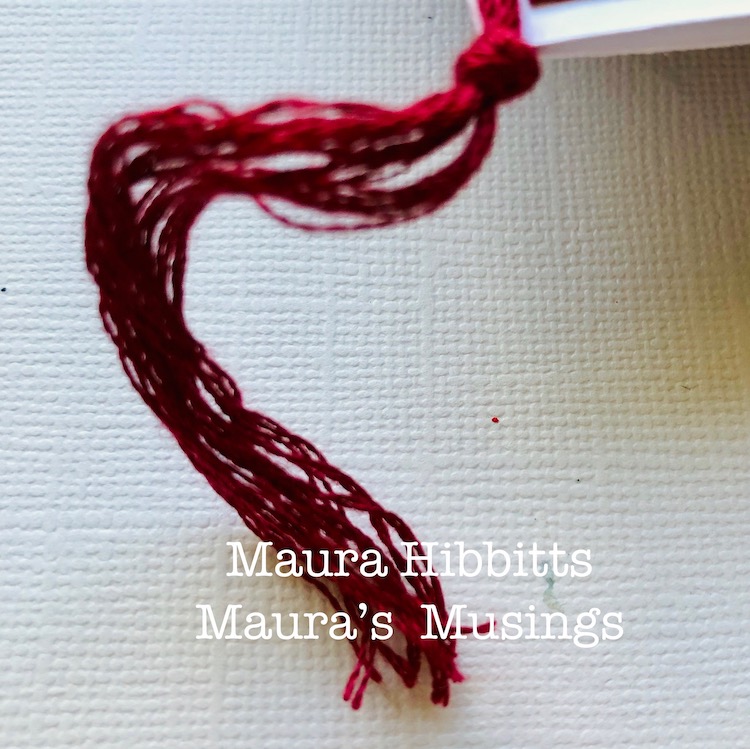
Finally, I tied a double layer of maroon embroidery floss around the card, tied it at the bottom, and separated the strands to create a tassel.

Now, I have a trio of bold and shimmery cards ready for the perfect occasion. Why not try making an easy set of stamped cards with paint, yourself?

Layer several colors of paper, use a couple of stamps and paint colors, and just imagine the variety of cards you could create! What occasions would you use these for? It’s time to Go Bold!


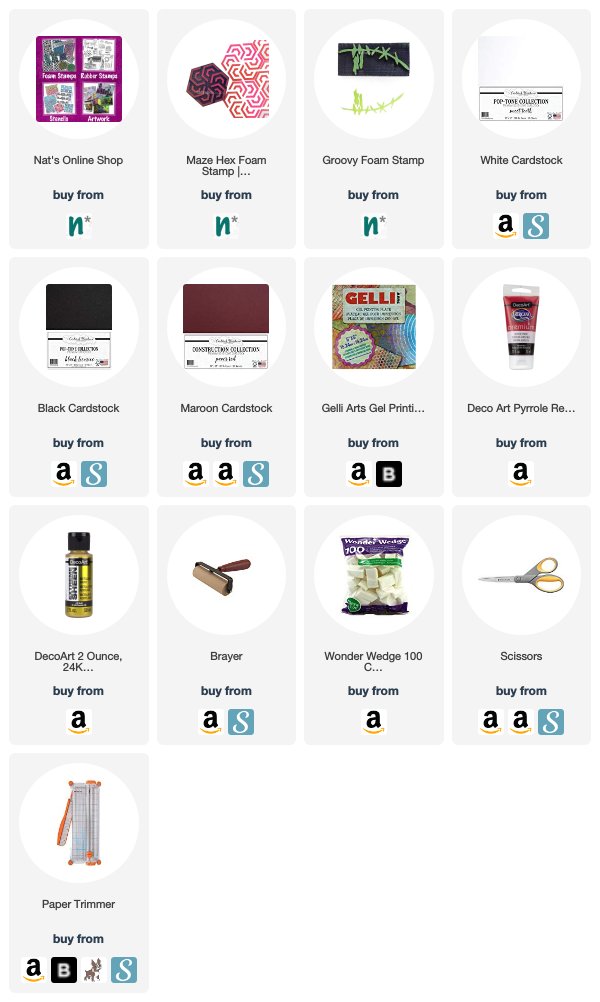
Thank you Maura! Love this combination of black red and gold! You can find all of my Foam Stamps in my online shop. Here are some of the other supplies Maura used:

Feel inspired? Working on something yourself that you’d like to share?  I love to see how you interpret our monthly themes. Email me how you used my stencils and stamps with the theme and email me an image – I would love to share your projects in my next  “n*Spiration From Around the Globe“.
Leave a comment

Boldly Going – Jennifer Gallagher

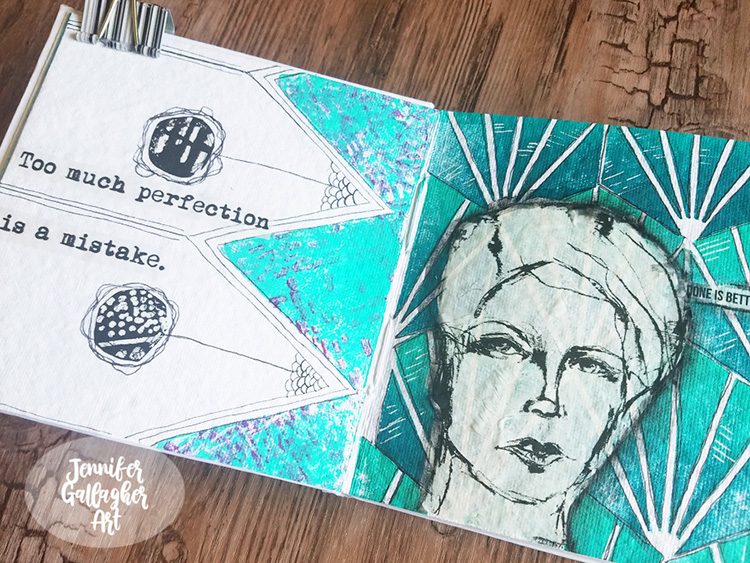
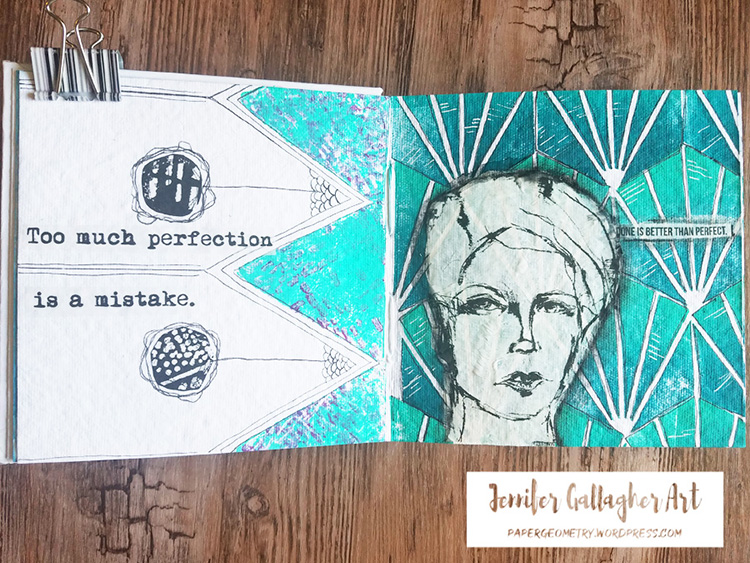
Welcome to a post from the Creative Squad! Today we have an art journal page from Jennifer Gallagher that will inspire you to work more boldly and intuitively. She is using my Clam Hex and Signals foam stamps and this month’s theme: Boldly Going – Go BOLD with color or pattern this month and really make something that is packed with visual POP! This is no time to be subdued or subtle. Go Bold!!!


This month we are “boldly going” while creating with n*Studio products. To me being bold means making artistic decisions quickly and going with my gut. I try to shut down the negative voice inside and create almost intuitively. While creating this art journal spread I made quick decisions about colors and patterns and just went with the flow. Let’s get started!

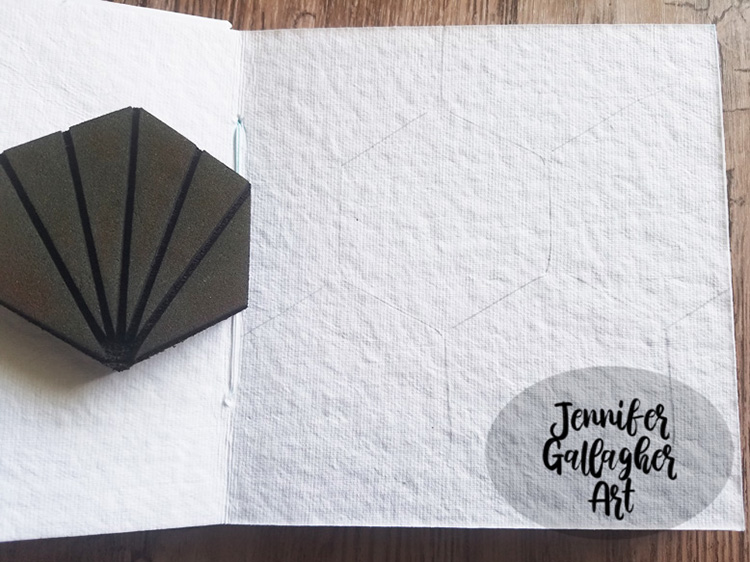
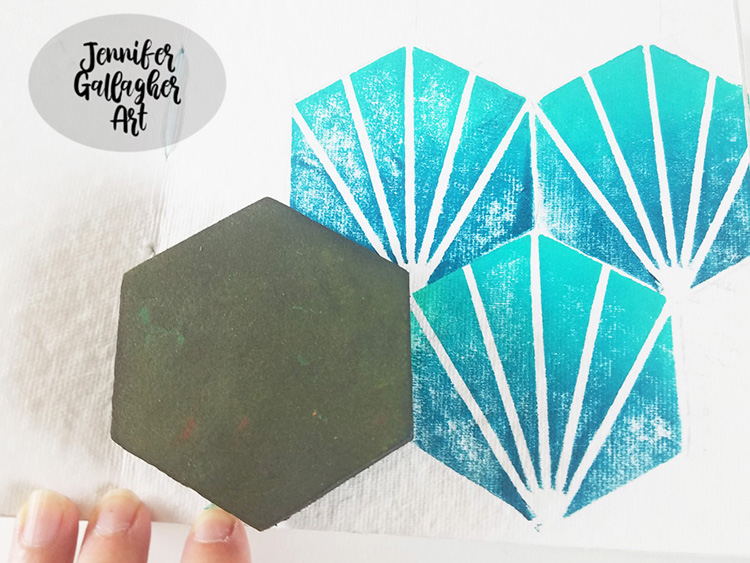
I began on the right side of my journal spread by penciling in a grid with my Clam Hex foam stamp. Having a grid determined before hand makes the stamping quick and easy.

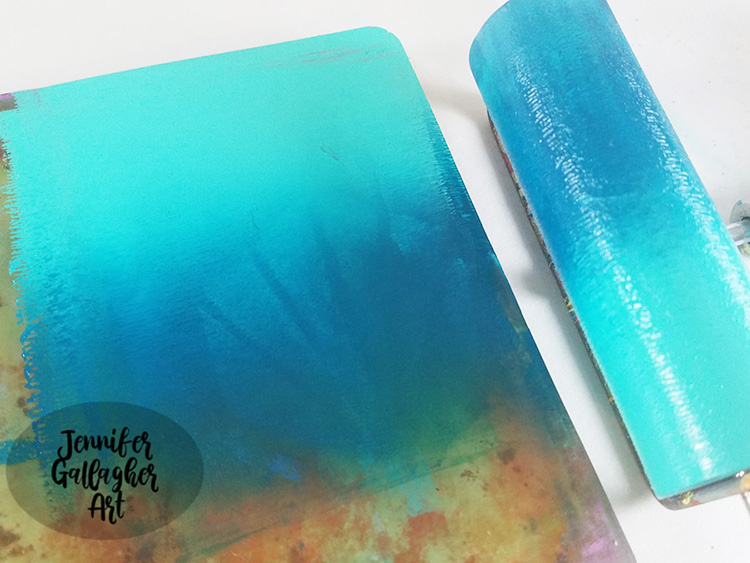
I wanted to stamp with a gradient of two colors. I have applied bright aqua green and phthalo turquoise acrylic paint on a gelli plate and brayered it out and applied it to my foam stamp. I then pressed my stamp down in accordance with my grid across the entire page.

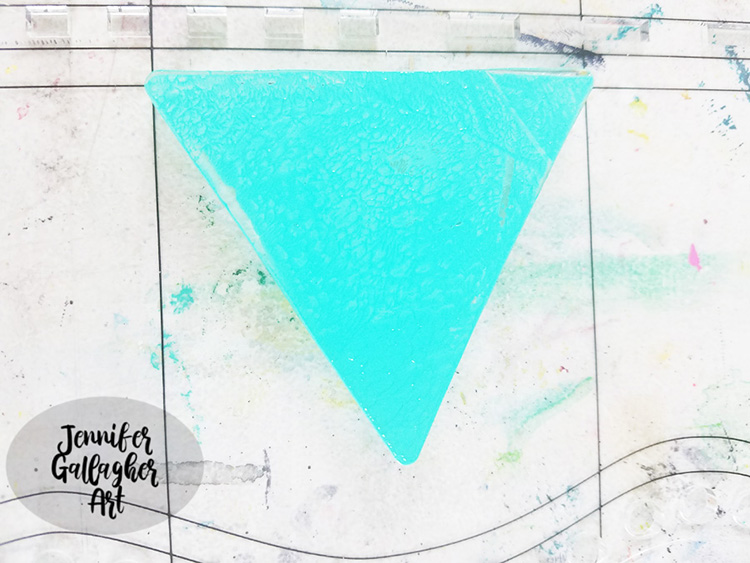
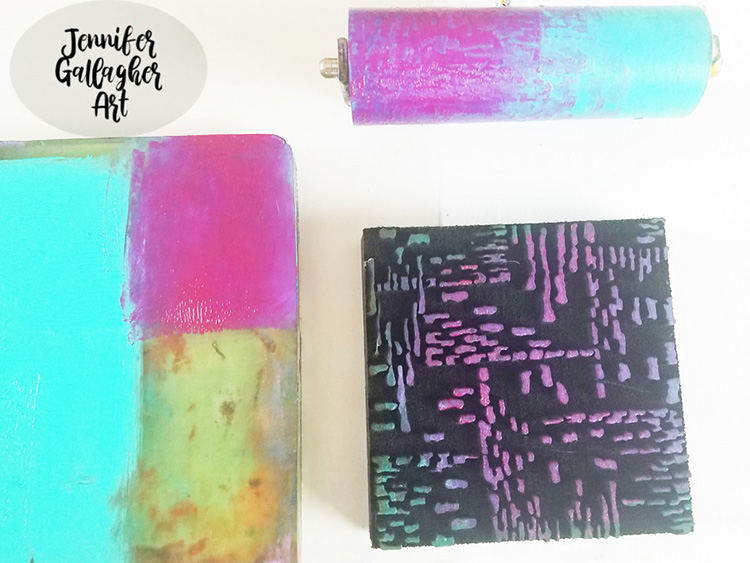
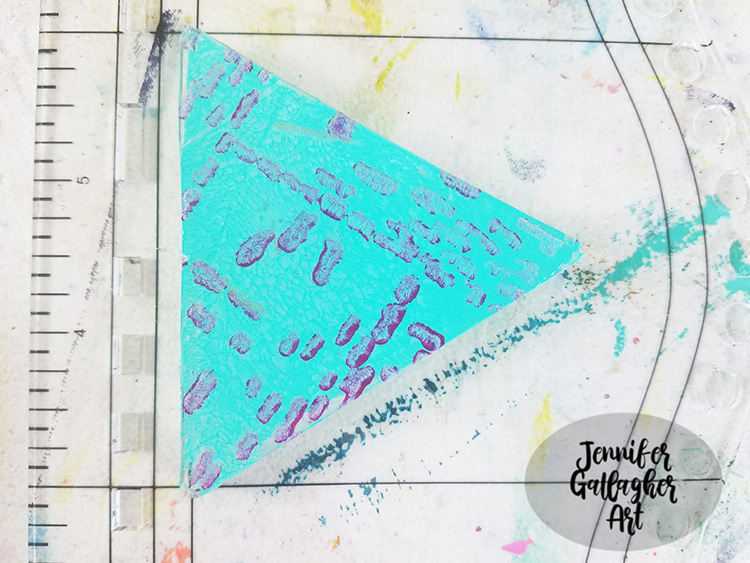
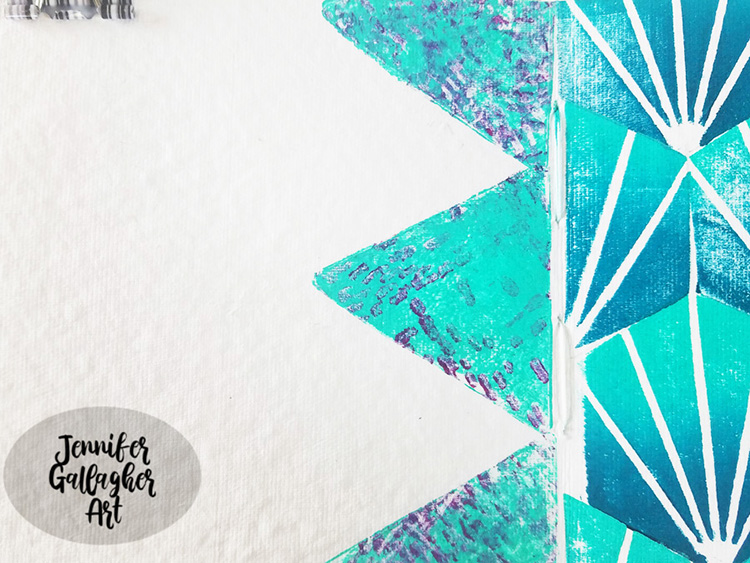
Next, I brayered bright aqua green acrylic paint onto a three inch triangular shaped gelli plate which I fixed to an acrylic block. Then I brayered quinacrodone magenta acrylic paint onto Nat’s Signals foam stamp and pressed that onto the triangular plate. Lastly, I pressed the plate down onto the right side of the left page, down the length of the page.

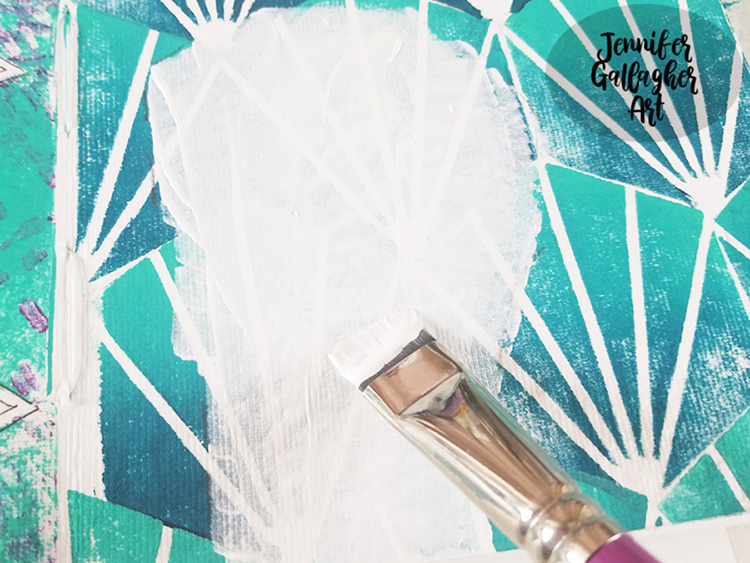
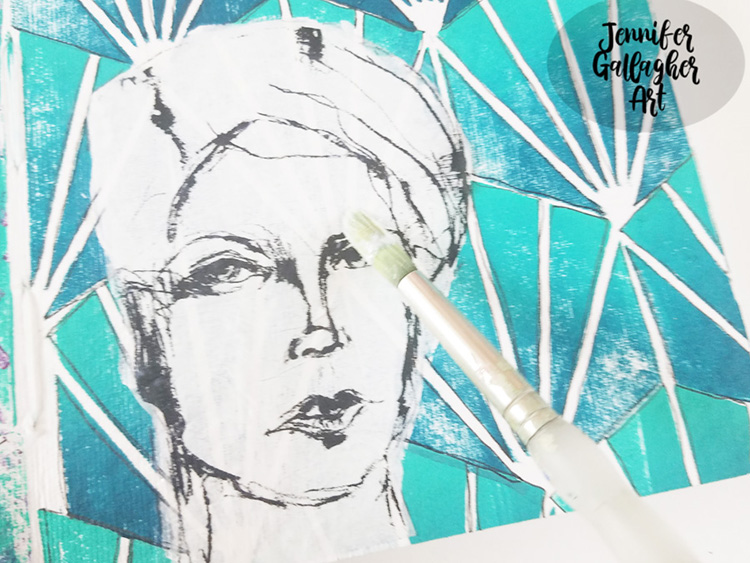
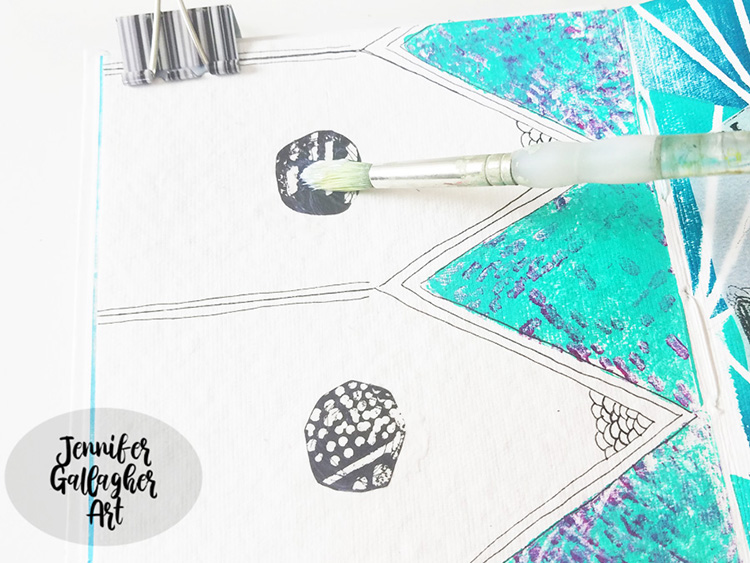
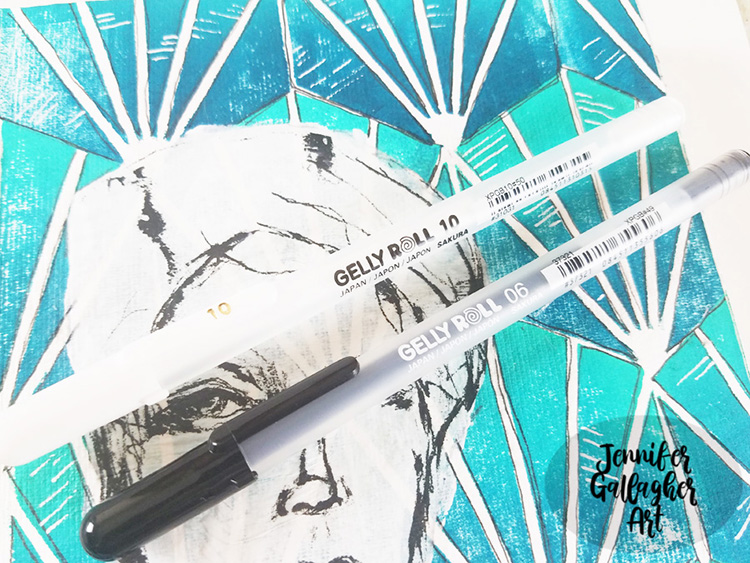
I decided where I wanted to place my tissue paper face and laid down a light layer of white gesso in that area. This helps the image to pop off the page. Then I adhered it and two tissue paper circles on the left side of the page with matte medium. Using a black and white gelly roll pen, To add a little extra interest, I doodled on both pages.

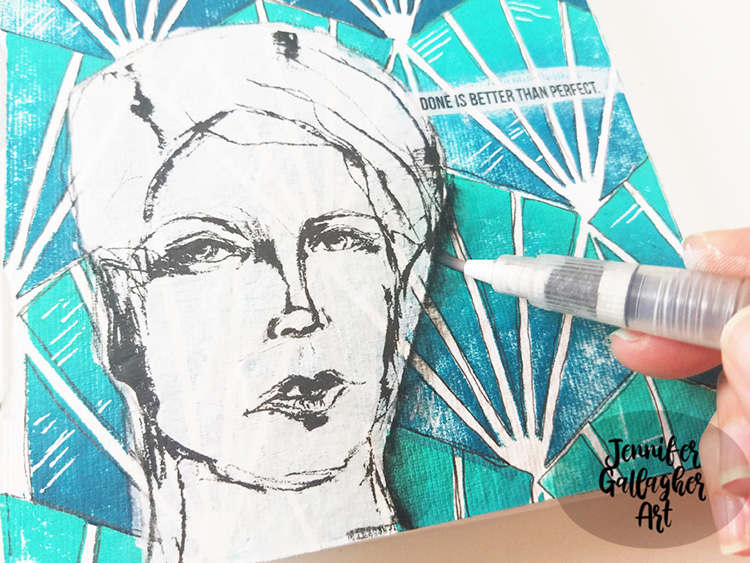
I chose a few tissue paper sentiments and adhered them with matte medium. Next, I used a stabilo all pencil and a waterbrush to add a little shadow around the face.

I love how this page turned out. Now it’s your turn! Pull out those n*Studio products and be bold. Don’t forget to share your creations with us.


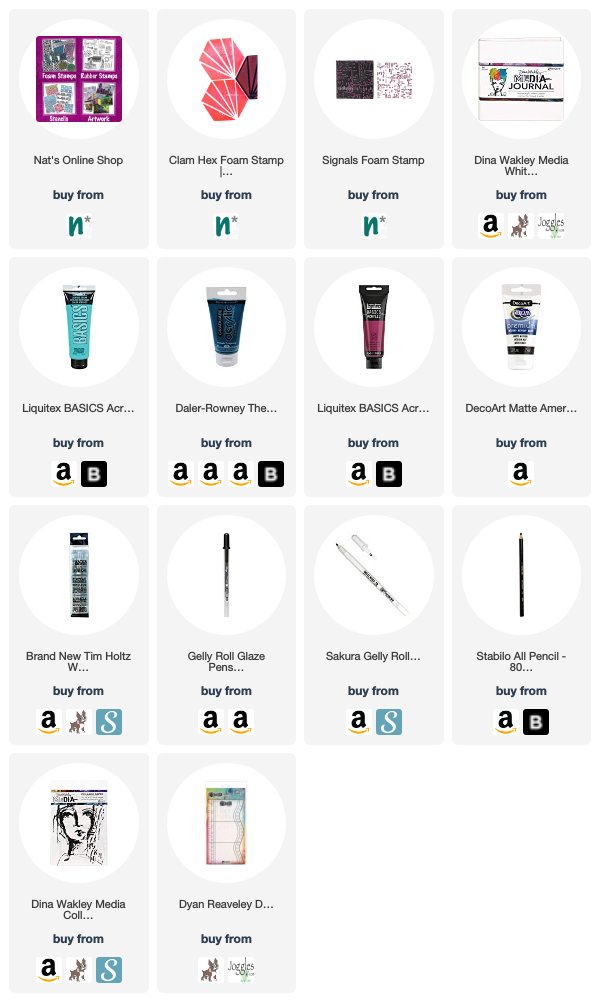
Thank you Jennifer! Definitely love how “going with your gut” made for such a bold page :) You can find all of my Foam Stamps in my online shop. Here are some of the other supplies Jennifer used:

Feel inspired? Working on something yourself that you’d like to share?  I love to see how you interpret our monthly themes. Email me how you used my stencils and stamps with the theme and email me an image – I would love to share your projects in my next  “n*Spiration From Around the Globe“.
Leave a comment