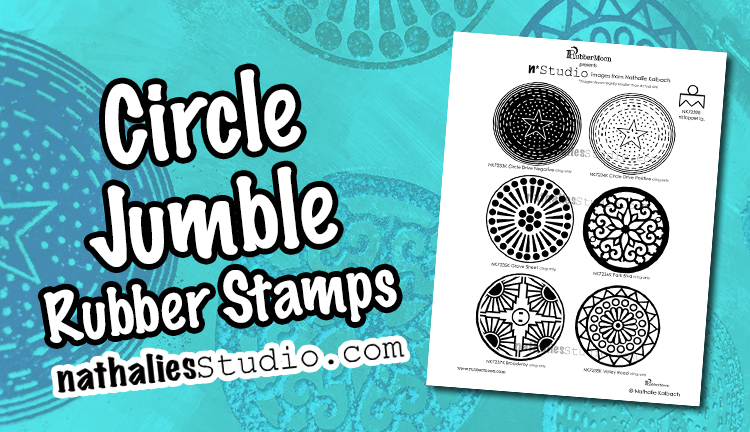
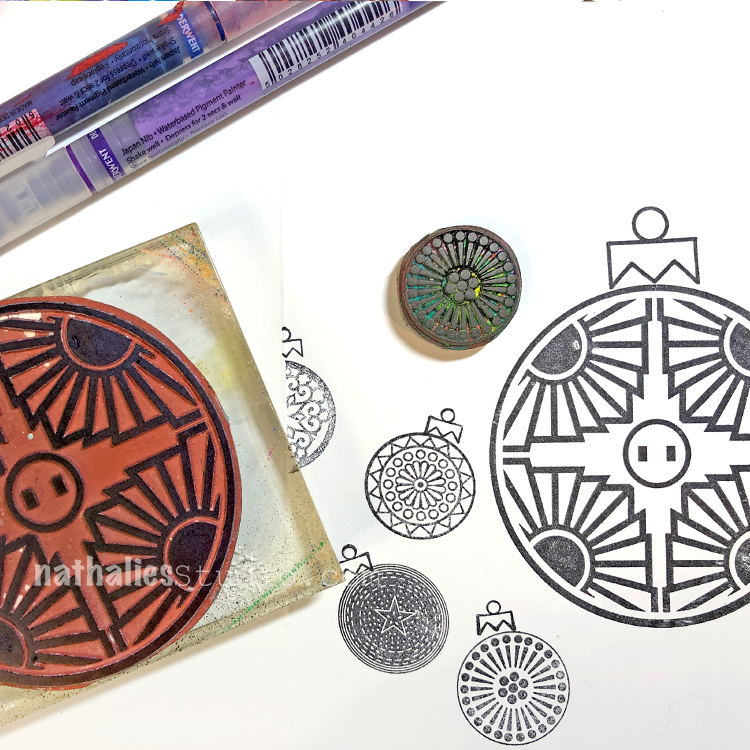
Put a Circle on It! I don’t know why circles are such a pleasing design element but I definitely gravitate towards them. Maybe it’s just something in our makeup as humans that we like these focused, round shapes that remind us of the Sun and our moon, many things in nature, and are without harsh pointy corners. Who knows. But what I do know is they make excellent focal points in an art journal or on a canvas and they have a ton of innate appeal. That’s one reason I designed my Circle Jumble rubber stamp set – I wanted some nice circle options to go to again and again :)
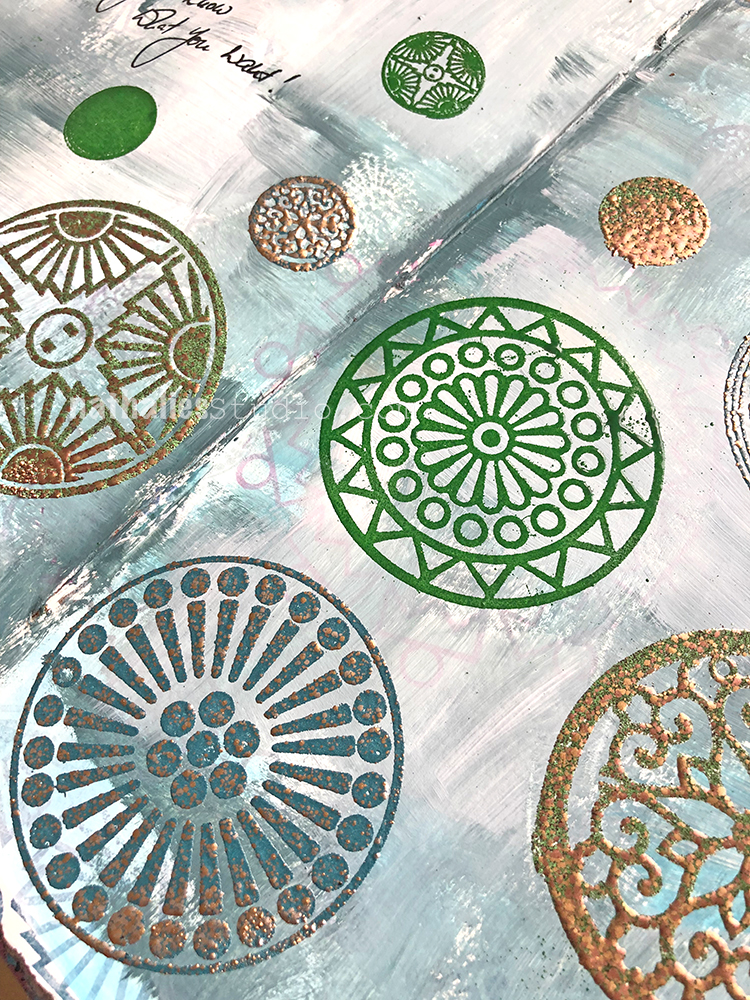
I used the stamps with chunky embossing powder in this spread. Don’t you just want to touch them? It’s like the embossing emphasizes the roundness and that is even better!
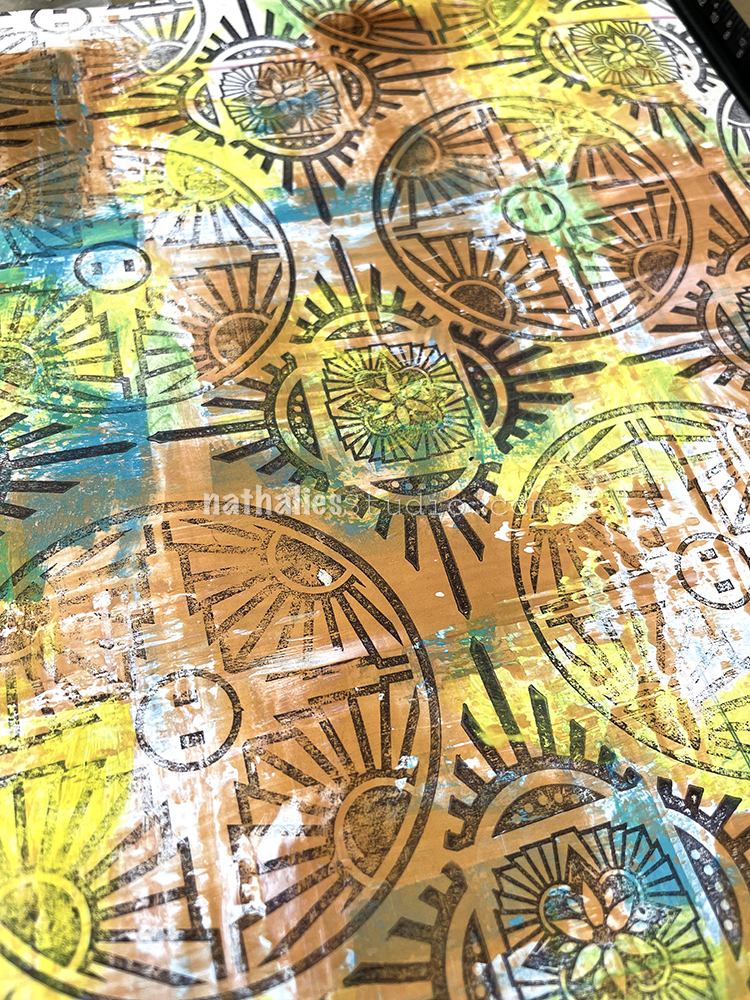
Circles are so harmonious… and they play so well with other shapes and are an excellent building block to patterns. In this art journal page I used those Large Circle Jumble stamps with triangles and squares and it all just fits and makes me happy.
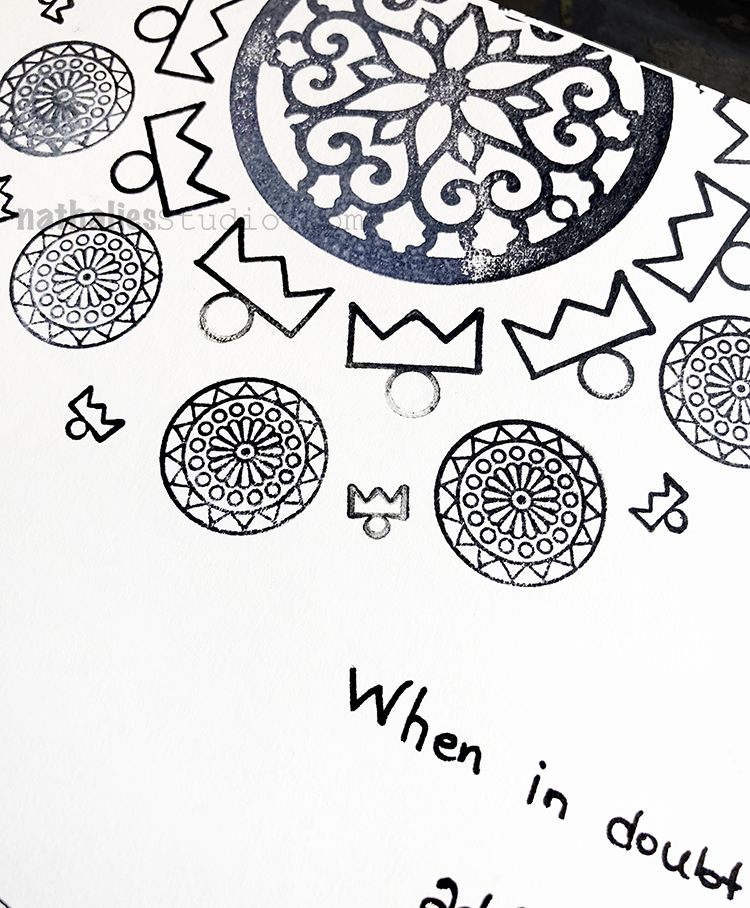
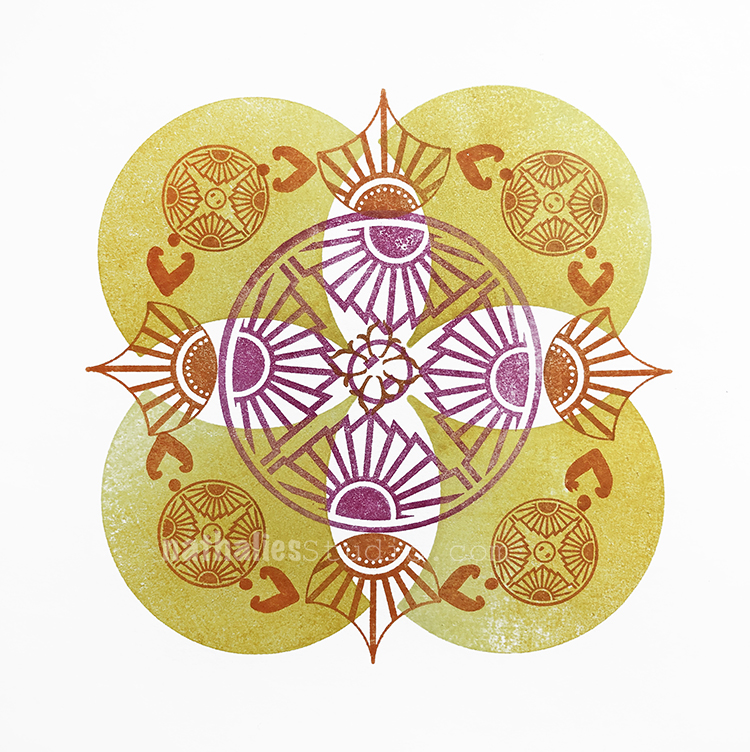
When in doubt… start with a circle! Here I used them as the center of a mandala. All the Circle Jumble stamps have a central focal point that everything can radiate out from.
You can also keep it simple with circles. Just a few on a card and you have a pleasing design scheme. This stamp set has a positive/negative pair in it too – looks great playing off one another.
Put a Circle on It! Get your hands dirty (maybe with some paper clay even!) and bask in the harmony of the circle – the Circle Jumble ;)
Hello from my Creative Squad and a post today from Maura Hibbitts. Maura is sharing with us a super cute ornament and gift tag idea using my Grove Street stencil and my Large and Small Circle Jumble rubber stamps. This month’s theme is: Happy Holidays – It is a time of year where we are celebrating and coming together and enjoying some merriment. Create something holiday related (whatever holiday you may be celebrating) and enjoy the season!
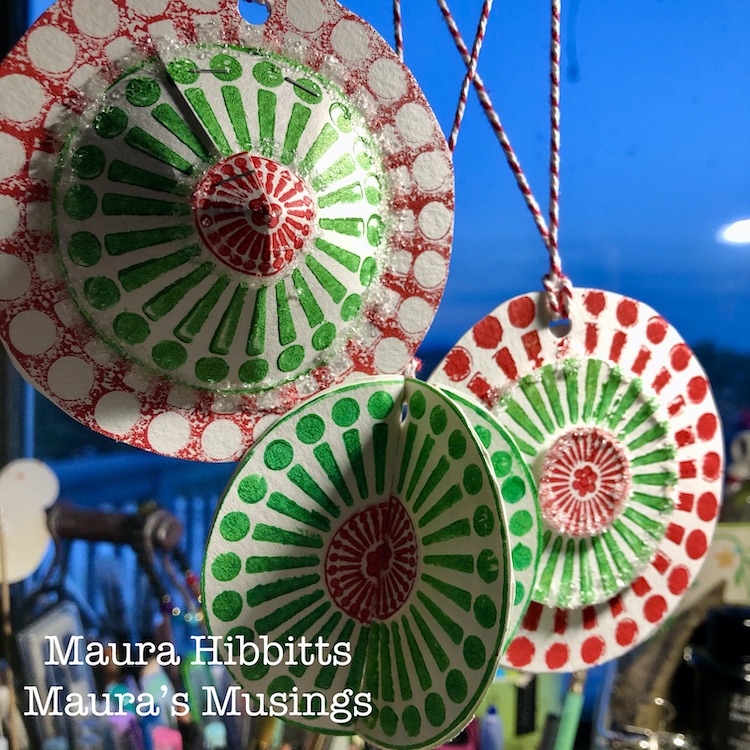
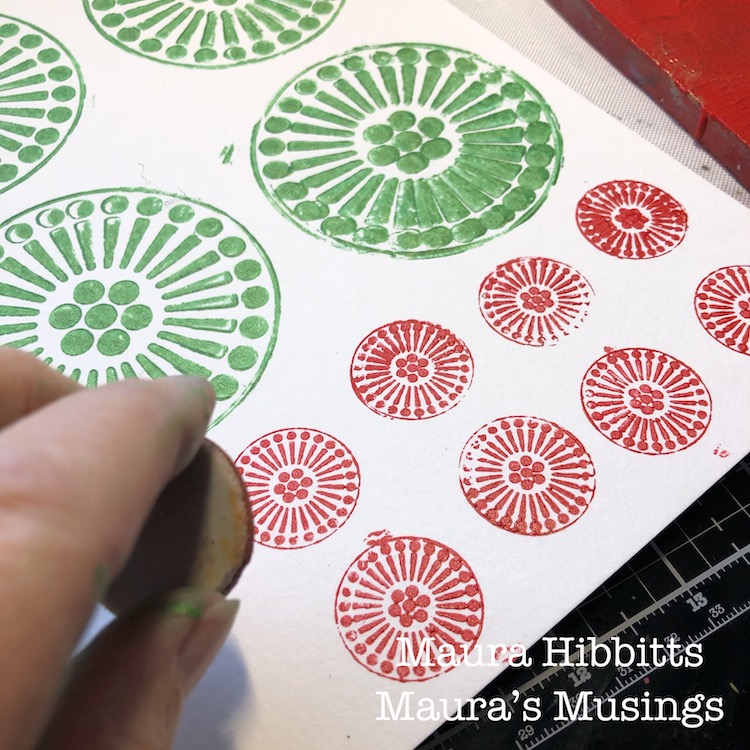
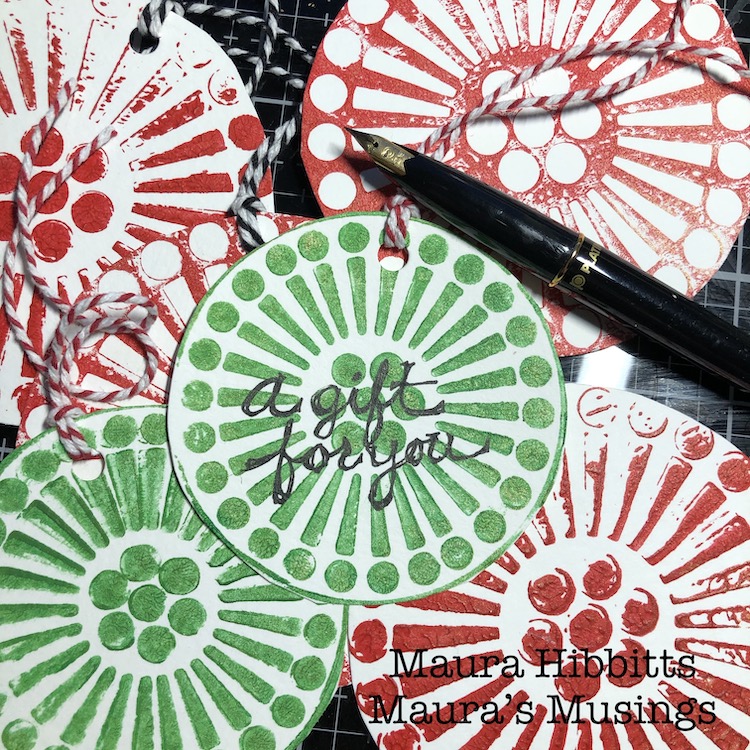
Wishing you all a very merry holiday season! Here in the U.S. it’s a really short run between Thanksgiving and Christmas this year, with the usual hustle and bustle of meeting up with friends and family, baking extra goodies, and looking for the perfect gifts. I’ve been busy already working on cards and small items for friends, so our theme for this month is perfect to get a bit more completed. I decided to work in traditional green and red, and make some tree ornaments and tags.
I’m using one design, and repeating it in several sizes, with the Grove Street stencil and Small and Large rubber stamps.
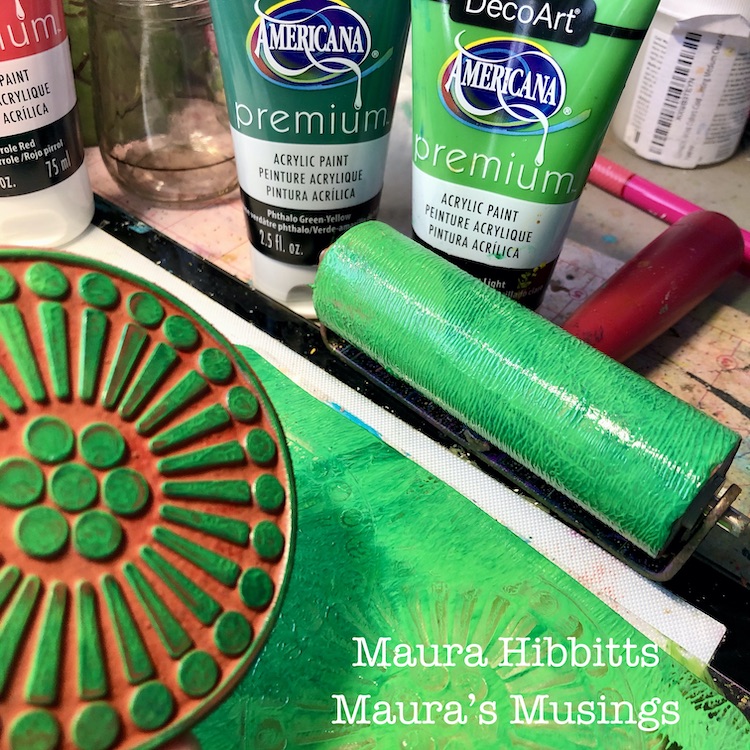
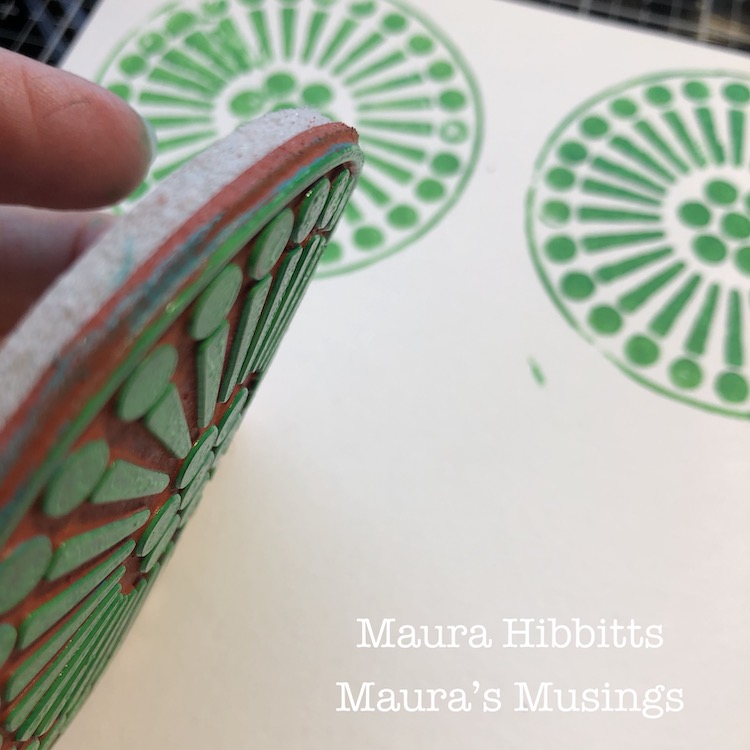
I started with a mix of the green paint on my gelli plate, then added a bit of gold, stamped onto the plate with the large stamp, and transferred the image to heavy watercolor paper.
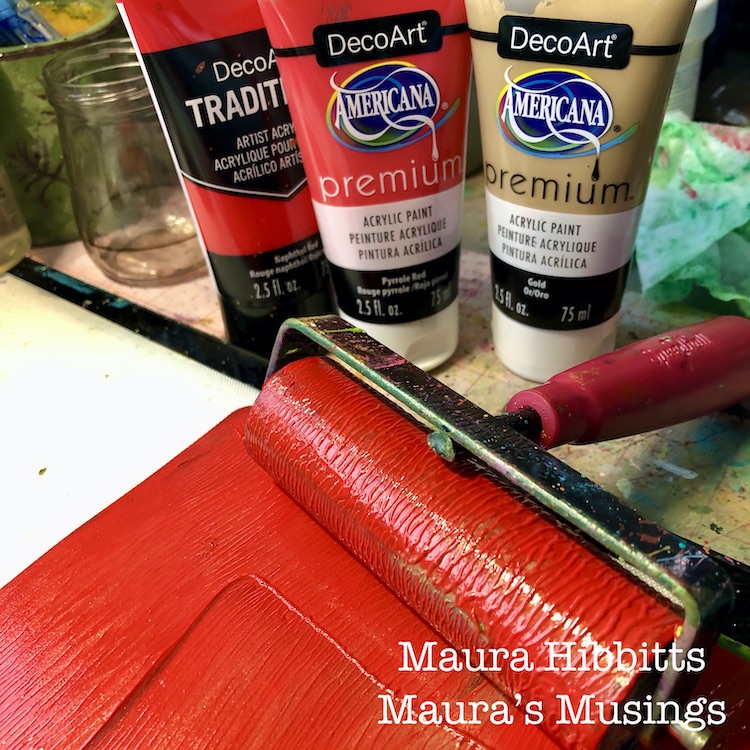
I knew I wanted to mix the colors with the sizes, so next up on the gelli plate is a mix of red and gold. I used the small stamp with the red paint, and stamped these images on the watercolor paper also. Note – be sure to clean the acrylic paint off your stamps right away.
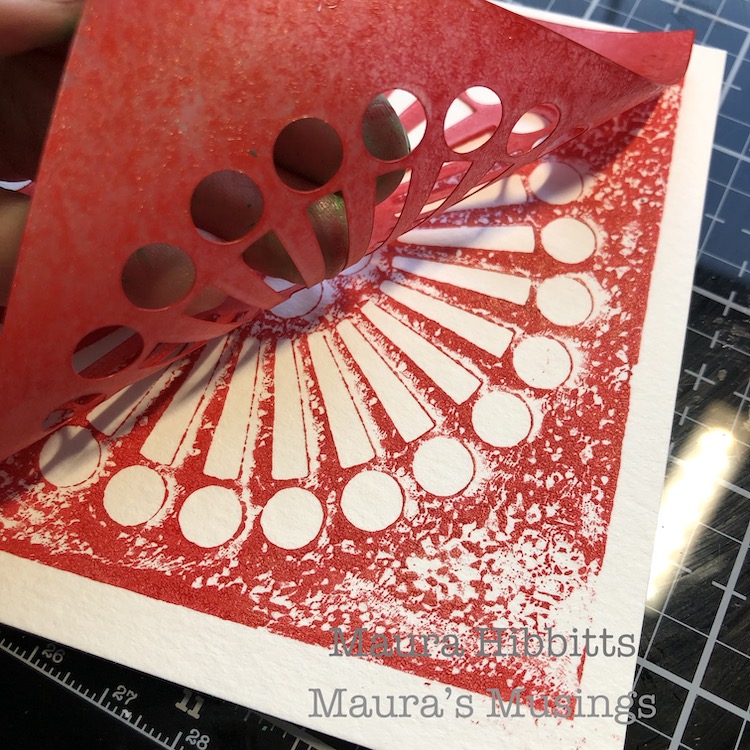
The Grove Street stencil is the largest image, and I laid the stencil down on the red paint on the gelli plate and pressed the paper down onto it. Then I lifted the stencil and pressed it onto another paper, so I would have both a negative and a positive print.
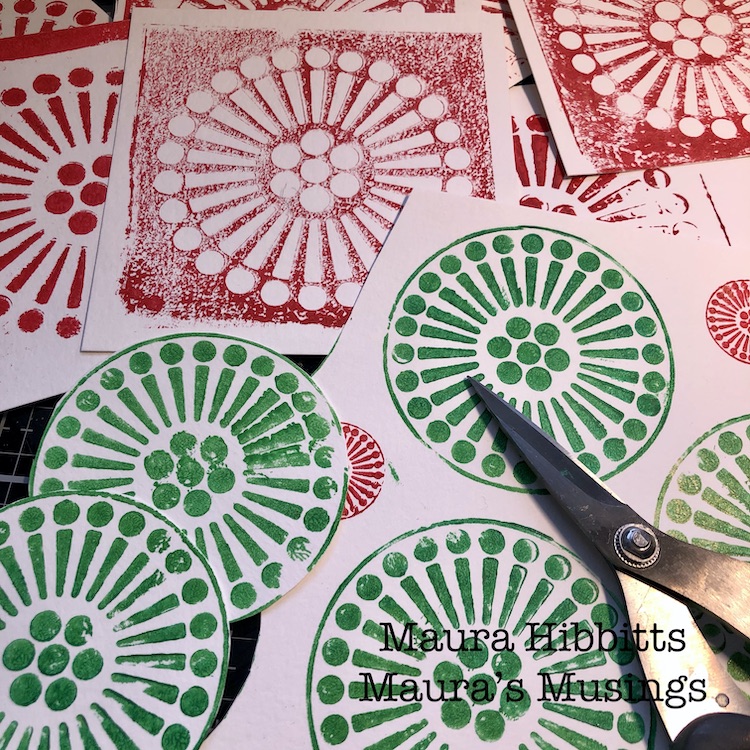
Once all the paint is completely dry, it’s time to cut them out. I just do it with scissors, but if you had a punch in the correct size that would work well.
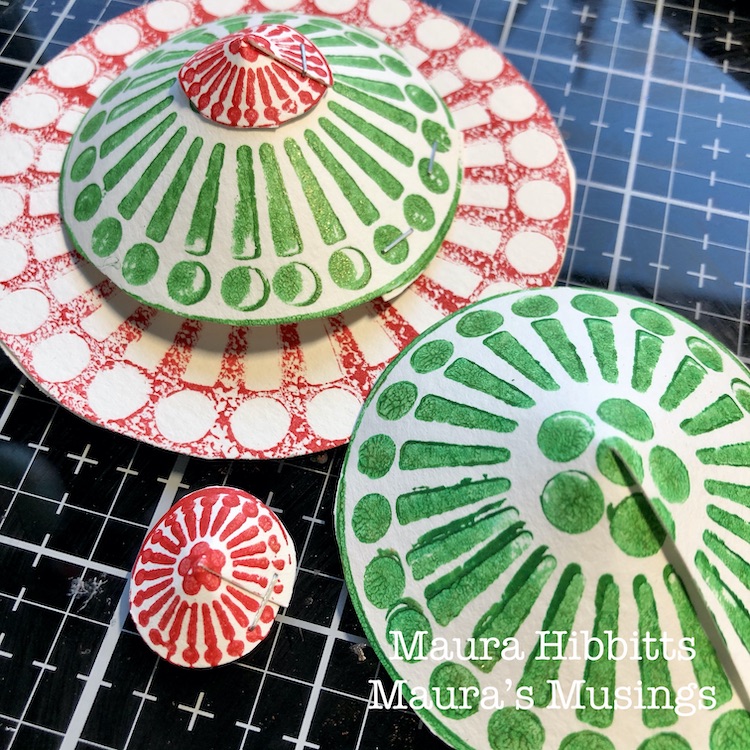
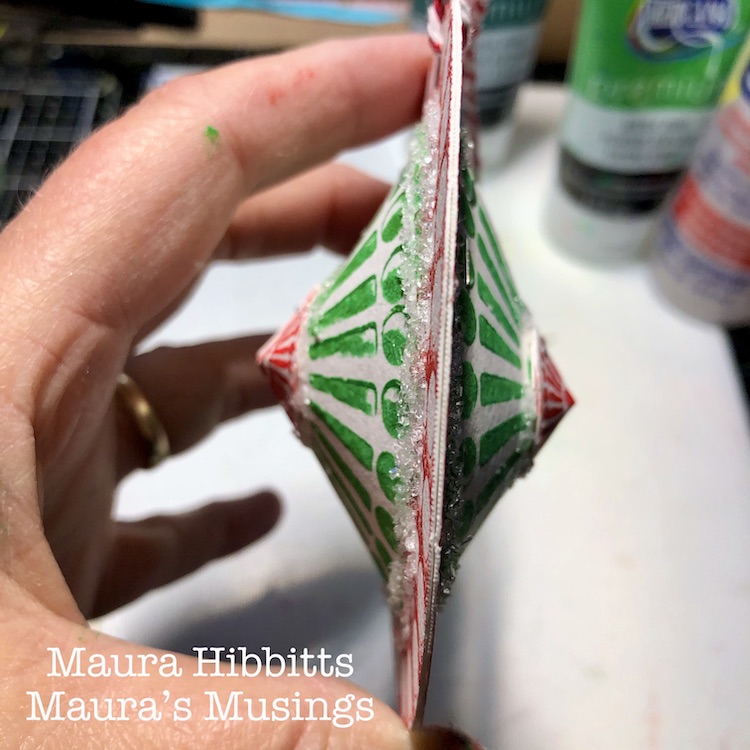
I got the idea in my head that I could make a 3D ornament, so I started by gluing two of the stenciled circles together. Next, on two green and small red circles, I cut a slit to the center, then formed it into a cone and stapled it. I made sure the little red one fit onto the green circle, and glued the cap on. I added a layer of glue to the bottom of the green circle and attached it to the stenciled circle. I had to apply pressure and hold in place for awhile to get the glue to hold. I repeated the process on the other side, then decided it needed a bit of glitter, so added a bit more glue and glittered it up.
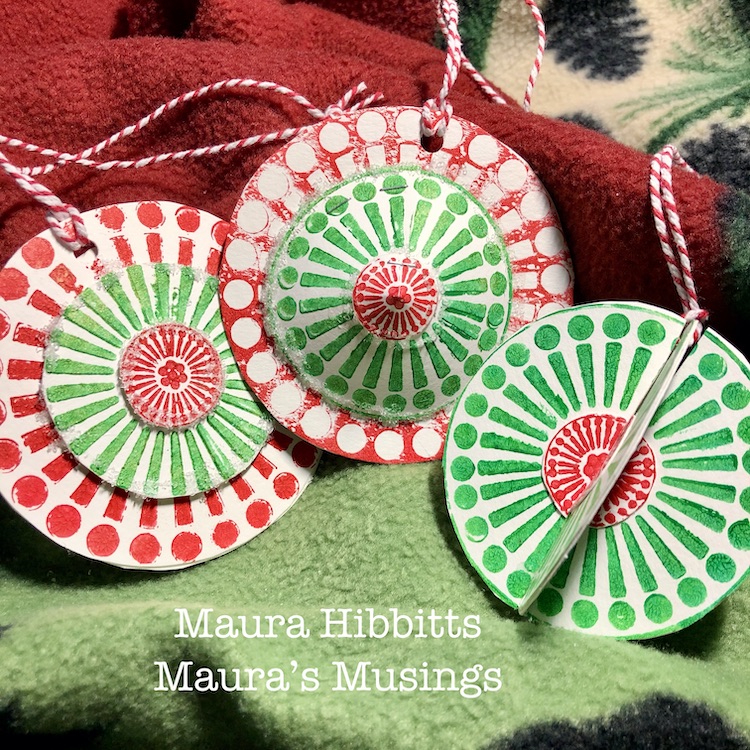
I made two more ornaments, a flat one, and another 3D one in which I cut slits into both circles to the center and slid them together. On each of these, I glued a double layer together and added glitter to the flat one. I had a lot of circles remaining, so turned these into gift tags. I punched holes in the tags and ornaments and attached some bakers twine. It’s easy to add words on the acrylic paint with a carbon ink pen.
I like how the ornaments came out looking unique, while using the same materials. These are ready to hang on the tree.
I love adding a bit of homemade to the holidays! I always hope when someone receives a handmade gift or card, they feel that extra bit of love that went into it. Wishing you and yours a joyous holiday season and blessings for the new year! -Maura
Thank you Maura – love how you created some 3D ornaments and those tags are such a great idea for giving gifts with a personal touch.
Want to give Maura’s project a try? You can find all my Stencils and Rubber Stamps in my Online Shop and here are some of the other supplies Maura used:
Feel inspired? Working on something yourself that you’d like to share? I love to see how you interpret our monthly themes. Email me or tag me #natkalbach how you used my stencils and stamps – I would love to share your projects in my next “n*Spiration From Around the Globe“.
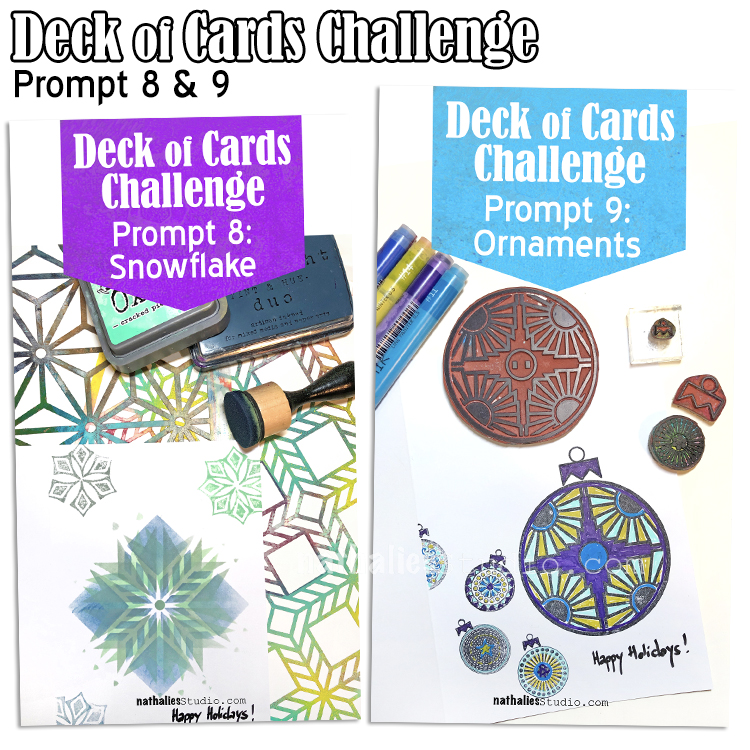
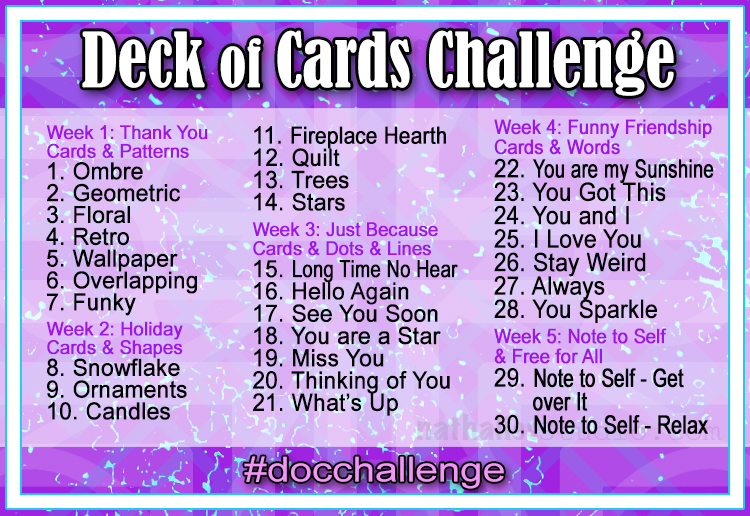
Today I am recapping Day 8 and 9 of my Deck of Cards Challenge that is running this month on Instagram. This week we are making holiday cards with a focus on shapes.
Here is a recap of days 8 and 9:
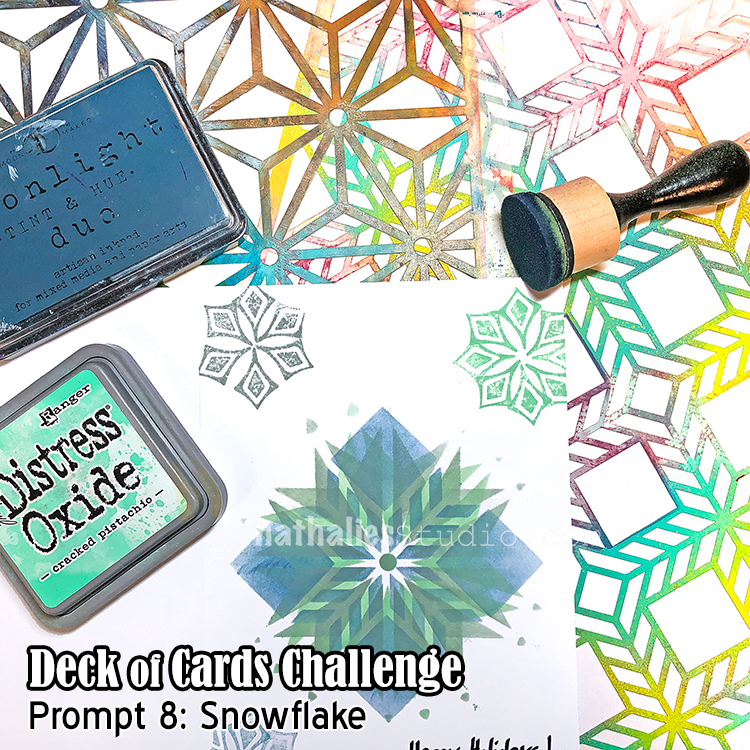
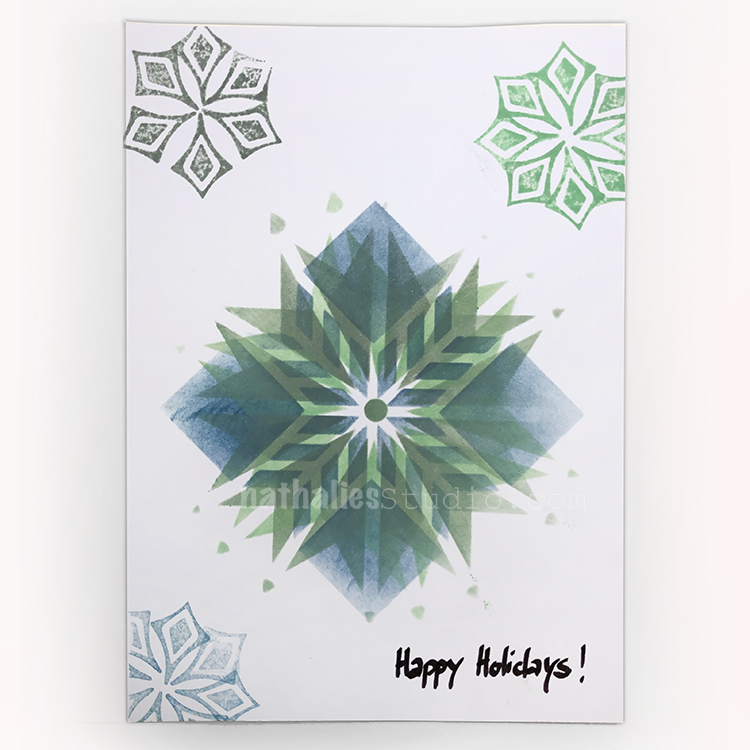
Day 08 – Snowflake
For week 2 of the challenge we are making holiday cards so I thought I’d start off with a classic winter motif – the snowflake.
Using an ink blending tool and masking off a shape in my Santiago stencil…
and then Star Struck stencil, I layered up a very nice snowflake. Because no two snowflakes are the same, I added a few more with my Fanfare stamps. This is one snow storm that will brighten anyone’s day :)
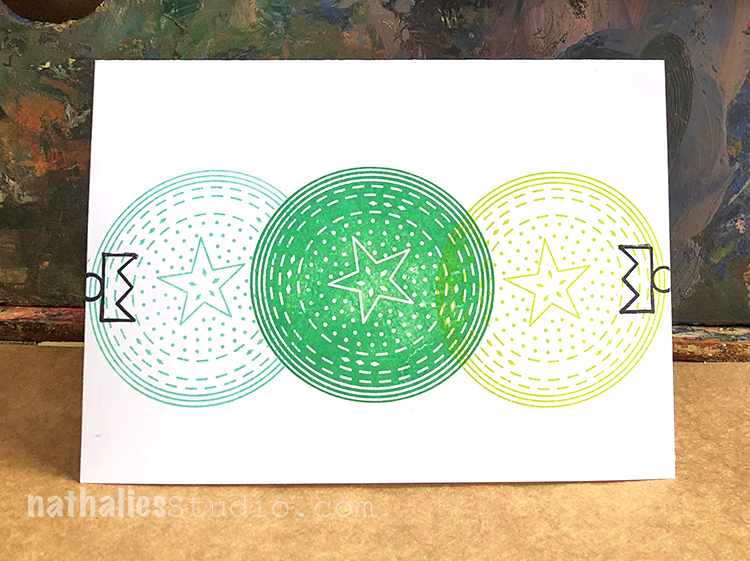
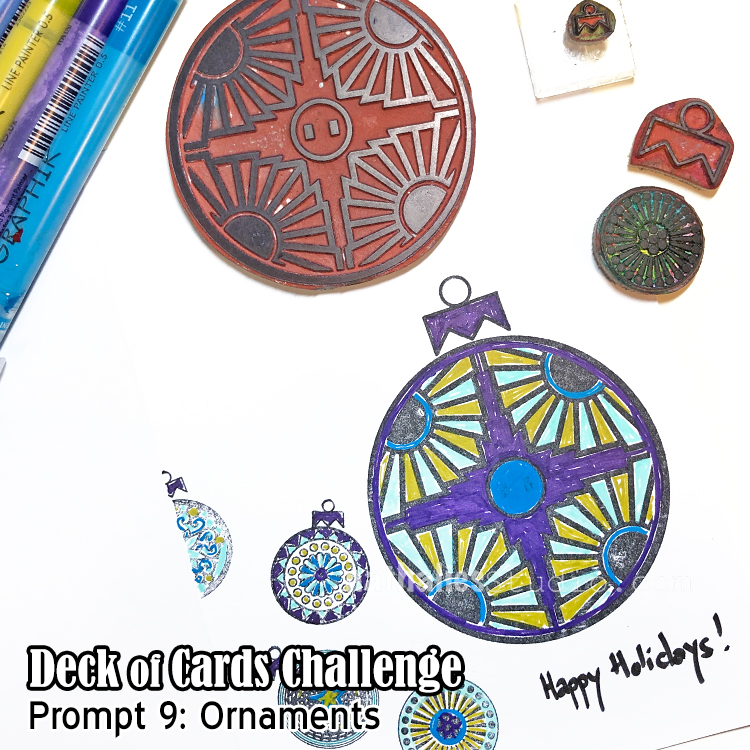
Day 09 – Ornaments
Today we are making a holiday card with Ornaments on it.
My Small and Large Circle Jumble stamp sets actually include an ornament topper stamp in them – so it couldn’t be easier. You could fill these in with lots of different colors – I’ve chosen to use Graphik Line Painter markers in some merry and bright colors.
Keep following us and I hope you share what you are working on using #docchallenge
Here are some of the supplies that I used in these prompts:
Here is the prompt list so you can play along too! Follow the daily prompts on Instagram and tag your creations with #docchallenge
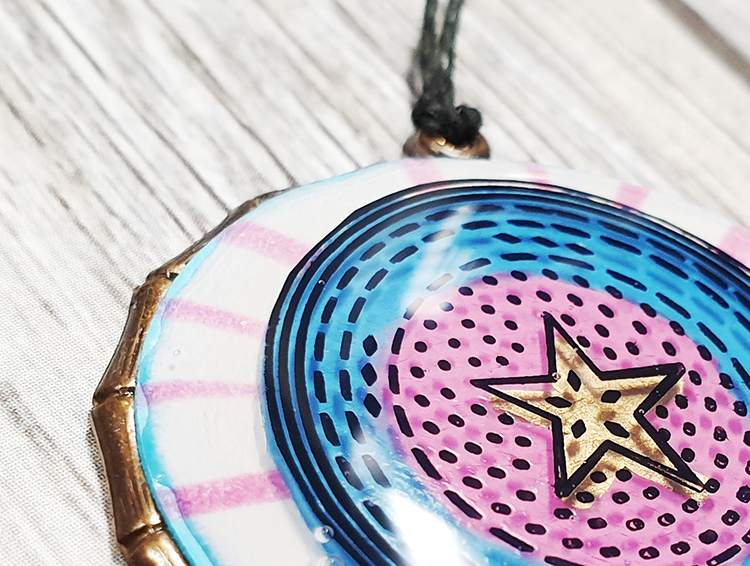
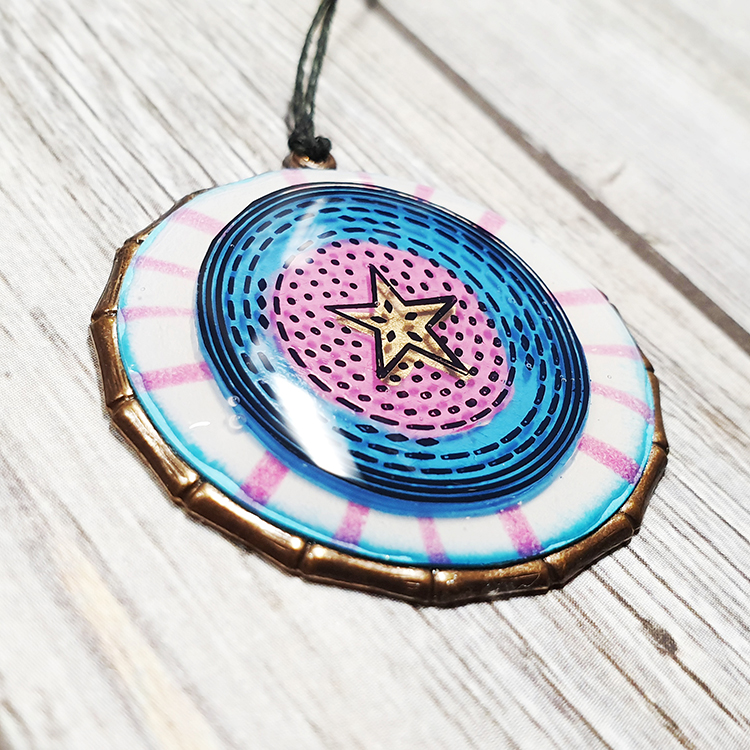
Hello from the Creative Squad and our last post from the amazingly talented Tania Ahmed who will be leaving us next month but who was a joy to have on the squad for her time here. You will be missed Tania! For her final post she presents a tiny little treasure that she’s made using my Large Circle Jumble rubber stamps and my Van Vorst stencil. This month’s theme is: Little Wonder – We’re thinking small this month and focusing in on a tiny scale, exploring the delicate details, and creating something that is petite and precious.
When working on things on a tiny scale, I always think of Shrink Film which is fun to work with. I’m always fascinated by how much a design shrinks!
I wanted to create a fun mixed media pendant and once I had shrunk and decorated my embellishment, I adhered it to a stencilled design on a pendant that I had been saving *cough hoarding cough * and covered it all with Glossy Accents! This makes me now wish I had some resin in my stash, which could turn into a project for another day ?
Here’s a video of how I made my project:
This will be my last post on Nat’s Creative Squad … A very special thank you to Nat and Kim for all your support and for giving me a chance to join the very amazing Creative Squad and using Nat’s fabulous products! It has been a blast and I will cherish this time. Thank you all so very much ♥️
Thank YOU Tania! It has been such fun to see how your creativity transforms the monthly themes into gorgeous and unique projects. We have loved getting to know you and your stunning artistic talent!
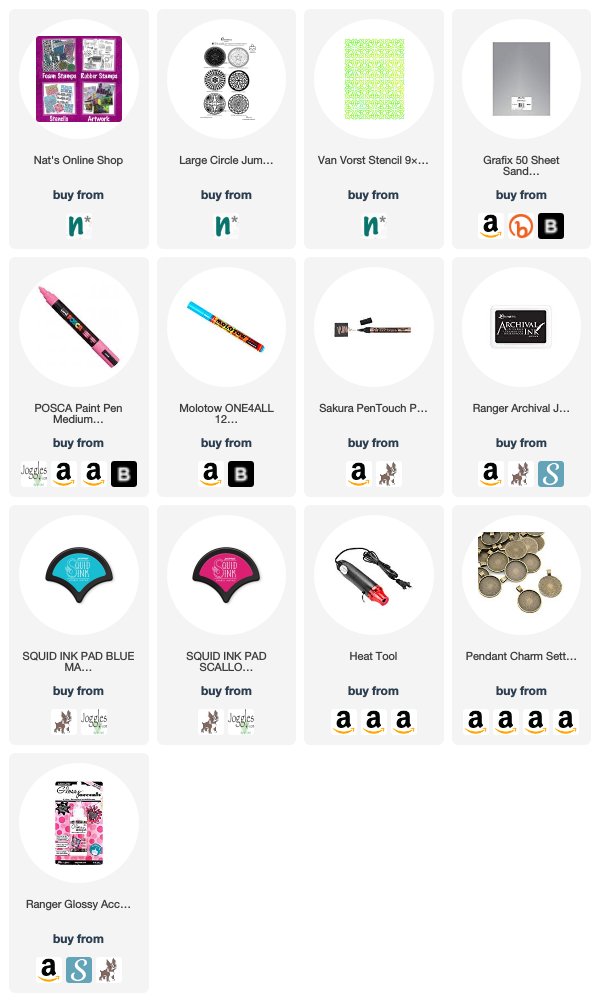
If you’d like to try your hand at making a pendant like Tania’s, you can find all my Rubber Stamps and Stencils in my Online Shop and here are some of the other products she used:
Feel inspired? Working on something yourself that you’d like to share? I love to see how you interpret our monthly themes. Email me how you used my stencils and stamps with the theme and email me an image – I would love to share your projects in my next “n*Spiration From Around the Globe“.
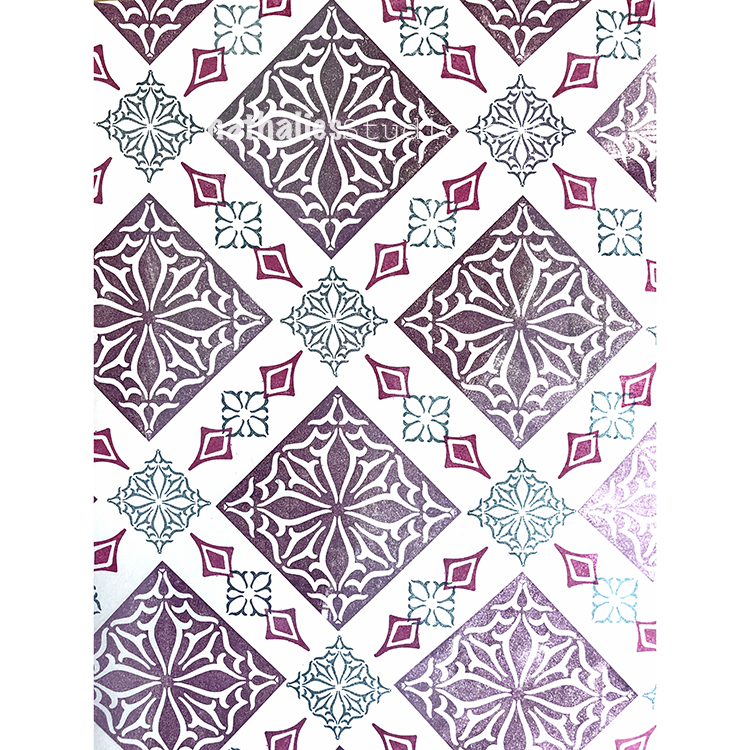
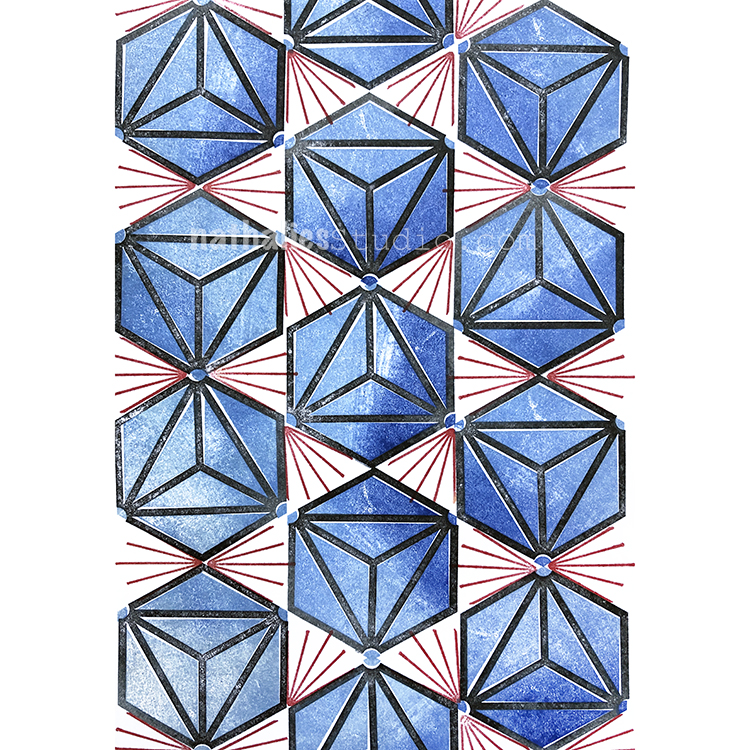
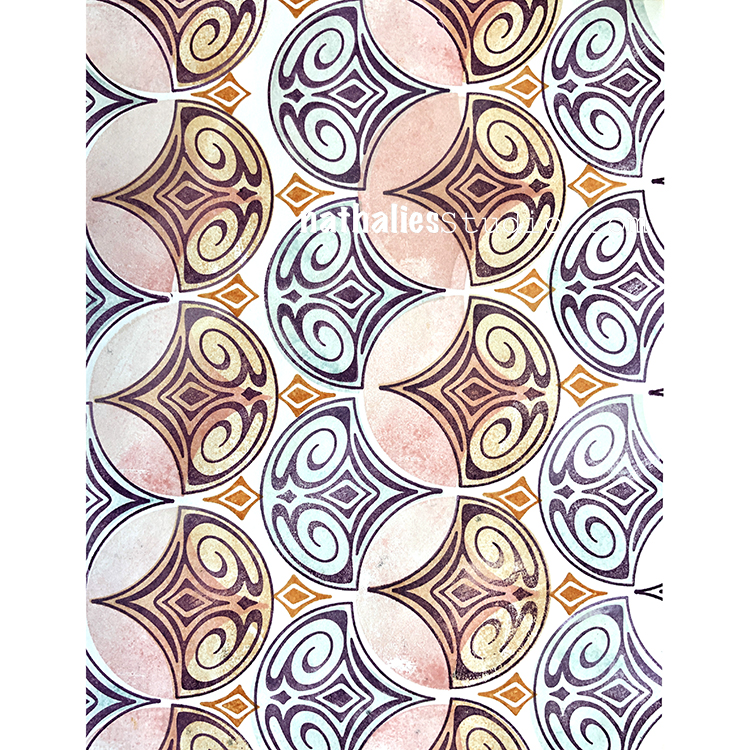
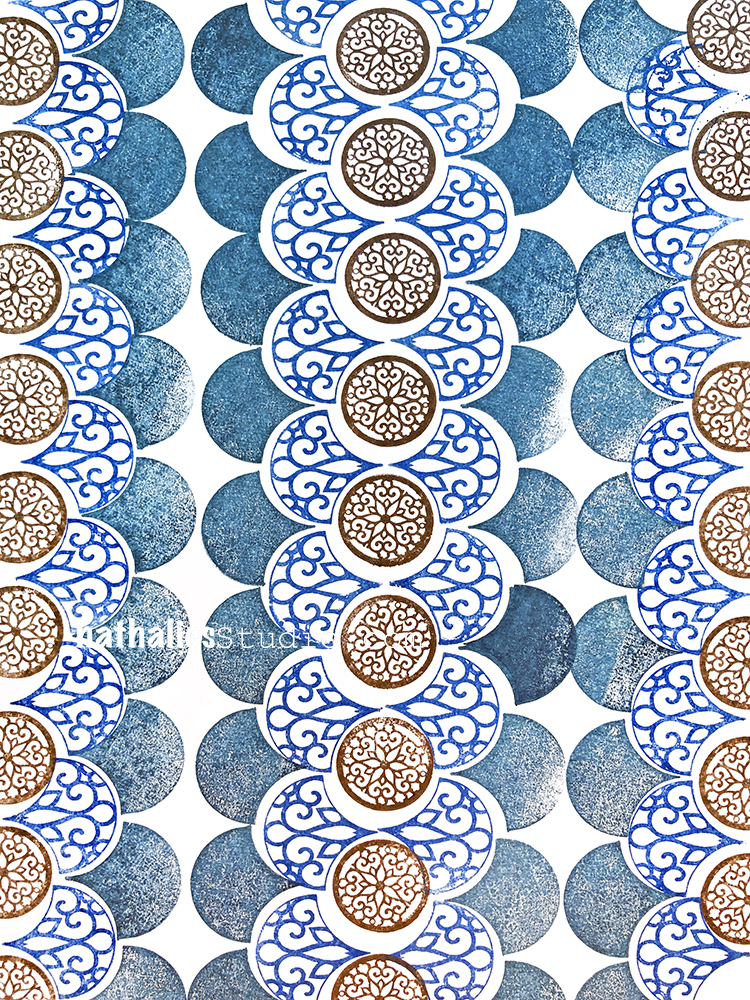
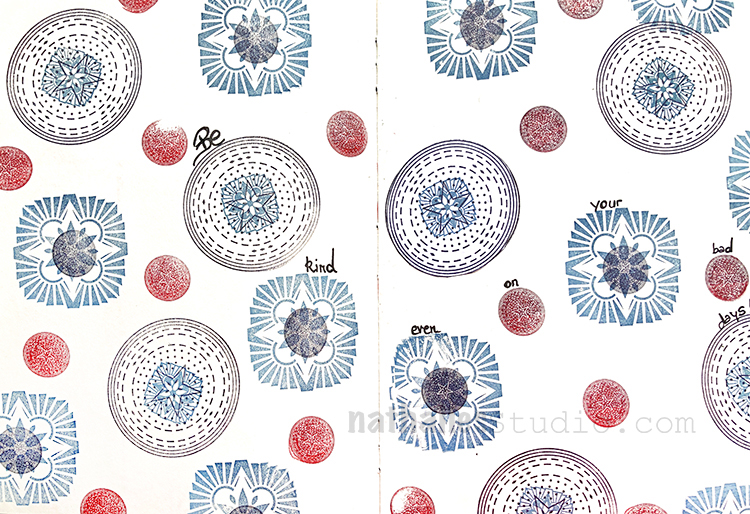
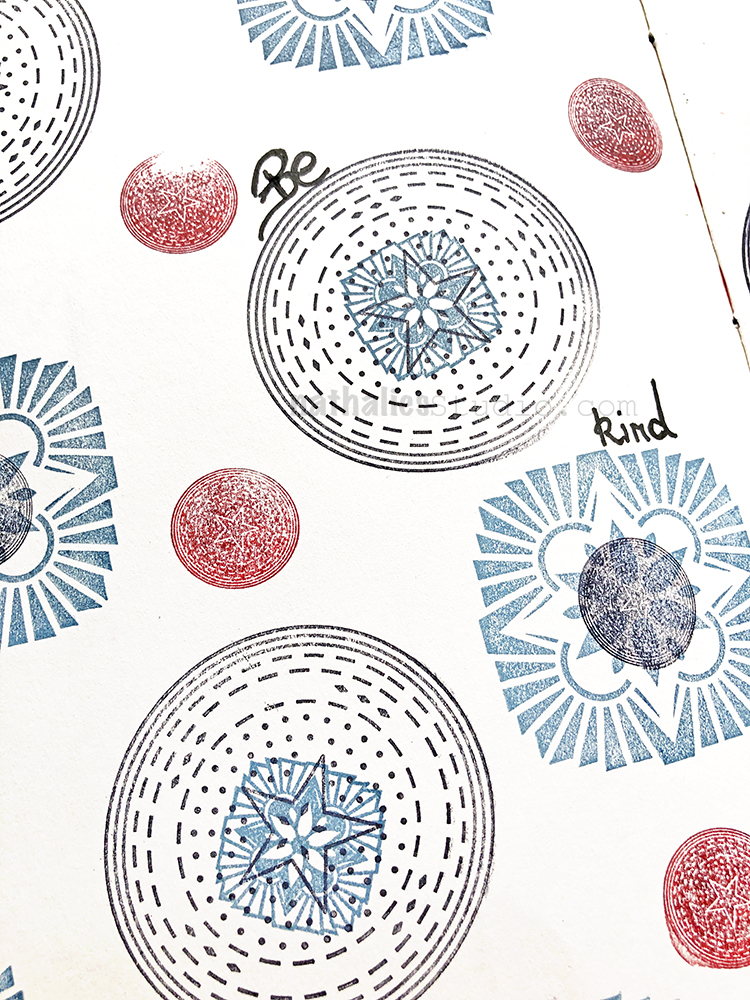
I wanted to share a little Flip Through video of my newly finished Pattern Sample Book. I started Nat’s April Patterns back at the start of April with my new rubber stamps and decided to bind them together in one book. It was relaxing and super fun to create the patterns and now I have an awesome resource for inspiration. Enjoy the flip through!
I hope you enjoyed this and are inspired to try some patterns of your own. All my new Rubber Stamps can be found in my Online Shop. Here are the supplies I used for these patterns:
Such a great quote to live by. I had fun mixing my Floral Stamp Sets up with my Circle Jumbles and layering them in different ways on top of each other.
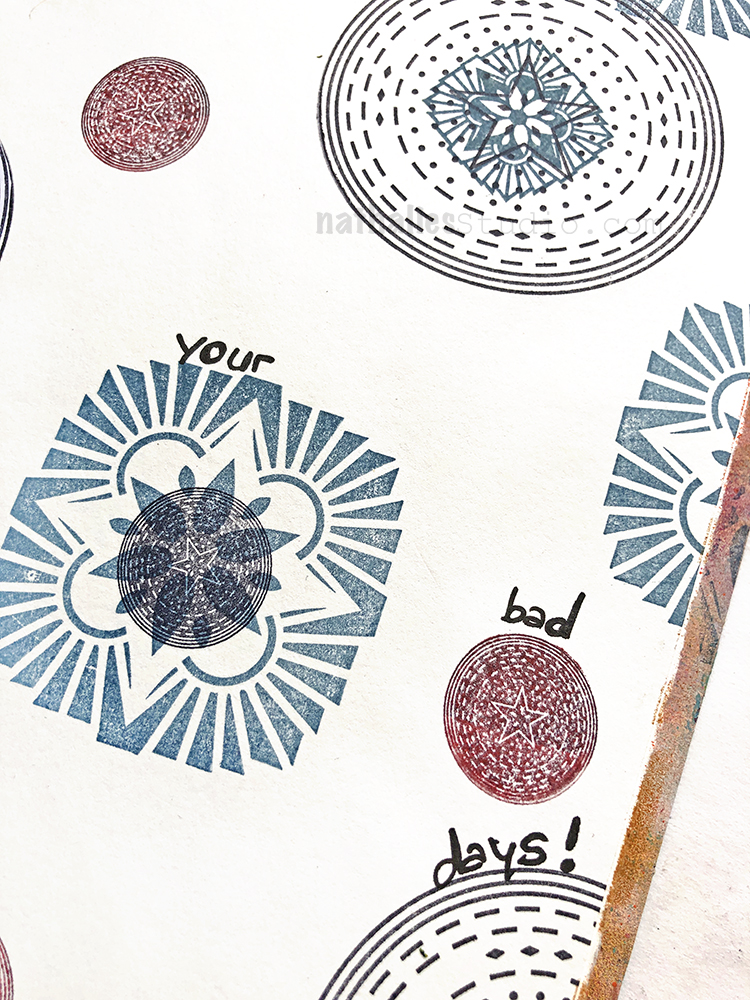
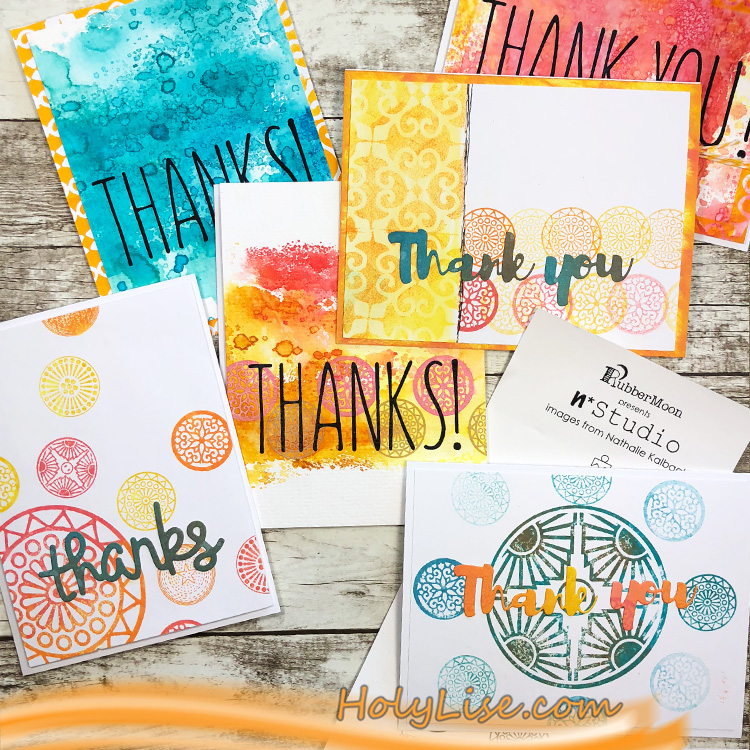
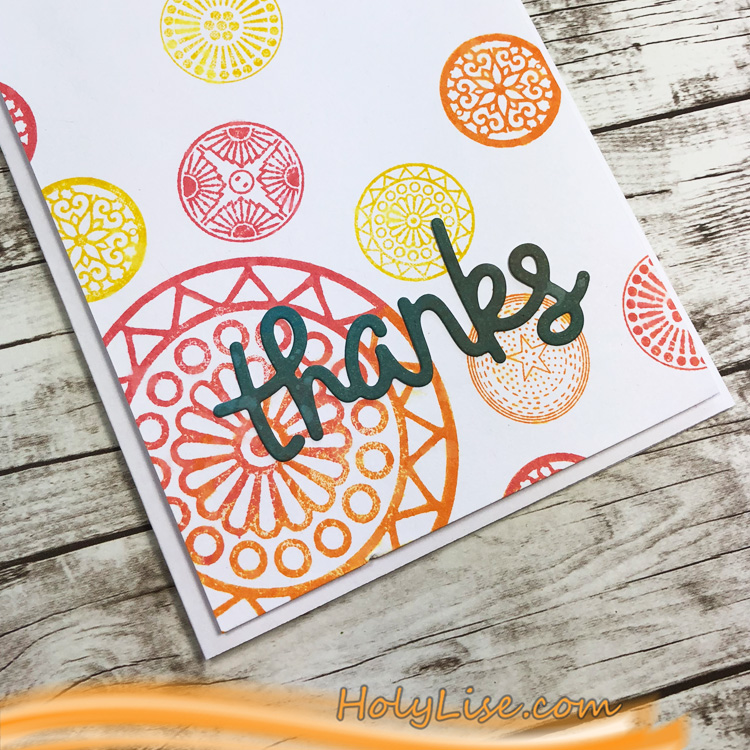
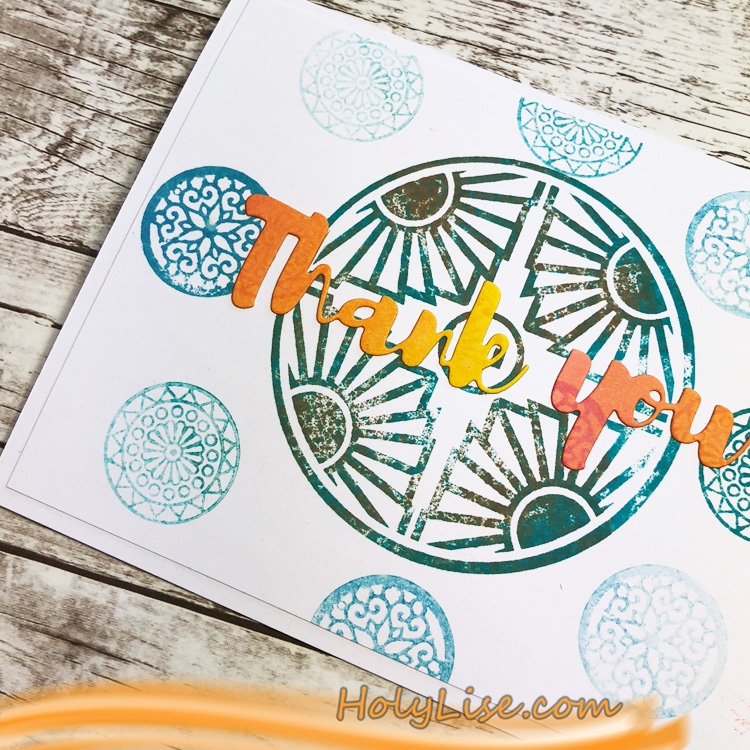
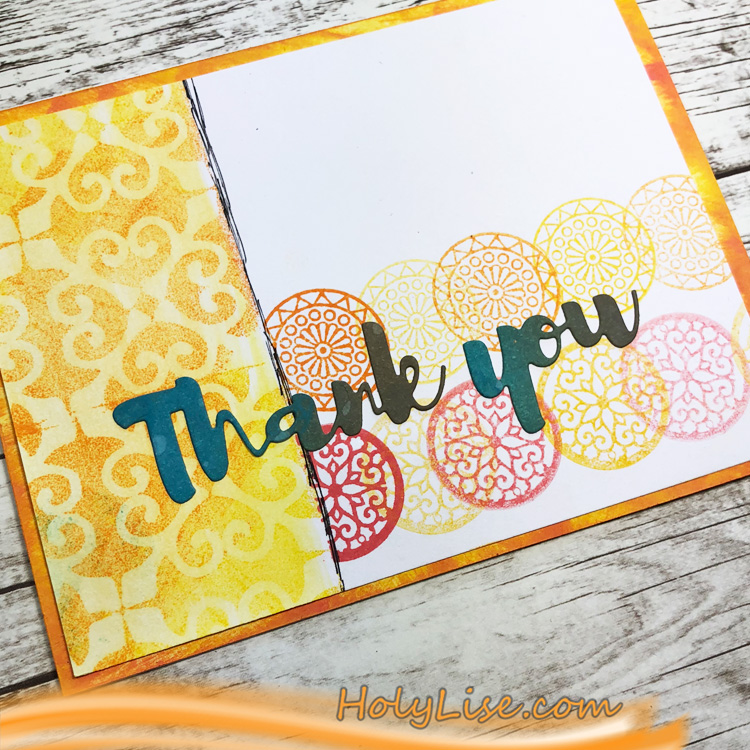
Hello my friends! Today we have a post from Josefine Fouarge from my Creative Squad. She is sharing some gorgeous techniques for making thank you cards using my Small and Large Circle Jumble stamp sets and my Mini Antique Tile foam stamp. She was inspired by this month’s theme: Doin’ My Thing – We all have a unique artistic style and way of working with supplies. This is the time to rock it! Be yourself. Do your thing.
Aren’t we all good at “doin’ our thing”? Perfect theme, if you ask me. The problem was that I couldn’t decide which of my favorite techniques to show you… mono printing, layering, something snarky…? So many options. At the end, I decided to go with a variety of techniques using watercolor inks (Distress Inks, etc). I created a few “Thank You” cards as I needed them anyway ;)
In addition, I love to create videos, so here is my “doin’ my thing” video for the thank you cards that I made.
All cards are kind of similar but have individual features, making them all very unique. I hope you enjoyed my quick tutorial and the use of Nathalie’s stamps to decorate all the cards.
Thanks so much for stopping by. Want to know what “the thing” for the rest of the Creative Squad is? Then come back every Tuesday to see all the other creations.
Thank you Josefine! To try out Josefine’s technique, you can find my Foam Stamps and Rubber Stamps in my Online Shop. Here are some of the other supplies that Josefine used:
Feel inspired? Working on something yourself that you’d like to share? I love to see how you interpret our monthly themes. Email me how you used my stencils and stamps with the theme and email me an image – I would love to share your projects in my next “n*Spiration From Around the Globe“.
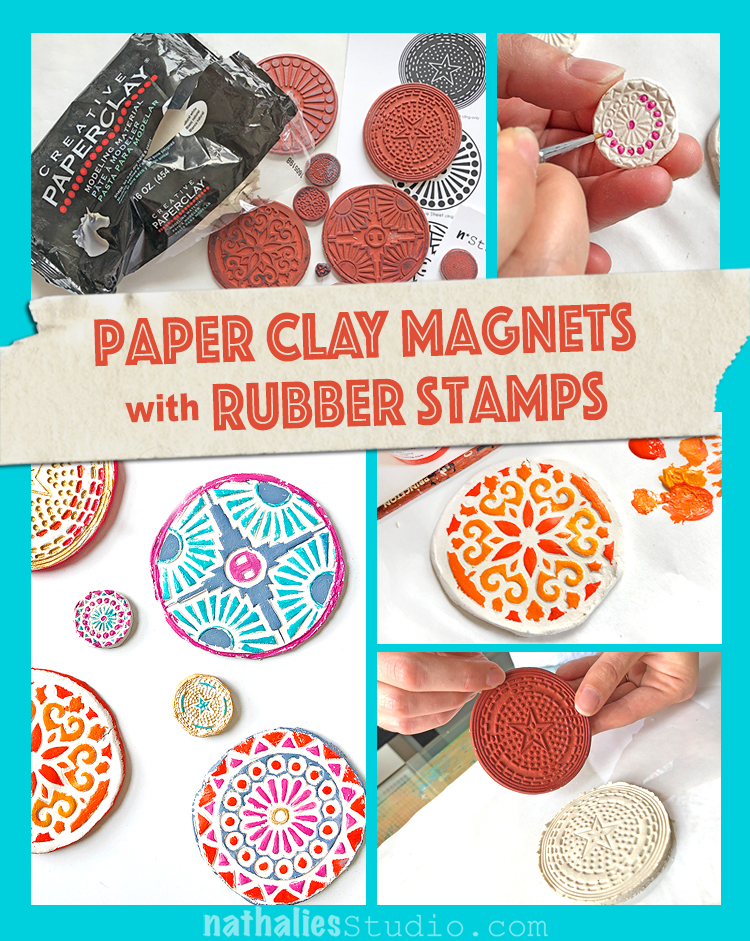
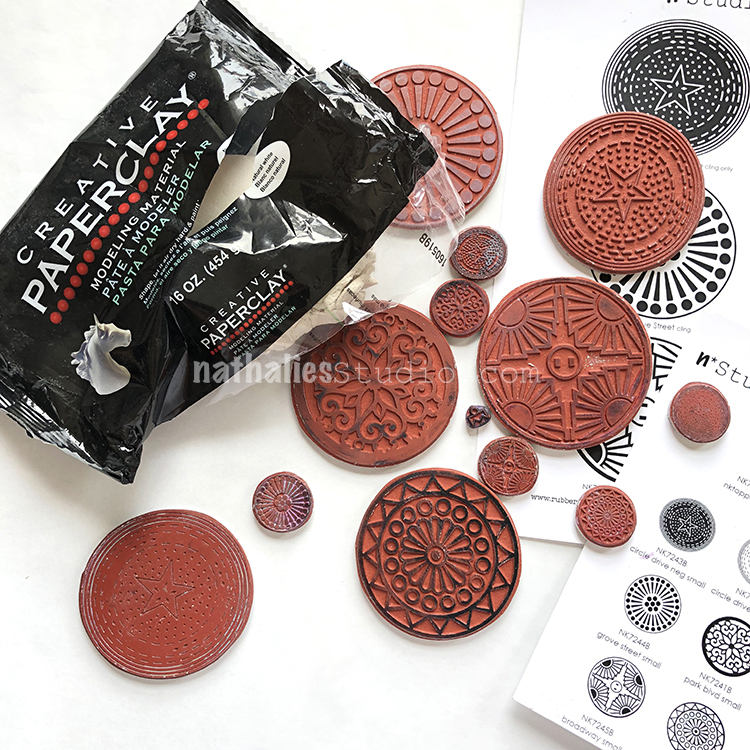
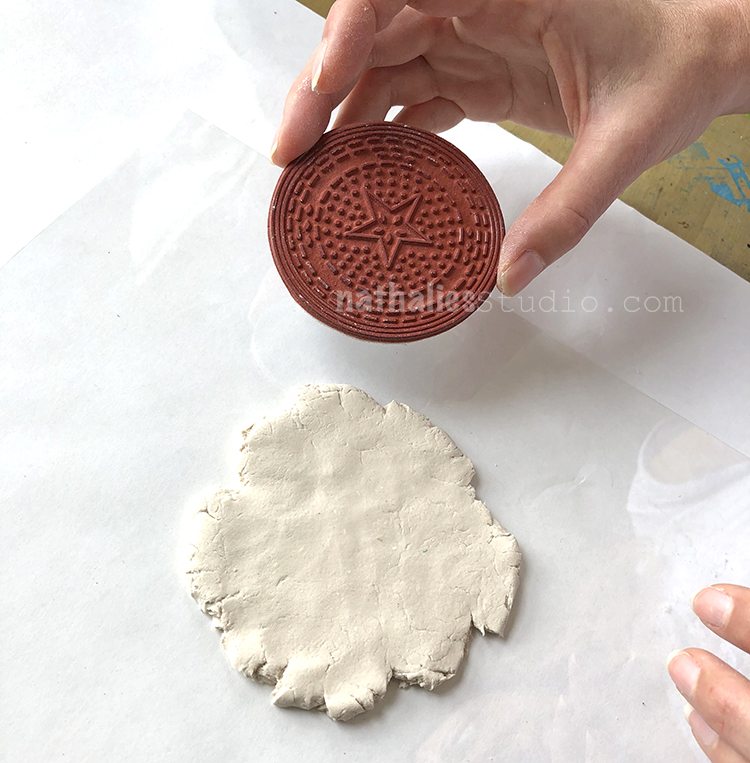
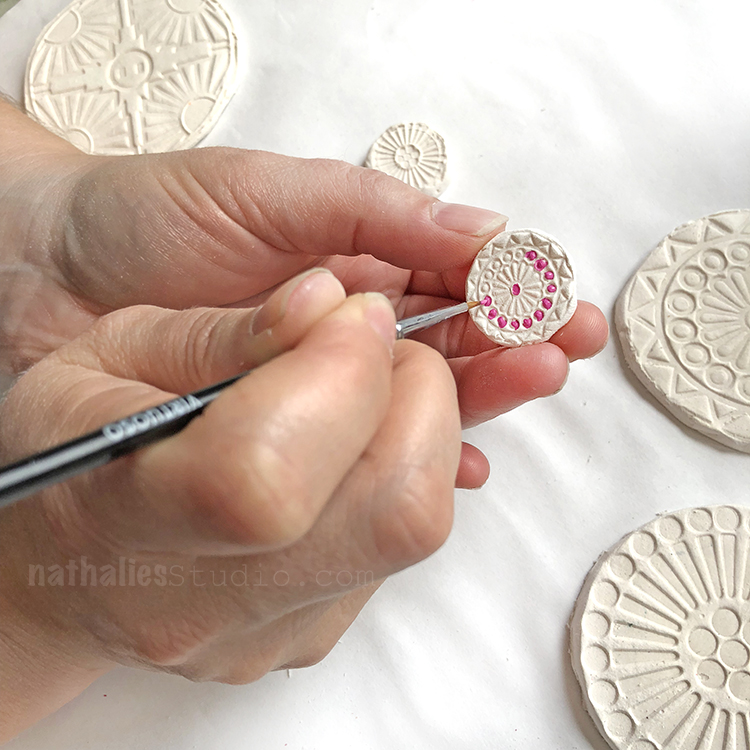
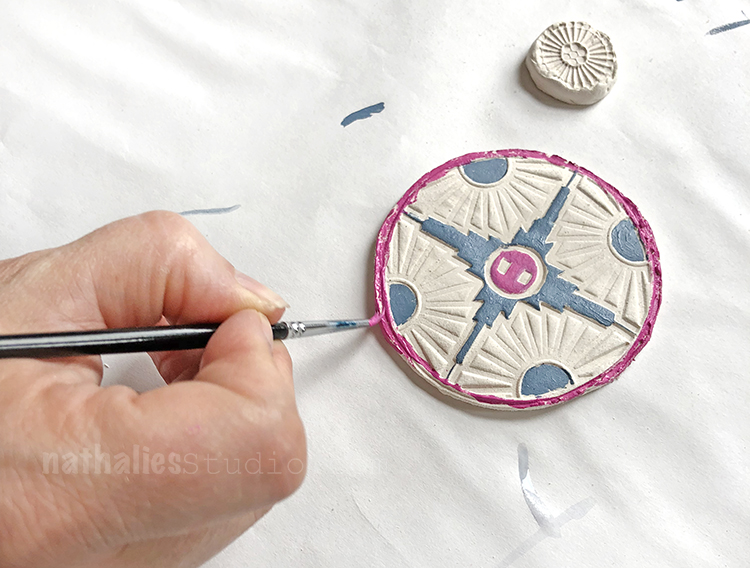
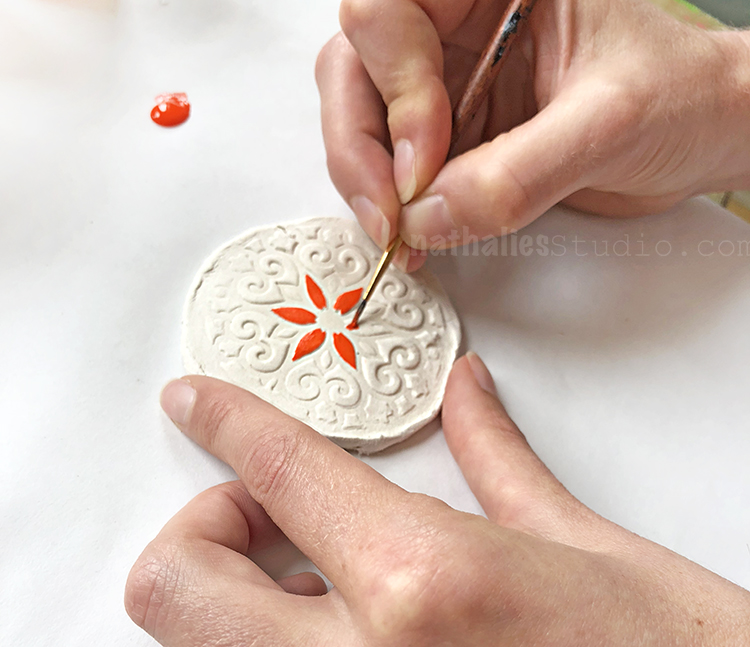
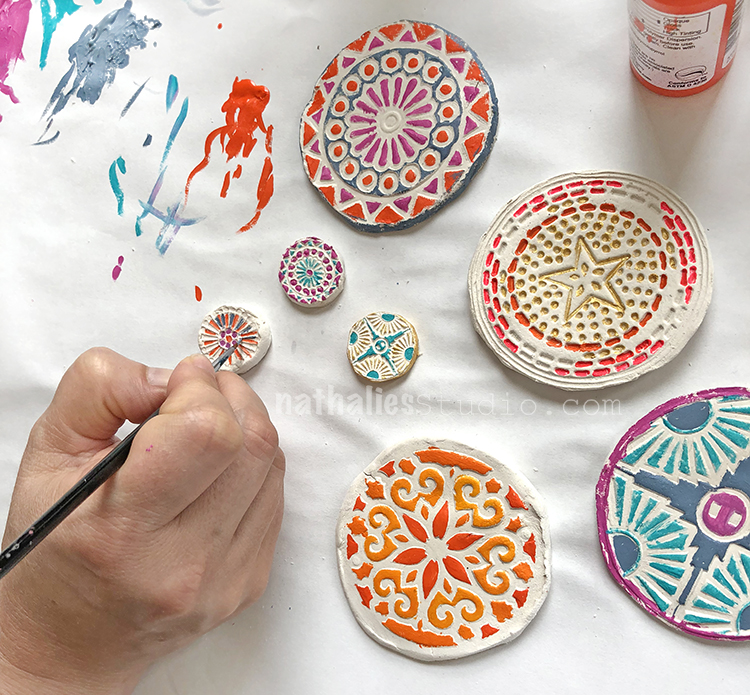
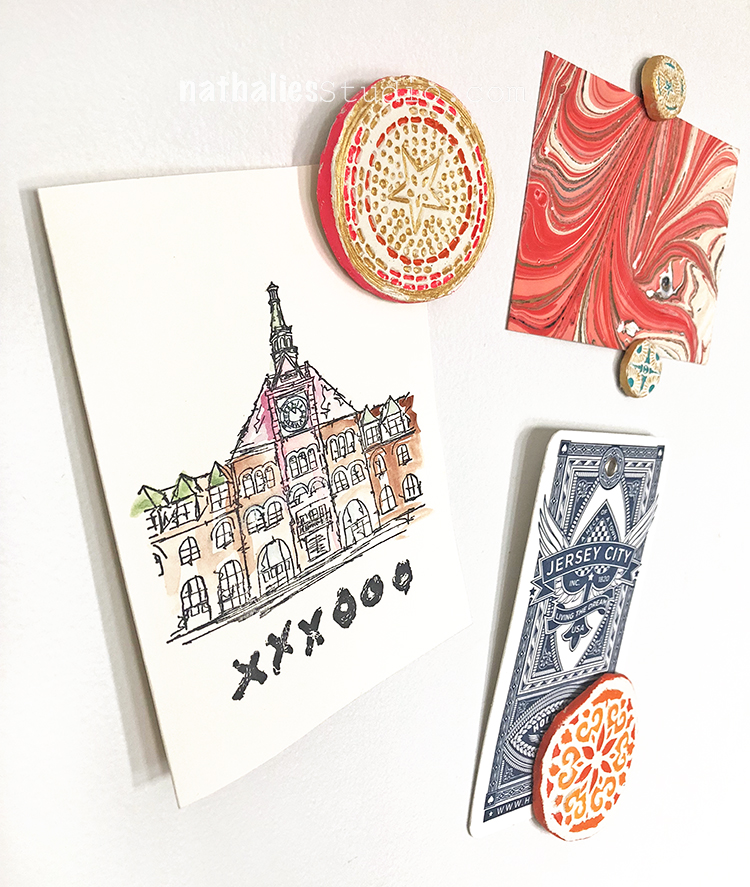
For our monthly play date, Kim and I wanted to show another great way to use rubber stamps – to make an impression in paper clay!
We thought my new Large Circle Jumble and Small Circle Jumble sets would be a nice shape and size for some magnets. Our plan: to stamp into the clay, paint them with some acrylic paint, and attach magnets to the back for the refrigerator, bulletin board, wherever magnets will stick.
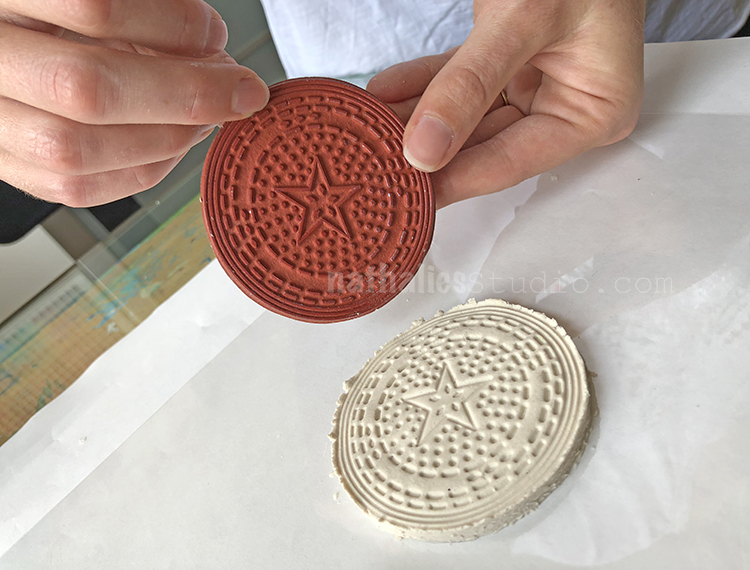
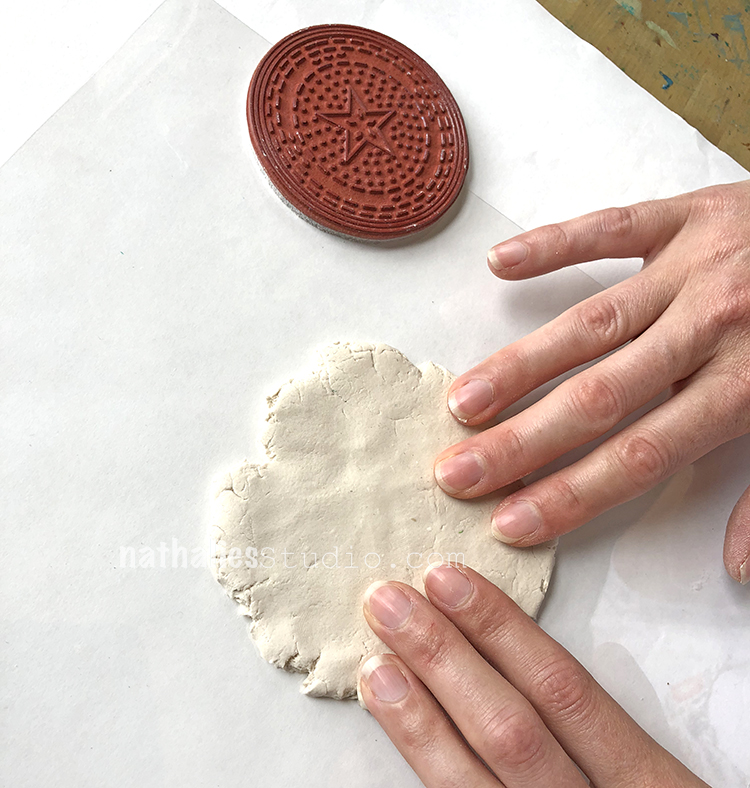
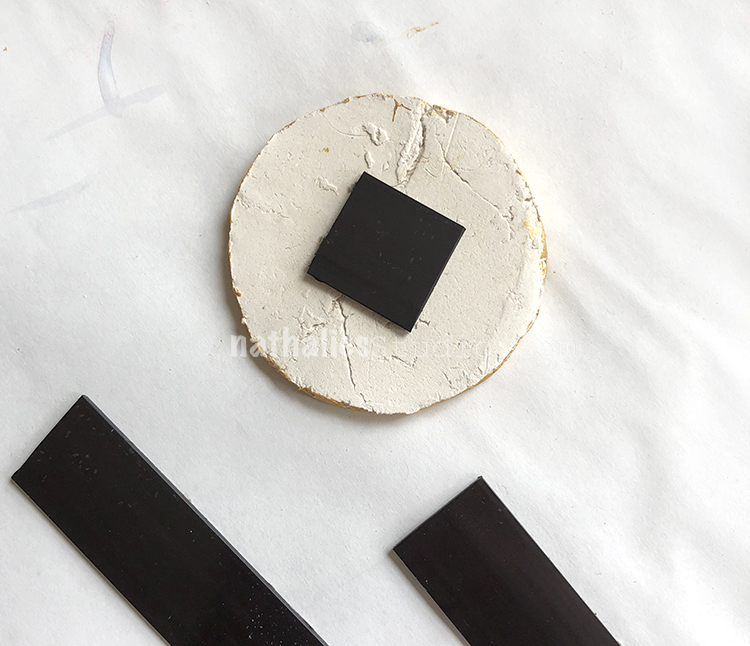
Paper clay is fun and easy to work with and is air dry so you don’t even need to turn on an oven. Here we chose the Circle Drive stamp from the Large Circle Jumble set, and flattened out some clay on a non stick surface to about 1/8-1/4″ thick and big enough to fit the design.
Time to stamp!
Press the stamp evenly into the surface, making sure to cover the whole design with pressure.
Really press it in there!
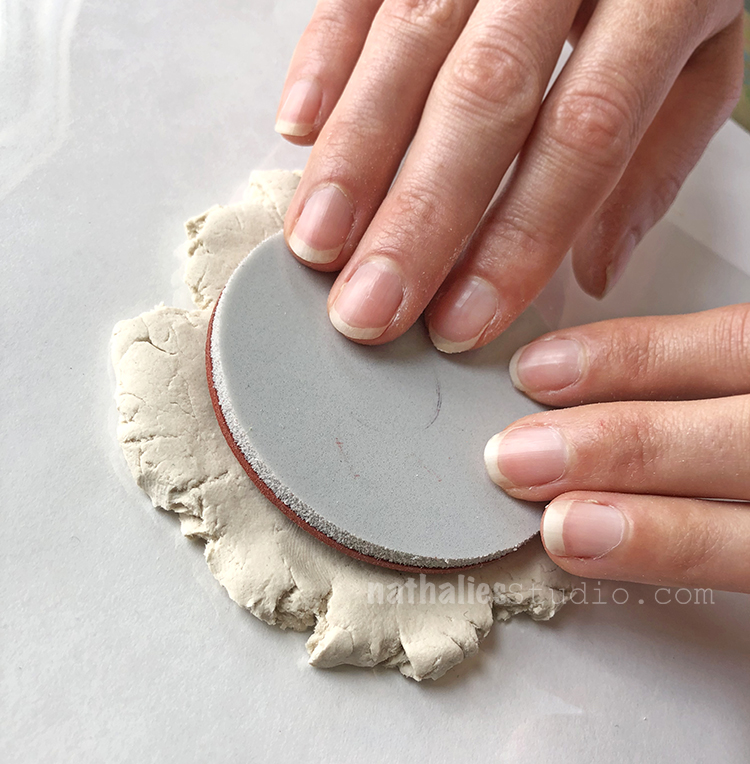
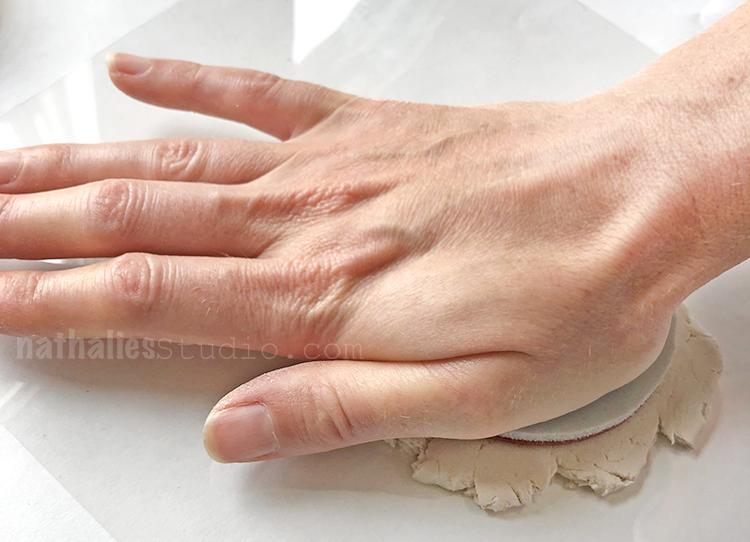
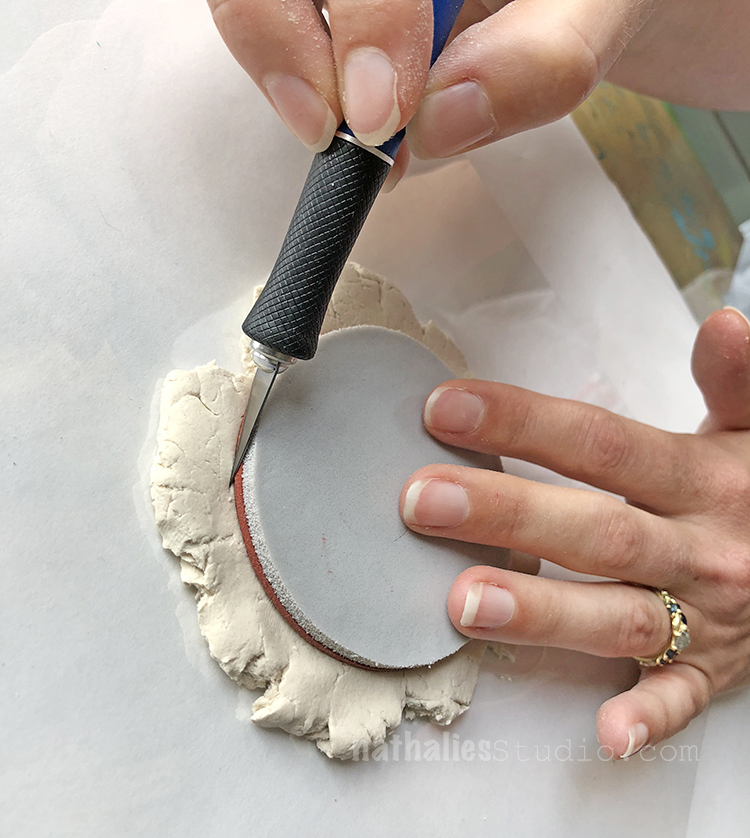
Then we cut around the stamp using a knife and the edge of the stamp as a guide. Work over a cutting mat and watch your fingers :)
Trim all the way around the stamp and pull away the excess clay. You can save the extra for later use.
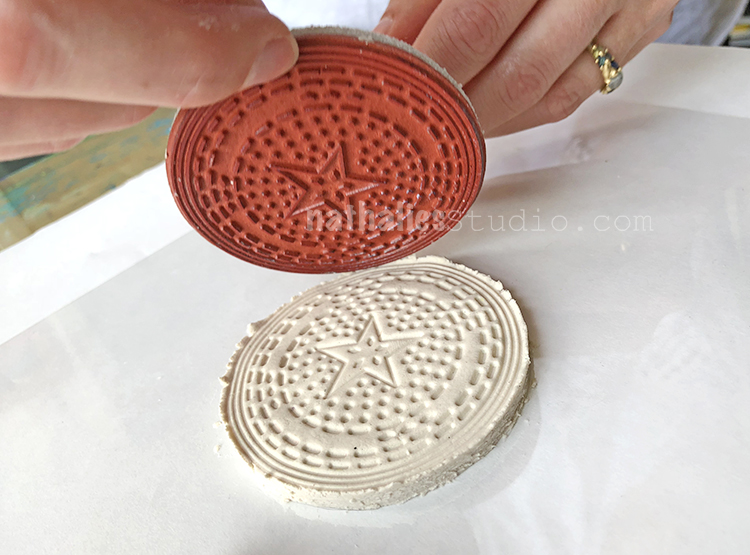
Gently lift the edge of the stamp to reveal the impression.
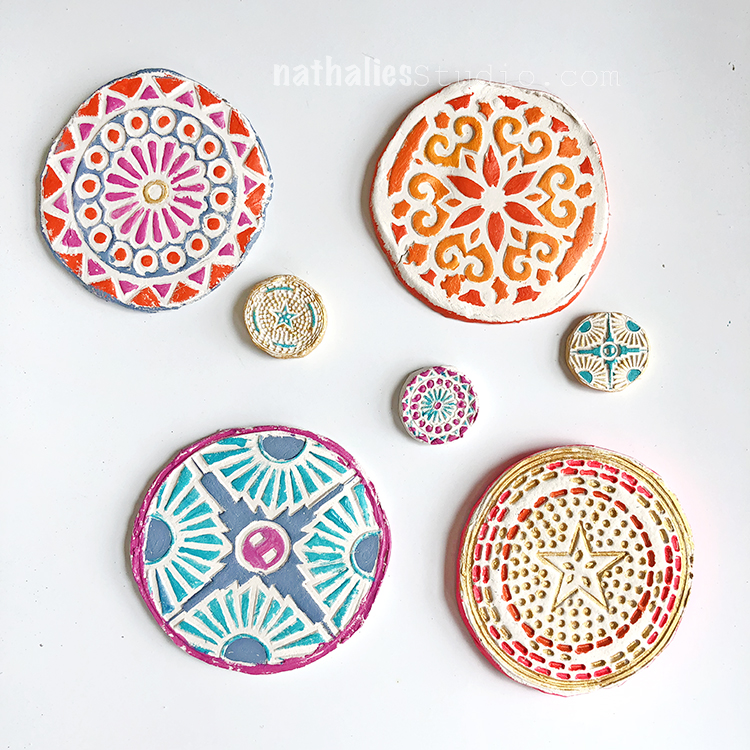
Here is the big reveal and a great impression in the clay!
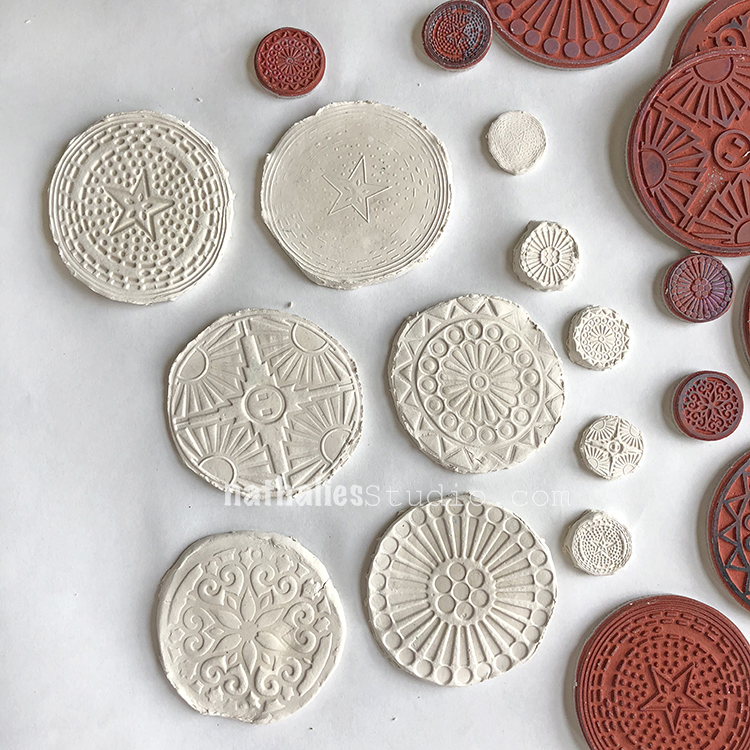
We tried almost every design from both the Large Circle Jumble set and the Small Circle Jumble set. Follow the directions on your paper clay package for drying times. Ours took a few days to completely dry before we could move to the next step.
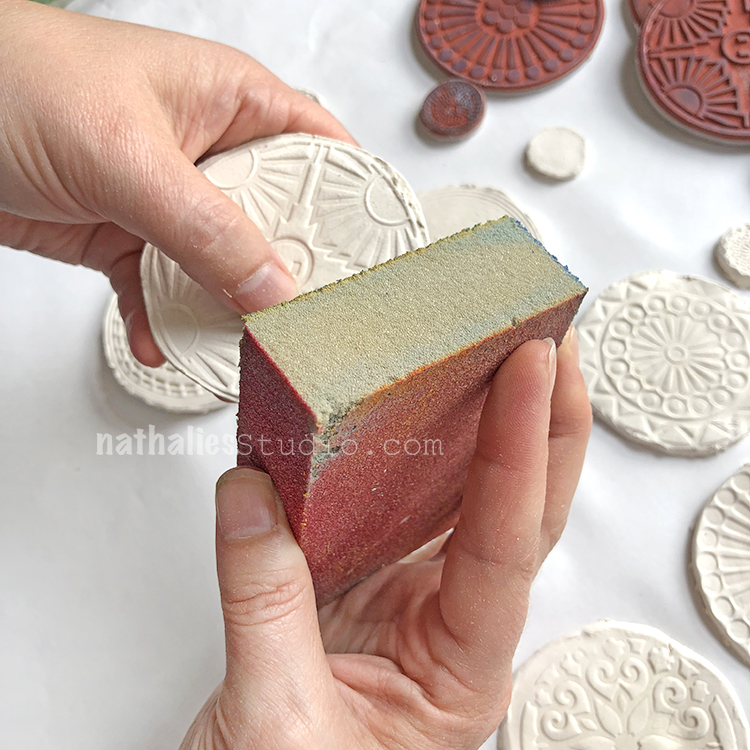
Once the clay is completely dry, you can use a sanding block to smooth down the edges. Be gentle!
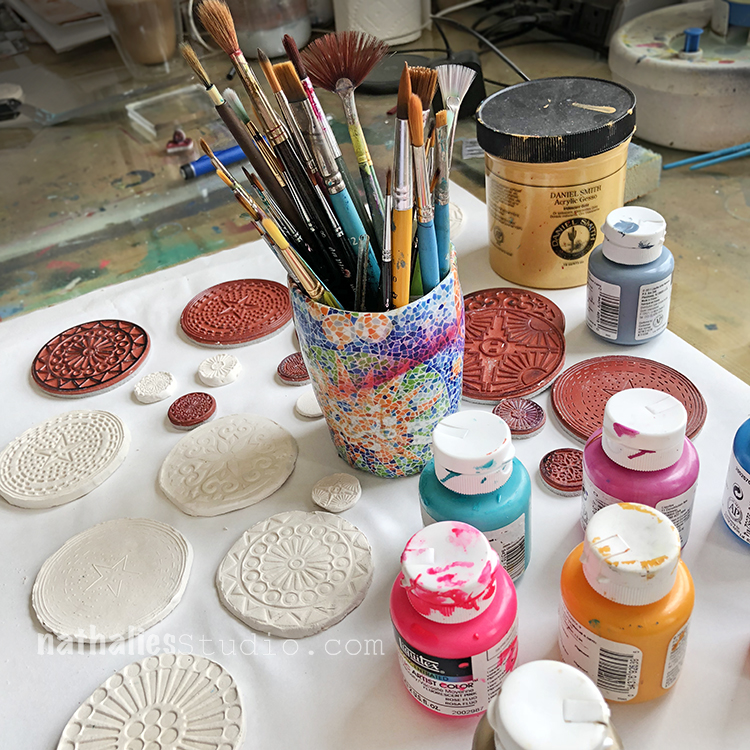
Now it’s time to assemble some acrylic paint and fine brushes for the detailed painting.


Comments (1)
Sue Clarke
| #
Nice! I am also drawn to circles.
Reply