Creative Squad

Elephants Never Forget – Michelle Rydell

CS May Elephants Never Forget

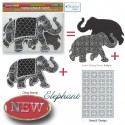
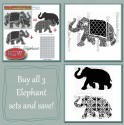
It’s Tuesday and time for a project from my Creative Squad and this month’s theme: “Elephants Never Forget”. Throughout the month of May, the team is using my new Elephant Foam Stamp, Rubber Stamp and Stencil Set to interpret the theme. I asked them to draw from a childhood memory, and to use the elephant as a symbol of something that fascinated them as a child. And if you want to hear a little bit about me, you can read about my personal connection to elephants here (just scroll down to “WHY an elephant…”)

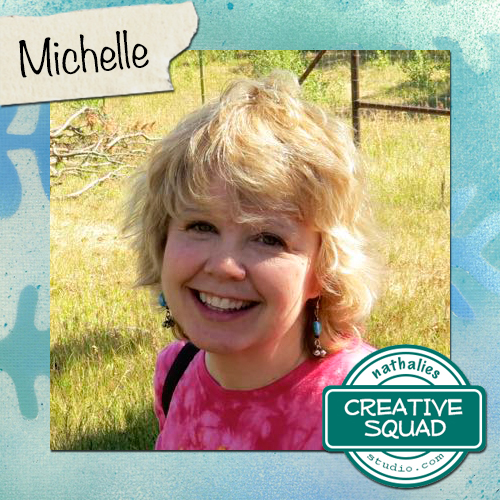
Today we have an art journal spread by Michelle Rydell. Michelle used the theme as a jumping off point for this colorful page.  I love her inspiring message!
—————————————————————————————————

Michelle May Headshot

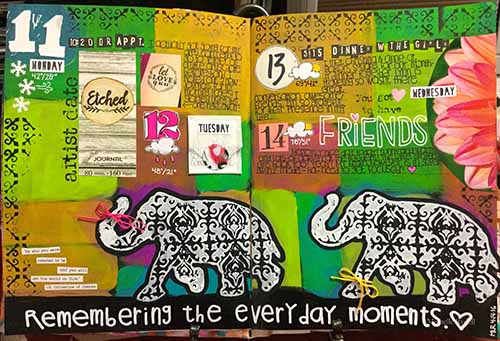
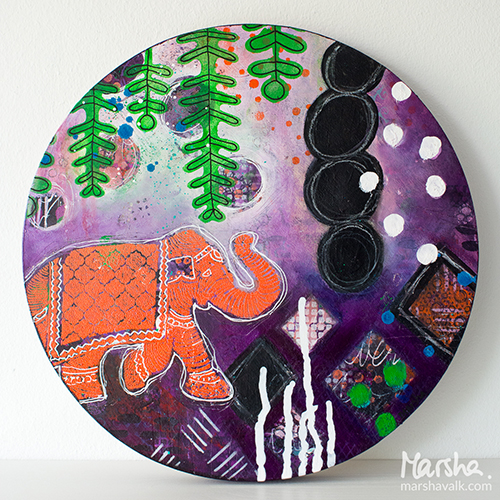
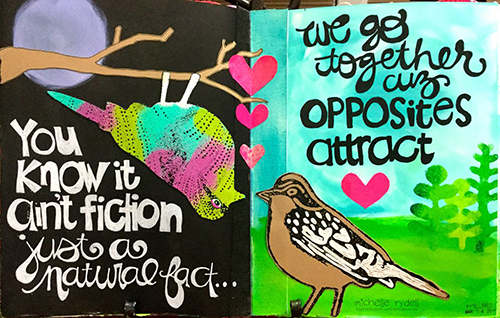
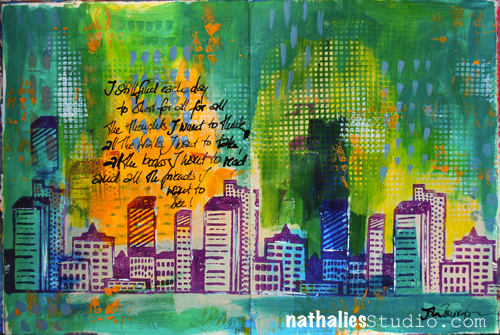
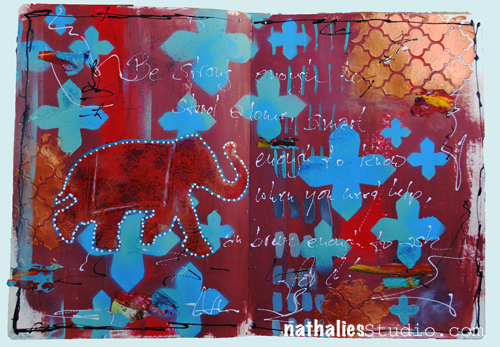
When I heard the theme “Elephants never Forget,” the first thing I thought of was my daily entries in my art journal. The ones where I record little bits of my life each day, so I don’t forget them! I decided it would be fun to let Nat’s regal elephants guard my memories for the week! Here’s how I did it…

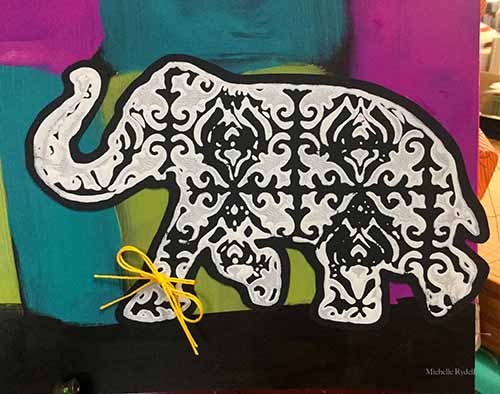
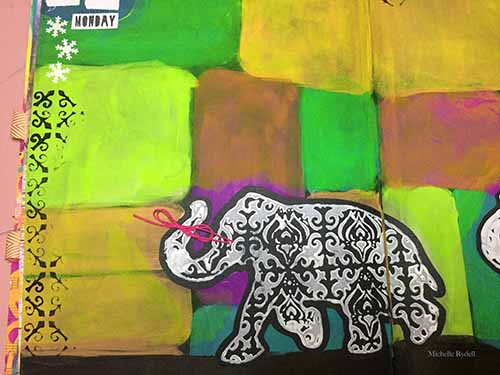
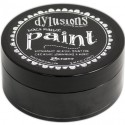
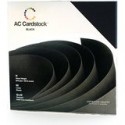
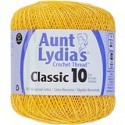
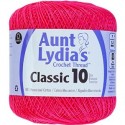
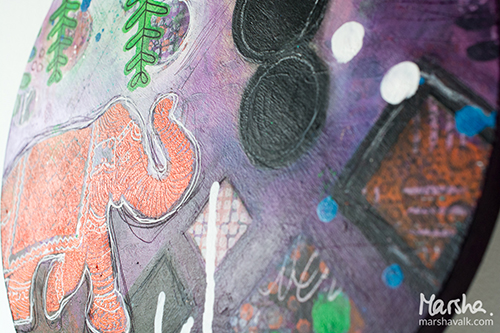
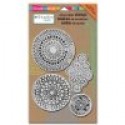
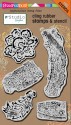
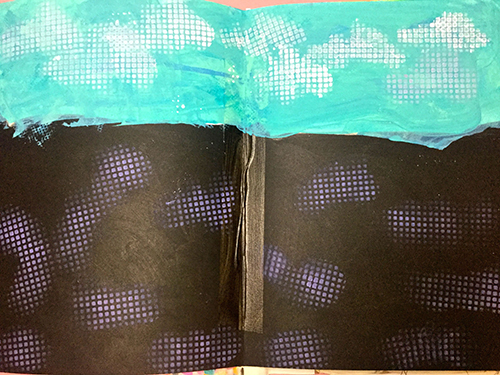
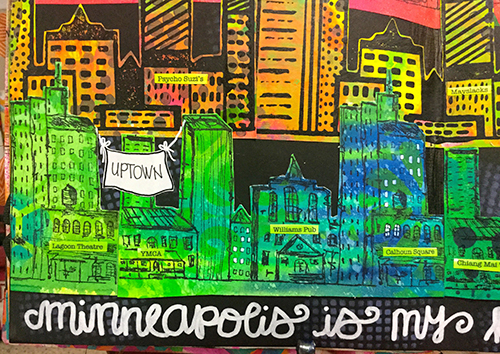
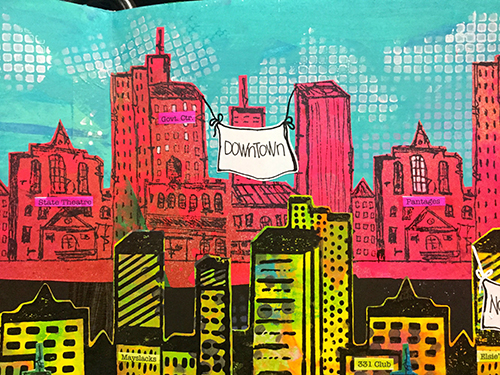
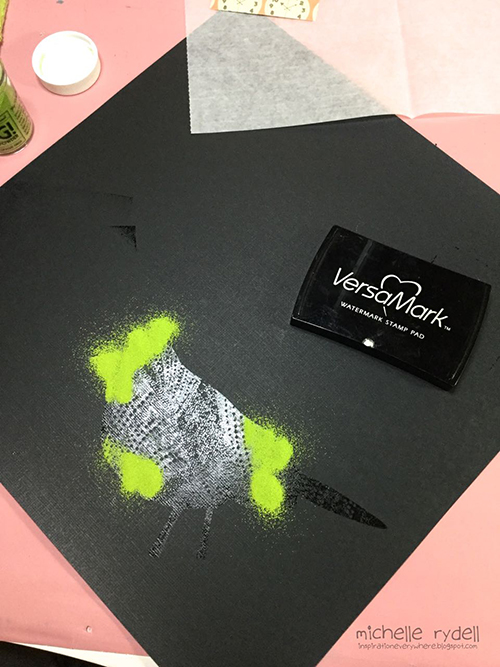
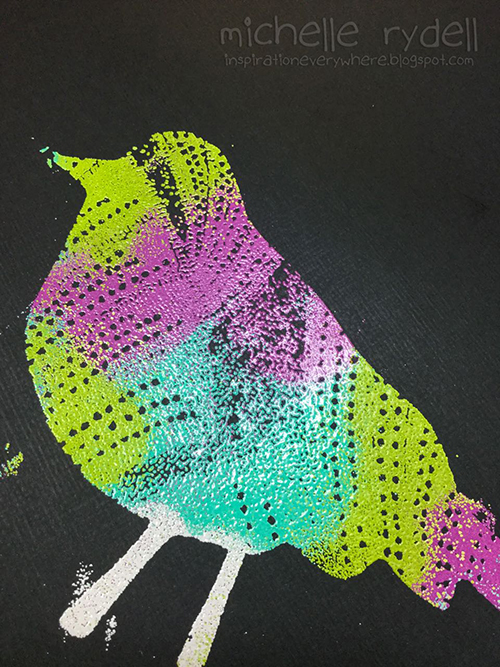
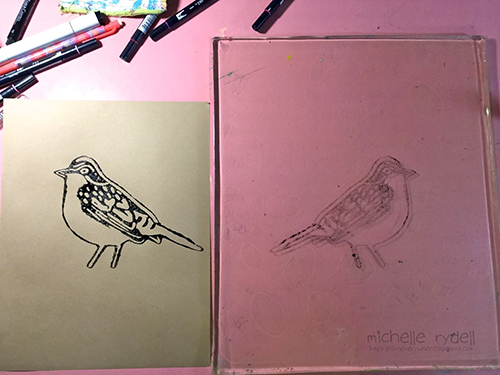
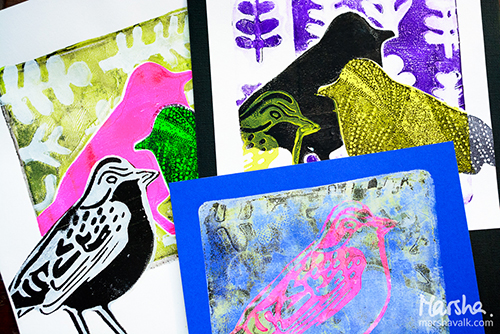
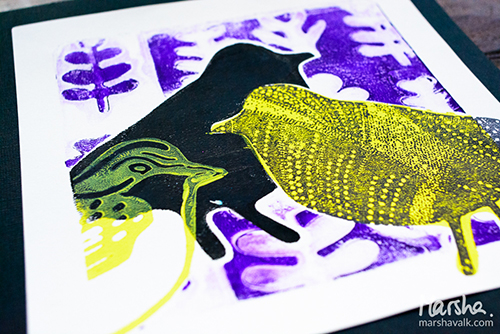
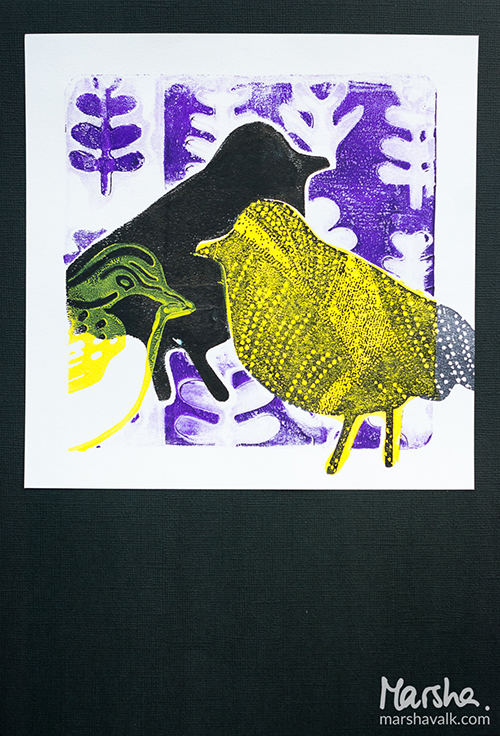
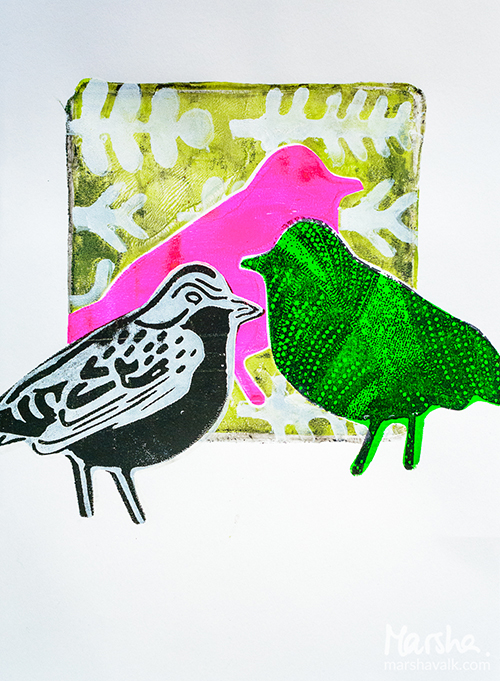
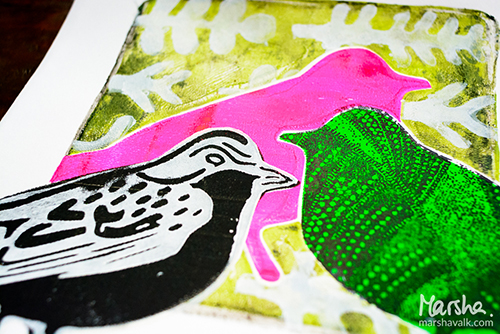
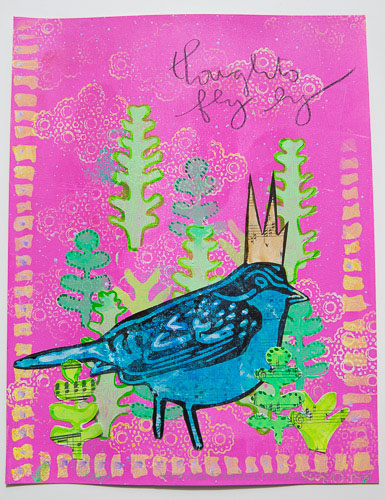
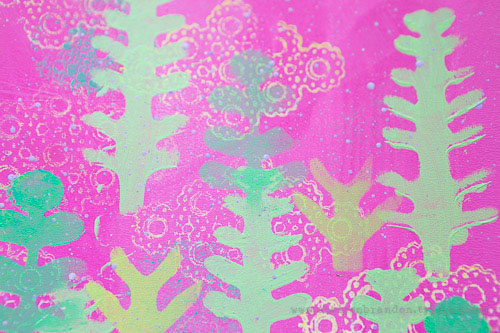
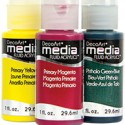
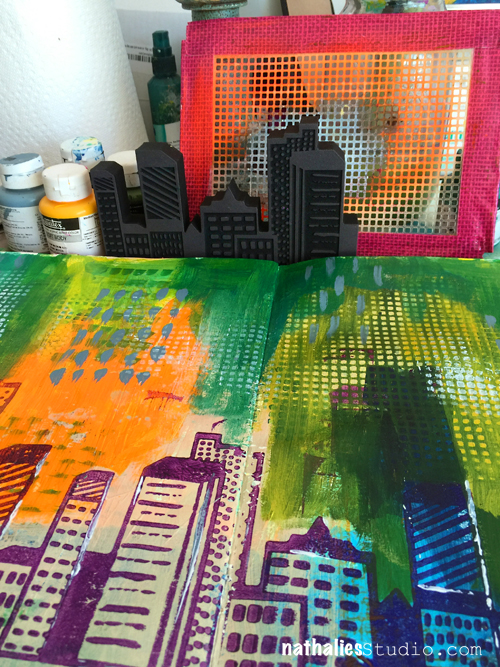
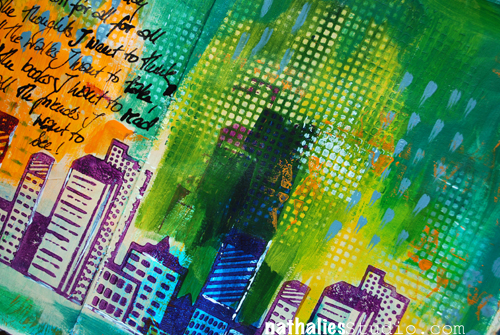
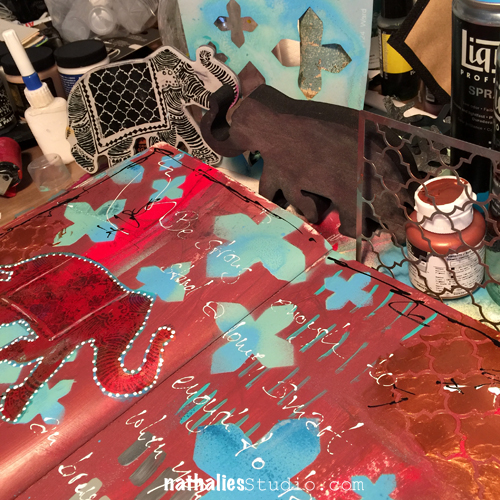
I painted my whole background with black acrylic paint, and then covered up the black with squares of bright colors. Next I stenciled the foam elephant stamp with white paint onto black cardstock – twice, and then cut them out.  You know how sometimes people wrap a thread around their finger to help them remember something? I wrapped a little crochet thread around one elephants trunk, and the other ellies leg to symbolize that! After that I pasted the two elephants onto the journal spread.

RydellElephants1

RydellElephants2

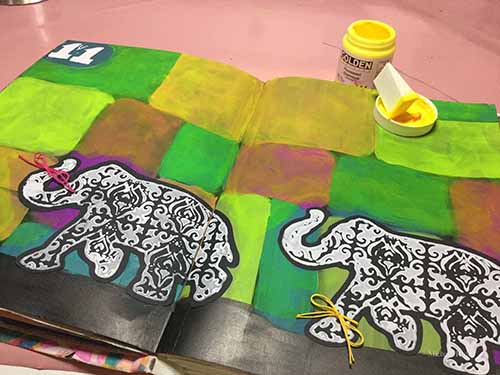
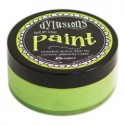
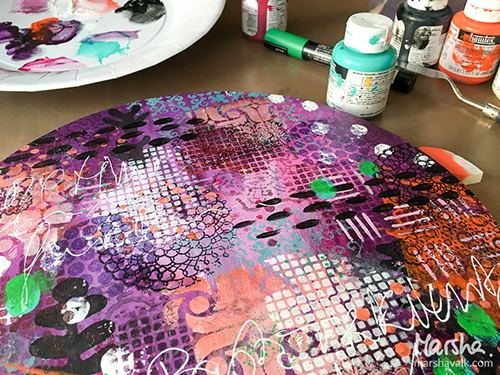
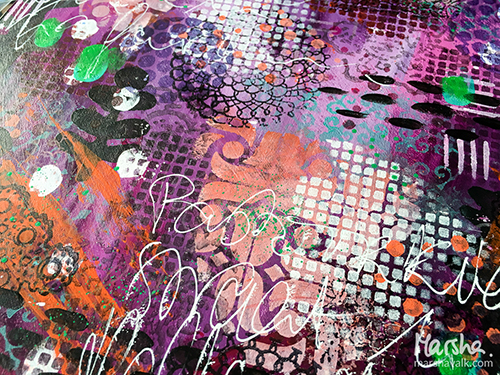
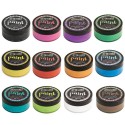
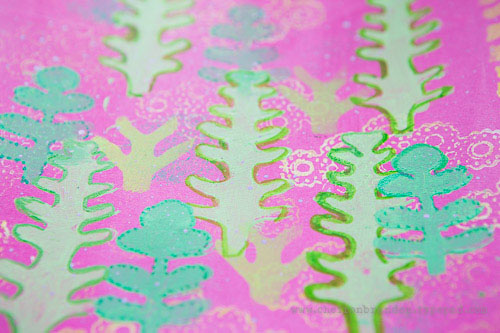
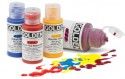
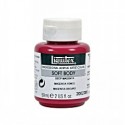
I felt like the page needed something to make the colored blocks work cohesively together; so I glazed the whole page (except for the ellies) with a thin coat of Golden’s fluorescent chartreuse paint.

RydellElephants3

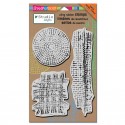
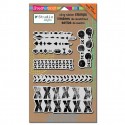
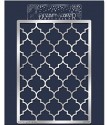
I used the stencil that comes with the kit to create a border with black paint. My page was then ready to add memories as the week progressed!

RydellElephants5

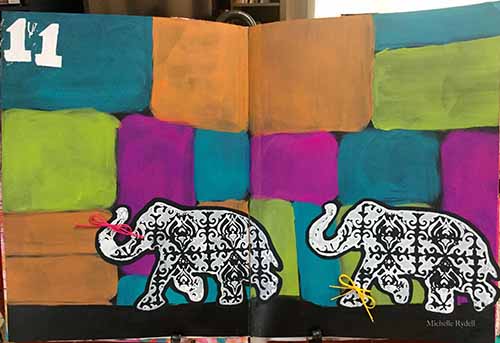
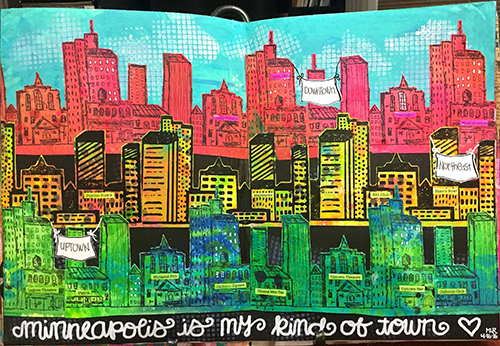
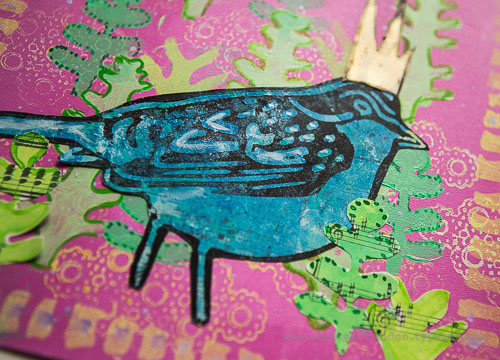
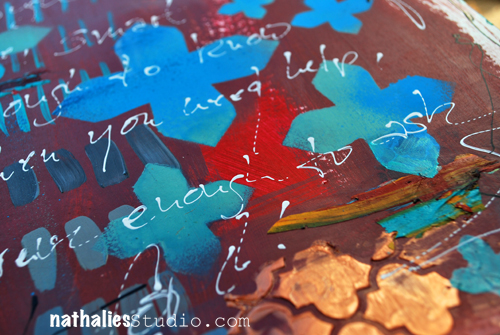
Here’s how the week looks all finished. I just love my elephants parading across the bottom. I really feel like it makes the page special!

RydellElephants6

—————————————————————————————————

I love Michelle’s color block background and the very fun way she tied reminder bows on the elephants!  Here are the links (some are affiliate links) for the supplies Michelle used:

SuppliesCJS


Maybe you will even play along with us -I would love to see how you interpret our monthly themes. Email me how you used my stencils and stamps with the theme and email me an image – I would love to share what you did at the end of the month!

See you next Tuesday for inspiration from around the globe using some of my stamp and stencil products!

Comments (4)

  • Sharon Fritchman

    |

    I love your art journal pages, Michelle! I especially like the fun theme and what you did with the stencil!! So creative and fun!

    Reply

  • Joi @RR

    |

    Hehhehe – ADORABLE Michelle. What a great journal creation. j.

    Reply

  • Julie Tucker

    |

    Love love love this Michelle!! LOVING those elephants and the colors!!!!!!!!!!!

    Reply

Leave a comment

Elephants Never Forget – Marsha Valk

CS May Elephants Never Forget

It’s Tuesday again so here is my Creative Squad with another fun project for you with this month’s theme: “Elephants Never Forget”. Throughout the month of May, the team will use my new Elephant Foam Stamp, Rubber Stamp and Stencil Set to interpret the theme. I asked them to draw from a childhood memory, and to use the elephant as a symbol of something that fascinated them as a child, inspired awe, or just got their little brain all wrapped up with wonder. And if you want to hear a little bit about my childhood, you can read about my personal connection to elephants here (just scroll down to “WHY an elephant…”)

Today we have a mixed media piece by Marsha Valk.  After persisting through a brief creative block (it happens to everyone!) she created this gorgeously layered piece using a fantastic combination of purple and orange.
—————————————————————————————————

Marsha May Headshot

It’s hard to choose just one childhood story or memory, so I concentrated on the elephants and tried to come up with as many elephants as I could remember from my childhood. The big one is that my little brother collected elephants when he was young. He had many, many elephant figurines. At least two of those came from my grandmother’s house and I remember that at one point they were in the guest bedroom. The room had a typical 70’s decor. It wasn’t psychedelic in any way, the walls where neutral, the furniture was white, but there was an orange washbasin and purple bed spreads with a fringe.  I loved those bed spreads! When we were very little, my sister and I used to play with them when we woke up early.
MarshaValk_nSCS_ElephantsNeverForget-1
Anyway: the colour scheme for this project was set! It had to contain purple and orange. I struggled with what to do though. I tried some things first with no great success, until I decided to just have fun! I chose the back of a shallow round tray (28 cm) as a substrate. I love working on wood panels, so when I saw this at my local craft store, I knew I wanted to use it as a ‘canvas’!
MarshaValk_nSCS_ElephantSteps-2
The problem with ‘having fun’ is that I can’t exactly tell you what I did. I started to prepare the wood tray with two coats of gesso that I sanded smooth. Then I randomly applied soft body acrylic paint to the surface. Once that was dry I started painting, stenciling and stamping layers using soft body acrylic paint, paint markers and permanent stamping inks.
MarshaValk_nSCS_ElephantSteps-1
I tried to get the whole surface covered. Then I decided on my composition, stamped and embossed the Elephant cling rubber stamp image and painted the top layer. I also scratched into the surface and I added acrylic inks and black and white charcoal pencil.
MarshaValk_nSCS_ElephantsNeverForget-4

—————————————————————————————————

I love Marsha’s circular design and I’m so glad that she decided to have fun with it! I think the results, and those super nice, 70’s inspired colors :) speak for themselves. In addition to the supplies (some links are affliate links)  listed below, Marsha also used a wooden tray, black and white charcoal, and the stencils from the Urban Scribble, Bird, Mish Mesh, and Fashion Dame stamp sets.

SuppliesCJS


And maybe you will even play along -we would love to see how you interpret the theme. Email me how you used my stencils and stamps with the theme and email me an image – I would love to share what you did at the end of the month!

See you next Tuesday for the another project from the Creative Squad, with the theme Elephants Never Forget.

Leave a comment

My City Speaks to Me – Michelle Rydell

CS April My City Speaks to Me Blue

It’s Tuesday, so it’s time for my Creative Squad to share a project with you with this month’s theme: “My City Speaks to Me”.  Throughout the month, the team has been using my new Urban Scribble Foam Stamp, Rubber Stamp and Stencil Set to interpret the theme and to share with us what their hometown or city is all about.  We want to know what makes it special, vibrant, and important! This month, our Creative Squad has taken us on a trip to their city!

Today we have a really fun art journal page from Michelle Rydell. Her colorful interpretation of the theme is like an insider’s travel guide to Minneapolis :)  Thanks for sharing all the good spots, Michelle!
—————————————————————————————————

Michelle April Headshot

Up until a few years ago, I lived in the city of Minneapolis my whole adult life.  Now, I live in the country, just outside of the city, but Minneapolis will always have a piece of my heart.  I love this month’s theme because it gave me a chance to document that!

First I created a background in my art journal, using black on the bottom to represent city streets, and blue on top to represent sky.  I used white paint with the Urban Scribble stencil to create texture on the streets, and clouds in the sky.

RydellMyCity1

The city is broken up into neighborhoods, so I decided to represent that with a variety of colors and patterns, using painting underpapers as my substrate.  I stamped the cling stamp on two different color schemes, and the foam stamp on a third. Then I cut them out…

RydellMyCity2

I pasted them onto my page in overlapping rows, and drew little banners on sticker paper to label the neighborhoods.  I also typed up the names of some of my favorite places in each neighborhood, printed them onto sticker paper and stuck them on to corresponding buildings.  I colored over the building names with tombow markers to blend them in a bit.

Here’s my finished piece:

RydellMyCity3

And a few closeups…

RydellMyCity4

RydellMyCity5

RydellMyCity6

—————————————————————————————————

I absolutely love how Michelle used the Urban Scribble stamp to create rows for different neighborhoods, and her colors are so vibrant against the black stamping, the whole design really pops.  The overall idea is a super clever way to share with us the hotspots in Minneapolis!

Besides the supplies listed below, Michelle also used newsprint underpapers with a variety of paints and sprays on them:

SuppliesCJS


And maybe you will even play along -we would love to see how you interpret the theme – email me how you used my stencils and stamps with the theme and email me an image – I would love to share what you did at the end of the month!

See you next Tuesday for the another project from the Creative Squad, with a brand new theme for the month of May.

BLOG TEMPLATE[20]

P.S. Stampendous is doing a blog hop this week and you can win one of the stamp sets. Simply comment on this post or their blog post in order to be eligible to win!

Check in with their blog all week long to see some fun projects with my foam stamp sets – my creative squad is posting a lot of new projects this Friday- so stay tuned :)


STM_NatNfriendsHop_prize[8]

Comments (39)

  • Tracy Moloney

    |

    FABULOUS pages Michelle!!!
    LOVE the colours and dimension of your “old town”
    THANK YOU for sharing :)
    Tracy from Australia

    Reply

  • Kate B

    |

    This is fantastic – so creative and colorful!

    Reply

  • nancy L

    |

    Awesome, love the cityscape

    Reply

  • Sarah P.

    |

    This looked like a lot of fun. The talent is awesome.

    Reply

  • Jade Sutton

    |

    Your page is beautiful. I love how you have layered the city to create the different areas.

    Reply

  • myriam Le Blanc

    |

    Wow! I love it! The colors are so vibrant!

    Reply

  • Miriam Prantner

    |

    Really love these pages and the different layers of the buildings and the colors, so fun!

    Reply

  • Joela

    |

    That is incredible

    Reply

  • Teresa Godines #6857

    |

    Wonderful project

    Reply

  • Rachel Alexander

    |

    Love the colours, such a fun page. Rachel

    Reply

  • kirsty vittetoe

    |

    I have a soft spot for city scene, lived in and visited many, LOVE this!
    (Las Vegas)

    Reply

  • Greta H

    |

    Very creative–just beautiful!

    Reply

Leave a comment

Opposites Attract – Michelle Rydell

CS Opposites Attract logo

It is Tuesday and that means it is time for my Creative Squad to show you a fun project. The theme for March is Opposites Attract and the team will use my new Bird Foam Stamp, Rubber Stamp and Stencil Set. Just as opposite colors on a color wheel highlight one another, or yin and yang fit together so comfortably, sometimes the best is brought out when we celebrate extreme differences!

This week we’re happy to show you an art journal page by Michelle Rydell, which has us singing along with her! Take a look at her musically inspired interpretation of our theme.

—————————————————————————————————–

Michelle March Headshot

The first thing I thought of when I heard this month’s theme, was the song “Opposites Attract,” by Paula Abdul. I thought it would be fun to use that as inspiration for my journal spread!

Michelle Rydell Opposites Attract 04

Here’s how I made the spread (the song running thru my head the whole time)…

I used the cling stamp bird first, and stamped her with versamark ink, so I could emboss her in a variety of bright colors. I poured each color of embossing powder on separately, so that I could shake the extra off and back into the jar, without the colors getting mixed up.

Rydell Opposites Attract 1

When I was done, this is how my bird looked. The stray bits of color don’t matter because I will be cutting her out.

Michelle Rydell Opposites Attract 2

Next I used the foam stamp bird. For my vision to come to life, I needed this guy to be facing left, instead of right. In order to accomplish this, I stamped him onto my gelli plate, and then pressed my kraft paper onto the plate, and voila, a left facing bird! (Just a note: If you don’t have a gelli plate, you could probably accomplish the same thing by substituting any non-porous surface, such as a piece of acetate or a plastic placemat.)

Michelle Rydell Opposites Attract 3

Once I had my two birds cut out, the rest of the page came together quickly. I painted a simple nighttime background on the left, with a paper-pieced tree branch. On the right side of the spread, I used the stencil that comes with the set to create some bushes in the background for my daytime bird. The hearts were cut from some underpaper on my desk that had pink paints and sprays on it. The lyric from the song was written with markers for a finishing touch.

Michelle Rydell Opposites Attract 04

I just loved working with this fun set! The birds are adorable and I love how you can mix and match them to create all kinds of different looks!

———————————————————————————————————
I love how Michelle showed us step-by-step her process for creating this fun page.  Her placement of the bird up-side-down on the tree really made me smile and her lettering is just gorgeous too!
Besides the supplies listed below, Michelle also used kraft paper and underpaper to create this art journal page.
SuppliesCJS

And maybe you will even play along -we would love to see how you interpret the theme – email me how you used my stencils and stamps with the theme and email me an image – I would love to share what you did at the beginning of next month!

See you next Tuesday for project inspiration from around the globe.

Comments (17)

Leave a comment

Opposites Attract – Marsha Valk

CS Opposites Attract logo

It is another Tuesday and therefore time for my Creative Squad to show you a fun project. The theme for March is Opposites Attract and the team will use my new Bird Foam Stamp, Rubber Stamp and Stencil Set. Just as opposite colors on a color wheel highlight one another, or yin and yang fit together so comfortably, sometimes the best is brought out when we celebrate extreme differences!

We’re very excited to share with you the very colorful, layered mono prints by Marsha Valk.  Take a look at her nifty interpretation of our theme!

—————————————————————————————————–

Marsha March Headshot


My thoughts on the theme ‘Opposites Attract’ were positive vs. negative and opposite colours on the colour wheel. And that immediately made me think… monoprints!
MarshaValk_nStudioCS_OppositesAttract-2
I started with sketching different placements on a scrap of paper so I could figure out how many masks and stencils I would need of the bird shape. Turned out I needed one stencil and three masks. I made them by stamping the solid foam bird shape onto transparencies and scraps of paper and then cutting them out.
MarshaValk_nStudioCS_OppositesAttract-5
I decided to use my 6 x 6 inch Gelli Plate so I could have a nice white border around my monoprinted images. I started with the yellow/purple print: added black acrylic paint to the Gelli Plate, put my handmade bird stencil on top, masked off part of the stencil with a handmade bird shape mask and then pulled the print and cleaned the plate.
I added yellow paint to the plate, positioned my bird stencil on the print with repositionable adhesive, pulled another print and cleaned the plate.
MarshaValk_nStudioCS_OppositesAttract-4 ver2
When the print was dry I masked off three birds on the paper using repositionable adhesive. Then I added purple paint to the Gelli Plate, created a pattern on top using the stencil and masks that come with the Bird Foam Stamp and pulled a print on a scrap piece of paper. Then I removed the stencil and masks and pulled a ghost print with my original paper.
Once I had removed all masks and any adhesive residue that was left on my print, I stamped the foam stamp bird with yellow paint on top of the negative (white) bird shape and the cling rubber bird with black ink on top of the yellow bird shape.
MarshaValk_nStudioCS_OppositesAttract-3
The second print was created in a similar way, but this time my black ghost print background didn’t work out as I wished. So I ended up adding another green colour and I stenciled the plant shapes over it with white paint.
MarshaValk_nStudioCS_OppositesAttract-6
The last print on blue paper was a ghost print that I pulled to clean the Gelli Plate and that I stamped over with the foam stamp bird.
MarshaValk_nStudioCS_OppositesAttract-7
Monoprinting like this is always a puzzle and rest assured that I had a few misprints too. I will keep those around for other projects! Whilst choosing my paint colours, I discovered that I hardly ever go for opposites on the colour wheel. It was fun to try this with a limited colour palette, out of my comfort zone!
MarshaValk_nStudioCS_OppositesAttract-1
———————————————————————————————————
I love how Marsha showed how to use all three stamp surfaces together, by creating a reverse print of the solid foam stamp, and using the patterned side of it to stamp on top.  The layering and colors are super intriguing.
Besides the supplies listed below, Marsha also used black and blue cardstock to create these prints:
SuppliesCJS


Maybe you will even play along -we would love to see how you interpret the theme – email me how you used my stencils and stamps with the theme and email me an image – I would love to share what you did at the beginning of next month!

See you next Tuesday for the another project with the theme ‘Opposites Attact’.

Comments (6)

Leave a comment

Opposites Attract – Cheiron Brandon

CS Opposites Attract logo

It is another Tuesday and therefore time for my Creative Squad to show you a fun project. The theme for March is Opposites Attract and the team will use my new Bird Foam Stamp, Rubber Stamp and Stencil Set. Just as opposite colors on a color wheel highlight one another, or yin and yang fit together so comfortably, sometimes the best is brought out when we celebrate extreme differences!

So here is the gorgeous Cheiron Brandon with her beautiful interpretation of the theme in form of an art journal page

—————————————————————————————————–

Cheiron March Headshot

I had all kinds of thoughts when I heard the theme “opposites attract”.  I decided that since I love bright rainbow colors so much, I would try to mix up some paints that were a bit of a different palette this month for my art journal page. So for me my opposite was to start out with colors I would not normally use.  I mixed up a bunch of pastel greens, yellows and pink and just went with it!
cheiron thoughts fly by page
I created the pink background with a brayer, then used a stamp from the Kaffee Klatsch stamp set along with some yellow paint to create some texture on the background. I gave my page a border using the Batik stencil.
cheiron thoughts fly by 1_
I wanted to create a scene for my bird so I used the stencil included in the Bird Foam stamp set to create a little garden. I layered the “trees” in different greens and then painted around them with acrylic ink to make them pop a bit. To create the bird I painted some blues onto a separate piece of paper and once it was dry, I stamped over it with the outline bird from the Bird Foam stamp set that I “inked” up with black paint using a foam tool.
cheiron thoughts fly by 2
Once I created my bird, I added some more trees to ground him to the page. Once he was all done, I added a tiny crown, some lavender splatter and a few words to complete the page.
Not my normal color palette, but in the end I love how the colors look!  It’s always great to try something new :)
cheiron thoughts fly by 3
———————————————————————————————————
 I hope you enjoy Cheiron’s project as much as I do. I love how she stamped the patterned bird side of the foam stamp on a pre-painted piece of paper and then cut it out, as well as her layering of the stencil shapes in the background and in the foreground. And the crown…too cute!
Besides the supplies listed below, Cheiron also used acrylic paints, music sheet paper and a pencil to create this art journal page:
SuppliesCJS


Maybe you will even play along -we would love to see how you interpret the theme – email me how you used my stencils and stamps with the theme and email me an image – I would love to share what you did at the beginning of next month!

See you next Tuesday for the another project with the theme ‘Opposites Attact’.

Comments (6)

Leave a comment

Opposites Attract – Gwen Lafleur

CS Opposites Attract logo

I am so excited as this is the first Tuesday for my Creative Squad to show you a fun project. The theme for March is Opposites Attract and the team will use my new Bird Foam Stamp, Rubber Stamp and Stencil Set. Just as opposite colors on a color wheel highlight one another, or yin and yang fit together so comfortably, sometimes the best is brought out when we celebrate extreme differences!

So here is the wonderful Gwen Lafleur with her amazing and stunning interpretation of the theme in form of an art journal page

—————————————————————————————————–

Gwen March Headshot

For the this month’s theme of “opposites attract,” I decided to interpret it in two ways. You can see lots of complementary colors used throughout the piece, but the main way I created “opposites” was by contrasting bright / shiny / new with old / rusty / brown. I tend to use this type of contrast in a lot in my work, so I thought it would be fun to really emphasize it for this piece.

Opposites - Bird Stamp Art Journal Page - Gwen Lafleur

To make the page, I created a background with black gesso and layered some color on top to create a kind of distressed look, but using a mix of bright and dark colors. To add more old / new contrast, I used the Circuit stencil with gold ink. For the birds, I stamped each side of the foam stamp plus the rubber stamp on cardstock, then decorated each of them separately.
 Opposites-Bird-Stamp-Art-Journal-Page-Close-ups2-Gwen-Lafleur-e1456529458962
The bottom bird used the rubber stamp, and he’s all about bright colors, beads, gloss and shine. The middle bird used the detailed side of the foam stamp and he’s a fun little hybrid. I made the top look rusty, but layered shiny dimensional paints on top. I cut out a section from the bottom following the lines of the stamp and added some fabric – it’s vintage sari fabric, but it has shiny sequins on it. The top bird is from the solid side of the foam stamp and is all old and rusty with no shine or bright colors. I used acrylic paints, texture paste, and Viva Rusty paint and patina to make it look like a piece of rusted metal, then added a vintage metal button for his eye.
Opposites-Bird-Stamp-Art-Journal-Page-Close-ups1-Gwen-Lafleur-e1456529458962
To finish, I positioned each of the birds on the page and then used the leaf stencil that comes with the stamps and stenciled the base of the leaves where I wanted them. I kept the same pattern as I added the leaves – brighter green at the bottom moving to brown and dark leaves at the top.
It was so much fun to work with these stamps and stencils – they’re so versatile! Plus, this month’s theme was challenging yet enjoyable, and I really love how it turned out!
———————————————————————————————————-
Wow – I hope you enjoyed Gwen’s project as much as I did. I love how she used all three bird stamp surfaces and created them differently yet cohesive and the texture and detail in this page is stunning!
Besides the supplies listed below, Gwen also used several dimensional paints, misc fabric, jewel and metal buttons to create this art journal page:

SuppliesCJS


And maybe you will even play along -we would love to see how you interpret the theme – email me how you used my stencils and stamps with the theme and email me an image – I would love to share what you did at the beginning of next month!

See you next Tuesday for the another project with the theme ‘Opposites Attact’.

Comments (16)

Leave a comment

More hours or …. In My Art Journal Today

AJ_MoreTime_NatKalbach01

“I still find each day too short for all the thoughts I want to think, all the walks I want to take, all the books I want to read and all the friends I want to see!” John Burroghs

Apparently I didn’t find the day too short to repeat myself but was at the same time not concentrated enough to write everything grammatically right in my art journal spread -LOL – can you spy it? Oh man, embarrassing but …oh well… here you go … the real deal;)

I played with different greens and yellow and orange acrylic paint and stamped the city shape using the pattern art of my Urban Scribble foam stamp with purple as a nice contrast to the orange. I applied the paint with a brayer to the foam stamp- goes quick and easy.

AJ_MoreTime_NatKalbach03

As you can see in the WIP (Work In Progress) Picture above I added a little border to my stencil in the set with duct tape as to prevent over spraying when using the stencil with spray paint. Here I just added paint to the surface, then placed the stencil on top and rubbed areas of paint off with a baby wipe – at other spots I stenciled through the stencil.

Urban Scribble Stamp Set

For the Journaling I used a bamboo sketching pen and black acrylic ink- I love to write with the pen …so much, that I like to double my words ;)

AJ_MoreTime_NatKalbach02

What would you do if you had more hours in the day?

Here is a list of the supplies, I used for the art journal spread above.

SuppliesCJS


Comments (2)

Leave a comment

Be Strong, Smart, Brave Enough or …. In my Art Journal Today

BeStrong_natKalbach01

“Be strong enough to stand alone, smart enough to know when you need help, and brave enough to ask for it”

Very true and this year I will be brave enough to ask for help when I need it…hope I will be smart enough to know when I need it ;)

BeStrong_natKalbach04

I have tried out some new supplies for this art journal spread. Well – my new Elephant Set also counts as new :) I painted the background with several soft body acrylic paints and then applied the copper acrylic paint with a brayer onto the solid Elephant Foam Stamp side. I stamped the elephant and let it dry. I cleaned the Foam Stamp with a baby wipe and later throughly cleaned it with water. I stamped with archival ink applied to the Elephant Rubber stamp on top. I added some white dots with a Fineline applicator filled with a mixture of white soft body paint and acrylic ink.

BeStrong_natKalbach02

As the Elephant has the quatrefoil blanket, I pulled out my new metal Stampendous Dreamweaver Quatrefoil Stencil for pattern repetition. I applied the Metallic Copper Dreamweaver Paste through it. Oh how yummie!!! It is shiny and beautiful and dimensional and oh so scrumptious – I might have fallen in love with the paste :) I also thought Michelle Ward’s Maltese Stencil would be a good pattern fit and spray painted with two different colors through it . For the journaling and some mark making I used again the Fineline Applicator – one filled with white and one filled with black acrylic paint+ink.

BeStrong_natKalbach03

I love the rich colors – not my usual color palette but I really liked playing with it and I think I will use it again :)

What new supplies have you tried out recently?

Here is a full list of the supplies I used:

SuppliesCJS


Comments (5)

Leave a comment