Stroll Through The Hood

Stroll Through the Hood – June 2019

Strolls through my hood get me out of my studio, they help me get unstuck and often I get inspired by what I see and get new ideas to create something. It is part of my philosophy about Artful Adventures in Mixed Media – which is the subject of my book. Here are some photos that I gathered in the last couple weeks.

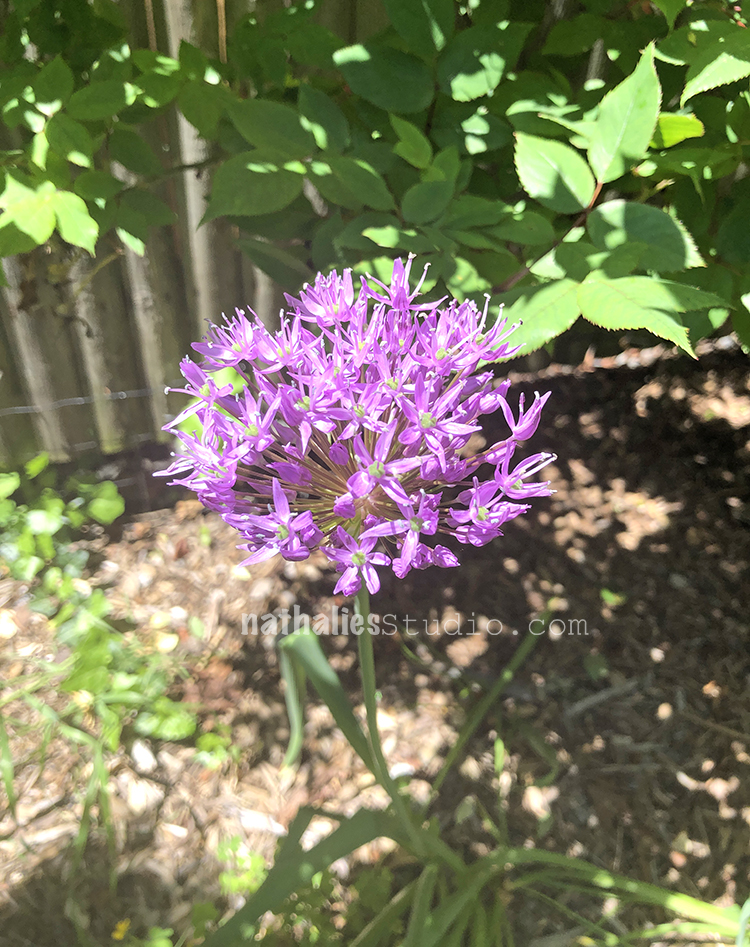
Look at this gorgeous Allium in my garden! LOL- just a couple weeks ago I had no clue what those guys are called when they popped up but you my friends helped me quickly on instagram. I love the purple and green with this kind of fireworks look.

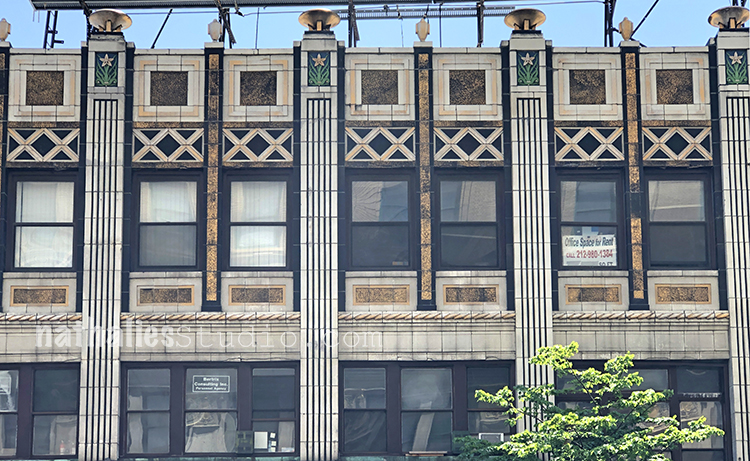
Around Journal Square are a lot of really ugly store fronts …sorry but it is the truth and I have to admit rarely do I look up but one day I did and I saw this gorgeous facade – look at the beautiful tiles with the flowers – I will now be a bit more on the look out and see what other little beauties I can detect there as well.

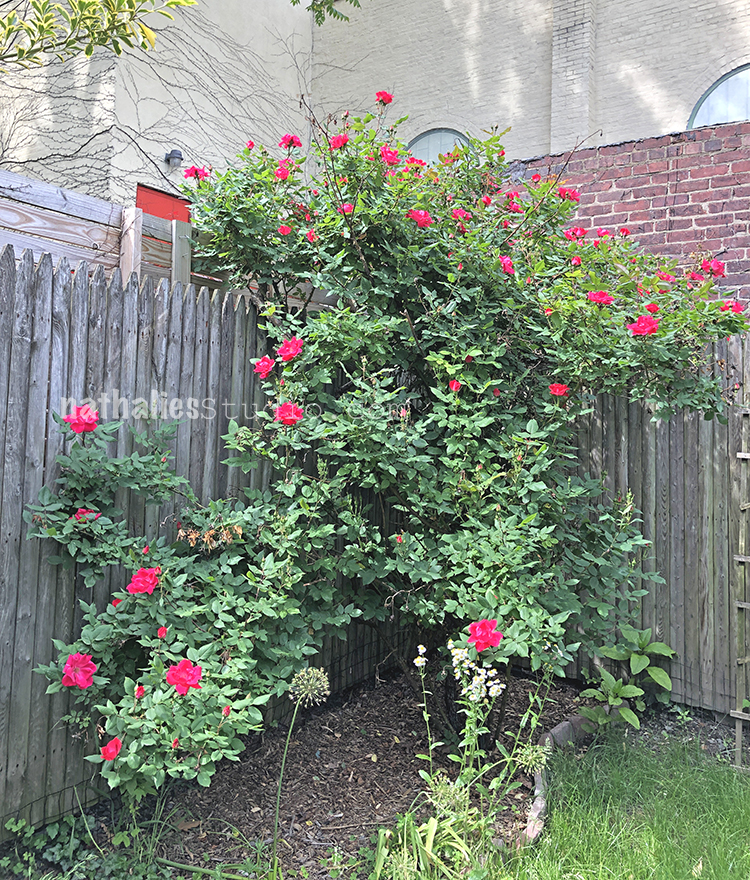
OK – now as I might have mentioned before I never had a garden, I am a terrible plant mother and I am excited like a little kid about anything that pokes it’s head out in our new garden. The rose bush though – I mean seriously …how gorgeous are those popping bright pink flowers.

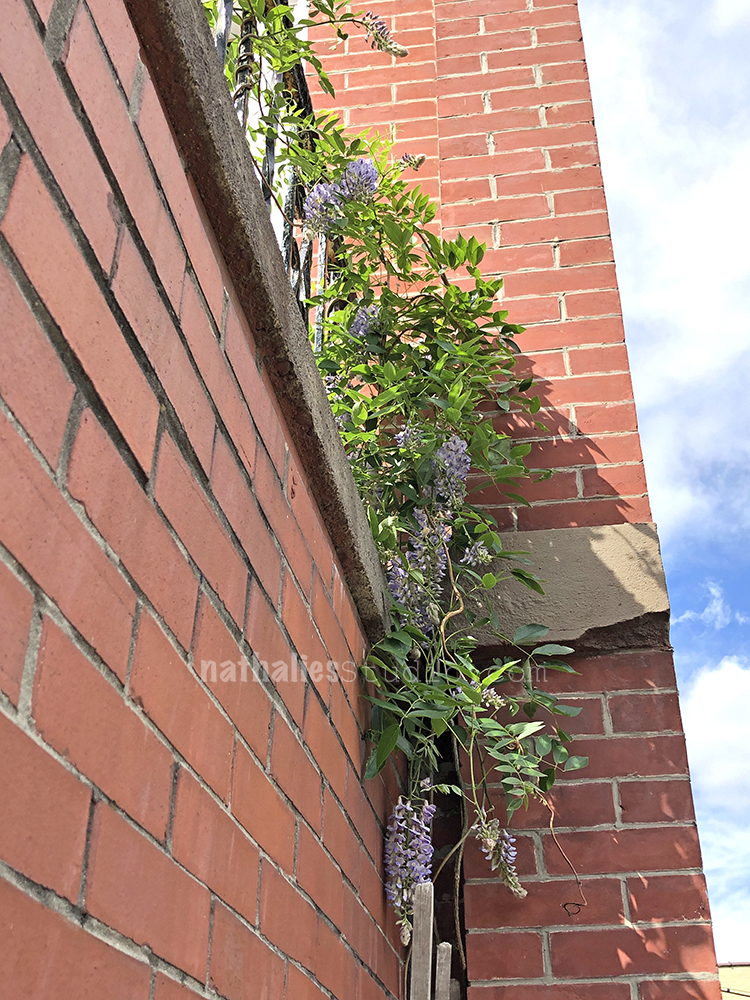
And the Wisteria at the front of our house – I love those cute little flower buds -well not soooo little – LOL. They are called Blue Rain Flower in German – which I think is so fitting. I love how some of the colloquial names for flowers are so descriptive and creative.

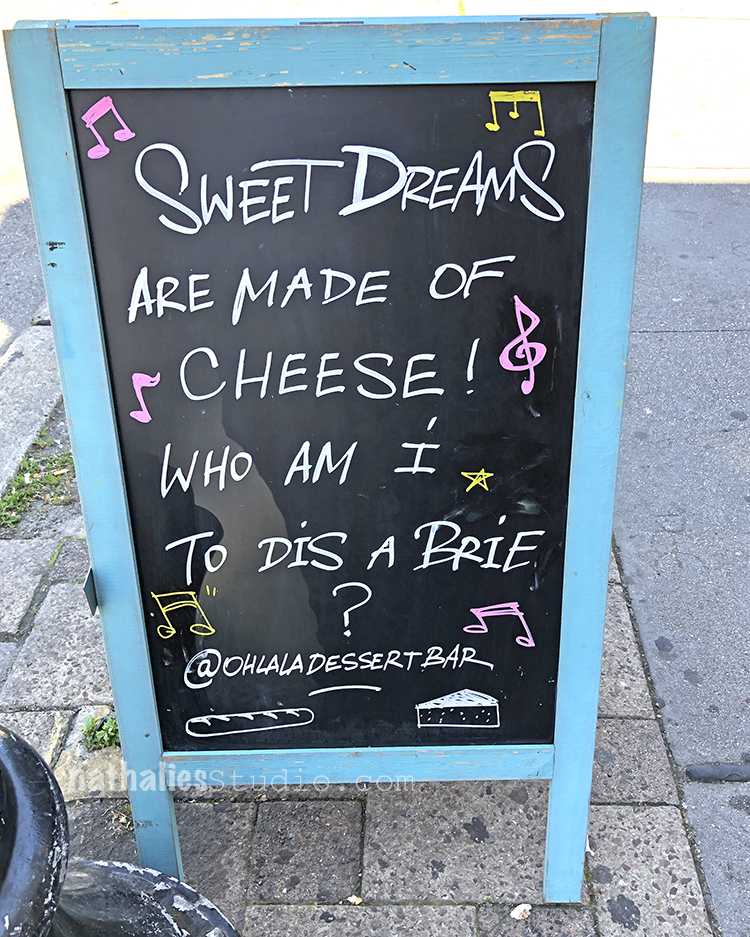
Speaking of words- LOL – this sign at a dessert bar made me laugh! And yes …I a brie – cheese is dessert.

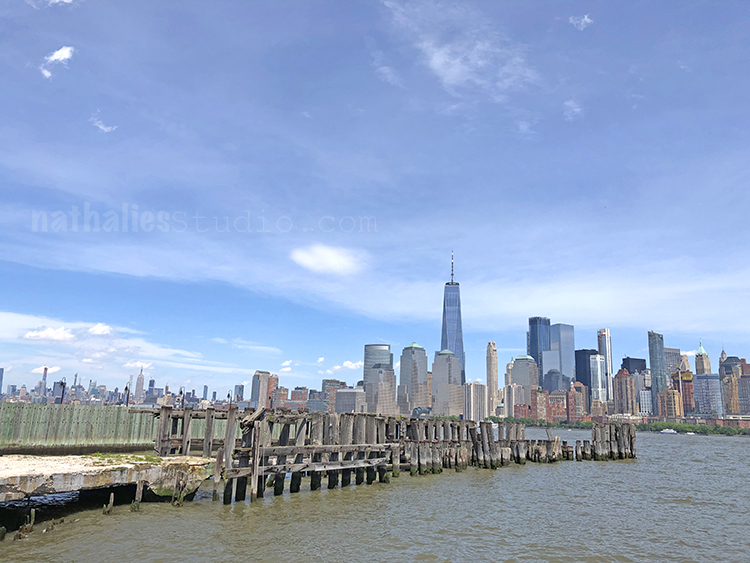
More NYC views from the routine bike rides through Liberty Park – see the “tiny” Empire State Building and the WTC ?

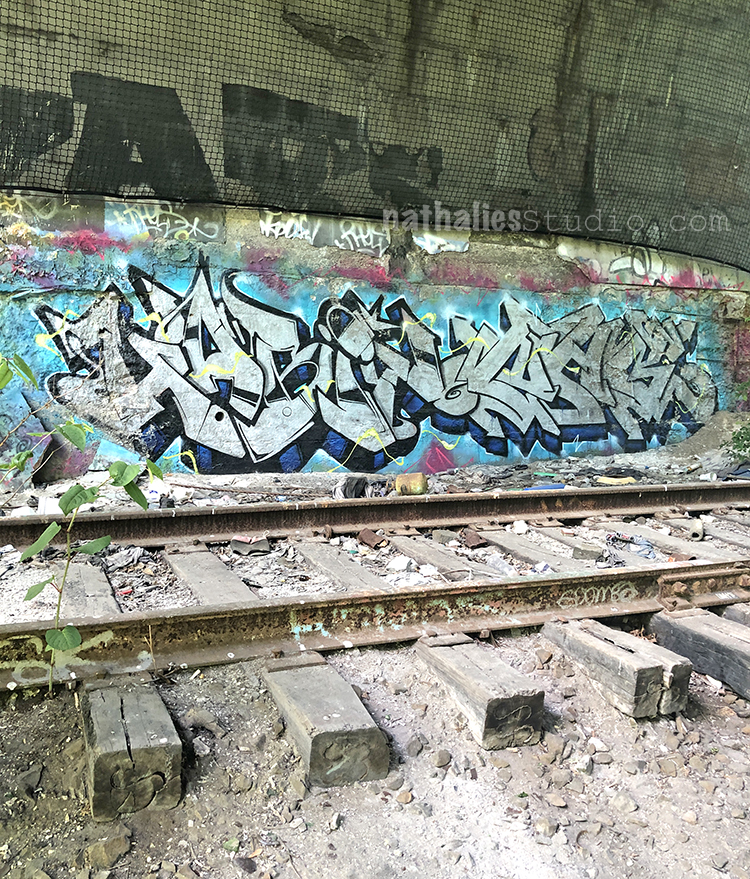
We also went a bit adventurous and explored the Bergen Arches – a little strip of abandoned railway passage through the Jersey City which is being discussed as a park – we are totally up for it.

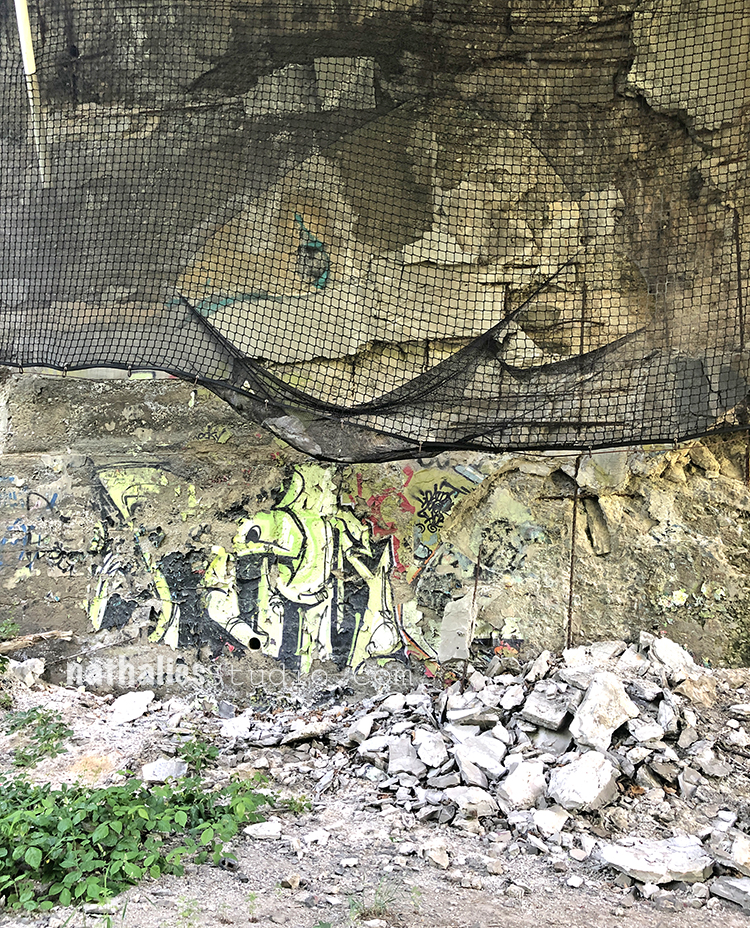
Some weathered Graffiti under the bridges

And NATURE – in the middle of a buzzling loud city – crazy – and beautiful and crazy …

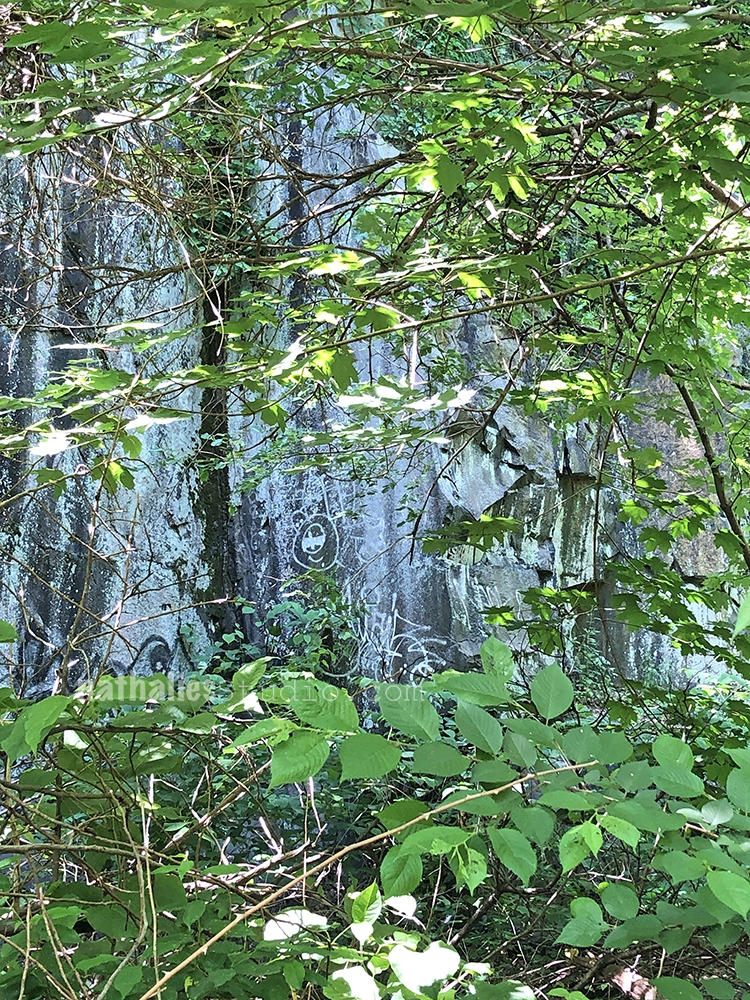
Some urban petroglyphs …wonder if in 1000 years someone tries to figure out what the meaning of this is and will call it newspaper rock- hahahah

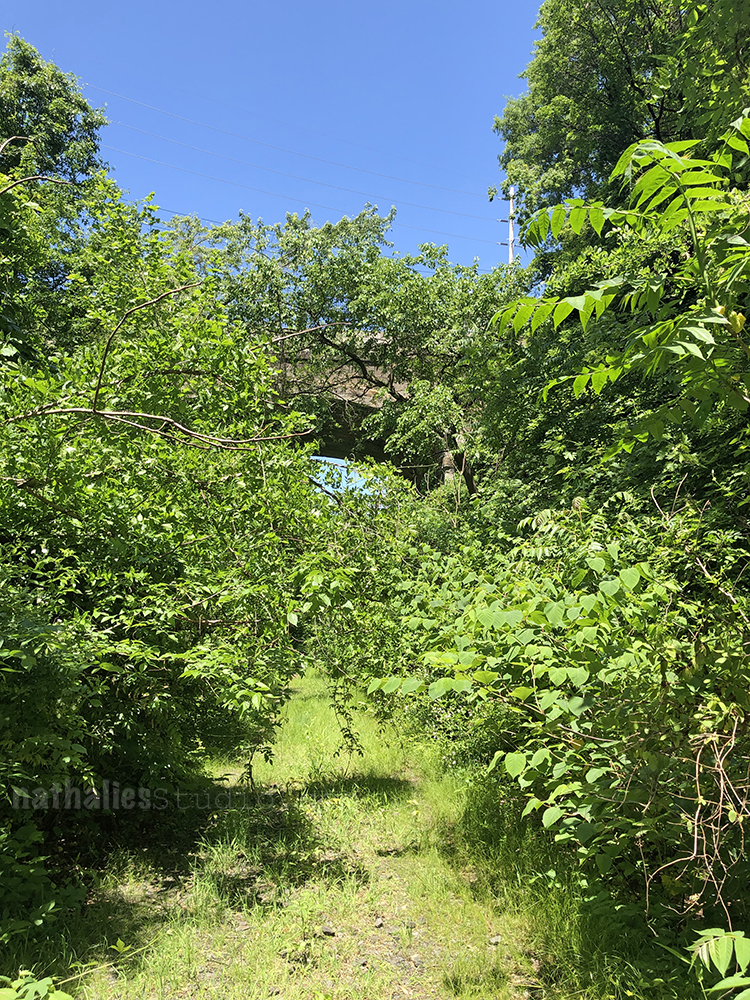
Here one of the many “arches” on the way

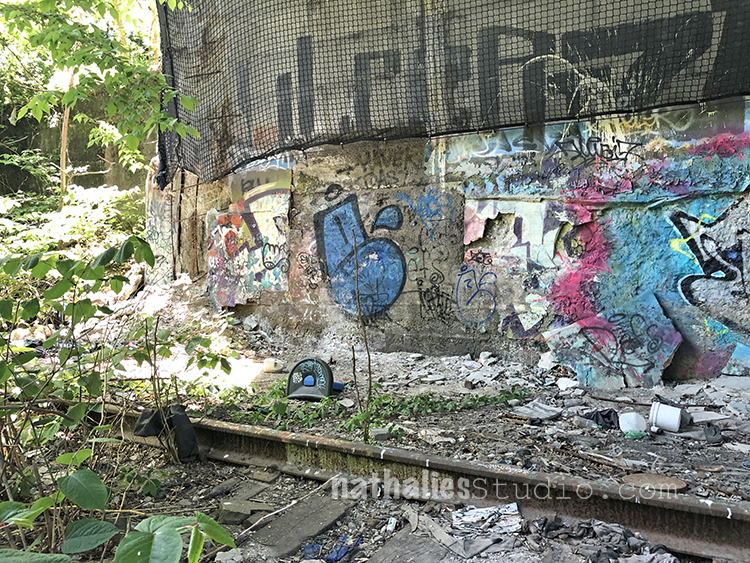
Lot’s of garbage down here too – but there was something about this grungy dirty , colorful area with nature taking it back that I found interesting ….

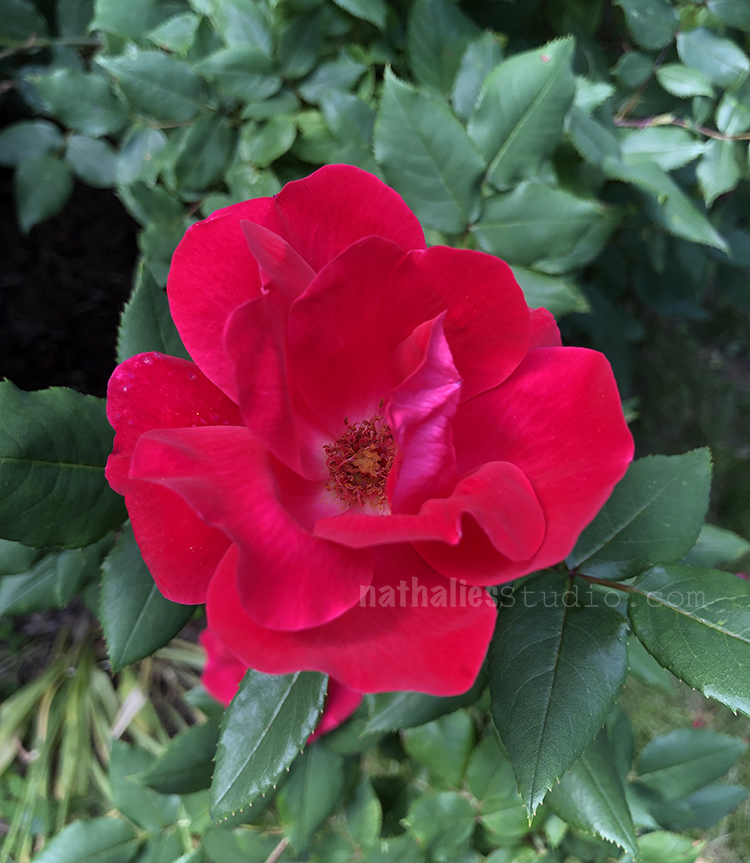
OK for those of you who might have now wrinkled their nose …smell that rose ;) LOL. Sorry still back to my rosebush – I am sure like totally gaga about it – please don’t let me kill this gorgeous plant!

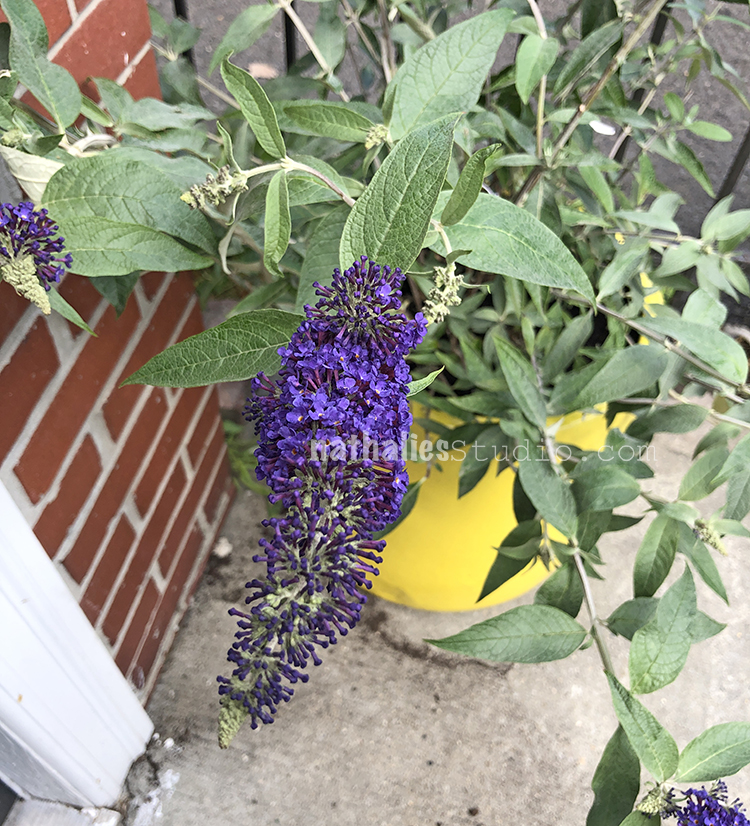
And we also bought a little buttterfly bush for the front of our house . This was one of our first plant we bought for our roof deck when we moved into our apartment in Hamburg, Germany and you know …we are romantic sentimental fools LOL.

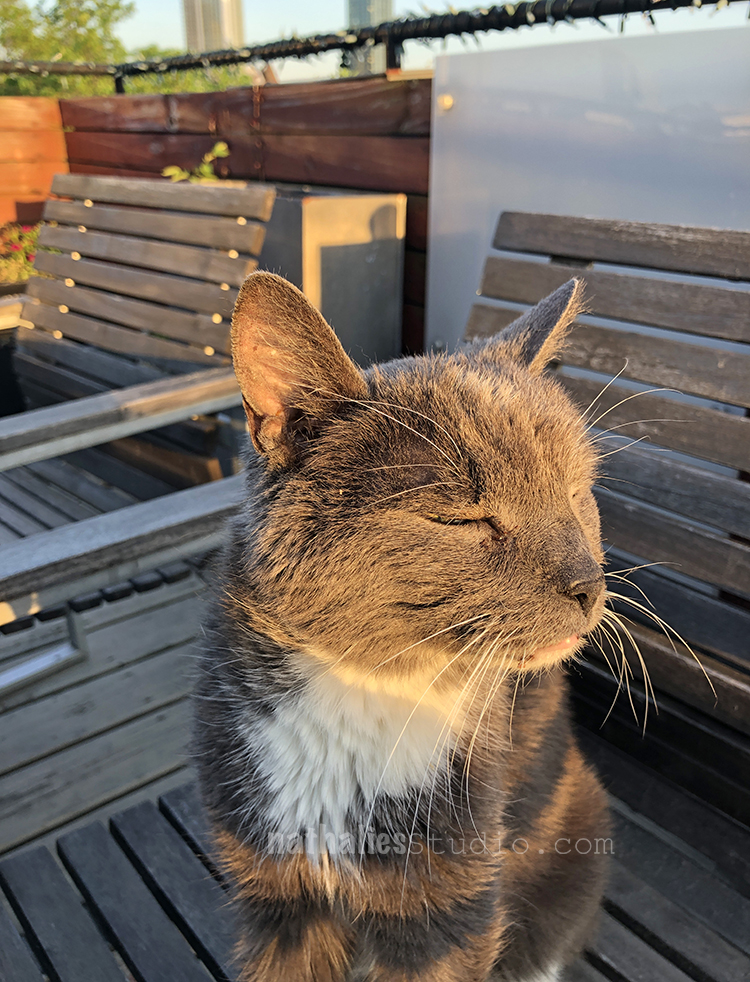
We are still enjoying our deck in our apartment here – and as you can see, so does Niles who turned 19 in May. He loves the deck and as Bobby Pretzel is not allowed yet on the deck because he is a suicide contender, Niles loves the time he has just with us as well. He always just sits on the chair while we eat and talk and pokes his head up to the sun. Wise guy!

I hope you enjoyed the little stroll – until next month!

Comments (2)

  • Jean Goza

    |

    Always love strolling with you!

    Reply

  • Sue Clarke

    |

    Nat, as always I so enjoy your strolls and that you share them with your fans!
    Bobby Pretzel not being allowed on the deck is a riot (in how you described him).
    Yeah for Niles being 19!
    I have a thing for arches as well. They make me think that I can pass through time.
    Keep posting,
    Sue

    Reply

Leave a comment

My Stencils go on Sale at StencilGirl Tomorrow!

StencilGirl Products is having a Summer Solstice SALE starting tomorrow, June 20th and my stencil designs are 21% off! Just use the coupon code SOL21 while shopping at their site.

Here are the official details:

My stencils are on sale for the Summer Solstice!

Thursday, Friday, and Saturday
Save 21% off all* stencils
Use code: sol21
Coupon code expires June 22, 2019, at 11:59 p.m. CST (Central Standard Time) USA

PLUS The 10% discount when you buy 6 stencils of the same size still applies!

Choose 1 FREE large stencil for every $100 spent (after discounts are applied). You MUST specify your choice(s) by L### (such as L048) in the comments section of the cart when you check out or it will be StencilGirl’s choice. Sorry, no exceptions.

SHOP HERE beginning June 20!

*Stencils only. Does not apply to DVDs, books, tools, wholesale orders, StencilClub, or gift certificates. The StencilClub exclusive monthly member discount does not apply.

Leave a comment

Hex Marks the Spot – Jennifer Gallagher

Happy Tuesday folks! It’s time for a post from my Creative Squad and today we have Jennifer Gallagher sharing a beautiful art journal page representing her family. She is using the stamps from my Hex Set Large rubber stamp set and this month’s theme: Hex Marks the Spot –In the days of pirates and lost treasure, a map would lead you to gold and jewels. Today we treasure all sorts of things – our family, friends, experiences, meaningful objects, accomplishments, etc. Think about what you treasure and how you found your way there.


This month we are talking about our treasures. My treasure is my family. It just so happens this week is my wedding anniversary. I decided to create an art journal page that reflects my love of family and how they are my most valued treasures. I have represented my husband and two sons as flowers using Nat’s Maze Hex stamp. I hope you enjoy this quick and easy tutorial for a fun and vibrant art journal page.

Start by applying a layer of distress stain and spritzing it with water. Move the page around the let the water travel. Dab with a paper towel to create extra interest and texture.

Stamp Nat’s Maze Hex stamp with black archival ink. These shapes will become your flowers so place them as your focal points.

Fill in your flowers negative space with posca pen acrylic markers.

Paint the bottom half of your page with green acrylic paint and a mini blending tool. Once dry, stamp Nat’s Beacon Positive stamp in vivid chartreuse archival ink to add blades of grass.

Using a black gelly roll pen, draw in petals around each flower, stems, and leaves. Add as much doodling as you like. Use a distress marker in peeled paint to color in your leaves.

Write in a sentiment that describes what your treasure is. I chose, “Where your treasure is, there your heart will be also.”

I hope this tutorial has shown you a creative way to use some of Nat’s Hex Set Large stamps. The Maze Hex stamp screams flower to me! What about you? What fun ways can you get more out of your n*Studio stamps? Be sure to play along and share your creations with us.


Thank you Jennifer – so cool to see the Maze Hex transformed into flowers! Great idea. You can find all of my rubber stamps in my online shop. In addition to green acrylic paint, here are some of the supplies Jennifer used:

Feel inspired? Working on something yourself that you’d like to share?  I love to see how you interpret our monthly themes. Email me how you used my stencils and stamps with the theme and email me an image – I would love to share your projects in my next  “n*Spiration From Around the Globe“.

Leave a comment

The Stencilfied Journal – Prompt 23

My wonderful friend Tina Walker is at it again – she invited several people to join her Stencilfied Prompts. The prompts are music related and each week she is posting a song. You can be inspired by the lyrics, the video, the album cover or anything related and the only restriction is that you have to use StencilGirl Product Stencils. Here is my take on Prompt 23

This week the song was Paradise by the Dashboard Light by Meatloaf. This is definitely a classic, so I pulled some lyrics and then added my own thoughts :)

I used my Hamilton stencil for the background, with spray paint, then ink and paint on top.

I traced some fan shapes using my Fantastic Mixed Media Chip, and also stamped my Broadway Fan stamp from my FANtastic Large stamp set.

Here are some of the supplies that I used:


Leave a comment

Currently Digging – Creative Squad Edition with Marsha Valk

It’s time for a special edition of Currently Digging – with my Creative Squad! Once in a while I like to share with you some nifty finds – like an Artist whose work caught my eye…, some Inspiration that got my creative juices flowing, and Tools & Techniques I am currently digging. Today I asked Marsha Valk from my Creative Squad what SHE is Currently Digging :) Hope you enjoy this.


Maria Lassnig – I love to go to museums, and it’s more than often the unexpected, bonus exhibitions that take me by surprise. A couple of weeks ago I went to see the Hockney exhibition at the Van Gogh Museum in Amsterdam. The Van Gogh Museum is always quite busy, but this time, the crowd was huge, and I could not get out of there quick enough. The Stedelijk Museum is right next door, so I decided to pop in there to have a look at the Maria Lassnig retrospective. I had no clue of who she was or what she made, except that it had to do with body awareness. I did not expect to be captivated by her art, but I was! Her works of art aren’t always easy to look at (the themes aren’t easy either), but they’re also beautiful and moving. The thing that struck me right away was her stunning colour palette. She used the same palette pretty much throughout her oeuvre. I’m so glad I got to see some of it!

Pippi Longstocking – If you ask me about a particular book or movie that has inspired me to create lately, then it has to be Pippi Longstocking! The movies are pretty much etched into my memory because I must have seen them annually during my childhood. I hardly ever have just one source of inspiration though. In general, you can probably group the things that instantly grab my attention by theme. A major one right now is ‘anything printmaking’, and another one is ‘anything Barcelona’. 

Drypoint needle – This is my favourite drypoint needle. I know it doesn’t look like much, but it’s by far the most exciting tool I have right now. I go to a weekly printmaking class, and I’ve been learning different intaglio and relief printing techniques. There is still lots more to learn, but it seems like I enjoy drypoint, because I’ve been creating drypoints for weeks on end now. It takes me out of my comfort zone, and the needle still doesn’t always do what I have in mind, but I guess that’s half the fun. It takes time to learn a new skill, so I’m taking it!


Thank you Marsha! Stay tuned for the next Currently Digging for more unexpected inspiration!

Leave a comment

Most Important – Art Journal and Mixed Media Chip Tips

“How unique to this human experience that we all just wish to be the most important thing on earth to someone else.” – Tyler Knott Gregson

I used acrylic paint with my new Hexastencil Planet Earth Mixed Media Chip to create my background.

Then I came back and stamped with my Hex Set Large rubber stamps – they are just the right size to work together.

Mixed Media Chips are made of chipboard – here are some tips for helping you give them a longer “life”.

Brush some gel medium on both sides, let dry, this seals it for a bit so you can play with it a bit longer.

Add some artist masking tape around the edges to make it easier to use as a stencil too- you can remove it later.

You can use it as a stencil and line it up for a continuous pattern – makes for great color blending and layering.

And best of all, this hex chip works with my rubber stamp sets.

Here are some of the supplies I used in this post:


Leave a comment

Back to School: Suminagashi

A couple weeks ago Kim and I went to a lecture about Marbling Paper at Kremer Pigments in NYC. It was a great lecture by Sarah Oppenheimer and I learned a ton.

While I love the Western style of paper marbling I was totally taken by Suminagashi – which is the Japanese paper marbling technique where you basically float sumi ink on top of water.

We couldn’t try the technique ourself since it was a lecture and demo but I knew I had to try this at home.

The pictures you see – starting with the one above are all from my second try. The first try was a total disaster and I didn’t take photos because basically I just used “bad words” and tried to figure out what was going on. My ink would mostly blob to the bottom of the container , the ink would just run off my paper …water everywhere- ink everywhere – you get the picture.

But ..of course I wouldn’t give up – after some digging for information of what possibly could have gone wrong and some research and reading I was ready for the second try and that was wayyyyy better.

For this second trial I used Sumi Ink – which is the black ink you see in the pictures as well as some Shellac Inks by Kremer Pigments. You also need a surfactant (which can be watercolor medium, dishwash soap, a marbling surfactant, soap nut ….and it is a trial and error to see how well they work) and two or more Sumi brushes. The problems of my first trial were a mixture of wrong surfactant and also dipping the brushes way too far into the water.

Basically you start with for example two or three brushes- here in the picture above you see a sample where I worked with three brushes . One will be dipped into the surfactant and the other ones in ink. Then you patiently dip just the very tip of the brush onto the water surface and alternate between the brushes – meaning between the colors and the surfactant.

At some point you will have tons of rings on your water surface and you can then either manipulate the “design” with some “wind” – meaning carefully blowing the surface or using a hair of your scalp to go through it. Then you lay paper -preferably washi paper on top of the surface and slowly pull it off.

Does that sound stressful to you? LOL- not at all- all good. The washi paper as the one above was my favorite result but also the most complicated to handle. Taking it off of the water and not ripping it – not folding it and just handle it in any normal way was sooo tough – little bit of stress here …but I think next time and with more practice that will work well. Having some non-washi paper on hand definitely helped.

Look at the gorgeous pattern and the texture of the washi paper- I cannot wait to use this as collage paper but that will take a bit hahahah- I need to pet it a bit more before i can let go ;)

The one above was after I blew onto the surface before adding the paper on top – I love how the rings just went nuts and zig-zaggy . BTW this was done with red and black ink. The colors will always be very very washed out and muted, which is the charm of this. For me this creates so many opportunities to incorporate the paper into my artwork without being overpowering.

For this one above I used a hair of mine and swirled it through. Apparently the oil on your hair makes sure that the rings won’t get interrupted as it would if you would use something else like a comb – but don’t quote me on this- I haven’t tried a ton yet because I first wanted to get a feel of how things work …without having the ink coming off the paper or just sitting in the bottom of the tray.

It was so much fun and I love the couple papers I made with my first sitting. I could have done way more papers but the problem was basically space – next time I def. have to set myself a bit better up – close to the sink and also with some better space for the paper to dry.

I would also love to try some other colors and actually also different inks- for example also acrylic inks. I am not sure if it will work but hey – that doesn’t stop me ;)

The blue came out quite nice

And then this one – I pulled the blue ones on the top and then instead of cleaning and skimming the water right away I added some black ink with surfactant and then printed again – I love the result.

The one on top is a layered print – first I printed black and white and then blue and white on top . I love it- but have to practice this also a bit more to get some better prints.

And there you go – a pile of paper that I love. I cannot wait to do this again. If you want to try it yourself find different videos about Suminagashi – and start maybe with a small container and dishwasher soap and see if it works – It seems to be quite a trial and error if you do not want to dive right away in the “traditional right way” but I have to say – I enjoy that journey because that gives me the possibility to adjust to my own needs and to what I have.

I cannot wait to show you some art journal spreads I used them for.

Do you like those prints and how could you see yourself using them?

Comments (8)

  • Dee Spillane

    |

    Nathalie, this is so cool. Did you do some journaling with them? Also did you ever try acrylic inks. I just saw this post recently and am intrigued. I have tried marveled paper but never this.

    Reply

  • Jill Elizabeth

    |

    I love that you have documented your experiences so well. I would love to see an update . Surely you’ve had lots of practice since . Where did you get those lovely white trays that you are working in.. seems so much better than the clear plastic bins that I have been using…

    Reply

  • Christine Mack

    |

    Nat, I loved your papers.. I have done suminigashi before and here are some suggestions: PAPER-Masa and Canson’s Mi Tientes work well. You can get both at Dick Blick. To dry your paper try blotting your print (don’t rub, blot) with paper towels with no pattern on it like Viva or blotter paper. Your print will dry in about 15 minutes if you blot it first. INK-acrylic inks will not work with plain water. You must use a thickened water like for regular marbling and you must put a mordant on the paper to make it stick. You can use printer’s ink or India ink but you will need to thin it with a dispersant. A good source for Sumi ink in colors is a small kit you can get either at Dick Blick or Amazon. Search for Suminagashi and the kit should appear. Blick also has a nice tutorial on their web site. Hope these tips help and have fun with suminagashi.

    Reply

    • nathalie-kalbach

      |

      Christine, thank you so much for your tips! that is super helpful !

      Reply

  • Nancy G.

    |

    I’ve seen videos on this process, but never tried it. Thanks for sharing your experiments. You make me want to try.

    Reply

  • Jean Goza

    |

    Nat these are so amazing! I would have to hang them on the wall awhile to enjoy the “flow” of lines before I could cut into them. Thanks for sharing!

    Reply

    • nathalie-kalbach

      |

      Thank you Jean- yeah it is really tough to cut into them LOL- but the good thing is I can always make more – cannot wait for my bigger studio.

      Reply

Leave a comment

Hex Marks the Spot – Marsha Valk


Hello from my Creative Squad! Today we have a post from Marsha Valk and she takes us on a journey into the mind of an artist – to show us how a theme can prompt a thoughtful art journal page. She is using my Hex Large set, Fan-fare, and Hex Small rubber stamps and this month’s theme: Hex Marks the Spot –In the days of pirates and lost treasure, a map would lead you to gold and jewels. Today we treasure all sorts of things – our family, friends, experiences, meaningful objects, accomplishments, etc. Think about what you treasure and how you found your way there.


This month’s prompt made me intensely sad. Somehow to me, to treasure something is like trying to prevent sand from slipping through your fingers.

Change is constant. People disappear from your life, things break, or an event can make you see things in a completely different light. Even you change.

I truly realized this during my scrapbooking years: as soon as I scrapped about something precious, things changed, broke, got lost, went away or something happened that just changed everything. I’m not even kidding. I’m not saying I jinxed things by scrapbooking about them, but documenting everything did make me painfully aware of all of the changes and losses.

I’m not sure why the prompt made me steer down memory lane via the sad route. Maybe it’s because our neighbours are moving house, perhaps it’s because last week two huge trees that have dominated my view for twenty years were cut down or maybe it’s PMS… Things you treasure disappear all the time, and there is nothing you can do about that.

Good thing I know the perfect remedy for sad moods. It’s called ‘art journaling’. ;-)

For the background, I applied StazOn to my gel printing plate. Then I used Nat’s Hex Set Large stamp set to make marks in the ink. I pulled a print directly into my journal and used the leftover ink on the plate and a few stamped hexes to fill any of the remaining white spots.

Next, I browsed through my folder of scraps leftover from previous projects using Nat’s products and I pasted some of them to my page with Matte Medium.

Then I randomly applied magenta and white paint with a brush.

I stamped on top with the Diamond Hex Positive and white paint, and I also added a couple of diamond shapes from the Fan-fare set in gold paint, because what’s a treasure without gold!

I remembered that I had also had a cutout of a gold heart in my collage stash, so I pasted that to a painted scrap of paper that I cut to the shape of the heart.

I tucked some sewing thread under the heart before adhering it.

Then I wrote part of the lyrics to ‘Gold Dust’ by Tori Amos on the page, added black splatter and pulled the page spread together by stamping a couple of small Diamond Hex Positives in black ink.


Thank you Marsha! What a beautiful page and love that you used your art journaling to help work through all that. You can find all of my rubber stamps in my online shop. In addition to the gold heart collage element and the sewing thread, here are some of the other supplies Marsha used:

Feel inspired? Working on something yourself that you’d like to share?  I love to see how you interpret our monthly themes. Email me how you used my stencils and stamps with the theme and email me an image – I would love to share your projects in my next  “n*Spiration From Around the Globe“.

Leave a comment