Creative Squad

Food for Thought – Maura Hibbitts

Hello from my Creative Squad! Today we have a cute project from Maura Hibbits for all you chefs out there (or maybe hat enthusiasts???)! She is using my Park Blvd stencil and my Solid Fan and Fantastic Large rubber stamps, along with this month’s theme: Food for Thought – Let’s take a lighthearted look at food! While the culinary world has become an art and a science in terms of preparation and presentation, sometimes it is the simplest foods that bring us the most joy. Simple fare or elaborate family traditions, we all have our favorite foods. What is yours?


Do you have a King or Queen of the kitchen at your house? Anyone who loves to cook? Why not create a crown themed chef’s hat for them? One of my sisters loves to cook, and loves the color purple which got my muse thinking. I found a canvas chef hat in my stash, and purple made me think of royalty, hence the crown reference.

I started with simple materials for my project, chef hat, stencil, stamps, and paints. Of course, this could easily be done on a canvas bag too. 
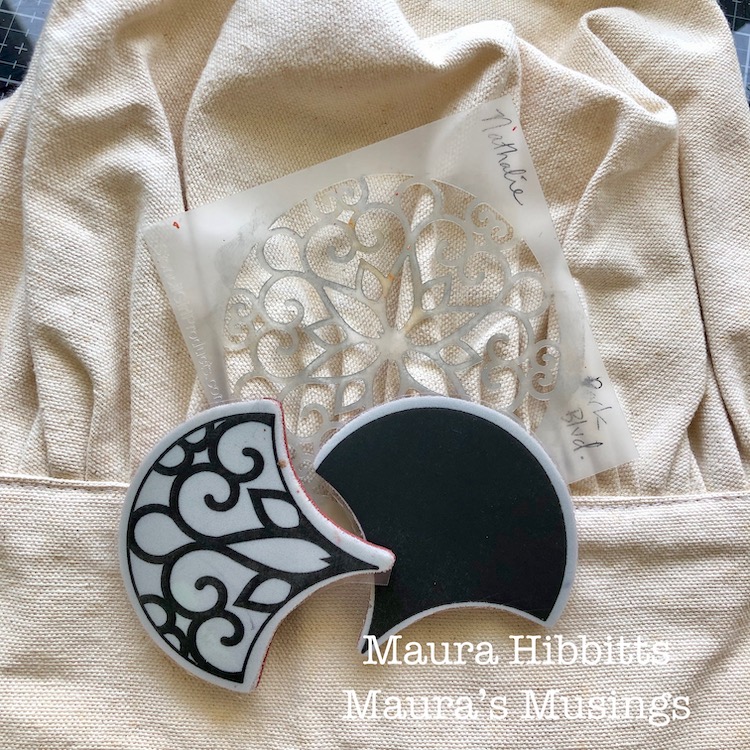
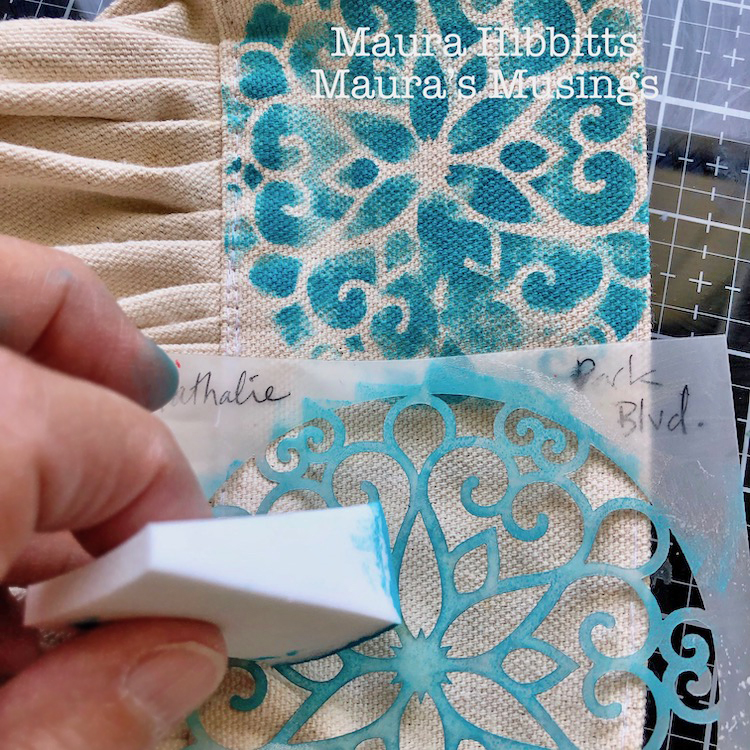
My first step was to stencil around the headband portion of the hat with Nat’s Park Blvd stencil. I used a cosmetic sponge with the Cobalt Teal Hue acrylic paint and dabbed lightly. In retrospect, I would have waited to do this step until after I did the fans, which would have made the placement better. I also would have lightened the blue. Oh, the things we learn as we go!
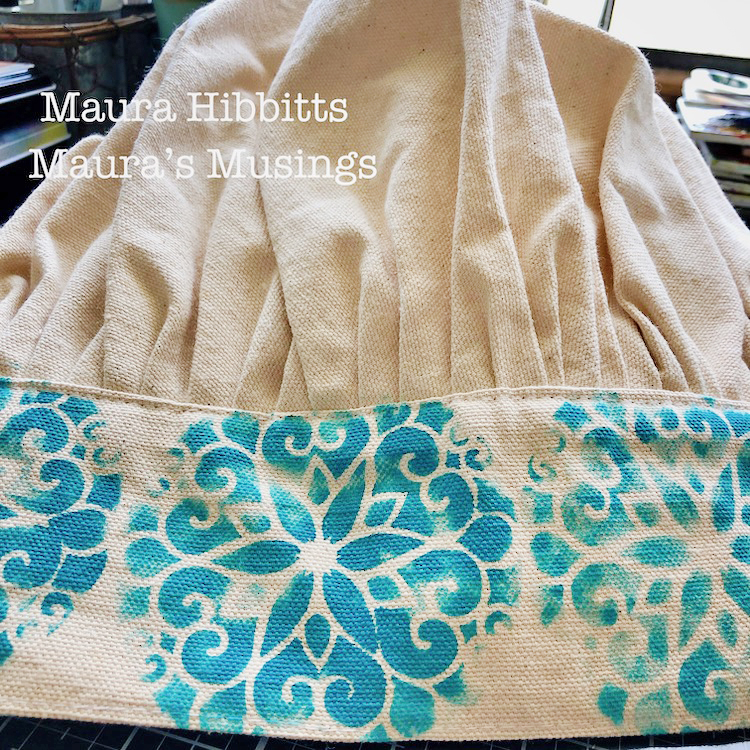
I blended the Dioxazine Purple and Translucent White on the gel plate with the brayer, then used this as a stamping base for the Solid Fan. I found I had to repeat the paint stamping onto the hat two to three times in order to get it dark enough.
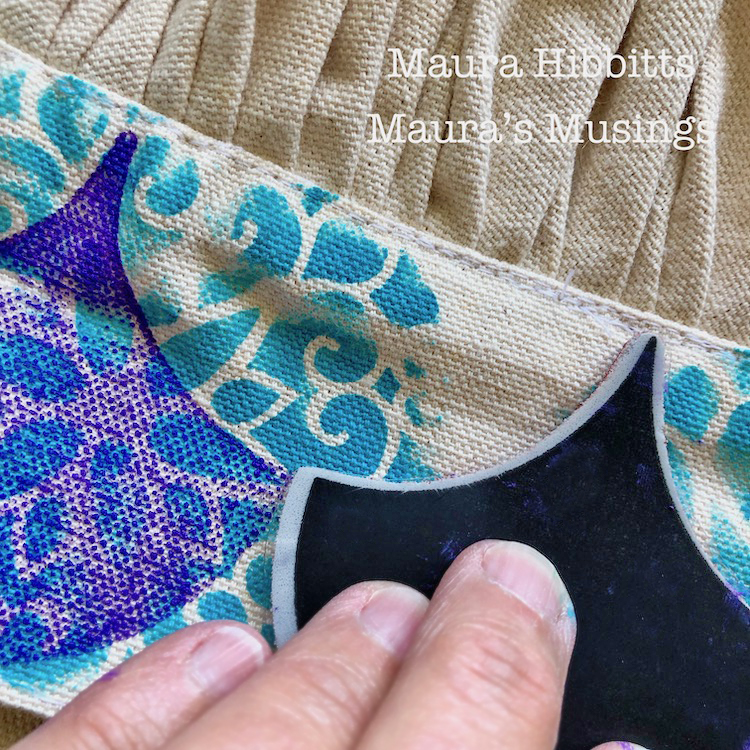
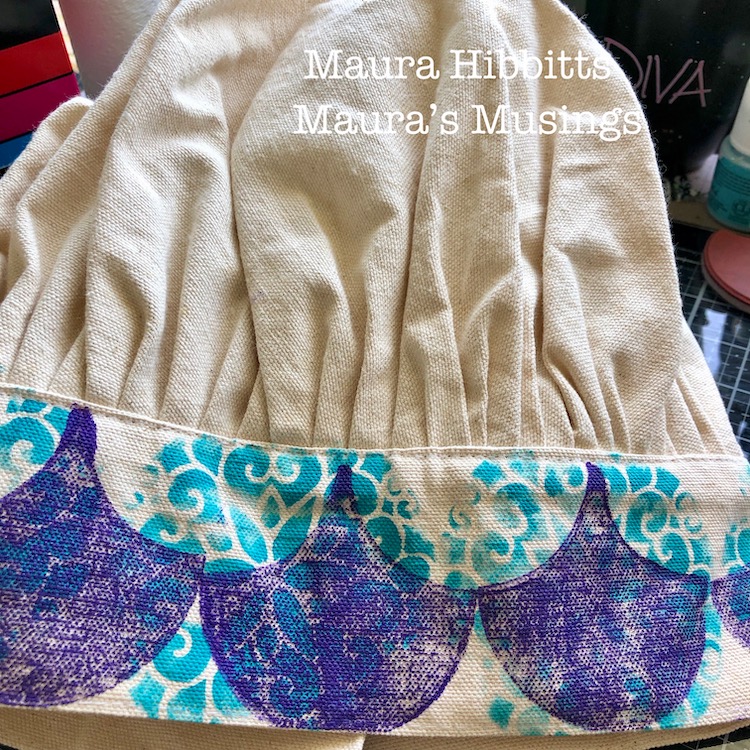
Next, I blended Quinacridone Magenta and Translucent White on the gel plate, and stamped into this with the large Park Avenue Fan to transfer it to the hat. I stamped this design on top of the solid fans around the brim. Then, I decided there wasn’t enough contrast, so mixed a second blend using more white, and re-stamped the design. If you look closely you can see a shadow effect.
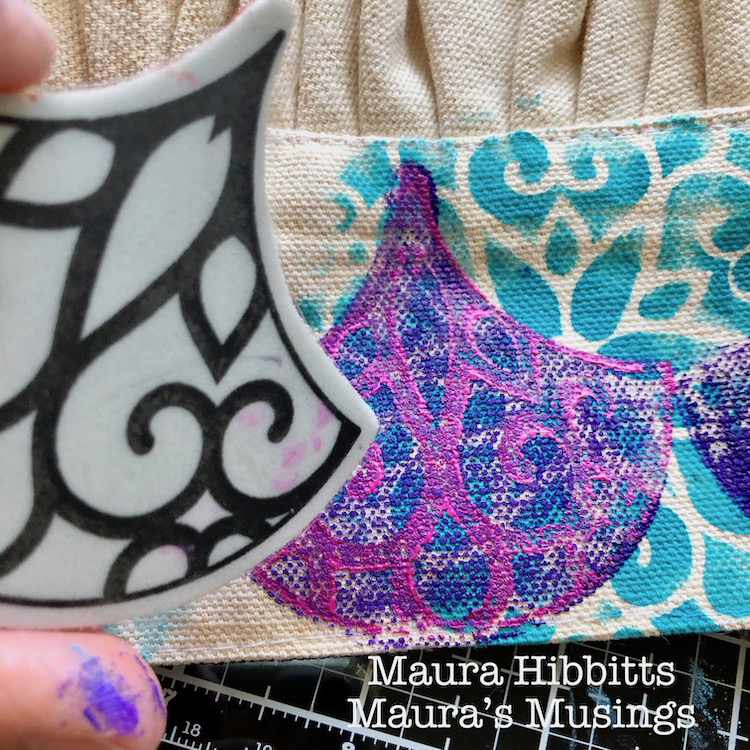
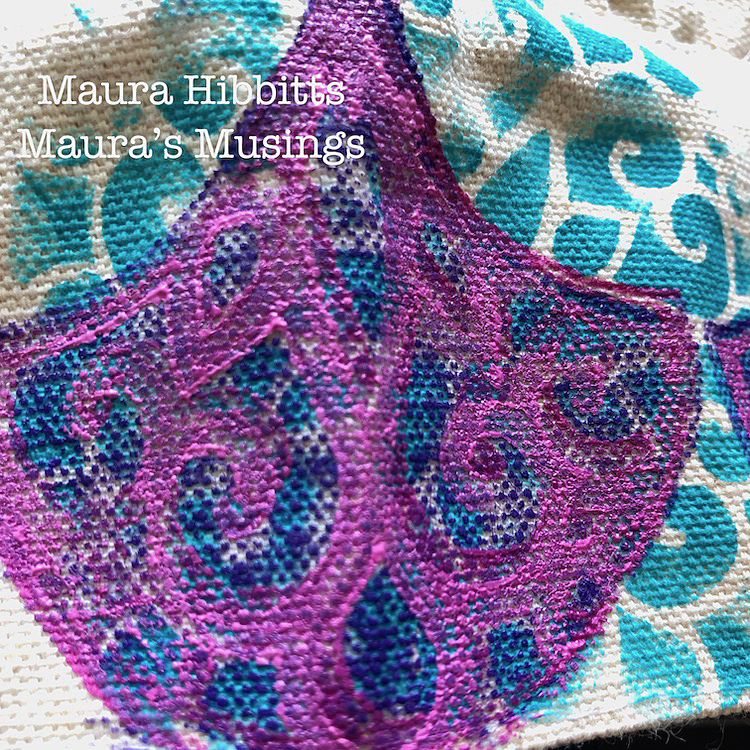
To create a royal feel to the chef’s hat, I outlined the fans with a gold acrylic paint pen.
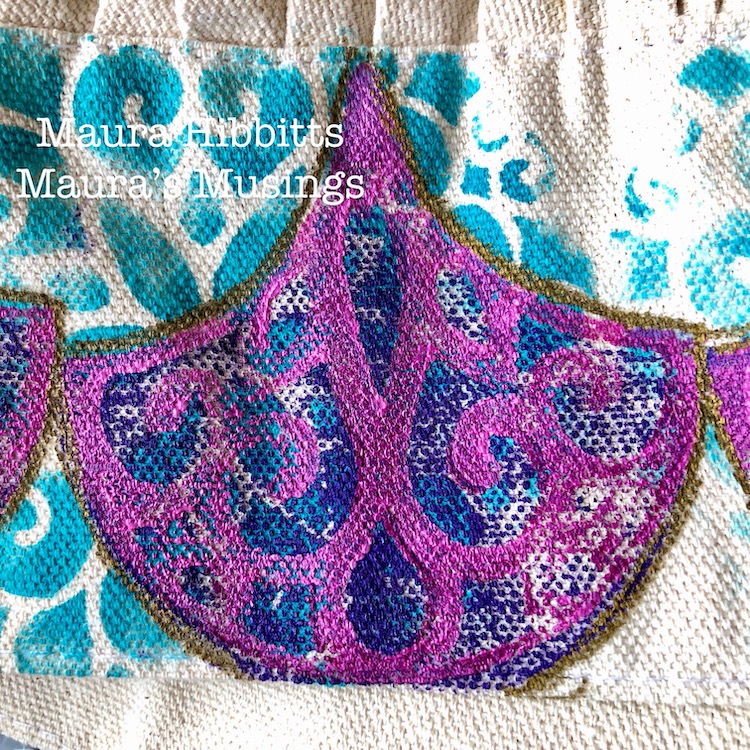
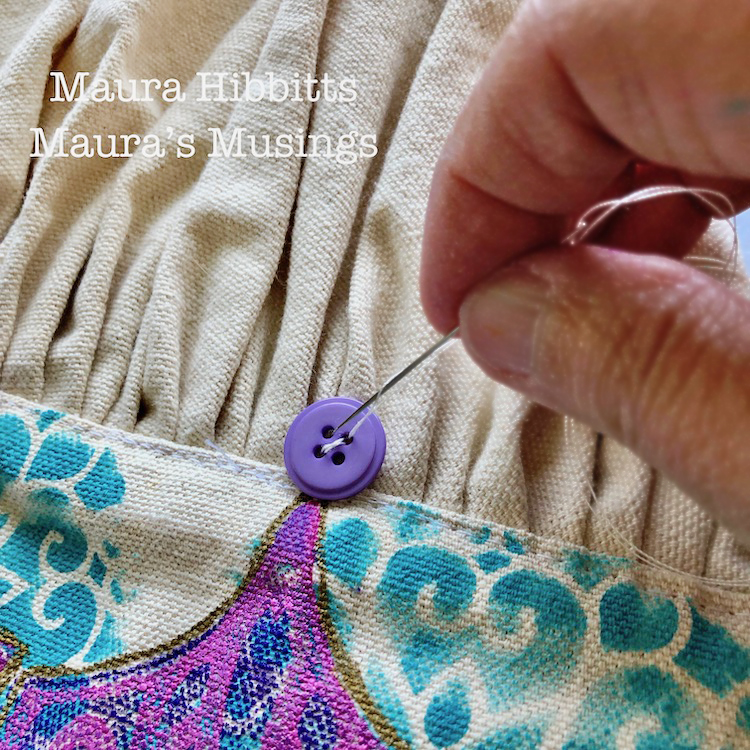
Then, I figured a “crown” needs jewels, so sewed a purple button to the top of each fan.
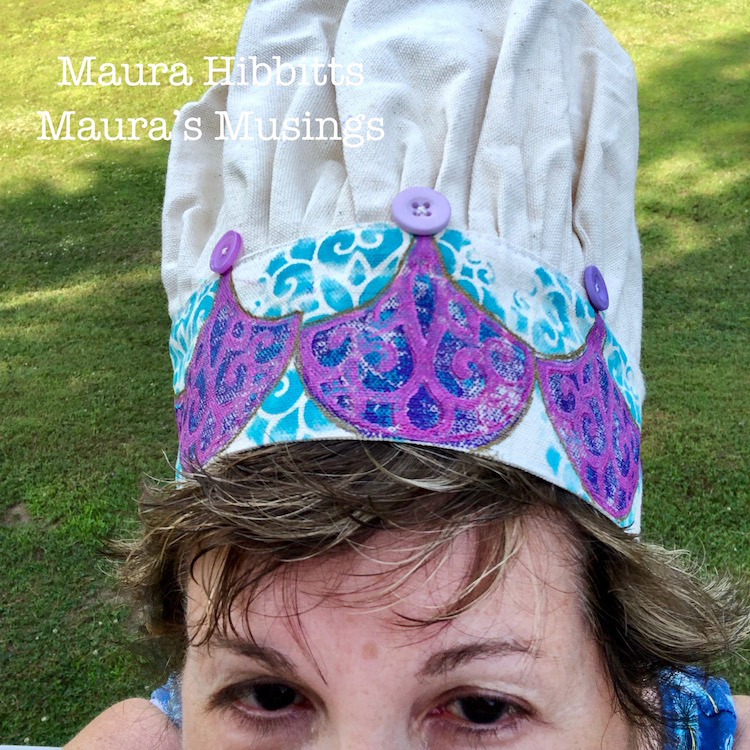
Time for the “foodie” shot, so I am modeling the Royal Chef Hat.
I can’t wait to see my sister’s reaction when I hand her the Royal Chef Hat in honor of her love of cooking and creating. I think it’s a good thing she enjoys wearing hats, even weird ones that look like a dragon or jester, lol. Time to honor the Queen of the Kitchen!
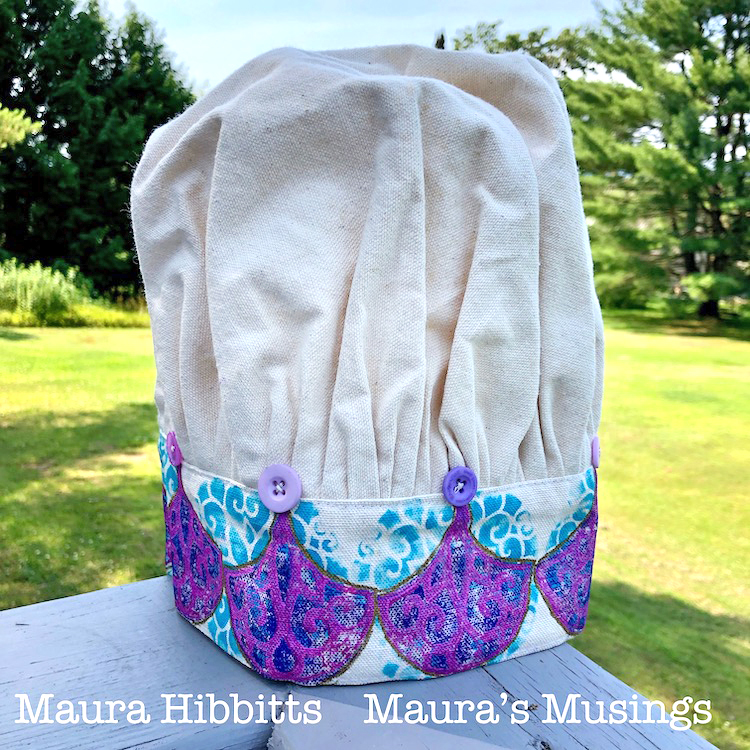

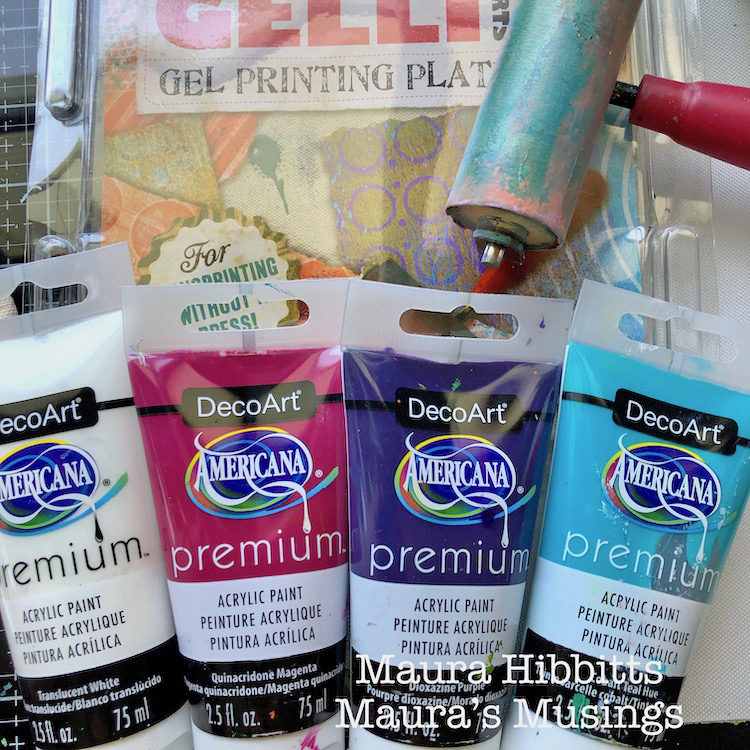
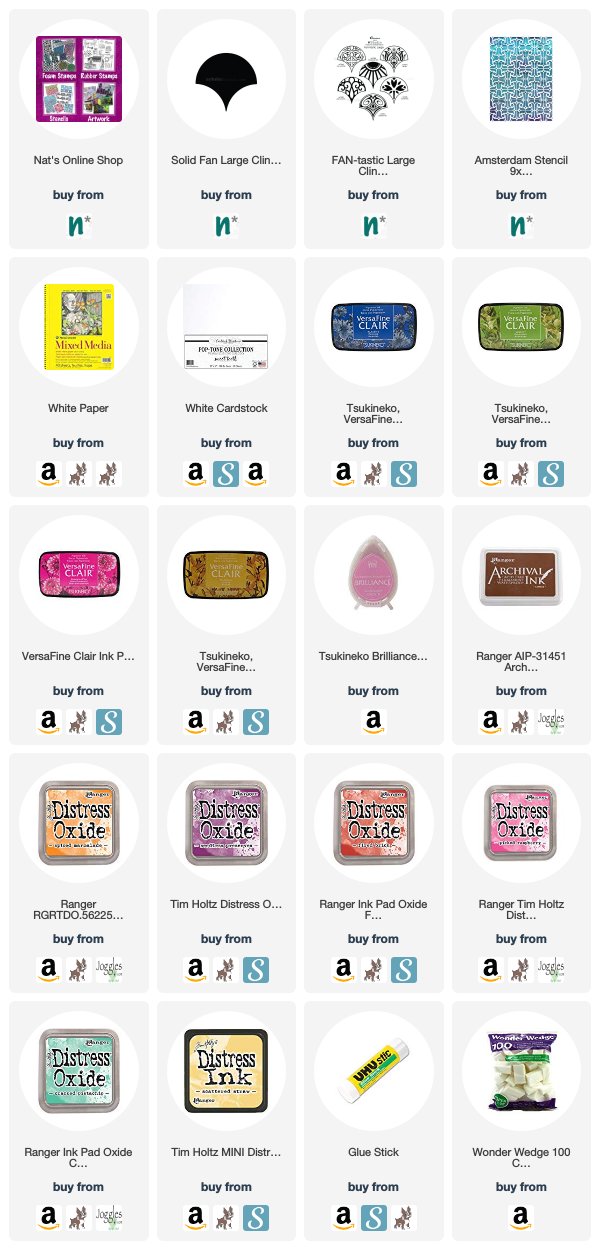
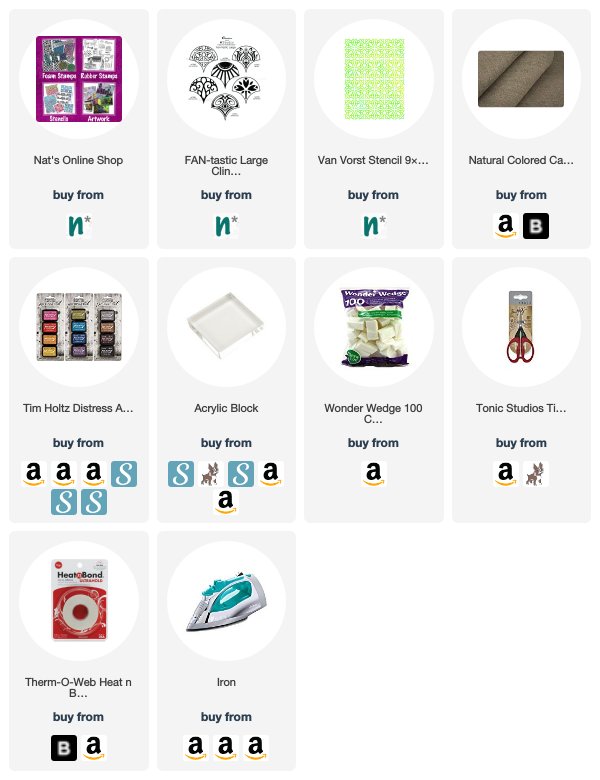
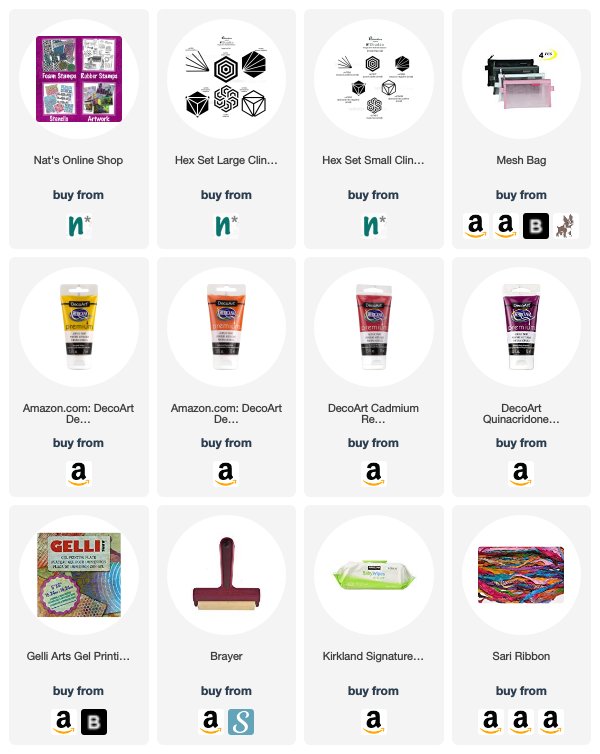
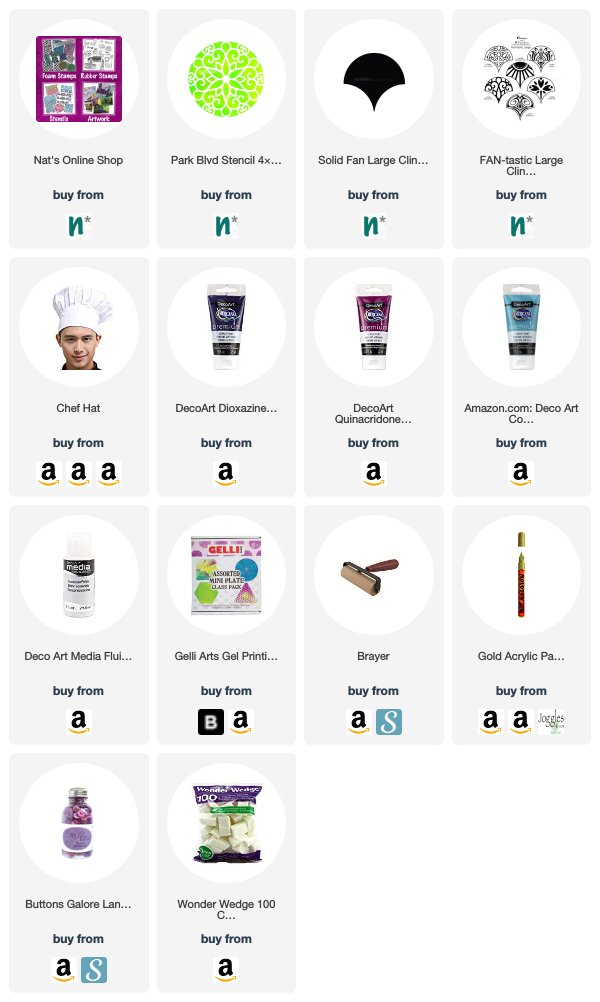
Thank you Maura – I love the idea of donning one of these in the kitchen :) You can find all of my Rubber Stamps and my Stencils in my online shop. Here are some of the supplies Maura used:
If you are working on something yourself that you’d like to share, please do!  I love to see how you interpret our monthly themes. Email me how you used my stencils and stamps with the theme and email me an image – I would love to share your projects in my next  “n*Spiration From Around the Globe“.

Leave a comment

Food for Thought – Jennifer Gallagher

Hello everyone – time for a post from my Creative Squad! Today we have Jennifer Gallagher and her upcycled candy box turned recipe box and cards using my Fantastic Large stamps and my Buenos Aires stencil. This month’s theme is Food for Thought – Let’s take a lighthearted look at food! While the culinary world has become an art and a science in terms of preparation and presentation, sometimes it is the simplest foods that bring us the most joy. Simple fare or elaborate family traditions, we all have our favorite foods. What is yours?


This month we are discussing food for thought. Well, I am a southern girl. We take our food and our traditions very seriously. So when I received this month’s prompt, I instantly thought of family dinners, holiday celebrations, and those recipes that get handed down from person to person. This month, I am sharing with you a fun way to recycle a candy box into a recipe box. Let’s get started.

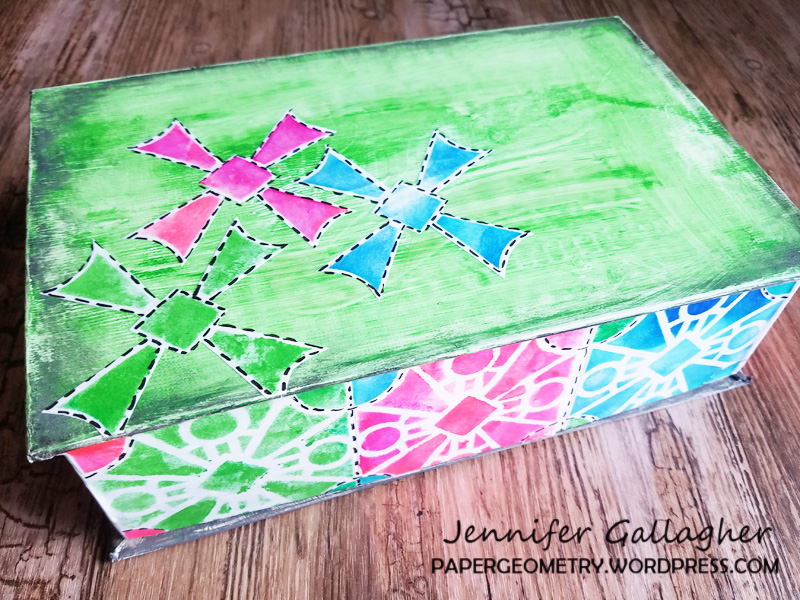
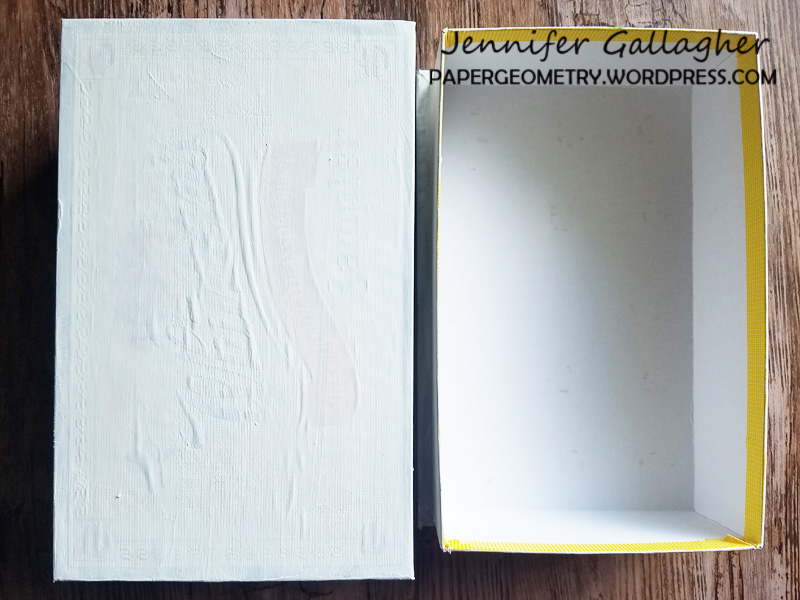
I had been holding on to a candy box left from Valentine’s Day for a while now. I knew I could turn it into something fabulous. I started by applying a coat of white gesso to the box. (It ended up needing two coats.) 

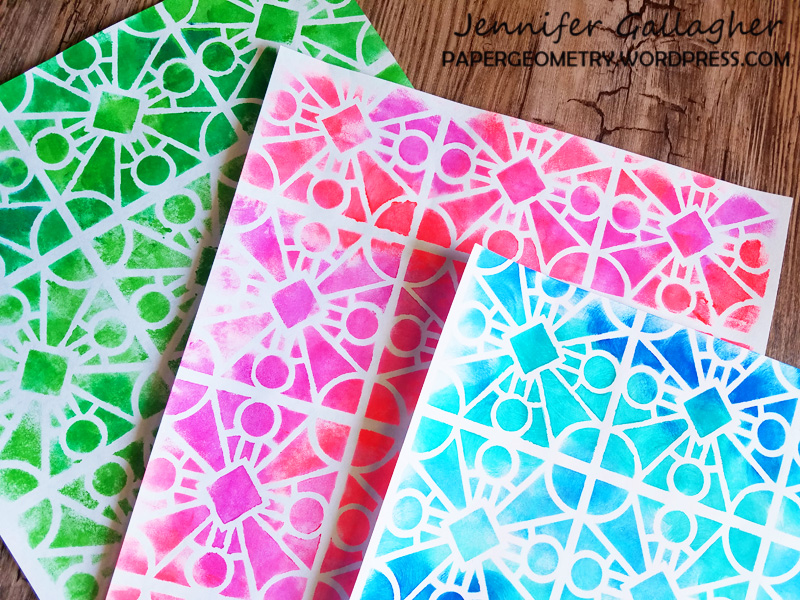
While the gesso dried, I created a series of papers to use for collage. Using just basic computer copy paper, I stenciled acrylic paint through Nat’s Buenos Aires stencil with a mini blending tool.

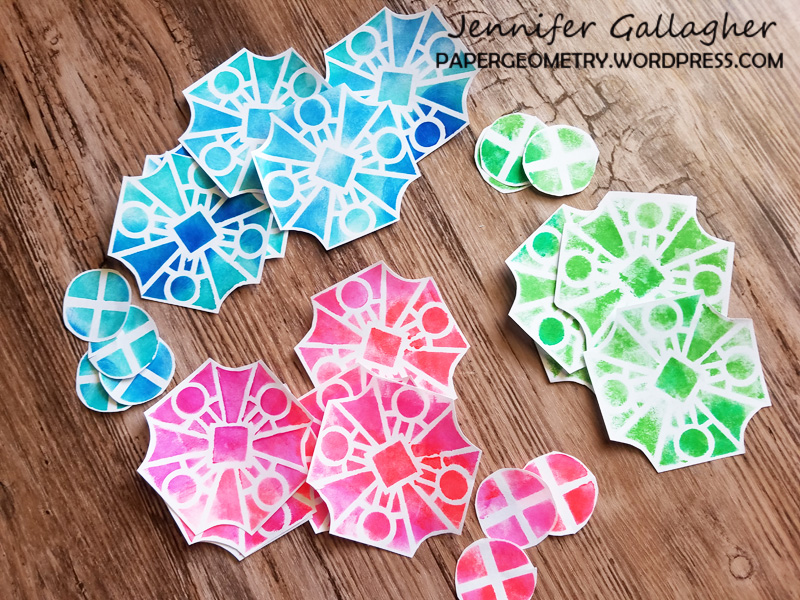
Next, I cut some shapes out of the stenciled paper. This is one of my favorite ways to push my stencils and stamps to get more out of them. 

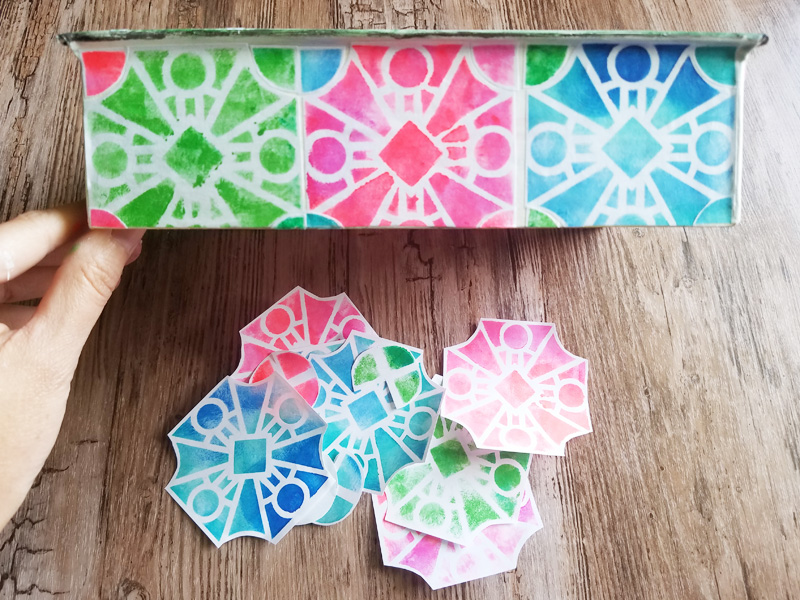
Using matte medium and a small brush, I glued down the cut out shapes in a pattern that was pleasing to me. I followed this pattern around the entire side of the box.

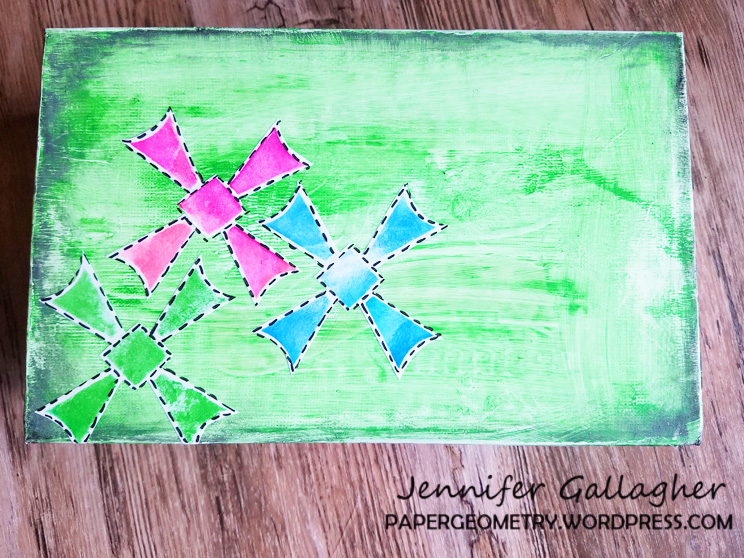
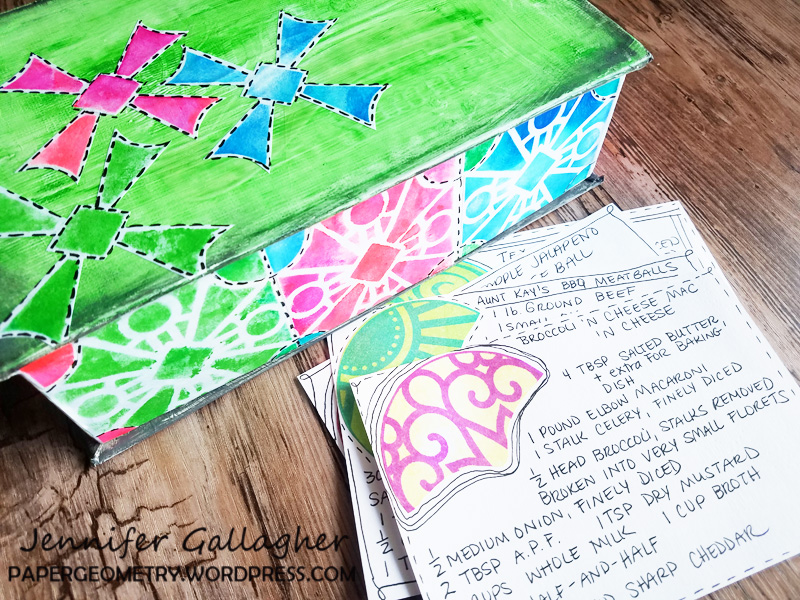
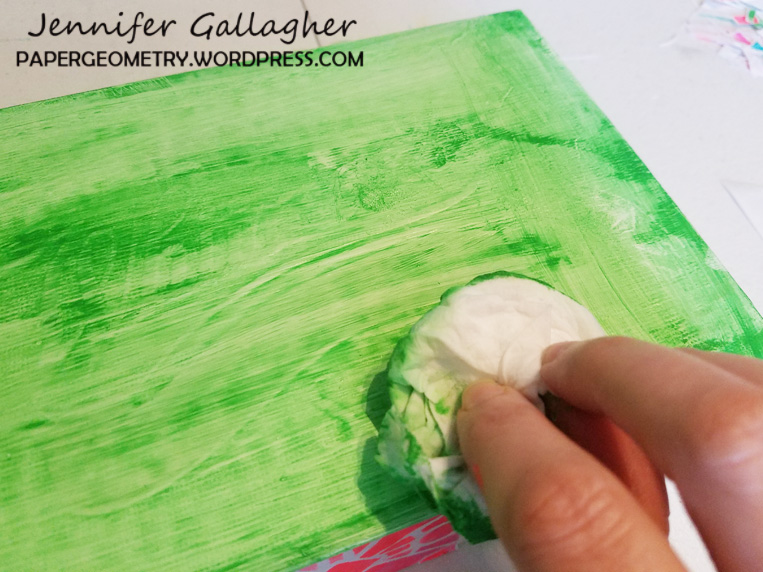
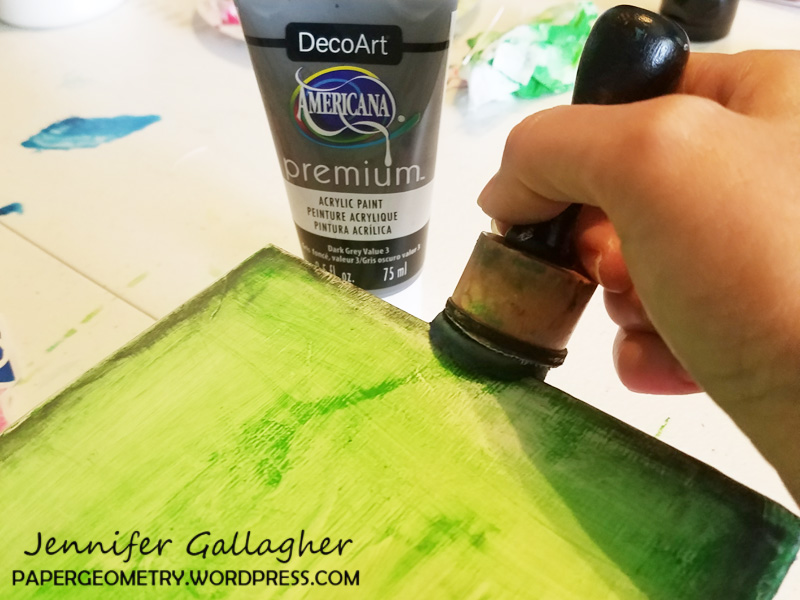
I painted the top of the box green. Once it was about half way dry, I dabbed the paint with a baby wipe to give the top texture and a distressed look. Then I dabbed a little dark grey acrylic paint along the edges of the top of the box.

I cut out three more shapes from the painted paper and glued them to the top of the box. I added doodles around the designs with a black posca pen. I liked it so much I did the same around the sides.

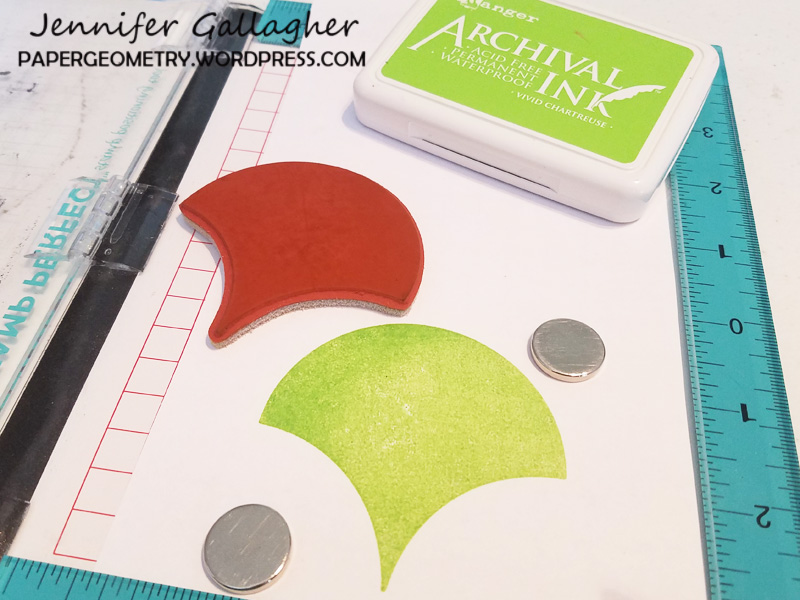
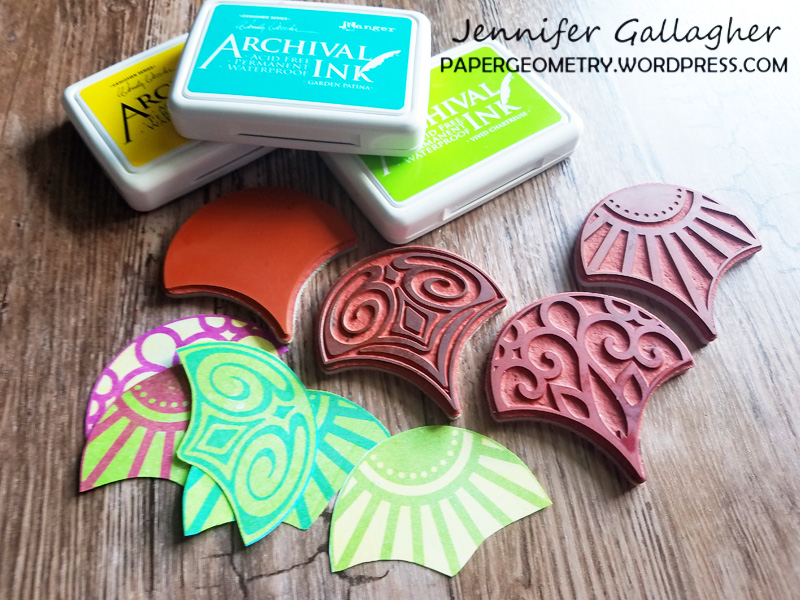
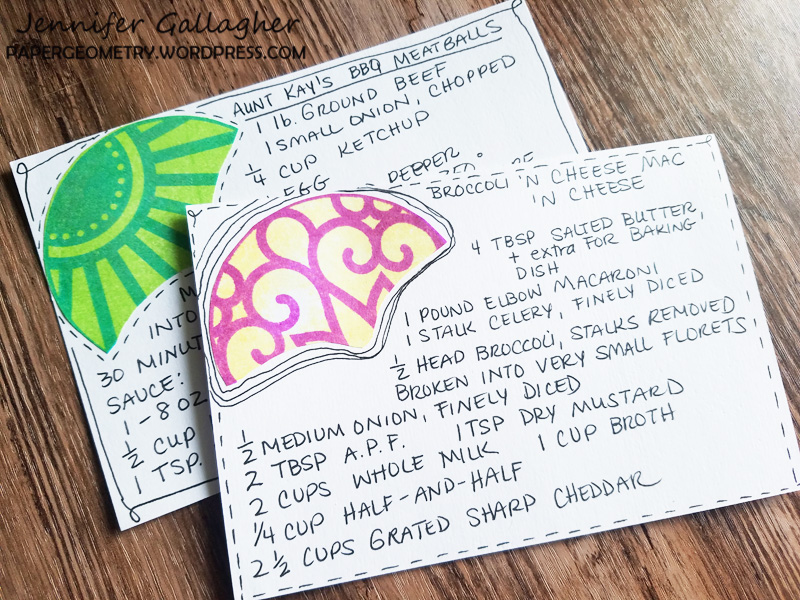
Now we need recipe cards. I started by stamping the Solid Fan in one color onto copy paper and then stamping another color in the Fantastic Large designs over that. I used archival inks for this process. I cut each one out, modified it slightly with scissors, and glued it to my blank 4×6 inch recipe card. I added a little doodling with a black pen and wrote in my recipes.

Saving our traditions to pass down to others is very important. I have so many cherished recipes that not only help me keep those traditions alive, but remind me of people that have passed and good times that are now memories. I hope you have enjoyed this tutorial. Remember, play along with us and share your creations!


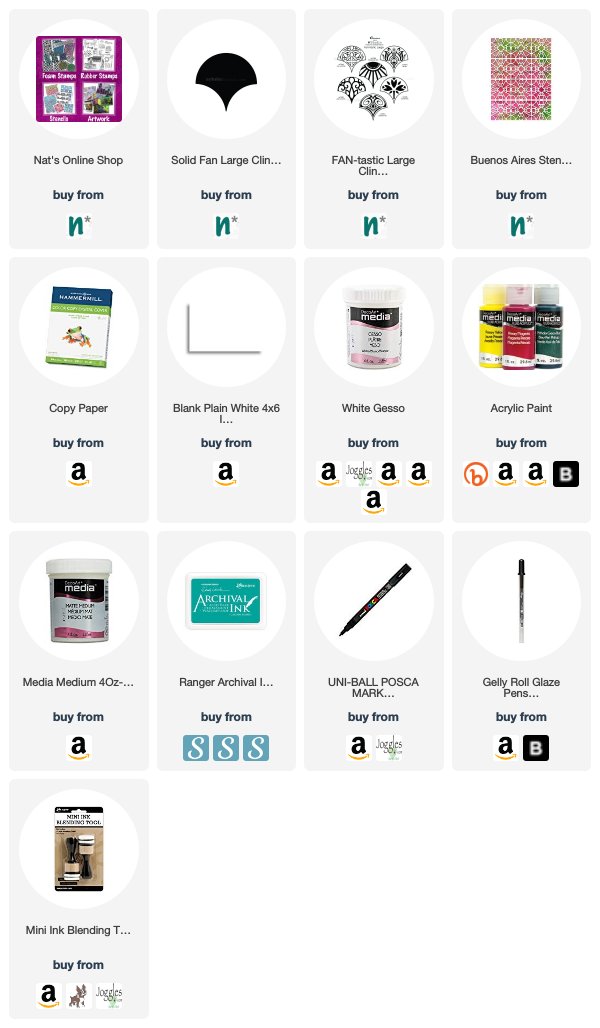
Thank you Jennifer! I love how you cut up the stencil design to pull out some cool shapes. You can find all of my Rubber Stamps and my Stencils in my online shop. In addition to a candy box, here are some of the other supplies Jennifer used:

If you are working on something yourself that you’d like to share, please do!  I love to see how you interpret our monthly themes. Email me how you used my stencils and stamps with the theme and email me an image – I would love to share your projects in my next  “n*Spiration From Around the Globe“.
Leave a comment

Food for Thought – Marsha Valk

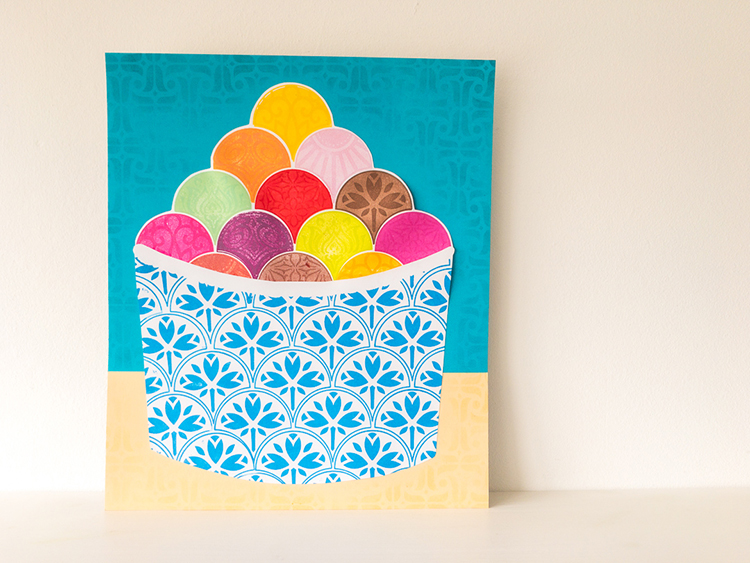
Hello from my Creative Squad! Today we have a super cute post from Marsha Valk with a mixed media project that is just perfect for summer. She is using my Fantastic Large and Solid Fan rubber stamps, as well as my Amsterdam stencil. This month’s theme is: Food for Thought – Let’s take a lighthearted look at food! While the culinary world has become an art and a science in terms of preparation and presentation, sometimes it is the simplest foods that bring us the most joy. Simple fare or elaborate family traditions, we all have our favorite foods. What is yours?


For this month’s prompt, I had my heart set on making something off the page for a change. I made a list of all the things I could do. I even went (window) shopping to come up with more ideas. But once I began stamping to try out colour combinations, I came up with something entirely different and maybe a bit silly…

For years I only knew of two ice cream parlours you could go to in our town. One had the reputation of being THE best, so I don’t think we ever even considered going to the other one. But then all of a sudden there was this new kid on the block who’s ice cream flavours stole our hearts. I guess others noticed its success too, and now it seems like brand new ice cream shops are opening everywhere! We’ve got so many choices now, and my husband has jokingly said that we should try them all. 

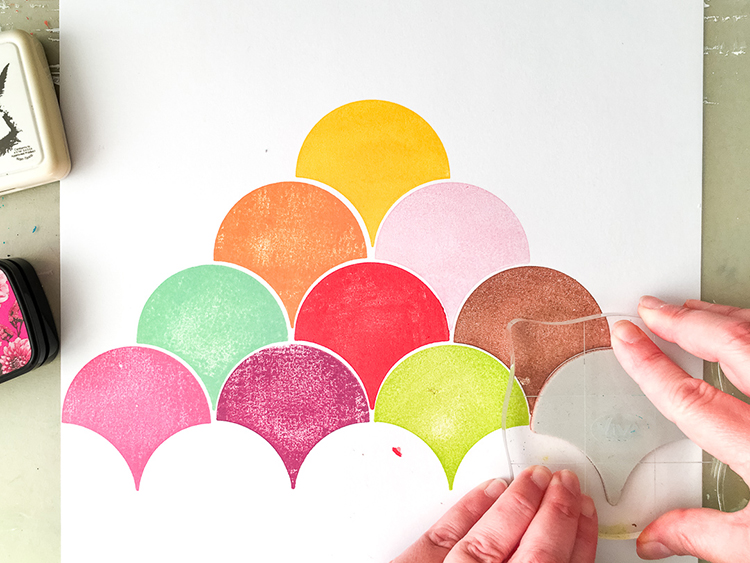
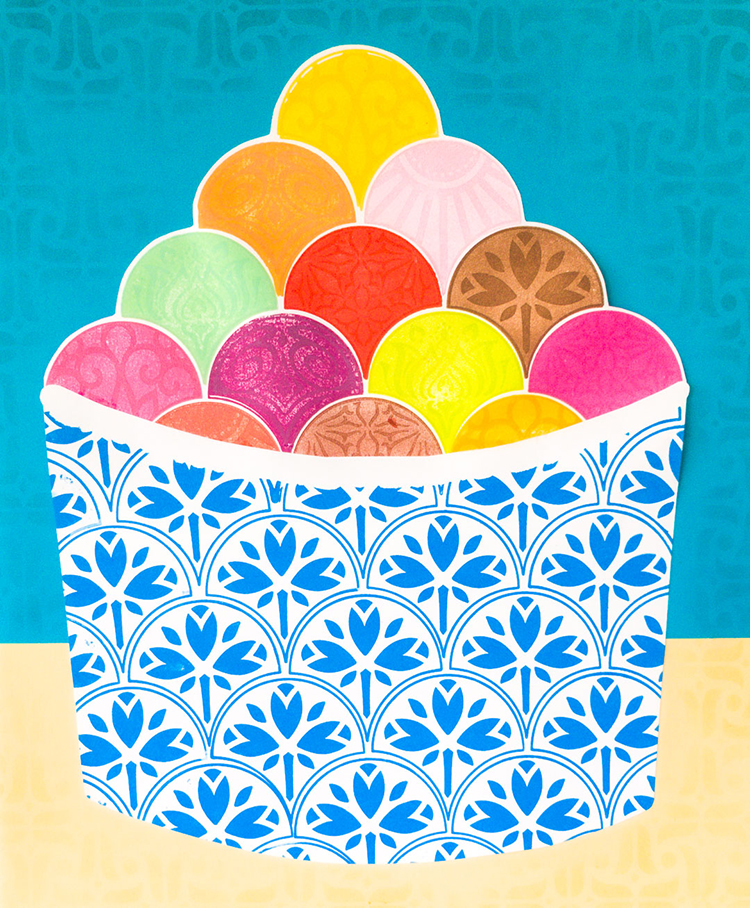
Back to the stamping: the fans I was stamping to swatch colours were looking an awful lot like scoops of ice cream to me. So I thought… what if I could make something like a cross-off list of all the ice cream shops we could try?!

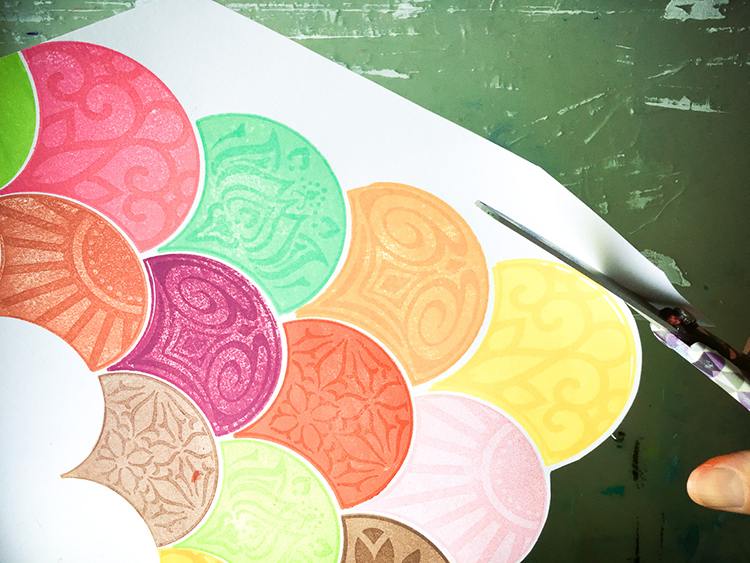
I started with stamping the scoops with the Solid Fan. I figured that I could stamp about ten scoops and still have it look like an ice cream cup.

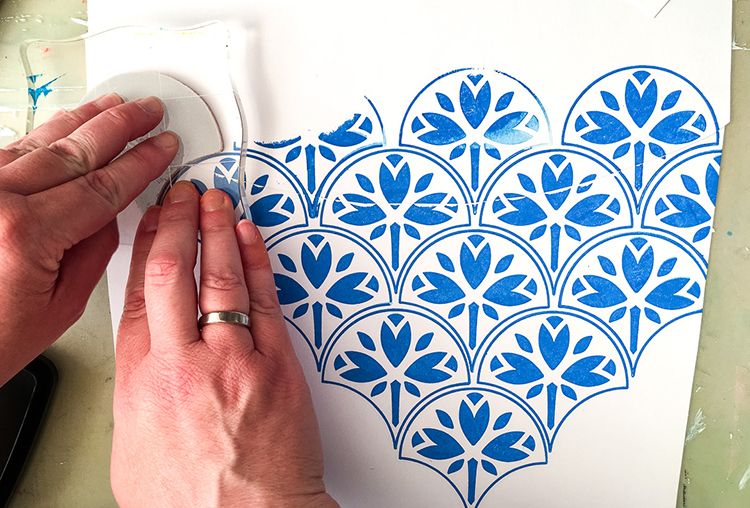
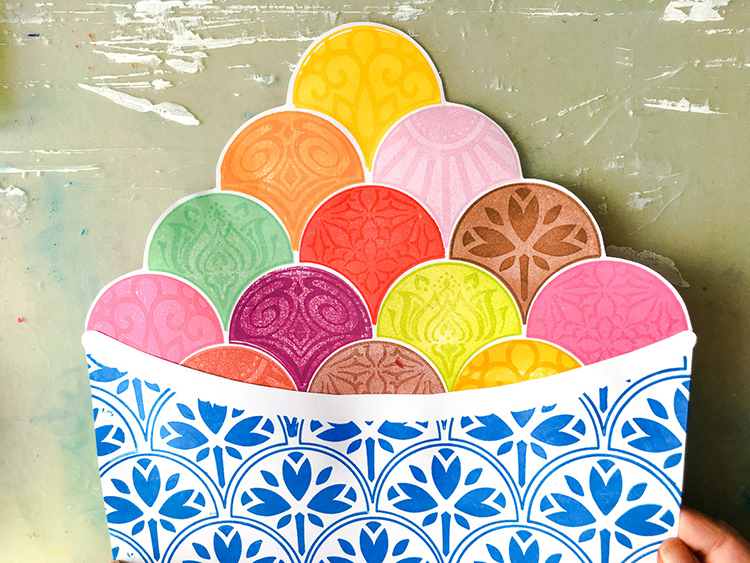
Next, I stamped a pattern on the ice cream cup with the Jewett Fan. I sketched the shape of a container on paper first and then cut it before I started stamping.

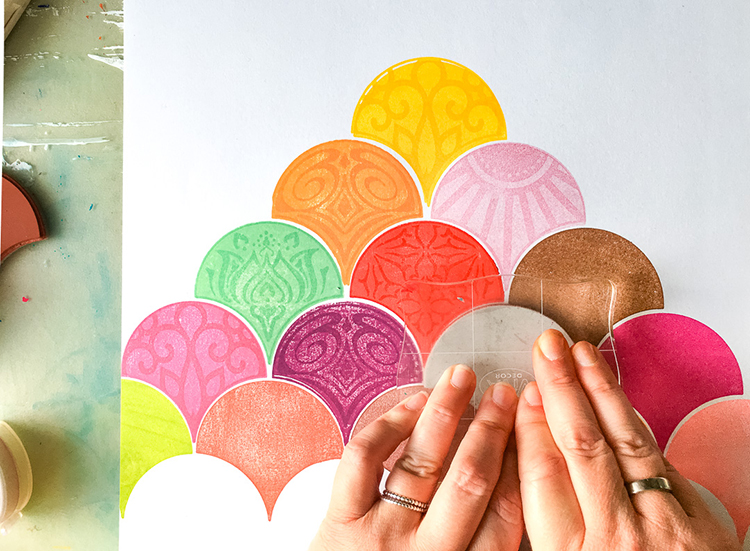
Then I went back and stamped over the scoops with the different fans in the Fan-tastic Large stamp set.

I cut out the scoops, adhered the cup to the scoops and then mounted the ice cream cup on cardstock. I did not have a sheet of cardstock large enough, so I taped two sheets together and then cut it down to fit my ice cream cup.

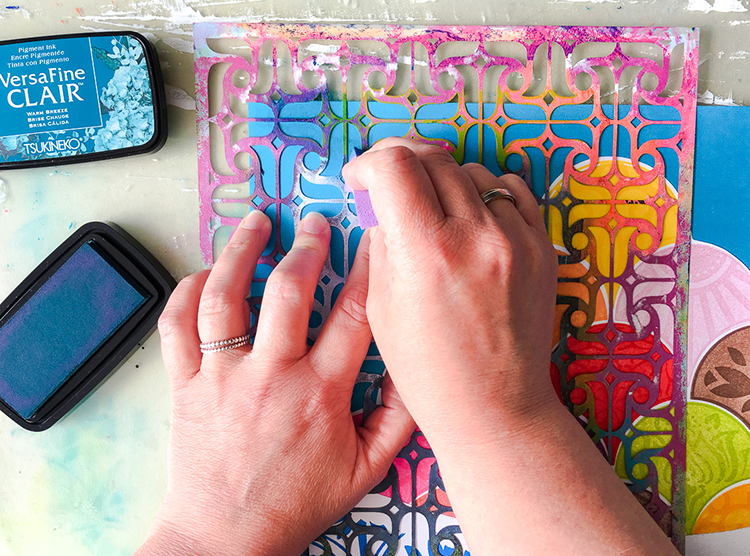
I used a cosmetic sponge to stencil onto the cardstock with stamping ink and the Amsterdam stencil.

Once finished, it looked so pretty that I didn’t dare to write anything in the scoops. But, even if we don’t end up crossing off anything, this ice cream cup will serve as a reminder of something fun we should do this summer!


Thank you Marsha! We are now inspired to both do some stamping AND visit our local ice cream shops :) Wanna try making Marsha’s ice cream creation? You can find all of my Rubber Stamps and my Stencils in my online shop. Here are some of the other supplies Marsha used:

If you are working on something yourself that you’d like to share, please do!  I love to see how you interpret our monthly themes. Email me how you used my stencils and stamps with the theme and email me an image – I would love to share your projects in my next  “n*Spiration From Around the Globe“.
Leave a comment

Food for Thought – Tania Ahmed

Hello and welcome to a post from my Creative Squad! Today we have Tania Ahmed starting us off this month with a delightful and easy decorating idea for the kitchen. She is using my Fantastic Large rubber stamps, my Van Vorst stencil, and this month’s theme: Food for Thought – Let’s take a lighthearted look at food! While the culinary world has become an art and a science in terms of preparation and presentation, sometimes it is the simplest foods that bring us the most joy. Simple fare or elaborate family traditions, we all have our favorite foods. What is yours?


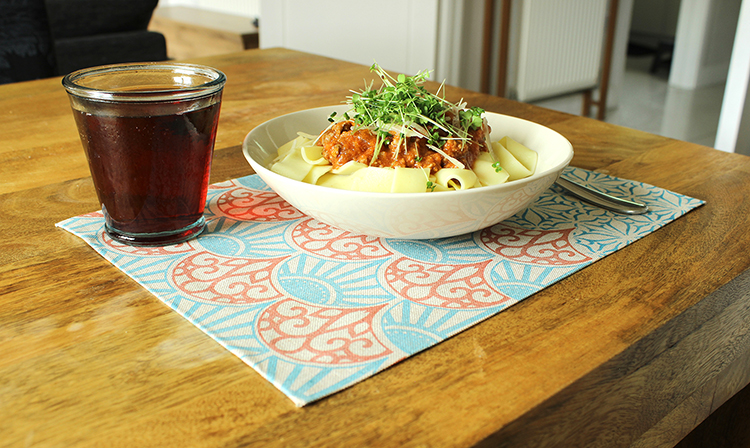
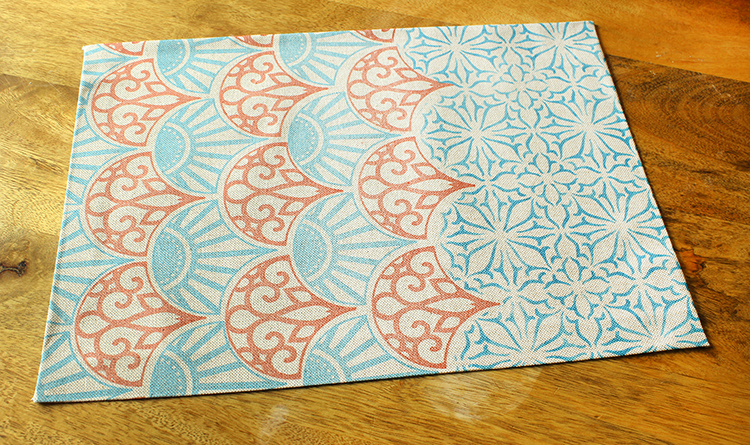
The theme that we were given for the month of July is Food For Thought, which gave me plenty to think about what to make as my project! I decided on creating a place mat, which I think will actually make a perfect present for someone special! :) 

Watch my video tutorial:

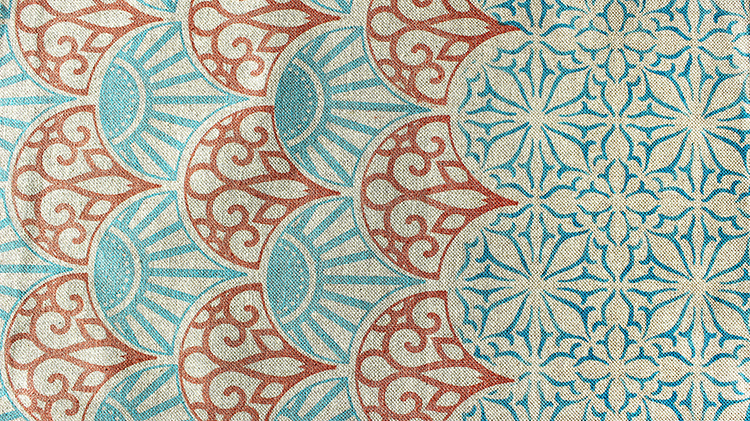
I stamped Broadway Fan Stamp and Park Avenue Fan Stamp in alternating colours and lines. They are so easy to line up and even if they don’t line up perfectly, when you see the overall design it adds to the handmade charm, so I like to think! ;) At this point you can add stitching over the lines to make it extra fancy or even use a permanent marker to add more details.

I liked how the colours looked very patriotic so I kept the same blue ink for the stencil. I created a mask and cut it out, and taped it down on my canvas. I then taped down the Van Vorst stencil and applied my ink with a makeup sponge. 

After making sure the ink was completely dry, I finished off the edges with some iron on adhesive and if desired you can add some felt or more fabric to finish of the back of the mat. 

And lastly, I enjoyed my new place mat with one of my favourite meals: pasta! My cat Billi also makes an appearance in the video as she is my assistant, always supervising my filming or editing making sure I am working hard :)

Thank you so much, and I hope you enjoy the video!


Thank you Tania! Wow we feel really inspired to try making some of these quick and easy placemats ourselves!!! And also now we are hungry :) haha. You can find all of my Rubber Stamps and my Stencils in my online shop. Here are some of the other supplies Tania used:

Feel inspired? Working on something yourself that you’d like to share?  I love to see how you interpret our monthly themes. Email me how you used my stencils and stamps with the theme and email me an image – I would love to share your projects in my next  “n*Spiration From Around the Globe“.
Comments (1)

  • Sue Clarke

    |

    Tania, thank you for that easy to follow video.
    I love the colors that you chose for the place mat.

    Reply

Leave a comment

Hex Marks the Spot – Maura Hibbitts

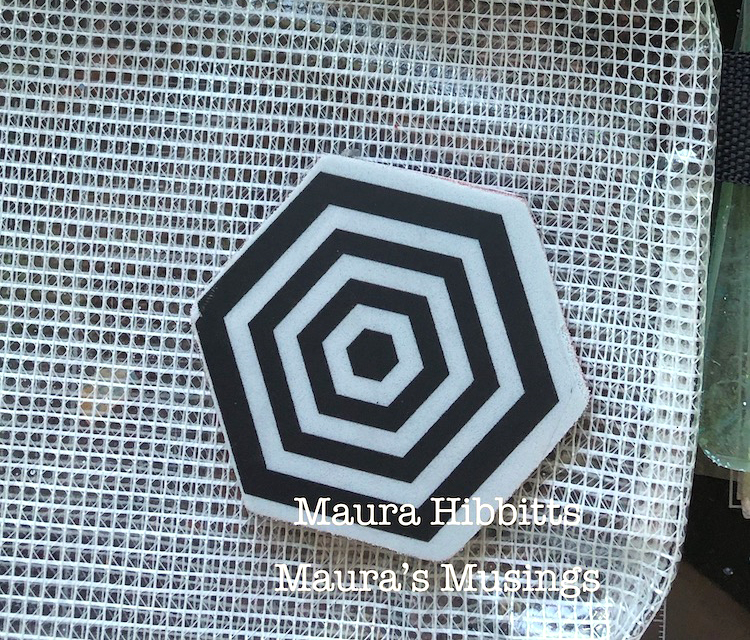
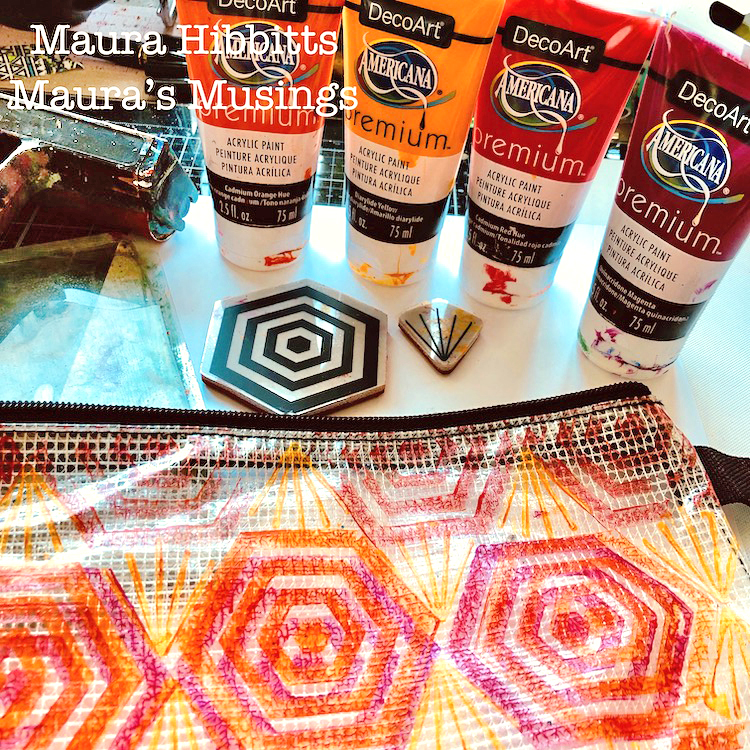
Hello from my Creative Squad today! Here we have a post from Maura Hibbitts, sharing an awesome little stamped pouch with us that will inspire you to get organized! She is using my Hex Set Large and Hex Set Small rubber stamps and this month’s theme: Hex Marks the Spot –In the days of pirates and lost treasure, a map would lead you to gold and jewels. Today we treasure all sorts of things – our family, friends, experiences, meaningful objects, accomplishments, etc. Think about what you treasure and how you found your way there.


I love using pouches and bags to organize my art supplies, and have a wide variety of styles to choose from. Bags to hold pens and pencils, bags to hold paint, papers … you name it, and I probably have a bag for that supply.
Some bags are boring and plain, like the mesh bag I started with here. It is so easy to transform a plain pouch into a mini work of art with some paint and stamps and make it your own.

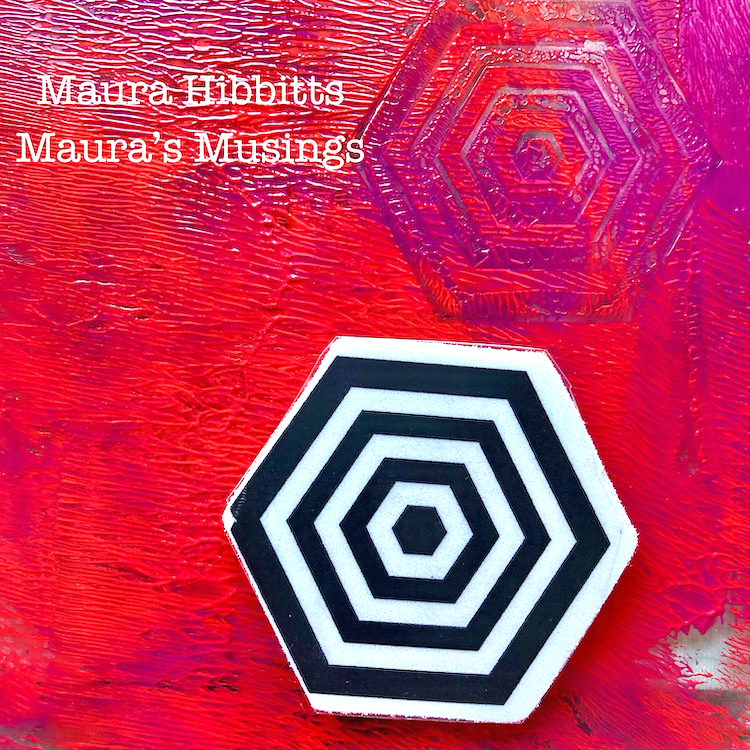
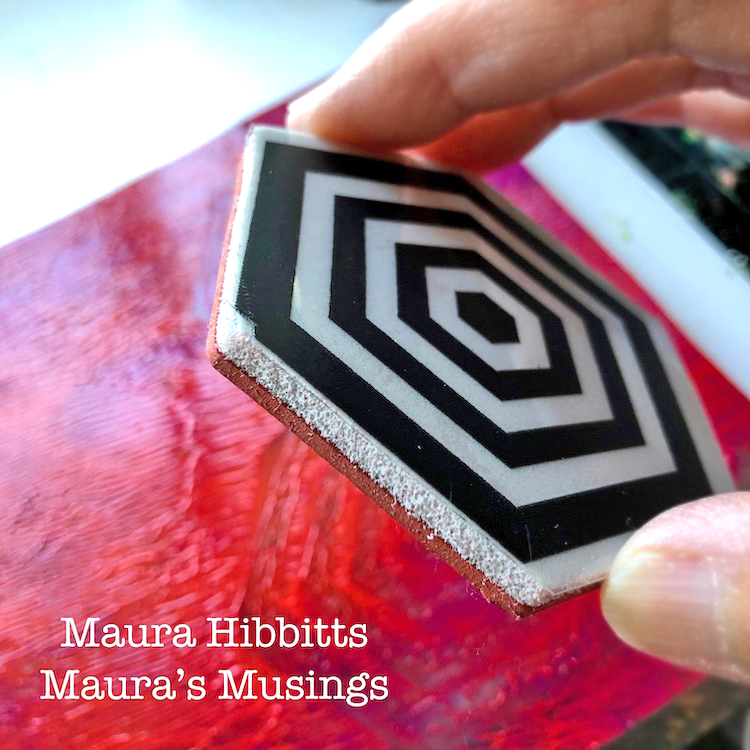
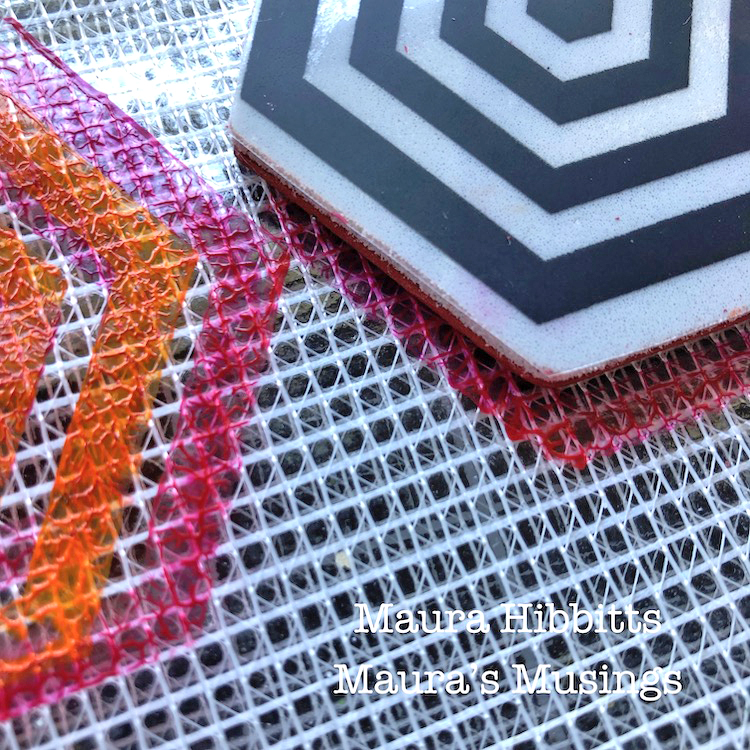
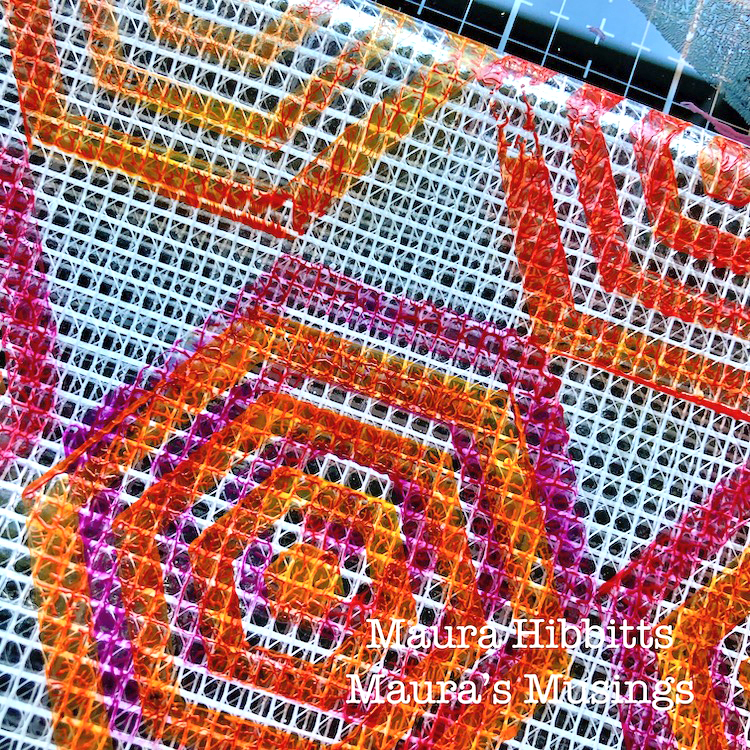
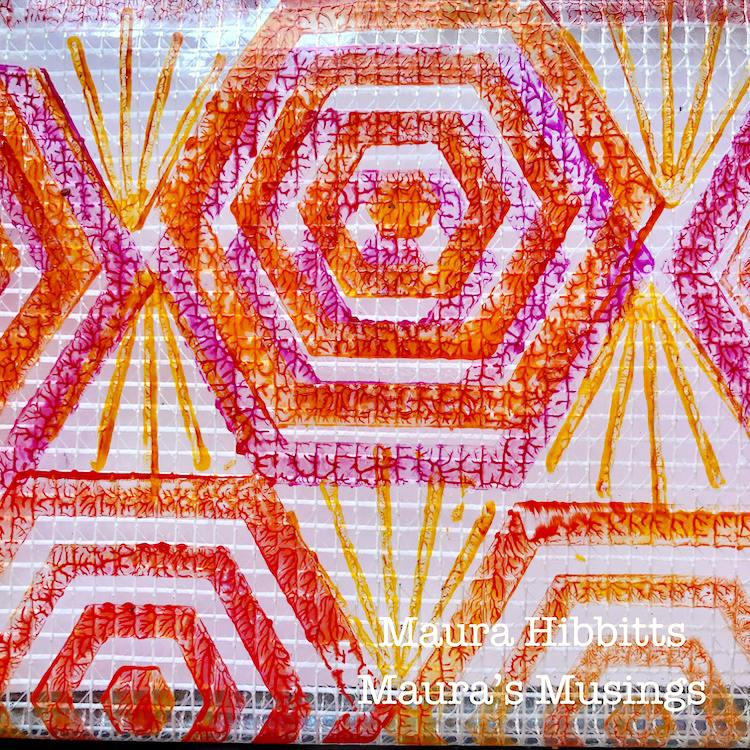
I like to use the gel plate to blend colors. I started with the red and magenta, and stamped the Space Oddity Hex stamp into it, then transferred the paint to the bag and repeated a pattern of three across the bag. Be sure to clean the paint off the stamps after using them. With a large design like these, I just use a baby wipe to clean them.

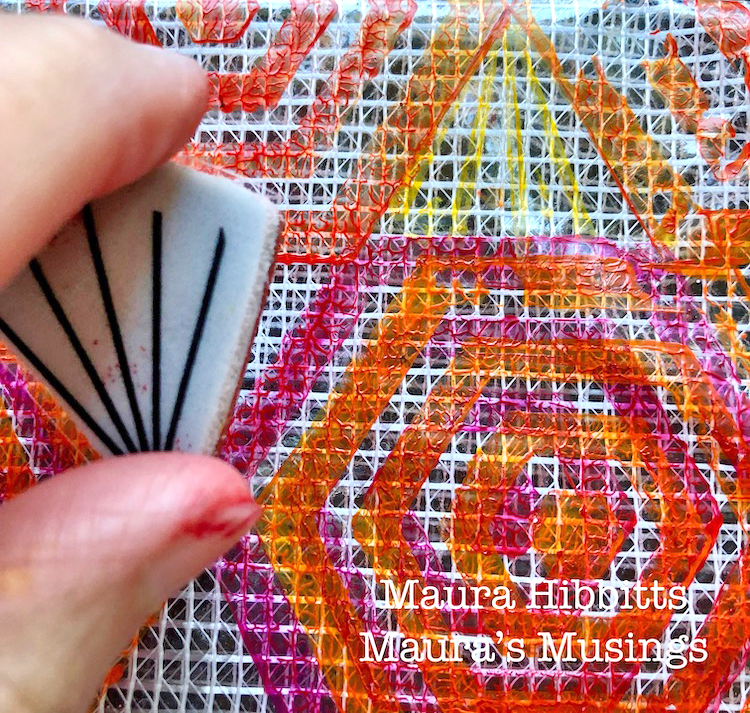
Next, I blended the yellow and orange on the gel plate with the brayer, and laid the stamp into it. I offset the hex stamp this time onto the previous stamped design. I also repeated a partial pattern at the bottom and top of the bag with the yellow/orange and then the magenta.

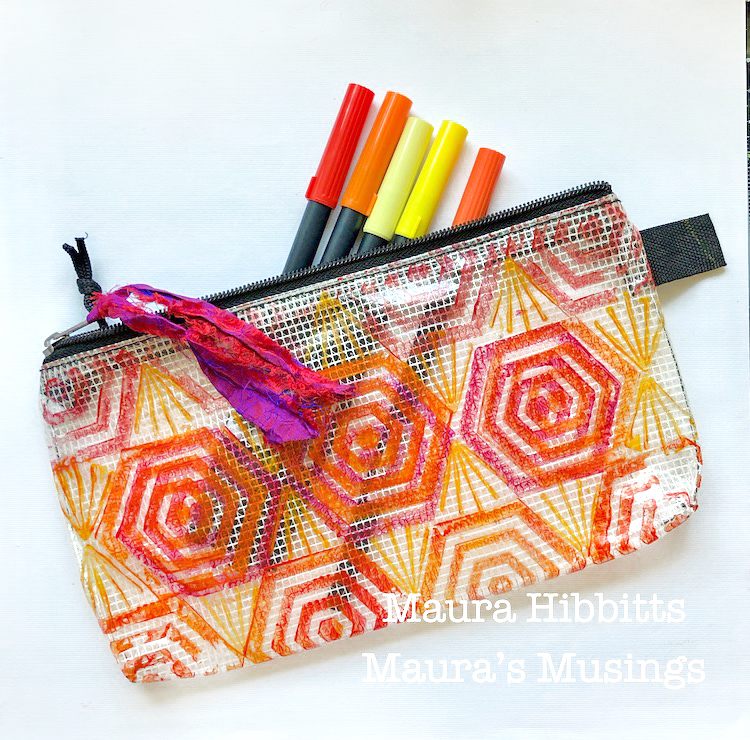
I spread the yellow onto the gel plate with a brayer, and used the small beacon positive stamp to fill in the design between the hexes. Final step once the paint dried was to tie on a bit of sari ribbon.

This is an easy project with minimal supplies. The process will work on any surface that will take acrylic paint.

I challenged myself to work outside of my usual color choices, and I like the bright, cheerful feel of the altered bag. It’s ready to be filled with markers, pencils, tools…whatever I might need for a project. One thing is for certain, this bag won’t get lost in a crowd!


Thank you Maura! What a great looking little bag!!! You can find all of my rubber stamps in my online shop. Here are some of the supplies Maura used:

Feel inspired? Working on something yourself that you’d like to share?  I love to see how you interpret our monthly themes. Email me how you used my stencils and stamps with the theme and email me an image – I would love to share your projects in my next  “n*Spiration From Around the Globe“.
Comments (1)

  • Sue Clarke

    |

    Nice bright cheery colors Maura. What a cute bag and the ribbon pull is a nice addition.

    Reply

Leave a comment

Hex Marks the Spot – Jennifer Gallagher

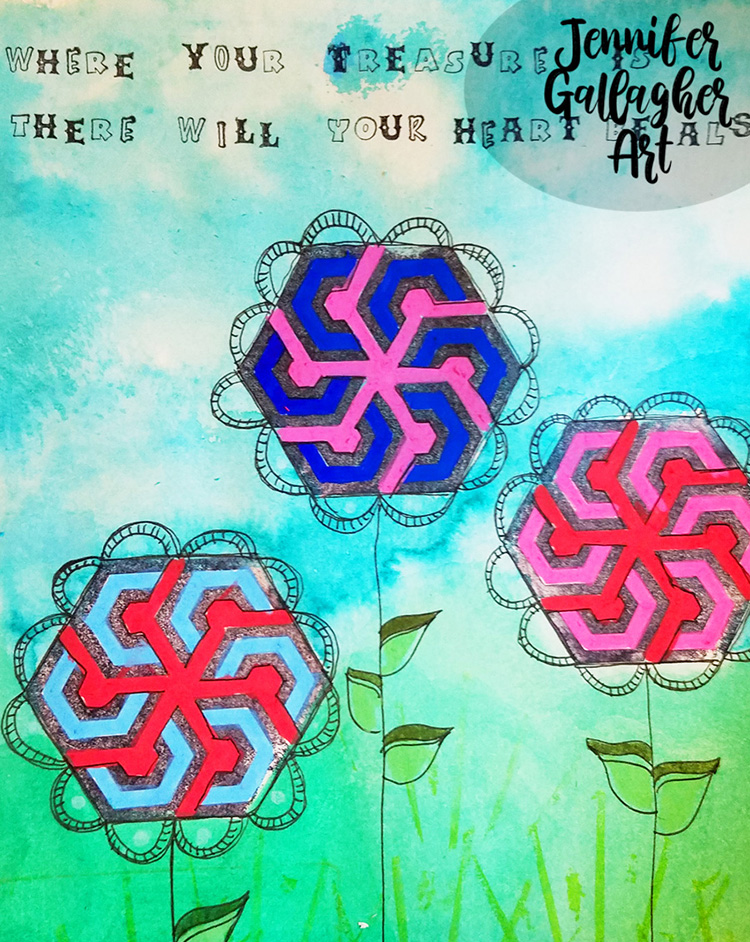
Happy Tuesday folks! It’s time for a post from my Creative Squad and today we have Jennifer Gallagher sharing a beautiful art journal page representing her family. She is using the stamps from my Hex Set Large rubber stamp set and this month’s theme: Hex Marks the Spot –In the days of pirates and lost treasure, a map would lead you to gold and jewels. Today we treasure all sorts of things – our family, friends, experiences, meaningful objects, accomplishments, etc. Think about what you treasure and how you found your way there.


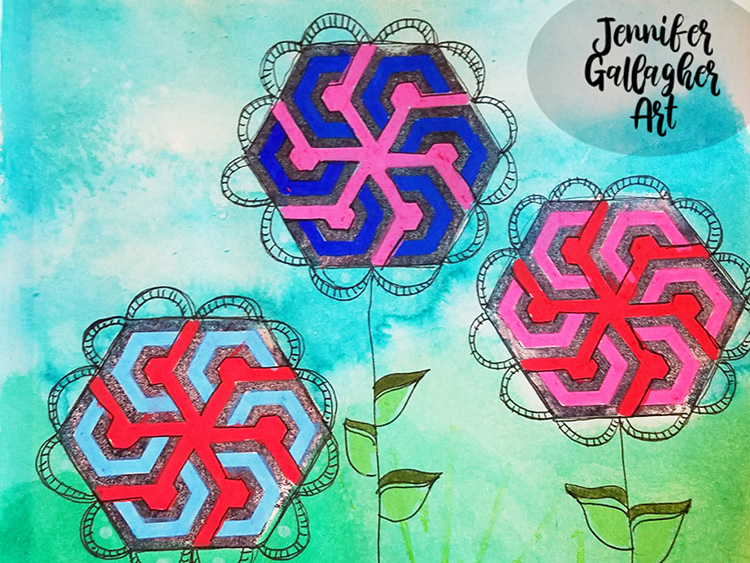
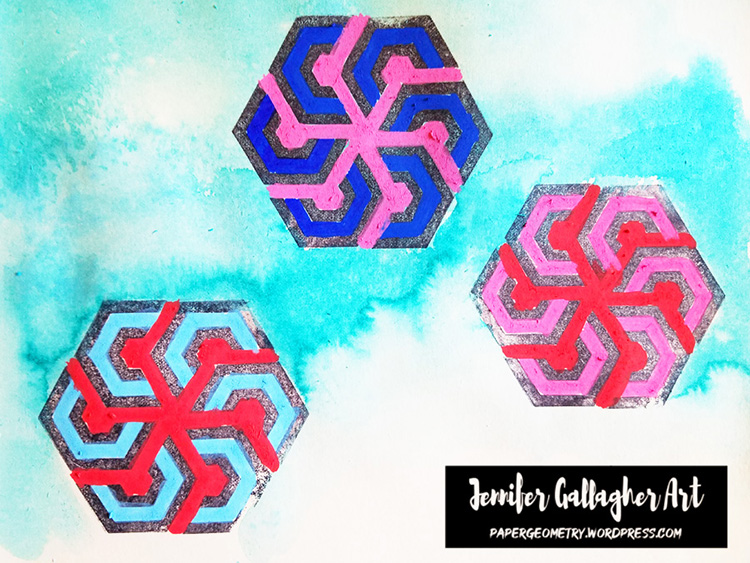
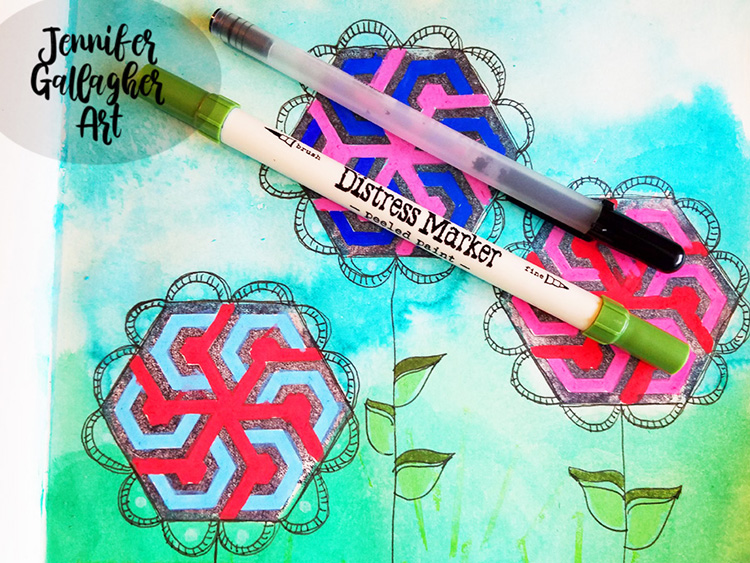
This month we are talking about our treasures. My treasure is my family. It just so happens this week is my wedding anniversary. I decided to create an art journal page that reflects my love of family and how they are my most valued treasures. I have represented my husband and two sons as flowers using Nat’s Maze Hex stamp. I hope you enjoy this quick and easy tutorial for a fun and vibrant art journal page.

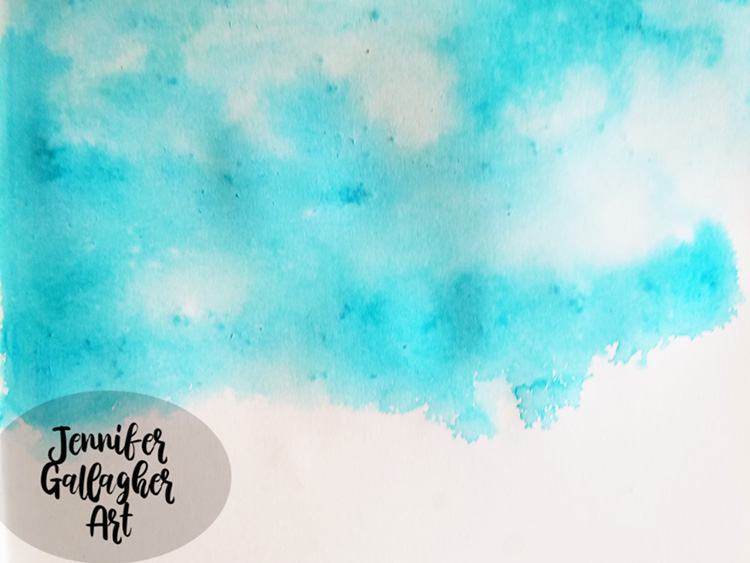
Start by applying a layer of distress stain and spritzing it with water. Move the page around the let the water travel. Dab with a paper towel to create extra interest and texture.

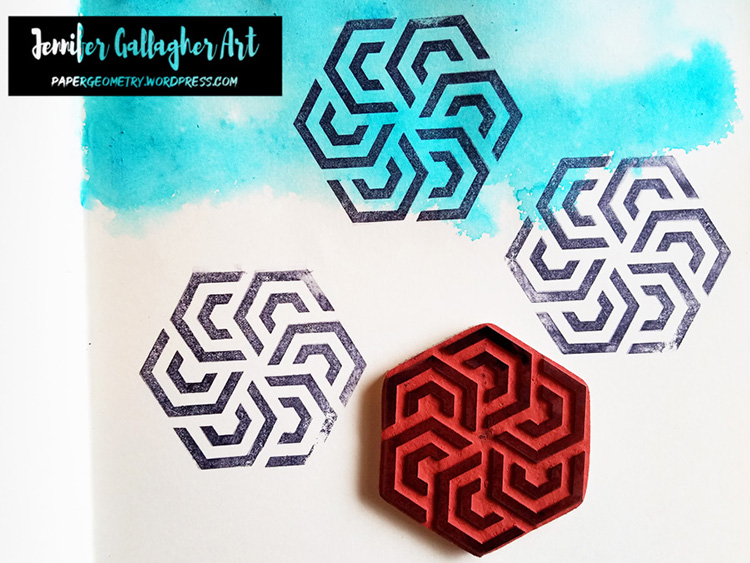
Stamp Nat’s Maze Hex stamp with black archival ink. These shapes will become your flowers so place them as your focal points.

Fill in your flowers negative space with posca pen acrylic markers.

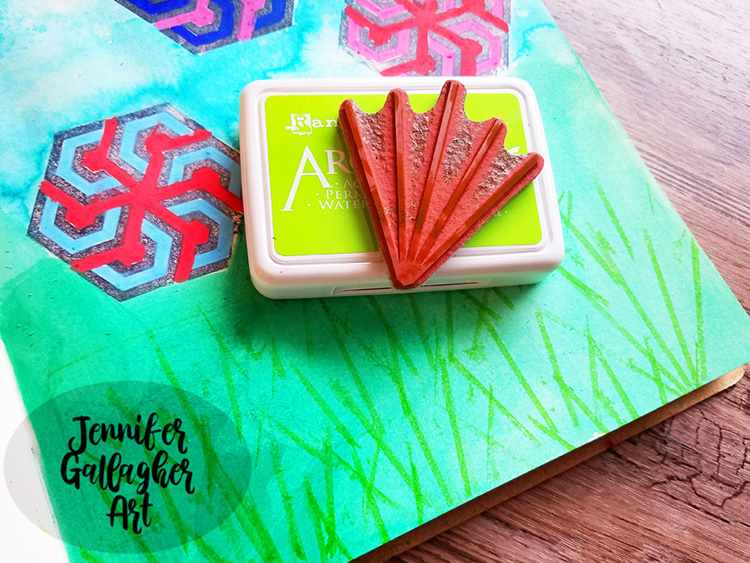
Paint the bottom half of your page with green acrylic paint and a mini blending tool. Once dry, stamp Nat’s Beacon Positive stamp in vivid chartreuse archival ink to add blades of grass.

Using a black gelly roll pen, draw in petals around each flower, stems, and leaves. Add as much doodling as you like. Use a distress marker in peeled paint to color in your leaves.

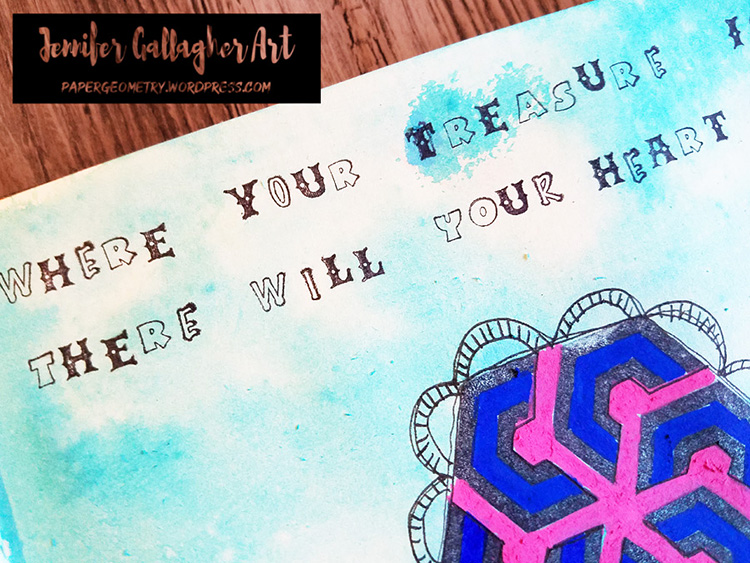
Write in a sentiment that describes what your treasure is. I chose, “Where your treasure is, there your heart will be also.”

I hope this tutorial has shown you a creative way to use some of Nat’s Hex Set Large stamps. The Maze Hex stamp screams flower to me! What about you? What fun ways can you get more out of your n*Studio stamps? Be sure to play along and share your creations with us.


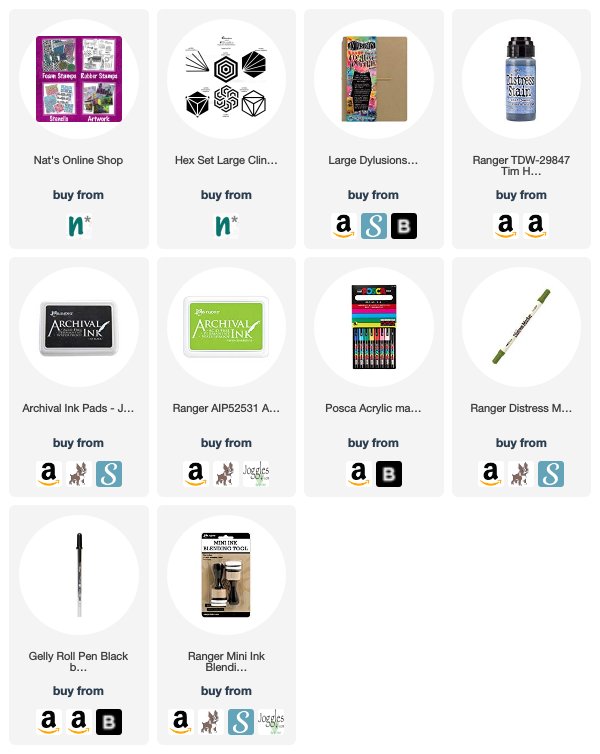
Thank you Jennifer – so cool to see the Maze Hex transformed into flowers! Great idea. You can find all of my rubber stamps in my online shop. In addition to green acrylic paint, here are some of the supplies Jennifer used:

Feel inspired? Working on something yourself that you’d like to share?  I love to see how you interpret our monthly themes. Email me how you used my stencils and stamps with the theme and email me an image – I would love to share your projects in my next  “n*Spiration From Around the Globe“.
Leave a comment

Hex Marks the Spot – Marsha Valk


Hello from my Creative Squad! Today we have a post from Marsha Valk and she takes us on a journey into the mind of an artist – to show us how a theme can prompt a thoughtful art journal page. She is using my Hex Large set, Fan-fare, and Hex Small rubber stamps and this month’s theme: Hex Marks the Spot –In the days of pirates and lost treasure, a map would lead you to gold and jewels. Today we treasure all sorts of things – our family, friends, experiences, meaningful objects, accomplishments, etc. Think about what you treasure and how you found your way there.


This month’s prompt made me intensely sad. Somehow to me, to treasure something is like trying to prevent sand from slipping through your fingers.

Change is constant. People disappear from your life, things break, or an event can make you see things in a completely different light. Even you change.

I truly realized this during my scrapbooking years: as soon as I scrapped about something precious, things changed, broke, got lost, went away or something happened that just changed everything. I’m not even kidding. I’m not saying I jinxed things by scrapbooking about them, but documenting everything did make me painfully aware of all of the changes and losses.

I’m not sure why the prompt made me steer down memory lane via the sad route. Maybe it’s because our neighbours are moving house, perhaps it’s because last week two huge trees that have dominated my view for twenty years were cut down or maybe it’s PMS… Things you treasure disappear all the time, and there is nothing you can do about that.

Good thing I know the perfect remedy for sad moods. It’s called ‘art journaling’. ;-)

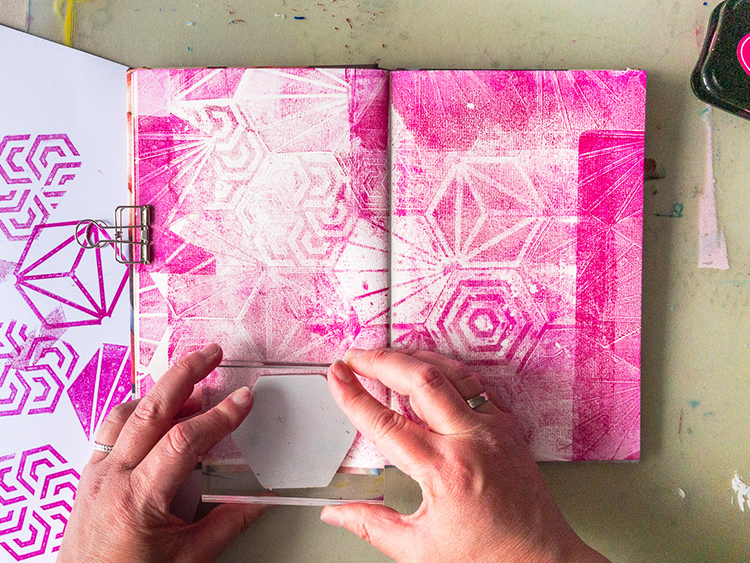
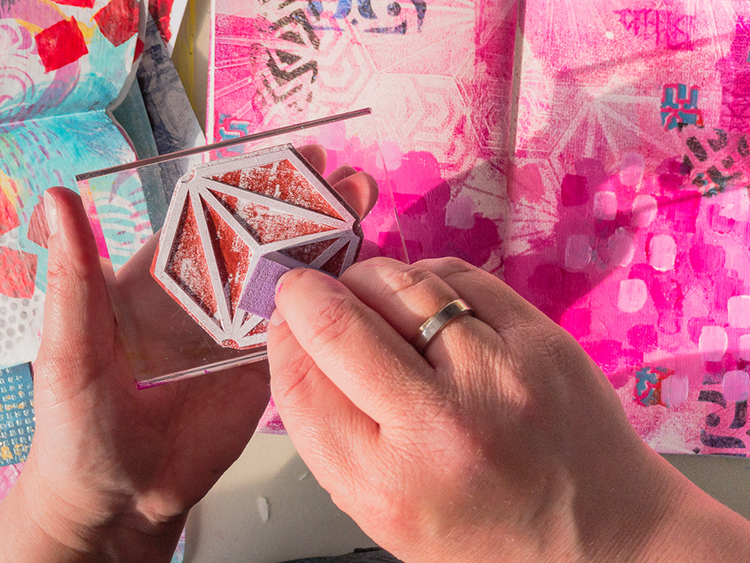
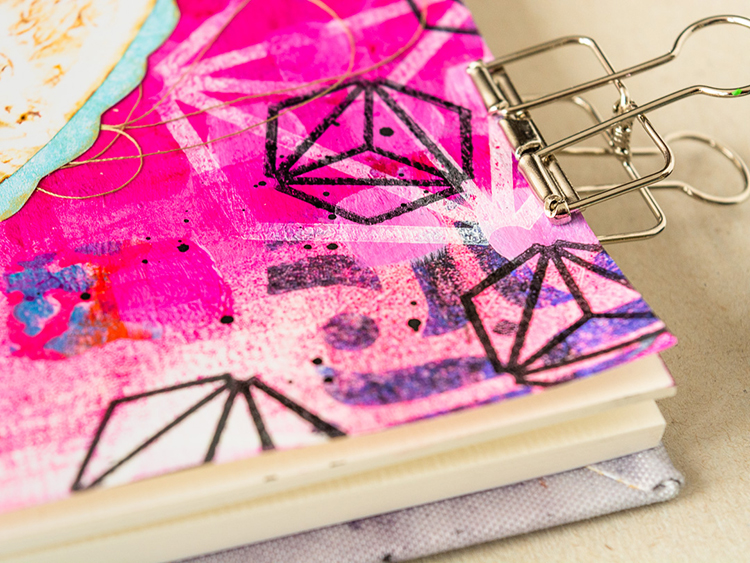
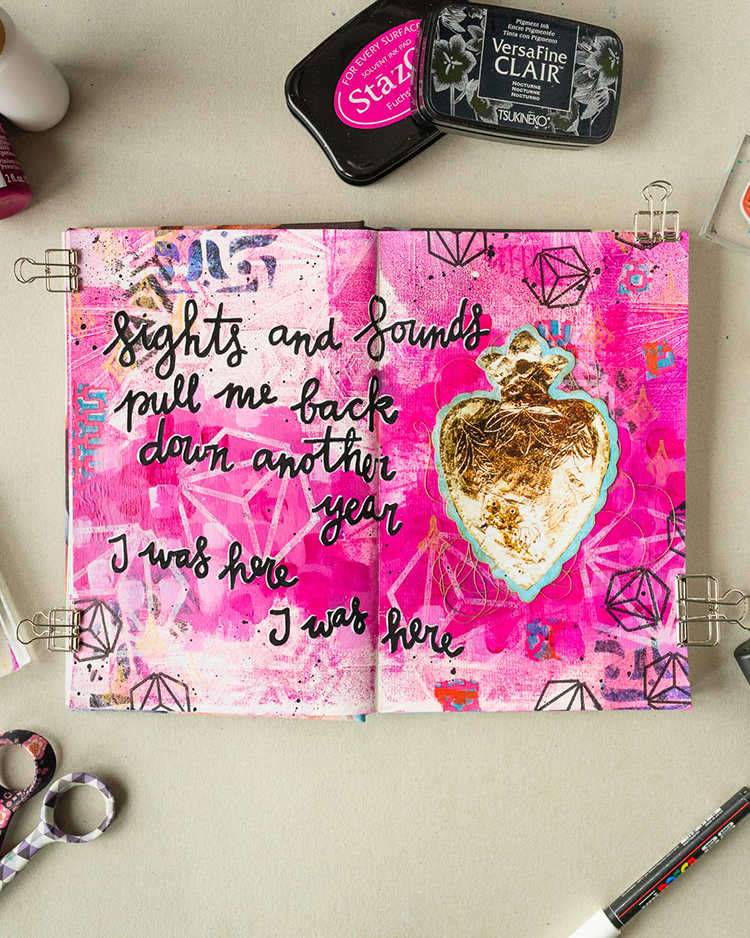
For the background, I applied StazOn to my gel printing plate. Then I used Nat’s Hex Set Large stamp set to make marks in the ink. I pulled a print directly into my journal and used the leftover ink on the plate and a few stamped hexes to fill any of the remaining white spots.

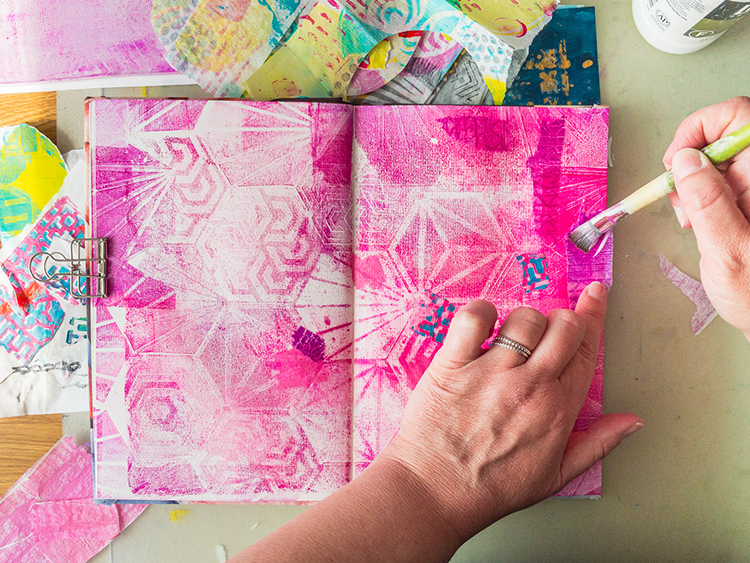
Next, I browsed through my folder of scraps leftover from previous projects using Nat’s products and I pasted some of them to my page with Matte Medium.

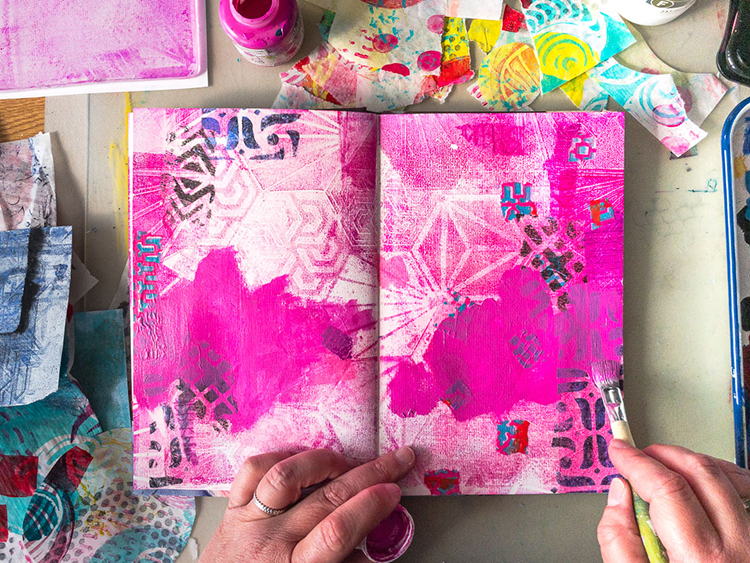
Then I randomly applied magenta and white paint with a brush.

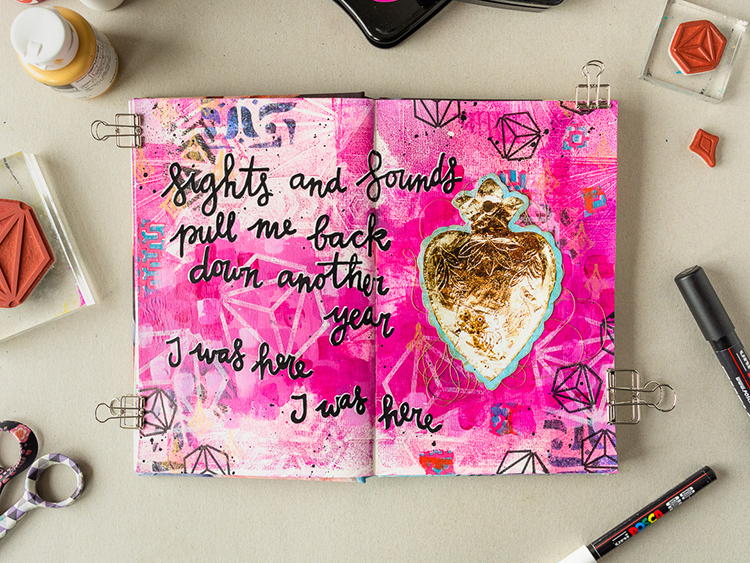
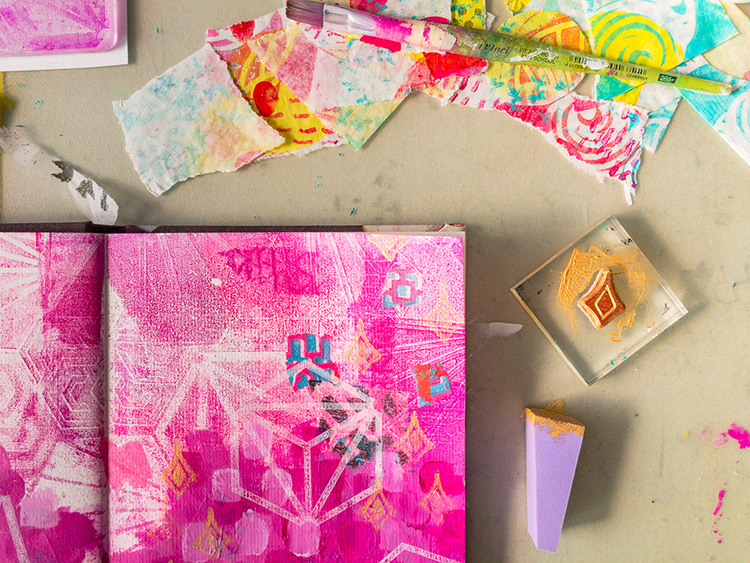
I stamped on top with the Diamond Hex Positive and white paint, and I also added a couple of diamond shapes from the Fan-fare set in gold paint, because what’s a treasure without gold!

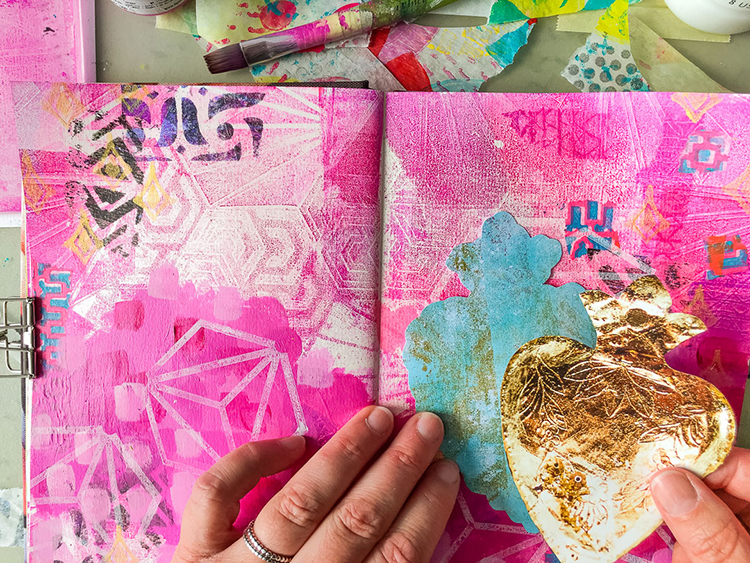
I remembered that I had also had a cutout of a gold heart in my collage stash, so I pasted that to a painted scrap of paper that I cut to the shape of the heart.

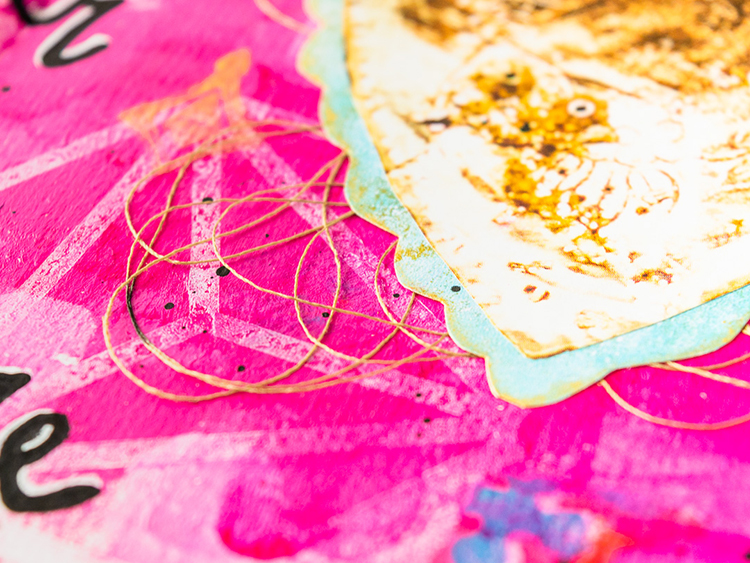
I tucked some sewing thread under the heart before adhering it.

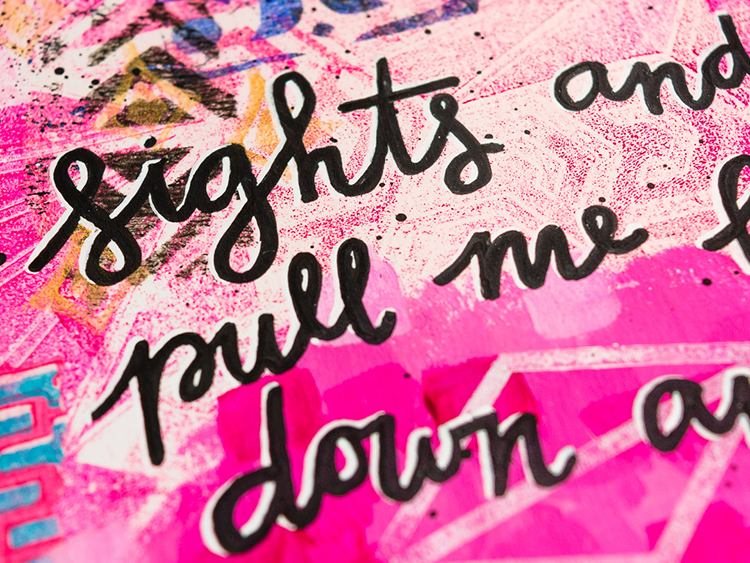
Then I wrote part of the lyrics to ‘Gold Dust’ by Tori Amos on the page, added black splatter and pulled the page spread together by stamping a couple of small Diamond Hex Positives in black ink.


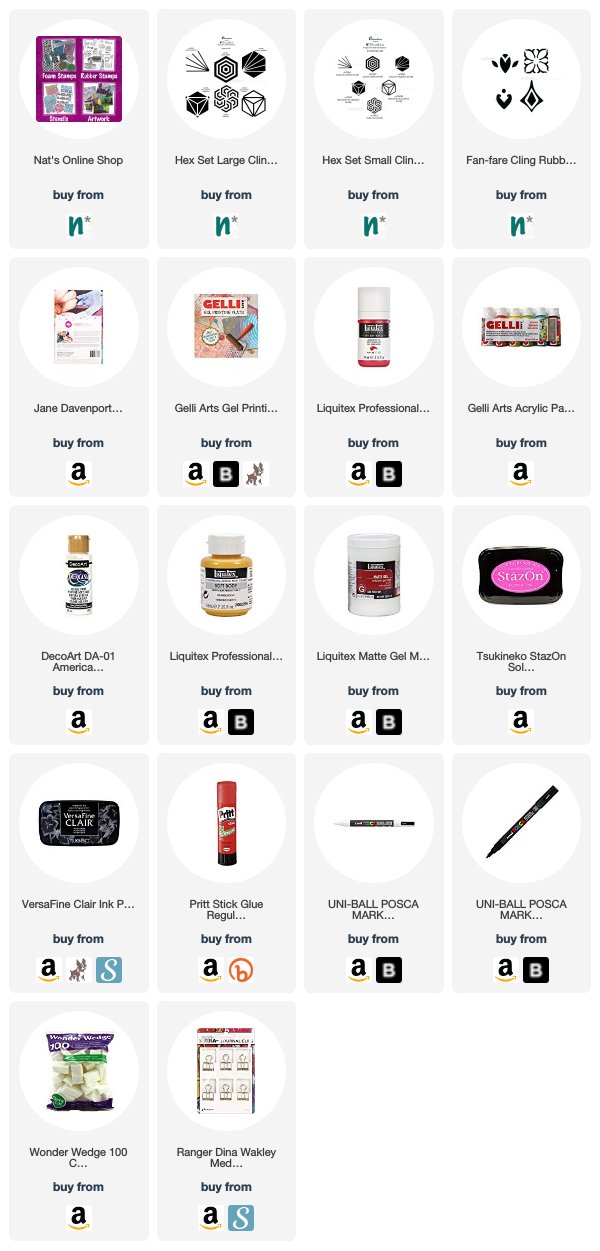
Thank you Marsha! What a beautiful page and love that you used your art journaling to help work through all that. You can find all of my rubber stamps in my online shop. In addition to the gold heart collage element and the sewing thread, here are some of the other supplies Marsha used:

Feel inspired? Working on something yourself that you’d like to share?  I love to see how you interpret our monthly themes. Email me how you used my stencils and stamps with the theme and email me an image – I would love to share your projects in my next  “n*Spiration From Around the Globe“.
Leave a comment

Hex Marks the Spot – Tania Ahmed

Welcome to a post from my Creative Squad! This week we have an upcycling project from Tania Ahmed using my Hex Set Large rubber stamps. She dresses up a storage container, drawing inspiration from this month’s new theme: Hex Marks the Spot –In the days of pirates and lost treasure, a map would lead you to gold and jewels. Today we treasure all sorts of things – our family, friends, experiences, meaningful objects, accomplishments, etc. Think about what you treasure and how you found your way there.


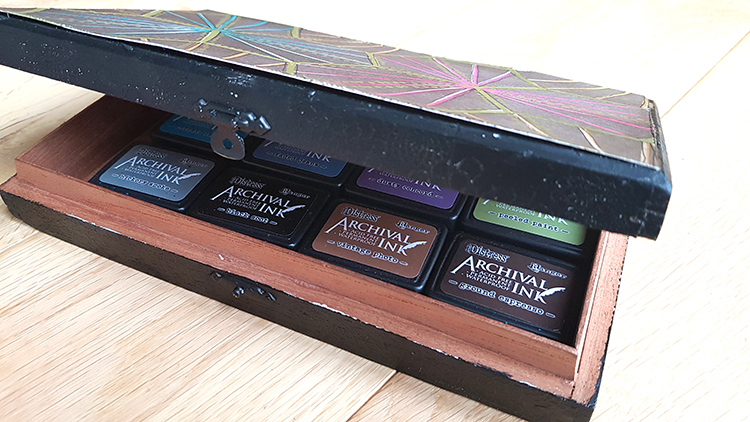
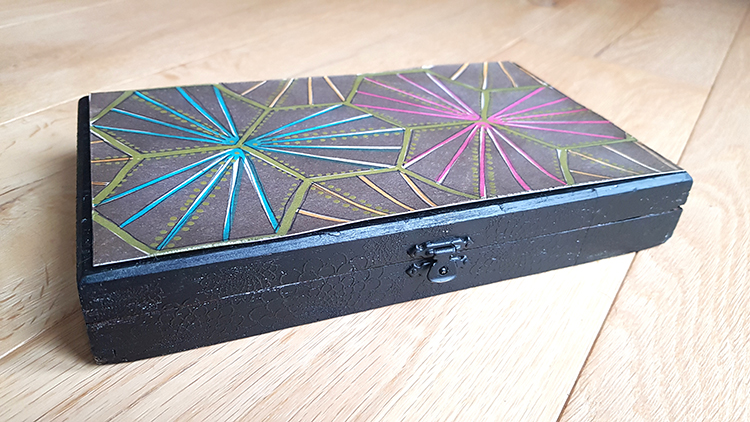
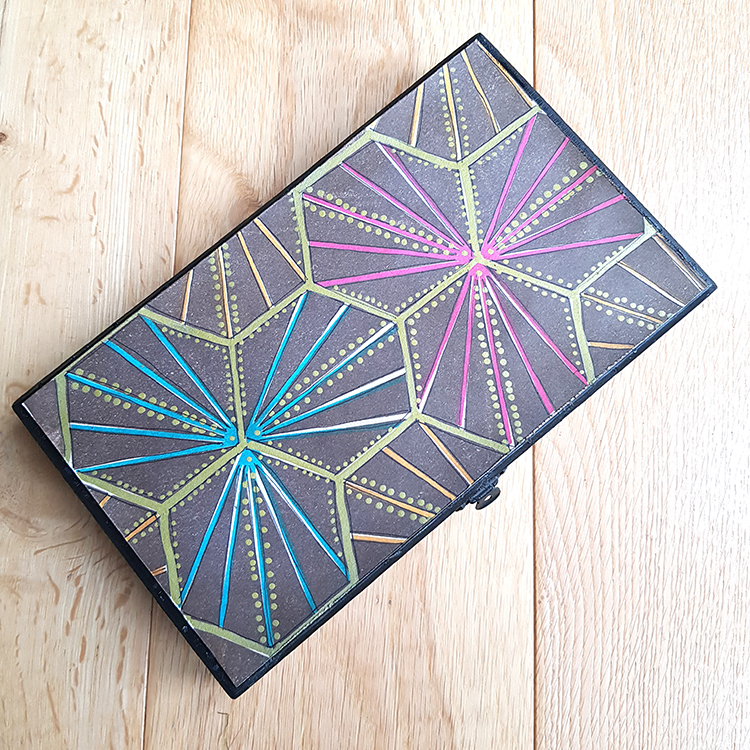
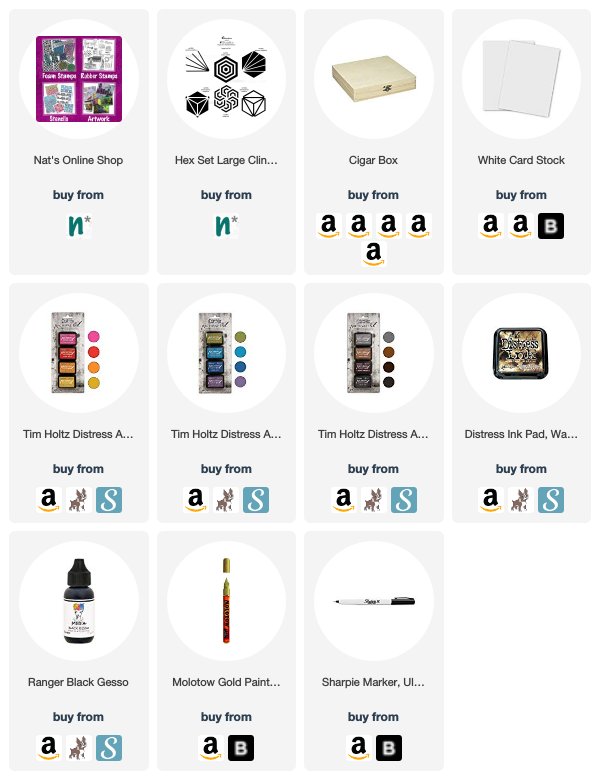
My project for the day is a quick and easy project that I made to house my mini Distress Archival Inks which I love but keep losing! I stashed them in a cigar box that I had rescued from being thrown away which I have upcycled many times over the years. I decided it was time to revamp it to keep my inks in! 

I scraped off as much of the paint and paste that I could off the box first and covered the whole thing with black gesso to give it a matt black finish. 

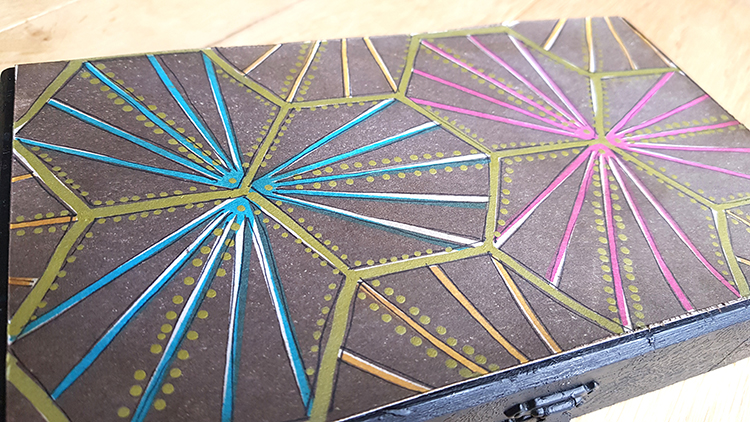
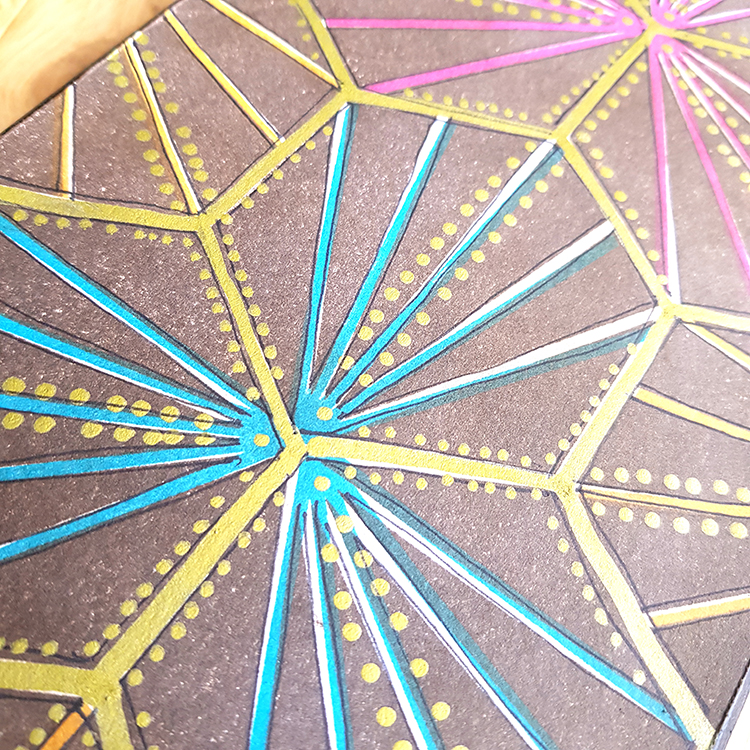
On a piece of cards stock I stamped my Hex pattern with Distress Archival Inks, inspired by the Instagram hashtag #ihavethisthingwithtiles and added some shading with Walnut Stain Distress Oxide. 

I then added some additional details with my Gold Molotow Acrylic Marker and some sketchy lines with a fine sharpie marker. I glued the cardstock panel to my dried cigar case and added my Mini ink pads to the box! 

This was a quick project to put together and it gives me great joy knowing that my inks have somewhere to “live” :) 

Thank you so much for stopping by and have a great day!


Thank you Tania – love your box of treasure :) You can find all of my rubber stamps in my online shop. Here are some of the other supplies Tania used:


Feel inspired? Working on something yourself that you’d like to share?  I love to see how you interpret our monthly themes. Email me how you used my stencils and stamps with the theme and email me an image – I would love to share your projects in my next  “n*Spiration From Around the Globe“.
Leave a comment

Pastel Dreams – Maura Hibbitts

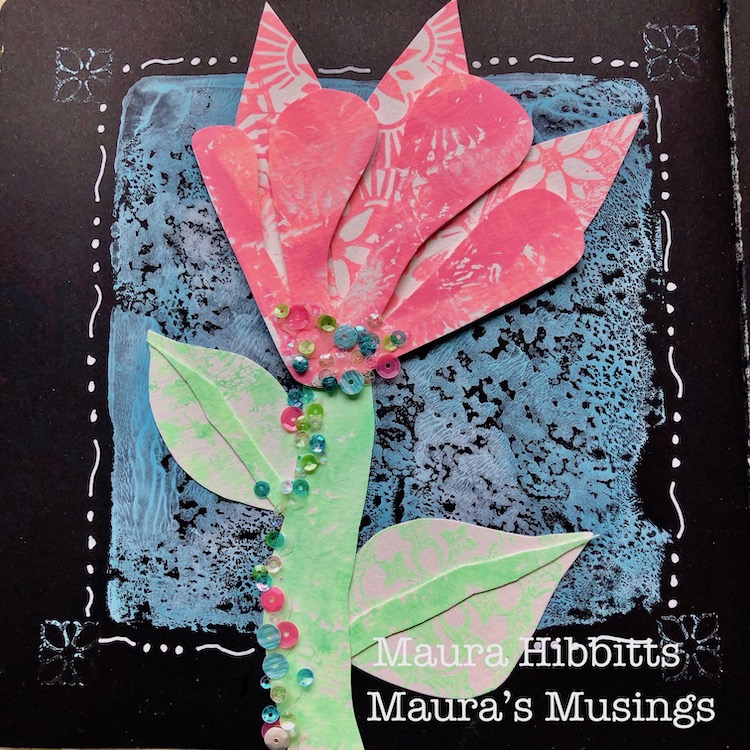
Hi from my Creative Squad! Today we have a colorful art journal page to usher us into summer from Maura Hibbitts. She is using my Floral Tile Large rubber stamp set and this month’s theme: Pastel Dreams – This month we are focusing on the softer, gentler side of things and going pastel with our color palettes. These dreamy pale colors are undeniably appealing and just as powerful as their bolder cousins on the color wheel.


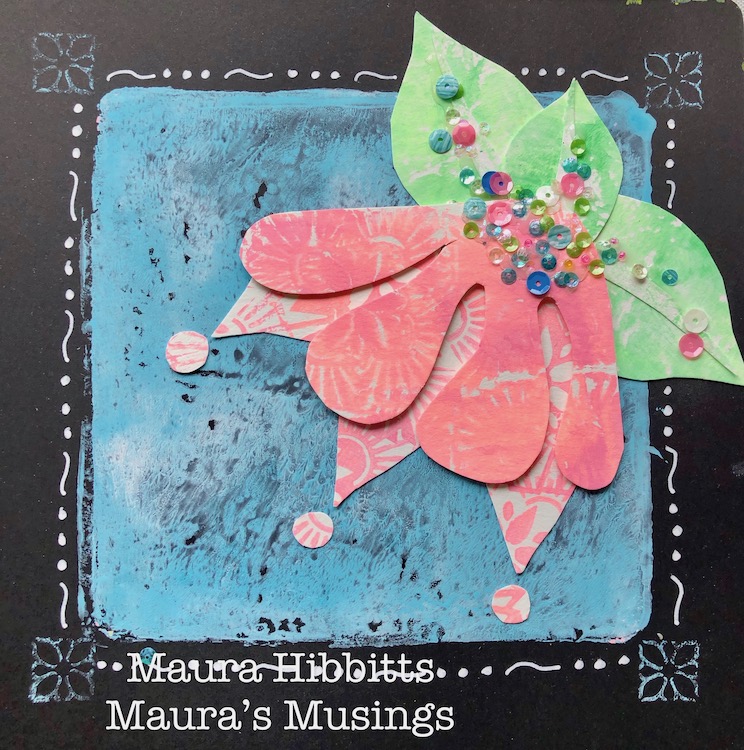
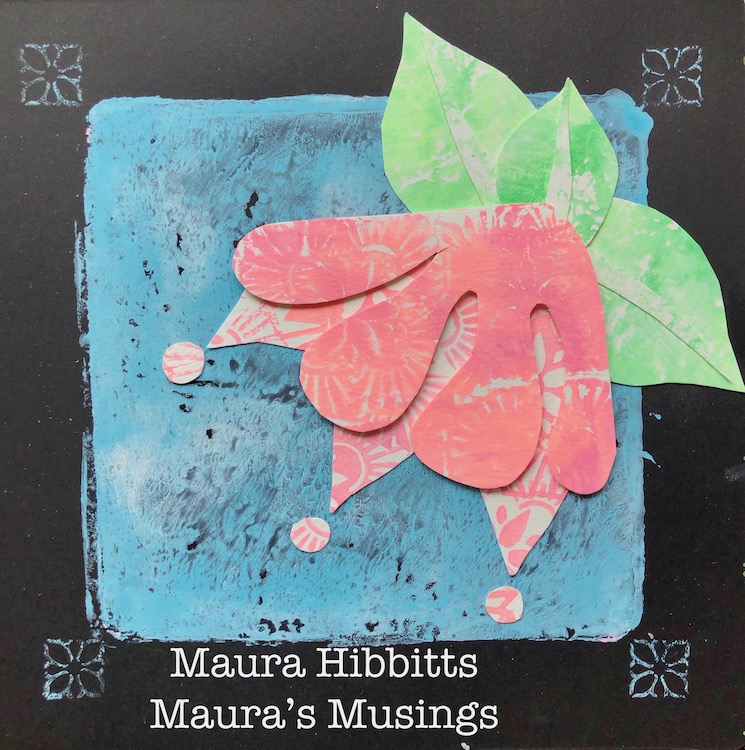
Why not create some giant flowers that only exist in your imagination? That’s what I decided to do this month in one of my art journals. I’d kind of like to see these chunky flowers growing in my gardens now that spring is here! 

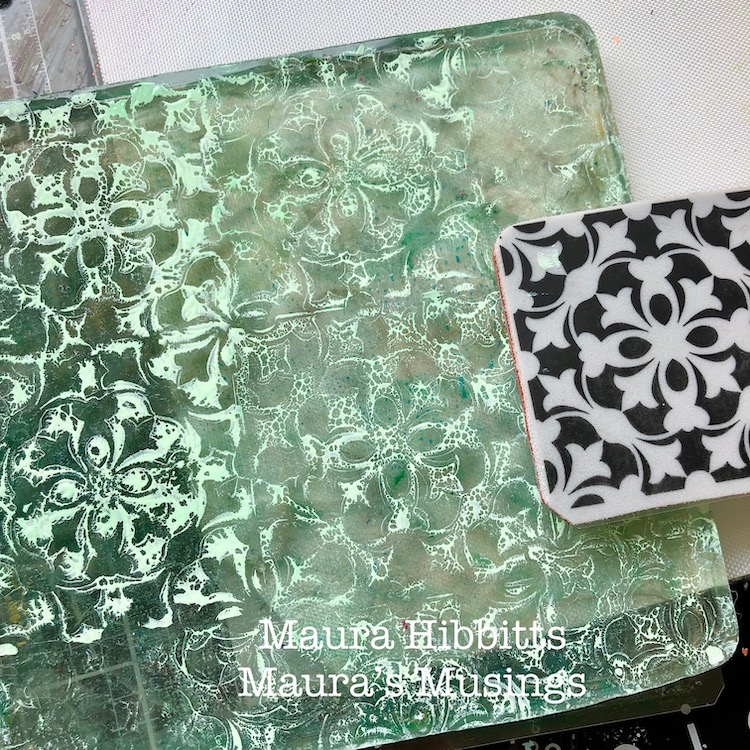
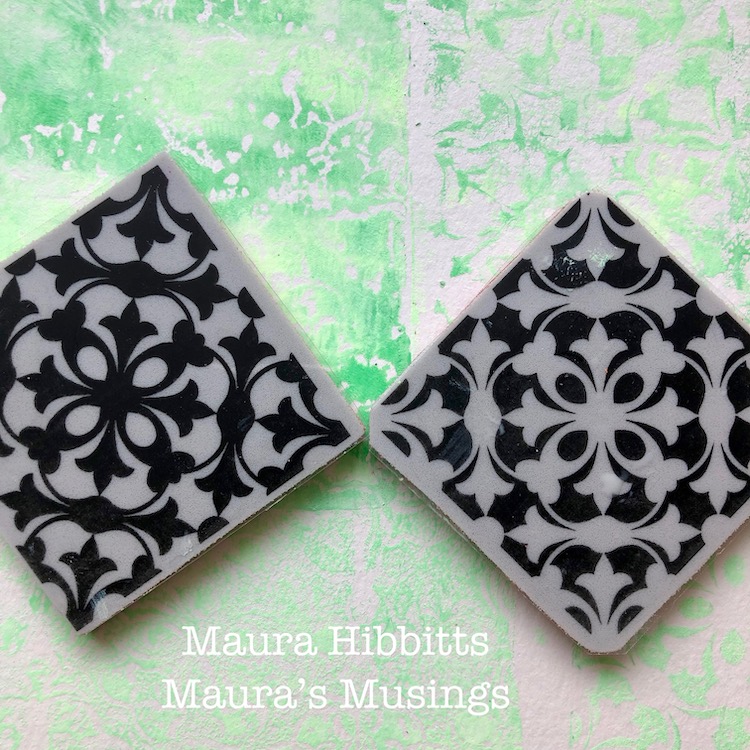
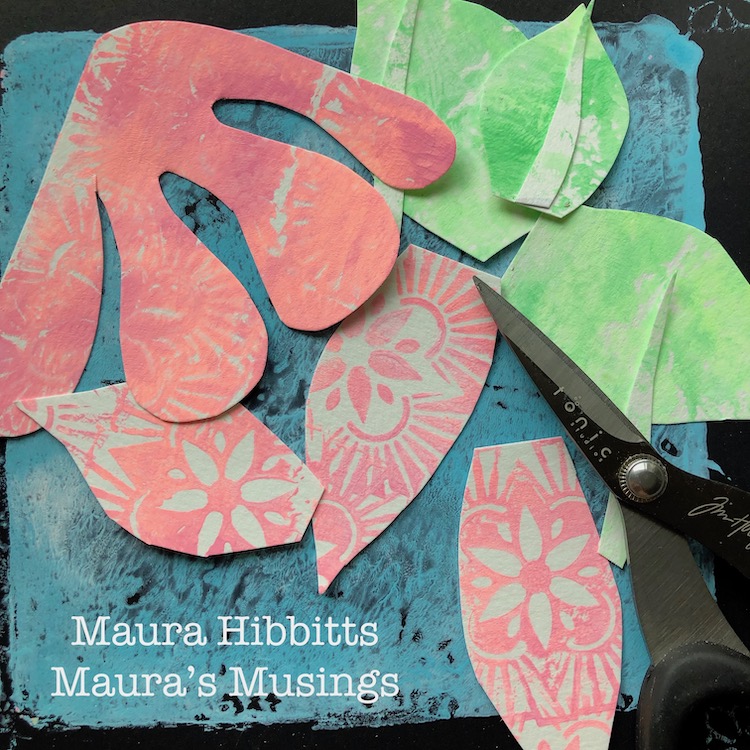
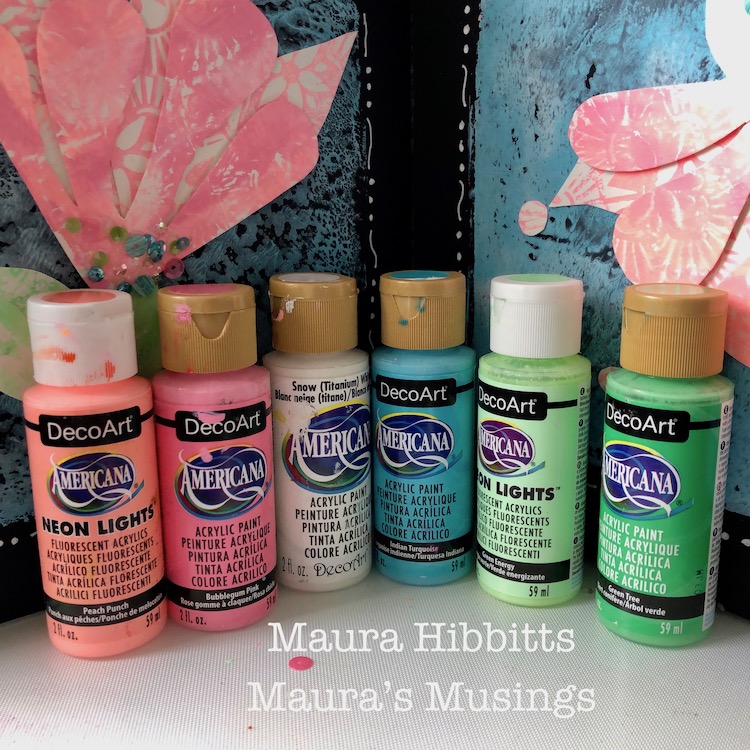
I started off by printing watercolor sheets with the Large Floral Tiles, the gel plate, and pastel acrylic paints. I began with the green sheet and blended a bit of white, Green Tree and Green Energy on the 6×6 gel plate with the brayer. Next, I pressed the Versailles Positive and Negative stamps into the paint, then laid the paper on top of the plate and made my first print. I did a second ghost print, as well as stamping the paint directly onto the paper. I wanted a variety of printed designs from the same stamps. 

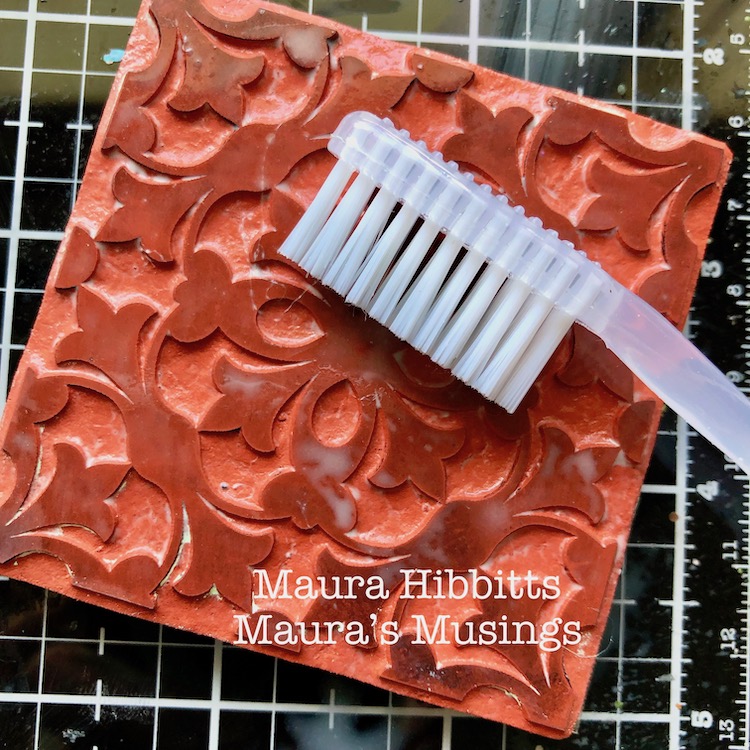
Tip: When you use paint to stamp with, it’s important to clean them off right away before the paint dries into the detailed areas. Spritzing with water and scrubbing with an old toothbrush really helps get them clean. 

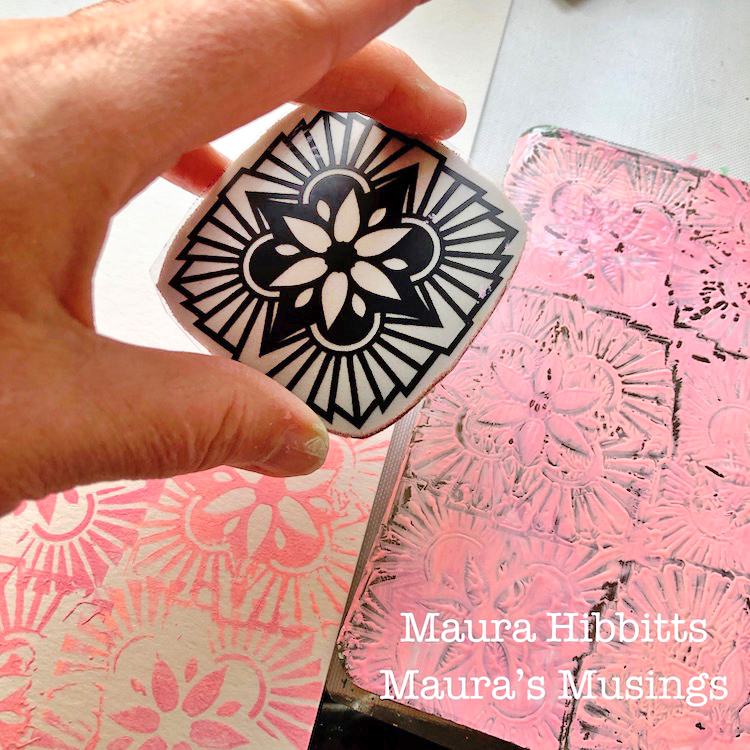
I repeated the stamping process with the Hamilton Positive and Negative stamps, white, Bubblegum pink and  Peach Punch blended on the gel plate. 

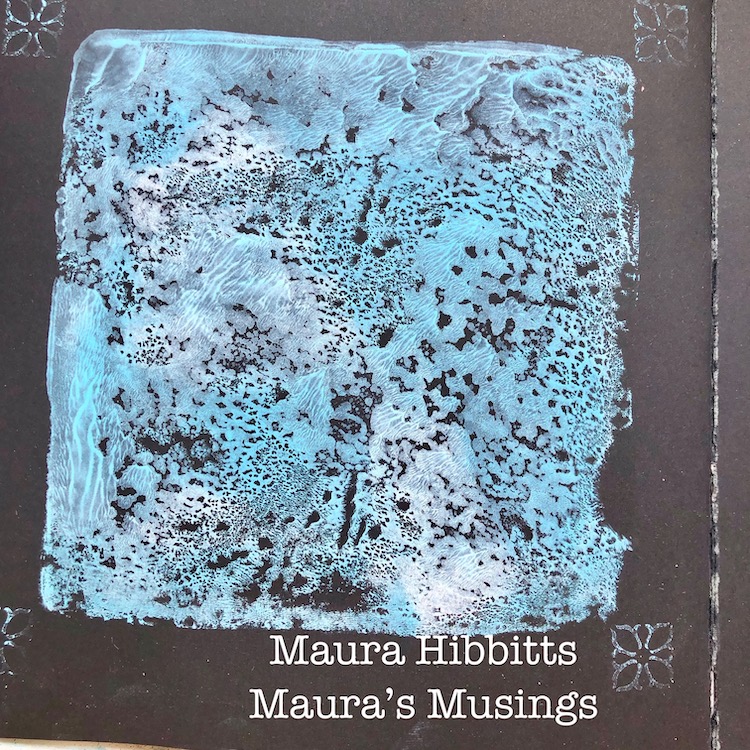
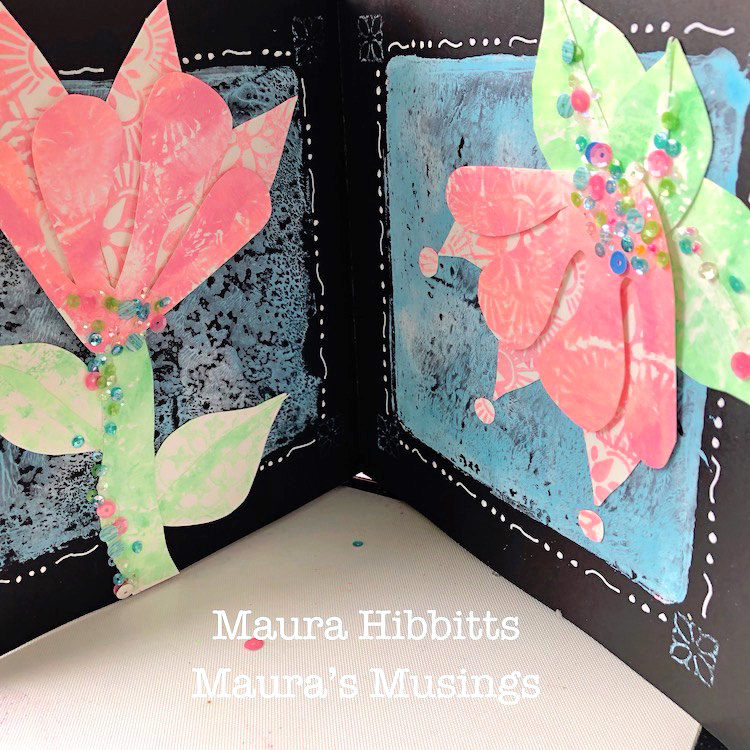
To create my blue backgrounds, I blended white and Indian Turquoise on the gel plate, spritzed it with water, and laid my art journal onto the plate. I made a second print on the facing page. I like the mixture of textures for the background.  I also stamped a bit of the blue into each corner with the Fanfare cube. 

While the pages were drying, I hand cut my flower pieces, leaves and stems just following what I imagined. 

I glued the pieces of the flower down into the journal, then embellished with sequins and beads, and doodled around the edges. 

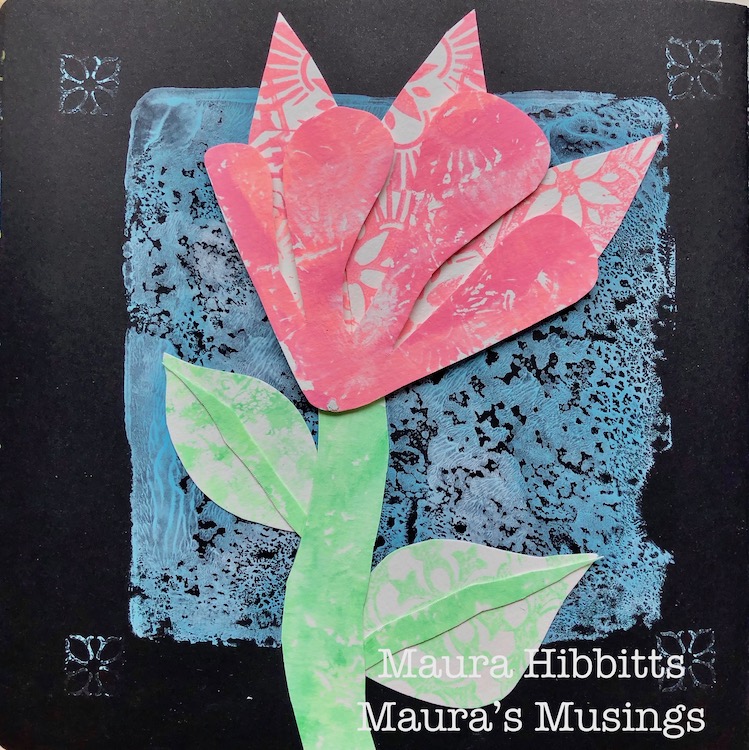
I repeated the steps, but made this flower upright. 

I don’t usually reach for pastel colors, but it was fun to create with them this month. 

I felt that my pastel flowers would pop against a dark background which is why I chose my black art journal. Originally my idea was to create a scene of grass and sky and pink clouds, thinking back to the days of childhood, laying on the ground and seeing shapes in the clouds. I guess I bypassed all that and went right to what I was imagining with my funky flowers. 


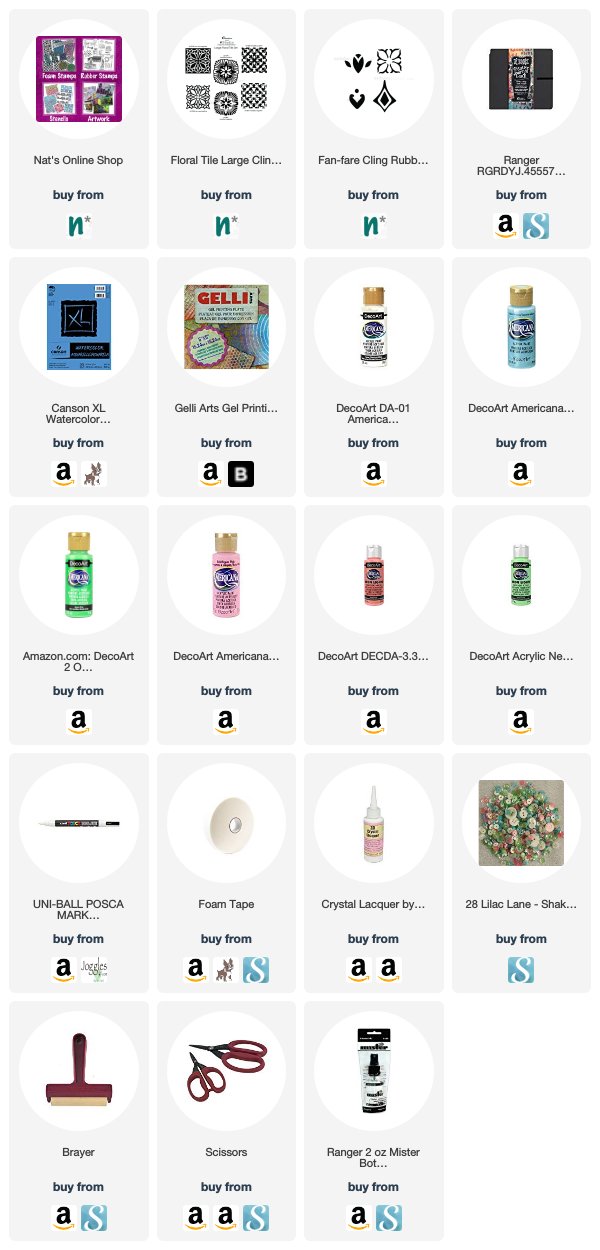
Thank you Maura – I just love these fanciful blooms! You can find all of my rubber stamps in my online shop. Here are some of the other supplies Maura used:


Feel inspired? Working on something yourself that you’d like to share?  I love to see how you interpret our monthly themes. Email me how you used my stencils and stamps with the theme and email me an image – I would love to share your projects in my next  “n*Spiration From Around the Globe“.
Leave a comment