Creative Squad

My City Speaks to Me – Gwen Lafleur

CS April My City Speaks to Me Blue

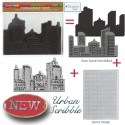
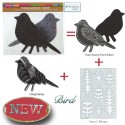
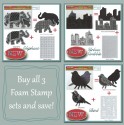
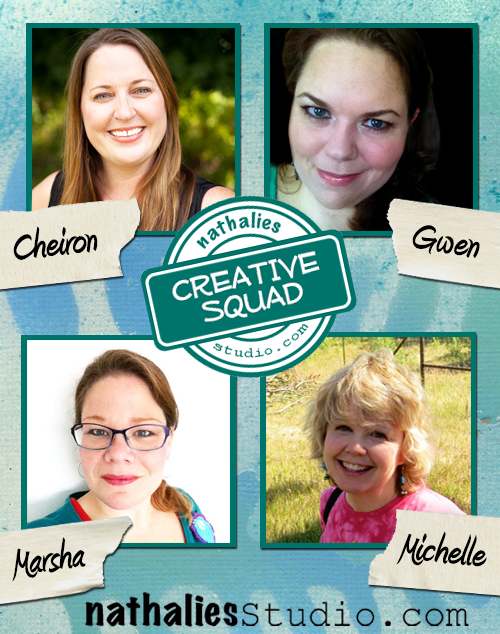
It’s Tuesday so it’s once again time for my Creative Squad to show you a fun project, and we are at the start of April now, so we have a new theme too!  The theme for April is “My City Speaks to Me” and throughout the month, the team will be using my new Urban Scribble Foam Stamp, Rubber Stamp and Stencil Set. This month’s theme is all about expressing what your hometown or city is all about.  What makes it special, vibrant, and important to you?  This month, our Creative Squad will take us on a trip to their city!

So without further ado, here is the uber creative Gwen Lafleur with her gorgeous interpretation of the theme!

—————————————————————————————————–

Gwen April Headshot

I live in a suburb of Salt Lake City, Utah, but I work downtown and one of my favorite views is when I’m driving in and the city comes into view up against the mountains. I especially love it when the sun is coming up in the background (or the sunset behind the mountains on the other side of the valley when I’m driving home at night!) There are frequently spectacular colors and I never get tired of the view; the contrast of the man-made city with the rugged mountains really draws me. It also influences a lot of the culture here – my office mates are frequently off doing morning ski tours before work and lunchtime discussion usually centers around outdoor activities. I’m not particularly outdoorsy, but I love the views and the openness of this area, and after recently moving back here from Chicago, I’m especially loving the more laid back and less crowded lifestyle!

500 Salt Lake City Mixed Media Painting - Gwen Lafleur - WM

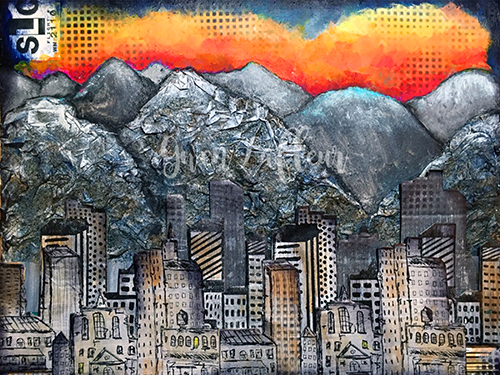
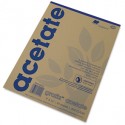
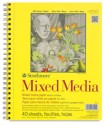
With those thoughts in mind, when I got this month’s challenge I immediately knew that I needed to use the Urban Scribble stamps backed by mountains of some kind. I started by taking an 11″x14″ sheet of heavy weight mixed media paper and I sketched out where I wanted the mountains to be. I used pages torn from a telephone book along with Mod Podge mixed with water and put crumpled paper within the outline of the mountains in the foreground.

detail Salt Lake City Mixed Media Painting Close-up 2 - Gwen Lafleur - WM

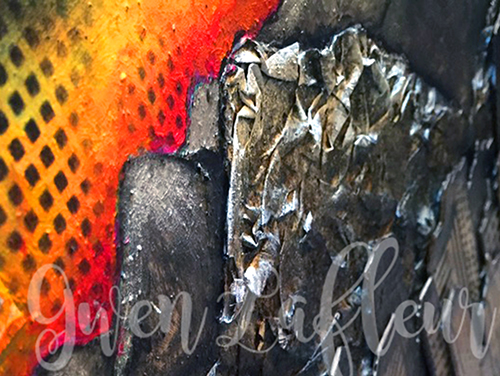
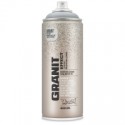
Once they were dry, I used Montana Granit Effect spray paint and gave them a good coat – it really helps them look like rock! I used a few washes of acrylic paint on top to add a little shading and dry brushed some white on the tops (since the mountains still have their snow caps right now.)

detail Salt Lake City Mixed Media Painting - Gwen Lafleur - WM

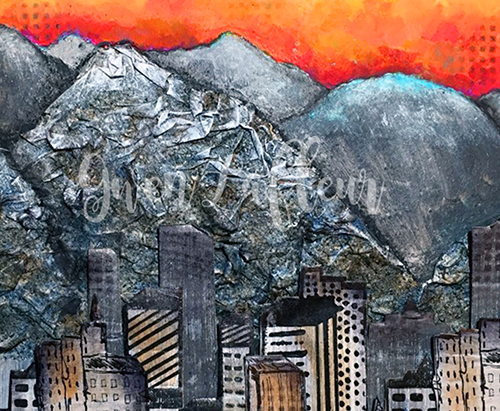
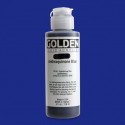
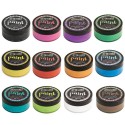
Next, I gesso’d the area above my mountains and painted in some more in the background, then I added a sunrise with lots of fluorescent paints. For the city, I took a few sheets of drawing paper and gesso’d them, then painted them with different shades of gray and silver. When they were dry, I stamped on them twice with both the detailed side of the foam stamp and the rubber stamp. I also stamped in gray with the solid side of the foam stamp. I cut out each individual stamped image and mounted them all on a thin sheet of cardboard, then cut them out again. I lined them up in front of the mountains on my piece and started adhering them in layers, using stacked cardboard on the back of each piece to add dimension. I cut some of the cityscapes into smaller pieces so I could arrange them the way I wanted.

500 Salt Lake City Mixed Media Painting Close-up 2 - Gwen Lafleur - WM

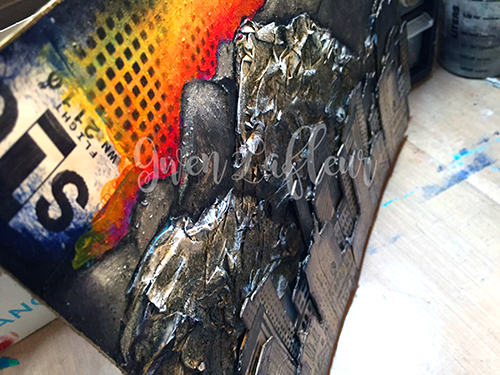
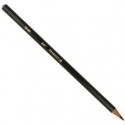
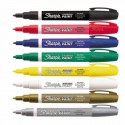
Once that was done, I added a wash of color here and there. I used a black Stabilo All pencil to add some definition to the mountains, then I finished the piece by using the stencil that comes in this set in the sky and in the bottom corners and on some of the buildings and outlined the whole piece with a gold paint marker.

I really love the contrast of the texture from the mountains with the stamped buildings, as well as the colorless early morning city against the beautiful colors of the sunrise. I think it even looks a bit like Salt Lake!

———————————————————————————————————-
I hope you enjoyed Gwen’s project! I think we’re all wishing we had a scenic commute like hers :) I love how she created really dimensional texture with layers upon layers of stamped cityscape and the crumbled paper mountains in the background.  And that orange sunrise!  It literally glows.
Besides the supplies listed below, Gwen also used cardboard, phone book pages, and pieces from a luggage tag with SLC on it:
SuppliesCJS


And maybe you will even play along -we would love to see how you interpret the theme – email me how you used my stencils and stamps with the theme and email me an image – I would love to share what you did at the beginning of next month!

See you next Tuesday for the another project with the theme ‘My City Speaks to Me’.

Comments (18)

  • Dee Ann O'Brien

    |

    Amazing mountains that really enhance the city!

    Reply

    • gwenlafleur

      |

      Thanks so much! I just wish I could capture a fraction of how beautiful it is in real life, but it’s sure fun to try!

      Reply

  • Karen Petitt

    |

    I have no words to express how wonderful this is. I get it completely because we lived in central London for a long time and the one thing I love about coming home was the city behind and the country ahead. Its beautiful, gorgeous, wonderful, awesome – not enough words to express how great it is. Thank you for sharing some of your process too. As I recent convert to mixed media I would not have had a clue how you created those mountains – it’s genius! Many thanks for the fabulous inspiration and for sharing your art with us Karen x

    Reply

    • gwenlafleur

      |

      Thank you Karen! There’s just something about the contrast of city and nature that really speaks to you, isn’t there? You’re also making me want to go back and visit London again :D

      Reply

  • Joi@RR

    |

    Oh my gracious – THIS is a FABULOUS creation Gwen. I am just blown away by the dimension and texture of this piece. YOU – dear girl – totally GLORIFIED Nat’s Urban Scribble. And since it’s my very fav one – I am just THRILLED to see this. HIGH FIVE!!!! Your entire piece is SPLENDID – your mountains are beyond GORGEOUS. LOVE love love this. j.

    Reply

    • gwenlafleur

      |

      Aw, thank you so very much! I really love this set too and it was so much fun to use. So glad you liked it!

      Reply

  • cheiron

    |

    This is one amazing page Gwen! I love the texture…what a beautiful city.

    Reply

    • gwenlafleur

      |

      Thanks Cherion! The texture is definitely my favorite part :)

      Reply

  • Karenliz Henderson

    |

    WOW amazing piece. Just gorgeous! I love the way you created the mountains plus the sky is gorgeous.

    Reply

    • gwenlafleur

      |

      Thank you so much! It was lots of fun to put together :)

      Reply

  • Lynn Reed

    |

    Wonderful artwork! Love the buildings and the mountains and the bright accent color of the sky.

    Reply

  • Sue Clarke

    |

    I LOVE the texture in the mountains Gwen. Nice piece for sure!

    Reply

    • gwenlafleur

      |

      Thanks Sue! The mountains are my favorite part as well… it was a bit of an experiment, but I love how it came out!

      Reply

  • Michelle LaPoint Rydell

    |

    Wow! Gwen, your page is StUNNING!!! The dimension is fabulous, and that sunrise is breathtaking!

    Reply

    • gwenlafleur

      |

      Thanks so much Michelle! I had a lot of fun putting this one together :)

      Reply

  • Laurie Hunt

    |

    Gwen this is beautiful! I totally get how you feel about those mountains. I recently moved from Detroit to Phoenix and I love every time I go out seeing those mountains over the valley — and our mountains are nothing compared to yours! I tell my husband all the time I hope I never lose that awe inspiring feeling as I look around this beautiful southwest. Great work. Loved the step outs and the commentary.

    Reply

    • gwenlafleur

      |

      Thanks so much Laurie! Yeah, I can imagine that going from Detroit to Arizona would be very similar… that’s a beautiful area too :) I’m with you… I never want to lose that sense of awe!

      Reply

Leave a comment

Inspiration from Around the Globe

This Tuesday we’re taking a break from our Creative Squad (don’t worry, they will be back next week with a new theme to play with!) to bring you some super fun projects from around the world.  As you may know, my stamps and stencil designs are available for purchase online and maybe even in your local craft store, so crafters and mixed media artists and art journalers from around the world are using them.  I am always excited to see how YOU use my products in your own projects.  I am even more excited to share some of the beautiful and creative examples of these projects with you today. Enjoy this inspiration from around the globe!

Global Inspiration Asia King Fashion Dame Card

From the UK:  I absolutely love Asia King’s use of my Fashion Dame stamp set for this mixed media panel.  Her combination of neon green, that cool Caution stamp, and my Fashion Dame really made for an image with a lot of attitude.  It goes great with my word of the year ;)

Global Inspiration Frieda O Fashion Dame

Frieda Oxenham also from the U.K. paired my Fashion Dame stamp set gal with a funky car and some great colors for a really nifty art journal page.  I love how she built up all those layers in the design to give a real sense of dimensionality.

Global Inspiration Sarah Donawerth Stampington Art Deco

Stampington Magazine based in California, featured a free project using my Art Deco Wallpaper stencil on their website and social media.  You can follow along to create this beautiful journal with a super nice textured cover!

Global Inspiration Janelle Stolfus Urban Scribble

Janelle Stollfus in Idaho created this gorgeous card using my Urban Scribble stamp set.  I love how she filled in the cityscape to make it her own.  The little touches really give it a personalized look that is so unique.

Global Inspiration Eeva Urban Scribble-2

And finally, here is Eeva from Sweden, purchasing one of my Urban Scribble Stamp sets at her local craft store!  So fun to see all of you shopping for my designs and inspiring us with your creativity :)

Join us again next Tuesday for another great project from one of our Creative Squad members!  They will be working with a new theme for April.  And in the meantime, share with me what you’ve been working on with my stamps and stencils.  I would love to feature your project in an upcoming post!

Comments (2)

  • Asia King

    |

    Thank you so much Nat for featuring my panel on your blog! I feel really honoured that you enjoyed my Girl with attitude project :). I absolutely adore this stamp! And what a gorgeous collection of projects – it’s such a fabulous company to be in! :). Thanks again, Asia xx

    Reply

  • Joi@RR

    |

    What a wonderful post. I just LOVE LOVE LOVE seeing how folks all over the world are being touched by your INCREDIBLE CREATIVITY Nat. THRILLING. I saw Asia’s design on her blog and thought that your Fashion Dame could not look more FABULOUS – that is an awesome make. But I have to say that I also just ADORE that abstract fun of your DAME on the art journal page with the old car – Wow – this could be a huge painting on a wall!! And your Art Deco Wallpaper Stencil looks BEAUTIFUL – wow. But of course, my favorite has always been the cityscape and WOW WOW WOW did Janelle do it up SUPER FINE???!!! YES. LOVE it. OK – Nat – are you busting your buttons???? You should be totally swelled with pride girl. So proud of you!!! This was great treat to see – thanks bunches. XXj.

    Reply

Leave a comment

Opposites Attract – Michelle Rydell

CS Opposites Attract logo

It is Tuesday and that means it is time for my Creative Squad to show you a fun project. The theme for March is Opposites Attract and the team will use my new Bird Foam Stamp, Rubber Stamp and Stencil Set. Just as opposite colors on a color wheel highlight one another, or yin and yang fit together so comfortably, sometimes the best is brought out when we celebrate extreme differences!

This week we’re happy to show you an art journal page by Michelle Rydell, which has us singing along with her! Take a look at her musically inspired interpretation of our theme.

—————————————————————————————————–

Michelle March Headshot

The first thing I thought of when I heard this month’s theme, was the song “Opposites Attract,” by Paula Abdul. I thought it would be fun to use that as inspiration for my journal spread!

Michelle Rydell Opposites Attract 04

Here’s how I made the spread (the song running thru my head the whole time)…

I used the cling stamp bird first, and stamped her with versamark ink, so I could emboss her in a variety of bright colors. I poured each color of embossing powder on separately, so that I could shake the extra off and back into the jar, without the colors getting mixed up.

Rydell Opposites Attract 1

When I was done, this is how my bird looked. The stray bits of color don’t matter because I will be cutting her out.

Michelle Rydell Opposites Attract 2

Next I used the foam stamp bird. For my vision to come to life, I needed this guy to be facing left, instead of right. In order to accomplish this, I stamped him onto my gelli plate, and then pressed my kraft paper onto the plate, and voila, a left facing bird! (Just a note: If you don’t have a gelli plate, you could probably accomplish the same thing by substituting any non-porous surface, such as a piece of acetate or a plastic placemat.)

Michelle Rydell Opposites Attract 3

Once I had my two birds cut out, the rest of the page came together quickly. I painted a simple nighttime background on the left, with a paper-pieced tree branch. On the right side of the spread, I used the stencil that comes with the set to create some bushes in the background for my daytime bird. The hearts were cut from some underpaper on my desk that had pink paints and sprays on it. The lyric from the song was written with markers for a finishing touch.

Michelle Rydell Opposites Attract 04

I just loved working with this fun set! The birds are adorable and I love how you can mix and match them to create all kinds of different looks!

———————————————————————————————————
I love how Michelle showed us step-by-step her process for creating this fun page.  Her placement of the bird up-side-down on the tree really made me smile and her lettering is just gorgeous too!
Besides the supplies listed below, Michelle also used kraft paper and underpaper to create this art journal page.
SuppliesCJS

And maybe you will even play along -we would love to see how you interpret the theme – email me how you used my stencils and stamps with the theme and email me an image – I would love to share what you did at the beginning of next month!

See you next Tuesday for project inspiration from around the globe.

Comments (17)

  • Dee Ann O'Brien

    |

    Fun use of the birds to cleverly send a message!

    Reply

  • Karen Petitt

    |

    I have to play in my journal tomorrow now! All these gorgeous journal pages have made me want to get covered in paint or ink and play with my stamps and stencils. Just awesome inspiration and awesome art! Many thanks for the blog hop, the fabulous inspiration and for sharing your art with us Karen x

    Reply

  • gwenlafleur

    |

    Really beautiful page! Love the colors and lettering, really love the way that you used the different colors of embossing powder. So cool!

    Reply

  • Joi@RR

    |

    Ahhh so darling Michelle – and so true – opposites attract!!! Love your upside down bird – eheheheheh!! And all the bright colors on black and on white – you thought of everything!! SUCH a fun page. Nat’s stamps look FABULOUS once again!!! Happy Easter! j.

    Reply

  • Sharon Fritchman

    |

    I LOVED this song so much and Michelle’s creativity really shines here! Awesome!!!!!

    Reply

  • Jenny Petricek

    |

    Wonderful spread! (And a great old song from my 1990’s childhood!)

    Reply

  • Sue Clarke

    |

    LOVE it. The phrase, the colors and the birds being opposite each other (plus day and night). Nice job!

    Reply

  • marsha.

    |

    Love it Michelle! Love the colours, the night and day contrast, the bird upside down and your lettering <3! And the lyrics… I had totally forgotten about that song!!

    Reply

    • Michelle LaPoint Rydell

      |

      Thanks Marsha! It was such a fun set to work with! I love what you did with it too!

      Reply

  • Gayle

    |

    Exquisite! What a clever interpretation of the theme!

    Reply

  • phinner

    |

    This is super Michelle!!! Its all very cool, I especially like how you formatted the lyrics with the cursive and block lettering! Now I’m off to find my Paula Abdul cassette, LOL!

    Reply

    • Michelle LaPoint Rydell

      |

      thank you Phin! I appreciate you noticing that about the lettering! Have fun looking thru your cassettes!

      Reply

  • Julie Tucker

    |

    Love love love this! LOVING what you did with the bird .. and now I have that song in my head! LOL!!!!

    Reply

Leave a comment

Opposites Attract – Marsha Valk

CS Opposites Attract logo

It is another Tuesday and therefore time for my Creative Squad to show you a fun project. The theme for March is Opposites Attract and the team will use my new Bird Foam Stamp, Rubber Stamp and Stencil Set. Just as opposite colors on a color wheel highlight one another, or yin and yang fit together so comfortably, sometimes the best is brought out when we celebrate extreme differences!

We’re very excited to share with you the very colorful, layered mono prints by Marsha Valk.  Take a look at her nifty interpretation of our theme!

—————————————————————————————————–

Marsha March Headshot


My thoughts on the theme ‘Opposites Attract’ were positive vs. negative and opposite colours on the colour wheel. And that immediately made me think… monoprints!
MarshaValk_nStudioCS_OppositesAttract-2
I started with sketching different placements on a scrap of paper so I could figure out how many masks and stencils I would need of the bird shape. Turned out I needed one stencil and three masks. I made them by stamping the solid foam bird shape onto transparencies and scraps of paper and then cutting them out.
MarshaValk_nStudioCS_OppositesAttract-5
I decided to use my 6 x 6 inch Gelli Plate so I could have a nice white border around my monoprinted images. I started with the yellow/purple print: added black acrylic paint to the Gelli Plate, put my handmade bird stencil on top, masked off part of the stencil with a handmade bird shape mask and then pulled the print and cleaned the plate.
I added yellow paint to the plate, positioned my bird stencil on the print with repositionable adhesive, pulled another print and cleaned the plate.
MarshaValk_nStudioCS_OppositesAttract-4 ver2
When the print was dry I masked off three birds on the paper using repositionable adhesive. Then I added purple paint to the Gelli Plate, created a pattern on top using the stencil and masks that come with the Bird Foam Stamp and pulled a print on a scrap piece of paper. Then I removed the stencil and masks and pulled a ghost print with my original paper.
Once I had removed all masks and any adhesive residue that was left on my print, I stamped the foam stamp bird with yellow paint on top of the negative (white) bird shape and the cling rubber bird with black ink on top of the yellow bird shape.
MarshaValk_nStudioCS_OppositesAttract-3
The second print was created in a similar way, but this time my black ghost print background didn’t work out as I wished. So I ended up adding another green colour and I stenciled the plant shapes over it with white paint.
MarshaValk_nStudioCS_OppositesAttract-6
The last print on blue paper was a ghost print that I pulled to clean the Gelli Plate and that I stamped over with the foam stamp bird.
MarshaValk_nStudioCS_OppositesAttract-7
Monoprinting like this is always a puzzle and rest assured that I had a few misprints too. I will keep those around for other projects! Whilst choosing my paint colours, I discovered that I hardly ever go for opposites on the colour wheel. It was fun to try this with a limited colour palette, out of my comfort zone!
MarshaValk_nStudioCS_OppositesAttract-1
———————————————————————————————————
I love how Marsha showed how to use all three stamp surfaces together, by creating a reverse print of the solid foam stamp, and using the patterned side of it to stamp on top.  The layering and colors are super intriguing.
Besides the supplies listed below, Marsha also used black and blue cardstock to create these prints:
SuppliesCJS


Maybe you will even play along -we would love to see how you interpret the theme – email me how you used my stencils and stamps with the theme and email me an image – I would love to share what you did at the beginning of next month!

See you next Tuesday for the another project with the theme ‘Opposites Attact’.

Comments (6)

  • A Year of Favorites from 2016

    |

    […] Creative Squad joined our team for a week of mixed media fun! You can see from this peek at Marsha Valk’s project during the hop that it was full of vibrant […]

    Reply

  • Karen Petitt

    |

    Please come teach me how to use a Gelli plate like that! Your projects are stunning. And the more I see of these new stamps the more I want them. Many thanks for the blog hop, the fabulous inspiration and for sharing your art with us Karen x

    Reply

  • gwenlafleur

    |

    Love how these turned out! Such cool compositions… and I really love your interpretation of the theme!

    Reply

  • Joi@RR

    |

    So unique and fun Marsha. What great colors. It’s so amazing to see how Nat’s birds look so different in so many settings. HAPPY ST. PATRICK’s DAY!!! j.

    Reply

  • Michelle LaPoint Rydell

    |

    Beautiful work with the theme Marsha! I love your opposite colors, and how you layered the birds!

    Reply

Leave a comment

Opposites Attract – Cheiron Brandon

CS Opposites Attract logo

It is another Tuesday and therefore time for my Creative Squad to show you a fun project. The theme for March is Opposites Attract and the team will use my new Bird Foam Stamp, Rubber Stamp and Stencil Set. Just as opposite colors on a color wheel highlight one another, or yin and yang fit together so comfortably, sometimes the best is brought out when we celebrate extreme differences!

So here is the gorgeous Cheiron Brandon with her beautiful interpretation of the theme in form of an art journal page

—————————————————————————————————–

Cheiron March Headshot

I had all kinds of thoughts when I heard the theme “opposites attract”.  I decided that since I love bright rainbow colors so much, I would try to mix up some paints that were a bit of a different palette this month for my art journal page. So for me my opposite was to start out with colors I would not normally use.  I mixed up a bunch of pastel greens, yellows and pink and just went with it!
cheiron thoughts fly by page
I created the pink background with a brayer, then used a stamp from the Kaffee Klatsch stamp set along with some yellow paint to create some texture on the background. I gave my page a border using the Batik stencil.
cheiron thoughts fly by 1_
I wanted to create a scene for my bird so I used the stencil included in the Bird Foam stamp set to create a little garden. I layered the “trees” in different greens and then painted around them with acrylic ink to make them pop a bit. To create the bird I painted some blues onto a separate piece of paper and once it was dry, I stamped over it with the outline bird from the Bird Foam stamp set that I “inked” up with black paint using a foam tool.
cheiron thoughts fly by 2
Once I created my bird, I added some more trees to ground him to the page. Once he was all done, I added a tiny crown, some lavender splatter and a few words to complete the page.
Not my normal color palette, but in the end I love how the colors look!  It’s always great to try something new :)
cheiron thoughts fly by 3
———————————————————————————————————
 I hope you enjoy Cheiron’s project as much as I do. I love how she stamped the patterned bird side of the foam stamp on a pre-painted piece of paper and then cut it out, as well as her layering of the stencil shapes in the background and in the foreground. And the crown…too cute!
Besides the supplies listed below, Cheiron also used acrylic paints, music sheet paper and a pencil to create this art journal page:
SuppliesCJS


Maybe you will even play along -we would love to see how you interpret the theme – email me how you used my stencils and stamps with the theme and email me an image – I would love to share what you did at the beginning of next month!

See you next Tuesday for the another project with the theme ‘Opposites Attact’.

Comments (6)

  • Karen Petitt

    |

    I love how you have used this new bird, in fact checking back through the posts I have been completely and utterly inspired by all of the DT! The way you have used colour and the paints really works for me because it feels like it’s something I too could achieve! Many thanks for the blog hop, the fabulous inspiration and for sharing your art with us Karen x

    Reply

  • Joi@RR

    |

    Bright, springish, and fun Cheiron. You made a lovely world for Nat darling bird! j.

    Reply

  • Gwen L.

    |

    Great page Cheiron! I love the way you used the stencils to create a scene… and the little crown on the bird! Great idea to use colors that are the opposite of your usual palette – I love that idea!

    Reply

  • Michelle LaPoint Rydell

    |

    This is such a beautiful page Cheiron! I LOVE the colors you used, and the way you created a scene with the stamps and stencils – the stamps in the background make awesome clouds! Cute crown too!

    Reply

  • Miriam Prantner

    |

    Wonderful page! I love the bright pink with the greens and how that cool blue of the bird contrasts.

    Reply

Leave a comment

Opposites Attract – Gwen Lafleur

CS Opposites Attract logo

I am so excited as this is the first Tuesday for my Creative Squad to show you a fun project. The theme for March is Opposites Attract and the team will use my new Bird Foam Stamp, Rubber Stamp and Stencil Set. Just as opposite colors on a color wheel highlight one another, or yin and yang fit together so comfortably, sometimes the best is brought out when we celebrate extreme differences!

So here is the wonderful Gwen Lafleur with her amazing and stunning interpretation of the theme in form of an art journal page

—————————————————————————————————–

Gwen March Headshot

For the this month’s theme of “opposites attract,” I decided to interpret it in two ways. You can see lots of complementary colors used throughout the piece, but the main way I created “opposites” was by contrasting bright / shiny / new with old / rusty / brown. I tend to use this type of contrast in a lot in my work, so I thought it would be fun to really emphasize it for this piece.

Opposites - Bird Stamp Art Journal Page - Gwen Lafleur

To make the page, I created a background with black gesso and layered some color on top to create a kind of distressed look, but using a mix of bright and dark colors. To add more old / new contrast, I used the Circuit stencil with gold ink. For the birds, I stamped each side of the foam stamp plus the rubber stamp on cardstock, then decorated each of them separately.
 Opposites-Bird-Stamp-Art-Journal-Page-Close-ups2-Gwen-Lafleur-e1456529458962
The bottom bird used the rubber stamp, and he’s all about bright colors, beads, gloss and shine. The middle bird used the detailed side of the foam stamp and he’s a fun little hybrid. I made the top look rusty, but layered shiny dimensional paints on top. I cut out a section from the bottom following the lines of the stamp and added some fabric – it’s vintage sari fabric, but it has shiny sequins on it. The top bird is from the solid side of the foam stamp and is all old and rusty with no shine or bright colors. I used acrylic paints, texture paste, and Viva Rusty paint and patina to make it look like a piece of rusted metal, then added a vintage metal button for his eye.
Opposites-Bird-Stamp-Art-Journal-Page-Close-ups1-Gwen-Lafleur-e1456529458962
To finish, I positioned each of the birds on the page and then used the leaf stencil that comes with the stamps and stenciled the base of the leaves where I wanted them. I kept the same pattern as I added the leaves – brighter green at the bottom moving to brown and dark leaves at the top.
It was so much fun to work with these stamps and stencils – they’re so versatile! Plus, this month’s theme was challenging yet enjoyable, and I really love how it turned out!
———————————————————————————————————-
Wow – I hope you enjoyed Gwen’s project as much as I did. I love how she used all three bird stamp surfaces and created them differently yet cohesive and the texture and detail in this page is stunning!
Besides the supplies listed below, Gwen also used several dimensional paints, misc fabric, jewel and metal buttons to create this art journal page:

SuppliesCJS


And maybe you will even play along -we would love to see how you interpret the theme – email me how you used my stencils and stamps with the theme and email me an image – I would love to share what you did at the beginning of next month!

See you next Tuesday for the another project with the theme ‘Opposites Attact’.

Comments (16)

  • Dee Ann O'Brien

    |

    Wonderful birds- inspiring. Great technique directions!

    Reply

    • gwenlafleur

      |

      Thank you so much! So glad you liked it :)

      Reply

  • Karen Petitt

    |

    Oh no and dang! I now have to change what new stamps and stencils I had planned to purchase in May. This is just dang! For me it was an OMGee when I hopped over, I love the rich deep colour which is so perfectly opposite yet matches the rusted layer. I own one of Natalie’s stamp and stencils sets and I knew when I could I was going to purchase more of her tools. Today’s post has reminded me not to plan ahead so much because I need these new stamps and stencils so very much! Just as I thought it couldn’t get better this month you guys release these beautiful products.
    Thank you so much for the blog hop, the awesome inspiration and for sharing your gorgeous art with us Karen x

    Reply

    • gwenlafleur

      |

      Thanks so much Karen! I have to admit, this is a pretty fun stamp set… plus it’s 3 stamps and one stencil in one! You really kind of have to have it ;)

      Reply

  • VikiB

    |

    That is an awesome piece! I love the contrast and the addition of the circuit looks so cool.

    Reply

    • gwenlafleur

      |

      Thank you so much! I couldn’t resist adding the circuit stencil as part of the opposites theme – so glad you like it!

      Reply

  • alisa

    |

    Love the creative team! Great ideas

    Reply

    • gwenlafleur

      |

      Thanks Alisa! I’m thrilled to be included in such fantastic company :)

      Reply

  • cheiron

    |

    Amazing page Gwen. I am loving the colors and texture!

    Reply

    • gwenlafleur

      |

      Thanks Cheiron! I can’t wait to see what you did for this challenge :D

      Reply

  • Martha Richardson

    |

    I’m so glad to see a Creative Squad! Love the project and tutorial ;)

    Reply

    • gwenlafleur

      |

      Me too Martha! And thank you! It was fun to work with this month’s stamp set :)

      Reply

  • Michelle LaPoint Rydell

    |

    Gorgeous page Gwen! I love how you combined the rusty elements with the bright colors – it really pops!

    Reply

    • gwenlafleur

      |

      Thanks Michelle! I really like the contrast of old and new… glad I’m not the only one!

      Reply

  • Sue Clarke

    |

    I love how you used the Circuit stencil Gwen!
    Makes it seem like branches. Nice job.

    Reply

    • Gwen L.

      |

      Thanks Sue! I thought that was a fun stencil to use for this – it felt like it fit, but still added some cool (to me!) contrast :)

      Reply

Leave a comment

Meet our Creative Squad!


Creative Squad Intro ImageI’m super excited to introduce you to the newest addition of my n*Studio Site:  the Creative Squad!  Maybe you remember that I posted recently that I need to get some help as I am really busy working on my book (details to come later this year) and I feel sometimes there is not enough hours in the day to do all the things I want to do. So,  I reached out to some of my most creative friends to help me out.  And thankfully, four of them agreed!  I am so excited to have these super talented and wonderful friends as a support. Over the next several months, the Creative Squad will be helping with posting some inspiration for you on the blog.

At the beginning of each month, our Creative Squad will be given a theme to work around and a stamp or stencil from my store to use.  Then every week, a different Creative Squad member will post a mixed media project of their own design, inspired by the monthly theme and using one of my new products. And maybe you will even play along -we would love to see how you interpret the theme!

Meet the Creative Squad!

Cheiron Brandon

Cheiron Brandon

Gwen Lafleur

Gwen Lafleur

Marsha Valk

Marsha Valk

Michelle Rydell

Michelle Rydell

Please stop back every Tuesday to the blog for the latest project ideas from the Creative Squad – it is going to be super inspiring and fun!

Comments (10)

  • Maura

    |

    Awesome idea! Congratulations to the fantastic team!

    Reply

  • Jenny Petricek

    |

    Wonderful news–and congrats to all! Can’t wait to be inspired!!

    Reply

  • Joi@RR

    |

    Hello hello to all four of you Creative Squad gals! THIS is VERY exciting. I have to admit…I’m a bit envious though. Helping Nathalie seems like the ultimate creative fun!! I will be ENJOYING your work, for sure.

    So happy that you are doing this Nat. YEAH!!! Your Creative Squad looks SUPER FINE. I’m excited for you and for all of us reaping the benefits too!! XX j.

    Reply

  • Marit

    |

    What a creative group of women you have in the squad Nathalie… their projects will be awesome for sure! Congratulations ladies, have fun!

    Reply

  • JoAnn

    |

    Sounds like fun – anything you do Nathalie is ok by me!

    Reply

  • Gwen L.

    |

    Thanks for the welcome! So excited to be joining the team!

    Reply

  • Sue Clarke

    |

    Congrats and welcome to the new creative squad!
    I’m looking forward to getting inspiration from you.

    Reply

  • Michelle LaPoint Rydell

    |

    Thanks for having me on your squad Nat! I’m so excited to be creating with this talented group of women! We are going to have fun!!!

    Reply

  • marsha.

    |

    Yay! :-D So happy to be on (in?!) your Creative Squad with these three fabulous artists!!!

    Reply

  • Sanna

    |

    congratulations!!! can´t wait to see what you make!!!

    Reply

Leave a comment