Creative Squad

Today is the Day – Michelle Rydell

cs-october-theme

This Tuesday, Michelle Rydell from my Creative Squad is happy to share with you a gorgeous art journal spread using my new Versailles ArtFoamies and inspired by this month’s theme: “Today is the Day.”  I invite you to join me and my Creative Squad to stop procrastinating and to make today the day you finally tackle that artsy thing you’ve been meaning to get to for so long.  Start that new project you’ve been planning for months.  Try out that new product you bought ages ago.  Experiment with that new technique you read about last year.  Try it!  Today is the Day!

michelle-october-headshot

I have seen Art Foamies videos on youtube and always thought they looked like fun. I love their chunky look, and have been especially intrigued by the concept of the “stamp buddy” that comes with each foam stamp!  I was so excited to find out that Nat has a new line of gorgeous Art Foamies stamps! So finally, Today is the day I get to try them out!  I decided to use the Versailles set – I love how the intricate patterns of the two stamps fit together!  Here’s what I did to create my page…

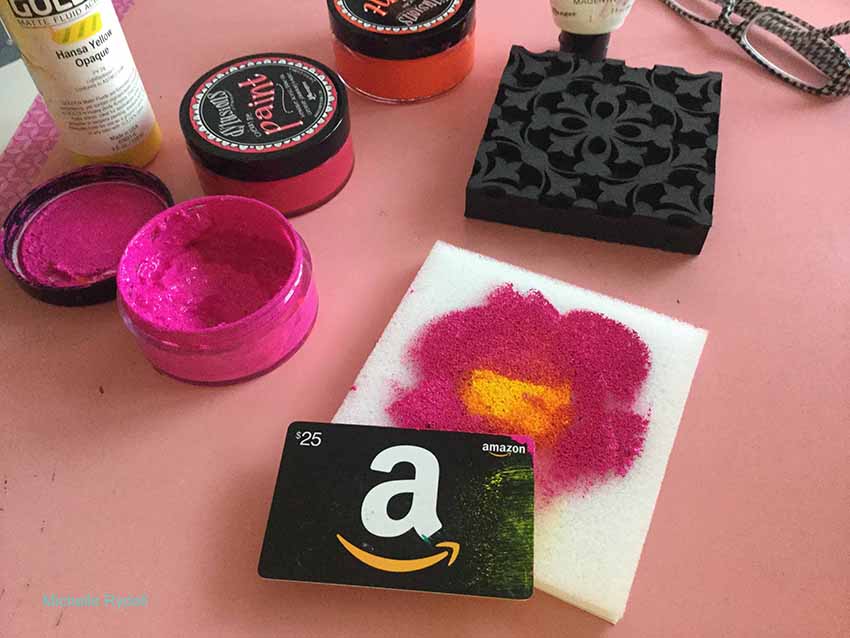
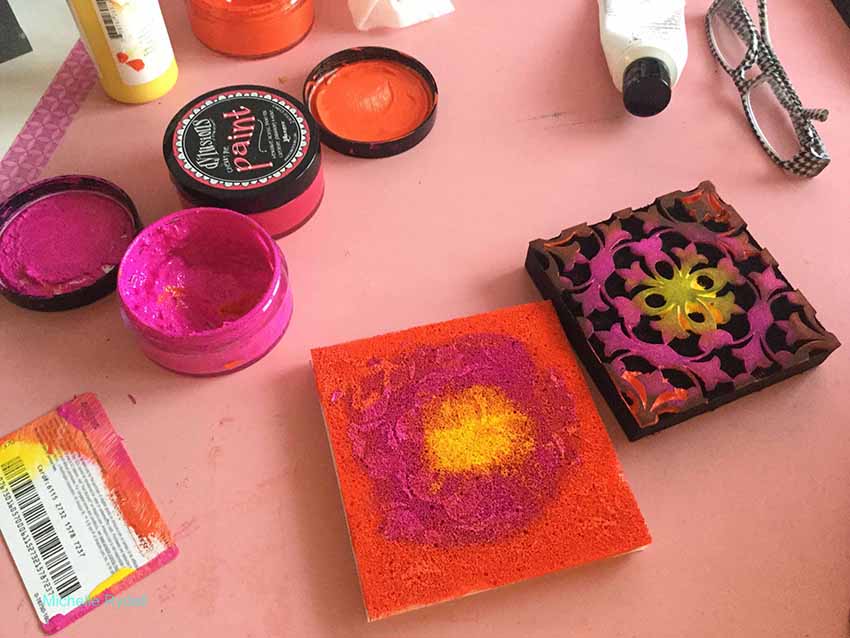
I got out some warm colors of acrylic paint – yellow, pink and orange; and scraped them onto the stamp buddy, with the lightest color in the middle and the darker colors radiating outward. At first I used a credit card, but then decided it would be more fun to use my fingers – ha…
rydell-today-1

rydell-today-2

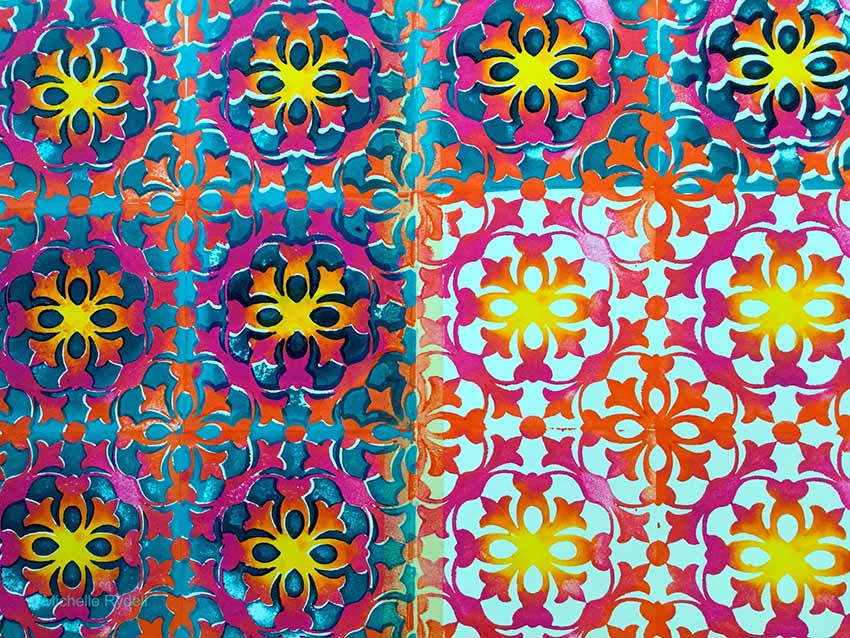
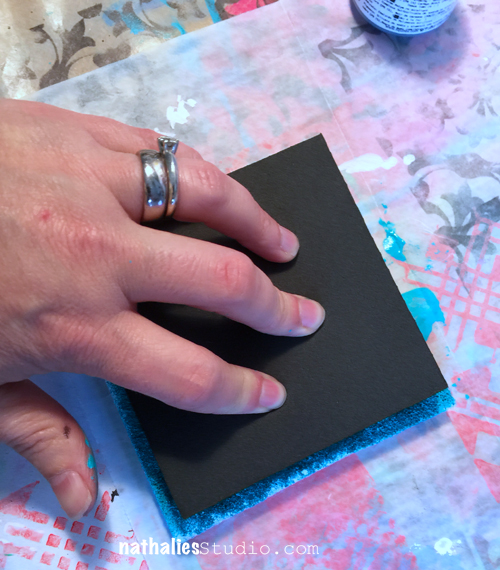
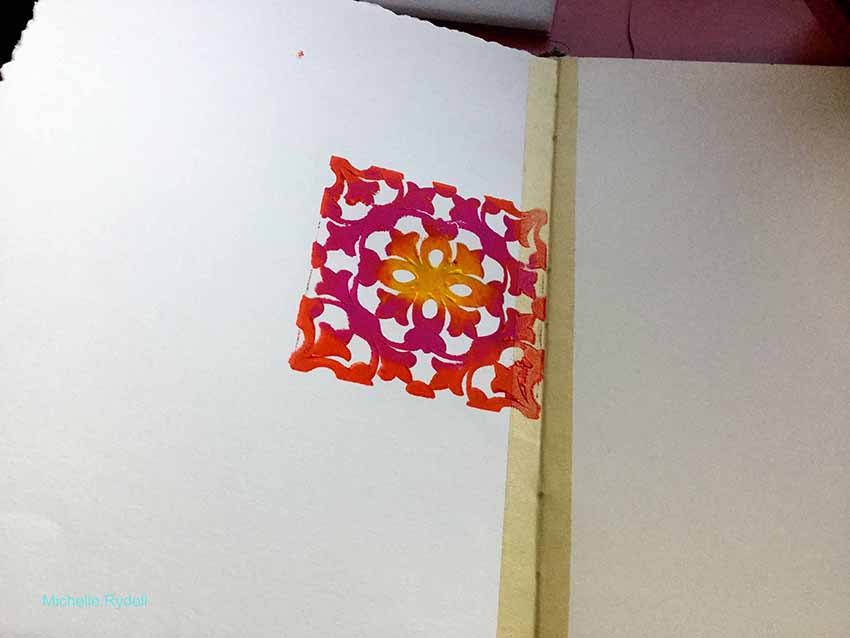
I pressed the stamp into the stamp buddy to distribute the paint, and stamped it onto my art journal spread. WOW it looked gorgeous!  I was so excited to see how the colors created an ombre effect!
rydell-today-3

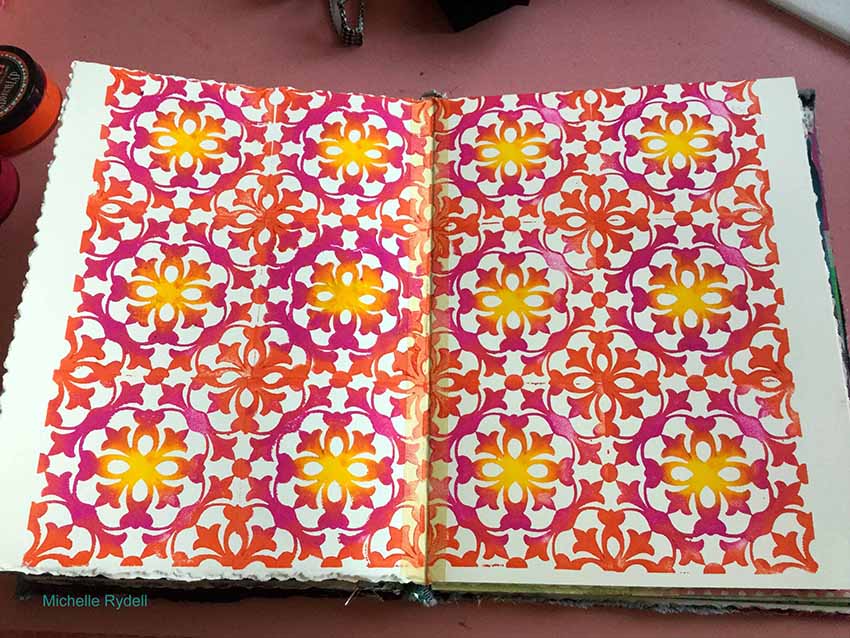
I decided to cover the whole page with this stamp, and I did not have to re-ink the stamp buddy at all!  That thing really holds a lot of paint!!! When I was done it reminded me of a tiled wall.  I almost didn’t want to do anything else to it!
rydell-today-4

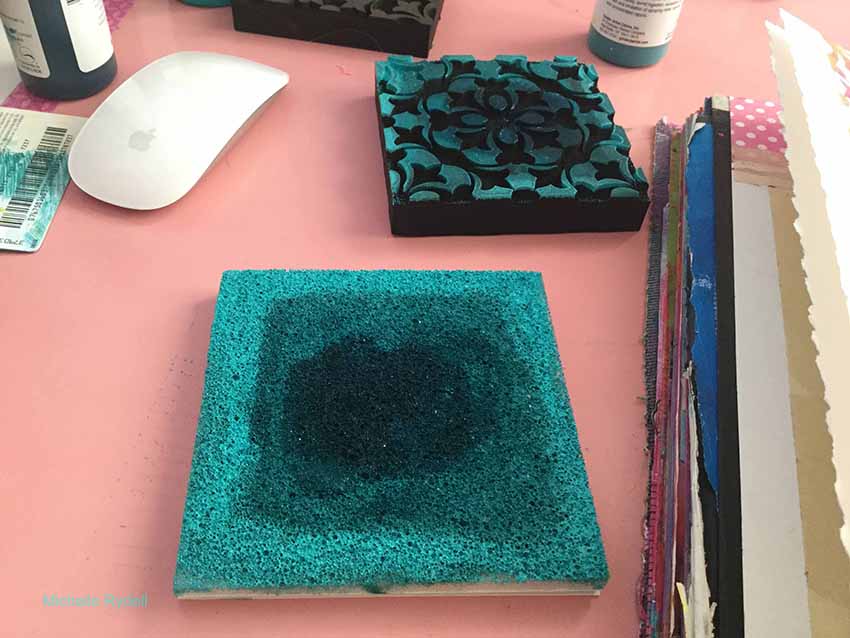
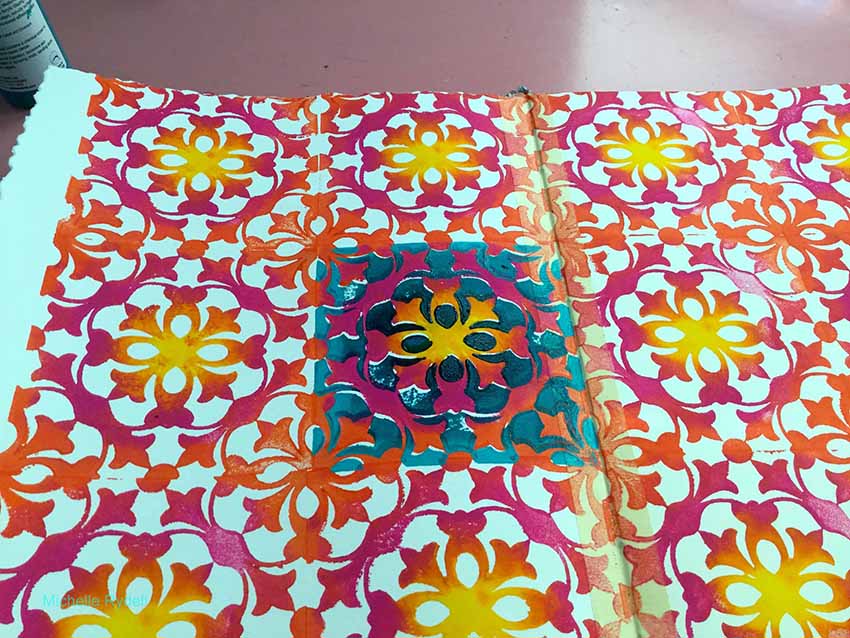
I decided to repeat the ombre effect with the second stamp in the set; only this time use all cool colors, and instead of having the lightest color in the middle, I put the darkest.
rydell-today-5

I stamped the second stamp onto my page and actually said EEK out loud – it looked so pretty!  I LOVE how the images fit so easily together.  This is truly a new experience in stamping!
rydell-today-6

rydell-today-7

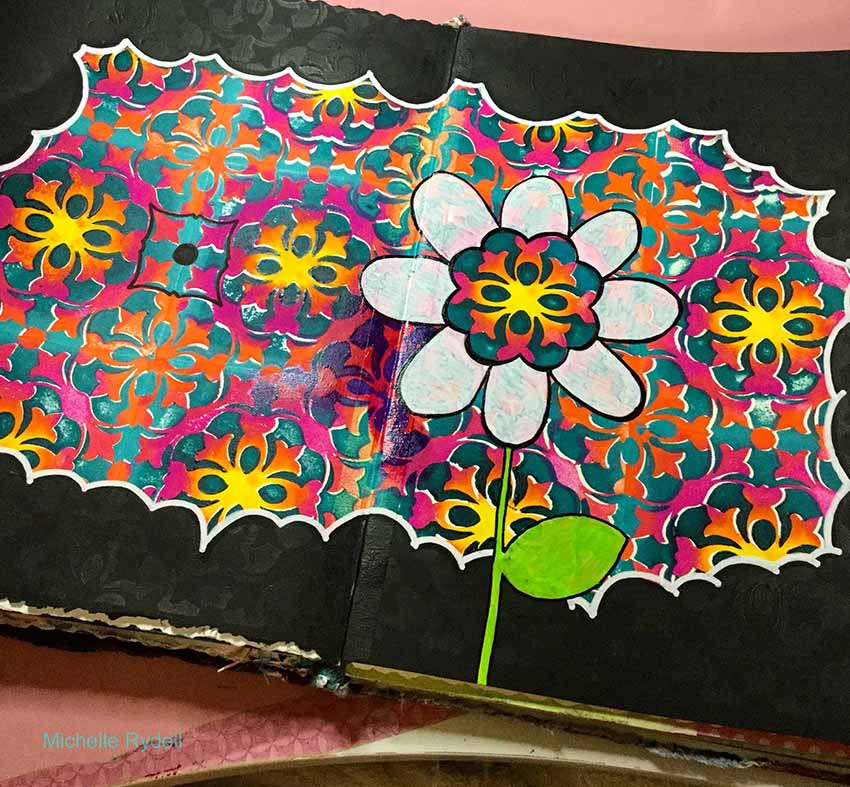
I wanted to cover up the blank edges of the page, so I decided to paint a black, cloud-like frame to make the colors pop even more.  At that point I just stared at the pattern for a minute, to see what I could see… and out came a flower!  I used part of the pattern for a colorful center, and drew and colored the petals and stem with paint pens. After that I realized that I needed to differentiate the flower from the background a little more, so I added a magenta glaze to the background.  You can just see the beginnings of that behind the bottom left few petals in this photo…
rydell-today-8

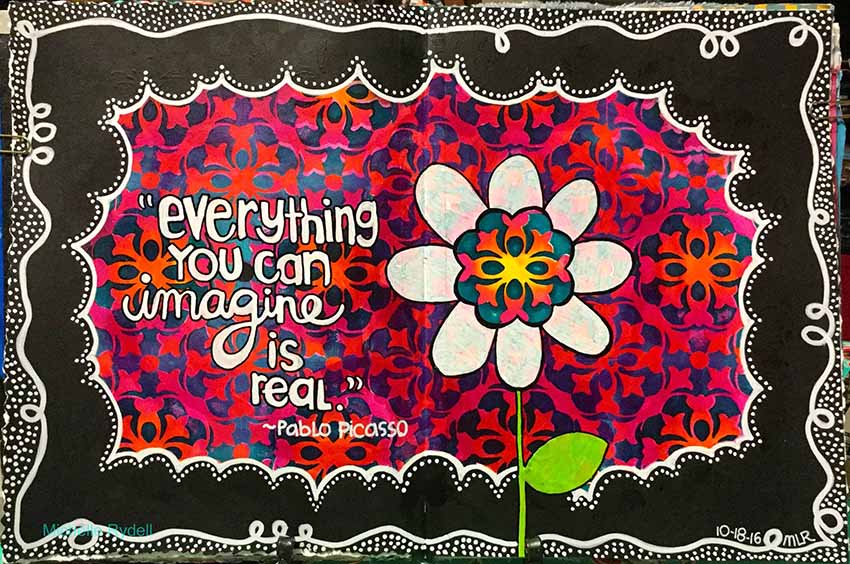
And here is my finished page.  I finished glazing the background, did some doodling in the black frame area, and added a quote with a white paint pen…
rydell-today-9-1


I love the super juicy background that Michelle created by using both the positive and negative Versailles stamps together!  And the whole thing really pops with that cute black and white frame around it.  Here are the supplies Michelle used – note that some of the links are affiliation links:
SuppliesCJS

Maybe you will even play along with us -I would love to see how you interpret our monthly themes. Email me how you used my stencils and stamps with the theme and email me an image – I would love to share your projects in my next “n*Spiration From Around the Globe“.

See you next Tuesday for another project from the Creative Squad!


Comments (10)

  • Dee Spillane

    |

    Wow! This is wonderful. Fantastic stamps with great color yay!

    Reply

  • Cindy

    |

    Always love your work, Michelle … so colorful and bold, and happy!

    Reply

  • Jessica Sporn

    |

    This is just beautiful. I love Nat’s foams and what you created with them. Gorgeous.

    Reply

  • Meg

    |

    Michelle, this is gorgeous!!! ❤️

    Reply

  • Kim

    |

    This is just a stunning page … big fan of Julie’s ArtFoamies, so the product is wonderful, but this takes it to a whole new level with the negative stamp included as a set, WOW. Always love seeing your work … thanks for sharing!

    Reply

  • Marit

    |

    I love how you explain every step and thought along the way from beginning to end… awesome post Michelle!

    Reply

  • Kandy Gordecki

    |

    So creative! You amaze me how your ideas just keep coming!

    Reply

  • Sue Clarke

    |

    I really enjoyed seeing how the pages progressed and ended up with such a colorful, full two pages of pattern. Delightful!

    Reply

  • Kathy P

    |

    Totally awsome—I love it!!!! So colorful, cool design!

    Reply

  • Julie Tucker

    |

    This is GORGEOUS! LOVING how you created that background!!!!!!!!!!!!

    Reply

Leave a comment

Yes to all or … In my Art Journal today

natkalbach_yestoall_01

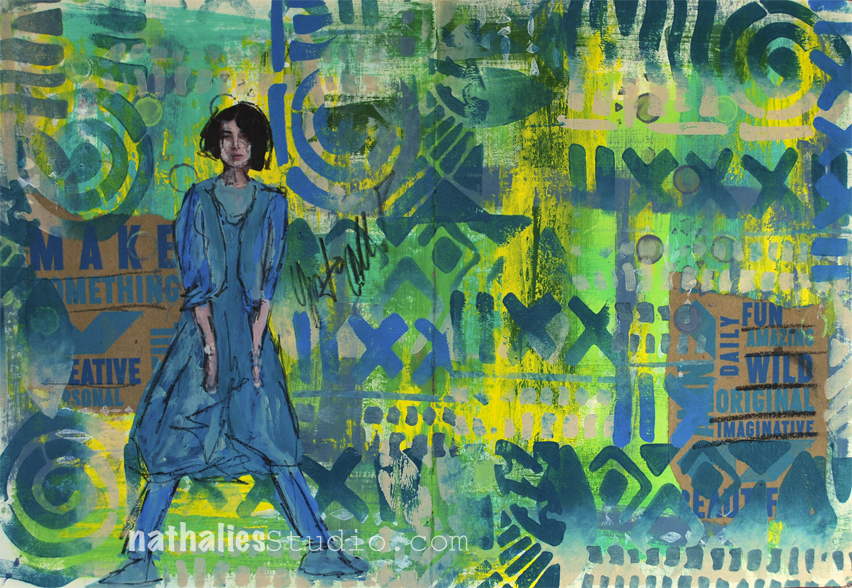
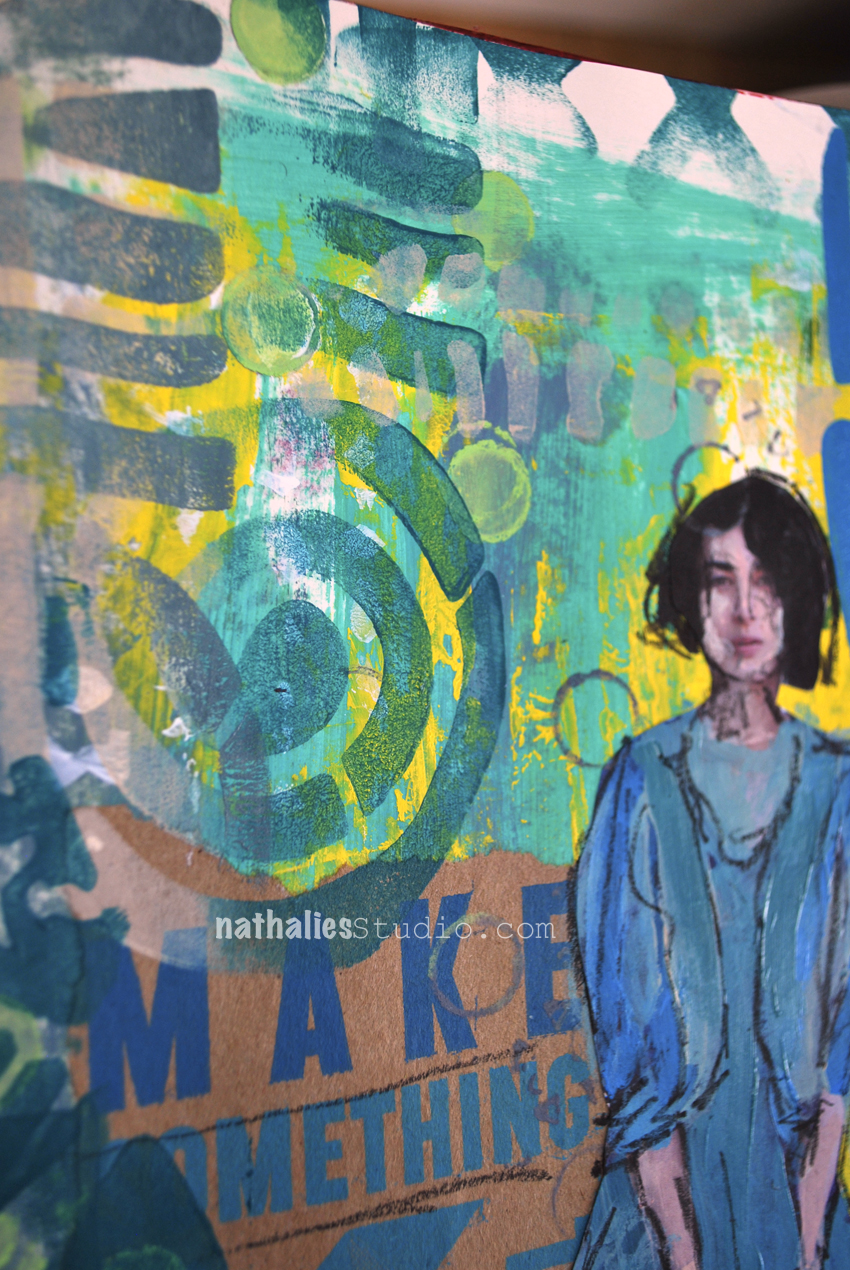
Make something, be creative, be fun, wild, original, imaginative….etc ….YES to all

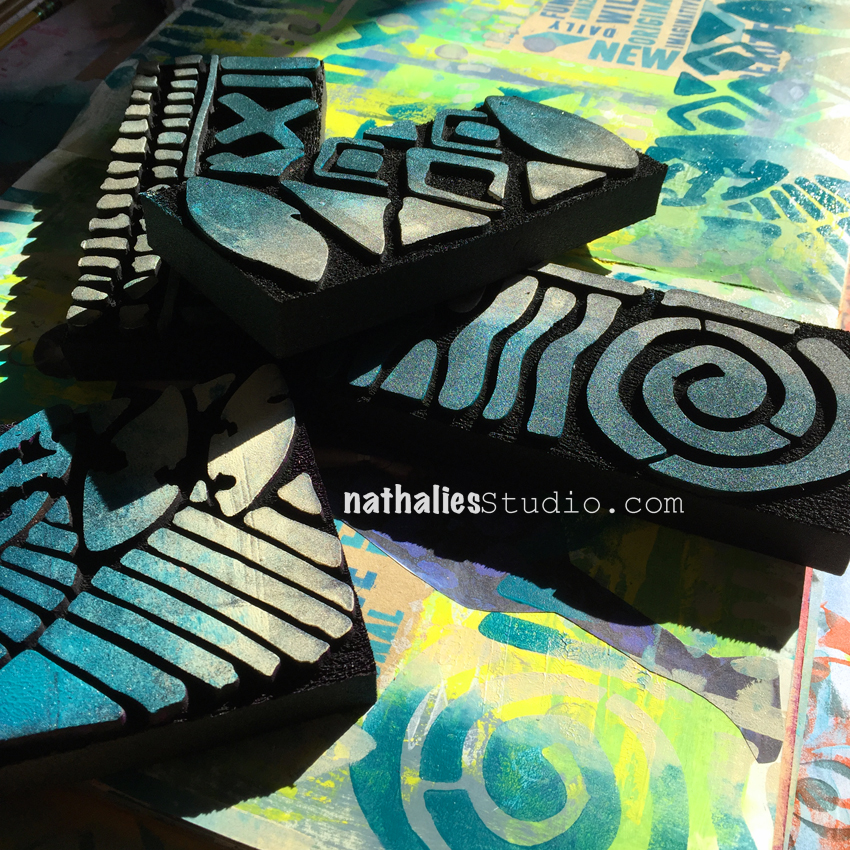
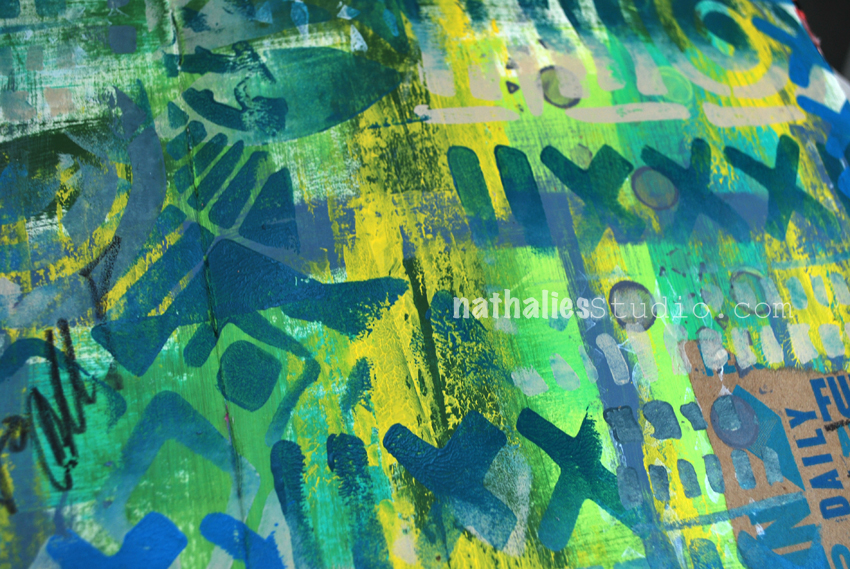
So much fun to play a bit in my art journal using the new ArtFoamies Batik Stamps 1, 2, 3 and 4

natkalbach_yestoall_02

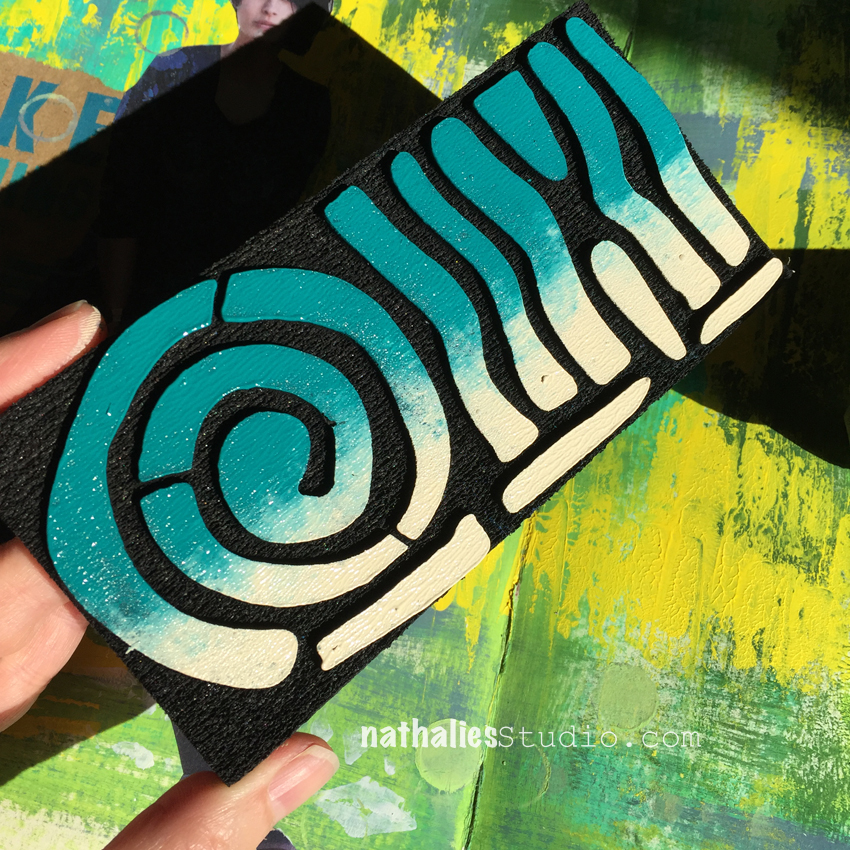
I painted the background and then rolled out two different color next to each other with a brayer- so half the brayer was covered in cobalt turquoise and the other half in unbleached titanium and applied the brayer to the stamps

natkalbach_yestoall_03

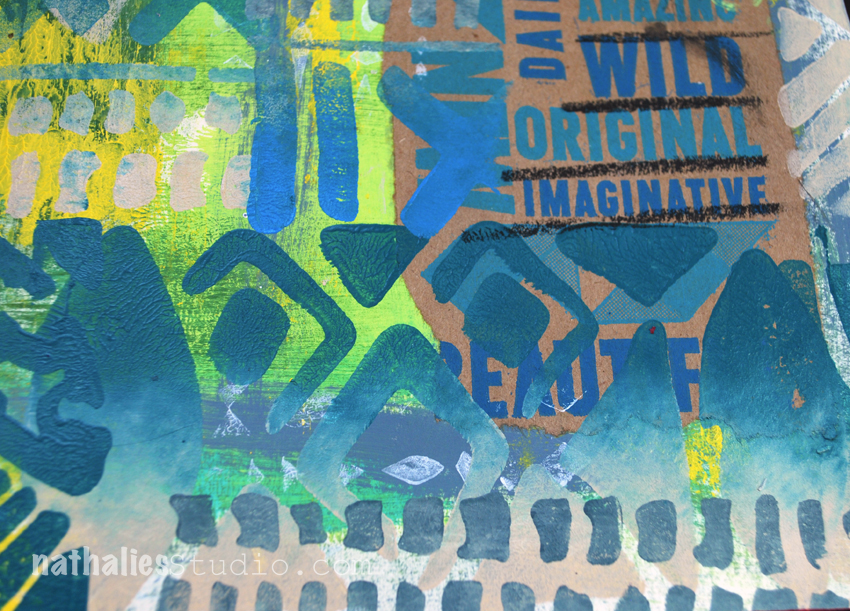
and just went with it. Loved the two colored patterns and the texture this created.

natkalbach_yestoall_04

It tied the background and collaged paper snippets together. The text on the kraft paper is actually from a paper bag.

natkalbach_yestoall_05

I overpainted a magazine image with the same colors using a small brush and then went over with a soft pencil.

natkalbach_yestoall_06

It was a quick and fun art journal page – a much needed creative time after a bit of a long stretch working on a computer.

Here are some of the supplies I used for this spread – note that some links are affiliate links

SuppliesCJS


Hope you have a wonderful day full of happy YES :)

Comments (2)

  • Sherri Scott

    |

    Dear Nathhalie
    I wanted to tell you I had the best weekend ever when you where at the Ink Pad. Thank you

    Reply

  • Kathy P

    |

    Awesome journal pages, Nat—& I love those bold new stamps!

    Reply

Leave a comment

Stepping Up The Game or … In my Art Journal Today

gameup_natkalbach01

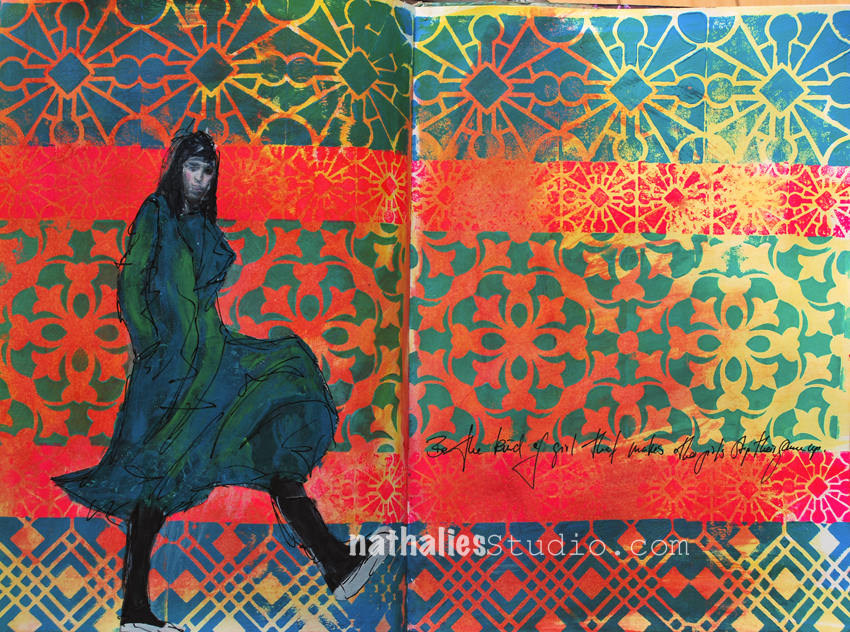
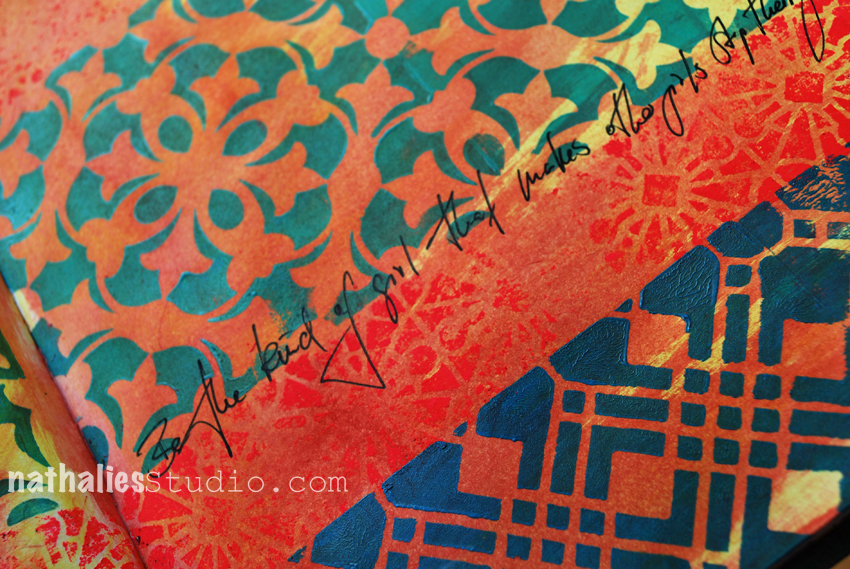
“Be the kind of girl that makes other girls step their game up”

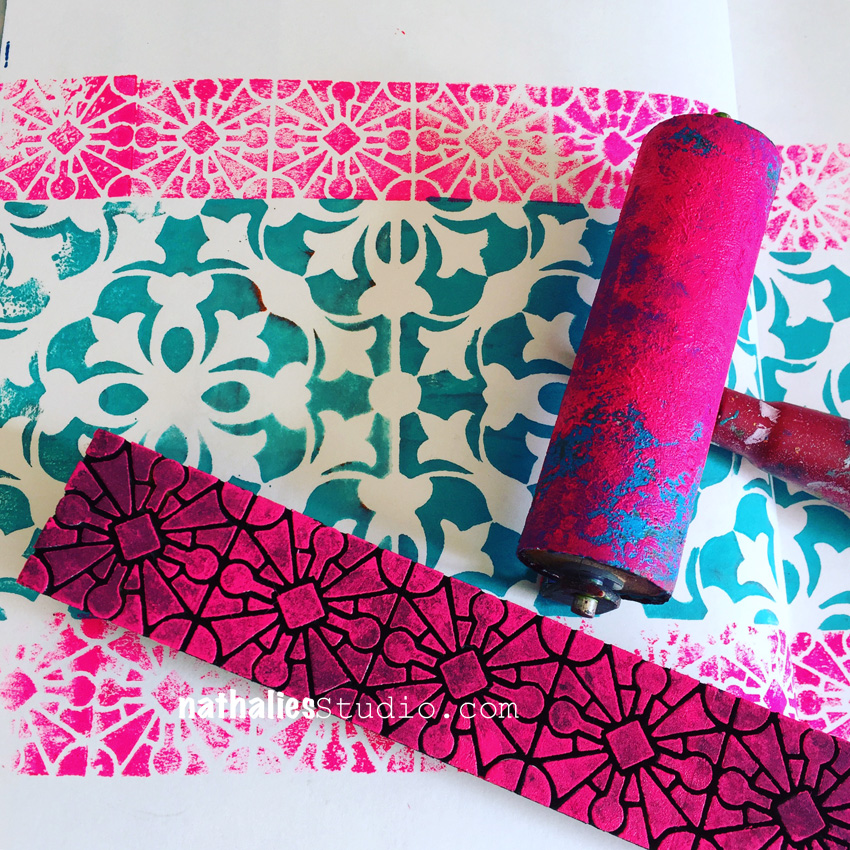
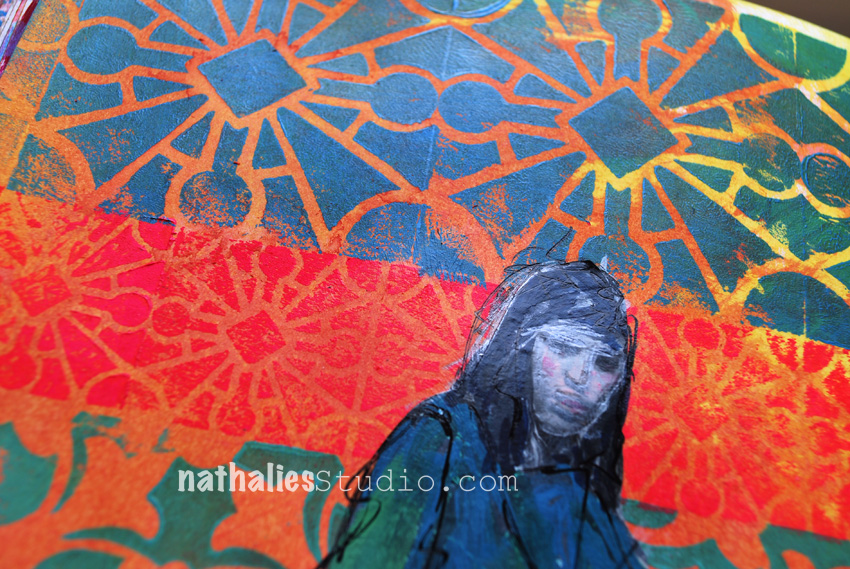
I started this page in one of my classes with the middle pattern showing one of the Versailles Foam Stamps stamped with acrylic paint.

gameup_natkalbach02

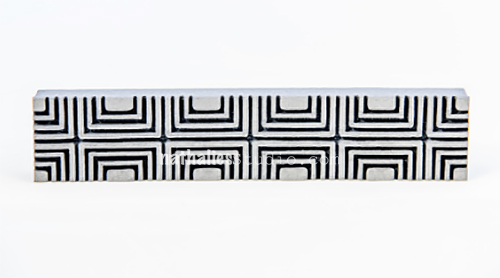
and then kept on going at home adding more patterns using the Buenos Aires Border Stamp and the Buenos Aires Tile Stamp on top.

gameup_natkalbach03

On the bottom I used one of the Chicago Stamps. To finish it up I layered some acrylic ink on top which was mostly resisted by the stamped images. This is a good way to add some color to the background after you stamped.

gameup_natkalbach04

But it looked also very good without the colored backgrounds – next time I guess *wink.

Here are some of the supplies I used for this journal spread – some links are affiliate links:

SuppliesCJS


Hope you are having a wonderful day

Leave a comment

Battles Won or … In My Art Journal Today

battleswon_01natkalbach

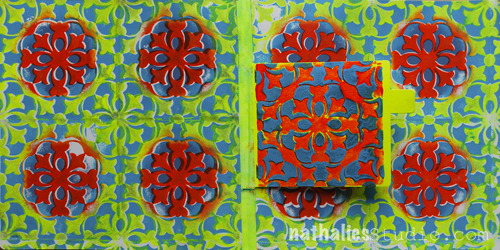
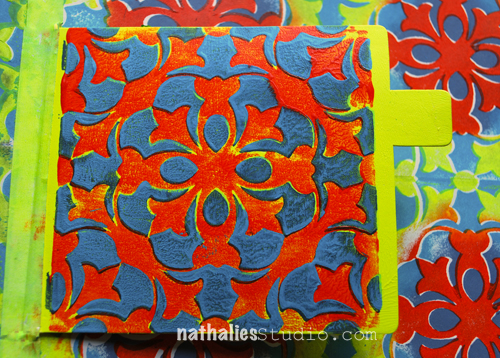
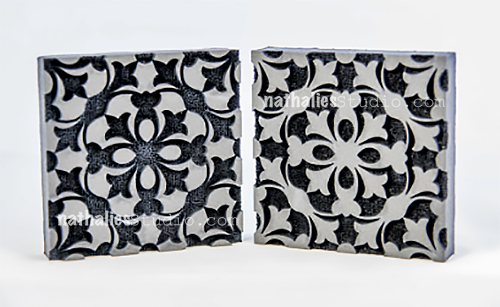
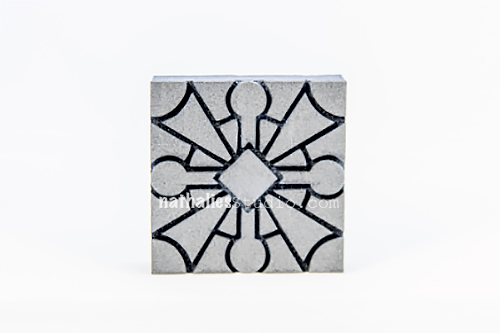
For this Art Journal Spread I played a bit with my new Versailles Positive and Negative Foam Stamp Set.

battleswon_02natkalbach

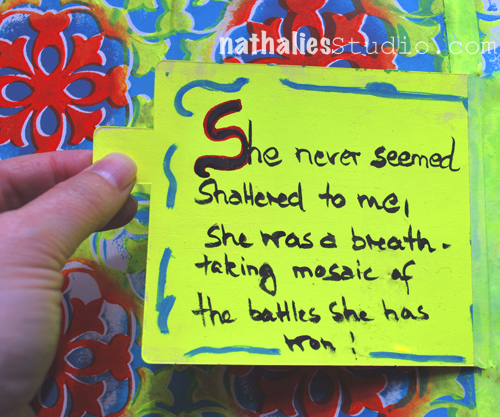
I created a flap for the journaling by using a shipping tag which I applied with artist masking tape to create a hinge.

battleswon_03natkalbach

I love this quote: She never seemed shattered to me. She was a breathtaking mosaic of the battles she has won! (unknown source)

Versailles

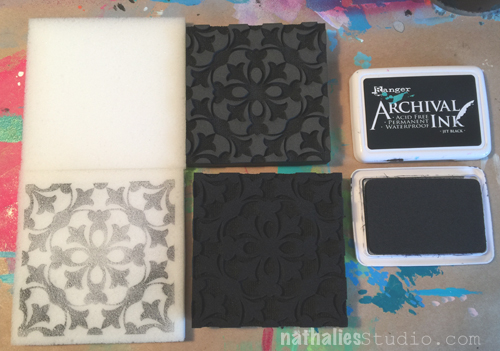
I used the Versailles Stamp Set  which comes with two Foam Stamps – positive and negative pattern- and I also used two StampBuddies, one for each stamp. Now what can you do with the StampBuddy? Wellllllll…some seriously cool stuff. Instead of applying acrylic paint with a brayer onto the Stamp -like in this Rule of Three Video – 3Ways to “ink” up foam stamps – which also shows you two more application ways, you can also use the nifty StampBuddy the following way :)

battleswon_04natkalbach

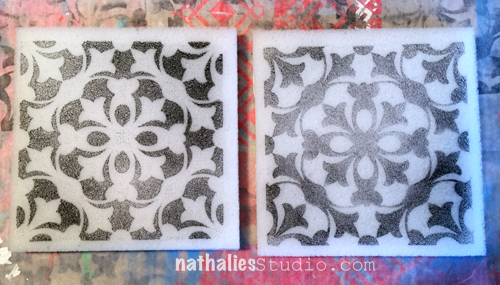
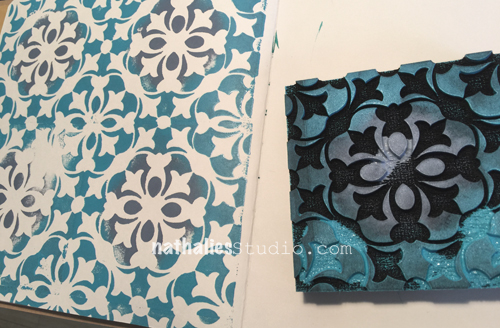
Using Archival Ink (any ink pad that is waterproof) I stamped each of the stamps on a StampBuddy.

battleswon_05natkalbach

The picture above also shows you how the stamps look like when stamped with a solid color – pretty cool – huh?

battleswon_07natkalbach

What I want to do though is coloring the stamps with different colors – like in the picture above.

battleswon_06natkalbach

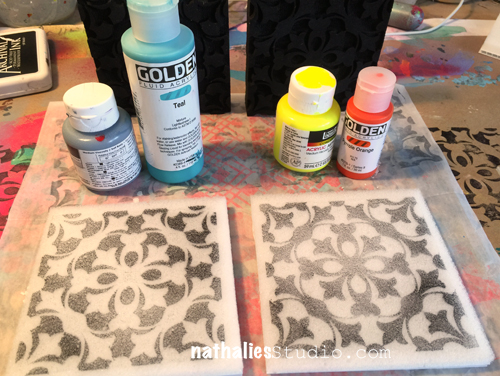
So I gathered the colors that I would want to have appear on the stamps

battleswon_08natkalbach

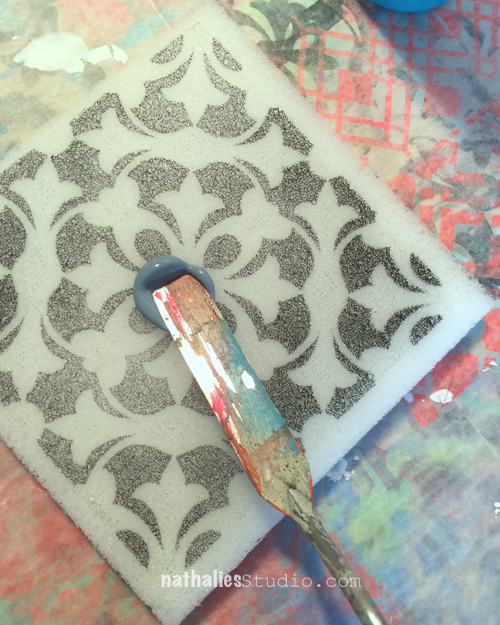
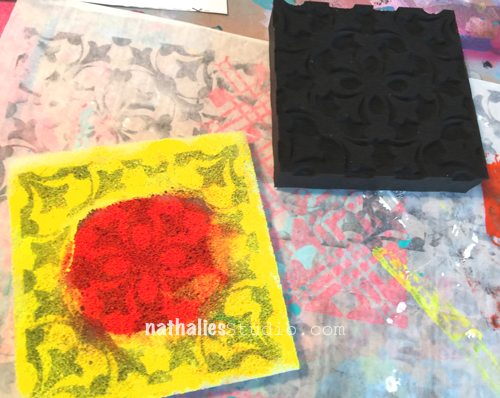
and started to apply grey  acrylic paint using a palette knife into the middle section of the StampBuddy. This is never going to be a perfect circle but that is beyond the point  in my view. Soft Body or Fluid Acrylic paint works best, and you have to work a bit fast to not use too much paint as it soaks quite quickly into the StampBuddy.

battleswon_09natkalbach

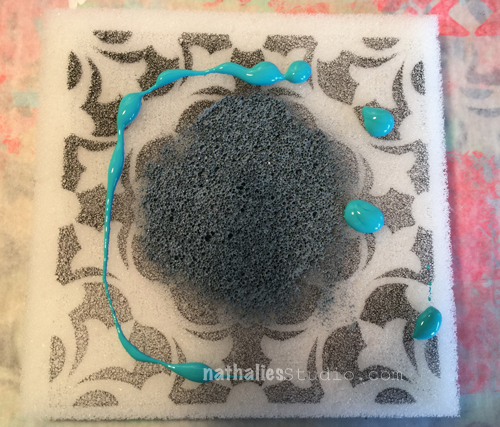
Next I massaged some teal acrylic paint into the remaining uncovered area.

battleswon_10natkalbach

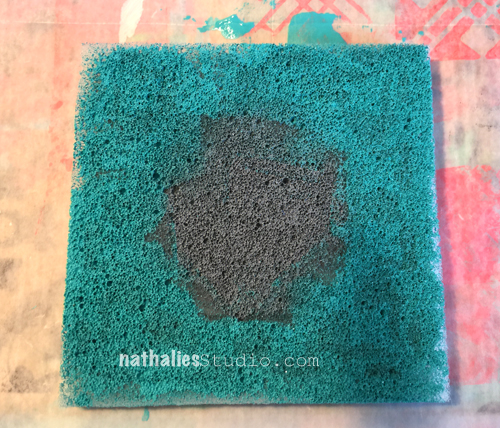
which results into this fuzzy guy – but don’t worry- since your StampBuddy is always approximately the size of your stamp – you will get the different colors at the areas where you want it.

battleswon_11natkalbach

Your StampBuddy has now become your “Ink” Pad – filled with acrylic paint instead of ink.

battleswon_12natkalbach

I stamped a tile background into my art journal by lining up the stamp in rows. You can easily see how to line up the stamp when you look from the side. LOOOOOVEEE!

battleswon_13natkalbach

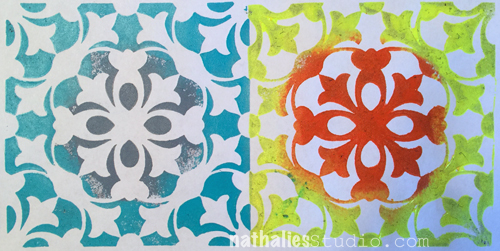
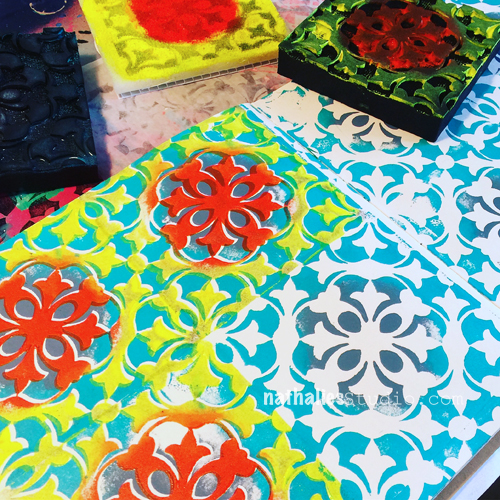
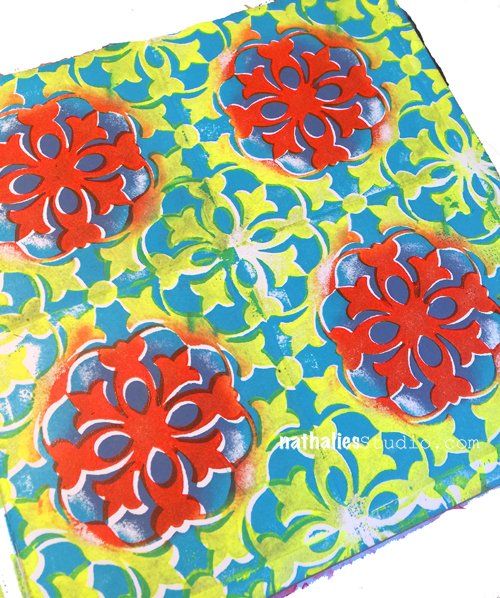
Now I did the same thing with different colors on the second StampBuddy. Since the yellow I used is not opaque you can still see the stamped image peeking through. I could have stamped different rows but HA – here is another cool thing you can do with those stamp sets :)

battleswon_14natkalbach

You can actually just line up the second stamp on top of the other stamped image – again you will see where it lines up from the side – and it will stamp perfectly into the white space filling it up with juicy yummie colors.

battleswon_15natkalbach

I love this – such a cool tile pattern, don’t you think???? Yes- I jumped up and down like a little kid when I did this because it was exactly how I envisioned my stamps to work *Wink.

Just a couple tips:

  • The StampBuddy will contain a lot of paint, so use it only if you have time to actually use it up in one session or when you want to do the different color method
  • I used the paint up by stamping a sheet of gift wrapping paper – boom – one sheet down for the next presents.
  • Clean the StampBuddy when you are done with your creative time, wash it out with water until the water is clear. The stamped archival ink impression will remain on your StampBuddy.
  • Clean your Foam Stamp – I know there are different approaches- I do not clean it super crazy scrubby, but I want most of the acrylic paint off. For me this is a foam stamp and it should remain cushiony as this is what creates this kind of impression and it also let’s me use other paint media than just acrylic paint on it – I will get back to this some time later.
  • Do only use a small amount of paint with your StampBuddy – you will be surprised how far it will get you and it also prevents seeping paint into the creases of your stamps- which a) wastes paint and b) makes it harder to clean up your stamp and c) gives less nice stamped images.

I cannot wait to show you more fun stuff and patterns with my new ArtFoamies Foam Stamps.

Here is what I used for the art journal – some links are affiliate links:

Hope you enjoyed this post and wishing you a wonderful day!

Leave a comment

City Blues or… In my Art Journal today

offbeat01_natkalbach

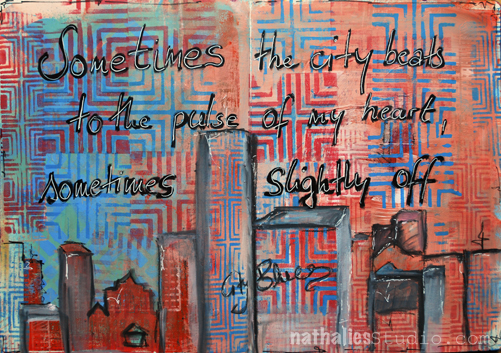
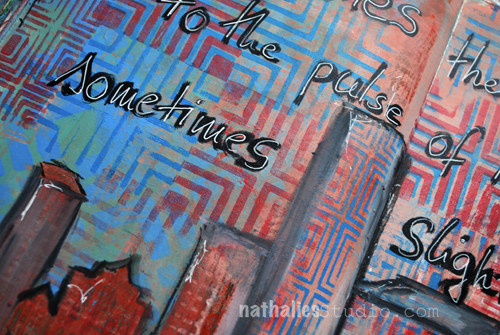
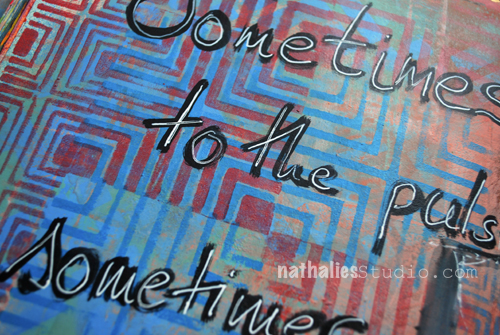
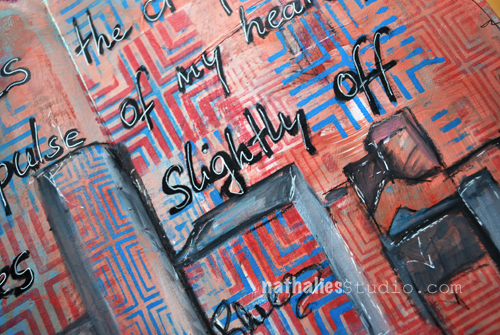
“Sometimes the city beats to the pulse of my heart, sometimes slightly off”

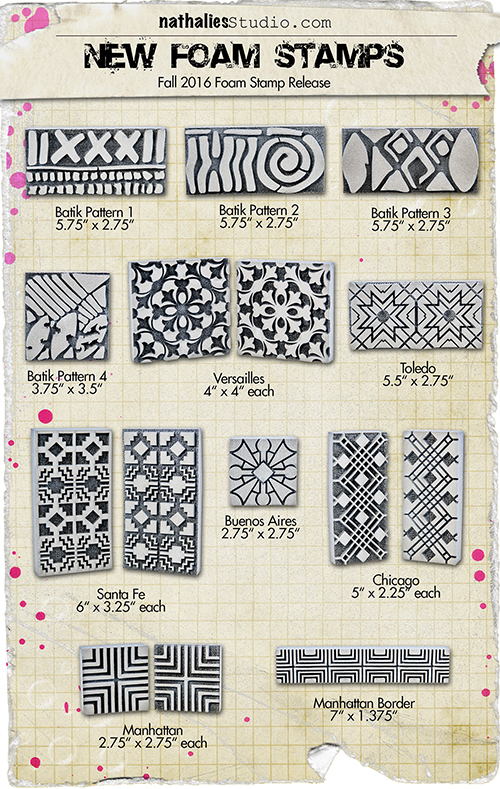
Last week the city was beating slight off my heart pulse, meaning I was grumpy at the city – yup that can happen – but playing with some of my brand new ArtFoamies Designs helped *wink. In case you have missed the big news- check them out  – you can order them now in my store

nstudio-f16-foam-stamp-announcement-500

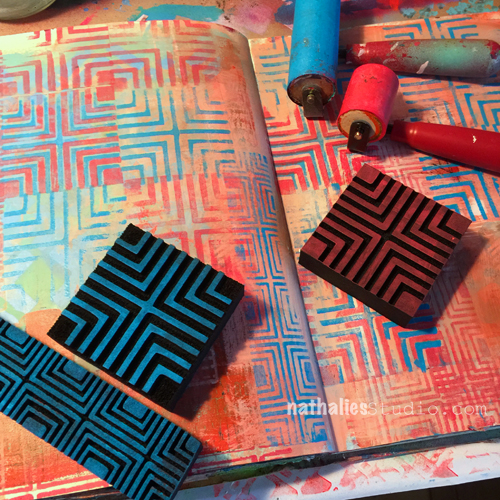
I used the Manhattan Border Stamp and the Manhattan Positive & Negative Stamp Set and went to town for some fun pattern play.

offbeat02_natkalbach

The Manhattan Positive and Negative Stamp Set comes with both stamps and you can use them either alone, together or …even cooler on top of each other – yeah!!!

offbeat03_natkalbach

I played with all three variations and added the Manhattan here and there and then outlined some areas for a city scape.

offbeat04_natkalbach

I added the journaling with a black marker and traced on top with a white signo pen. And…I felt way better about the city again – no more City Blues *Wink

offbeat05_natkalbach

Here is what I used (some of the links are affiliate links):

SuppliesCJS


Which of my new ArtFoamies Stamps do you like the best and would take away any Blues from you?

In case you are in the NYC- Area – there are still a couple seats open for my two day and super duper awesome Art Rules Workshop at The InkPad this coming weekend. Check it out- it is going to be amazing and we will use all the new stamps and even some other fun secret things *wink

October 8-9, 2016 in NYC at The Ink Pad  in NYC, NY

ArtRulesWorkshopNat

Registration open now

Have a wonderful day!!!

Comments (1)

  • Joi @RR

    |

    Wow – awesome new stamps Nat. How exciting. And super fine journal pages created with a new one too!! Xj.

    Reply

Leave a comment

N*Studio ArtFoamies Stamps Release

kalbachartfoamiesstampspreorder

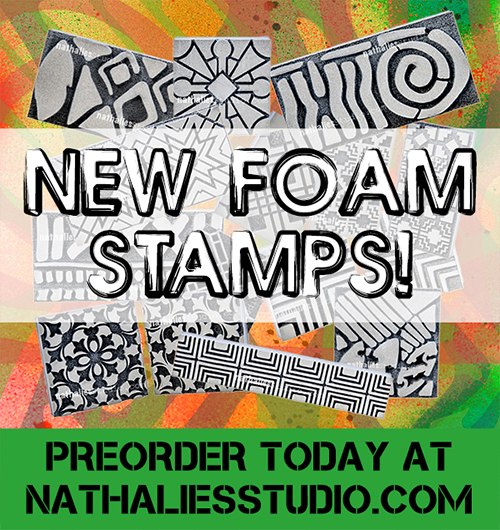
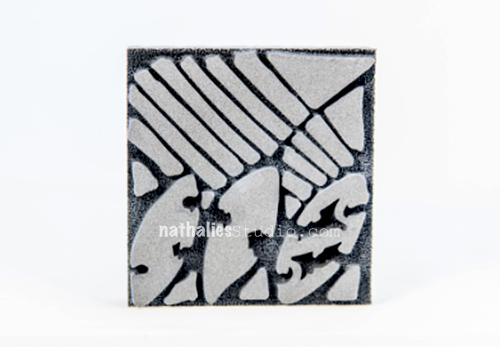
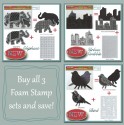
This is BIG NEWS!!!  I am so stoked that ArtFoamies and I teamed up together for a stamp release. I had so much fun working on these brand new foam stamps – all of them inspired by my travels around the world.  Here they are!

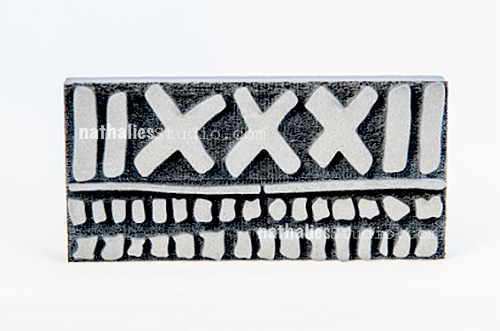
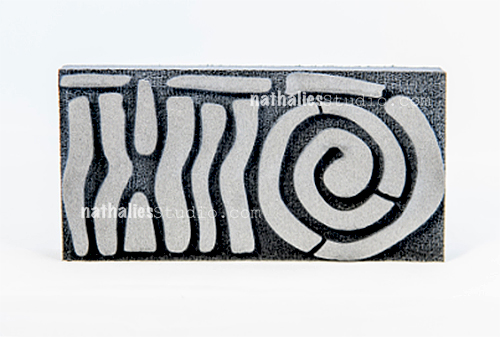
Batik Pattern 1

batik-pattern-1

Batik Pattern 2

batik-pattern-2

Batik Pattern 3

batik-pattern-3

Batik Pattern 4

batik-pattern-4

Buenos Aires Tiles

buenos-aires-tile

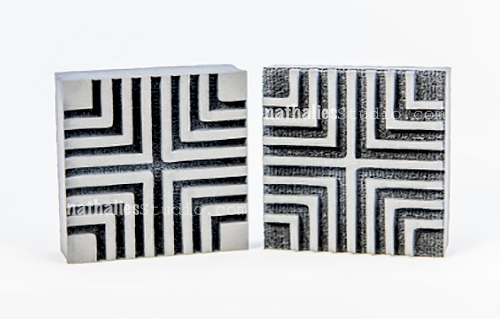
Chicago – comes with two stamps a positive and a negative pattern

chicago

Manhattan Boarder

manhattan-border

Manhattan comes with two stamps a positive and a negative pattern

manhattan

Santa Fe comes with two stamps a positive and a negative pattern

santa-fe

Toledo comes with two stamps a positive and a negative pattern

toledo

Versailles comes with two stamps a positive and a negative pattern

Versailles

I cannot wait to show you loads of fun and creative projects with them! If you want to get your hands on these- you can PREORDER them in my store NOW – they will ship out at the latest the week of October 17th – but probably earlier though as I should get them next week!

Comments (6)

  • Bec Miller

    |

    Wow!wow!wow! Congrats Nat!!
    I love foamies and all of these have to make it in my stash!!

    Reply

  • Sue Clarke

    |

    Batik Pattern 4, 1, and 2 are my favs.
    Congrats on the new line Nat!

    Reply

    • nathalie-kalbach

      |

      thank you Sue – glad you like those – they are also a favorite for me!

      Reply

  • Seth

    |

    Congrats Nat. These are very cool. Kind of like taking a trip around the world!

    Reply

    • nathalie-kalbach

      |

      thank you so much Seth :) Yes they have been inspired by many wonderful places around the world.

      Reply

Leave a comment

Say Yes to New Adventures – Marsha Valk

CS August Say Yes

It’s Tuesday and time for my Creative Squad to share a project with you with this month’s theme: “Say Yes to New Adventures”. Throughout the month of August, the team will use any of my n*Studio Stamps and Stencils they would like to use to interpret the theme. Here in the northern hemisphere, summer is coming to a close and it’s about time to seize the days and go on a little adventure before hibernation! With this in mind, the team will create something that celebrates the spirit of adventure.

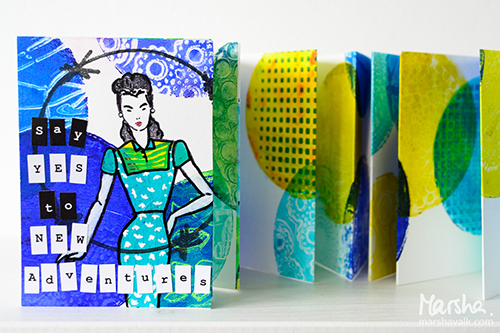
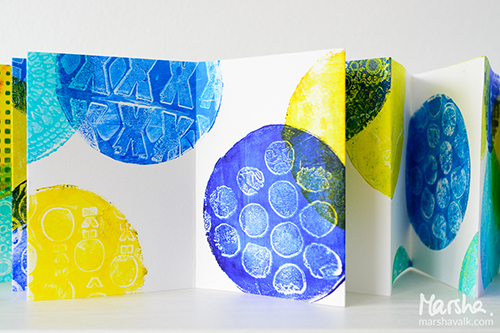
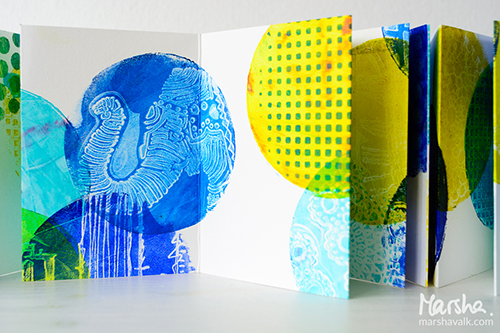
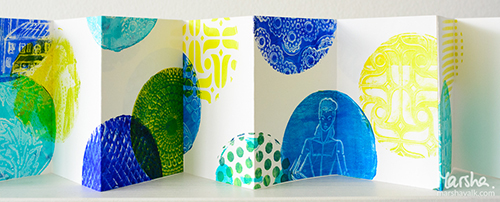
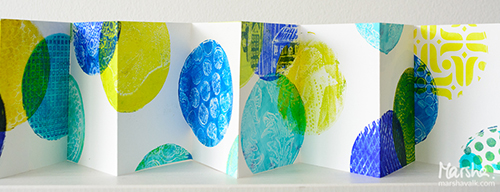
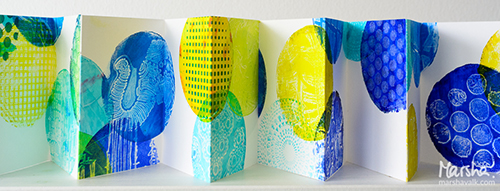
This week we bring you Marsha Valk and her adventure with a new tool and the gorgeous accordion book that resulted from her journey!

—————————————————————————————————

Marsha August Headshot

MarshaValk_nSCS_SayYesToNewAdventures-1

I go on new adventures all the time. I’m on new adventures as we speak. But the problem with new adventures is that it’s not always easy to talk about them. Because they’re new… and I’m only just getting used to the idea… and I don’t yet know how I feel and what I think about it.

MarshaValk_nSCS_SayYesToNewAdventures-7

MarshaValk_nSCS_SayYesToNewAdventures-6

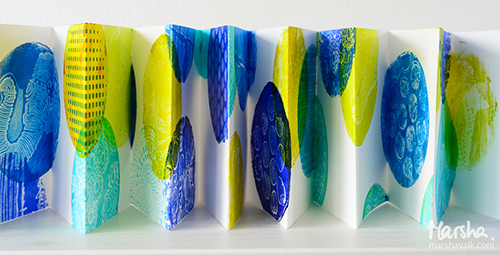
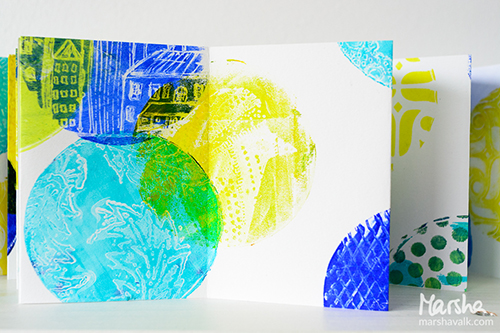
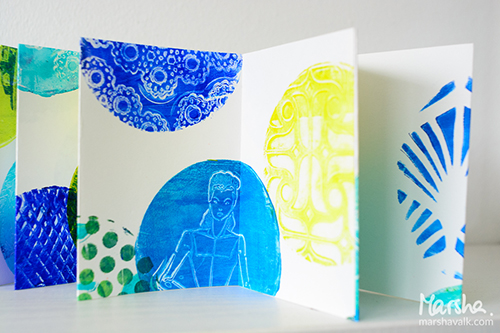
So for this month’s theme I took a simpler approach: I wanted to use something from my stash that I hadn’t used before. I decided to go with the round mini gel printing plate. And I just started printing on a A4 sized sheets of paper: adding paint to the little plate, making marks with my n*Studio Cling Stamps and using some stencils too. The outcome was sometimes unpredictable and messier than I had hoped, but that’s what happens when you go on an adventure!

MarshaValk_nSCS_SayYesToNewAdventures-5

MarshaValk_nSCS_SayYesToNewAdventures-4

MarshaValk_nSCS_SayYesToNewAdventures-3

Once I had a couple of prints, I thought about what I wanted to do with them. I didn’t know. So I thought about how sometimes things get better when you cut them up and I started to cut each print in half.

MarshaValk_nSCS_SayYesToNewAdventures-2

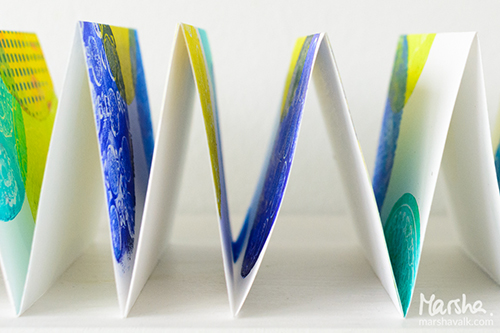
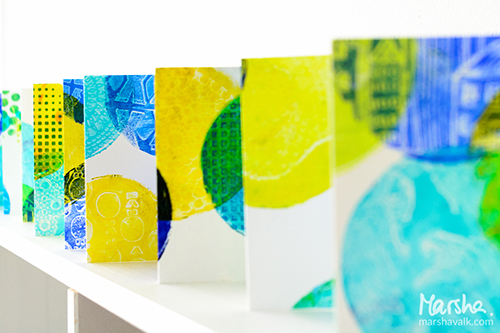
Then I thought: these prints would make nice simple cards. But once I had folded them into cards I thought: or maybe this could be a mini book or mini art journal. So I decided to fold the cards up like accordions and I glued each far left panel behind the far right panel of the previous accordion card.

MarshaValk_nSCS_SayYesToNewAdventures-10

MarshaValk_nSCS_SayYesToNewAdventures-9

MarshaValk_nSCS_SayYesToNewAdventures-8

I haven’t decided if I want to keep it like this or to glue the backs together to make an actual little book. I figure that it will be easier to work on it in this state, so I decided to just embellish the front a bit more and leave the rest blank (and unglued) for now. It’s small and light, so it’s ideal to just doodle in whilst watching TV or to take with me when I have to go on a long train ride. I’m ready to take it on another new adventure!

MarshaValk_nSCS_SayYesToNewAdventures-11

—————————————————————————————————

Marsha’s accordion book is stunning.  I love the super fresh color palette she chose and her bold move to cut the prints in half and reimagine the whole thing.  And of course, look at all those stamps!

Marsha used the supplies listed below (some are affiliate links) as well as Toga Alphabet Stickers:

SuppliesCJS

Maybe you will even play along with us -I would love to see how you interpret our monthly themes. Email me how you used my stencils and stamps with the theme and email me an image – I would love to share your projects in my next “n*Spiration From Around the Globe“.

See you next Tuesday for another project from the Creative Squad!

Comments (2)

  • Joi@RR

    |

    Your new adventure is sooooo FUN Marsha. Love all the white space, all the wonderful stamps/stencils and the colors. What a great idea to put them together in such a fun way. I hope you will share your doodles when you get them finished. j.

    Reply

Leave a comment

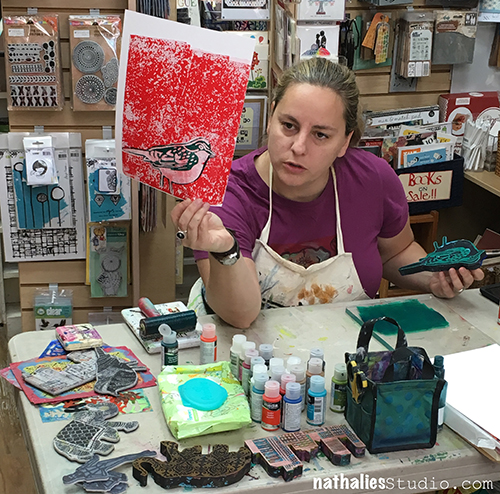
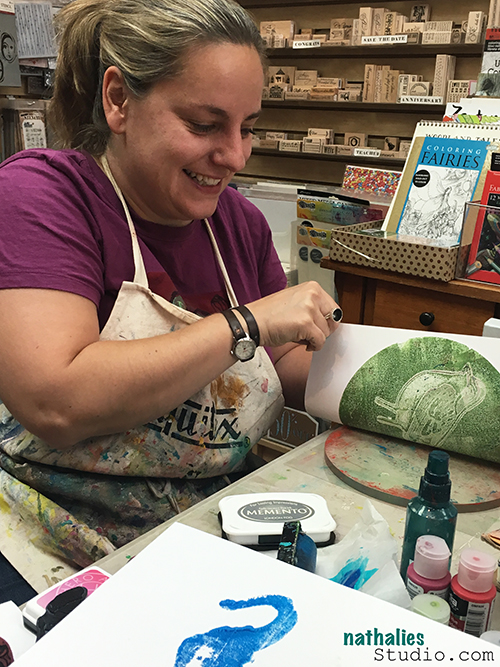
Demos at The Ink Pad in NYC

KalbachInkPadCollage

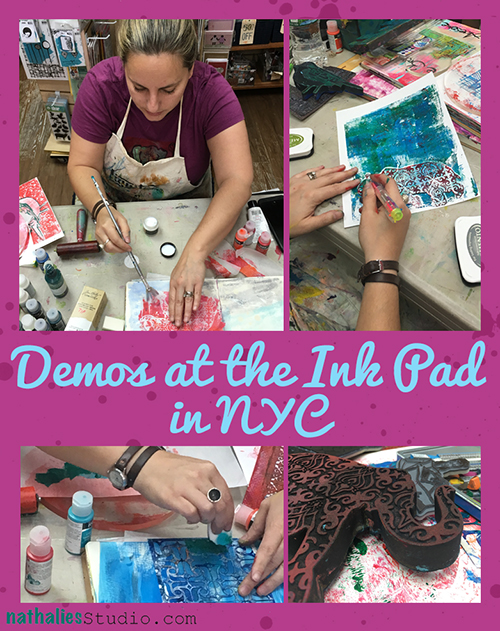
Last month I had a fun afternoon demoing with my stamps at one of my favorite stores – The Ink Pad in New York.

KalbachInkPad01

I showed some easy and fun Gelli-Printing tricks with acrylic paints and foam stamps

KalbachInkPad05

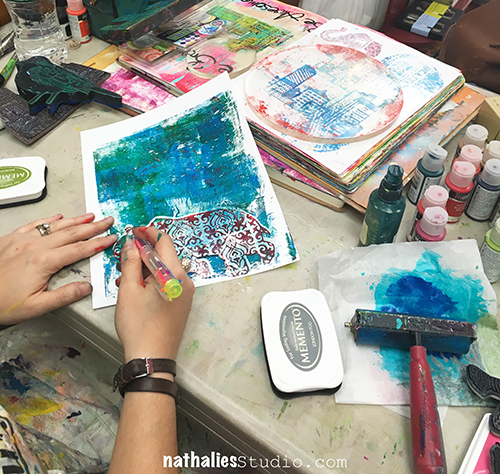
having lot’s of fun with a round plate and using dye inks

KalbachInkPad04

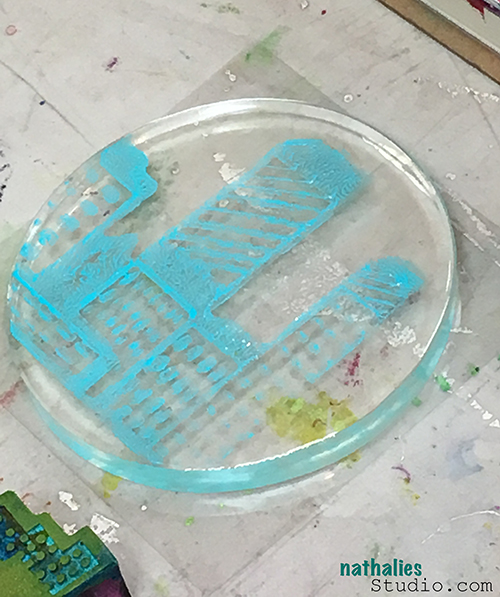
playing with small round printing plates

KalbachInkPad06

having an Elephant in the room

KalbachInkPad02

doing some collage fun

KalbachInkPad03

and stenciling

KalbachInkPad07

and of course taking over the whole store and making a big mess :)


We did a FB Live Stream right from the store on my Facebook Page of some fun techniques – you can see the store, some wonderful people and the store in action if you want :) It was a lot of fun and thank you to all that came, the people who watched the video and joined and Anna and Jane from the InkPad!!!

Comments (4)

  • Julie B

    |

    Looking forward to meeting you in Cali in a couple of months! Thank you for the video/tutorials.
    Reply

    • nathalie-kalbach

      |

      Yeah- so looking forward meeting you in Cali too- it is going to be loads of fun!

      Reply

  • Linda Faber

    |

    Thanks, Natalie, for the great demos! Just what I needed, a refresher lesson on using my gelli plate. I will definitely have to visit that NY store!

    Reply

    • nathalie-kalbach

      |

      Glad you liked it Linda- and yes yes – The Ink Pad is worth a visit in NY :)

      Reply

Leave a comment

Rule of Three – #3 – Three Ways to color with Stamps

Here is another episode of my new series of mini-videos: “Rule of Three”. As we all know all good things come in three and these mini-tutorial-videos will show you all kinds of fun and practical things and techniques coming in three.

+ Expand this article
4comments

Comments (4)

  • Dara Hale

    |

    Love the Rule of 3 series with the stamp sets!!!! I own two and love trying different mediums to play with :) Thank you for sharing with us Nathalie :)

    Reply

    • nathalie-kalbach

      |

      Dara, so glad you enjoyed the video and that you have fun playing with different media and the stamp sets :) Share with me what you did with them – I would love to see :)

      Reply

  • Joi @RR

    |

    Ahhh – loved beginning my Sunday with you Nat! Really professional and informative video. HIGH FIVE!!! Loved seeing all three techniques and your fab stamps too. Xj.

    Reply

    • nathalie-kalbach

      |

      So glad you enjoyed the video Joi! Have a gorgeous rest of the sunday :) Nat

      Reply

Leave a comment