Blog: Foam Stamps

Hood Inspired – Central Ave Foam Stamps

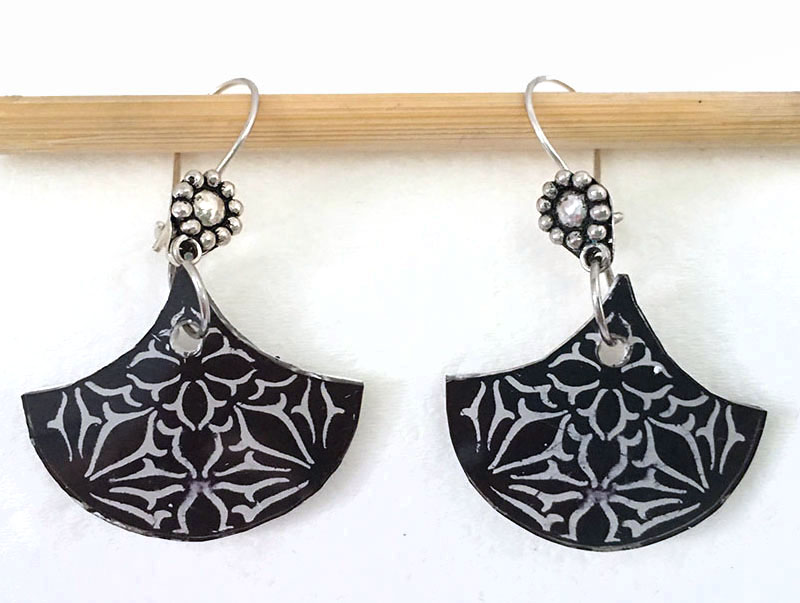
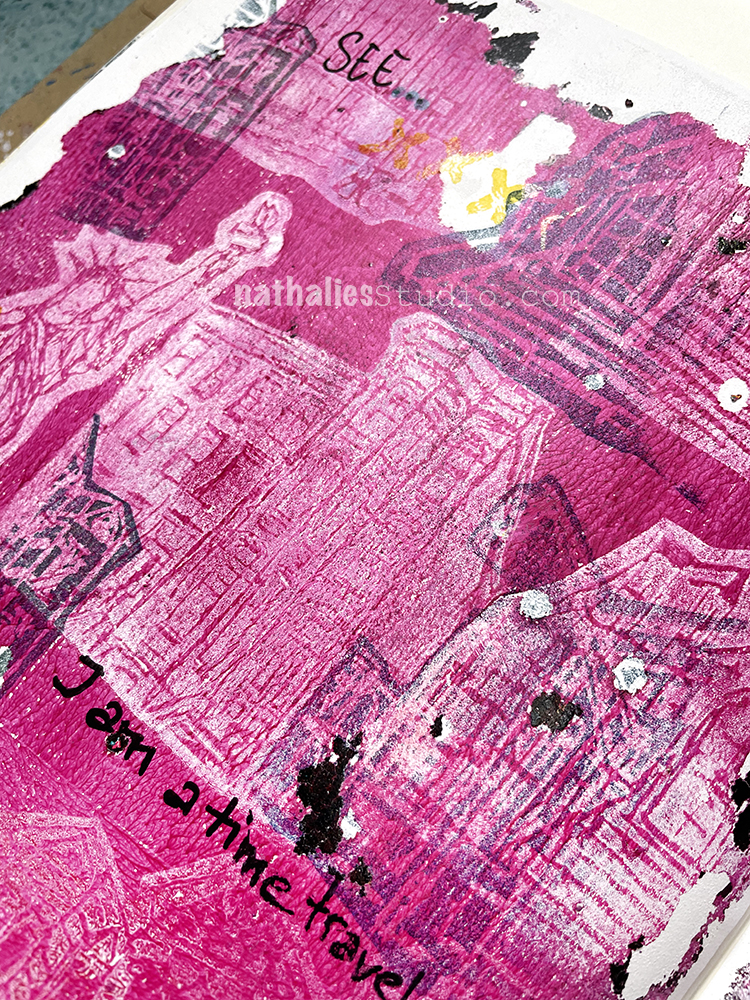
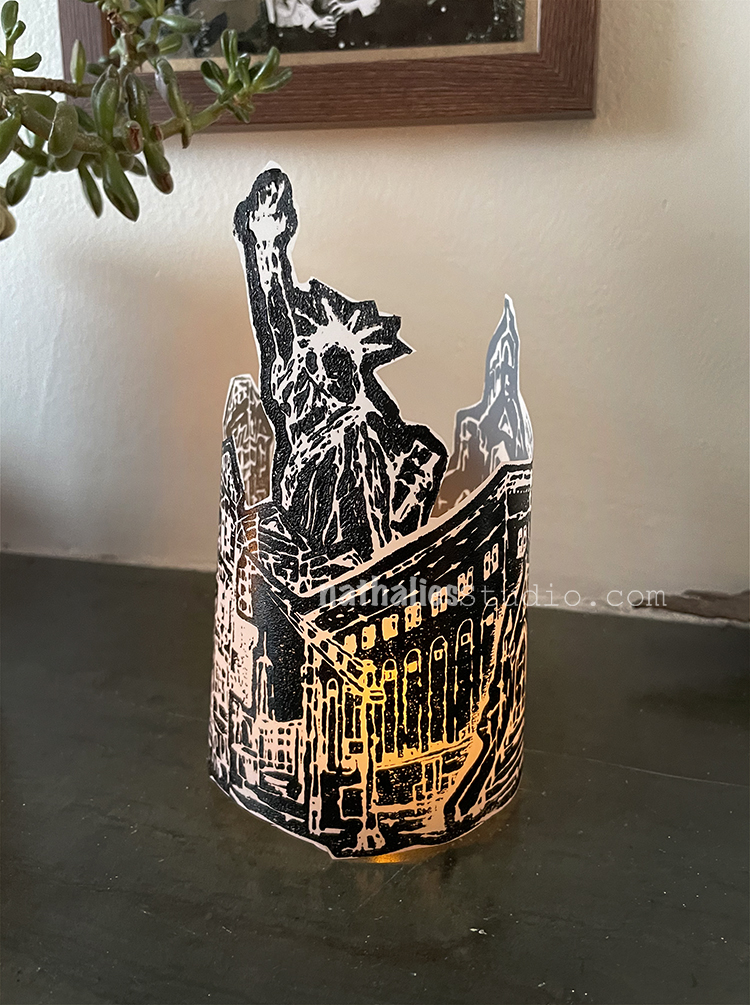
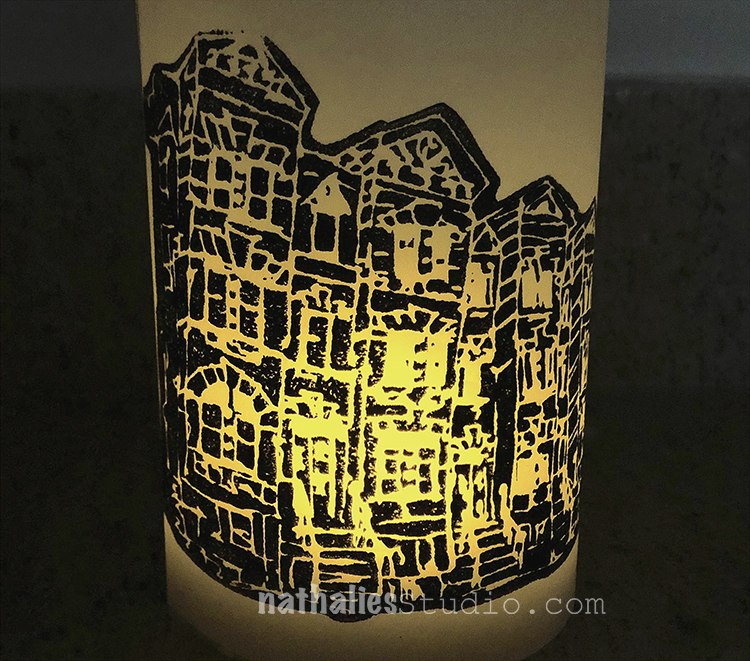
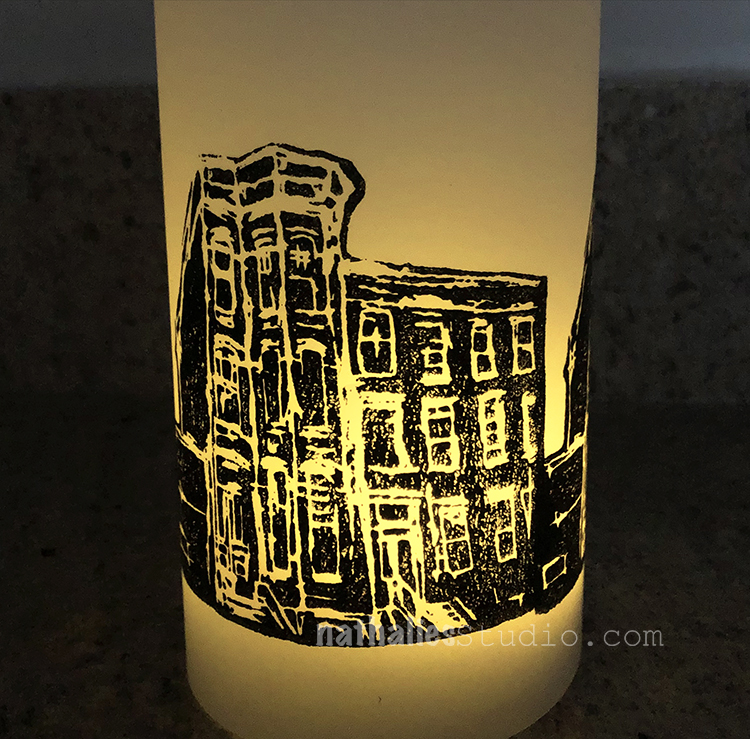
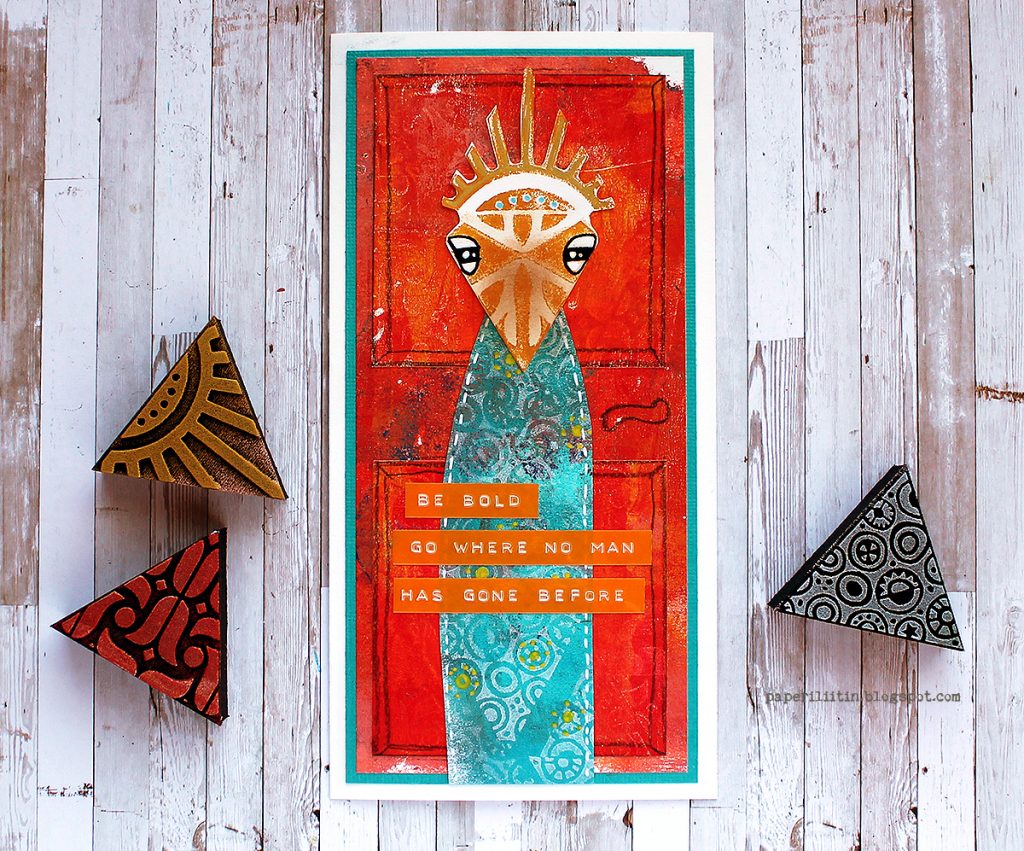
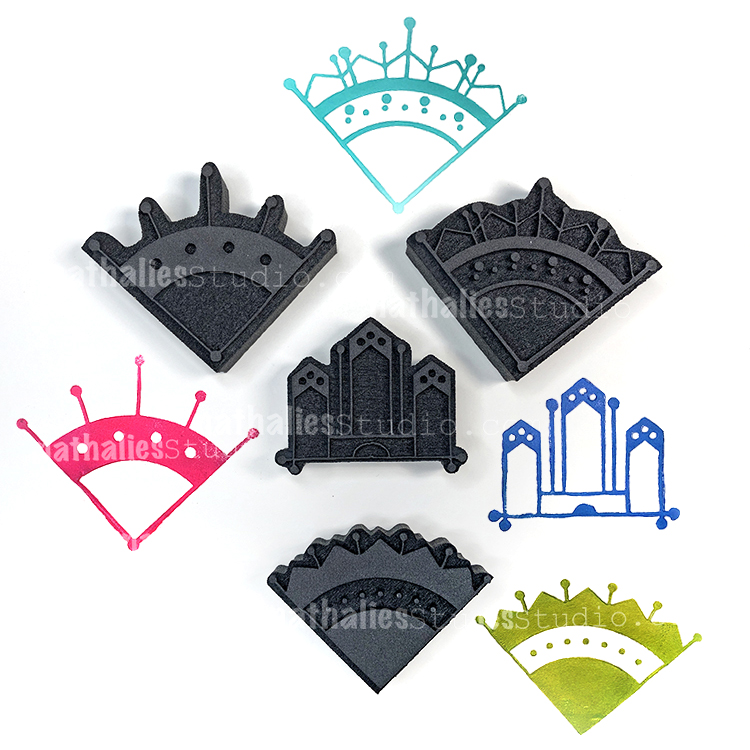
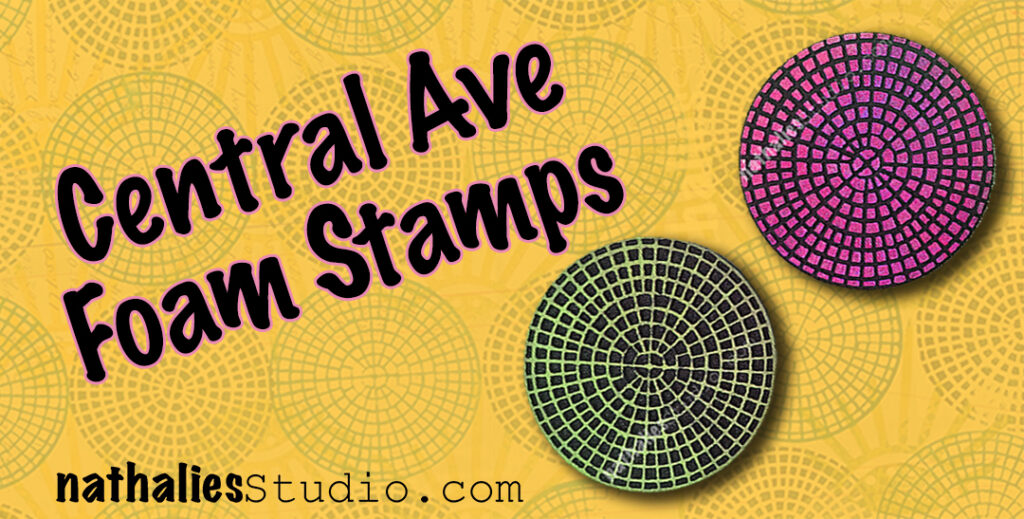
My neighborhood is a constant source of inspiration for me (have you seen my Stroll Through the Hood posts?) and that was just the case when I designed the Central Ave foam stamps. I was out and about looking at all kinds of drainage grates, manhole covers, and iron fences. I was getting inspo from all the municipal patterns out there that often we just overlook. Lots of them, especially the old intricate ones, are very ornamental and beautiful. Central Ave isn’t beautiful per say, but I love the intricate geometry of it and its urban and gritty vibe.

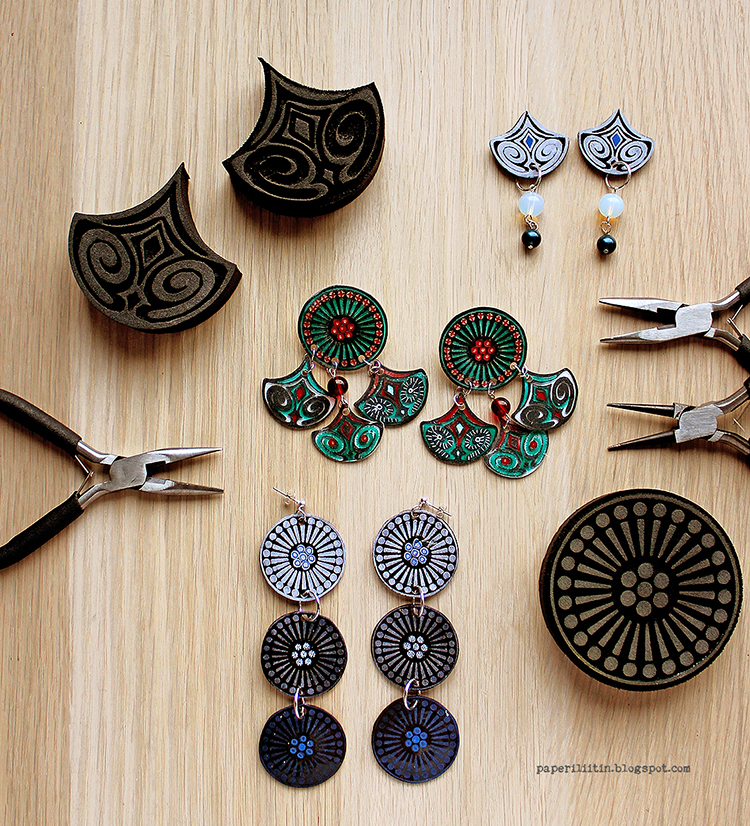
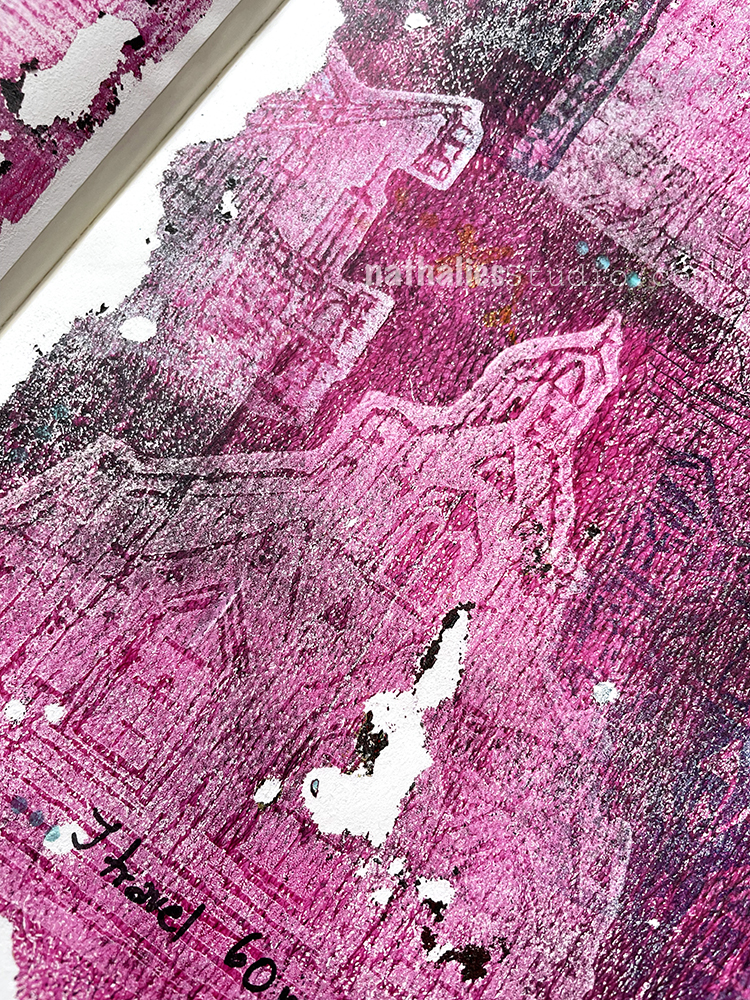
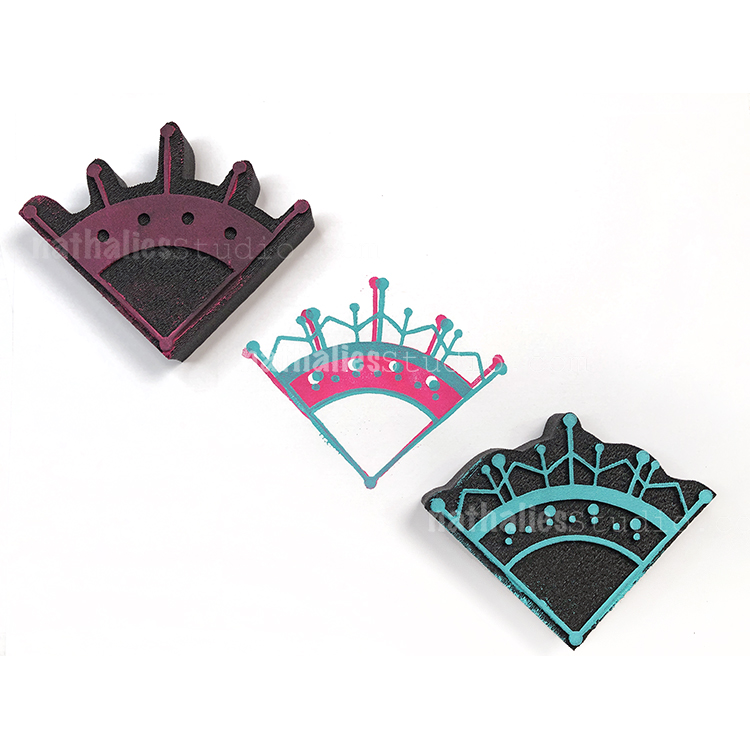
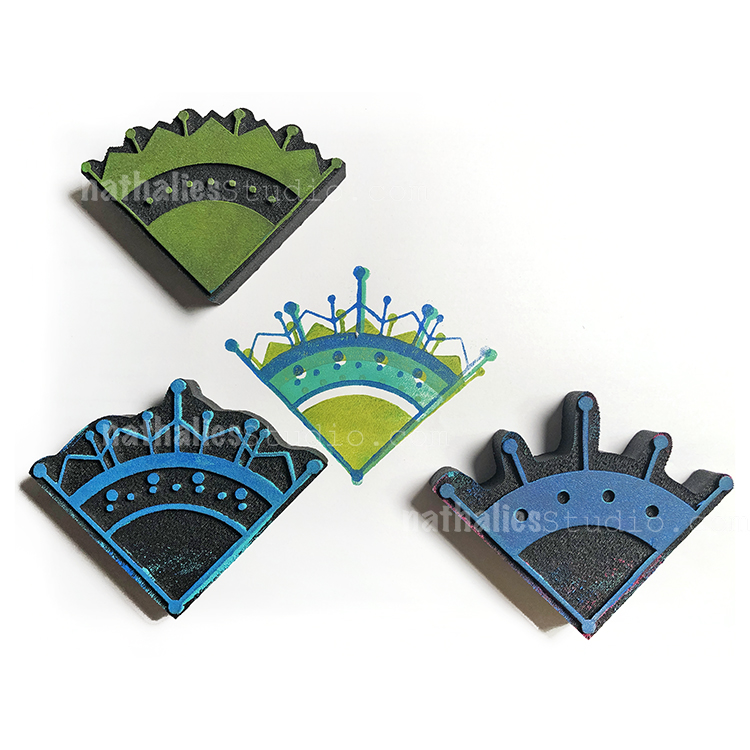
Central Ave is a two piece foam stamp set – a positive and negative of the same design. If you’re really fussy, you can line them up and play off that. I personally love using them together in an art journal page – doubling up on the design in my compositions – but not necessarily lining them up.

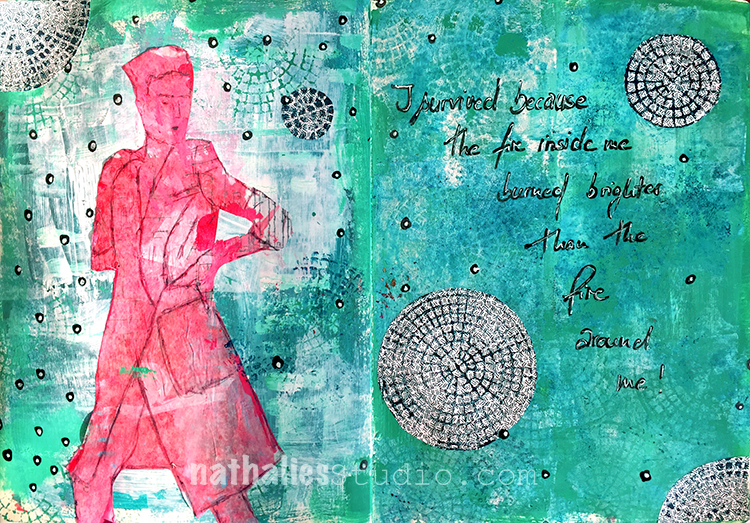
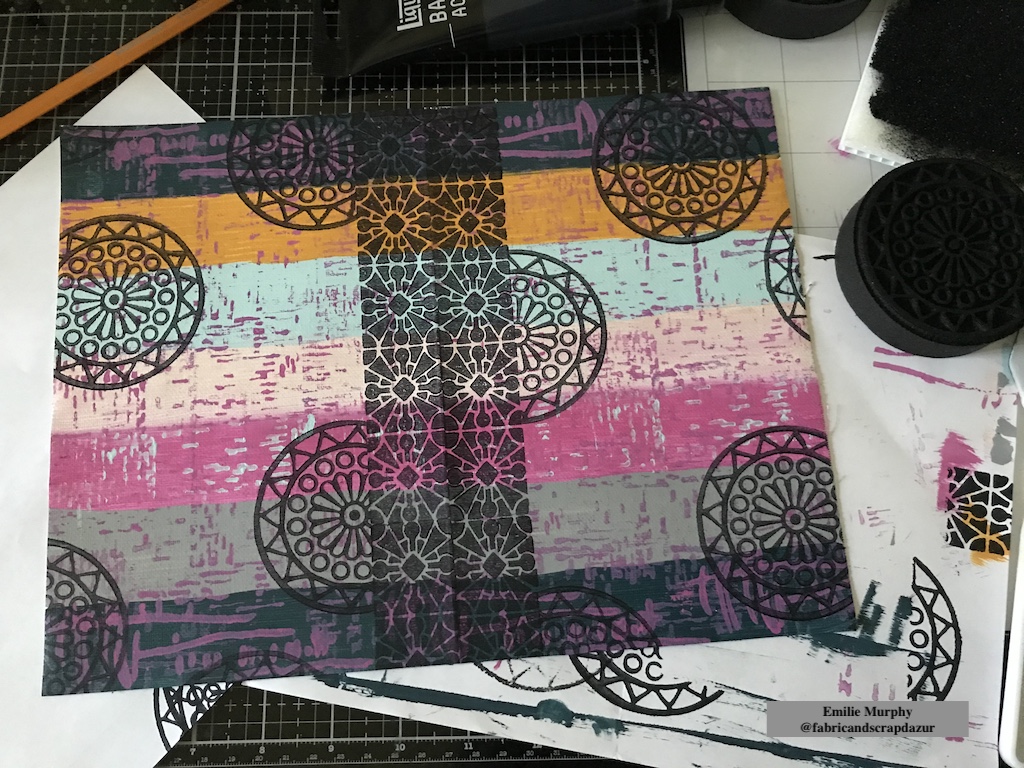
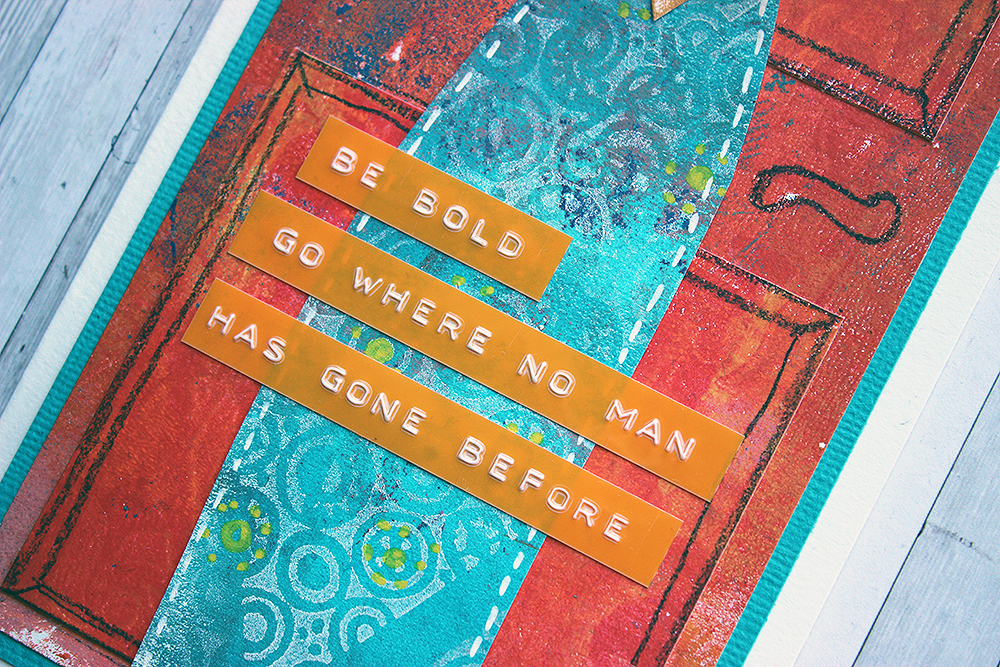
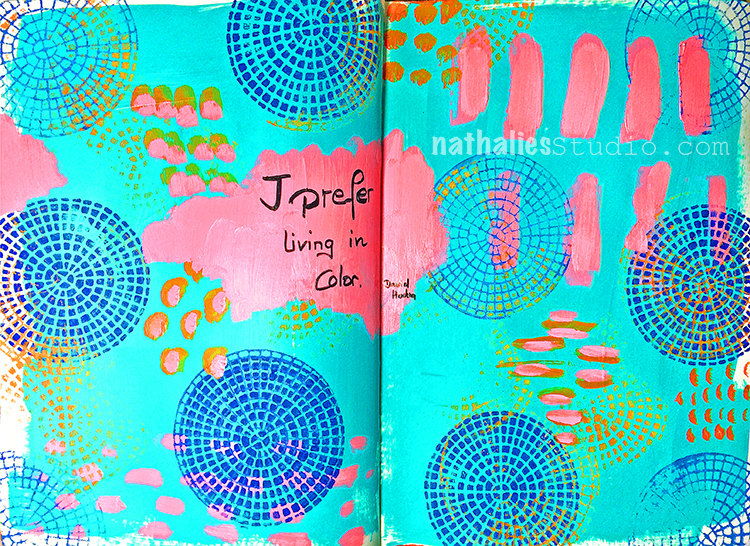
In the above art journal spread I stamped them onto the patterned inside of a junk mail envelope, as well as stamping them directly in the background. The junk mail pieces were nice to cut up into different sizes, repeating the circle shape but adding variety to the composition too.

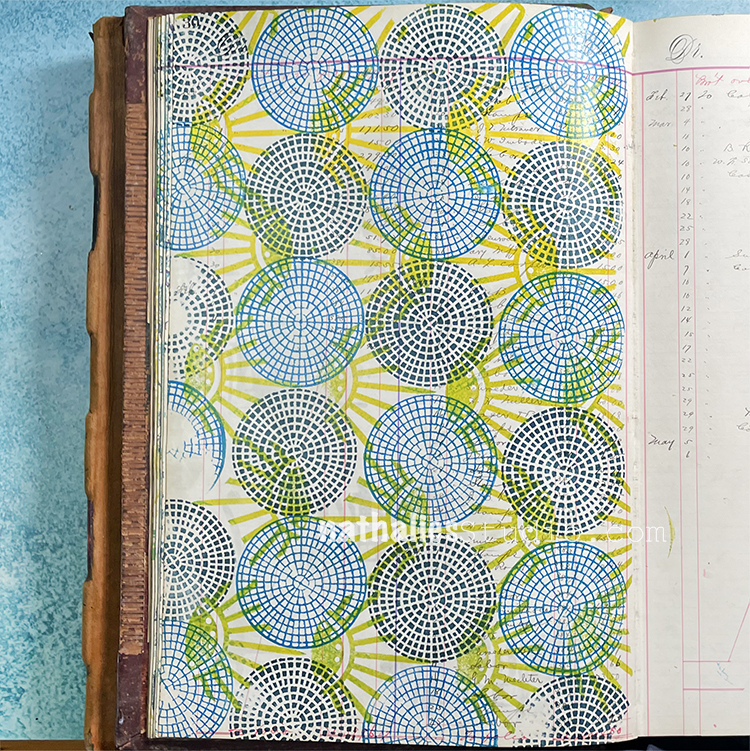
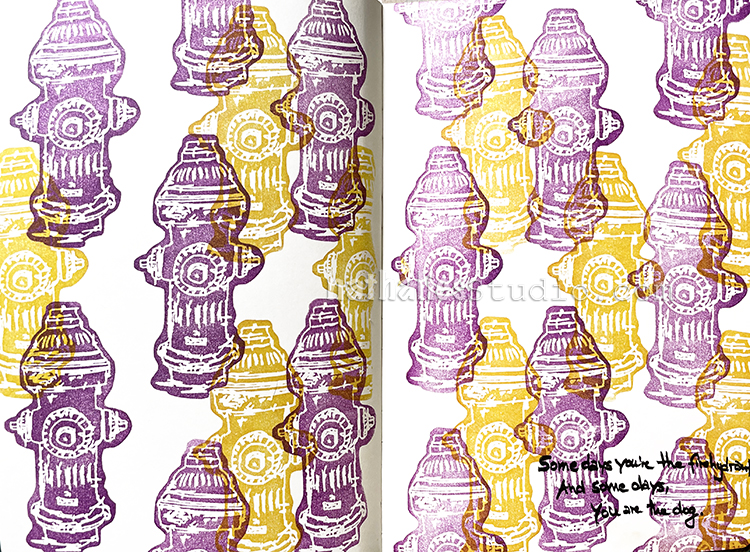
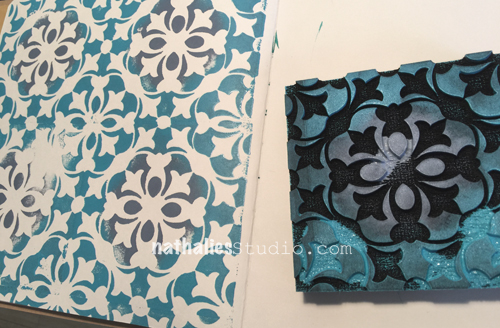
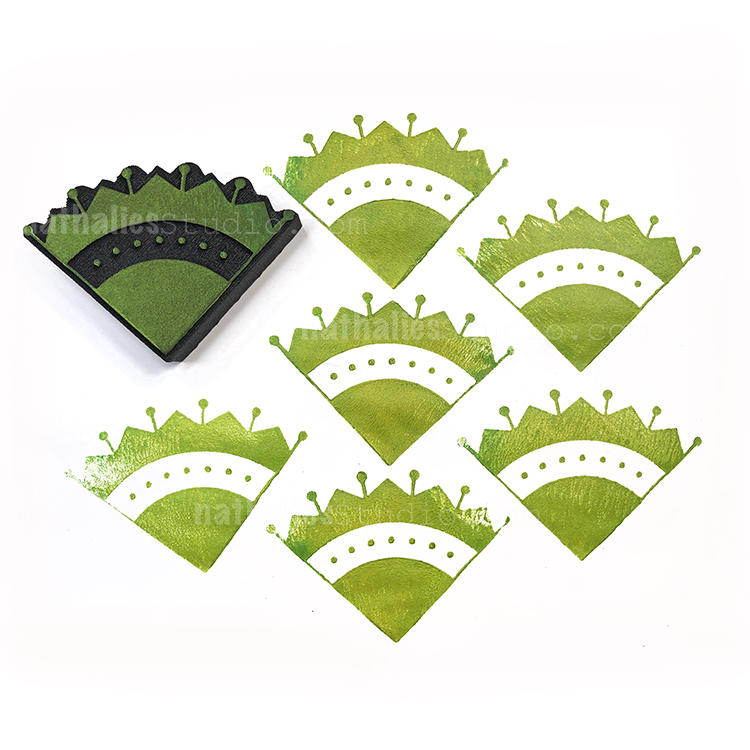
Patterns are another way to go with the Central Ave foam stamp set. You can watch me make this pattern HERE for the April ArtFoamies Challenge back in 2021. This would be an excellent background for an art journal page or maybe an idea for a fabric project…

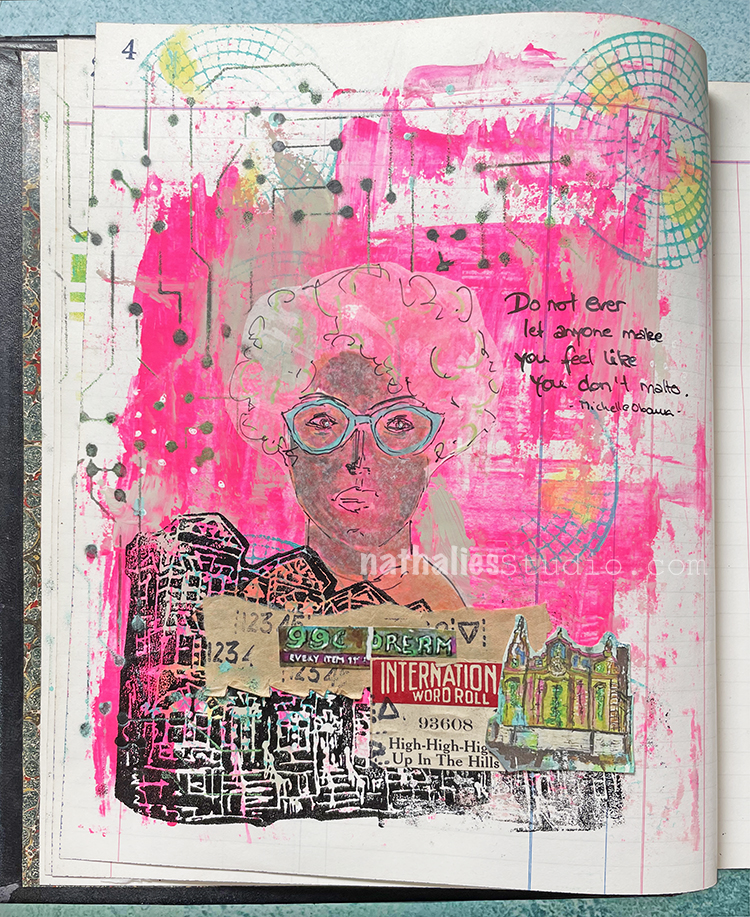
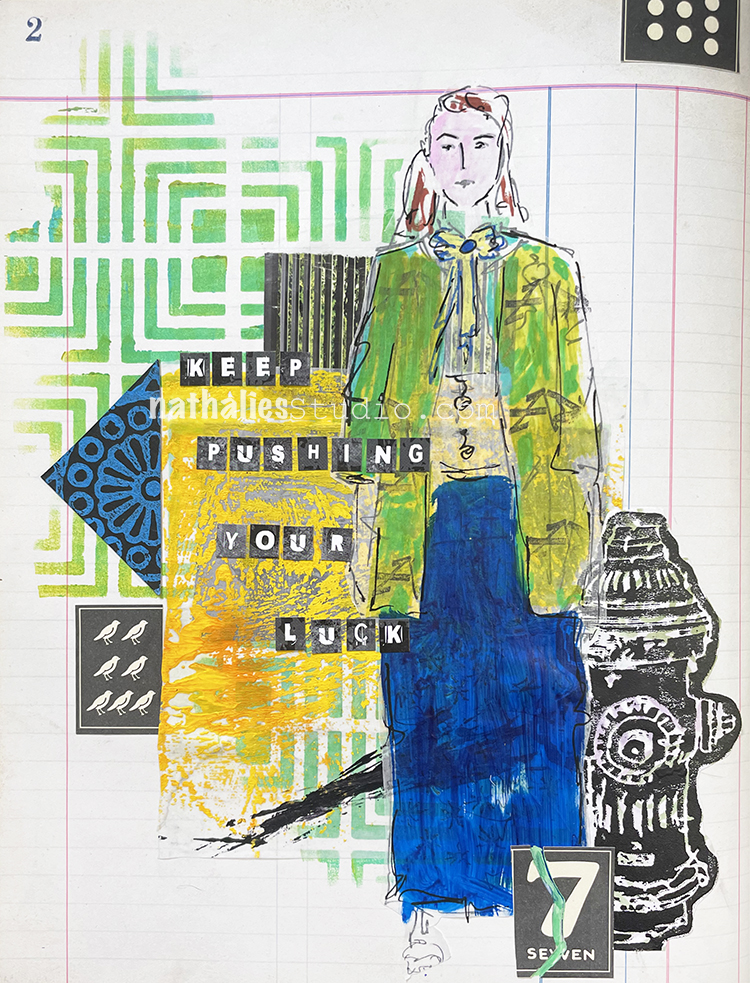
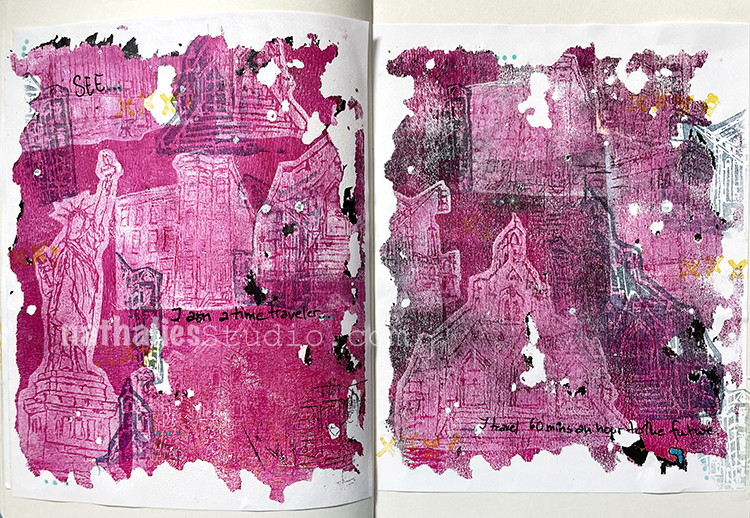
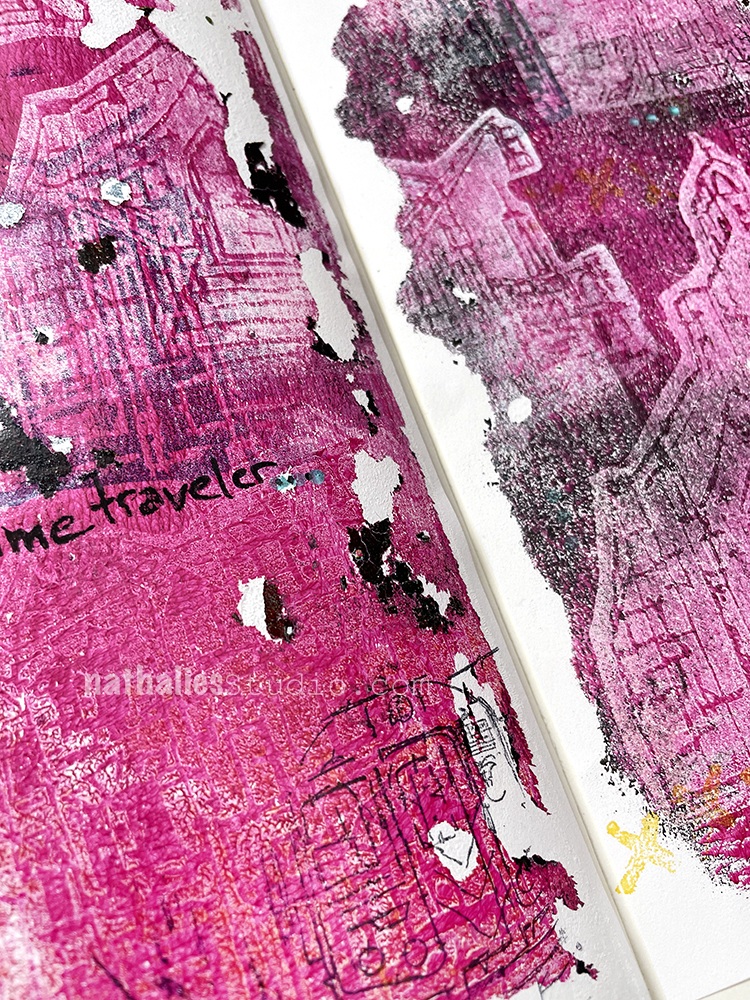
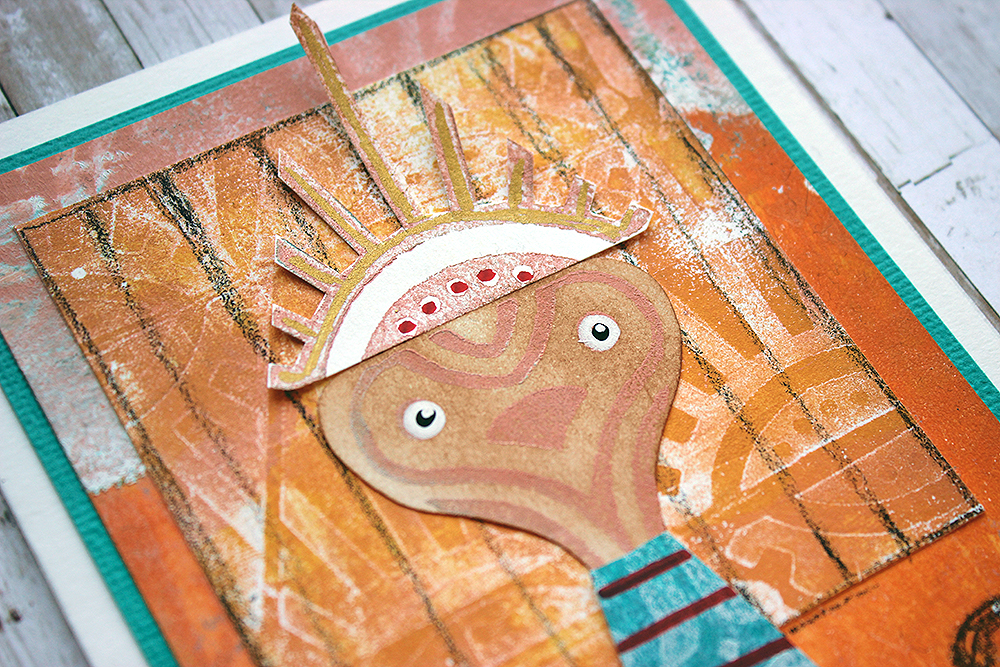
Even as a delicate addition to a page, the Central Ave pattern works nicely. It was just the fine linear detail that I needed to finish off this art journal page.

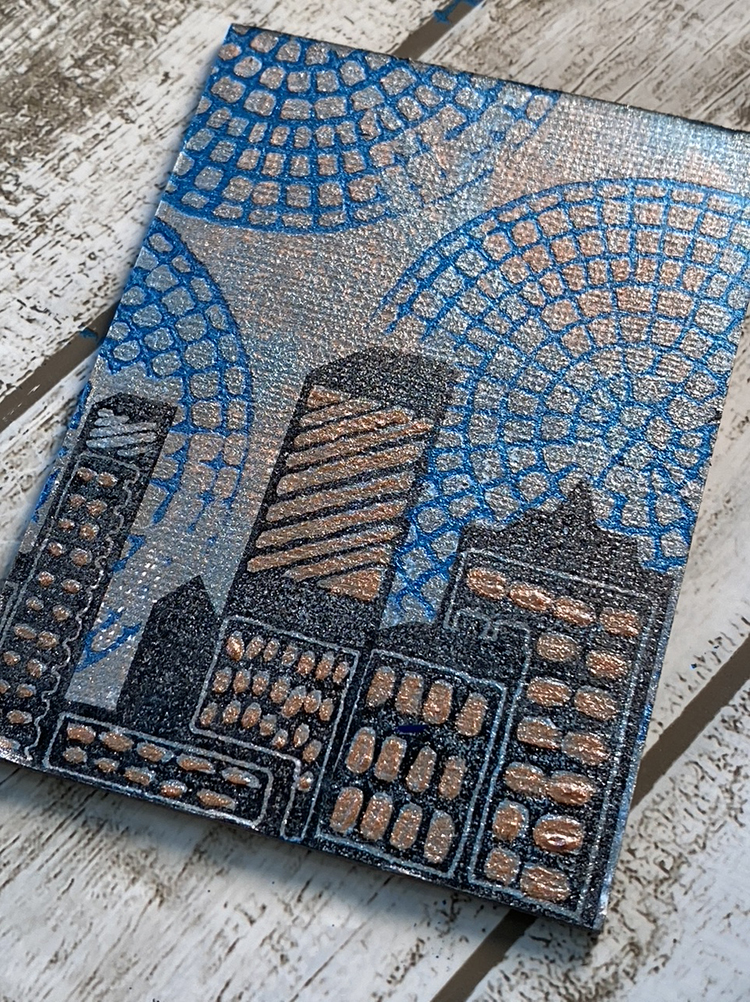
My Creative Squad is no stranger to the magic of Central Ave either. Here Robin finishes off a sweet nocturnal cityscape with the stamp in a deep shimmery blue. It reminds me of how lights flare and radiate through the darkness.

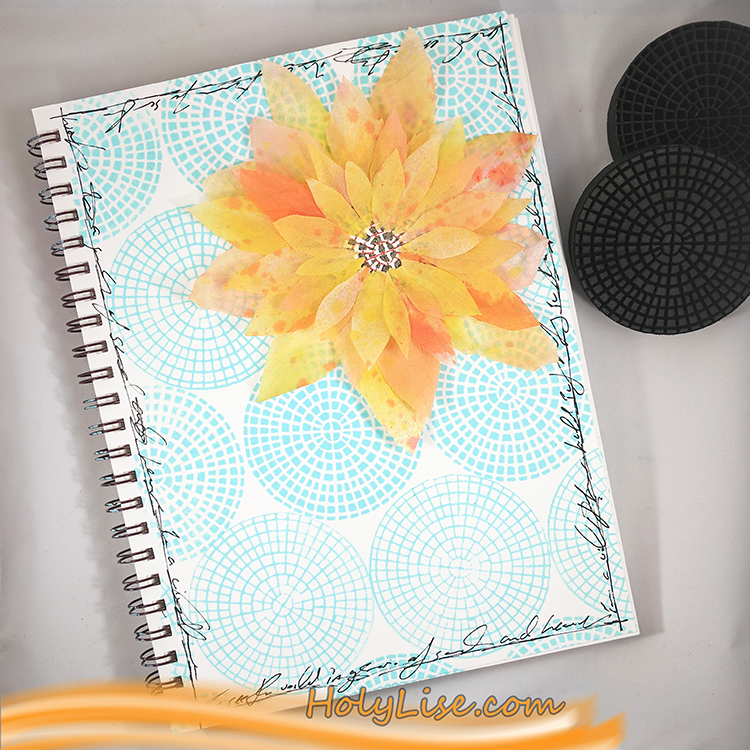
And Creative Squad alum Josefine keeps it clean and simple in this art journal page, highlighting the Central Ave foam stamps. I love the complimentary colors in this page and how the center of the flower also uses the center of the stamp.

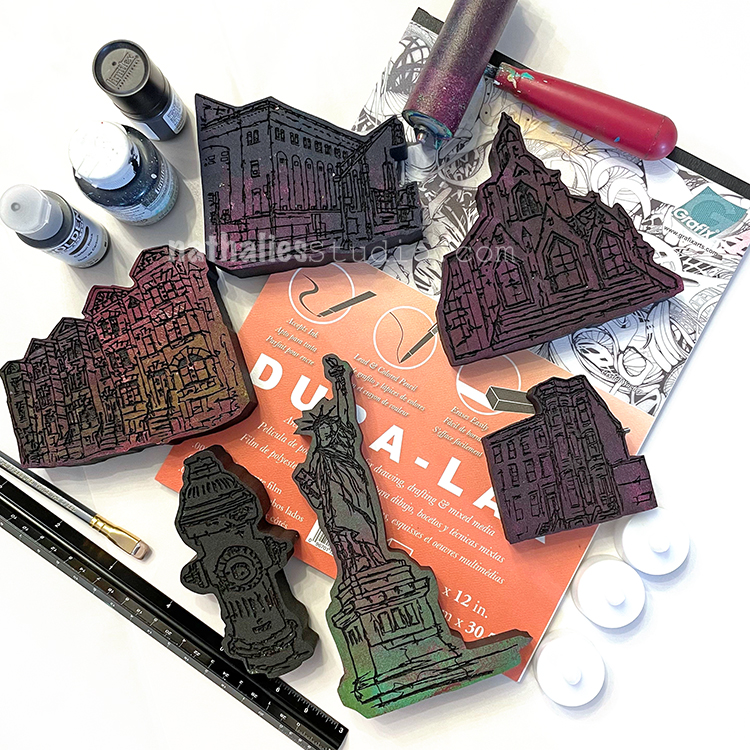
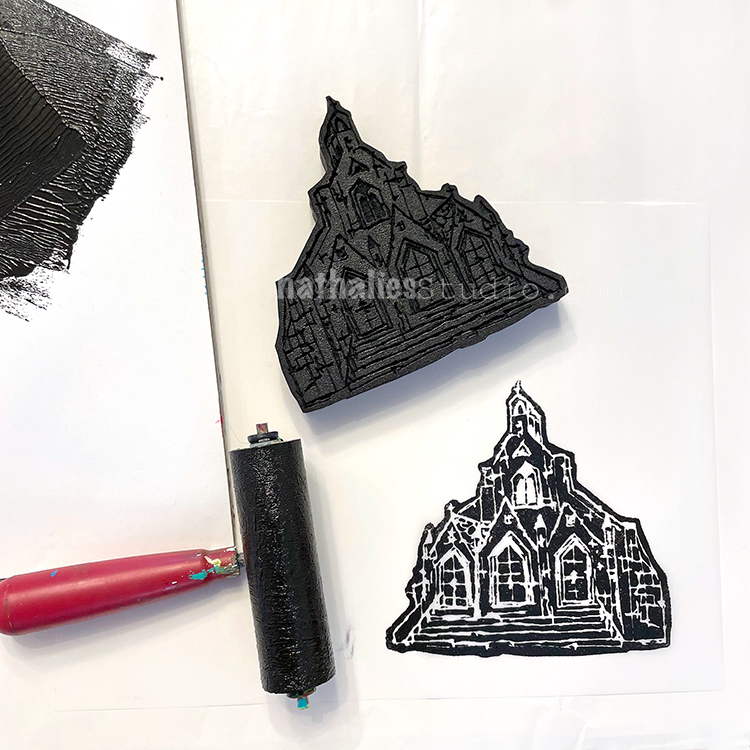
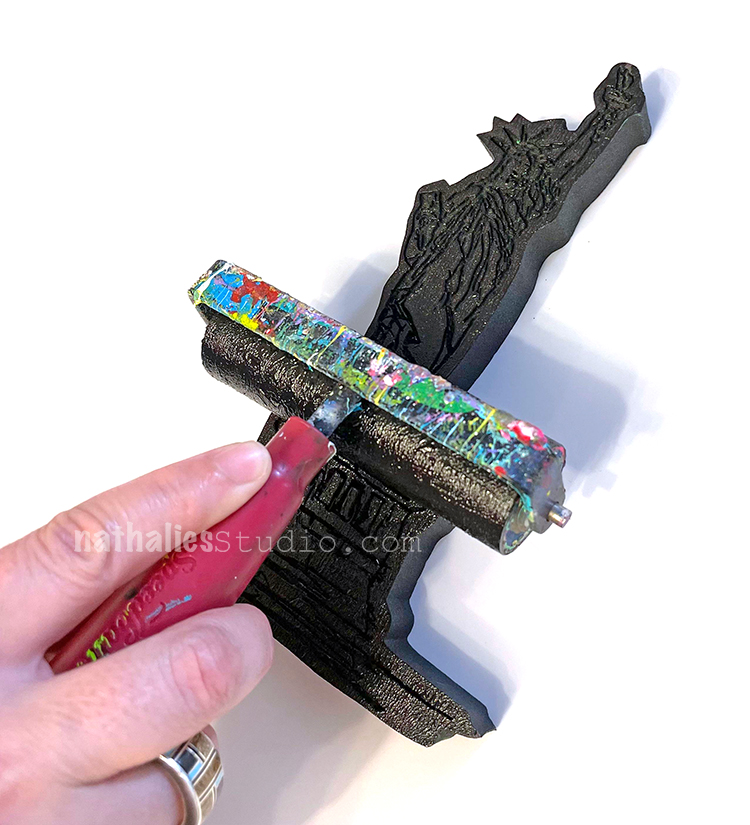
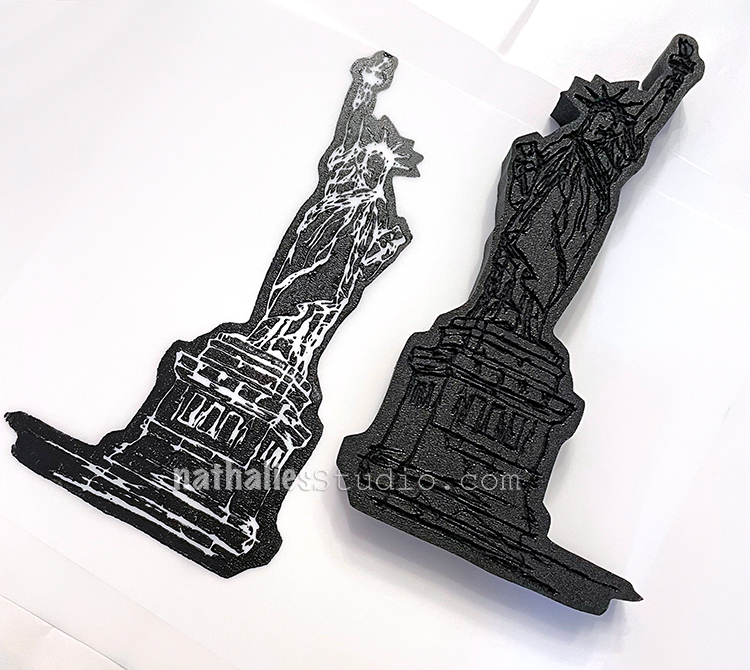
Here are some of the supplies used in these projects:

Leave a comment

Some Days You are the Hydrant

My Hydrant foam stamp just cracks me up sometimes. It’s big and bold and well… kinda cute. Is that possible for a hydrant? I don’t know but in this case I think so.

It’s one of those iconic sights on the street in the US and wow is it popular with four legged friends if you know what I mean ;) But it’s also a pretty interesting piece of equipment, always a bright color (usually red), and it makes me think of city neighborhoods, which I love.

It’s a little unexpected and fun to use it as a repeating pattern in my art journal…

…and in fact I also like the abstract shape that you can make by stamping the back!

Got some dog lovers you know? These cards by Creative Squad member Judi Kauffman are hilarious:

And then also this votive project was a pretty neat idea, especially when combined with a few of my other foam stamps. You can create a whole little illuminated streetscape:

It’s a unique foam stamp, but that’s probably why the Hydrant catches your eye and makes you smile. It’s a little different and that’s one reason I love it.

You can find the Hydrant foam stamp and all my Foam Stamps in my Online Shop. Enjoy!

Leave a comment

A Look Back – DIY Jewelry – Cool Stuff You May Have Missed

A Look Back – Today I sifted through my blog archives and pulled out some jewelry making posts from the past few years. Every once in a while my Creative Squad creates a jewelry project using my stamps and shrink film, and one time Kim and I got in on the action too during a play date. It’s a fun and nostalgic process using shrink film but also all the projects we show here are very giftable too ;) so bookmark these ideas and get creating!

A Look Back is a blog series to show you some projects and posts that you may have missed – sometimes going WAY back in the archive. I think it will be fun to revisit a few ideas that we haven’t seen for a while. I’m excited to see how a little look back might inspire something new in the future :)

First up is a play date that Kim and I did when I released my Wabi Sabi foam stamps. We stamped them with Moonlight Duo ink pads onto shrink film and then made them into post back earrings. I love how modern these are and the idea to use foam stamps in this way opens up a lot of ideas. Here is the full post with instructions.

Next up was a pendant that Creative Squad member Tania Ahmed made for one of our monthly themes. She used shrink film with my Large Circle Jumble rubber stamps, and she encased the medallion in glossy clear resin to seal the jewel. Here is a link to her post and video.

Creative Squad member Linda Edkins Wyatt was inspired to turn my Van Vorst Fan foam stamp into shrink film earrings, and I love the intricate beauty that this design lends to shrink film. Here was her post outlining the process she used to create these stunning baubles.

Before Riikka Kovasin officially joined the Creative Squad, she shared some shrink film earrings that she made using my Grove Street and Fairview Fan foam stamps. I love her use of color in these and I was quite tickled to catch her wearing them during a recent Spill your heART episode too :) Here was her original post.

I hope you enjoyed this look back on some jewelry projects using stamps and shrink film and will maybe make a few of your own too. Here are some of the supplies we used:

Leave a comment

Time Traveler – Art Journal

“See… I am a time traveler… I travel 60 mins an hour to the future.”

For this art journal spread, I was playing with my new ArtFoamies on a Gelli Plate.

I rolled out magenta acrylic paint on my Gelli plate, then pushed the foam stamps into it to lift the paint and let it dry. Then I rolled out white paint on top and pulled a print while the paint was still wet – this takes off the dried paint as well. Also bits and pieces that were dried to the plate before I rolled out the magenta color came up too here and there and I love the grungy look that resulted.

Above you can see my Lady Liberty, Brownstone, and part of my Powerhouse foam stamps…

and here is Church peeking through some yummy grunginess.

I pasted these prints into my art journal and then also stamped some of the foam stamps inked up with Versafine ink in there too to add some other elements.

I used my E-Train rubber stamp with black archival ink for some detail and also my Love Knots rubber stamp with yellow ink from the Embroidery set.

Here are some of the supplies I used:

Leave a comment

City Scenes Votive Candles – DIY Play Date

Last week Kim and I got together for the first time since 2019 for one of our epic Play Dates!!! We had such a nice time gabbing and making art and just enjoying the experience of creating together. Our project? Votive candles using my NEW foam stamp designs! It was an easy peasy project to get us back in the groove and the results are very nice. Here’s how we did it:

The supplies are simple: my new foam stamps (Clockwise from the top they are Powerhouse, Church, Brownstone, Lady Liberty, Hydrant, and Row Houses), Grafix Dura-Lar matte film, black acrylic paint, brayer, double stick tape, LED votives, and scissors or a paper trimmer. We also dressed some up with Posca markers, but more on that in a bit ;)  The whole idea was to have the buildings and such silhouetted so that the light shines through all the details. Read on!

We started out by rolling black acrylic paint out on palette paper with a brayer. We both liked Carbon Black Golden Fluid Acrylic paint for this – a nice opaque black. Then we rolled it on the stamp (in this case, the Church stamp) and stamped it on the Grafix Dura-Lar matte plastic sheet – a matte white plastic that is kinda translucent with light behind it. You could also use a StampBuddy here too to ink up your stamps.

We left some room at the bottom of the film and stamped across the width, leaving room on either side to eventually tape the ends together. In this one I am stamping the Brownstone foam stamp.

Here I am inking up Lady Liberty

… for a nice impression :)

A lineup of Hydrant stamps… cue the dogs!

Keep in mind that when stamping on plastic film the surface is slick and the stamps can slide if you aren’t careful.

The Row Houses on the left turned out fine but I slipped a bit with Powerhouse on the right. We each had a couple misfires so plan on having some extra sheets of plastic just in case.

With some of the mistakes, we created masks to use in building up more complex, layered scenes – a great way to use those.

Kim stamped Row Houses and Brownstone and then used the masks to add Church to the background for a little streetscape.

Looks pretty neat all together like that.

I first stamped Church, then added Powerhouse, and then…

…I added Row Houses to the left…

And then I finished with Lady Liberty!

We created a variety of sheets to move on to the next step:

I broke out my new Dahle trimmer and we cut things down to size. We experimented with trimming some with a margin around the image – room for tape and a little lift off the ground.

We also fussy cut some for a different effect!

Looking pretty good there Lady Liberty! The choice is yours on how you want to trim them.

We also tried coloring some in with acrylic markers.

Here are some details in those stained glass windows.

Using double sided clear tape we got ready for the final assembly.

Coming together and holding tight with permanent tape.

Here are our City Scenes votives ready for illumination – LED lights must be used with these to be safe.

Let’s light them up!!!

For the taller ones you may want to use a taller LED votive or stack the votive on something inside the sheath.

Love this one that I fussy cut!!!

And now after dark…

I hope you enjoyed this little tutorial and maybe you’re feeling inspired to make some foam stamped votives of your own. Please do!!! And I hope you join us back here for our next Play Date :)

Here are some of the supplies we used:

Leave a comment

New ArtFoamies Stamps – Summer 2021

My latest ArtFoamies foam stamp designs are released today! I am excited about this grouping as some are familiar and others are newly inspired by my Stroll Through the Hood walks and paintings :)

First let me introduce some of those newbies:

First up is Row Houses – a neighborhood scene of 4 lovely houses, all lined up and full of architectural detail. This is based on my “Neo Greek to Me” painting and a spot in my neighborhood that always catches my eye.


Next up is Church – inspired by St. John’s Church in my hood and my painting “Where is Tiffany” that considers the whole story behind that building.


Next we have a familiar face – Lady Liberty – from my Stroll through the Hood rubber stamps but this one is BIG and BOLD. I am already loving how it has a street art vibe to it.


Hydrant is another that first made its debut in my Stroll Through the Hood rubber stamps. It’s such a fun design that I thought it’d be perfect as a BIG foam stamp too. 


Powerhouse is another familiar one and this one I’m excited about because it is almost the same size as the rubber stamp version. You can use them together for an offset print. Pretty cool, eh?


And finally, Brownstone – another favorite from the Stroll rubber stamps too and again, similar in size to the rubber stamp version so lots of layering fun is possible!

I can’t wait to play more with these designs and share some of my projects. I’m digging how bold they are and am thinking about some future play date projects on other surfaces. In the meantime, I hope you check out the new foam stamps here and get inspired too! 

Leave a comment

How to use a StampBuddy

I want to share with you one of my favorite tools to use with foam stamps – a StampBuddy! It’s a nice soft nappy foam surface that you can use with paint media so that it becomes an ink pad for your foam stamps. This is my go-to technique when I want to do a lot of repeat stamping for say making a repeating pattern, background, gift wrap, and such. If I know I want to stamp the same color over and over in an efficient and clean way, I use a StampBuddy.

A Stampbuddy holds your paint media, keeping an even amount ready to go for your stamping. I generally apply paint to it using a paintbrush or an old gift card/key card, spreading it around in the area I need. You can get a good overview of my process in this blog post where I use my Versailles Positive Negative set and a few colors of acrylic paint for a colorful pattern. Check out the post here.


See a StampBuddy in action – here’s a recent video I made for the Beyond the Paper workshop that shows how you can use a StampBuddy for complex patterns with multiple colors. In the video I am using the Triple Play stamp set.


In the video, you see a trick that I use often – stamping onto the StampBuddy with an archival ink to have a guide. This helps me use multiple colors at the same time and it helps with registration. You can see me doing it in this video as well:


Of course you don’t have to do this. Creative Squad alum Michelle Rydell shows us in this post how she stamps the Versailles set with excellent results:


Using one color is a snap too – it helps make crisp, efficient impressions. In this post Creative Squad Alum Emilie Murphy uses her StampBuddy to stamp my Valley Road and Buenos Aires Border stamps with black paint.


Maybe fabric paint and sewing projects are your jam? I’m a fan too and I recommend taking some pointers from Creative Squad alum Marsha Valk in this post – she uses a StampBuddy with my Mid Century Squared and Groovy foam stamps, along with acrylic paint and fabric medium. After stamping on her fabric, she creates a really cool tote bag.


However you use your StampBuddy and Foam Stamps, here are a couple tips:

  • The StampBuddy will hold a lot of paint, so use it only if you have time to actually use it up in one session or when you want to do the different color method.
  • You can store the StampBuddy with paint in a ziploc bag for a day or two if you want to continue stamping the next day but if it is not a lot of paint in there, it will dry into the StampBuddy and then you cannot use it anymore- be careful
  • I used the paint up by stamping a sheet of gift wrapping paper – boom – one sheet down for the next presents.
  • Clean the StampBuddy when you are done with your creative time, wash it out with water until the water is clear. The stamped archival ink impression will remain on your StampBuddy. Do not let paint dry on the StampBuddy
  • Clean your Foam Stamp – I know there are different approaches- I do not clean it super crazy scrubby, but I want most of the acrylic paint off. For me this is a foam stamp and it should remain cushiony as this is what creates this kind of impression and it also lets me use other paint media than just acrylic paint on it.
  • Only use a small amount of paint with your StampBuddy – you will be surprised how far it will get you and it also prevents paint from seeping into the creases of your stamps- which a) wastes paint, b) makes it harder to clean up your stamp, and c) gives less nice stamped images.

I hope this has helped you see how you can use a StampBuddy the next time you get your ArtFoamies out for some fun.

Here are some of the supplies used in this post:

Leave a comment

Creative Squad: Another Door Opens – Riikka Kovasin

Hello from my Creative Squad! Today we have the debut of new Squad member Riikka Kovasin – a video showing how she creates some super cool whimsical characters created using my new Triple Play foam stamps and our theme: Another Door Opens – There is this saying, “when one door closes, another door opens” that basically is an optimistic way of looking at change in your life. Create an art journal page with this in mind, however you’d like to express it, however the idea inspires you to create!


Hi there! It’s Riikka here today with my very first Creative Squad post! The theme of the month was “Another Door Opens” and I was feeling outwordly as my first idea was to turn the patterns of the great “Triple Play” foam stamp set into whimsical characters.

I interpret the theme like children’s peek-a-book – what might be behind the door? At first, I was thinking of doing the cards or an art journal page as a peek-a-book, first showing just the door and then you could open it to reveal the character. In the end I then chose to add the character on top of the door so that it had already come through it. I saw the heart-styled shape as a face immediately but when I used a peachy tone to stamp it, I realized it was ET! So, even if I had been thinking about whimsical character all along, now I would have a more precise theme. I paired the characters with greetings (hopefully) fitting to the stargazing theme.

As you see from the video a bit further below, I started by making patterned papers using acrylic paints and a gelatin printing plate. I made two sheets using similar color scheme and then one with a contrasting one. The first two I then cut to make the door (actual door and panels on it) and the third one became the robes of the character. The contrast between the two elements ensures that the character just pops out of the background.

Like I said earlier, I also used the patterns of the “Triple Play” foam stamp set to make the face and a headdress of sorts for the characters. I hope this inspires you to see the stamps from another angel. You don’t always have to use the whole stamped piece or build a bigger pattern. Collaging different little elements might just be the thing the doctor ordered!

Now, if you want to see how I made the cards, please see the video below. It shows me making the ET one, but I made the other one with similar steps. The only thing that differs is the stamps I used and I changed the color scheme a little, too. But the steps are the same!

Thank you for stopping by today! I hope you were inspired by the characters to see the stamps in another way! 


Thank you Riikka – these are such intriguing characters and I just love how you used all those Triple Play patterns in there!

Give it a try: you can find all my Foam Stamps in my Online Shop and here are some of the supplies Riikka used:

Don’t forget to check out Nat’s Creative Squad on Instagram too: Each week we post projects, ideas, and inspiration for mixed media art.

Leave a comment

New ArtFoamies Stamps – Mini Motifs Set

I’m happy to announce this nice new set of Artfoamies that I designed: Mini Motifs Foam Stamp Set. It is now available HERE in my shop. 

Each of the 4 Mini Motifs stamps in the set is inspired by some of the designs on an old fireplace in my home. I love the idea of drawing inspiration from this bit of history and thinking about the craftsman who carved the designs so long ago.

The triangle shaped ones are fantastic for layering up. I also discovered that they work great with the Mini Motifs Rubber Stamp Set!

You can find my new Mini Motifs Foam Stamp Set HERE in my shop. Enjoy!!!

Leave a comment