
Creative Squad

Today We Smile – Jennifer Gallagher


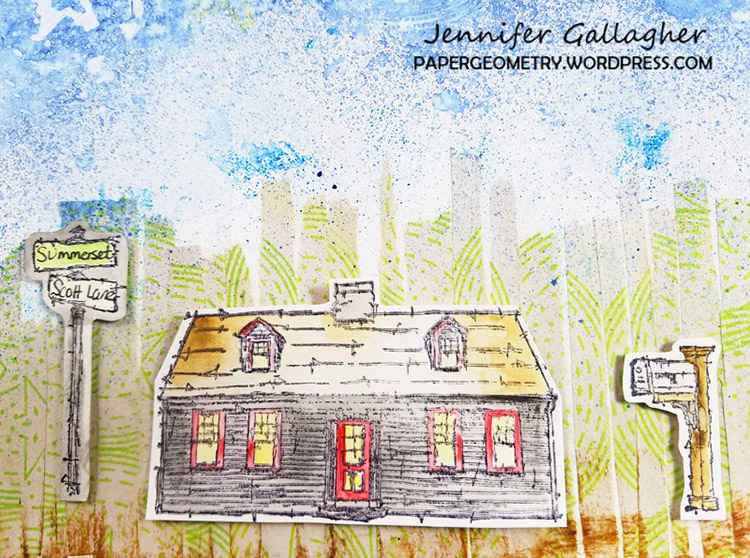
Hello from the Creative Squad and a post from Jennifer Gallagher to kick off February for us. Jennifer is using some of my Large Circle JumbleStroll Around the Block and My Home is My Castle rubber stamps for her charming piece on canvas. She was inspired by our theme this month: Today We Smile – They say smiling can lift our mood and maybe improve our overall health. Let’s try it! Think about what makes you smile and share it with all of us. After all, smiles are also known to be contagious :)


This month the Creative Squad is looking at what makes each of us smile. We are pondering what makes us truly happy and reflecting that feeling into our projects. Well, for me, the answer will always be my family. Nothing makes me happier than being at home with them. We love to cook together, play board games, and watch movies. With that in mind, I’ve put together an adorable little project that reflects my love of home.
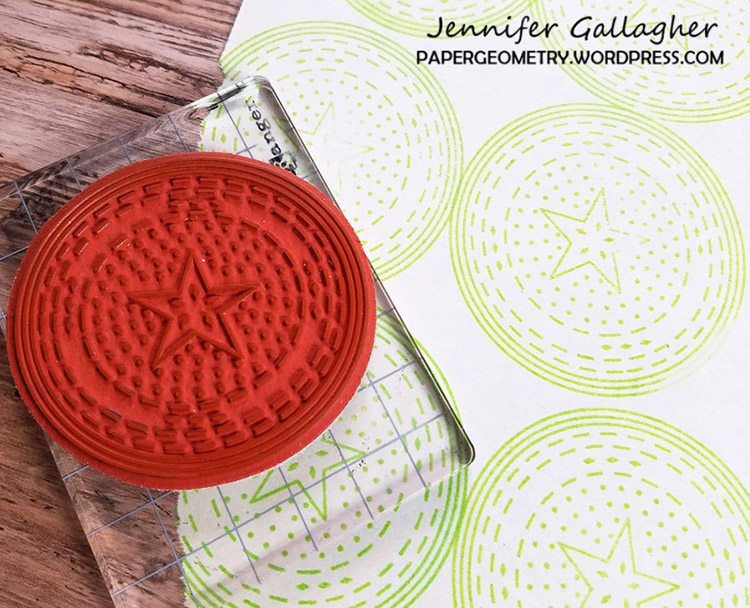
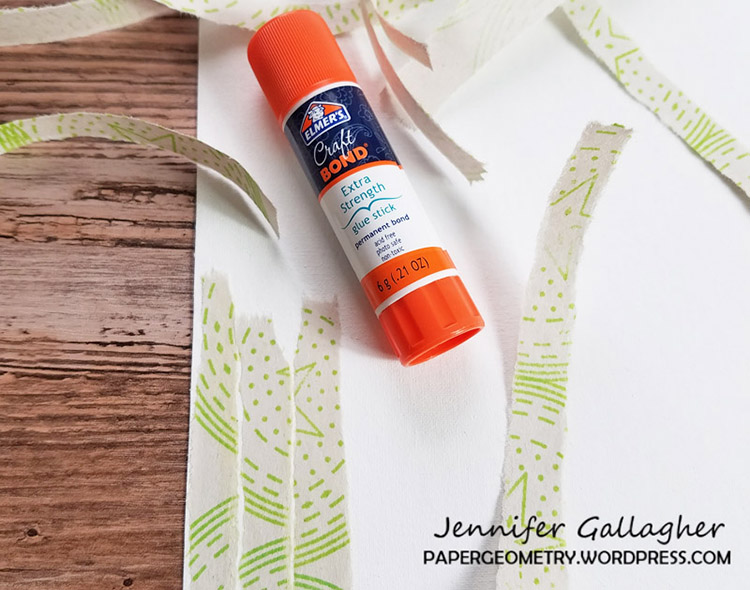
I started by stamping Nat’s Circle Drive (positive) stamp onto a sheet of newsprint in vivid chartreuse archival ink. Next, I ripped the sheet of newsprint into strips and glued them onto my canvas pad to represent grass.
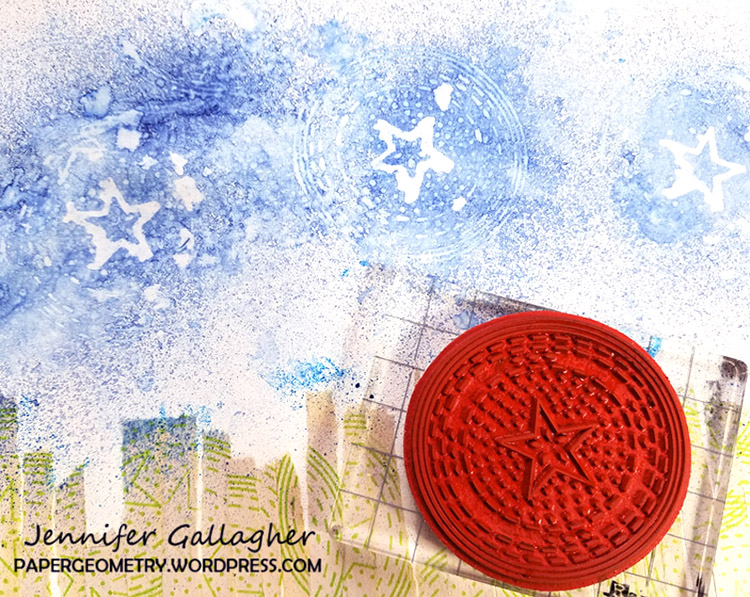
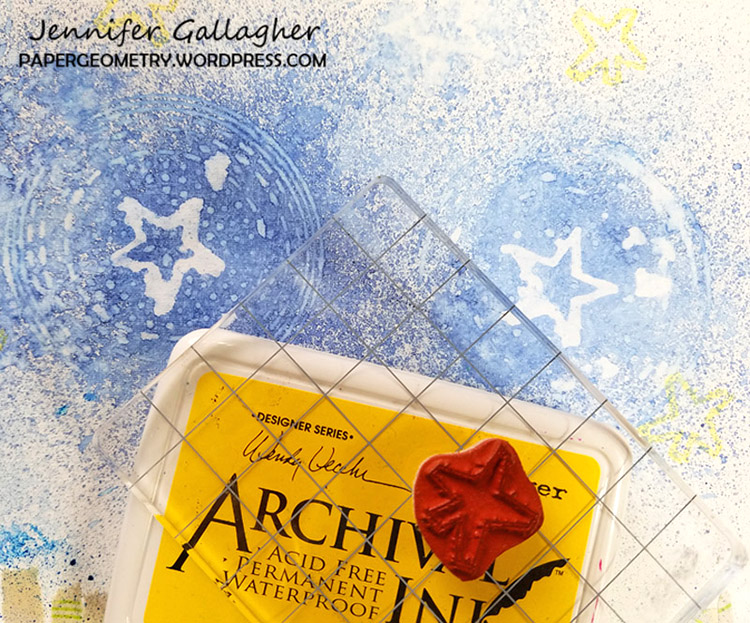
Then, I sprayed my canvas with dylusions periwinkle blue ink spray to represent sky. You can adjust the depth of color by adding more spray or dabbing with a wet paper towel.  Allow the ink spray to thoroughly dry. To add additional interest, I sprayed the Circle Drive stamp with a mist of water and pressed it into the blue ink spray in several spots and then dabbed the water up with a paper towel. It left behind the stamped design.
To add stars in the sky, I stamped Nat’s Star Tag stamp with buttercup archival ink and pressed it around the canvas.
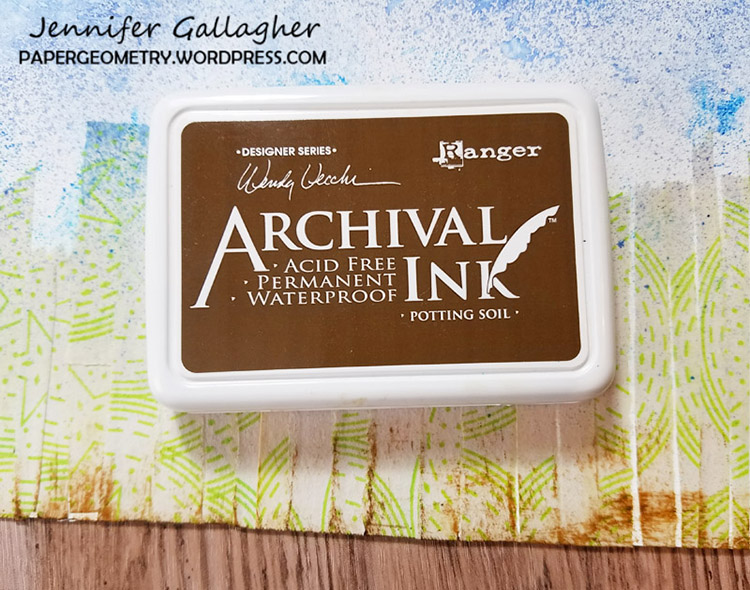
For interest around the grass, I rubbed a brown ink pad on the edge of the canvas pad.
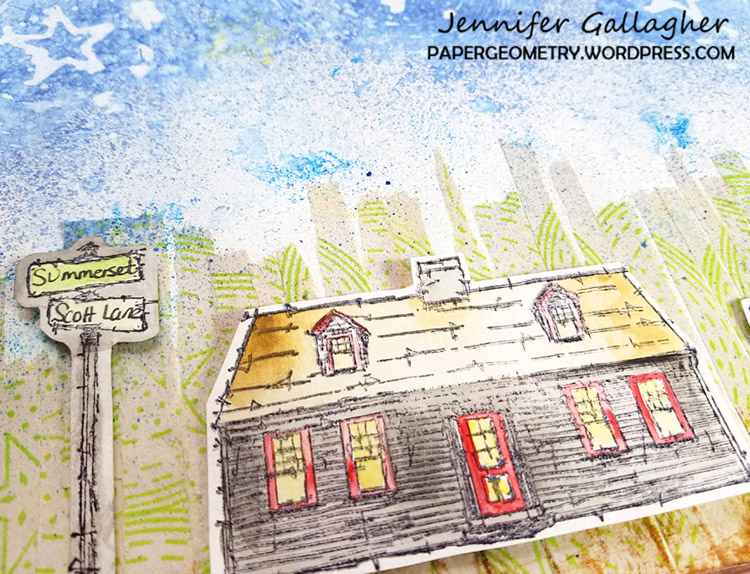
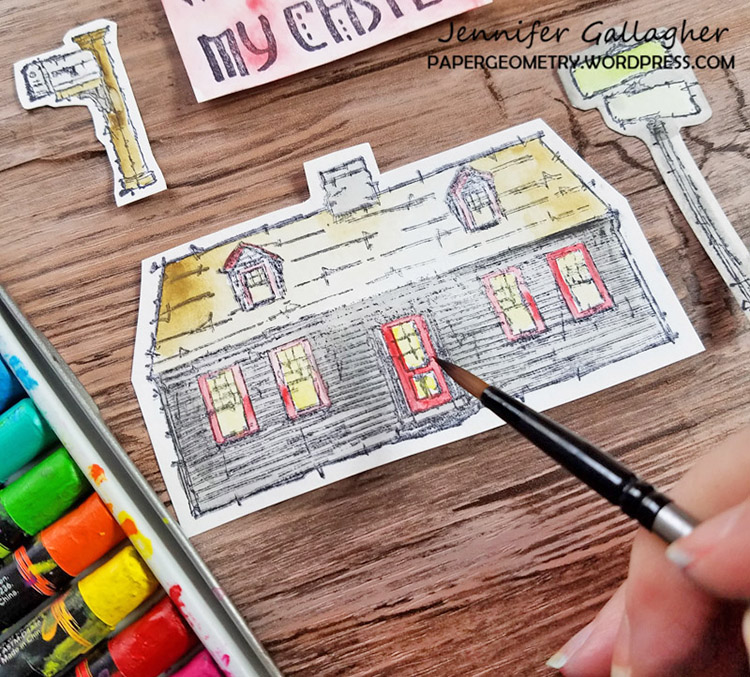
Next, I stamped Nat’s Cape Cod stamp along with the Street Sign, Snail Mail mailbox and the My Home is My Castle sentiment stamps onto scrap watercolor paper with black archival ink. Then, I colored them in with a wet paint brush and scribble sticks.
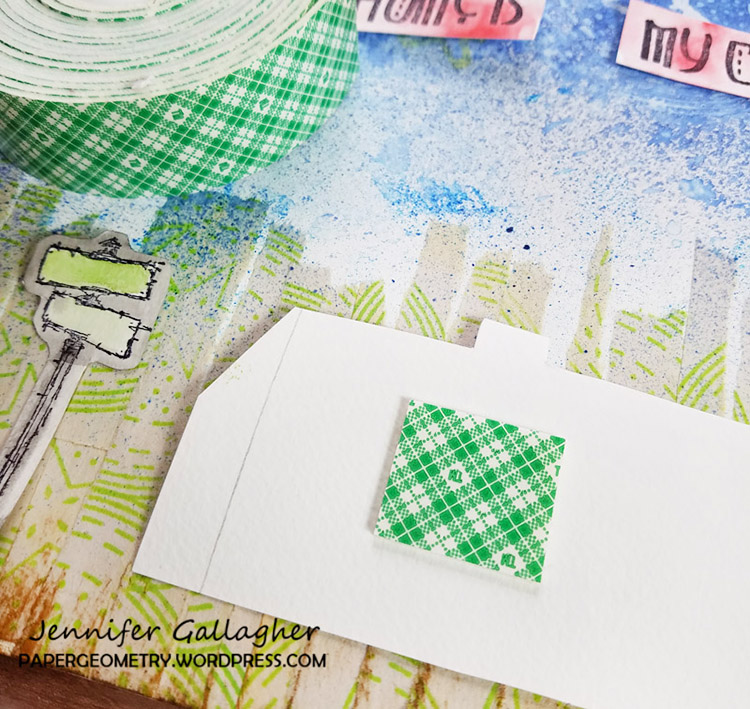
I cut each of the stamped images out and then mounted them onto the canvas pad with mounting tape.
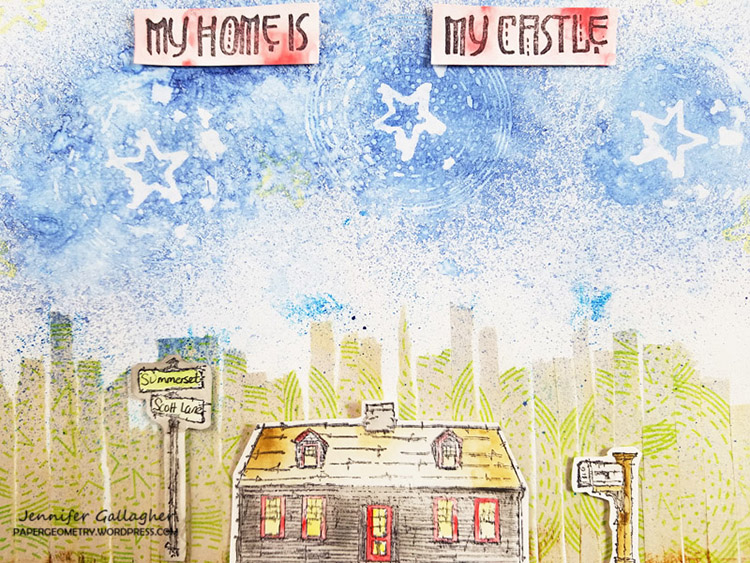
I hope this project has inspired you to break out your favorite n*Studio stamps and make something today that puts a smile on your face. Be sure to share your creations with Nat and the creative squad!


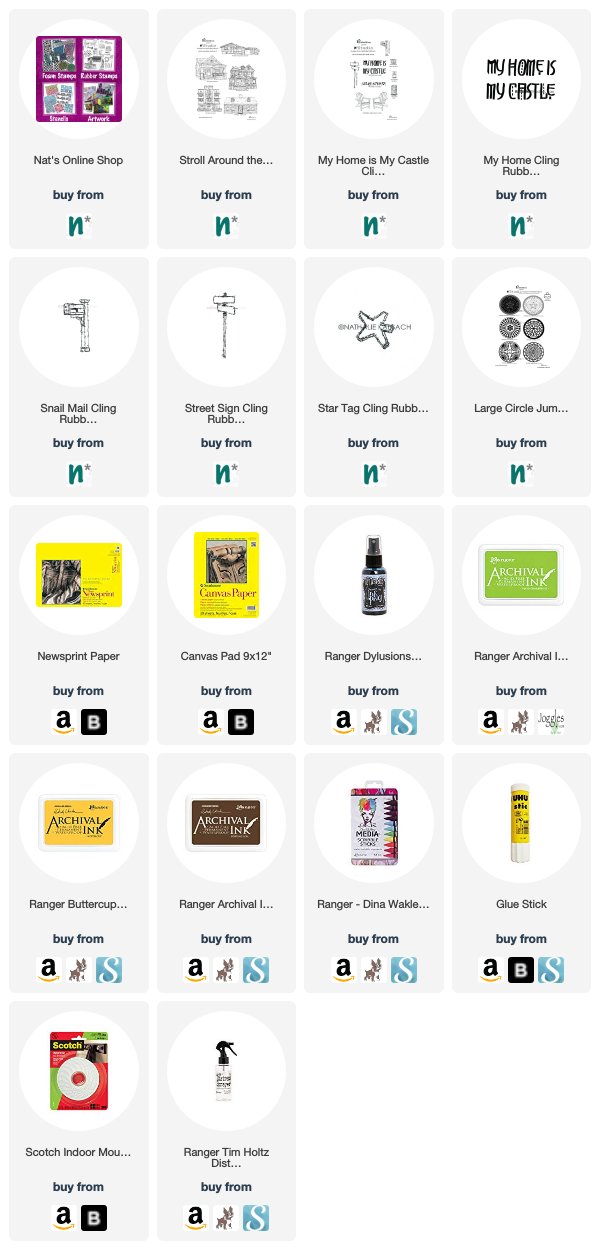
Thank you Jennifer for sharing with us what makes you smile and for showing us this gorgeous project. You can find my Rubber Stamps in my Online Shop and here are some of the other supplies that Jennifer used:


Feel inspired? Working on something yourself that you’d like to share?  I love to see how you interpret our monthly themes. Email me how you used my stencils and stamps with the theme and email me an image – I would love to share your projects in my next  “n*Spiration From Around the Globe“.

Comments (2)

  • Nancy A Olsen

    |

    I love this project ! The background really inspires me to work in my art journal ! Thank you for the inspiration !

    Reply

  • Sue Clarke

    |

    I just love how you made the “grass” Jennifer!

    Reply

Leave a comment

Let’s Jump with the Creative Squad – Judi Kauffman

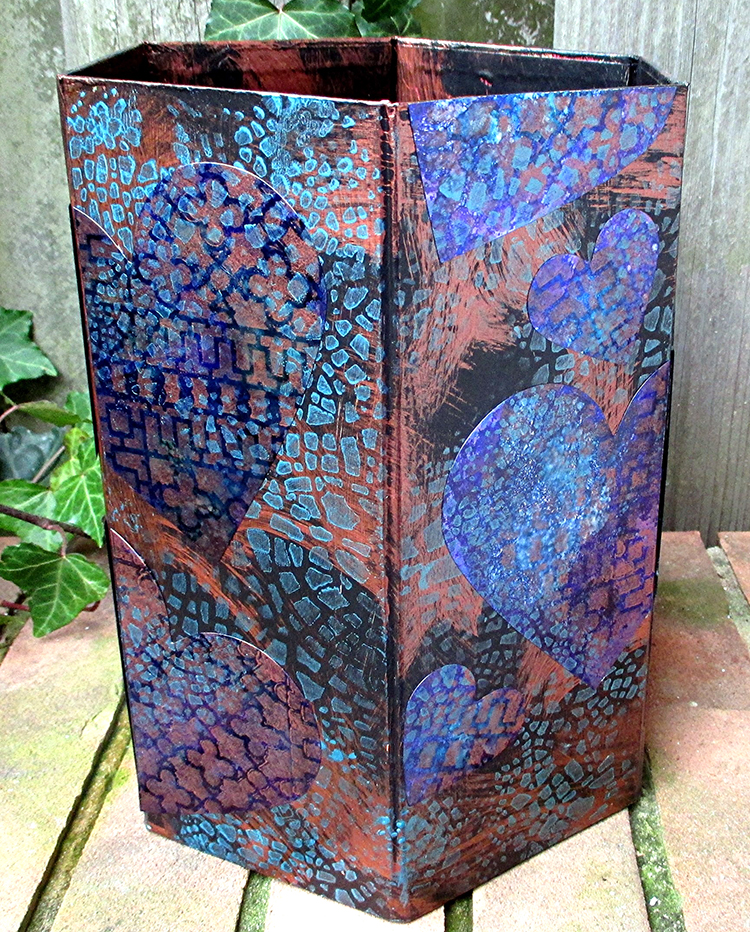
We’re Jumping with the Creative Squad today with a post from Judi Kauffman. You can learn more about Judi from our Nice to Meet You blog post featuring her creative story and artwork. Judi is transforming some home decor items for us today and wow what a miraculous transformation indeed :) She is using my Downtown and Crackle stencils and this month’s theme: Let’s Jump! – The Creative Squad is joining the fun of Creative JumpStart 2019 this month. They’re creating objects for the home, inspired by the CJS19 theme My Home is My Castle.


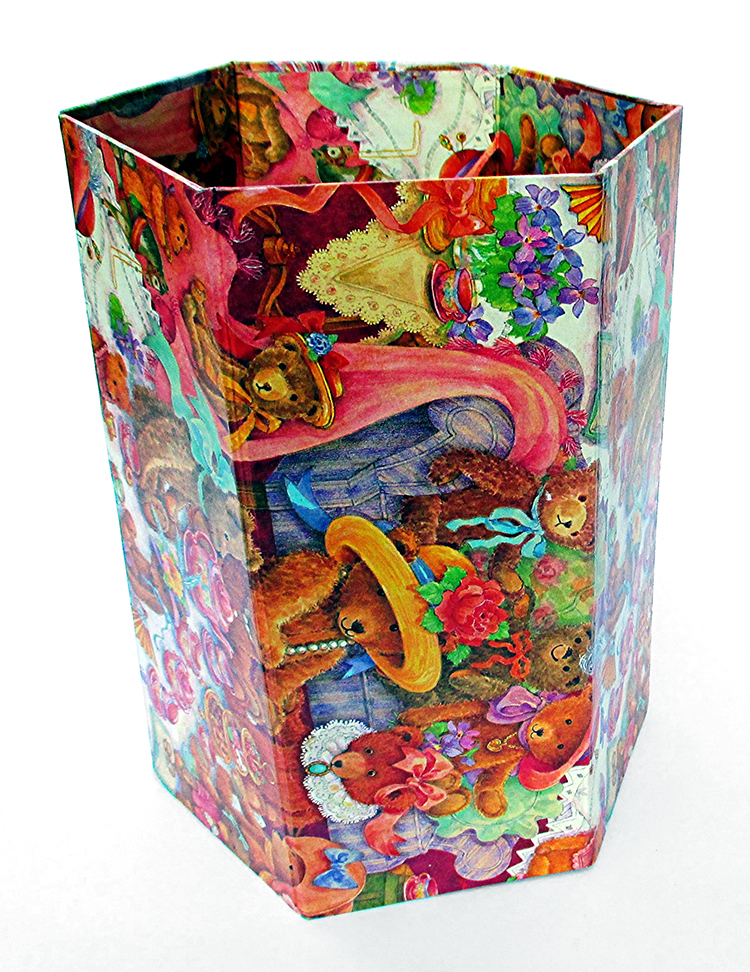
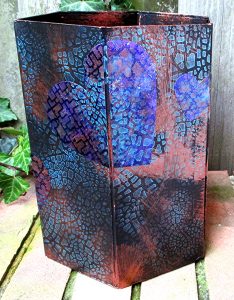
I loved the shape, so I bought a rather garish paper-covered trash can with teddy bears all over it. I tucked it under my sewing machine where it has served me well.

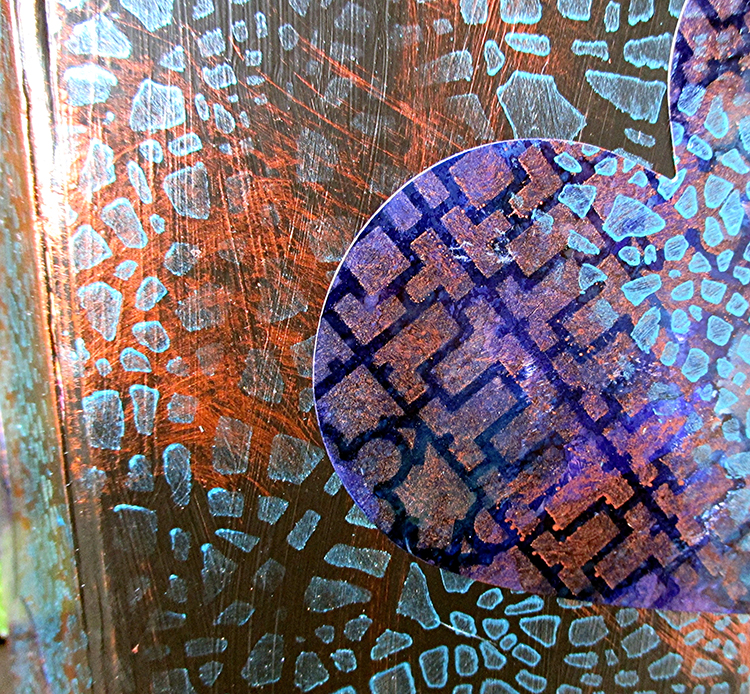
There it sat in all its pink and orange glory until this week, when it was time to start on my Home Décor project for Nathalie’s Creative Squad January Challenge. Bye bye, bears! Hello, Downtown and Crackle stencils!

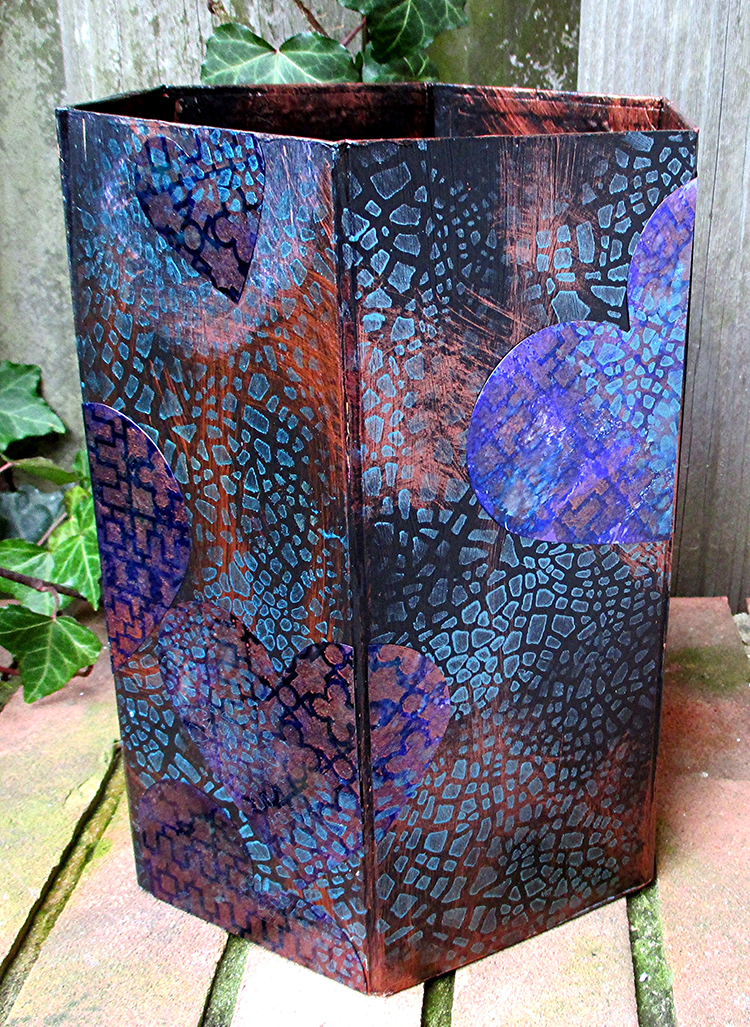
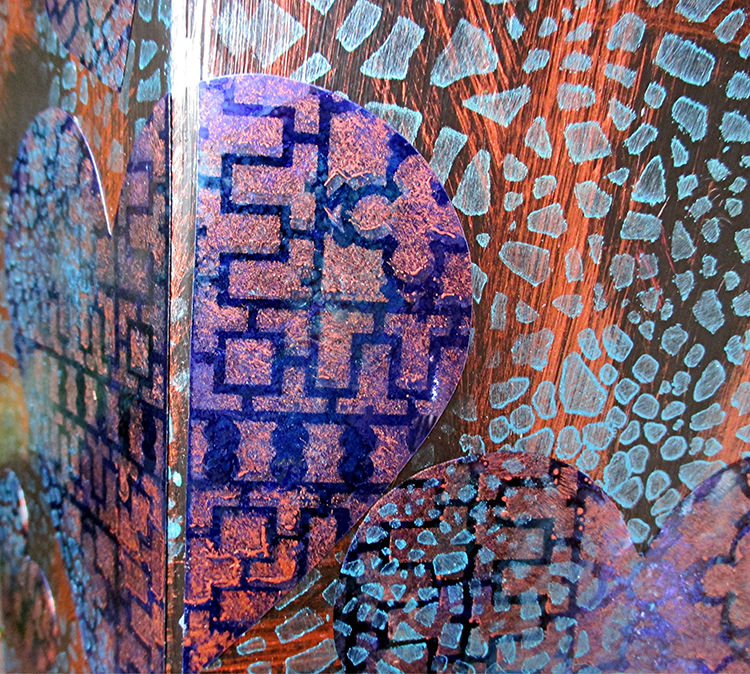
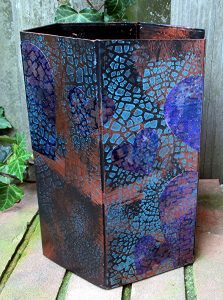
I gave myself a challenge within a challenge – to incorporate hearts, a shape usually thought of for Valentines and weddings, to create an offbeat, upscale, graphic design. Using a deep, rich, unexpected palette and stencils that helped take things to a new level made it easy to accomplish.

The hearts aren’t immediately obvious, the overall effect pleases my eye. I’m almost sorry that the trash can is going right back under the sewing machine. Maybe I should use it for a big bouquet of dried flowers instead!

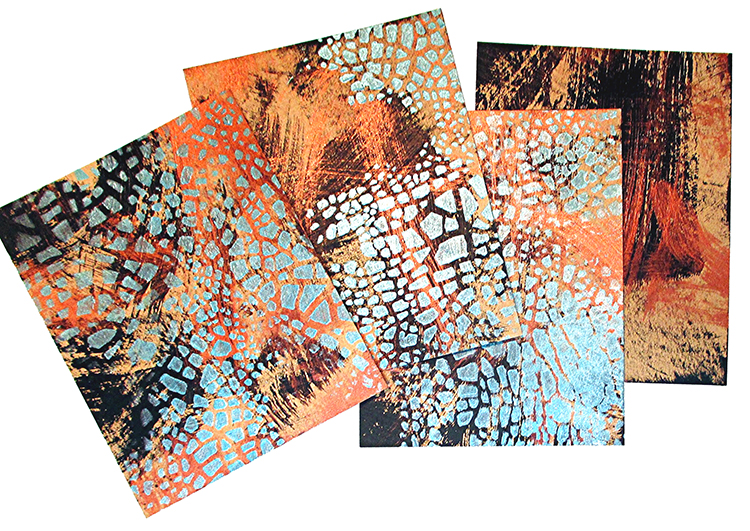
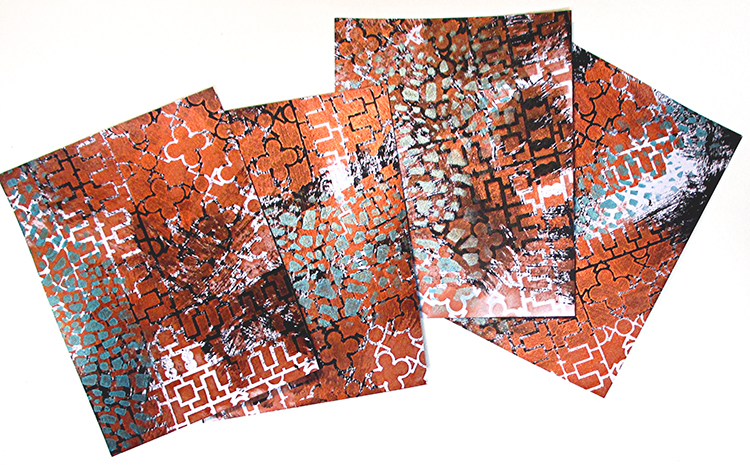
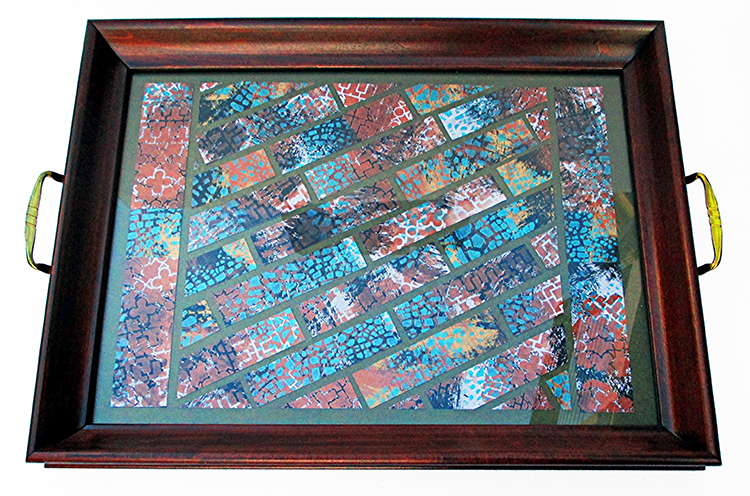
While I was at it, I wiped my brushes onto pieces of cardstock and stenciled on top of the brush marks. That gave me a second project – a mosaic style tray, an extra bonus.

Instructions for Trash Can:

To customize the project, pick a color palette that suits your décor. Alternatively, duplicate the project as shown by using the paints and Shimmer Sheetz that I chose. Either way: You will need two stencils (a graphic pattern plus a crackle pattern), metallic acrylic paint in two colors, black or white gesso, and Shimmer Sheetz that coordinates with the paints and gesso.

Choose a trash can with smooth sides. Base coat with black gesso. Randomly brush with copper metallic acrylic paint, leaving much of the black visible. Randomly stencil with Crackle pattern in teal metallic acrylic paint. Allow to dry. (Choose paints appropriate for the trash can – mine is paper-covered, but yours may be metal.) *Wipe brushes onto quarter sheets of cardstock before washing them. (8.5” x 11” cut into four pieces.)

Freehand or die-cut hearts from Amethyst Gemstone Shimmer Sheetz in assorted sizes. Back the Shimmer Sheetz with double-sided adhesive sheet prior to cutting. Size of hearts is determined by the size and shape of the trash can. Keep the scraps for other projects. Note: I used the AccuCut GrandeMARK machine with standard cutting dies. If you use a Big Shot or other personal-size machine with thin dies, a metal adaptor plate is required– follow Els van de Burgt’s YouTube tutorial for this technique. *While you’re at it, stencil onto the cardstock that was wiped with paint in Step 1. Set aside stenciled cardstock to use for Tray.

Stencil the hearts with various sections of the Downtown Stencil using copper metallic acrylic paint. Randomly stencil with Crackle pattern in teal metallic acrylic paint. Allow to dry.

Arrange and adhere the hearts as shown or as you prefer. Note that many of the hearts have been cut where they move from one side of the trash can to the adjacent side, and some are cropped so they appear to extend at the top and bottom edges. This will not be necessary if using a round or oval trash can.


Instructions for Tray:

Find a tray with a glass insert or make one with a frame, handles, glass and sturdy backing. (Shown: Tea Tray from Sudberry House). Cut a background for the tray from metallic finish cardstock, carefully piecing together strips if the tray is larger than a single piece of cardstock.

Cut each piece of stenciled cardstock into four 1” x 4.25” strips and one 1.5” x 4.25” piece. Using the project photo below as a reference, piece together and adhere the 1.5” strips at the right and left sides of the tray, close to the handles. (This hides the seam where I joined bands of background cardstock.) Angle and trim the 1” strips to cover the remainder of the tray, leaving space between the strips for a mosaic effect.

Assemble the tray.

Options:

*Instead of simple strips, cut the cardstock into square mosaic ‘tiles’ or randomly cut mosaic pieces.

*Instead of backing the pieces with glue, adhere them to cardstock that has exposed double-sided adhesive sheet on top. Leave very little space between the pieces; use embossing powder and a heat tool to create the effect of textured grout! (This is time-consuming, but fun.)


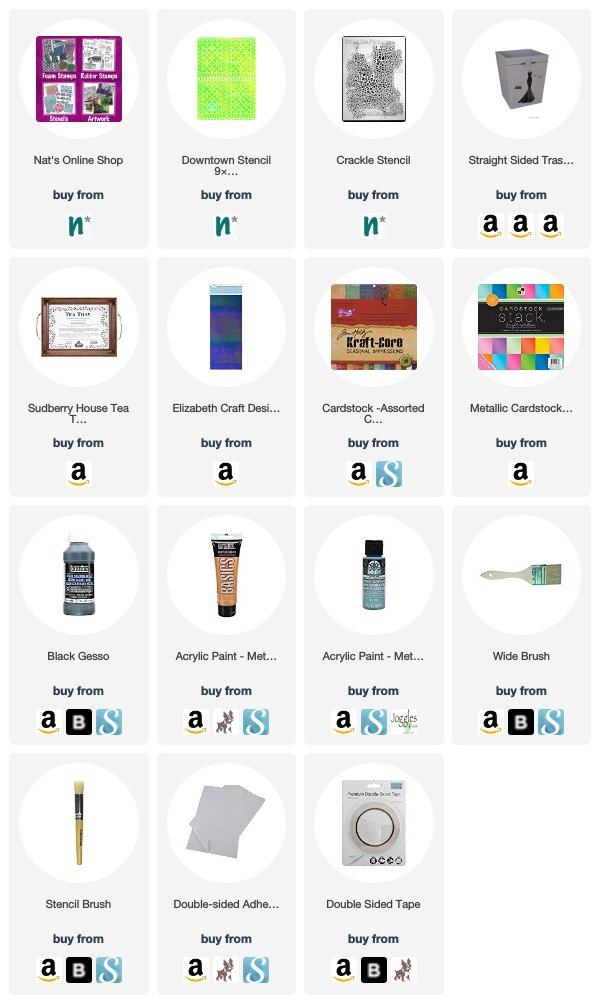
Thanks Judi! You really turned that teddy bear trash can into something great to look at! Feel inspired to try dressing up your own home decor items? You can find all my Stencils in my Online Shop. Here are some of the other supplies that Judi used:


Working on something yourself that you’d like to share?  I love to see how you interpret our monthly themes. Email me how you used my stencils and stamps with the theme and email me an image – I would love to share your projects in my next  “n*Spiration From Around the Globe“.
Leave a comment

Let’s Jump with the Creative Squad – Maura Hibbitts


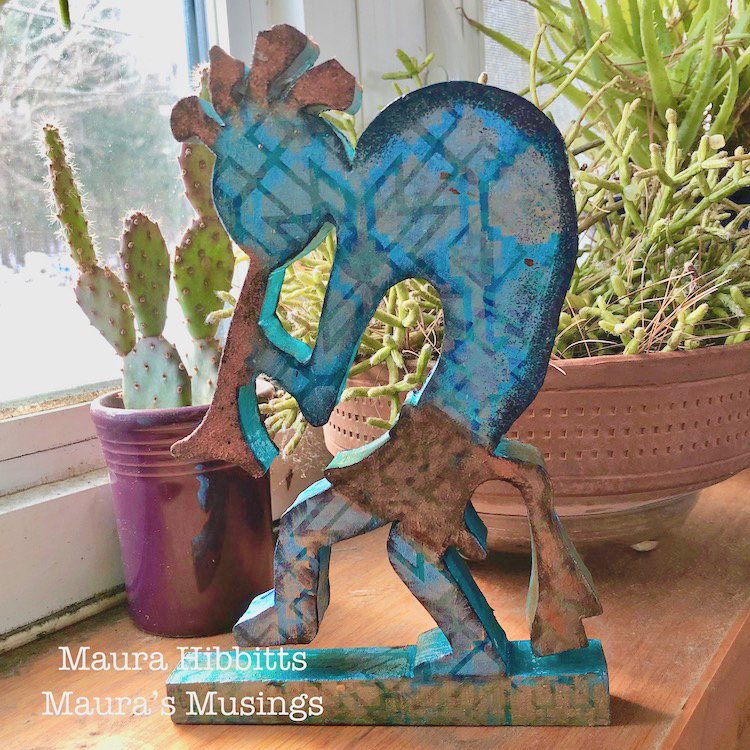
Today we have Maura Hibbitts with us sharing a project that is sure to brighten up any home – a lovely little Kokopelli figure! Maura is using my Downtown, Mesa Verde, Toledo, and Crackle stencils and this month’s theme: Let’s Jump! – The Creative Squad is joining the fun of Creative JumpStart 2019 this month. They’re creating objects for the home, inspired by the CJS19 theme My Home is My Castle.


We are focusing on home decor this month to brighten our personal “castles”. My husband drew a Kokopelli design years ago, following one of our epic summer camping trips to the Southwest, and then cut a number of them out of wood. I decided to use one of these figures and alter it with paint and stencils. I chose Kokopelli for a couple of reasons – one, he carried his “home” on his back as he traveled between pueblos, and two, we grow a number of cacti and succulents that have to come inside our home each winter, and they remind me of Kokopelli.

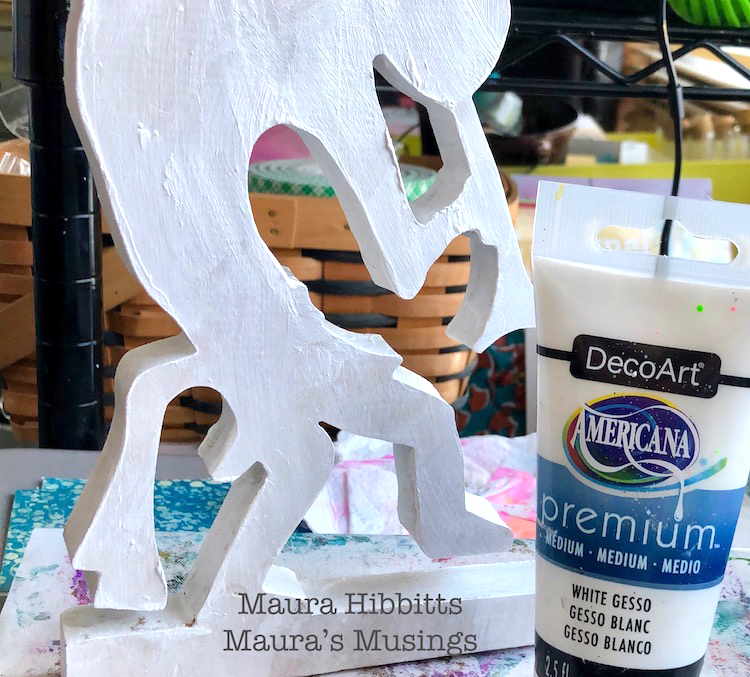
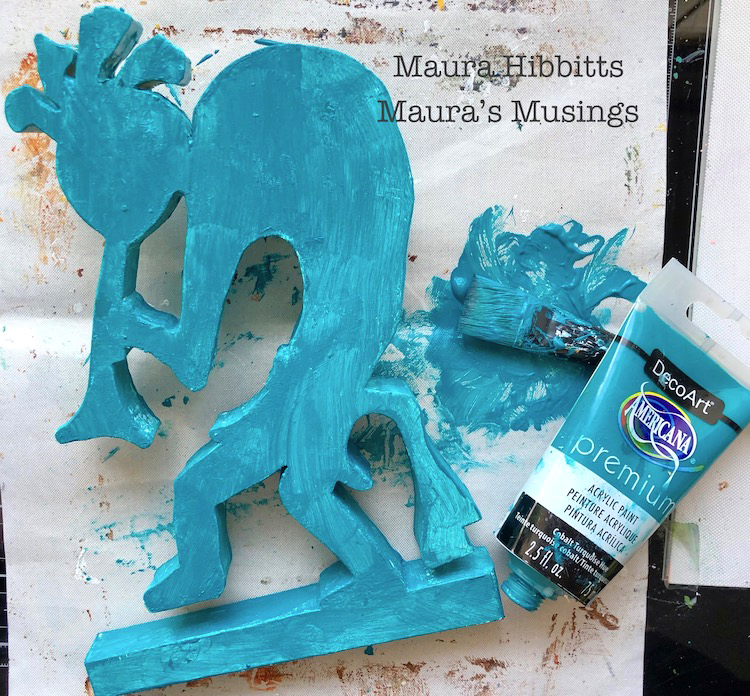
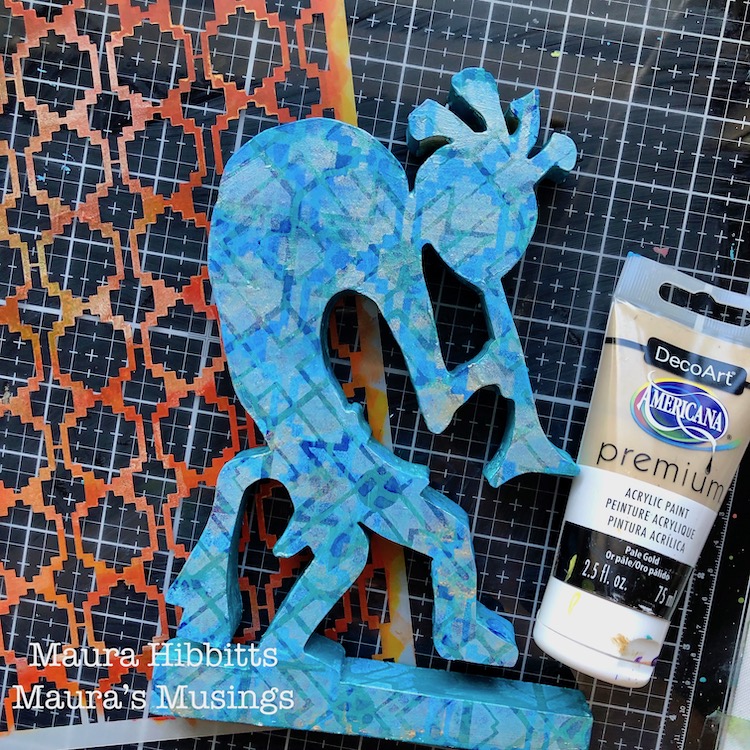
I started my project by painting the wood with gesso, and once that dried, painting him turquoise, a color I associate with the southwest. (I love the turquoise jewelry from this region.)

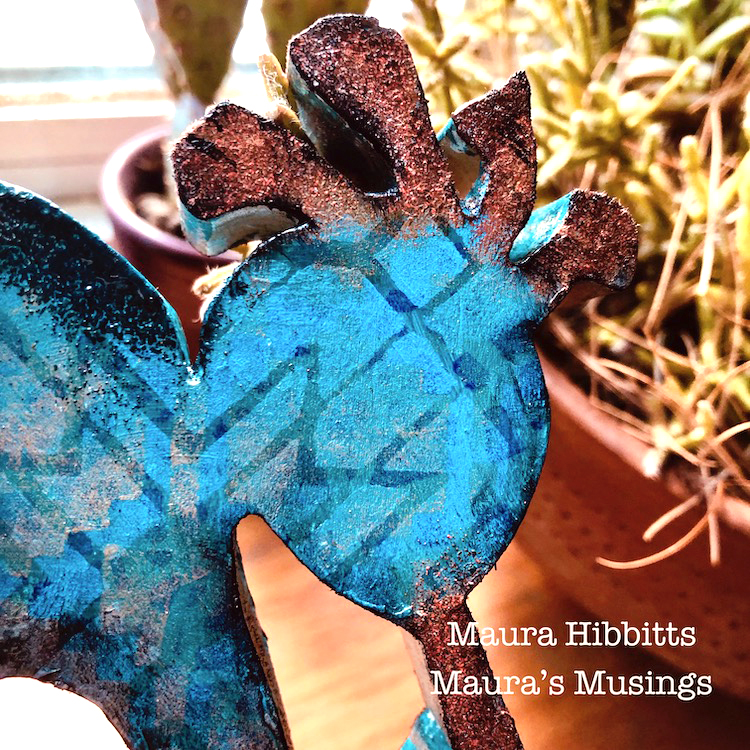
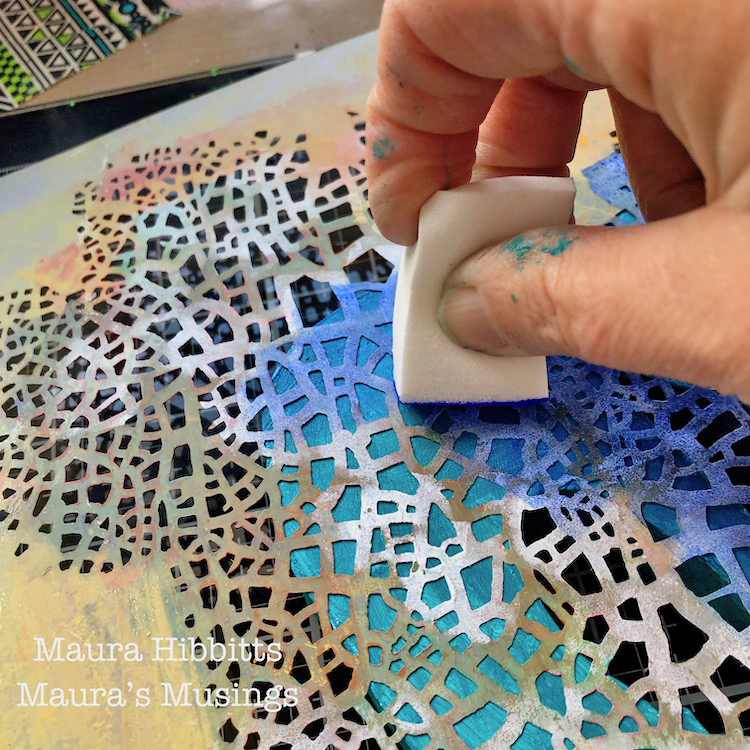
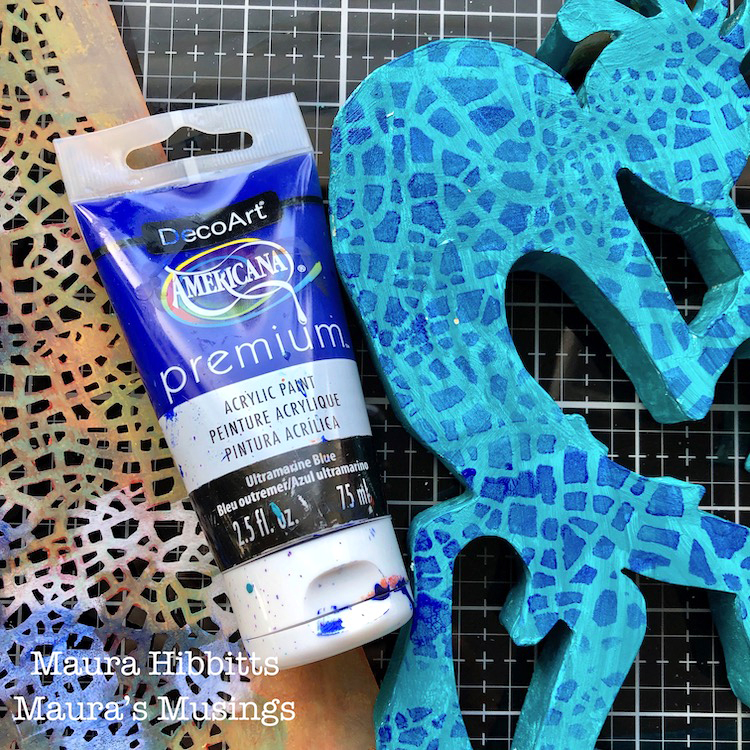
I laid the Crackle stencil onto the figure and using a cosmetic sponge, lightly dabbed Ultramarine Blue all over the front and back and edges. The edges were tricky to do, I had to wrap the stencil along the edge, hold it with one hand and dab the paint. It might have been easier to tape it on, now that I think about it.

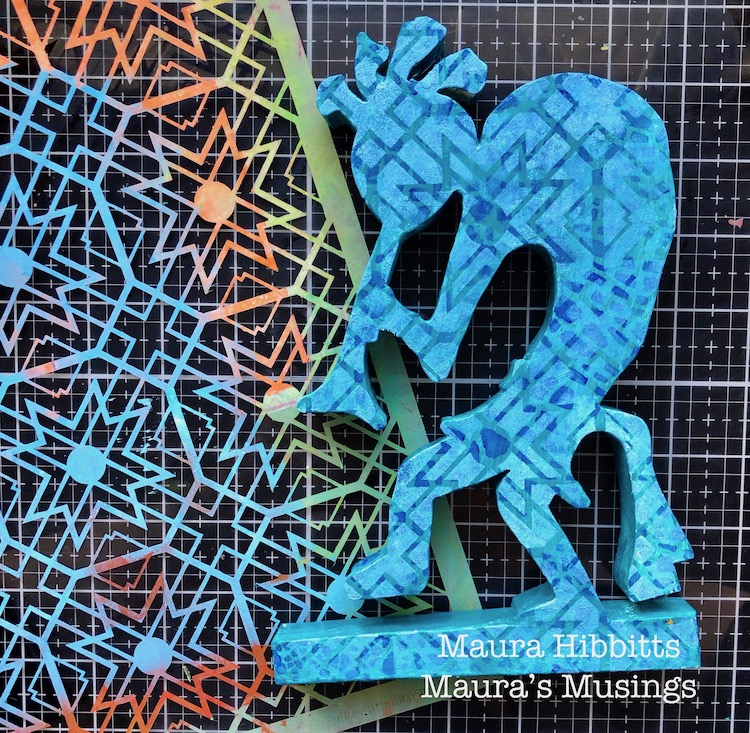
I wanted to use stencils with designs that remind me of the southwest, and Nathalie has several. I chose to use the Toledo stencil next, and mixed Titanium White and Cerulean Blue, then dabbed that on with the sponge.

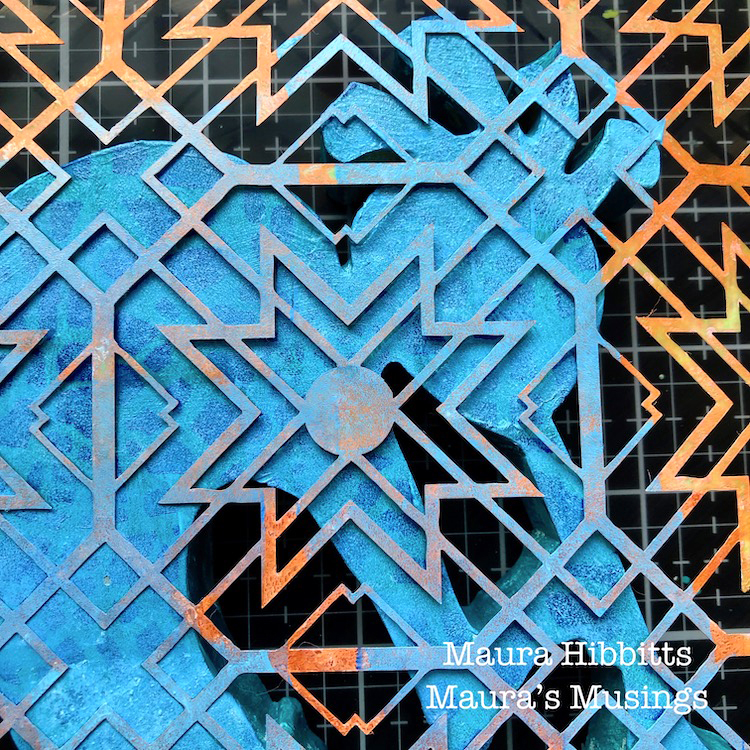
Now that I have all of my blue layers on, it’s time to add the gold. I used the Mesa Verde stencil with Pale Gold.

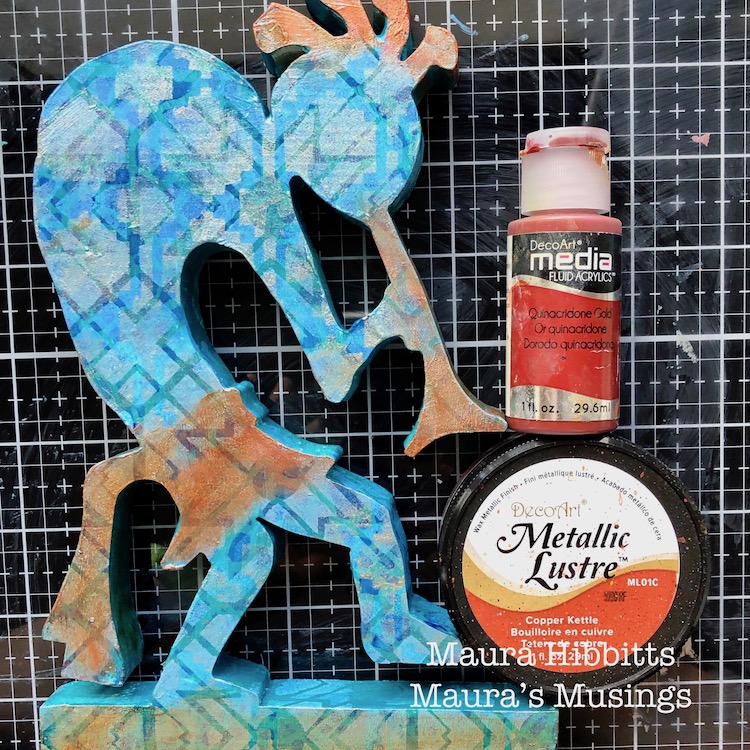
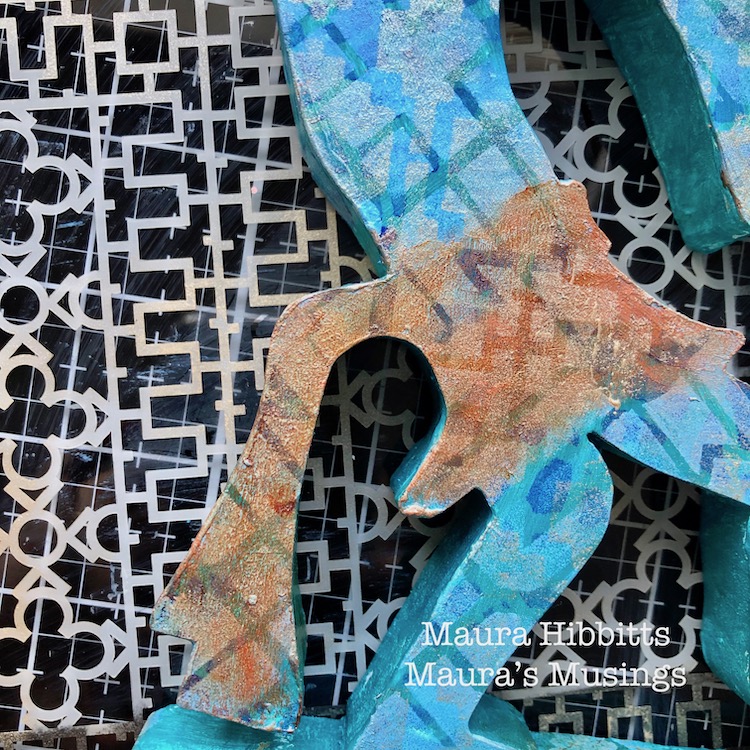
Kokopelli needs a bit of contrast, and I chose to add copper and gold to his hair, flute and loincloth. I started by rubbing on the Copper Metallic paste with my finger, and then rubbed on some Quinacridone Gold to bring out the color, and decided to add a bit to the base too.

I went back in to add more design on the loincloth area with the pale gold and the Downtown stencil.

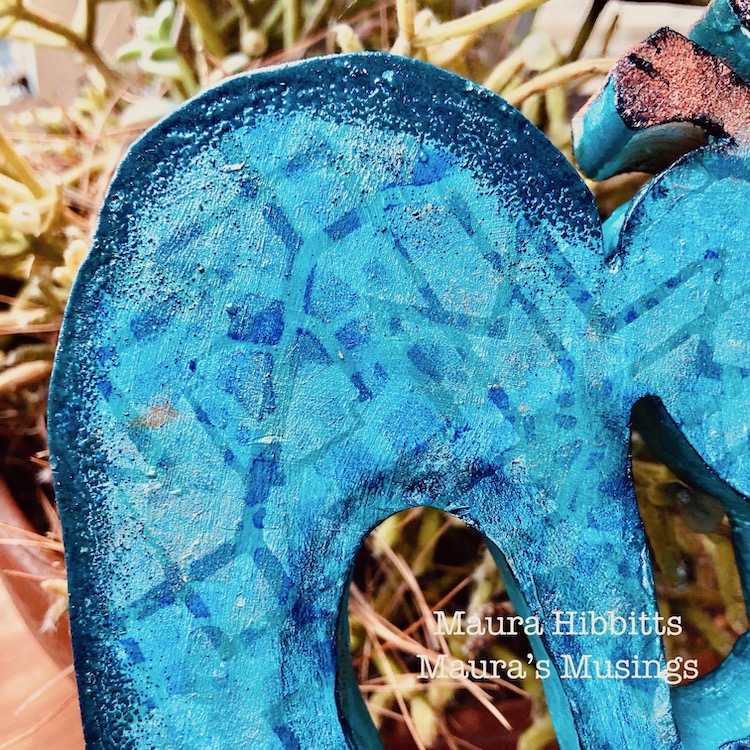
I decided to add a bit more contrast, and went back in with some embossing powder on the flute, hair and back area. When I did my final look at my project, I still felt like it needed a bit more definition, so took a small brush and edged the figure with Payne’s Grey.

Kokopelli is playing to the sun among the cacti in our front window. Listen for the song of his flute! – Maura


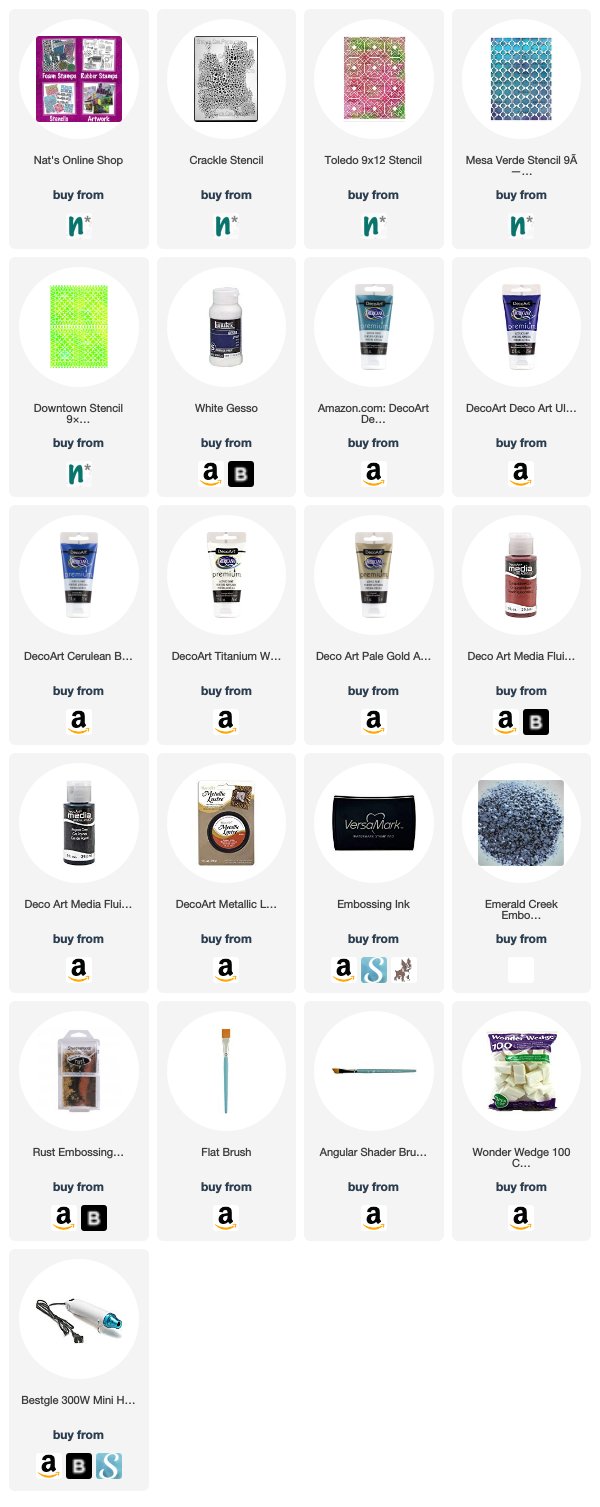
Thank you Maura! Loved hearing your personal connection to this little guy and seeing him transform into something with a lot of positive energy for the home :) You can find all my Stencils in my Online Shop. In addition to her wooden figure here are some of the supplies that Maura used:


Feel inspired? Working on something yourself that you’d like to share?  I love to see how you interpret our monthly themes. Email me how you used my stencils and stamps with the theme and email me an image – I would love to share your projects in my next  “n*Spiration From Around the Globe“.
Leave a comment

Let’s Jump with the Creative Squad – Jennifer Gallagher


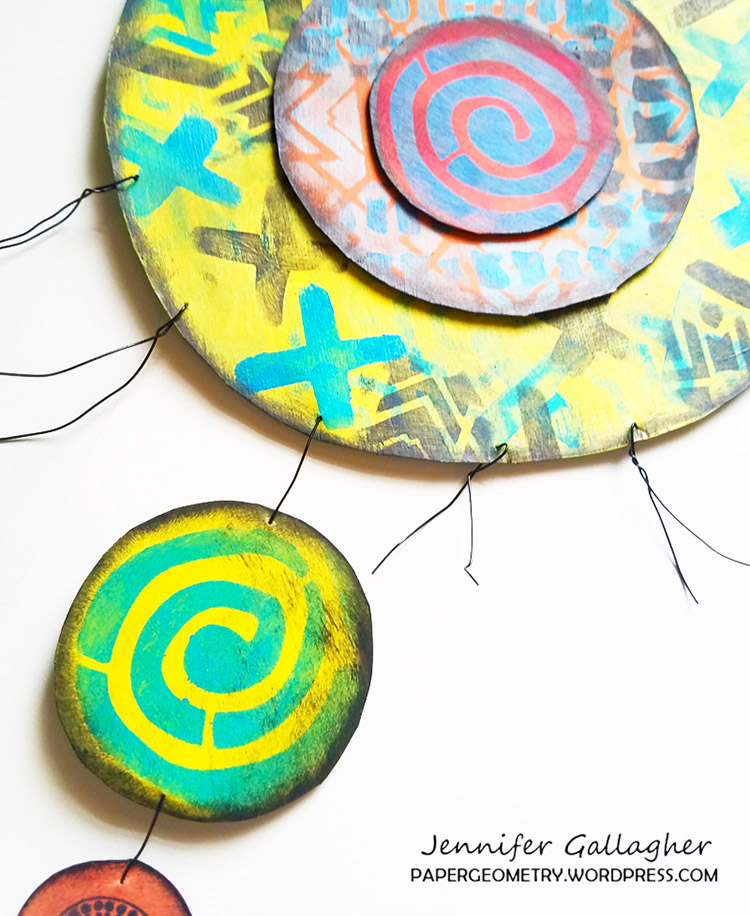
Today we have a post from Jennifer Gallagher from my Creative Squad! She is sharing with us a super cool wall hanging project that I love because it upcycles some materials you probably have around the home, and she transforms them into something gorgeous! Jennifer is using my Flower Maze, Toledo, and Batik stencils, and this month’s theme: Let’s Jump! – The Creative Squad is joining the fun of Creative JumpStart 2019 this month. They’re creating objects for the home, inspired by the CJS19 theme My Home is My Castle.


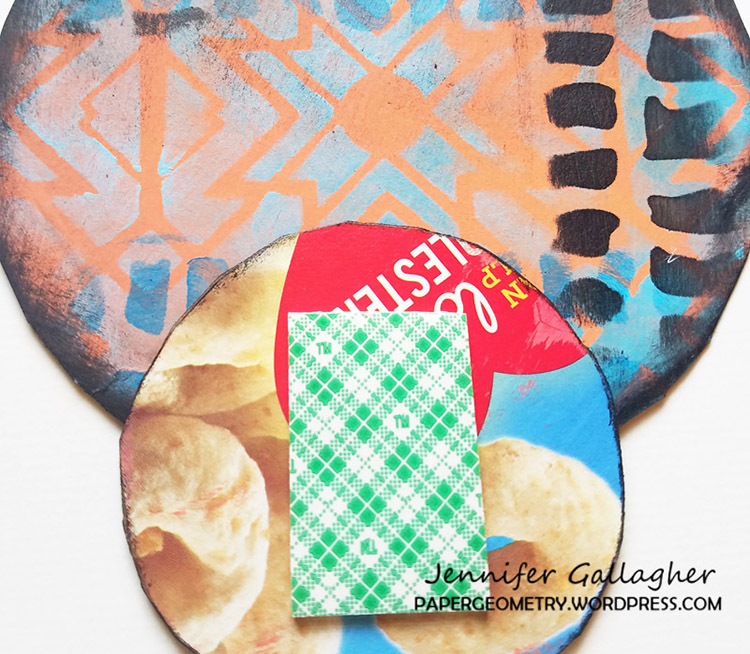
It’s a new year and that means another chance to join in and play along with Nat’s Creative JumpStart. The theme this year is all about home. We were challenged to create a home decor piece and that got me thinking that you don’t need a lot of money to decorate your home. All you need for unique decor is imagination and a little inspiration.

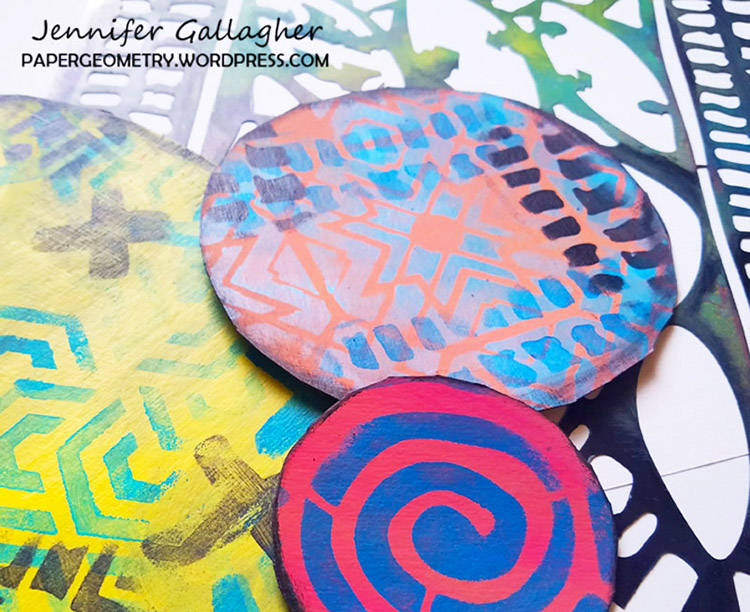
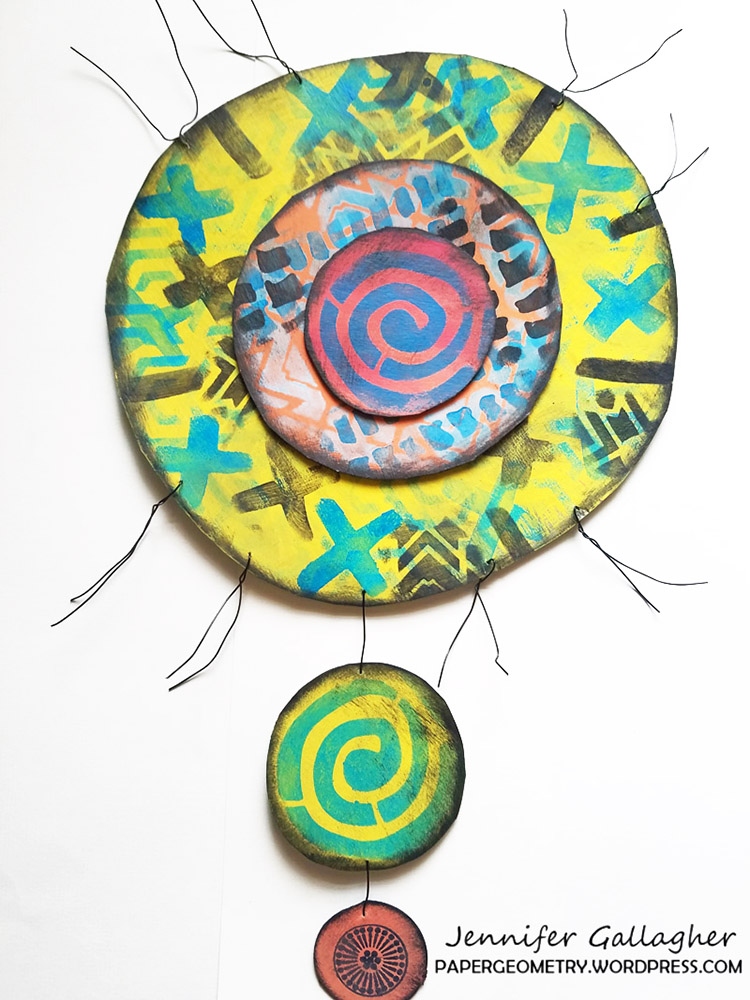
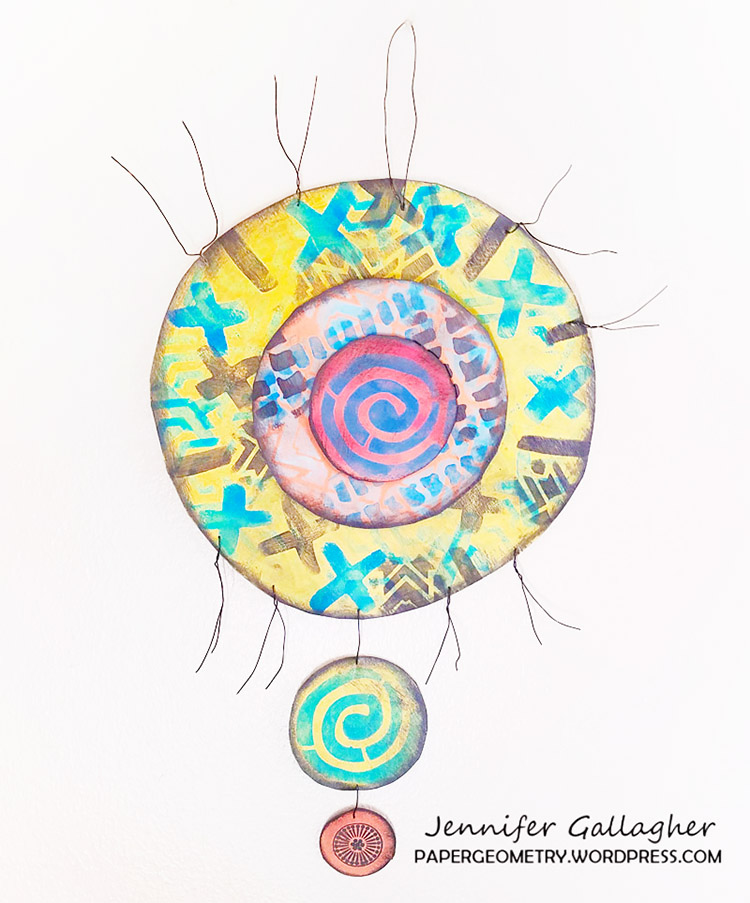
I began by cutting circles out of the cardboard: one large, one medium, two small, and one extra-small. I then applied a thin coat of acrylic paint onto each circle.

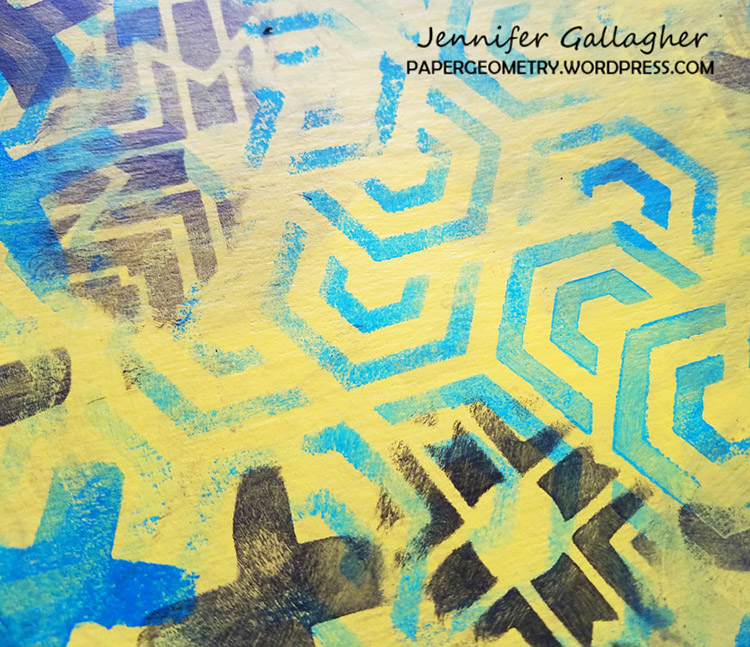
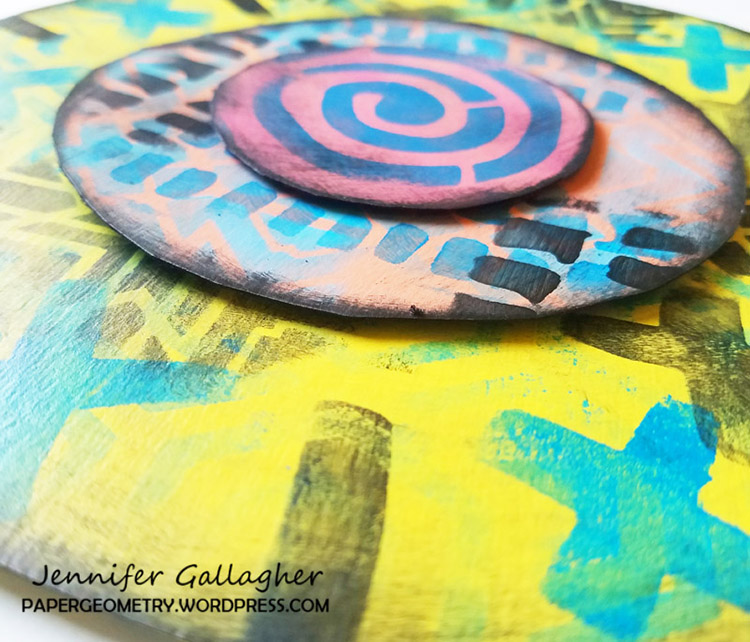
Next, I applied layers of stenciled designs in contrasting colors using Nat’s Flower Maze, Toledo, and Batik stencils. The final layer was painted in black for heavy contrast. I edged around each circle in black as well.

I placed a piece of mounting tape in the center of one of the small circles and attached it to the center of the medium circle. Then I attached the medium circle to the large circle with mounting tape as well.

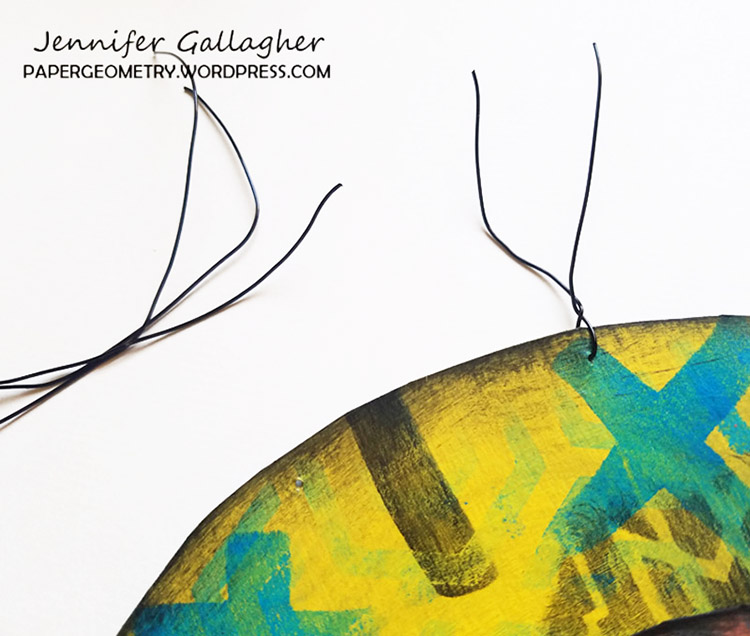
Next, I punched a hole in the top and bottom of the large circle (this is to attach a hook to the top and hang the small pieces from the bottom). You can use a hole punch or a safety pin for this step. Using wire snips, I cut small pieces of wire, about two inches long each. Using a safety pin I made several small holes around the edges of the large circle to attach my wire.

Finally, I attached a piece of wire for a hook and to hang the final small circle and extra small circle from the bottom. You could use string if you prefer.

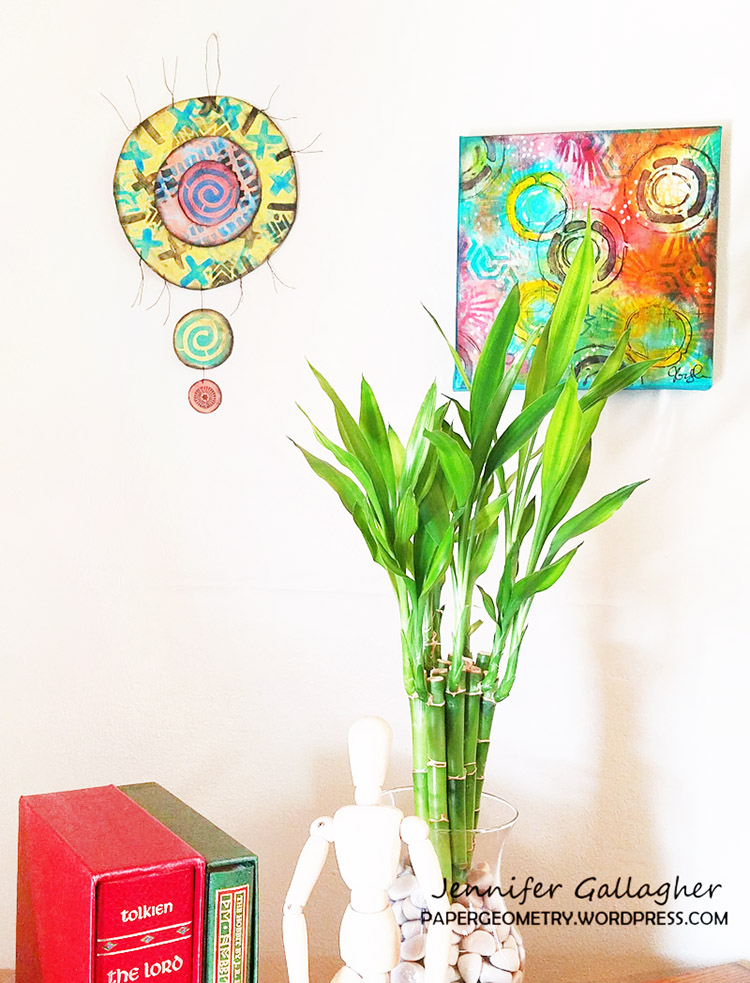
This piece really speaks to my funky, tribal aesthetic. If this style doesn’t suit your tastes, use it as inspiration only. You could definitely change up the stencil choices to make one perfect for your home. Be sure to check out Creative JumpStart and get loads more inspiration.


Thank you Jennifer – we are always big fans of using materials in new ways – even stuff that you might first think of as trash :) You can find all my Stencils in my Online Shop. In addition to cereal boxes or other thin cardboard here are some of the supplies that Jennifer used:


Feel inspired? Working on something yourself that you’d like to share?  I love to see how you interpret our monthly themes. Email me how you used my stencils and stamps with the theme and email me an image – I would love to share your projects in my next  “n*Spiration From Around the Globe“.
Leave a comment

Let’s Jump with the Creative Squad – Josefine Fouarge


Welcome to the creative adventures of my Creative Squad :) Today we have Josefine Fouarge with a home decor piece using my Art Deco, Ornament, Lily and Park Blvd stencils and this month’s theme: Let’s Jump! – The Creative Squad is joining the fun of Creative JumpStart 2019 this month. They’re creating objects for the home, inspired by the CJS19 theme My Home is My Castle.


Welcome to 2019 and an entire year of excitement and creativity. January is starting off with a great treat – Creative JumpStart, this year with the theme “My Home is My Castle”. The Creative Squad jumps with all the 31 artists (and hopefully you?) and shares their interpretation of the theme.

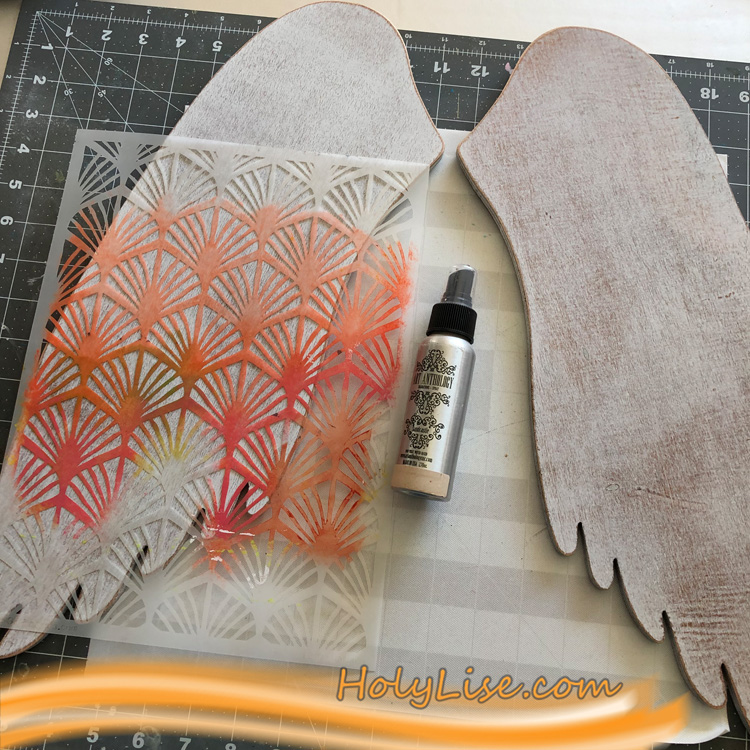
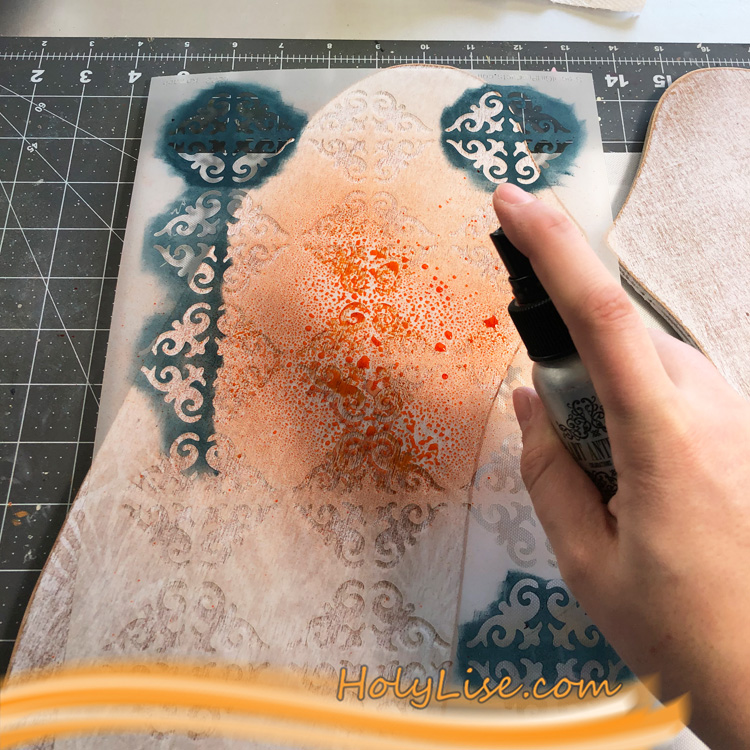
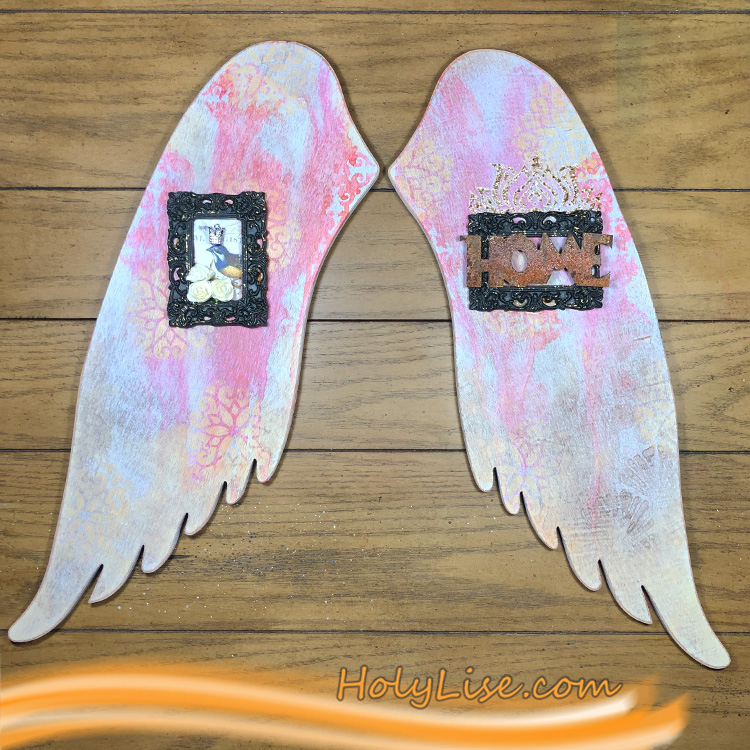
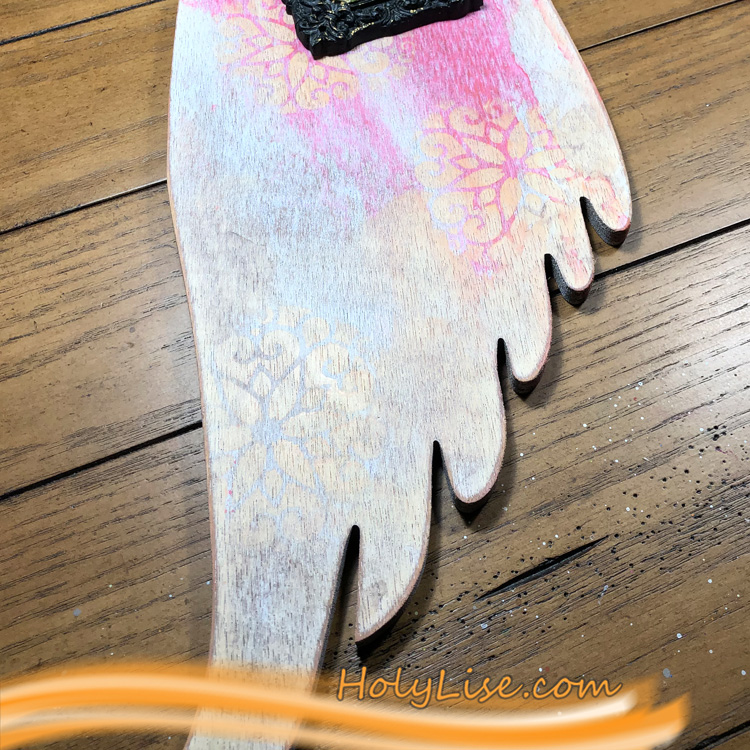
My project is a set of wings that has been laying around for a while now. I thought that it is perfect for my next home decor piece, so I grabbed it and stared at the wings for a while. I rarely work in a size like that and I felt a little intimidated at first. Once I let go of the feeling, I just grabbed Nat’s Art Deco stencil and a color spray and started.

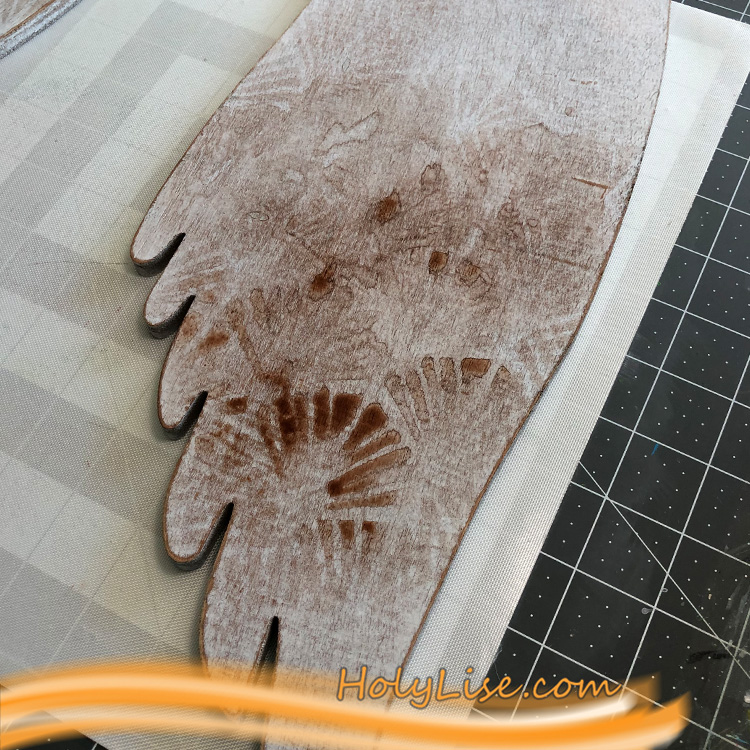
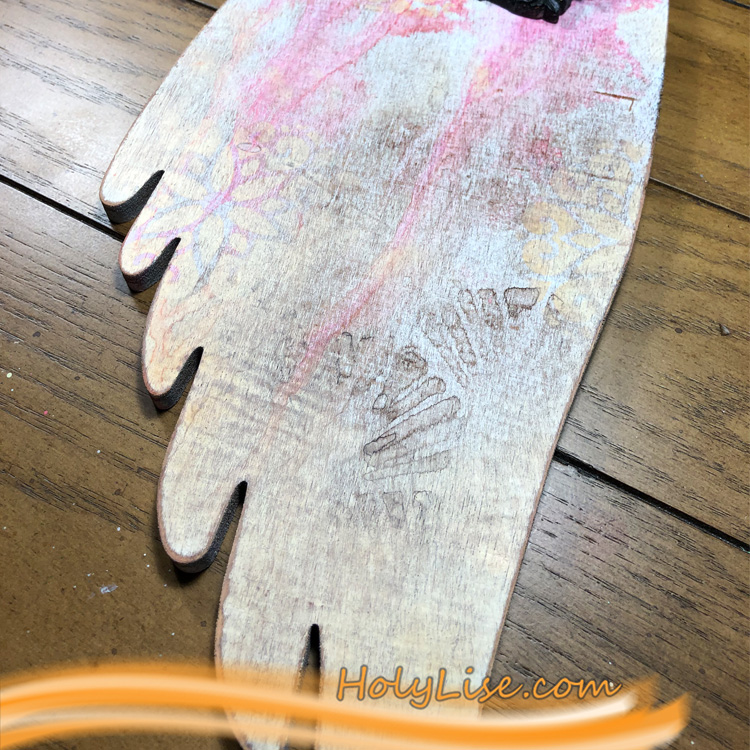
I added a little texture to both wings, starting with a more neutral color.

The more patterns I added the more confident I got and finally, was able to let go of the intimidating feeling. I enjoy when this happens as it allows me to turn my head off completely and just enjoy the creative process.

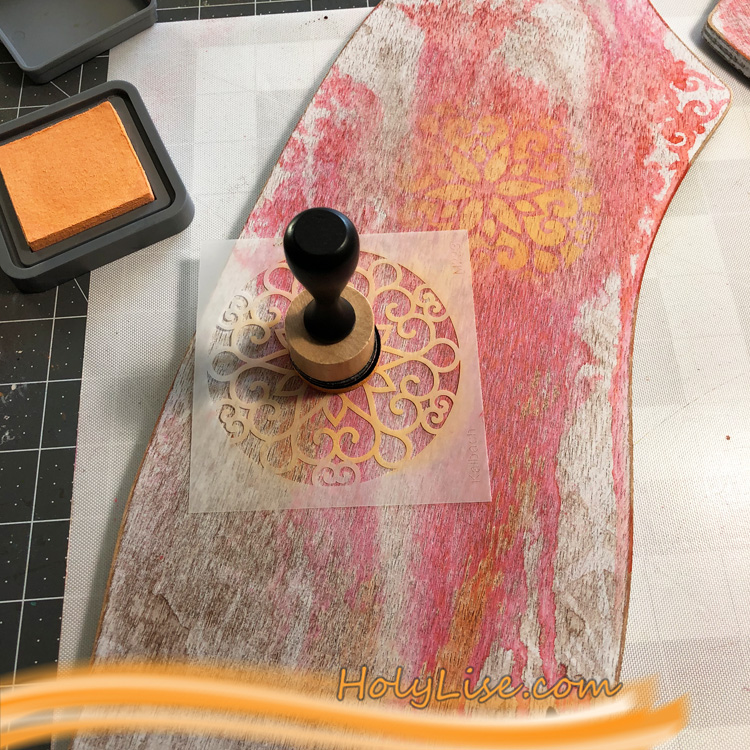
After I added a few ink sprays and mixed them up with water, I added more patterns with Nat’s Ornament and Park Blvd stencils using Distress Oxides.

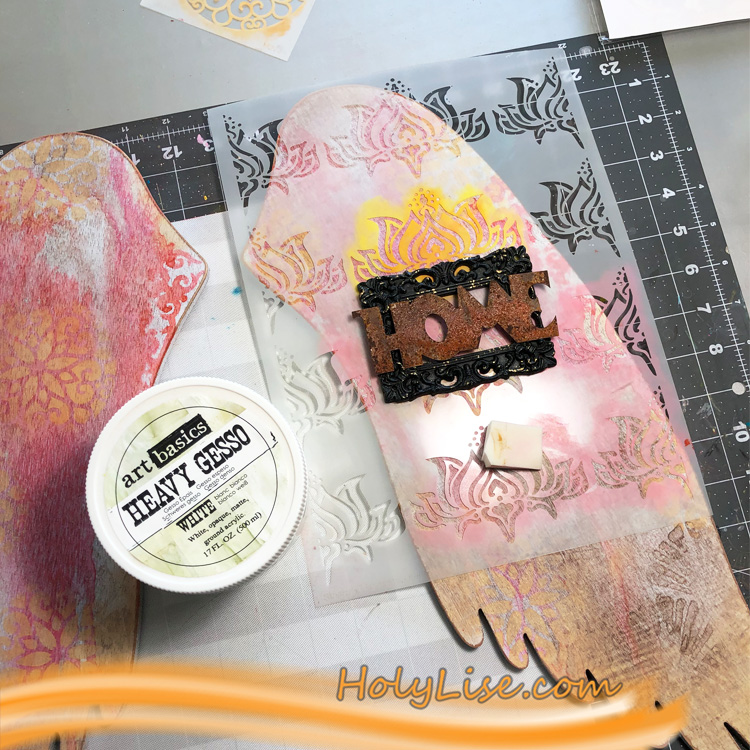
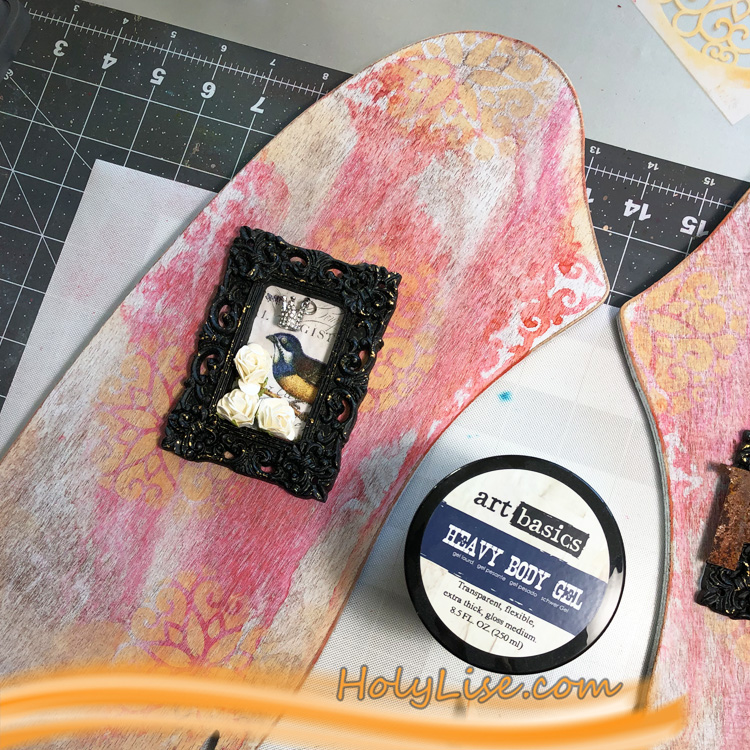
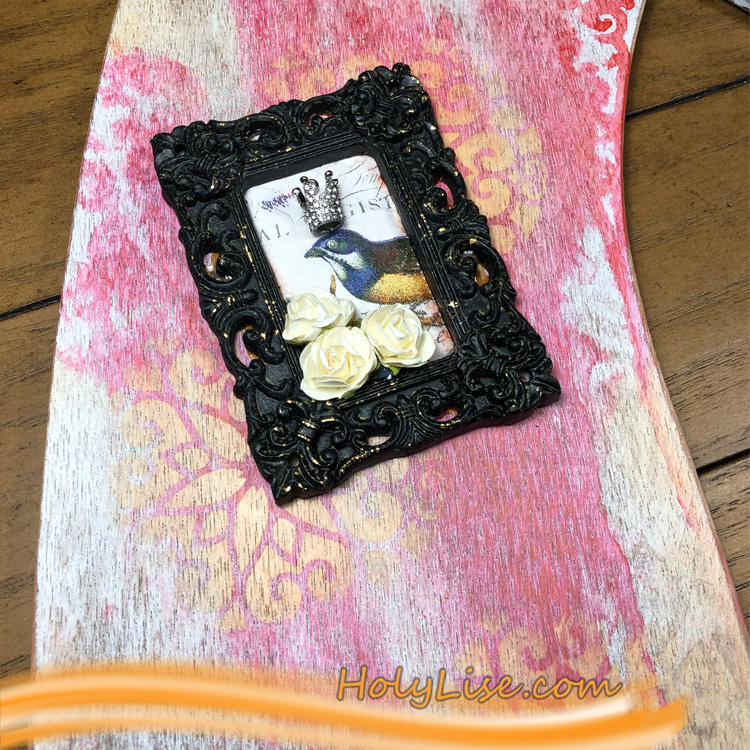
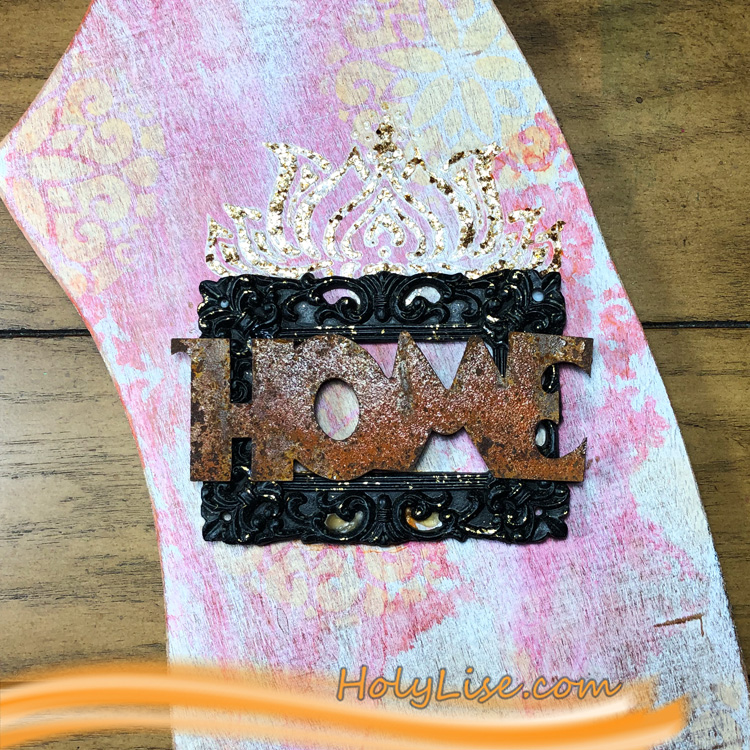
Once I liked my background, I started working on my foreground. I found the “home” at an antique store. It’s a rusted metal piece that was perfect for my project. So, I arranged the Lily Wallpaper stencil, a frame and the metal word till I liked the composition.

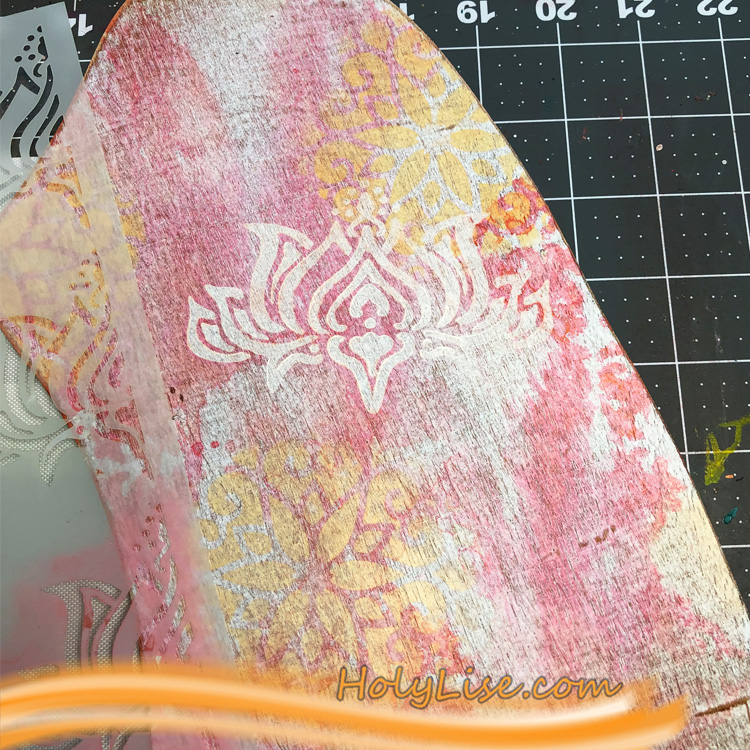
First, I added some gesso through the stencil and later some Golden Mica Flakes.

I adhered the one frame down, but the other wing felt naked. Thankfully, the frame came in a 2-pack which allowed me to assemble another one.

Now I had to let it sit. Patience… But it was so worth it. All the pieces are securely attached to the wings and I can now hang my new home decor piece.

I like that it looks like a simple piece but when you look closely, you can see all the different patterns and layers.

Thanks so much for stopping by. Don’t forget to check out Creative Jumpstart and all the inspiration that it comes with.


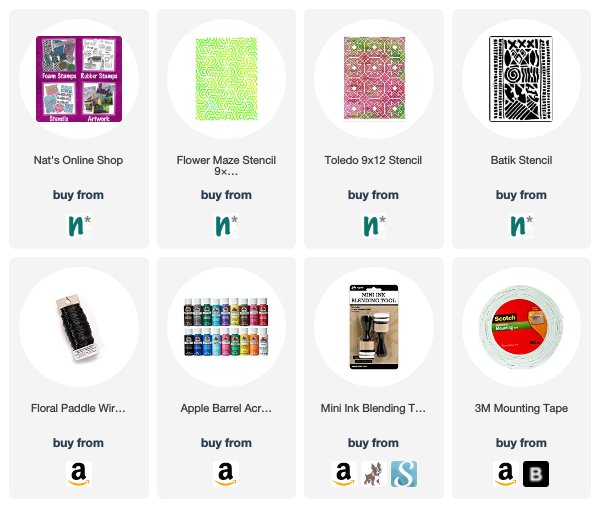
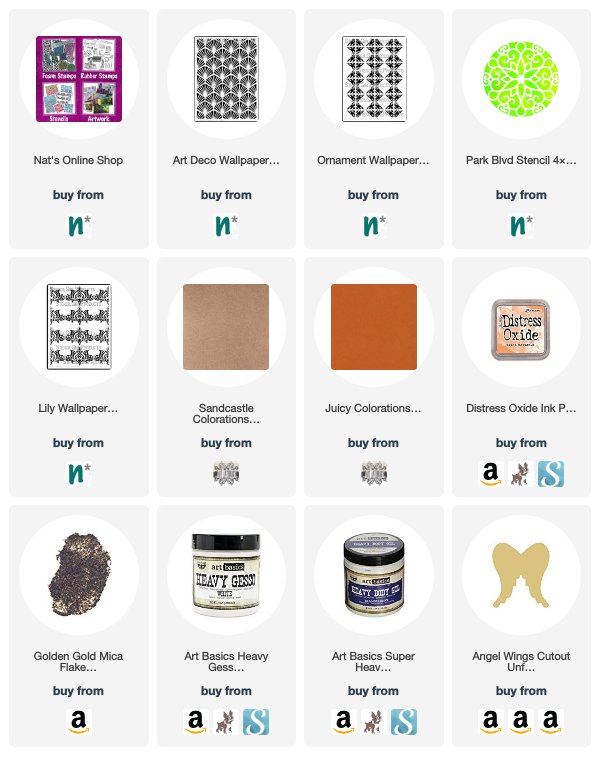
Thank you Josefine! I hope all of our readers will find inspiration from this post to try something new and maybe even a bit daunting this new year. Just go for it like Josefine did! You can find all my Stencils in my Online Shop. In addition to some decorative frames and assemblage elements, here are some of the other supplies that Josefine used:


Feel inspired? Working on something yourself that you’d like to share?  I love to see how you interpret our monthly themes. Email me how you used my stencils and stamps with the theme and email me an image – I would love to share your projects in my next  “n*Spiration From Around the Globe“.
Leave a comment

Let’s Jump with the Creative Squad – Tania Ahmed


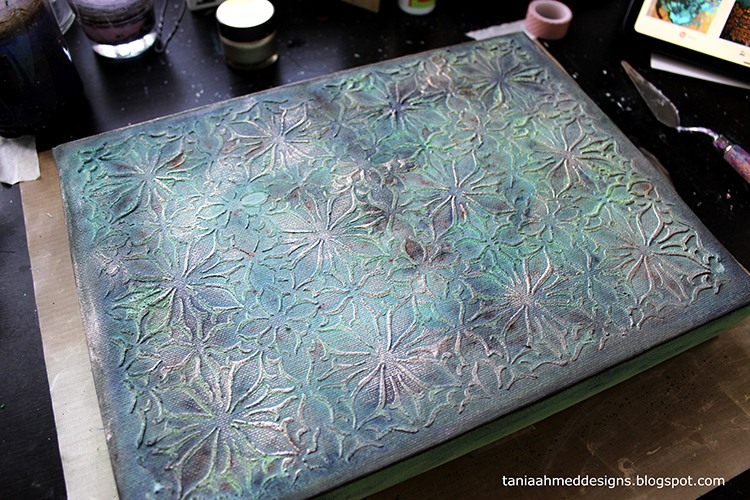
Happy New Year from the Creative Squad! This month we have a special edition of projects from the team as they are playing along with the Creative JumpStart workshop that just kicked off yesterday! Here is Tania Ahmed with a gorgeous canvas using my Van Vorst stencil and the theme: Let’s Jump! – The Creative Squad is joining the fun of Creative JumpStart 2019 this month. They’re creating objects for the home, inspired by the CJS19 theme My Home is My Castle.


Hi Everyone!

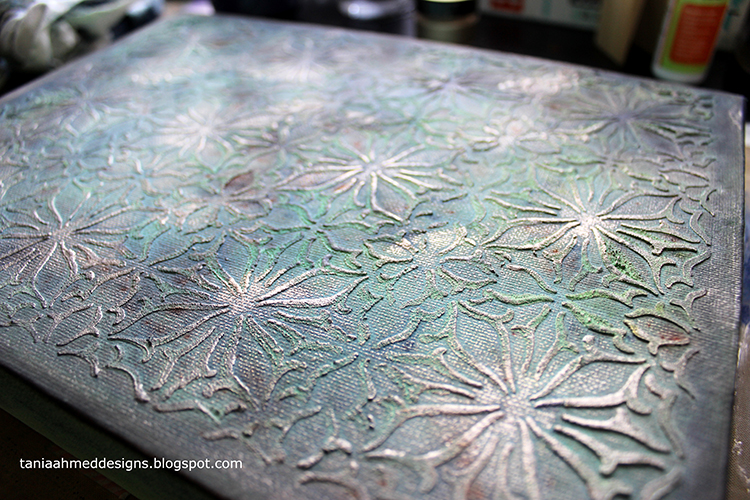
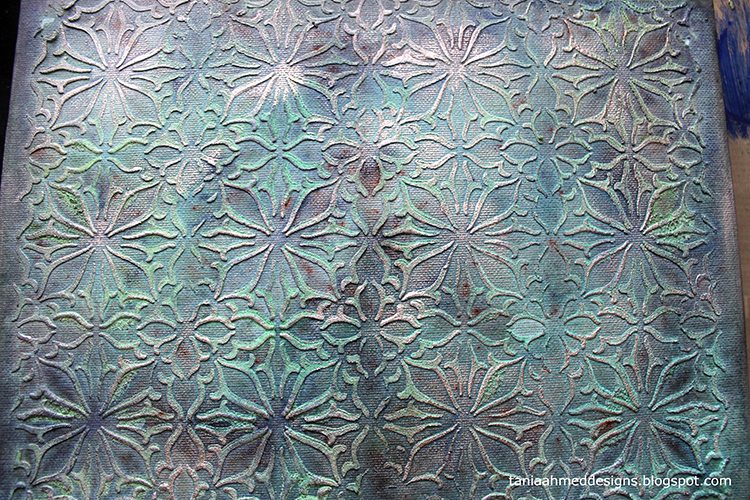
The theme for this month is the same as Creative Jumpstart: My home is My Castle, and we were challenged to create a mixed media home decor piece. I am really into creating canvases these days, so when I found out that the product focus for this month was for us to use stencils, I knew this was my chance! I got busy and made a highly texturized mixed media canvas and I have made a video with a voice over how I made it.

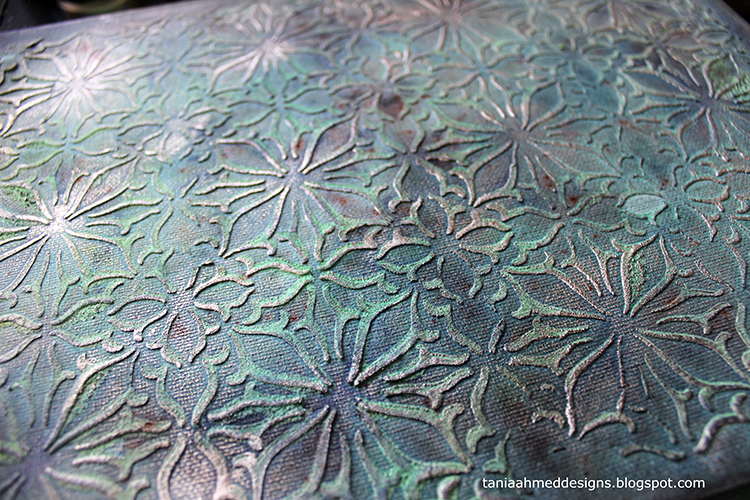
My inspiration was rusty, copper patina, textured and worn surfaces. I really love how materials (especially metal) age and oxidise over time and I wanted to try and emulate that or at least take inspiration from the effect.

I used moulding paste by Golden and Brusho pigment inks, along with different pencils and mediums to add shading and highlights. I used it with one of Nat’s Stencils that I have been itching to use called Van Vorst which is a very detailed stencil which actually reminds me of hand hammered metal work plates.

I hope you enjoyed my video and are taking part in Creative Jumpstart! Thank you so much for dropping by and I hope you are having a great start to the New Year!


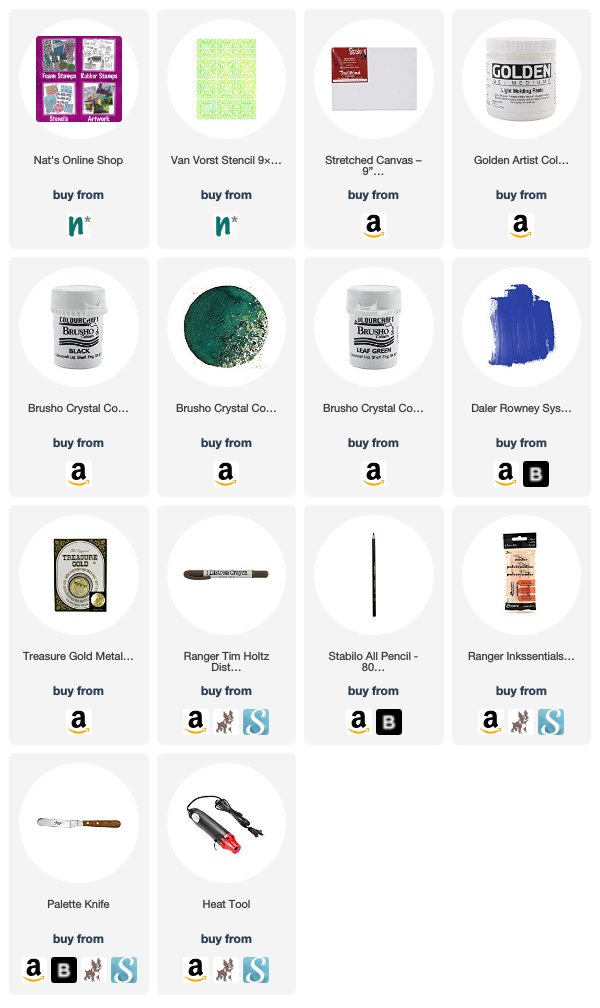
Thank you Tania – such a beautiful surface!!! You can find all my Stencils in my Online Shop. Here are some of the other supplies that Tania used:


Feel inspired? Working on something yourself that you’d like to share?  I love to see how you interpret our monthly themes. Email me how you used my stencils and stamps with the theme and email me an image – I would love to share your projects in my next  “n*Spiration From Around the Globe“.
Leave a comment

Creative JumpStart Interviews with Rae, Mary Beth, Mystele, and Sandra

The final batch of interviews is in!!! Here are your Creative JumpStart Artists chatting about art, life, and so much more :)

“Jumping with” is an interview series that I like to do to showcase some of the CJS artists. Each year we always have some new faces or folks that I haven’t spoken with in a while and it’s a fun way for us to get to know the artists a little more before January. Grab a cup of coffee, sit back, relax and enjoy a few interviews with some very talented people.

You can learn more about Rae here:

nstudiowebsitesocialmediablog nstudiowebsitesocialmediafacebook nstudiowebsitesocialmediainstagram

You can learn more about Mary Beth here:

nstudiowebsitesocialmediablognstudiowebsitesocialmediafacebooknstudiowebsitesocialmediainstagram

You can learn more about Mystele here:

nstudiowebsitesocialmediablognstudiowebsitesocialmediafacebooknstudiowebsitesocialmediainstagram

You can learn more about Sandra here:


Early Bird pricing for Creative JumpStart 2019 is available for just a couple more days!!! Don’t delay, sign up now and get ready for 2019 to be a year where you JumpStart YOUR Creativity. The workshop begins on January 1st and you can sign up TODAY for just $50:

Comments (2)

Leave a comment

Warm Wishes – Maura Hibbitts


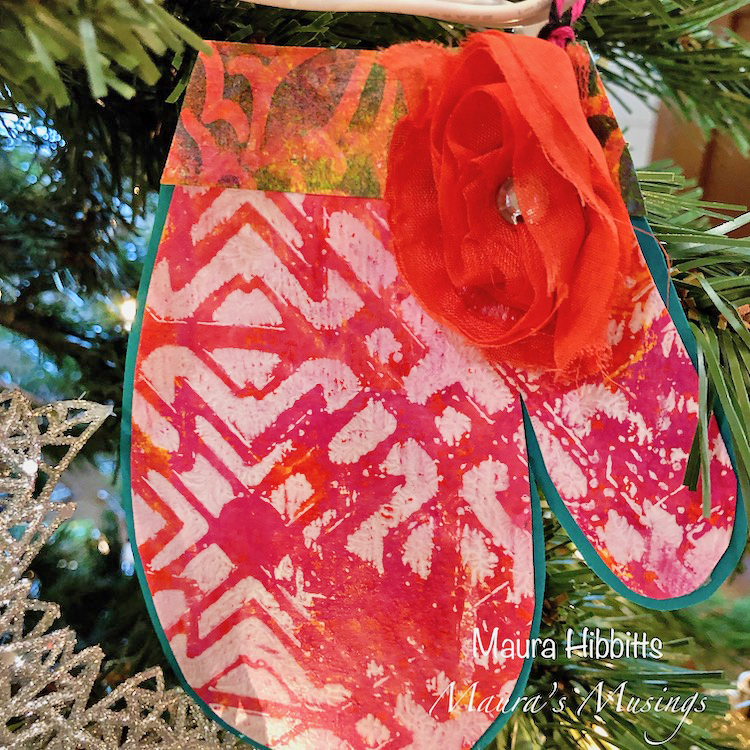
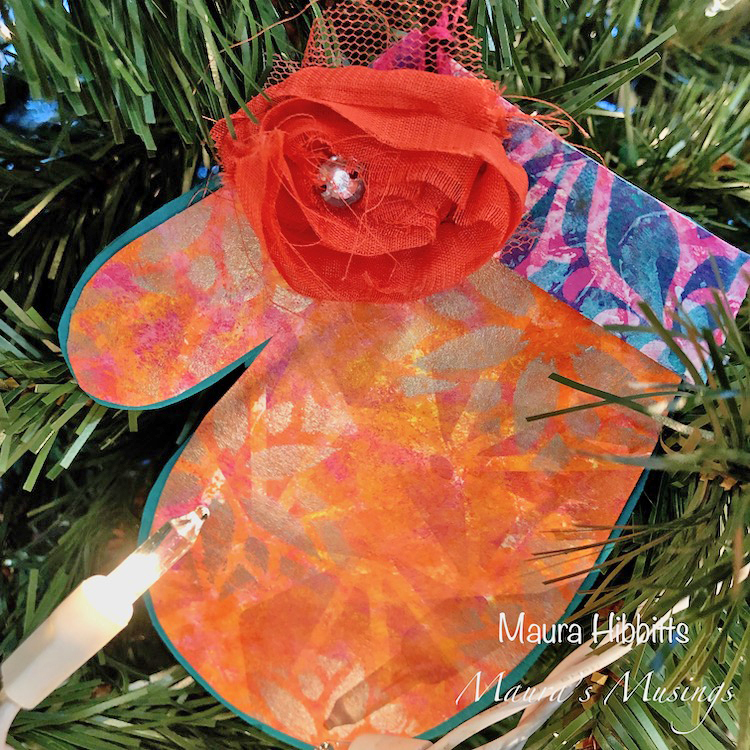
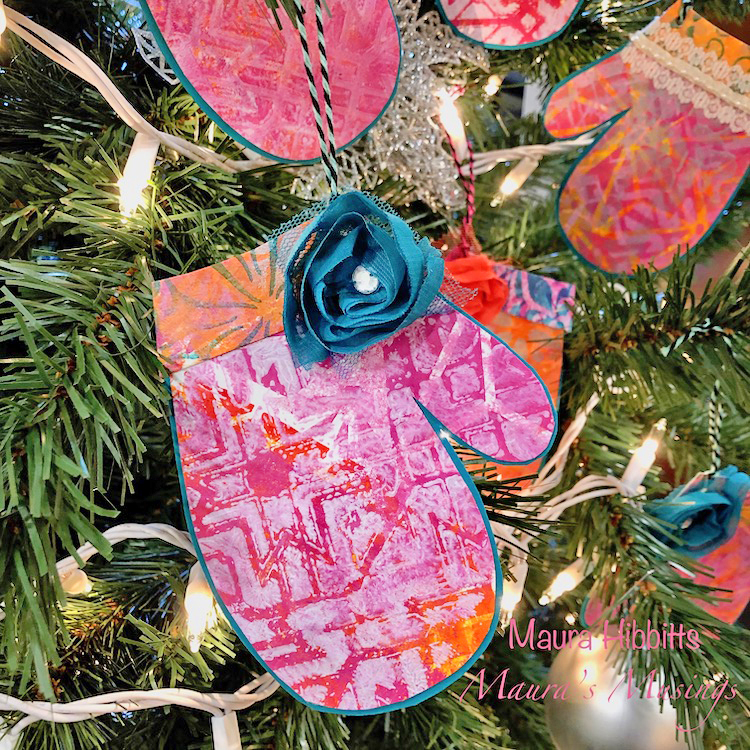
Happy Holidays from the Creative Squad and Maura Hibbitts! Today Maura brings us a wonderfully charming seasonal project just in case you need a last minute ornament or gift tag idea. She uses my Park Blvd 4×4, Toledo 9×12, and Toledo 4×4 stencils and my Diamond Hex, Antique Tile, and my Van Vorst foam stamps to bring us a project that will surely warm you up this season :) The theme this month is: Warm Wishes – For many cultures around the world, December is a holiday season filled with celebrations and good cheer. The Creative Squad is taking this month to send Warm Wishes to all our readers!


Tis the season, right? Winter has arrived on the calendar, we’ve celebrated the Winter Solstice, and tomorrow is Christmas for all who celebrate. Happy Solstice! Merry Christmas! Happy New Year! My winter started early this year in November with snow and cold, so staying warm is a priority. I headed for warm colors in my project and sketched out a mitten pattern to use as I rarely head outdoors these days without my mittens or gloves.

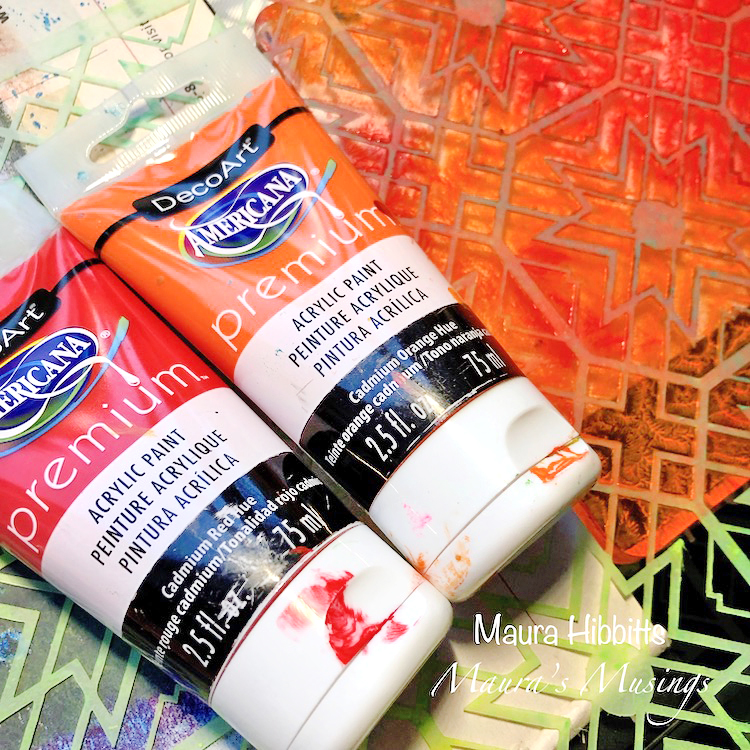
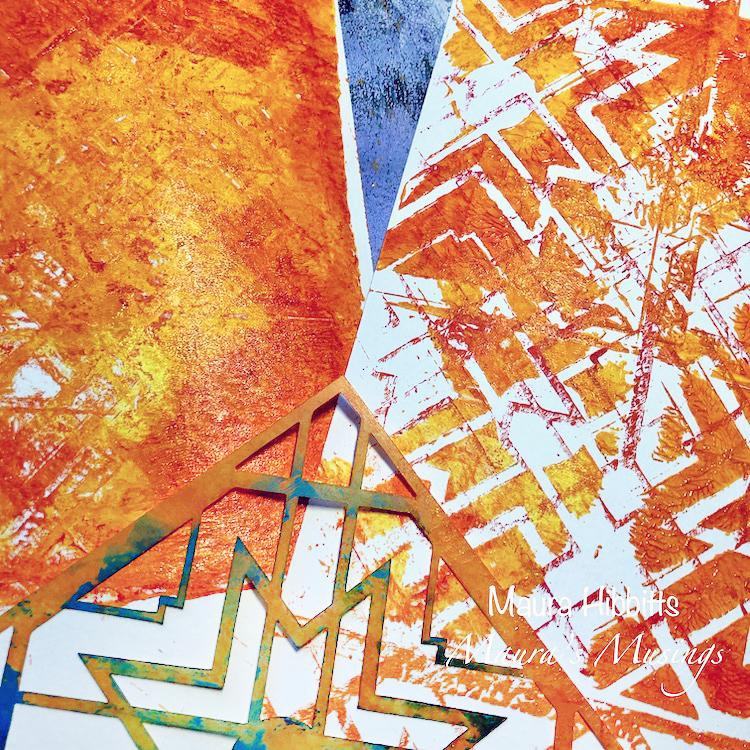
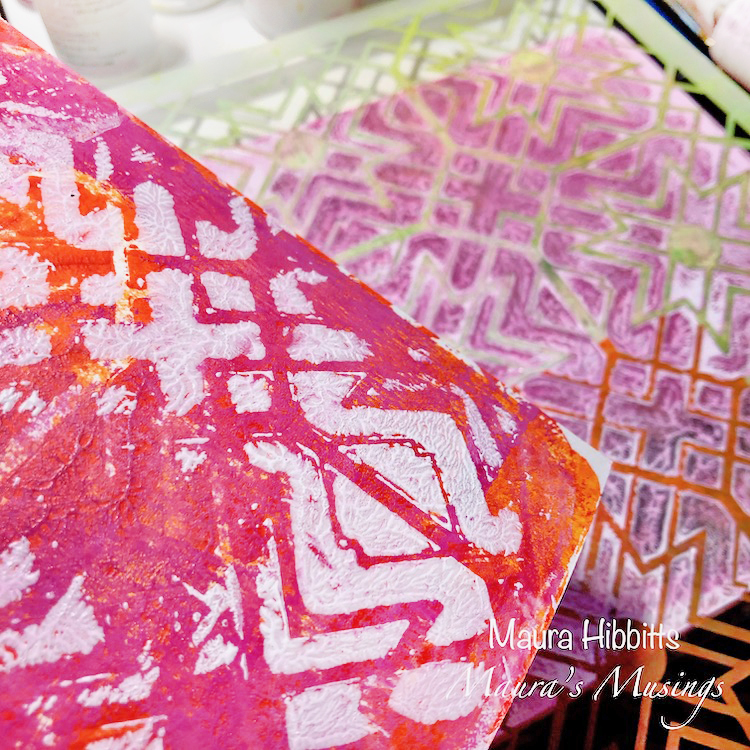
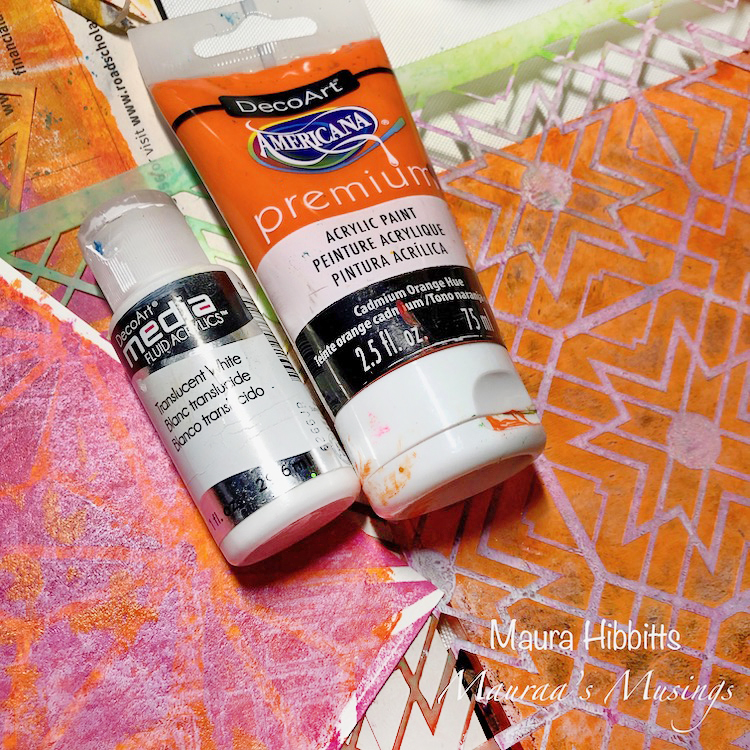
I have a small workspace, so my 6 x 6 gel plate works well with many projects. I started with a mix of Cadmium Red Hue and Cadmium Orange Hue and blended them on the plate with the brayer. I laid the large Toledo stencil on the gel plate and pressed my watercolor paper onto it for one print, lifted the stencil to print another, then printed again on the gel plate without the stencil.

Next, I blended Diarylide Yellow, Cadmium Yellow Hue, and Primary Yellow on the gel plate with the brayer, and used the Toledo Small stencil on the plate. I printed the next layer of color and design onto my sheets.

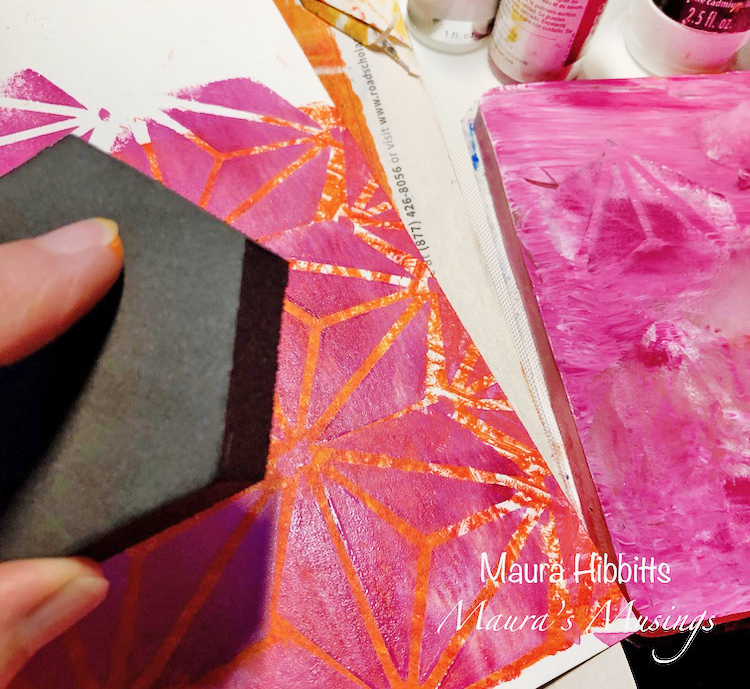
Time to add another bright, warm layer to my papers with a blend of Translucent White and Quinacridone Magenta. Once again, I used the gel plate and brayer to blend, and then stamped the Diamond Hex stamp into the paint, then on to my papers.

As you can guess, I like to build up layers, so went in for another one using the Translucent White and Quinacridone Magenta on the gel plate, then laid the large Toledo stencil down on it again. This time, I randomly pressed some areas of the paper into the paint.

I repeated the previous step with Translucent White and Cadmium Orange Hue.

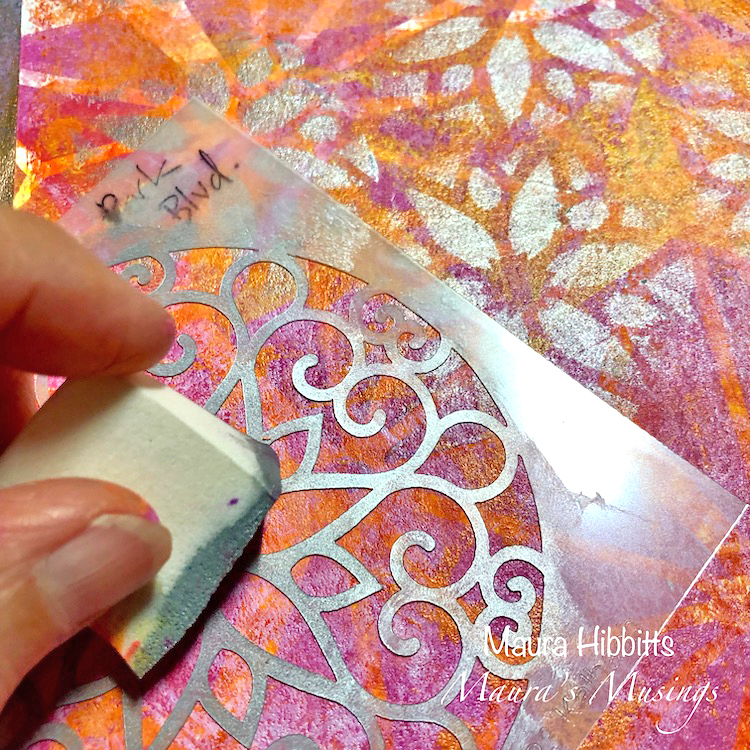
I decided to add some shimmer to my papers with the Park Boulevard stencil and Shimmering Silver paint. I used a sponge and dabbed the center of the stencil (it reminded me of a flower or snowflake) randomly over my papers.

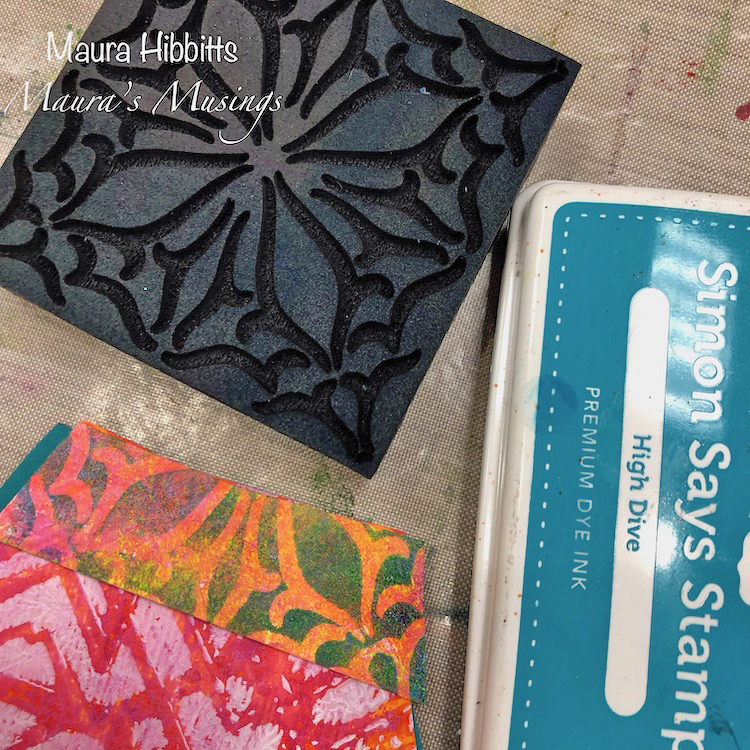
Now that my papers are created, it is time to cut out my mittens. I sketched my mitten onto scrap paper and used this to cut my mittens. Then I used a slightly larger mitten shape to cut out my background with the Peacock Teal card stock. I cut a cuff for each mitten and stamped another design onto the cuffs with the Antique Tile and VanVorst stamps and blue ink.

I adhered the patterned mitten to the teal card stock, added the cuff and decorated with ribbons. Then I punched a hole and tied on some bakers twine to hang these. They can be used as tags on a gift or ornaments for the tree.

Stay warm this winter with warm colors and mittens! Peace and Joy! – Maura


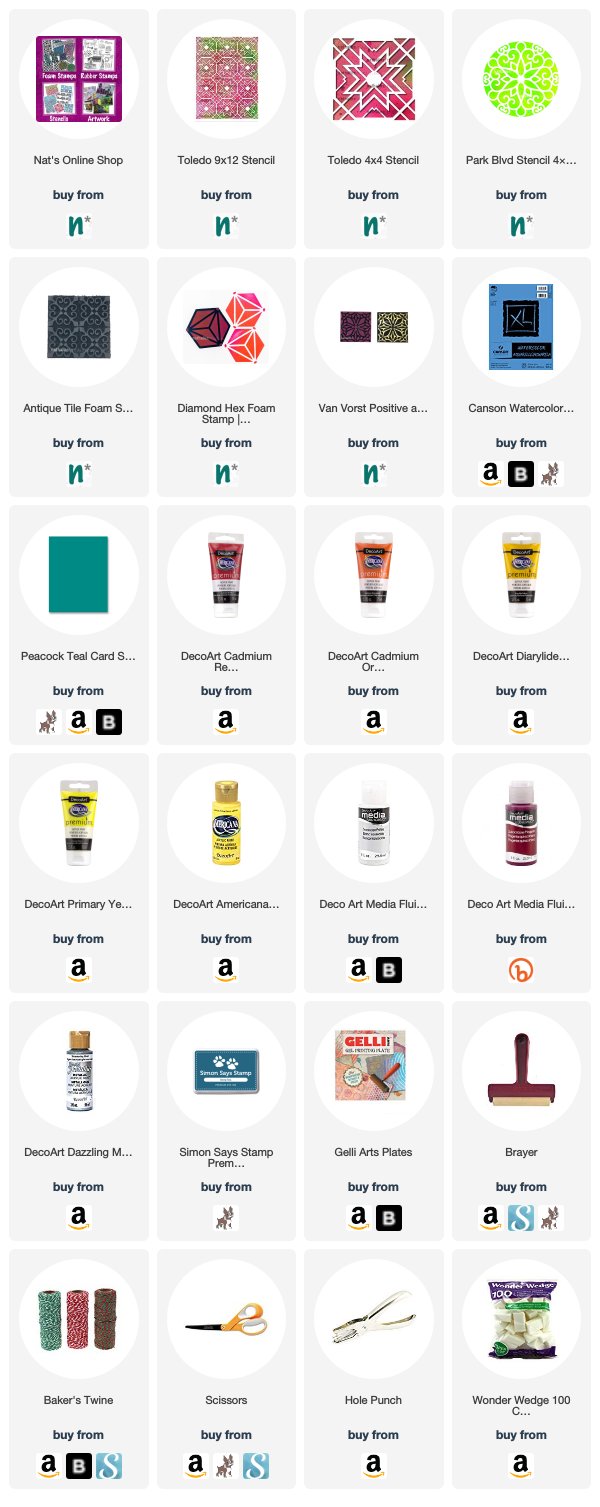
Seasons greetings to you Maura and thank you for this definitely super cute holiday idea! Maura used the following supplies:


Feel inspired? Working on something yourself that you’d like to share?  I love to see how you interpret our monthly themes. Email me how you used my stencils and stamps with the theme and email me an image – I would love to share your projects in my next  “n*Spiration From Around the Globe“.
Leave a comment

Warm Wishes – Jennifer Gallagher


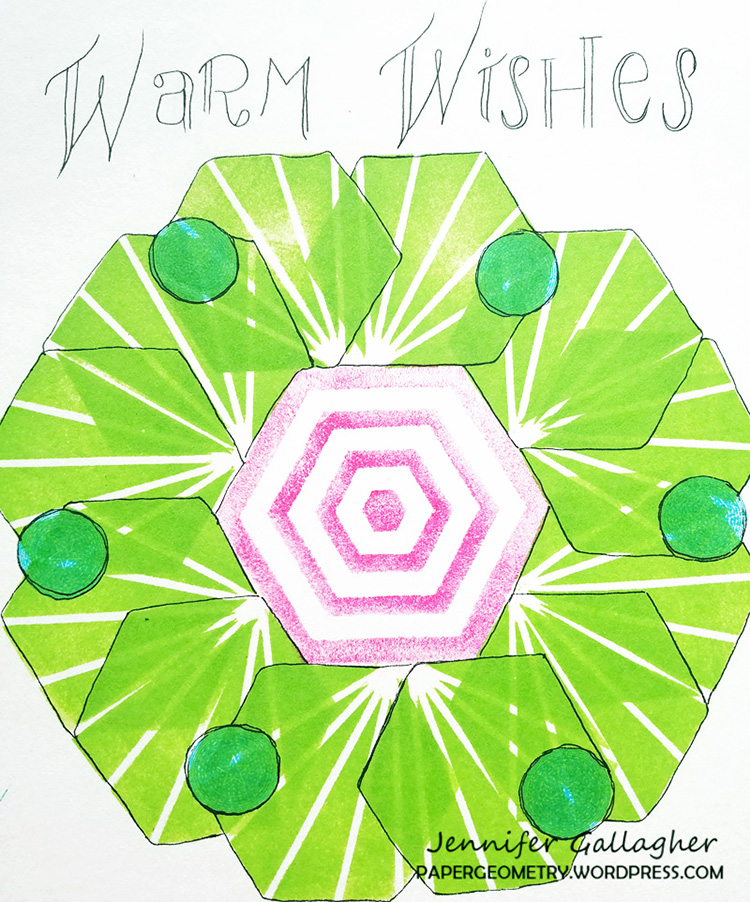
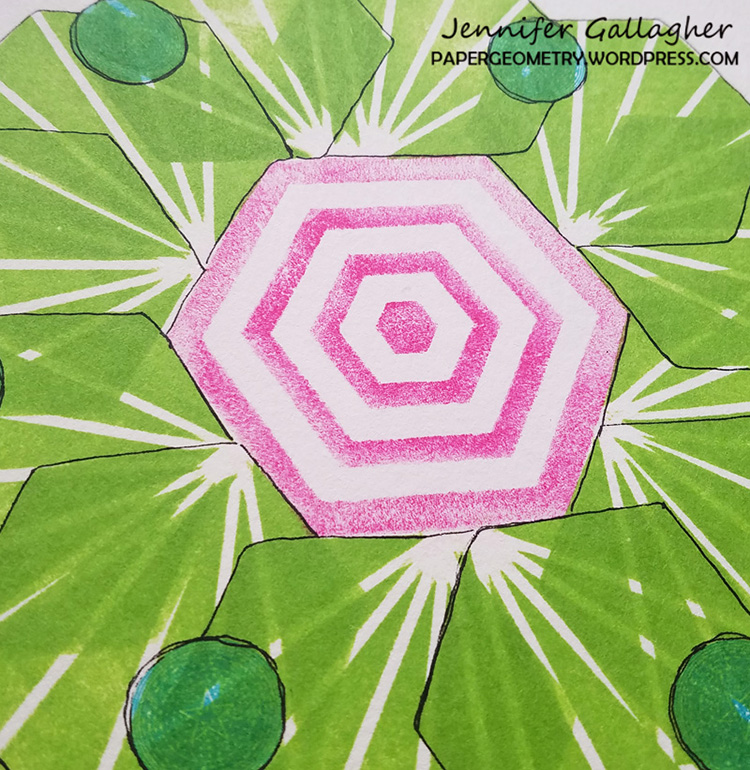
Tis the season for some Warm Wishes from my Creative Squad. Today we have a holiday art journal spread from Jennifer Gallagher that transforms my Clam Hex and Space Oddity stamps into a non-traditional wreath design. Jennifer was inspired by our theme: Warm Wishes – For many cultures around the world, December is a holiday season filled with celebrations and good cheer. The Creative Squad is taking this month to send Warm Wishes to all our readers!


This month the creative squad is creating projects that celebrate this festive time of year. We are sending you all our warmest wishes! I love to think outside of the box with our creative squad prompts. So, when I sat down to contemplate warm wishes and holidays, I was immediately transported to somewhere tropical for some literal “warm” holiday wishes. I hope you enjoy my non-traditional and somewhat tropical take on a holiday wreath for a spread in my art journal.

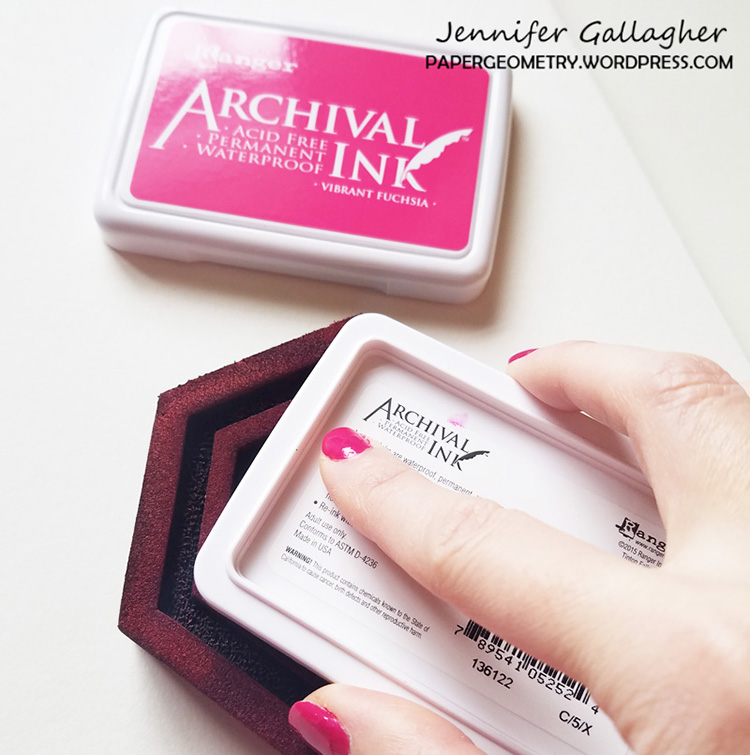
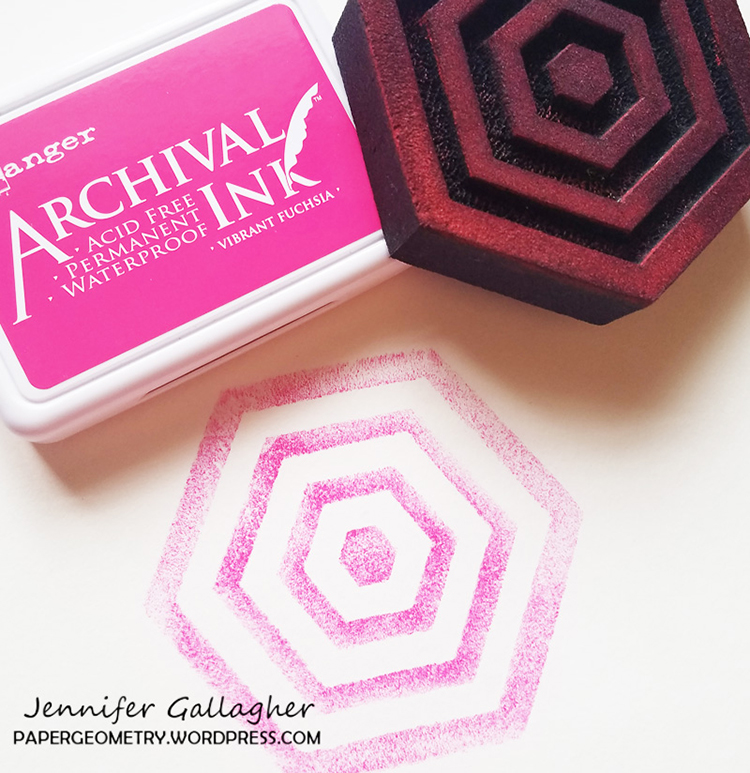
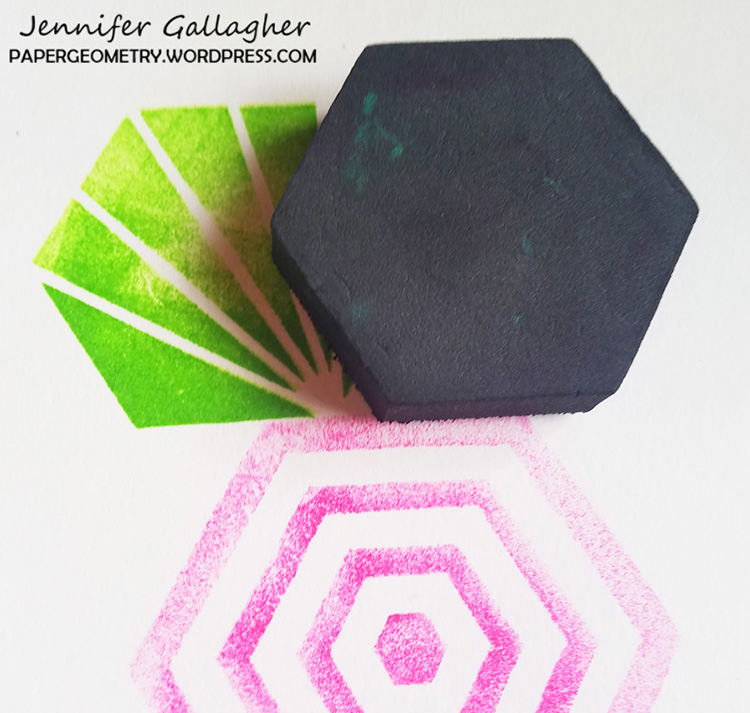
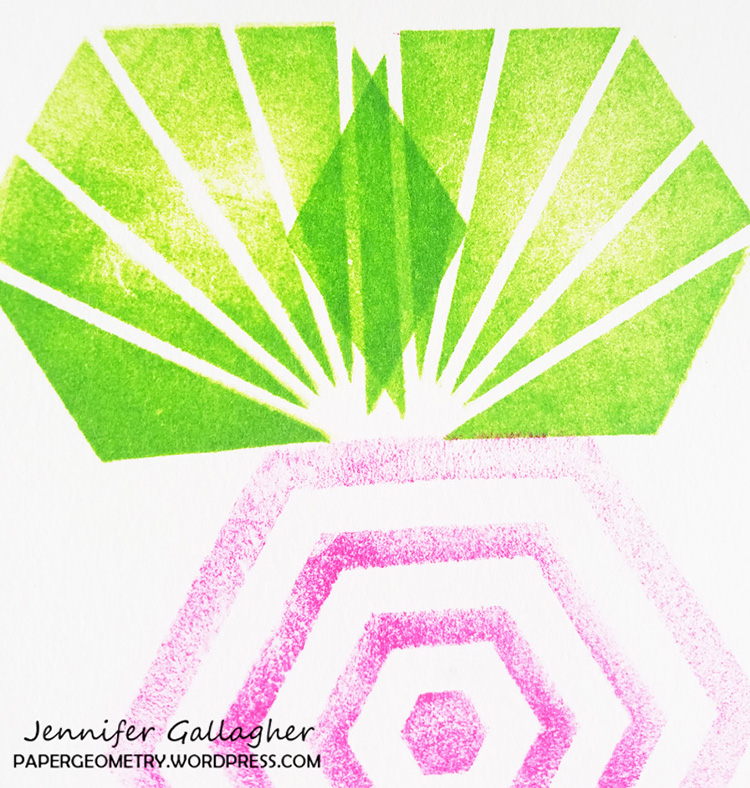
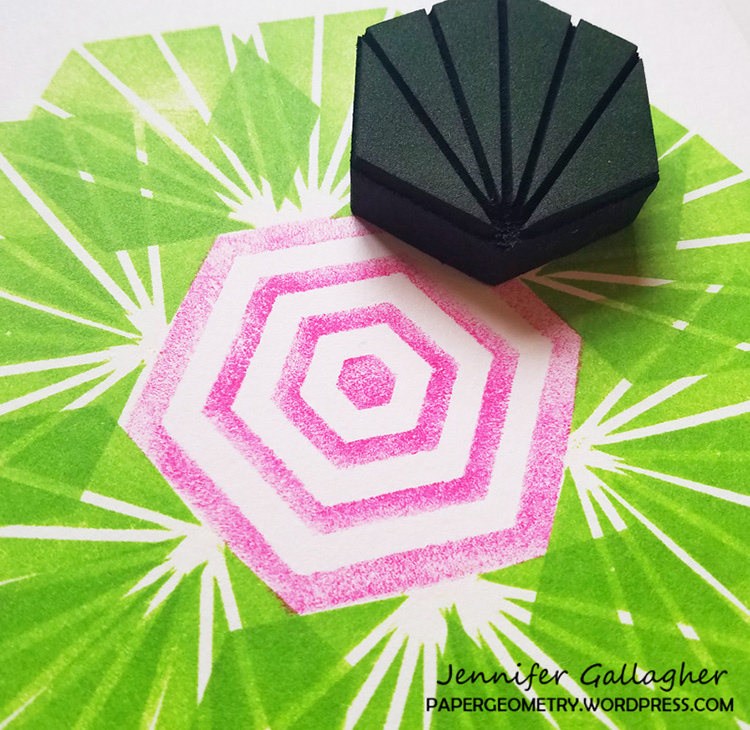
I began in my canson mixed-media journal. I placed a small pencil mark in the center of my page as a guide. Then I inked my space oddity foam stamp with vibrant fuchsia archival ink. Next, I pressed the foam stamp into the center of my page, pressing with even pressure. This striped design mimics a fun candy cane pattern. Here is where we begin with a non-traditional use of color. Instead of the normal red and white, this pink and white will feel a lot more modern and tropical.

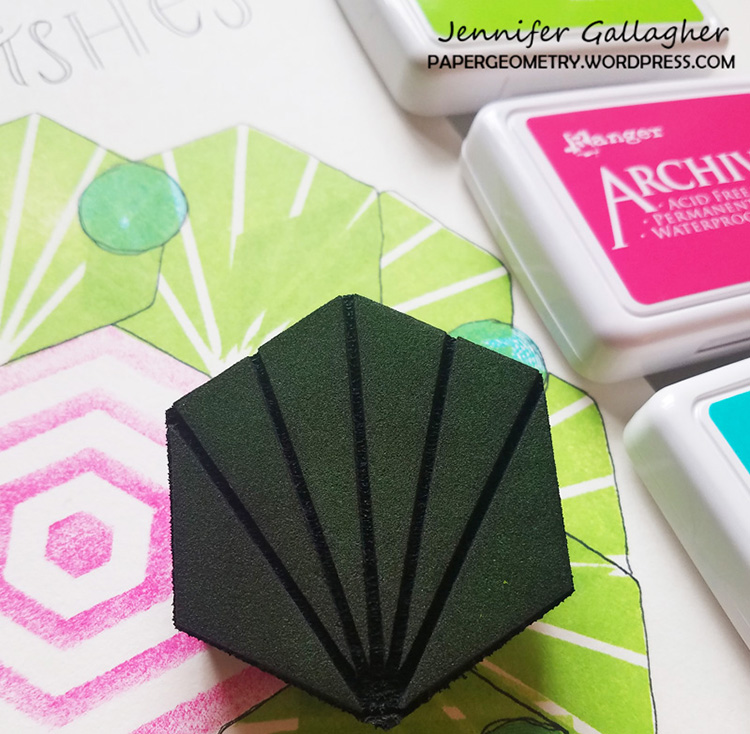
I used the mini clam hex foam to create my faux tropical leaves around the center of my wreath. I inked up the foam stamp with vivid chartreuse archival ink and pressed the stamp down in an exact pattern that I repeated all the way around.

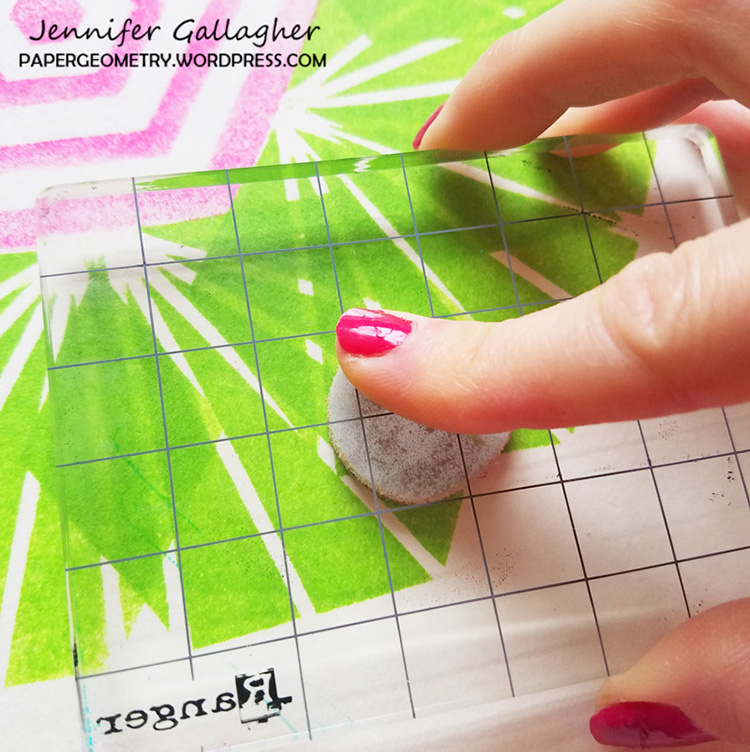
Next, I wanted to add some ornament balls all around the wreath. Nat’s Small Circle Jumble rubber stamp set was the perfect thing. I chose the circle drive negative stamp and inked it up with garden patina archival ink. I stamped the ornaments all over the wreath.

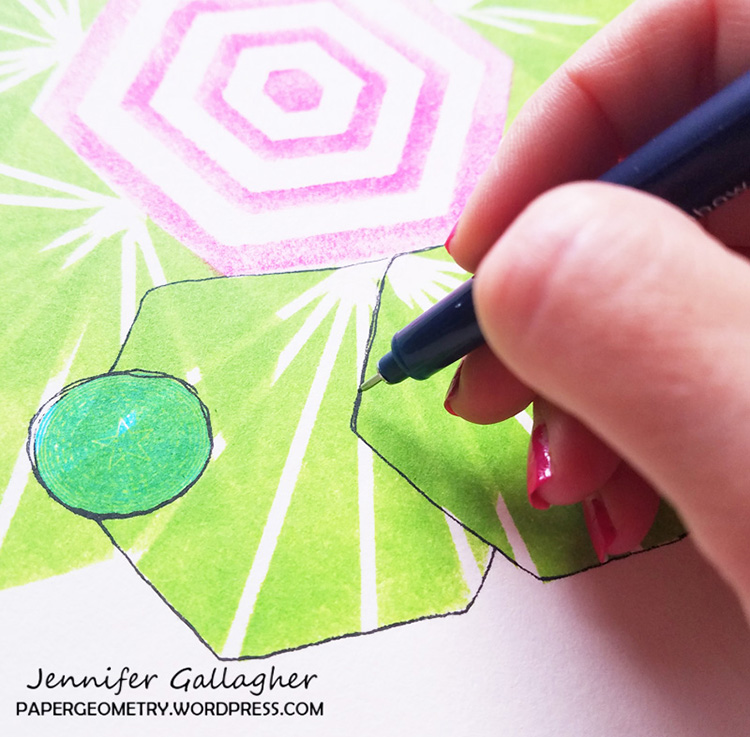
I used my tombow mono drawing pens to add a little detail around each ornament and leaf.

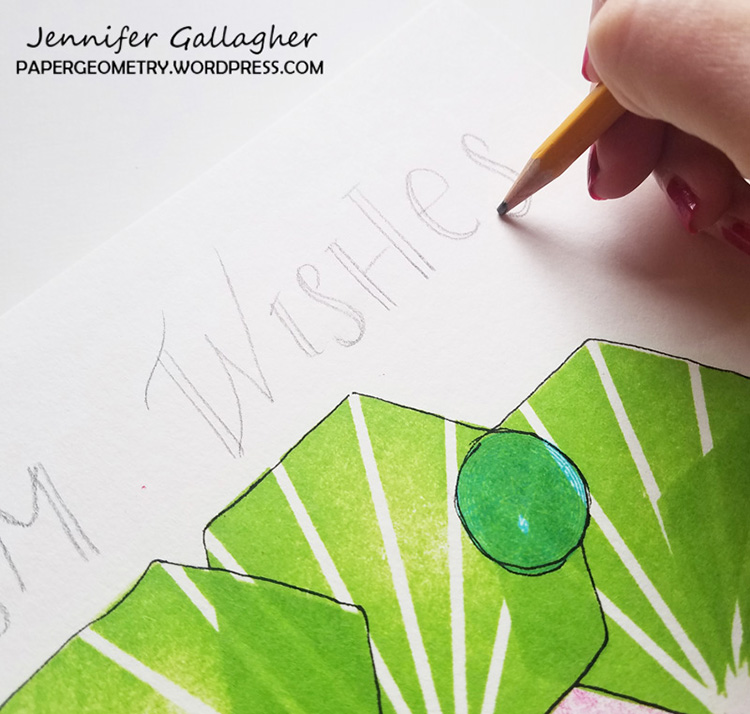
Lastly, in pencil I sketched out a little fun hand-lettered sentiment. Once I settled on the design, I drew over it with my drawing pens and erased the pencil marks.

It has been another wonderful year working with Nat, Kim, and the gals from the Creative Squad. I hope you have enjoyed my work this year and have been inspired. I am sending you warm wishes for a wonderful holiday season and a happy new year.


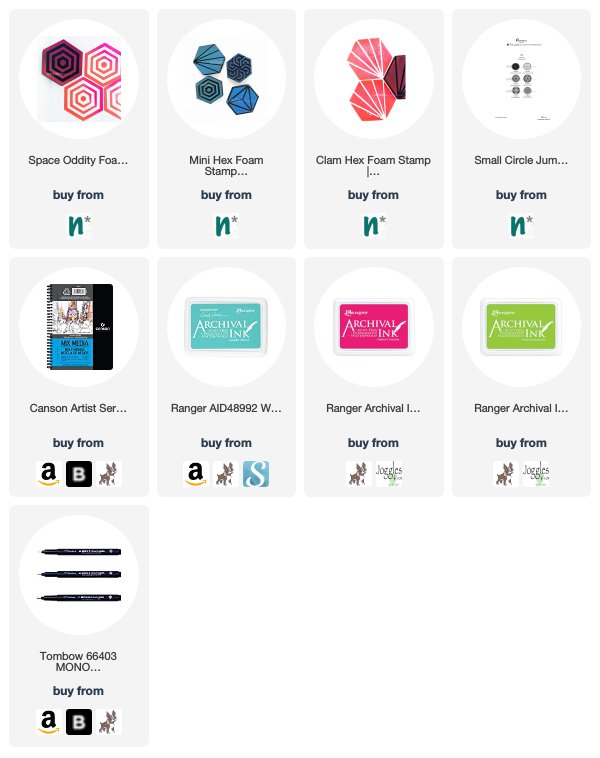
Thank you Jennifer and we thank you for a great year of inspiring projects and of course we wish you a restful holiday season and happy new year too :) Here are some of the supplies that Jennifer used:


Feel inspired? Working on something yourself that you’d like to share?  I love to see how you interpret our monthly themes. Email me how you used my stencils and stamps with the theme and email me an image – I would love to share your projects in my next  “n*Spiration From Around the Globe“.
Leave a comment