Creative Squad

Reduce, Reuse, Recycle with Cheiron Brandon


Hello from the Creative Squad! Today we have a spooky card from Cheiron Brandon to get you thinking about Halloween :)  She uses my Buenos Aires stencil to help her pull together this month’s theme: Reduce, Reuse, Recycle – Let’s do Mother Earth a favor this month and use what we already have.  Maybe we’ll dip into our stash of leftovers from other creative projects or maybe we’ll repurpose something unexpected.  This month we’re thinking about how artmaking can impact the environment and we’re trying to make our footprint just a little bit smaller.


Hi there, it’s Cheiron here with my September post. This month we are using the theme Reduce, Reuse, Recycle and I thought it would be fun to challenge myself just to use all the leftover paper bits that were on my desk. The easiest way for me to do this was to make a card. 

I took a scrap of book paper and applied some Tangerine paint through the Buenos Aries stencil. I used some black slick paint to fill in the dots. I thought this color combo would be perfect for Halloween, as I have a ton of Halloween bits and pieces on my table right now.

Once the paper was dry, I collaged it to a blank note card. I love using painted and stenciled papers as backgrounds on my cards. I had some parts of paper dolls that I had cut out, so I used this fun witch and added a simple sentiment. I love the handmade, whimsical look of cards like this and its so easy to incorporate all those scraps that we tend to save!

Hope you enjoyed this fun and simple way to recycle your scraps into new creations :)


Thank you Cheiron for showing us a great way to incorporate some leftovers into seasonal cards! In addition to some leftover papers, Cheiron used the following supplies (some are affiliate links):


Play along with us too: I love to see how you interpret our monthly themes. Email me how you used my stencils and stamps with the theme and email me an image – I would love to share your projects in my next  “n*Spiration From Around the Globe“.

Comments (2)

  • Karen Bearse

    |

    Spooky!! Love the art journal look.

    Reply

  • Stephanie

    |

    So cool!

    Reply

Leave a comment

Reduce, Reuse, Recycle with Tina Walker


Hello my friends! It’s Tuesday and time for a project from my Creative Squad. Today we have a beautiful and clever book created by Tina Walker who reused two old projects and gave them a new life :)  Tina used my Batik Pattern 3 foam stamp, my Amsterdam 6×6 and Lily Wallpaper stencils, and my Marks stamp set to help her with this month’s theme: Reduce, Reuse, Recycle – Let’s do Mother Earth a favor this month and use what we already have.  Maybe we’ll dip into our stash of leftovers from other creative projects or maybe we’ll repurpose something unexpected.  This month we’re thinking about how artmaking can impact the environment and we’re trying to make our footprint just a little bit smaller.


Hi! Tina Walker here today with a new month and a new theme and…… my last Creative Squad post. :(  I have SO enjoyed my time as part of Nat’s Creative Squad family and will truly miss this part of MY monthly creative process. But don’t despair, I will still be around and will see y’all in cyber-land. Thank you again Nat! And thank you to this wonderfully creative community.

September’s theme is Reduce, Reuse, Recycle. These three (little) words have such a strong, powerful meaning in today’s world and have a very special meaning for me. I am hosting a year long project called, The Sustainable Souls Project, where a group of like-minded artists are creating awareness about sustainability topics and how we impact the world and the environment. Our very own Nat was a Guest Artist for two months and we thoroughly enjoyed her vision. For today’s project, I expanded the idea of repurposing, to include my art. I will show how I recycled two past, uninspiring projects into one new project that I am happy to share.

Several months ago, I created these two projects, ironically as part of a Creative Squad post. I never shared them and created something else, so how perfect to repurpose them into something new for this month’s theme?

Here’s a peek at my two (previously) created projects.


Using part of both projects, I created a larger mini journal, that can be functionally used or displayed. Let’s take a look.

I deconstructed the book and home décor hanging, removing the embellishments, ribbons, and papers. Using the papers as the base for my new book, I repeated the same Batik Pattern 3 foam stamp for a cohesive look.

Next, I repeated the same Lily Wallpaper stencil for more cohesiveness and added stamps from Nat’s Marks stamp set.

Using one of the paper pages, I created a binding for the entire journal and added it to the inside of the previous mini book covers.

Since the previous mini book was narrow, I wanted my new cover to extend the width of the folded-out pages. I machine-stitched the home décor hanging piece to the new cover. I used the Amsterdam stencil here for the background. I also added a piece of string, a button, and the metal hanging embellishment from the previous projects to my new cover. It went from drab to fab in a quick minute.

Just a few last details and my new book is ready for assembling. Here’s a peek at several of the inside pages.

I am so happy with the ‘new’ result and I am glad for the challenge.

Do you re-purpose old, unwanted projects? Yes? We would love to see them.

I hope you enjoyed my project today. Have a great day!


Thank you Tina for your (re)creation!  :)  In addition to vintage papers, jewelry findings, buttons, and twine, Tina used the following supplies (some are affiliate links):


Play along with us too: I love to see how you interpret our monthly themes. Email me how you used my stencils and stamps with the theme and email me an image – I would love to share your projects in my next  “n*Spiration From Around the Globe“.

Comments (4)

  • Karen Bearse

    |

    Love how you combined 2 projects to make this hip, funky original arr journal. Very inspiring!

    Reply

  • Sue Clarke

    |

    Clever, pretty, green and gorgeous Tina!

    Reply

Leave a comment

Artful Adventures – Michelle Rydell


Hello from the Creative Squad! Today we have a post from Michelle Rydell sharing an art journal that she created for taking on some weekly Artful Adventures. She used my Hamburg stencil, and this month’s theme: Artful Adventures. Are you planning an Artful Adventure this summer? Whether it’s a day at the beach or a full blown International Vacation, don’t forget to take the time to soak up the uniqueness of your new surroundings and gather some inspiration for future artmaking. This month we’re turning to Nat’s new book Artful Adventures in Mixed Media, to help us find inspiration as we travel. We’ll be noticing color, shape, texture and more and then we’ll be taking that to the studio to help inspire some mixed media projects. Join us in the adventure!


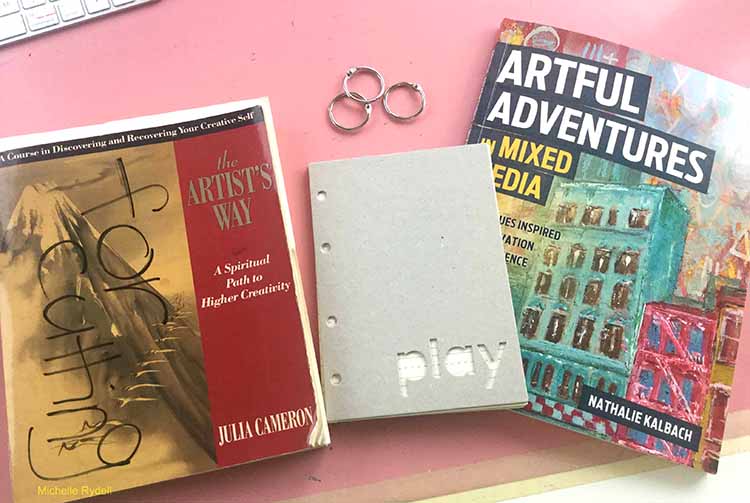
I have to say that I was very inspired by Nat’s “Artful Adventures” book!  (and I am not just saying that because this is her blog – ha). I’m a color enthusiast and Artful Adventures is a visual feast of color!  The chapter about gathering inspiration from books and movies got me thinking about that, and I knew I wanted to take inspiration from her book in some way.

I decided to combine that with another book that has really inspired me, called  “The Artist’s Way,” by Julia Cameron.  It’s a book about rediscovering your creative self, and it really helped me do just that. One of the tools that the book suggests, is that you take yourself on a weekly artist date; which is an excursion alone, to do something that feeds your creative soul.  It can be anything from a long walk in nature, to visiting a junk store, to going to a movie. I’m telling you this, because it’s one thing from the book that I rarely make time to do, even though I really want to; and Nat’s book gave me an idea. What if I use my weekly artist dates as a springboard for my art journaling?  That would inspire me to actually do them! I’m going to make a special journal for recording my artist’s dates!

So, my project for today is inspired by both books –  “Artful Adventures,” and “The Artist’s Way.”

Here’s how I made my little book…

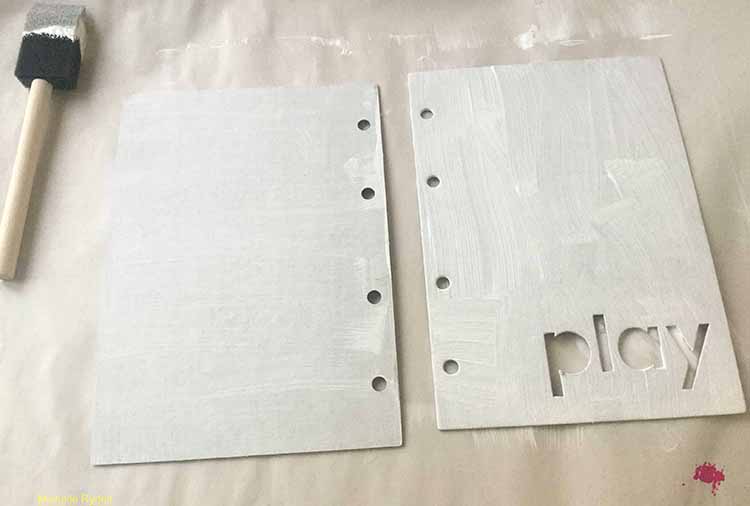
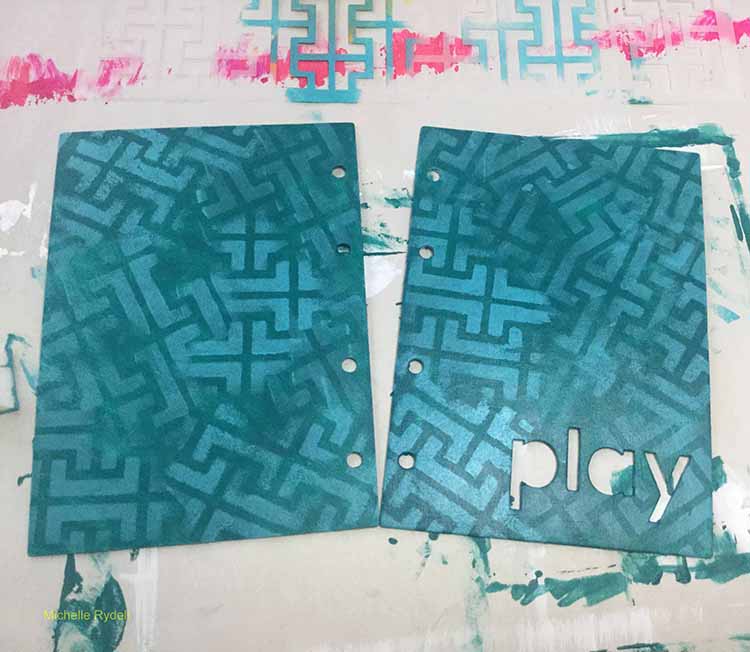
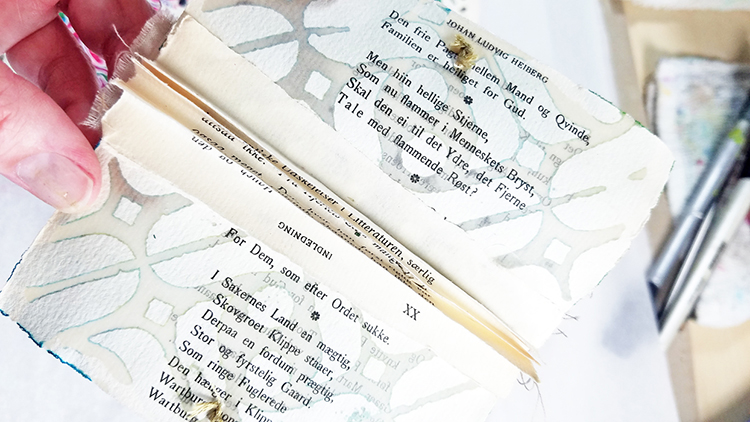
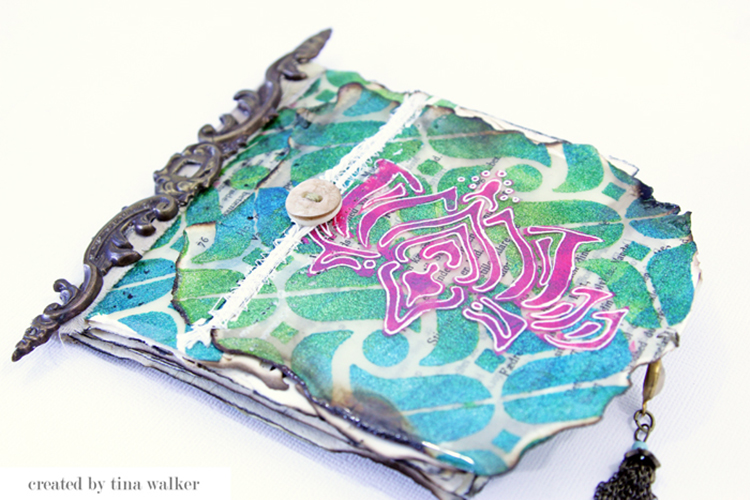
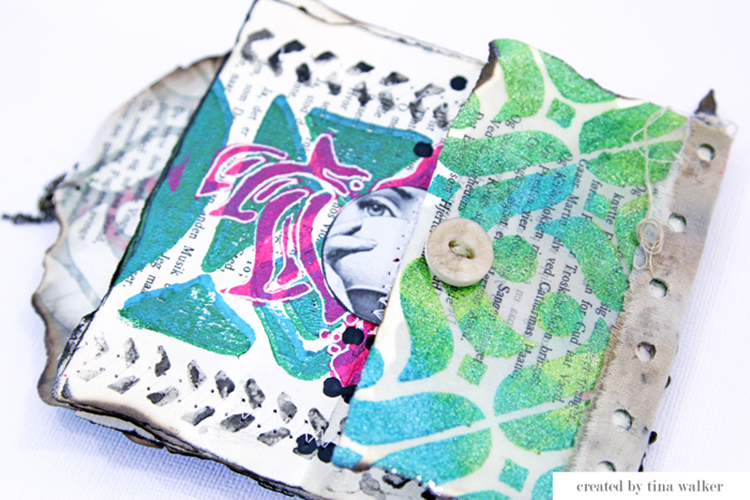
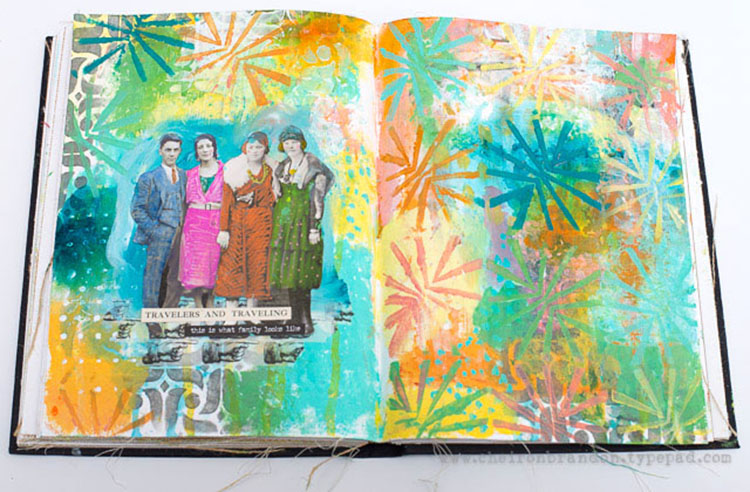
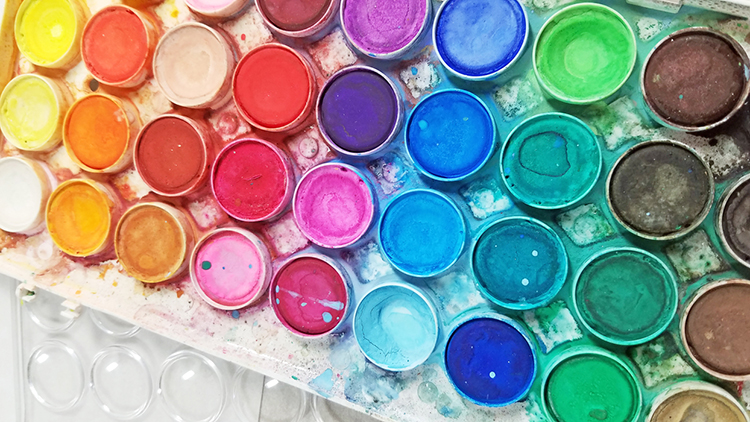
I happened to have an old October Afternoon chipboard mini-book cover lying around, so I decided to use that as my substrate. It’s 5 x 7 – just the right size for recording my adventures.  You could use any piece of chipboard or even heavy cardboard instead. I wanted to use the gorgeous colors from the Nat’s painting on the Artful Adventures cover as inspiration, so I gathered up some paints that matched as closely as possible…

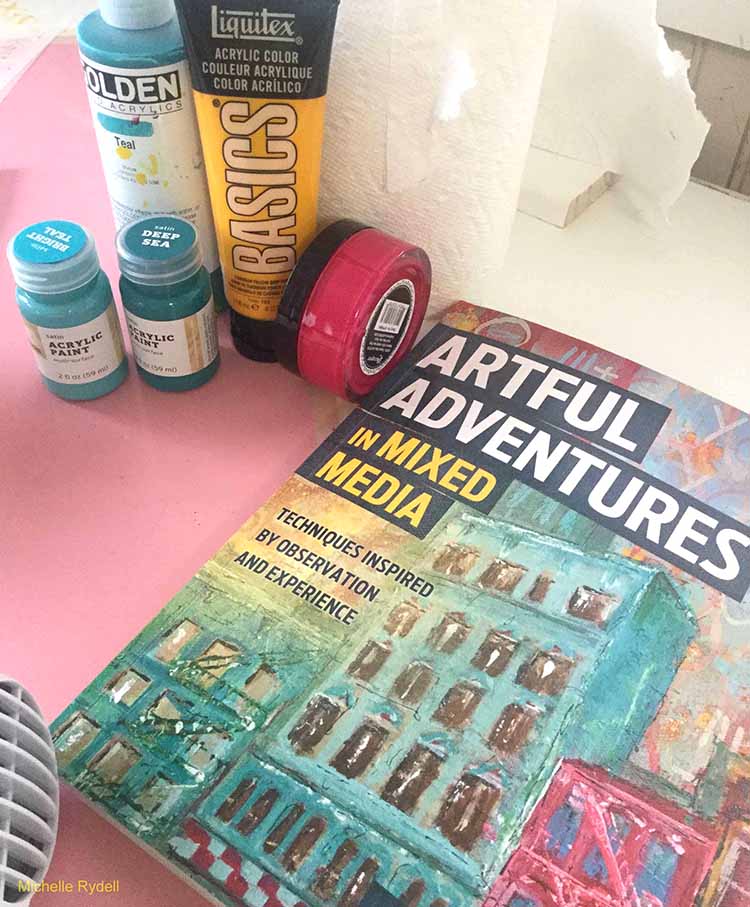
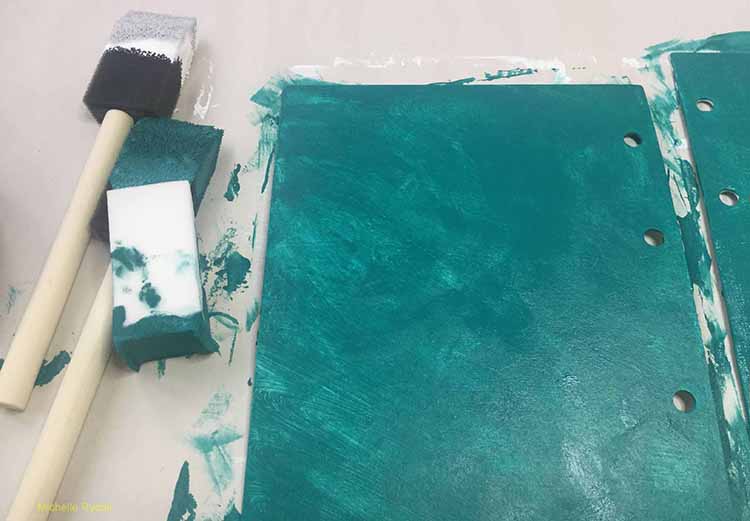
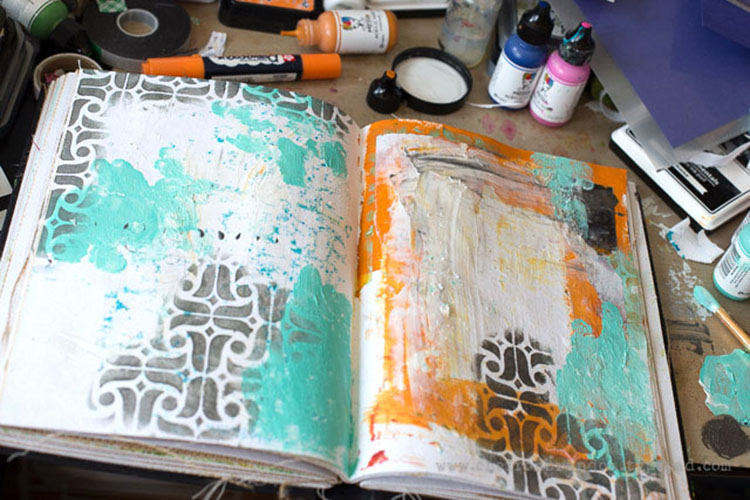
I gessoed the chipboard first, so the paint wouldn’t soak into the chipboard, keeping the colors brighter.  Then I added a couple of coats of a dark teal color as a base.


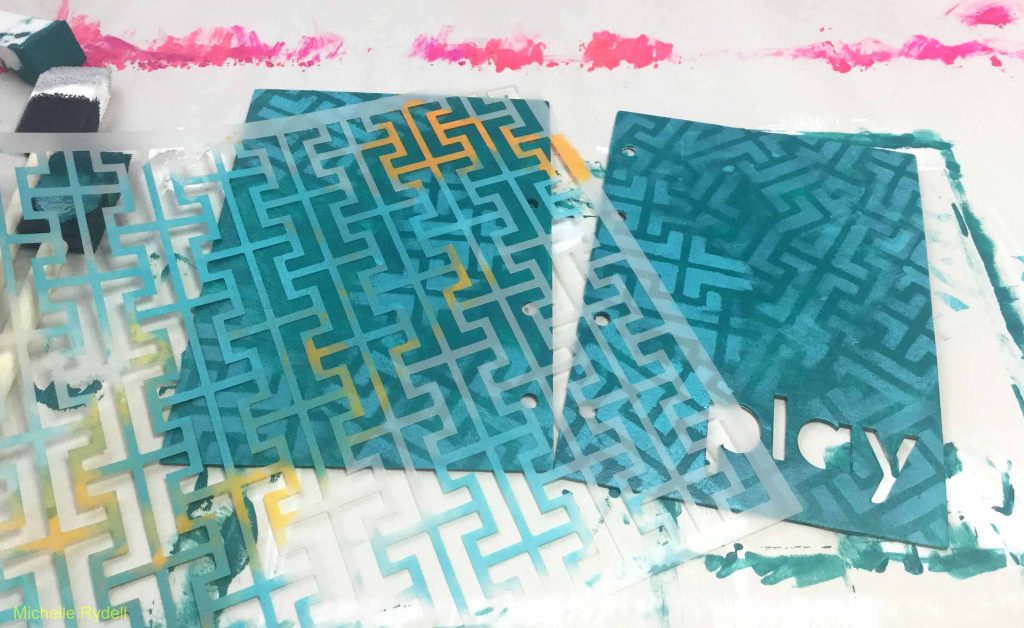
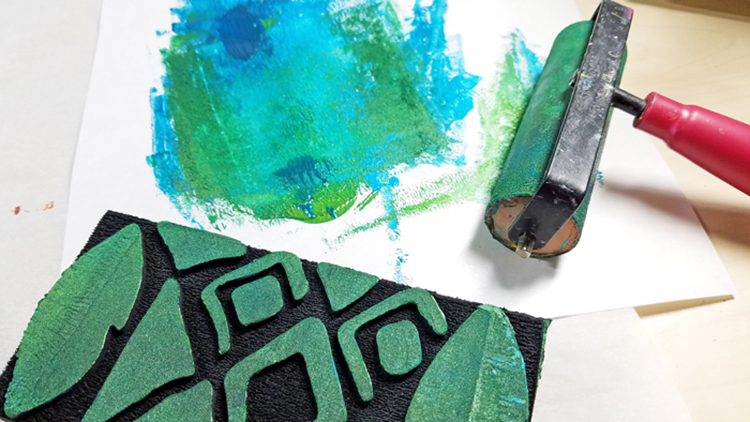
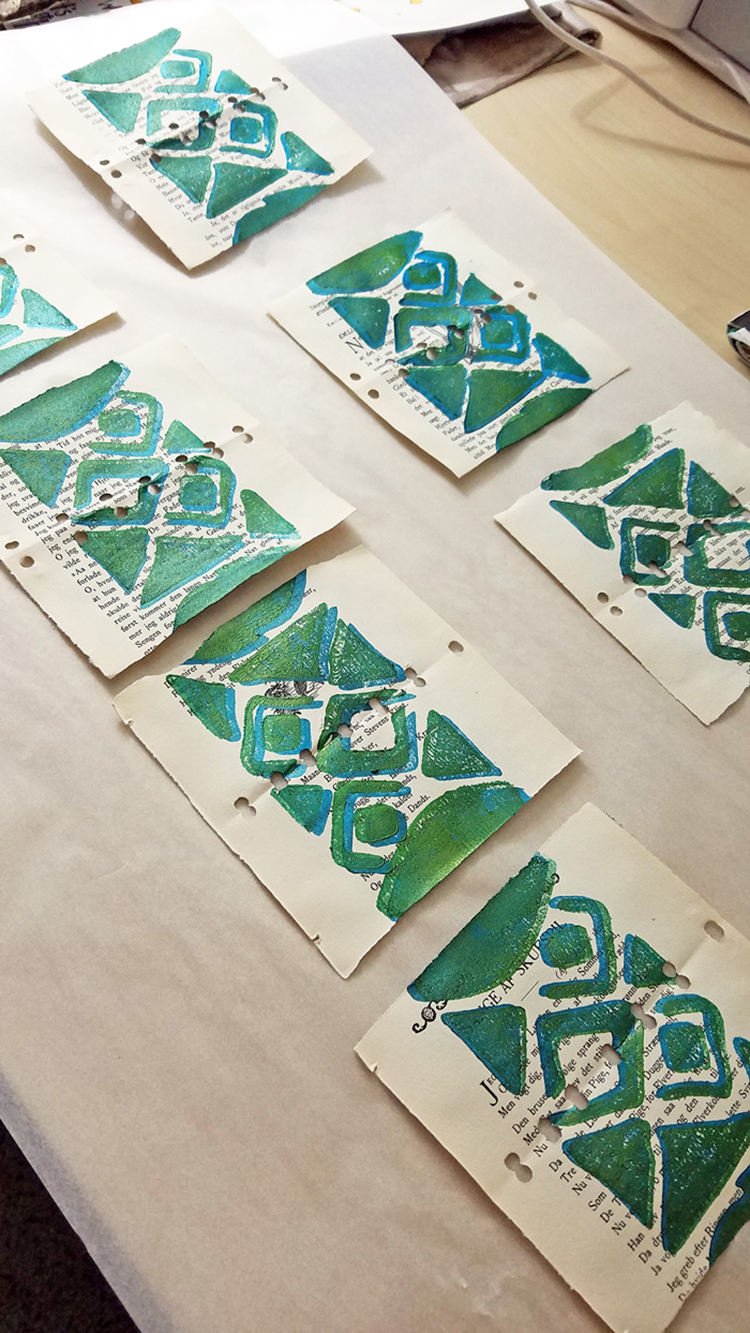
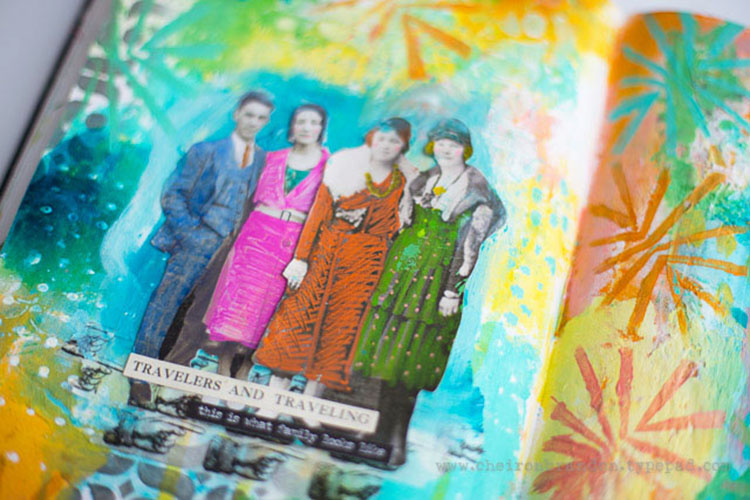
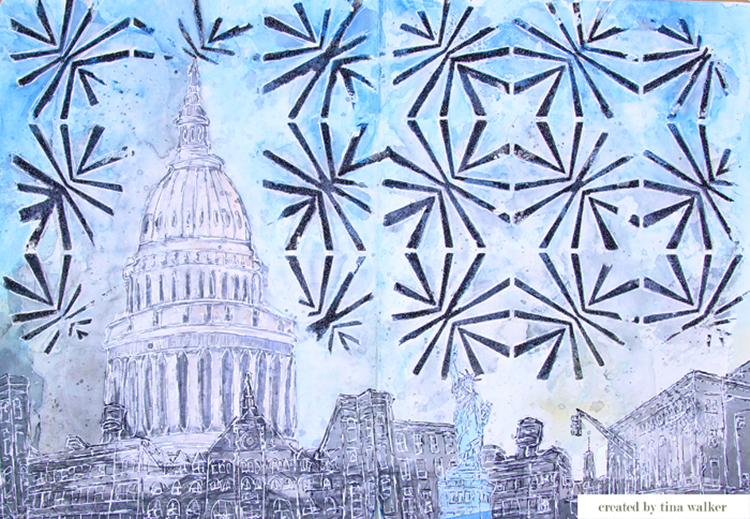
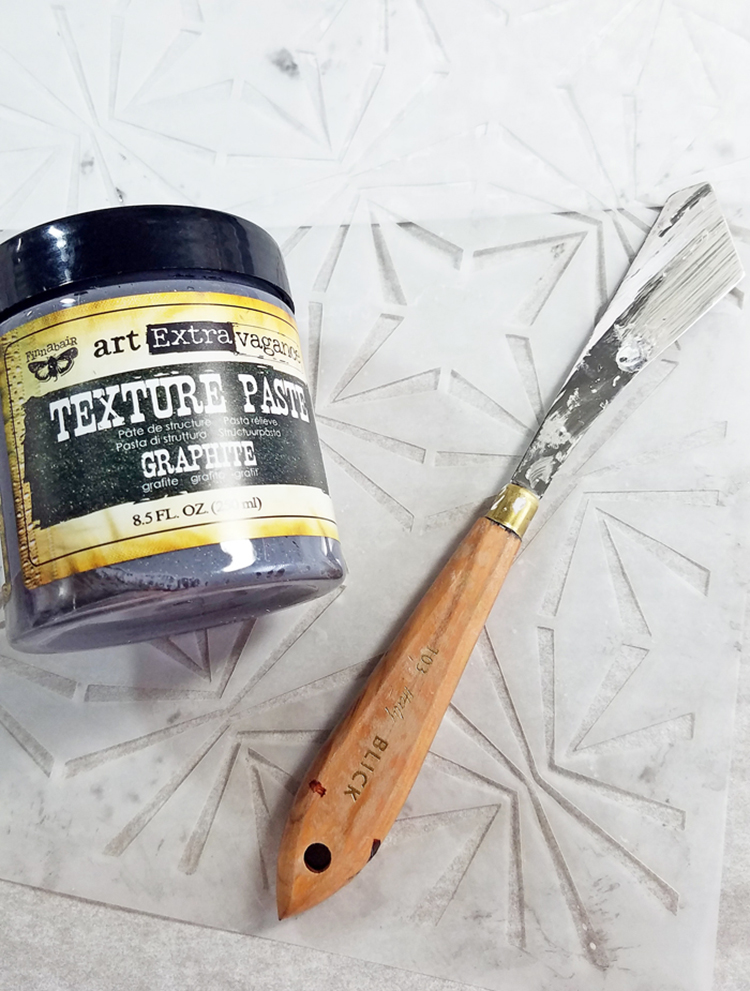
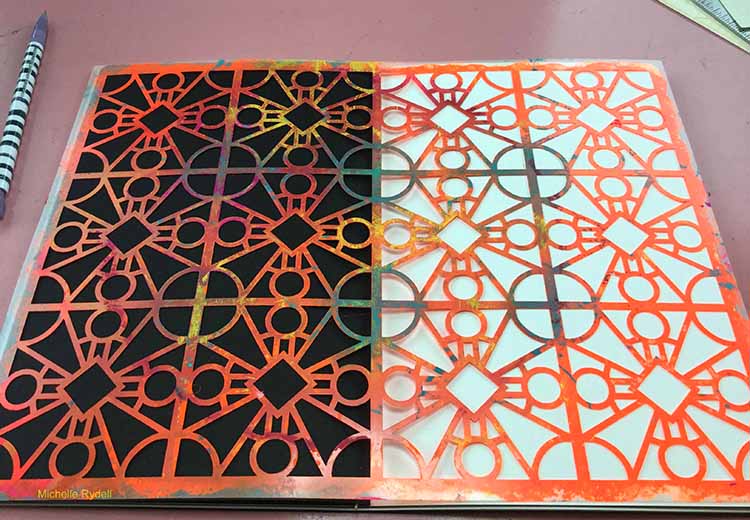
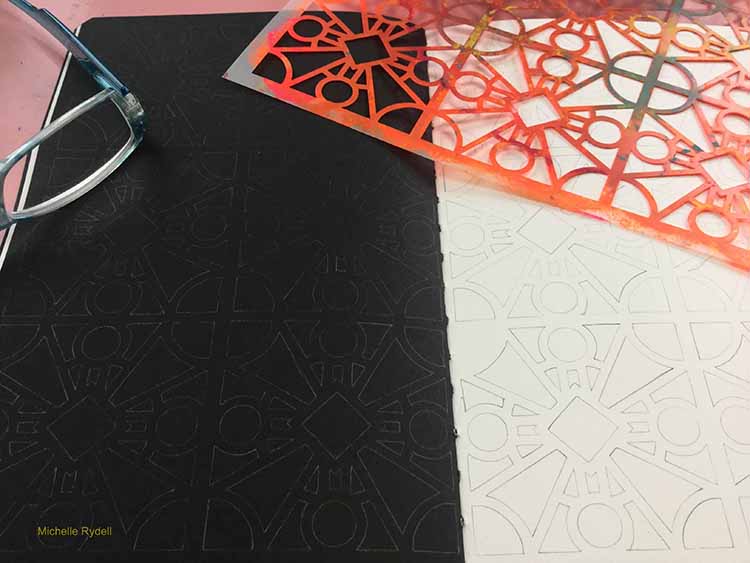
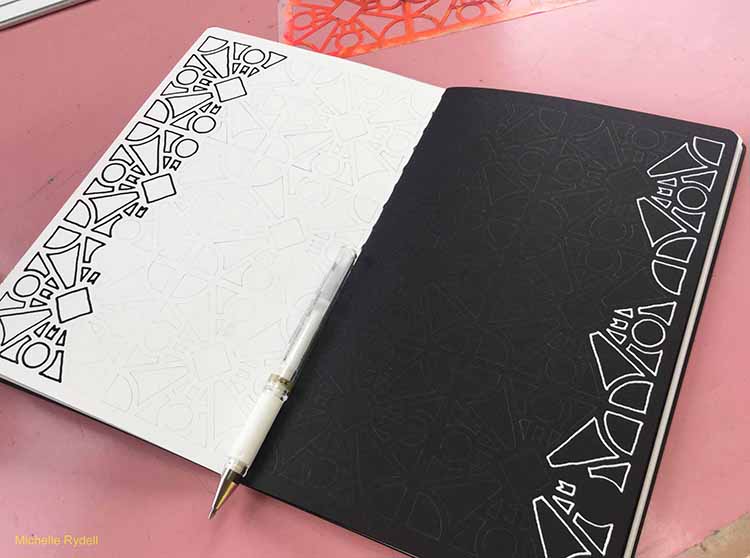
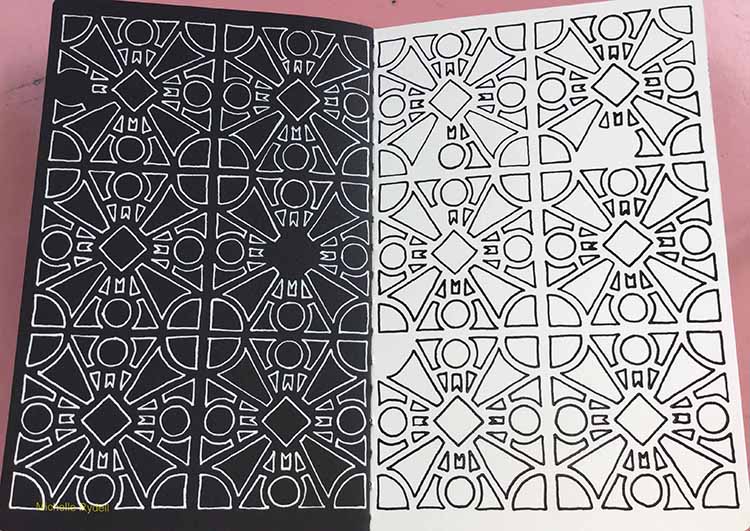
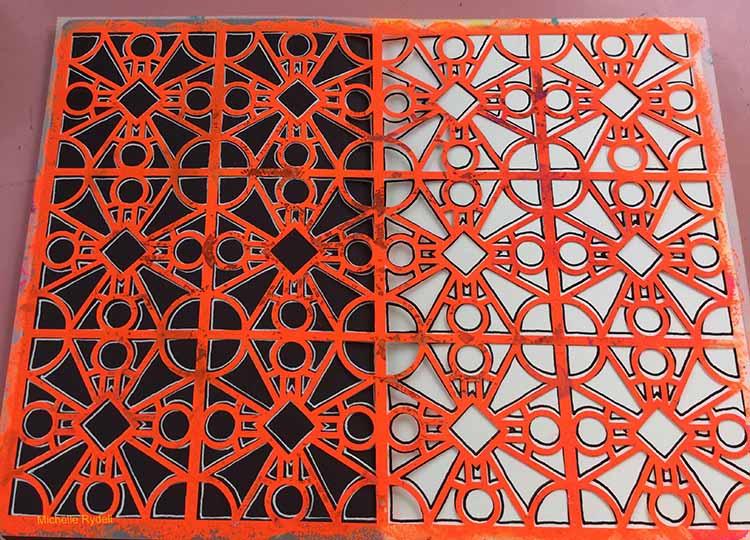
I used the Hamburg stencil to add interest to the background. I sponged small areas at a time with a lighter teal, while twisting and turning the stencil to create movement and texture.

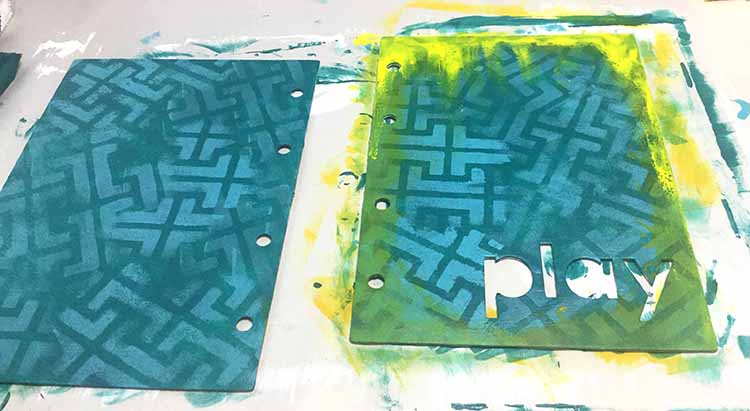
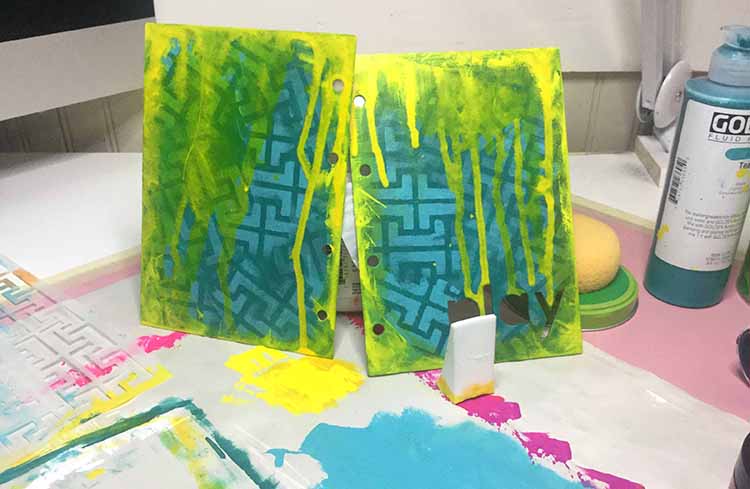
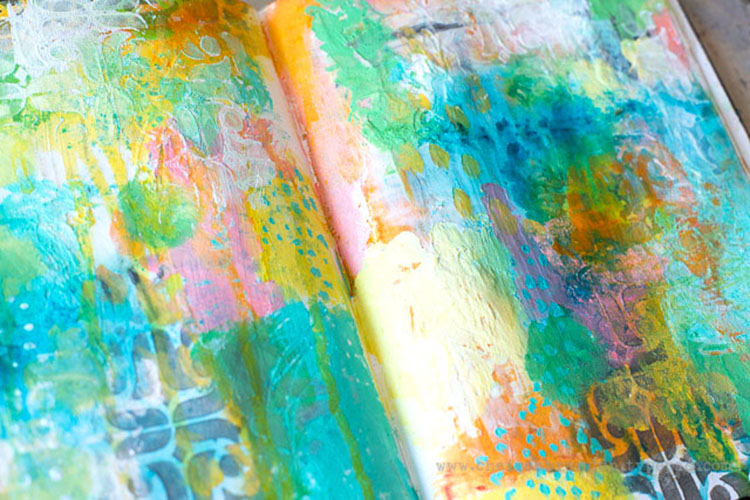
I love the beautiful green on Nat’s painting, so I attempted to mimic that by adding yellow over the teal –  as a border, and also dripping it across the top.  At first it wasn’t showing the green, so I sprayed some water on the drips to make them more transparent, and then it mixed with the teal to create green – yeayyy!  I hope I did it justice!

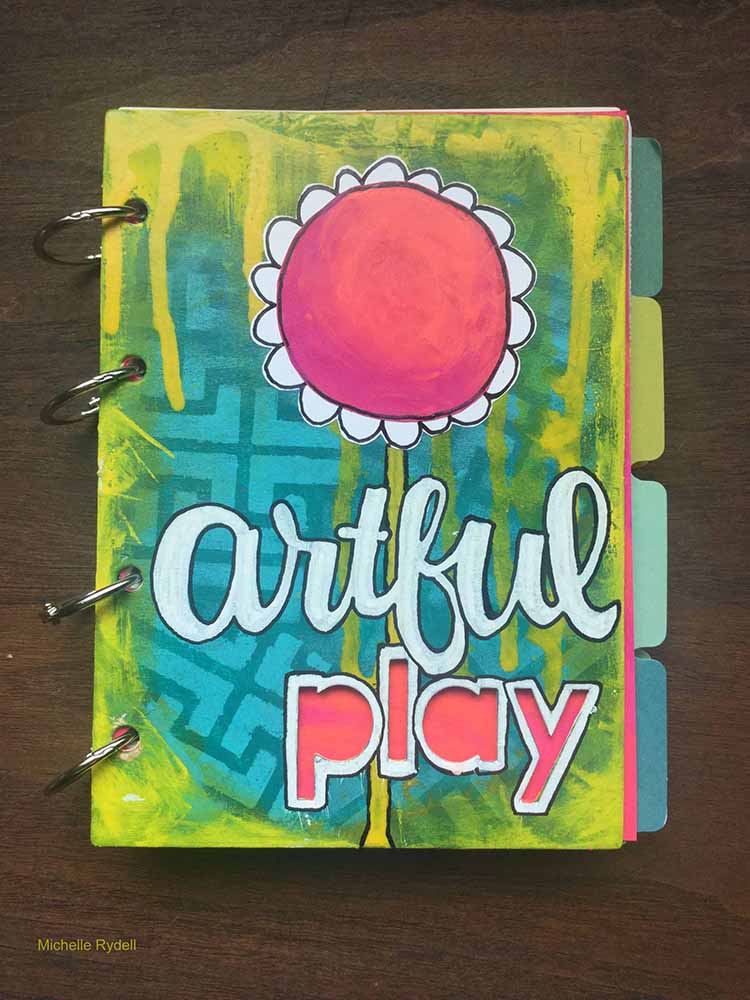
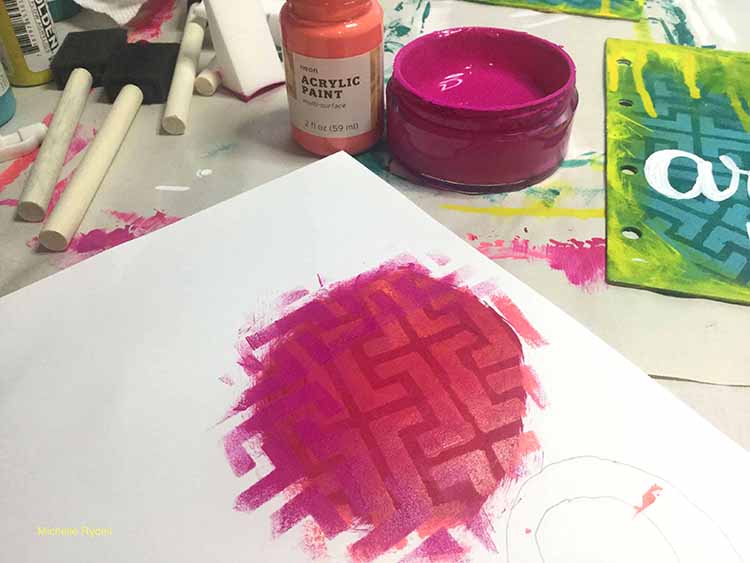
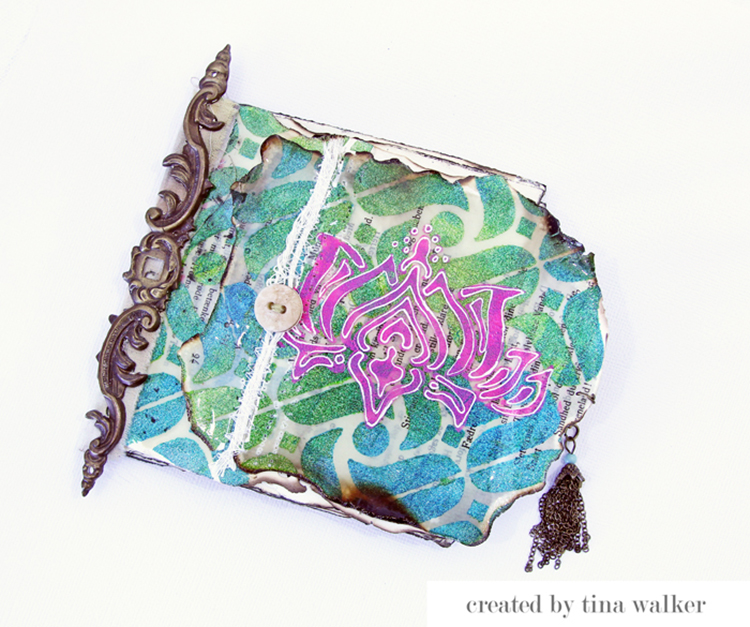
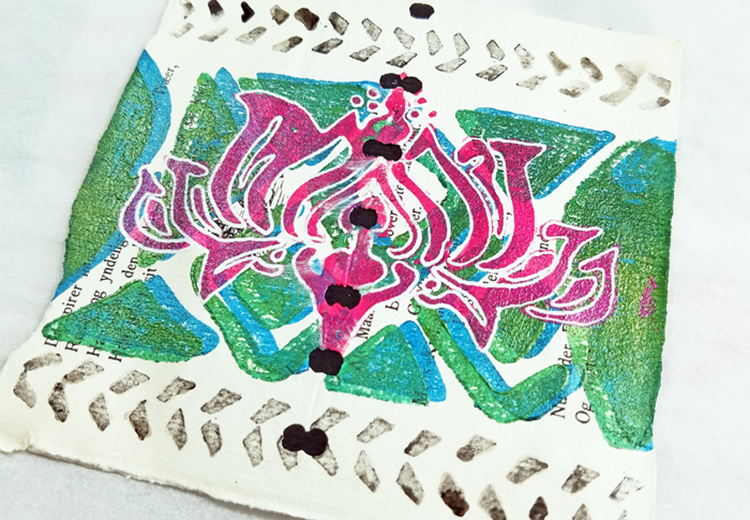
I wanted to add some contrast so I decided to add a pink flower to the cover.  I painted the center on copy paper, and then added the Hamburg stencil pattern again, with a subtle color change.

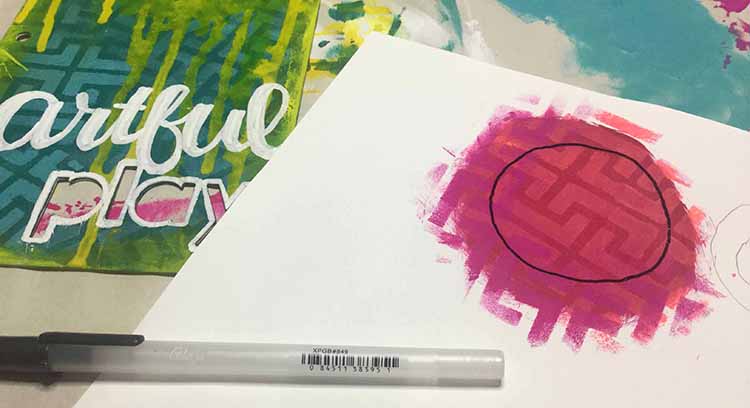
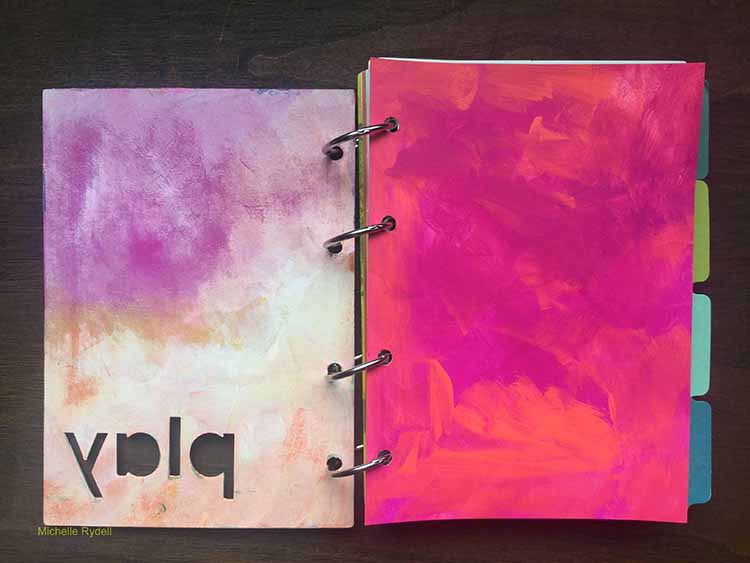
I pasted the pink flower middle onto another layer of white copy paper, and drew the petals for the flower.  Then glued it onto the front of the cover.  One of the drips looked like a stem to me, so I outlined it in black. Then I finished it off by adding a title with a white poster paint pen. Here’s the finished book-

And one last photo so you can see the pink and coral title page I painted, so the word “play” would show thru the cover in pink.  I plan to put a quote about Artist’s Dates here. The inside of the front cover was created by adding a layer of gesso to the same bright pinks and corals, then rubbing some of it off with a dry paper towel.

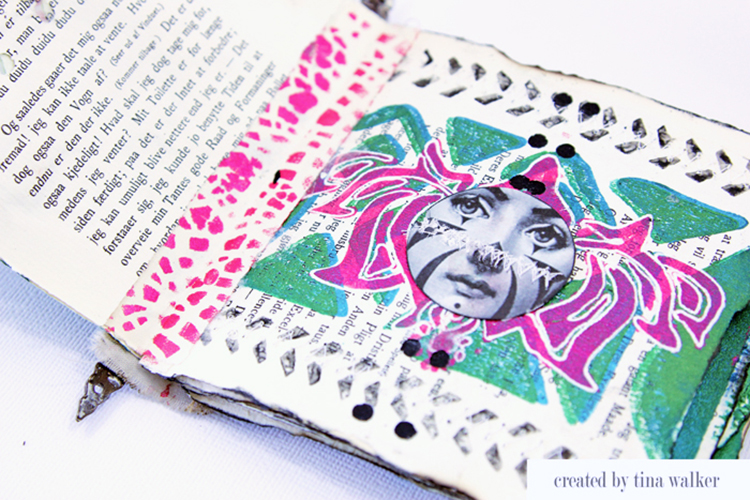
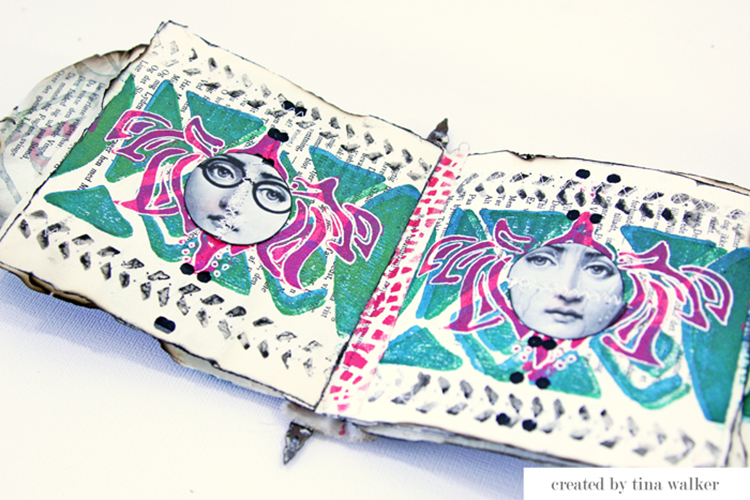
My plan is to add to this book each time I go on an artist date, by writing my thoughts and creating a little art piece inspired by the experience.  I hope you like it, and maybe you will try making one too!


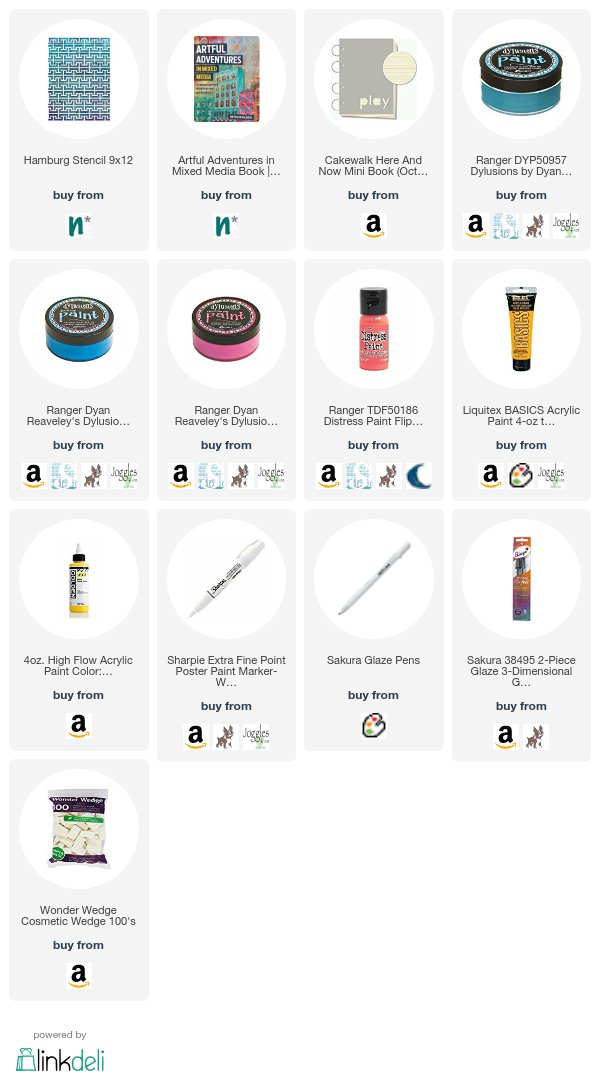
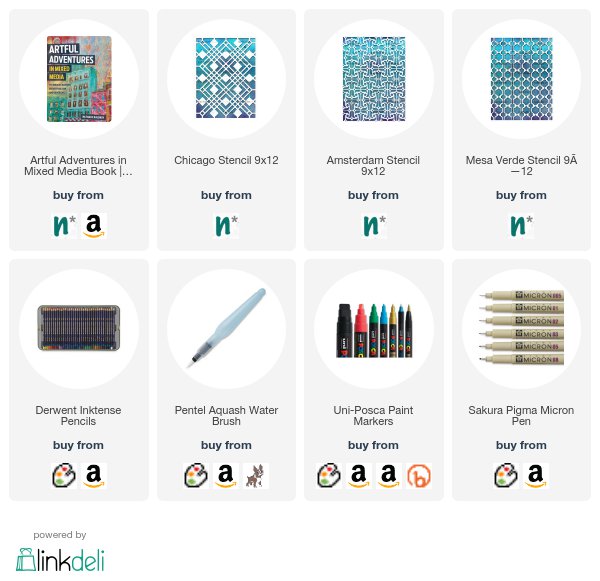
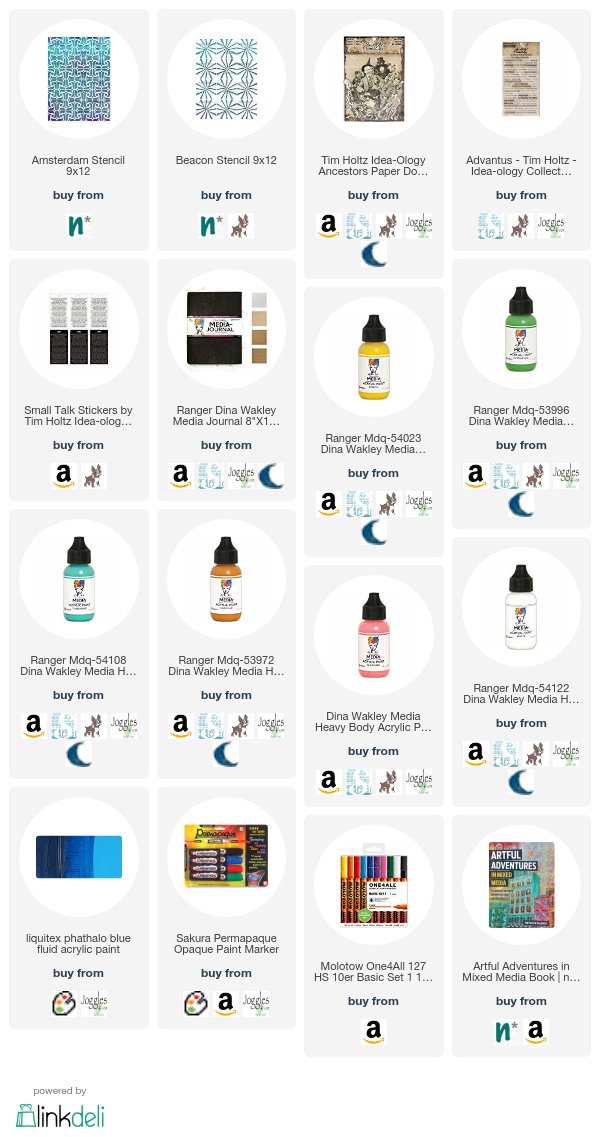
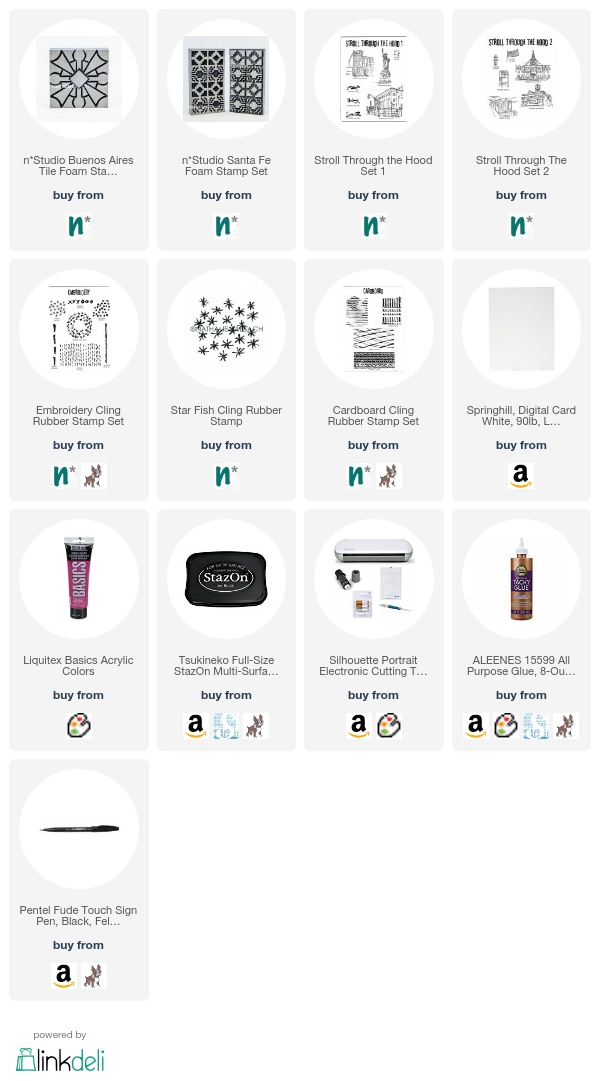
Thank you Michelle! We hope you have many happy art dates!!! Michelle used the following (some are affiliate links):


Play along with us too and share your Artful Adventures with us: I love to see how you interpret our monthly themes. Email me how you used my stencils and stamps with the theme and email me an image – I would love to share your projects in my “n*Spiration From Around the Globe“.

Comments (4)

  • Sue Clarke

    |

    Thank you for your detailed instructions and that teal is gorgeous Michelle.

    Reply

    • Michelle Rydell

      |

      thank you Sue! I’m so glad you liked the tutorial!

      Reply

  • Julie Tucker

    |

    This is gorgeous! LOVING the colors!!!!!!!!

    Reply

Leave a comment

Artful Adventures – Marsha Valk


Hello my friends! Today we have a post from Marsha Valk from the Creative Squad. She is sharing an art journal page from a journal that she created just for taking Artful Adventures :)  She uses my Amsterdam, Chicago, and Mesa Verde stencils, and this month’s theme: Artful Adventures. Are you planning an Artful Adventure this summer? Whether it’s a day at the beach or a full blown International Vacation, don’t forget to take the time to soak up the uniqueness of your new surroundings and gather some inspiration for future artmaking. This month we’re turning to Nat’s new book Artful Adventures in Mixed Media, to help us find inspiration as we travel. We’ll be noticing color, shape, texture and more and then we’ll be taking that to the studio to help inspire some mixed media projects. Join us in the adventure!


I’m not going away on vacation this Summer. We were planning to, but it just didn’t happen. And that’s OK because when you read Nat’s new book ‘Artful Adventures in Mixed Media’, you quickly realize that you don’t have to go far to experience an artful adventure!

I was set on taking inspiration from the city I live in, and the photos I had taken during the Artful Adventures Stroll Through The Hood Challenge leading up to the release of the book. You can see the photos I took during the challenge here.

But when it came down to creating I took one look at my Wanderlust stencils and changed my mind!

The Chicago stencil reminded me of the floor of the place in Amsterdam we had lunch recently. And the Amsterdam stencil reminded me of the logo of the ice cream place we went to after that. And the Mesa Verde stencil…

All these stencils combined told another story: the story of a beautiful day in Amsterdam. Not Amersfoort. Amsterdam!

So I took my art-on-the-go kit into the yard and explored what this day in Amsterdam would have looked like in a travel journal (a regular Midori sketchbook), had I been on vacation.

I even did the Observation exercise from the book to remind myself of what I saw and felt that day. I also went online to collect images of things I hadn’t photographed or wasn’t allowed to take photos of at the time (museum).

My art-on-the-go kit doesn’t include Inktense watercolour pencils, but I decided to use these with the stencils instead of my regular watercolours.

Watercolour pencils are a great addition to an art-on-the-go kit though, because you can use them as a regular coloured pencil as well as activate them with a waterbrush: I used a warm red Inktense pencil without water to colour in the openings of the Mesa Verde stencil.

The Chicago and Amsterdam stencil designs were first traced with the pencils before I used a waterbrush to pick up the pigment from the same pencil and coloured inside the lines.

The red watercolour background is created with regular watercolours, and I used Posca markers to draw and colour the black tree.

It was super relaxing to create like this, with limited supplies, having to pause to wait until the watercolour was dry. And I especially love that I have this particular day recorded in a journal now!


Thank you Marsha for sharing your vision of an Artful Adventure in Amsterdam! In addition to her sketchbook, Marsha used the following supplies (some are affiliate links):


Play along with us too: I love to see how you interpret our monthly themes. Email me how you used my stencils and stamps with the theme and email me an image – I would love to share your projects in my “n*Spiration From Around the Globe“.

Leave a comment

Artful Adventures – Cheiron Brandon


Hello from the Creative Squad! Today we have a gorgeously colored art journal spread from Cheiron Brandon that uses my Beacon and Amsterdam stencils, and this month’s theme: Artful Adventures. Are you planning an Artful Adventure this summer? Whether it’s a day at the beach or a full blown International Vacation, don’t forget to take the time to soak up the uniqueness of your new surroundings and gather some inspiration for future artmaking. This month we’re turning to Nat’s new book Artful Adventures in Mixed Media, to help us find inspiration as we travel. We’ll be noticing color, shape, texture and more and then we’ll be taking that to the studio to help inspire some mixed media projects. Join us in the adventure!


Hi there. It’s Cheiron here with my monthly post, I haven’t had a lot of adventures this summer, but I did head down to a family wedding in Virginia with my siblings. Here’s a picture of us at the wedding (it was on a farm):

I was inspired to create a fun painty summer background on a page to add my “family” that used the Photo Manipulation technique in Nat’s book, Artful Adventures in Mixed Media. I used some Tim Holtz paper dolls and colored and doodled on them with some paint pens. Then I created a super fun painty background for them.

To begin my page, I put down some paints in turquoise, cheddar and medieval through the Amsterdam stencil. I also added texture paste in a layer to some spots.

I created lots of painty layers and marks. I kept adding and adding the layers until I was happy, I used the back of my paintbrush to add some sgraffito, revealing the layers underneath. I also added some white paint through the Amsterdam stencil on top of everything.

I added my Tim Holtz paper dolls that I had colored in with acrylic markers and pens. I love giving them fun clothing and details!

To make the page more cohesive and add extra pops of color, I used the Beacon stencil to create a pattern all over the blank page.

I also added some more stenciling with the beacon stencil around my focal image.

I hope you have enjoyed this fun, colorful page. Even if I haven’t had a real vacation yet this summer, I have sure enjoyed some fun times with my siblings!


Thank you Cheiron for this peek into your beautiful family! Cheiron used the following supplies (some are affiliate links):


Play along with us too: I love to see how you interpret our monthly themes. Email me how you used my stencils and stamps with the theme and email me an image – I would love to share your projects in my “n*Spiration From Around the Globe“.

Comments (1)

  • Karen Bearse

    |

    Love it!! Great use of the paper dolls and fun way to use family life as the inspiration. Really love all the layers!

    Reply

Leave a comment

Artful Adventures – Tina Walker


Hello again from the Creative Squad! Today we have a gorgeous art journal spread from Tina Walker that uses my Beacon stencil, the Stroll Through the Hood #1 and #2 stamp sets, and this month’s theme: Artful Adventures. Are you planning an Artful Adventure this summer? Whether it’s a day at the beach or a full blown International Vacation, don’t forget to take the time to soak up the uniqueness of your new surroundings and gather some inspiration for future artmaking. This month we’re turning to Nat’s new book Artful Adventures in Mixed Media, to help us find inspiration as we travel. We’ll be noticing color, shape, texture and more and then we’ll be taking that to the studio to help inspire some mixed media projects. Join us in the adventure!


Hi! Tina Walker here today with a new month and a new theme. August’s theme is Artful Adventures and we are continuing the celebration of Nat’s new book ‘Artful Adventures in Mixed Media’. We will be using inspiration from our summer travels to create a mixed media project. I was super excited when I saw this month’s theme as I had recently took a short trip to Washington DC. And Nat’s stencil and stamps collections are perfect for the project I had in mind. Let’s get to it!

During my mini vacation to Washington, I took many pictures of the government buildings and historic sites. One particular photo, of the Capital building, inspired me to create. Here’s my inspiration photo.

Using the image of the Capital, I sketched the general shape into my journal. (for this spread, I choose to work in my large, 8x11in journal. I wanted plenty of room to work). Not being a sketch artist, I took liberal direction on specific building designs and shapes. Once I had the rough shape of the capital, I began working on the background of my page.

Apply Texture Paste with the Beacon stencil over the entire background. Let dry completely.

Add watercolors over the entire background, working around the sketched and stenciled areas. I graduated deep blues to light tans on my page. I love how the watercolors pool and blend, especially around the stenciled shapes.

To create a representation of all Americans, past, present, and future, stamp several building images from both the Stroll through the Hood 1 and 2 stamp sets. Since I was using multiple stamps, I wanted to ensure proper placement before stamping. I stamped them onto a transparency first, so I could move them around the page before committing to the stamp.

In order to create a cohesive look across all sketched, stenciled, and stamped images, paint with watercolors, then doodle over the images with a white pen.

The finished page had such a powerful and graphic image, no words were needed. ?

Do you ever use photographs as inspire for your art? I would love to see what you create.

I hope you enjoyed my project today. Have a great day!


Thank you Tina for this beautiful page and for showing us how your Artful Adventures helped inspire it! Tina used the following supplies (some are affiliate links):


Play along with us too: I love to see how you interpret our monthly themes. Email me how you used my stencils and stamps with the theme and email me an image – I would love to share your projects in my “n*Spiration From Around the Globe“.

Comments (4)

  • Karen Bearse

    |

    Really love the drawing of the capital building. Lots of inspiration here!

    Reply

  • Karen Bearse

    |

    Cool ideas!! Love your page. I need to start drawing!

    Reply

  • Yvonne Garner

    |

    Love this! Is the domed building a new stamp?Thanks! Yvinne

    Reply

Leave a comment

Free For All – Michelle Rydell


Hello from the Creative Squad! Today we have a cool art journal spread from Michelle Rydell that uses my Buenos Aires stencil and this month’s theme: Free for All! It’s time for summer vacation and relaxing so around here the Creative Squad is taking a break from themes this month. They’re just going with the flow and making a project of their choosing. It’s a Free for All!


One of my favorite stencils of Nat’s is the Buenos Aires. I love how the shapes connect in so many different ways – creating different patterns, depending on how you look at it. I’m taking a class that focuses on black and white journaling, so I thought it might be fun to play with the positive and negative shapes…

I started by placing the Stencil down on a spread in my journal that has black paper on one side and white on the other; and tracing all the shapes with a pencil.

Then, I started drawing over the pencil lines with black and white gel pens. Because the gel pens take a minute to dry, I started on the outside shapes and worked inwards, so as to not get my hand in the wet ink.

Here’s how it looked when phase one was done. Do you see where I missed a few shapes?

It was easy to put the stencil back over the drawing and trace in the shapes I missed. Here’s the completed initial phase…

From here, I just started doodling. Whatever I did on the white side of the page, I repeated on the black side. This was so much fun and very meditative. When I felt like the doodling was complete, I added a quote around the border and called it done. Here’s the finished page…

Since it doesn’t require many supplies, or deep thought, this is a great technique to do on the couch, watching your favorite tv program! I hope you’ve enjoyed this tutorial, and will consider giving the technique a try sometime!


Thanks Michelle! I love how the simple color palette shows off the gorgeous pattern. In addition to white drawing paper, Michelle used the following supplies (some are affiliate links):


Play along with us too: I love to see how you interpret our monthly themes. Email me how you used my stencils and stamps with the theme and email me an image – I would love to share your projects in my “n*Spiration From Around the Globe“.

Comments (4)

  • Julie Tucker

    |

    These pages are FABULOUS! I love them!!!!!!!!!!

    Reply

  • Melody Willoughby

    |

    Michelle, this is such a perfect page for our black and white journals! I love that stencils!!!

    Reply

    • Michelle Rydell

      |

      thank you so much Melody! I’m glad that you like it!

      Reply

Leave a comment

Free For All – Marsha Valk


Hello from the Creative Squad! Today we have a cool mixed media piece from Marsha Valk that smartly uses up some of those extra stenciled and stamped papers we all have in our stash. She combined my Buenos Aires Tile and Santa Fe ArtFoamies with a bunch of my rubber stamps and this month’s theme: Free for All! It’s time for summer vacation and relaxing so around here the Creative Squad is taking a break from themes this month. They’re just going with the flow and making a project of their choosing. It’s a Free for All!


I have piles and piles of prints sitting under the desk in my workspace, waiting for a fun project to use them on. So for this month’s theme, I dug out a couple of prints I made previously using Nathalie’s Buenos Aires and Santa Fe ArtFoamies! I wasn’t sure what I was going to do with them, but whilst sorting through the pile of prints, I came across an illustration I did a couple of years ago. I decided to use it for my project.


I scanned the illustration, loaded the image into the Silhouette Studio software on my laptop and traced the image and made it into a cut file.


Then I mounted one of the stamped sheets of paper onto a Silhouette cutting mat, fed it into the machine and let the machine cut out all the little houses. I let the Silhouette cut the same houses from three different sheets of stamped paper. I added more stamped images from the Stroll Through the Hood 1 & 2 sets, the Embroidery set, and the Cardboard set with black ink to two of the sheets before cutting.


With all houses cut three times, I started arranging the little village onto a blank piece of paper, mixing parts from all of the different background papers.


Once I was happy with the arrangement I glued everything down.


I wanted to add black outlines to the cut-outs, but because some of them are super tiny, I was afraid my pen would slip. I didn’t want to mess up the original, so I scanned the collage and doodled on top of a print instead.


Thank you Marsha for such a unique project! In addition to a scanner, Marsha used the following supplies in her project (some are affiliate links):


Play along with us and share how you interpret our monthly themes. Email me how you used my stencils and stamps with the theme and email me an image – I would love to share your projects in my “n*Spiration From Around the Globe“.

Comments (3)

  • nathalie-kalbach

    |

    this is stunning Marsha- I love the idea and such a great design!!

    Reply

  • Jean Goza

    |

    Great project! Love the colors and energy of the piece.

    Reply

Leave a comment