Creative Squad

Happy Holidays – Maura Hibbitts

Hello from my Creative Squad and a post today from Maura Hibbitts. Maura is sharing with us a super cute ornament and gift tag idea using my Grove Street stencil and my Large and Small Circle Jumble rubber stamps. This month’s theme is: Happy Holidays – It is a time of year where we are celebrating and coming together and enjoying some merriment. Create something holiday related (whatever holiday you may be celebrating) and enjoy the season!
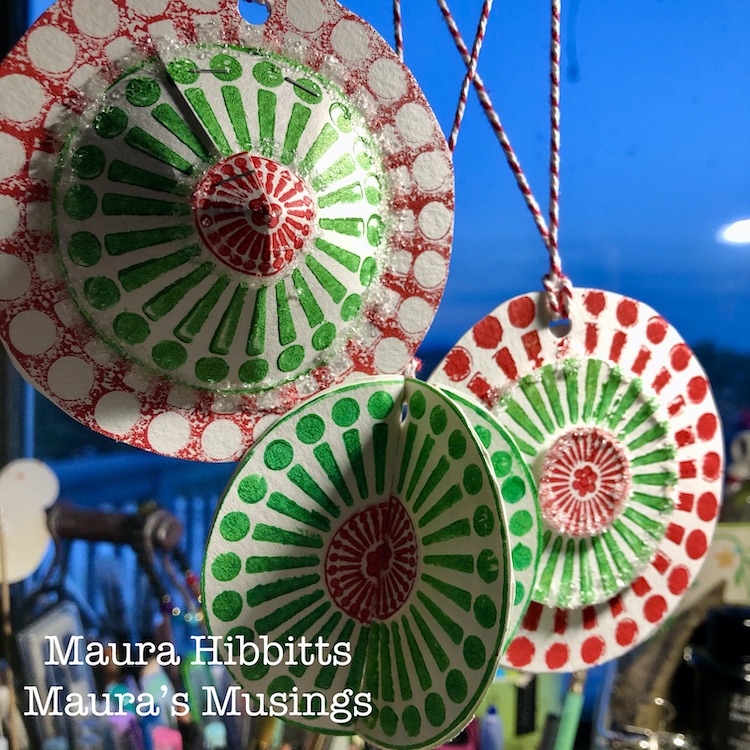

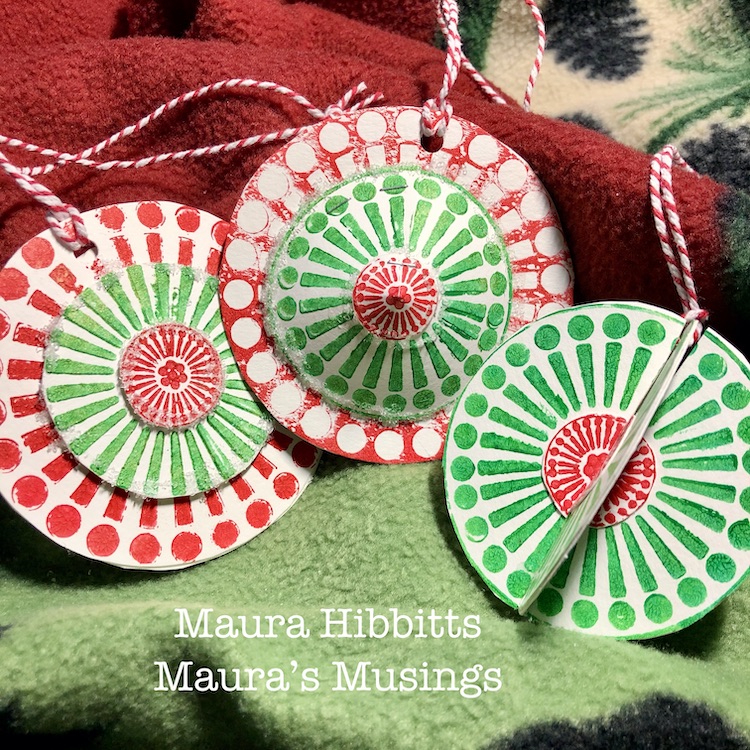
Wishing you all a very merry holiday season! Here in the U.S. it’s a really short run between Thanksgiving and Christmas this year, with the usual hustle and bustle of meeting up with friends and family, baking extra goodies, and looking for the perfect gifts. I’ve been busy already working on cards and small items for friends, so our theme for this month is perfect to get a bit more completed. I decided to work in traditional green and red, and make some tree ornaments and tags.

I’m using one design, and repeating it in several sizes, with the Grove Street stencil and Small and Large rubber stamps.
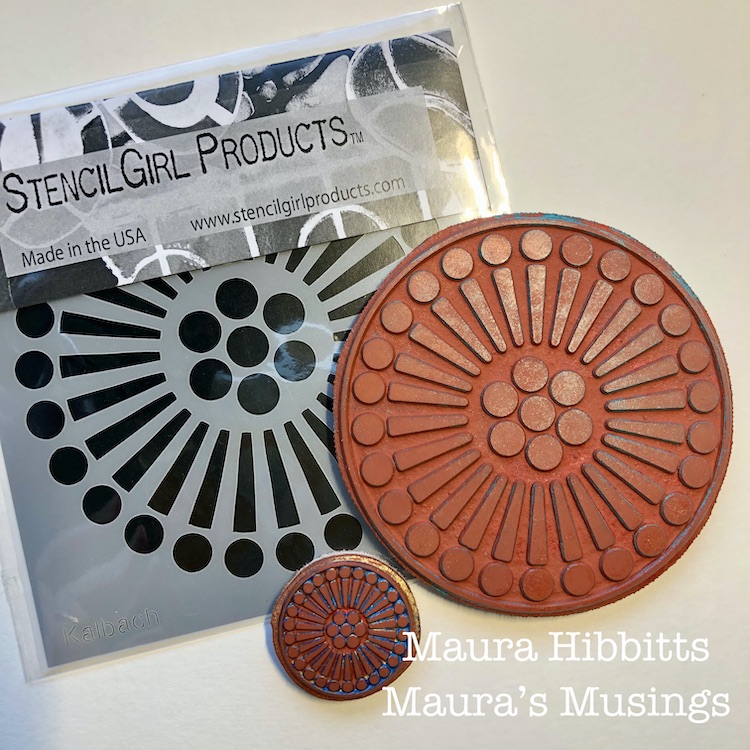
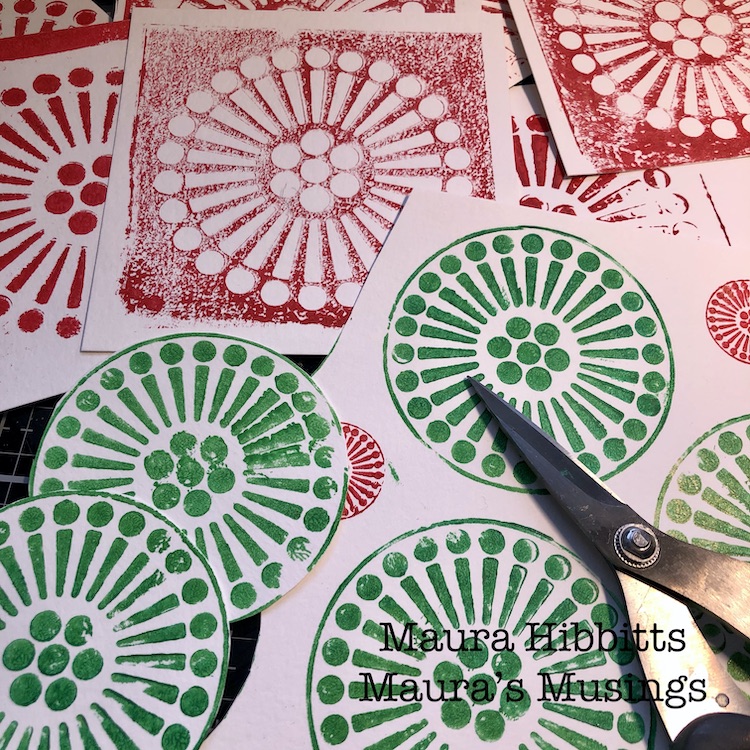
I started with a mix of the green paint on my gelli plate, then added a bit of gold, stamped onto the plate with the large stamp, and transferred the image to heavy watercolor paper.
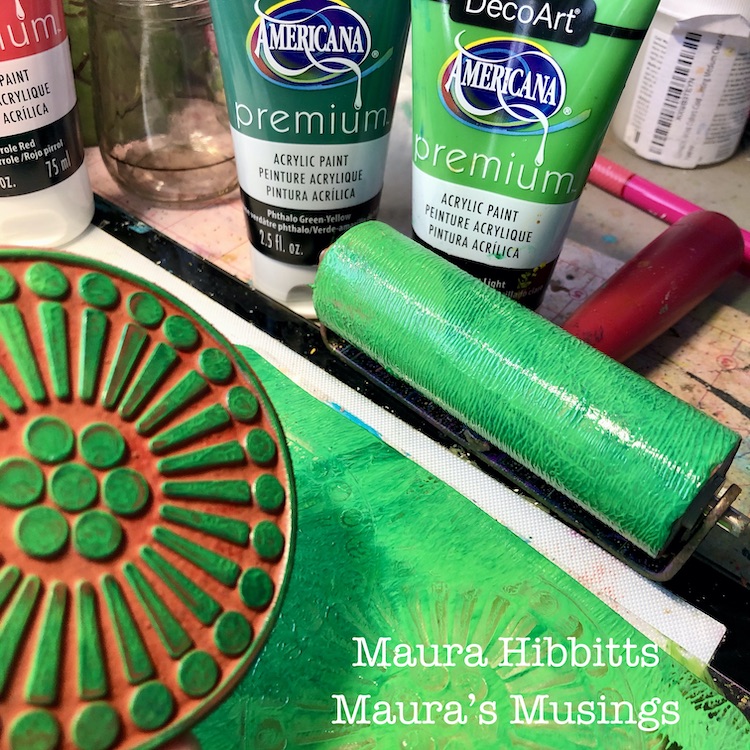
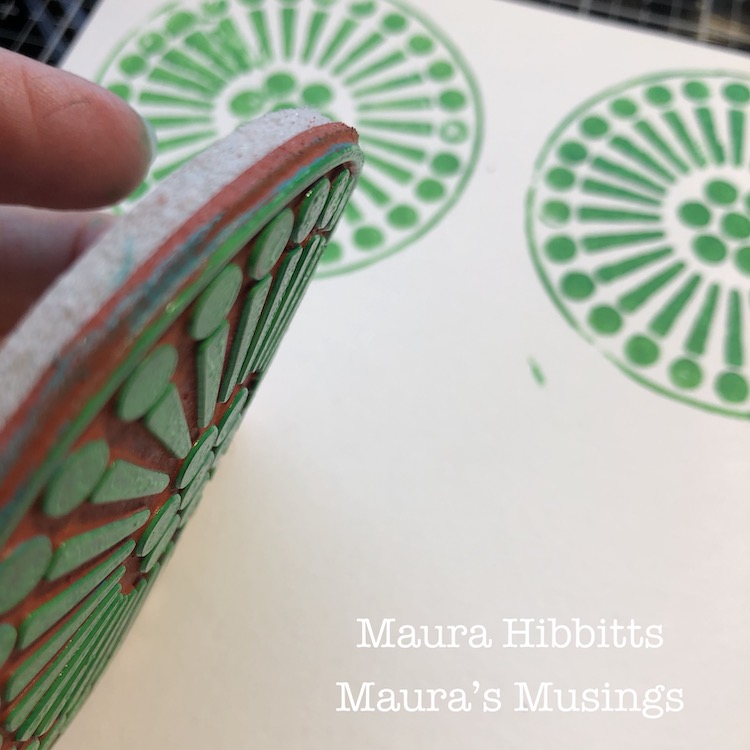
I knew I wanted to mix the colors with the sizes, so next up on the gelli plate is a mix of red and gold. I used the small stamp with the red paint, and stamped these images on the watercolor paper also. Note – be sure to clean the acrylic paint off your stamps right away.
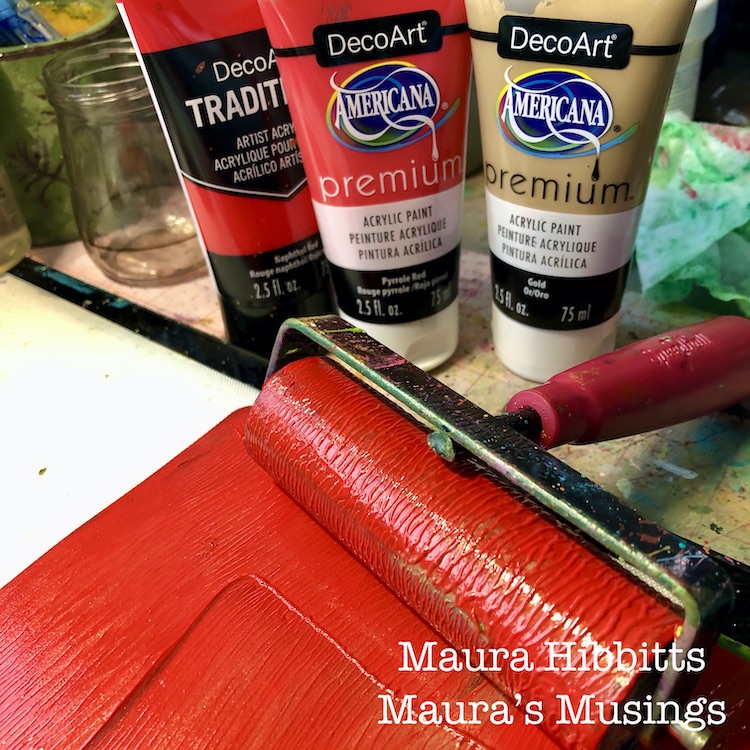
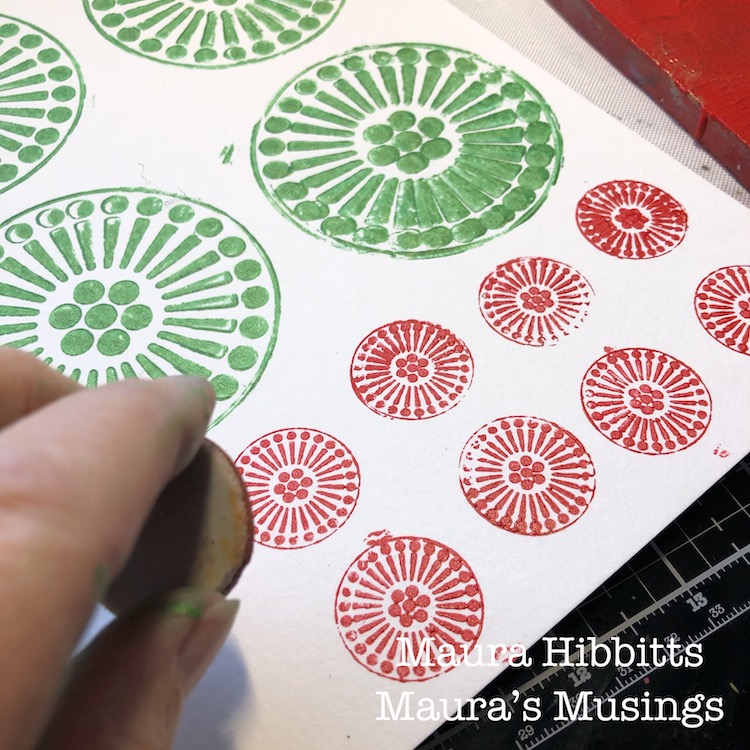
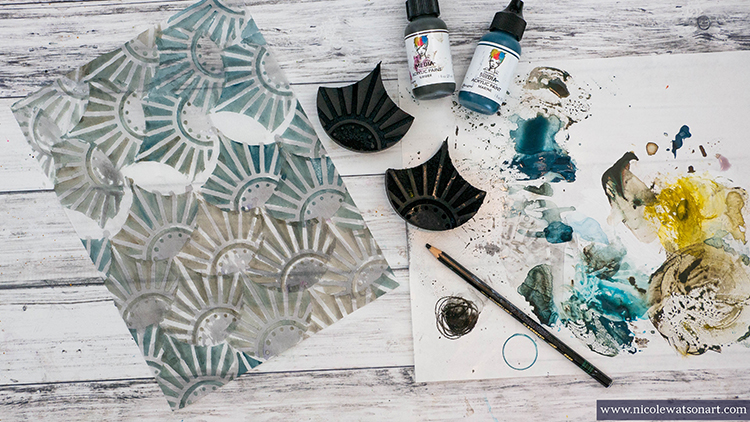
The Grove Street stencil is the largest image, and I laid the stencil down on the red paint on the gelli plate and pressed the paper down onto it. Then I lifted the stencil and pressed it onto another paper, so I would have both a negative and a positive print.
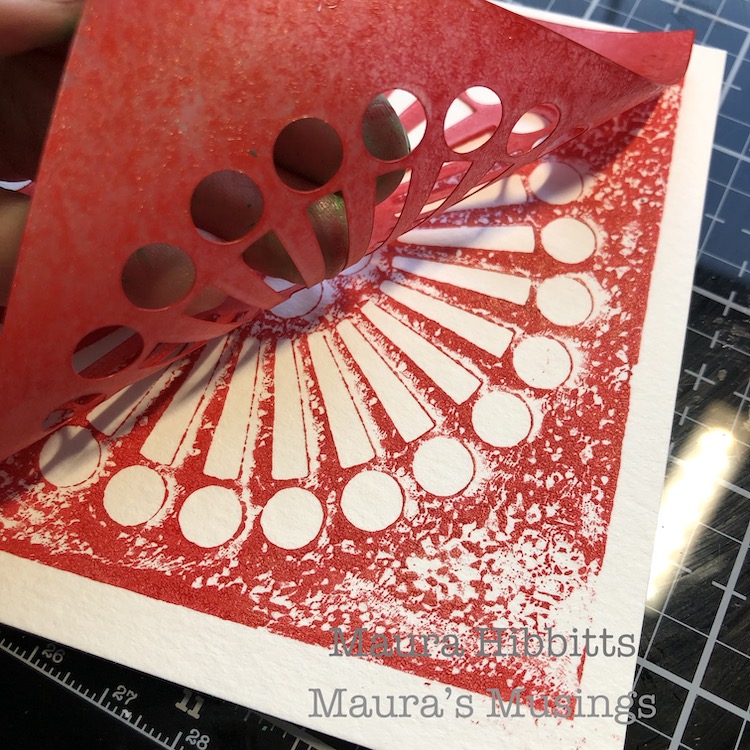
Once all the paint is completely dry, it’s time to cut them out. I just do it with scissors, but if you had a punch in the correct size that would work well.
I got the idea in my head that I could make a 3D ornament, so I started by gluing two of the stenciled circles together. Next, on two green and small red circles, I cut a slit to the center, then formed it into a cone and stapled it. I made sure the little red one fit onto the green circle, and glued the cap on. I added a layer of glue to the bottom of the green circle and attached it to the stenciled circle. I had to apply pressure and hold in place for awhile to get the glue to hold. I repeated the process on the other side, then decided it needed a bit of glitter, so added a bit more glue and glittered it up.
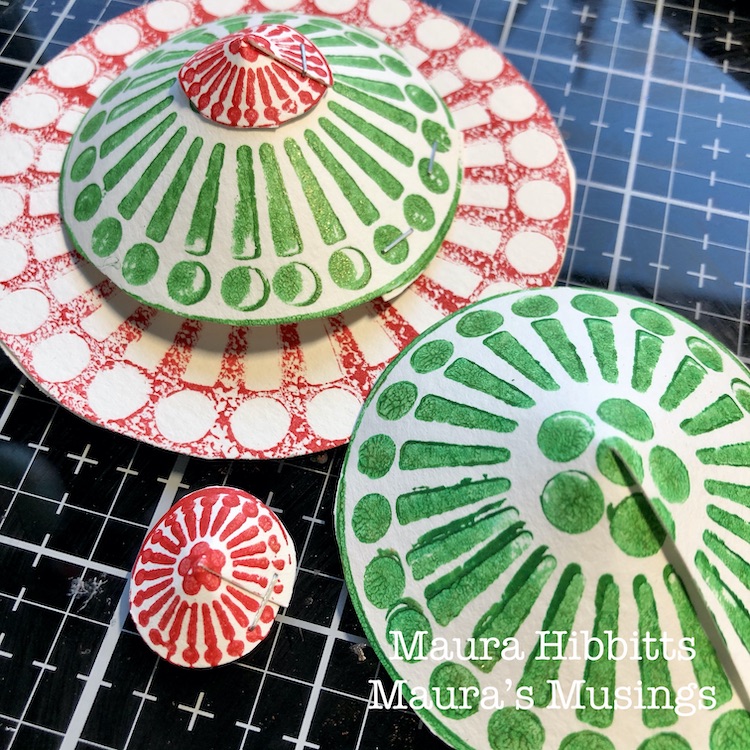
I made two more ornaments, a flat one, and another 3D one in which I cut slits into both circles to the center and slid them together. On each of these, I glued a double layer together and added glitter to the flat one. I had a lot of circles remaining, so turned these into gift tags. I punched holes in the tags and ornaments and attached some bakers twine. It’s easy to add words on the acrylic paint with a carbon ink pen.
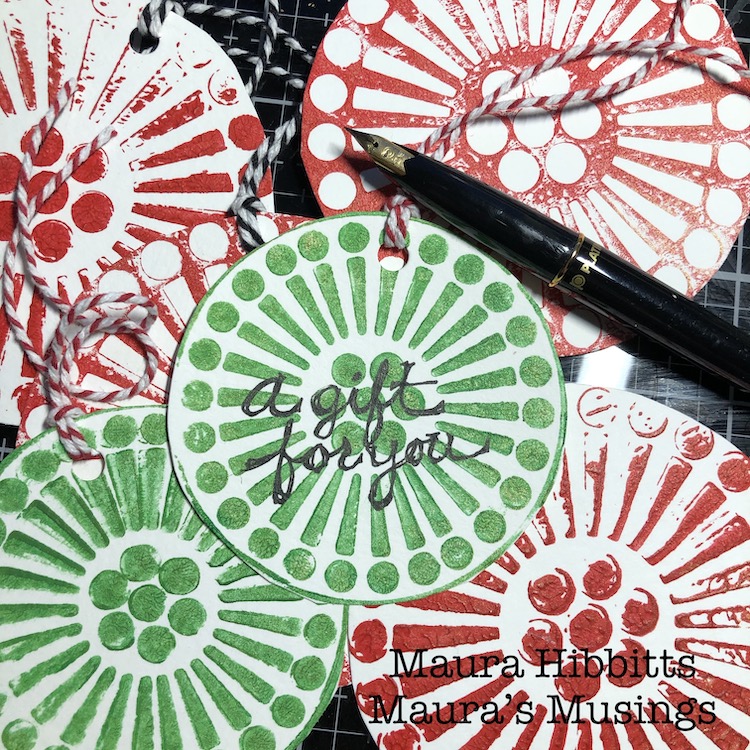
I like how the ornaments came out looking unique, while using the same materials. These are ready to hang on the tree.
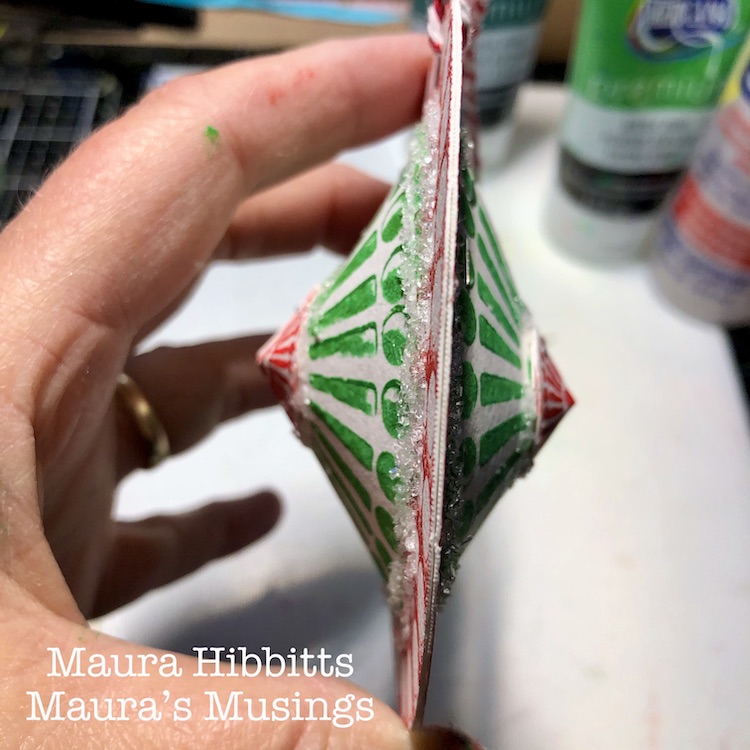
I love adding a bit of homemade to the holidays! I always hope when someone receives a handmade gift or card, they feel that extra bit of love that went into it. Wishing you and yours a joyous holiday season and blessings for the new year! -Maura


Thank you Maura – love how you created some 3D ornaments and those tags are such a great idea for giving gifts with a personal touch.

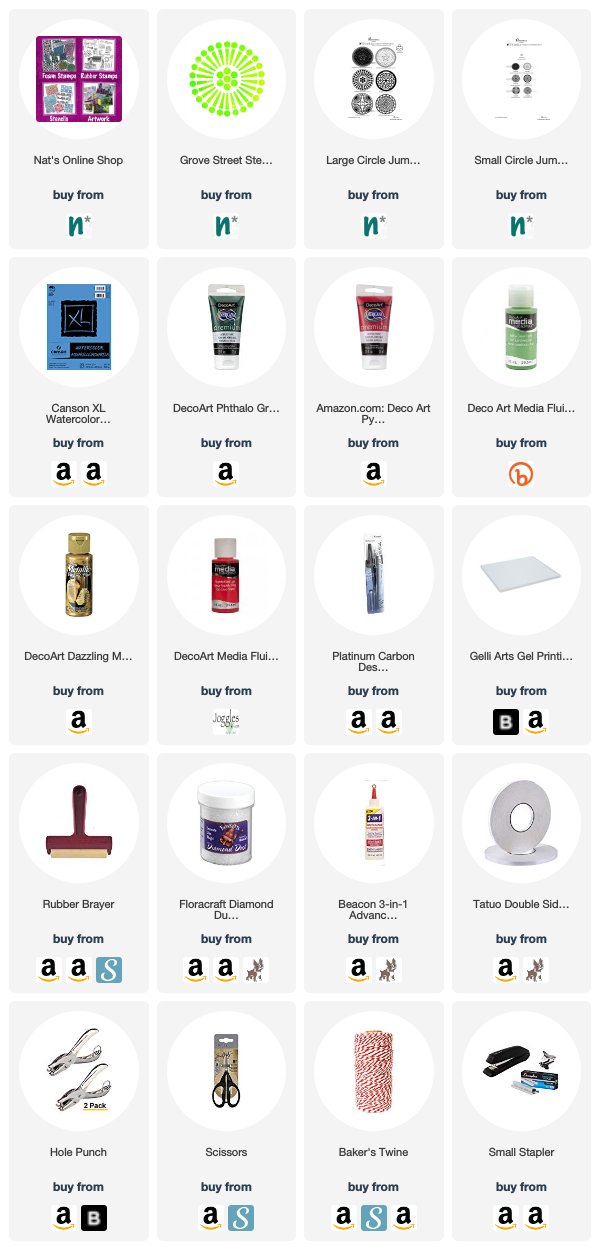
Want to give Maura’s project a try? You can find all my Stencils and Rubber Stamps in my Online Shop and here are some of the other supplies Maura used:
Feel inspired? Working on something yourself that you’d like to share?  I love to see how you interpret our monthly themes. Email me or tag me #natkalbach how you used my stencils and stamps – I would love to share your projects in my next  “n*Spiration From Around the Globe“.

Leave a comment

Happy Holidays – Jennifer Gallagher

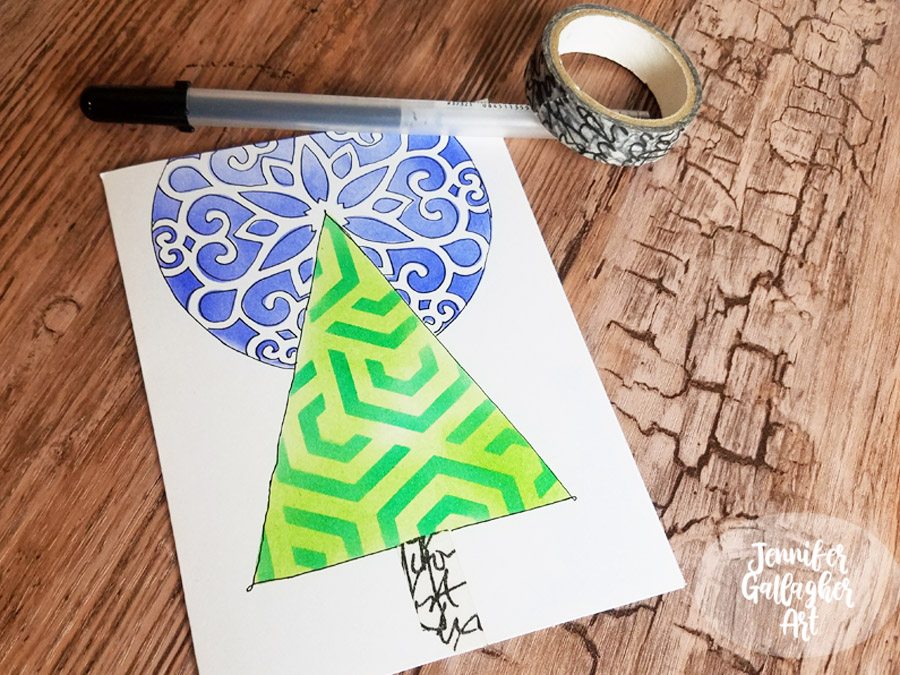
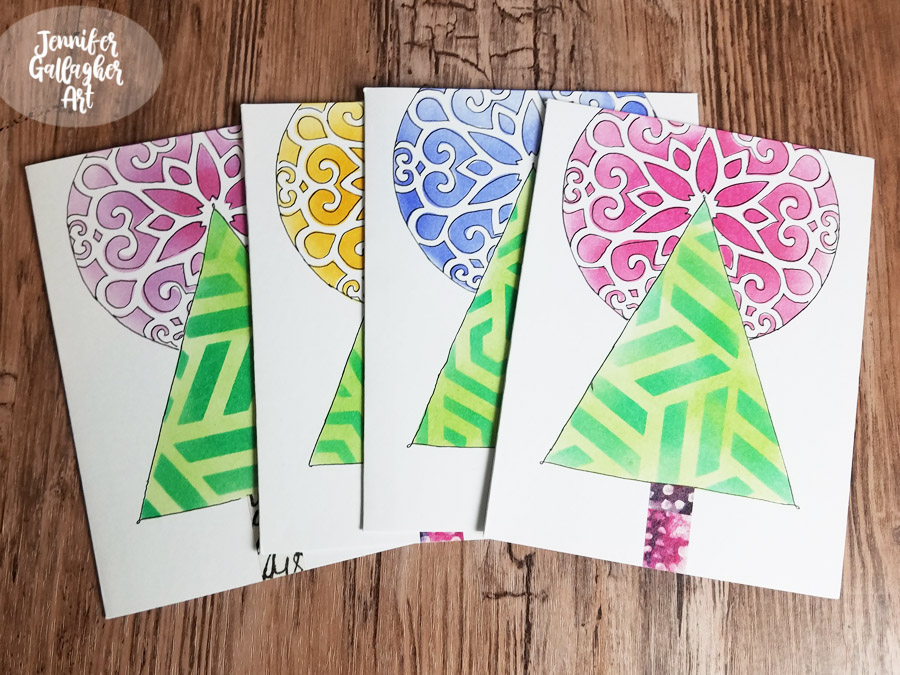
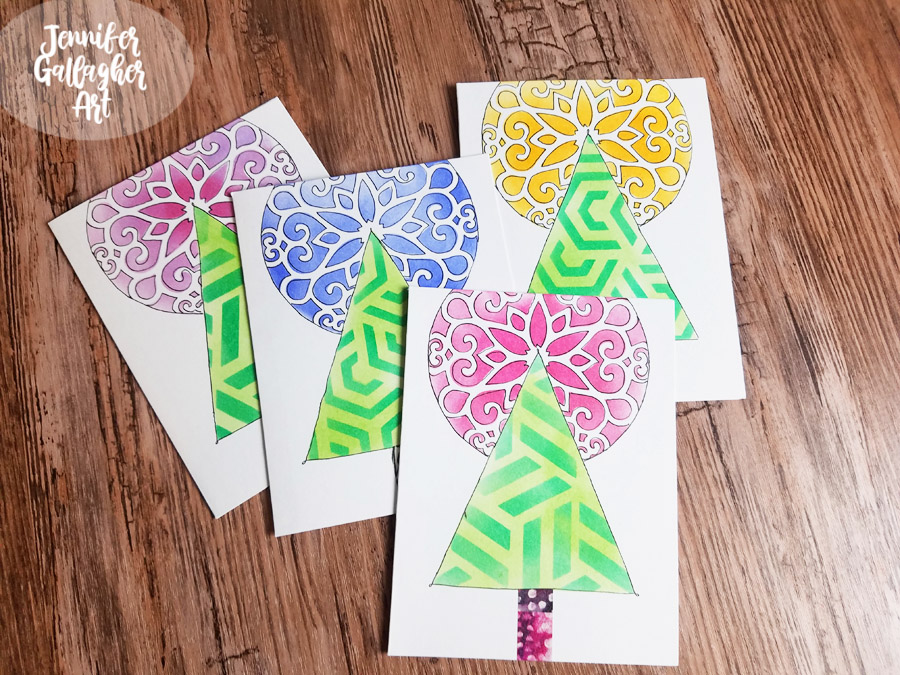
Hello everyone and welcome to a Happy Holidays post from our Creative Squad. Today we have a group of super cool looking cards from Jennifer Gallagher that you can make with the whole family! Jennifer is using my Kassel, Park Blvd 4×4, and Flower Maze stencils and this month’s theme: Happy Holidays – It is a time of year where we are celebrating and coming together and enjoying some merriment. Create something holiday related (whatever holiday you may be celebrating) and enjoy the season!


This month we are celebrating the holiday season and what better way than to create some fun holiday cards. You’re going to love this tutorial because it’s fun, easy, and family friendly. So break out your favorite n*Studio stencils and let’s get started.

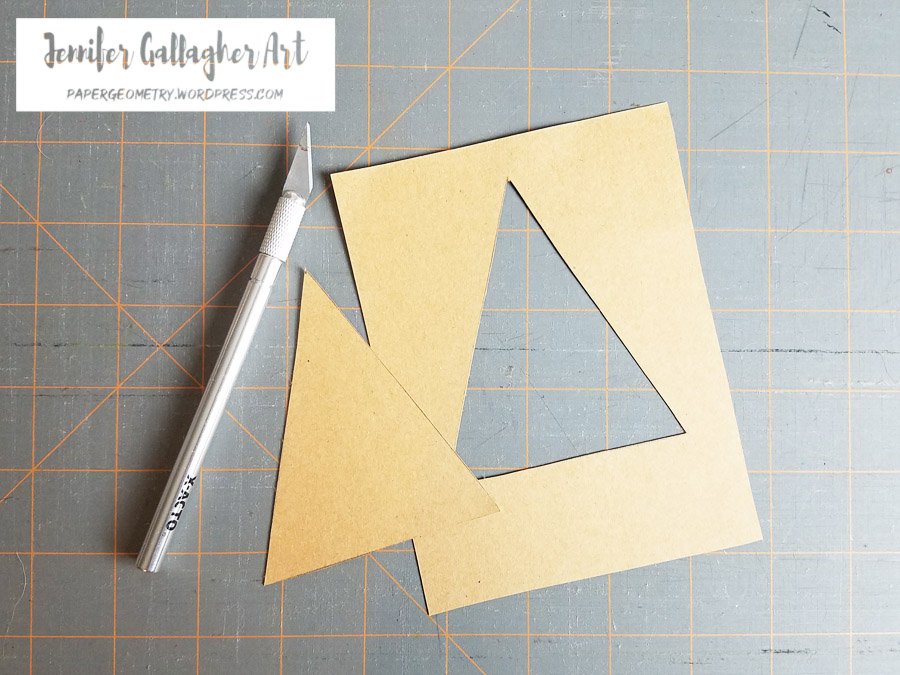
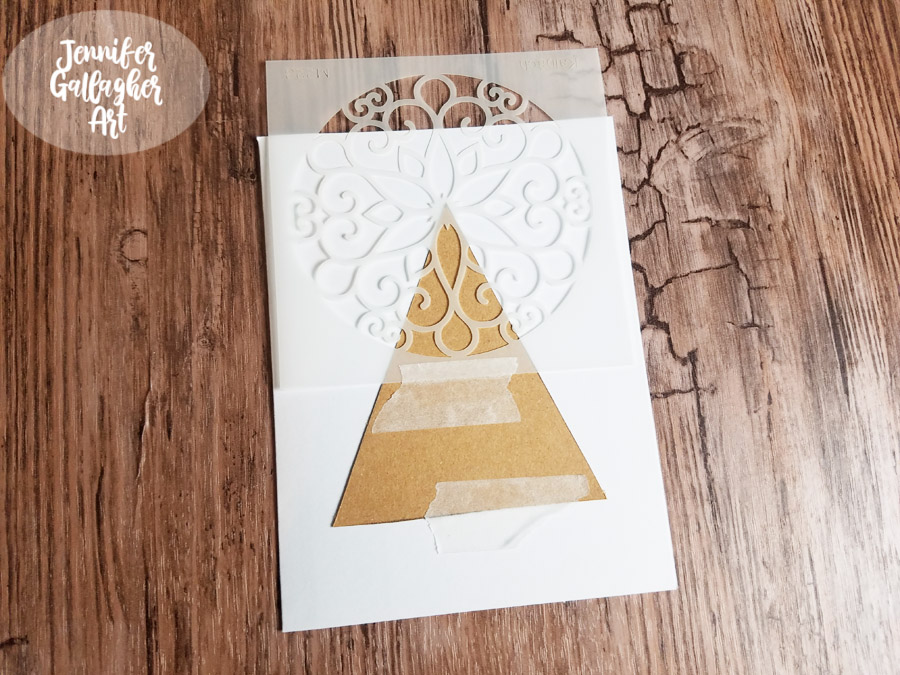
I began by drawing a simple tree shape onto craft card stock and cutting it out with a craft knife. I kept both pieces, one we will use as a stencil and the other as a mask.

Using the tree mask and Nat’s Park Blvd 4×4 stencil, I placed the designs down using a low tack washi tape. The mask allows me to protect the area where I don’t want to apply color.

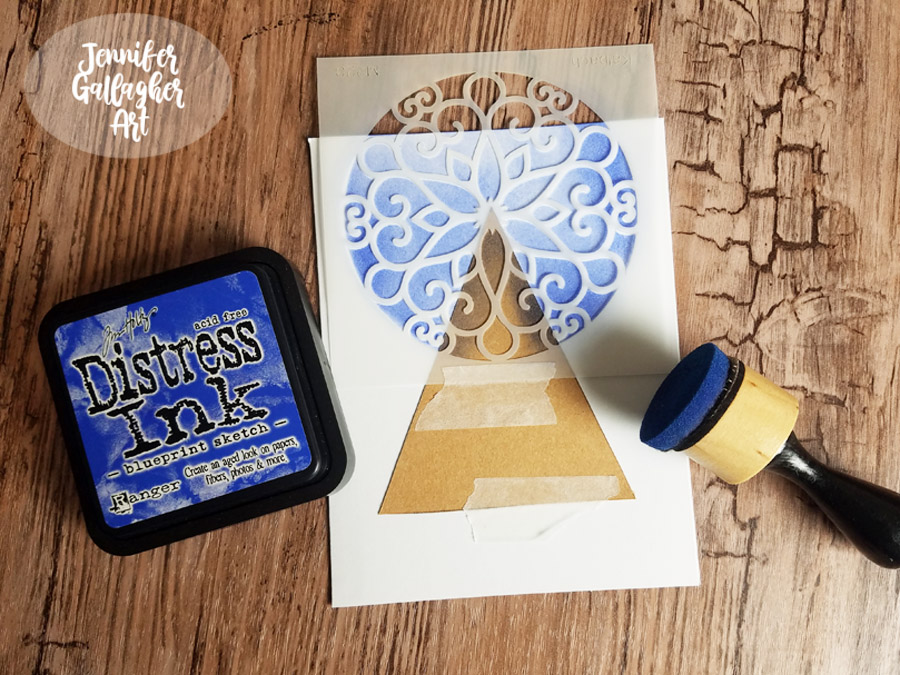
Next, I applied distress ink in blueprint sketch to the Park Blvd. stencil. This creates a lovely halo around the tree.

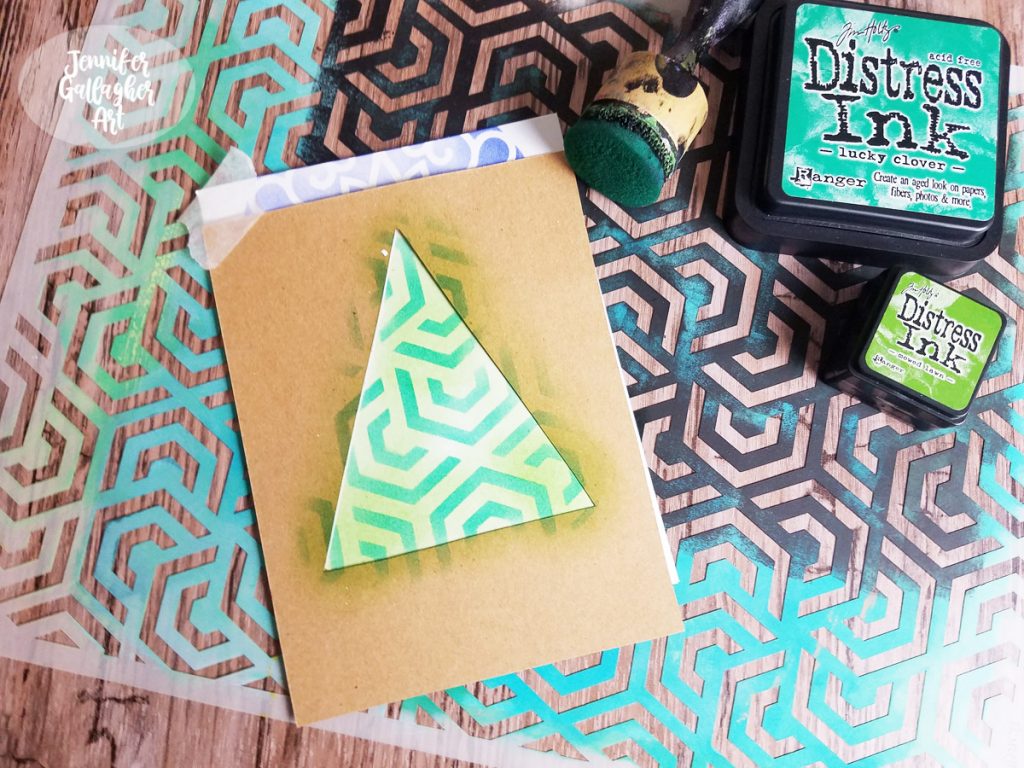
I placed the tree stencil in the spot where the mask was and applied mowed lawn distress ink. Next, I laid Nat’s Kassel and Flower Maze stencils down and applied lucky clover distress ink over that.

Now is the time to pull out all of your favorite washi tapes. I chose one of my favorites and used a small piece to create the tree trunk. Then, using a Sakura Gelly Roll in black, I outlined my tree and halo.

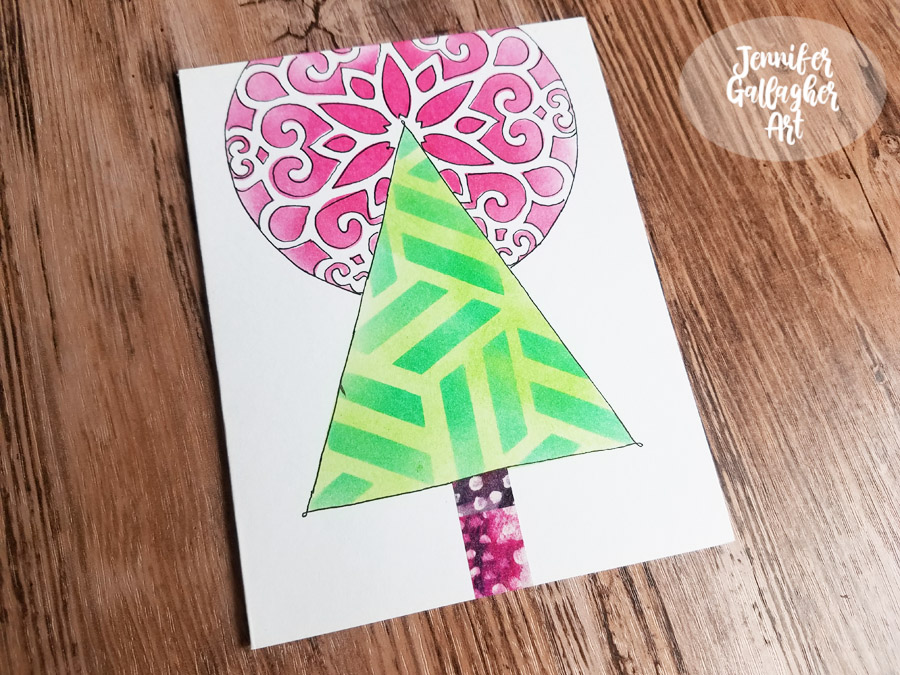
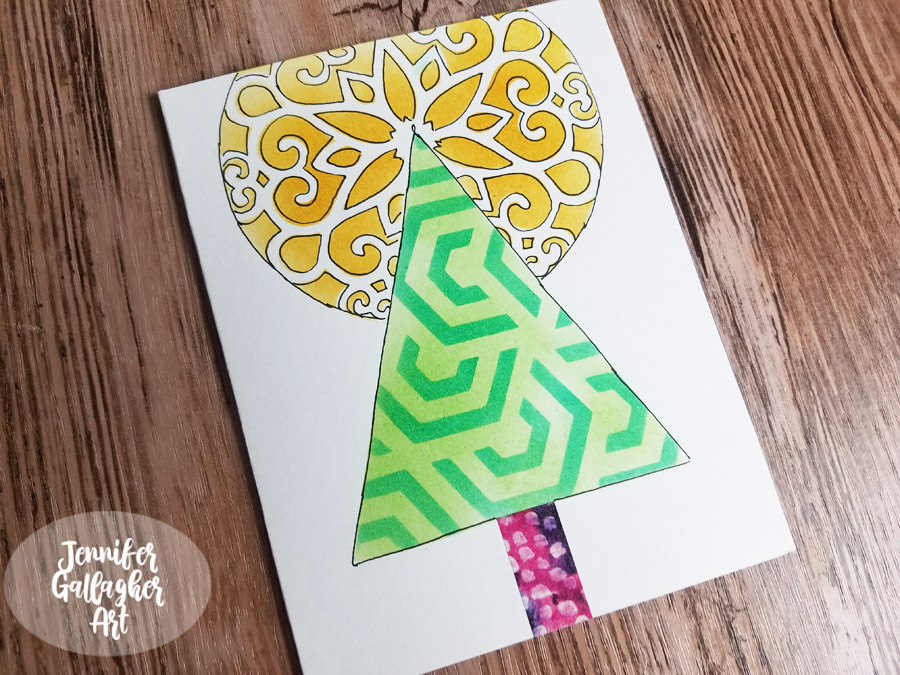
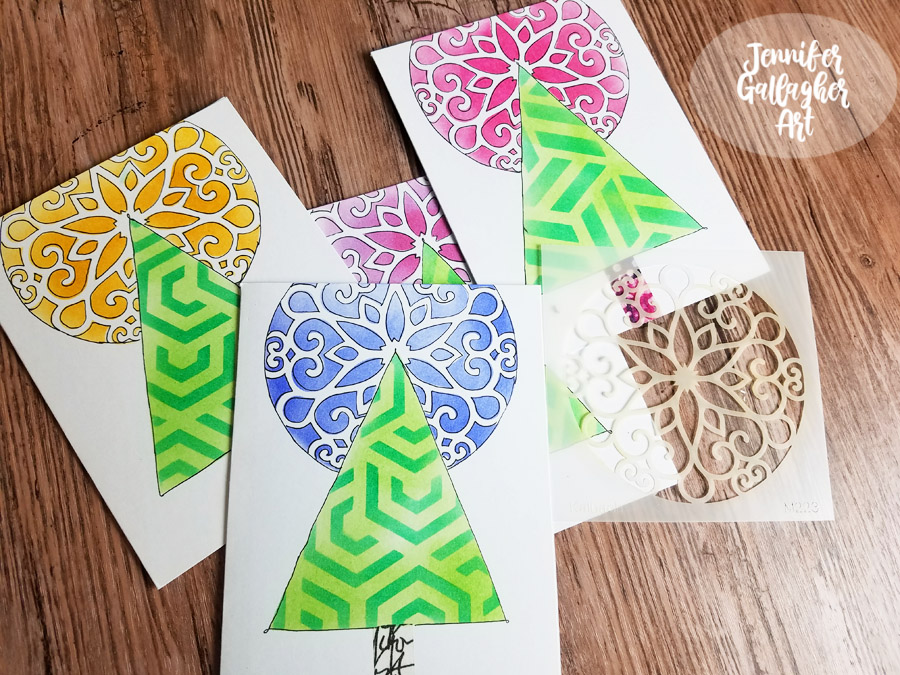
Now it’s time for the remix! Change up your ink colors, stencil designs, and washi tapes to create different designs. I suggest trading out the Kassel stencil for Nat’s Flower Maze stencil in your trees. Some additional ink colors I used are picked raspberry, wild honey, and shaded lilac. Check out these variations:

I hope you have enjoyed this tutorial. This would be a great craft to make with your kids and grandkids. There is nothing better than receiving a handmade card around the holidays. If you try out any of this month’s tutorials, be sure to share with us. Happy Holidays!


Thank you Jennifer for this kick off to our December Creative Squad posts – love how doable the cards are and the very fun results – great design!

Give it a try: you can find all my Stencils in my Online Shop and here are some of the other supplies Jennifer used:

Feel inspired? Working on something yourself that you’d like to share?  I love to see how you interpret our monthly themes. Email me how you used my stencils and stamps with the theme and email me an image – I would love to share your projects in my next  “n*Spiration From Around the Globe“.

Leave a comment

Mirror Mirror – Linda Edkins Wyatt

Hello from my Creative Squad. Today we have a beautiful collage and stencil project from Linda Edkins Wyatt to inspire you. Linda is using my Manhattan, Ornament Wallpaper, and Versailles stencils and this month’s theme: Mirror Mirror – A mirror can be a reflection of many things. We look into them every day and can see who we are outside and in. But they can also just be a fun visual tool to play with as we flip and reverse images and patterns. Play with reflection this month.


I adore playing with mirror images! But, when I pulled out my Nat Kalbach stencils, I had a Homer Simpson “D’oh!” moment. They were all geometric and already in a mirror image layout! I freaked out a little. I had to move my orderly Virgo mind outside the box to tackle the mirror image theme in a new way.

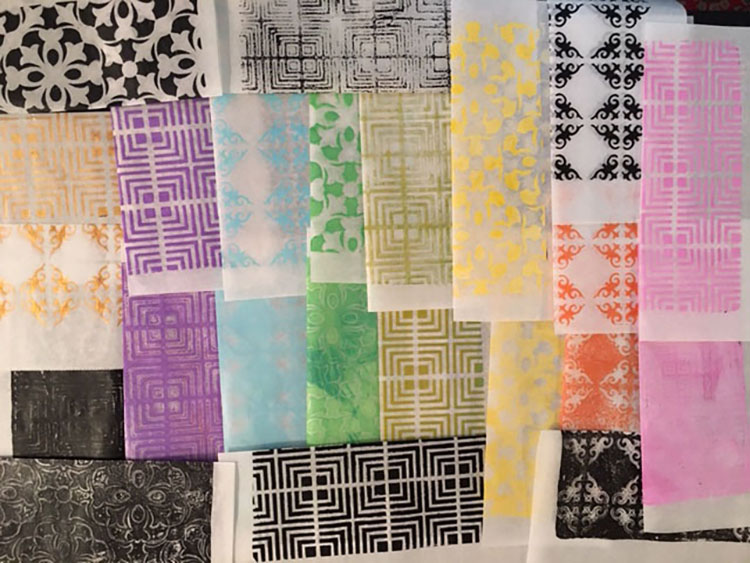
I didn’t really have any idea of how to create a mirror image with stencils that were already in a mirror image, so I calmed myself by gelli printing in a rainbow of colors, plus black and white.

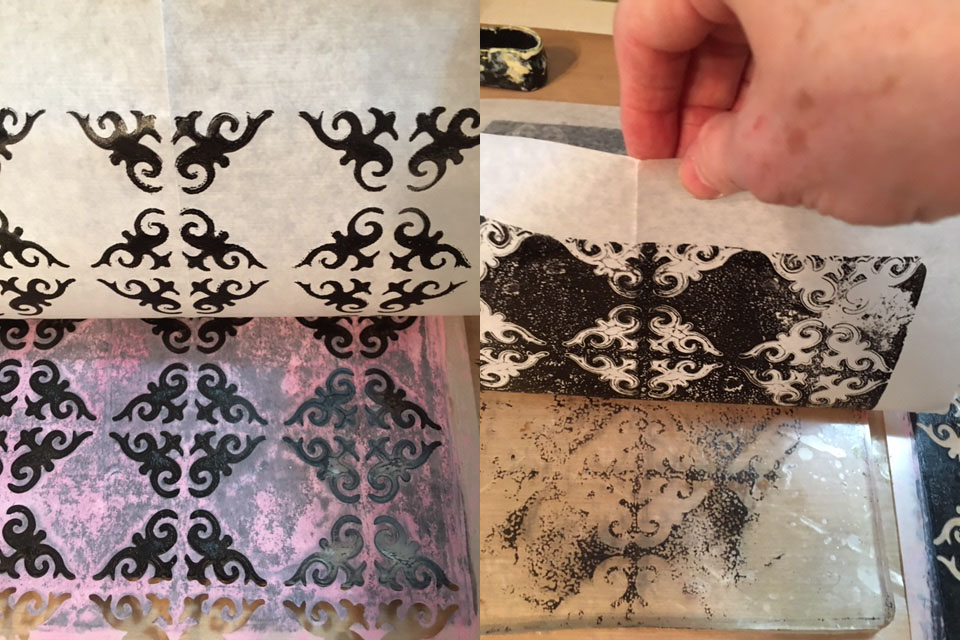
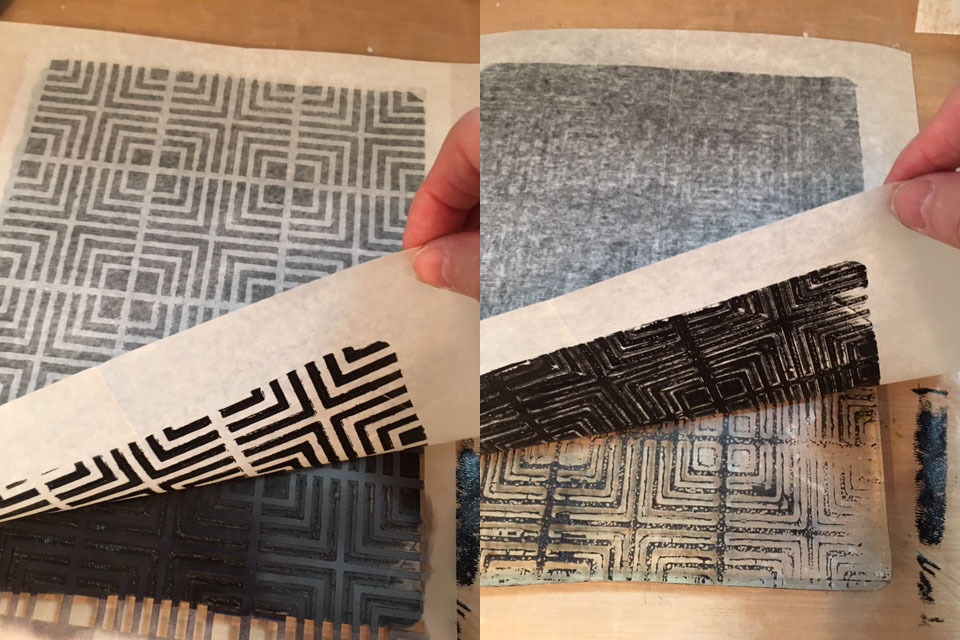
An interesting aspect of the gelli plate is that after you pull the first print, the image left on the plate is the exact opposite. I got a bit excited when I saw my pile of printed deli paper growing and started thinking about the mirror image using both color and the reverse images.

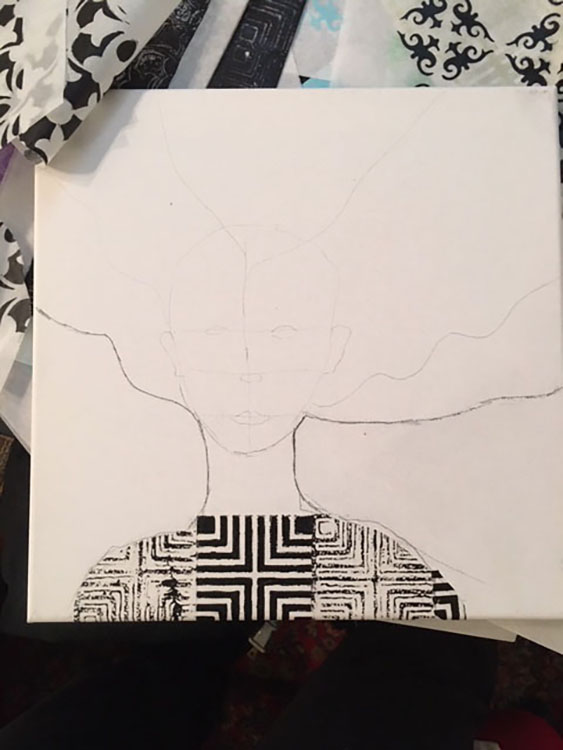
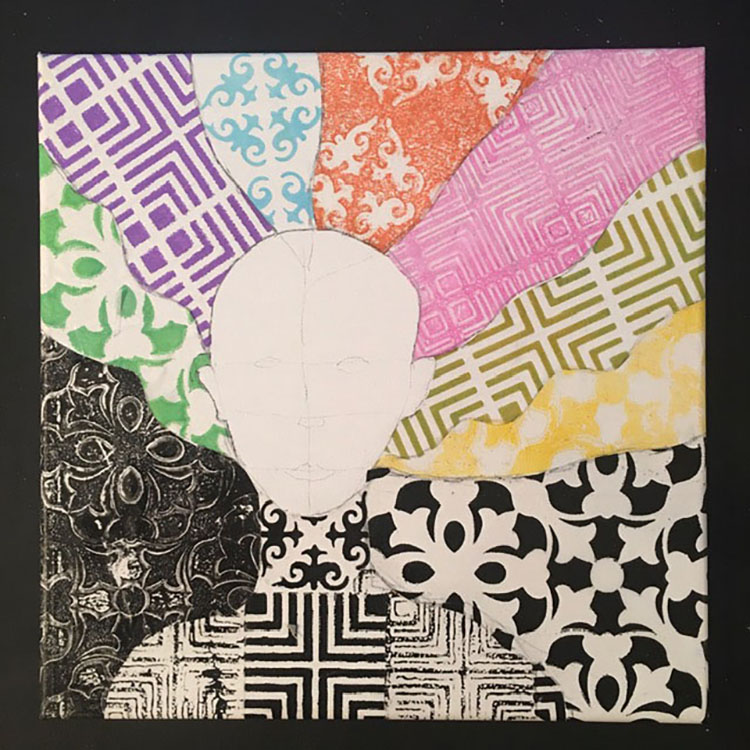
I love portraits, so I decided to try a face…after all, that’s what you usually see in the mirror, right? I sketched out a face shape, slightly off center, and added marks for the features and hair.

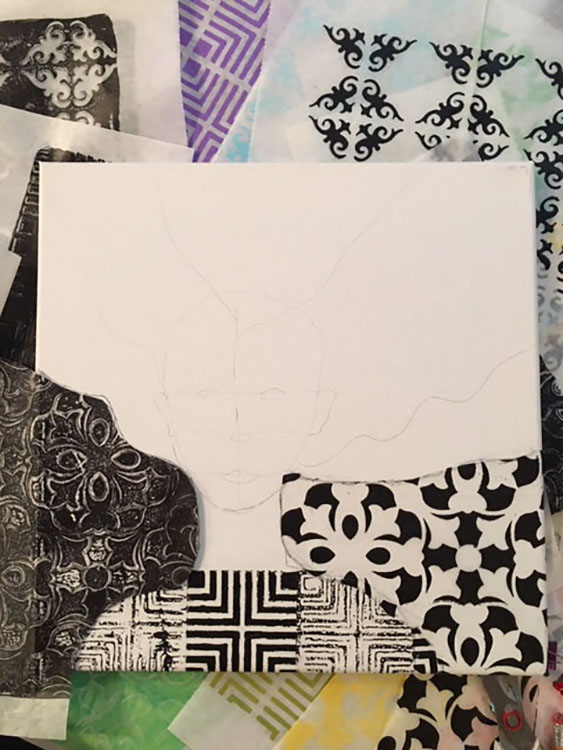
I decided to make her clothing a mirror image. I used both the positive and negative gelli prints and cut them to fit the space I had sketched in pencil.

Next, the background. I again used a positive/negative, but this time one on the left and one on the right.

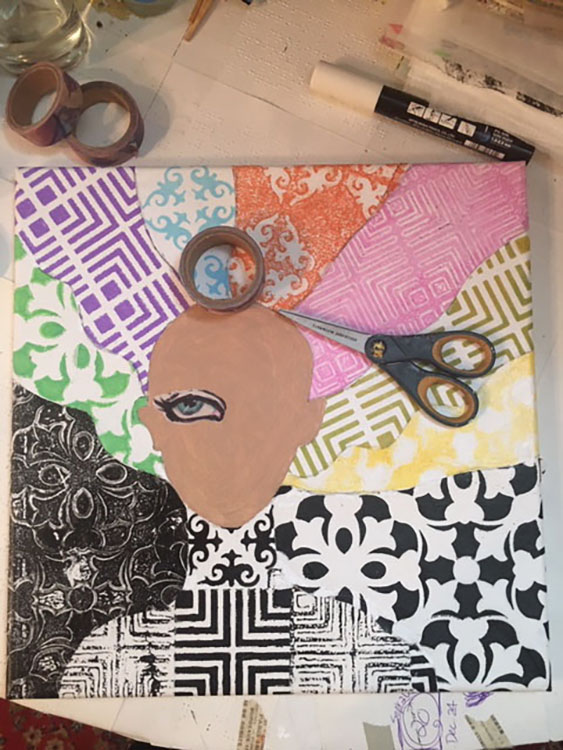
My concept was that society often sees things in black and white, but inside my head there is usually an explosion of colors and shapes and ideas. To convey that, I decided to have the hair made up of a rainbow of deli paper gelli prints.

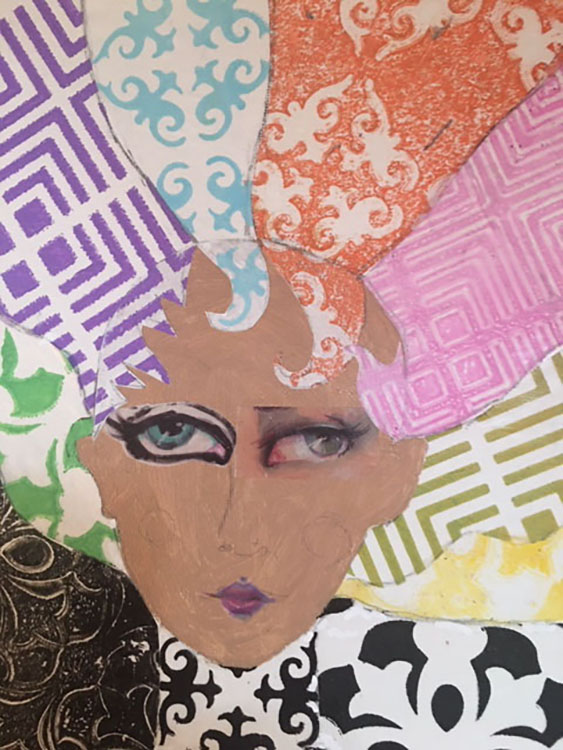
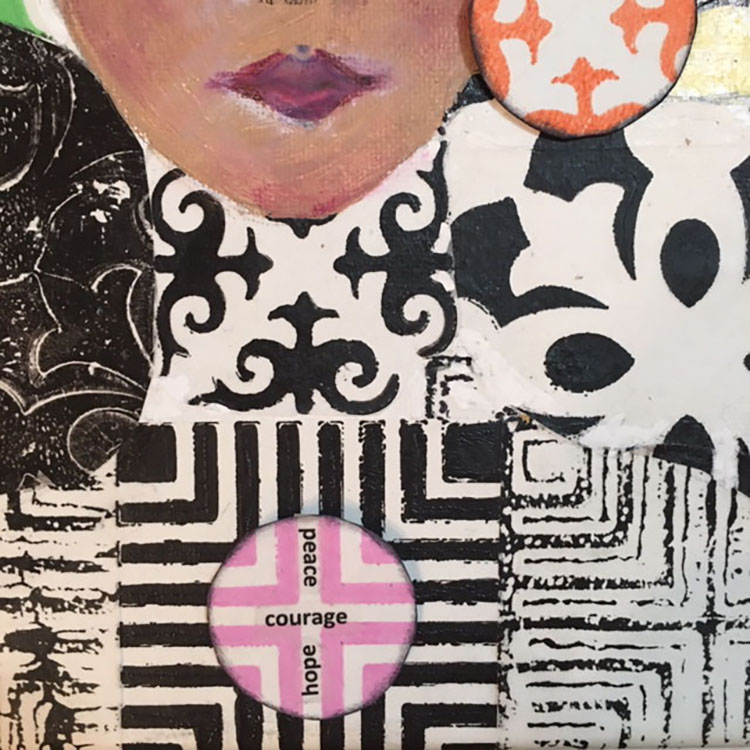
When the hair was done, it was time for a face. First, I painted a skin tone. Next, I chose some Jane Davenport washi tape with eyes and a mouth. I added extra paints, colored pencils and posca pens until the face was complete and the washi tape sections blended with my own colors. I tend to subconsciously make my women look like me, so I tried to do a “not Linda face” and went for a deeper, multicultural skin tone.

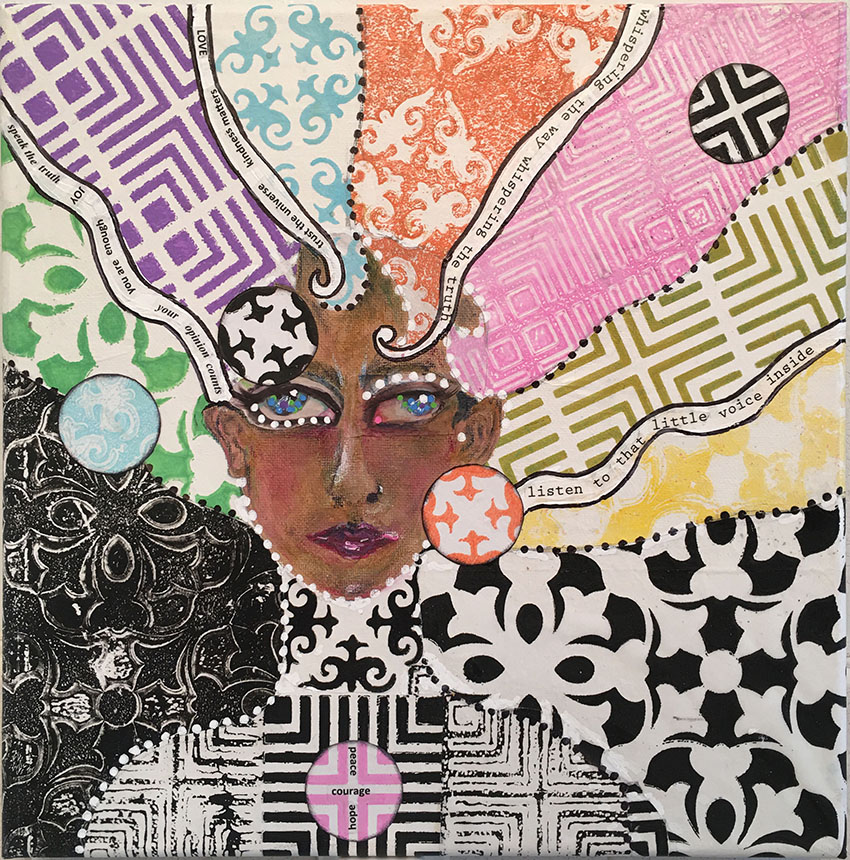
Once the gelli prints were all on the canvas (I used both a glue stick and Golden heavy gel gloss to adhere the cut paper to the canvas), I wanted to add words, lines and dots. The words were printed on Avery clear mailing labels; I carefully cut them to fit in the white swirls running through her hair. (Be sure to have very clean hands when handling the printed words. Also, using tweezers helps get the words exactly where you want them.)

I also added colored deli paper circles floating in the hair to add visual interest and to spot the colors around the canvas. Since deli paper is sheer and I wanted the circles to pop, I glued the printed deli paper to white cardstock first, then cut the circles and placed them around the canvas.

For the center of the body, I added a pink “button” with the words of encouragement for both the soul and the world: peace, hope and courage.


Thank you Linda! Love that you were able to interpret the theme in a way that inspired you to create such a striking canvas – looks awesome!

Want to give Linda’s project a try? You can find all my Stencils in my Online Shop and here are some of the other supplies she used:

Feel inspired? Working on something yourself that you’d like to share?  I love to see how you interpret our monthly themes. Email me or tag me #natkalbach how you used my stencils and stamps – I would love to share your projects in my next  “n*Spiration From Around the Globe“.

Leave a comment

Mirror Mirror – Nicole Watson

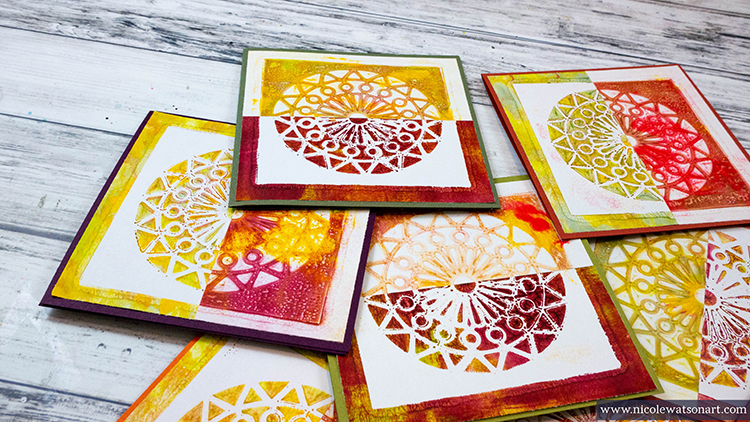
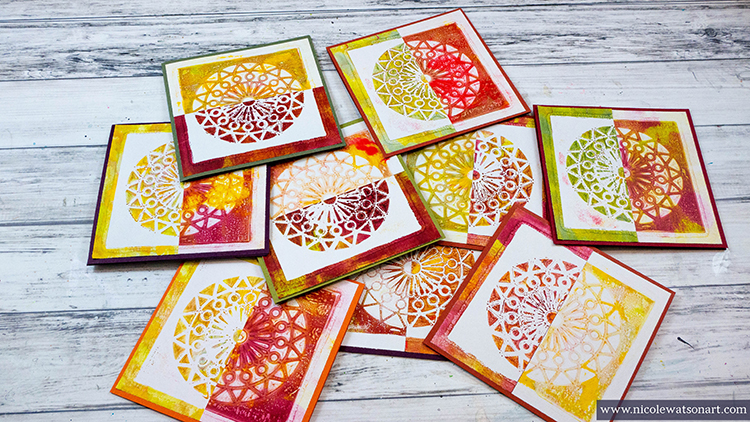
Hello and welcome to a post from my Creative Squad! Today we have Nicole Watson sharing with us a nice and easy card project – just perfect to go along with my Deck of Cards Challenge this month on Instagram :) She is using my Valley Road stencil and this month’s theme: Mirror Mirror – A mirror can be a reflection of many things. We look into them every day and can see who we are outside and in. But they can also just be a fun visual tool to play with as we flip and reverse images and patterns. Play with reflection this month.


Since Nathalie is doing a card-making challenge this month, I decided to make cards for this tutorial! These mirrored cards are quick, easy, and require minimal supplies.

Here is a video of my process and below the video you can find the step by steps with photos


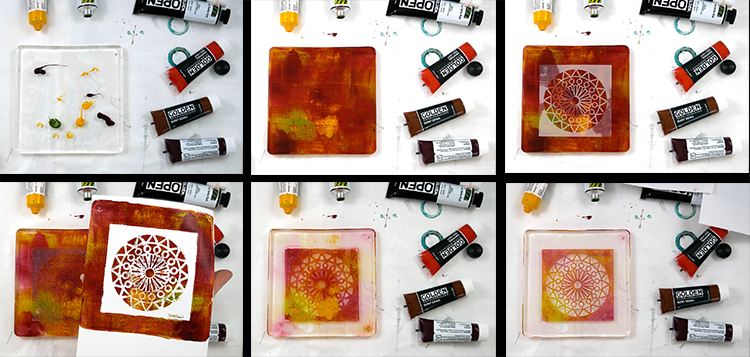
First, grab some fall colored paint. I used Golden’s Open Acrylic paint since it has a longer drying time, and I wanted to pull multiple prints before the paint dried. Begin by squirting several colors of paint on your gel plate and spreading it around with your brayer. I like to brayer off my excess paint in a book. Then, place your stencil in the middle of your plate. Now it’s time to pull some prints!

If you’ve never gel printed before, don’t worry. This is very simple printing and a good place to begin. Simply place your white paper on top your plate and stencil and smooth over it several times with your hand. I like to concentrate on the stencil (I’m using Nat’s Valley Road stencil here) with more pressure to make sure the paper contacts the paint inside the stencil holes. The more detailed your stencil is, the harder it is to ensure this happens. Gently pull your paper from the plate and admire your print! Repeat this process about two more times. You should be able to get three really nice pulls before the paint runs out.

Now it’s time to create the mirrored image. Carefully pull your stencil off the plate to not disturb the paint that was masked by the stencil. Place your stencil paint side up (We’ll use it in a minute!). Grab your white paper and you should be able to get two nice pulls. You will also be able to get one nice pull from the stencil itself. Place the stencil paint side up on your gel plate and use a white paper to pull the paint off the stencil. This will clean it for the next colors, and give you one more print.

Continue this process until you have a bunch of prints. Be creative and use different color combinations so when you put the mirrored images together, they are different.

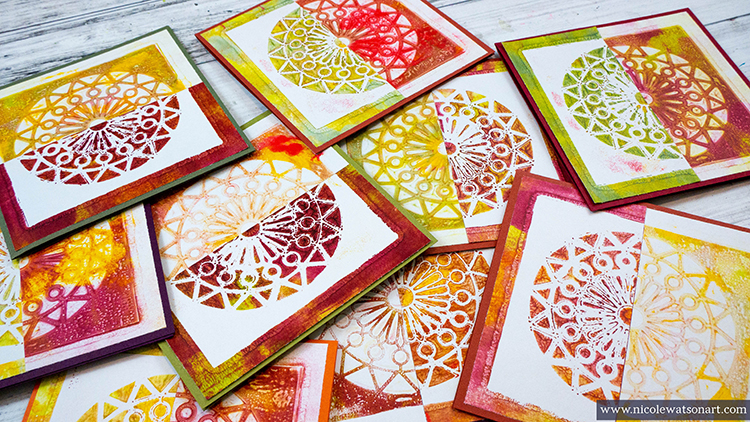
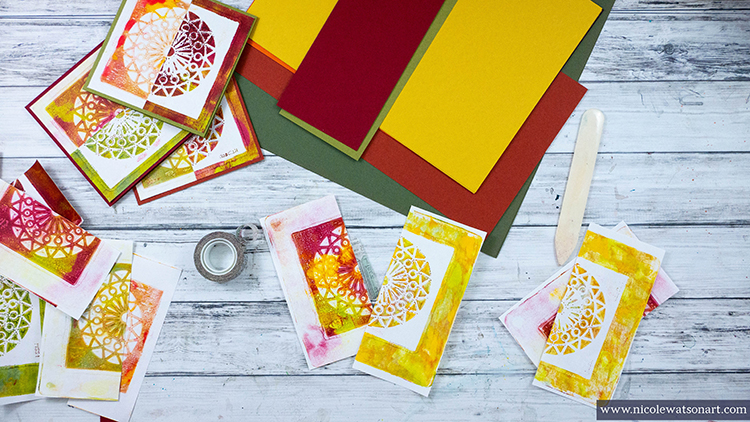
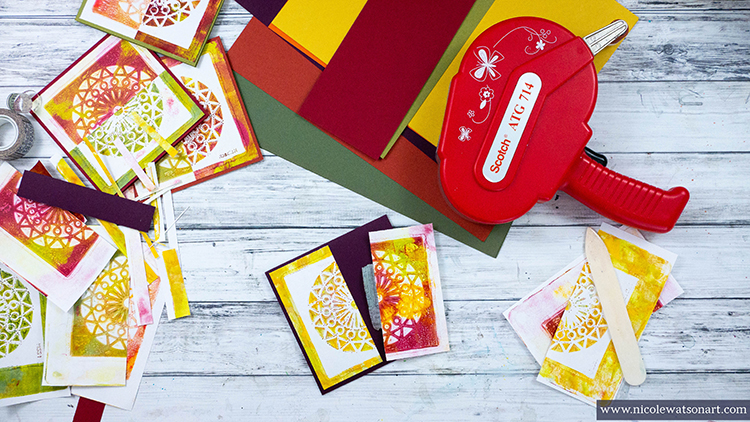
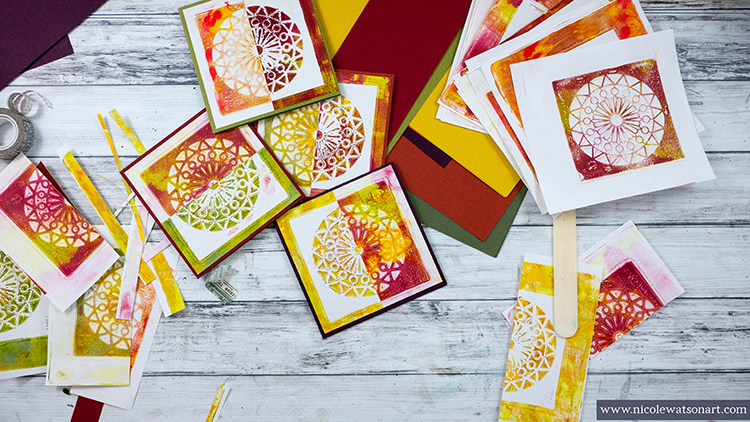
Once your prints are dry, pair them together: one negative and one positive print that you think work well together. Then, cut these prints in half. This is where you can be a precise measurer or just eye-ball it like me. Use some washi tape to gently tape each half together to make a whole print and trim your squares down for card fronts. I made cards that are 5 inches by 5 inches, so I trimmed by stenciled fronts down to 4.75×4.75. Carefully remove the washi tape and adhere your prints to the front of your folded card base.

That’s it! Super simple but beautiful fall cards. You can take them further by stamping a sentiment or writing one on the front. These would make great cards to send as a thank you this month or even tie a bunch together with a ribbon to give away. They would also make super-cute place cards at your Thanksgiving table. And, your extra prints are perfect for using in your art journal or other projects.


Thank you Nicole and love that you were inspired by my card making challenge – what gorgeous results :)

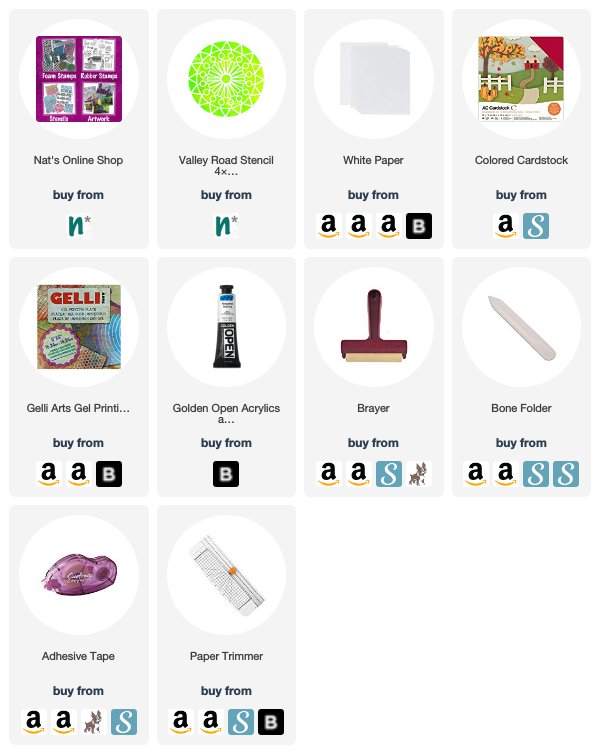
Want to give Nicole’s project a try? You can find all my Stencils in my Online Shop and here are some of the other supplies she used:

Feel inspired? Working on something yourself that you’d like to share?  I love to see how you interpret our monthly themes. Email me or tag me #natkalbach how you used my stencils and stamps – I would love to share your projects in my next  “n*Spiration From Around the Globe“.
Leave a comment

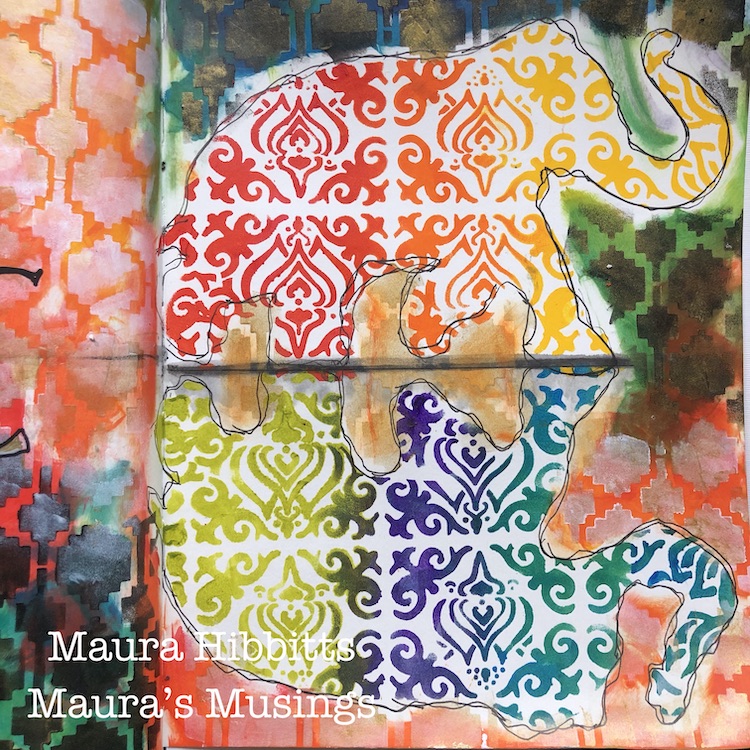
Mirror Mirror – Maura Hibbitts

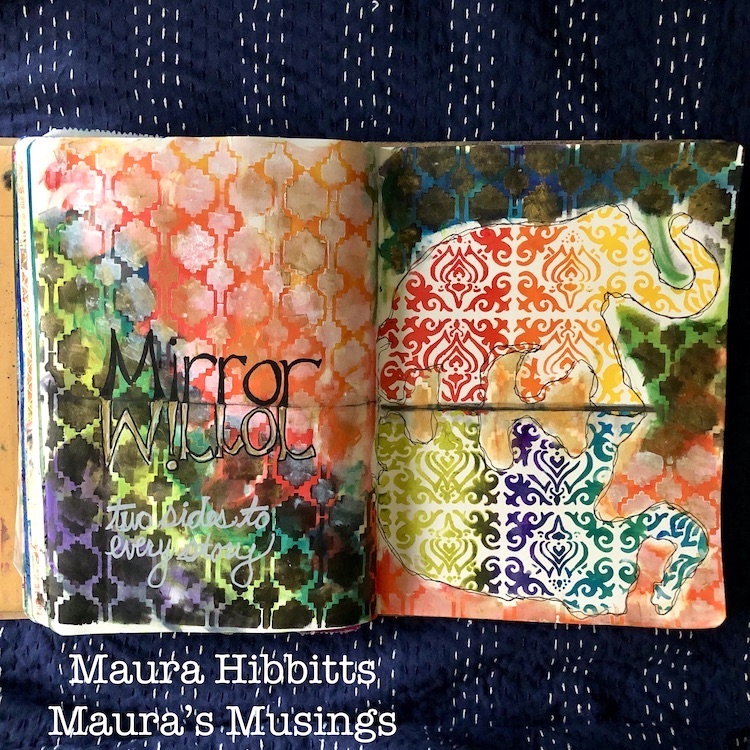
Happy Tuesday folks and welcome to a post from my Creative Squad. Today we have Maura Hibbitts sharing a colorful and intriguing art journal page with us that uses my Elephant Parade and Mesa Verde stencils and this month’s theme: Mirror Mirror – A mirror can be a reflection of many things. We look into them every day and can see who we are outside and in. But they can also just be a fun visual tool to play with as we flip and reverse images and patterns. Play with reflection this month.


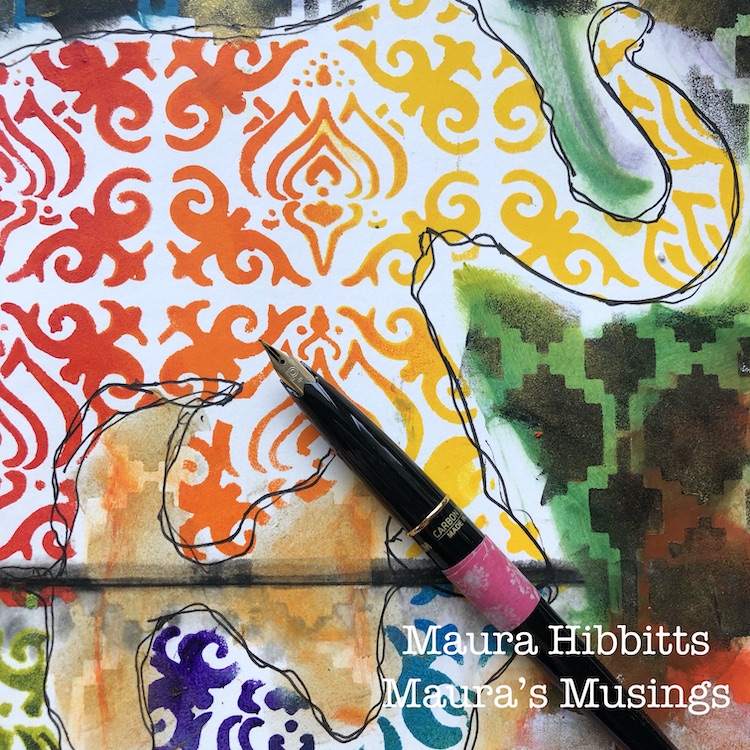
As I was looking through my stencils for this month’s project, I came across Nat’s Elephant Parade and knew I wanted to work with this one. A few days ago, I was speaking with a former student and her parents about her Peace Corps work in Botswana, I am so proud of her! Among the many things we talked about were elephants, as there is a large wildlife refuge near her village with lots of elephants. It also took me back to a trip to India a few years ago with my husband, and I know neither of us will ever forget our ride on an elephant. Color is always a part of my creative soul, and our autumn colors have been so beautiful this year. My sons have captured the reflections of trees and sky in the lakes here, in their photos. These are the ideas that meshed together in my art journal.

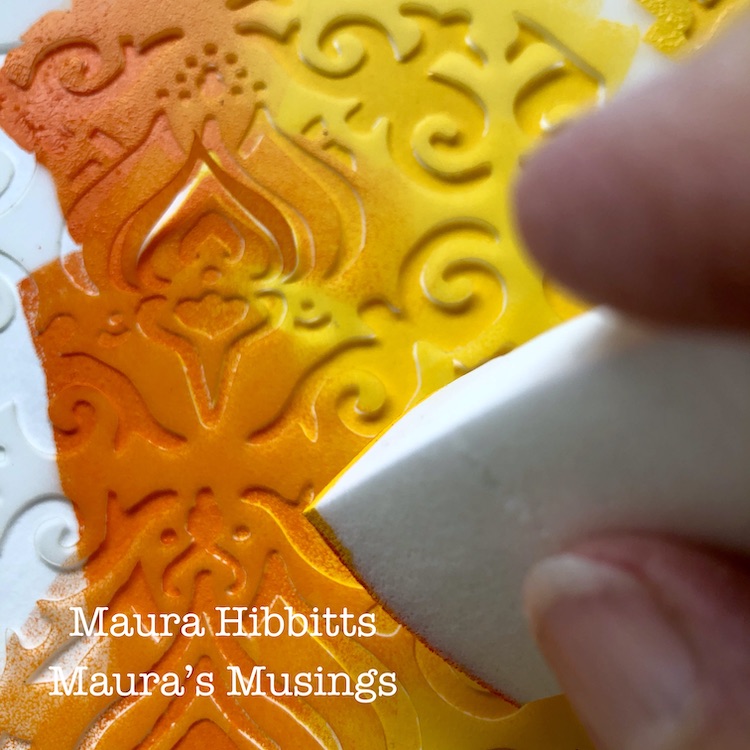
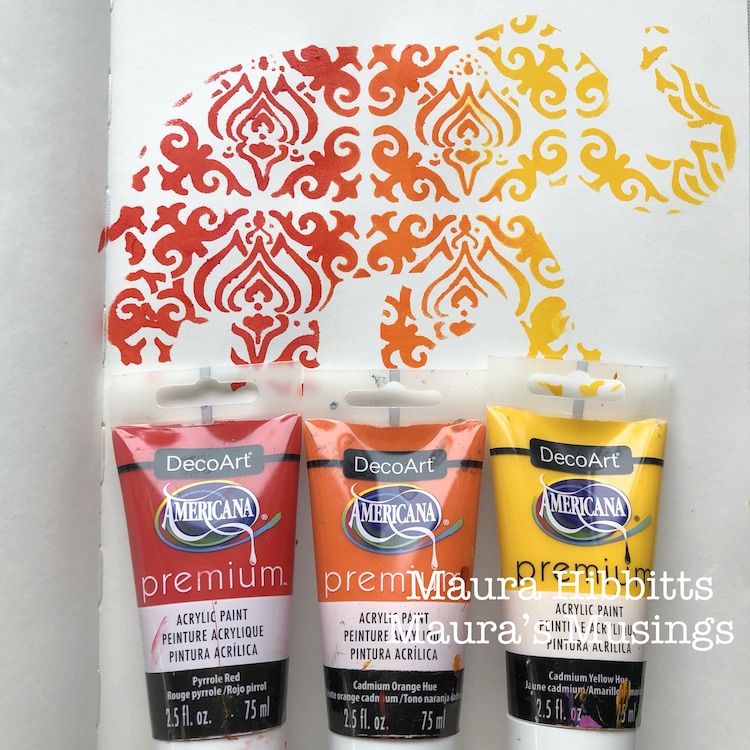
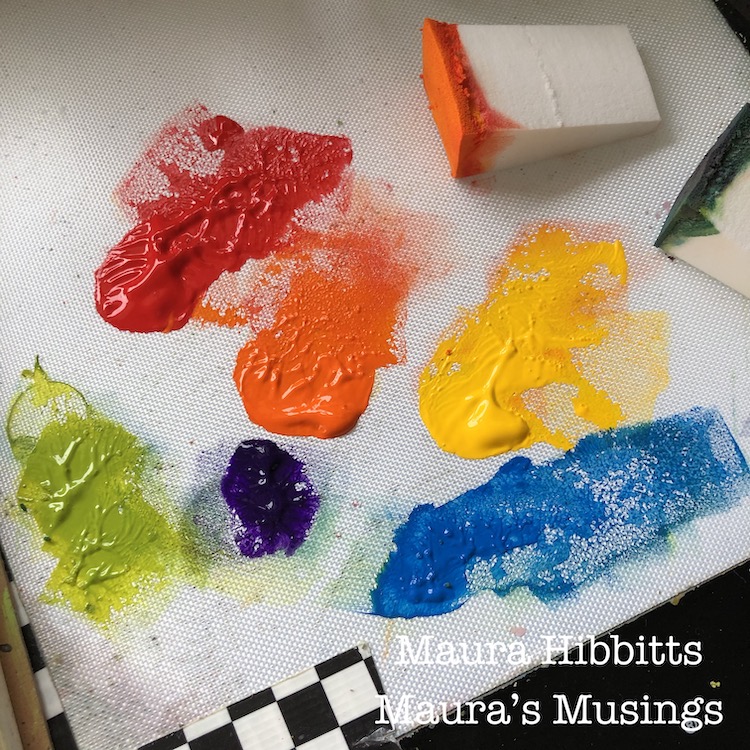
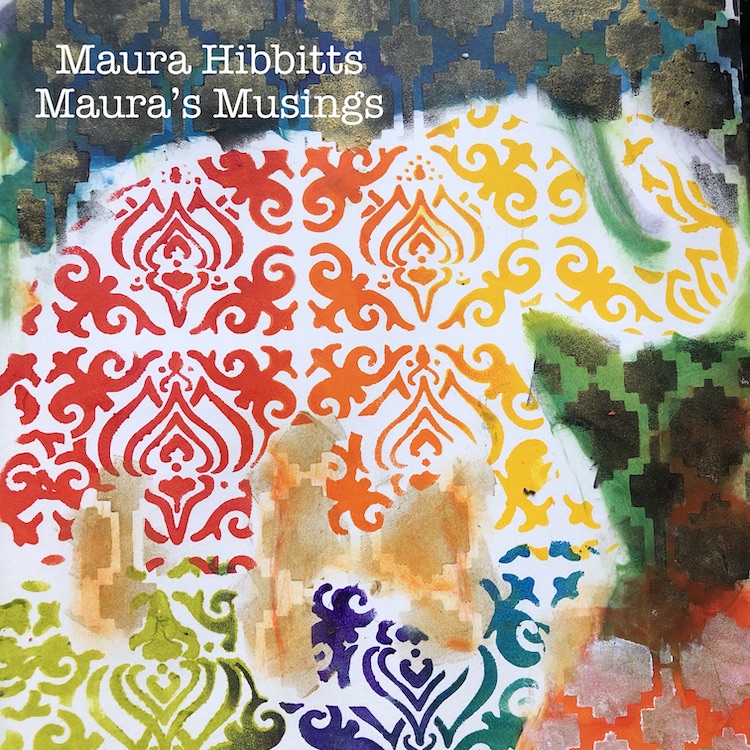
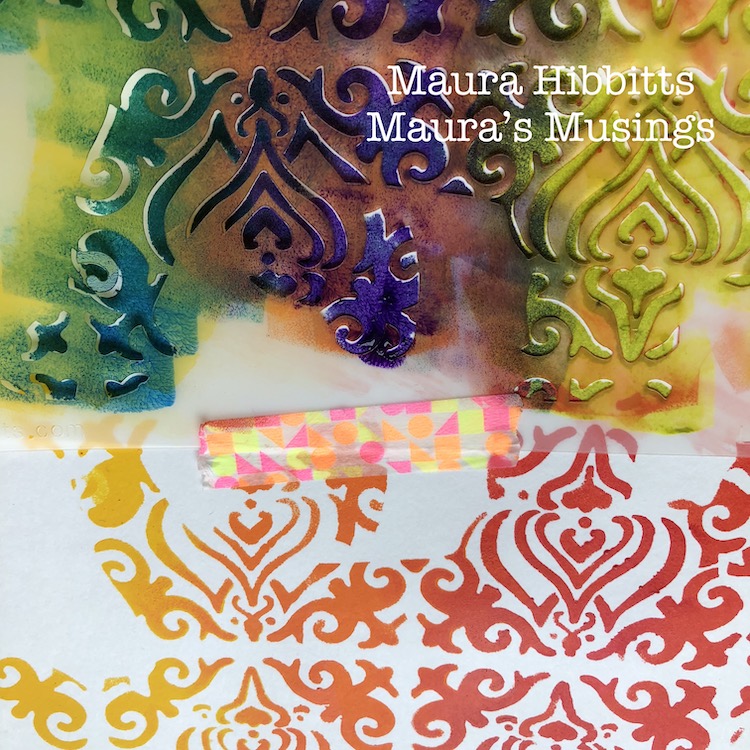
I decided to go with the primary colors with the elephant and began with the top one, using the Elephant Parade stencil, a cosmetic sponge, and yellow, orange and red paints. As I worked across the stencil, I blended between the colors a bit. Since I was changing colors as I worked, I took a bit of washi tape (since I have a huge collection) and taped it in place.

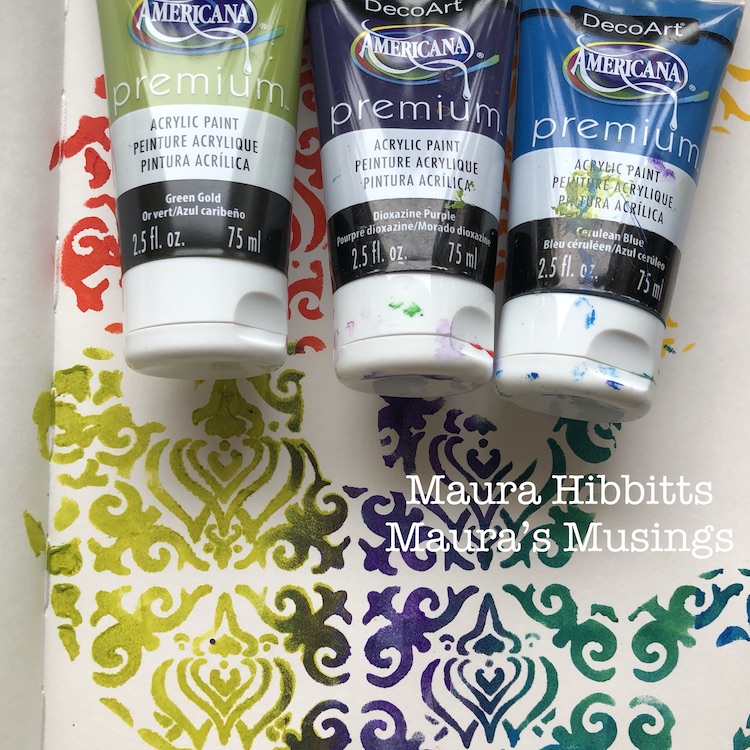
I turned the stencil upside down in my art journal, taped it in place, and started sponging in the contrasting colors, red with green, but then I goofed and put orange and purple together instead of orange and blue. Oh well, I still like how it looks with warm colors on top and cool colors below.

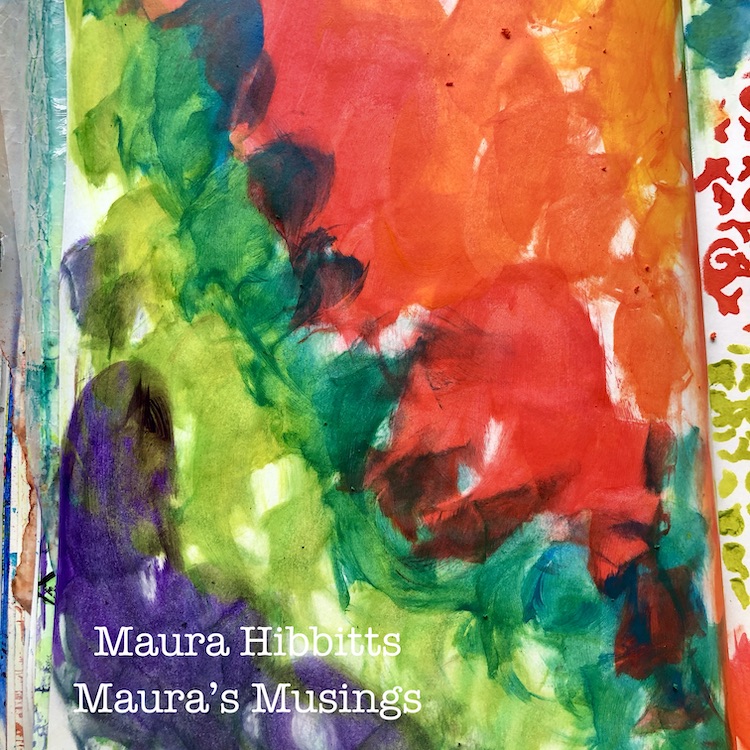
With colors left over from my palette, I decided to also do the opposing page (not in my original plan), so took the sponges and swiped the leftover paint onto the page in a circular motion.

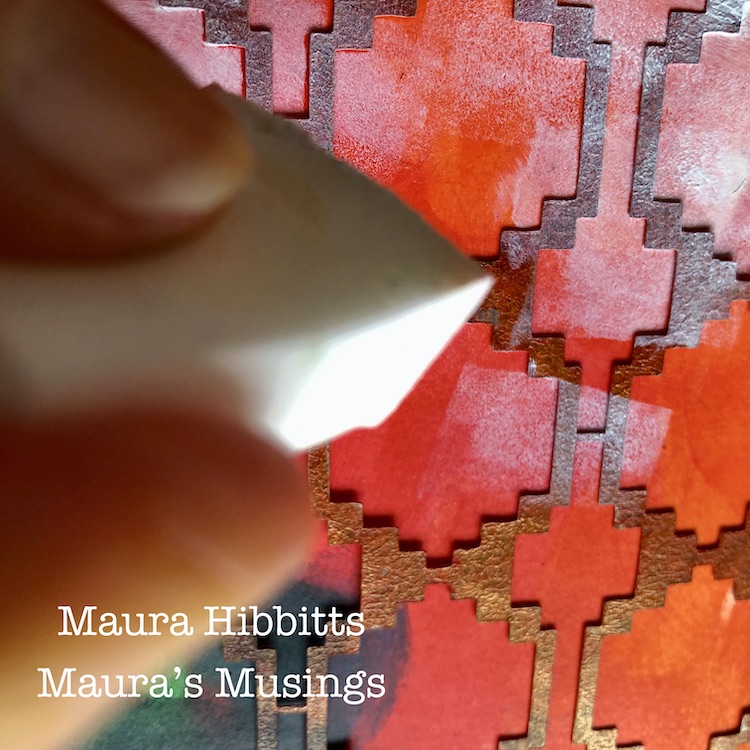
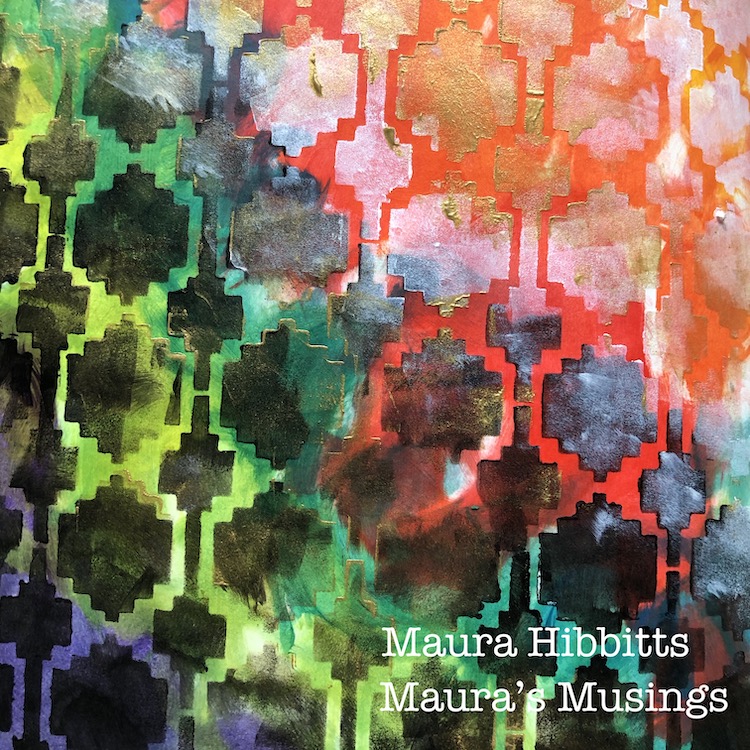
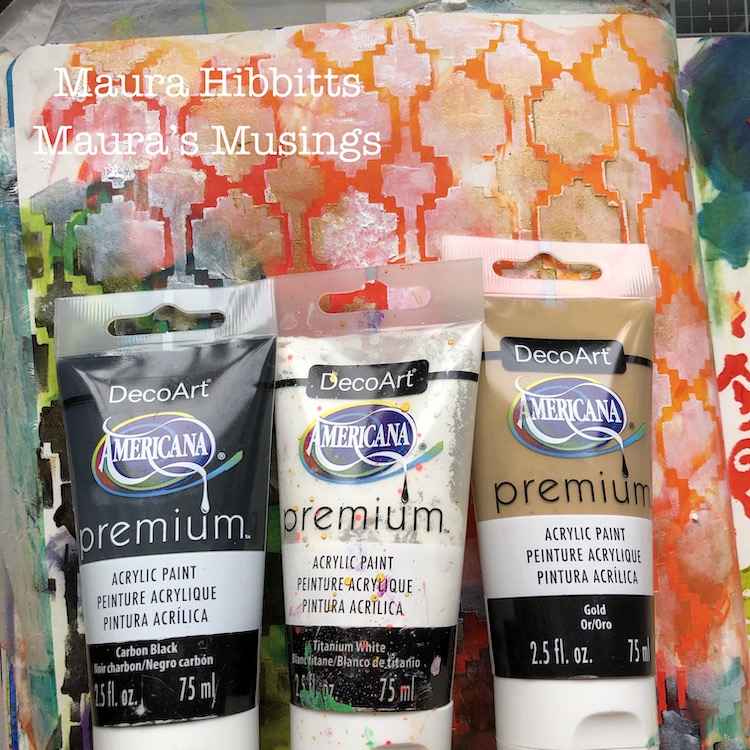
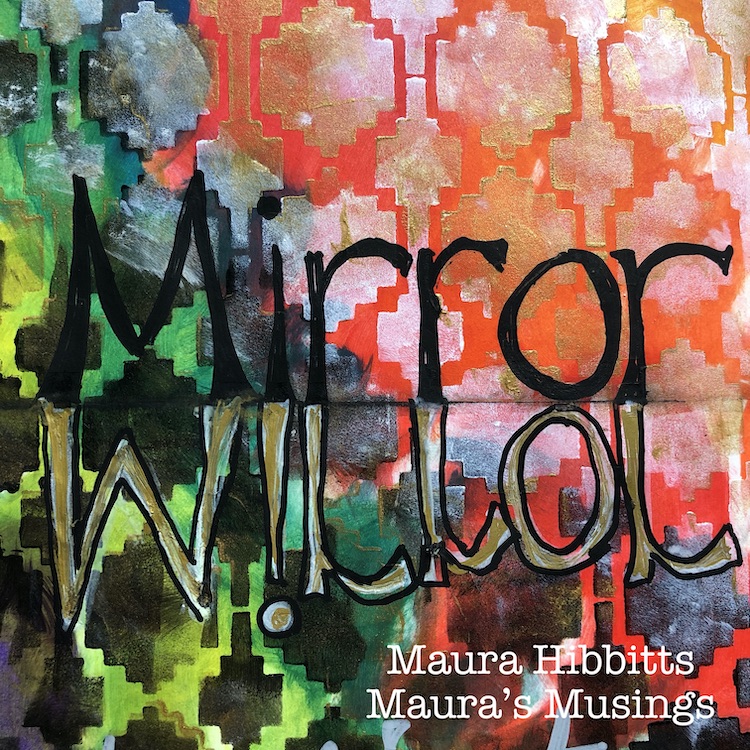
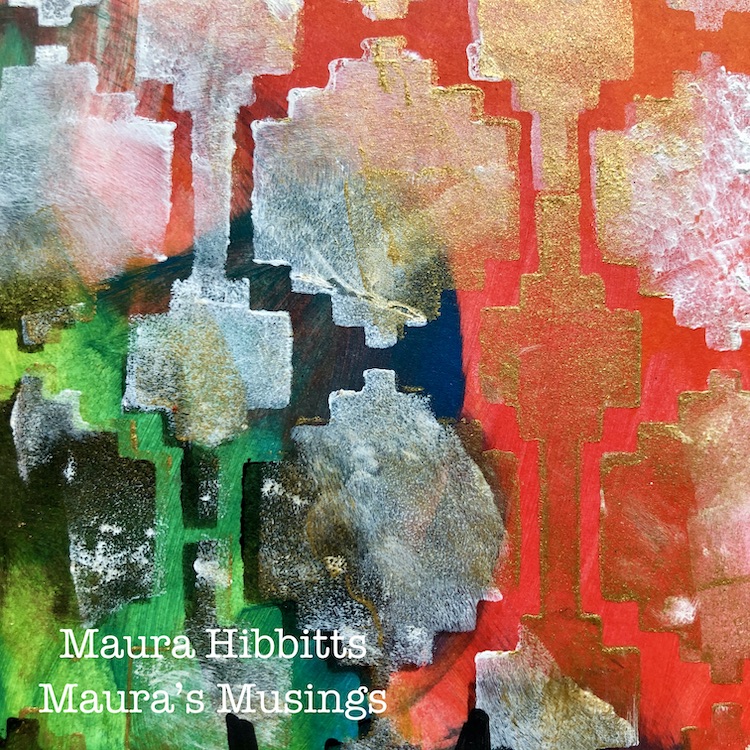
Now that I had a second page, I needed to work with it and wanted to find a stencil with an Indian feel to it to go with the elephants. Mesa Verde stencil to the rescue! I taped it in place, and used black paint over the dark colors, white over the light colors, and then I just had to add in some gold. (bright colors and gold remind me of India). After I finished the left side, I looked over at the elephant page, and decided to repeat with the stencil here also.

To create an idea of a reflection with the elephants, I added a line with the graphite pencil and water brush. Once that dried, I felt the elephants needed to stand out more, so added some scribbly lines with a carbon ink pen.

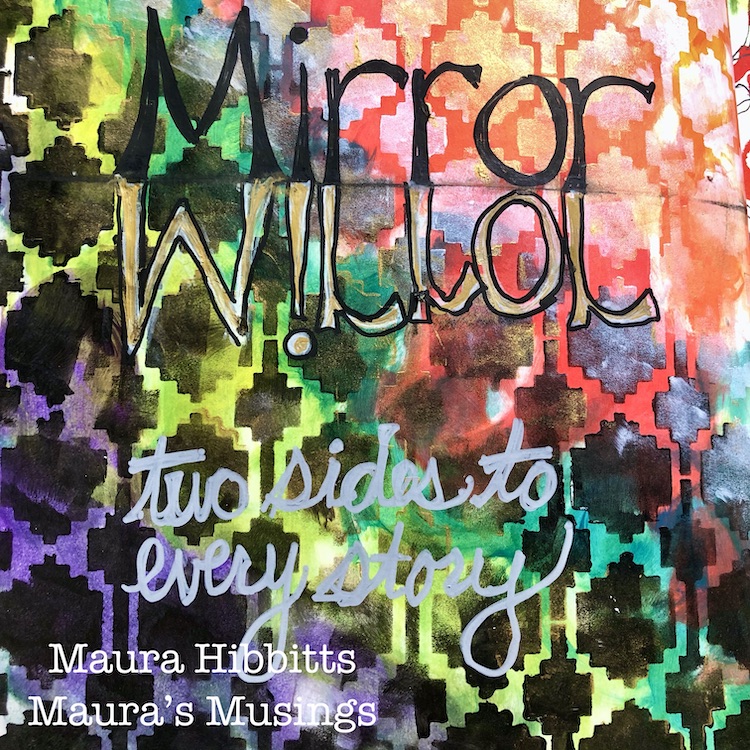
Now for the words…I started with Mirror at the top in hand lettering with a black paint pen. Then, I turned the page upside down and did a reverse of Mirror with a white paint pen, added gold and went around it with black to make it stand out.

While I was writing my Mirror reflection I started thinking about mirrors showing us two images (or more), and how there is often two sides to every story, so I added these words in with a grey paint pen.

Bright colors, reflections, and  journeys all play a part in my art journal pages.

Mirrors can reflect our images, calm waters can act like mirrors to reflect the landscape and sky around them. Artists have used mirrors in their paintings, adding intrigue with a glimpse into that small bit of the painting. We find mirrors in fairy tales…”mirror, mirror on the wall”…and stories.  I’ve been thinking about the stories on both sides of the mirror. Thanks for sharing my reflective journey, Maura


Thank you Maura – love the resulting page with those lovely colors AND love your thoughts on mirrors and their stories.

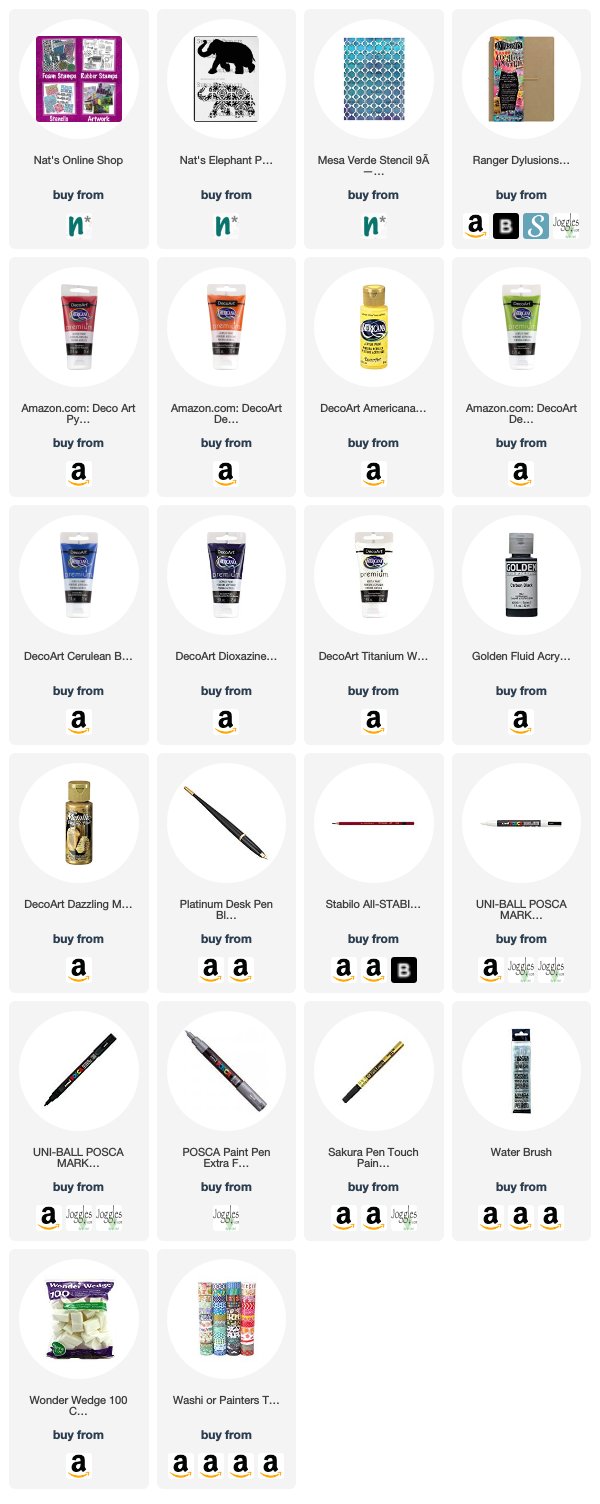
Want to give Maura’s project a try? You can find all my Stencils in my Online Shop and here are some of the other supplies Maura used:

Feel inspired? Working on something yourself that you’d like to share?  I love to see how you interpret our monthly themes. Email me or tag me #natkalbach how you used my stencils and stamps – I would love to share your projects in my next  “n*Spiration From Around the Globe“.
Comments (1)

  • Aimeslee Winans

    |

    Wonderful art journaling with a wise message. xoxo

    Reply

Leave a comment

Mirror Mirror – Jennifer Gallagher

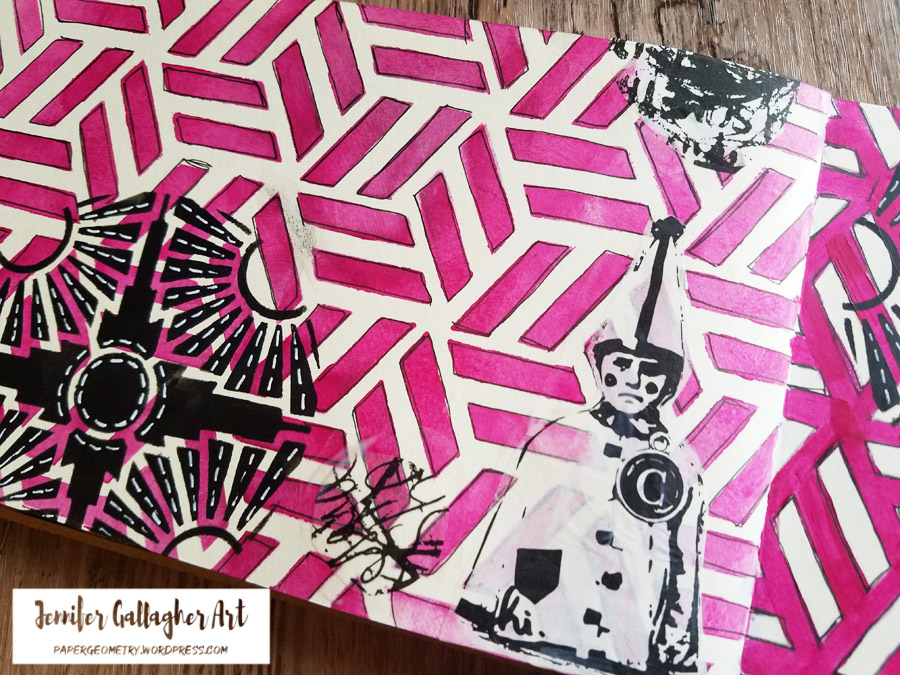
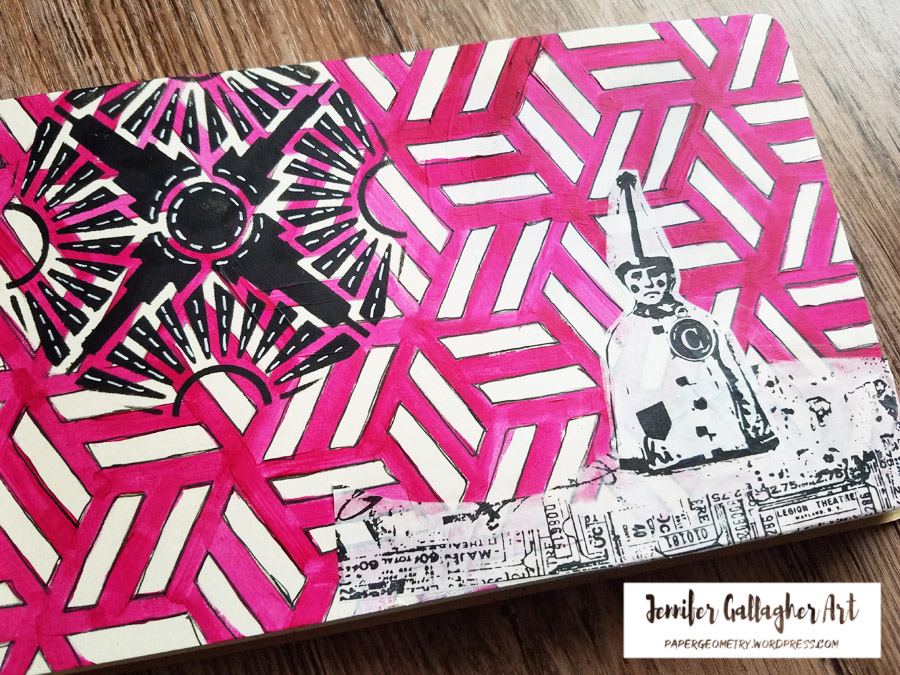
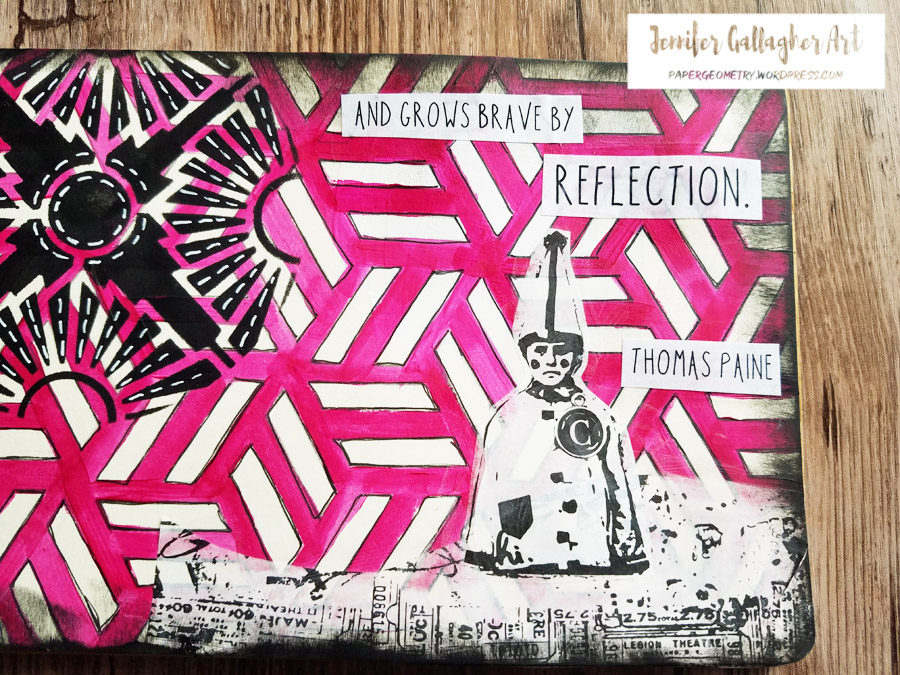
Hello from my Creative Squad and today we have Jennifer Gallagher starting us off this month with a new theme and a bold and funky art journal page for you. Jennifer is using my Kassel stencil and my Broadway 4×4 stencil and our November theme: Mirror Mirror – A mirror can be a reflection of many things. We look into them every day and can see who we are outside and in. But they can also just be a fun visual tool to play with as we flip and reverse images and patterns. Play with reflection this month.


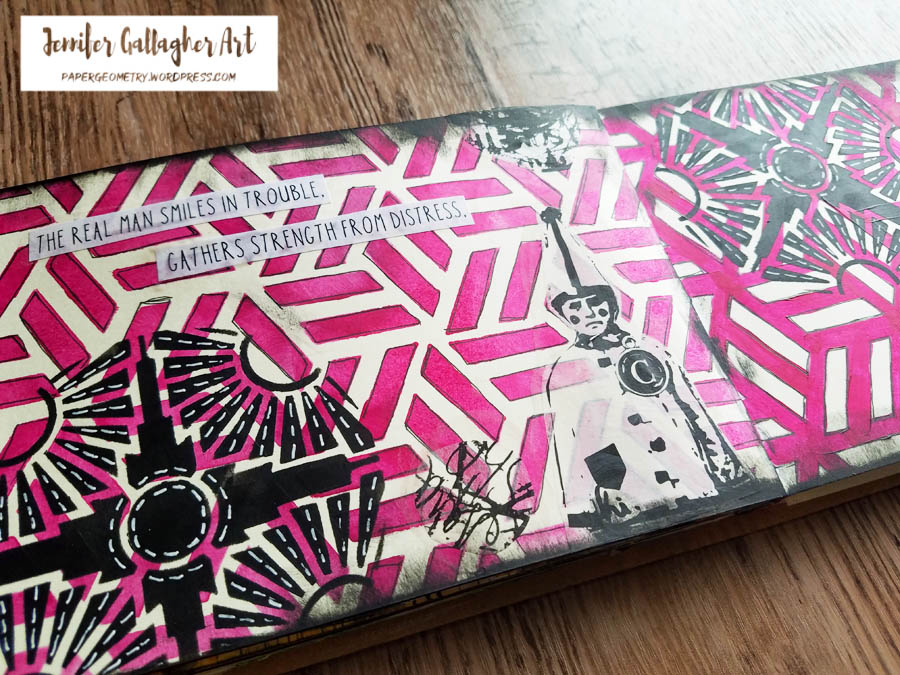
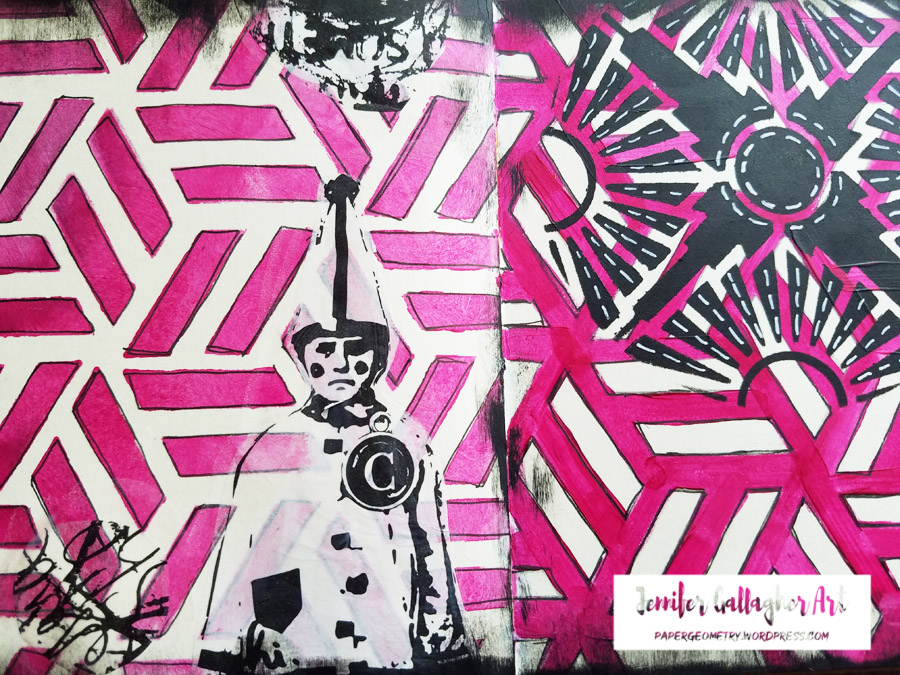
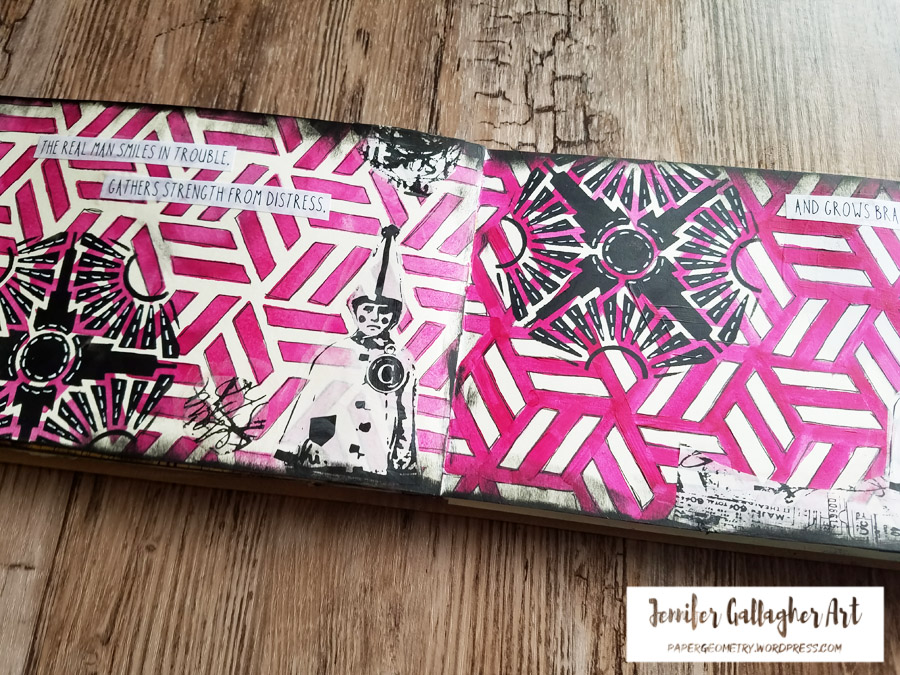
This month the creative squad is focusing on reverse images and patterns as we celebrate the fun in reflection. I’ve taken the theme quite literally and created a positive and negative background using Nat’s stencils for a bold and bright art journal page. This technique is fun and easy and gives new life to even your most loved stencils. Let’s get started.

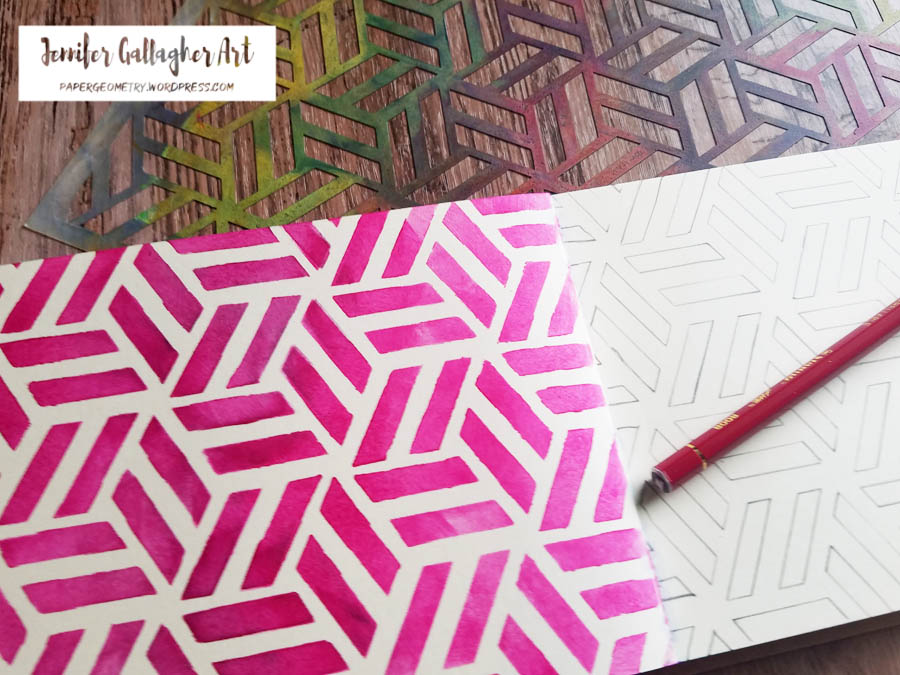
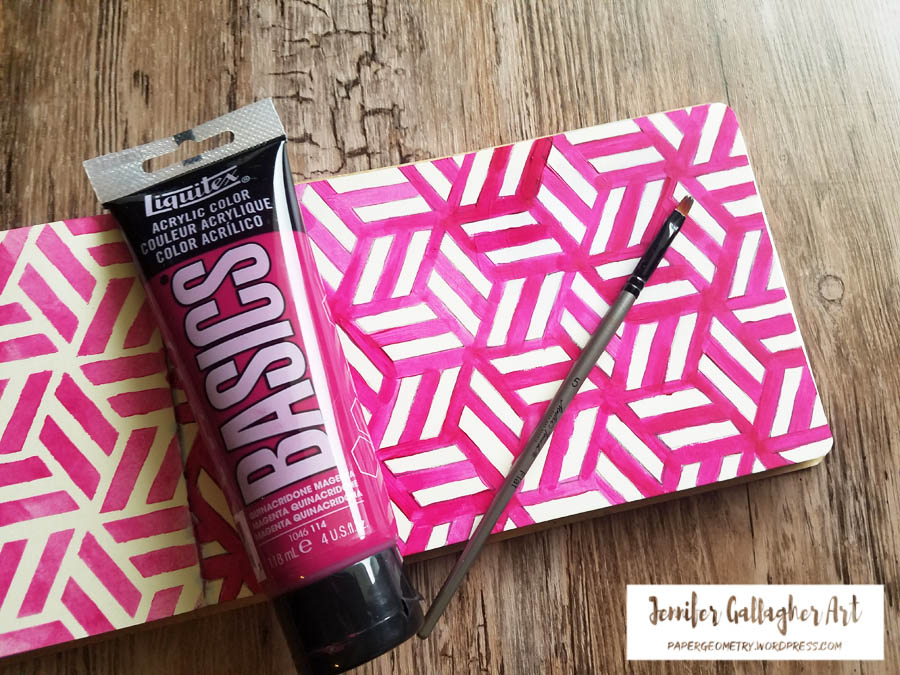
I am using my small rectangular dylusions journal for this spread. I began by stenciling quinacridone magenta acrylic paint through Nat’s Kassel stencil on the left side. On the right side I am penciling in the design for the next step.

Using a small square bristled brush, I hand painted in around the penciled design in the same color, quinacridone magenta. I am creating the opposite design that I did on the left hand side.

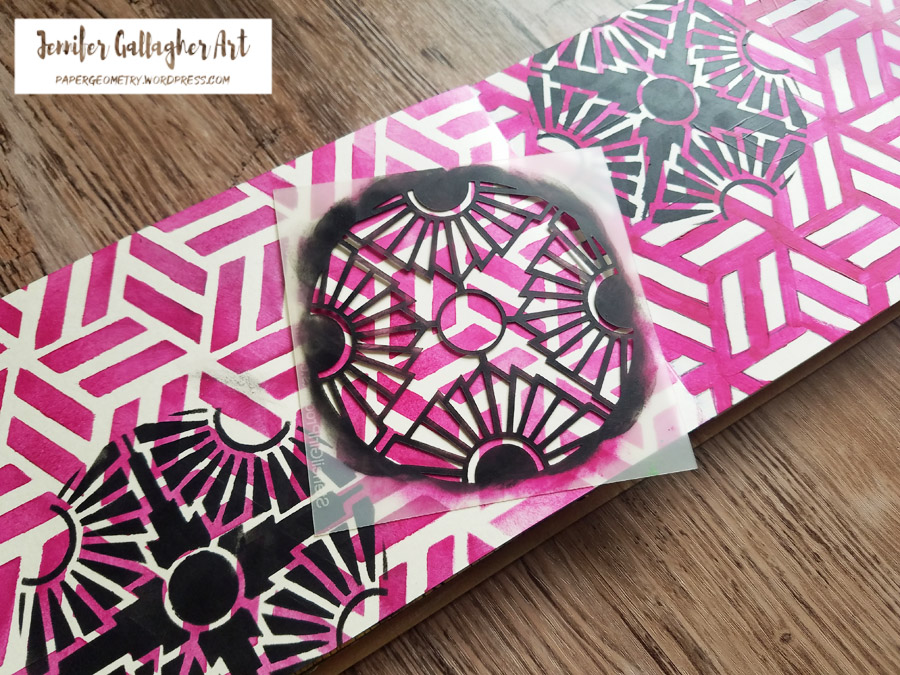
Next, I stenciled black acrylic paint through Nat’s four inch Broadway stencil on both pages. I did not exactly mirror the location of the two sides, but you can do so if you wish.

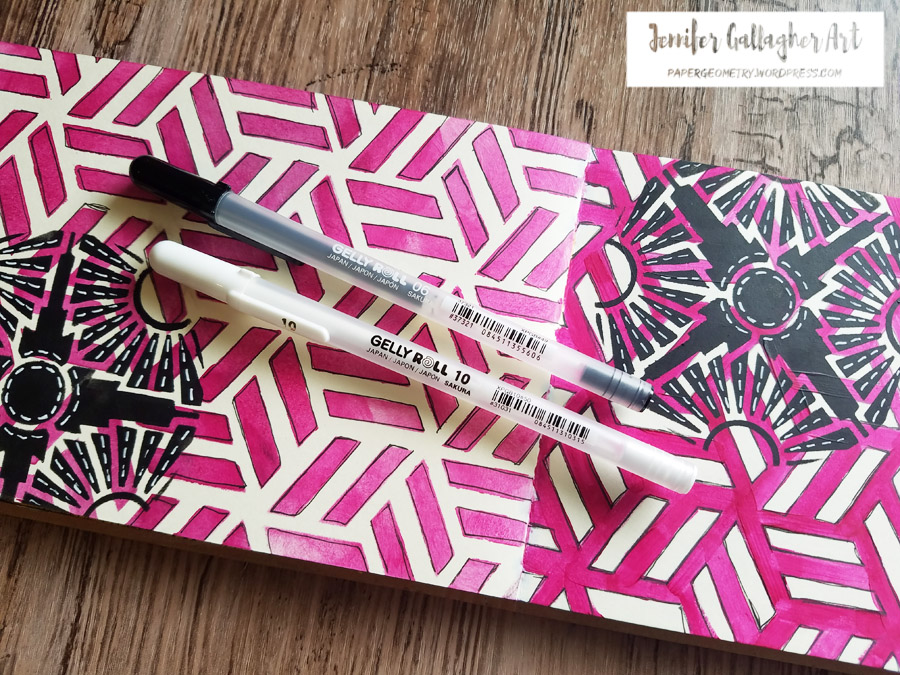
Using a black and white Gelly Roll Pen, I added dashes and lines around the designs on both pages.

Next, I added tissue paper collage elements from Dina Wakley Media. I’ve used the same elements on both sides but not exactly mirrored. Again, you could mirror it if you wish.

Using a mini blending tool, I rubbed black acrylic paint around the edges and center of the pages.

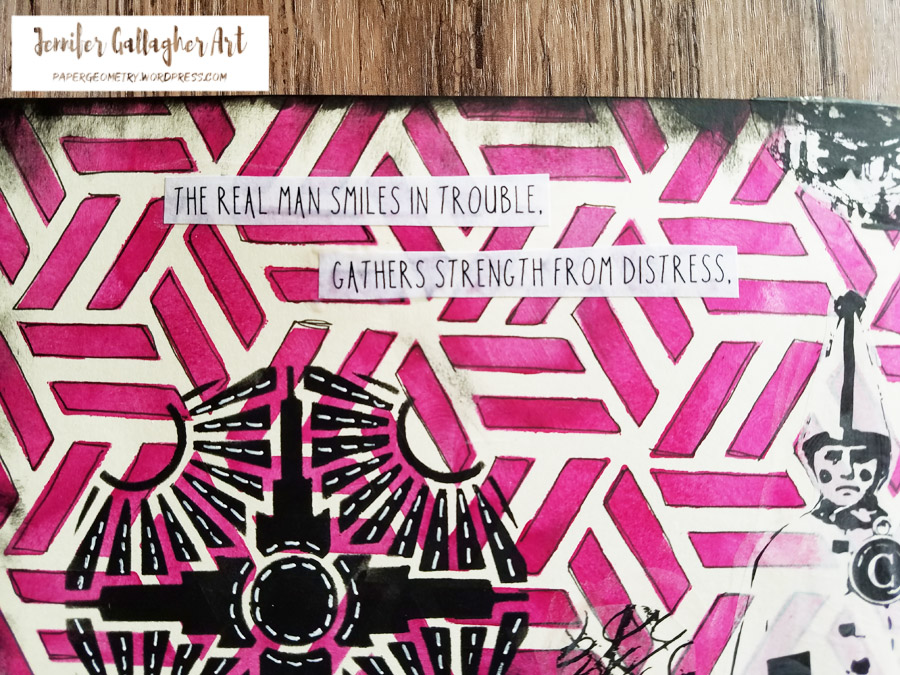
I typed up a quote on the computer, cut it out, and placed it where I wanted it. I adhered it with matte medium.

I hope you’ve enjoyed this tutorial. Be sure to play along each month with the creative squad and the n*Studio themes.


Thank you Jennifer! What a cool looking spread!

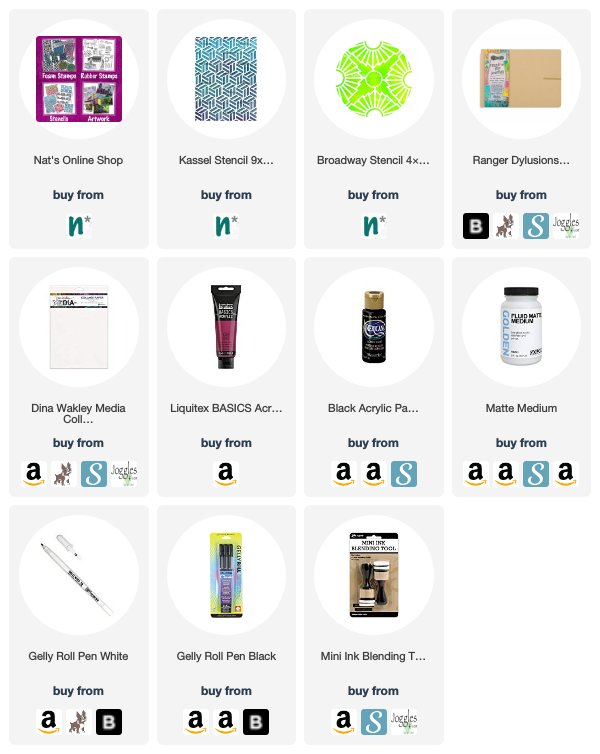
Give it a try: you can find all my Stencils in my Online Shop and here are some of the other supplies Jennifer used:

Feel inspired? Working on something yourself that you’d like to share?  I love to see how you interpret our monthly themes. Email me how you used my stencils and stamps with the theme and email me an image – I would love to share your projects in my next  “n*Spiration From Around the Globe“.

Comments (1)

  • Linda Wyatt

    |

    Beautiful pages! Love the way you mirrored and mixed the other elements. The color combo is perfect❤️

    Reply

Leave a comment

Your Biggest Fan – Judi Kauffman

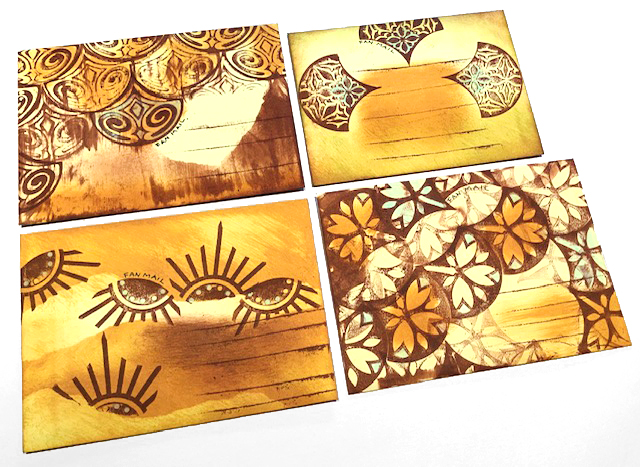
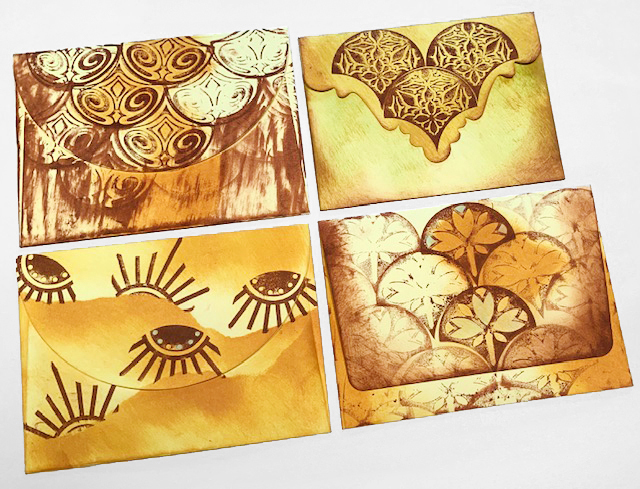
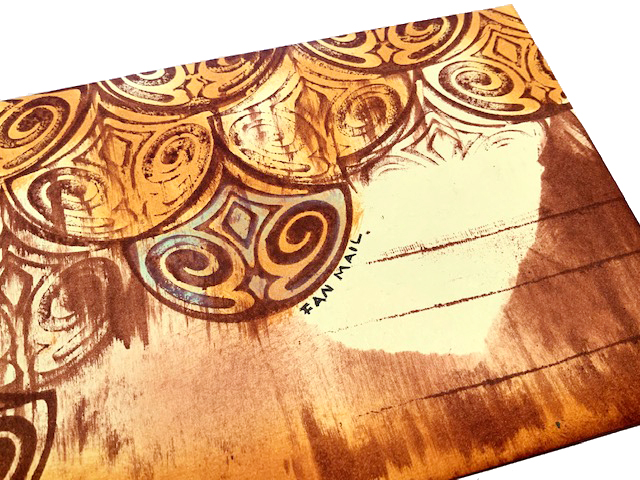
Happy Tuesday and welcome to a post from my Creative Squad. Today we have a post from Judi Kauffman. You can learn more about Judi from our Nice to Meet You blog post featuring her creative story and artwork. This time Judi is sharing her Fan Mail Envelope project using my Mini Fan Foam Stamp Set and this month’s theme: Your Biggest Fan – Let’s give a shout out to someone who is doing an amazing job. In a world obsessed with Me Me Me it’s important to take a look around sometimes and give some encouraging words to another, and not just in your art and craft making :) Be their Biggest Fan!  


I’m crazy about this month’s theme. Telling someone you’re their biggest fan is so important! It ensures that my nephew’s little boy knows how proud I am of him, that my friend who is going through chemo knows that I support her every single day, that my neighbor knows how much I appreciate her many kindnesses, along with all of the recipes she’s shared over the years…and…and… So many people who matter in a person’s life.

I do try to express these things in person with words and hugs, but sometimes putting it into the form of a card or letter just makes more sense. And since I love decorating envelopes, I like to turn that part of the project into something special, too.

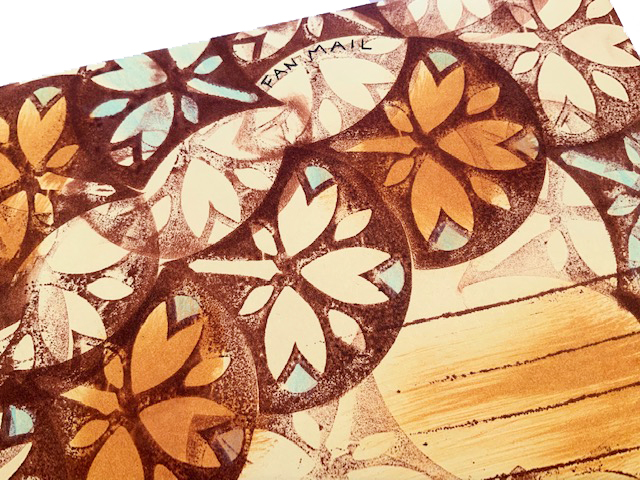
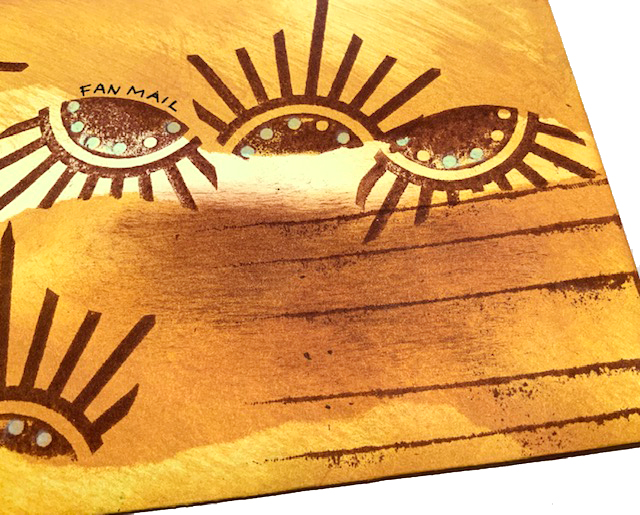
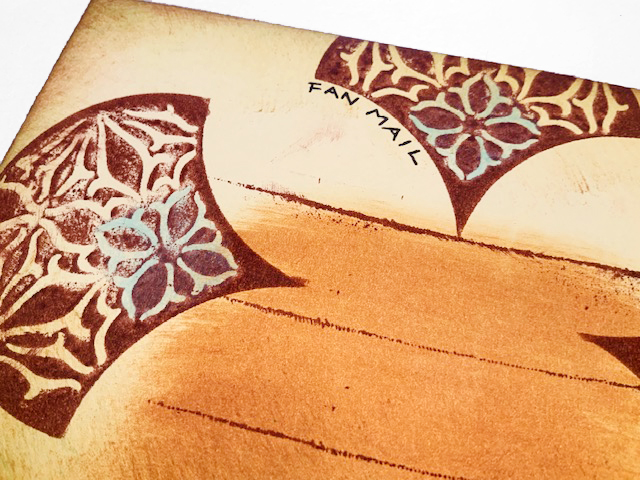
My new set of Nathalie’s Mini Fan stamps (ArtFoamies), two or more inks, a couple of colored pencils, and a craft sponge were all I needed to whip up a batch of Fan Mail Envelopes! I die cut my envelopes from heavyweight pale yellow paper because I like the option of having a variety of flap styles (half-circle, Victorian, etc.), but smooth-finish purchased envelopes work great as well. 

Use my samples as a jumping-off point: Do a bit of smudging, mask with torn paper, tap the envelope against the edge of an ink pad to create lines for the name and address; use colored pencils to add little pops of color here and there. Optional: Stamp or hand—write the words FAN MAIL in small caps to hint at the contents of the envelope.


Thank you Judi – these positively glow! And we love reading your thoughts too – so true that if you think about it, there are a lot of people in everyone’s lives that could use some encouraging words. Want to give Judi’s project a try? You can find all my Foam Stamps in my Online Shop and here are some of the other supplies she used:

Feel inspired? Working on something yourself that you’d like to share?  I love to see how you interpret our monthly themes. Email me or tag me #natkalbach how you used my stencils and stamps – I would love to share your projects in my next  “n*Spiration From Around the Globe“.
Leave a comment

Your Biggest Fan – Linda Edkins Wyatt

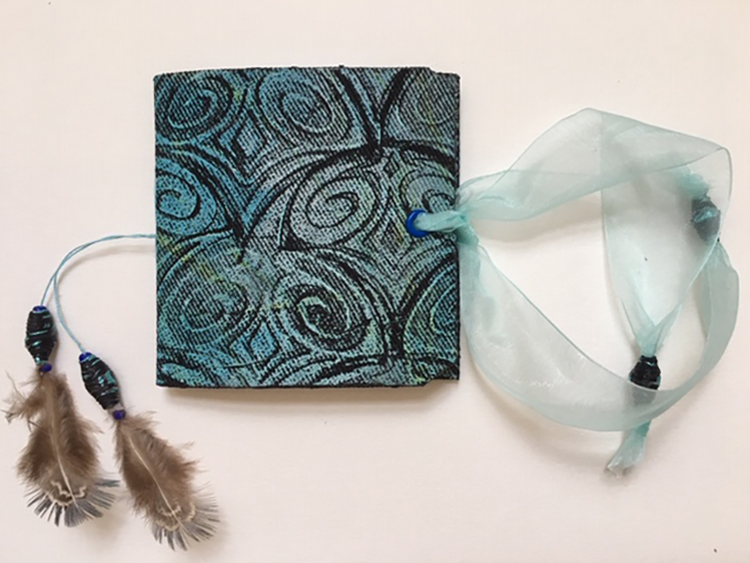
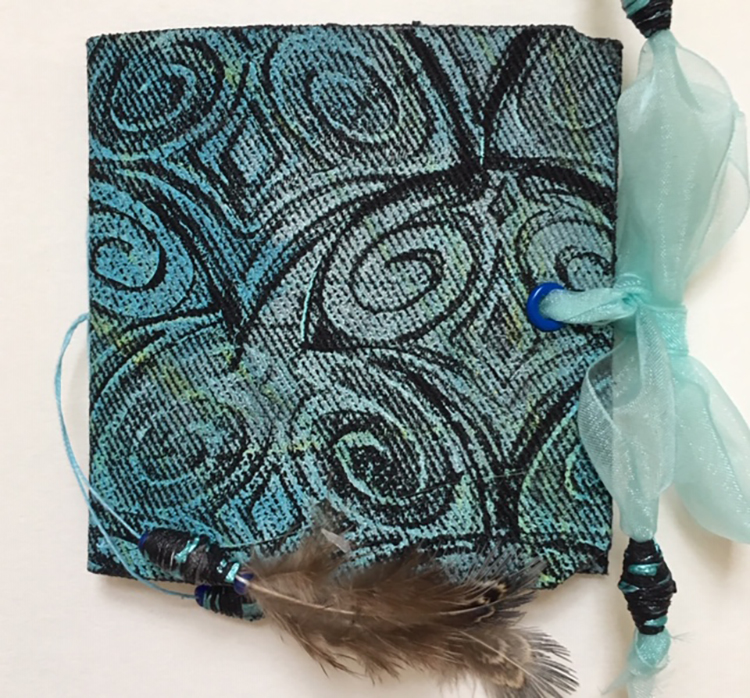
Hello from my Creative Squad and today we have another debut post from our stellar new member Linda Edkins Wyatt who we are so happy to have join our talented group. She is sharing with us a precious little book, using my Fairview Fan foam stamps on fabric – a lovely little keepsake for anyone! This month’s theme is: Your Biggest Fan – Let’s give a shout out to someone who is doing an amazing job. In a world obsessed with Me Me Me it’s important to take a look around sometimes and give some encouraging words to another, and not just in your art and craft making :) Be their Biggest Fan!  


Hi! I’m super excited to be part of Nat’s Creative Squad and share my first Squad project with you.

A few months ago, I had the opportunity to take a gelliprint class with Julie Balzer at Ink Pad NYC. I thought I was a terrible gel press printer and couldn’t see what all the excitement was about gelli printing, so I figured if anyone could help me get the hang of it, it would be Julie. Among the many tricks and tips Julie shared, I learned that I was using way, way too much paint. I also learned to use a barren to make sure the gel press transferred the paint to the paper evenly.

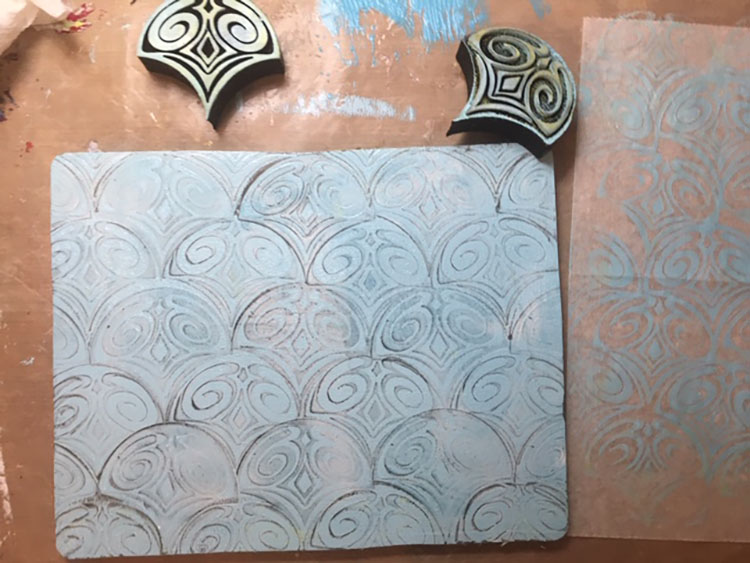
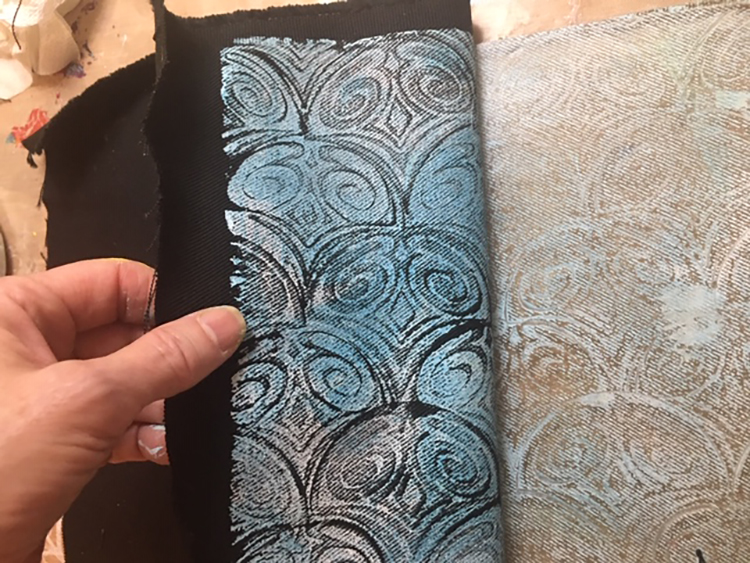
I decided to test my newly developed gel press skills with Nat’s “Fairview” positive/negative fan set. I coated the gel plate with paint and pressed the art foamie Fairview pieces into the color, then printed the excess on a nearby piece of deli paper. After printing a bunch of different colors, I mixed up some light turquoise paint and created a nice design on the gel plate, alternating the positive and negative images until the whole 9”x12” plate was covered. But this time, I thought “let’s try it with fabric!” (I am, by training and inclination, a textile designer, so using fabric, stitch, and creating repeating designs is second nature to me.)

I cut a piece of black fabric to about 12”x14”, pressed it carefully onto my gel plate, applied pressure with my brayer, and gently pulled it off. The fabric had a twill weave which added to the design and gave it a rustic look. I loved it! So, I made a couple more pieces of printed black fabric, trying different arrangements of the fan foamies.

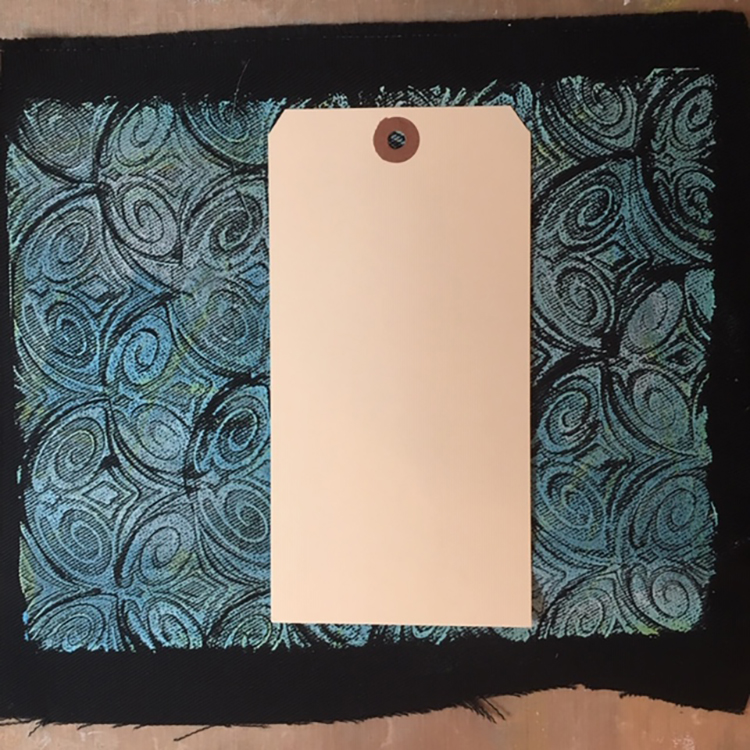
My favorite print was just the right size to fit on an oversized shipping tag, so I decided to create a tag book. I was inspired to start making tag books when I saw a post from a wonderful artist, Ann Sullivan Barnes. I am a big fan of Ann, who artfully combines precision and fine detail with creativity—not an easy feat.

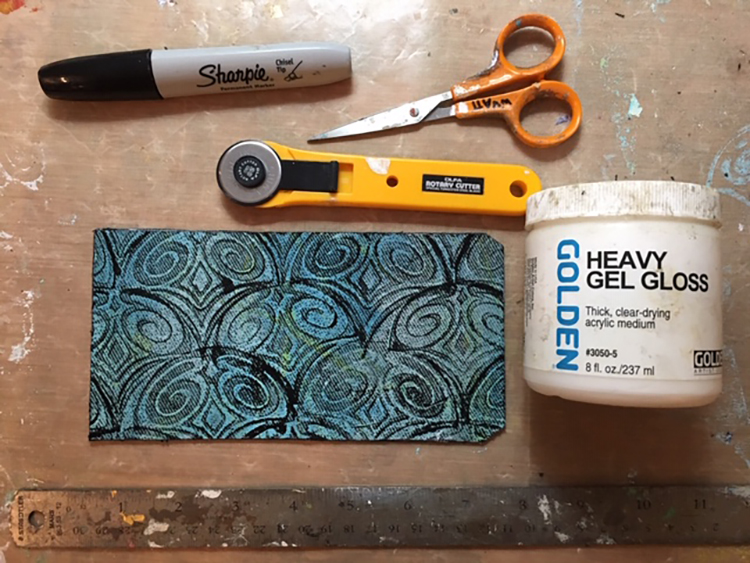
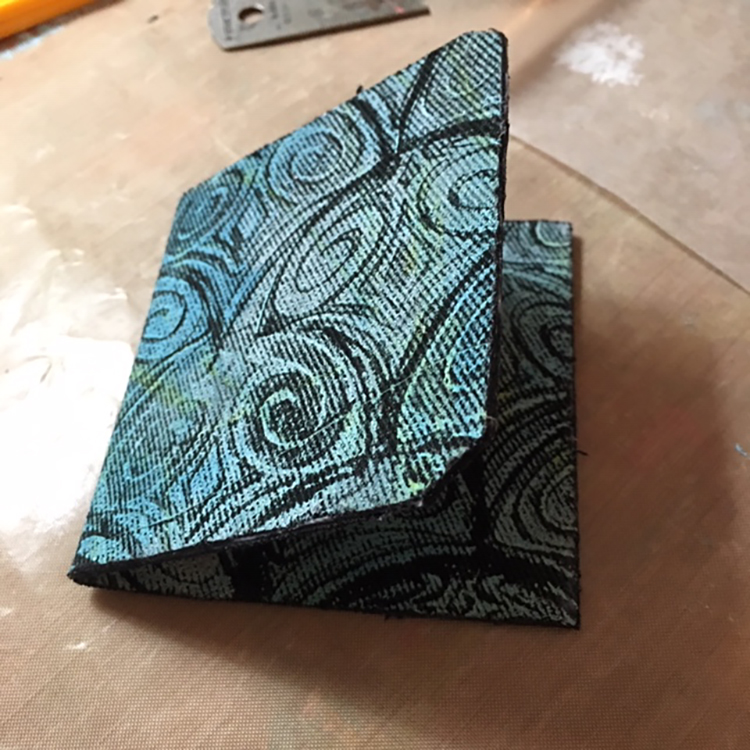
I carefully glued the fabric to both sides of an oversized shipping tag and let it dry. Next, I trimmed the fabric close to the tag edges, added black sharpie to cover the white edges of the tag, and added a thin layer of heavy gel gloss to keep the fabric from fraying. Once the glue had dried, I folded it in half, pressing the fold with my bone folder, then placing the folded tag under a heavy weight for a few hours.

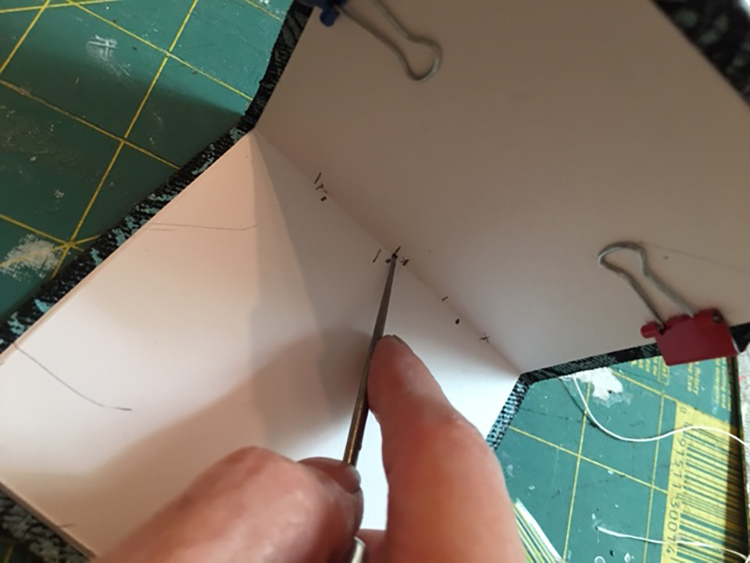
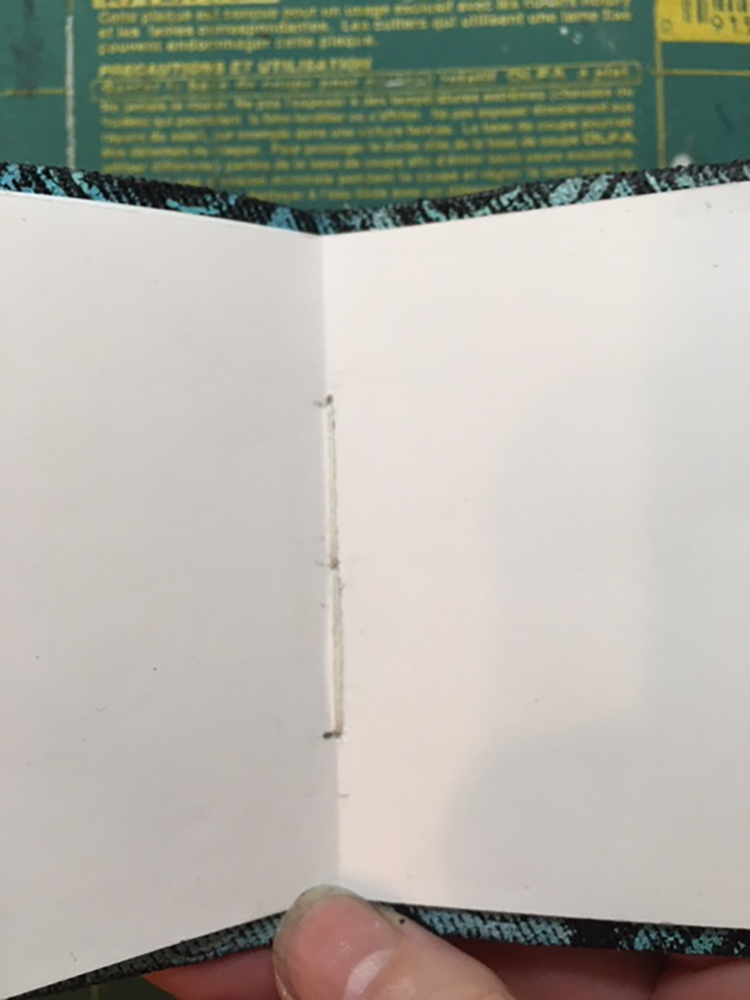
It needed pages, so I cut some heavy white printer paper to fit inside the tag book (I made the pages about 1/8” smaller than the cover) and, using bookbinding thread and a fat needle, stitched the signature in place. I left the strings long with an idea of later adding some kind of decorative beads.

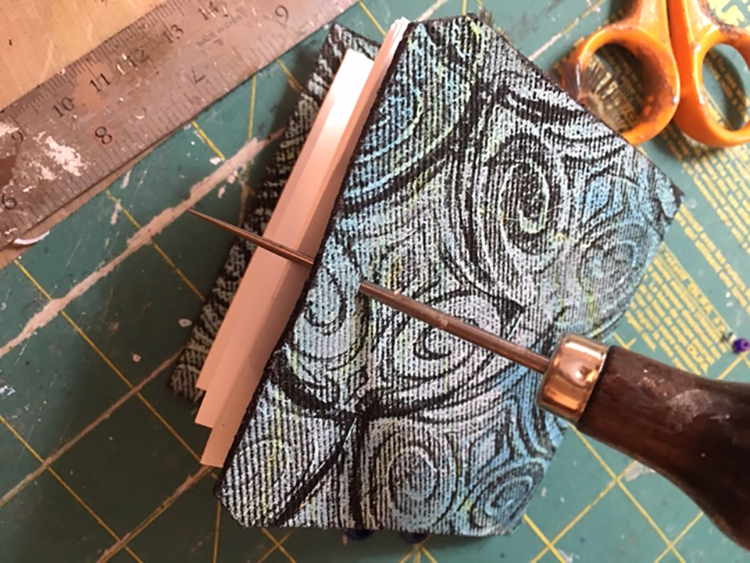
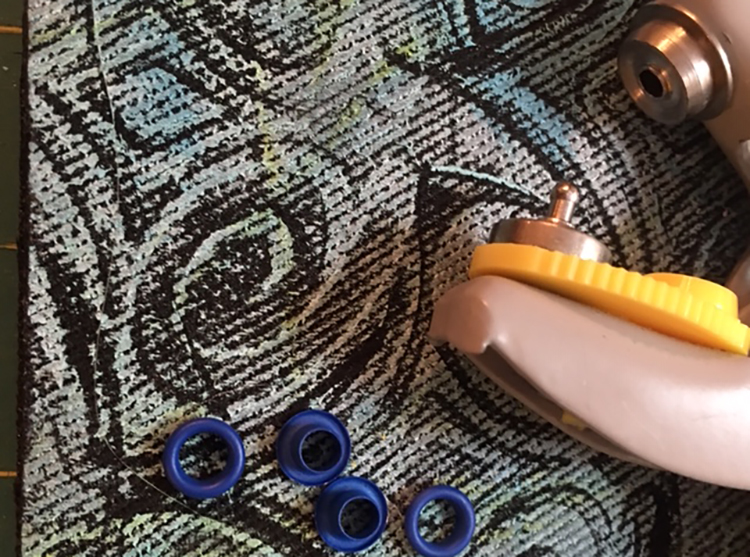
It looked great so far, but then I had to decide what kind of closure and embellishment it needed. I inserted grommets in the tag hole, poked a second hole, and placed another grommet in the back of the book. I chose a simple ribbon closure: I tied a length of sheer aqua ribbon on the inside of each grommet, leaving it long enough to tie the two pieces into a bow closure at the side.

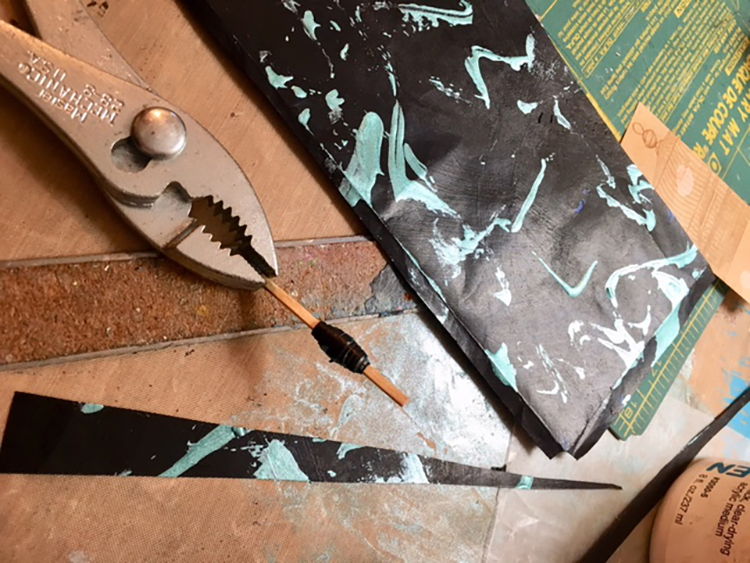
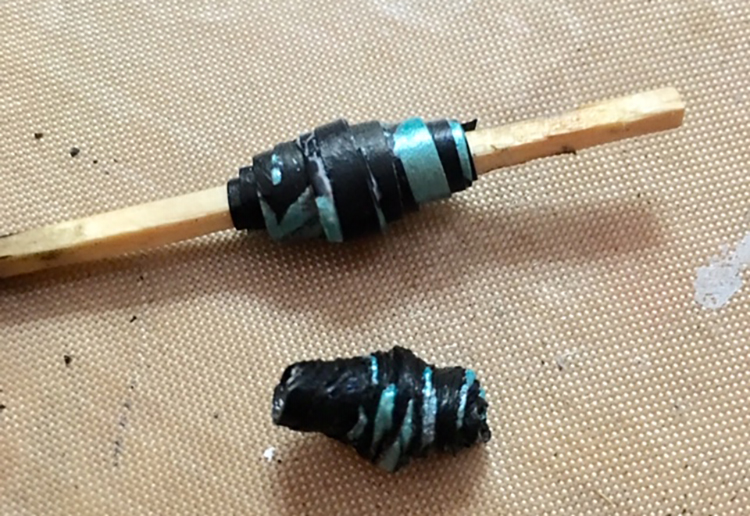
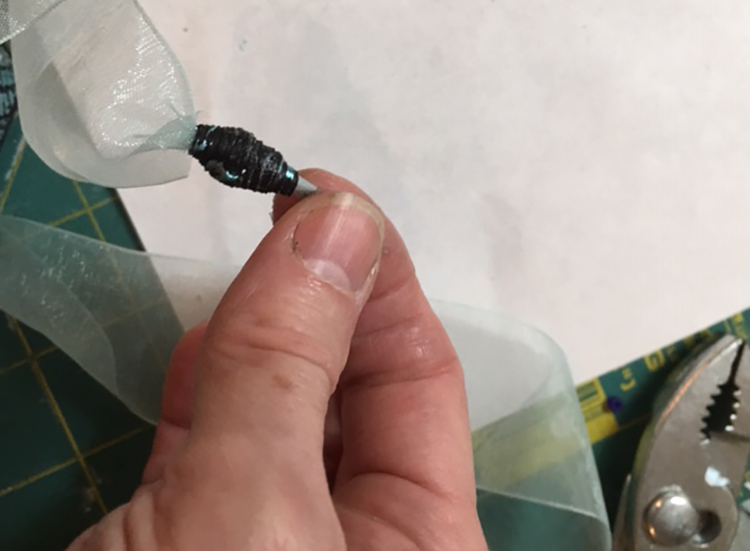
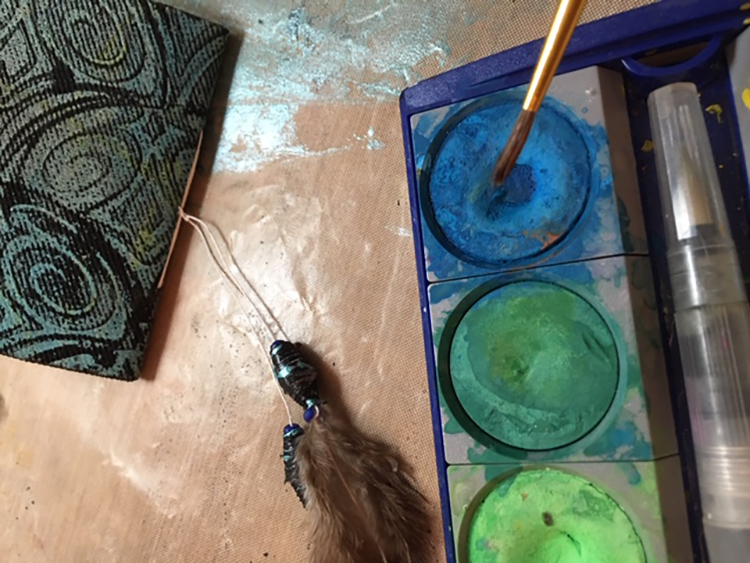
I decided to embellish both the signature’s hanging threads and the ribbon closure with Tyvek beads. I painted some Tyvek black and added splashes of turquoise Lumiere paint. Once it was dry, I cut long triangles, rolled beads, and heated them until the Tyvek melted. I threaded each end of the sheer ribbon through a bead and tied the ends.

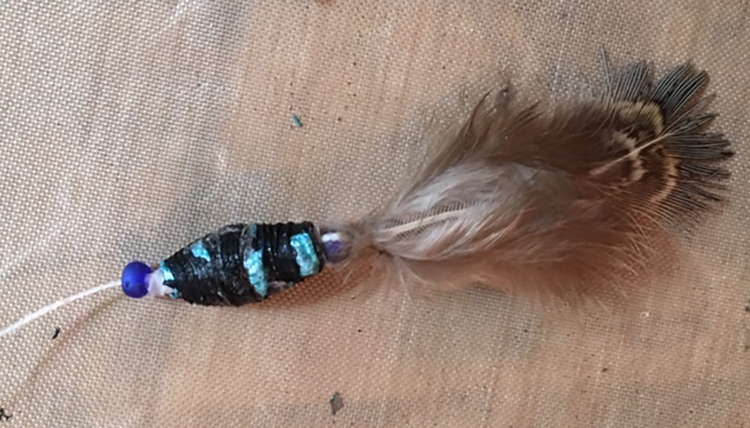
On the long threads of the signature, I got a little fancier. I added a small bead onto the string, then a Tyvek bead, and inserted a small feather into the bead. A few drops of glue on the feather tip held the feather inside the beads. Then I used watercolor to paint the white thread to match the turquoise paint.

The Little Fan Book is a nice small size to fit in a pocket or a purse, and great for writing notes or dashing off a quick sketch. It also could be filled with photos, poetry or inspirational quotes for a very personal and special gift.


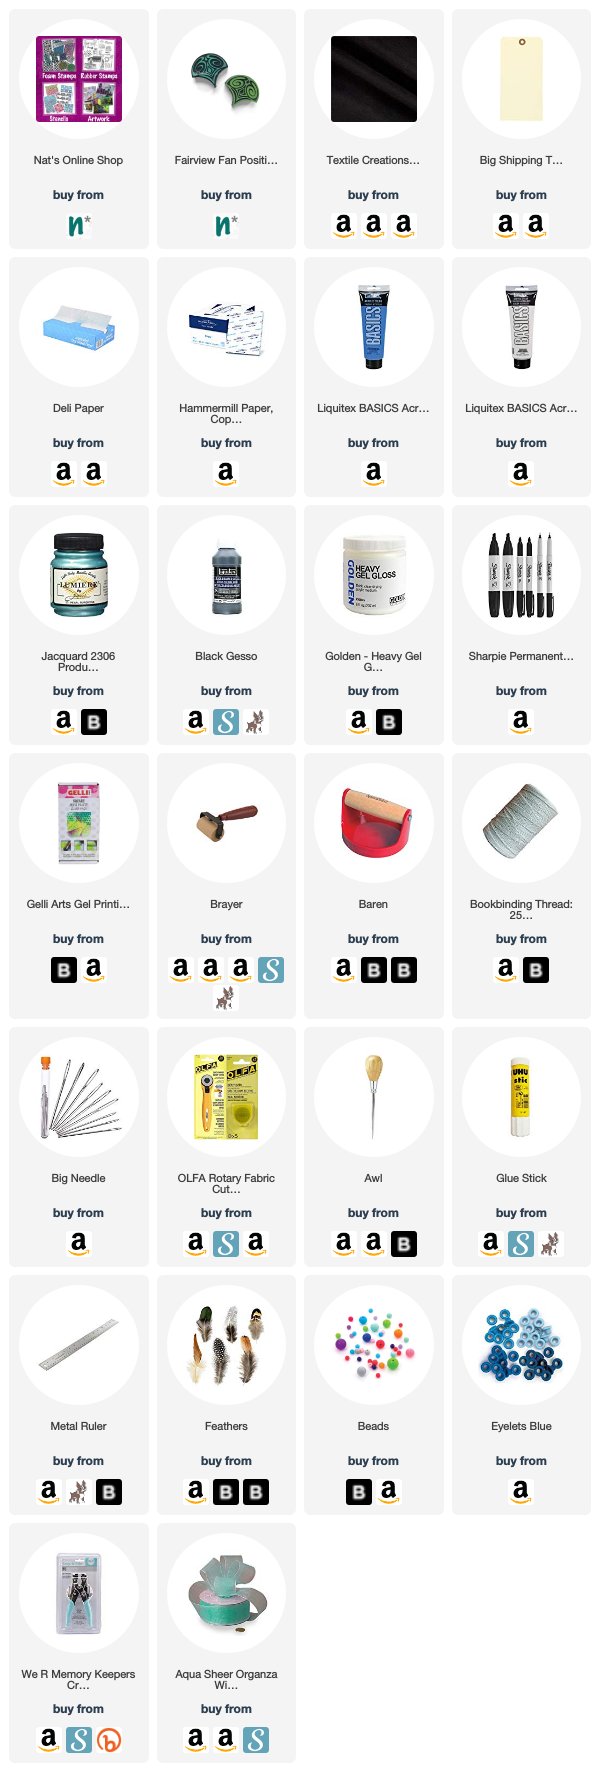
Thank you Linda! I love that you stamped on fabric and then created this gorgeous little treasure with it. Want to give Linda’s project a try? You can find all my Foam Stamps in my Online Shop and here are some of the other supplies she used:

Feel inspired? Working on something yourself that you’d like to share?  I love to see how you interpret our monthly themes. Email me or tag me #natkalbach how you used my stencils and stamps – I would love to share your projects in my next  “n*Spiration From Around the Globe“.
Comments (2)

  • Sue Clarke

    |

    Wow Linda, I can’t wait to see more of your posts…this one is gorgeous!

    Reply

  • Ann

    |

    I am thrilled to see Linda as part of your Creative Squad, she is such a talented artist, and seeing her incorporate her talents in textile design makes me even happier. This is a gorgeous piece. I am honored that Linda is inspired by my work because I truly admire her talents and creations. Fantastic tag book, all the special details bring it to life and that fan stamp design is glorious! ~Ann

    Reply

Leave a comment

Your Biggest Fan – Nicole Watson

Hello again from my Creative Squad. Today we have a very special post from one of our NEW squad members: Nicole Watson! We are so happy to have Nicole on the team and are excited to share her incredible talent with you! Her project today is an art journal page that will have you swooning over layers :) She is using my Broadway Fan Positive Negative foam stamps and this month’s theme: Your Biggest Fan – Let’s give a shout out to someone who is doing an amazing job. In a world obsessed with Me Me Me it’s important to take a look around sometimes and give some encouraging words to another, and not just in your art and craft making :) Be their Biggest Fan!  


I have to admit that I had more of what I wanted to do with the stamps in mind before figuring out how I was going to tackle the theme this month! For some reason I was really struggling just who or what I was going to pick to focus my journal page on, but as I was working on my concept, it clicked.

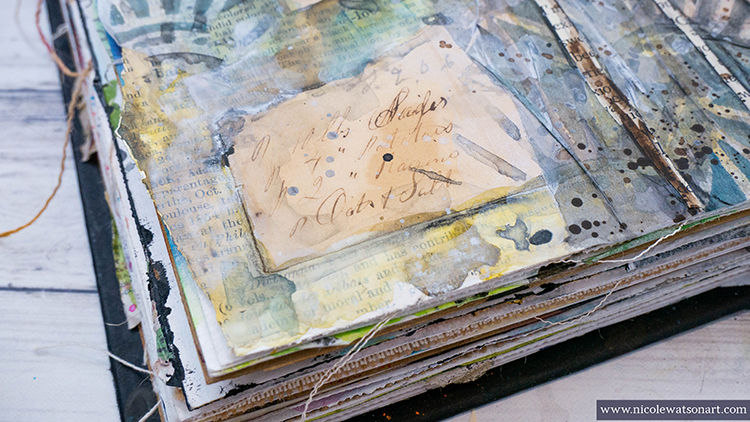
My idea was to create layers on my journal pages that looked like old wall paper through the years. This concept was partially inspired by binge watching Downton Abbyand looking at old photographs with my dad noticing how my grandma’s wallpaper on the stairs changed through time.

Here is a video for you and a writeup below:

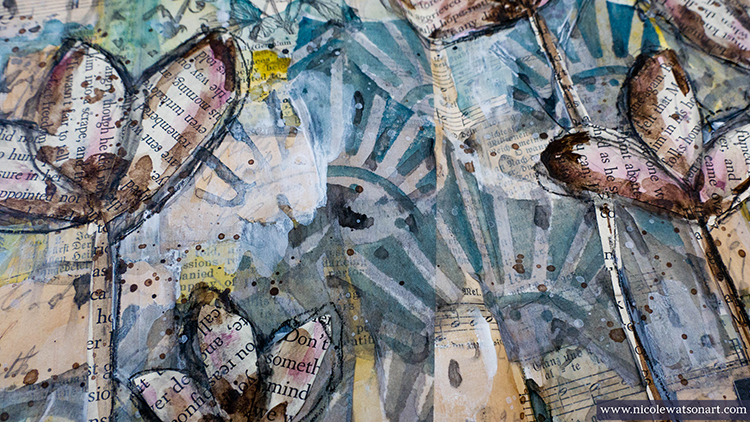
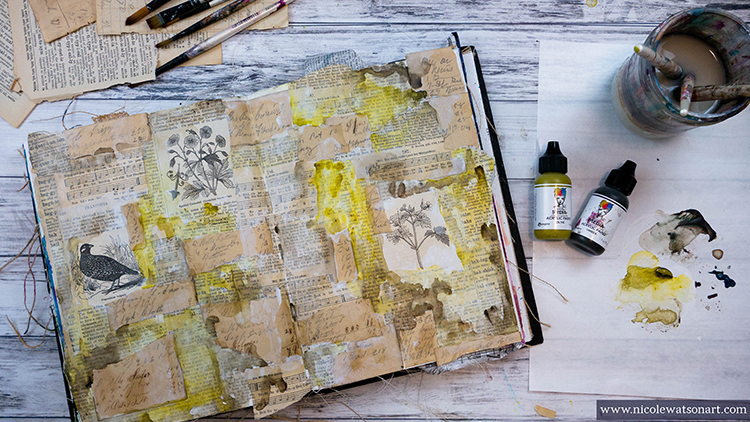
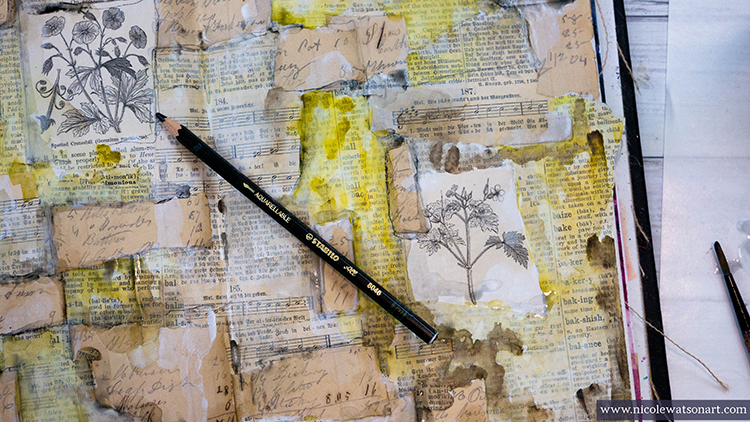
After gessoing my pages, I covered them with bits and pieces of book pages. I chose a variety to give that look of different wallpapers from encyclopedia pages showcasing the images, to a German songbook and a dictionary. Then I topped those off with bits of handwritten text from an old notebook and ledger. Next, I used some watered-down gesso to push some of the pages back and have areas that paint would cling a little differently.

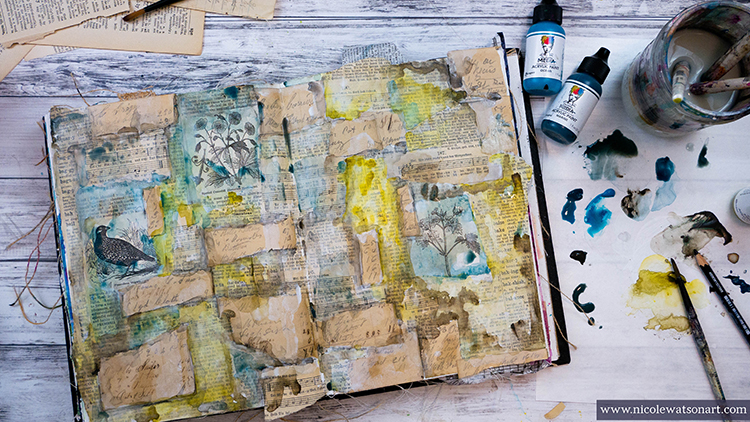
Once all the gesso and matte medium was dry, I began to add color to the pages mixing the colors with umber to add an old, grungy feel. I watered down the paint in places to allow it to flow and mingle with the other colors. After it was dry, I added some shadowing around some of the papers with the stabilo all by tracing and then activating it with water.

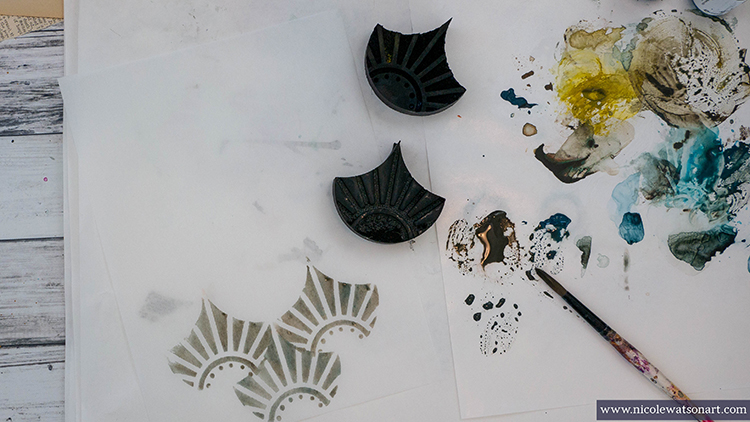
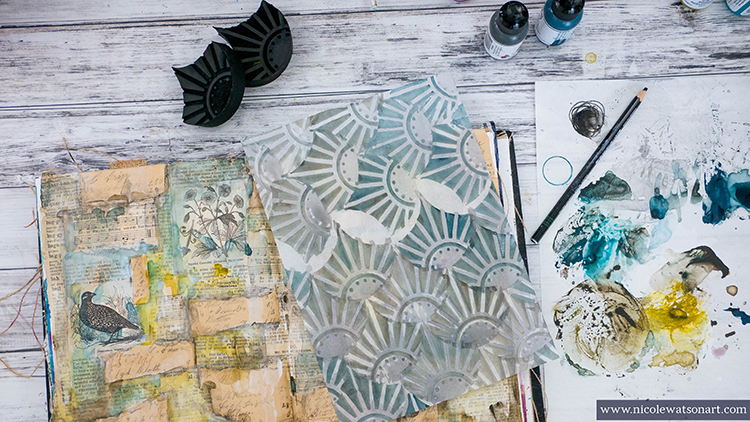
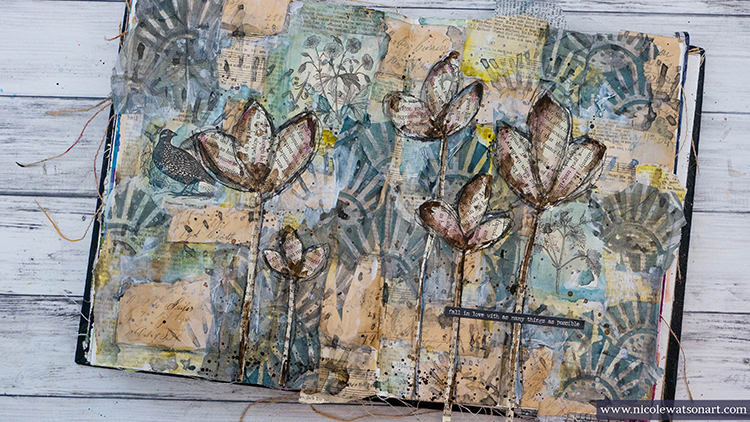
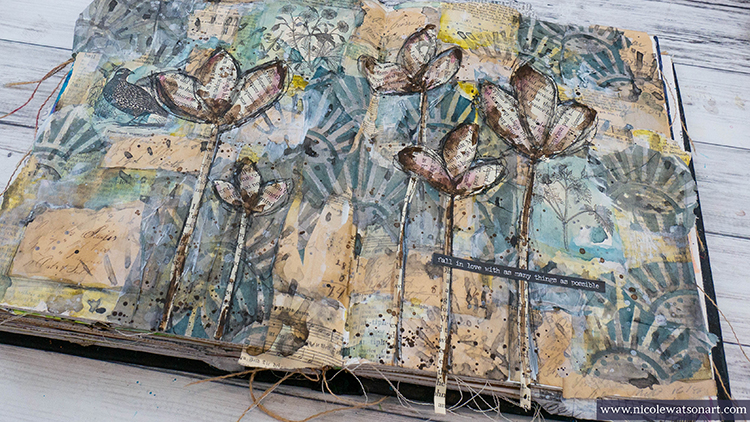
To create the final layer of wallpaper, I used Nat’s Broadway Fan Positive Negative Foam Stamp. I didn’t want to stamp directly on my previous layers, because I didn’t know exactly where to put the stamp, and wanted a more torn look than a perfect stamped image. So, I stamped both the positive and negative images on tissue paper, one with paint and the other with stabilo! To stamp with the stabilo, simply scribble onto a slick surface (like palette paper) and add water to make what I like to call, a stabilo puddle!

I stamped the pattern both vertically and horizontally on the tissue paper, because the paper only tears well in one direction. Then, I tore the paper apart and stuck it to my journal pages. I wanted to extend the pattern a bit, so I stamped some additional fans with the stabilo puddle directly on the journal pages.

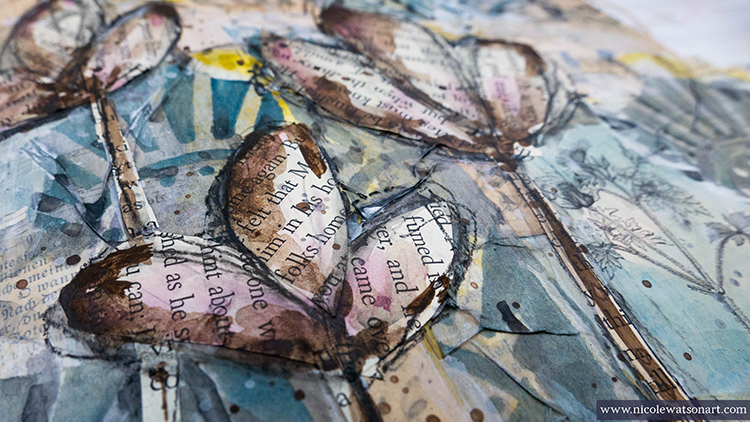
Then, I needed to figure out where to take these pages next and how to attach the theme. I drew some flowers with my charcoal pencil (so I could wipe them off as needed!) and painted them in. I didn’t like how this turned out, so I cut flower petals and stems from book pages and covered them up! I added some gesso here and there for some more white, splattered some of it, filled in the flowers with some sepia ink and a tiny bit of eggplant paint, splattered the ink and then thought about my pages.

It was hard for me to nail down who/what I’m the biggest fan of. My interests and fandom change yearly and sometimes even daily! I am a huge fan of all of the wonderful artists that I’ve connected with over social media, different musicians, musicals, shows, and movies.… and, well, coffee.  This reminded me so much of those wallpaper layers. We often have a change of heart or something we like …. but those layers are still there creating the picture of who we are. It’s fun to tear them back and reminisce.

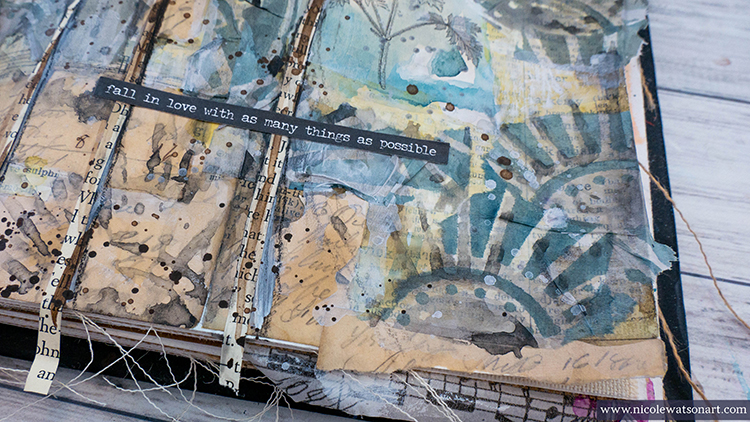
I topped my pages off with a sticker that expressed how I was feeling perfectly: fall in love with as many things as possible.


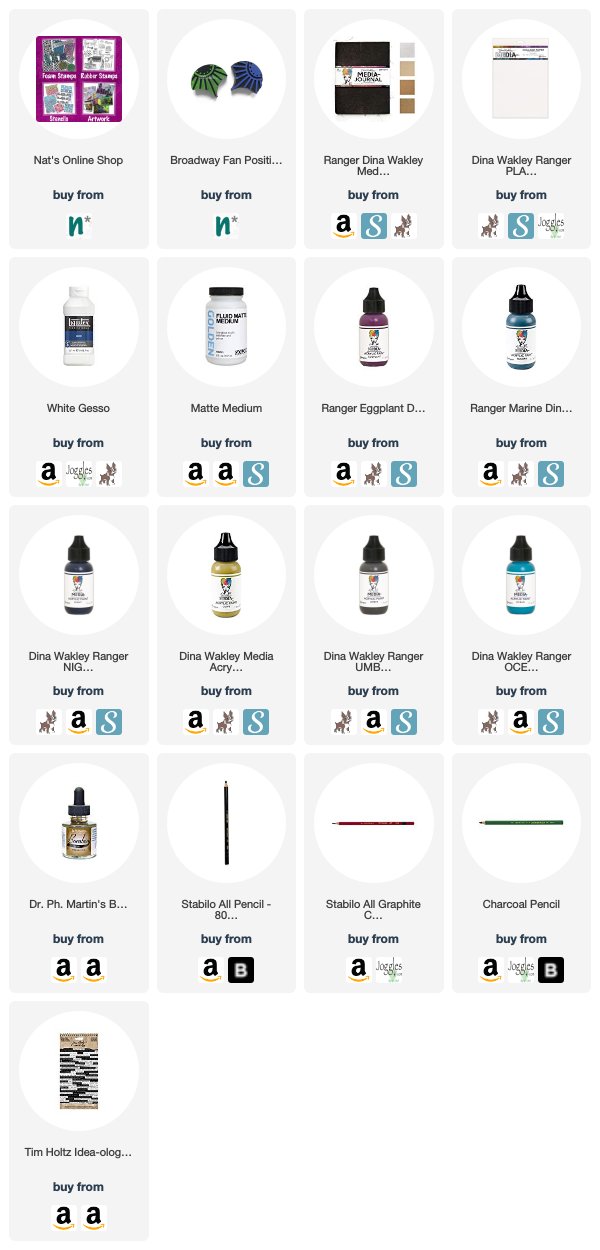
Thank you Nicole! Love hearing your thoughts behind your creative process and then seeing the beautiful results :) Want to give Nicole’s project a try? You can find all my Foam Stamps in my Online Shop and in addition to book paper, here are some of the other supplies she used:

Feel inspired? Working on something yourself that you’d like to share?  I love to see how you interpret our monthly themes. Email me or tag me #natkalbach how you used my stencils and stamps – I would love to share your projects in my next  “n*Spiration From Around the Globe“.
Comments (4)

  • Sue Clarke

    |

    I look forward to seeing more of your art Nicole.
    This art journal spread is great. Layers and layers!
    Reply

    • nicole

      |

      thank you so much!

      Reply

  • Linda Wyatt

    |

    This looks amazing! Your layers are so delicious and meld together so artfully ❤️

    Reply

    • nicole

      |

      thank you! <3

      Reply

Leave a comment