Blog: Broadway Fan

Fishy Fishy Koinobori Windsocks – DIY Playdate

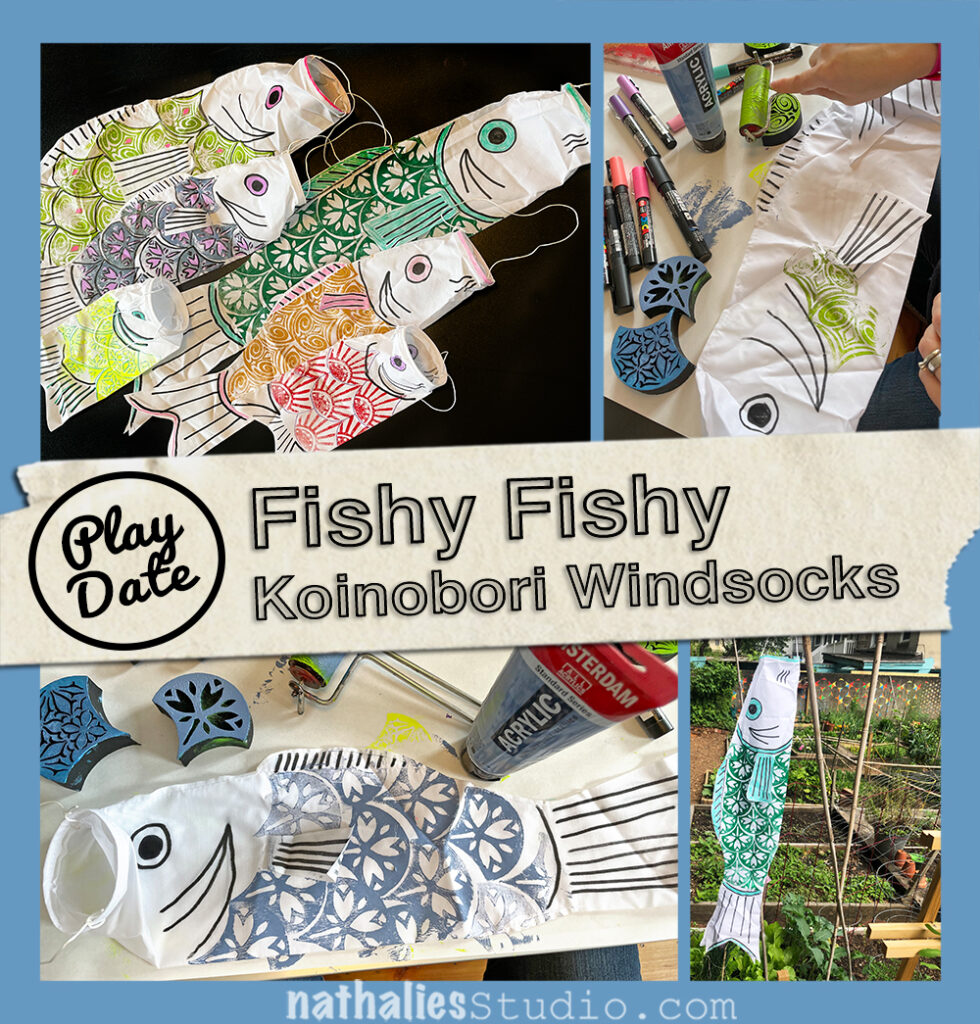
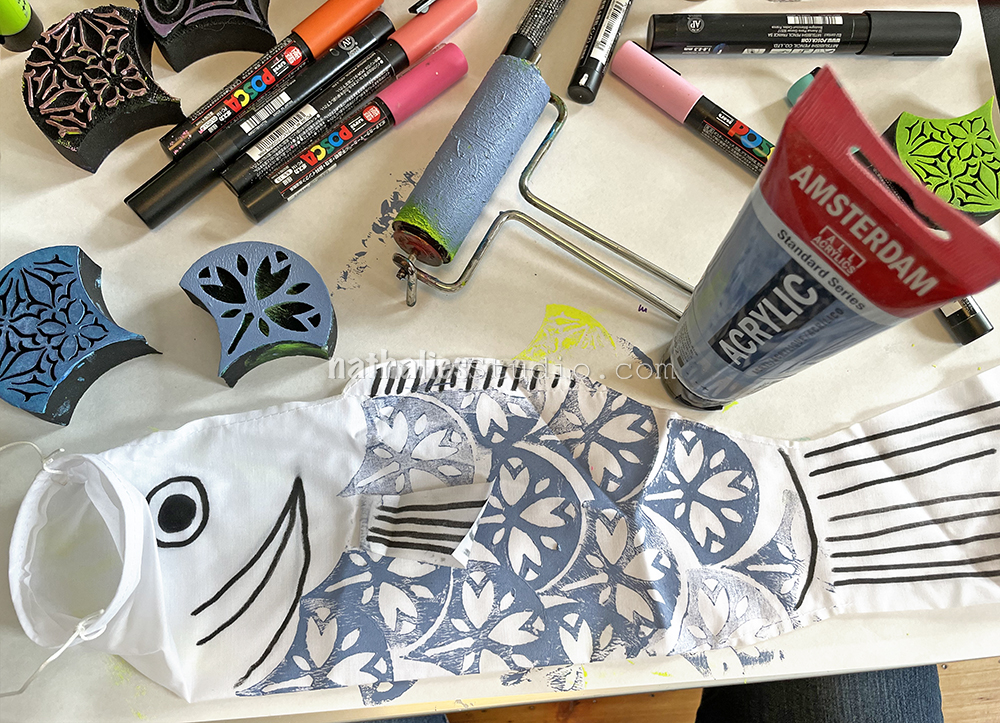
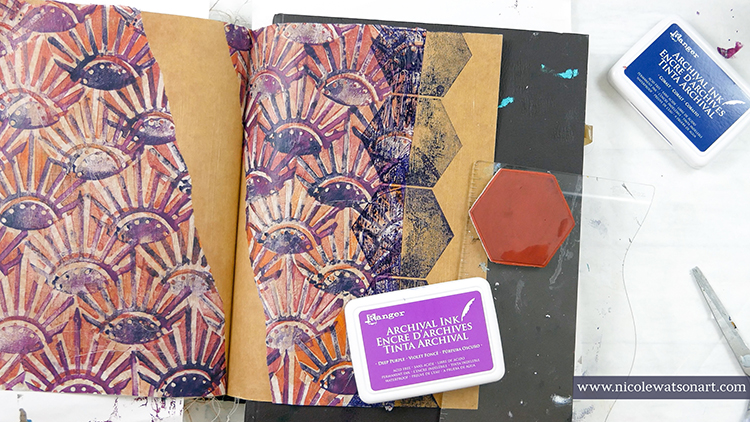
After many months of keeping these fish windsocks in my closet, Kim and I finally got together last week for a playdate. Koinobori are a Japanese tradition – windsocks that are usually flown around the celebration of Children’s Day (read more about this tradition here). We love the shape of these and the possibilities for personalizing them and wanted to put our spin (and stamps LOL) on these festive fliers.

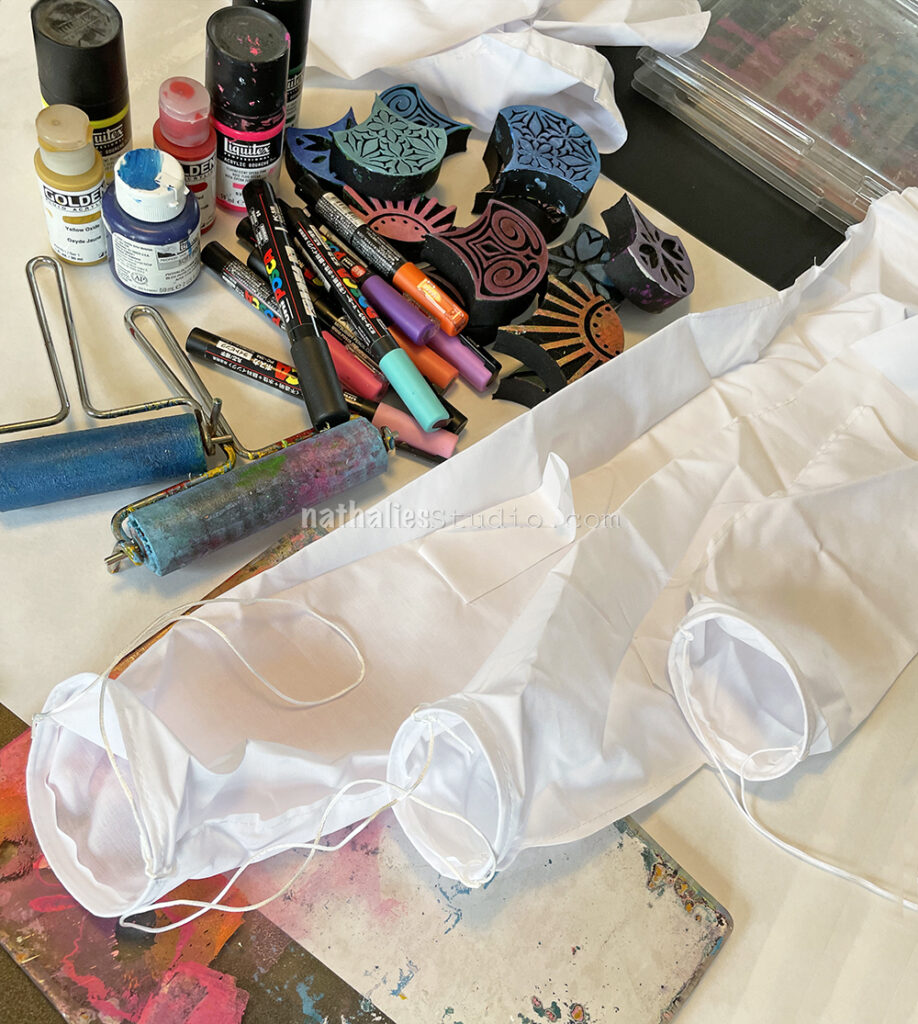
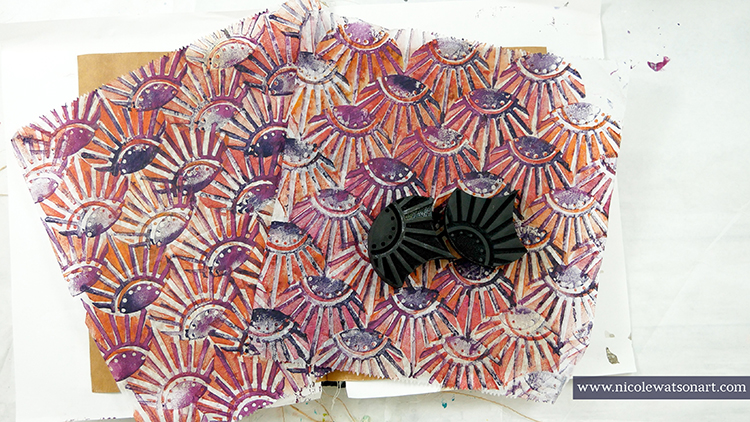
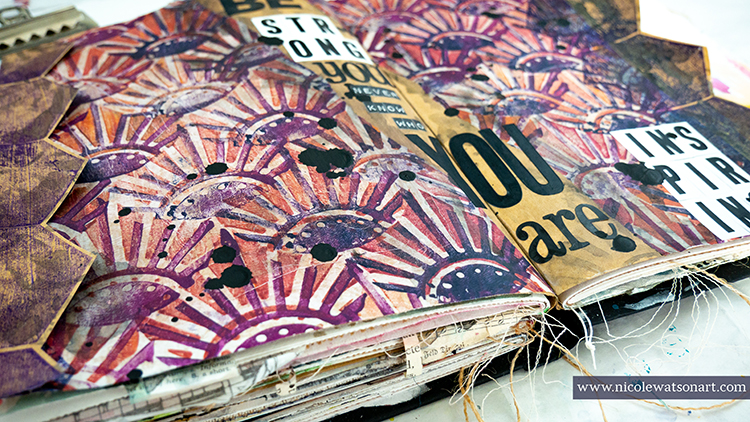
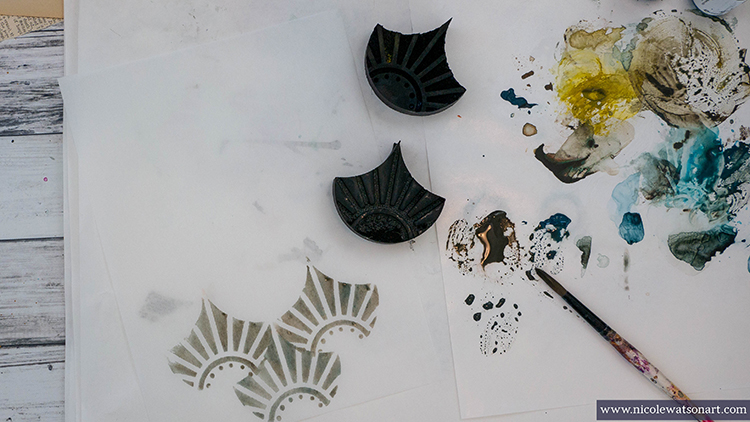
The supplies were easy to gather together: my fan shaped foam stamps (perfect for fish scales!!!), the Koinobori windsocks (link below for those), acrylic paint / acrylic gouache, Posca markers, a brayer, and gelli plate. There are traditional Koinobori colors to symbolize different members of your family, but we decided to go with some of our favorite colors.

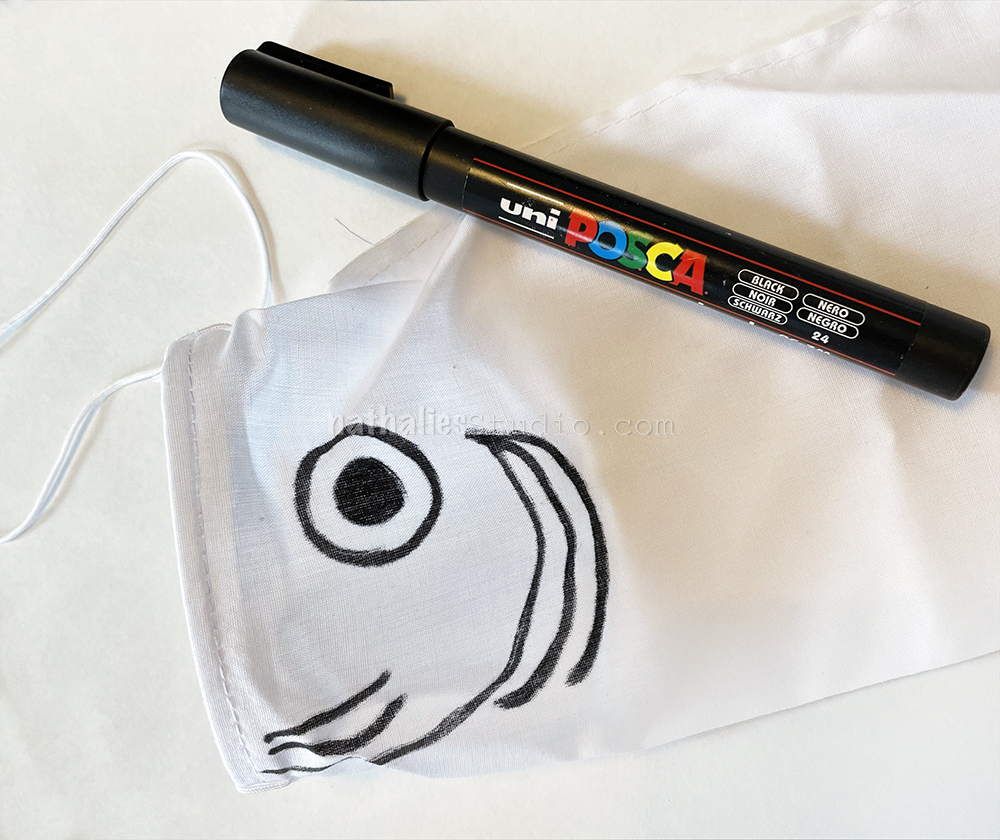
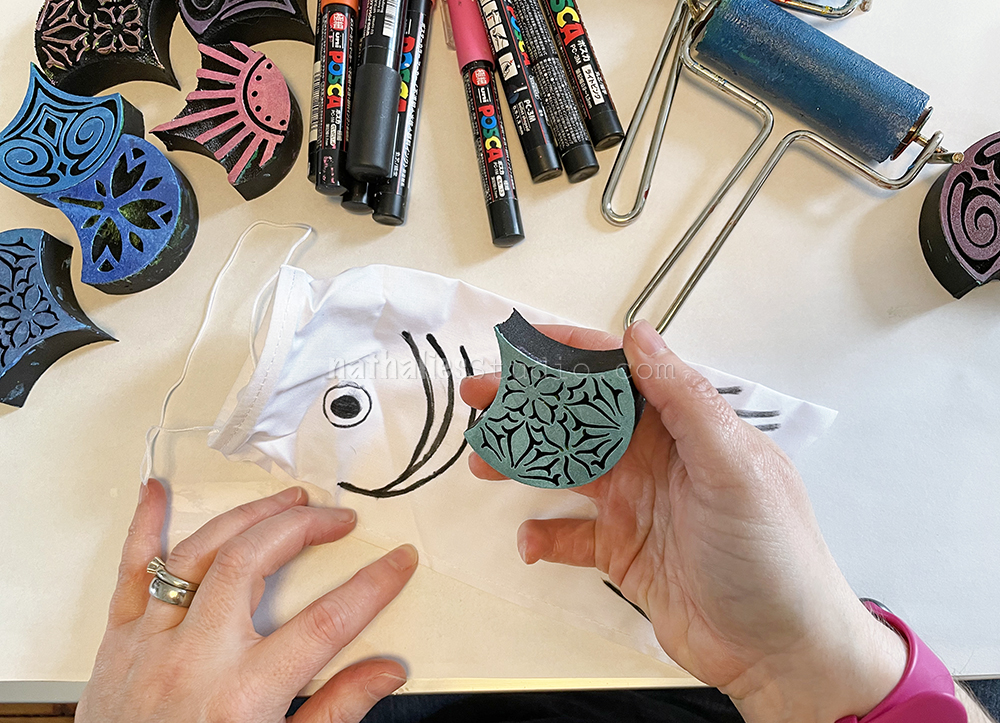
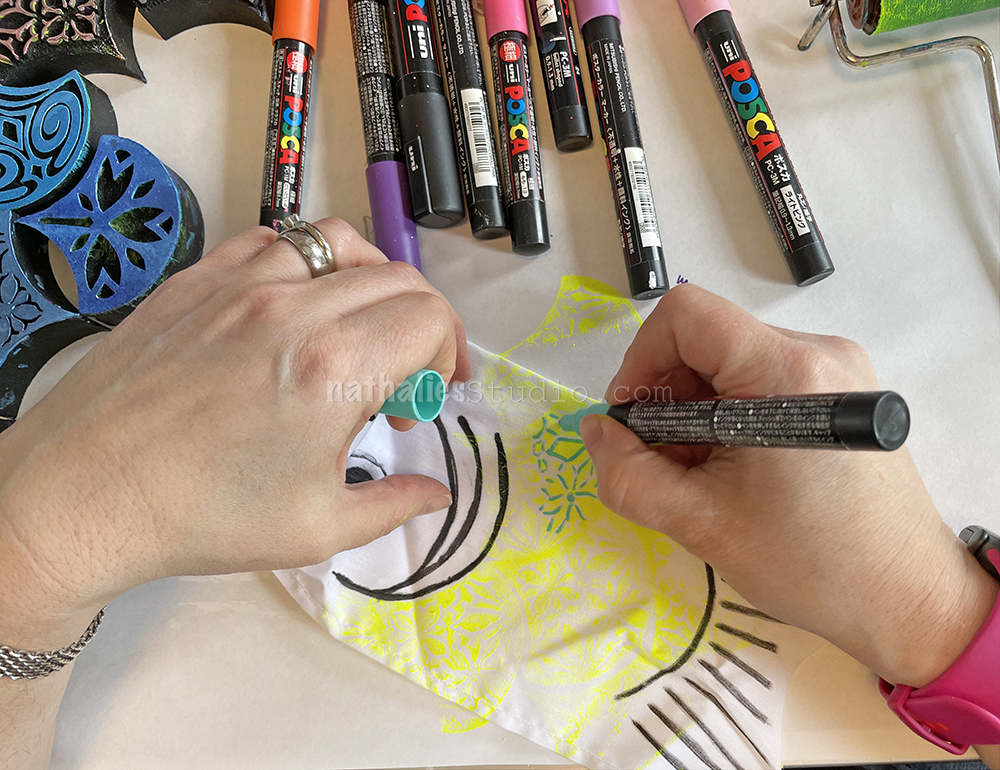
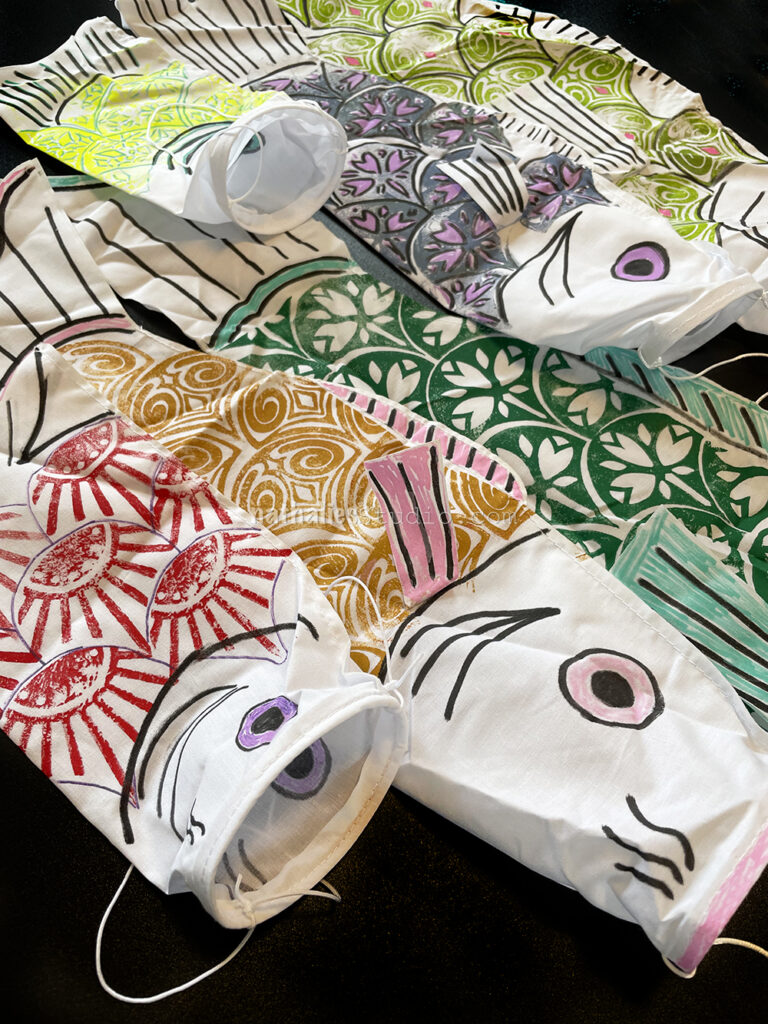
We looked at lots of examples online and started with some of the details, using a black posca marker. Eyes, gills, whiskers (these are actually carp, so they have some whiskers)…

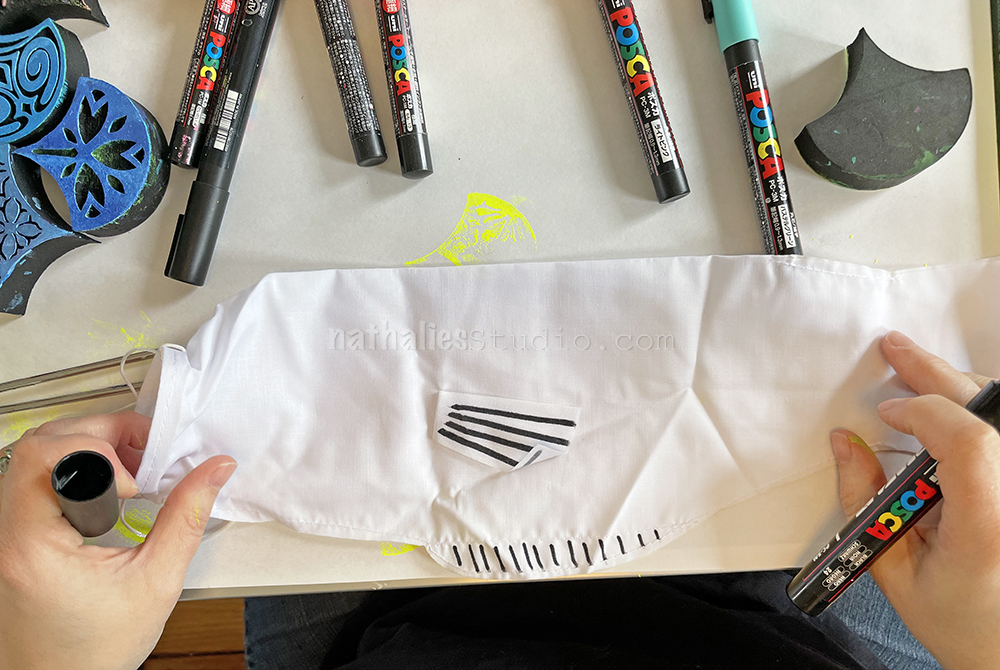
…and also the fins. Each set of windsocks came with 3 different sized fish and the larger two have more detail, shape, and fins. We found that the larger bullet nib Poscas worked best on the fabric.

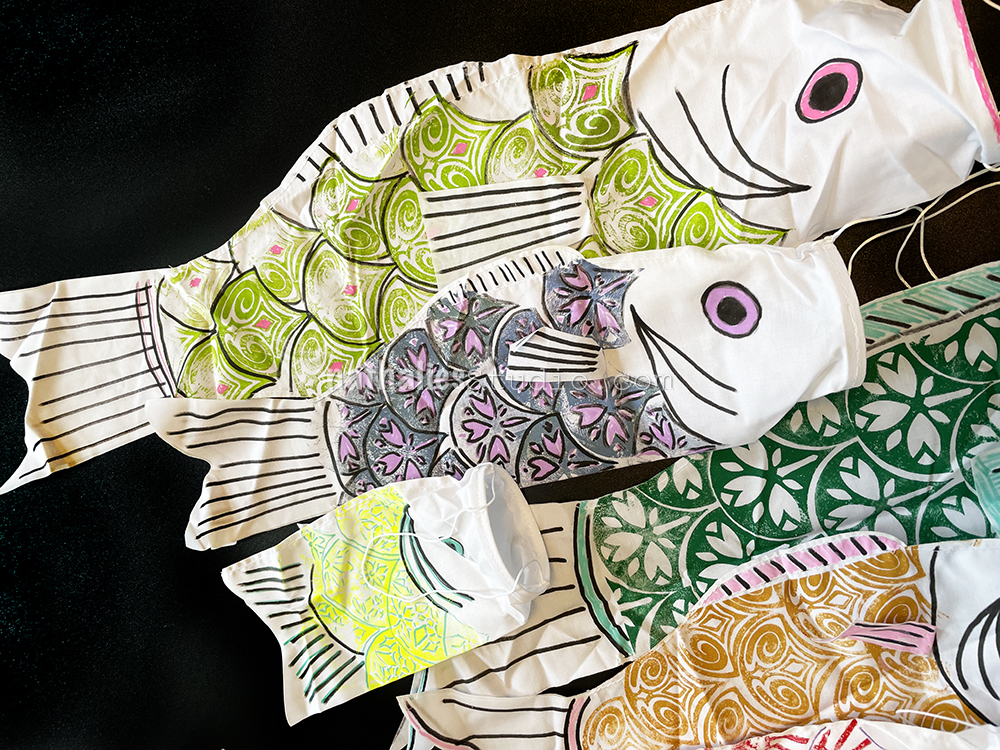
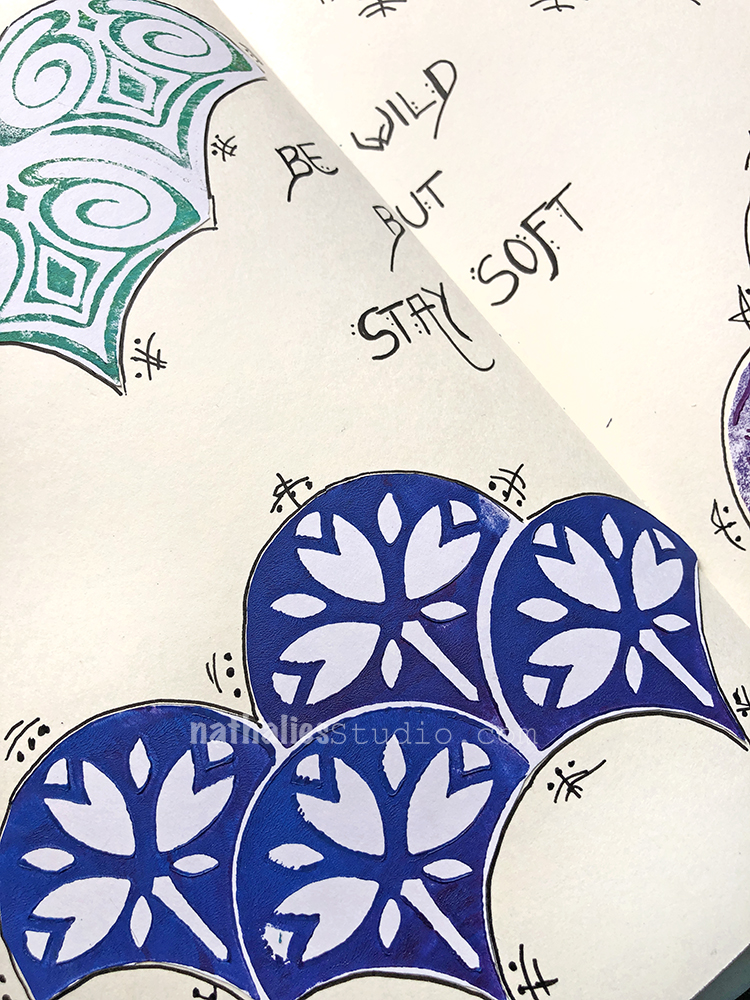
For the smallest fish, my Mini Fan foam stamp set was the way to go – a perfect size and shape to create “scales”.

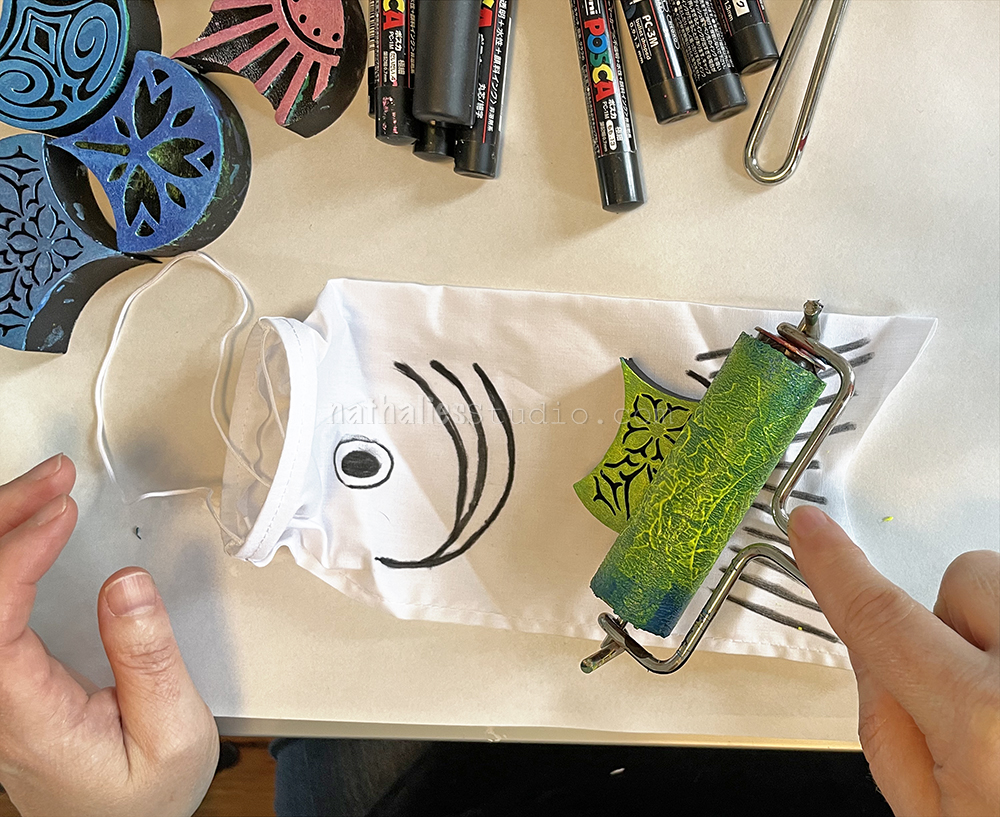
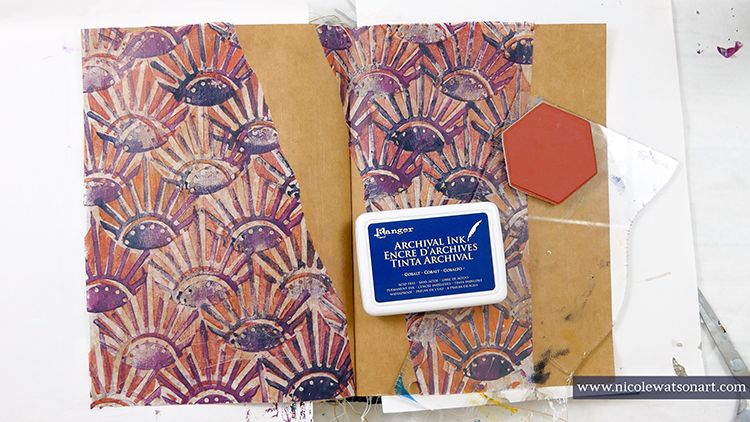
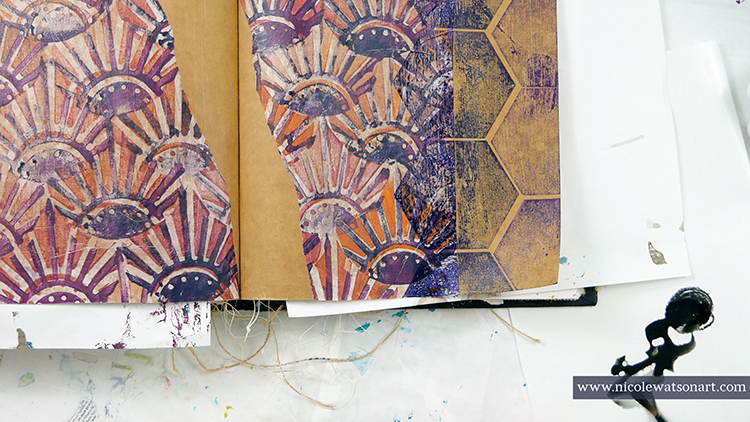
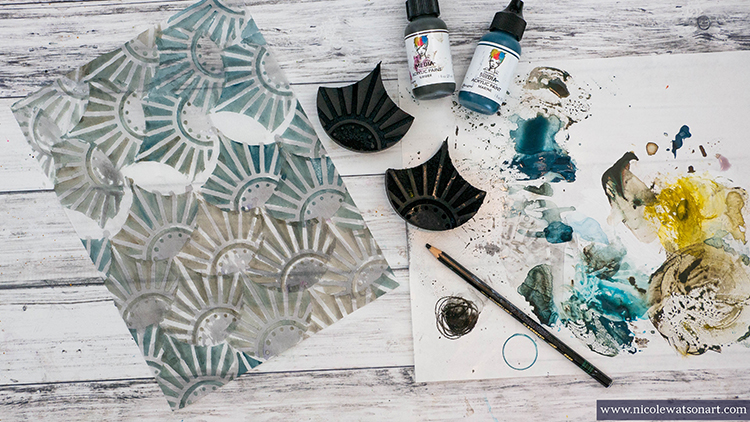
We rolled paint out on a Gelli plate and then either brayered it on the stamps or used the Gelli plate like a stamp pad.

Then just stamp on the fish. We found that the fabric was sturdy enough that it didn’t bleed through.

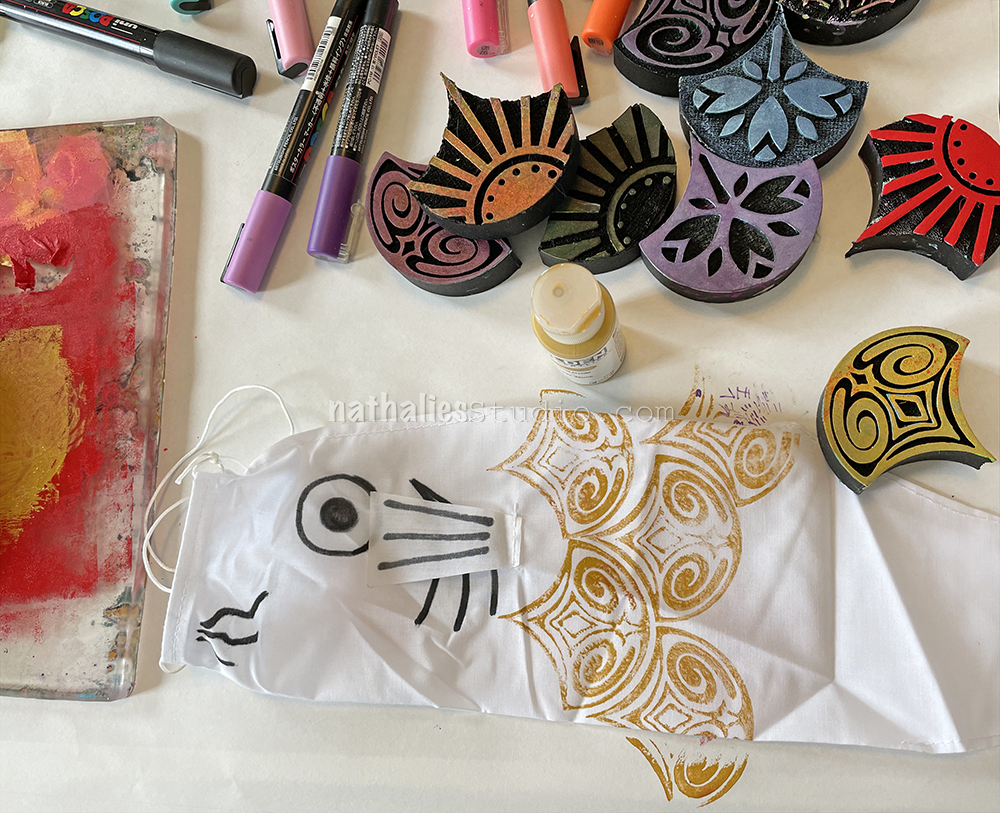
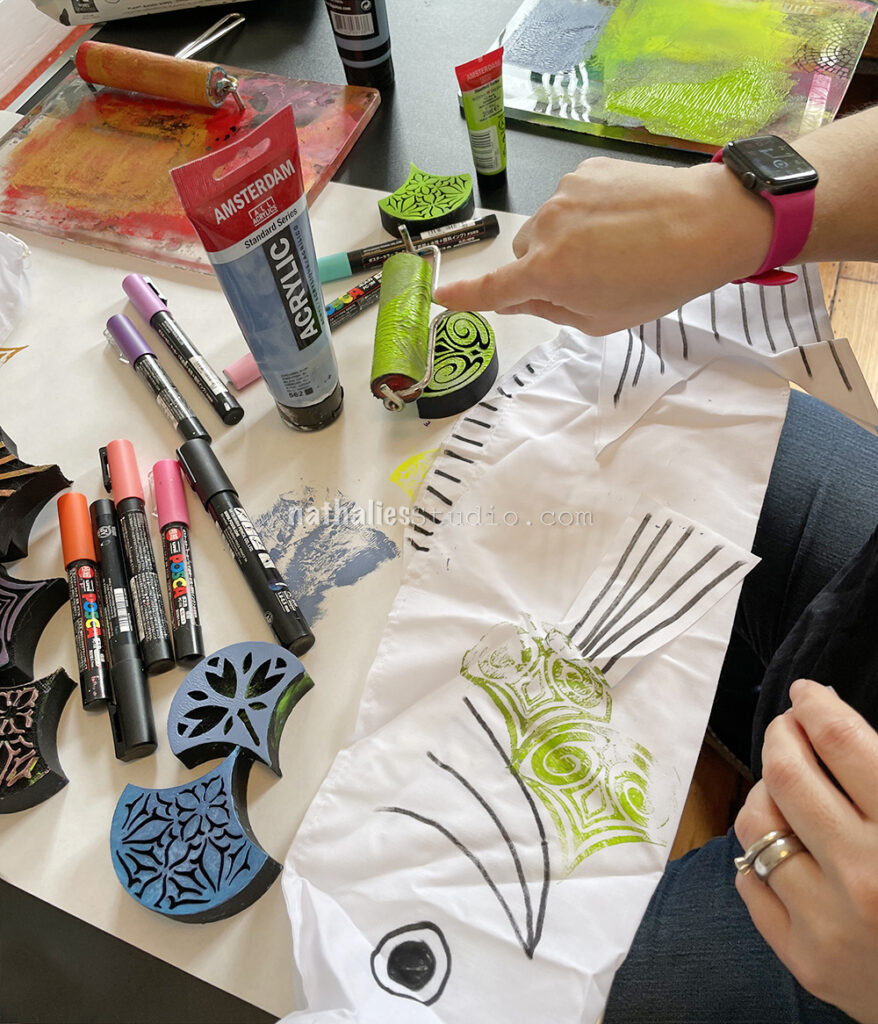
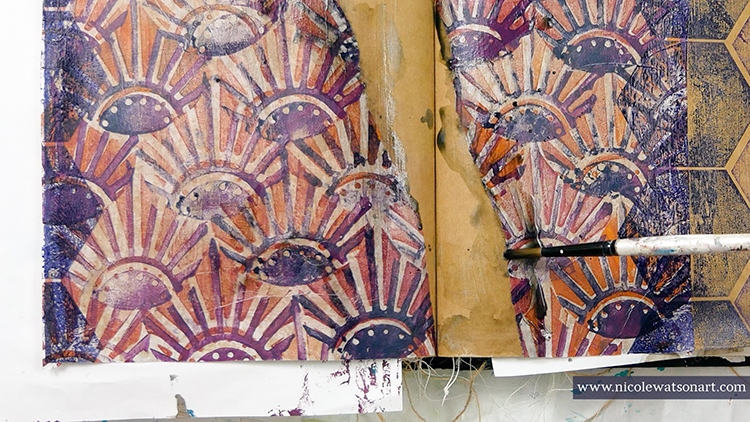
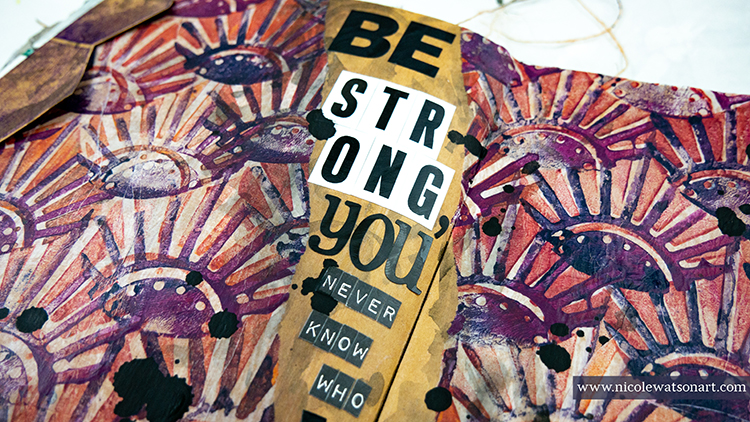
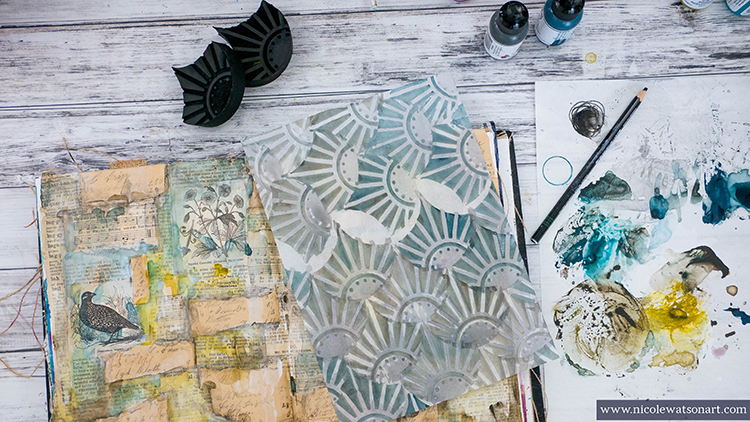
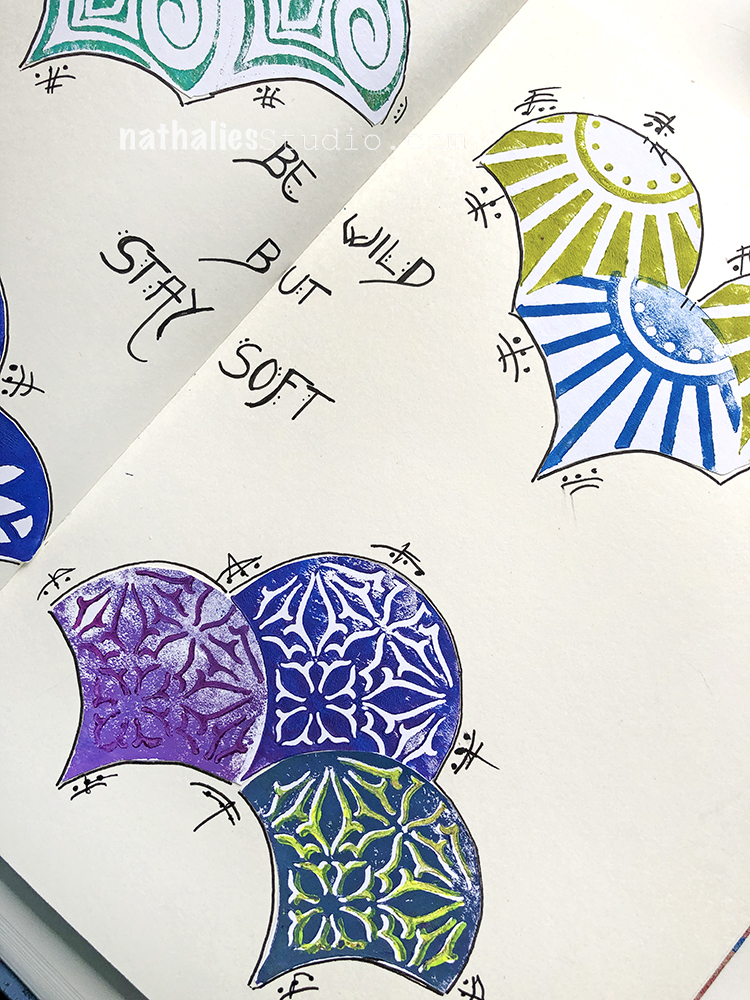
Just keep going with the pattern. This is the medium sized fish, so my larger fan stamps like the Fairview Fan set made quick work of the pattern.

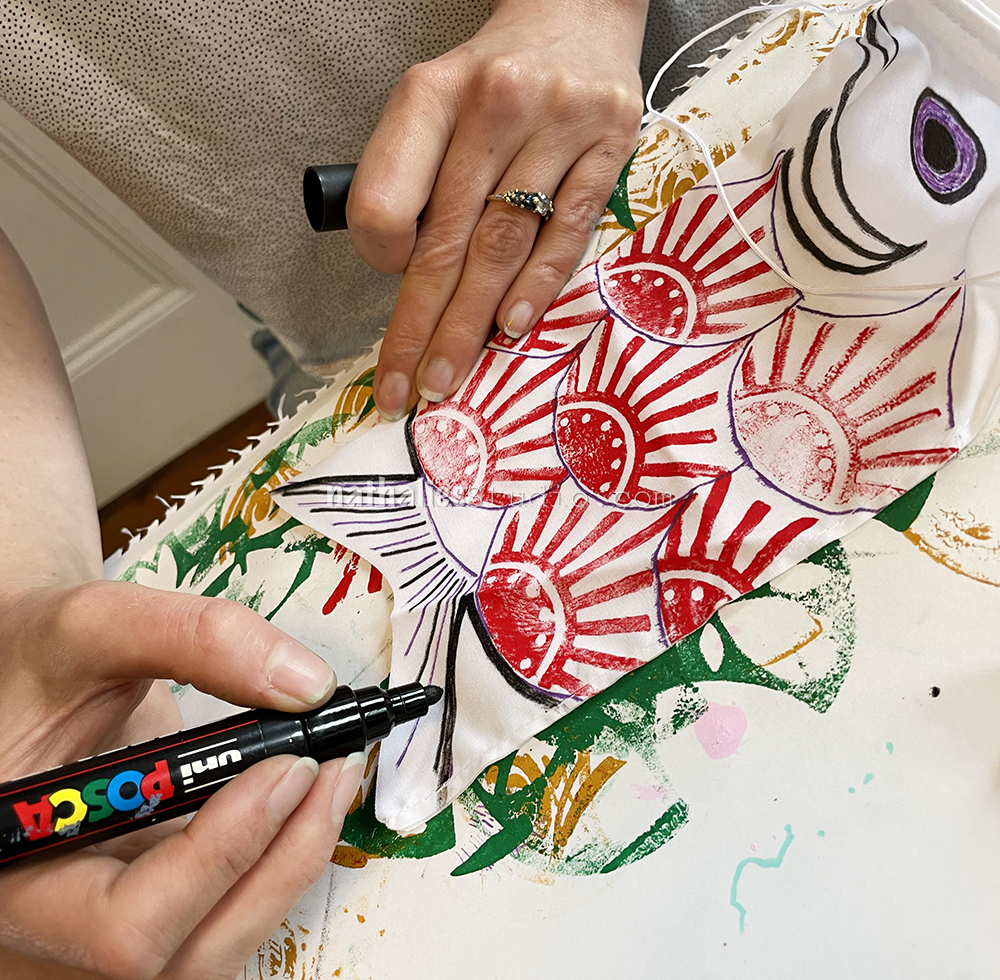
On the larger fish you have to work around the fins but you can decide how fussy you’d like to be.

Here’s a little guy all stamped with one of the Mini Fans.

And here’s the medium fish – it comes together pretty fast with the foam stamps!

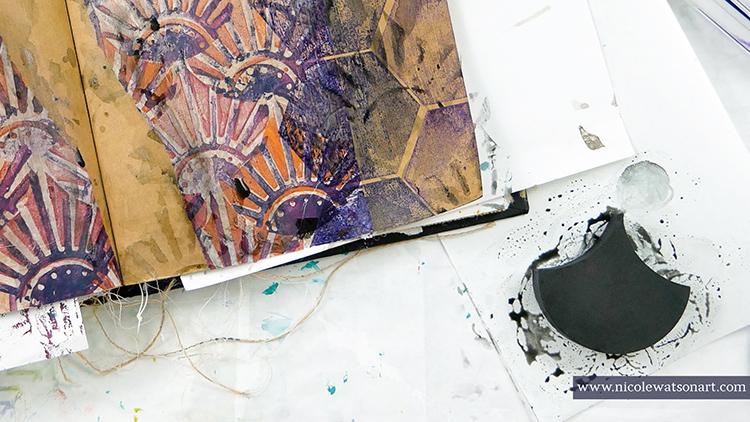
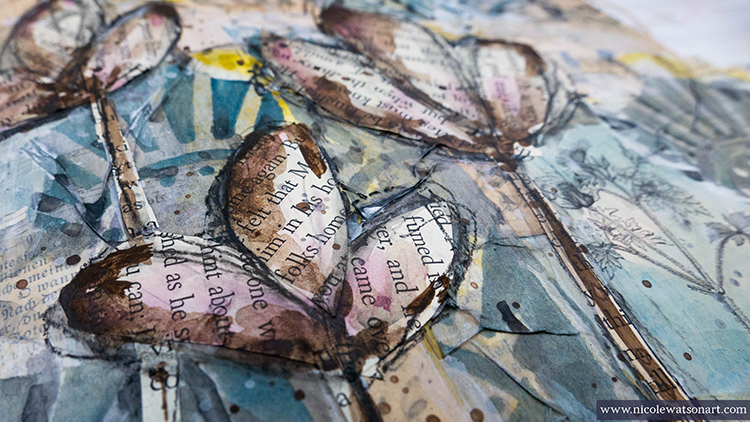
You can add other colors with Posca markers – trace the stamp shapes to highlight the pattern or to add more detail to the fish.

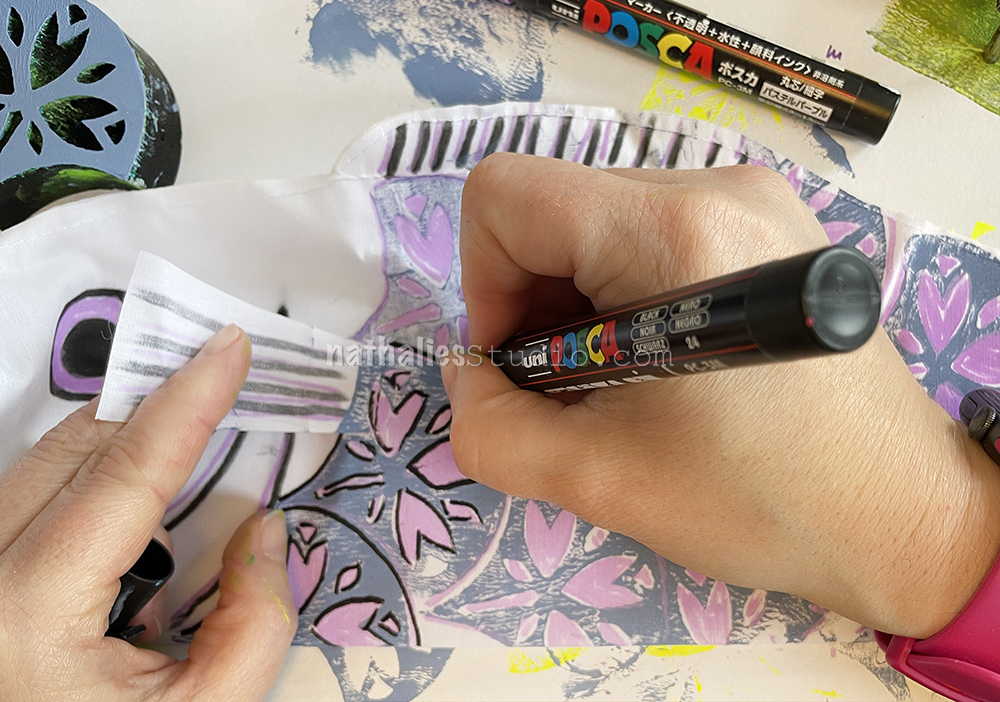
You can also trace the fan shapes to emphasize those scales.

The smallest fish has such little detail that you kinda have to fake it with fins and such. We also definitely used the small ones to test out what we liked best in terms of design.

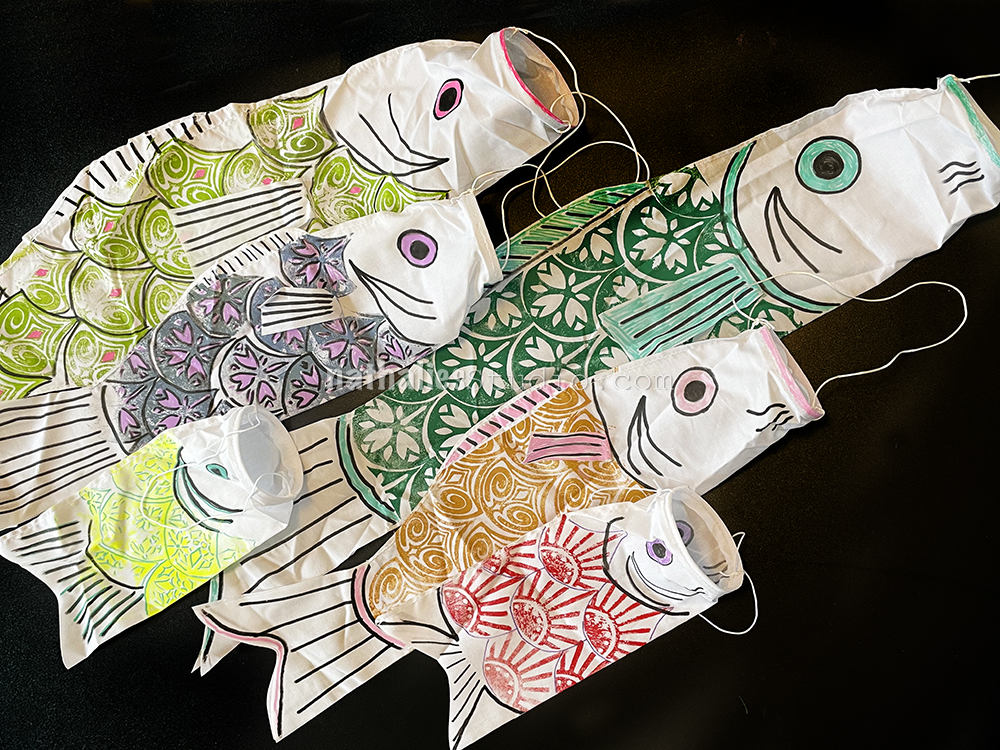
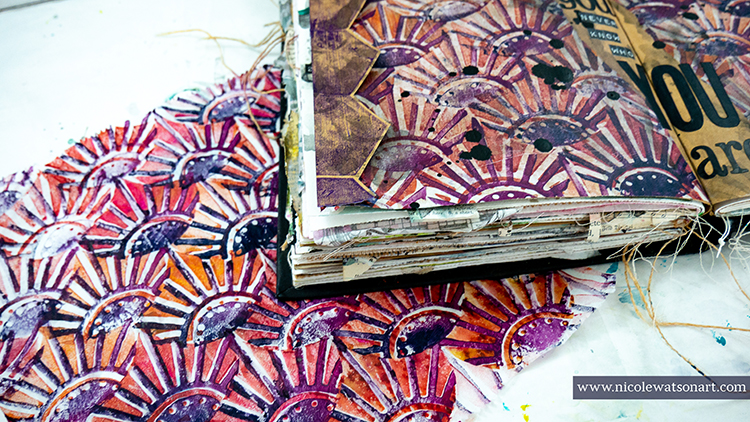
And in the end, we created a beautiful school of fish!

Each one an individual and full of personality :)

When they’re all ready, it’s time to let these windsocks fly!

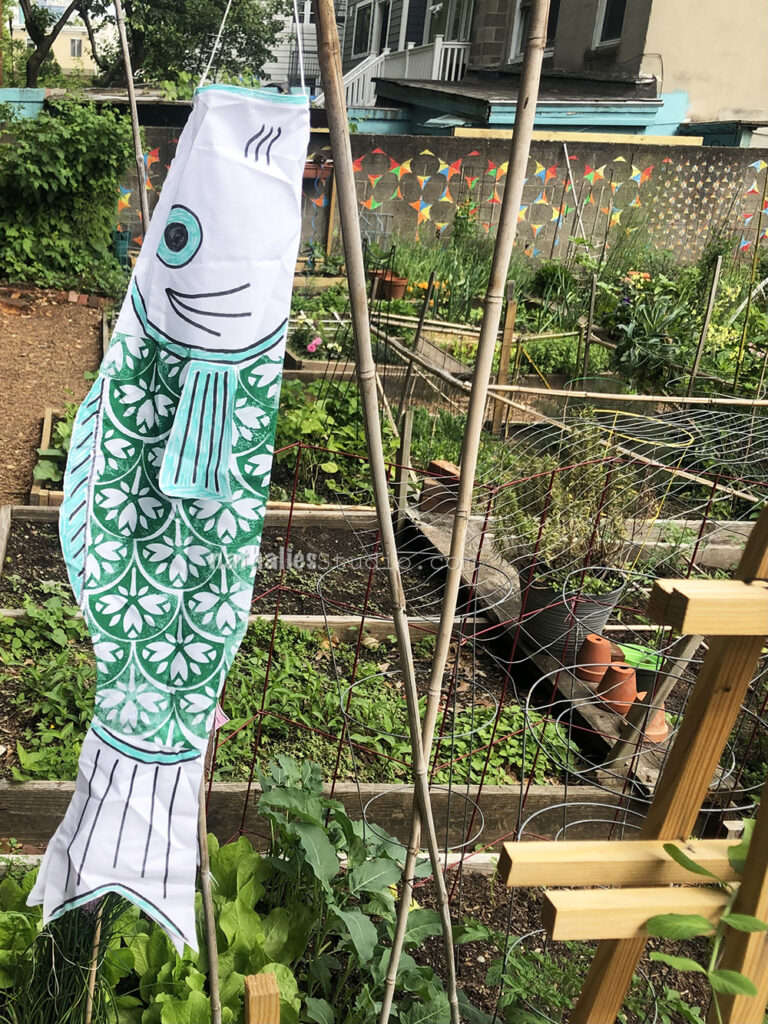
On a windy day this guy will be “swimming” through a local community garden :)

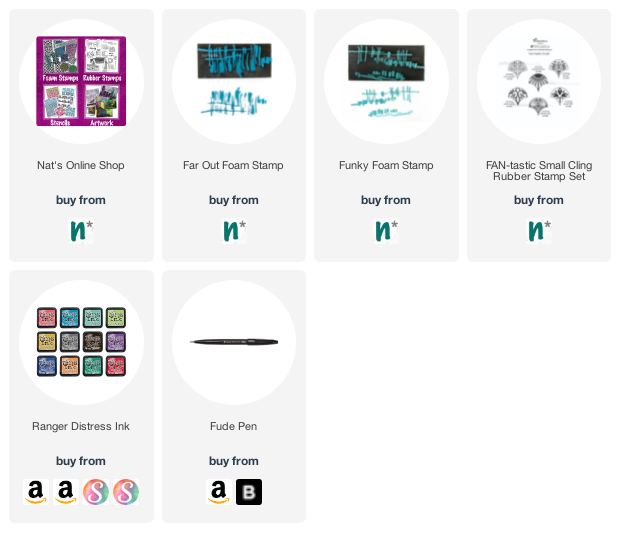
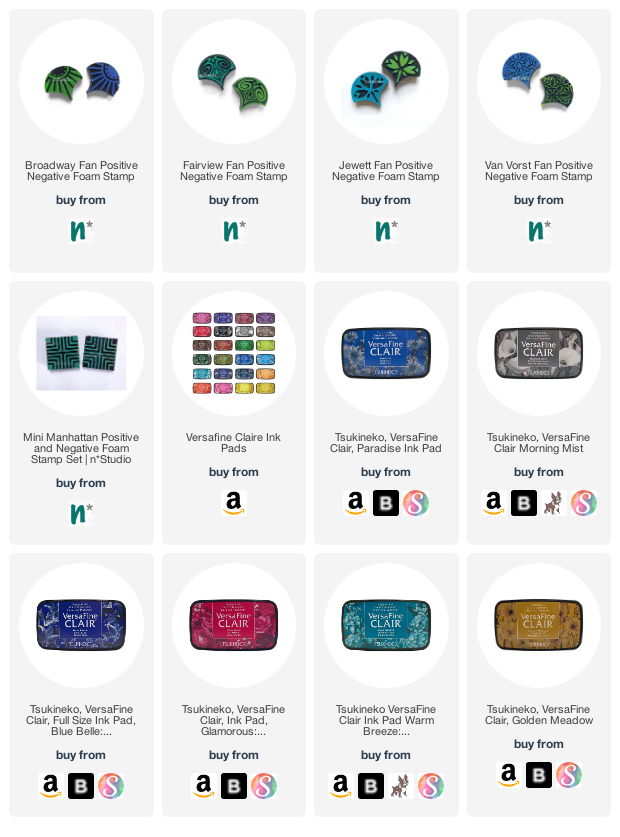
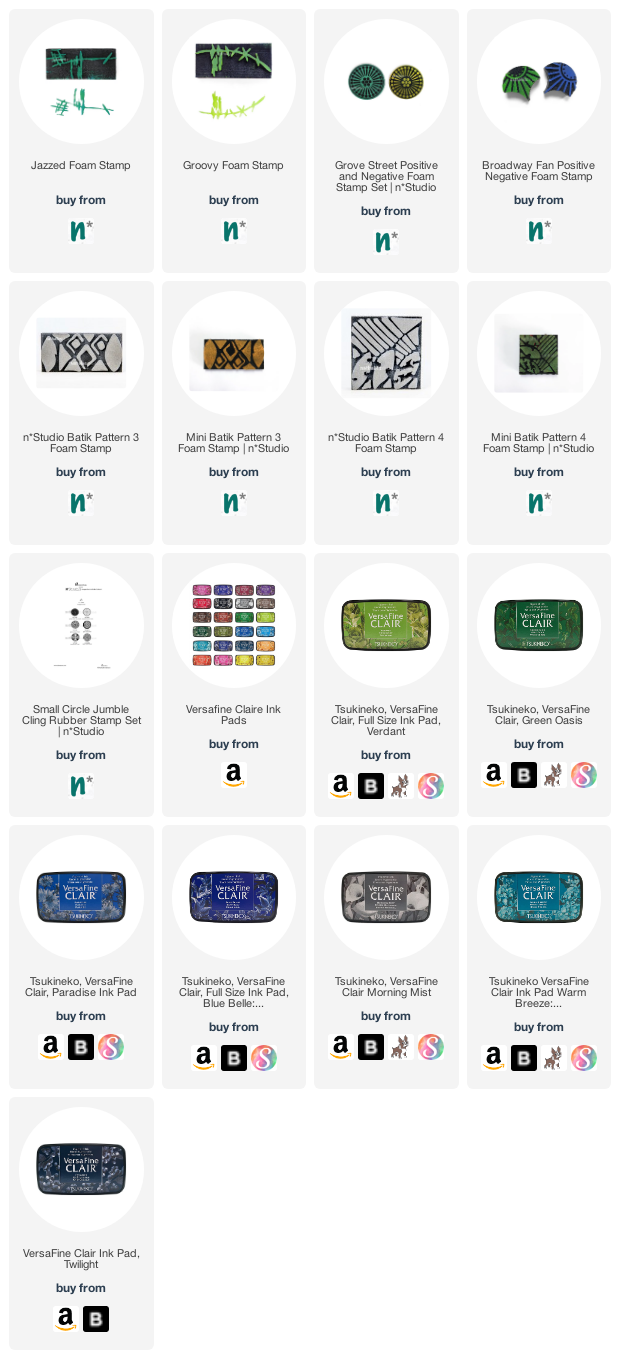
Hope you give this project a try. Here are some of the supplies we used:

Comments (2)

  • Sue Clarke

    |

    L-O-V-E these!!!!!!!!!!!!!

    Reply

  • jean marmo

    |

    These are so very cool!

    Reply

Leave a comment

Longing – Art Journal

While packing up some stuff I found this photo from our old apartment in Hamburg, Germany and I got a little melancholic. I had a great time in Hamburg and miss it a lot – I cannot wait to hop on a plane once things ease up more (I am not ready yet for a long haul flight and the uncertainties that go with international travel and a pandemic and regulations).

I used a piece of wallpaper I had designed for my studio bathroom a while ago as well as some collage paper I had created with distress ink pads and my Funky and Far Out ArtFoamies. I also used the small Broadway Fan stamp – the leaves of our Maple tree on the roof terrace reminded me of the shapes in the Broadway stamp …shapes are a funny thing :)

Here are some of the supplies I used:

Leave a comment

April ArtFoamies Challenge – Day 22 & 23

Are you playing along with Nat and Sarah’s April ArtFoamies Challenge ? You can follow along on my Instagram feed daily with videos and photos, and I post updates here on the blog too. Today I’m recapping 22 and 23. Enjoy!

Day 22 – Fantastic –

Not a surprise here…since I have been creating a ton of fan shaped stamps for a while. The shape and possibility to add pattern to it just makes me super happy! So here is a bunch of fantastic stamps ;) including Broadway Fan, Fairview Fan, Jewett Fan, and Van Vorst Fan.


Here is a look at those Fantastic Fans!


April 23 – Grid – Had to be the Manhattan Positive and Negative Stamp set. Of course I screwed it up in the middle of the stamping – just like you get lost in Manhattan when you do not pay attention. The trick is to just pretend you wanted to go that route anyway… and then all is good and you are mastering the grid.


Here is a look at that April 23 Grid:


Follow along with the challenge on instagram  and post your artwork too with the hashtag #artcollabChallengeAccepted

Here are some of the supplies I used:

Leave a comment

April ArtFoamies Challenge – Day 15, 16 & 17

Are you playing along with Nat and Sarah’s April ArtFoamies Challenge ? You can follow along on my Instagram feed daily with videos and photos, and I post updates here on the blog too from time to time throughout the month. Today I’m recapping 15, 16, and 17. Enjoy!

Day 15 – Plant – I love plants but unfortunately I am a really bad plant owner …so maybe printing a plant inspired pattern is a better idea ;) While my Jazzed and Groovy ArtFoamies were not designed with a plant pattern in mind- they definitely can stand in for that and I love the outcome. Wohoo for easy maintenance plants ;)


Here is a look at Day 15:


April 16 – Dots – Grove Street Positive and Negative Stamp is going to show off its dots today and since the Grove Street Path Station in Jersey City def. Is a route to get to Broadway… the Broadway Fan stamp made an appearance as well. I felt it needed a little bit of extra red omph, so for good measure I threw in one of my Rubber Stamps called Valley Road …because you know… sometimes you gotta change your plans.


And here is a look at Day 16:


April 17 – Layers – I love using the same patterned stamps but in different sizes, like my Batik 3 and Mini Batik 3 and then my Batik 4 and Mini Batik 4 – this was fun to stamp …and yes, the ledger is barely visible but it still adds to the whole. Keeping every ledger page pristine is overrated because why even bother stamping into it if you do. #myledgermyrules


Here are some looks at April 17:

Follow along with the challenge on instagram  and post your artwork too with the hashtag #artcollabChallengeAccepted

Everyone approaches Challenges differently. This ArtFoamies Challenge that Sarah Matthews and I came up with has had me thinking about how I want to approach it. In the past my Foam Stamplifier Challenge #foamstamplifierchallenge I used all kinds of different media, so I didn’t want to repeat myself. I also thought about how Sarah usually uses ArtFoamies with ink pads, while I use acrylic paints and the first parameter became clear: I will only use ink pads for the challenge. The other challenge is that I purchased an old ledger journal and I want to turn it into a pattern book. I usually make my own pattern books by binding loose printed papers into a book. This method has the advantage that if a print doesn’t turn out too great it can be discarded. By printing directly into this 125 year old ledger I have no out. So using my foam stamp designs to create patterns into a ledger book with ink pads is my challenge for this month.

Here are some of the supplies I used:

Play along with us and our daily prompts:

Leave a comment

April ArtFoamies Challenge – Day 01

We’re kicking off Nat and Sarah’s April ArtFoamies Challenge today! You can follow along on my Instagram daily with videos and photos, and I will post updates here on the blog too from time to time throughout the month. 

Everyone approaches Challenges differently. This ArtFoamies Challenge that Sarah Matthews and I came up with has had me thinking about how I want to approach it. In the past my Foam Stamplifier Challenge #foamstamplifierchallenge I used all kinds of different media, so I didn’t want to repeat myself. I also thought about how Sarah usually uses ArtFoamies with ink pads, while I use acrylic paints and the first parameter became clear: I will only use ink pads for the challenge. The other challenge is that I purchased an old ledger journal and I want to turn it into a pattern book. I usually make my own pattern books by binding loose printed papers into a book. This method has the advantage that if a print doesn’t turn out too great it can be discarded. By printing directly into this 125 year old ledger I have no out. So using my foam stamp designs to create patterns into a ledger book with ink pads is my challenge for this month.

Well here we go – the moment of truth and that shall be the name of the pattern …first one using my Broadway Fan positive and negative stamps in my ledger. Love using the solid back of my foam stamps as well – which basically in this case gives you three different options.


Here is a look at that page too:

Follow along with the challenge on instagram  and post your artwork too with the hashtag #artcollabChallengeAccepted

Here are some of the supplies I used:

Leave a comment

Motivated in March – Nicole Watson

Hello from my Creative Squad! Today we have a stunning art journal page from Nicole Watson to help motivate you to create and maybe even in life :) Nicole is using my Broadway Fan Pos Neg set, my Solid Hex Large rubber stamp, and this month’s theme: Motivated in March – What keeps you motivated to create? Is it a certain material? Your favorite colors that you can’t get enough of? Maybe you get motivated when you see artwork in a museum or out and about? Share with us your creative motivation and then create something inspired by it.


There are several things that motivate me to create. This list includes color palettes, new supplies, a visit to the museum, a random photo or advertisement, an Instagram hashtag challenge such as the hundred-day project, or a design team prompt like this one. One of my favorite parts about majoring in art were the assignments or challenges to solve with my supplies and creativity. However, lately, one of my biggest motivations is YOU!  Comments on my tutorials or other social media posts mean the world to me. I absolutely love inspiring other people to create and sharing tips and tricks along the way.

Recently, I received a beautiful message from someone thanking me for my inspiration. Through a random search after purchasing an art journal, she found my tutorials during her cancer fight. She used her art journal as a way to cope and understand her story. This beautiful lady was not expected to make it through her fight, but she did. This page is for her, as she has also inspired me.

“Be strong, you never know who you are inspiring.”

When I ran across this quote on Pinterest, I knew I wanted to use it on a simple journal page to showcase the message and as a reminder to myself to be strong, even in my own weaknesses.

So, I grabbed some deli paper that I had previously stamped with Nat’s Broadway Fan Positive Negative ArtFoamies. I loved how it had turned out, and was waiting for the perfect occasion! I simply stamped the negative stamp first all over the deli paper in a mixture of warm colors plus a little umber to tone them down and then stamped the positive image with a mixture of navy and eggplant. I wanted a variation in the colors throughout the paper.

Here’s a quick video of how I stamped with the ArtFoamies on deli paper:

I thought this paper would look amazing on the kraft paper, so I spread clear gesso over the kraft paper spread in my art journal and then ripped the deli paper in half and adhered it to the page with matte medium. I left a gap between the two sides for my quote and also a large space on the right side.

Wanting to add more interest and another graphic element, I grabbed Nat’s Solid Hex Large stamp and stamped the right side with cobalt archival ink. My first thought was to then cut around those hexagons, but I experimented with stamping another line of hexagons with deep purple ink. Then I stamped the same navy hexagons over to the left side.

The pages seemed a little flat to me, so I grabbed my stabilo all pencil and created a puddle. (Scribble the stabilo on a piece of palette paper and activate it with water.) I used this as watercolor paint and spread it around the page on the stamped hexagons for shadowing and on the torn edges. Then, I stamped the ArtFoamie into the puddle and stamped some shadowed Broadway fans in the gap and over the hexagons.

Looking at my pages for several minutes, I decided to go back to my original idea and cut the purple hexagons off the page! I’m so glad I experimented first, because then I had this awesome line or purple hexagons to adhere to the left side! I stuck it down with one strip from a tape runner, because I liked the dimension created from not sticking it down all the way to the page.

Finally, it was time to add the quote. I grabbed a bunch of different black and white stickers to spell out the quote and then went over them with matte medium to make sure they would stick.  I felt the page needed one more element to tie in the black, so I grabbed my Bombay India ink for a few ink drops.

The perfect reminder in the middle of my art journal to motivate me. It is truly a gift and a huge motivation to inspire you. I’ve often heard it say that art heals, and I sincerely believe it’s one amazing tool we have to care for our body, mind, and spirit.


Thank you Nicole and what a touching story about the power that art can have in our lives!

Want to give Nicole’s project a try? You can find all my Foam Stamps and Rubber Stamps in my Online Shop and here are some of the other supplies Nicole used:

Feel inspired? Working on something yourself that you’d like to share?  I love to see how you interpret our monthly themes. Email me how you used my stencils and stamps with the theme and email me an image – I would love to share your projects in my next  “n*Spiration From Around the Globe“.

Leave a comment

Your Biggest Fan – Nicole Watson

Hello again from my Creative Squad. Today we have a very special post from one of our NEW squad members: Nicole Watson! We are so happy to have Nicole on the team and are excited to share her incredible talent with you! Her project today is an art journal page that will have you swooning over layers :) She is using my Broadway Fan Positive Negative foam stamps and this month’s theme: Your Biggest Fan – Let’s give a shout out to someone who is doing an amazing job. In a world obsessed with Me Me Me it’s important to take a look around sometimes and give some encouraging words to another, and not just in your art and craft making :) Be their Biggest Fan!  


I have to admit that I had more of what I wanted to do with the stamps in mind before figuring out how I was going to tackle the theme this month! For some reason I was really struggling just who or what I was going to pick to focus my journal page on, but as I was working on my concept, it clicked.

My idea was to create layers on my journal pages that looked like old wall paper through the years. This concept was partially inspired by binge watching Downton Abbyand looking at old photographs with my dad noticing how my grandma’s wallpaper on the stairs changed through time.

Here is a video for you and a writeup below:

After gessoing my pages, I covered them with bits and pieces of book pages. I chose a variety to give that look of different wallpapers from encyclopedia pages showcasing the images, to a German songbook and a dictionary. Then I topped those off with bits of handwritten text from an old notebook and ledger. Next, I used some watered-down gesso to push some of the pages back and have areas that paint would cling a little differently.

Once all the gesso and matte medium was dry, I began to add color to the pages mixing the colors with umber to add an old, grungy feel. I watered down the paint in places to allow it to flow and mingle with the other colors. After it was dry, I added some shadowing around some of the papers with the stabilo all by tracing and then activating it with water.

To create the final layer of wallpaper, I used Nat’s Broadway Fan Positive Negative Foam Stamp. I didn’t want to stamp directly on my previous layers, because I didn’t know exactly where to put the stamp, and wanted a more torn look than a perfect stamped image. So, I stamped both the positive and negative images on tissue paper, one with paint and the other with stabilo! To stamp with the stabilo, simply scribble onto a slick surface (like palette paper) and add water to make what I like to call, a stabilo puddle!

I stamped the pattern both vertically and horizontally on the tissue paper, because the paper only tears well in one direction. Then, I tore the paper apart and stuck it to my journal pages. I wanted to extend the pattern a bit, so I stamped some additional fans with the stabilo puddle directly on the journal pages.

Then, I needed to figure out where to take these pages next and how to attach the theme. I drew some flowers with my charcoal pencil (so I could wipe them off as needed!) and painted them in. I didn’t like how this turned out, so I cut flower petals and stems from book pages and covered them up! I added some gesso here and there for some more white, splattered some of it, filled in the flowers with some sepia ink and a tiny bit of eggplant paint, splattered the ink and then thought about my pages.

It was hard for me to nail down who/what I’m the biggest fan of. My interests and fandom change yearly and sometimes even daily! I am a huge fan of all of the wonderful artists that I’ve connected with over social media, different musicians, musicals, shows, and movies.… and, well, coffee.  This reminded me so much of those wallpaper layers. We often have a change of heart or something we like …. but those layers are still there creating the picture of who we are. It’s fun to tear them back and reminisce.

I topped my pages off with a sticker that expressed how I was feeling perfectly: fall in love with as many things as possible.


Thank you Nicole! Love hearing your thoughts behind your creative process and then seeing the beautiful results :) Want to give Nicole’s project a try? You can find all my Foam Stamps in my Online Shop and in addition to book paper, here are some of the other supplies she used:

Feel inspired? Working on something yourself that you’d like to share?  I love to see how you interpret our monthly themes. Email me or tag me #natkalbach how you used my stencils and stamps – I would love to share your projects in my next  “n*Spiration From Around the Globe“.

Comments (4)

  • Sue Clarke

    |

    I look forward to seeing more of your art Nicole.
    This art journal spread is great. Layers and layers!

    Reply

    • nicole

      |

      thank you so much!

      Reply

  • Linda Wyatt

    |

    This looks amazing! Your layers are so delicious and meld together so artfully ❤️

    Reply

    • nicole

      |

      thank you! <3

      Reply

Leave a comment

Adventure – Art Journal

“Life is either a daring adventure or nothing at all.” – Helen Keller

When I was working on my April Patterns series, I found that the fans could be stamped in a row to leave perfect circles in between. So here I used my Broadway Fan foam stamp set and stamped them out with acrylic paint. I also used the back of the fan for a solid fan shape sometimes. Next I stamped my Mini Hex Set in the circle space, and filled in with Holbein markers.

I added some sketchy lines with Winsor Newton Fineliners to define everything a bit more…

… and to tie it visually to my quote.

Here are some of the supplies I used:

Leave a comment

Stay Soft – Art Journal

“Be Wild but Stay Soft”

For this spread I stamped out my new fan foam stamps with acrylic paint onto some white paper, cut them out, and collaged them into my art journal. Here is my Fairview Fan Positive Negative stamps.

And here is one of the stamps from the Jewett Fan Positive Negative pair. I went back into these elements with a bit of dots and marks using the new Winsor Newton fineliner pens – which I am super impressed with btw and links are below for them if you are also a fan of good fineliners :)

And here is the Broadway Fan Positive Negative stamps and the Van Vorst Fan Positive Negative stamps. Then I went in and played around with my lettering, bringing in the dots to tie everything together.

Here are some of the supplies I used:

Leave a comment