Creative Squad

Inspiration From Around the Globe!

nspiration from around

This Tuesday we’re taking a short break from our Creative Squad (they will be back next week with a new June theme to play with!) to bring you some amazing projects from around the globe. My stamps and stencil designs are available for purchase online and maybe even in your local craft store, so crafters and mixed media artists and art journalers from around the world are using them. I am always excited to see how YOU use my products in your own projects. I am even more excited to share some of the beautiful and creative examples of these projects with you today. Enjoy this inspiration from around the globe!

Robyn Seaniger

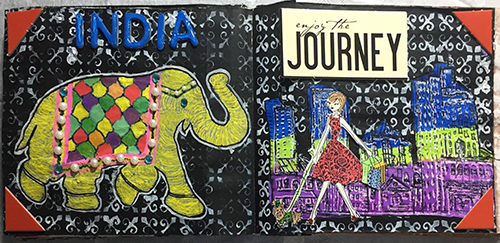
First we have this very fun travel-inspired art journal spread from Robyn Seaniger from NSW, Australia.  Robyn has used both my Elephant and my Urban Scribble foam stamp sets to create this colorful ode to India.

Elephant Parade Metal

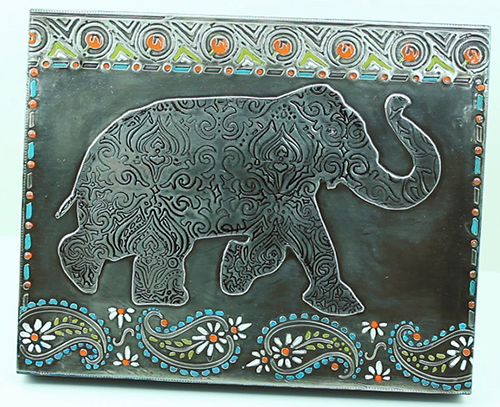
Metal Artist Elitia Hart from Calgary, Canada, used my Elephant Parade stencil in this very original metal embossing project.  This is a very creative use of the stencil and I highly recommend checking out her video below explaining her process.  It is long but definitely worth watching as it is a real step by step class!

Cool, right?

envelope

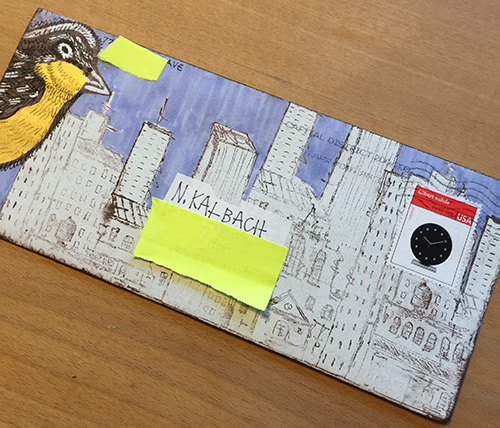
Judi Kauffmann from Maryland, USA sent me this fun mail art envelope using my Bird and Urban Scribble foam stamp sets. What a nice surprise in my mailbox :)

Finally, we have a couple of awesome videos from Lindsay Weirich from Maine, USA for you to check out.  In these videos, Lindsay uses my Urban Scribble foam stamp set to create a cool card project and then she uses my Bird, Elephant, and Urban Scribble foam stamp sets to make a gorgeous art journal.


Join us again next Tuesday for another great project from one of our Creative Squad members!  They will be working with a new theme for June.  And in the meantime, share with me what you’ve been working on with my stamps and stencils.  I would love to feature your project in an upcoming post!

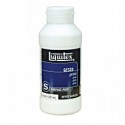
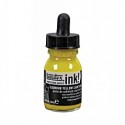
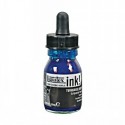
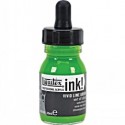
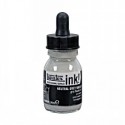
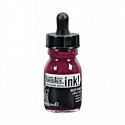
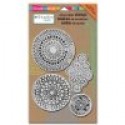
Try some of the above techniques for yourself with these n*Studio supplies:


Leave a comment

My new Acrylic Painting Workshop DVD’s and Downloads are out!

KalbachDVD Collage

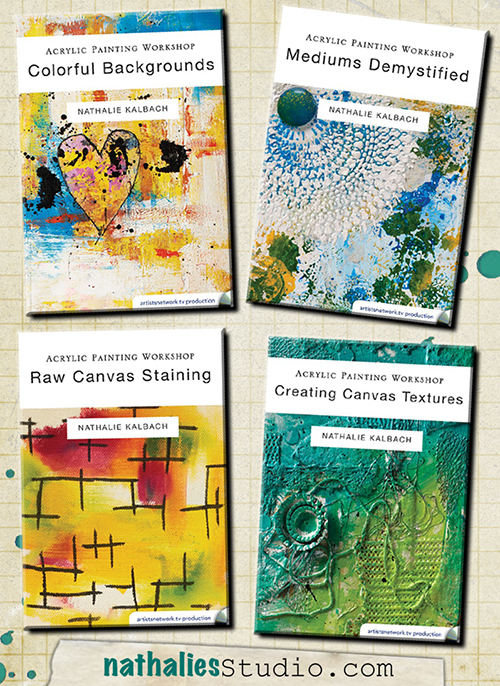
My new Acrylic Painting Workshop Videos: Colorful Backgrounds, Acrylics Demystified, Raw Canvas Staining and Creating Canvas Texture are out now and I am super excited. It was so  much fun to make them and I love how they came out. They are loaded with techniques, tips and fun things. Here is a preview for all four videos:

You can purchase the videos as DVD’s but also download them. Here are the links:


Which one sounds the most interesting to you?

Have a wonderful day!

Comments (2)

  • Joi@RR

    |

    ALL OF THEM sound the most interesting Nat because YOU are teaching them! Perhaps the colorful backgrounds would be my first choice but not sure that’s right either!!!!!!!!!!!!!!!! SUPER choice of topics. So excited that you did these. I know they will be a great resource for us all. XXj.

    Reply

Leave a comment

Playing with Gesso and Acrylic Ink

GessoInk

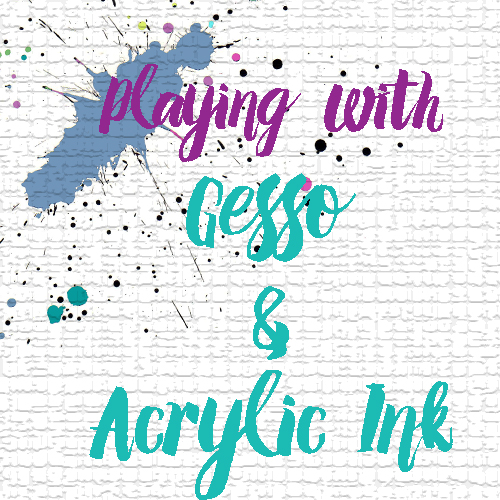
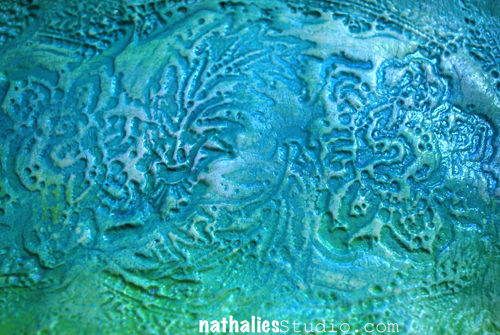
I love colors and I love texture …and I love adding both of it into my art journals, which is pretty easy :) Here is a fast forward video on how I create texture with Gesso and then add the super vibrant and pigmented Liquitex Inks to emphasize the texture even more.

Playing With Gesso and Acrylic Ink from Nathalie Kalbach on Vimeo.

Hope you liked this little playful video :)

nSupplies


Please note: I am an official Brand Ambassador for Liquitex, but all my ideas are my own and the opinions, comments and my love for their products are genuine!

Have a wonderful day

Comments (14)

  • Sabine Schneider

    |

    Liebe Nat,
    Wow! Gerade zur rechten Zeit ein kleiner Schubser von Dir!!!! Gleich ausprobiert und ich bin super Happy mit dem Ergebnis! Danke Dir für die immer guten Tips!
    Liebe Grüße, Sabine

    Reply

    • nathalie-kalbach

      |

      woot woot, freue mich, dass Du es gleich ausprobiert hast :) Danke, Sabine!

      Reply

  • Michelle LaPoint Rydell

    |

    Hi Nat! Love your journal page! The video was awesome! So inspiring! I think it’s time to bust out my gesso and inks! Thank you!

    Reply

    • nathalie-kalbach

      |

      Thank you Michelle- so good to see you – and happy you bust out your gesso and inks !

      Reply

  • Tracy

    |

    Wicked awesome! Love the colors and watching you do the lettering!

    Reply

  • Joi@RR

    |

    Just could watch you create forever Nat. This is SUPER FINE FUN in every way. I don’t have the acrylic inks yet but ohhhh how I want them! One day soon. Loved this…. love you too!!! j.

    Reply

  • rebeccavt

    |

    Just what I needed to watch this morning! Love your technique, the colors, the interesting tools, AND the music. Nice! Thanks!

    Reply

    • nathalie-kalbach

      |

      thank you Rebecca :) glad you liked the music too – always hard to choose :)

      Reply

  • Kathy P

    |

    Totally, totally awesome, Nat. The things you did to texturize your paints were fantastic…going to try this today! Thanks for the ongoing inspiration!

    Reply

Leave a comment

Paper Clay Play

FiestaPlate_NatKalbach_02

A couple months ago I was looking for some little bowls or plates that I could use for dropping of my bling in the evening but nothing really made me truly wanna spent money as colors or shapes weren’t what I was looking for.

So I remembered a tutorial that I had seen a long time ago on Pinterest on using Paper Clay and Lace to make your own little bowls and decided to give it a try with my newly arrived Stamp Sets. The Paper Clay I used doesn’t need any firing or heating and just air dries. Easy peasy :)

KaffeeKlatschPlate_NatKalbach01

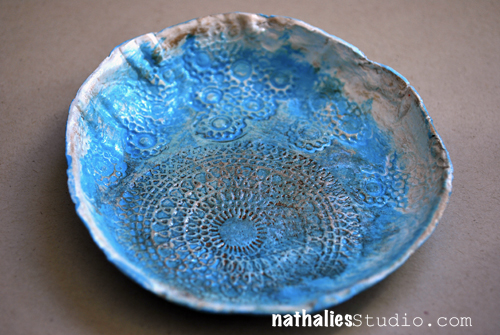
For this bow I rolled a piece of Paper Clay to a little ball and then rolled it out with a rolling pin to a flat wonky circle. I then stamped into the clay with some of my Kaffee Klatsch Stamps. You don’t need to press to hard to get a nice sharp impression. I found a bowl where I liked the shape on the bottom as a guide – since I wanted mine to be not a high bowl and a bit quirky – and pressed the top onto the clay to cut out a nice circle. Next I  formed the clay circle into the bottom of the bowl.  I let everything in the bowl dry for 12 hours and then carefully took the new paper clay bowl out. Since the moisture in the paper clay mostly is evaporated by then it shrinks a bit so that it is easy to get it out of the template bowl. It was still a bit moist on the bottom since now air could get there so I just put the paper clay bowl upside down and let it dry for another 12 hours.

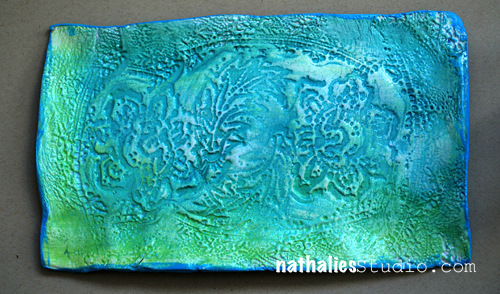
I did the same steps with this plate – just using a plate as a template and the Fiesta Stamp set for the Impressions

FiestaPlate_NatKalbach_01

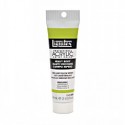
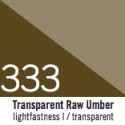
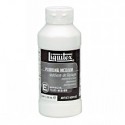
Once they both were dry I used Liquitex Soft Body paint thinly over the surfaces, waited a couple seconds and then using a paper towel rubbed some of the paint off again, so that the impressions were more colored and more prominent. That way the texture really popped off. For the plate I used two colors to and blended them. I painted outside of the bowl and the bottom of the plate and then everything dry again. I applied some Liquitex Transparent Raw Amber Acrylic Ink over the circle impression of the bowl to have it pop up even more and to give it some patina and let that dry again. To finish everything off I coated the bowl and plate with Liquitex Pouring Medium which gave it a nice shiny glossy and glass like look and feel. I coated it twice leaving a couple hours in between for curing.

Done :) Hope you like this little crafty fun project – I also made some christmas ornaments using the same technique…there is a lot of potential in this – you just have to play . Here is the full supply list:

nSupplies


Comments (11)

  • AmyO'

    |

    I have some Paper Clay in my stash from long ago – I’ll be digging it out this weekend to see if I can still use it – I love these!

    Reply

  • Stephanie

    |

    Great project. Thanks for the tutorial

    Reply

  • andrene

    |

    OK I am so doing this. Hope mine turn out as beautiful as yours!!

    Reply

  • Sue Clarke

    |

    That dish is so sweet and I love the new stamp on it.
    It’s nice to have a place to place one’s rings and such at the end of the night (or while washing yucky pots and pans).

    Reply

  • Petrin Diaz

    |

    Oh, Nat…so long not writing, but always take time to read all your publications…Love thiis “little idea”…and will try asap, as soon as i can. Thanks always for your kindness! lovely colors!

    Reply

    • nathalie-kalbach

      |

      So good to “see” you again! thanks for your sweet words!

      Reply

  • Kathy Gledsdale

    |

    Oh these are gorgeous, I adore them, thank you for sharing the idea.

    Reply

  • Win Dinn

    |

    Love these, and I love it that you made it rather than buying something that was less then appealing – living the art-ful life!

    Reply

    • nathalie-kalbach

      |

      Thank you Win! I agree, making something your own instead of buying is always double the fun!

      Reply

Leave a comment

As Easy as 1-2-3 Background² Tutorial

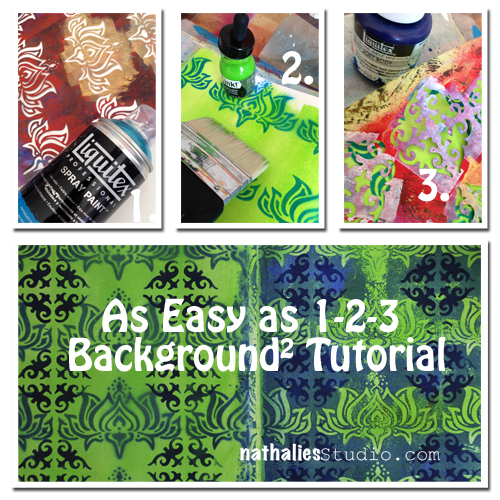
NatKalbach_Easy123Background

Today I am showing you how to make a background- actually two different backgrounds – for an art journal spread as easy as you count to 3…or almost as easy ;)

NatKalbach_Easy123Background01

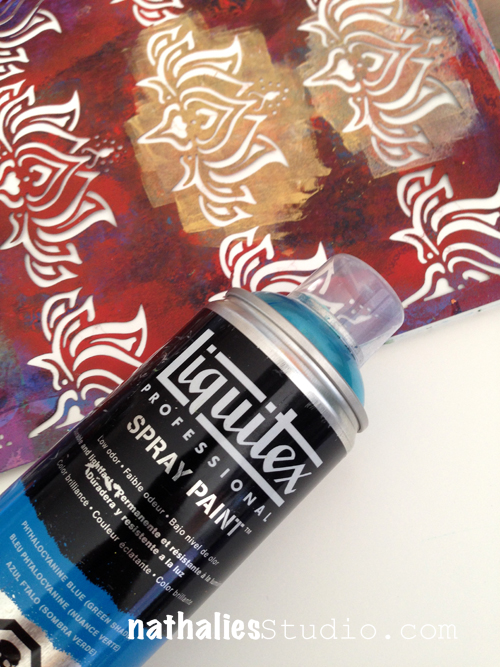
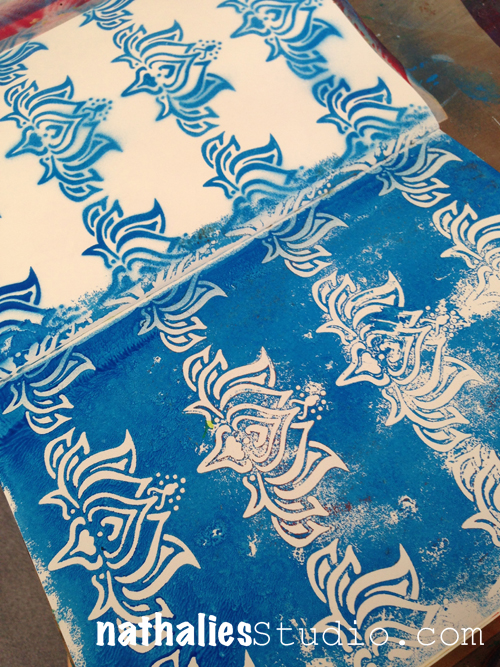
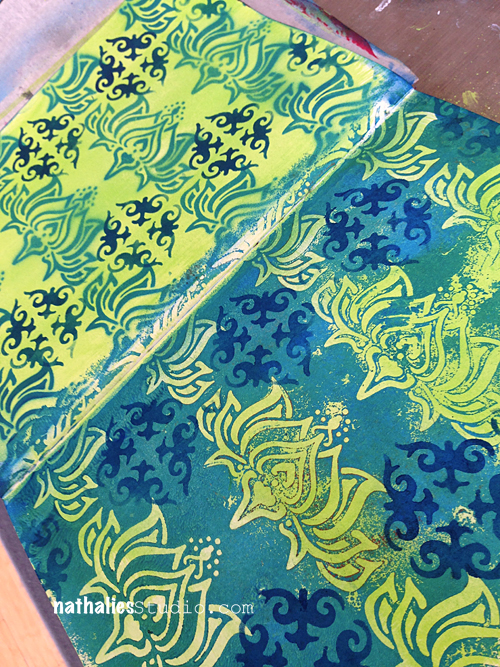
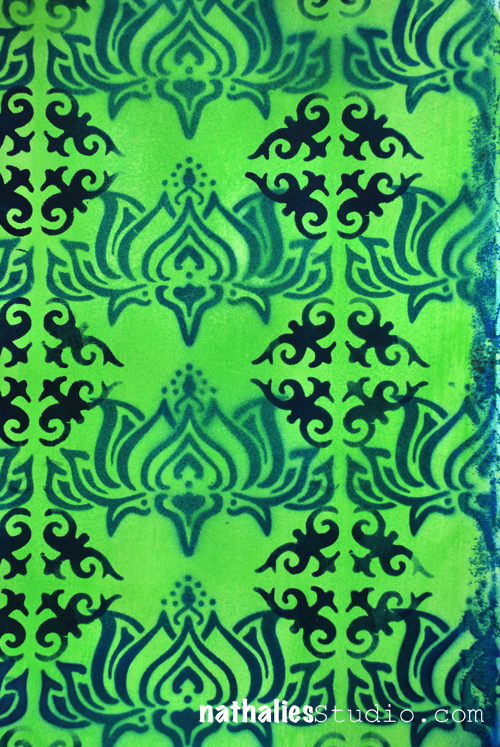
Picking my art journal, my Lily Wallpaper Stencil and Liquitex Spray Paint I start by spraying over the stencil over the left spread of my art journal.

NatKalbach_Easy123Background02

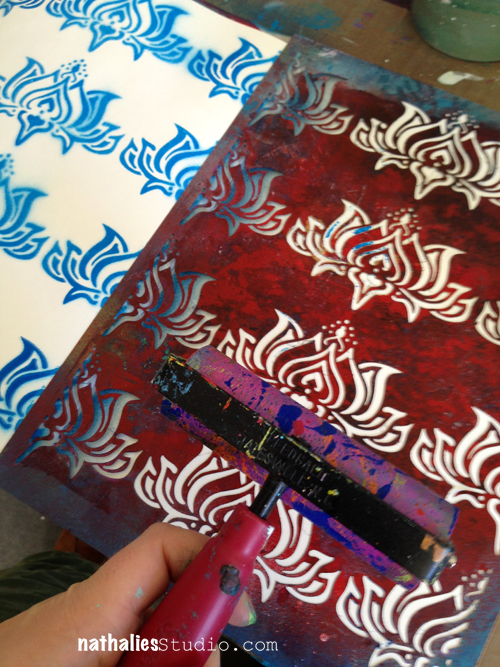
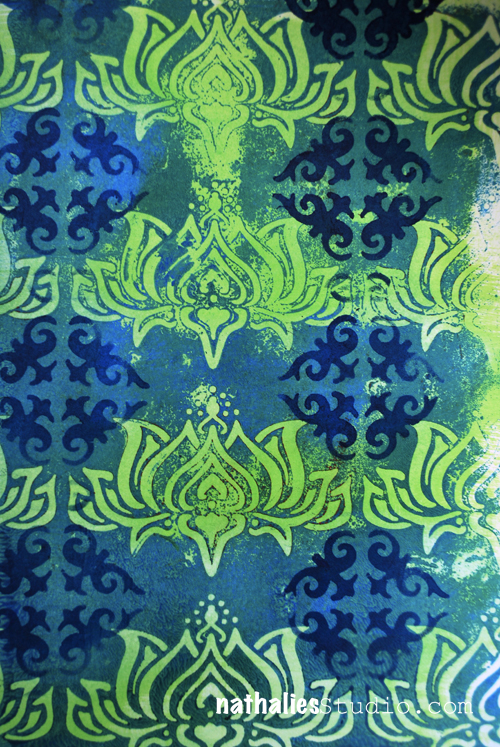
Using the paint on the stencil for a negative imprint, I simply flip the stencil over to the right side and brayer over the back of my stencil

NatKalbach_Easy123Background03

You can use the flip over step of course on a total different spread- because essentially these are actually two different background starters with the same techniques and materials. But I like to work in a double spread on my art journal and I like it when the sides are similar – like here in pattern, but still have  some interesting differences.

NatKalbach_Easy123Background04

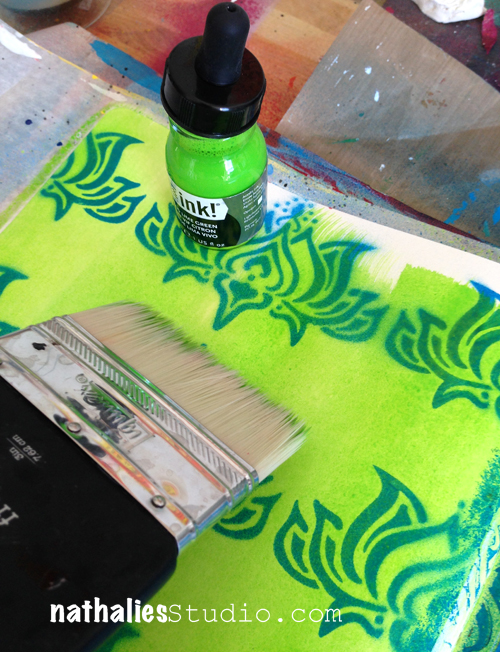
Using a big brush I spread a thin layer of Acrylic Ink over the spread. I love how the effect  – on the left side the lilly design is more bound in

NatKalbach_Easy123Background05

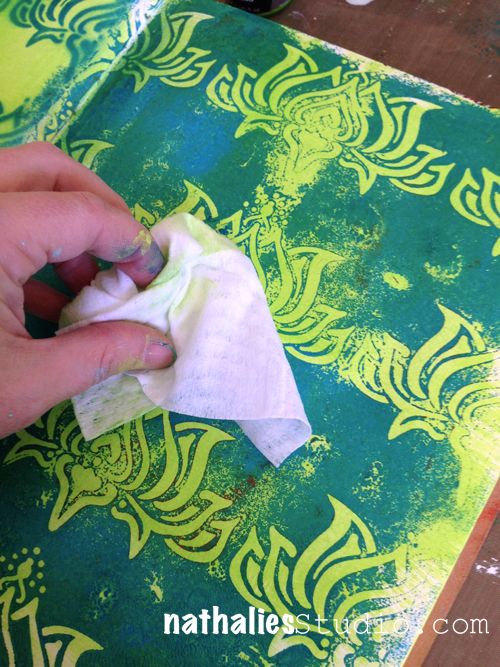
while on the right, by taking some of the ink off with a baby wipe, the blue spray paint color pops even more.

NatKalbach_Easy123Background06

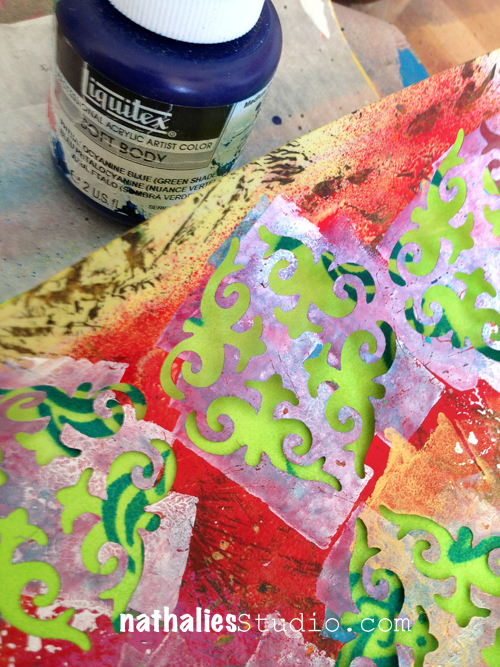
I picked the same blue as a Soft Body Acrylic Paint as I used as a Spray Paint (Phthalocyanine Blue (Green Shade) for the next step. Layering my Ornament Stencil over the empty spaces of my Lily Background I stenciled single ornaments in.

NatKalbach_Easy123Background07

And done is/are my background(s)

NatKalbach_Easy123Background08

Here is the background 1 …and

NatKalbach_Easy123Background09

Easy, wasn’t it? I will show you in a couple days, what I actually did in my art journal with these two backgrounds.

Here is a complete list of the supplies I used

nSupplies


Have an amazing day


Comments (6)

  • Christy Tremblay

    |

    REALLY Cool!!!
    I am going to have to try this. Thank you for sharing and the nice pictures!

    Reply

  • sécotine La Petite Française

    |

    thanks so much for sharing your amazing work!!! love to play with the transparences of liquid acrylic paint!

    Reply

  • Sue Clarke

    |

    Sweet and you make it look so easy.

    Reply

  • Jani Franck

    |

    I love how the layering works – gorgeous technique, thanks for sharing :)

    Reply

Leave a comment

Bamboo Sketching Pen and Liquitex Acrylic Ink – A Match in Heaven

NatKalbach_BambooInkTutBlog


I love Liquitex Acrylic Inks for their wonderful colors, high and fine pigmentation and their versatility. I use them for staining raw canvas, painting, stamping and sketching and I love to use them with a Bamboo Sketching Pen- especially to handwrite journaling or quotes in my art journals. A couple of you have asked me how I use the Bamboo Sketching Pen with the Inks and so I thought I show you in a quick video how easy you can use those two supplies. You will see they are a match in heaven .

Liquitex Ink and Bamboo Sketching Pen from Nathalie Kalbach on Vimeo.

I did forget to mention in the video that some of the pens of an indent that is called inkwell- where some of the ink can accumulate and gives a bit more writing time in between dipping. The dipping pen I used in the video has a tiny inkwell- which can be almost neglected. So if you have a bigger one- dipping right into the jar is a good idea ;)

Here is a supply list:

nSupplies


Please note: I am an official Brand Ambassador for Liquitex, but all my ideas are my own and the opinions, comments and my love for their products are genuine!

Have a wonderful day


Comments (13)

  • Marjie Kemper

    |

    I didn’t even know about bamboo pens – thanks for the video tute, Nat!

    Reply

  • Laura S

    |

    Great instructions for a cool looking tool! Sometimes it is good to get back to the very basics. I’m a little curious as to the history of the bamboo pen. Is it an ancient tool? It must provide an organic feel when being used. Thanks for the Vid, Nat. You rock!!

    Reply

    • nathalie-kalbach

      |

      I like the feel of it Laura :) As about the history I am no expert on it but I have a feeling it has been around for a long time especially in Asia.

      Reply

  • Sue Clarke

    |

    I like the drawing of you and the lady “swinging” in the book.
    Thanks for the video as it is so much easier to understand videos than just the written instructions.

    Reply

  • Madeline Rains

    |

    Love the look of this. I smile all the time too. Probably belying my sadness or other emotions. But they say that a smile can actually change the way you’re feeling.

    Reply

    • nathalie-kalbach

      |

      Thank you Madeline! I totally believe in the magic of a smile ;)

      Reply

  • Jackie P Neal

    |

    Thanks so much for the video,Nat! And your smile is awesome-nothing like an idiot! you silly!

    Reply

  • Petrin Diaz

    |

    I inherited mine from my son E (Graphic Designer) and never have used it.! Now i am anxious to start with my “new toy”!…Really inspiring video! TFS, Nat!

    Reply

    • nathalie-kalbach

      |

      Glad you like it :) Cannot wait to hear from you when you used it. Thank you Petrin!

      Reply

  • Nurse Ratchet

    |

    LOVE my Liquitex Inks….thanks for the demo!!

    Reply

Leave a comment

designed by n*Studio features: Judi Kauffman

One of the things that make me really giddy is when I spy someone using my new stamps by Stampendous or also my Stencils with StencilGirl Products :) So I thought once in a while I would feature the work of those wonderful talented people with a new Series called: designed by n*Studio features:…..

And today I feature: Judi Kauffman

Judi and I met several years ago at CHA and ever since I have been blessed by her friendship, advice and honest opinion in many fields of my artistic life. I am super stoked that Judi played with my stamps and templates – and she even wrote a tutorial for the cards she created. Here is what she has to say and more about herself (Judi has no blog- so leave some love here for her)

JudiAndPuppies

About Judi:

Judi Kauffman wears, and has always worn, many hats at the same time. She is a designer, writer, and teacher who has worked in the craft industry for over 25 years. She has also been a graphic artist, art director, photo stylist, illustrator, and weaver. She has an undergraduate degree in printmaking and a master’s in fibers. Judi’s projects, articles, and reviews appear in a wide variety of magazines, she works for several manufacturers in design and product development. She is a frequent guest artist for Elizabeth Craft Designs, Walnut Hollow, StencilGirl Products, and other manufacturers. She has also written five books (alas, all now out of print).
JudiKauffman02

JudiKauffman09

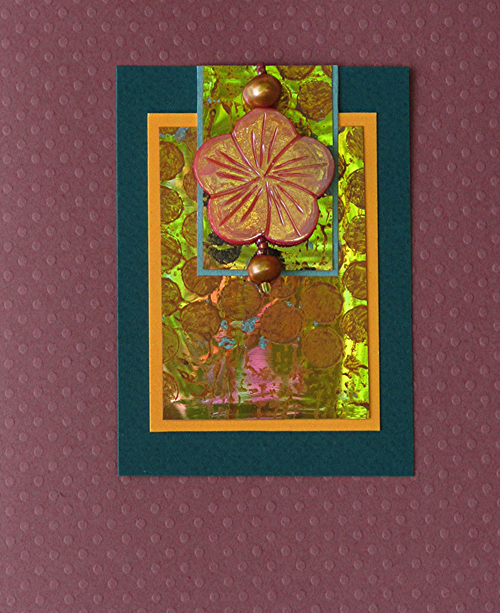
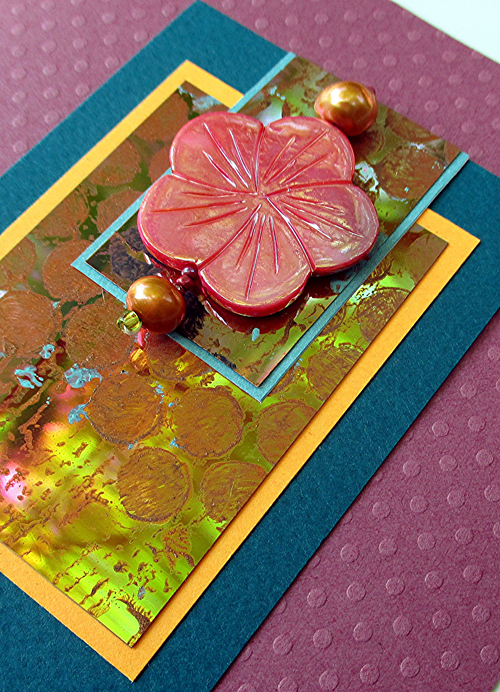
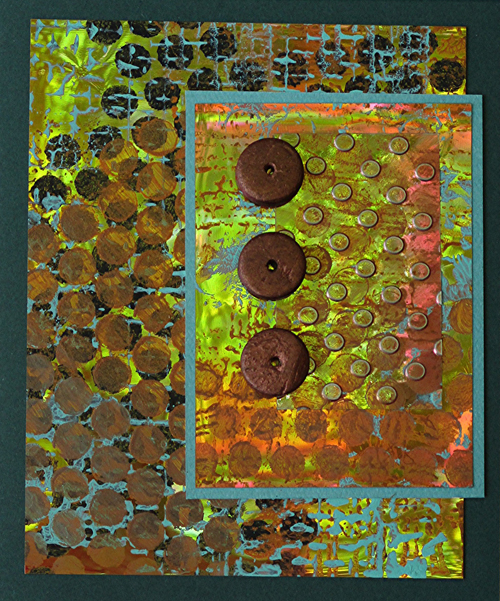
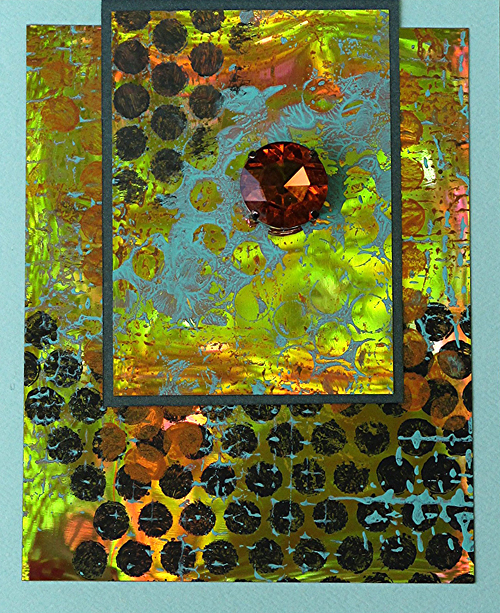
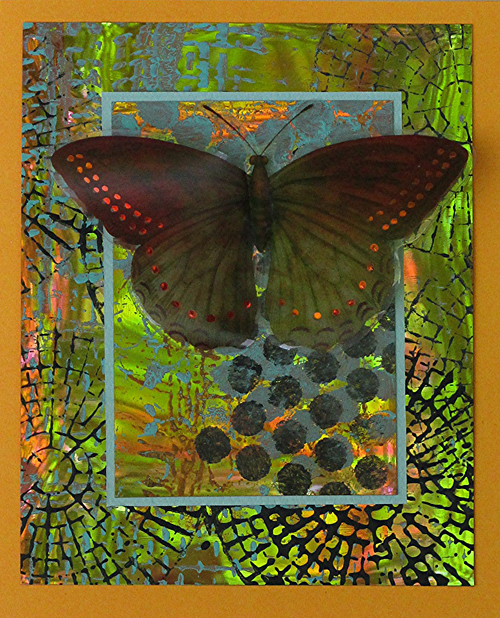
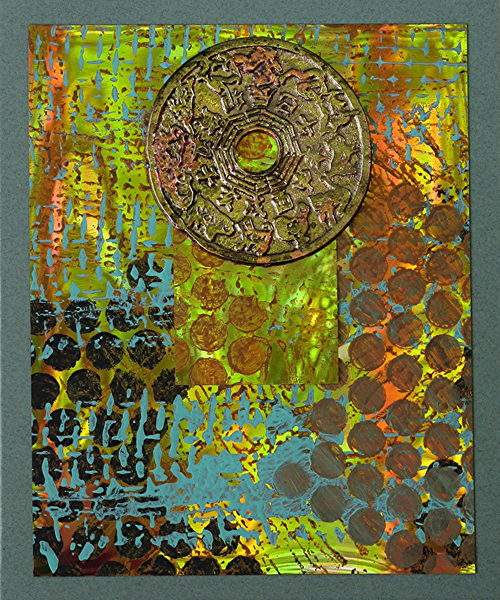
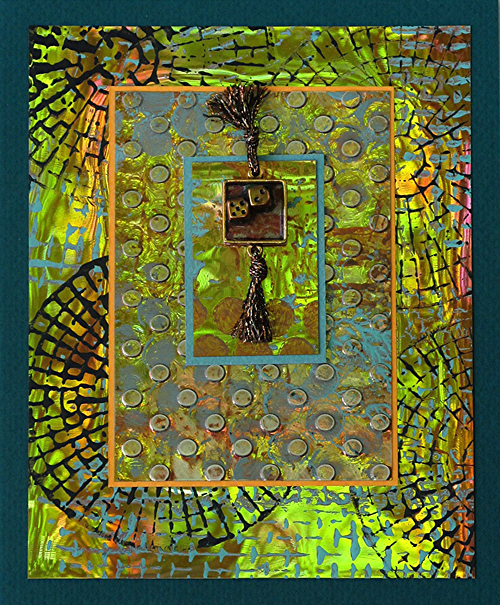
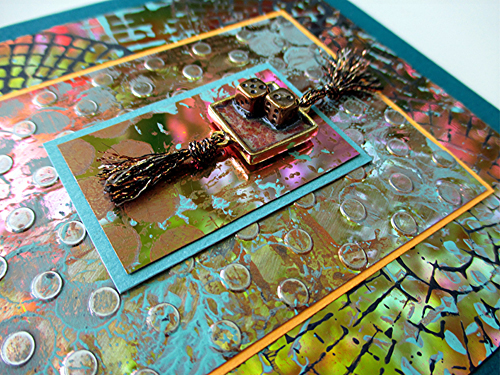
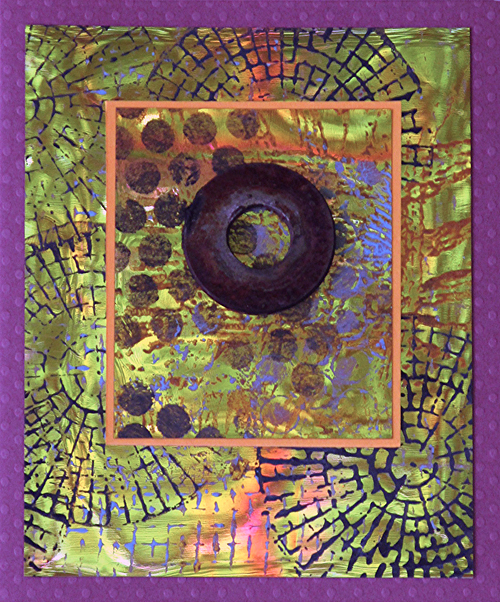
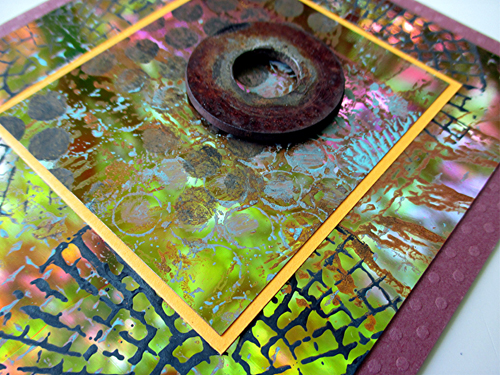
Thank you for inviting me! My project: Cards made with nothing but rectangles! But there are other options for stamped and stenciled Shimmer Sheetz: Mat and frame your creations instead of using them for card fronts. Incorporate pieces into art journals and mixed media projects. Stamp and stencil with alcohol inks formulated for non-porous surfaces instead of paint (StazOn). Stitch the layers instead of using adhesive (set the machine to 5-6 stitches per inch, or use a piercing tool and hand-sew).
JudiKauffman01

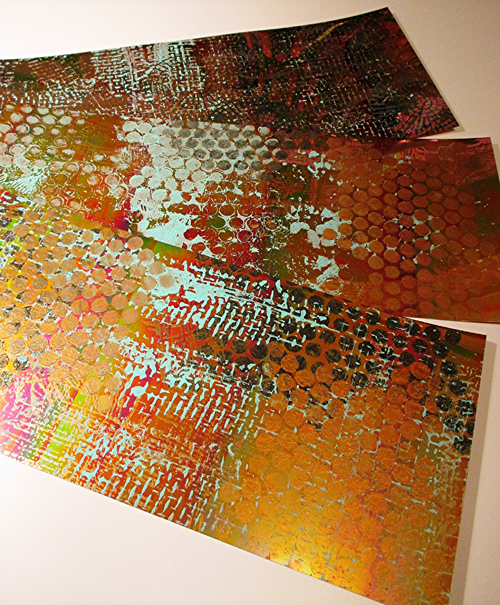
1. Stamp and stencil three 5” x 12” pieces (one package) of Fire Opal Gemstones Shimmer Sheetz using acrylic craft paint (shown: Primary Yellow, Sea Breeze, Metallic Bronze, and Traditional Raw Umber – or choose your own combination).

2. When the paint is dry, cut 2 of the pieces into thirds, each piece measuring 4” x 5”, for six of the cards.

3. Cut the remaining piece into assorted smaller rectangles, at least 5 of which are sized at 2.5” x 3.5”.

4. Cut a piece of cardstock measuring 9” x 5.5” for each card base (make seven). Score and fold in half (card size: 4.5” x 5.5”, folded at the left).

***Use double-sided adhesive strips for steps 5, 7, and 8.

5. Center and adhere a 4” x 5” Shimmer Sheetz rectangle on six card bases. Center and adhere a 2.5” x 3.5” piece of solid color cardstock on the seventh card base.

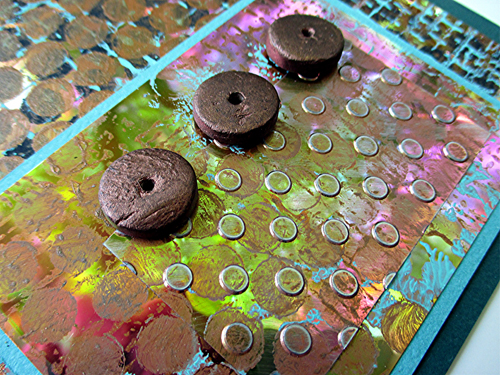
6. For added texture, emboss some of the small rectangles with Lots of Dots embossing folder, lightly sand to tone down the shine and highlight the dots.

7. Mat some of the small rectangles onto solid color cardstock, leaving a narrow border.

8. Arrange and rearrange the pieces, layering them as shown or as you prefer. Attach the layers. (Use the last couple of scraps for the seventh card.)

9. Using strong-hold Tombow Power Tabs to secure embellishments (found objects, beads, gems, charms, fibers).

10. Cards with low relief, unbreakable embellishments can be mailed in standard envelopes, others should be delivered in person or mailed between sturdy cardboard in a padded envelope.

Note: Shimmer Sheetz is reflective and difficult to capture in photographs, it changes color depending on the light and angle at which it’s viewed! Fire Opal is my favorite, but there are over 20 other choices (including sampler packs).
JudiKauffman03


JudiKauffman06

JudiKauffman04


JudiKauffman05


JudiKauffman07

JudiKauffman08


JudiKauffman10


JudiKauffman11


JudiKauffman12


Thank you so much Judi – I so love how the stamps and stencils pop off those gorgeous Shimmer Sheetz – make me want to play with those instantly! I love the cards!

SUPPLIES Judi used for the Cards:

Stamps and Stencils – N*Studio by Nathalie Kalbach in Wired, Grunge, and Mish Mesh (Stampendous!)

Surfaces – Fire Opal Gemstones Shimmer Sheetz, one 3-sheet package (Elizabeth Craft Designs, www.ecraftdesigns.com); Assorted solid color cardstock

Paints – Americana Acrylic Paint in Sea Breeze, Primary Yellow, and Traditional Raw Umber; Dazzling Metallics Metallic Paint in Bronze (DecoArt)

Adhesives – Double sided adhesive sheets (Elizabeth Craft Designs); Power Tabs (Tombow)

Other – Lots of Dots embossing folder (Elizabeth Craft Designs); Machine for embossing (Big Shot, Cuttlebug, or other); Stencil brush; Assorted embellishments; Craft knife, gridded ruler, cutting mat

Here are the n*Studio Stamps  Judi used:

nSupplies


thank you for visiting today- have a gorgeous day
Nat

LogoBlogSignature

Comments (18)

  • Tracy

    |

    I think I have that butterfly :P I’ve never worked with shimmer sheets, but I love that change of colors from different angles. I love the patterns you made with the stencils, stamps and inks. And I really like the cards with the gem and the butterfly. I’m not usually one for blig, but it’s the perfect complement. And the dice you used, so cute! (I’m a rpg girl, too:P)

    Reply

  • Laura Strack

    |

    Amazing artistry, Judy. No wonder Nathalie respects your opinion. You’ve created some gorgeous work. Thank you for sharing and for your step out. I can only imagine the beauty in person.

    Reply

    • judi kauffman

      |

      Thank you for the kind words. Shimmer Sheetz really is amazing in person. I like all of the colors and all three coatings but Fire Opal and Amethyst are my absolute favorites!

      Reply

  • Kelly Belton

    |

    Just. Beautiful. Wow.

    Reply

  • Debbie L.

    |

    These works are absolutely beautiful Judi. I am motivated to get out some paints, stencils and Shimmer Sheetz. Thanks so much for sharing your wonderful work with us.

    Reply

  • Mary Beth Shaw

    |

    Judi, Judi, Judi – I didn’t know you had dogs!?! Just another reason I need to visit you :)
    This work is absolutely stunning. STUNNING. Beautifully done.
    Hugs, my friend.

    Reply

  • Denise

    |

    Such vibrant colors and combinations Judi!! You really rock those stamps and stencils. Great cards!

    Reply

  • Seth

    |

    Great new feature Natalie. I have had the pleasure to have also met Judi at CHA. I really admire her “many hats” as well as her artwork. Great use of your stencils here!

    Reply

  • Denise Spillane

    |

    Natalie, what a great idea for posting. Judi, your artwork is amazing. I love the depth of color and texture. Each piece is stunning.

    Reply

  • Darla

    |

    Judi’s art is always an inspiration. I love the combinations and colors she used on these.

    Reply

  • Holly Young

    |

    I love the texture and depth you’ve achieved in your projects. The colors are so vibrant! Very pretty!

    Reply

  • Brenda

    |

    I am not familiar with shimmer sheets but yours look fab! Just another thing to add to the wish list:) Looking forward to seeing more of cards!

    Reply

    • judi kauffman

      |

      Brenda, Shimmeer Sheetz is waterproof, colorfast (garment-quaity) Mylar so it can be used for projects like these cards as well as to make embellishments for art quilts, mixed media – and I’ve made custom sequins for clothing, too. Nathalie included the link to the company in the supply list.

      Reply

  • Bibi Lindahl

    |

    Wow, love these cards! I’ve used Shimmer Sheetz a lot, and I think the use of these stamps with acrylic paint shows yet another cool use of those Sheetz. I know the cards must be even more stunning in person when you see the shine of the Shimmer Sheetz come through between the paint. Very cool stamps, by the way. The one that looks like a sunburst looks really cool on the cards. Well done, both of you! :-)

    Reply

  • Amante del Papel

    |

    amazing work!

    Reply

    • judi kauffman

      |

      Thank you. The stamps and stencils make it so easy and so much fun.

      Reply

  • Cheryl

    |

    I like these designs – a lot! I’ll be looking for more of Judi’s art. Also, being a dog lover – I’m curious – are those Affenpinschers in the photo with Judi?

    Reply

    • judi kauffman

      |

      They’re standard poodle puppies. We’ve had standard poodles for 38 years and have been so happy with all three. I love dogs in general!

      Reply

Leave a comment

Painting with Newspapers – Transfer Technique

Web_Baby01


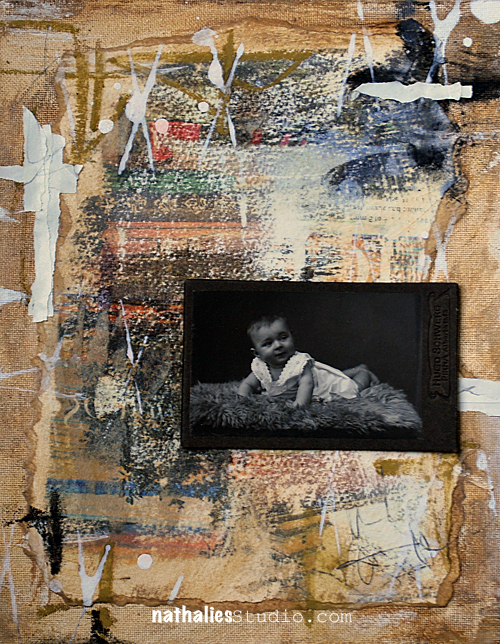
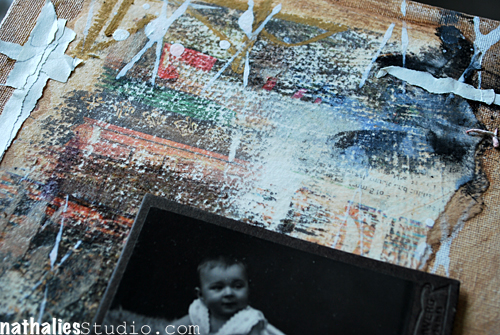
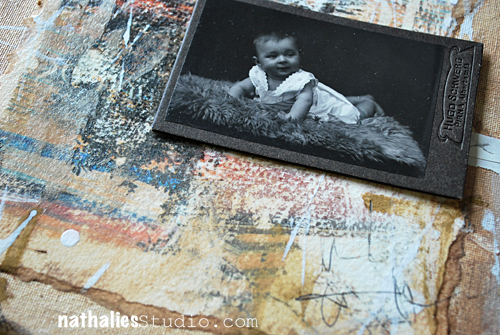
We get the New York Times on the Weekend and I love to read it but every time I put the paper into the recycling I look at the sometimes very colorful pages and think “what a shame” …and so…I came up with this Painting with Newspaper Technique. Basically you use the colors of images in your newspaper to create the background. Apply Liquitex Gloss Medium & Varnish thin onto surface (here water color paper) – press down newspaper image /text and wait for a couple seconds, peel off- repeat several times with different colored images until background is “painted”.

Web_Baby02


I painted the canvas board – just outer space with Acrylic Inks, tore the water color paper- applied with Gloss Medium and Varnish. Added Ink again to fill gaps – and stamped with the inks and household items to tie elements together. Made some marks with a graphite pen. Mounted photo on top. Done- FUN!

NatKalbach_Web_Baby03


Can you spot what inspired my for this project on my Stroll through the Hood in this post?

Here is a list of supplies I used:

nSupplies


Hope you like this mini technique and maybe you give it a shot :)

Nat


LogoBlogSignature


Comments (5)

  • Lisa

    |

    I love your innovations and inspirations! Can’t wait to give this a try!!

    Reply

  • Johanne Lacombe

    |

    This is a great way to recycle the newspapers. Think I’ll try it. Thanks for sharing,
    Reply

  • Ava Stone

    |

    So cool! Love new ways to use what we already have and your page turned out pretty and funky. Thumbs up!:)
    Reply

  • Mary W

    |

    Wonderful idea and thanks for sharing it!

    Reply

Leave a comment

Photo Painting Technique

CJSUberMediaOWSLOGO

Those of you who were part of the Creative JumpStart 2013 saw the videos that me and my artist friends posted on my website throughout January 2013.  The videos are not available here anymore, since CJS 2013 was only available till June,  but I thought it would be nice to repost my 10 technique videos over the next couple weeks- so that you have access to them whenever you want and see what CJS 2013 was all about.

And now let’s jump to the 7th video in my Über*Media Creative JumpStart 2013 Workshop which was the Photo Painting Technique :)

If you have no external speakers on your pc – turn up the volume a lot (the audio is very low in this video)

CJS 2013 Technique 7 Photopainting from Nathalie Kalbach on Vimeo.

As you might have seen I just proposed Creative JumpStart 2014 !

CJS2014Lable

It will work slightly different this year and has some major improvements like a forum and an easier access- and I can tell you already the line up of artists and the videos are AWESOmE!!! For 20 Dollars -that is less than 1 Dollar per video (23 videos by 21 artists) it is a great deal! Check out the information here :)

I would love to have you!

And here are my supplies I used for the Photo Painting Video above:

nSupplies

Have a gorgeous and wonderful day!
hugs
nat
LogoBlogSignature

Comments (2)

  • Sue Abell

    |

    This is great news Nathalie! Thanks so much for doing Creative Jumpstart again, I can’t wait! Have a wonderful Christmas, see you in January!

    Reply

  • smokeysmom

    |

    I’m signed up for CJS2014! I can’t wait for it!

    Reply

Leave a comment