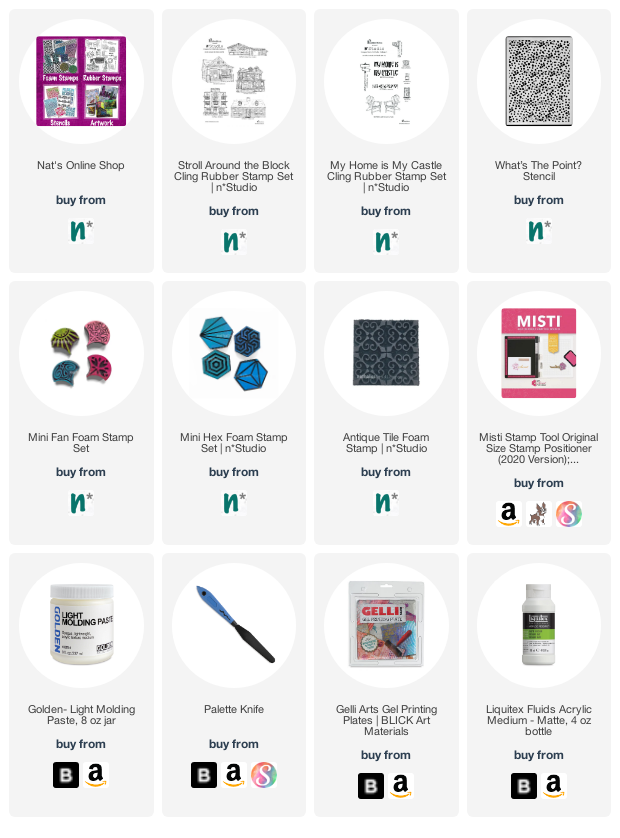
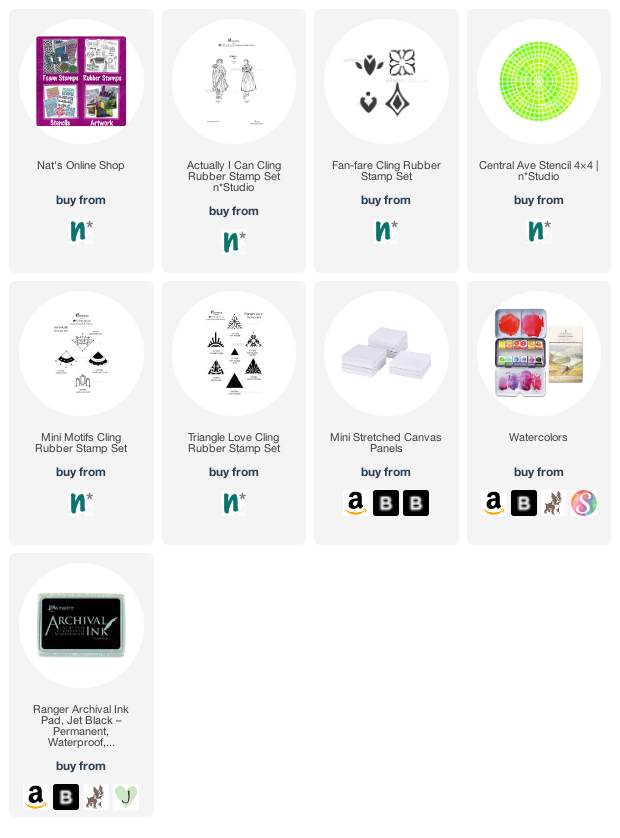
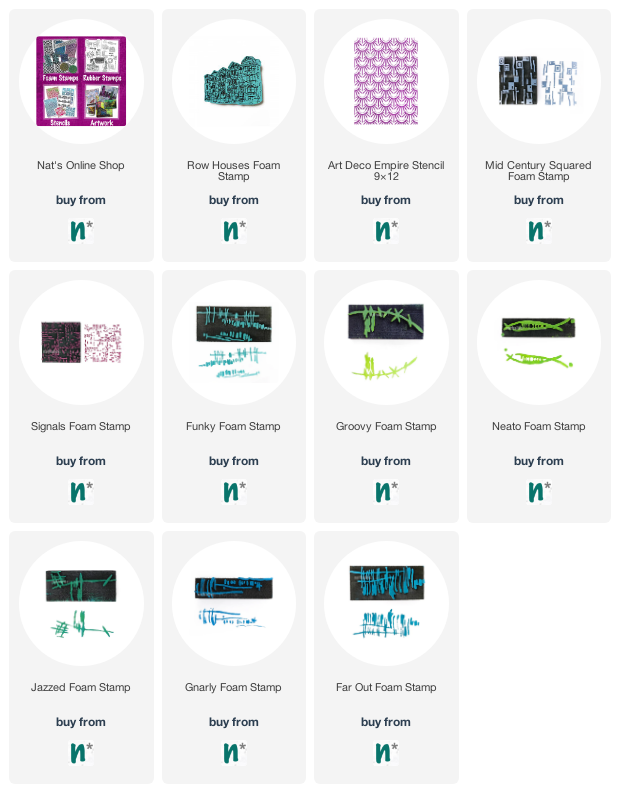
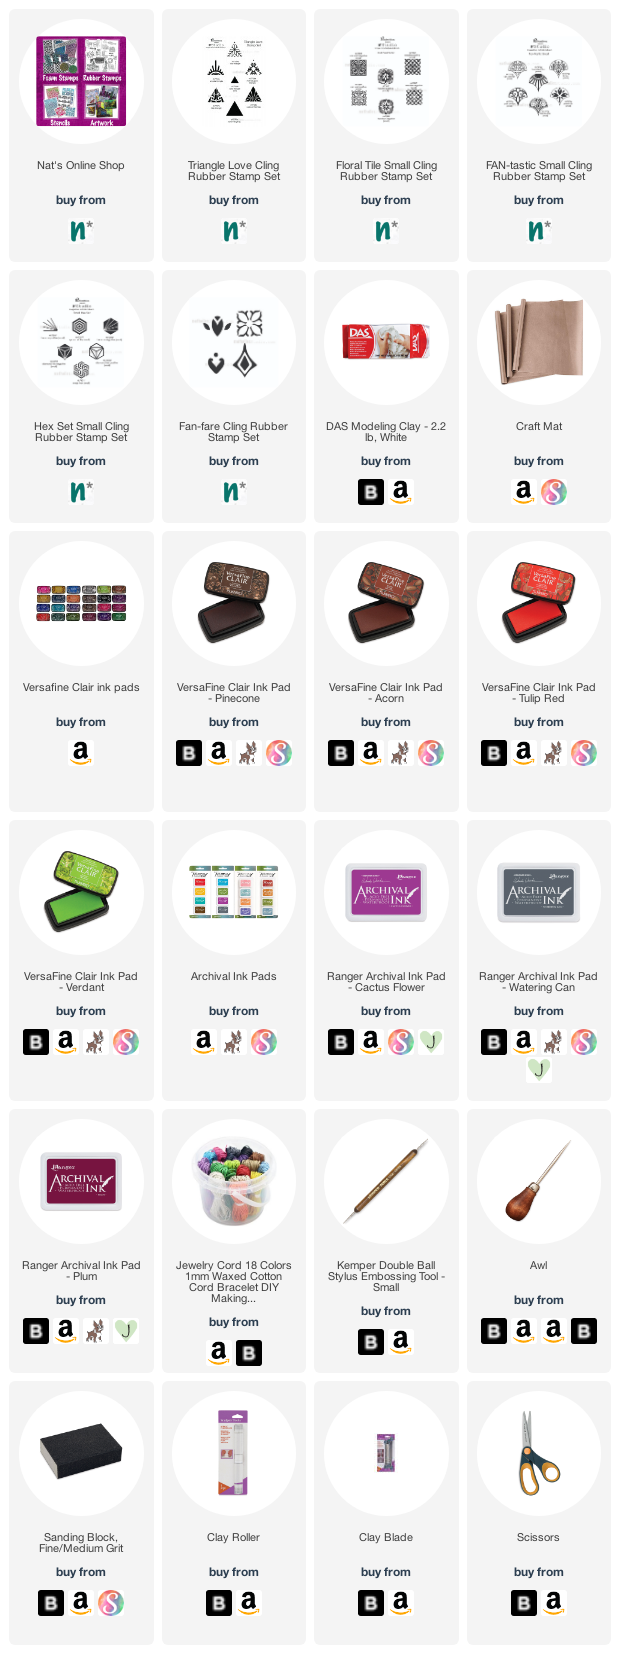
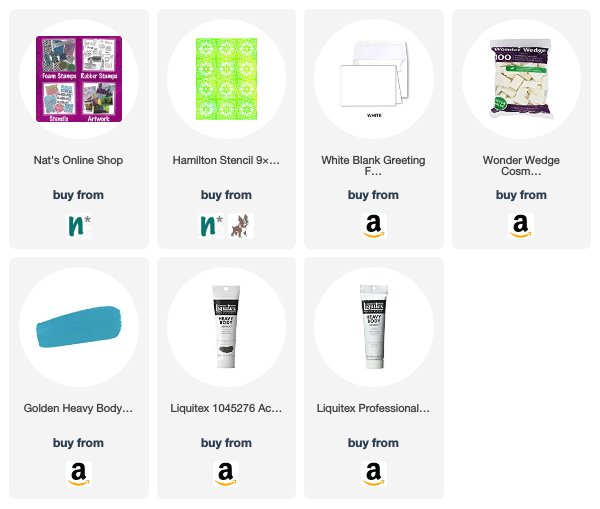
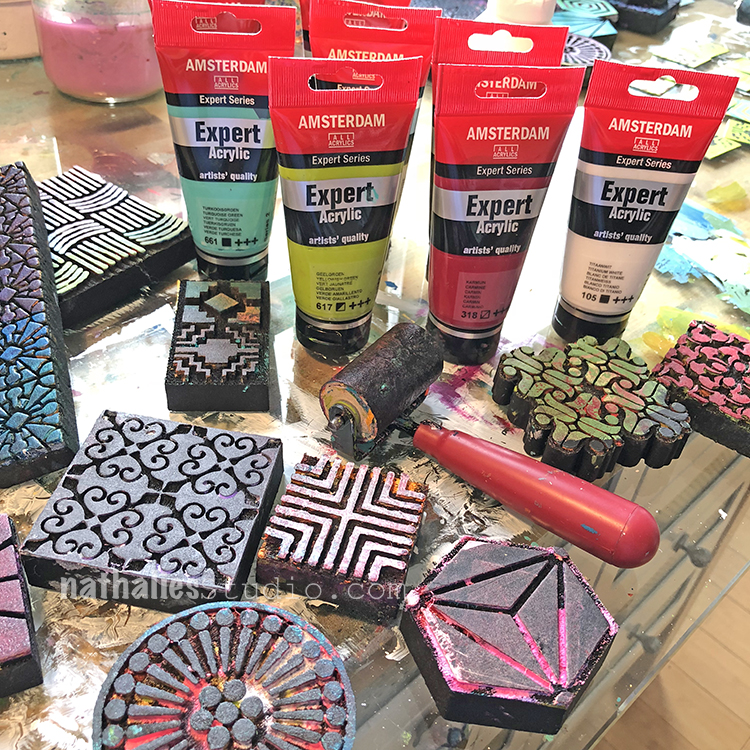
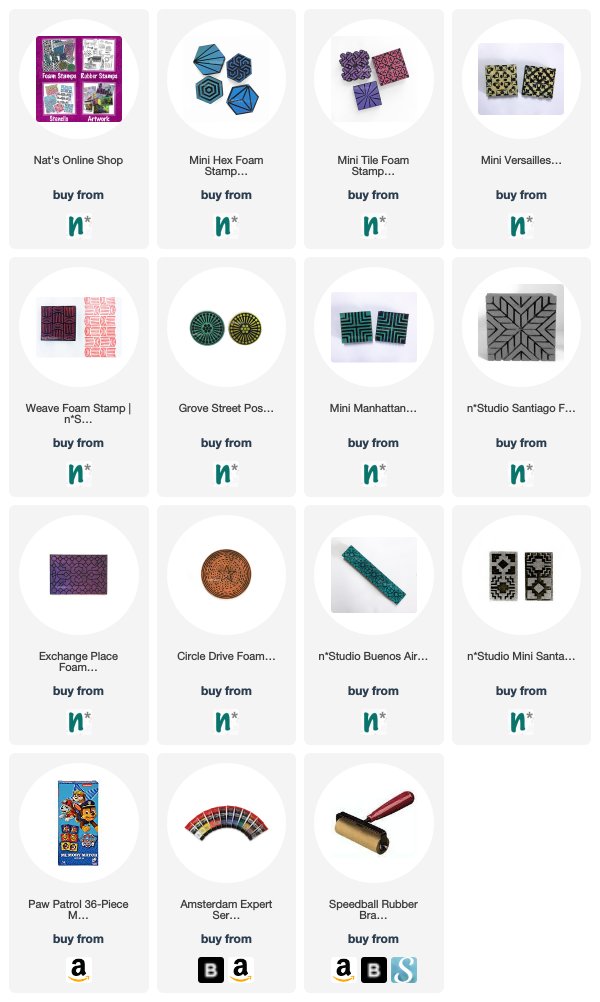
Here are some of the supplies used in these projects:
My Creative Squad has made some really cool videos for their projects through the years (what a talented bunch indeed) so I did a little 4 part series where I shared some with you. This is the 4th and final so I hope you have enjoyed them as much as I have. Also I encourage you to check out the Creative Squad archive of projects as an excellent resource for serious artistic inspiration.
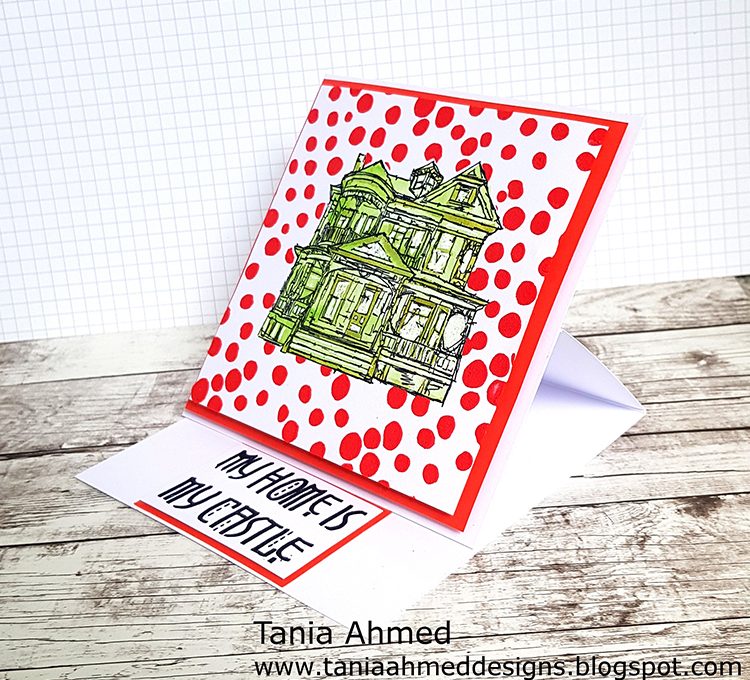
First we have Squad alum Tania Ahmed sharing a fun card with us that she made using my Stroll Around the Block set of house stamps, my My Home is My Castle stamp, and my What’s the Point stencil. Our theme was: Inside Outside – Inside can be cozy and warm. Outside is about fresh air and freedom. Are you a homebody or do you suffer from cabin fever? We’re creating with these opposites in mind.
I love the texture Tania creates with my What’s the Point stencil!
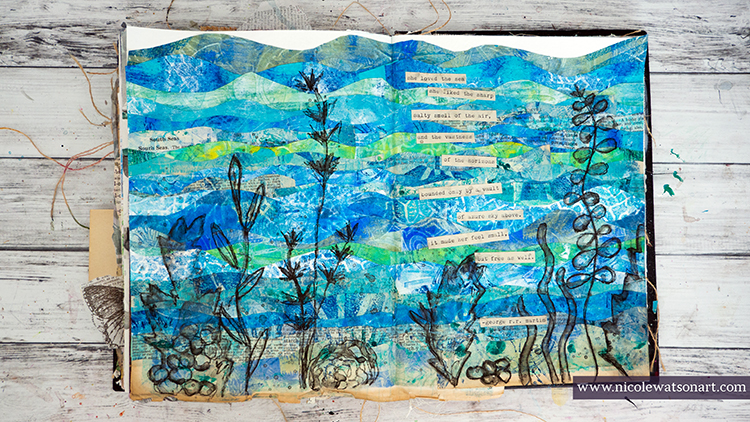
Lastly we have alum Nicole Watson and her magical art journal spread using my foam stamps and the theme: Under the Sea – There is something so fascinating about water. We love being in it, floating on it, relaxing next to it, and it remains one of the last frontiers here on the planet. Create something that is an ode to the sea.
This is a great way to make a whole bunch of gorgeous collage papers!
I hope you enjoyed all the Creative Squad videos I have been sharing. Be sure to check out the archive of their projects – they show so many ways to use foam stamps, rubber stamps, stencils and more in their beautiful mixed media creations.
Here are some of the supplies used in these projects:
My Creative Squad has made some really cool videos for their projects through the years (what a talented bunch indeed) so I thought I’d do a little 4 part series where I share some with you. Also I encourage you to check out the Creative Squad archive of projects as an excellent resource for serious artistic inspiration.
Let’s get started!
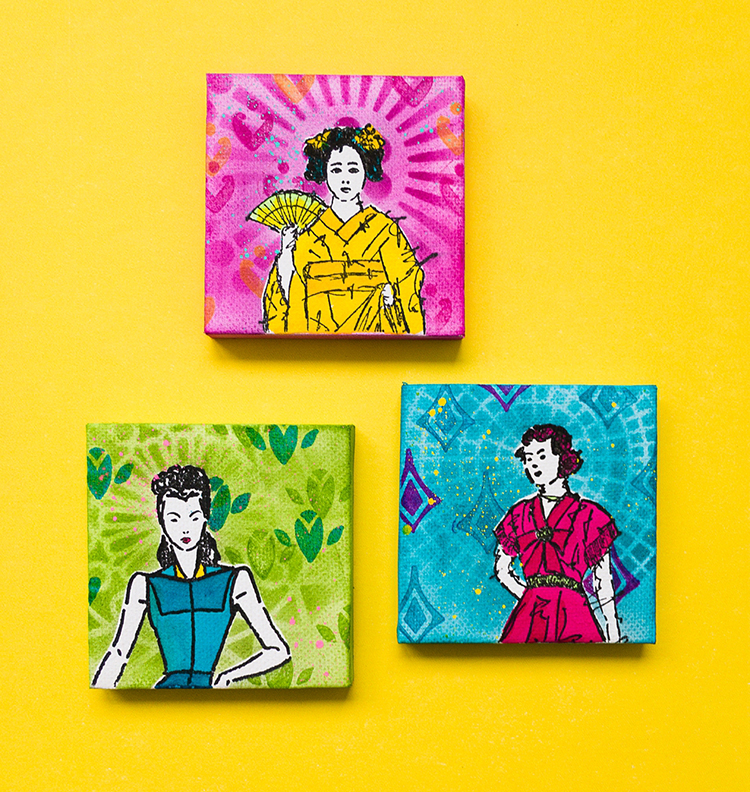
First up is Creative Squad alum Marsha Valk, sharing a trio of mini mixed media canvases using my Actually I Can and Fanfare rubber stamp sets and my Central Ave stencil. The theme that she was working with was Little Wonder – We’re thinking small this month and focusing in on a tiny scale, exploring the delicate details, and creating something that is petite and precious.
I love the bright color palette she uses and the layered backgrounds she builds up.
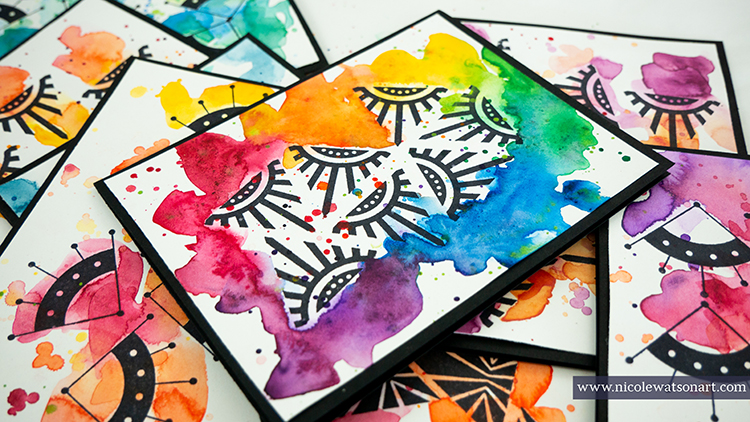
Keeping with a bright happy color scheme is this project from alum Nicole Watson who is using my Mini Motifs and Triangle Love stamp sets and the theme: Rise & Shine – Sometimes it is inspiring to think of each new day as an opportunity to do something good – to shine. Create something that will encourage others to do the same and let’s all bring a little more light into this world!
My Creative Squad has made some really cool videos for their projects through the years – what a talented bunch :)
I thought I’d do a little 4 part series where I share some with you and then also encourage you to check out the Creative Squad archive of projects for some serious inspiration.
Let’s get started!
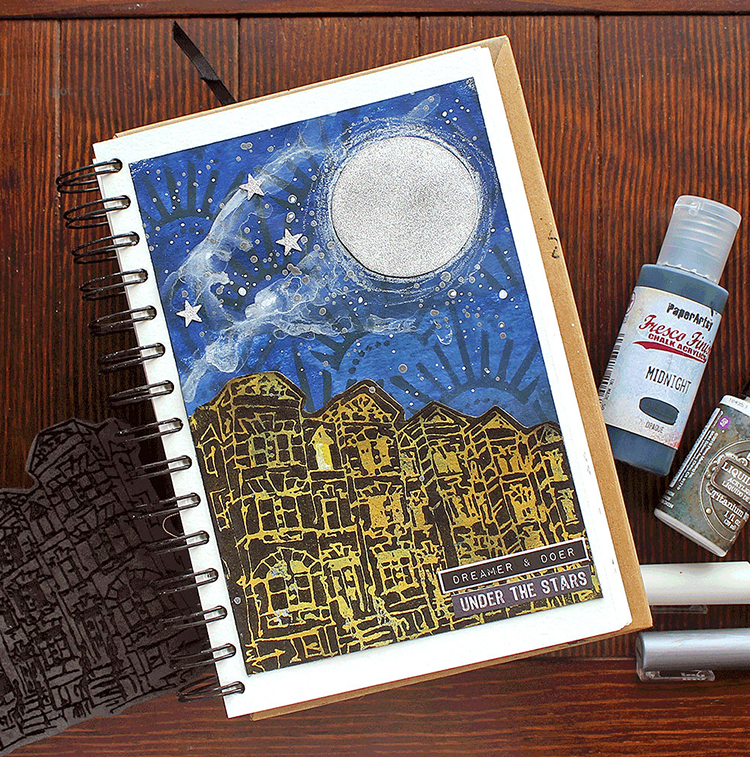
First up is Riikka Kovasin and her art journal spread using my Row Houses foam stamp and Art Deco Empire stencil in response to our theme: Good Morning Good Evening – Are you a Morning Person or a Night Owl? Or maybe neither? Create a project inspired by your preferred time of day – when you are in good spirits, doing what you love, and enjoying life.
I love watching Riikka build up that night sky with paint splatters, drips, and the moon and stars.
Next we have Creative Squad alum Tania Ahmed playing along with my Foam Stamplifier Challenge using my Foam Stamps along with her gelli plate for monoprinting and then she shows a great next step for that monoprint :)
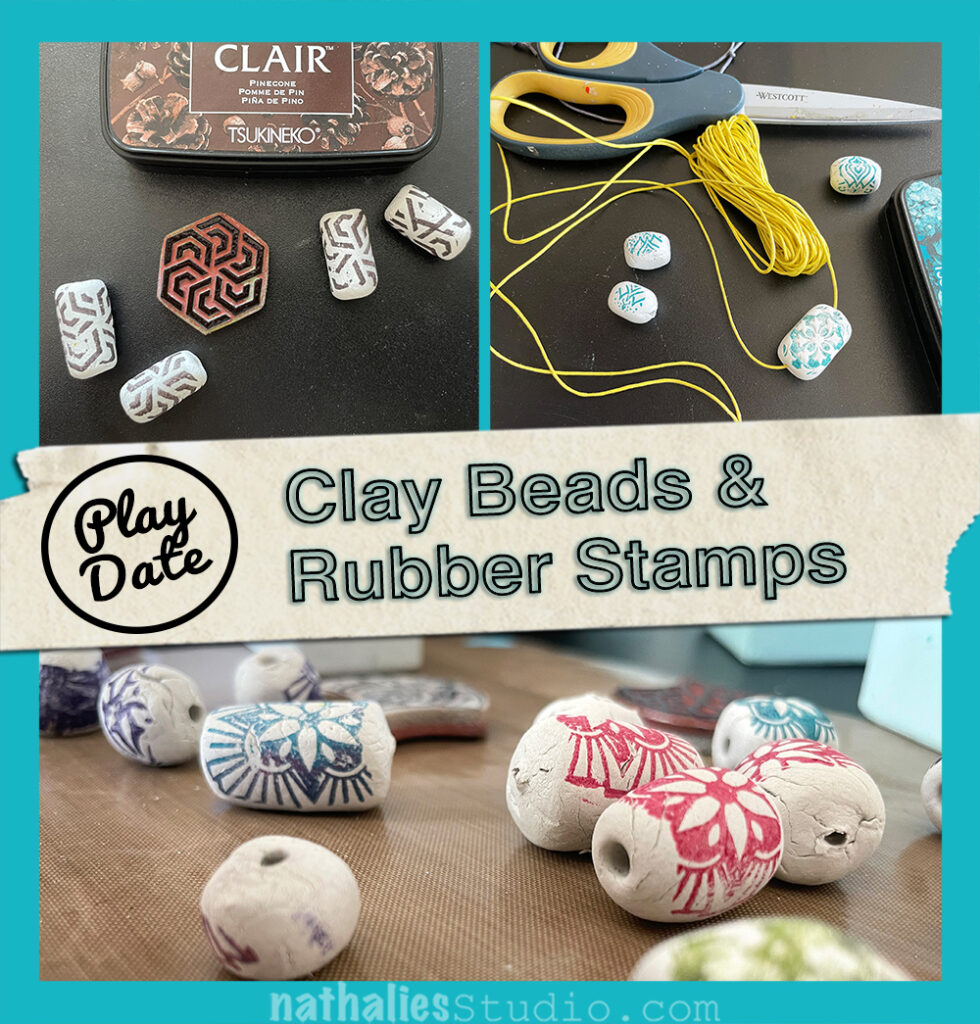
Last month I had a few old friends visit from Germany so Kim and I scheduled our play date with one of my guests: Sandra! We knew she would have fun with it as she teaches art classes and is always looking for inspo herself. So we set up a big table where we could all sit, poured ourselves some coffee and even had a little plate of treats too. It was great to get together and create, gab, and LAUGH :)
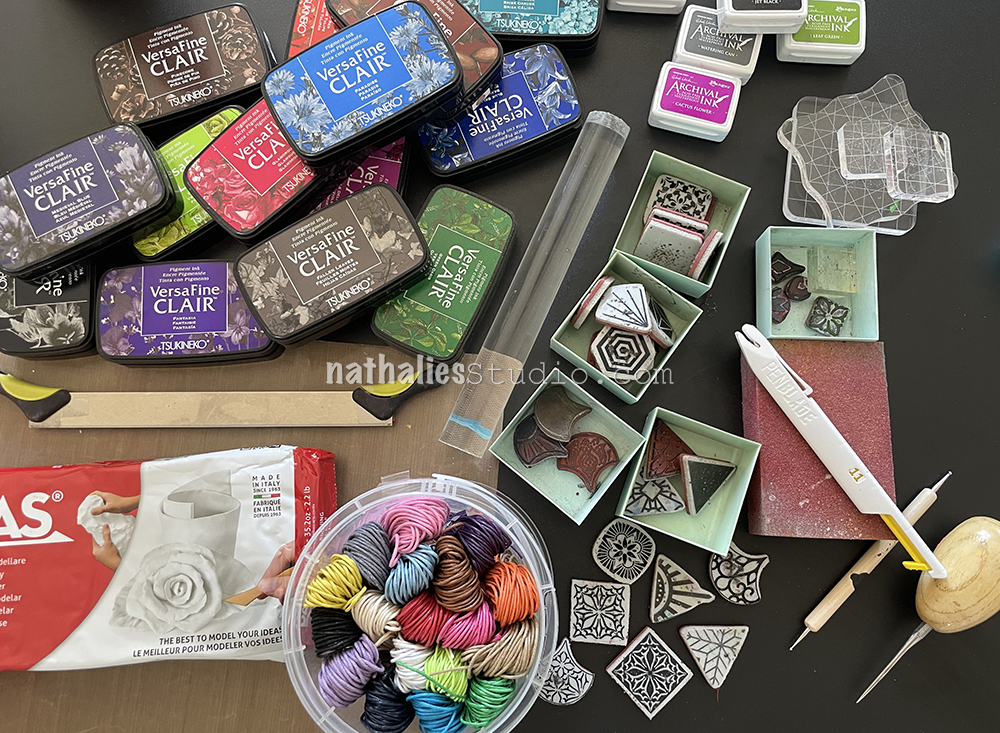
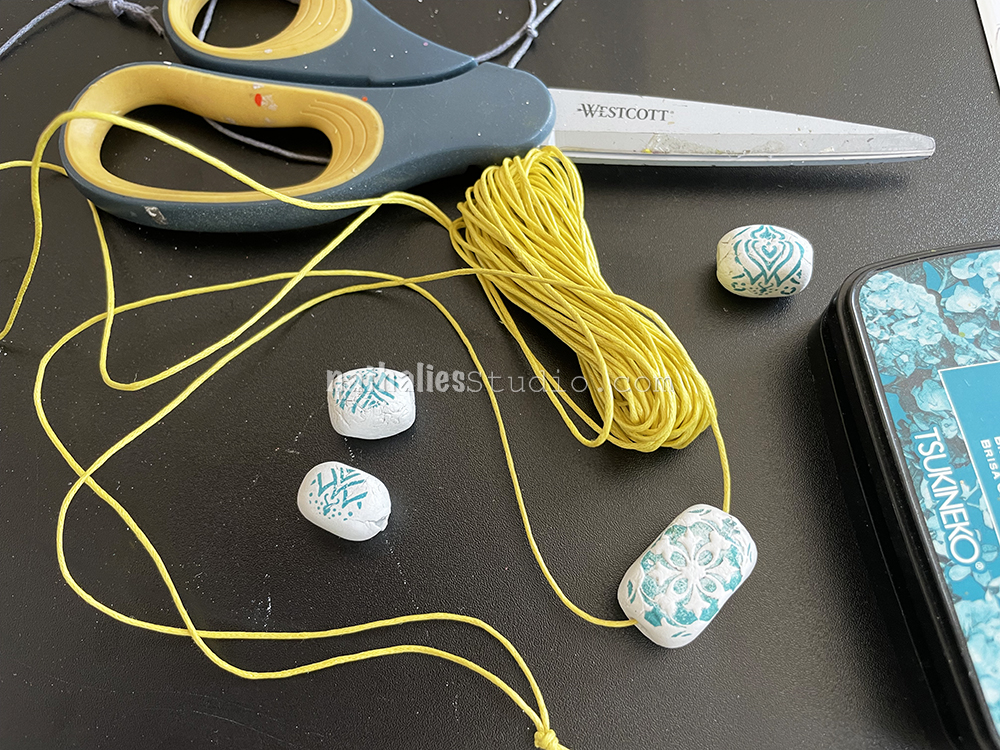
Our project was to make air dry clay beads, decorate them with my rubber stamps, and then string them to create funky necklaces. Wanna play along? You will need: air dry clay, jewelry cord, rubber stamps (small patterns work great for these), a selection of ink pads, an awl (or toothpick/ball tool/tapestry needle) to make holes, a small rolling pin, a clay cutting knife, a sanding block, scissors, and a craft sheet.
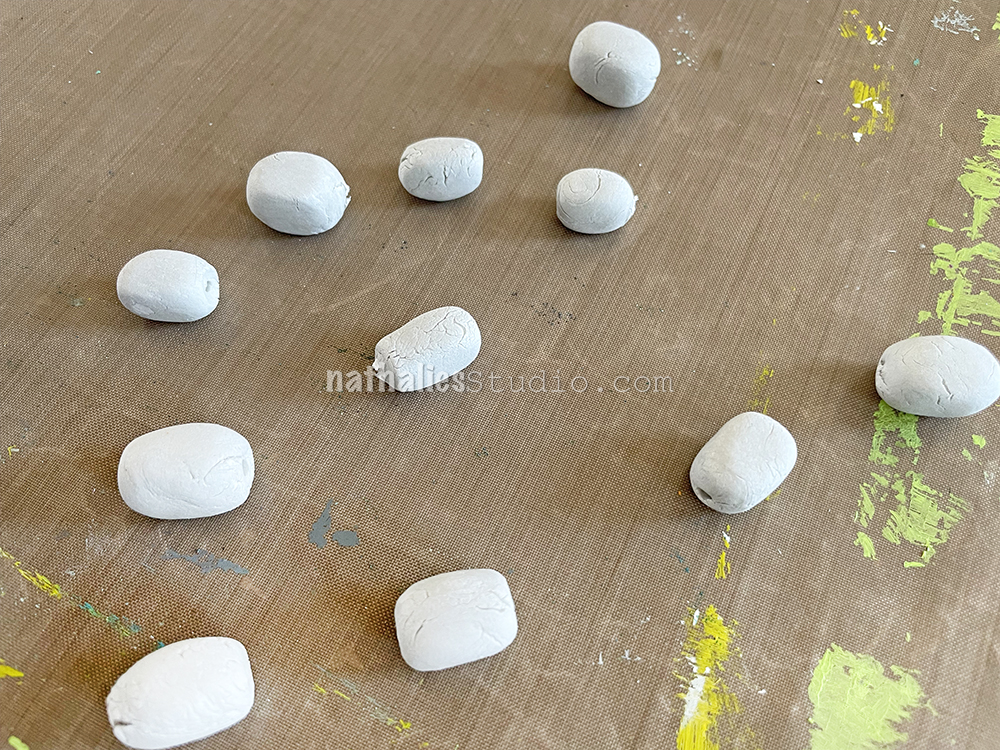
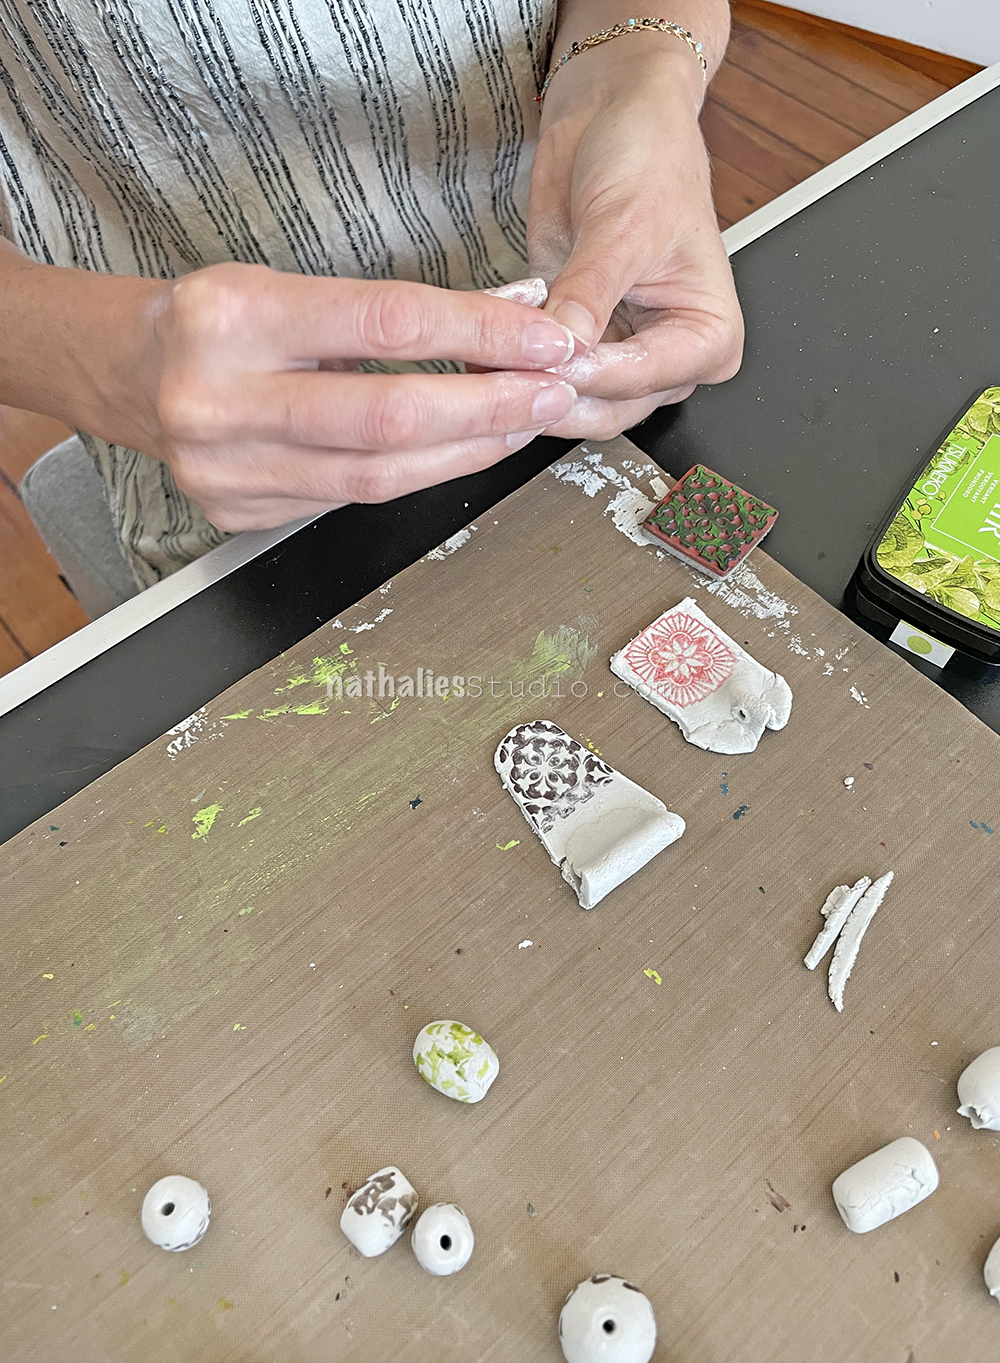
Working on the craft sheet we created some plain beads. Round, oval, barrel, square sided etc are all easy to do. Make a bunch!
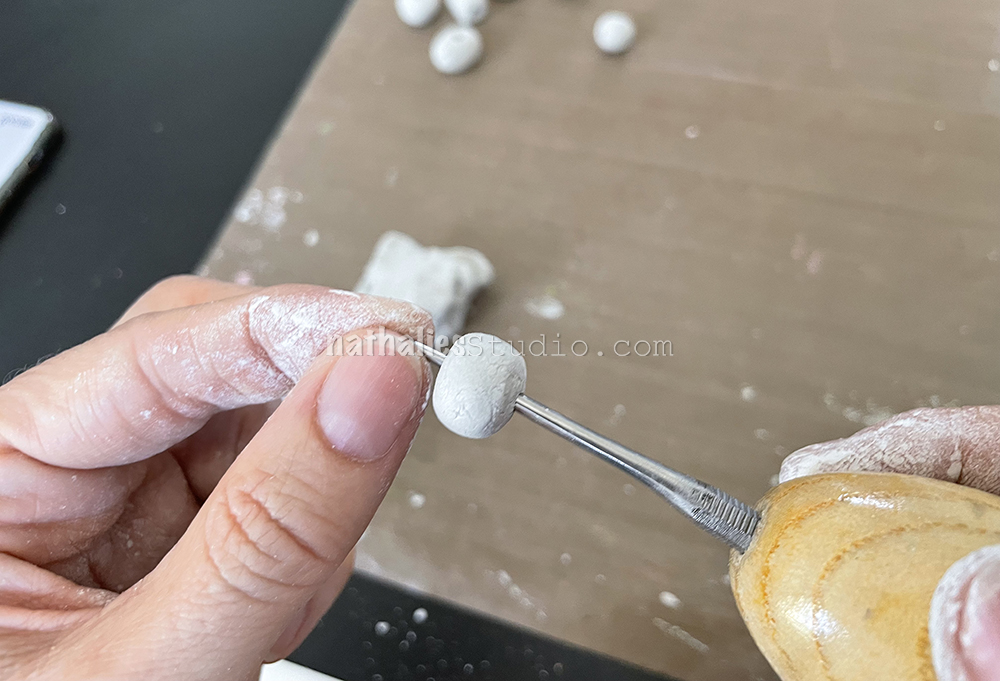
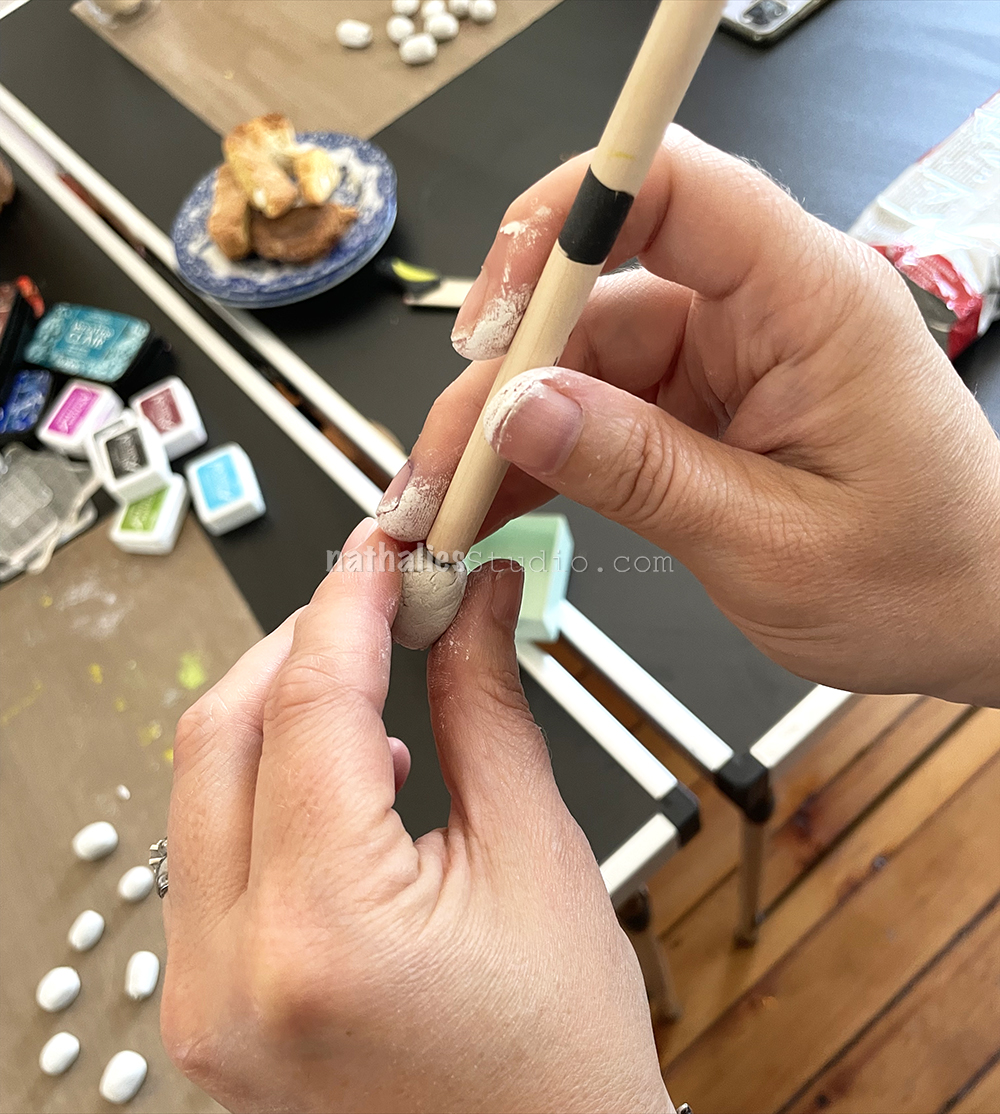
Before they get too dry, poke a hole in them that is big enough for whatever cord you have. We used an awl to poke the holes and then a ball tipped tool to make the ends a bit nicer. You could use a skewer or toothpick or even a heavy tapestry needle to make your holes. Then it is time to let them dry.
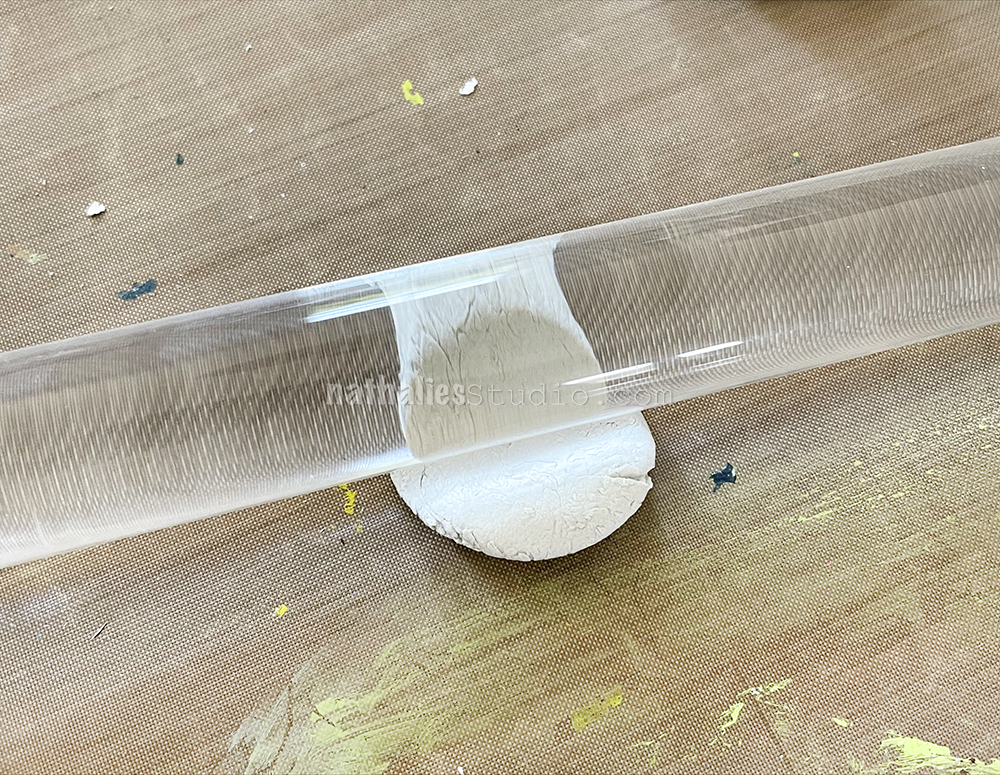
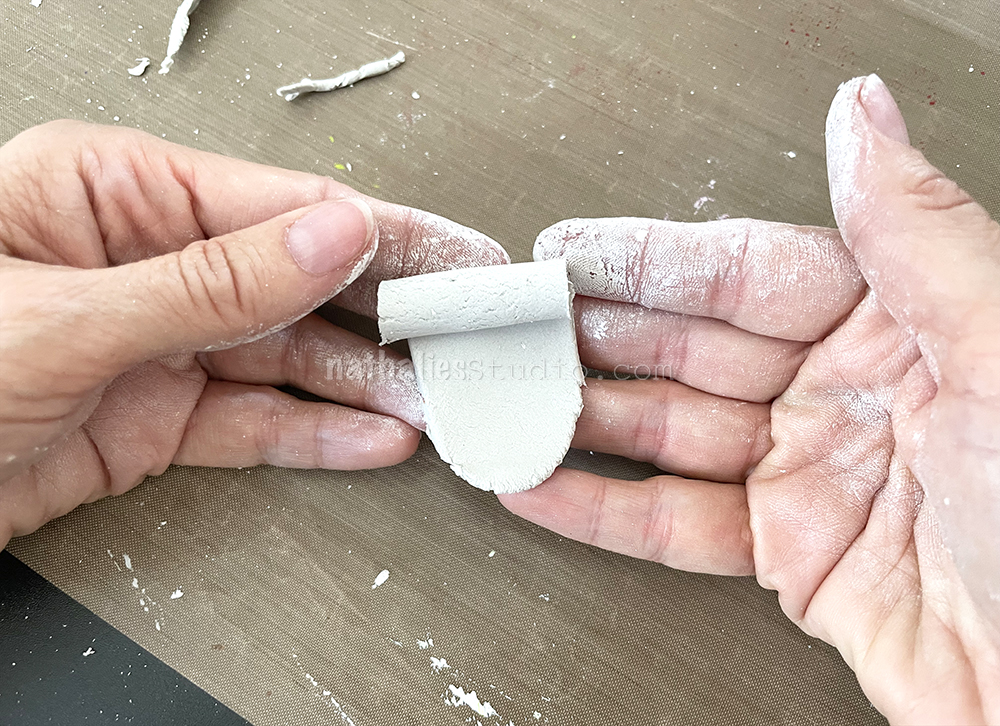
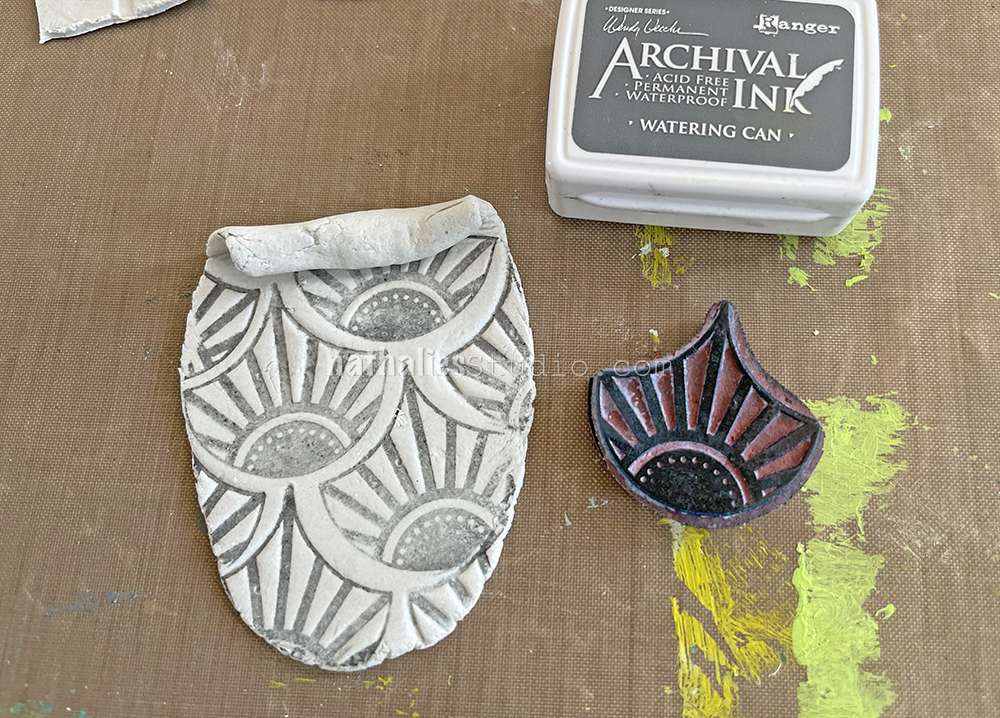
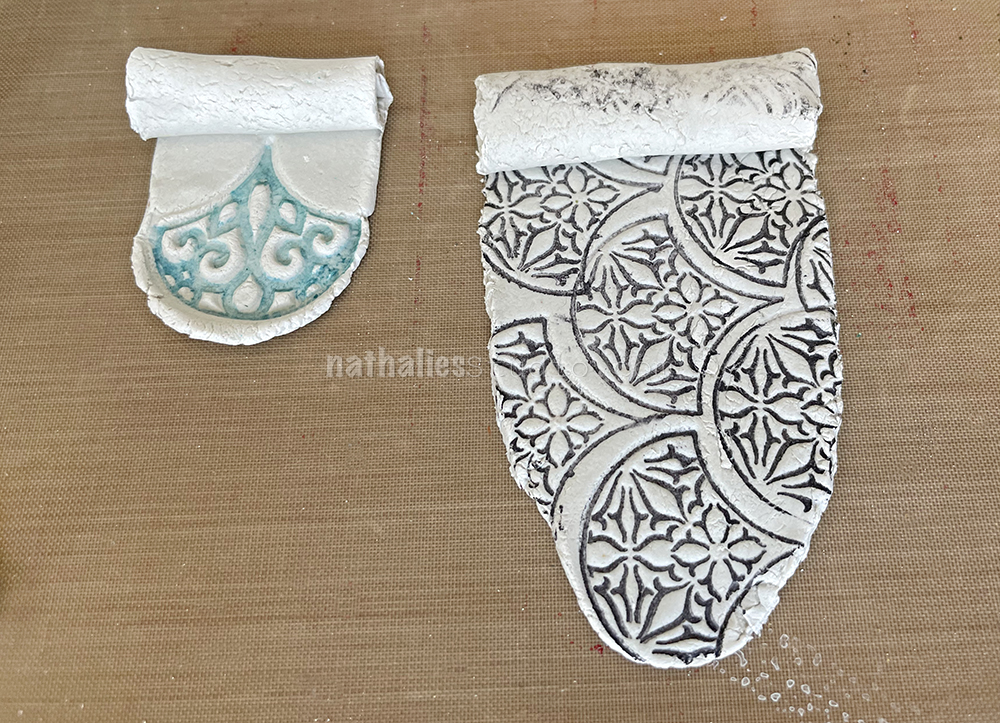
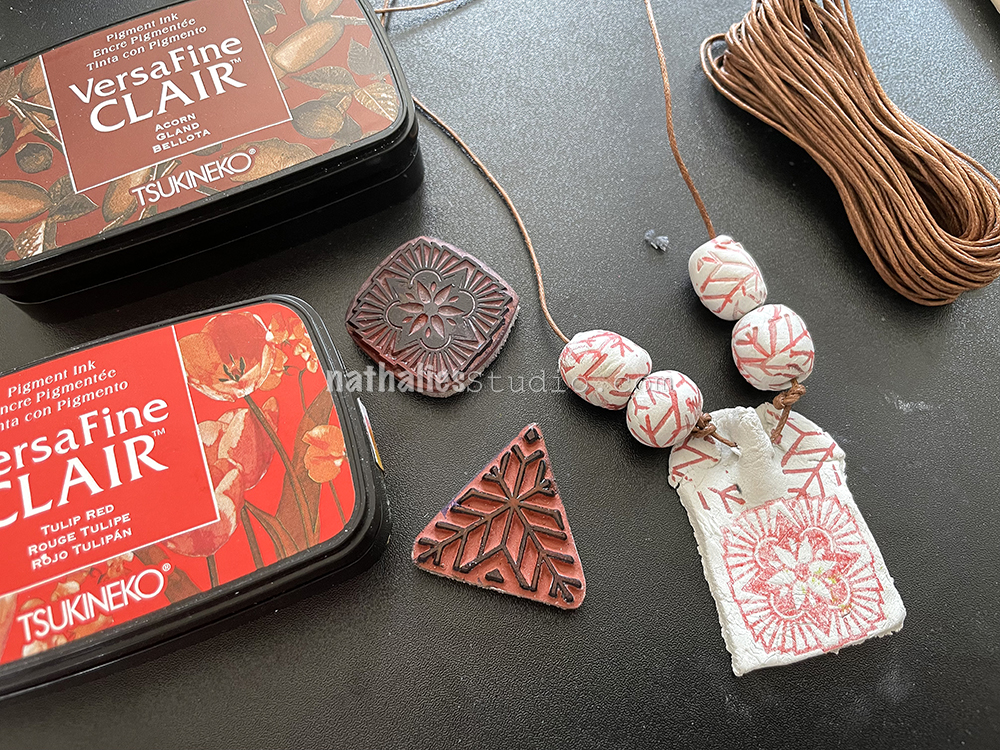
We also experimented with rolling out the clay to create larger pendent pieces with a rolled top edge.
This was trickier to do and if your clay dries out, the edges get a bit rough. You could use a clay blade to clean up the edges or a wet finger to smooth things out.
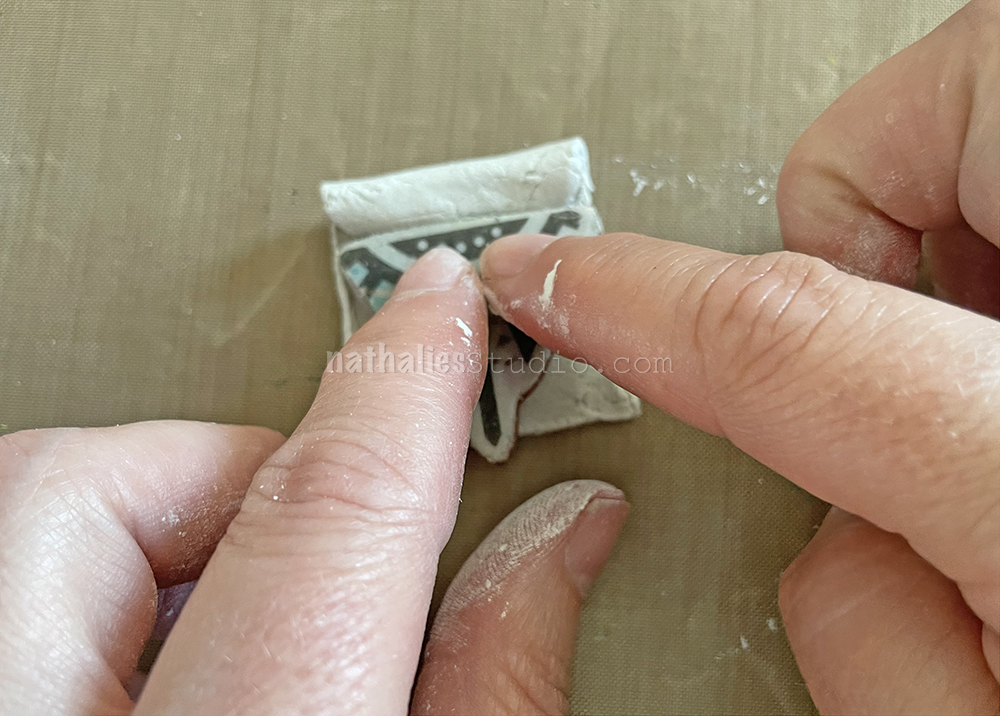
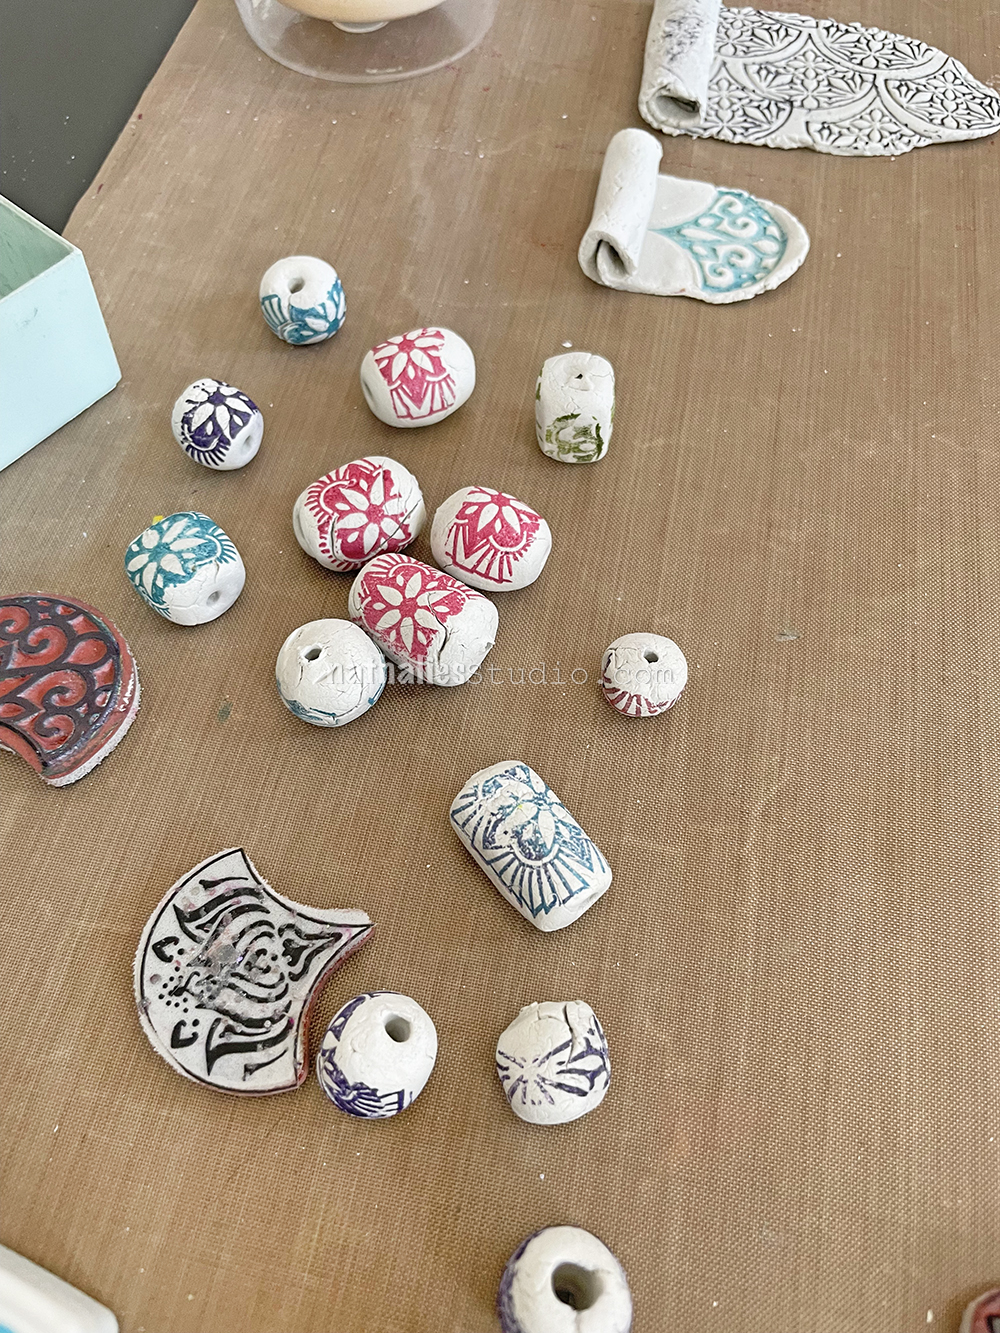
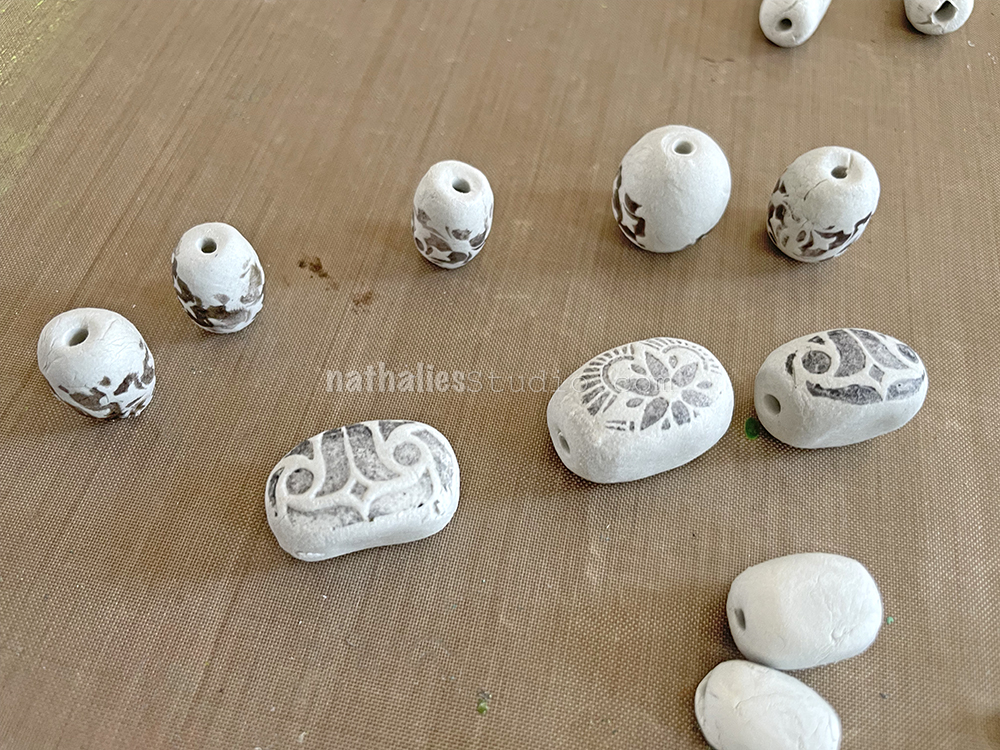
The idea is to create a flat surface to stamp on. We played with both my Triangle Love and Floral Tile Small stamp sets and used both Archival and Versafine Clair ink pads. You want an ink that dries permanent. We stamped into the still pliable clay, creating a small amount of relief too.
You can go pretty big with these and then use a stamp like my Fantastic Small set to tile up an allover design.
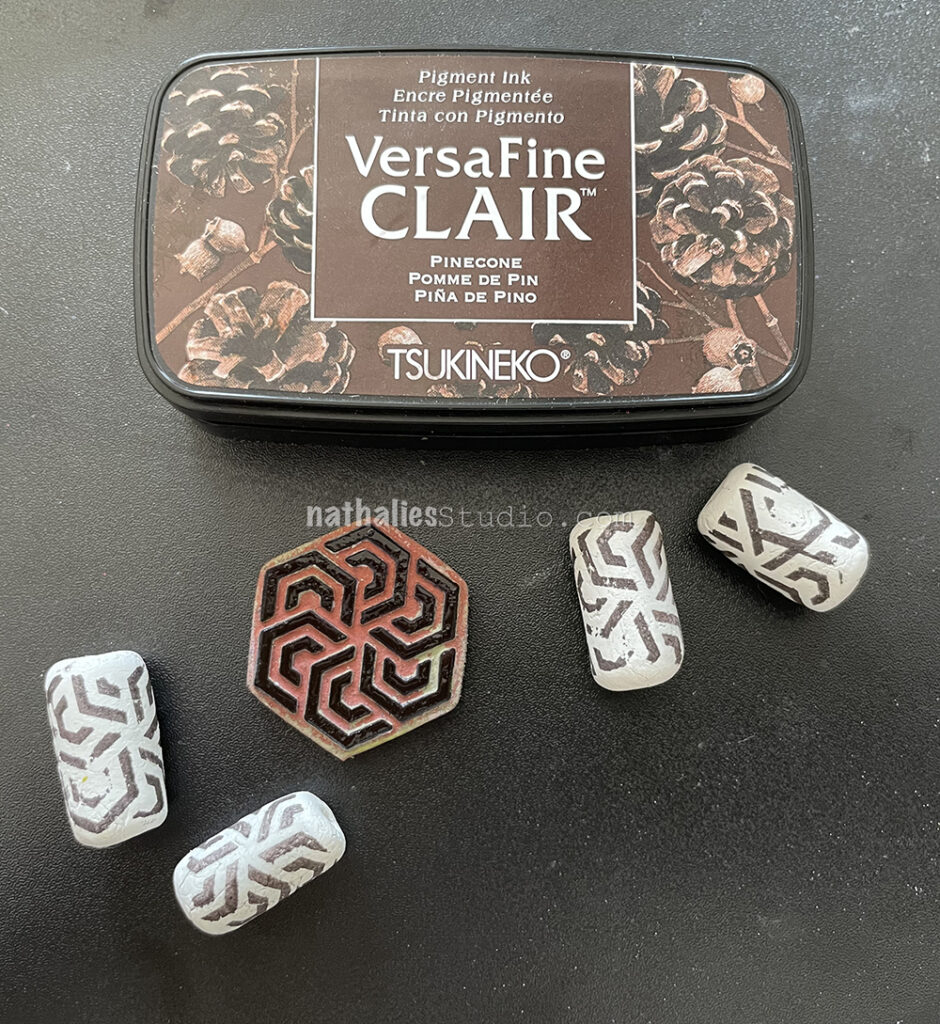
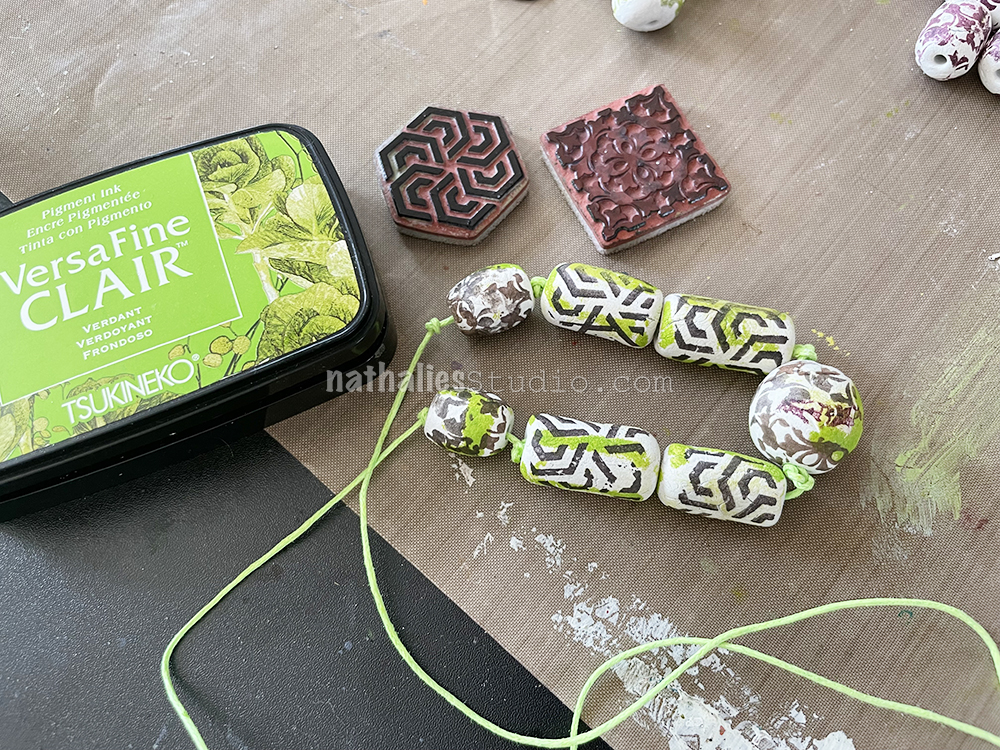
When our plain beads dried, it was time to stamp on them. Barrel shaped beads can just be rolled across an inked stamp. Here a stamp from my Hex Set Small creates a cool geometric feel.
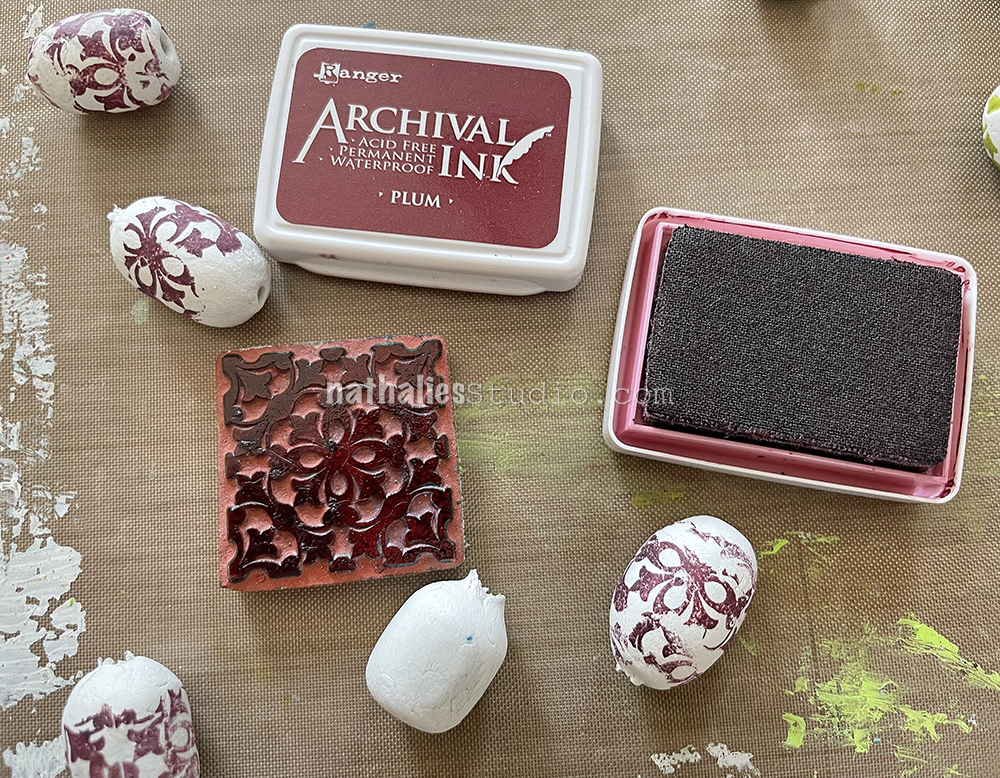
A stamp from my Floral Tile Small set adds a bit of abstract floral design to oval beads. They don’t need to be perfect impressions to create a cool look.
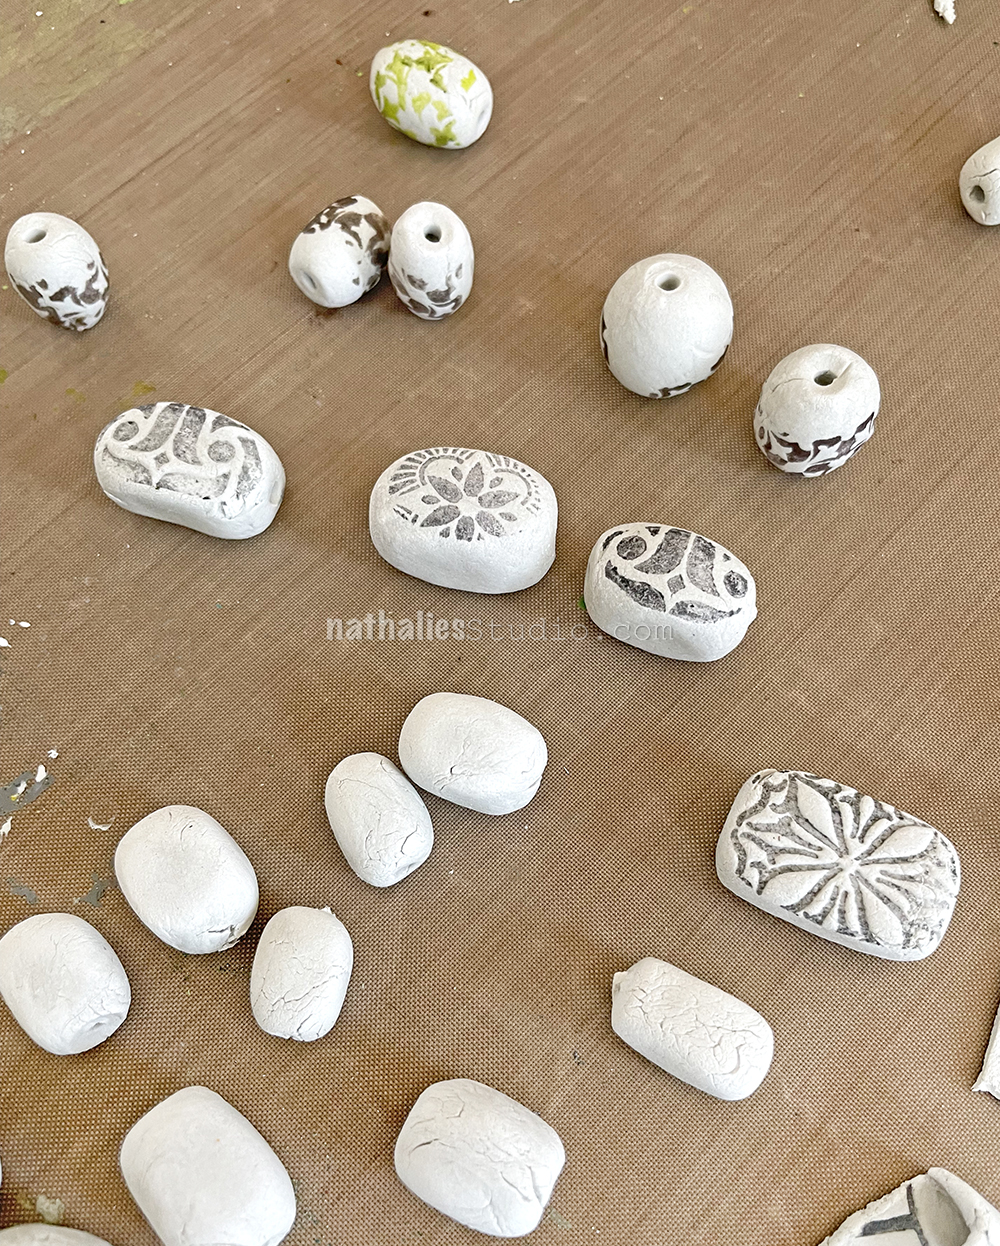
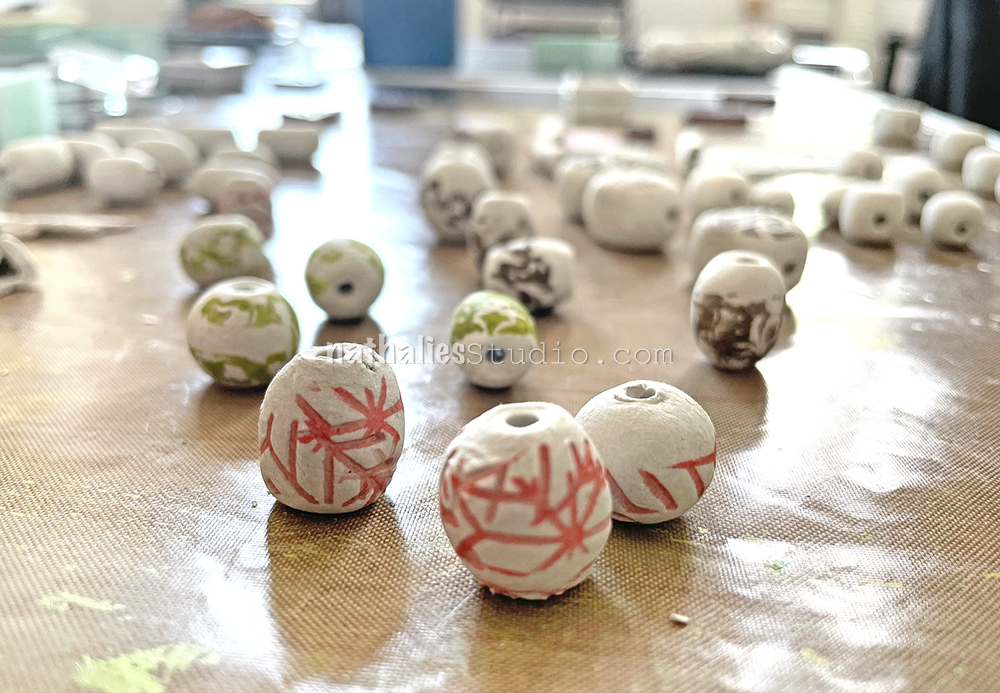
With three people making we created a big variety of beads.
Love all the different color and pattern combinations that each of us chose, whether it was cool gray, shades of brown…
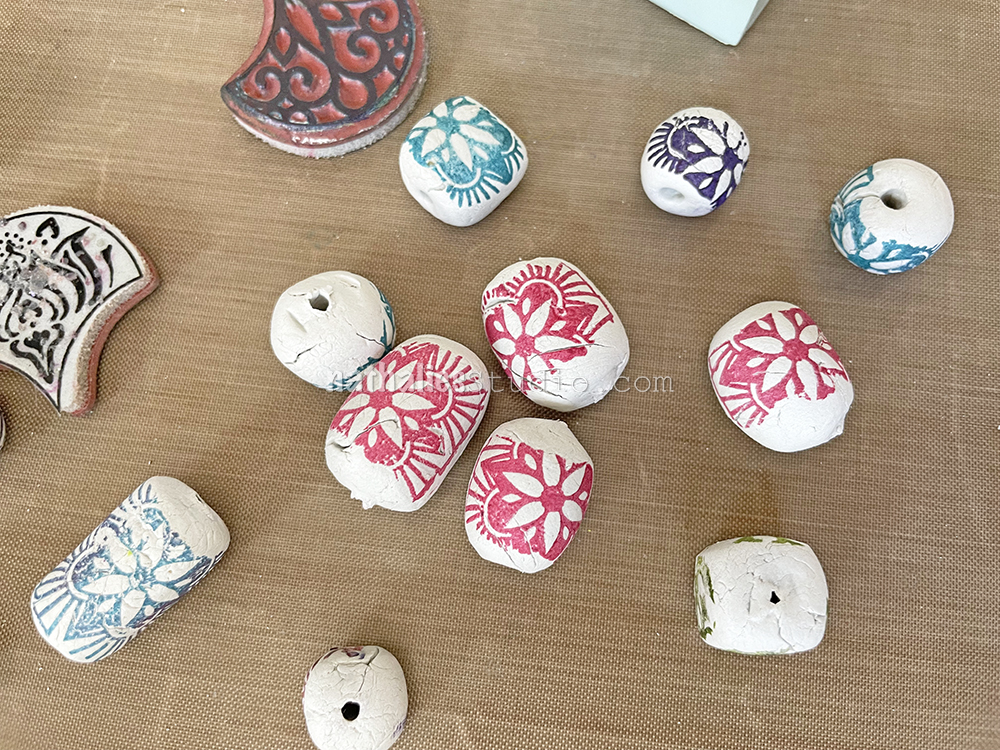
… vermillion and chartreuse…
… and vibrant pinks and blues and violet!
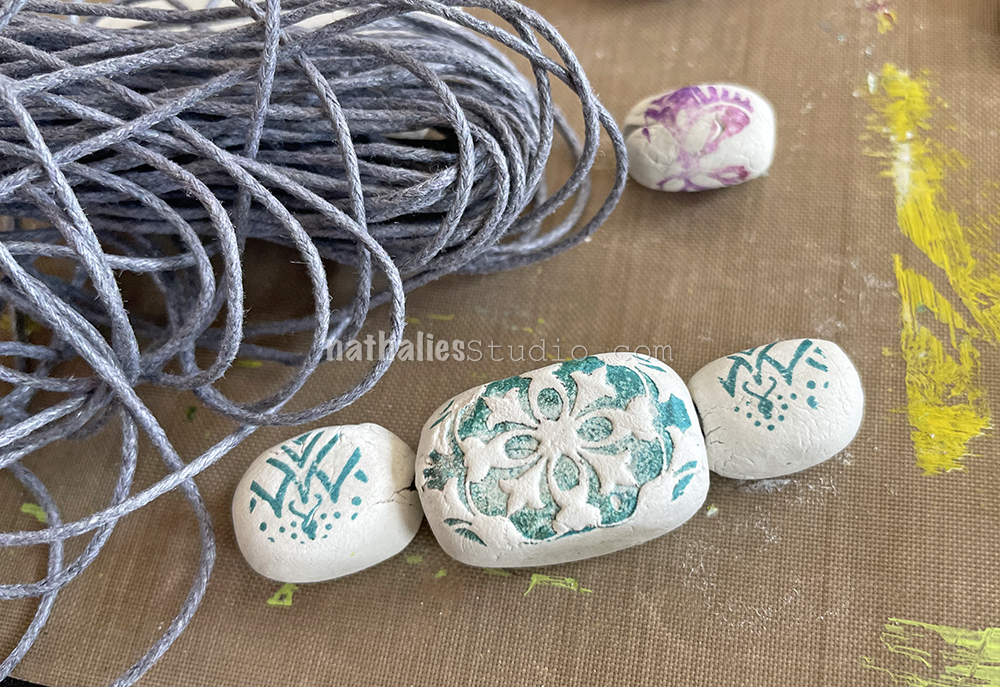
If you have rough spots on your beads, you can sand them with a sanding block for a smooth finish.
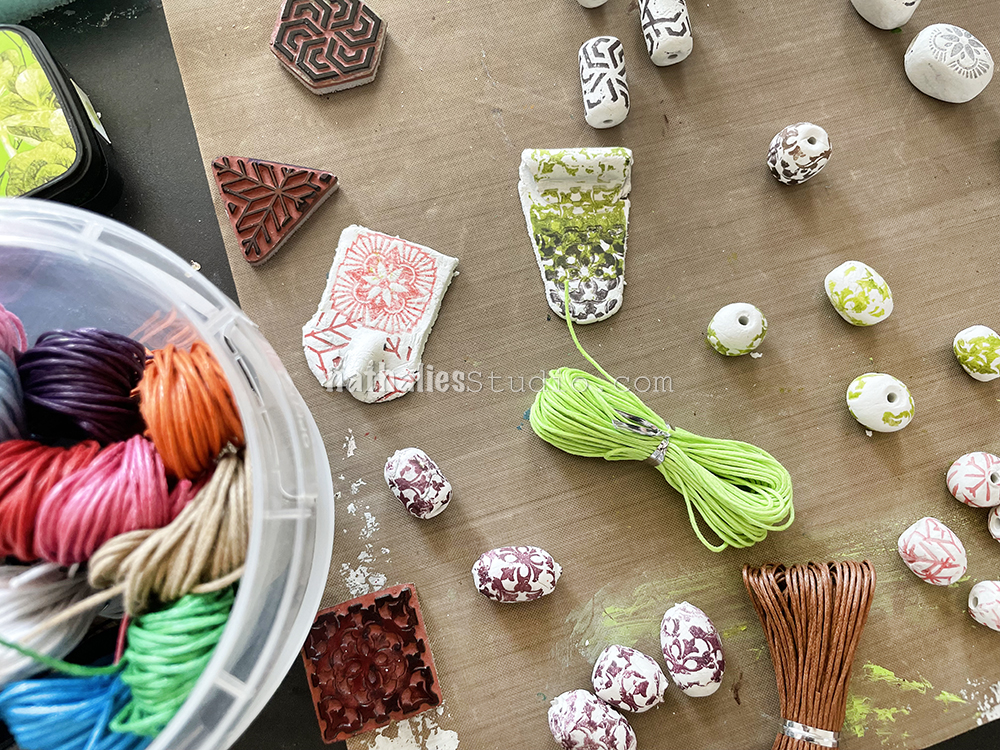
Once you’ve decorated your beads, it’s time to think about the next step – stringing them to make a wearable necklace. We got a little tub of colorful waxed cotton jewelry cord so that we had lots of colors to choose from.
When you choose your cord, unwind a longer piece than you think you will possibly need. You may want to tie knots around the individual beads and that will take extra cord. We also planned to slip these over our heads in the end, so allow enough to do that once you’ve tied it.
If you’ve made a lot of beads like we did, there are so many ways to combine colors and patterns.
Play around and see what you like. You can always switch things up later if you have extra cord and beads.
And if you still need a bit more color in there, don’t be afraid to use the ink pads to add a little more color here and there.
This was a really great play date to do with a group of friends. It was fairly easy to create some striking designs and everyone went home with a wearable creation.
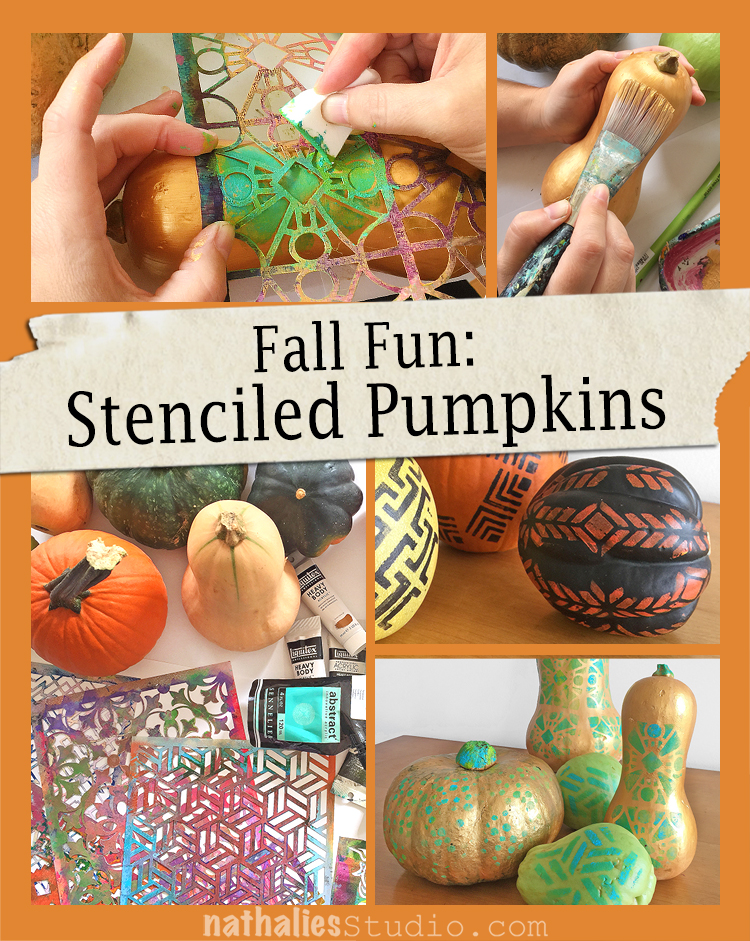
A Look Back – This time I’m looking at some fun fall play dates that Kim and I had back when we could get together in person and play with my stamps and stencils. Some of these are very seasonal (pumpkins) and others are just nice ideas for when you need an indoor activity to do. Read on and I hope you try some of these project ideas too!
A Look Back is a blog series to show you some projects and posts that you may have missed – sometimes going WAY back in the archive. I think it will be fun to revisit a few ideas that we haven’t seen for a while. I’m excited to see how a little look back might inspire something new in the future :)
This project was a great way to decorate pumpkins without getting out the carving knife and spreading gourd guts all over your kitchen LOL. We used my stencils and acrylic paint and came away with some very cool decor. Check it out here.
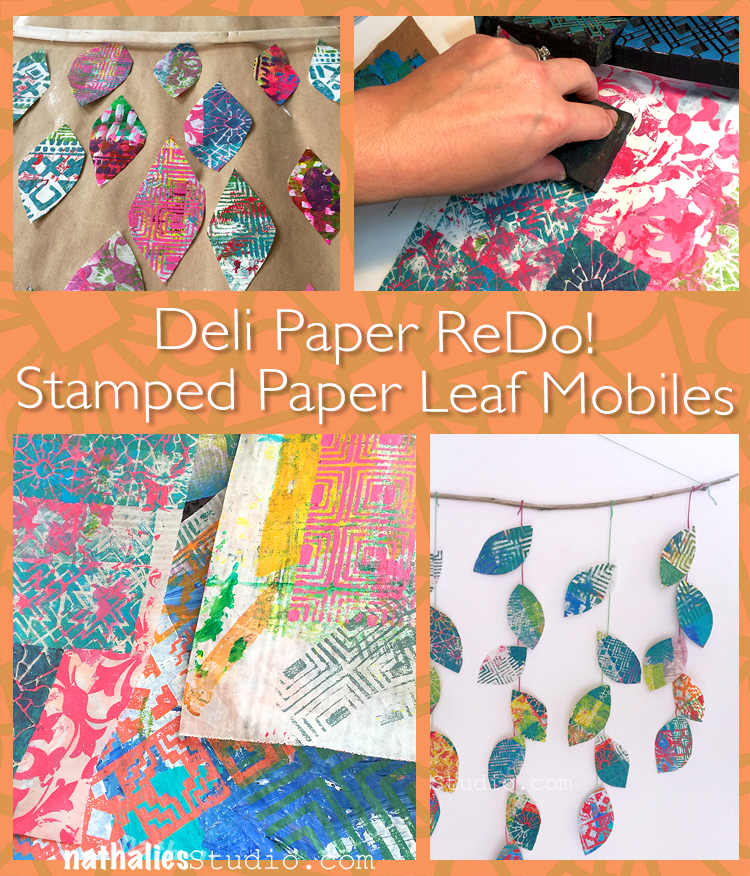
Here is a project that you can pull together with all those collage papers and deli papers you have in your stash. We gussied some of ours up with my foam stamps and acrylic paint and then cut out simple leaf shapes for a wall hanging. This is an easy fall project for all ages and abilities. Check it out here.
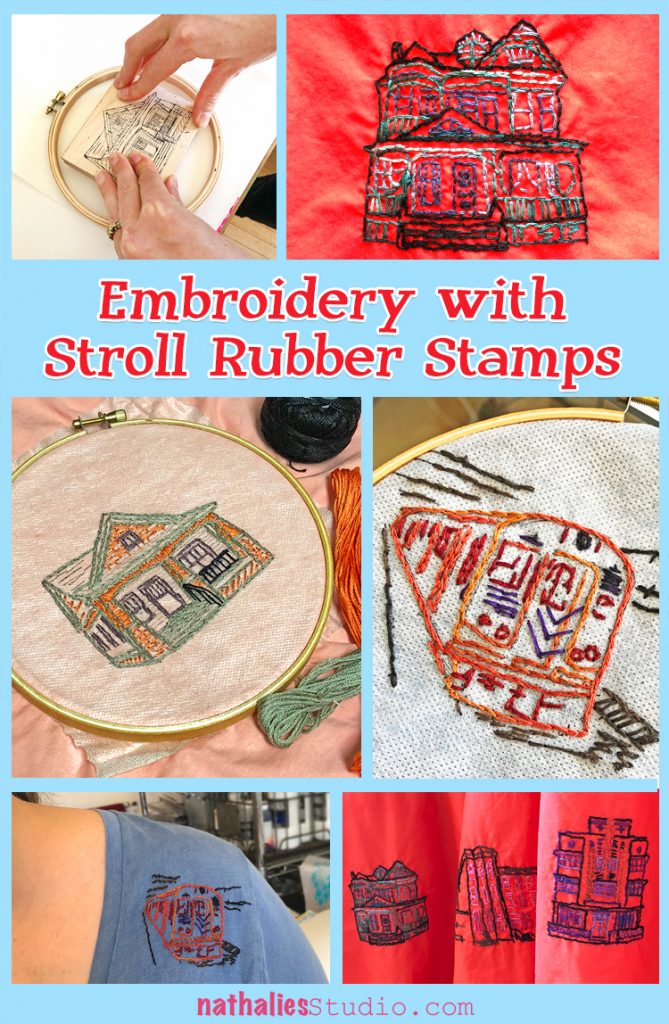
Has colder weather and shorter days got you thinking about indoor activities, curled up in front of a fireplace? Embroidery is an ideal activity if you just want to relax and chill. We used my Stroll Around the Block and Stroll Through the Hood 1 and 2 rubber stamps as a guide for our colorful stitched projects seen here in this post.
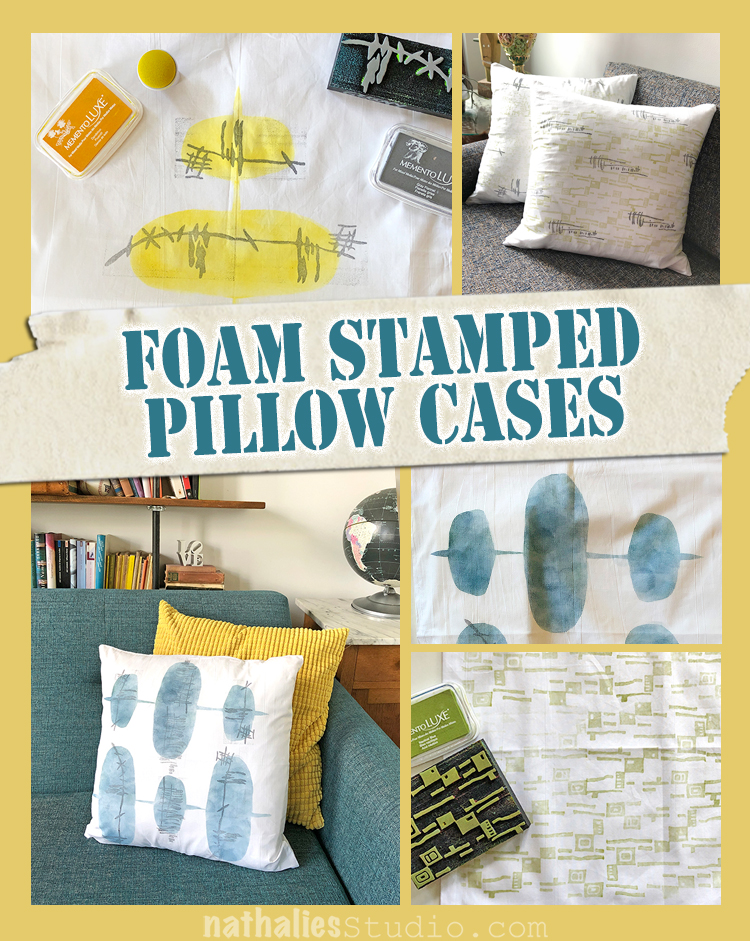
Thinking about sprucing up your decor while spending more time at home? We used my foam stamps and fabric ink to create modern pillow covers for our living rooms here in this play date post.
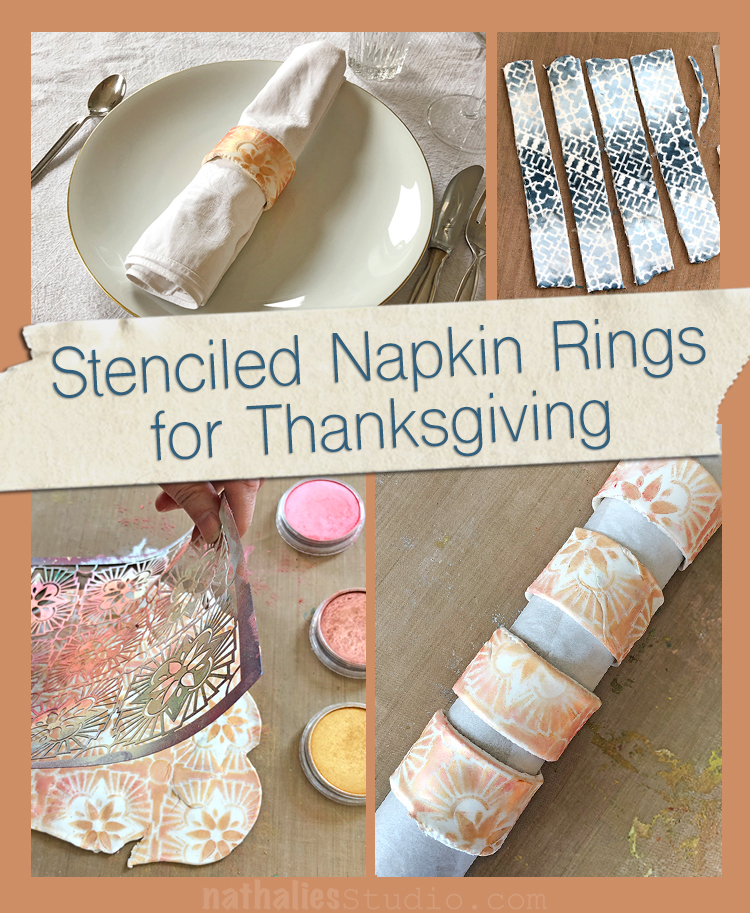
Your Thanksgiving table may be a little smaller this year but it doesn’t have to be any less Instagram worthy – check out these napkin rings we created using my stencils and pan pastels for a one-of-a-kind holiday tablescape.
I hope you enjoyed this look back and are inspired to try a few of these craft ideas.
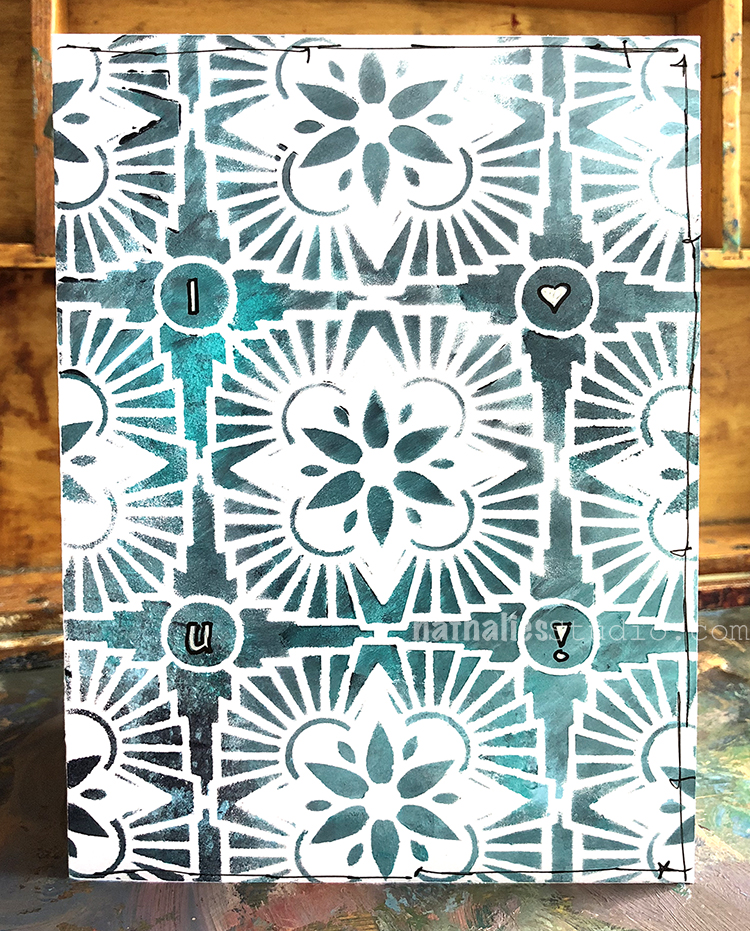
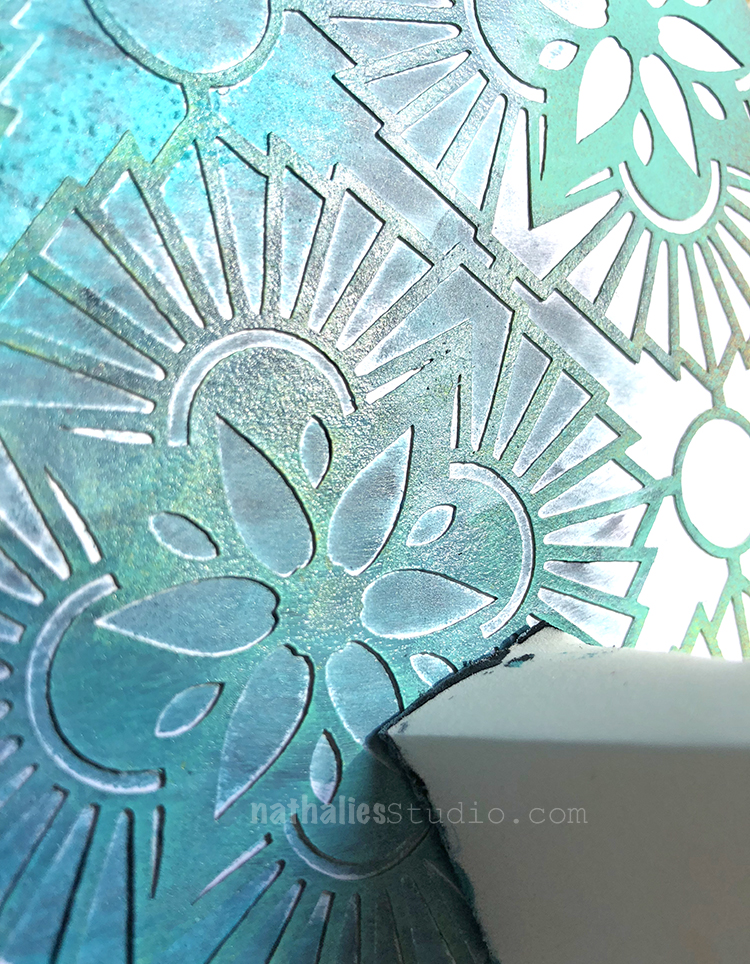
Have you told someone “I love you” today? Here is a quick card for this :)
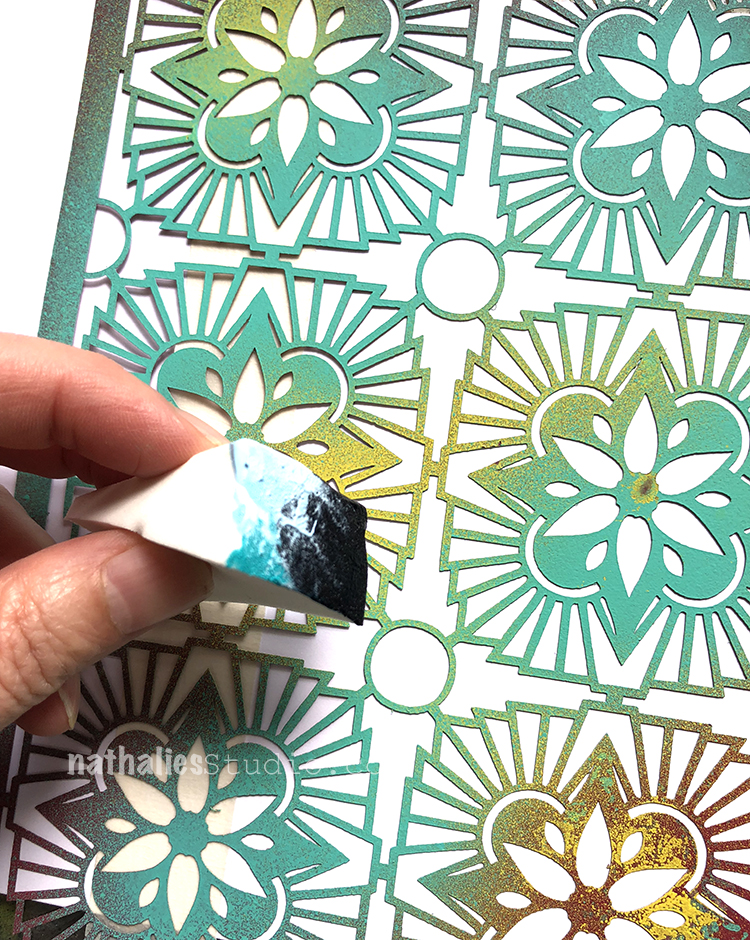
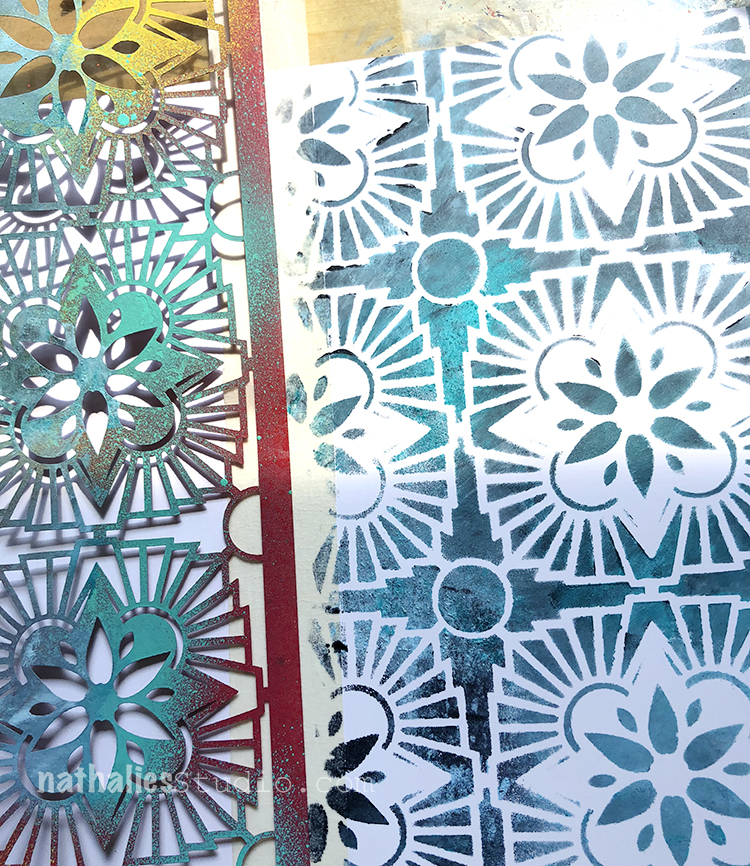
I used three different acrylic paint colors: teal, black and white, and squeezed out each color in a pea size next to each other. Than I dabbed my cosmetic sponge in it so that each color was on the sponge.
Mixing the colors slightly as I dabbed over my Hamilton Stencil I created some subtle color variations.
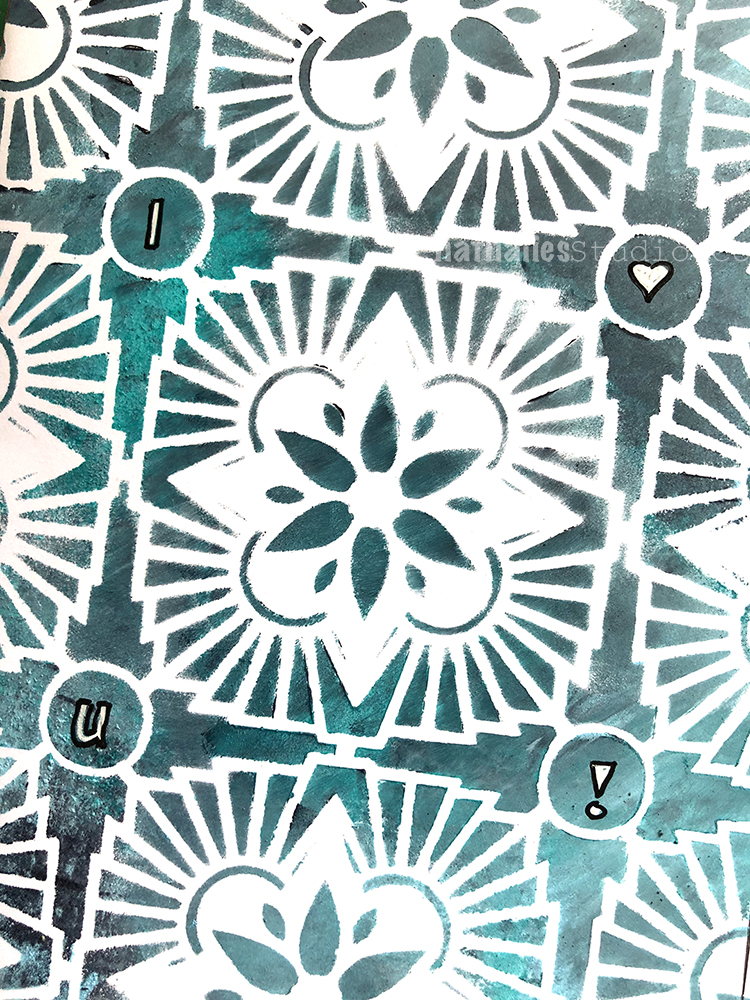
Love the pattern and colors
I added my message to my special someone in the circles and done :) Who are you telling today I love you?
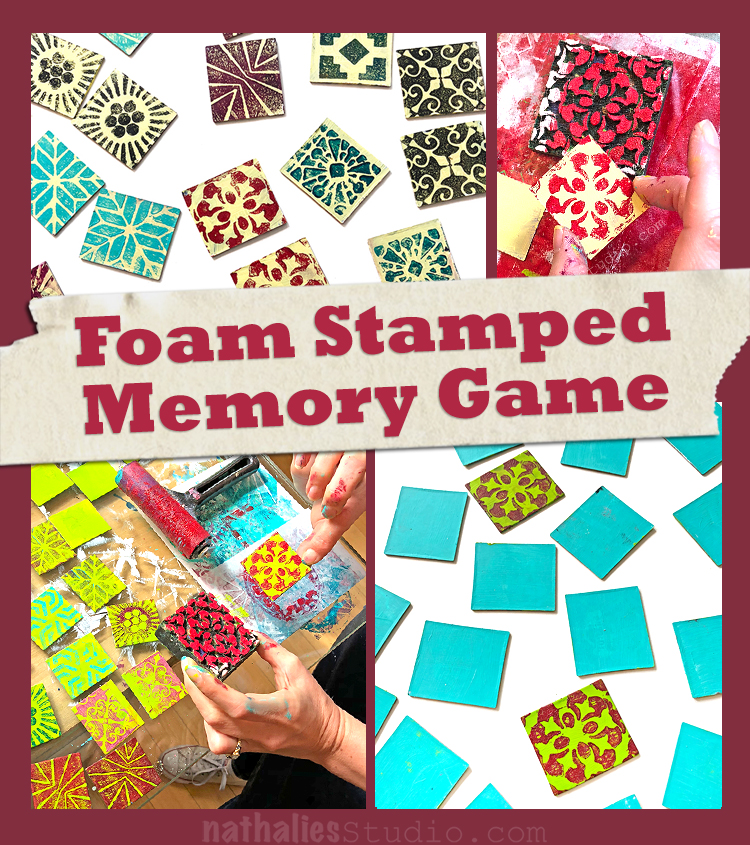
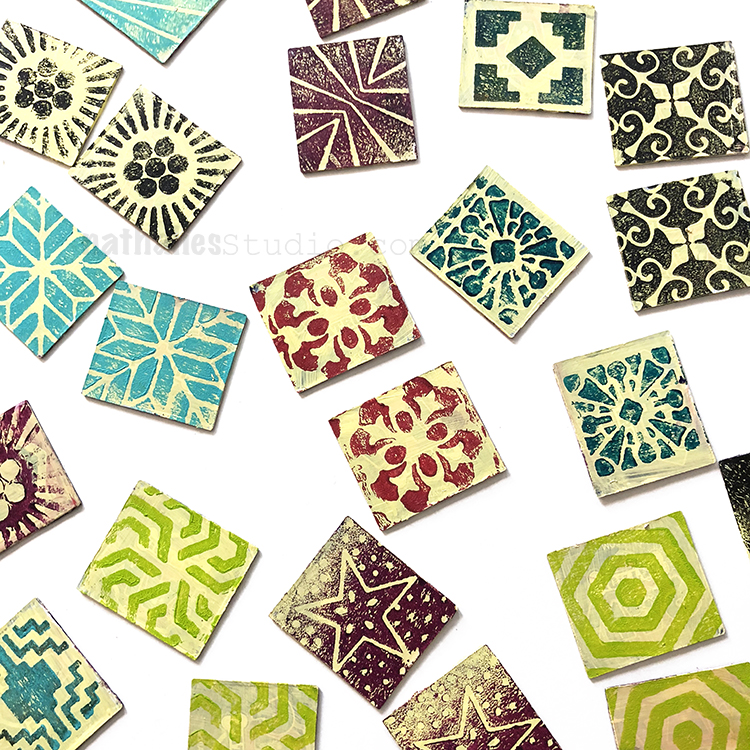
For our monthly playdate in October, Kim and I got together to make our own Memory Games. Remember those? Haha
We gathered some acrylic paint, a brayer, and enough foam stamps to do 18 different patterns (our memory set included 18 pairs of cards). The Mini Foam Stamps are perfect for this because the patterns are small enough for the little cards. You don’t necessarily need 18 different foam stamps to do this either – you could use different color paint with the same pattern foam stamp to get your sets. That might even add a level of challenge to the game!
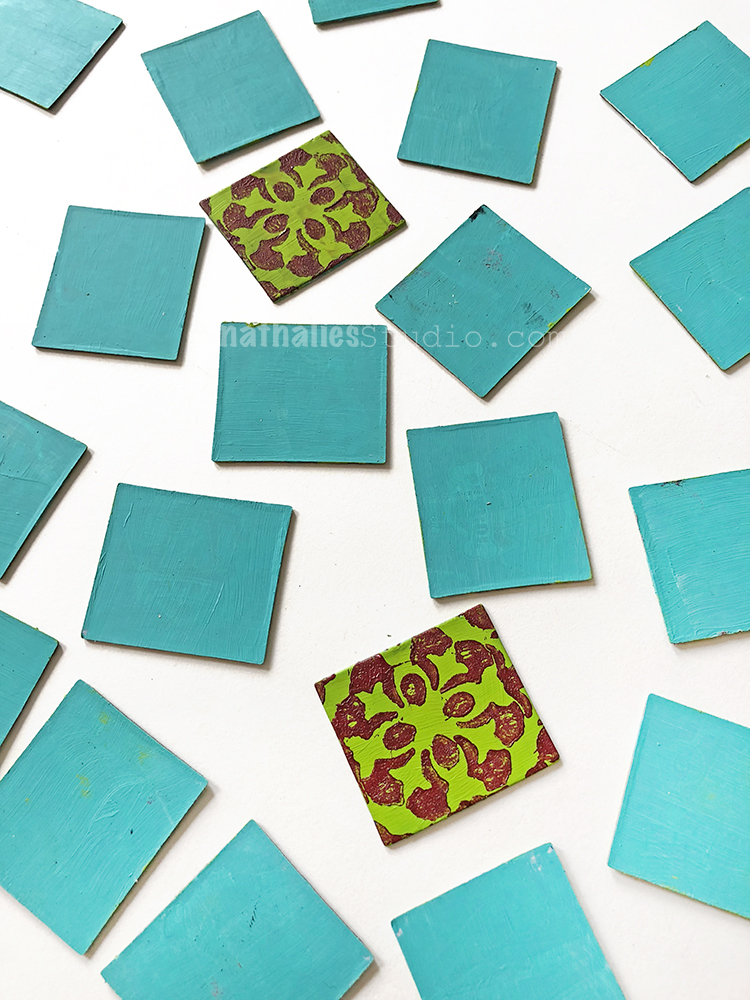
What did we use for cards? Well…
We found some really cheap sets online (you can see the one we used in the links below) and just repurposed them into our own awesome sets :)
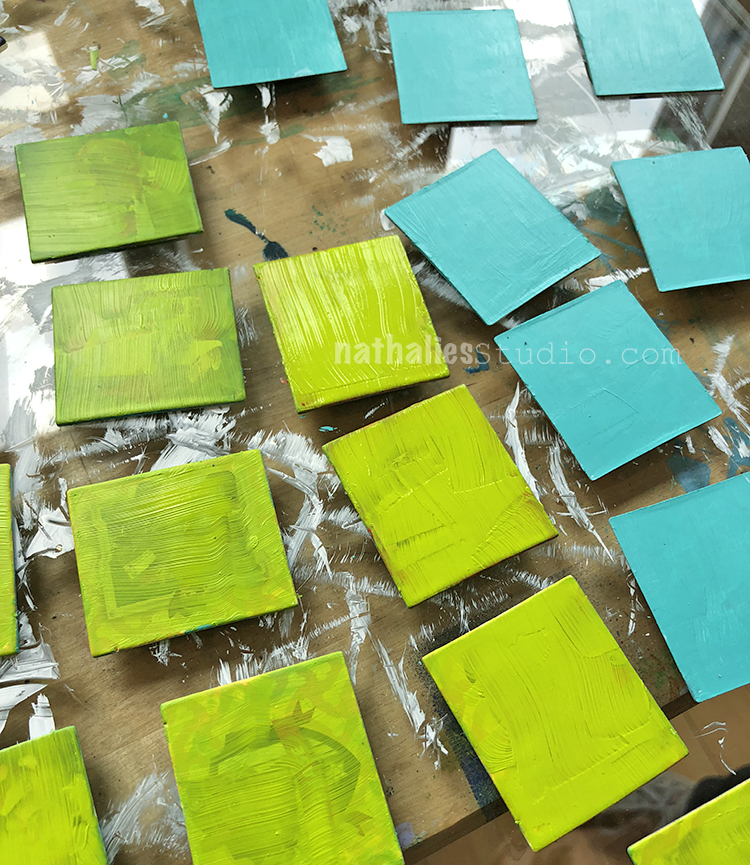
We just painted over the two sides with a solid color. It could take a couple coats of paint or a coat of gesso first and then a coat of paint.
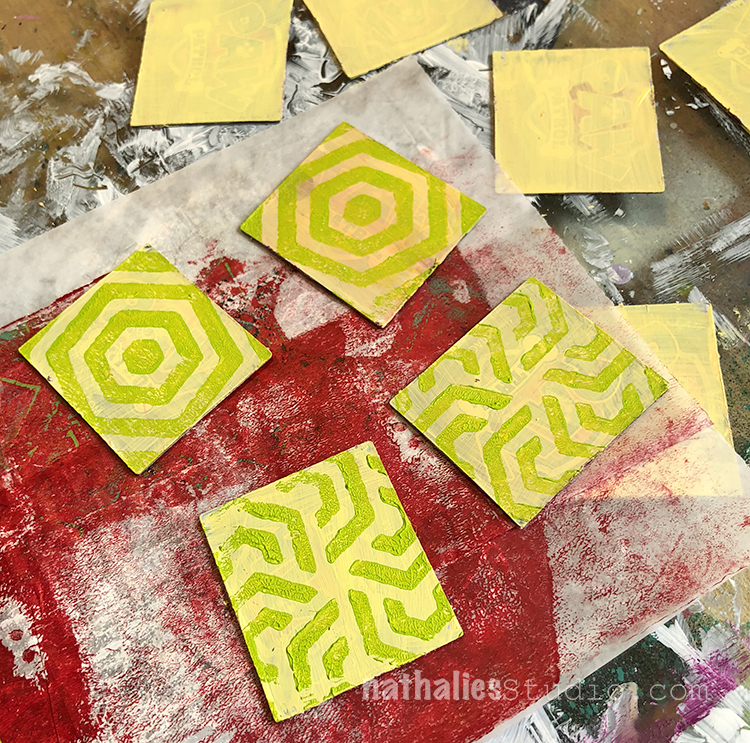
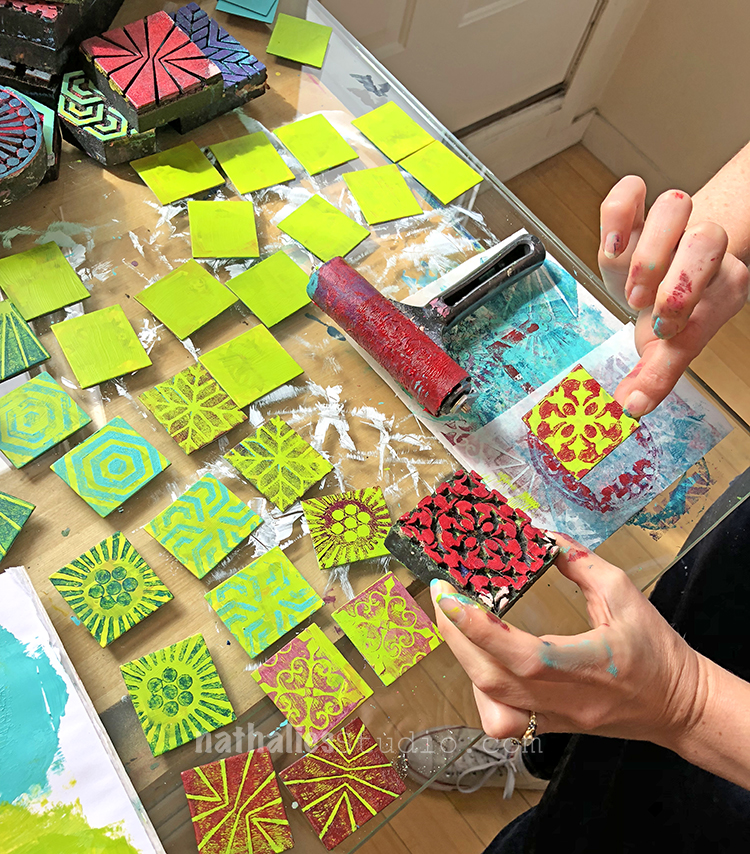
Then it was time to start making pairs… Here are some that use stamps from my Mini Hex Set.
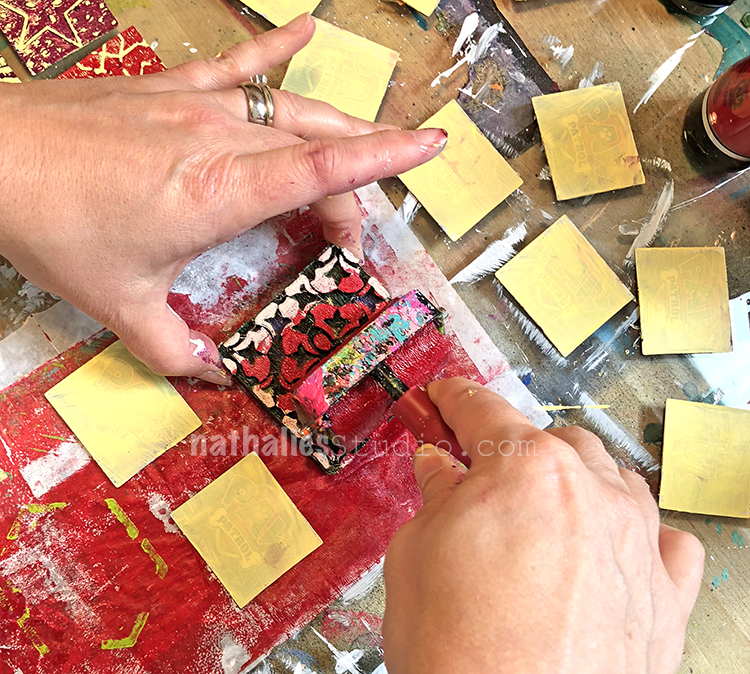
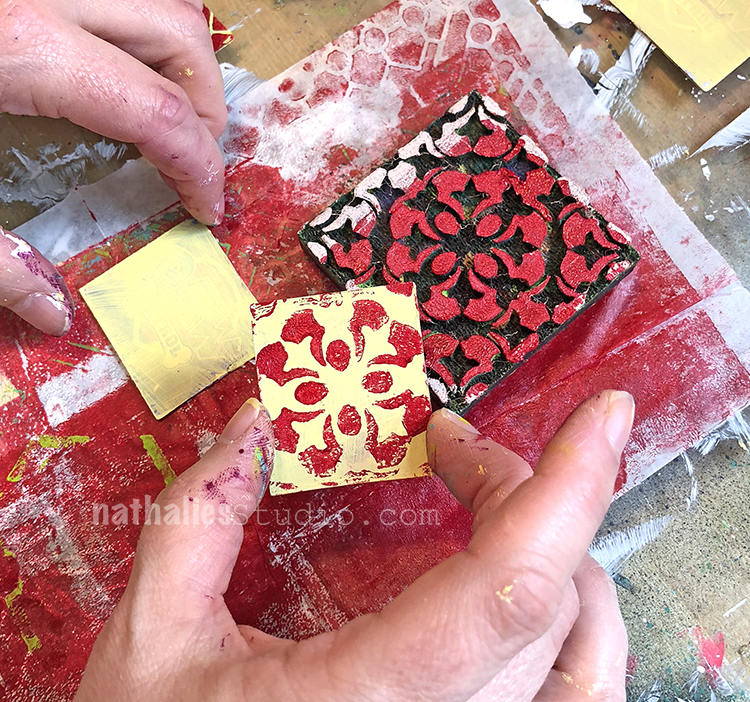
Here I’m using my Mini Versailles foam stamp and some bright red paint with a brayer.
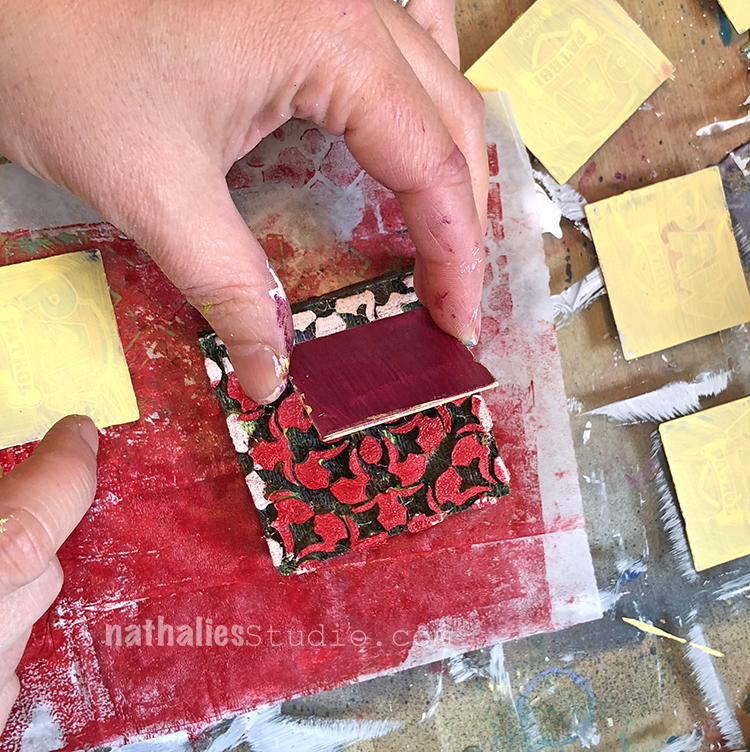
Then I placed the painted card onto the center of the stamp.
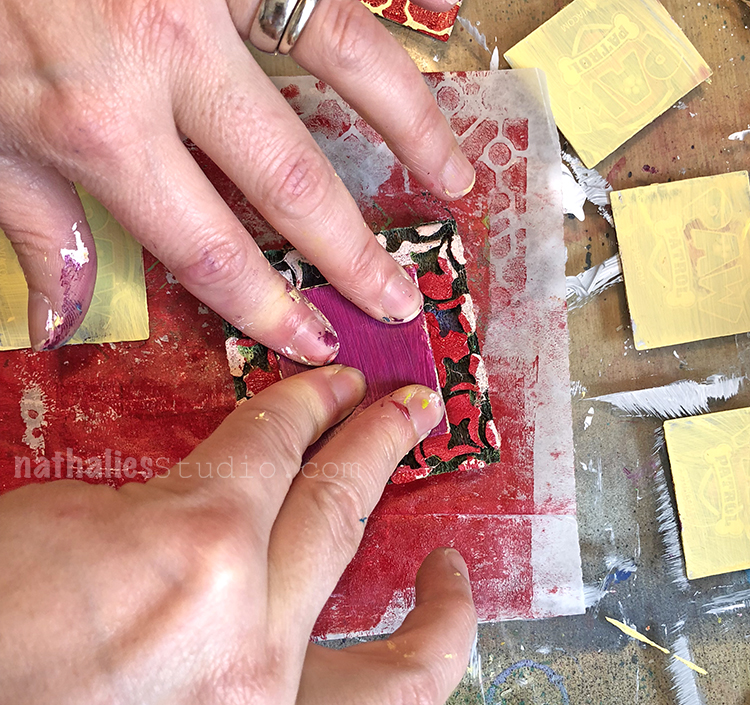
Pressing down evenly and firmly…
And Tada! One card of the matching set done. Repeat the process on the other to make the pair – we tried to line the pattern up in the same spot on the matching card – sometimes more successfully than others ;)
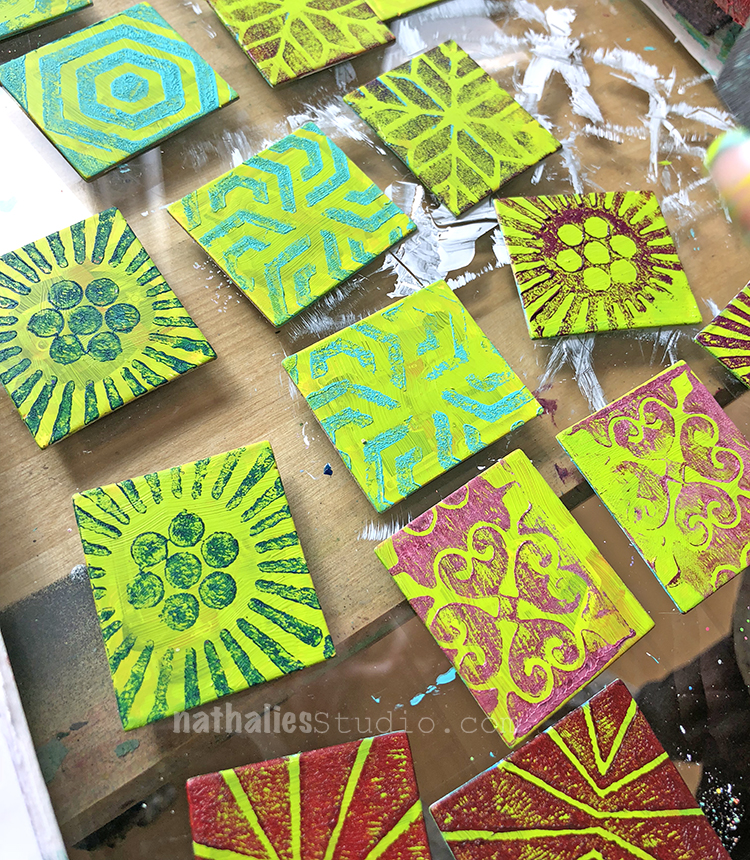
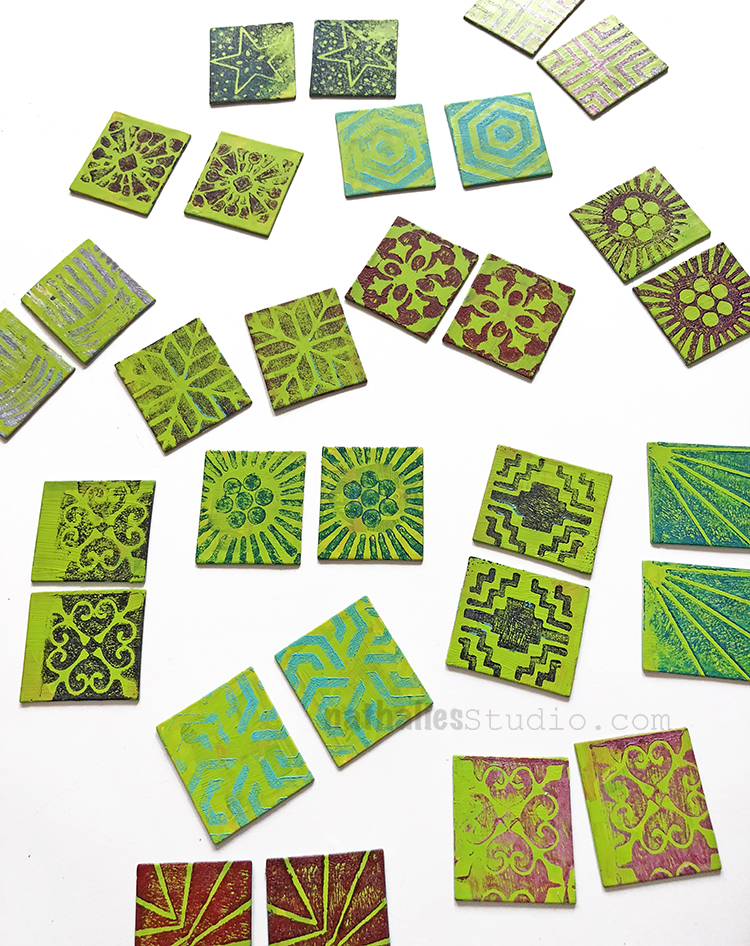
Kim worked on a bright green background and stamped out different matching pairs.
Some came out a bit grungy but this is your own unique set so it definitely doesn’t need to look perfect.
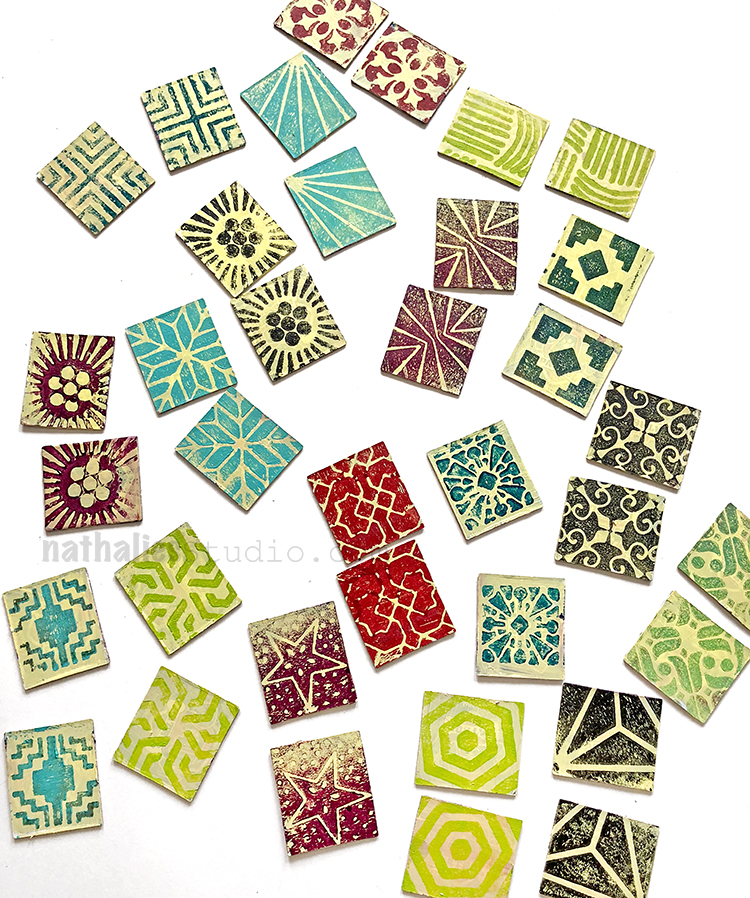
In the end I used lots of different patterns and colors.
Definitely a fun and probably more challenging version of the original memory game!
Here is Kim’s set on the green.
Who is ready to play? Just find the matching pairs :)
You can find all my foam stamps in my online shop. Here are some of the other supplies that we used for this playdate:
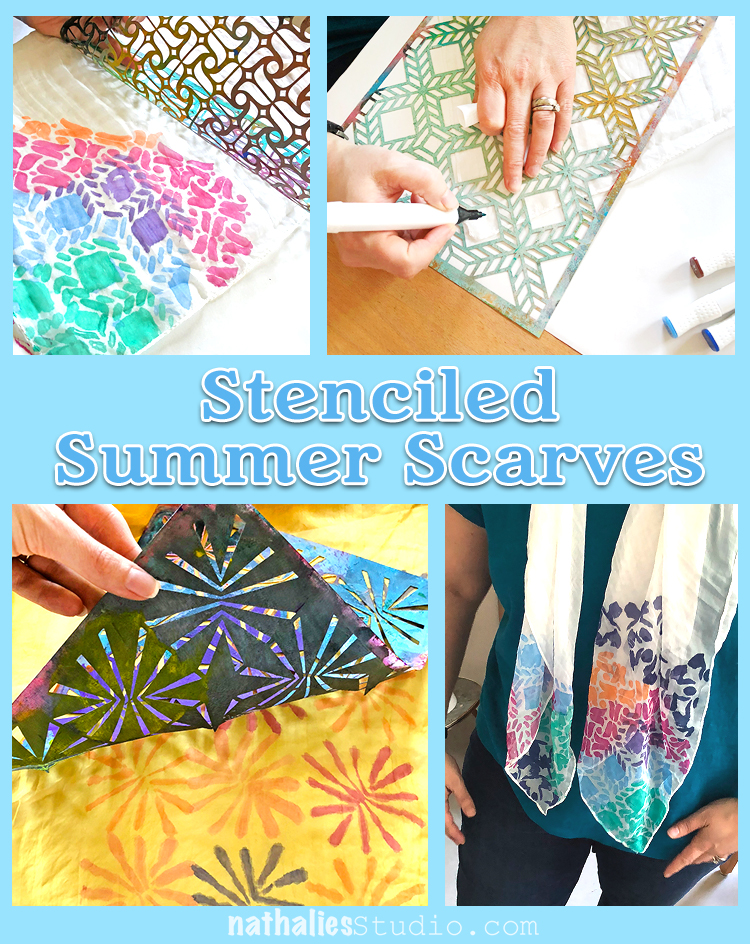
Last week Kim and I got together for a little stenciling playdate. We had already done some things with fabric paint but this time I was wanting to try fabric markers.
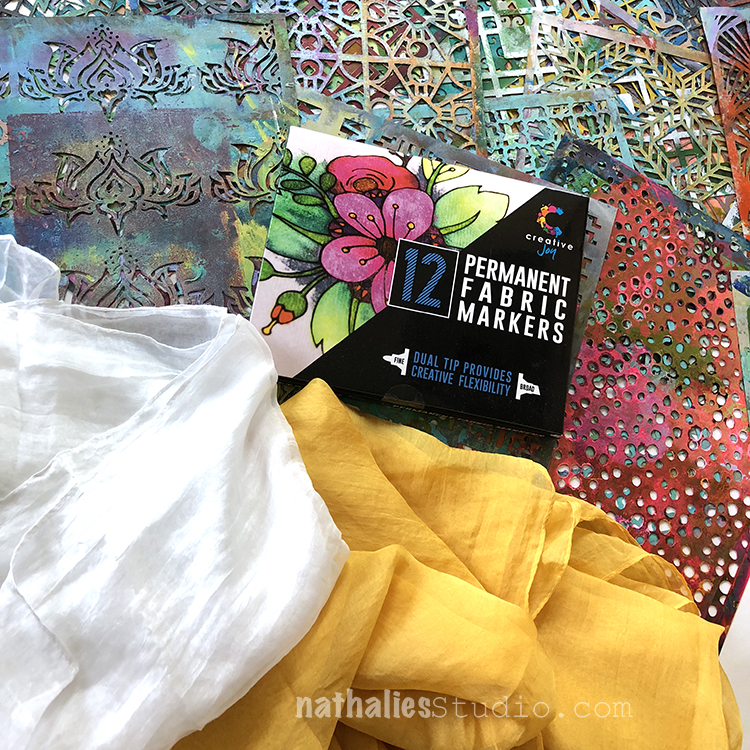
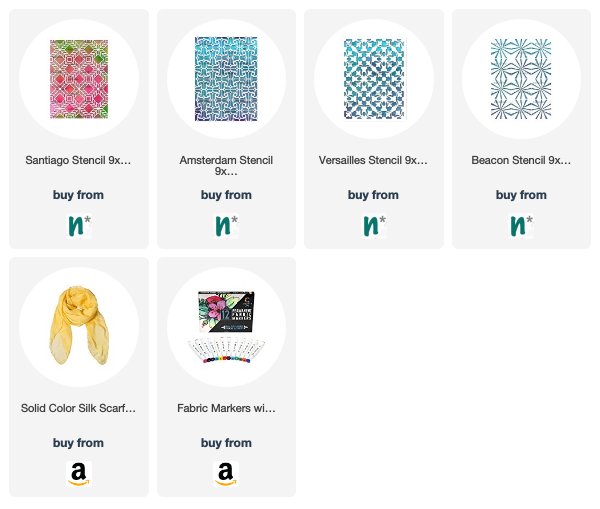
I found this nice set of non-toxic permanent fabric markers with both a fine and a broad tip ends and some silk scarves online. I chose a white scarf as my backdrop and Kim went for yellow. We gathered all my stencils to decide what patterns we might like.
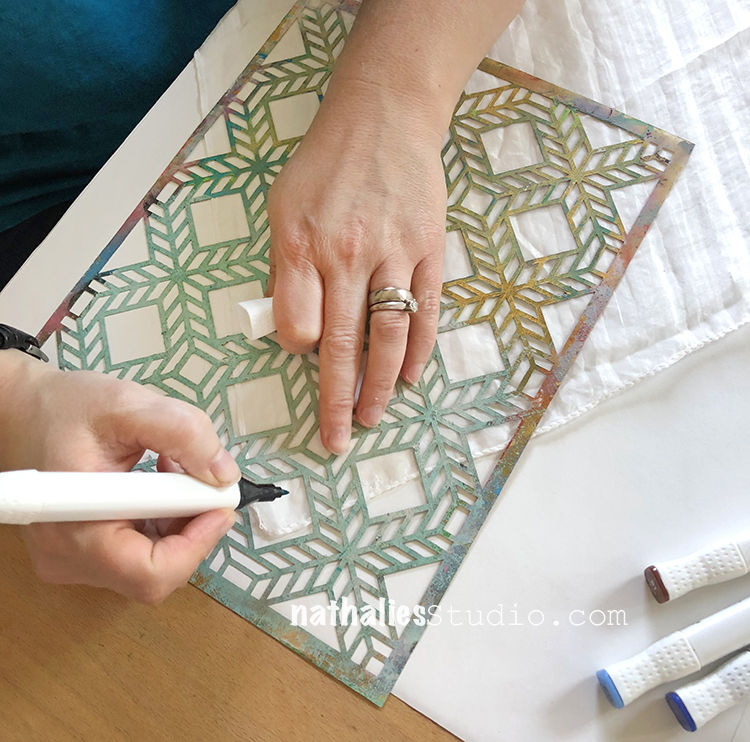
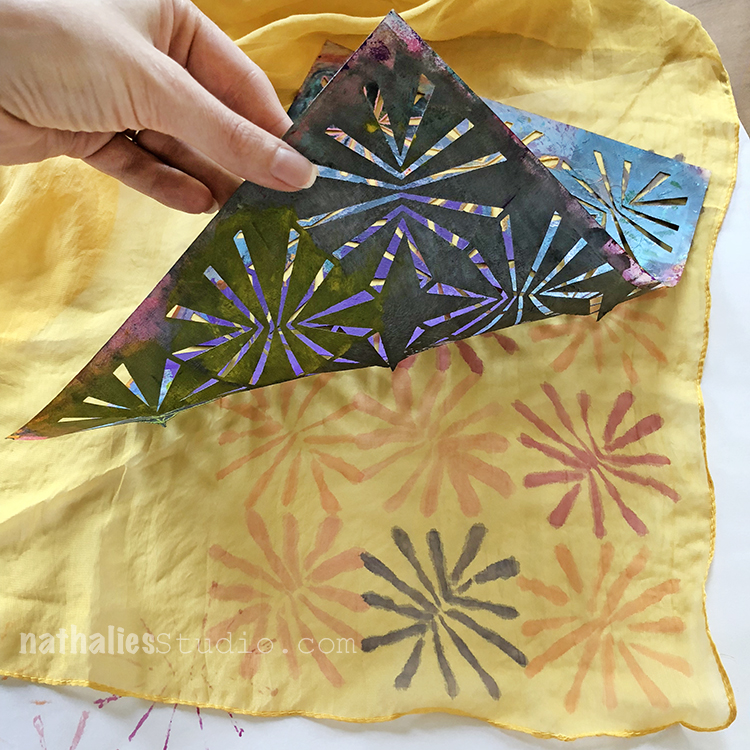
I jumped right in with my Santiago stencil – trying to decide how best to line it up. These are large square scarves so we decided to decorate the corners so you can see the design as it’s wrapped around your neck.
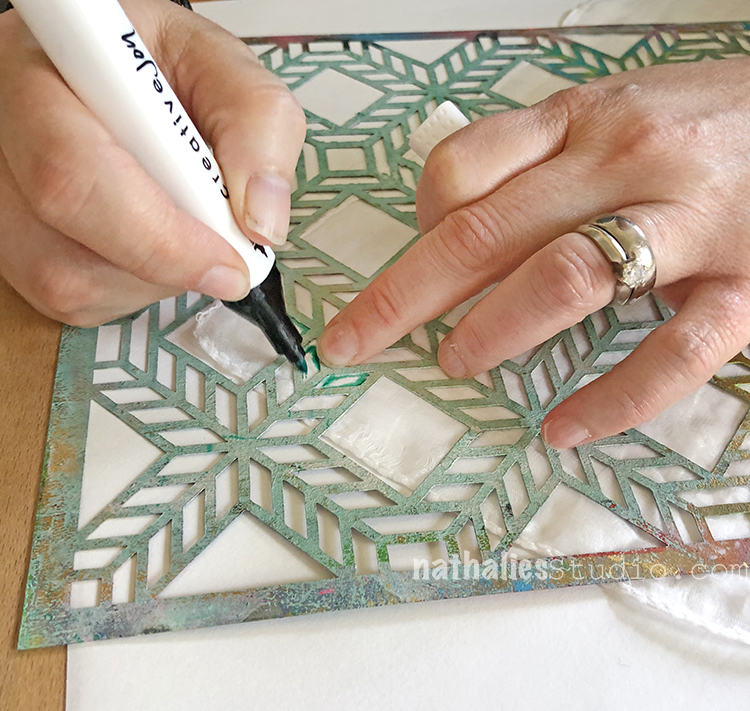
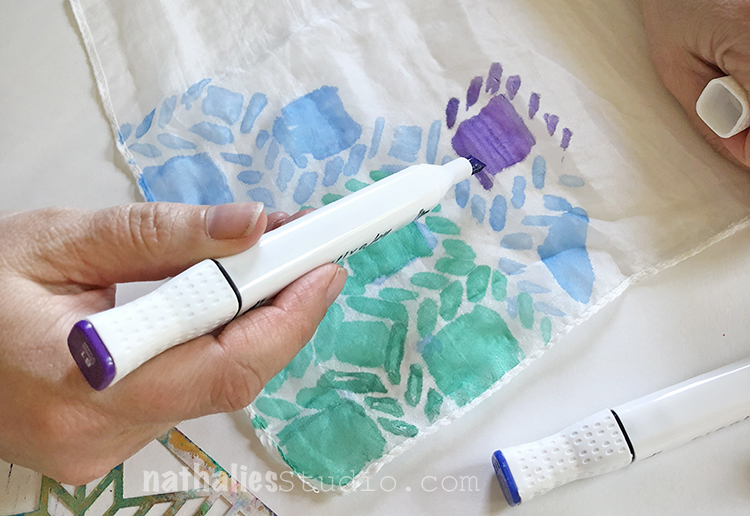
The fine tip end worked nicely with the stencil and the colors were pretty and bright – especially on the white scarf. The thin and smooth silk fabric was a bit tricky to hold down and we found you had to really hold the stencil and fabric in place to keep the pattern lined up. Another trick on thin silk – use very little pressure with the marker – it doesn’t take much ink to make a mark.
The ink spreads and gives a watercolor look to the design. This is maybe not a project for the very fussy – the silk and markers produce a more hand-painted look than precise line. I found the broad end of the marker worked well for filling in large areas of the design. As you can see, I switched colors several times with the same stencil.
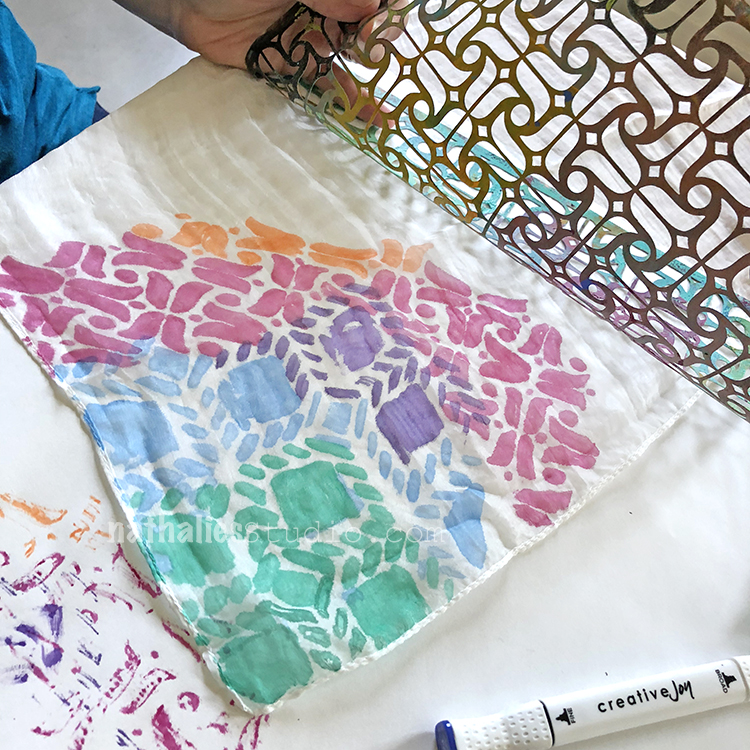
Another tip: make sure you have paper or some protective surface underneath the scarf to catch the pigment that bleeds through. I added another stencil here: Amsterdam, and a few more of the marker colors. My tactic was “more is more”.
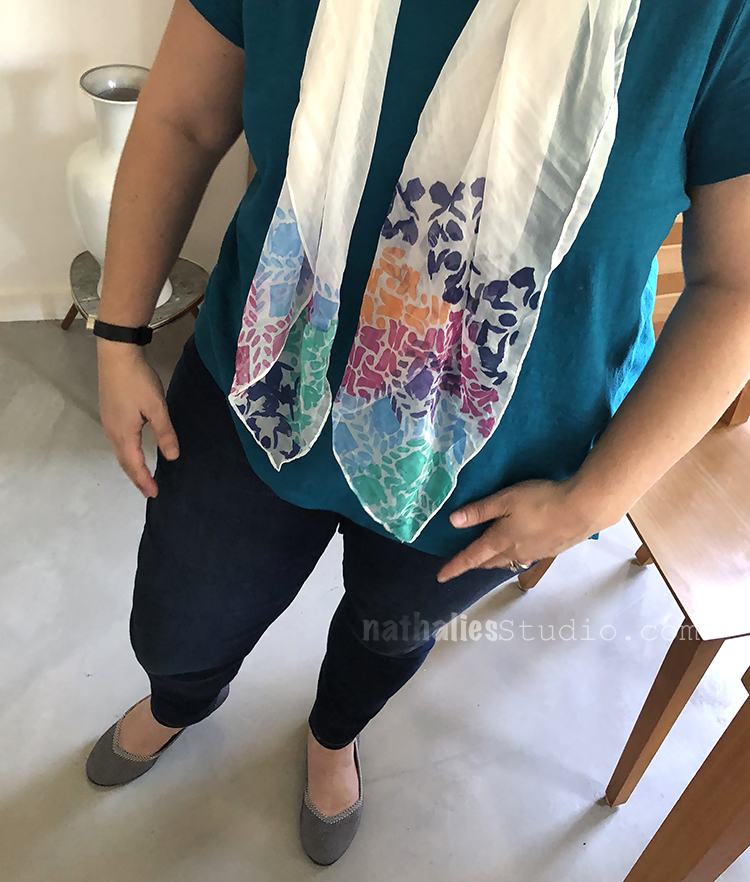
And finally I added a bit of the Versailles stencil and one final color. You can see that this scarf is thin and translucent (those marks near the orange pattern are actually on the paper underneath) and the markers are transparent too.
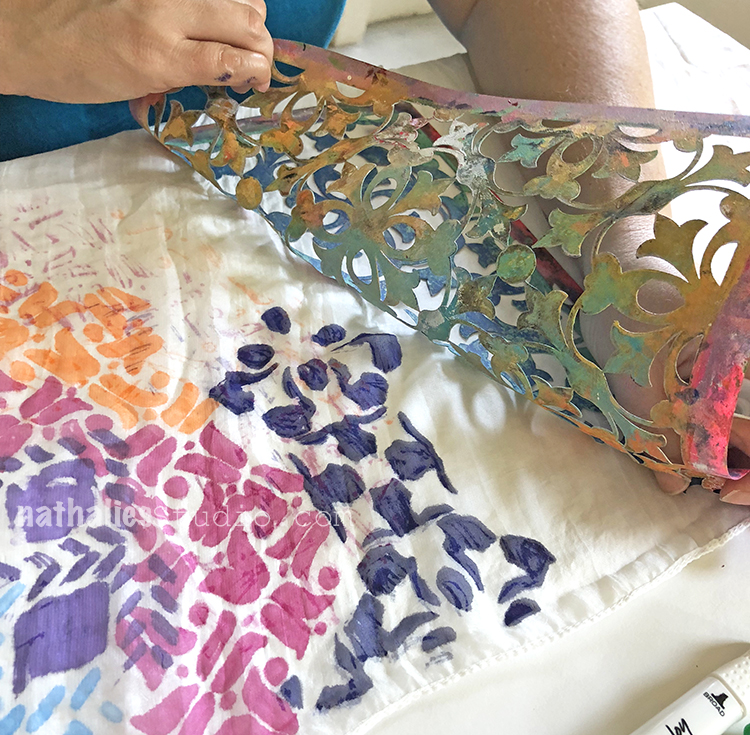
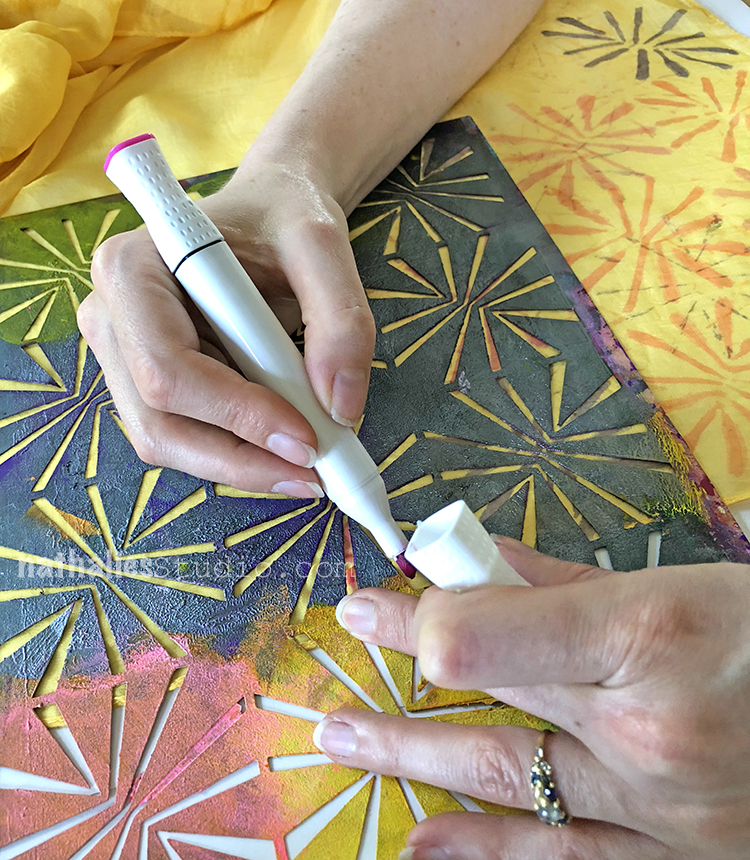
Kim chose to use only the Beacon stencil on her yellow scarf.
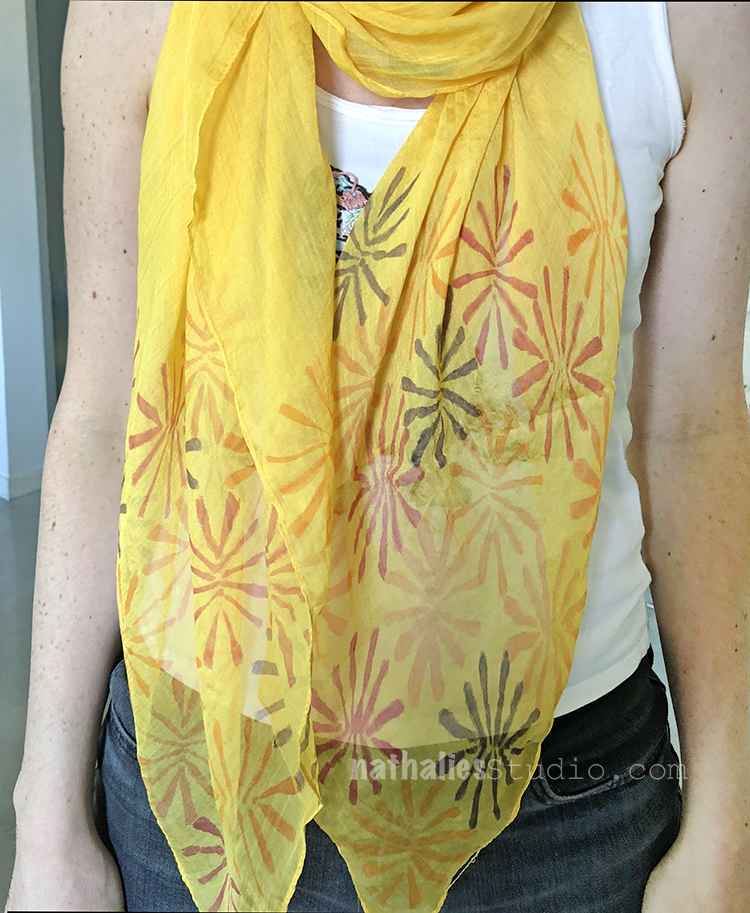
The designs look like flowers and she stayed with pinks, orange, and purple colors. Again, she worked on the corners of the scarf.
Here is her field of flowers when she was done. You can see the markers bleed on the thin silk, but it gives a pretty painted look.
My scarf is a colorful collection of patterns and so unique!
And here is the final result for Kim, a one-of-a-kind scarf for summer! This was a fun and easy project and just took an hour or so. I also really liked the color selection of the marker set so I’m definitely going to try them on some other things too. I hope you try it and share your results with me!
Here are some of the supplies we used for this project:
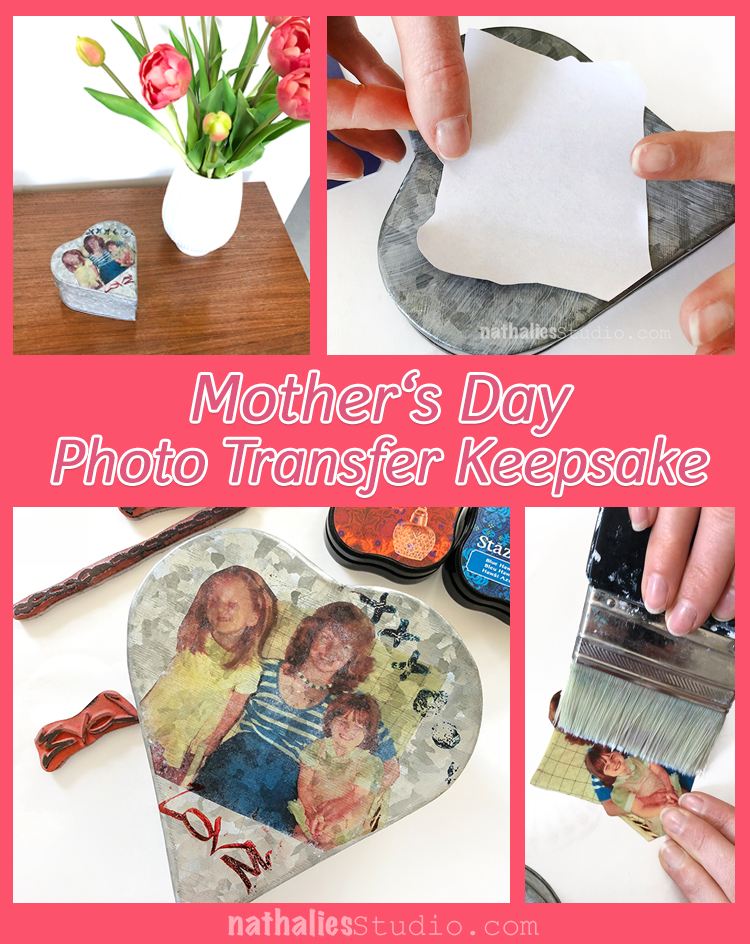
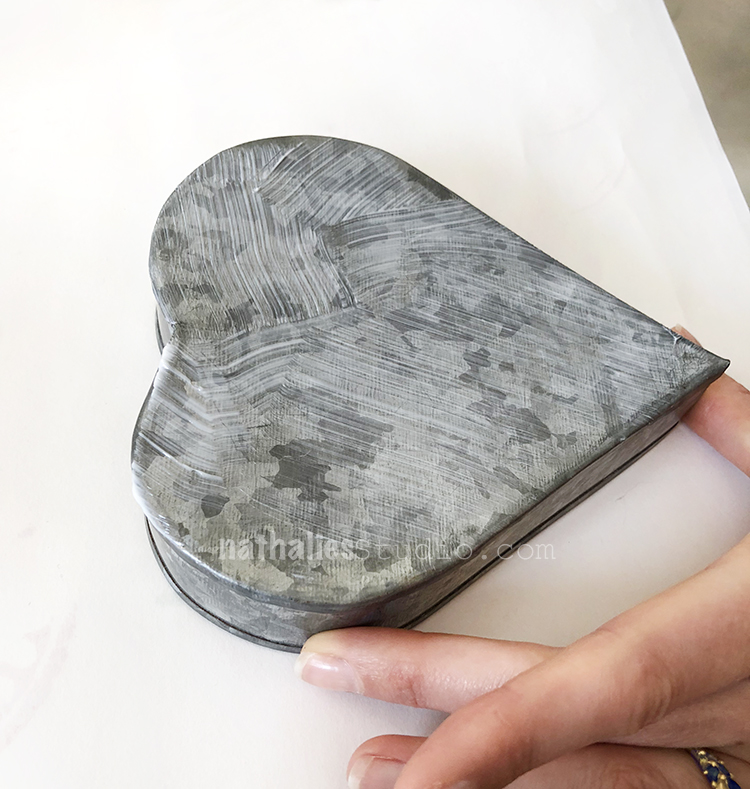
A while ago I made some photo transfers on galvanized metal plates and Kim really liked the look and so she asked if I could show her how to do it so that she could make a cute gift for her Mom for Mother’s Day.
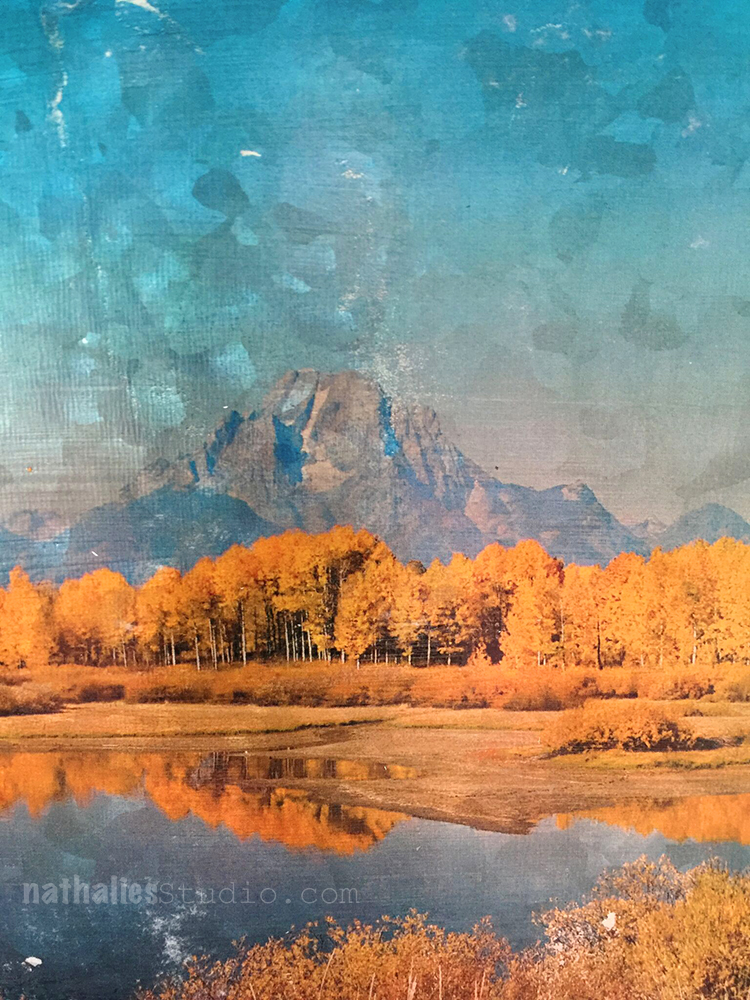
The fun part about doing a transfer on the metal is that you have the metallic sheen in the transfer but also the visual texture of the tin adding almost a painterly quality.
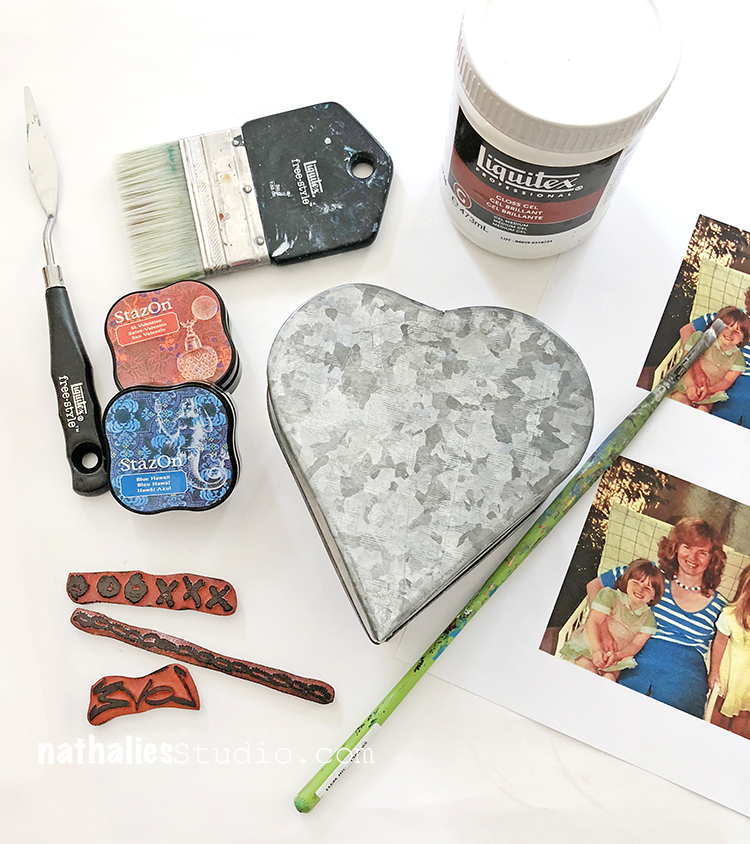
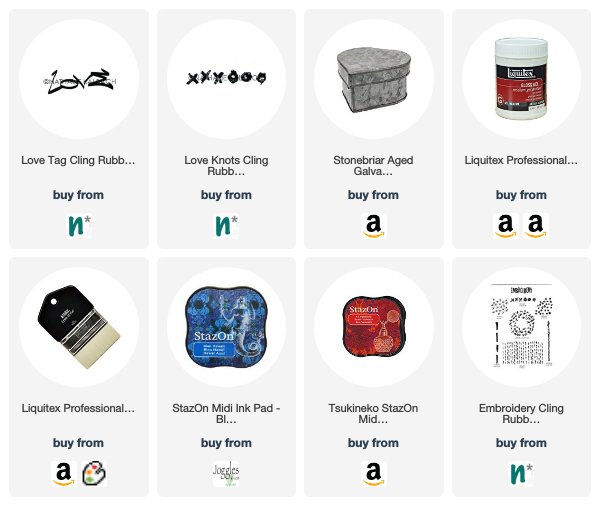
Gloss Gel, a brush, a galvanized tin and photo as well optional some stamps and a stamping pad are the supplies needed. Kim decided on a galvanized heart box for the transfer.
Something that is really important regarding the photo is that you need a high contrast laser print and that you will need to reverse the image before you have it printed out because the transfer will mirror your photo, words, buildings, people etc.
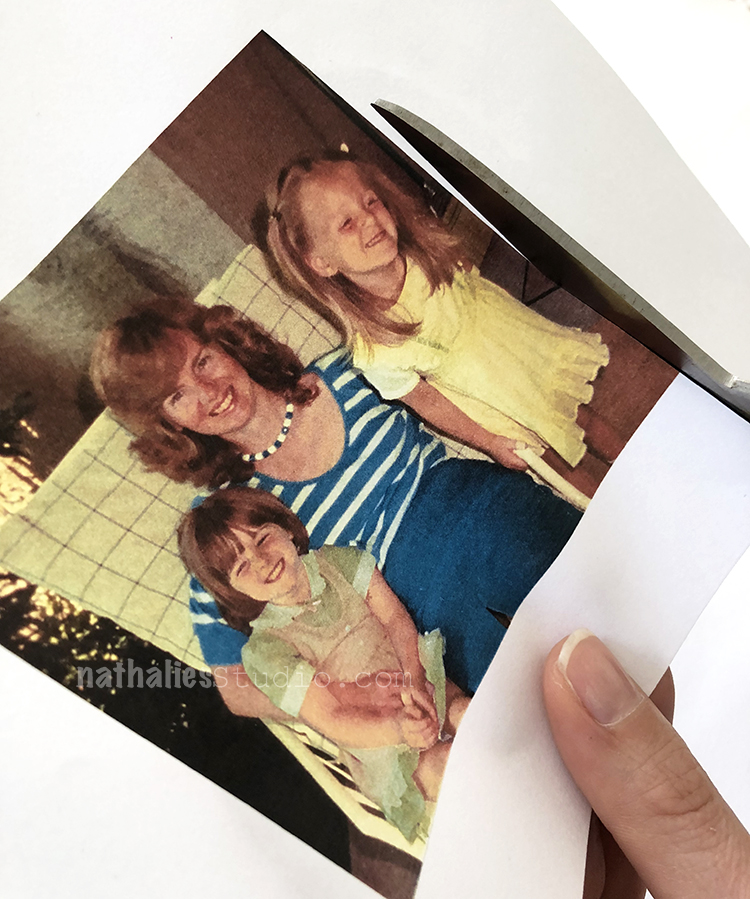
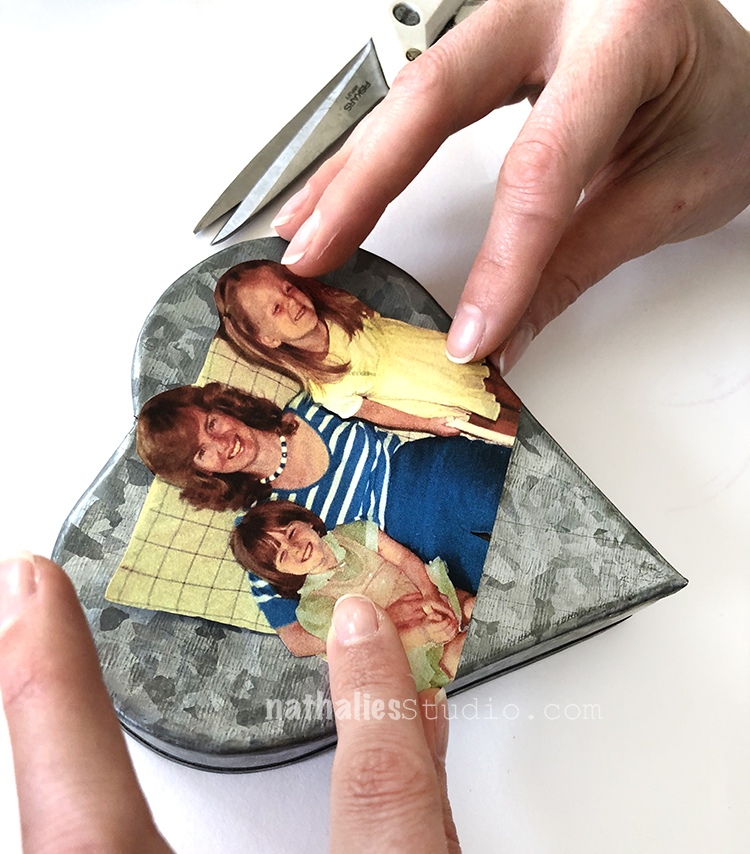
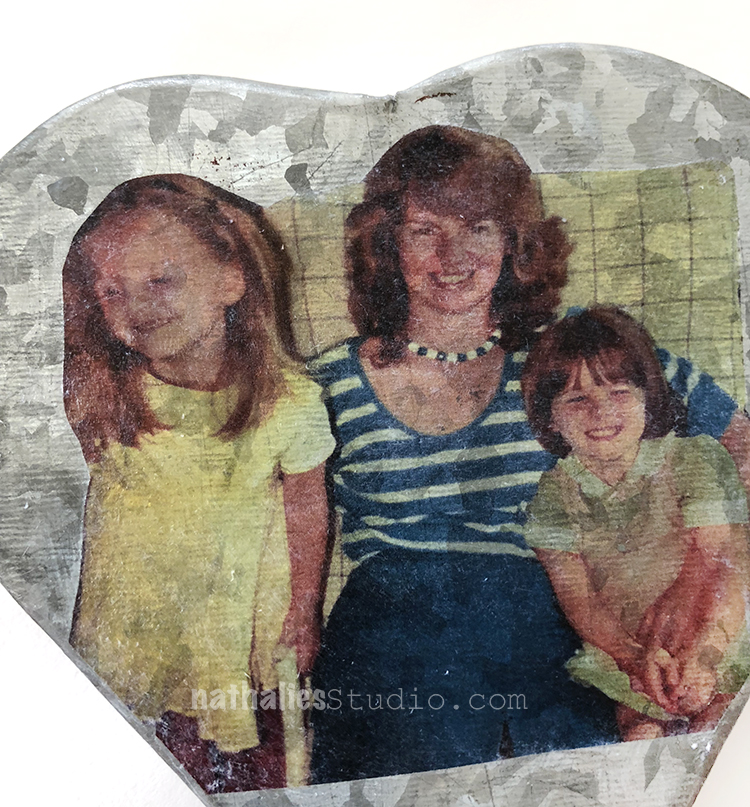
Cut the image to size – Kim cut along the edges of this photo -aren’t her sister, she and her Mom the cutest?
She made sure the photo would fit onto the heart shaped lid of a tin box.
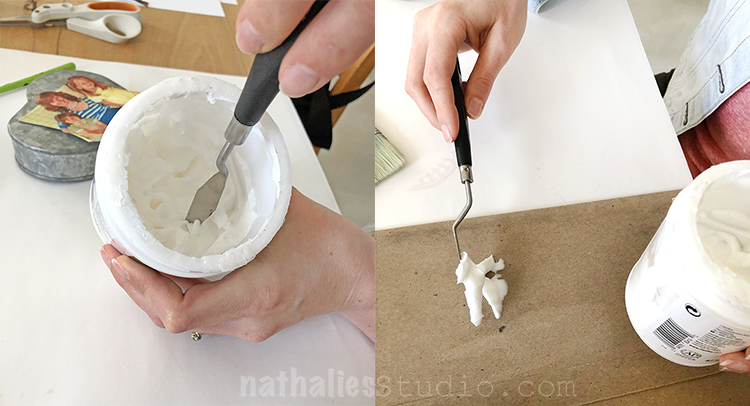
Scoop some of the Liquitex Gloss Gel out of the jar. You can later put the unused gel back into the jar. The reason why I like to use glossy Gel Medium is that the glossier the medium, the more translucent the transfer will become.
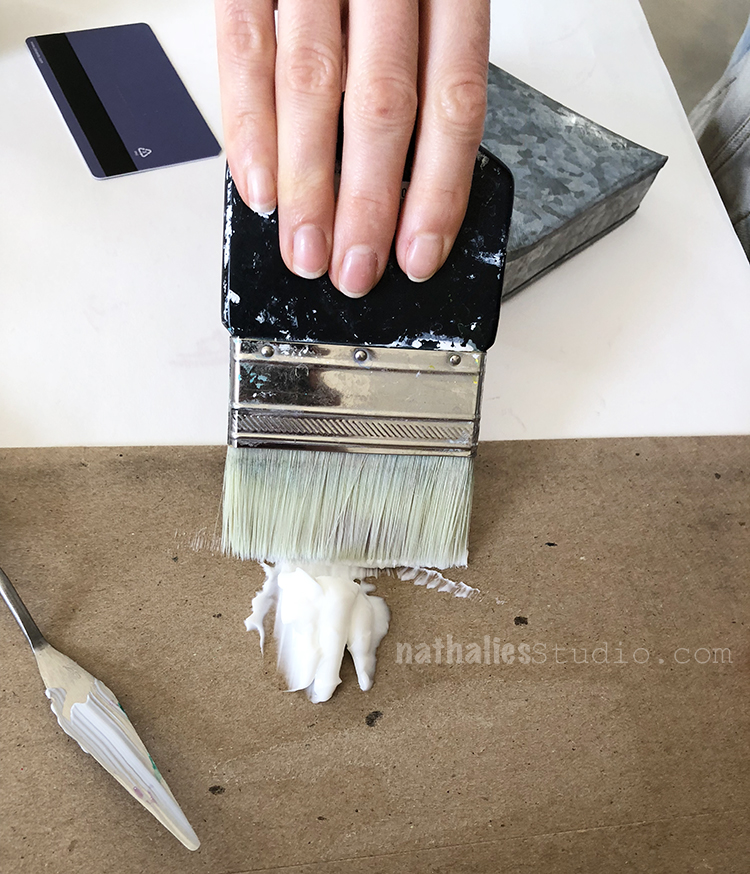
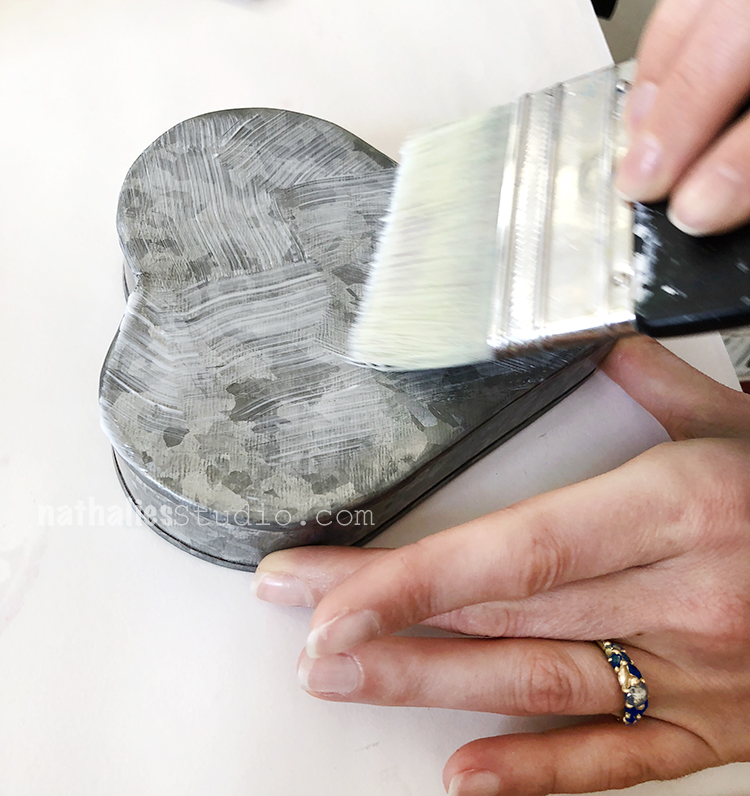
Using a paddle brush to cover the tin (you can use any brush- but I prefer the paddle brush because it helps with an even distribution of the medium and and makes it easer to smooth out brushstrokes)
Even though the photo is smaller then the lid Kim covered it entirely because will even the glossy sheen once the gel is dried.
Then spread the gel also over the photo. You don’t want to cover any of the surfaces to thickly and you need to work fast to prevent the gel from drying.
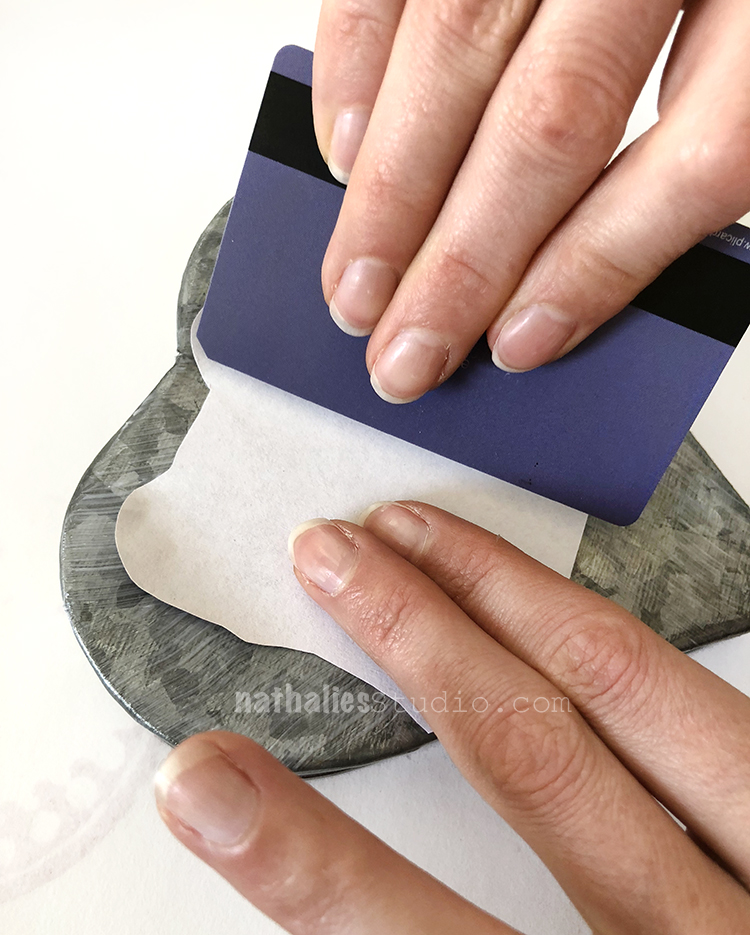
Then place the image facing down onto the tin
and burnish it down. Carefully get rid of any bubbles that may have accumulated beneath the image by using a plastic card or squeegee.
Start at the center and work towards the outer edges of the adhered image.
Set the tin aside and let it dry for several hours.
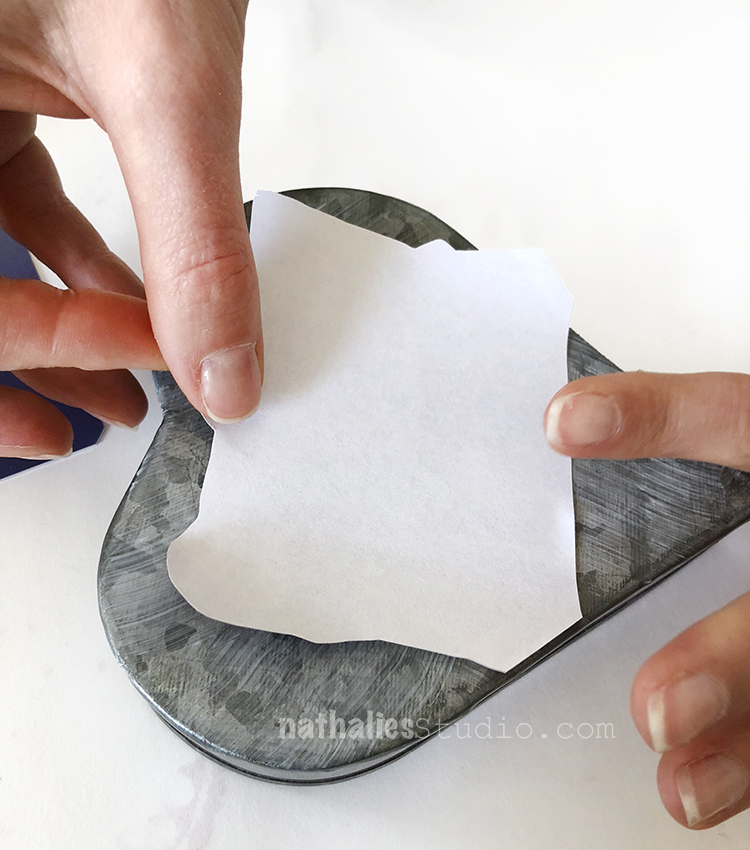
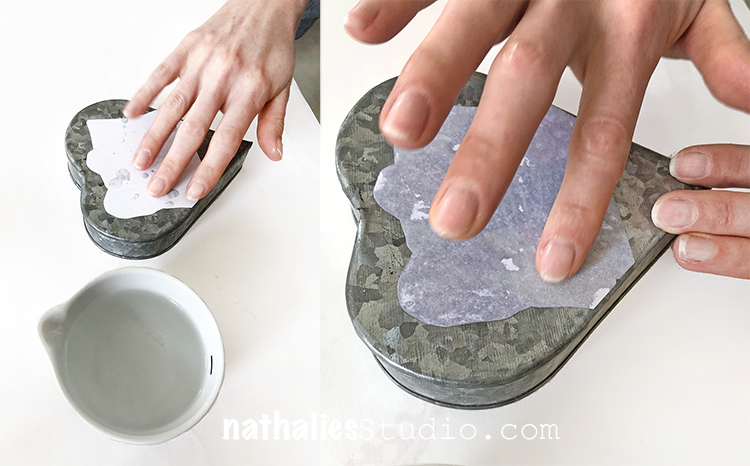
Wet the back of the image transfer paper applying some water with your fingertips.
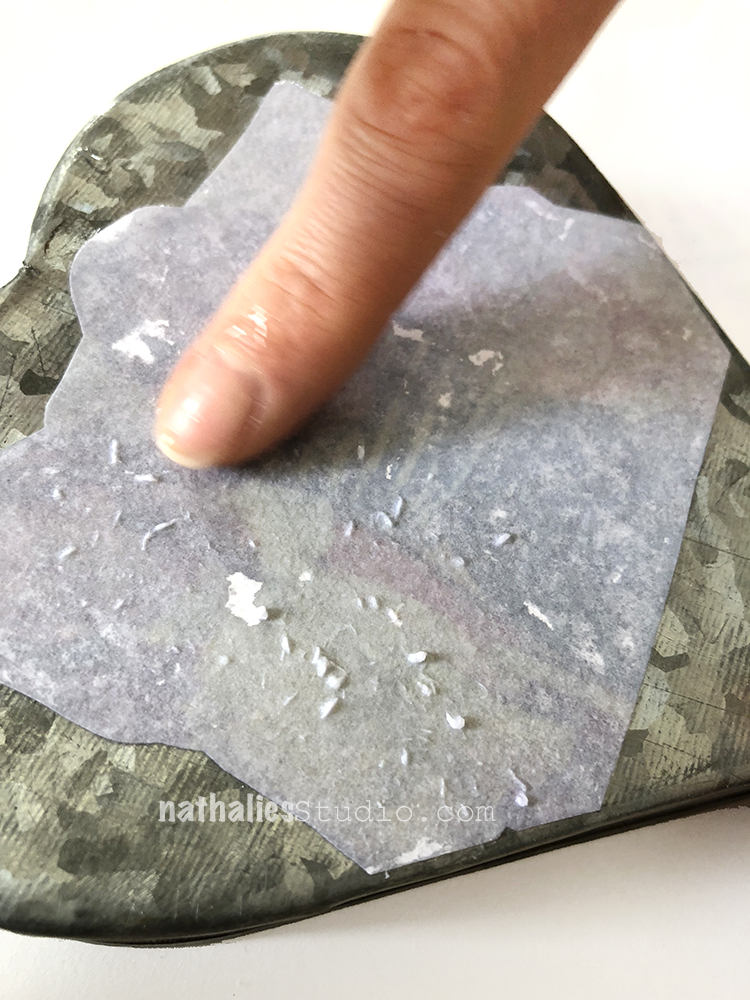
Start rubbing the back of the paper off in a gentle circular motion.
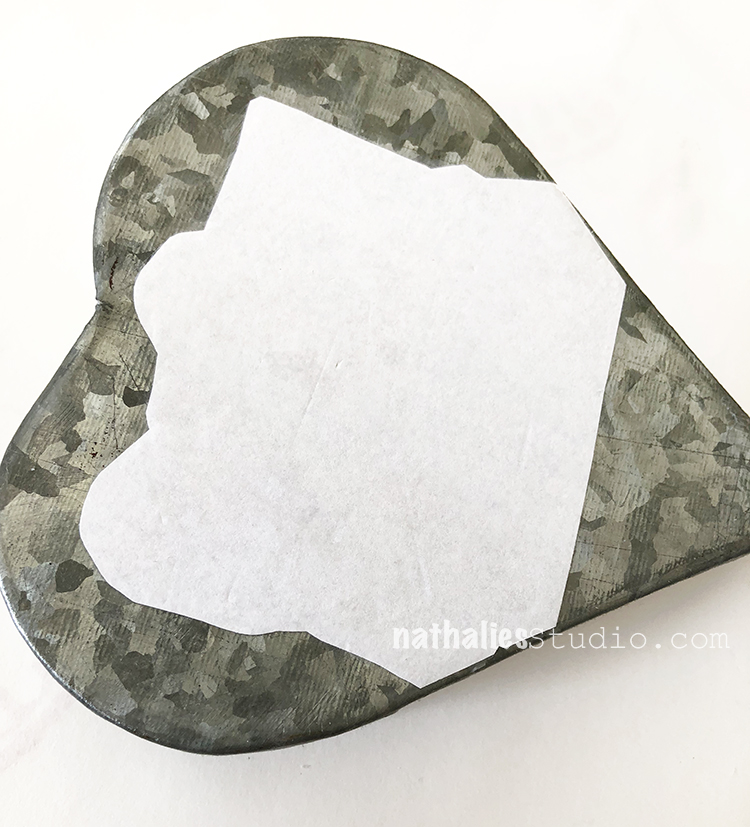
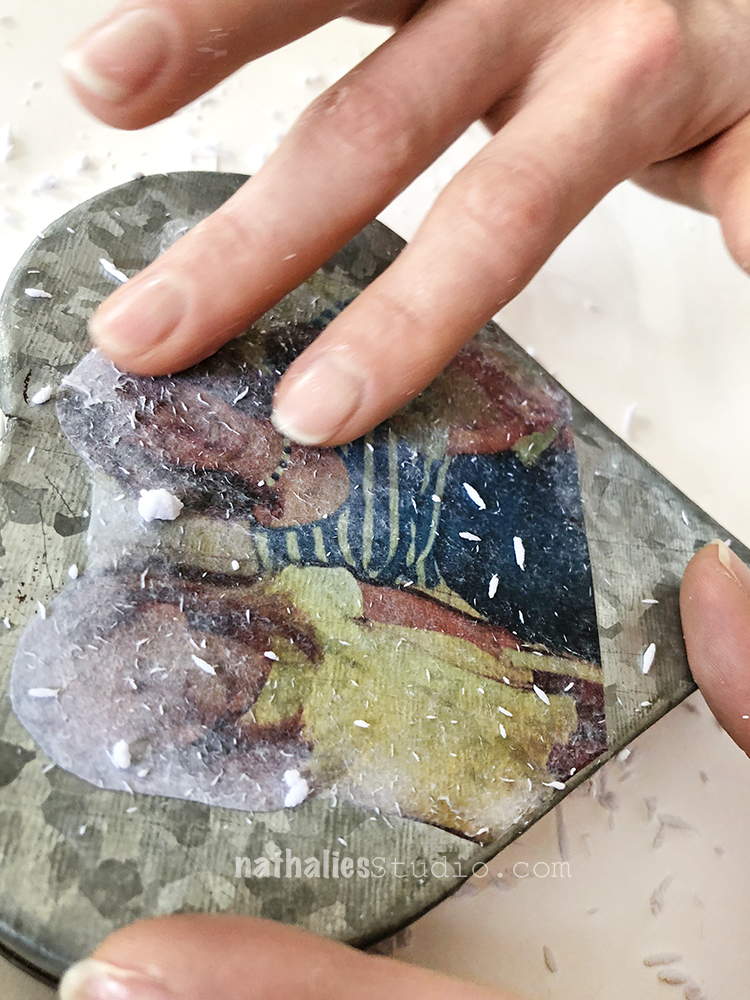
The image with start to appear as the paper pulp is removed. Work one area at a time until most of the paper is rubbed out. Let the image dry in between. The remaining paper will reappear and will show you which areas might need more rubbing. Work gently and stop before the transfer gets scratched or damaged by further rubbing.
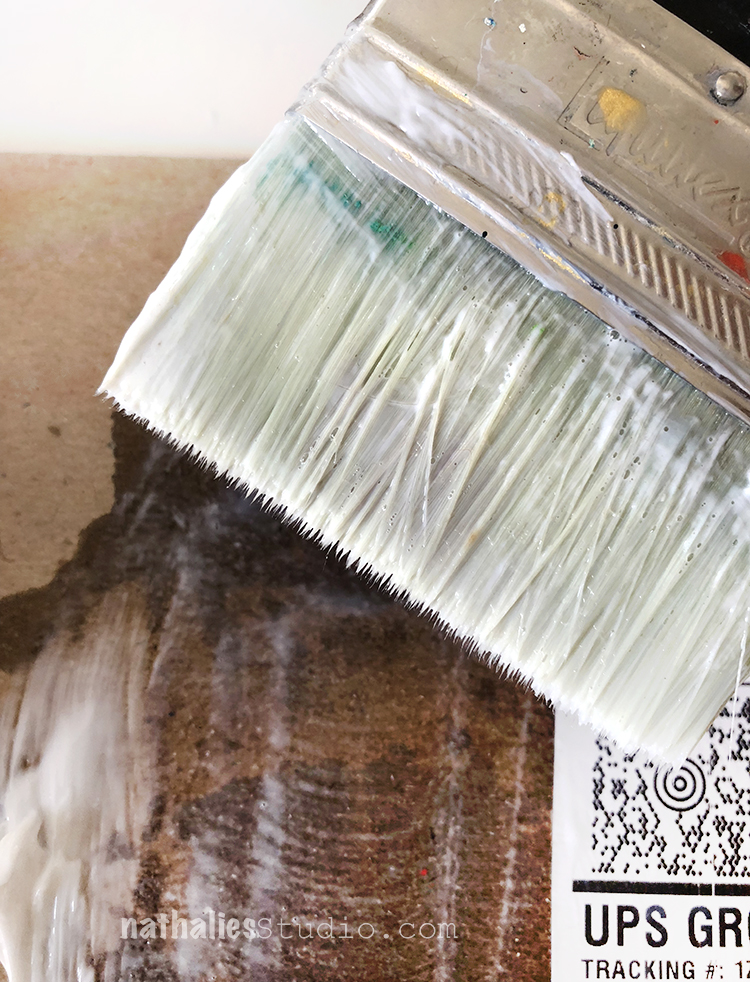
Apply a final coating of a little bit thinned down Gloss Gel to the entire lid of the tin. Make sure to carefully work the gel into any areas where are tiny bit of paper might remain. The Gloss Gel will seal the surface and make those bits of paper invisible once dried.
Let dry.
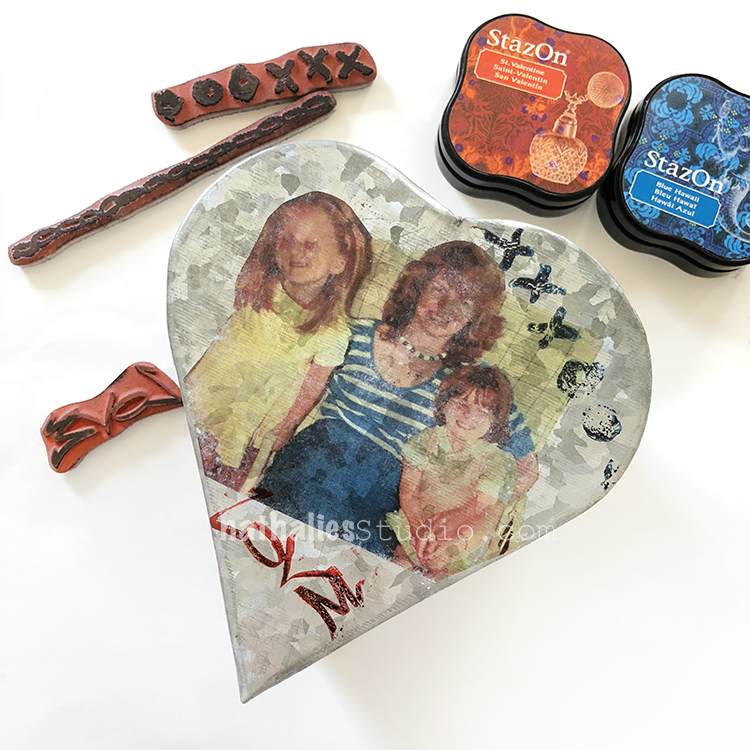
Kim then added some stamping with StazOn and my Love Tag and Love Knots stamps.
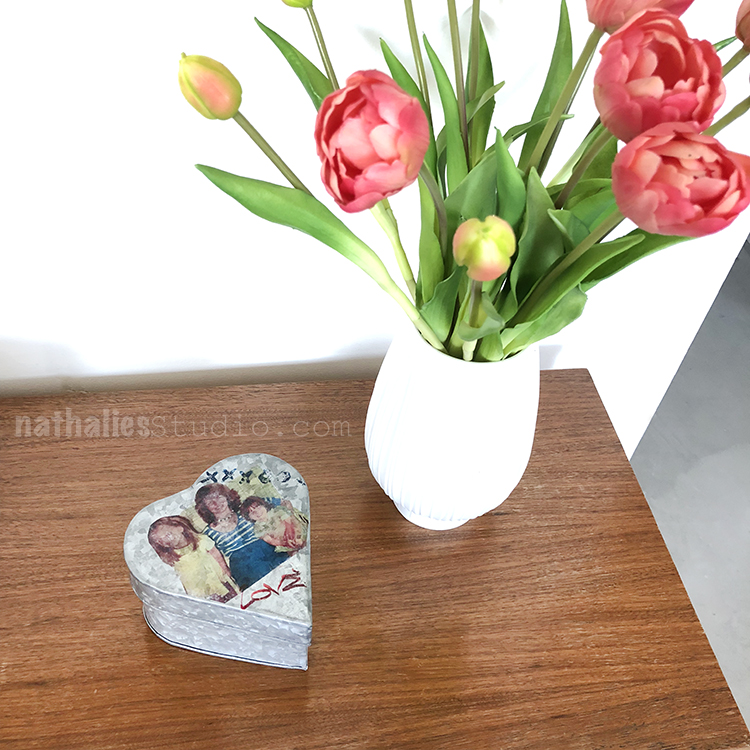
And there you go, a personal little keepsake box filled with some sweets, a bunch of flowers and you are ready to go for Mother’s Day.
I love the transfer on metal – there are many options using tin – for example tin plates with a transfer for a journal or else! Hope you give it a try if not for Mother’s Day then maybe some other time :)
Here are some of the supplies Kim used for her Keepsake box


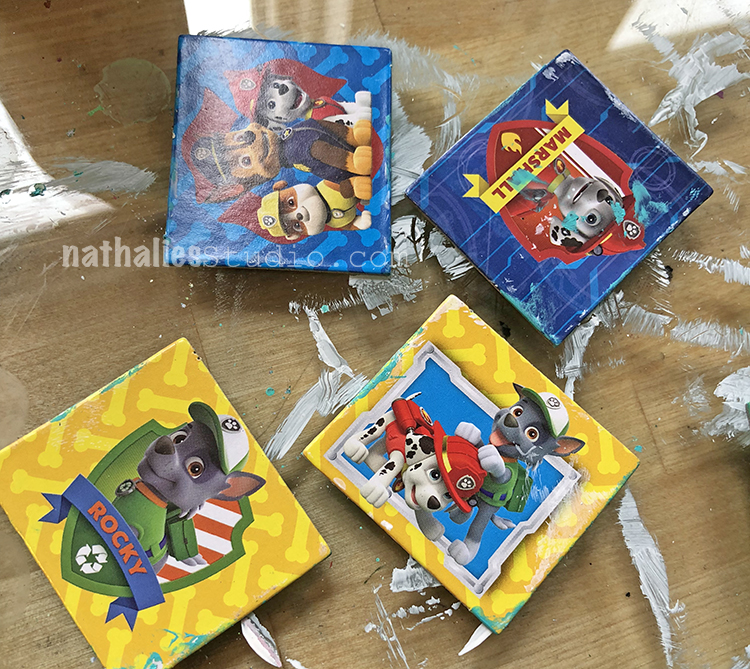


Definitely more of challenge and quite clever but you did cover up dogs from that cute Paw Patrol show.
Reply