General Announcements

Studio DaphNat: Marbled Technique – Results

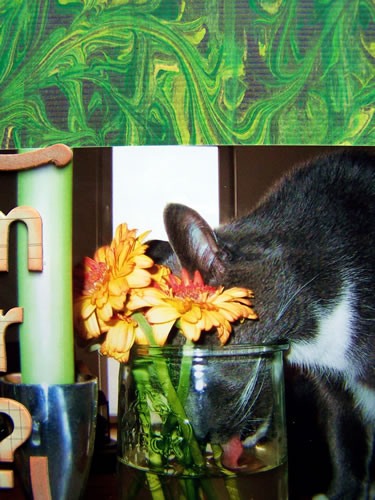
Vor einigen Wochen haben Daphne und ich die Marmoriertechnik mittels Rasierschaum ausprobiert und natürlich möchten wir Euch auch nicht vorenthalten, wie wir unsere Ergebnisse sodann beim Scrappen untergebracht haben.

A few weeks ago Daphne and I tried the marbled technique with shaving cream and of course we want to show you how we use our results in a project or layout.

Smart?

JOurnaling: …well, only if you don’t put into perspective that there is a water bowl on the floor :-)

Detail:

Ich finde es nett ein selbstgemachtes Element mit auf dem Layout zu haben – ich hofffe Euch gefällt es auch!

I like to have a selfmade element on the layout – I hope you like it too!

  • D@nielle

    |

    Love the whole project together, the marbling is cool and that photo, well it really doesn’t need an explanation.

    Reply

  • Jeani

    |

    Das ist absolut toll. Besonders das Foto hat es mir angetan. Sag mal, ist das echt oder eine Photomontage?

    Reply

  • Monique

    |

    Love all the bright colors! And that picture is great!!

    Reply

  • Vicki Chrisman

    |

    This is great Nat! I LOVE the fact that you are a technique junky! I did some layouts using this technique for an assignment for Scrapbook Answers,and was amazed how cool and vibrant the colors turn out! love your layout and that darling photo!!!

    Reply

  • Mirjam

    |

    Love your home made background papers… and as for your cat… ours drinks from the toiletbowl… not a nice thought… since she likes to (kiss) us too… and yes, she has always got a bowl of fresh water…..
    LOVE the DAPHNAT experiments!
    And oh, yeah, thanks for the nice comments on my blog!

    Reply

  • christiane

    |

    saw it in real!! yeah!! more better than here!! ;)

    Reply

  • Daphne

    |

    Great to see it on a layout :)
    It is indeed really cool to make your own piece of background paper!

    LOVE LOVE LOVE this photo… cats totally rule!!

    Reply

  • Kat

    |

    Wow, das sieht ja klasse aus!!! Muss unbedingt mal das Marmorieren ausprobieren!! :)

    Reply

  • Anja

    |

    Was für ein tolles Foto ! Und sehr geniales Layout – diese Marmortechnik ist toll!

    Reply

  • jana

    |

    und wie! das passt wirklich echt gut! gehst du in serie? ;)

    Reply

  • Marion

    |

    Sehr klasse – ich finde deine Farb- und Papierwahl immer wieder fazinierend. Dir ein schönes Wochenende.

    Reply

  • Judith

    |

    Hi Nat! How are you? I simply love this lo!!! The colors are great and the marbletechnique is beautiful. But most of all I adore that picture! it made me smile, love to see that pink tongue!!! Hahahaha!

    Reply

  • Andrea

    |

    Very cool – LOVE the marbled BG and the Layout is awesome (what a cool cat – LOVE the fun twist in your title/journaling!!!)!

    Reply

  • Daniela

    |

    LOL!!! Ja, man muß sich nur zu helfen wissen… Klasse Farben und dein Papier macht sich hervoragend!

    Reply

Leave a comment

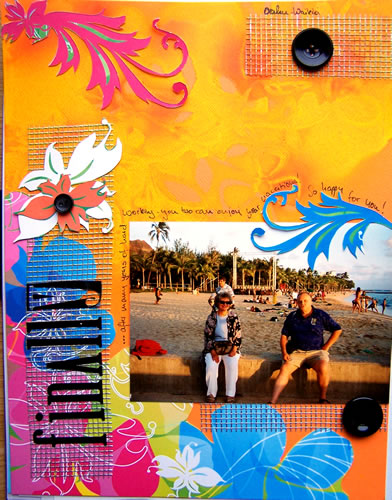
Layout: Finally

Mir war nach einem sonnigen Layout und danach auch etwas auszuprobieren. Also habe ich ein Foto von einem Urlaub auf Hawaii rausgekramt und Acryl Spray Farbe über der HeidiSwapp Maske gesprüht- hui – Ergebnis ganz schön – Maske verkorkst!

I wanted to make a sunny layout and I wanted to try something out. Therefore I took a photo from a vacation on Hawaii and sprayed Acrylic Spray Paint over a HeidiSwapp Mask – well – result is fun – the mask is screwed up!

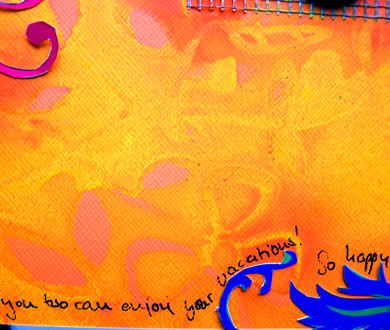
Journaling: Finally after many years of hard work – you two can enjoy your vacations! So happy for you!

Supplies: Heidi Swapp Mask, Acrylic Spray Paint, buttons (thanks Birgit), Mesh (thanks Christiane), Rouge de Garance papers and Cardstock, Lil’Davis letter stickers.

Detail:

Ich wünsch Euch einen sonnigen Tag :-)

I wish you a sunny day :-)

  • Julie Ann Shahin

    |

    Absolutely stunning colors! :) Hope your weekend is going well.

    Reply

  • christiane

    |

    sieht im echten leben ebenfalls sooooooo schön aus!!

    Reply

  • Fauve

    |

    So sunny :DLove the background,too bad your mask is screwed up :D

    Reply

  • Nura Keif

    |

    Love the vibrant colors.Awesome:-D

    Reply

  • Nadine

    |

    Wenn man genug Geld hat, sollte man das trotzdem öfter machen, denn das Ergebnis rechtfertigt jedes Maskenvermurksen :-)

    Reply

  • Daphne

    |

    heee…we have the same mask… mine is screwed up also :)
    LOL

    Love the pink and the yellow!

    Reply

  • leslie

    |

    very pretty! love the colors

    Reply

  • Marion

    |

    Klasse poppige Farben – gefällt mir sehr gut. Sonne??? Was war das noch gleich … Hier regnet es – mal mehr mal weniger, selten gar nicht :).

    Reply

  • Judith

    |

    It’s beautiful Nat!! I love the colors and the flowers, very bright and sunny! WOW!

    Reply

  • noell

    |

    Whatever happened to your mask, it sure did leave an interesting textured look on the paper! Cool!

    Reply

  • Andrea

    |

    WOW … so cool – LOVE those sunny, vibrant colours – puts me into a good mood right away :)

    Reply

  • Britta Scholles

    |

    Fällt gar nicht auf, mit der Maske. Der Hintergrund sieht toll aus. Und überhaupt: sonnige Farben, sehr prima!

    Reply

  • Svenja

    |

    Hmmmm, sehr sonnig und schön!

    Reply

  • Simone

    |

    Hey,das bringt einem gleich gute Laune ins Haus!
    Und mich Dir wegen der Mask mal keine Gedanken,solltest mal meine sehen…….
    Der Hintergrund ist super geworden,den Tip werde ich mir doch gleich mal stibitzen :)
    Dir auch einen Wunderschönen Tag!!!

    Reply

  • jana

    |

    na bei so einem schönen layout kann das wetter ja nur besser werden! dito ;)

    Reply

Leave a comment

Book Review: Designing with Color

/Viele Bücher habe ich in der letzten Zeit gekauft, unter anderem Designing with Colors von Autumn Leaves.

I bought a lot of books in the last weeks, one of them Designing with Colors by Autumn Leaves.

Das Buch verspricht zu zeigen, wie man Farben einsetzen kann, um ein Layout zu beleben oder um bestimmte Emotionen zu erwecken.

This books promises to show how to use colors to give a layout live or to excite certain emotions.

Designer wie Ashley Calder, Danielle Thompson oder Emily Falconbridge haben an diesem Buch mitgewirkt.

Designers like Ashley Calder, Danielle Thompson or Emily Falconbridge contributed to this book.

Das Buch ist in fünf Kapitel unterteilt: Fundamentales, Farbeinfluß, Farbinspiration, Farb-Innovationen, Galerie.

The book has five chapters as there are: Fundamentals, Color Impact, Color Inspiration, Color Innovations, Gallery.

Das erste Kapitel, welches die Farbtheorien beschreibt, ist recht kurz gehalten, was aber nicht unbedingt nachteilig ist. Es werden dort so Themen wie das Farb-Rad erläutert und auch Begrifflichkeiten wie Monochromatisch, tertiär und komplementär. Die Layouts, die hier aufgezeigt sind, sind bestens dazu geeignet, die Theorien verständlich zu machen.

The first chapter, which is about the color theories, is pretty short but that is unharmful. It includes facts about the color wheel as well as explanations about concepts as monochromatic, tertiary and complimentary layouts. All shown layouts are good examples to understand those theories.

Das zweite Kapitel zeigt den Einfluß, den Farben haben können, auf. So kann zum Beispiel Rot für Ärger., aber auch für Liebe stehen. Oder Orange für Enthusiasmus aber auch für den Herbst.

The Second chapter shows which impacts colors can have. Red could stand for anger as well as for love. Orange could stand for enthusiasm as well as for the season autumn.

Im Inspirations Kapitel werden Layouts der Designer gezeigt, die durch bestimmte Gegenstände des alltäglichen Lebens inspiriert worden. Besonders geht es hier natürlich um die Inspiration durch die Farben dieser Gegenstände.

The Inspirations chapter shows layouts of the desinger which are inspired by everyday objects. The main focus is on the color inspirations of those objects.

Ein schönes Buch, daß den Einfluß von Farbe auf unser Leben und somit natürlich auch auf unsere Scrapbookseiten wunderbar erläutert. Die Anleitungen und Techniken in diesem Buch animieren einen sofort mit dem Scrappen zu beginnen und so ist das Buch auch für denjenigen geeignet, der nicht sonderlich großes Interesse an Farbtheorien hegt. Ich kann es nur empfehlen!
This is a beautiful book which teaches the impact of color in our life – therefore also on our layouts in a wonderful way. The instructions and techniques animate to begin assap with Scrapbooking and so this book is applicable also for those that are not that interested in color theories. I can totally recommend it.

  • prolix

    |

    pop to say hello!

    bises*

    prolix

    Reply

  • Nadine

    |

    Vielen Dank für diese Rezension, über die Anschaffung jenes Exemplares hab ich nämlich auch schon nachgedacht :-D Und ganz lieben Dank auch für Deine lobende Erwähnung im sbs-Forum zu den DT-Werken. Hat mir als Debütant viel bedeutet, danke!

    Reply

  • Mirija

    |

    Das hört sich gut an! Danke für die Beschreibung!

    Reply

  • fauve

    |

    Yeah i am thinking of ordering this book,i LOVE color.
    It will be the color or the look book…

    Reply

  • marion

    |

    Danke für die ausführliche Buchbesprechung. Sehr gute Kaufentscheidungshilfe.

    Reply

Leave a comment

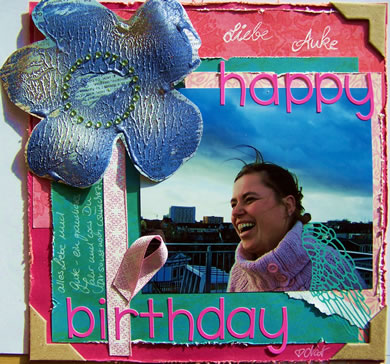
Happy Birthday Anke!

Alles Liebe und Gute zum Geburtstag – ich wünsche Dir einen grandiosen Tag, Anke!!!

Love and all the best for your birthday – I wish you a gorgeous day, Anke!!!

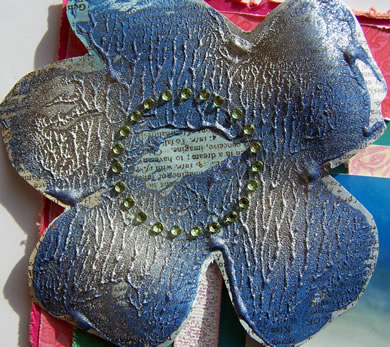
Blume/Flower detail:

Für die Blume habe ich Strukturpaste mit Acrylfarbe vermischt, diese Masse dann auf einen Blumenstempel gestrichen, die Blume auf 7Gypsies Papier gestempelt und dann leicht mit Chrom Spray eingesprüht.

For the flower I mixed structure paste with acrylic paint, spread this on a flower stamp, stamped on 7 Gypsies paper and sprayed it lightly with chrome spray.

  • Nura Keif

    |

    I love the flower!!I don’t know how to do it.Amazing!!

    Reply

  • Britta Scholles

    |

    Die Blume sieht genial aus!

    Reply

  • Anke

    |

    …Ohhh!!! WoHHHH!!!
    Ich Lieeeeebe dieses Layout!!! Vielen Dank liebe Nat!!!
    Und Euch allen natürlich auch vielen Dank für die Glückwünsche…;-))))
    Thank you everyone for your wishes for my birthday…;-)))

    Reply

  • Mirija

    |

    Herzlichen Glückwunsch Anke!!

    Das LO ist echt sehr cool! Die Blume ist der Hammer!

    Reply

  • noell

    |

    Wow, wild technique on the flower! I love that you put the little circle of bling on it.

    Reply

  • Daphne

    |

    Happy Birthday Anke.

    The flower is beautiful! And I just love the hambly wing rub on :)

    Reply

  • Eeva Hall

    |

    Du kommts immer wieder mit neue idén :) Dein LO ist klasse! Happy Birthday Anke!

    Reply

  • Judith

    |

    Hi Nat
    I love your LO and the flower is really cute with the little stones!!

    Reply

  • Marion

    |

    Klasse Idee mit der Blume – sehr geniales Layout.
    Herzlichen Glückwunsch Anke.

    Reply

  • christiane

    |

    auch von mir die besten wünsche zum neuen lebensjahr, anke!! und auf diese blume kannst du stolz sein: ein echter *natster* :))

    Reply

  • jana

    |

    happy birthday an dieser stelle, anke!

    und nun zu dir nat: dein layout ist genial, die blume rockt total!

    Reply

Leave a comment

Studio DaphNat: Rinse Aid Resist

Gestern war es mal wieder so weit, Daphne und ich hatten uns verabredet zur gleichen Zeit mit Klarspüler und Farbe eine weitere Technik auszuprobieren.

Finally yesterday Daphne and I again had an appointment to try the Rinse Aid Resist technique at the same time.

Für diese Technik benötigt man eine Oberfläche wie Leinwand oder Cardstock, möglichweise Serviettenkleber, Acrylfarbe, Pinsel, Wasser, Klarspüler und Papiertücher.

You need a surface like canvas or cardstock, optional gel medium or ModPodge, Acrylic paint, brushes, water, rinse aid and paper towels.

Zunächst die einfache Variante auf Leinwand.

First the easy variation on canvas.

Zunächst streicht man mit Wasser verdünnte Acrylfarbe auf die Leinwand.

First you apply watered down acrylic paint onto the canvas.
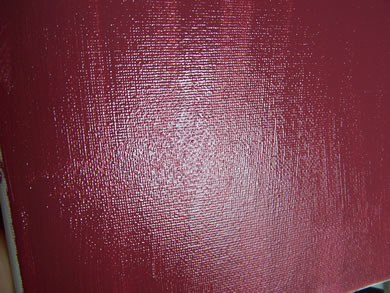
über der Spüle habe ich sodann auf die aufrecht gehaltene Leinwand Klarspüler gespritzt und durch die noch nasse Farbe herunterlaufen lassen, so dass kleine Streifen entstanden.

I hold the canvas up and over a sink and then applied drops of rinse aid into the wet paint. I let it run down to create a striped look.
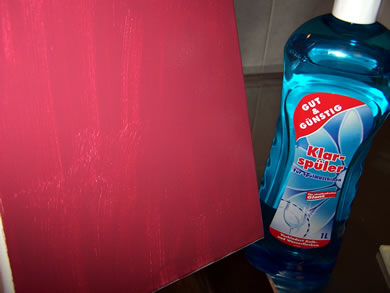
Dann liess ich die Leinwand an der Luft trocknen. Ich tränkte ein Papiertuch mit Wasser und rieb mit diesem die Leinwand, so dass die Farbe sich von den Stellen ablöste, wo der Klarspüler heruntergelaufen war.

I let the canvas air dry and damped a paper towel with water. I used this to rub over the canvas so that some of the paint got removed. The paint resisted the parts the rinse aid ran down.
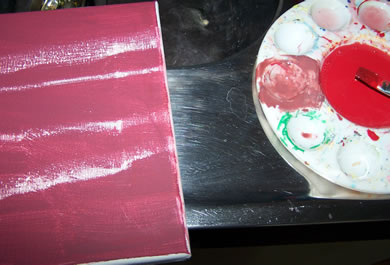
Hiernach verdünnte ich erneut eine andere Farbe mit Wasser verdünnt und trug diese wiederum auf die Leinwand auf – die vorher beschriebenen Schritte habe ich sodann wiederholt.

I applied again a watered down but different colored acrylic paint – and repeated all steps again to add another layer.
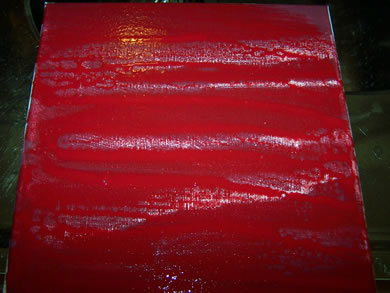
Hier ist das Ergebnis – das gefällt mir ganz gut.

Here is the result – I like it.
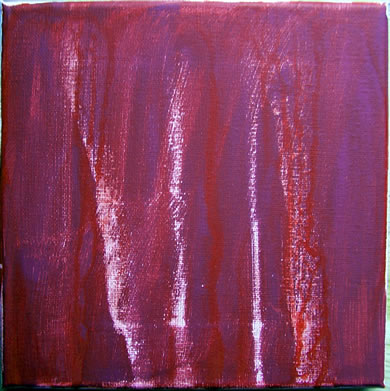
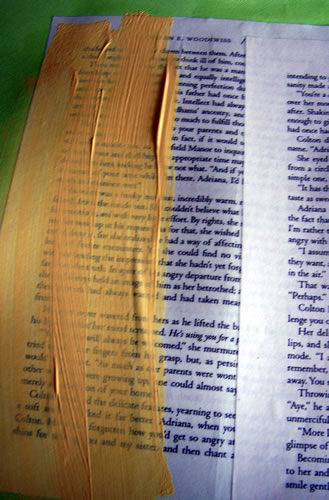
Die gleiche Technik habe ich sodann auf Cardstock angewandt, wobei ich zunächst auf den Cardstock zwei Buchseiten aufgeklebt habe und das ganze sodann mit Serviettenkleber versiegelt habe.

I used the same technique on cardstock. I glued two book pages onto it and sealed it with ModPodge.

Buchseiten anmalen/paint book pages
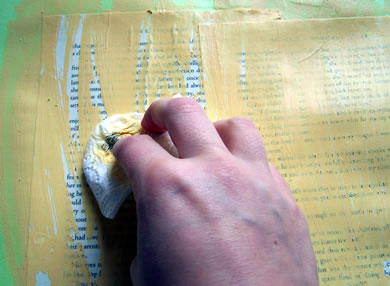
resistente Farbe entfernen/remove resisted paint
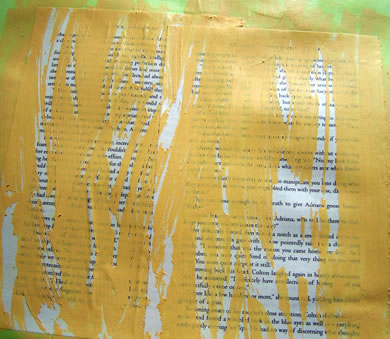
Zwischenergebnis/ intermediate result
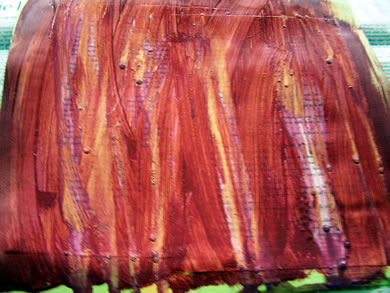
zweite Farbschicht/second layer of paint
erneutes Zischenergebnis/ intermediate result
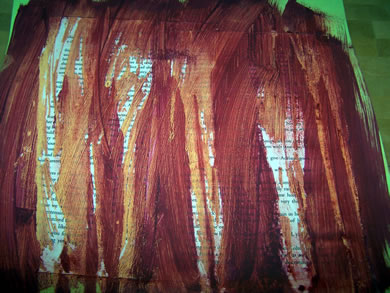
Hier ist das finale Ergebnis – insgesamt, habe ich drei Schichten aufgetragen. Sehr zufrieden bin ich nicht.
Here is the final result – I applied in total three layers. I’m not too happy about it.
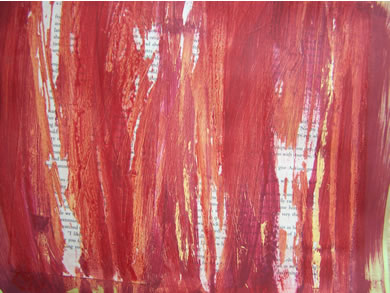
Wie immer konnte ich es dabei nicht belassen, der Versuch mit Alkohol Ink scheiterte kläglich…die Spüle war nach einiger Zeit wieder sauber ;-) Also versuchte ich es mit Color Wash.

As always I couldn’t resist to try more, my try with alcohol inks was unsuccessful though …the sink was clean after several hours ;-) So tried with color wash.
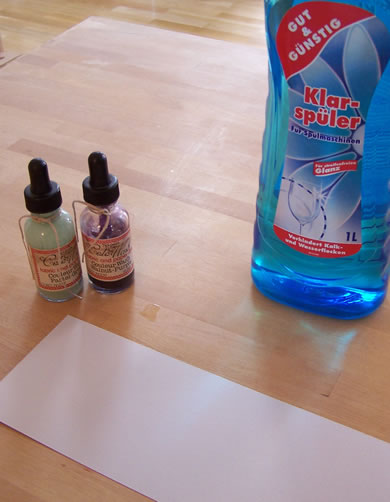
Ich habe dann ebenfalls auf die Oberfläche den Klarspüler aufgespritzt, wobei man hier nur sehr schwer eine Wirkung erkennen konnte.

I applied the rinse aid to the surface, but it was hard to see a result right away.
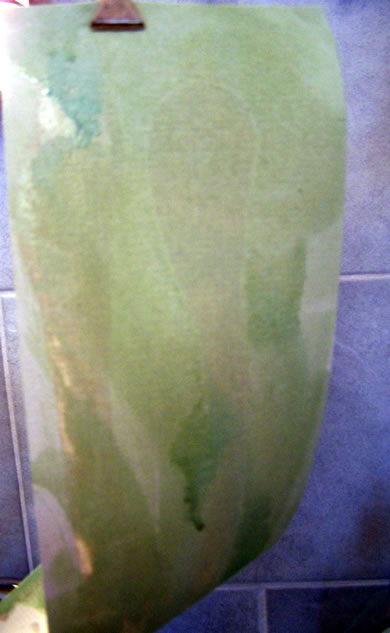
Nachdem ich die zweite Farbe aufgetragen hatte, war schon mehr zu erkennen.

After I applied the second color the result was more visible.
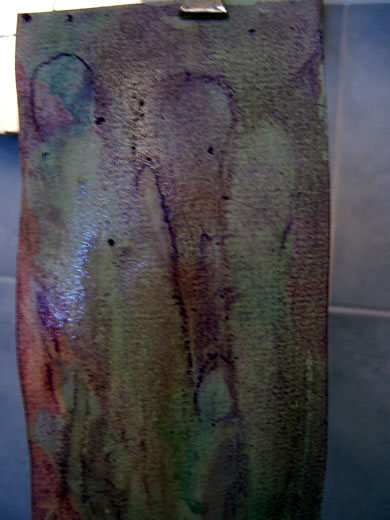
Hier ist das Ergebnis – es ist interessant – LOL

Here is the result – it is interesting – LOL
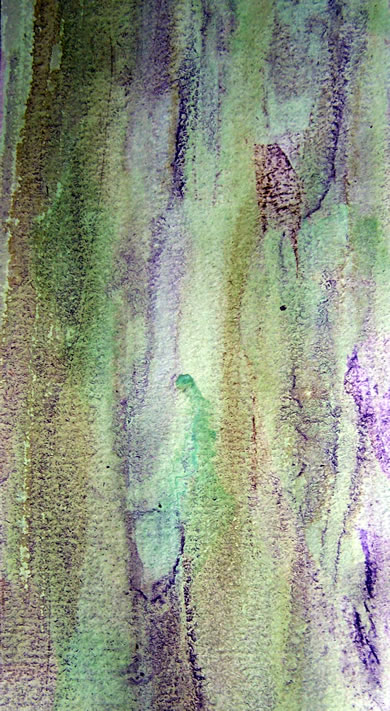
Es hat jedenfalls Spass gemacht und war interessant. Schaut mal bei Daphne rein, was sie für Ergebnisse hat. Hoffe Euch hat es auch gefallen.

It was a lot of fun and really interesting. Take a look at Daphne‘s results. I hope you liked it too.

  • Scrapbook-Trends

    |

    […] nicht vorenthalten, was ich damit nun letztendlich kreiert habe. Die Leinwand wurde ja erst mit der Klarspüler Technik bearbeitet und dann erst mit der Plastik-Krumpel-Technik weiterbearbeitet und hier ist mein […]

    Reply

  • maggie

    |

    Hi How are you?
    I luv the techniques but what is rinse aid. Is it dish washing liquid?
    Thanks
    Maggie

    Reply

  • Scrapbook-Trends » Studio DaphNat: Rinse Aid Resist - Result

    |

    […] Vor einiger Zeit hatten Daphne und ich mit Klarspüler rumexperimentiert und heute wollen wir Euch zeigen, was wir aus den Ergebnissen gemacht haben. Ich habe den Buchseiten-Hintergrund benutzt um für den Fotoswap mit Danyeela ein Layout zu machen. Irgendwie war ich der Meinung, für Danyeela ein selbstgemachter Hintergrund zu verwenden wäre ,-) Ich hoffe, daß ihr das Layout einigermaßen gefällt – wenn nicht, ich mache gerne noch eins! […]

    Reply

  • Marion

    |

    Tolle Inspiration und super Erklärung. Danke. Die Ergebnisse finde ich sehr genial.

    Reply

  • Daniela

    |

    Klingt sehr danach, als ob’s mir auch Spaß machen würde! Interessante Ergebnisse und Danke fürs Zeigen!!

    Reply

  • Charlotte

    |

    Wow, that looks awesome! Have to try this myself sometimes… TFS!

    Reply

  • Monique

    |

    Love the effect of it! Thanks for showing!

    Reply

  • christiane

    |

    ich habe mich gestern schon gefragt, was ihr wieder veranstaltet!! das letzte ergebnis finde ich sehr interessant und das ergebnis auf canvas kann sich doch gut sehen lassen!! :)
    bin auf weiteres gespannt!! :)

    Reply

  • Mirija

    |

    Wow das sieht nach ner Menge Spaß aus…ich glaub ich sollte mit sowas warten bis ich ausgezogen bin…meine Mutter klillt mich sonst *LOL*

    Reply

  • Lis

    |

    Wow that is an interesting technique, thanks for sharing!

    Reply

  • Daphne

    |

    So cool that you also tried more than just the canvas!
    I love the colorwash results..

    I tried it with ecoline.. don’t do it LOL!!

    The resuls with the 3 colour book pages just rule!!

    Reply

Leave a comment

Blog-Love: Scrapjacked #3 and PhotoSwap

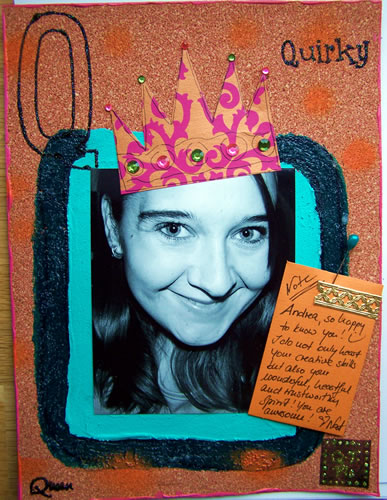
Dieses Mal habe zwei Sachen verknüpft. Mir gefiel das zu liftende Layout von Amber Skolnick auf Scrapjacked so sehr, daß ich es unbedingt mit dem PhotoSwap mit Andrea verbinden wollte- ich hoffe nur, daß Andrea das Layout auch gefällt – LOL! Sonst mache ich ein Neues ;-)

This time I connected to things. I love Amber Skolnick‘s layout on Scrapjacked so I lifted it for the PhotoSwap with Andrea – I so hope she likes it – LOL! Otherwise I make a new one ;-)

Ich habe das ganze Layout auf Kork gestaltet. Acrylfarben darauf gestrichen. Auf das dunkle Türkis habe ich Glasperlen in Acrylgel aufgetragen, so daß das ganze noch eine ungewohnte Struktur hat.

I worked on cork this time and added acrylic paints. On the darker turqouise I added glass beads in acrylic gel that gives the whole layer an interesting texture.

  • Daniela

    |

    Mal wieder sehr anders, sehr orginell und sehr schön!

    Reply

  • Daphne

    |

    Great coincidence… I recently made my first minibook :) with cork covers!
    Great scrapjack! Love the Amber lo!

    Reply

  • kathie

    |

    Totally cool. Love the idea of putting it all on cork. Love the crown.
    Hey, it’s great to see you on Blue Bazaar!

    Reply

  • Britta Scholles

    |

    Kork?! Sehr interessant.
    Das Layout sieht spitze aus!

    Reply

  • Andrea

    |

    Du Nase … von wegen ein Neues machen – ich finde es grooooßartig und möchte GENAU DAS und nix anderes :) Sieht total stark aus das LO – freu mich total drauf!!! Schöes WE …. :)

    Reply

  • D@nielle

    |

    good idea to combine, I try to do that too ! Cute lo I’m sure she’ll like it !

    Reply

  • jana

    |

    klasse- total genial… auf so eine idee zu kommen… tz.. ;)

    Reply

  • christiane

    |

    du tüdeltante!! wunderbar ist es geworden!!

    Reply

  • lisavc

    |

    Thanks for your comment on my latest blog entry.
    it’s actually an old layout but the only photo I could find of me as a child at short notice (without going to the bother of scanning)..I was’nt meaning to showcase the layout though of course that’s what it looks like, seems obvious now but did’nt think of it when I was posting.
    The post was meant to illustrate the ending of the uneasy truce with my mother that has been going on for the last 12 months or so. Obviously it has never been a good relationship anyway as you can see from the old layout. She was/is a very abusive woman.
    I really like your dares layout and the scrapjack one is so quirky and fun looking. Wonder what this week’s theme will be for emily’s challenge? can’t wait :)

    Reply

  • Anja

    |

    Du hast immer die ausgefallensten und coolsten Ideen Nat!
    Dein Layout ist genial!

    Reply

Leave a comment

Blog-Love: The Dares #58

Nette Idee, man sollte dieses Mal mal die aus der Mode gekommenen “Zierscheren” (wie heißen die Teile doch gleich auf Deutsch?) benutzen.

Nice idea, this time you were supposed to use the outfashioned deco scissors.

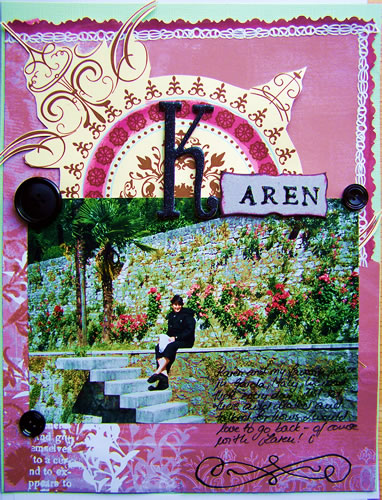
Absolut nicht aus der Mode gekommen ist dagegen meine Freundin Karen!!

Totally not outfashioned is my friend Karen !!

*Karen*

Journaling: Karen and my favorite place in Garda, Italy. We went there every day, just sat there and chatted and talked for hours. I would love to go back – of course with Karen! :-) (Italy 2000)


Autumn Leaves Papers, Lil Davis Design Paper and Chipboard, Scrapworks Chipboard letter, black buttons, self adhering lace, Ecoline paint, Transparency, Faber Castell Foil Writer
ohhh and don’t forget…deco scissors – LOL

  • Bianca

    |

    SOOOOOOOOOOOOOOOO beautiful!!!!!!!!!!! Love it, Nat!!!!!

    xoxo

    Reply

  • iralamija

    |

    OH!! I love this!! beautiful!!

    Bety

    Reply

  • KimmyS

    |

    Wow – das ist einfact TOTAL genial. Ich kann es kaunm noch erwarten Dich im Juni zu besuchen und dann mit Dir Schulter and Schulter zu rubbeln um etwas von Deinem Talent abzukriegen

    Reply

  • Karen Auld

    |

    This is the BEST layout yet! I love those scissors.
    Do you have a jpeg of the picture. Bill wants it!

    Peace!

    Reply

  • slammie

    |

    beautiful layout!

    Reply

  • Britta Scholles

    |

    Wunderschönes Layout! Und sooo übel finde ich Zierrandscheren gar nicht.

    Reply

  • christiane

    |

    use what you have!! great *deco-scissor-work*!! i was on this wall too. a really beutiful place. love the bright colors in this layout and your style!!

    Reply

  • jana

    |

    aaaahh- das kenn ich! da war ich schon *erinner*

    das layout ist klasse und eigentlich mag ich zierrandscheren GAR NICHT, aber bei dir gefällts mir richtig gut!

    Reply

  • Marion

    |

    Ich glaube “Zierrandscheren” – oder so … :).
    Super Foto und geniales Layout – diese Farbintensität in deinen Layouts fasziniert mich immer wieder – klasse.

    Reply

  • Daphne

    |

    Your deco scissors rule :)
    Beautiful lo! Love the buttons in the corners of the photo!

    Reply

Leave a comment

Deck of Me: Card #7

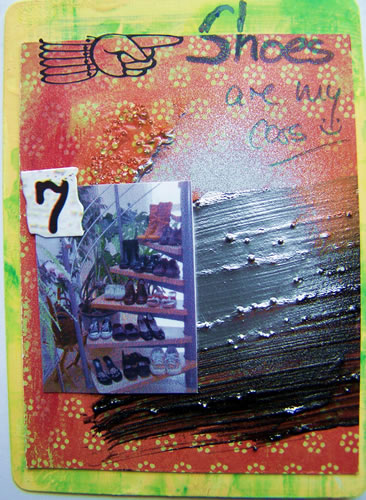
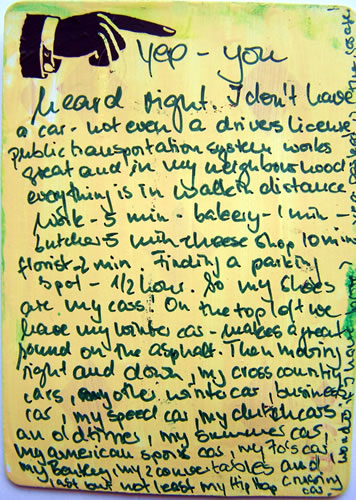
Schuhe sind das Thema des Deck of Me diese Woche auf Emilys Blog. Schönes Thema- lol – Ich habe letztes Jahr ein Foto gemacht und darüber etwas geschrieben, was ich einfach nochmal benutze – Schuhe sind meine Autos!

Shoes are the topic of the Deck of Me this week on Emily’s blog. Good one- lol – I took a photo last year and wrote something about it which I just use again – Shoes are my Cars!

Back

yep – you heard right. I don’t have a car – not even a drivers license. public transportation system works great and in my neighbourhood everything is in walking distance. Work – 5min, bakery – 1 min, butcher 5 min, cheese shop 10 min, florist 2 min. Finding a parking spot – 1/2 an hour. So my shoes are my cars! On the top left we have my winter car – makes a great sound on the asphalt. Then moving right and down my cross country cars, my other winter car, business car, my speed car, my dutch cars, an oldtimer, my summer car, my american sports car, my 70’s car, my Bentley, my 2 convertables and last but not least my Hip-Hop Cruising car.

Wonder if I have more? Yes – they are parked in the garage!

Ein wenig Spaß muß sein :-) :-)

A little bit fun :-) :-)

  • Jeanet

    |

    Thanks for dropping by on my blog!!
    Just checked out your other cards!! They’re great!!!

    Reply

  • Marjolein

    |

    Oh boy, you’ve got a lot of shoes, nice picture!!

    Reply

  • gigi

    |

    lolololol!!!! this is so fab! love that picture & dig all of your cars!!! lol!!

    Reply

  • jen davis

    |

    LOVE THIS! What an awesome thing to journal and it is so great that you walk everywhere! Love the card!

    Reply

  • noell

    |

    So cool! Your cars leave the air much cleaner than mine! I wish I could go carless. Most towns in the U.S. are just not conducive to that kind of lifestyle.

    Reply

  • jess

    |

    i love what you’ve written!!!! thats just so great and so true!!! your card is awesome!!
    Xx

    Reply

  • Jeani

    |

    Super! Das Journaling ist der Bringer überhaupt! Klasse :)

    Reply

  • Lene S

    |

    So cool Nat!! Loved it :o)

    Reply

Leave a comment

Deck of Me: Card #6

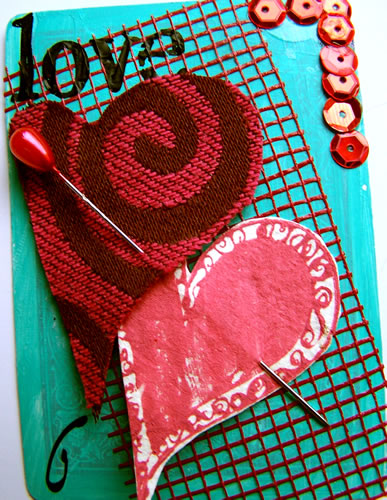
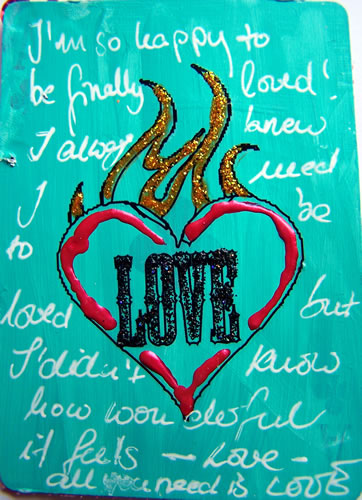
Ein wenig spät gepostet, obwohl ich die Karte bereits fertig hatte – Emilys Challenge, diesmal: LIEBE

This is a little bit late although I had the card finished for a while – Emily‘s Challenge, this time: LOVE

Danke fürs Schauen!

Thanks for looking!

Leave a comment