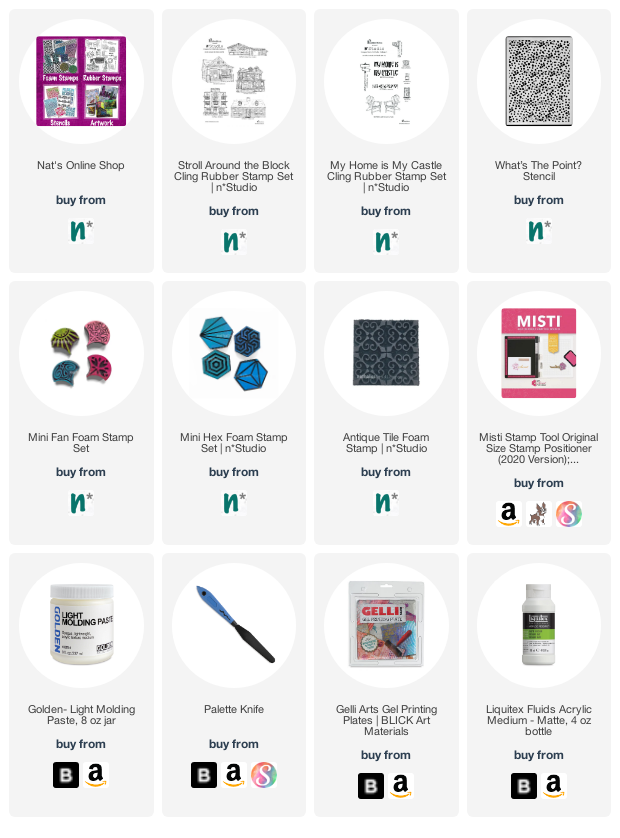
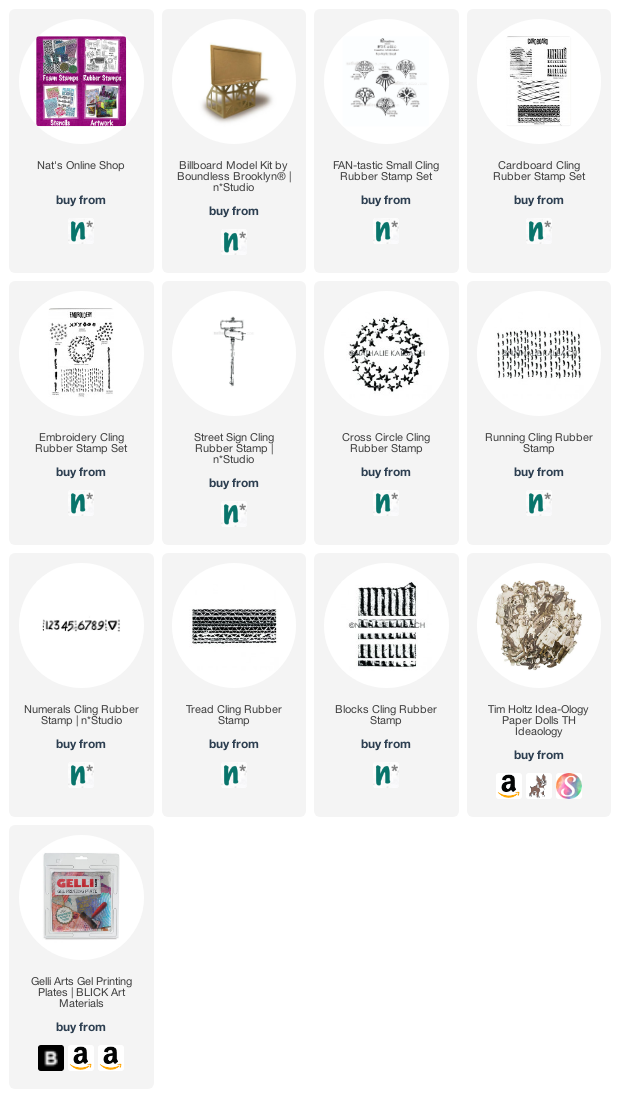
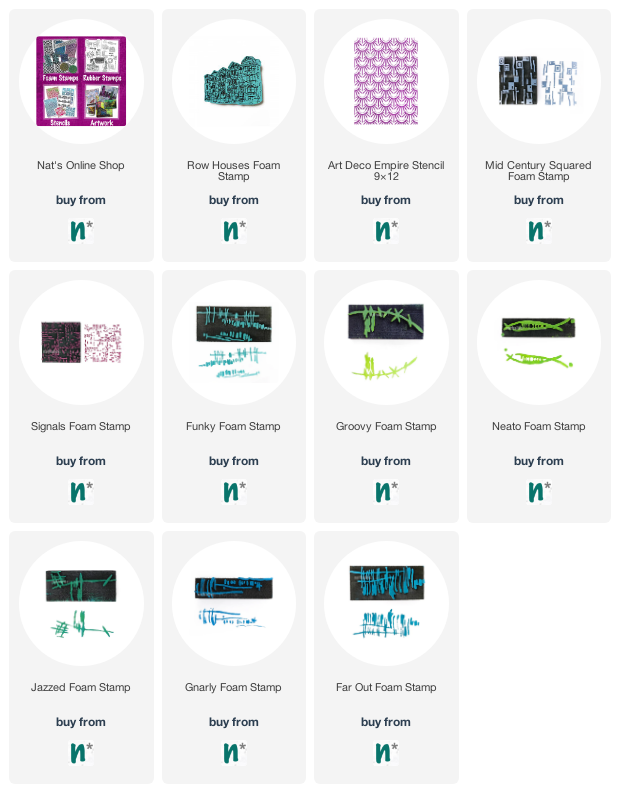
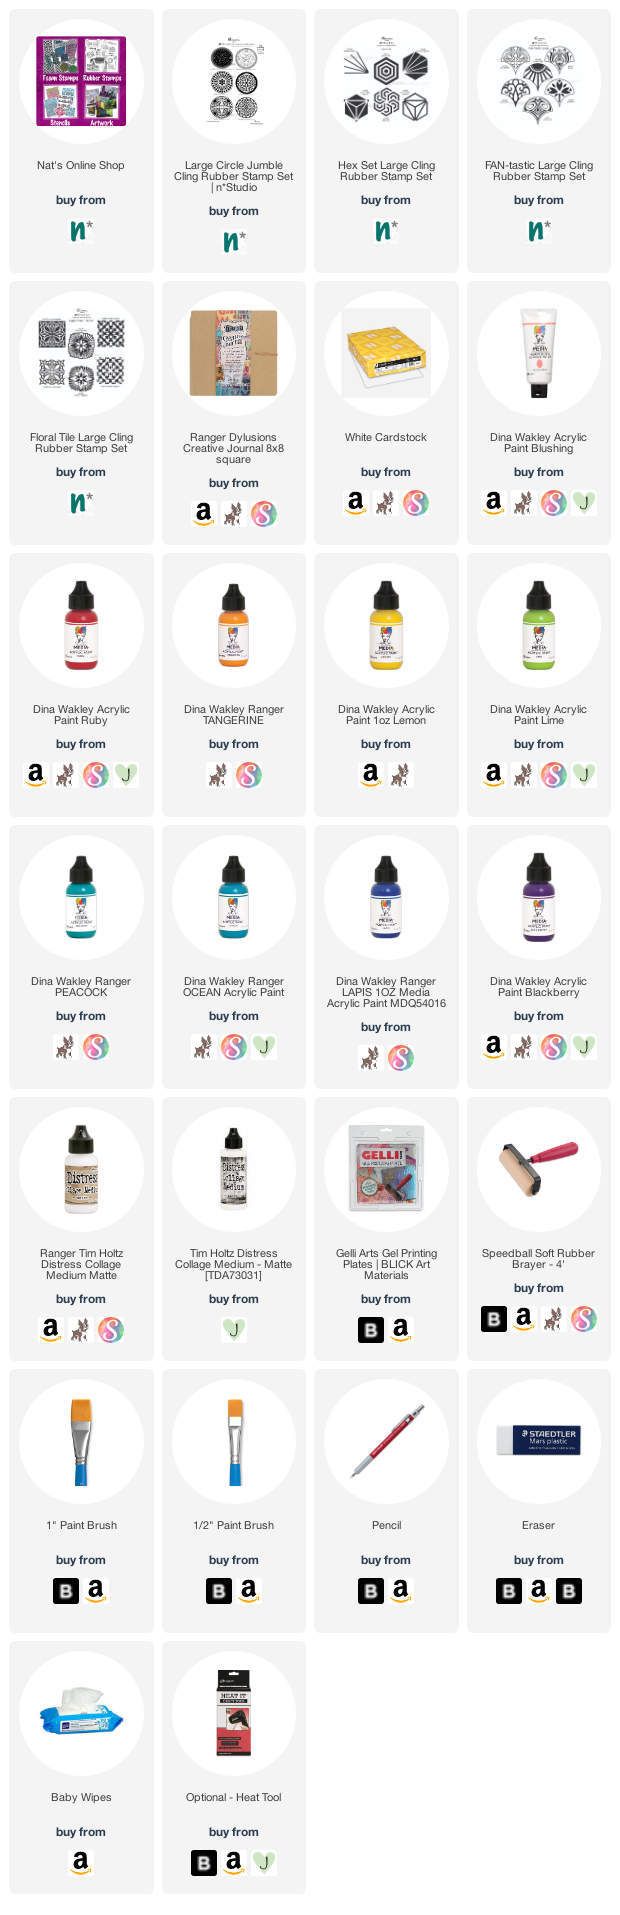
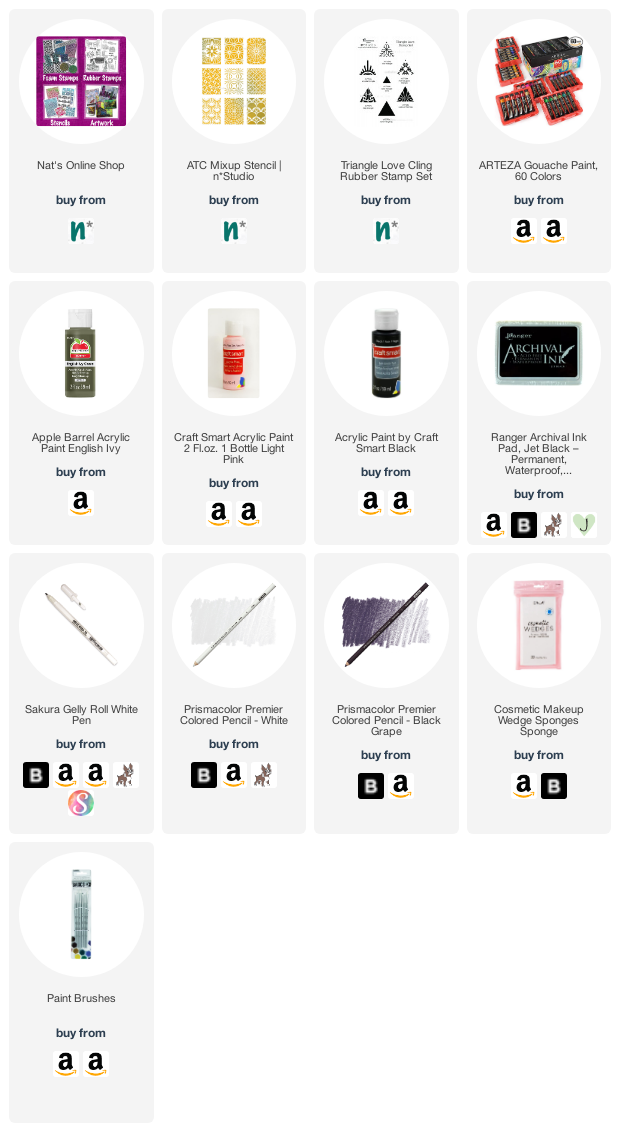
Here are some of the supplies used in these projects:
My Creative Squad has made some really cool videos for their projects through the years (what a talented bunch indeed) so I did a little 4 part series where I shared some with you. This is the 4th and final so I hope you have enjoyed them as much as I have. Also I encourage you to check out the Creative Squad archive of projects as an excellent resource for serious artistic inspiration.
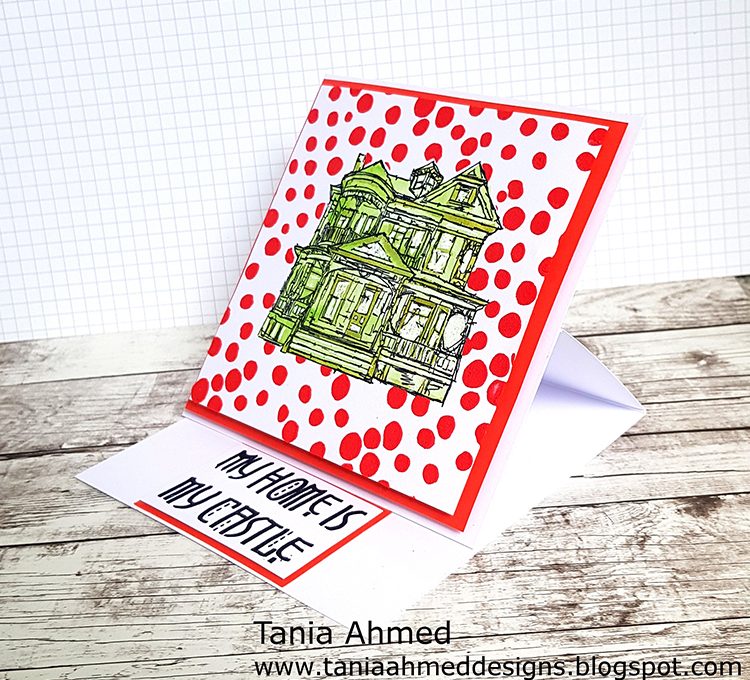
First we have Squad alum Tania Ahmed sharing a fun card with us that she made using my Stroll Around the Block set of house stamps, my My Home is My Castle stamp, and my What’s the Point stencil. Our theme was: Inside Outside – Inside can be cozy and warm. Outside is about fresh air and freedom. Are you a homebody or do you suffer from cabin fever? We’re creating with these opposites in mind.
I love the texture Tania creates with my What’s the Point stencil!
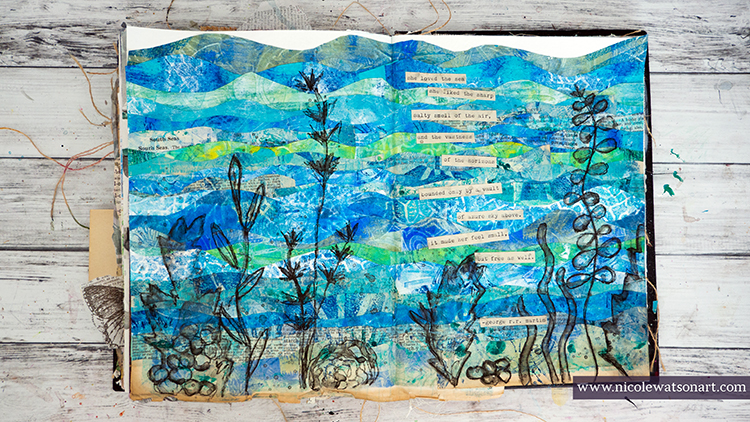
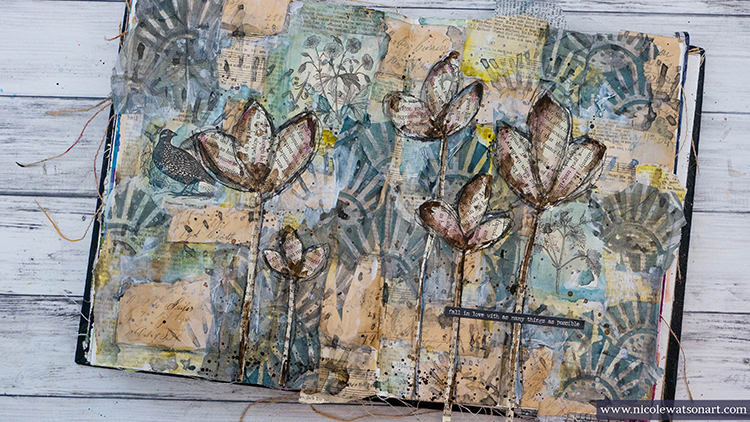
Lastly we have alum Nicole Watson and her magical art journal spread using my foam stamps and the theme: Under the Sea – There is something so fascinating about water. We love being in it, floating on it, relaxing next to it, and it remains one of the last frontiers here on the planet. Create something that is an ode to the sea.
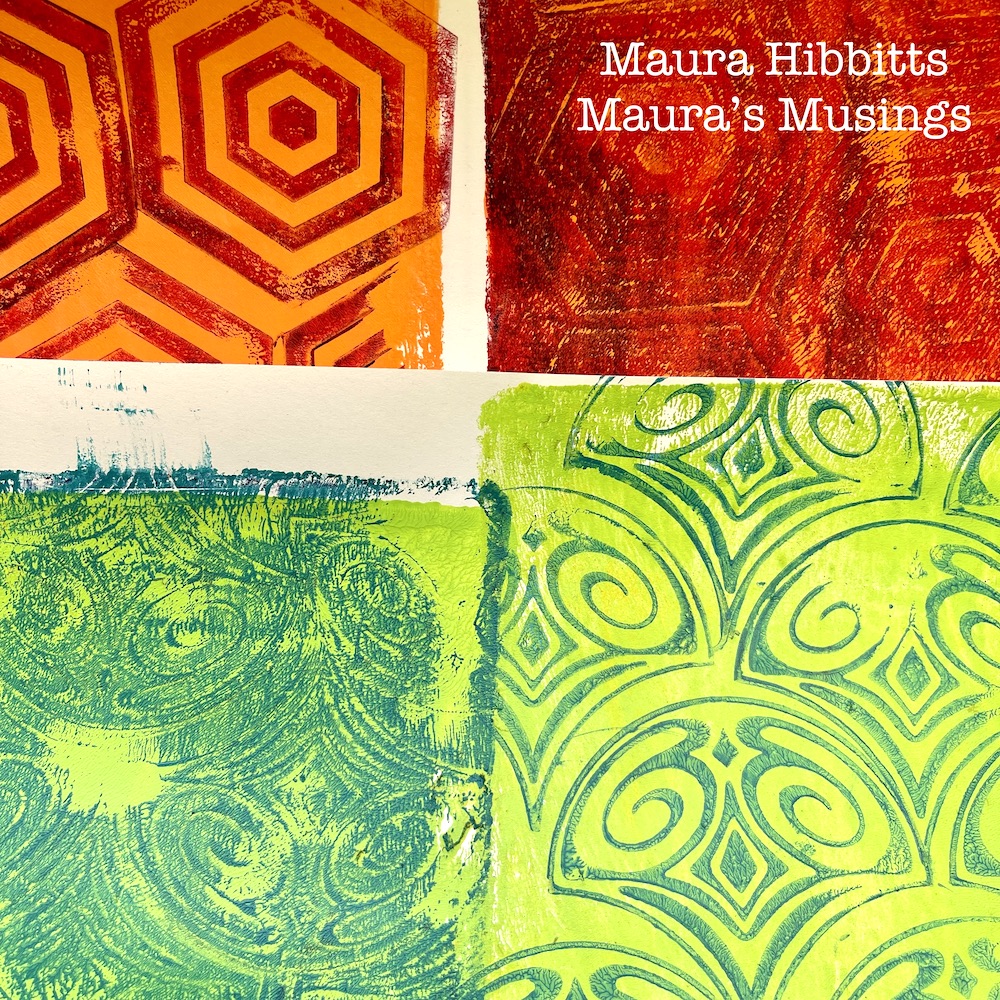
This is a great way to make a whole bunch of gorgeous collage papers!
I hope you enjoyed all the Creative Squad videos I have been sharing. Be sure to check out the archive of their projects – they show so many ways to use foam stamps, rubber stamps, stencils and more in their beautiful mixed media creations.
Here are some of the supplies used in these projects:
My Creative Squad has made some really cool videos for their projects through the years (what a talented bunch indeed) so I’ve been doing a little 4 part series sharing some with you. Also I encourage you to check out the Creative Squad archive of projects as an excellent resource for serious artistic inspiration.
Let’s get started!
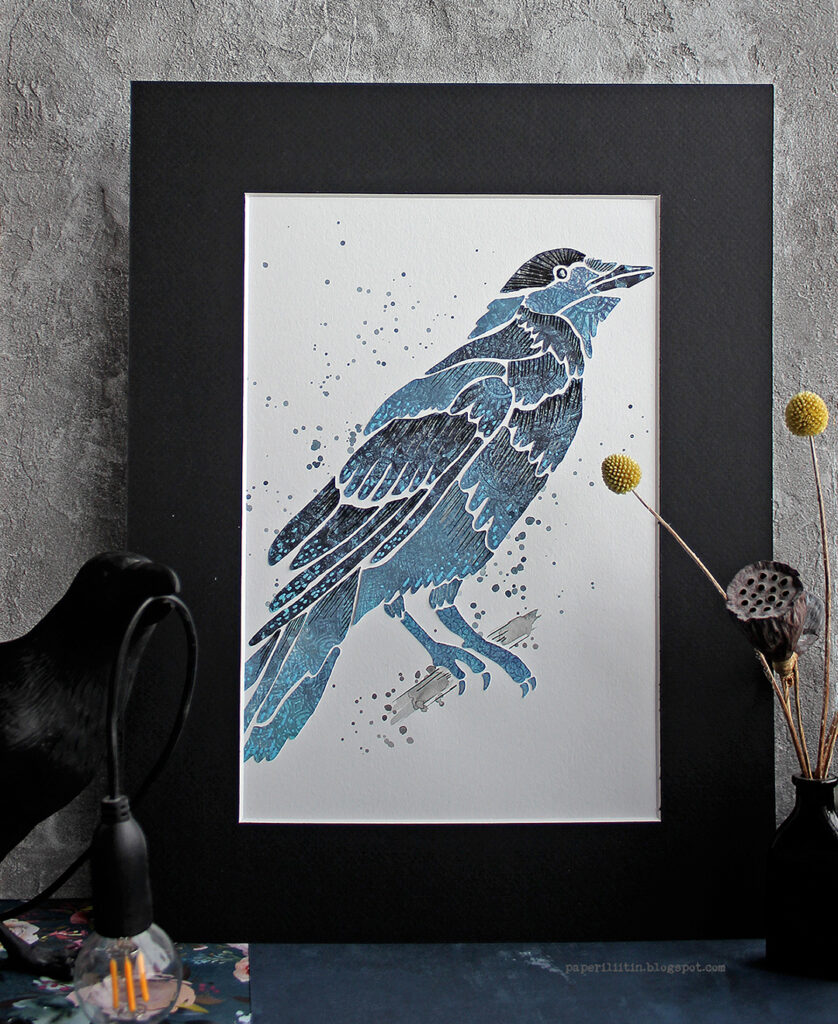
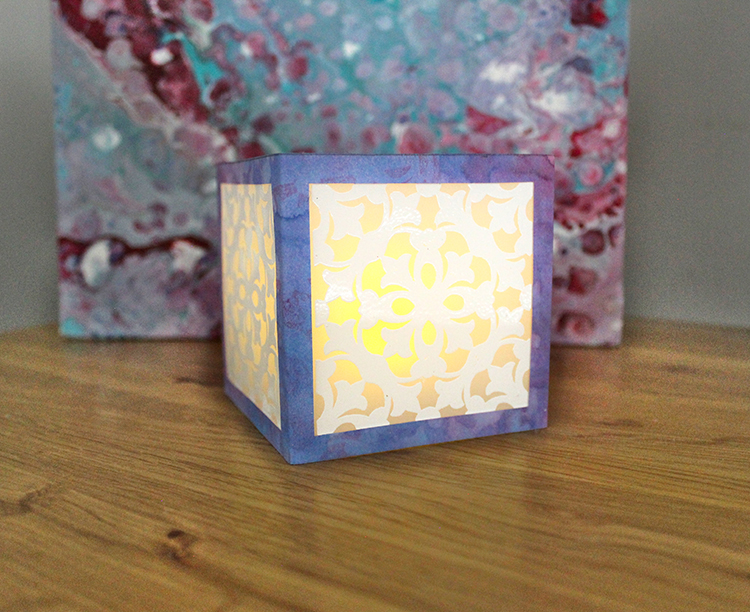
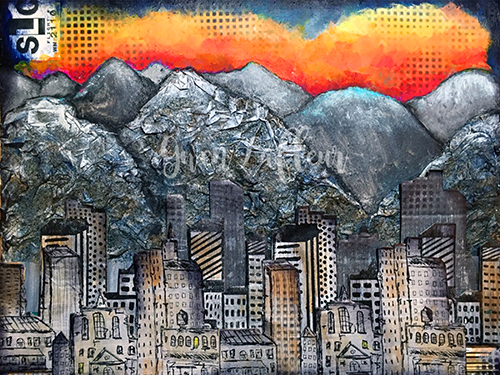
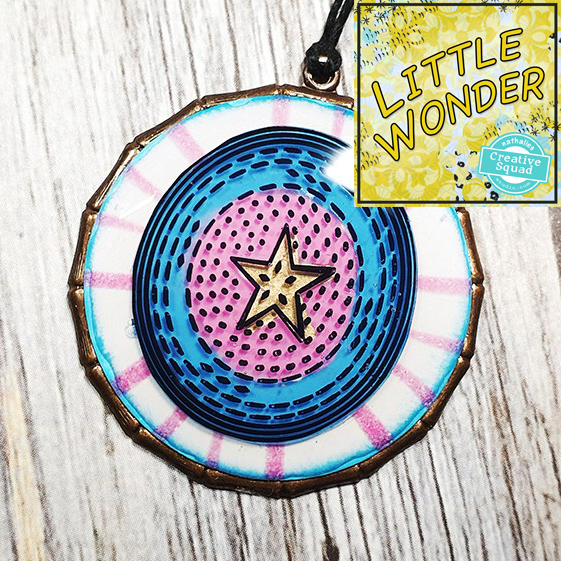
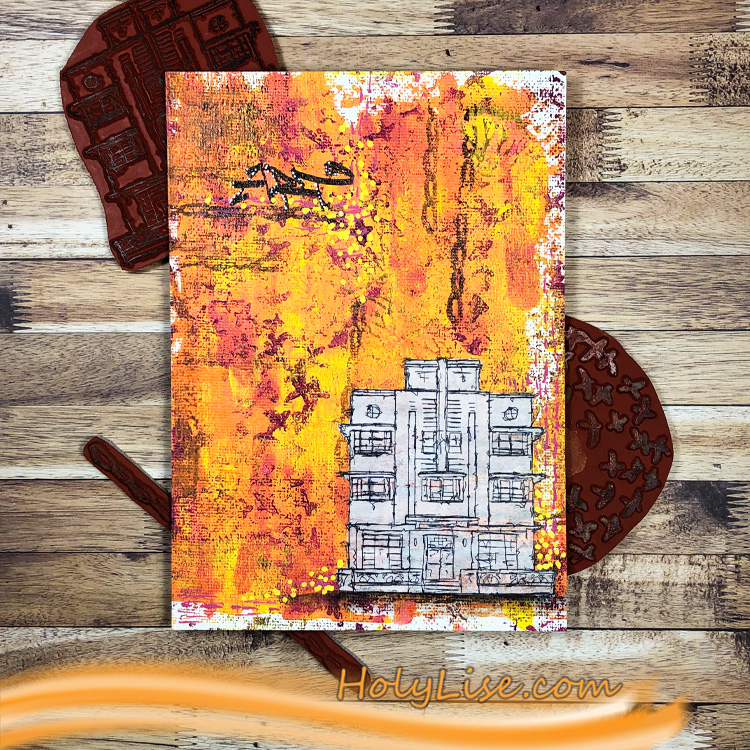
Today we have one of the sweetest project ideas from Riikka Kovasin using one of those mini billboard kits (50% off now while supplies last – use the code nowsave50 ) and my Fan-tastic Small stamps. The theme was In the City – let’s reminisce about a time we traveled to another town or city. Think about the flavor of the place and let that guide your color and design choices.
I love how she created a distressed look to the whole thing and that flower pot fits perfectly to scale. Such a cool way to use the billboard!
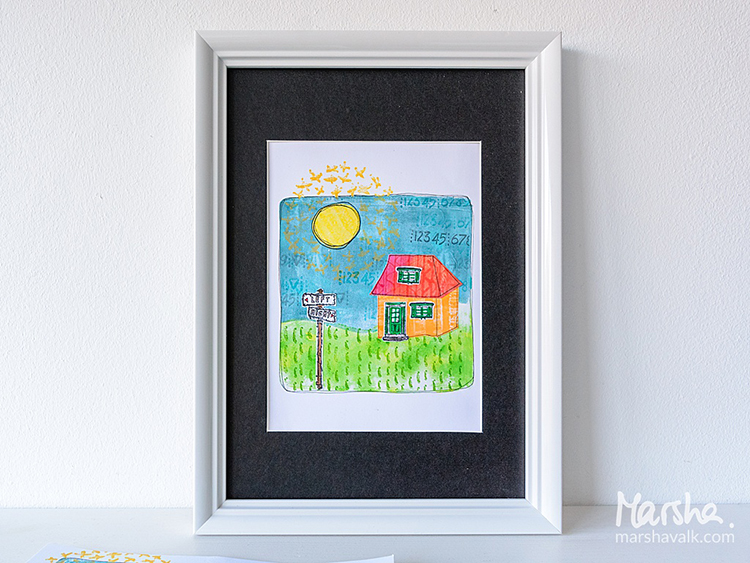
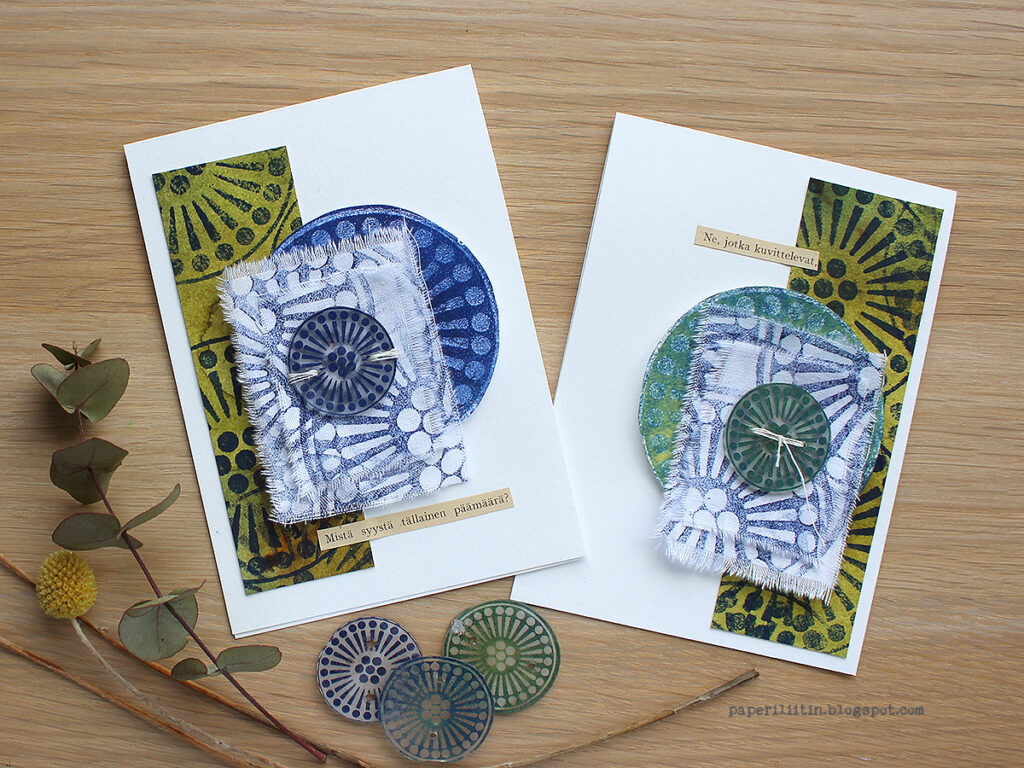
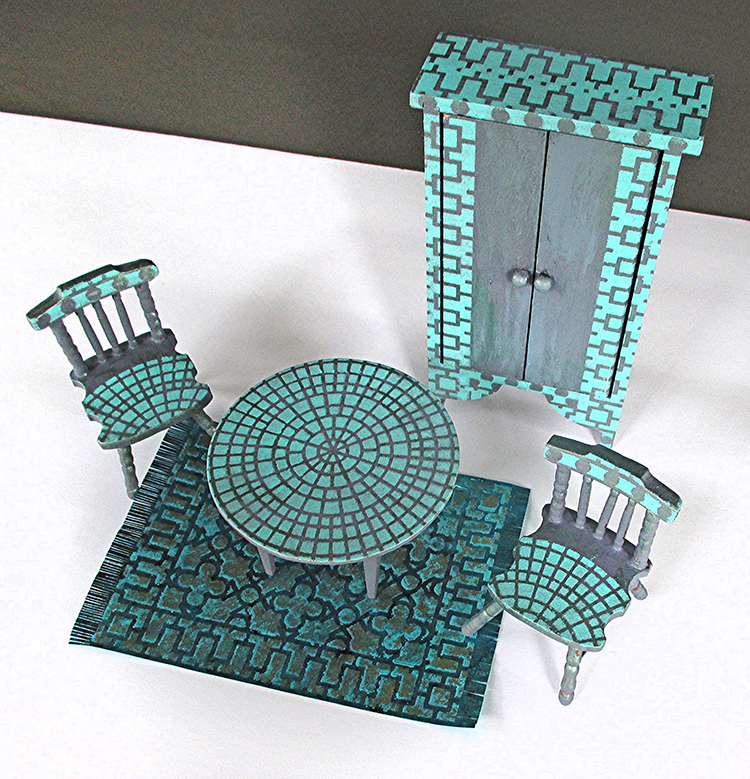
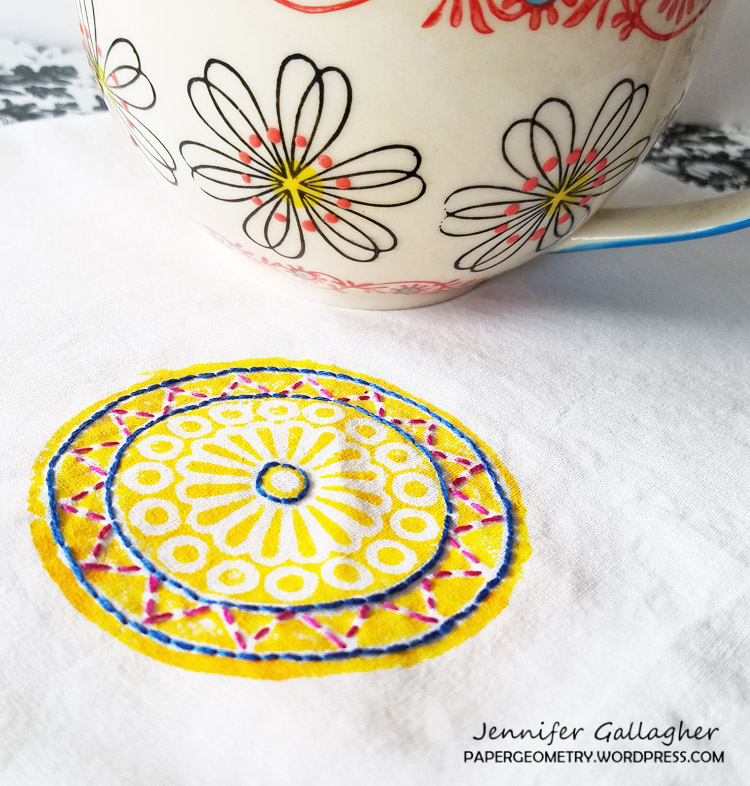
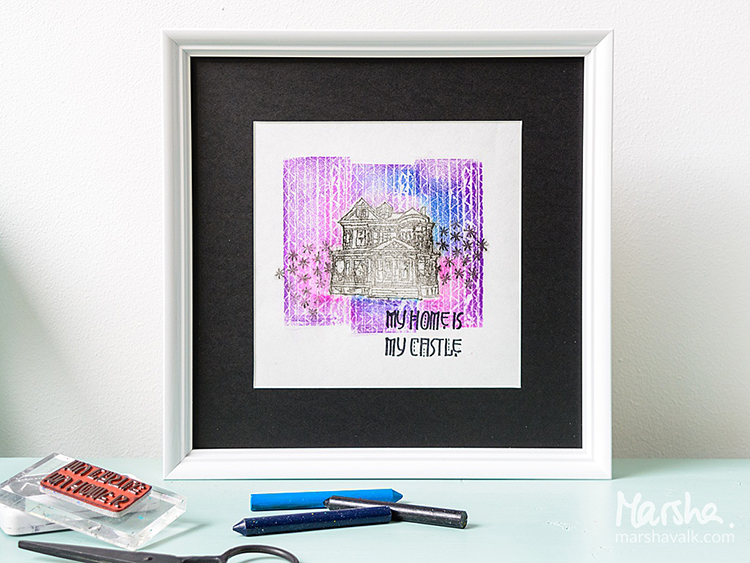
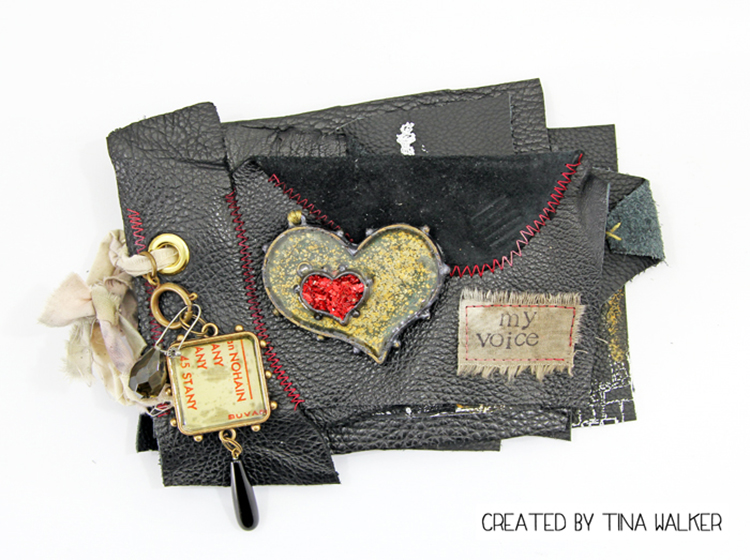
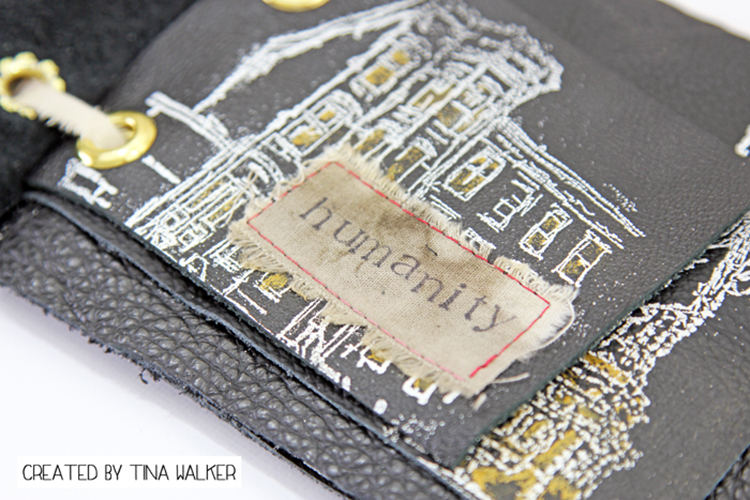
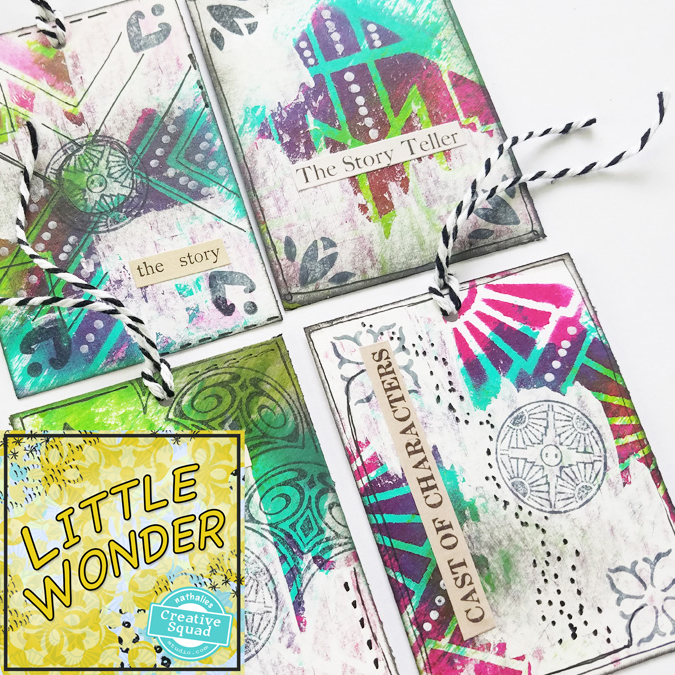
Here is a lovely little mixed media piece from alum Marsha Valk using rubber stamps from my My Home Is My Castle, Embroidery, and Cardboard stamp sets. She was working from our theme: This Must Be the Place –We’re all on a journey to somewhere or something. Sometimes we’re just making preparations for simple things like dinner or weekend plans. Other times we’re aiming for bigger goals, bigger places. Whether it’s a location or a state of mind, you’ll know when you get there. Where are you headed?
My Creative Squad has made some really cool videos for their projects through the years (what a talented bunch indeed) so I thought I’d do a little 4 part series where I share some with you. Also I encourage you to check out the Creative Squad archive of projects as an excellent resource for serious artistic inspiration.
Let’s get started!
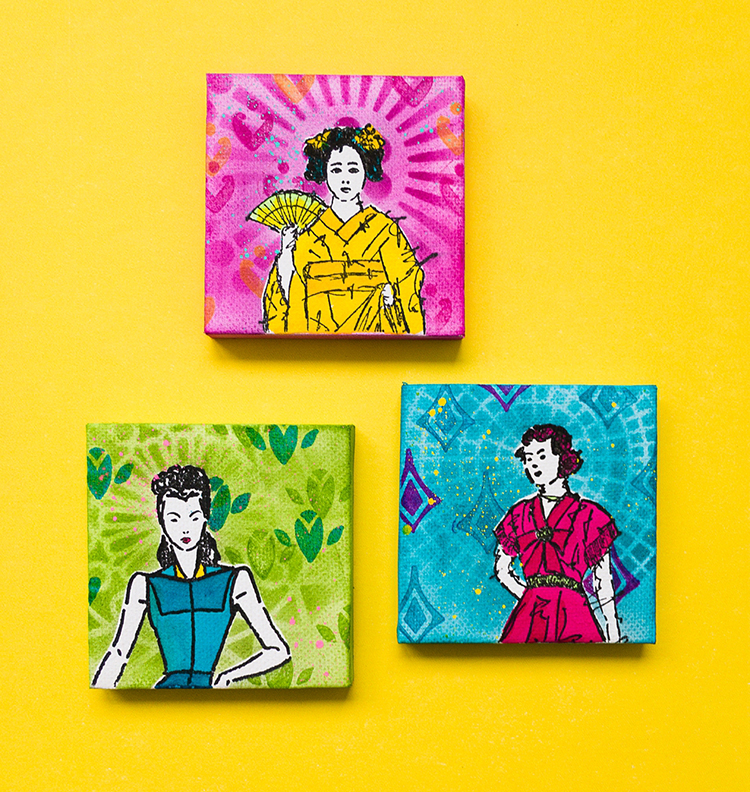
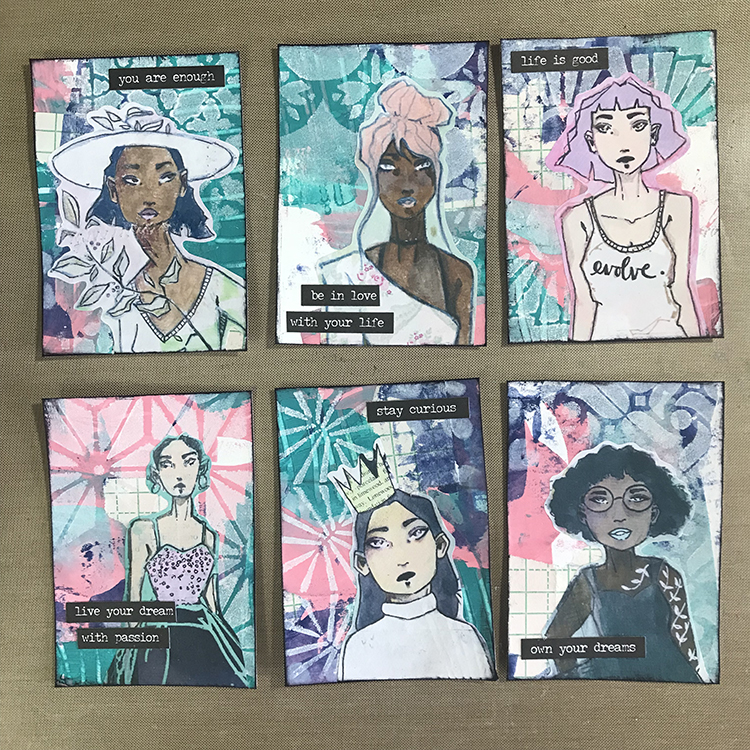
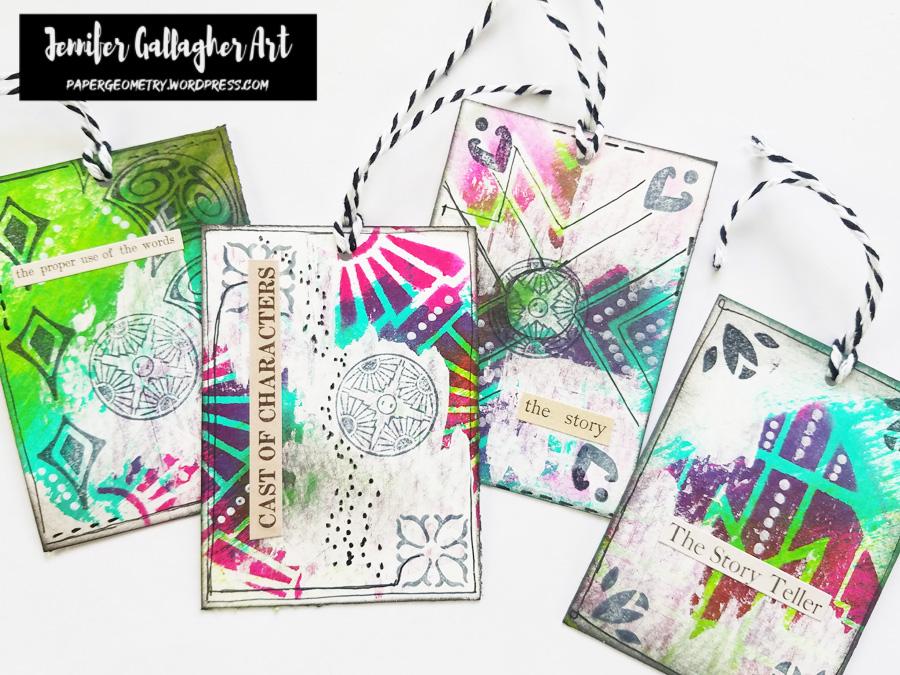
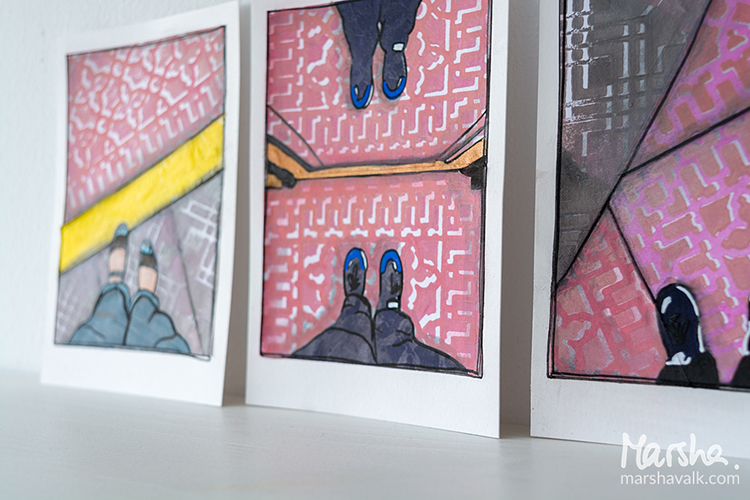
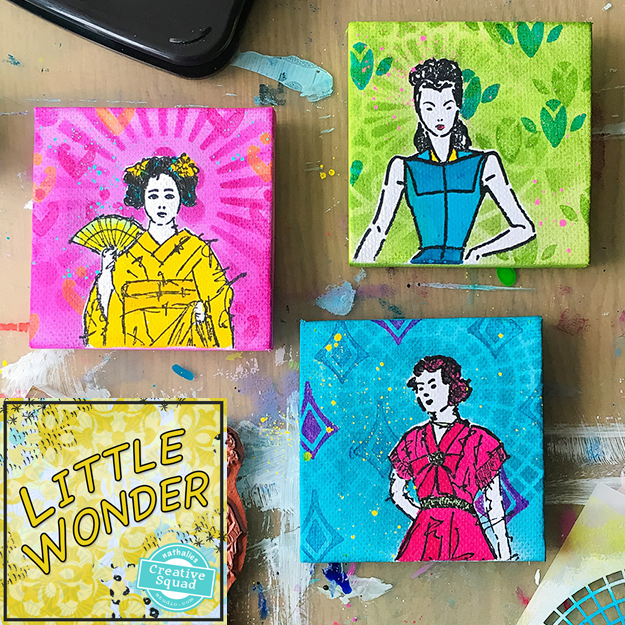
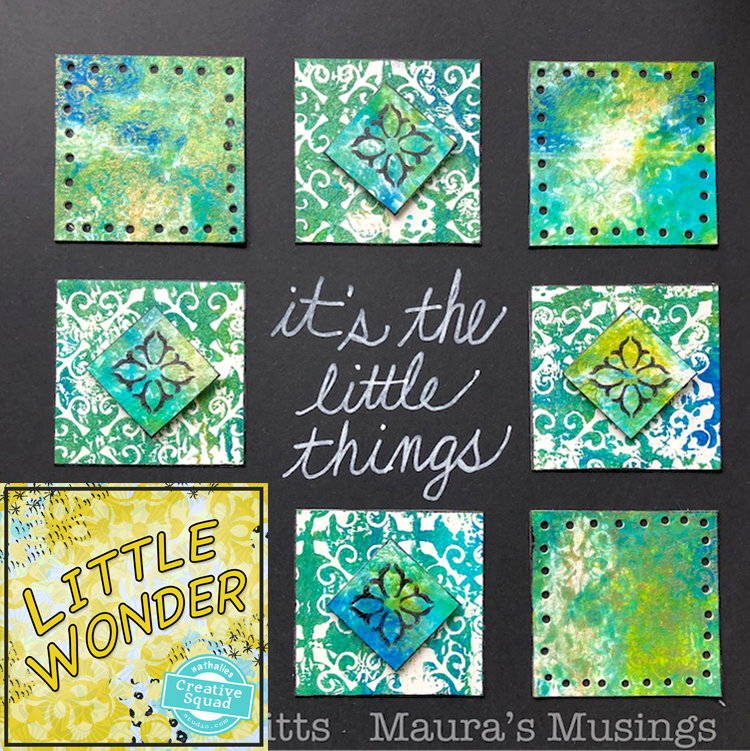
First up is Creative Squad alum Marsha Valk, sharing a trio of mini mixed media canvases using my Actually I Can and Fanfare rubber stamp sets and my Central Ave stencil. The theme that she was working with was Little Wonder – We’re thinking small this month and focusing in on a tiny scale, exploring the delicate details, and creating something that is petite and precious.
I love the bright color palette she uses and the layered backgrounds she builds up.
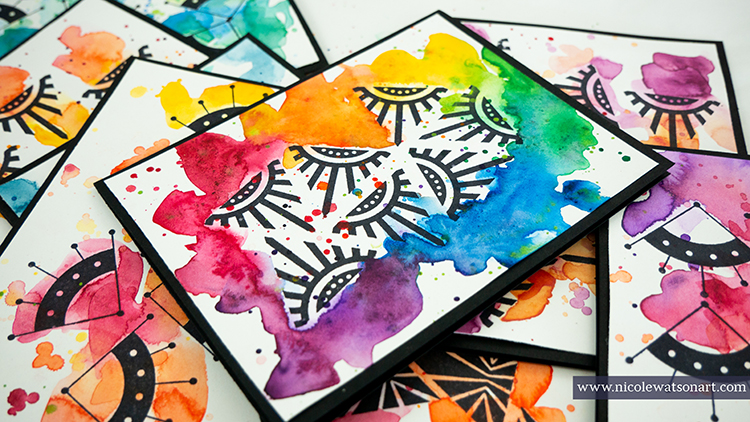
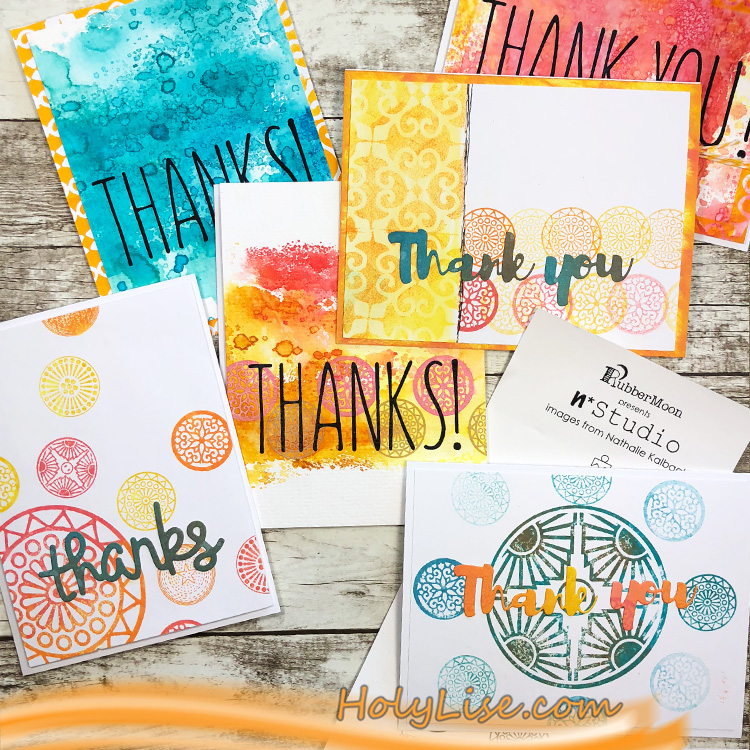
Keeping with a bright happy color scheme is this project from alum Nicole Watson who is using my Mini Motifs and Triangle Love stamp sets and the theme: Rise & Shine – Sometimes it is inspiring to think of each new day as an opportunity to do something good – to shine. Create something that will encourage others to do the same and let’s all bring a little more light into this world!
With heavy hearts we are saying farewell to our our design team the Creative Squad, while we take a break for some much needed art time.
We have had so much talent over the years (from March 2016 onward!) highlighting my designs. It has been a pleasure working with all of the artists who were members and seeing new projects each week. I never expected that running a design team would bring so much joy to my life, but almost as soon as we got rolling, it was apparent that it was going to be an amazing time. Thank you to all those who made it possible!!!
As you know, the current Squad was Maura Hibbitts, Jordan Hill, Riikka Kovasin, and Judi Kauffman. I wanted to just highlight some of their work and then go through the list of Squad members through the years.
Maura Hibbitts – always brightening us up with color.
Jordan Hill – inspiring us with collage and sketching.
Riikka Kovasin – a master of composition and storytelling.
Judi Kauffman – expect the unexpected… and gorgeous texture!
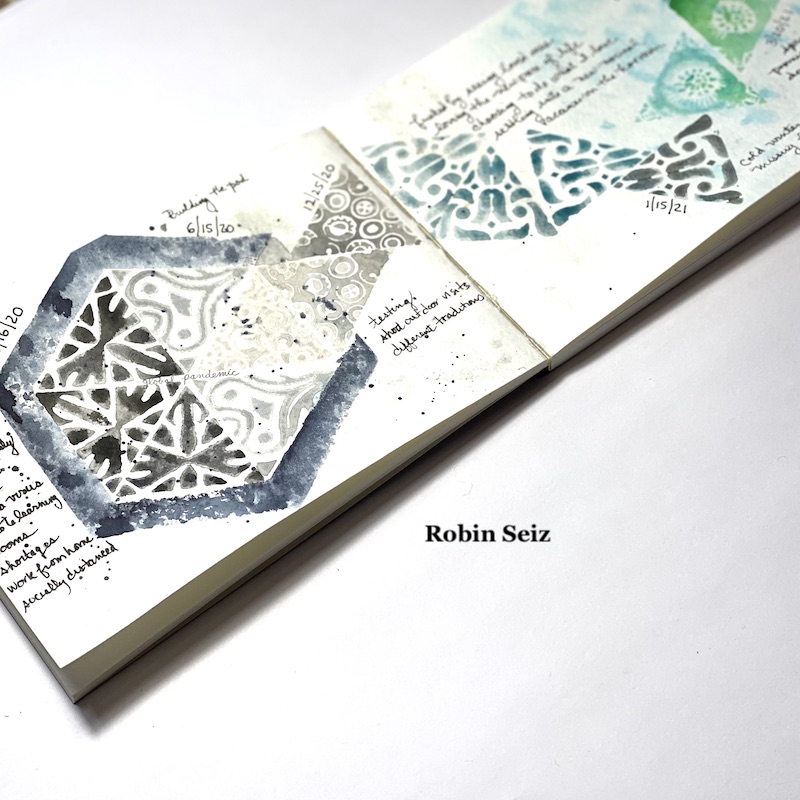
Robin Seiz – thoughtful projects with a delicate touch.
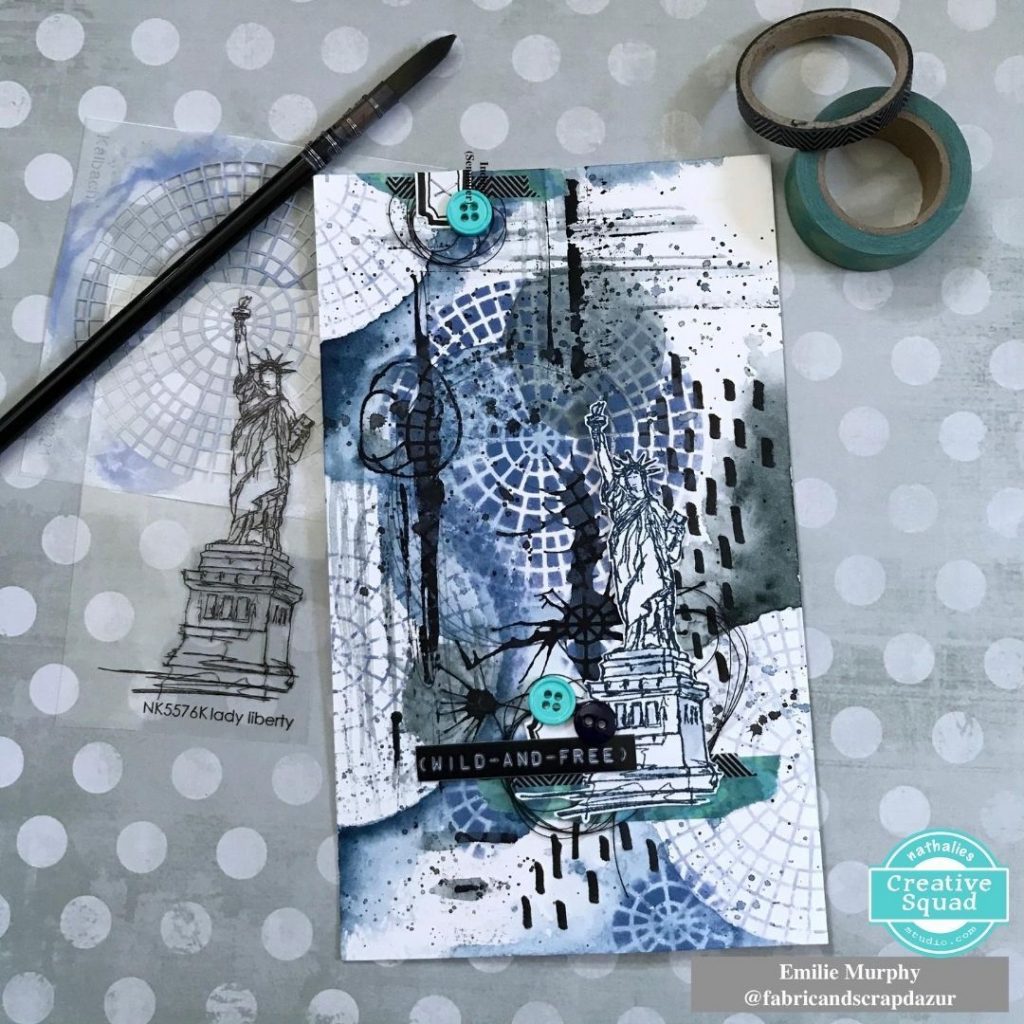
Emilie Murphy – all those beautiful layers!
Jennifer Gallagher – cool and clean vibes all the time :)
Nicole Watson – master of layering and texture.
Linda Edkins Wyatt – quirky creativity to expand our minds.
Marsha Valk – experimenter extraordinaire with an eye for design.
Tania Ahmed – positive energy and refreshing style.
Josefine Fouarge – color maven :)
Shilpa Nagaonkar – brilliant colors and patterns galore.
Cheiron Brandon – the card maker we all aspire to be :)
Michelle Rydell – bold positivity!
Tina Walker – mixing vintage with a meaningful message.
Gwen Lafleur – fearless with texture and rich color.
Holy moly what a lineup! As you can see, through the years I’ve worked with so many different artists, who brought their individual voices and artistic styles to the Squad. It has been one of the highlights of running this business and an incredible source of inspiration for me and I’m sure you too.
We also had a different theme every single month from March 2016 on, for the Creative Squad to build off of when they were creating. Here are a few favorites and the projects that came out of them:
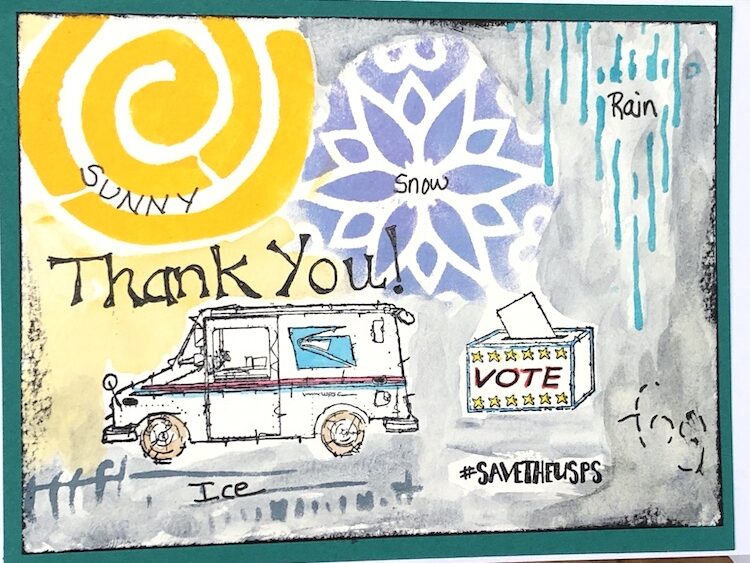
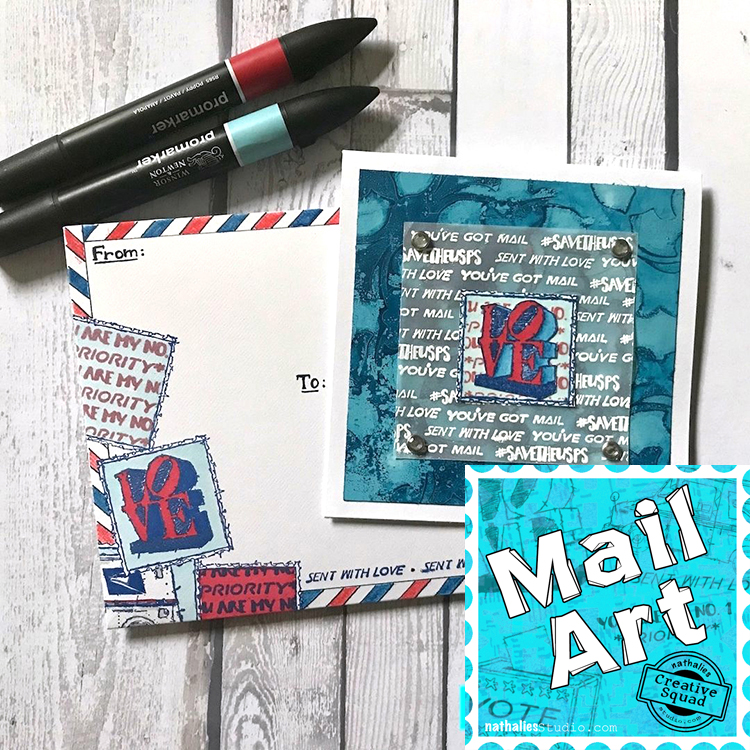
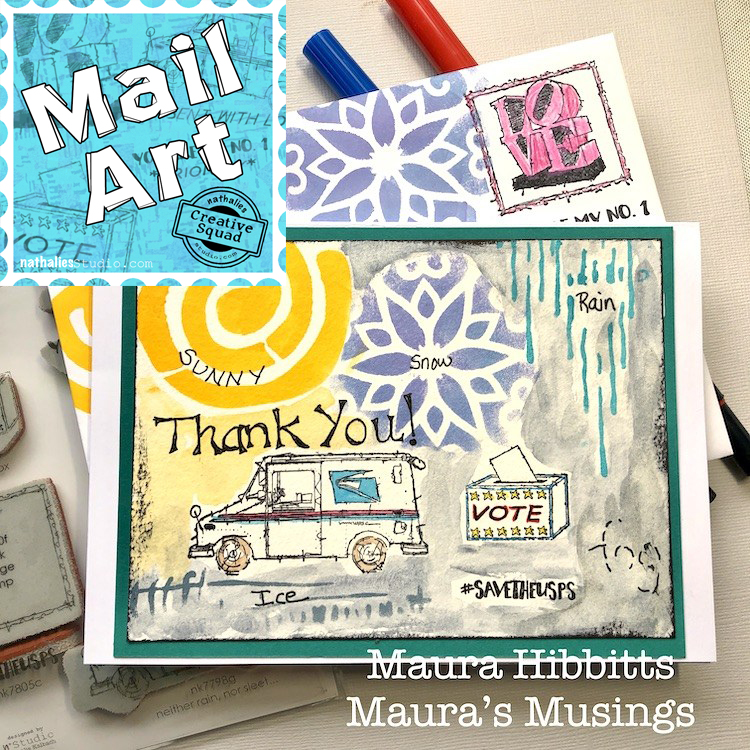
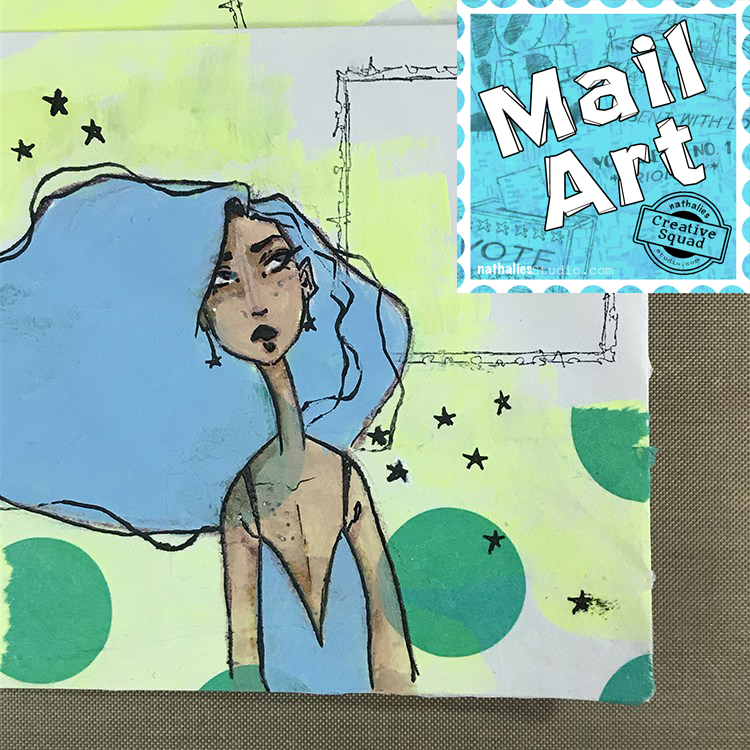
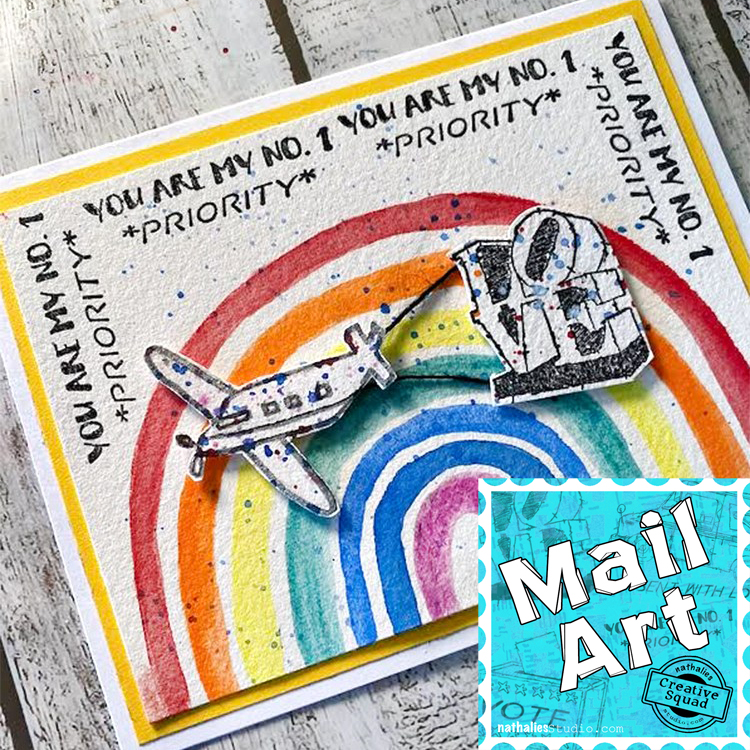
Mail Art – During the times of social distancing, old fashioned mail is a fun way to keep in touch and lift someone’s spirits. Create some mail art, and then actually send it off! Address it, put a stamp on it, and put it in the mailbox. You will make someone’s day :)
Little Wonder – We’re thinking small this month and focusing in on a tiny scale, exploring the delicate details, and creating something that is petite and precious.
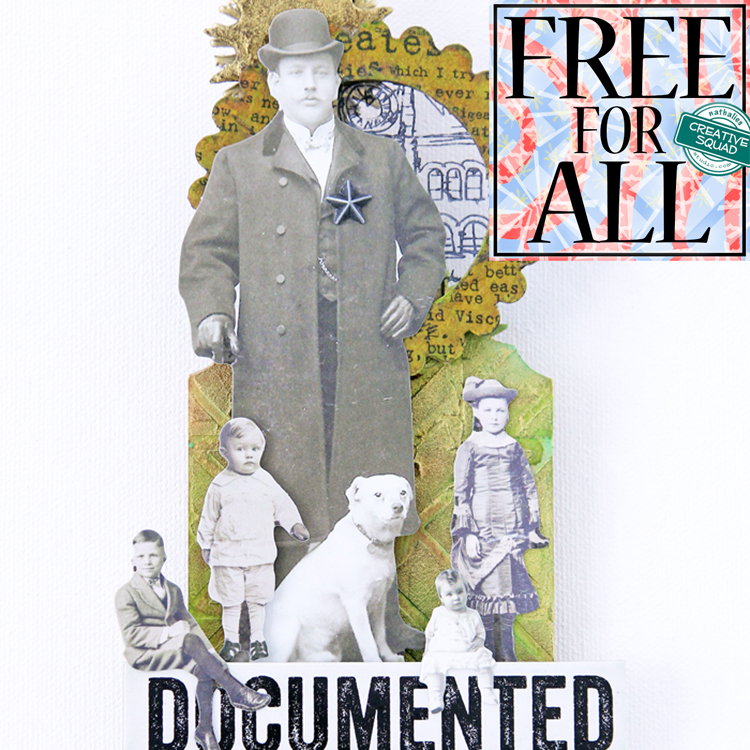
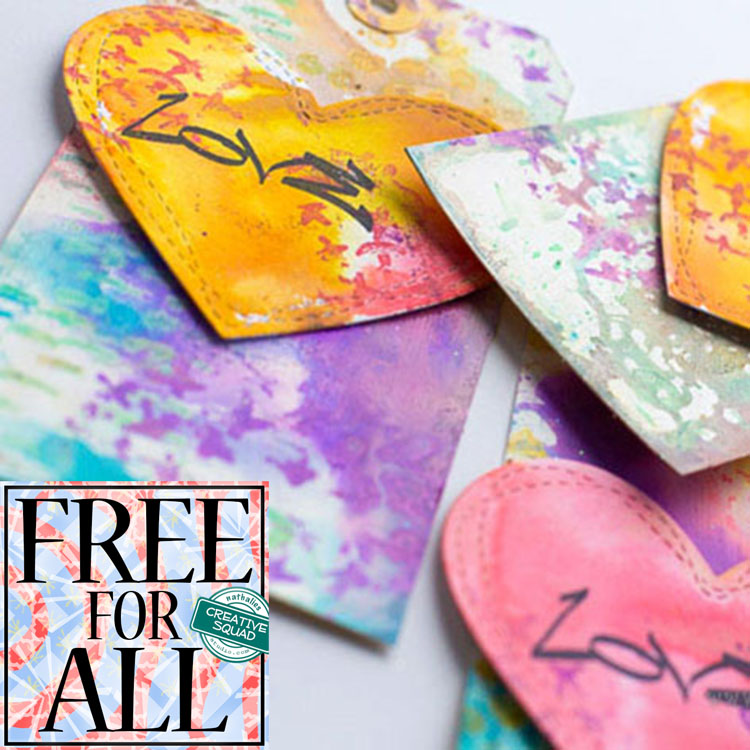
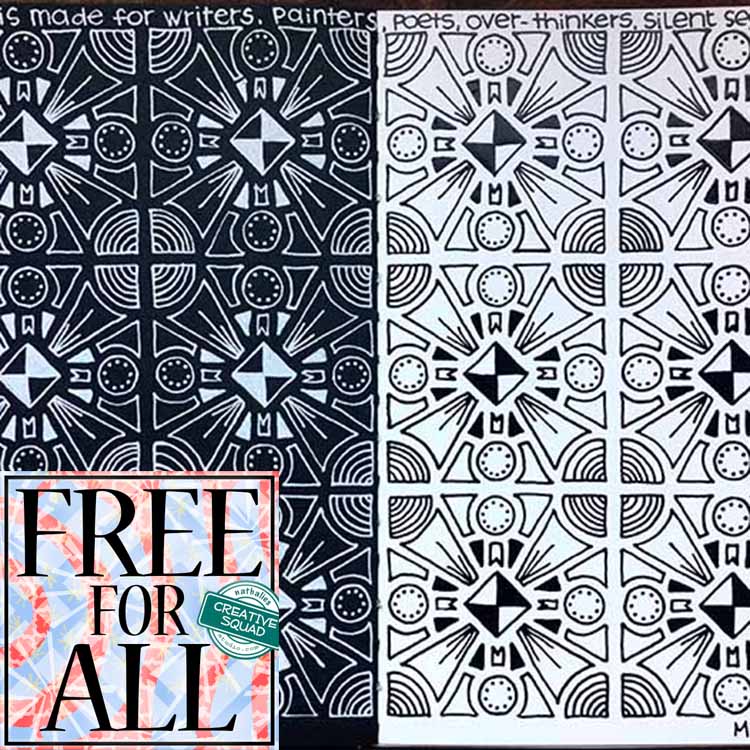
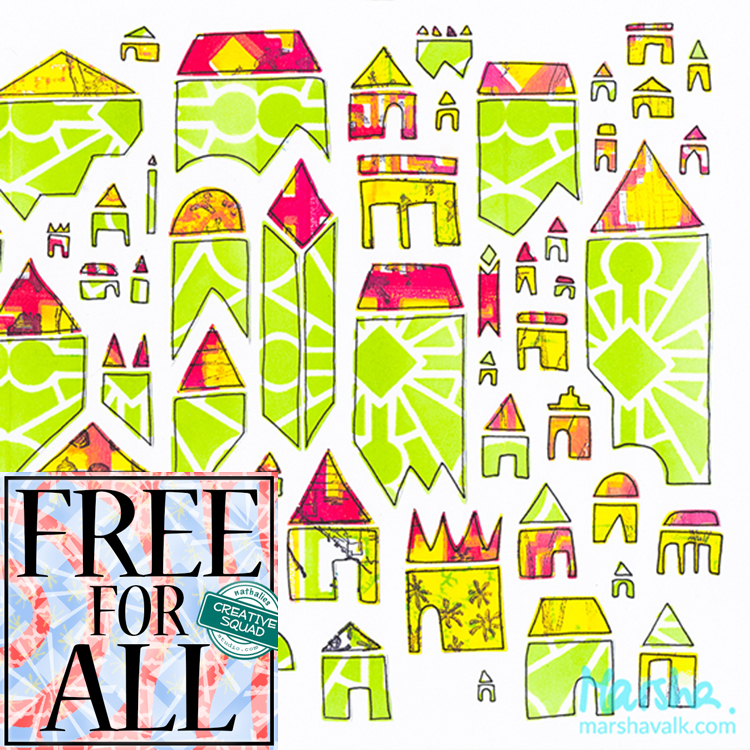
Free for ALL – It’s time for summer vacation and relaxing so around here the Creative Squad is taking a break from themes this month. They’re just going with the flow and making a project of their choosing. It’s a Free for All!
I hope you take the time to go back through some of these posts and enjoy all of the ideas and techniques that the Creative Squad has shared. It’s been a fun ride and I am so happy to have been a part of it :)
It was such a pleasure to be part of the Creative squad and a privilege to be part of that incredible line up of artists. I hope the extra time brings you closer to your goal of creating. Best to you!
My Creative Squad has made some really cool videos for their projects through the years – what a talented bunch :)
I thought I’d do a little 4 part series where I share some with you and then also encourage you to check out the Creative Squad archive of projects for some serious inspiration.
Let’s get started!
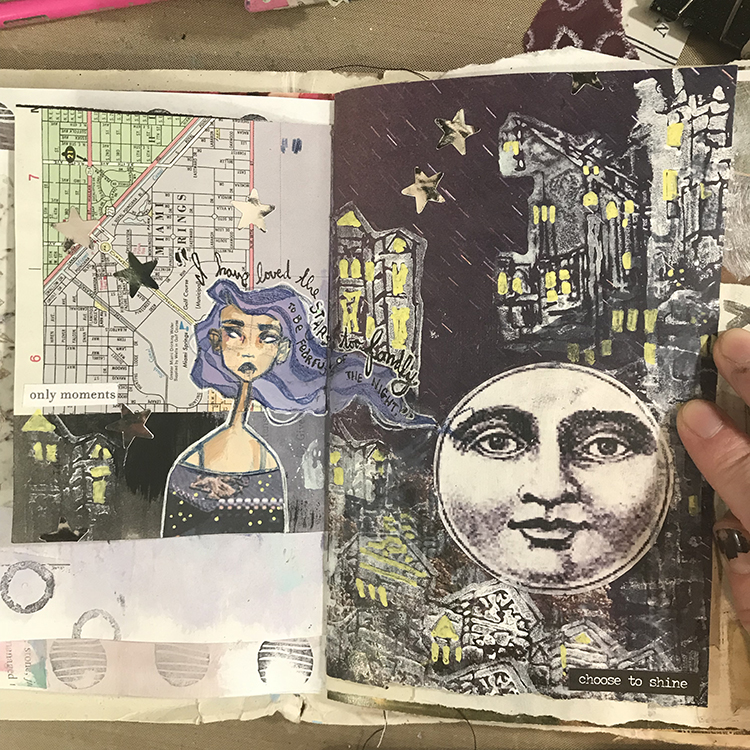
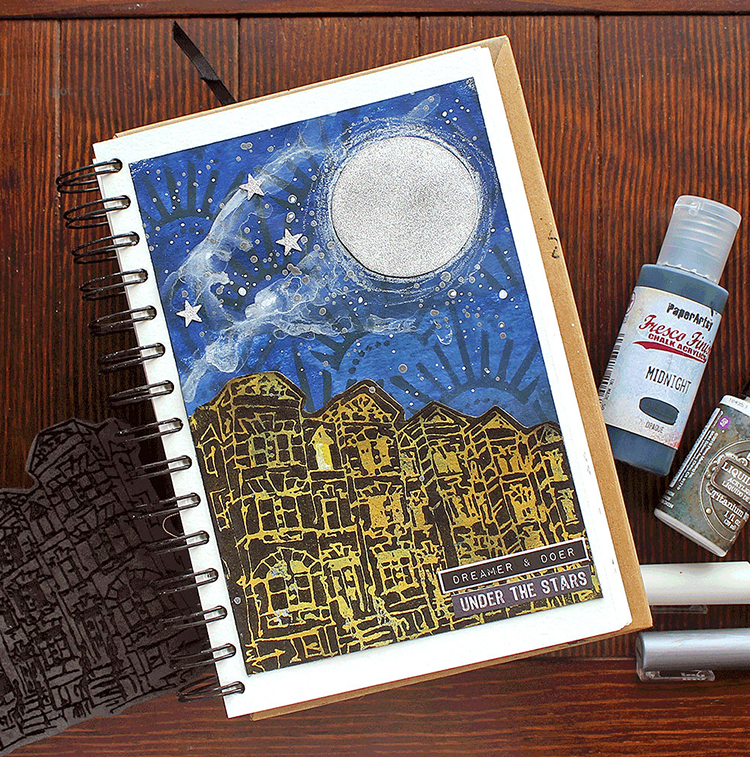
First up is Riikka Kovasin and her art journal spread using my Row Houses foam stamp and Art Deco Empire stencil in response to our theme: Good Morning Good Evening – Are you a Morning Person or a Night Owl? Or maybe neither? Create a project inspired by your preferred time of day – when you are in good spirits, doing what you love, and enjoying life.
I love watching Riikka build up that night sky with paint splatters, drips, and the moon and stars.
Next we have Creative Squad alum Tania Ahmed playing along with my Foam Stamplifier Challenge using my Foam Stamps along with her gelli plate for monoprinting and then she shows a great next step for that monoprint :)
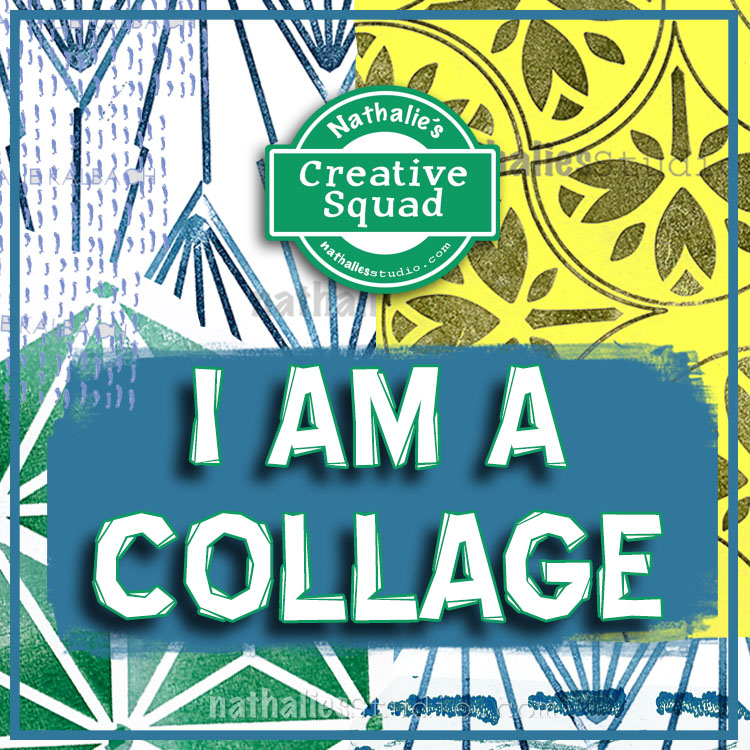
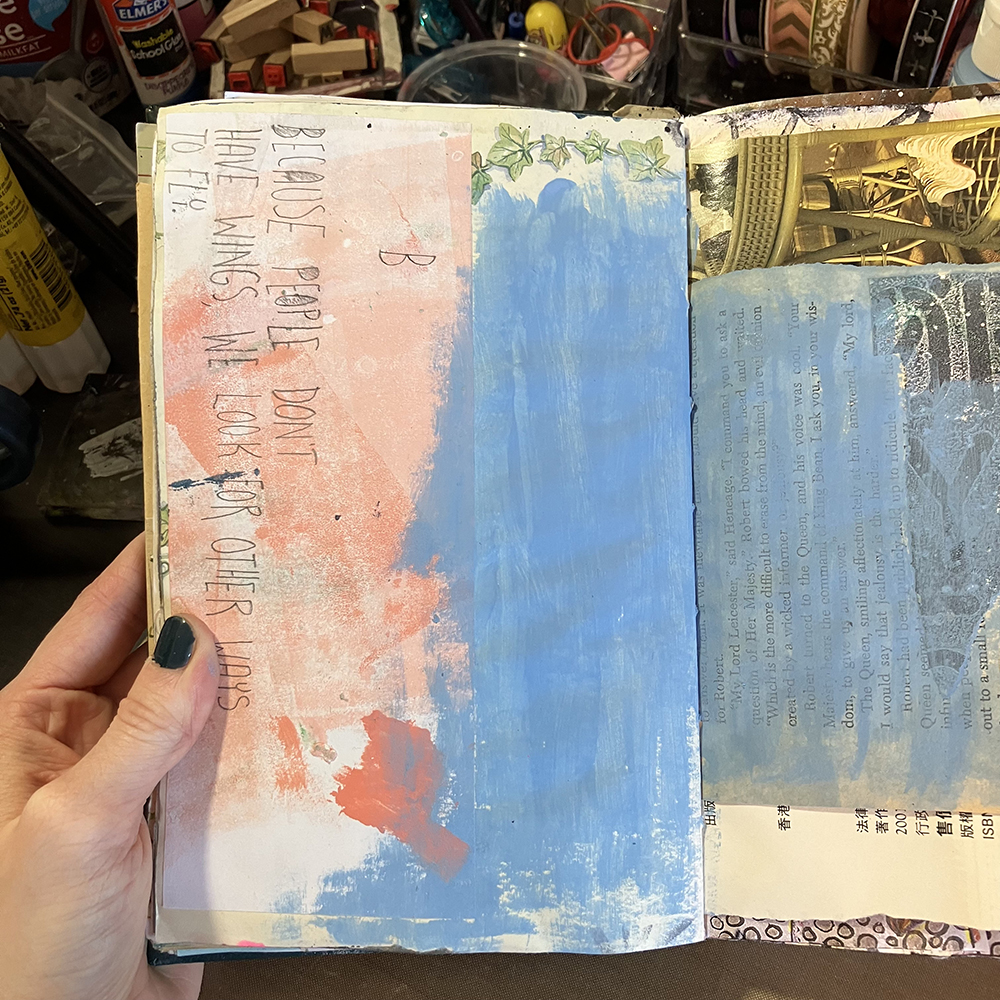
Hello from my Creative Squad! Today we have a post from Jordan Hill who is sharing an art journal page with a special self portrait technique to take on our theme this month: I am a Collage – We are all complex beings with many different facets. Create a “self portrait” piece using collage to represent parts of yourself, either literally or in an abstract way.
Happy October, everyone! I’m really happy to be here and sharing this project with all of you! When I was presented with this month’s theme of “I Am A Collage”, I immediately had an idea for a technique that I wanted to experiment with, which is quite different from things I’ve done in the past. I hope you enjoy following along with me!
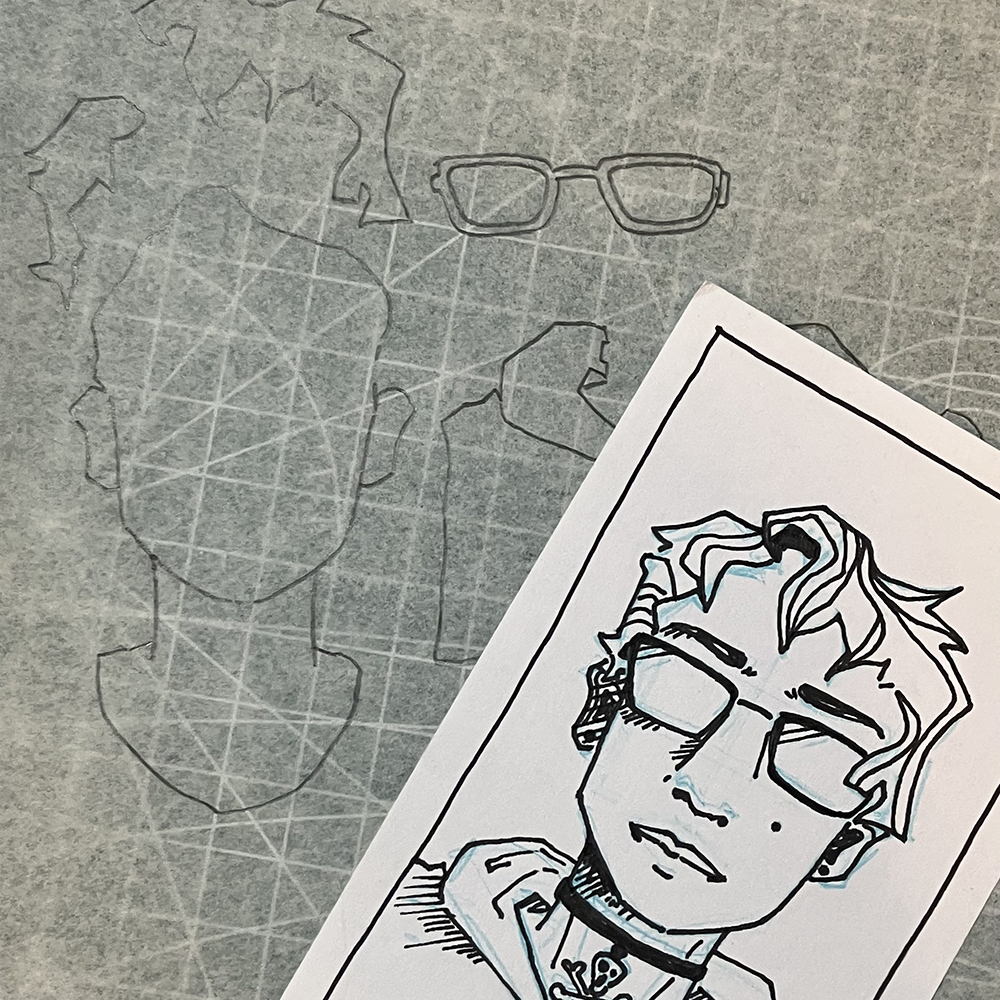
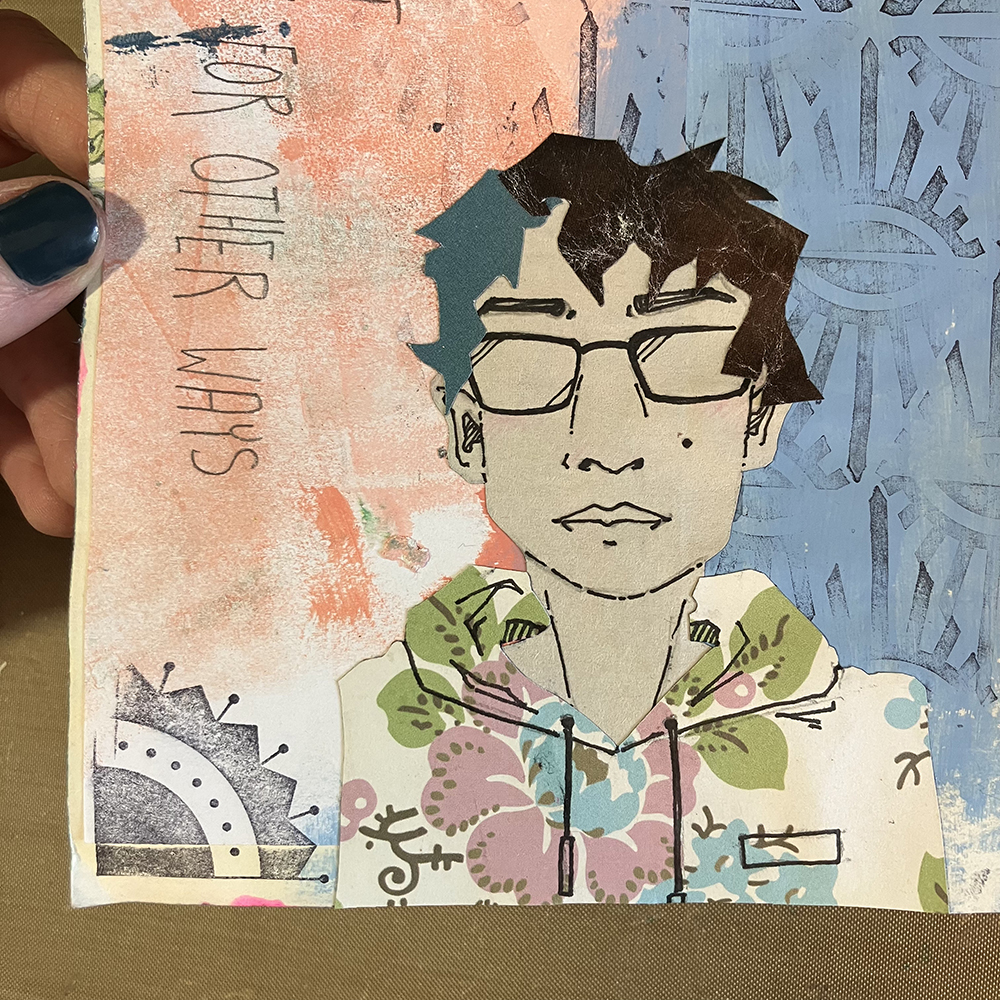
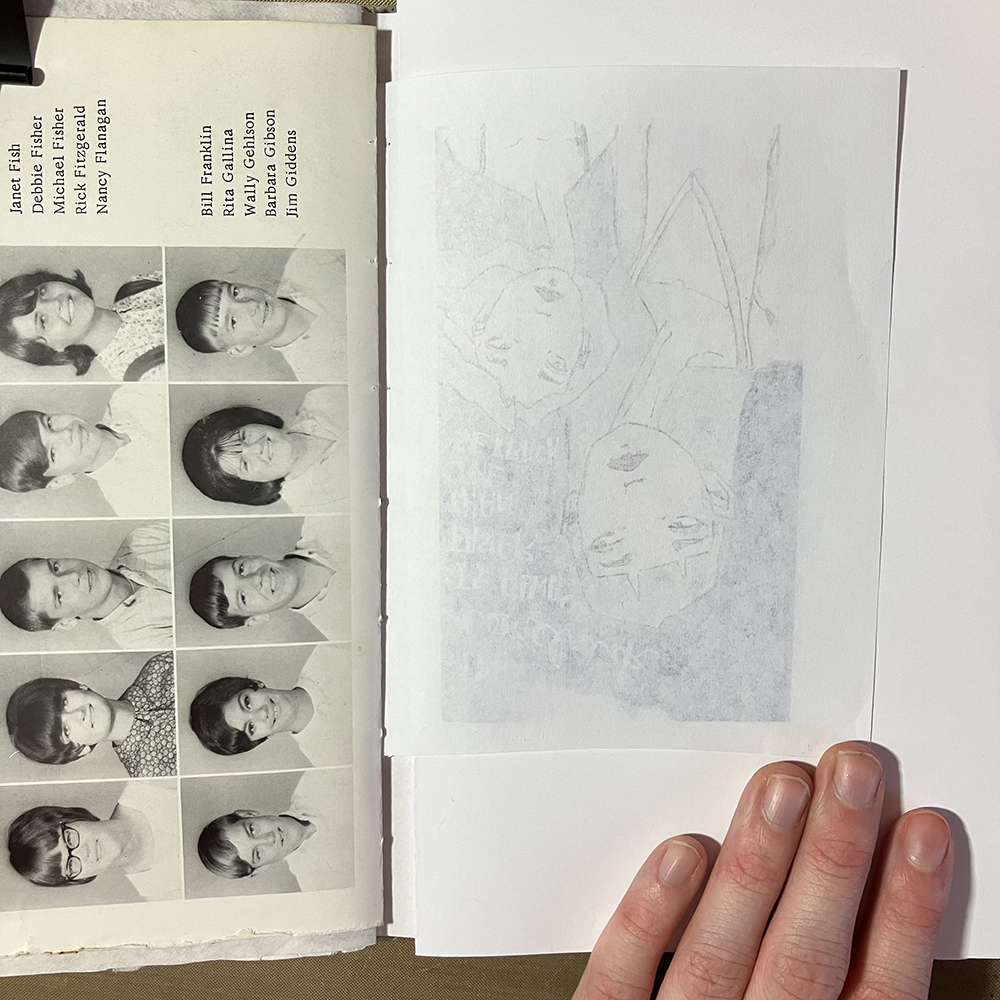
I started this page with a self portrait I had already drawn and a piece of tracing paper. You could just as easily use a photograph to achieve a similar result, but I really liked this drawing and wanted to work with it. I then placed the tracing paper over top of the self portrait and drew the portrait in chunks. I did one chunk for the face and neck, one for the shirt, one for the glasses and two separate pieces for the hair (the left and right sides). I don’t end up using the glasses.
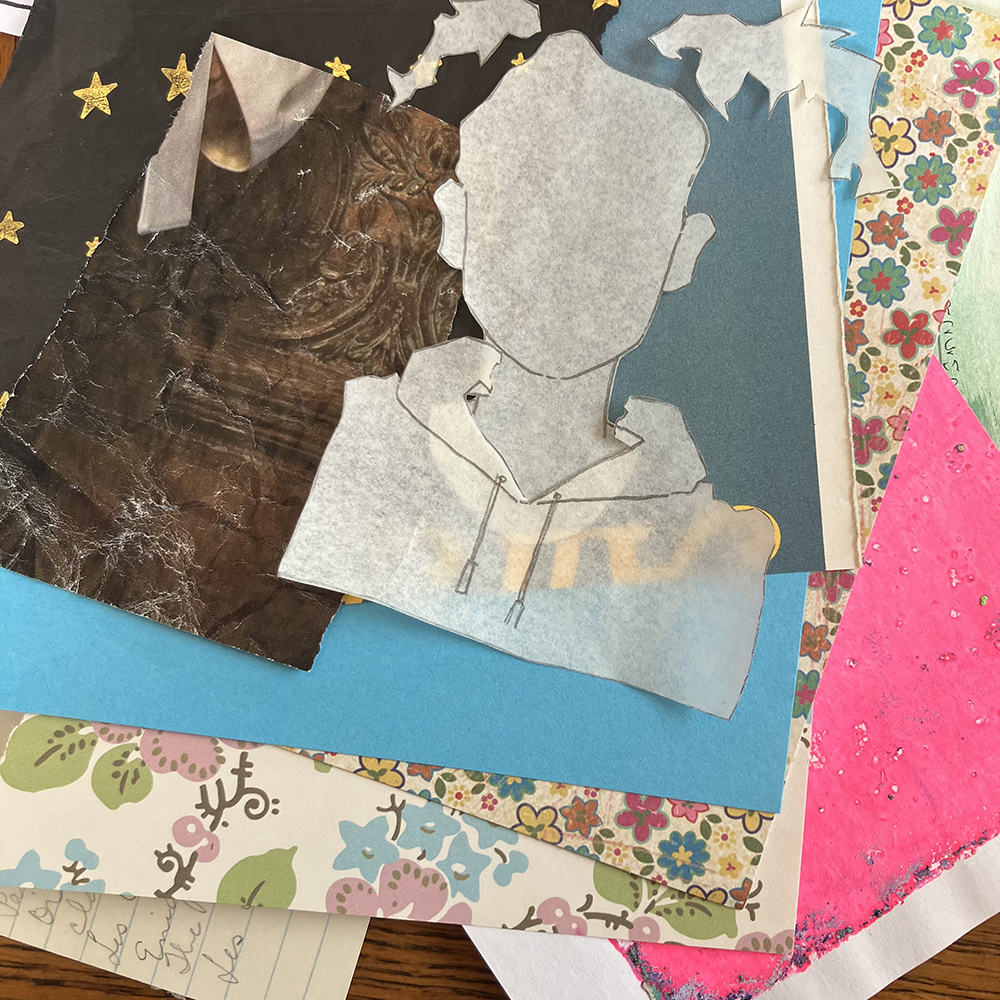
Next, I cut out the individual pieces of tracing paper to create patterns. I then selected some scraps of paper, traced my patterns onto the back of them, and cut them out with scissors. For more intricate pieces, you might consider using an X-Acto knife.
Once my pieces were cut out, I added a few more details onto the pieces using a black ink pen. This allowed me to add in the facial features and some folds and wrinkles to the sweatshirt without as much trouble as a lot of fiddly paper bits would have given me.
I then selected a page in my journal to work on. I ended up going with this one because of the quote along the left hand side of the page. I actually used this same quote on the Creative Squad project I did back in April; it is from a show/manga called Haikyuu!! I figured that it would be fitting to use something that is that important to me as part of this month’s theme.
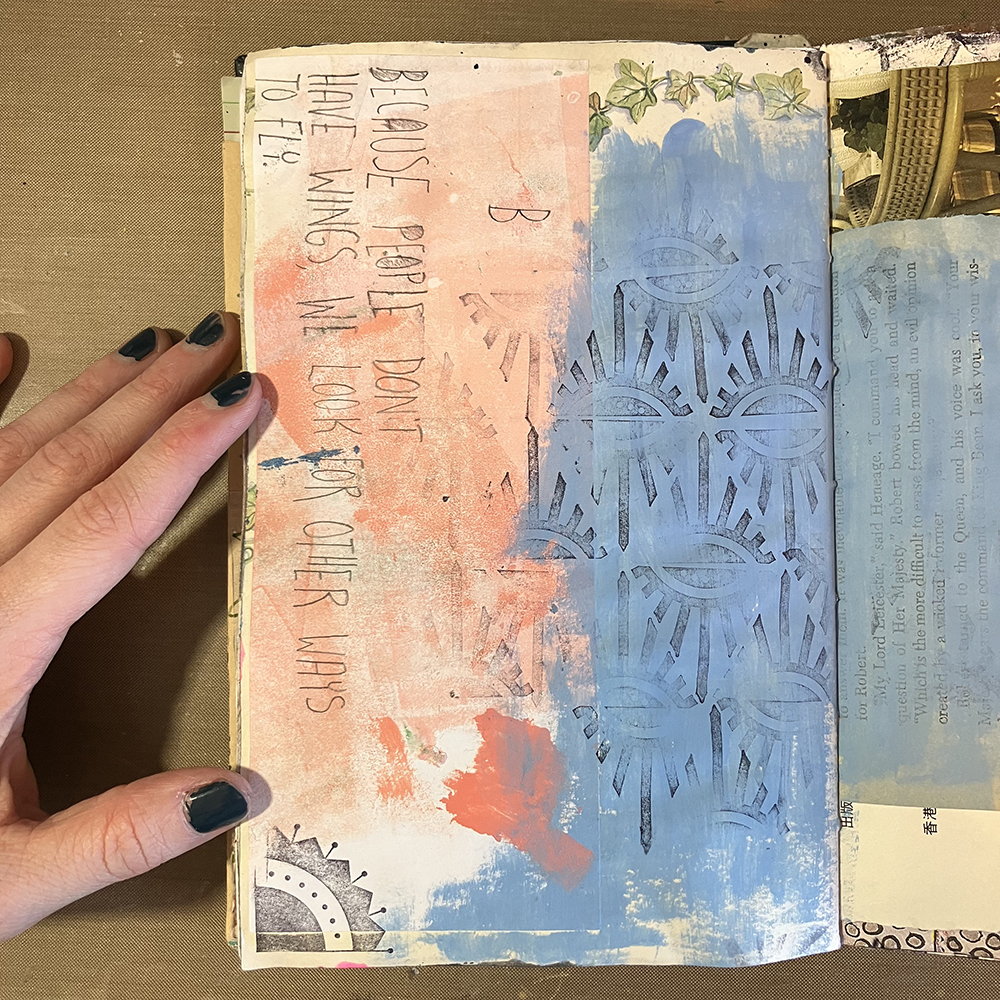
Next, using two of Nathalie’s rubber stamps (the Empire Triangle Stamp and the Arts and Crafts Motif Stamp), I added some texture and interest to the background. I used the Arts and Crafts Motif in the lower left hand corner, and used the Empire Triangle Stamp to create a pattern across the background.
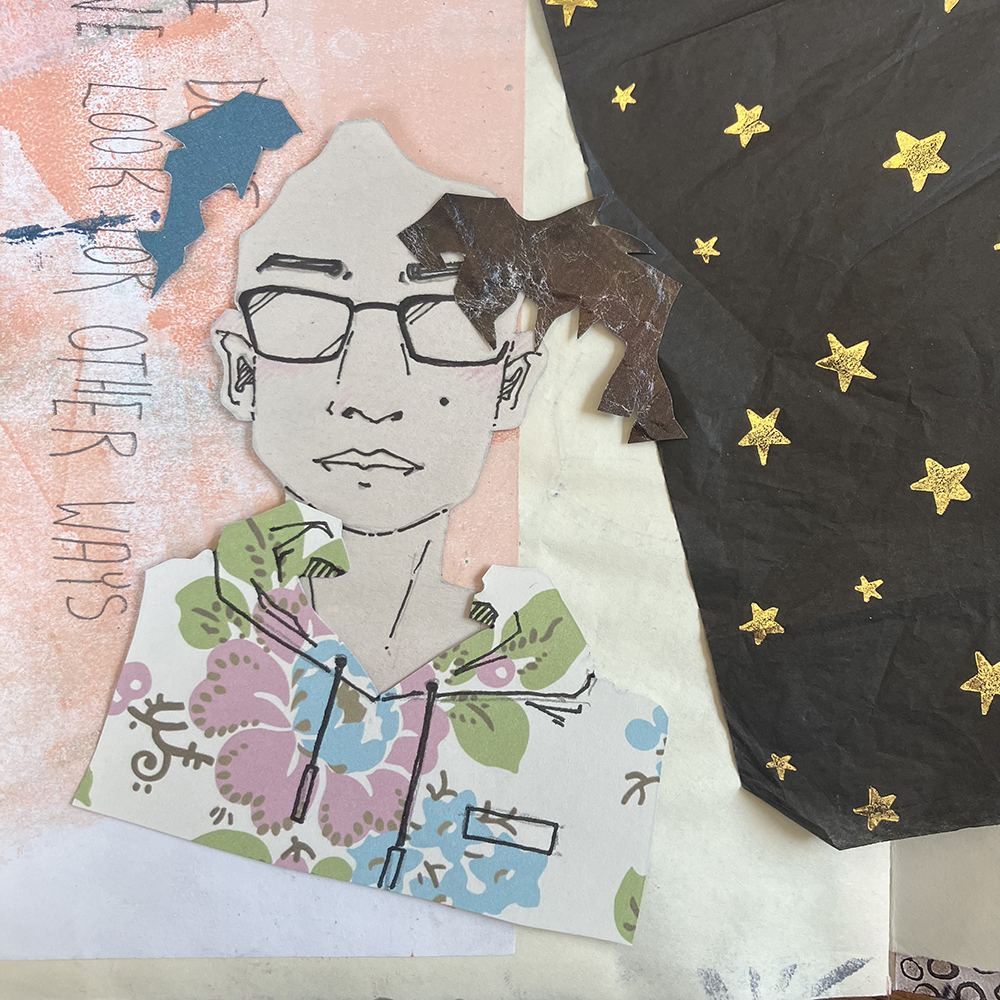
It was then time to add the focal point. Using the different pre-cut scraps of paper, I glued them to my background in layers, overlapping where necessary. I used a glue stick to adhere my pieces.
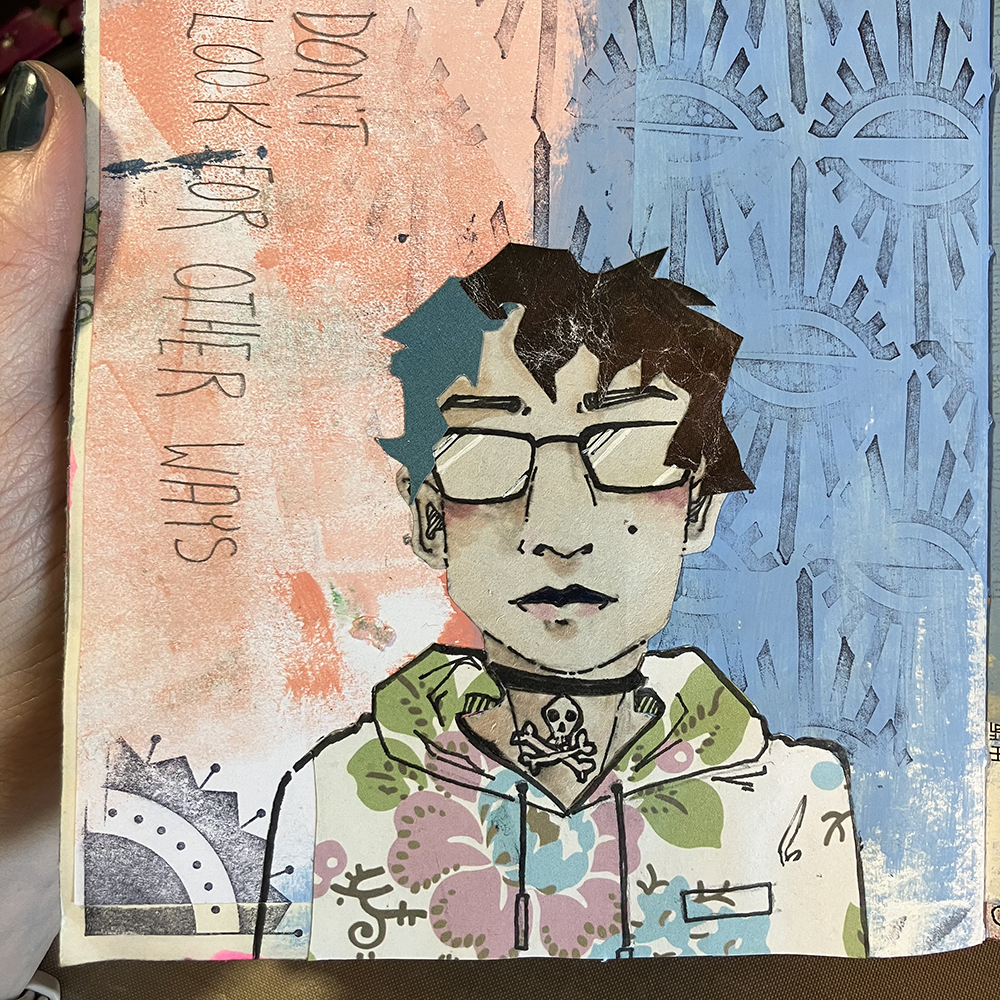
After my collage pieces were adhered to the page, I added more details to the pieces. I outlined some areas in solid black in order to help them stand out against the page and used a few Crayola markers to add color to the face. I also gave myself a nice Halloween-esque skull choker, which was part of the original self-portrait.
Finally, to finish the page off, I added a thought bubble shape using black acrylic paint and outlined it several times with a white gel pen. I haven’t added anything inside this thought bubble yet, but I think it will be a great place to add some journaling in the future. I hope you enjoyed following along with the process of this page and that you consider trying this technique for yourself in the future!
Thank you so much Jordan! I love how you created the self portrait and how you added different elements with various amount of details – it is a perfect example on how complex we are as human beings – we do have many facets.
Give it a try: you can find all my Rubber Stamps in my Online Shop ; here are some of the supplies Jordan used:
Looking for more projects? Follow the Creative Squad on Instagram here.
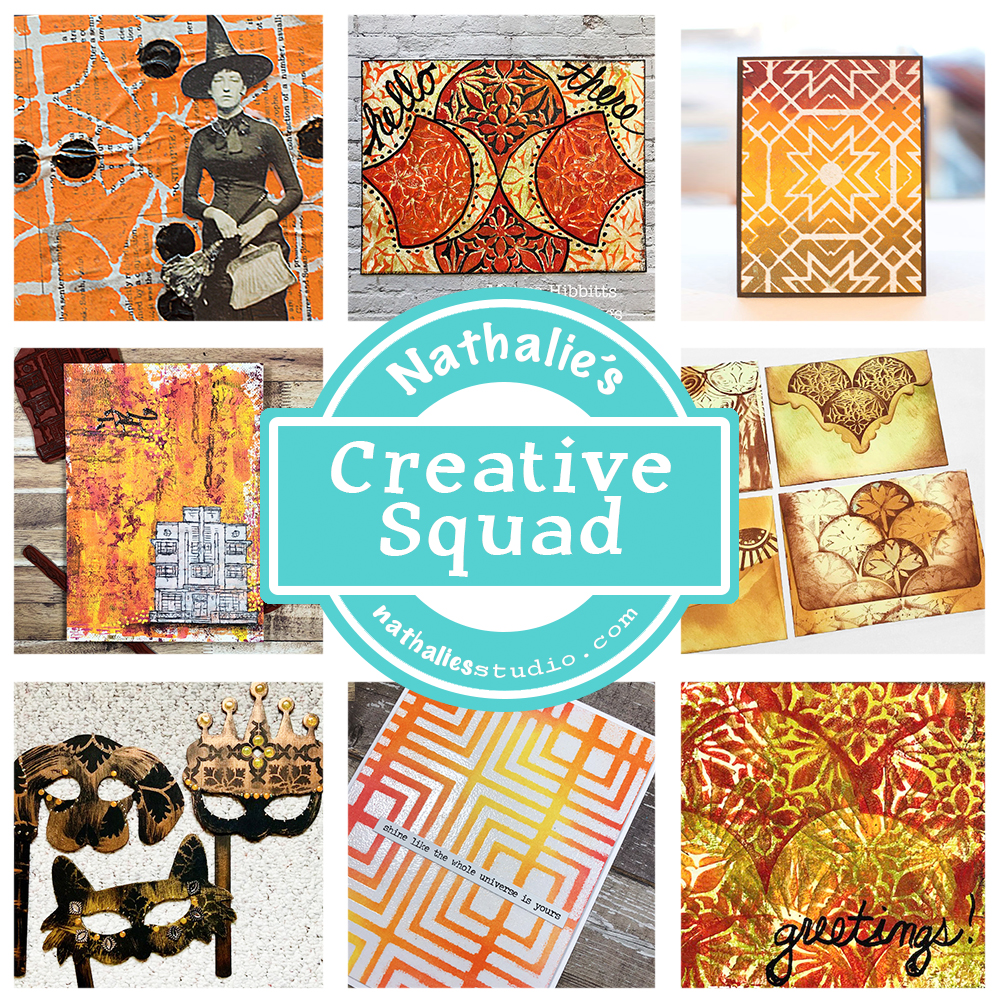
The air is crisping up and the leaves are changing. I’m beginning to think about Halloween. I’m feeling the October Vibes and loving it. How about you? Do you love the colors and sights of this time of year? How about a little roundup of Creative Squad projects to get you also in the seasonal mood.
Over the years my Creative Squad has produced so many amazing projects that it’s fun to go back and look through for inspiration. (You can see the archive of all this awesomeness here on the blog.) This time Halloween and Autumn were on my mind and I wanted to share some projects that the Squad has created that are so fun and so now.
Let’s take a look!
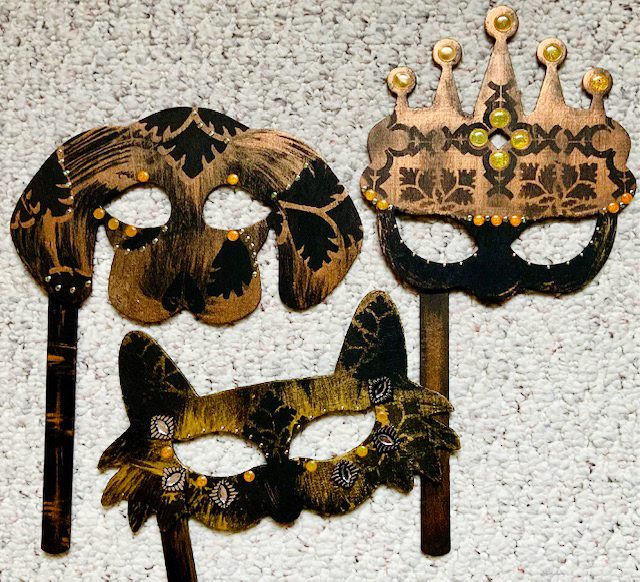
First up is Judi Kauffman and a suite of masks using rich metallic gold paint and my stencils over black for a bit of style and drama. Check out the post here for her how to.
Even if you’re staying in these days, you can still get into the spirit through your artmaking. Making a seasonal inspired canvas is one idea. In this project our Squad alum Josefine Fouarge created a layered piece using my Art Deco, Art Tag, Chain Link, and Cross Circle rubber stamps. How does your neighborhood look this time of year?
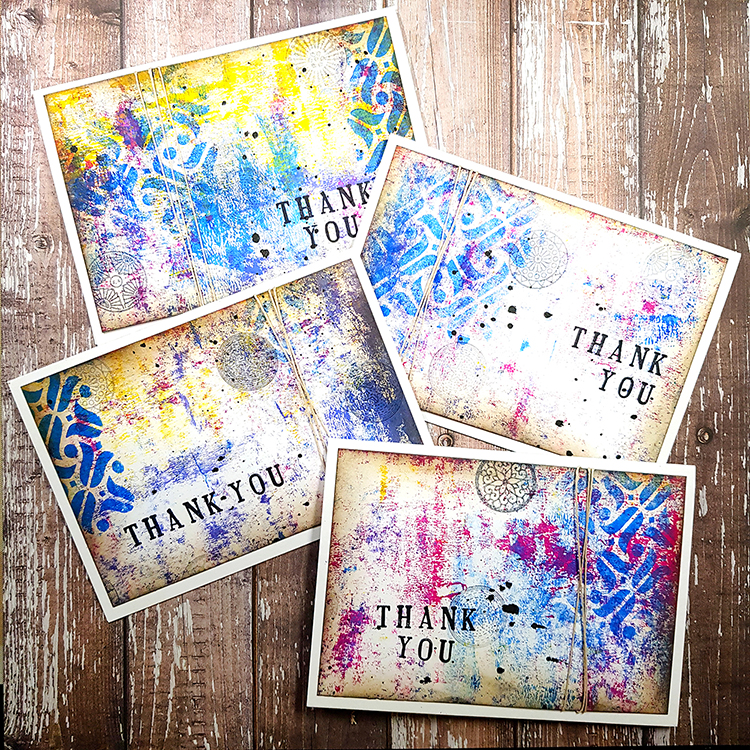
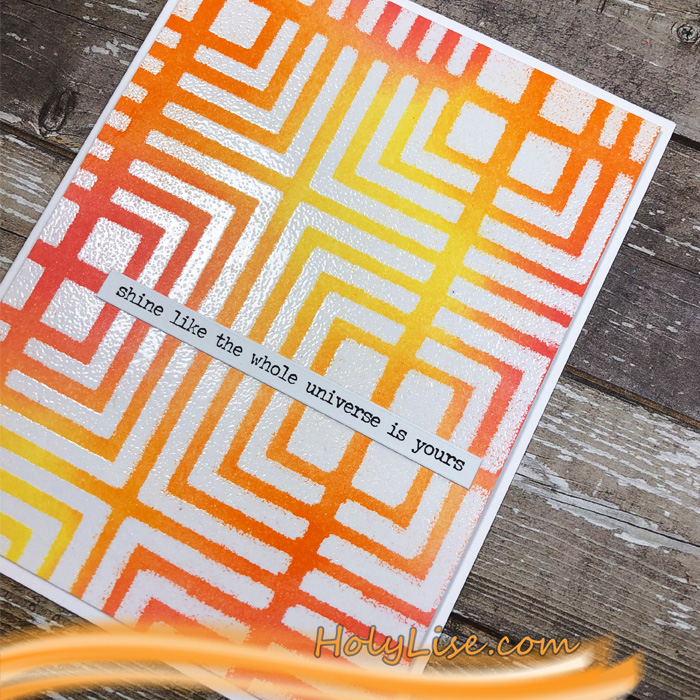
Squad alum Josefine created this cool card using embossing powder, Distress inks, and my Manhattan stencil. Love the result and you can see how she does it here.
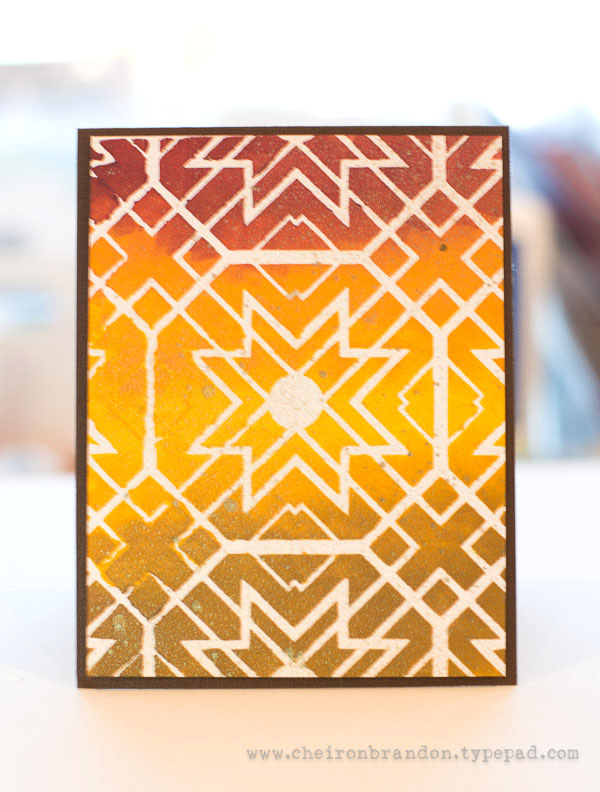
With just a few simple supplies like acrylic paint, cardstock, and a stencil (like Toledo), Squad alum Cheiron Brandon shows us another inspiring card idea here. It’s all about those autumnal colors and that bold pattern.
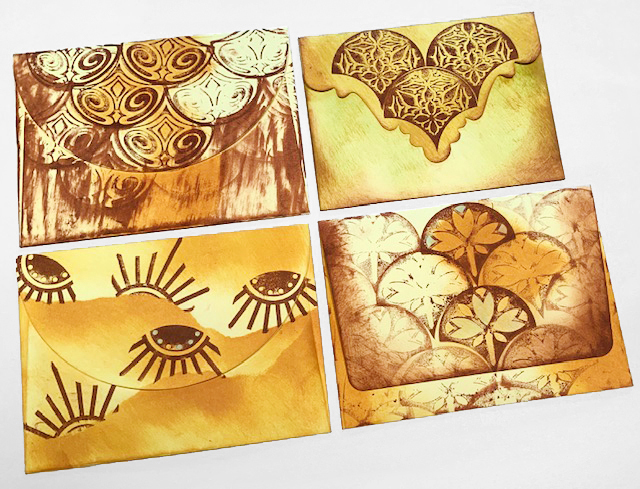
Now you’re going to need some envelopes right? Judi has us covered with this post using my Mini Fan Foam Stamp Set and inks in the colors of the season.
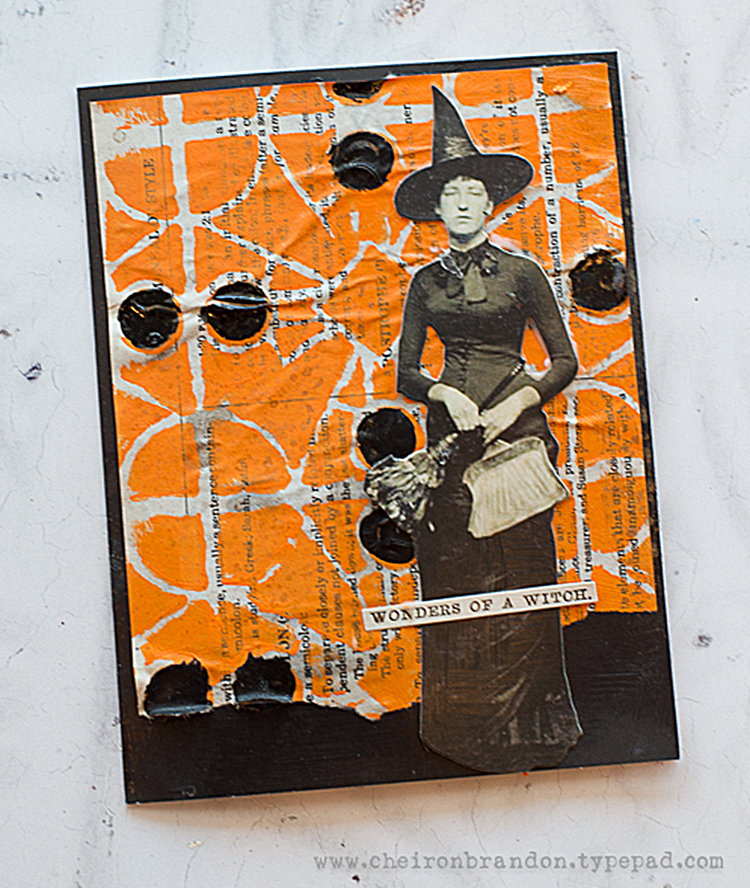
Let’s finish up with a classic for this time of year – a Halloween card idea from Cheiron from this post. She combined collage papers, orange acrylic, and my Buenos Aires stencil for big impact.
I hope you feel inspired to create a few things with an autumn or Halloween vibe to them and have some fun celebrating.
Here are some of the supplies used in these posts:
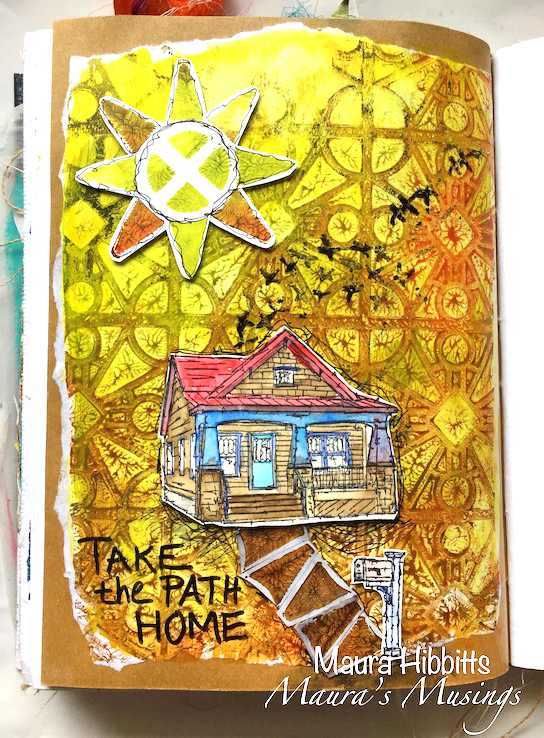
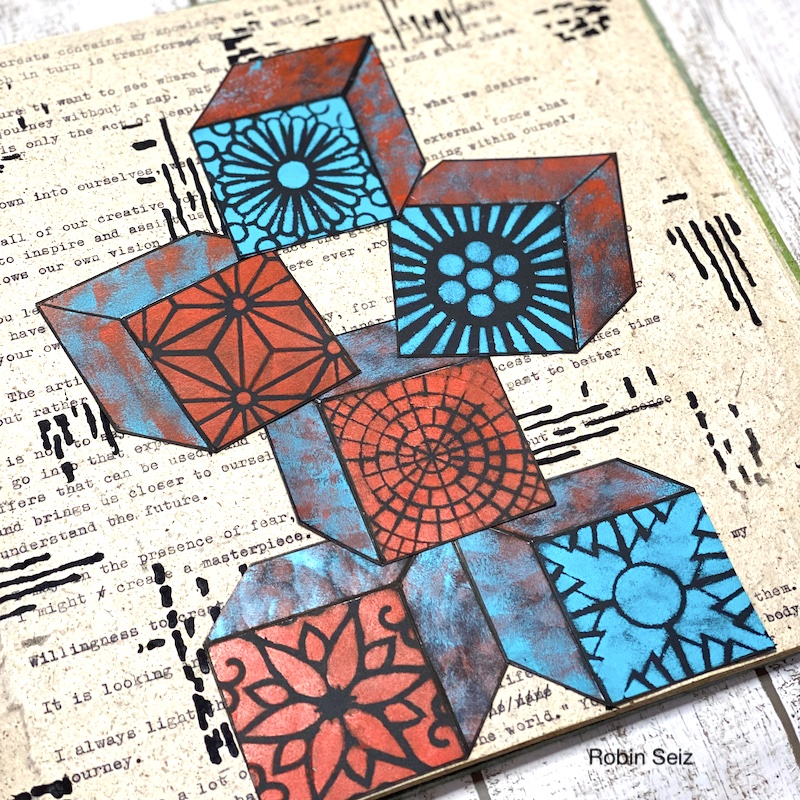
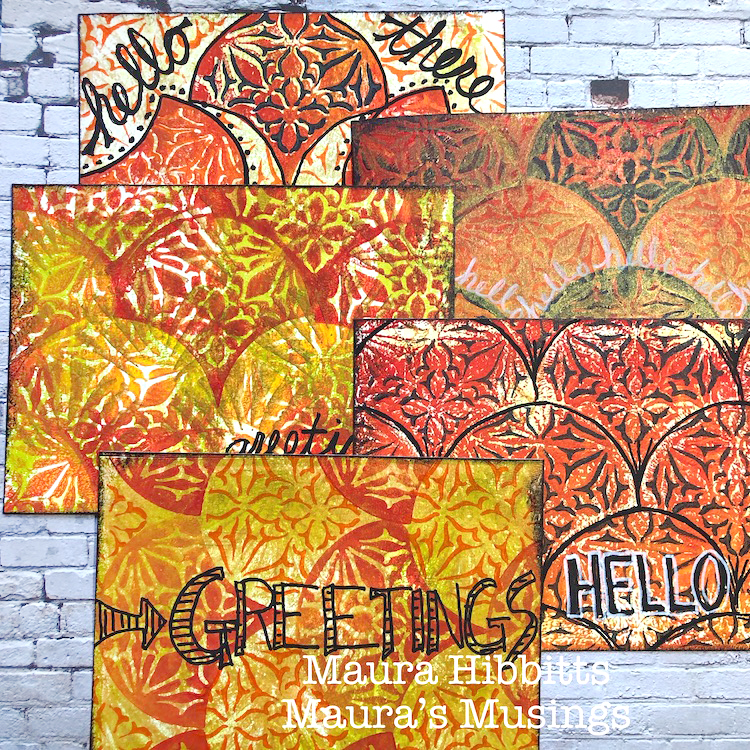
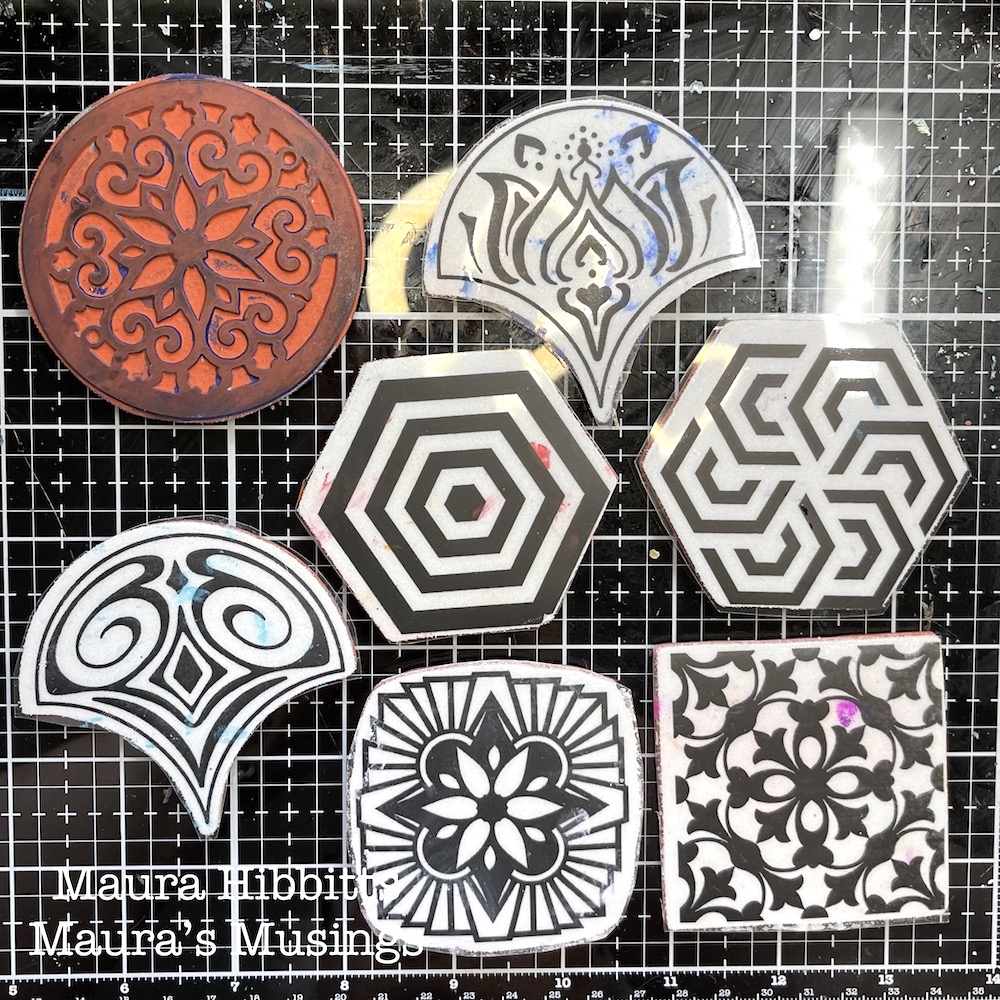
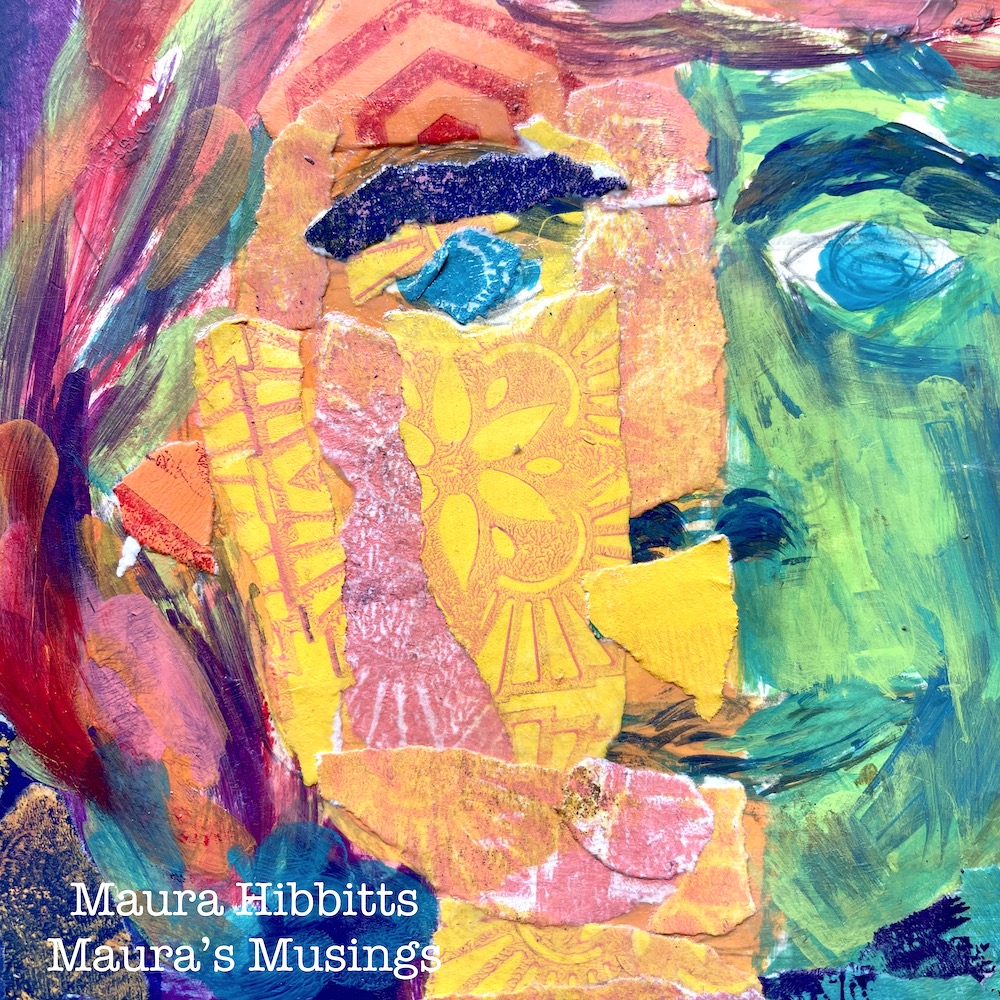
Hello from my Creative Squad! Today we have a post from Maura Hibbitts using my Circle Jumble Large, Hex Set Large, Floral Tile Large, and Fan-Tastic Large rubber stamp sets and our newest theme: I am a Collage – We are all complex beings with many different facets. Create a “self portrait” piece using collage to represent parts of yourself, either literally or in an abstract way.
I am a collage of thoughts, ideas, feelings and colors. The patchwork of my life has shaped who I am today. The experiences I’ve had, the highs and lows, the people I’ve met and shared my life with, adventures, work, laughing, crying, stopping in my tracks to take in a gorgeous sunset…all of these make up the layers of me that are expressed in my collage. Some are hidden, some in plain sight…these are the things that color my world.
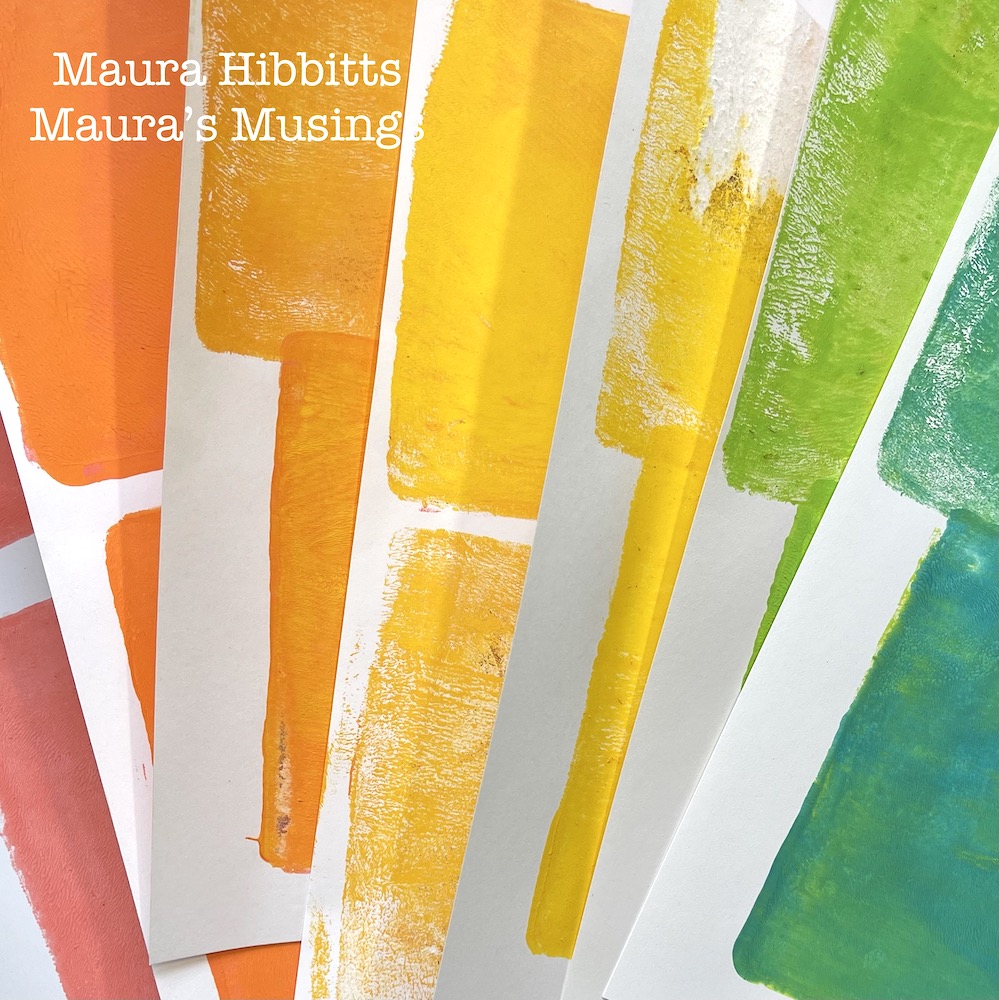
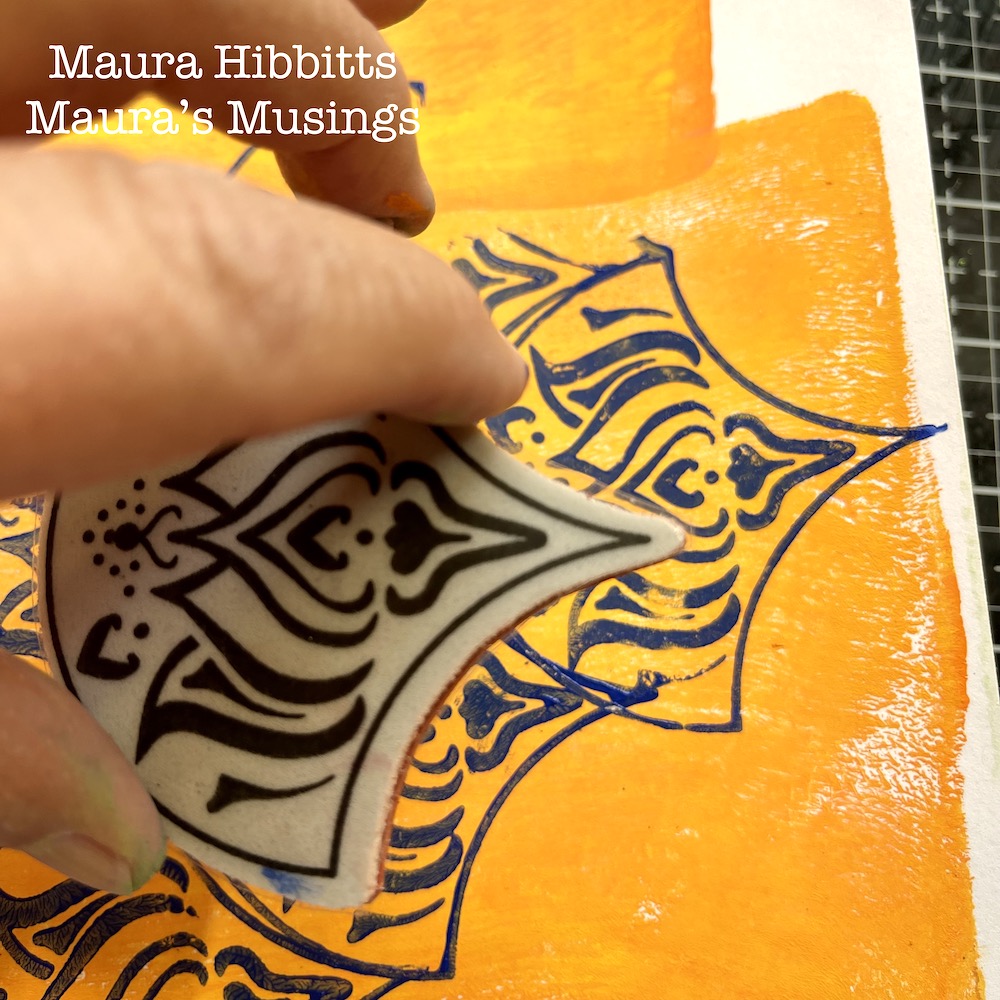
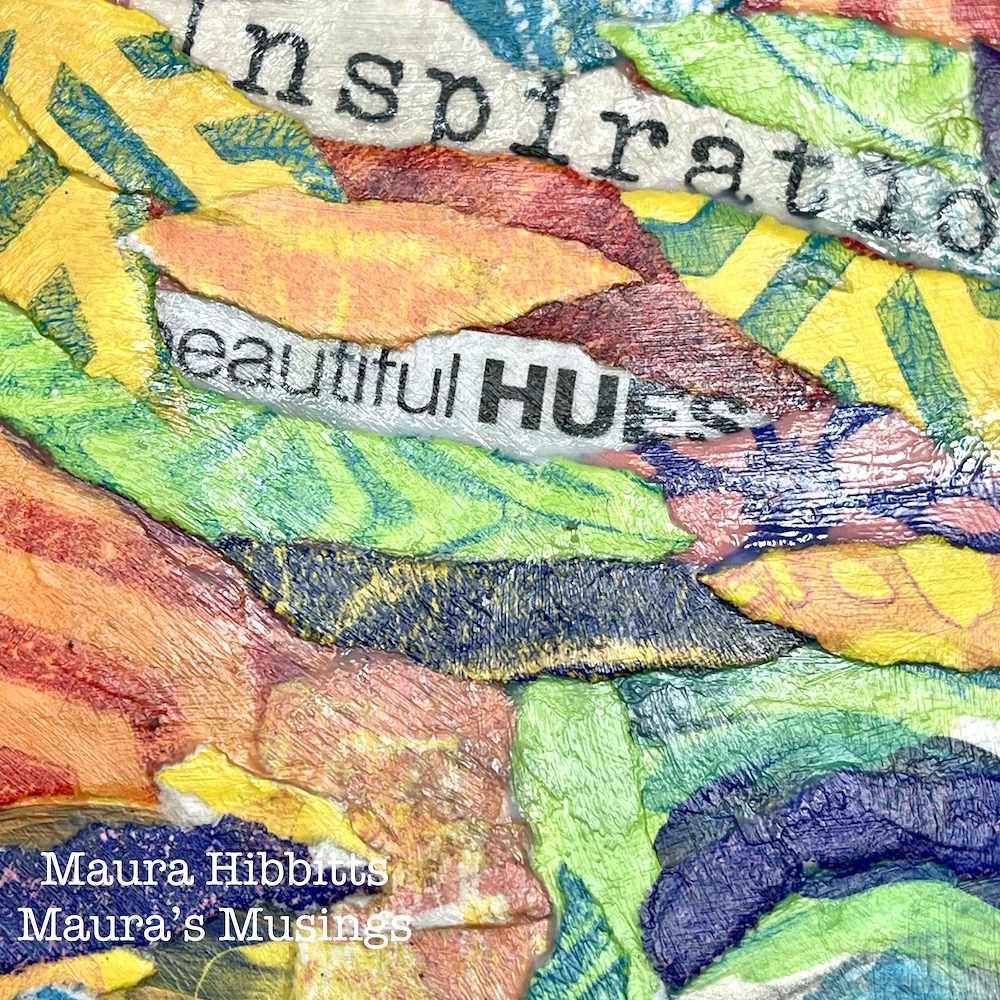
The collage technique I used, I learned from artist Elizabeth St. Hilaire. I began with the gel plate, lighter hued paints and a brayer to create the background papers. Add a small amount of paint to the gel plate, brayer it smooth, then press the white cardstock onto it and lightly rub then lift off. Using a 5×7” gel plate, you can get two impressions onto one sheet. Make a batch of background papers in different colors. Set aside to dry or use a heat tool.
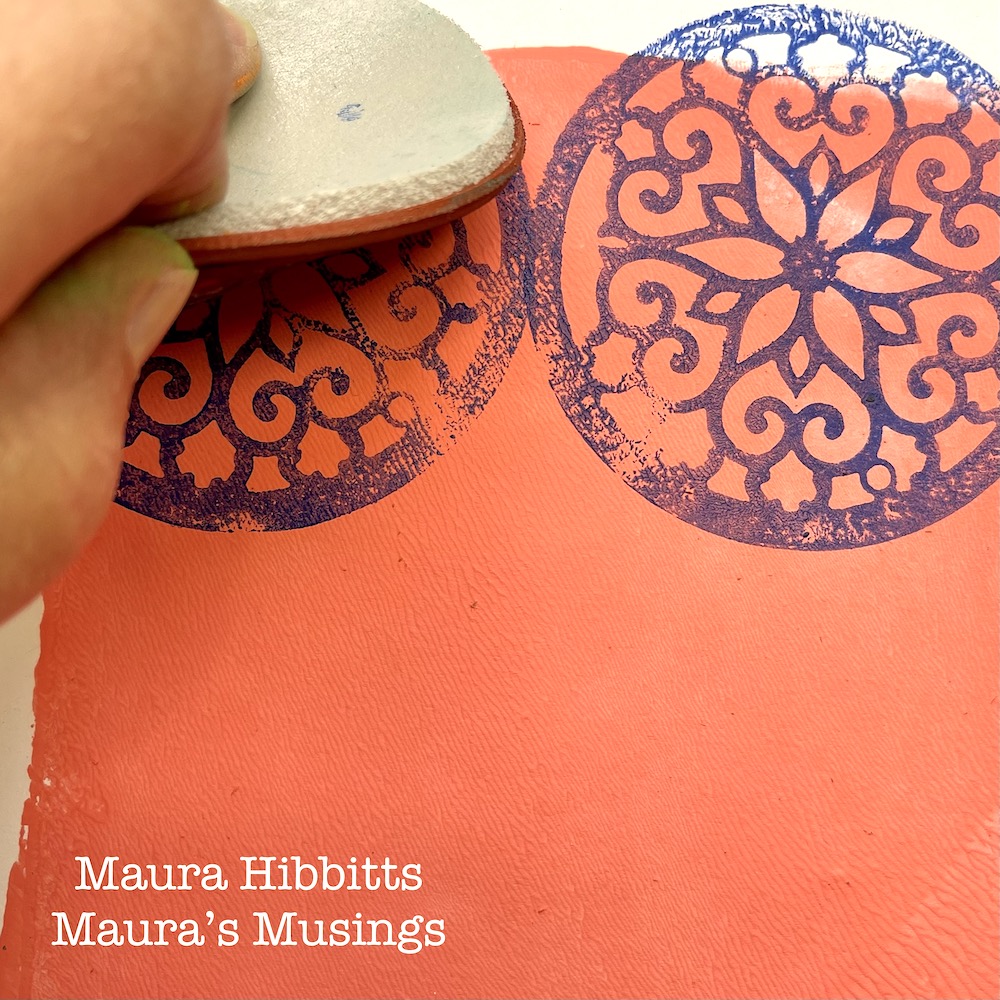
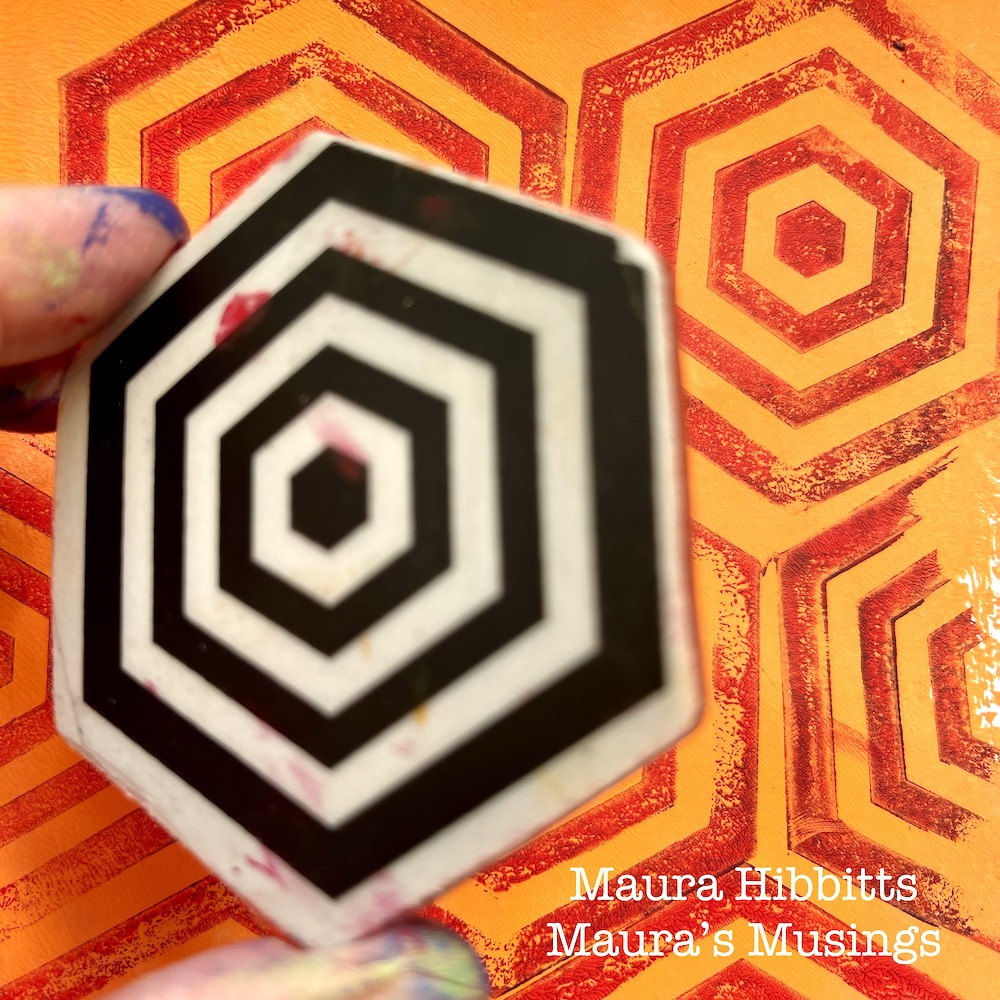
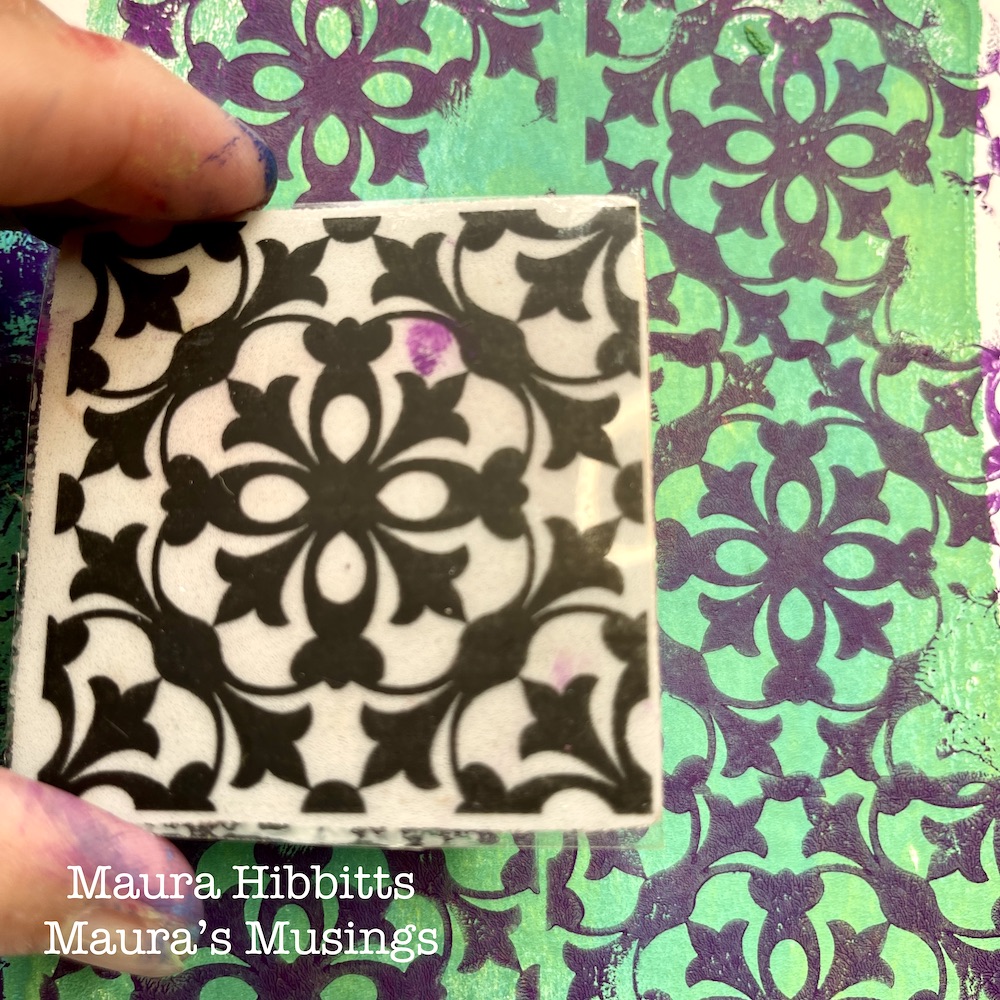
Next, brayer a dark or contrasting color onto the gel plate, and stamp into it with Nathalie’s Park Blvd stamp. Now, stamp the image repeatedly onto your background sheet in one section. Brayer the paint on the gel plate again and stamp repeating images on the plate, then place the other background section over it and lightly rub and lift. Basically, you are creating a positive and a negative print. Let dry or use heat tool.
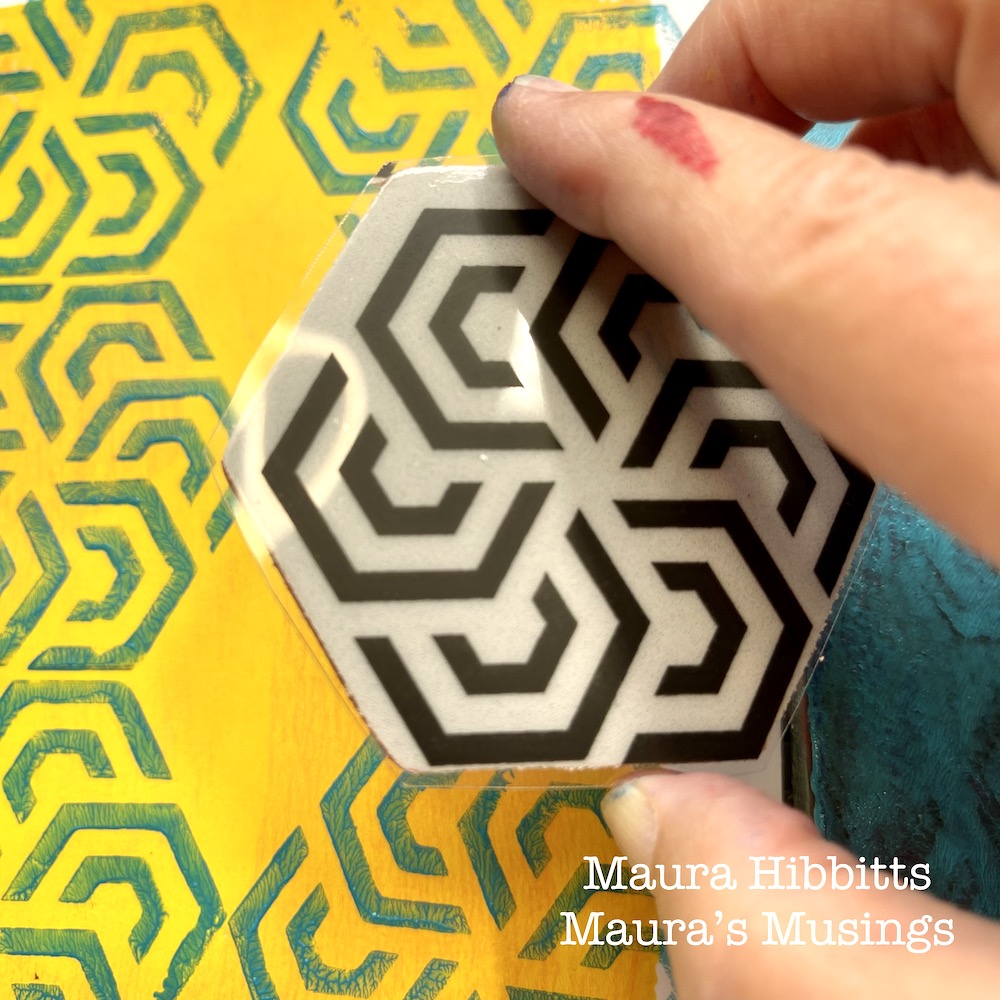
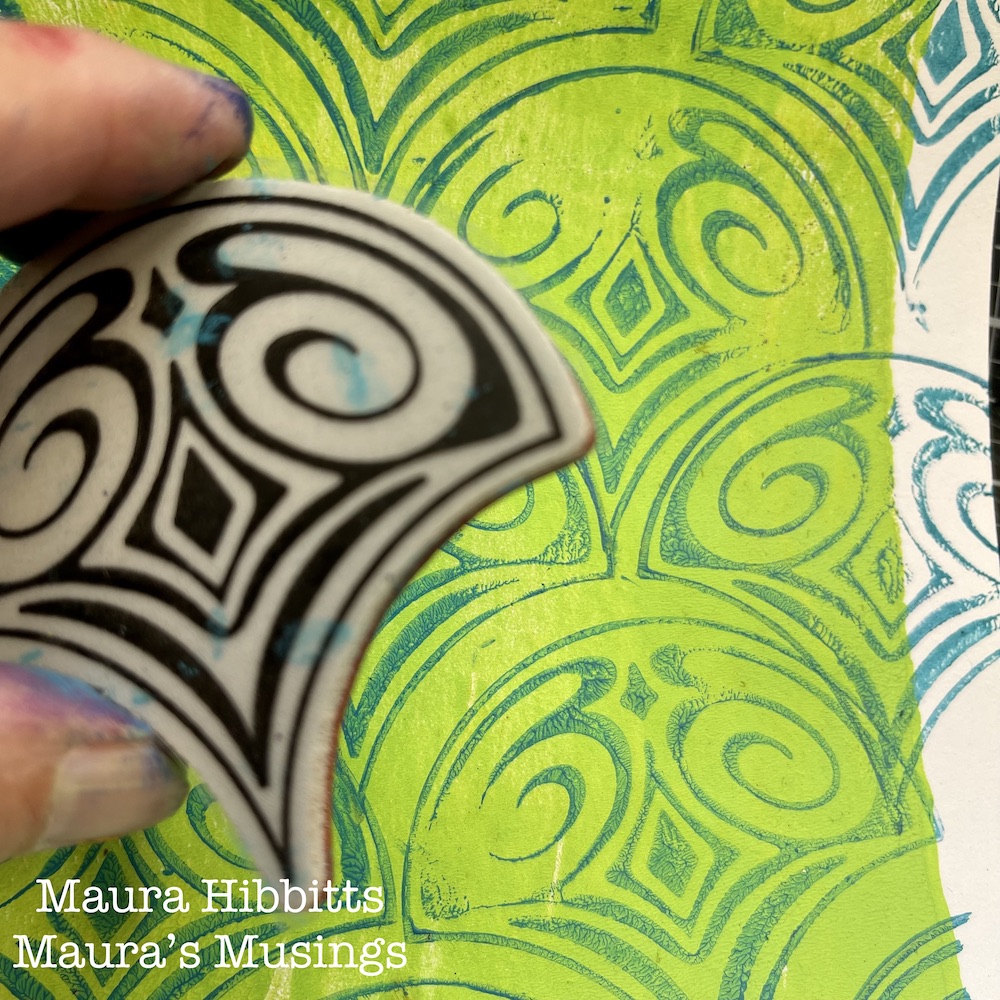
Repeat using the Lily Fan stamp and a different paint color.
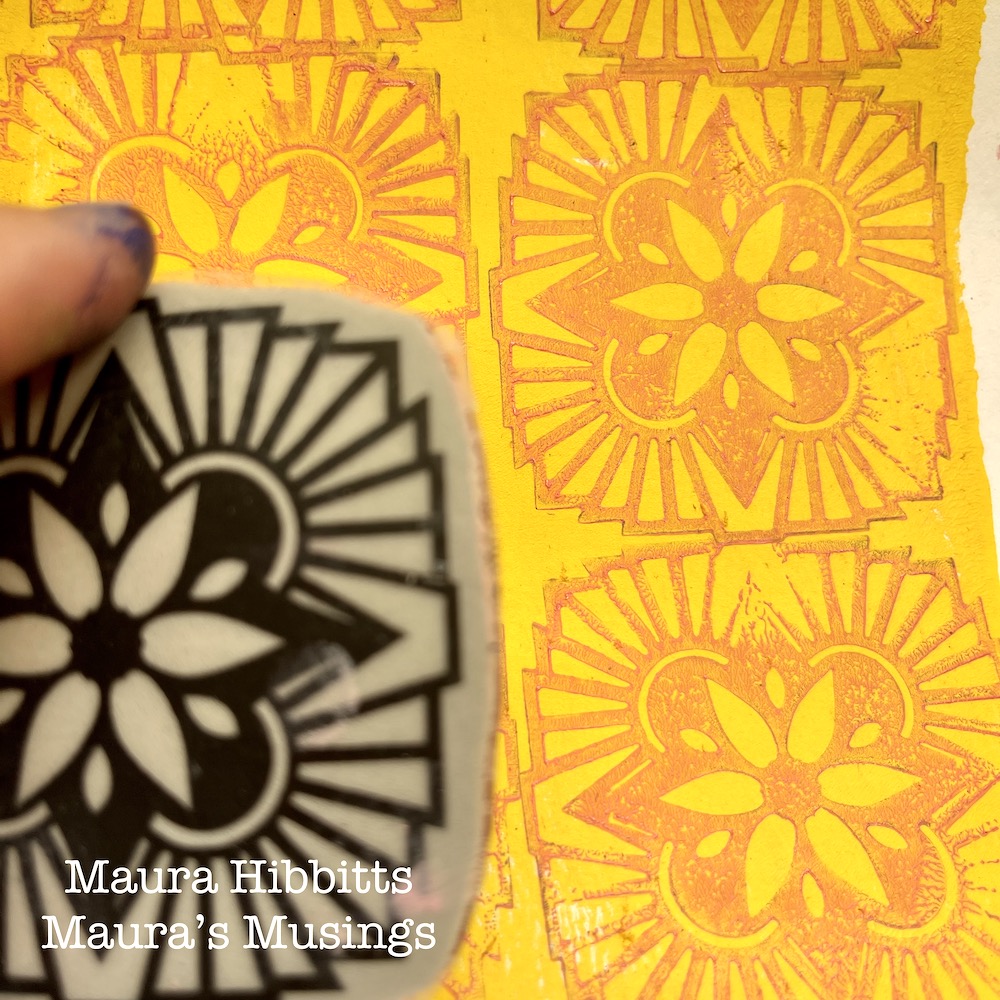
Now for the final repeat of this step – use the Fairview Fan stamp and a different paint color. Let all papers dry thoroughly.
At this point, you will have a selection of papers in several colors and designs to use for the project.
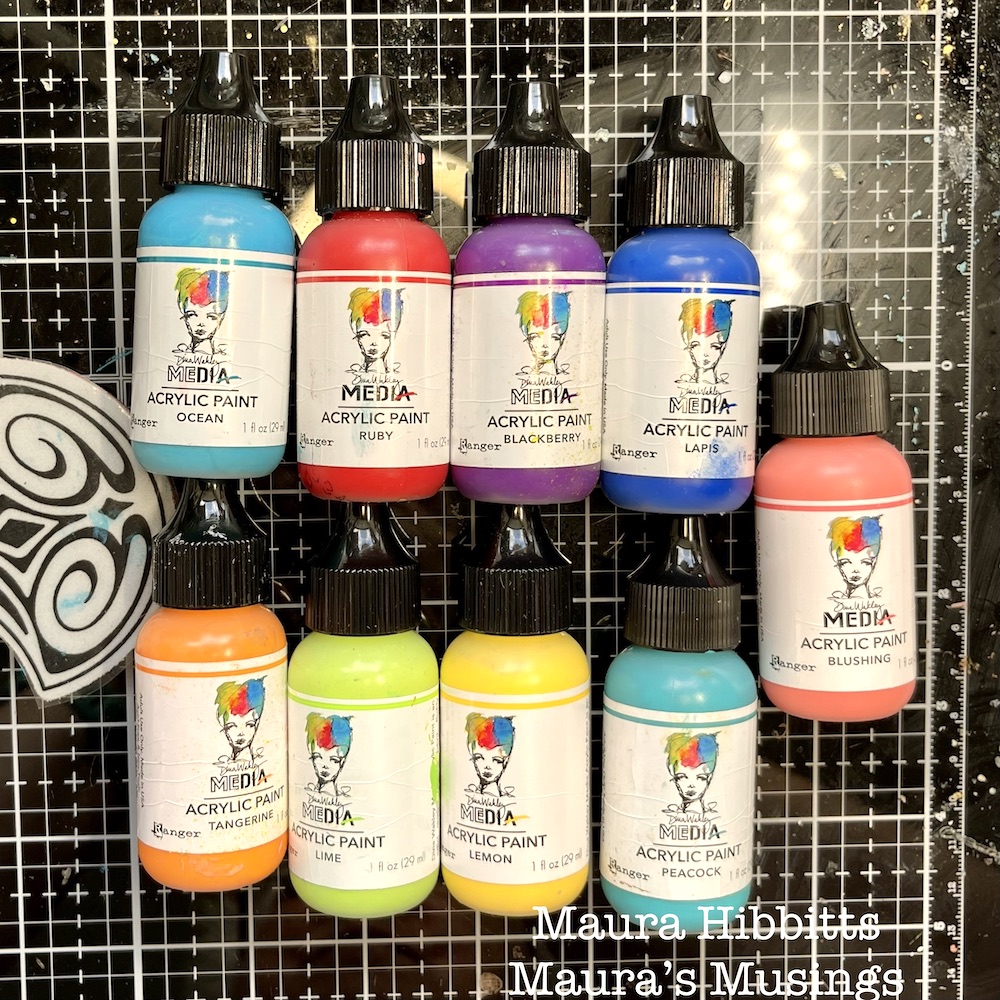
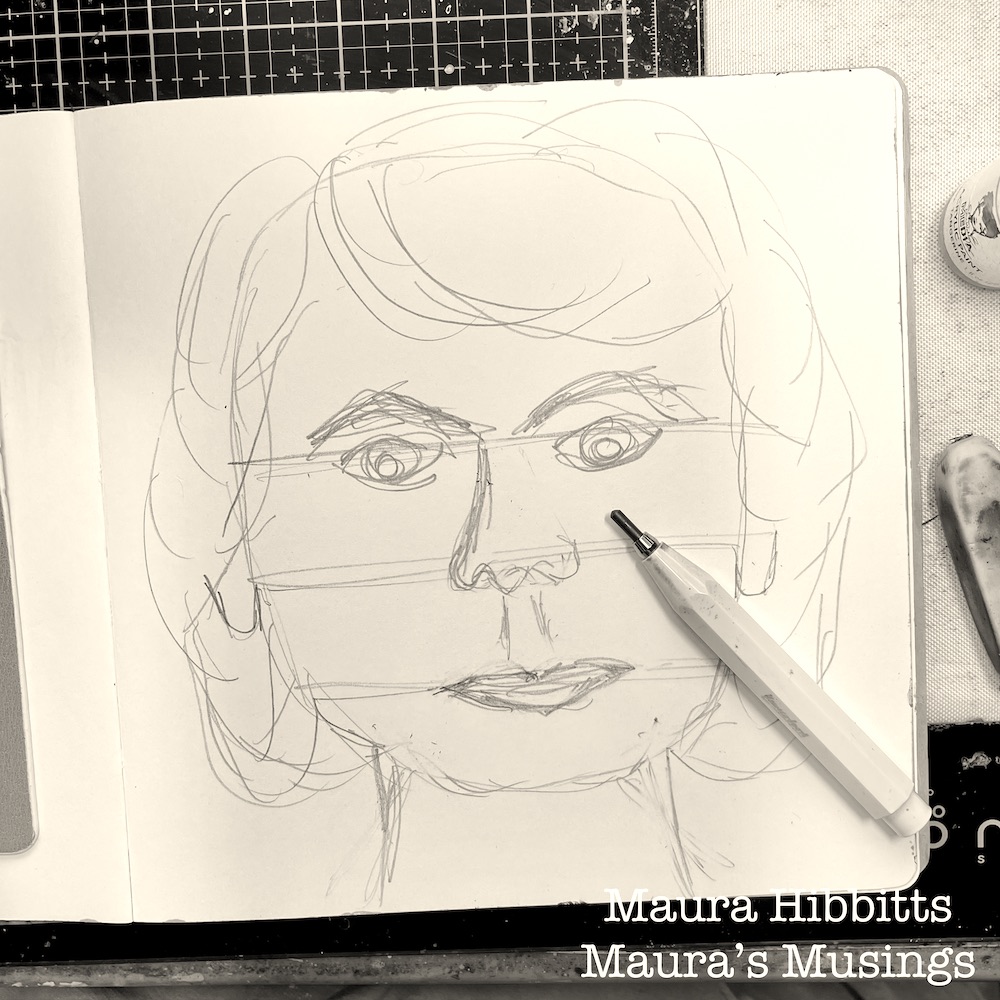
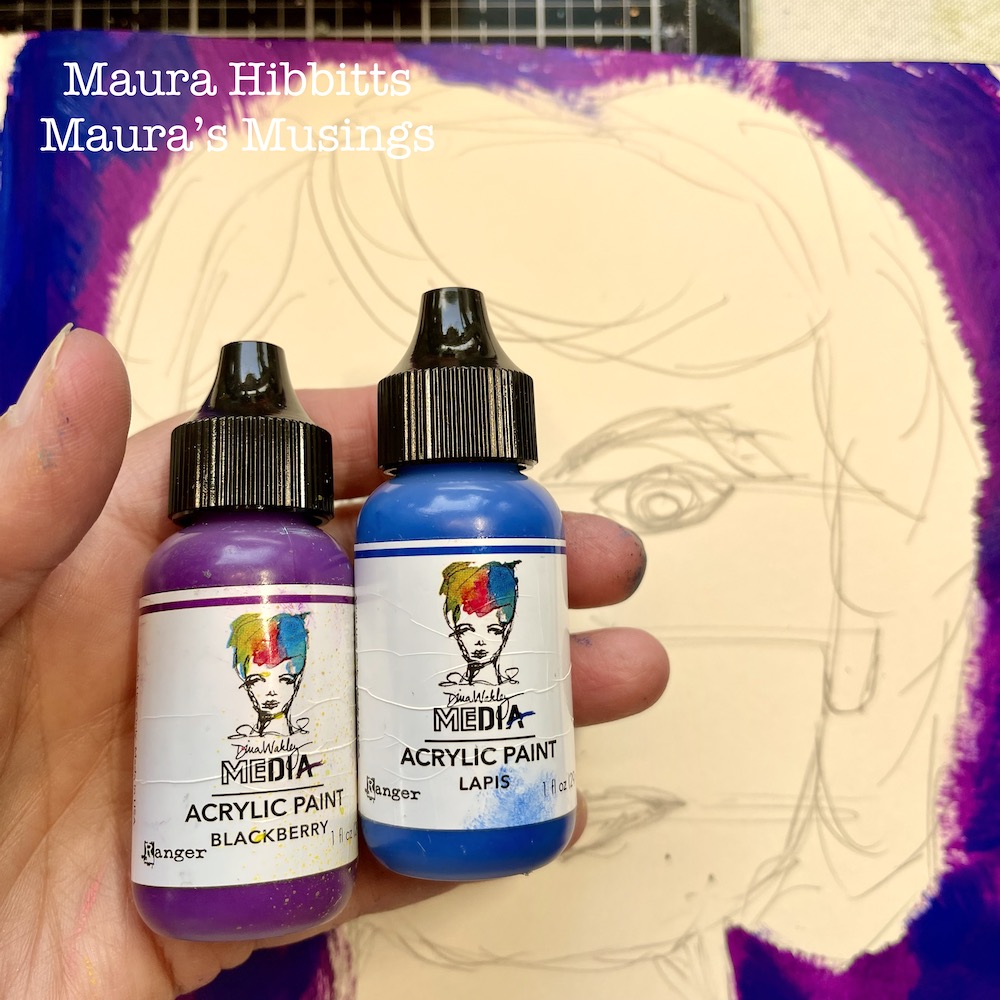
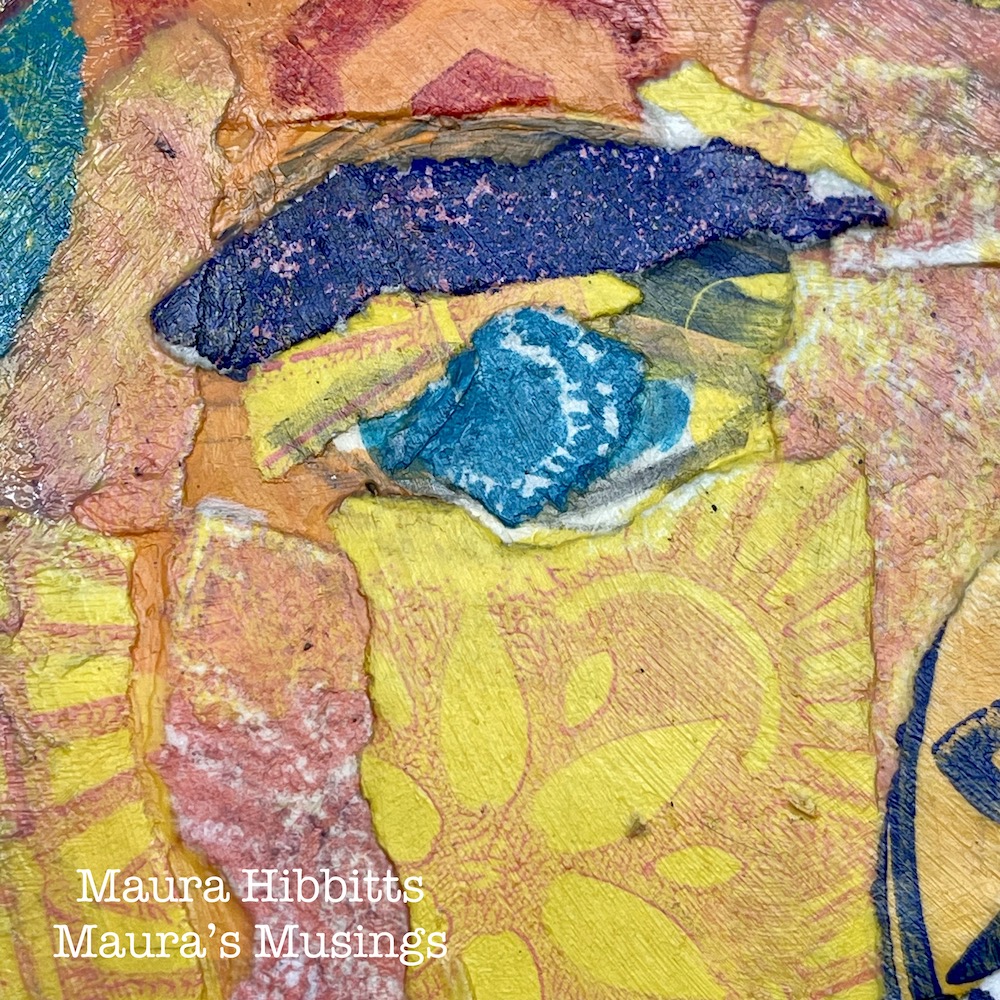
Now, the fun begins! Sketch a face on your page. Use the same paint colors here as you used to make the papers. Paint a mix of dark colors around the face to make a background. (I used Lapis and Blackberry) I wanted to use non traditional colors for my face and lots of variety… it might look a bit psychedelic to you, but I love the freedom of play here.
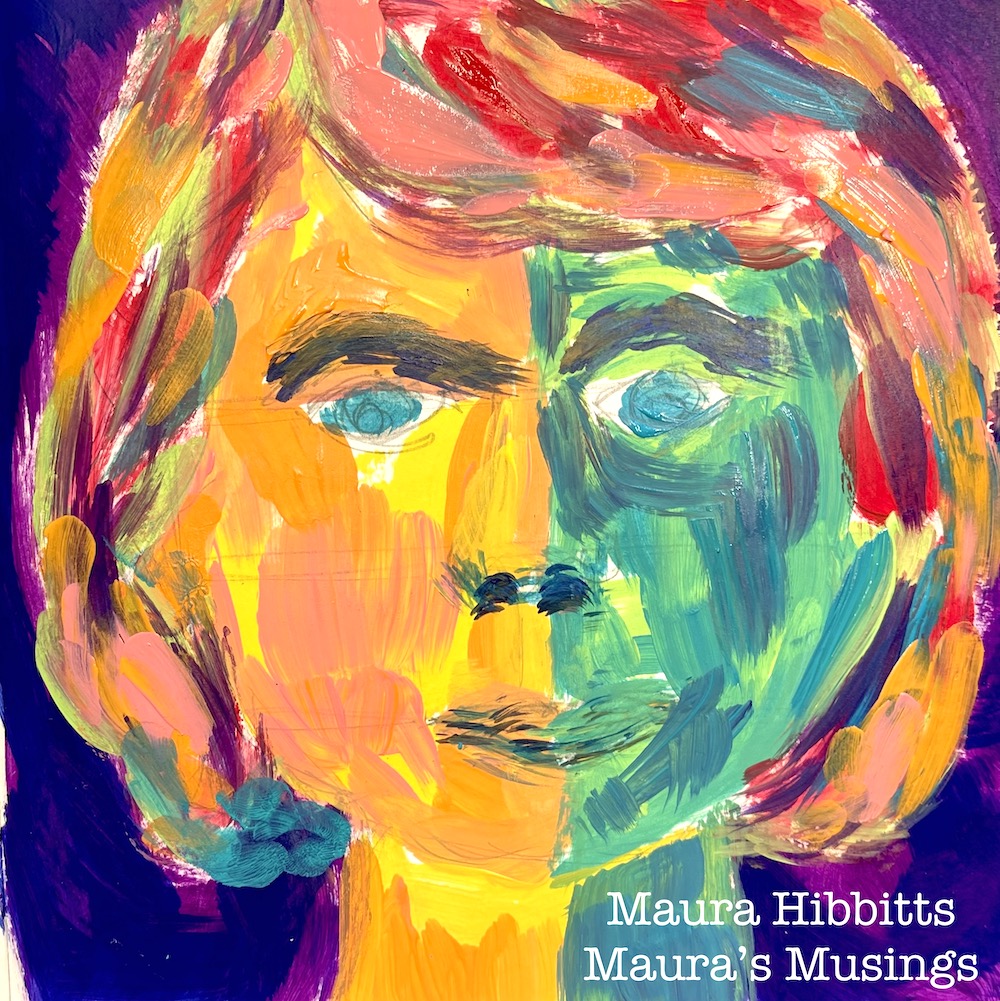
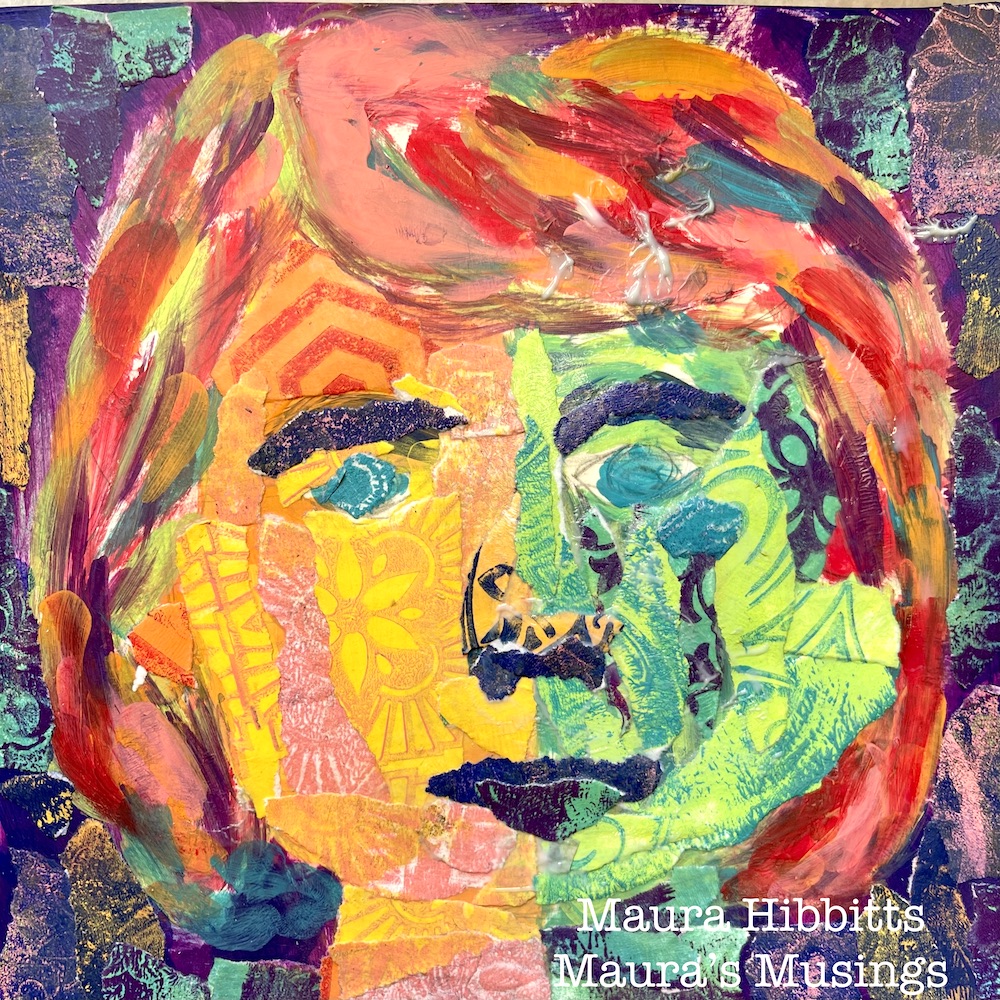
I used warm colors on one side of the face, and cool colors on the other. (When I look at the one side, I’m getting “She Hulk” vibes, lol!) And just go into a color frenzy with the hair! I tried to paint with big, loose strokes.
Rip out small pieces of paper from your background papers, matching the paint colors. Note – if you rip the paper towards you, it will eliminate a white edge. Adhere to the background with collage medium. I like to add the medium to the back of the piece, press it down with the brush, then go over it with more medium, pressing down.
Next, move to the face, and continue collaging paper pieces over your painted image. Match the paper bits to the paint color.
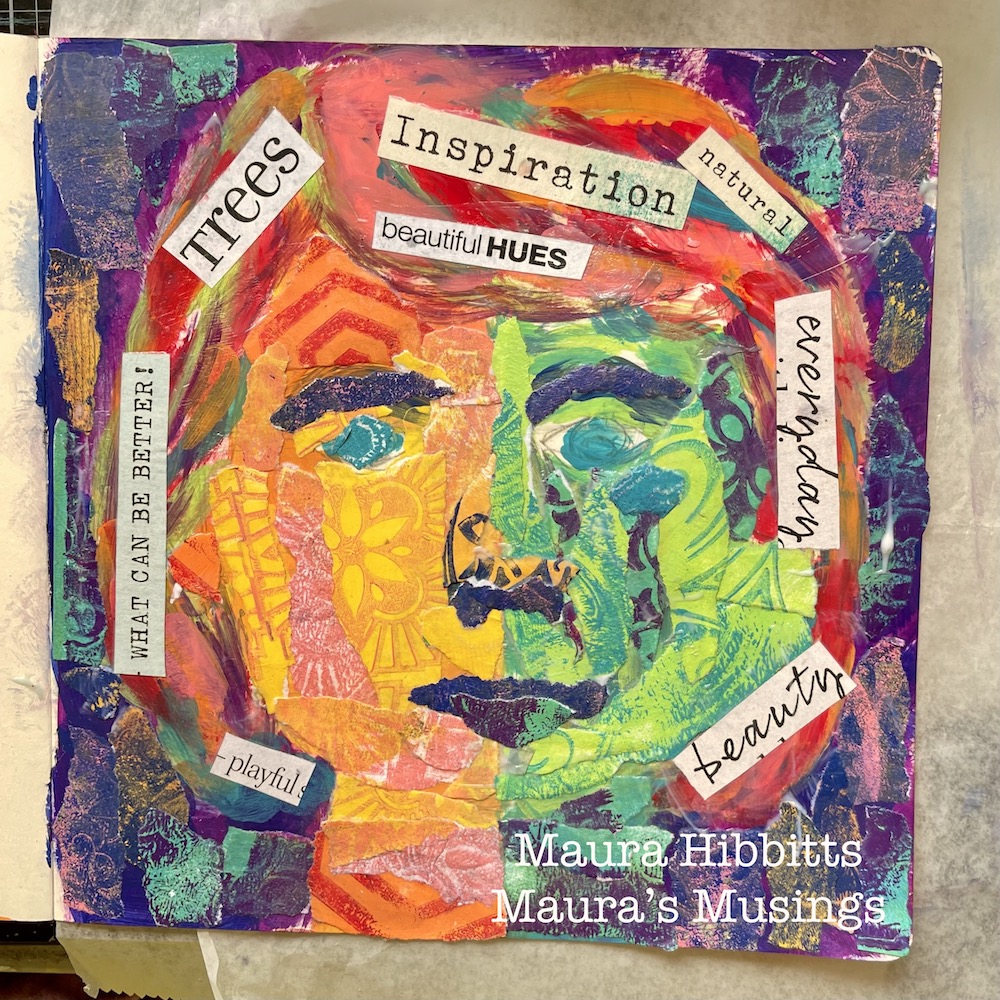
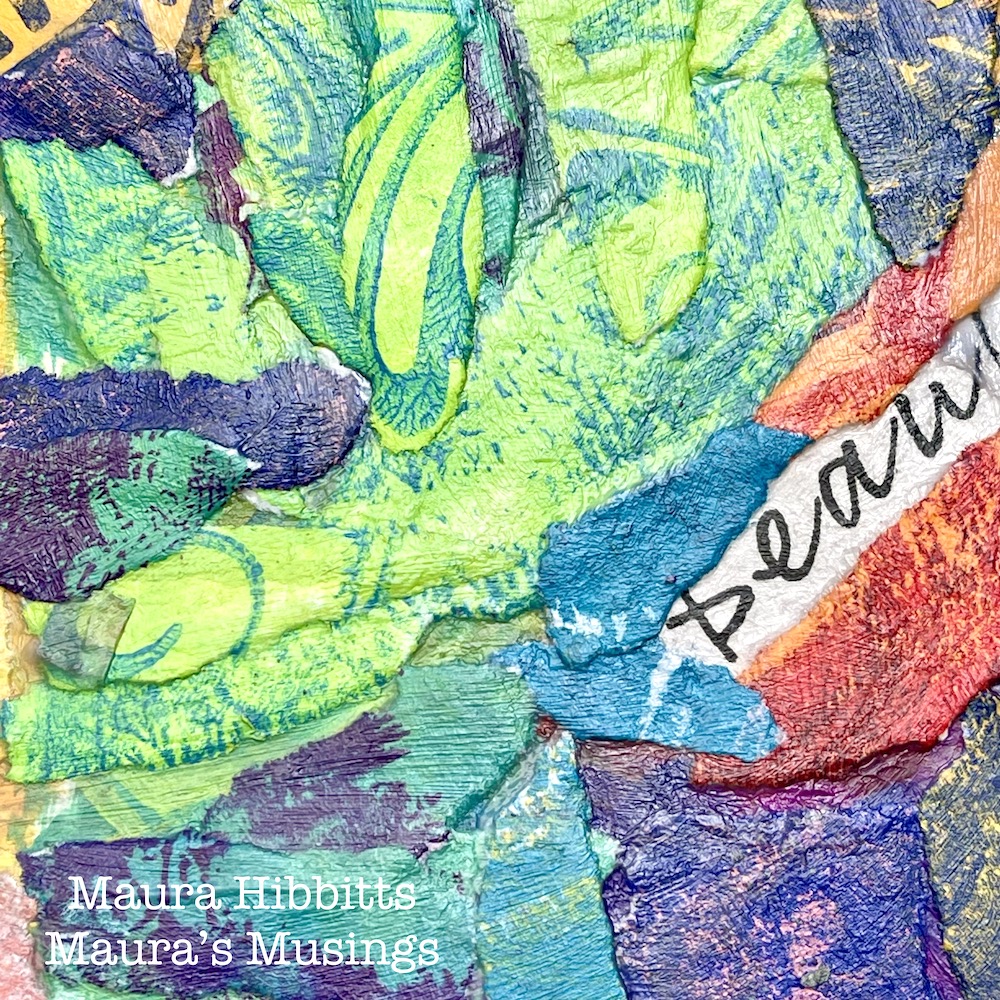
Cut words out of a magazine, or write them and collage onto the hair. Then, collage paper bits onto the hair and around the words, leaving them mostly visible.
When you look at the details in your project, you will see the layers of paper, color and stamped images. When you step back and look at it, you see the face, albeit a very colorful one.
How fun is it to think of yourself as a collage, and create a wild and colorful image? I found the collaging to be a very meditative process, giving me lots of time to think about what makes me unique. I hope you have as much fun with creating your own collage as I did. Happy creating! – Maura
Thank you Maura! Watching this process come together was very cool and I absolutely love the result – it’s complex, emotional, and such a wonderful way to approach self portraiture!
Give it a try: you can find all my Rubber Stamps in my Online Shop and in addition to her word clippings, here are some of the supplies Maura used:
Looking for more projects? Follow the Creative Squad on Instagram here.
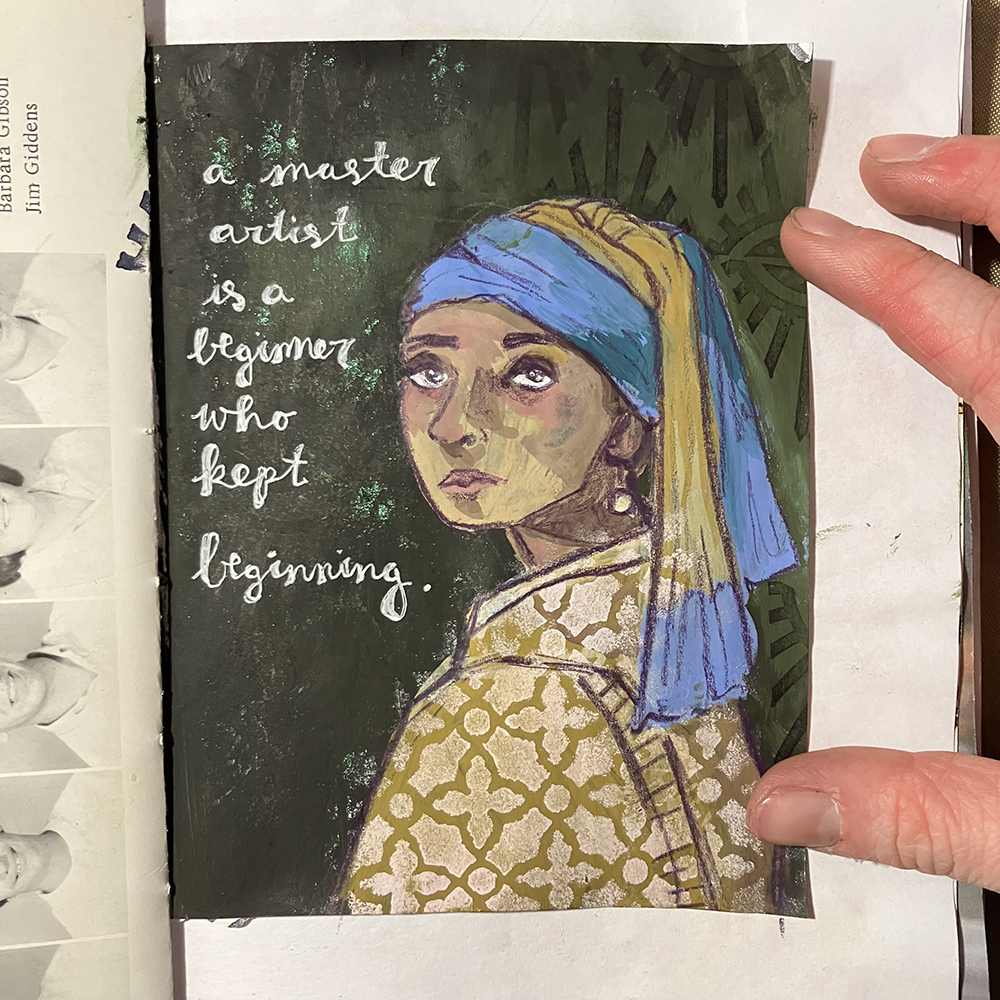
Hello from my Creative Squad! Today we have a post from Jordan Hill who is working with gouache this month along with my ATC Mixup stencil, Triangle Love rubber stamp set, and our theme: Favorite Art – My Way – Look at a favorite work of art and create something inspired by it, drawing from the colors, shapes, subject matter, feeling etc. that strikes you most when you look at it.
Hello everyone! I’m excited to be back for the month of September to share another art journal page with all of you. For this month’s theme of “Favorite Art – My Way”, I thought it might be fun to do a master study of a painting by copying one directly into my art journal. I’ve been wanting to play around with gouache for a while now (its been quite a few years since I last used it), and I decided to use the painting ‘Girl with a Pearl Earring’, painted by Johannes Vermeer as my inspiration. Let’s get into it!
The first step was to select a page to work on. Since I had a pretty specific idea of what I wanted to paint, I chose a page that I thought the illustration would look good next to.
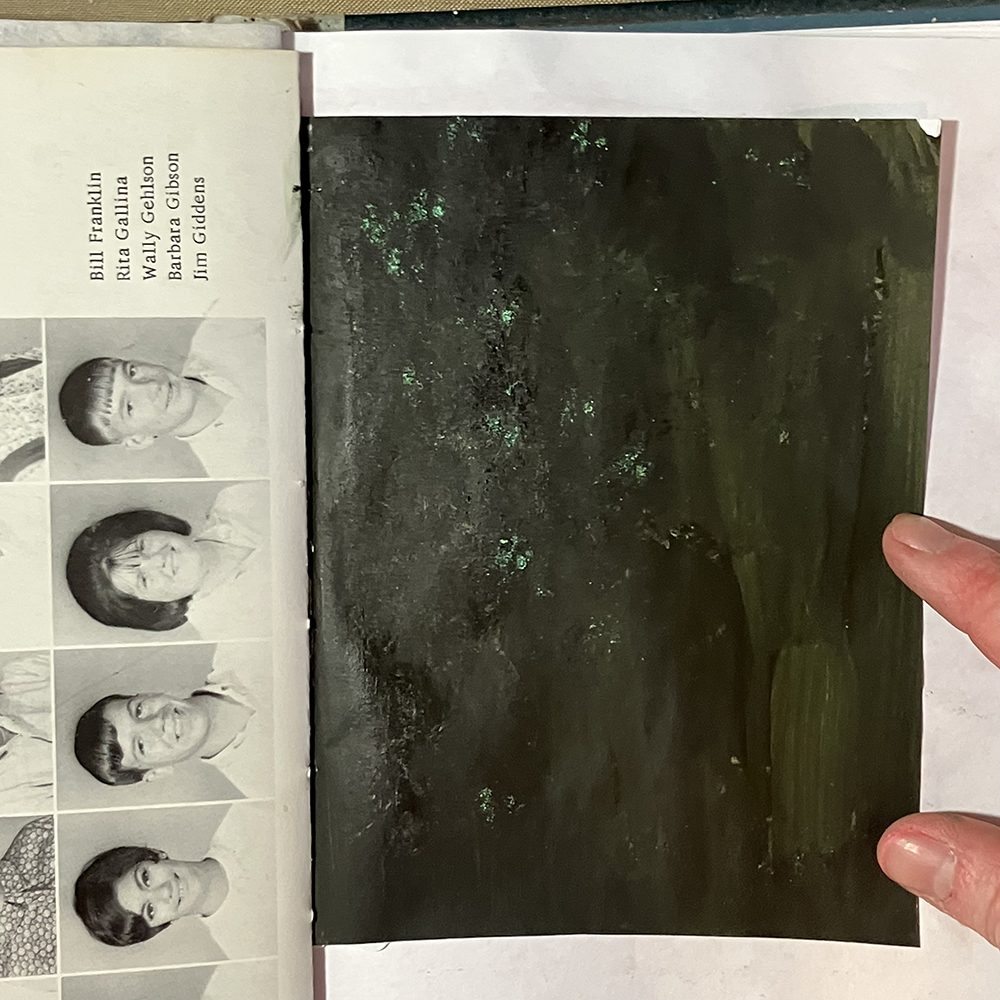
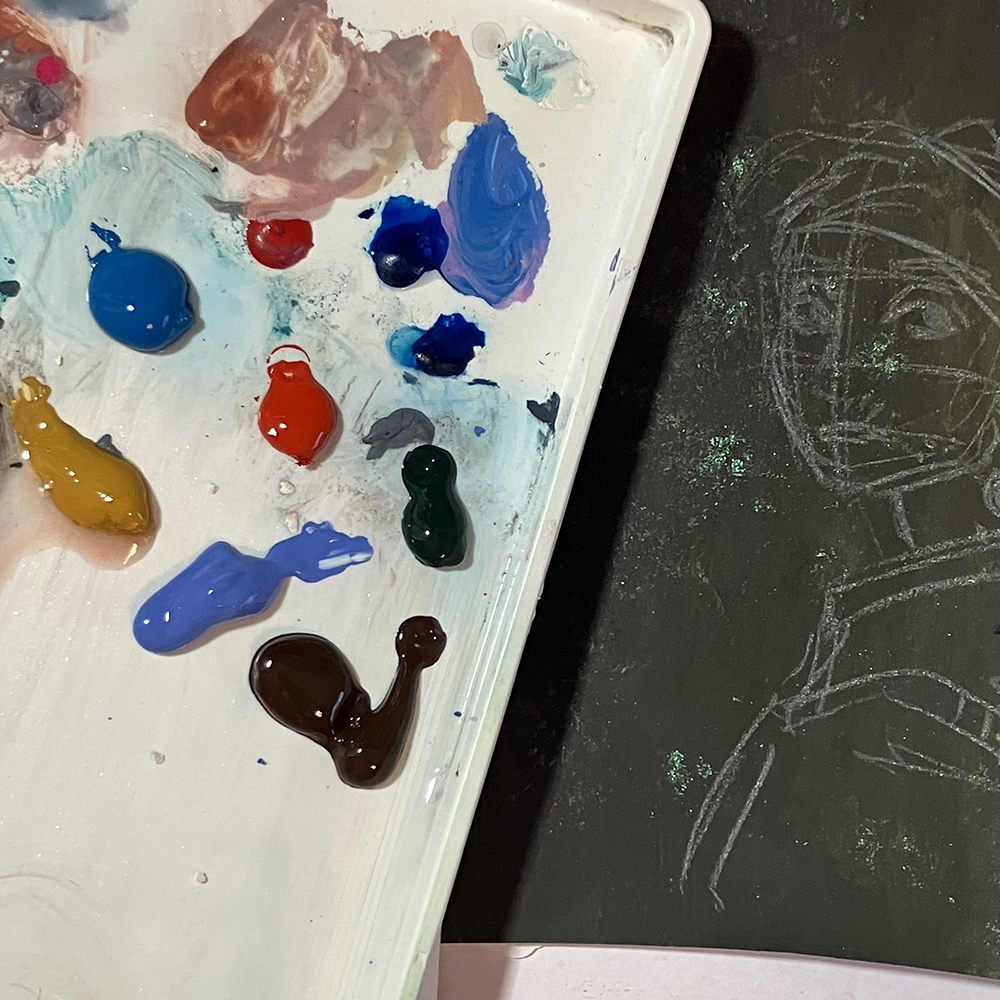
Once I had determined which page I was going to use, I decided to create the background first. In the original “Girl with a Pearl Earring” painting, the background is quite dark. I added some green and black paint directly onto my page, then moved it around with a paintbrush. Once it had been spread out, I blotted a crumpled up paper towel over the surface to give it a mottled texture.
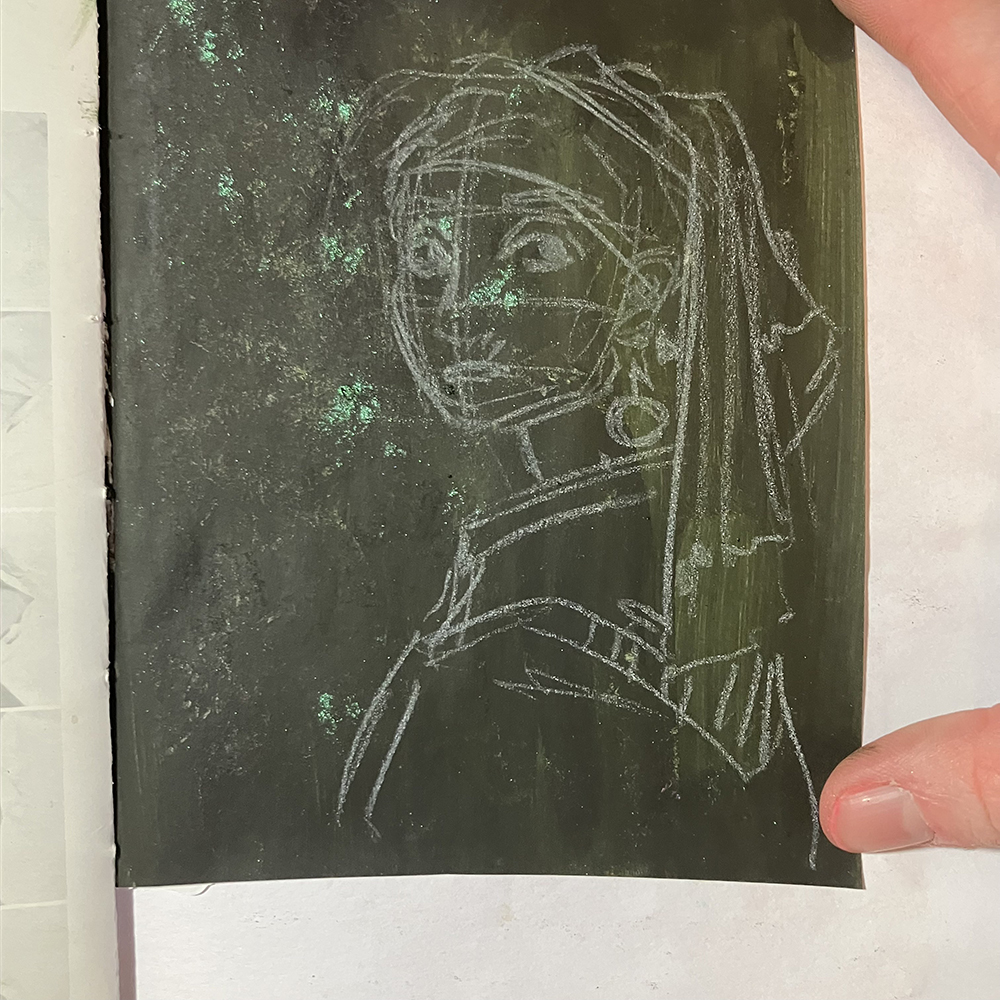
Once the background had dried, I used a white colored pencil to lightly block in the shapes of the painting. I copied directly from a photo of the original and tried to focus on getting the general idea of the painting down on paper, since I knew I was going to cover it up anyways.
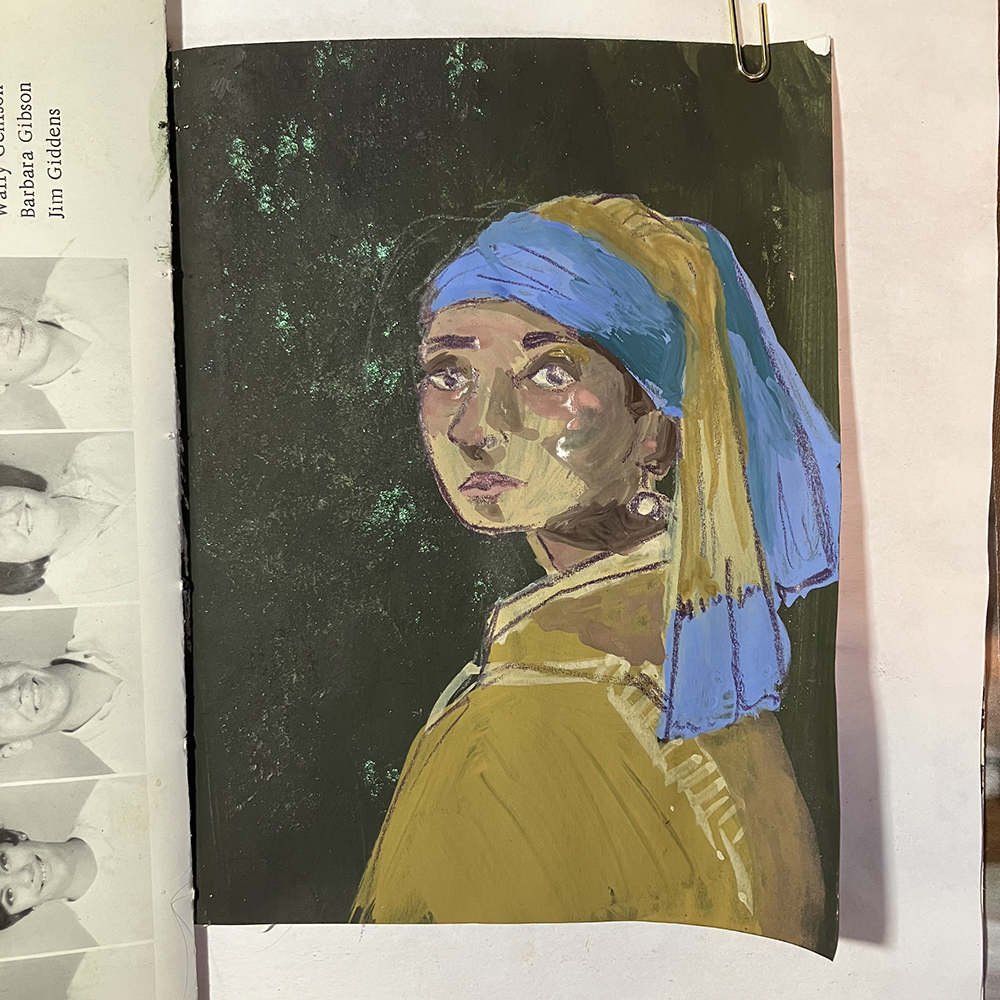
Next, I prepared my palette. Like I mentioned before, I knew that I wanted to use gouache, so I selected some colors of paint that matched the tones in the original painting. Though I didn’t have the perfect assortment of colors, I knew that I would be able to mix them in order to get the colors I wanted.
I then worked on building up the painting itself. I worked with the gouache in layers, starting out by applying a thin layer to each section of the sketch. This first layer was mostly about blocking in the colors. I then let that dry, and added another layer on top. In the second layer, I focused on the shadows. While working on this painting, I continued to cross reference my painting with the original, observing where the colors and shadows were placed and trying my best to replicate that.
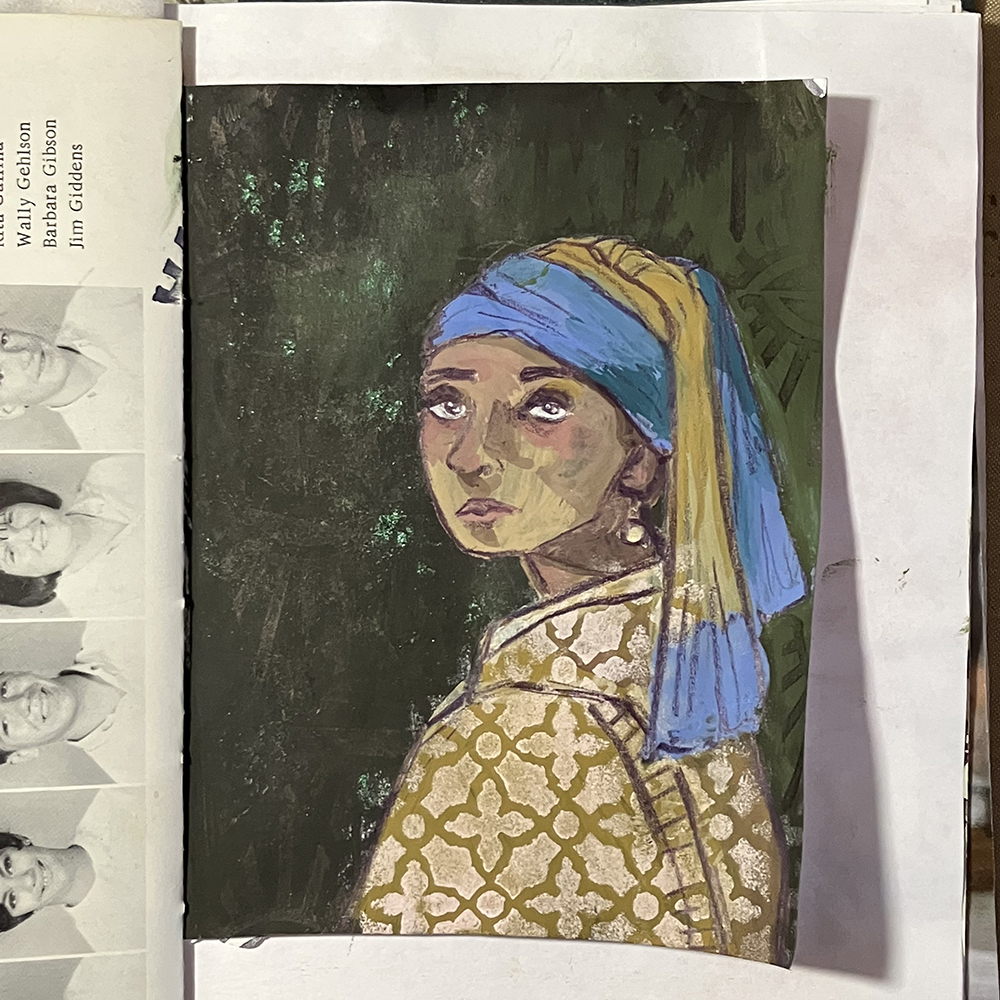
This is where I deviated from a typical study. Since the shirt consisted of such a large empty block of color, I thought it was the perfect place to add in a pattern. Using one of the patterns from Nathalie’s “ATC Mixup Stencil” and some light pink acrylic paint on a makeup sponge, I applied a pattern across the surface of the shirt. I then went in with a Prismacolor colored pencil and started to add lines to the piece, defining some of the areas that I lost while using the paint.
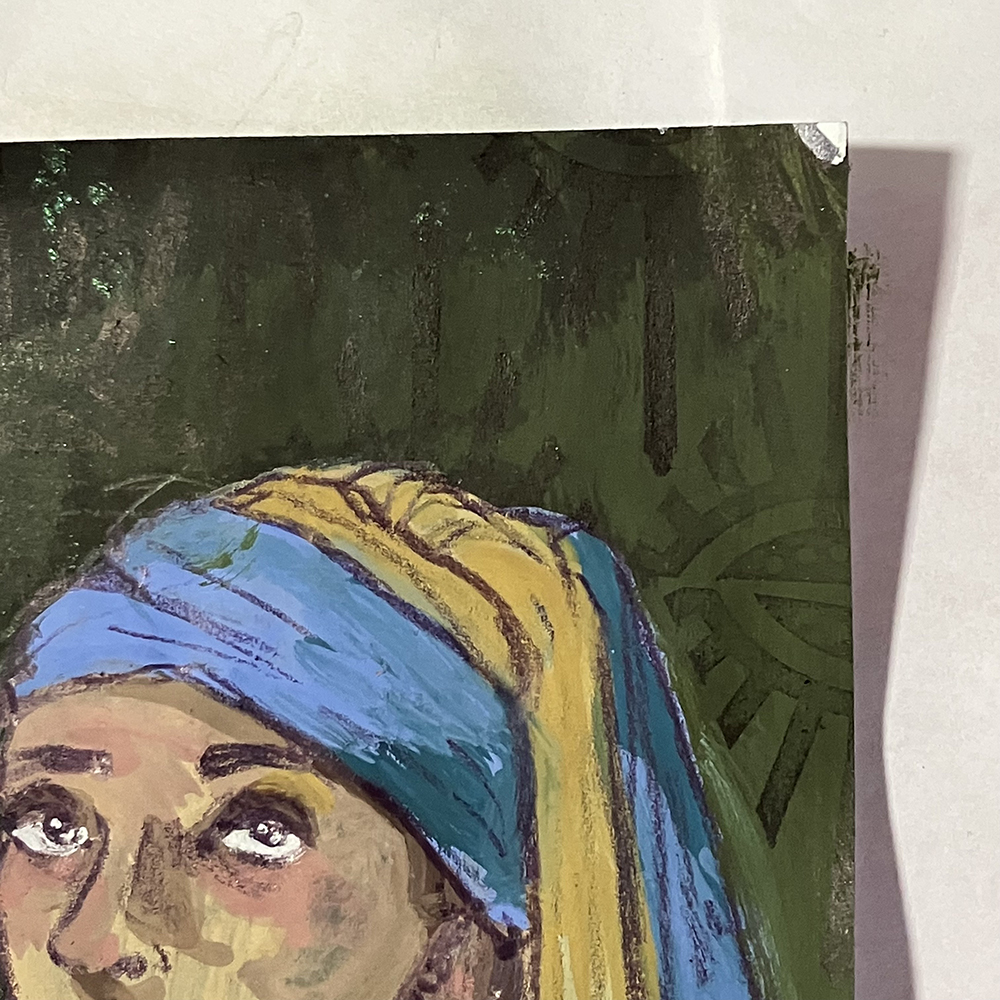
At this point, I wanted to add some subtle texture to the background, so I used Nathalie’s “Empire Triangle” and a black ink pad to create a pattern over the dark green color. Since the background was almost black, there wasn’t a lot of contrast between the pattern and the background, which is exactly the kind of subtlety I was looking for.
Finally, I added a quote to my page with a white gel pen. This quote seemed fitting considering the subject of the page, and it was a nice reminder to myself that everyone goes through struggles with their artwork, but that’s just part of the process!
I hope you enjoyed following along with the process of creating this page and that you consider doing a master study of your own! They’re a great way to learn and grow as an artist.
Thank you Jordan – wonderful idea to practice by copying a master and then putting your stamp (or stencil lol) on it. Looks awesome!!!
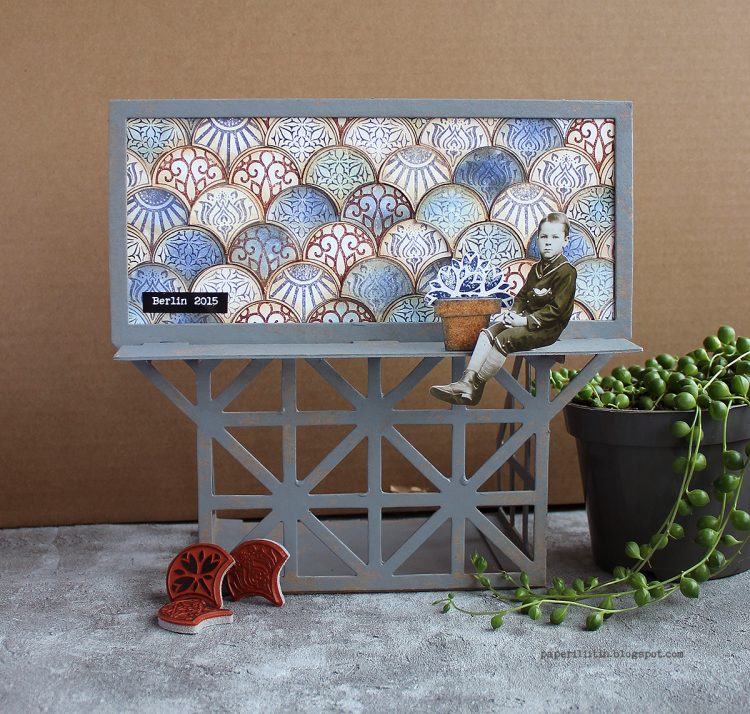


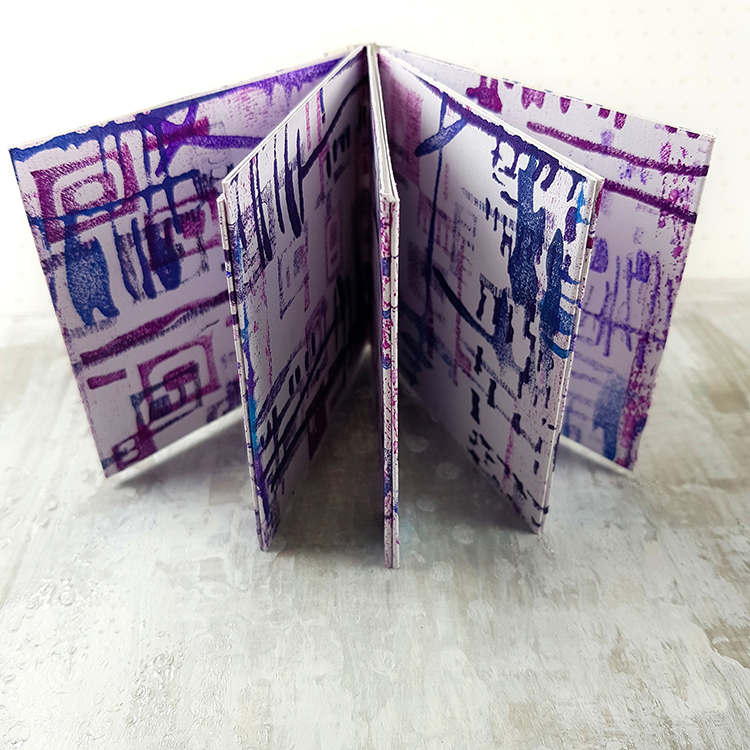


Riikka, I LOVE that mini-billboard!!!
Reply