Creative Squad

Artful Adventures – Cheiron Brandon


Hello from the Creative Squad! Today we have a gorgeously colored art journal spread from Cheiron Brandon that uses my Beacon and Amsterdam stencils, and this month’s theme: Artful Adventures. Are you planning an Artful Adventure this summer? Whether it’s a day at the beach or a full blown International Vacation, don’t forget to take the time to soak up the uniqueness of your new surroundings and gather some inspiration for future artmaking. This month we’re turning to Nat’s new book Artful Adventures in Mixed Media, to help us find inspiration as we travel. We’ll be noticing color, shape, texture and more and then we’ll be taking that to the studio to help inspire some mixed media projects. Join us in the adventure!
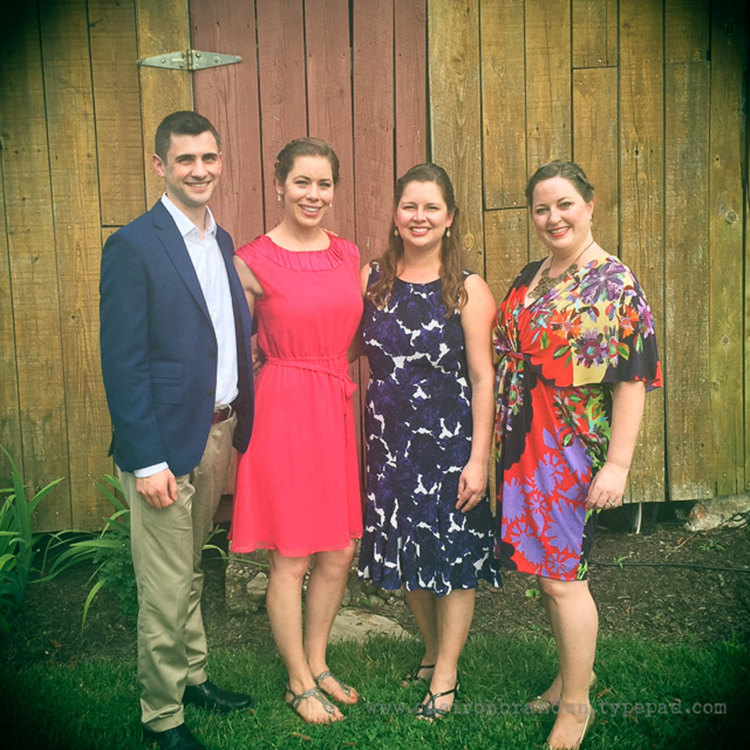

Hi there. It’s Cheiron here with my monthly post, I haven’t had a lot of adventures this summer, but I did head down to a family wedding in Virginia with my siblings. Here’s a picture of us at the wedding (it was on a farm):
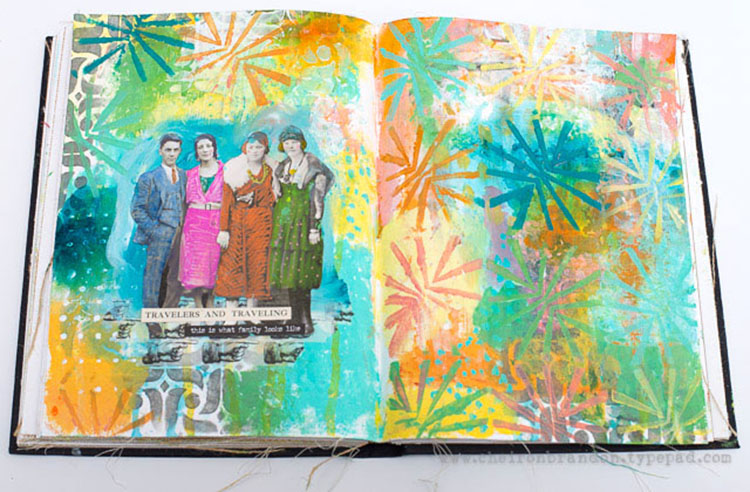
I was inspired to create a fun painty summer background on a page to add my “family” that used the Photo Manipulation technique in Nat’s book, Artful Adventures in Mixed Media. I used some Tim Holtz paper dolls and colored and doodled on them with some paint pens. Then I created a super fun painty background for them.
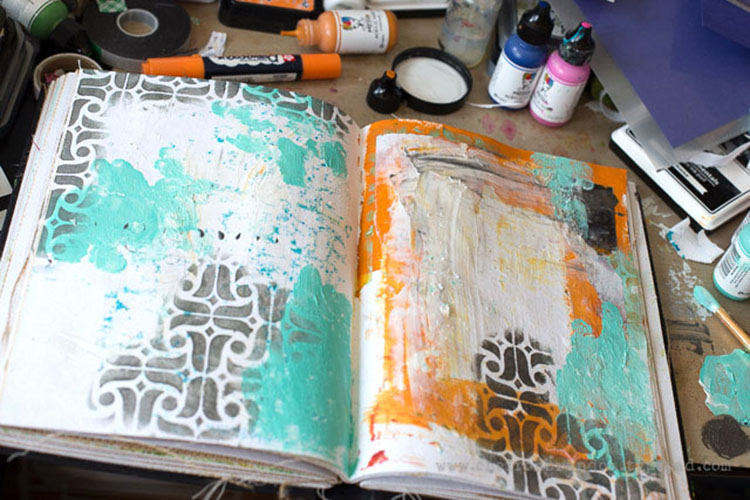
To begin my page, I put down some paints in turquoise, cheddar and medieval through the Amsterdam stencil. I also added texture paste in a layer to some spots.
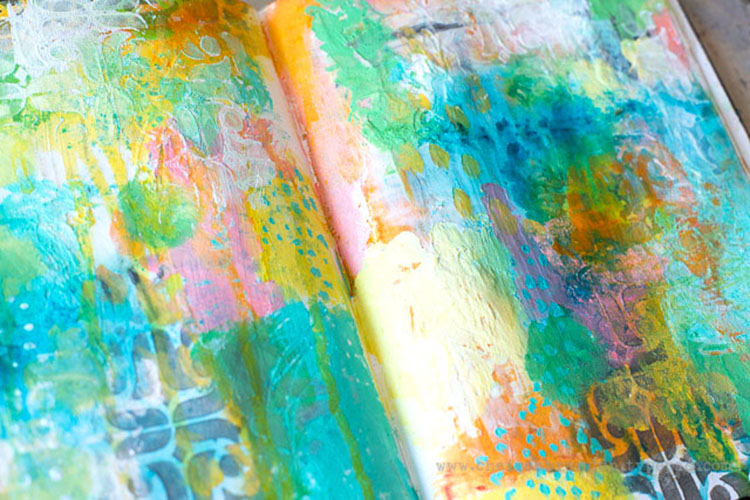
I created lots of painty layers and marks. I kept adding and adding the layers until I was happy, I used the back of my paintbrush to add some sgraffito, revealing the layers underneath. I also added some white paint through the Amsterdam stencil on top of everything.
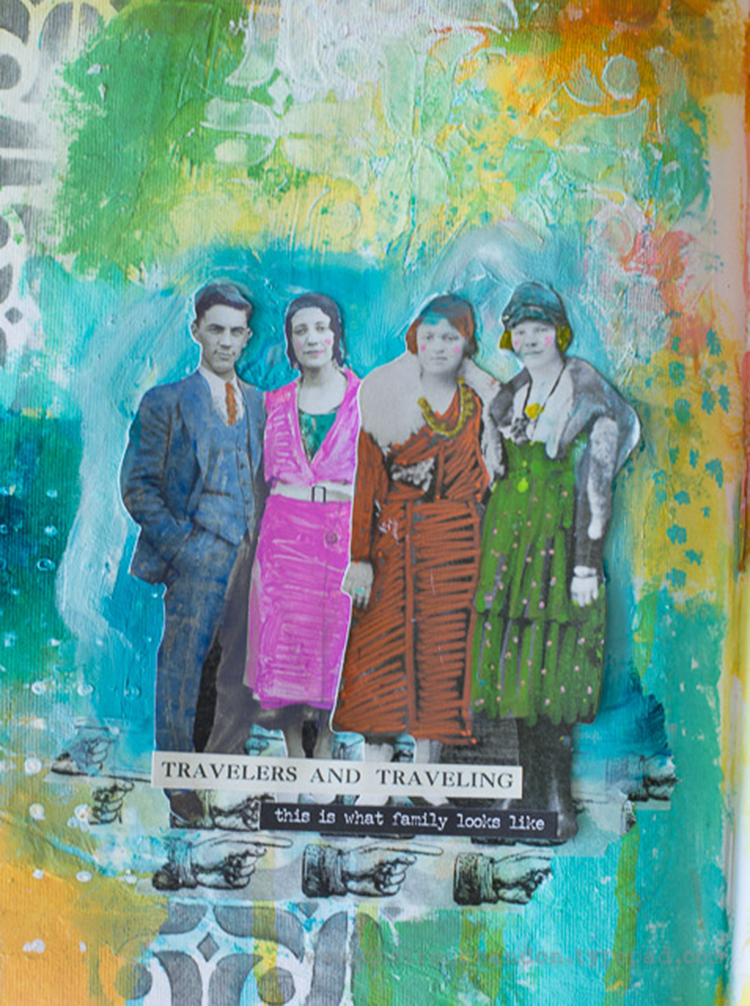
I added my Tim Holtz paper dolls that I had colored in with acrylic markers and pens. I love giving them fun clothing and details!
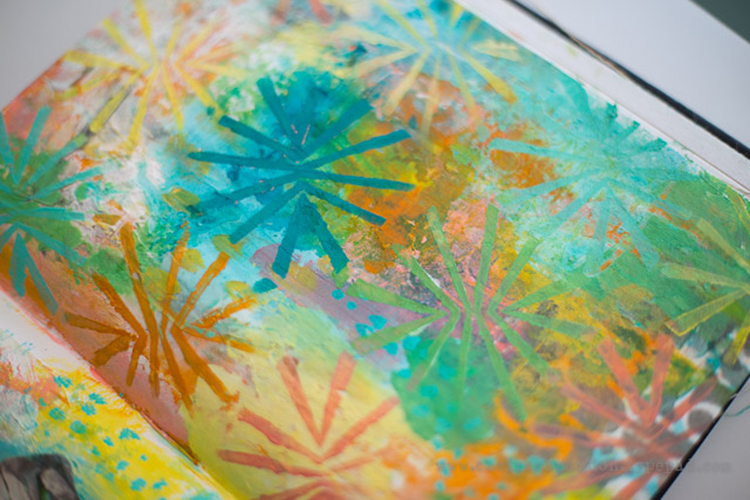
To make the page more cohesive and add extra pops of color, I used the Beacon stencil to create a pattern all over the blank page.
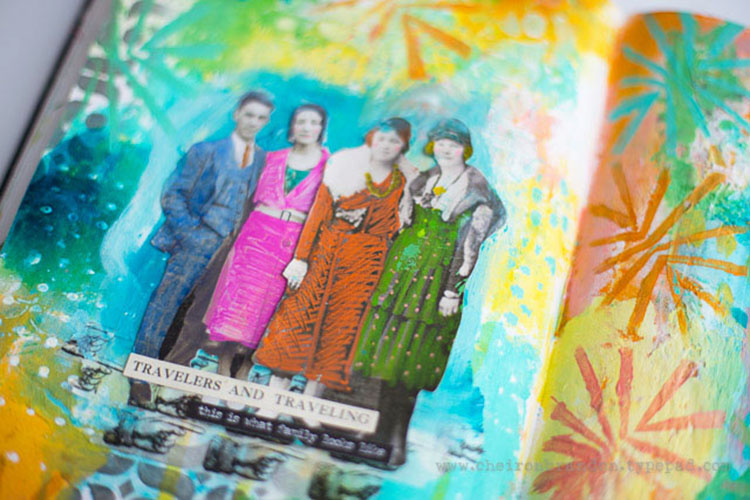
I also added some more stenciling with the beacon stencil around my focal image.

I hope you have enjoyed this fun, colorful page. Even if I haven’t had a real vacation yet this summer, I have sure enjoyed some fun times with my siblings!


Thank you Cheiron for this peek into your beautiful family! Cheiron used the following supplies (some are affiliate links):


Play along with us too: I love to see how you interpret our monthly themes. Email me how you used my stencils and stamps with the theme and email me an image – I would love to share your projects in my “n*Spiration From Around the Globe“.

Comments (1)

  • Karen Bearse

    |

    Love it!! Great use of the paper dolls and fun way to use family life as the inspiration. Really love all the layers!

    Reply

Leave a comment

Artful Adventures – Tina Walker


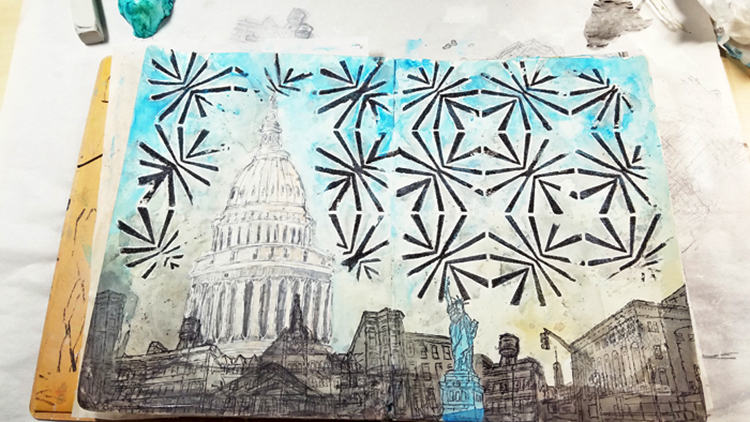
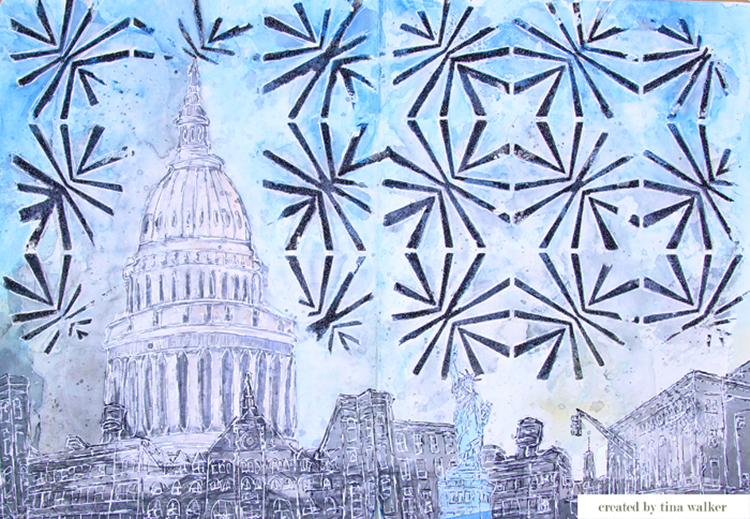
Hello again from the Creative Squad! Today we have a gorgeous art journal spread from Tina Walker that uses my Beacon stencil, the Stroll Through the Hood #1 and #2 stamp sets, and this month’s theme: Artful Adventures. Are you planning an Artful Adventure this summer? Whether it’s a day at the beach or a full blown International Vacation, don’t forget to take the time to soak up the uniqueness of your new surroundings and gather some inspiration for future artmaking. This month we’re turning to Nat’s new book Artful Adventures in Mixed Media, to help us find inspiration as we travel. We’ll be noticing color, shape, texture and more and then we’ll be taking that to the studio to help inspire some mixed media projects. Join us in the adventure!


Hi! Tina Walker here today with a new month and a new theme. August’s theme is Artful Adventures and we are continuing the celebration of Nat’s new book ‘Artful Adventures in Mixed Media’. We will be using inspiration from our summer travels to create a mixed media project. I was super excited when I saw this month’s theme as I had recently took a short trip to Washington DC. And Nat’s stencil and stamps collections are perfect for the project I had in mind. Let’s get to it!

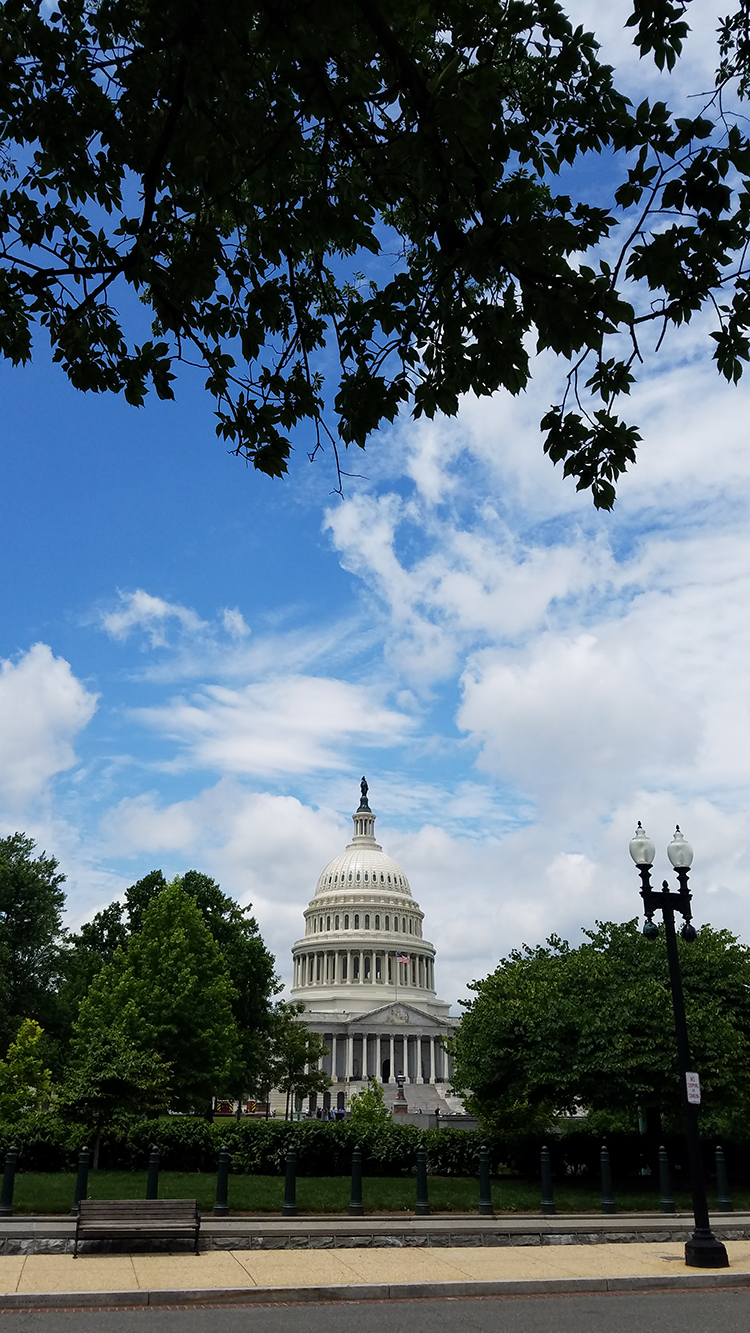
During my mini vacation to Washington, I took many pictures of the government buildings and historic sites. One particular photo, of the Capital building, inspired me to create. Here’s my inspiration photo.

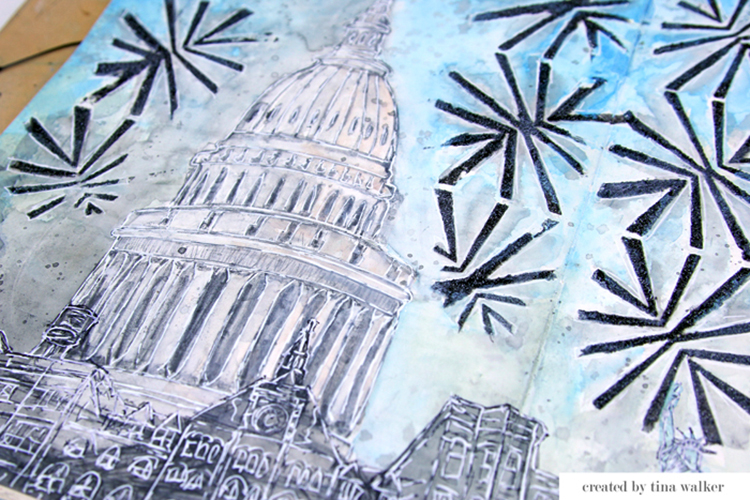
Using the image of the Capital, I sketched the general shape into my journal. (for this spread, I choose to work in my large, 8x11in journal. I wanted plenty of room to work). Not being a sketch artist, I took liberal direction on specific building designs and shapes. Once I had the rough shape of the capital, I began working on the background of my page.

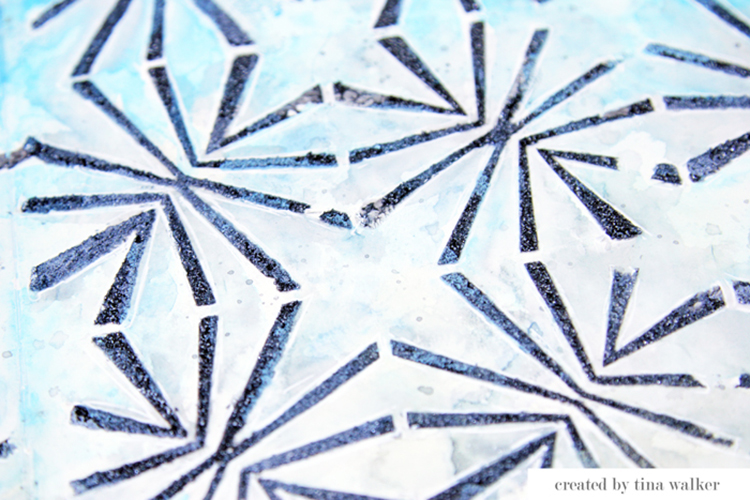
Apply Texture Paste with the Beacon stencil over the entire background. Let dry completely.

Add watercolors over the entire background, working around the sketched and stenciled areas. I graduated deep blues to light tans on my page. I love how the watercolors pool and blend, especially around the stenciled shapes.

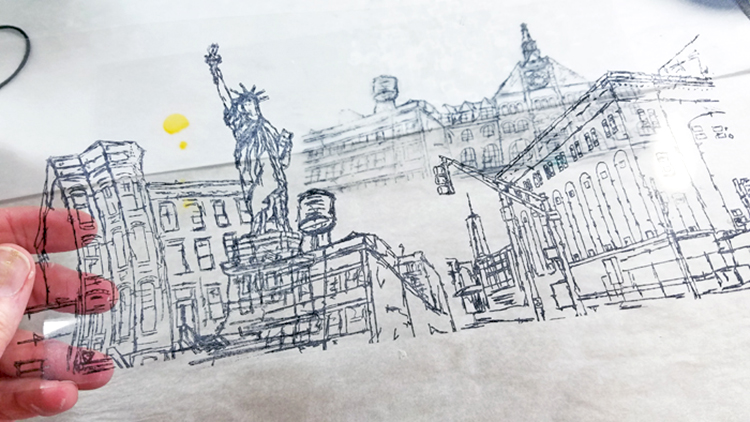
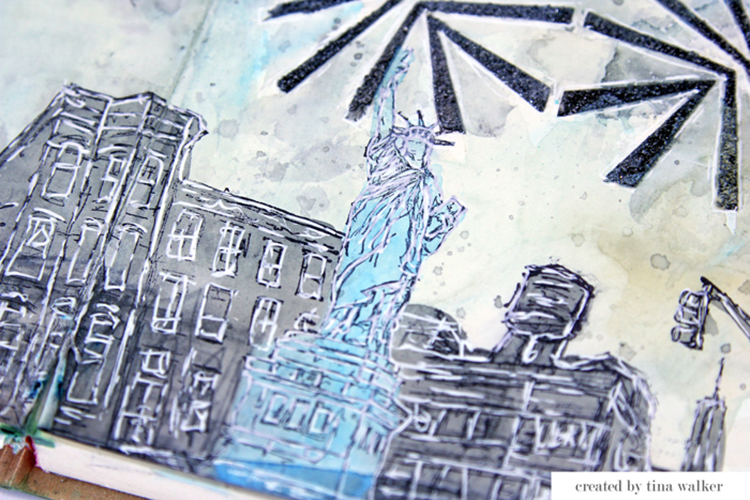
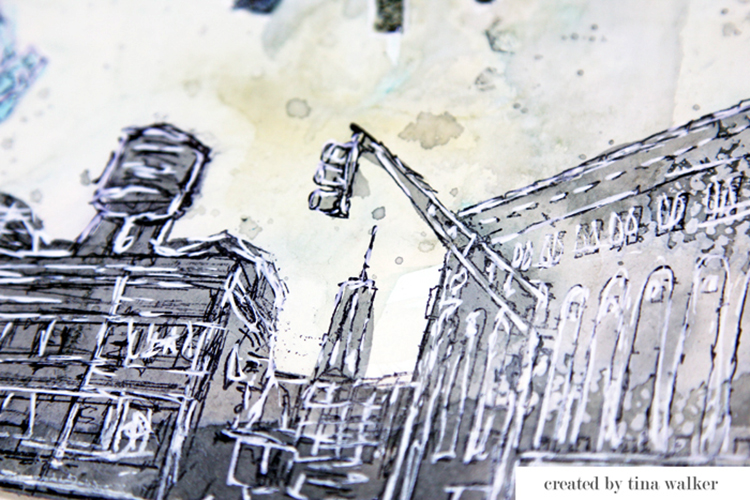
To create a representation of all Americans, past, present, and future, stamp several building images from both the Stroll through the Hood 1 and 2 stamp sets. Since I was using multiple stamps, I wanted to ensure proper placement before stamping. I stamped them onto a transparency first, so I could move them around the page before committing to the stamp.

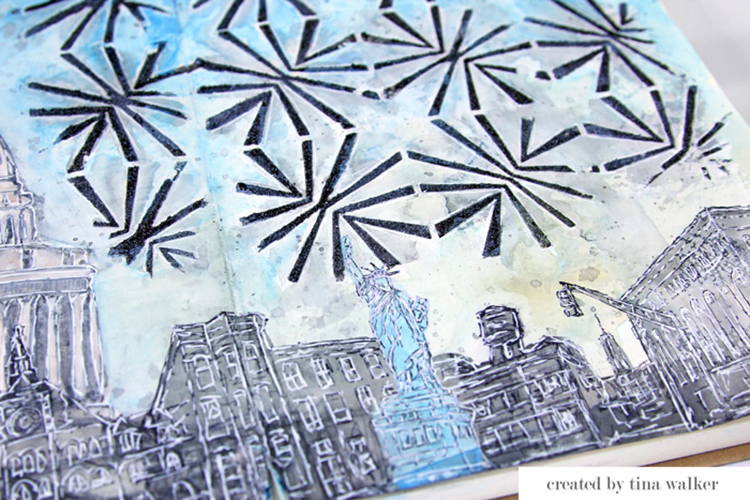
In order to create a cohesive look across all sketched, stenciled, and stamped images, paint with watercolors, then doodle over the images with a white pen.

The finished page had such a powerful and graphic image, no words were needed. ?

Do you ever use photographs as inspire for your art? I would love to see what you create.

I hope you enjoyed my project today. Have a great day!


Thank you Tina for this beautiful page and for showing us how your Artful Adventures helped inspire it! Tina used the following supplies (some are affiliate links):


Play along with us too: I love to see how you interpret our monthly themes. Email me how you used my stencils and stamps with the theme and email me an image – I would love to share your projects in my “n*Spiration From Around the Globe“.
Comments (4)

  • Karen Bearse

    |

    Really love the drawing of the capital building. Lots of inspiration here!

    Reply

  • Karen Bearse

    |

    Cool ideas!! Love your page. I need to start drawing!

    Reply

  • Yvonne Garner

    |

    Love this! Is the domed building a new stamp?Thanks! Yvinne

    Reply

Leave a comment

Free For All – Michelle Rydell


Hello from the Creative Squad! Today we have a cool art journal spread from Michelle Rydell that uses my Buenos Aires stencil and this month’s theme: Free for All! It’s time for summer vacation and relaxing so around here the Creative Squad is taking a break from themes this month. They’re just going with the flow and making a project of their choosing. It’s a Free for All!


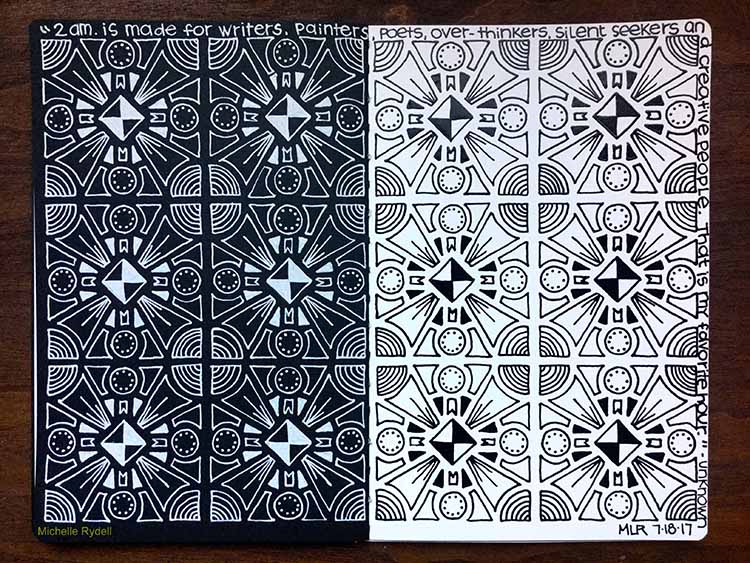
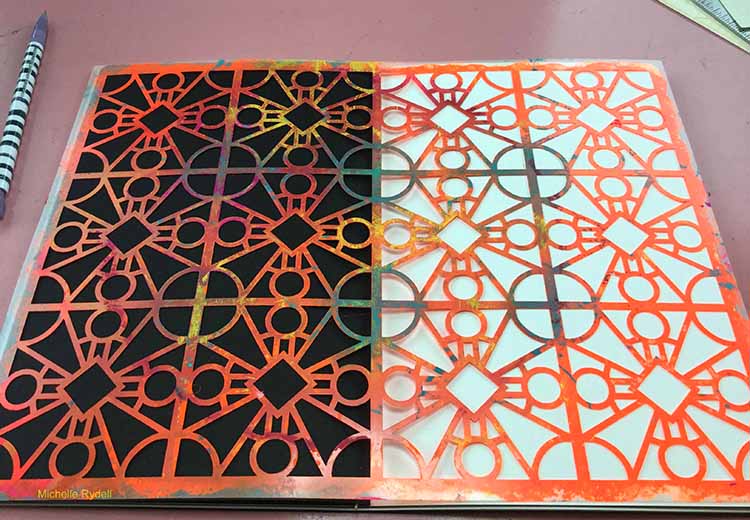
One of my favorite stencils of Nat’s is the Buenos Aires. I love how the shapes connect in so many different ways – creating different patterns, depending on how you look at it. I’m taking a class that focuses on black and white journaling, so I thought it might be fun to play with the positive and negative shapes…

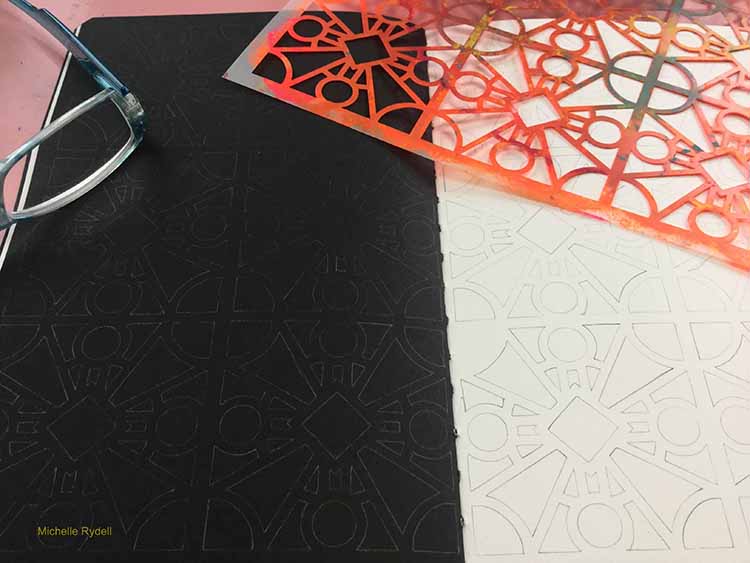
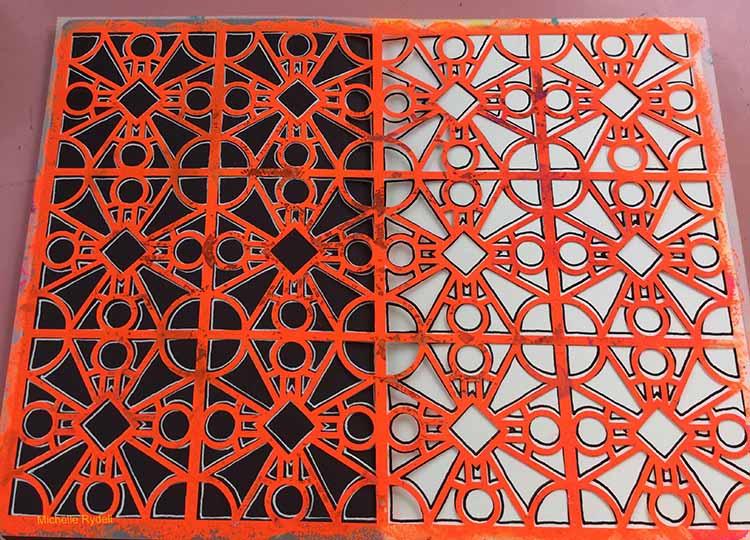
I started by placing the Stencil down on a spread in my journal that has black paper on one side and white on the other; and tracing all the shapes with a pencil.

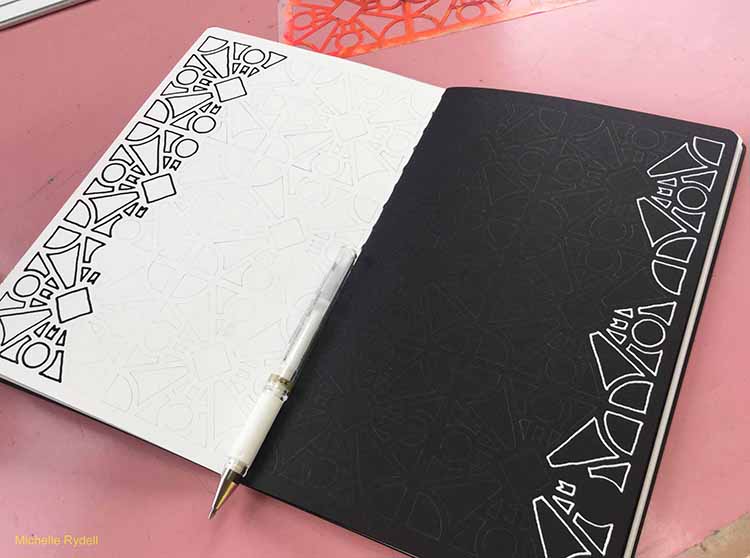
Then, I started drawing over the pencil lines with black and white gel pens. Because the gel pens take a minute to dry, I started on the outside shapes and worked inwards, so as to not get my hand in the wet ink.

Here’s how it looked when phase one was done. Do you see where I missed a few shapes?

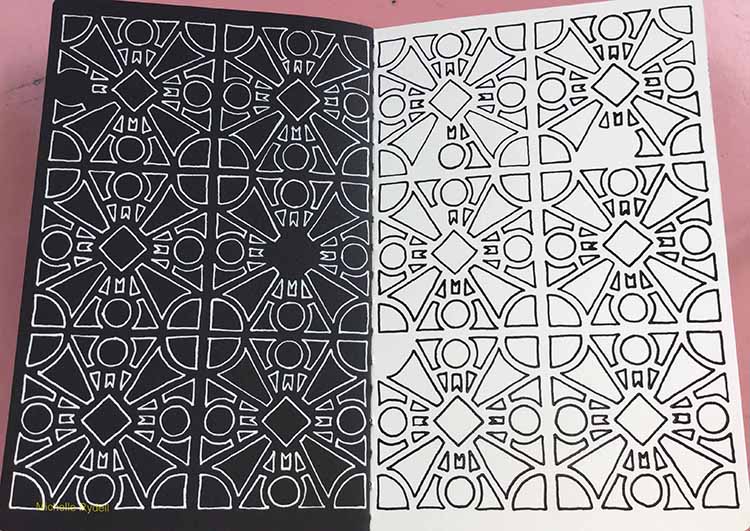
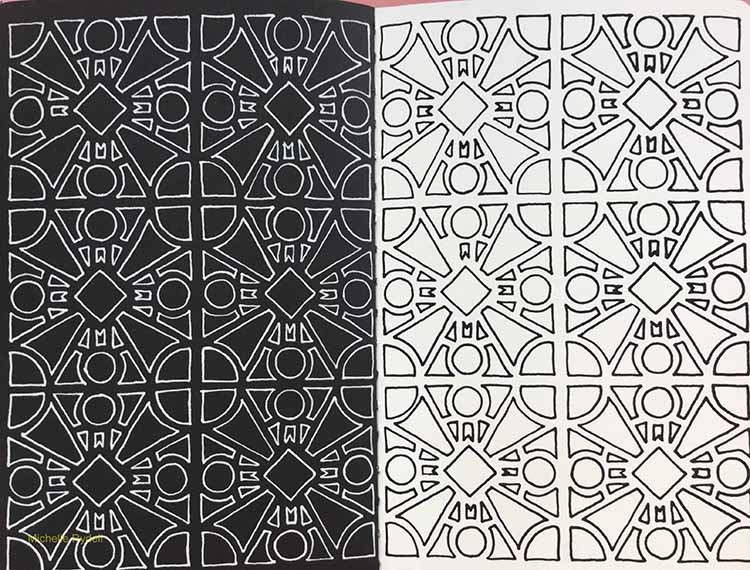
It was easy to put the stencil back over the drawing and trace in the shapes I missed. Here’s the completed initial phase…

From here, I just started doodling. Whatever I did on the white side of the page, I repeated on the black side. This was so much fun and very meditative. When I felt like the doodling was complete, I added a quote around the border and called it done. Here’s the finished page…

Since it doesn’t require many supplies, or deep thought, this is a great technique to do on the couch, watching your favorite tv program! I hope you’ve enjoyed this tutorial, and will consider giving the technique a try sometime!


Thanks Michelle! I love how the simple color palette shows off the gorgeous pattern. In addition to white drawing paper, Michelle used the following supplies (some are affiliate links):


Play along with us too: I love to see how you interpret our monthly themes. Email me how you used my stencils and stamps with the theme and email me an image – I would love to share your projects in my “n*Spiration From Around the Globe“.
Comments (4)

  • Julie Tucker

    |

    These pages are FABULOUS! I love them!!!!!!!!!!

    Reply

  • Melody Willoughby

    |

    Michelle, this is such a perfect page for our black and white journals! I love that stencils!!!

    Reply

    • Michelle Rydell

      |

      thank you so much Melody! I’m glad that you like it!

      Reply

Leave a comment

Call for NEW Creative Squad Members!


Creative Squad Call!

Are you a Mixed Media Artist, Scrapbooker or Card Maker with a unique style and a passion for creativity?
Do you love to use stamps and stencils in your work and love to try new techniques and media?
Do you love to share your projects on social media and engage with other artists?

If the answer is yes, yes, yes, we are looking to fill some spots on our n*Studio Creative Squad and would love to hear from you! Here is what we need from you:

1. Full name, email address, links to social media sites/blog/website where we can see your work
2. A couple sentence bio or description of your work
3. 4-5 low res images of your work that best represent your style

Email your submission to nat(at)nathaliesstudio.com with “Creative Squad Submission” as the subject.
Enter by August 11, 2017  :)

As a Creative Squad member for Nathalie’s Studio you will serve a 6-month term beginning 10/1/2017. As part of the Creative Squad, you will receive a variety of Nathalie’s Studio products. You will create one project per month, using specified products or groups of products and inspired by a monthly theme. You will be featured once a month on the nStudio blog, Facebook page, and Instagram, and you will be part of an amazing team of artists with a legacy of awesomeness!

Apply today!

Comments (3)

  • Karen Bearse

    |

    So tempting! I love your stamps and stencils… would love to be on your team just a bit overwhelmed right now. Hummm what to do…

    Reply

  • Irma

    |

    Really? Just 1 entry a month? Is a video or photo tutorial required? – Irma

    Reply

    • nathalie-kalbach

      |

      Irma, yes a, photos to go along with your post would be required- doesn’t have to be super long. If you look at the Creative Squad posts so far, you get a good grip for what is asked for :)

      Reply

Leave a comment

Free For All – Marsha Valk


Hello from the Creative Squad! Today we have a cool mixed media piece from Marsha Valk that smartly uses up some of those extra stenciled and stamped papers we all have in our stash. She combined my Buenos Aires Tile and Santa Fe ArtFoamies with a bunch of my rubber stamps and this month’s theme: Free for All! It’s time for summer vacation and relaxing so around here the Creative Squad is taking a break from themes this month. They’re just going with the flow and making a project of their choosing. It’s a Free for All!


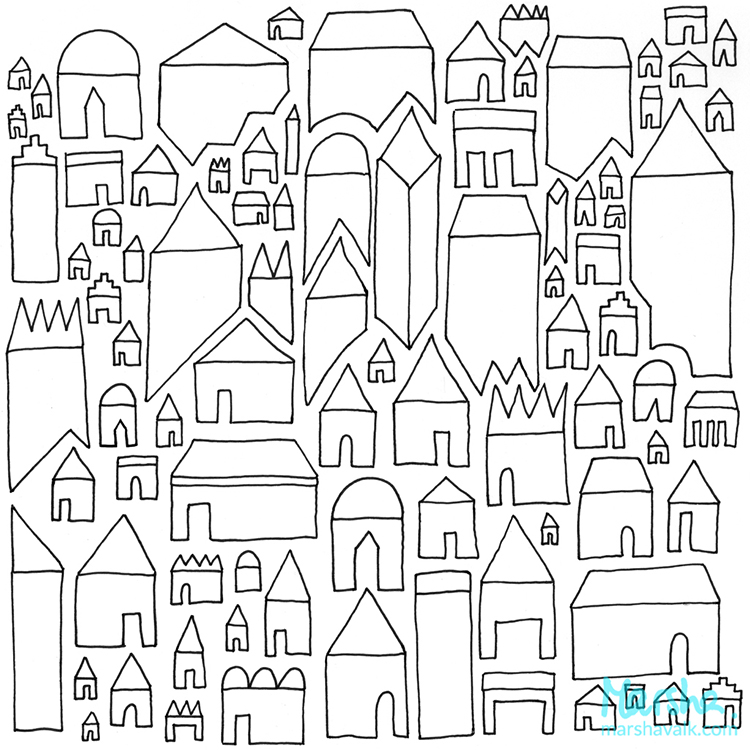
I have piles and piles of prints sitting under the desk in my workspace, waiting for a fun project to use them on. So for this month’s theme, I dug out a couple of prints I made previously using Nathalie’s Buenos Aires and Santa Fe ArtFoamies! I wasn’t sure what I was going to do with them, but whilst sorting through the pile of prints, I came across an illustration I did a couple of years ago. I decided to use it for my project.


I scanned the illustration, loaded the image into the Silhouette Studio software on my laptop and traced the image and made it into a cut file.


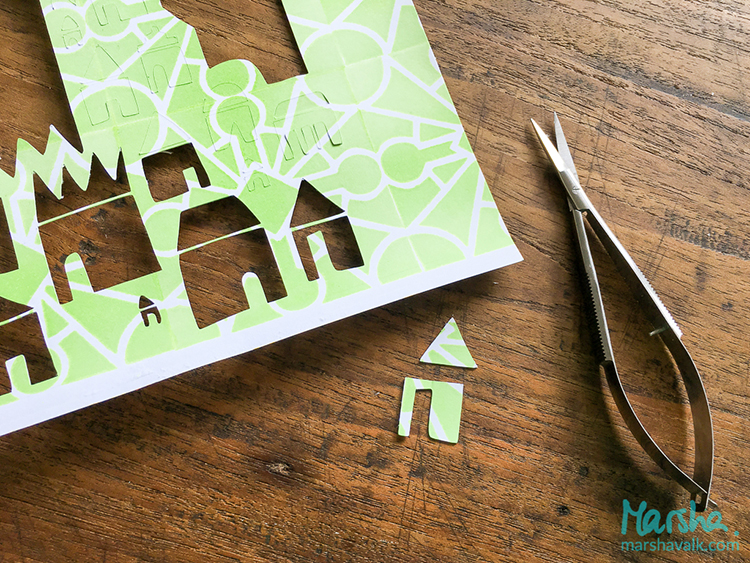
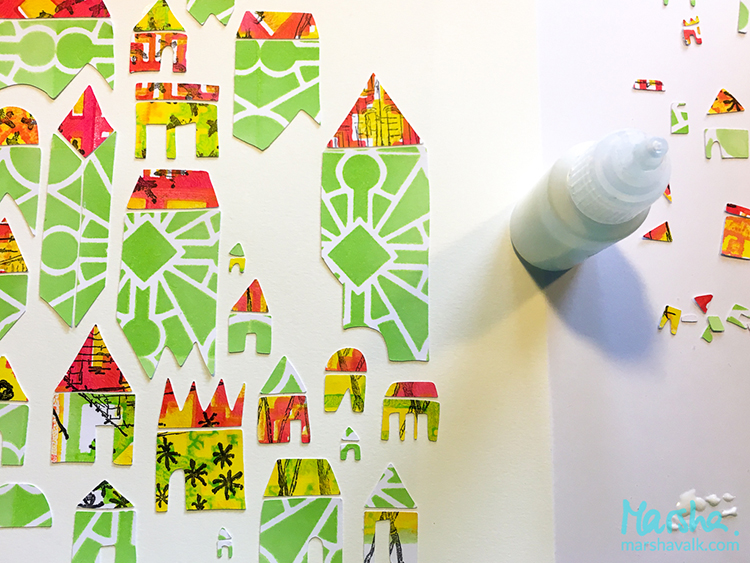
Then I mounted one of the stamped sheets of paper onto a Silhouette cutting mat, fed it into the machine and let the machine cut out all the little houses. I let the Silhouette cut the same houses from three different sheets of stamped paper. I added more stamped images from the Stroll Through the Hood 1 & 2 sets, the Embroidery set, and the Cardboard set with black ink to two of the sheets before cutting.


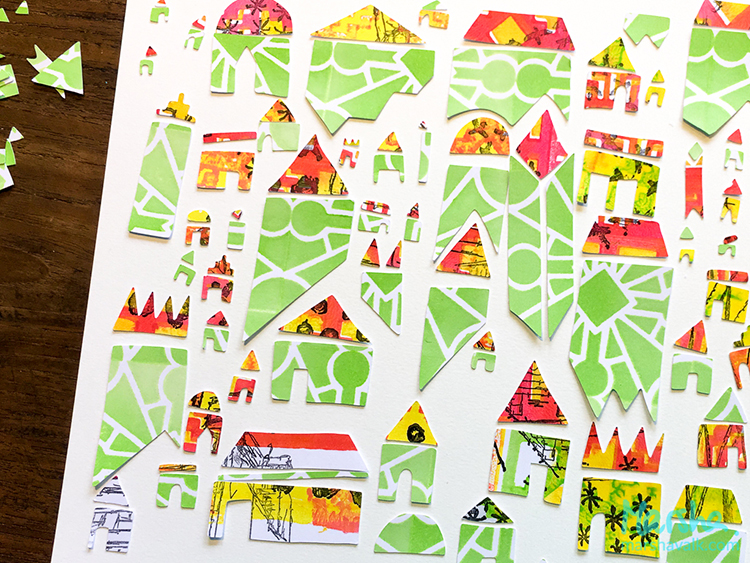
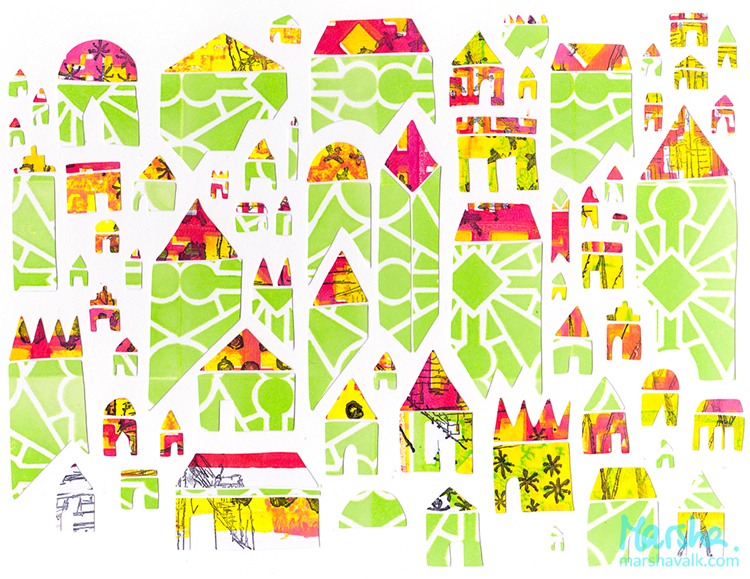
With all houses cut three times, I started arranging the little village onto a blank piece of paper, mixing parts from all of the different background papers.


Once I was happy with the arrangement I glued everything down.


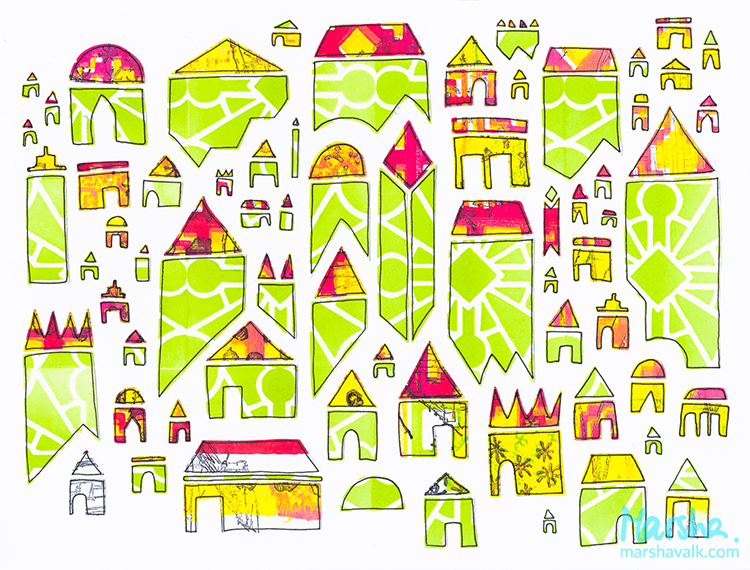
I wanted to add black outlines to the cut-outs, but because some of them are super tiny, I was afraid my pen would slip. I didn’t want to mess up the original, so I scanned the collage and doodled on top of a print instead.


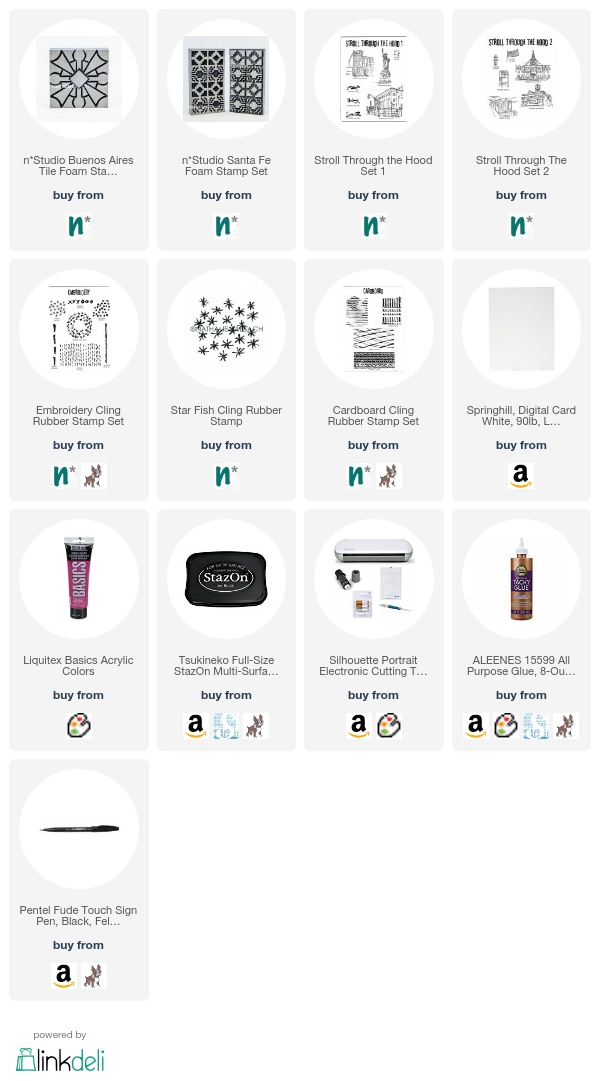
Thank you Marsha for such a unique project! In addition to a scanner, Marsha used the following supplies in her project (some are affiliate links):


Play along with us and share how you interpret our monthly themes. Email me how you used my stencils and stamps with the theme and email me an image – I would love to share your projects in my “n*Spiration From Around the Globe“.
Comments (3)

  • nathalie-kalbach

    |

    this is stunning Marsha- I love the idea and such a great design!!

    Reply

  • Jean Goza

    |

    Great project! Love the colors and energy of the piece.

    Reply

Leave a comment

Free For All – Cheiron Brandon


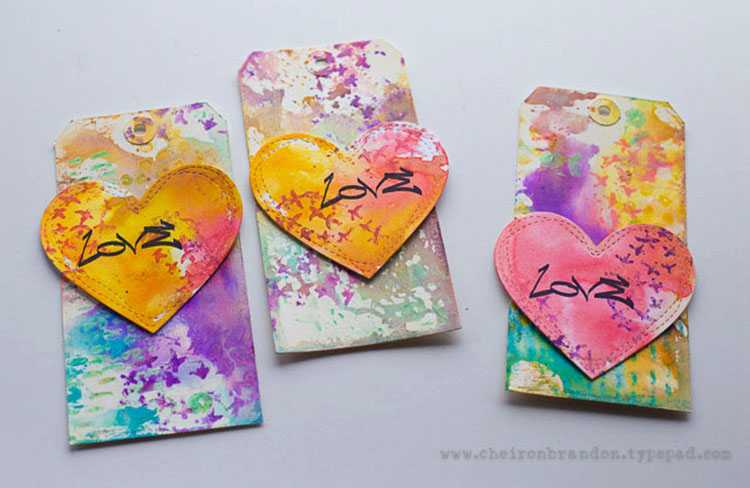
Greetings from the Creative Squad! Today we have a bright and happy tag project from Cheiron Brandon that will be perfect for the next hostess gift you present! She’s using my Love Tag stamp from the Stroll Through the Hood 1 set and stamps from my Embroidery set, and of course, this month’s theme: Free for All! It’s time for summer vacation and relaxing so around here the Creative Squad is taking a break from themes this month. They’re just going with the flow and making a project of their choosing. It’s a Free for All!


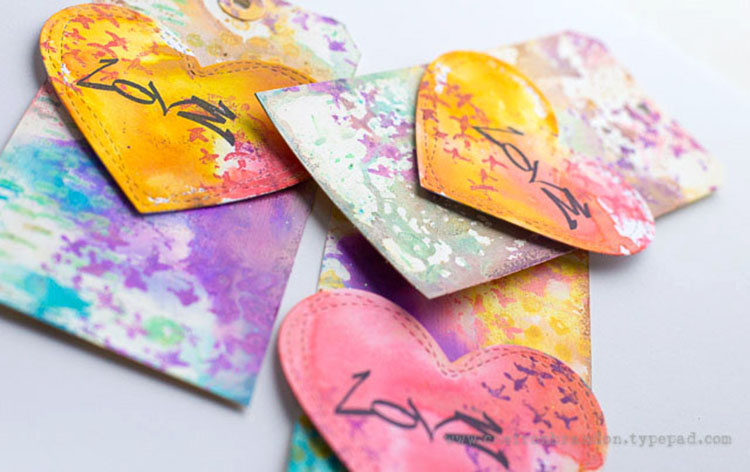
Hi there, it’s Cheiron here with my monthly post for July using the Free for All theme. Sometimes it’s just fun to have a little creative play at your desk and not complete a finished project at all. I love trying out new inks and paints so this month I gessoed up some tags and played around with Distress Oxides. To create these tags is really simple, put the Distress Oxides onto a non-stick craft sheet, spray with water and swipe the tags through to add some color to the background and dry them with a heat tool.

I used the Cross Circle, Running, and Grannies stamps from the Embroidery set to stamp different patterns using the same color of inks that I used to make my tags. These inks stamp wonderfully with Nat’s stamps. To finish off the tags, I added a heart die cut and stamped the graffiti word LOVE from the Stroll Through the Hood 1 set on them. What to do with these tags once you are done? That is entirely up to you! I like to embellish them with some bling and tie them onto a bottle of wine when going to a friend’s house, add them to an art journal spread or simply use them as a gift topper on a package. Hope you will try making some fun tags next time you want to experiment with a new medium.


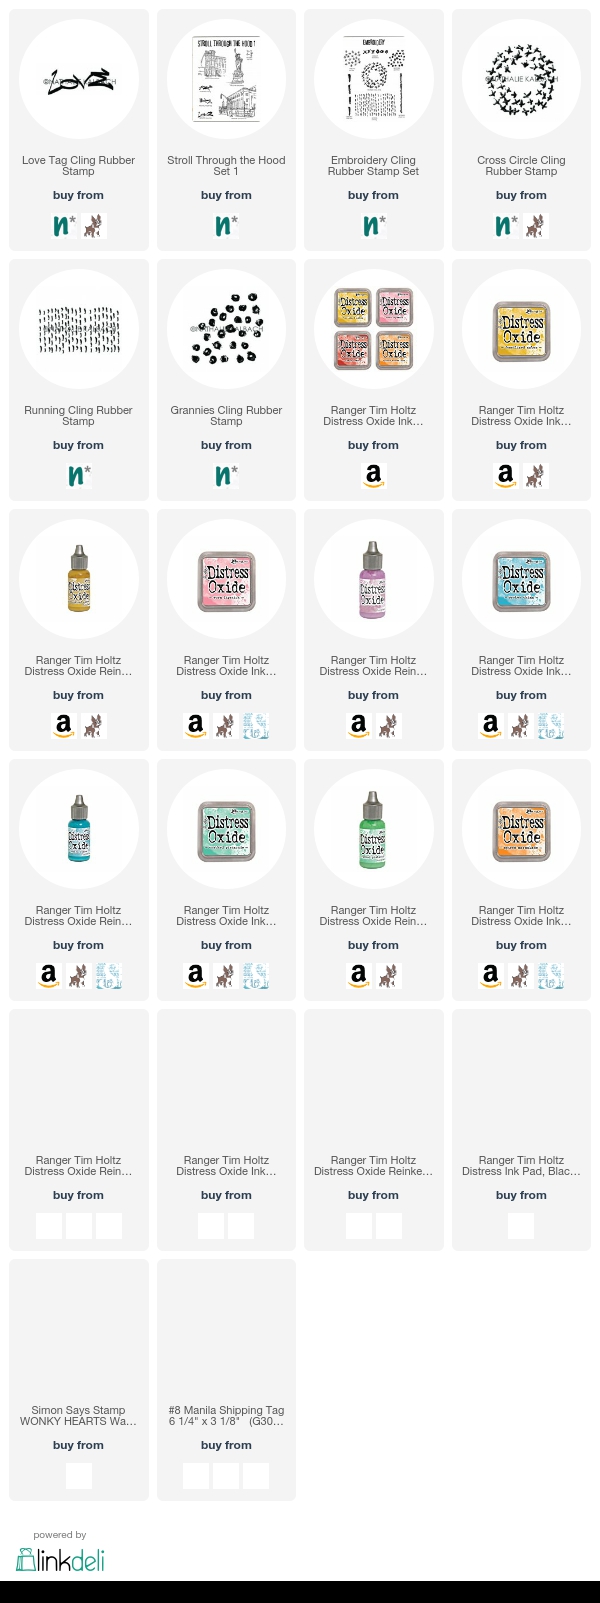
Thank you Cheiron for these beauties! Cheiron used the following supplies in her project (some are affiliate links):


Play along with us and share how you interpret our monthly themes. Email me how you used my stencils and stamps with the theme and email me an image – I would love to share your projects in my “n*Spiration From Around the Globe“.
Comments (2)

  • Shilpa

    |

    Beautiful tags, love the colors and layers! TFS Cheiron

    Reply

  • Sherry Canino

    |

    These tags are gorgeous !!! Thanks sommuch for the inspiration I so want to make some of these !!!❤️❤️❤️

    Reply

Leave a comment

Free For All – Tina Walker


If you are in the US today, Happy 4th of July from the Creative Squad! Today Tina Walker is starting us off on a new July theme with a gorgeous piece of assemblage using my Stroll Through the Hood #2 Main Station and Cardboard stamps and my Toledo stencil. This month’s theme is: Free for All: It’s time for summer vacation and relaxing so around here the Creative Squad is taking a break from themes this month. They’re just going with the flow and making a project of their choosing. It’s a Free for All!


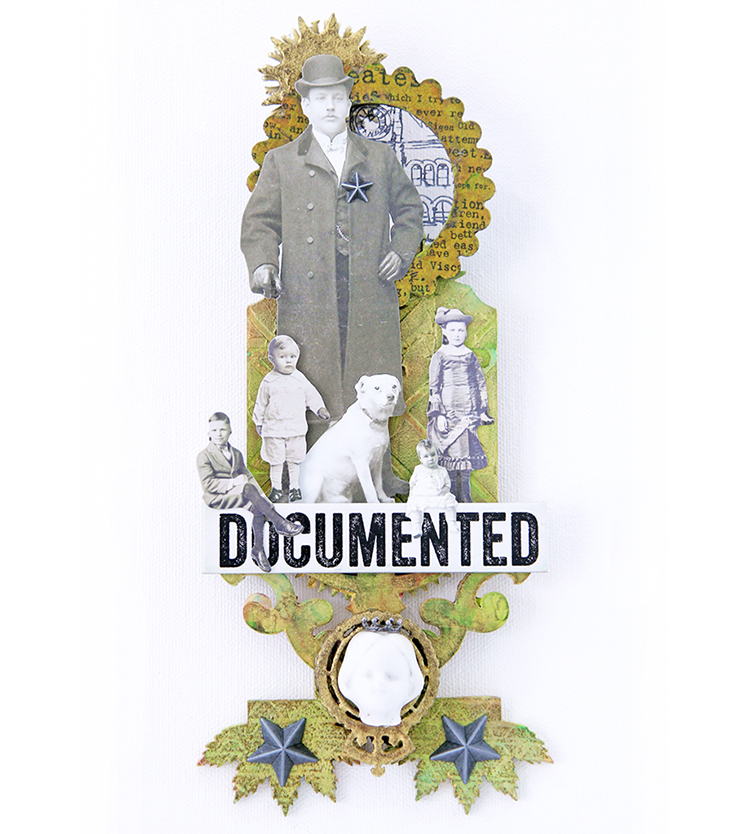
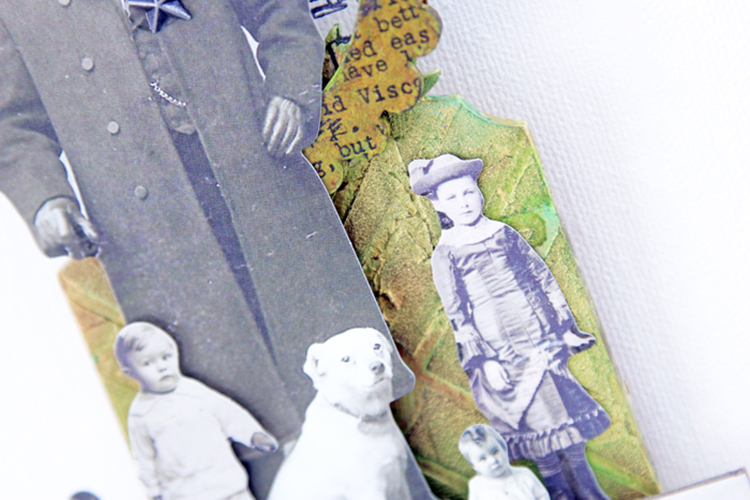
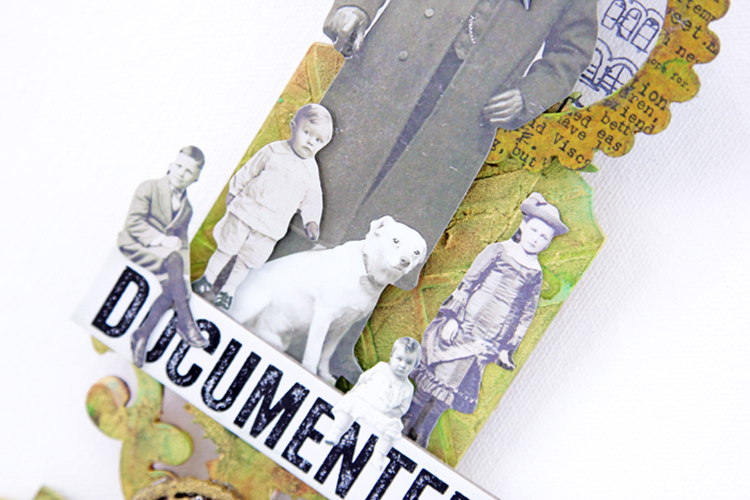
Hi! Tina Walker here today with a new month and a new theme. July’s theme is a Free For All! How perfect is that? We can make whatever our creative little hearts desire! But, to be honest, I always struggle with ‘anything goes’ challenges. I have so much product and love creating so many different types of art, it can be overwhelming. But no worries…my ole’ standby to the rescue – Assemblage Art!

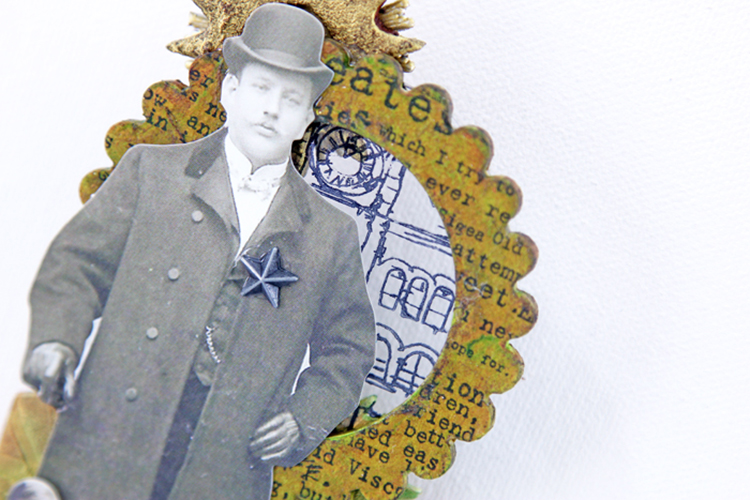
There is something about combining bits and bobs together to create a unique, one-of-a-kind piece. Stamps and stencils always make creating texture on assemblage easy and quick. Let’s see what I’ve created.

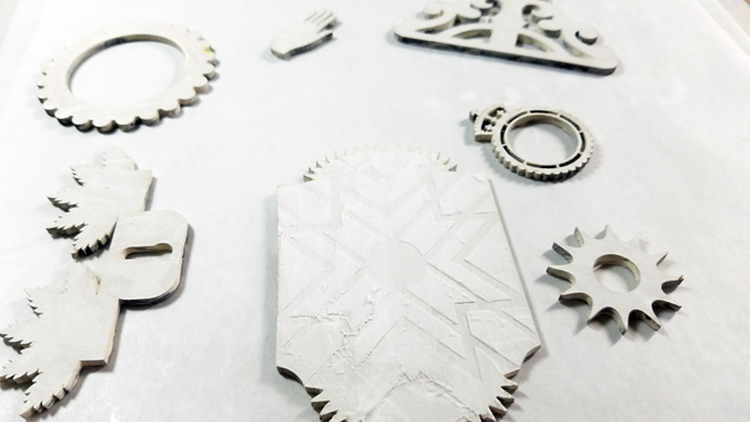
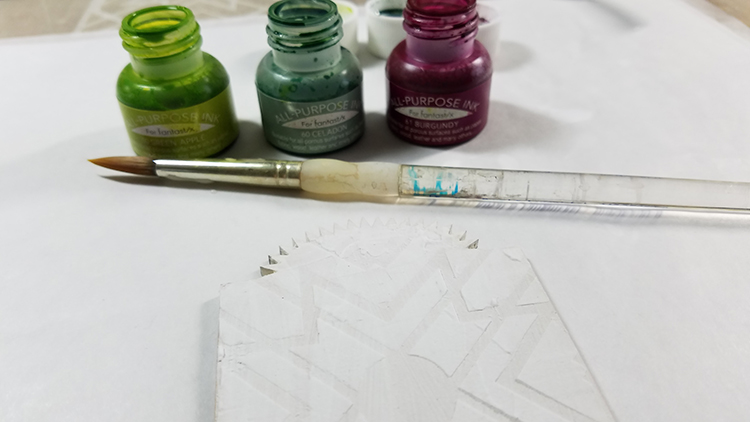
Cover all assemblage base pieces with a thin layer of gesso.

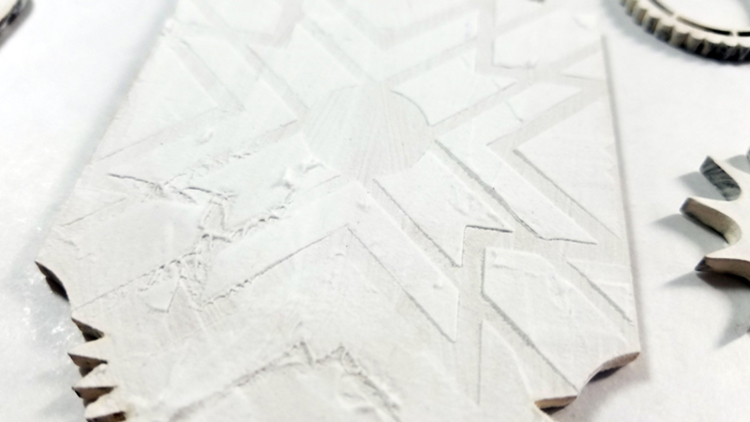
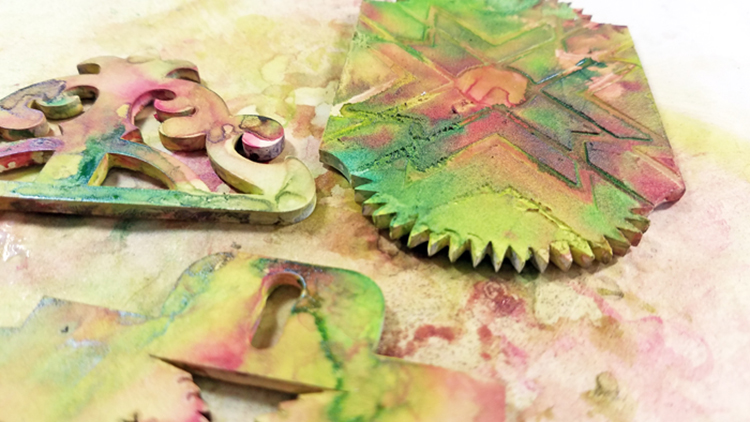
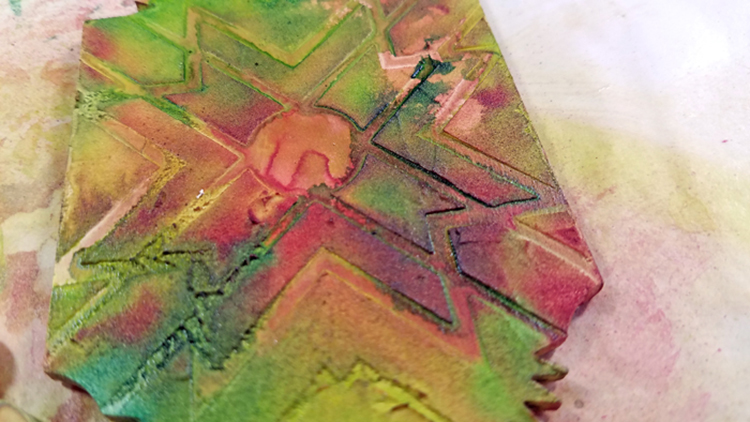
Apply modeling paste with your favorite Nat Kalbach stencil to your larger base pieces, I used the Toledo stencil here.

Paint your assemblage pieces with medium of choice. Acrylic paints, spray mists, inks, and pastes all work beautifully.

Just look at how the paint ‘grabs’ the stenciled image. Divine!

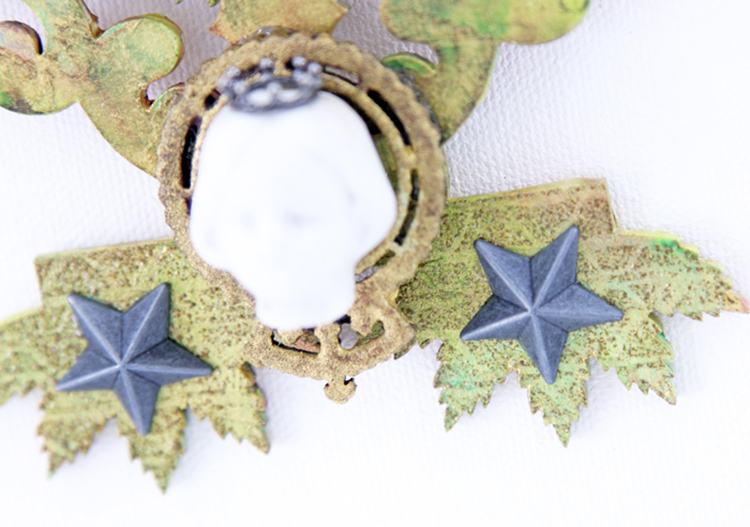
Stamp one of your favorite Nat Kalbach ‘Stroll Through the Hood 2’ stamps, such as the Main Station stamp, onto a transparency sheet. Layer it behind one of your assemblage pieces to resemble a window.

For even more texture, heat emboss some of your assemblage pieces with more favorite Nat Kalbach stamps, such as the Tread stamp.

Assemble all of your project pieces together and call it DONE!

I hope you enjoyed my projects today. Have a great day!


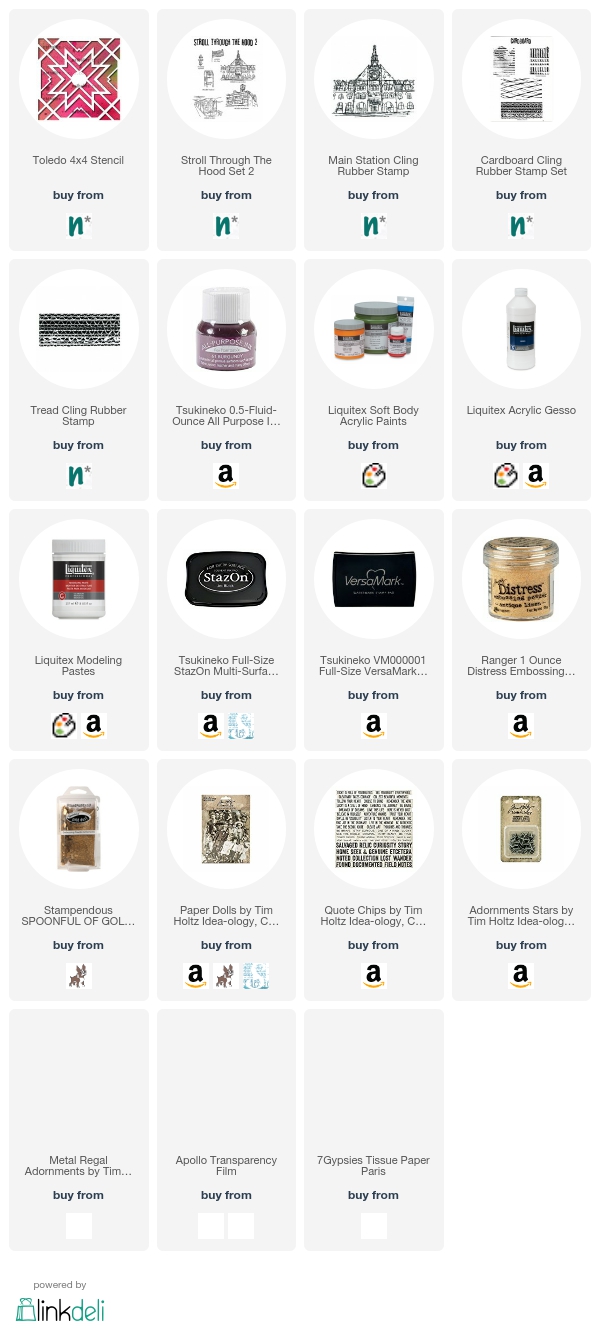
Thank you Tina for such a cool project! In addition to Green Apple and Celedon All Purpose Ink, a vintage doll head, and PaperWhimsy chipboard componants, Tina used these supplies – some links are affiliate links:


Play along with us this month and share how you interpret our monthly themes. Email me how you used my stencils and stamps with the theme and email me an image – I would love to share your projects in my “n*Spiration From Around the Globe“.
Leave a comment

Pattern Lovers – Michelle Rydell


Today we have a project from the Creative Squad! Michelle Rydell is sharing a really happy and colorful journal cover using my Santa Fe stencil and my Embroidery stamp set. This month’s theme is: Pattern Lovers Love Patterns: We admit it – sometimes we go a little crazy over cool patterns. We see them everywhere and whether it’s in the human-made stuff all around us or in the designs by Mother Nature, we love them all. So this month we’re playing with pattern and giving it the attention it deserves!


One thing I love just as much as art journaling, is making the journals to journal in!  When I heard that the theme for this month was Pattern Lovers I thought it would be perfect to do a journal cover!

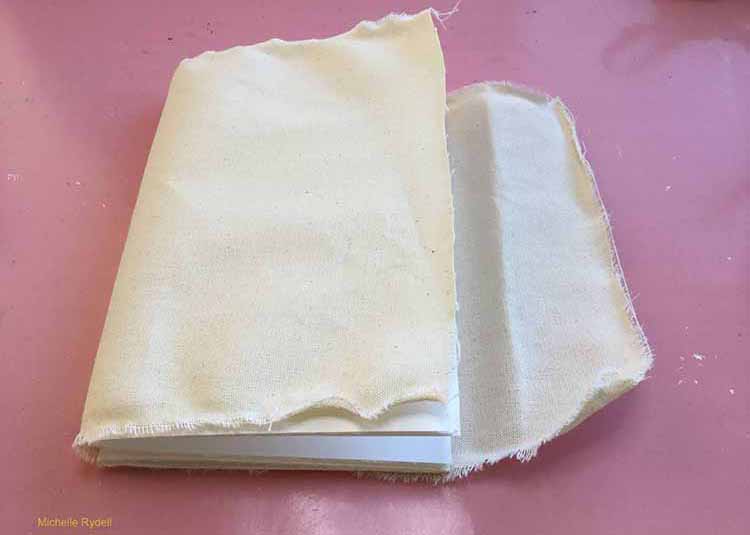
I started by folding some 9 x 12” paper in half to form a 6” x 9” journal. I cut/tore a long piece of unprimed canvas 9” high to match the height of the journal.  Then I wrapped it around the papers to decide how long to make it.  I wanted enough to create a flap.

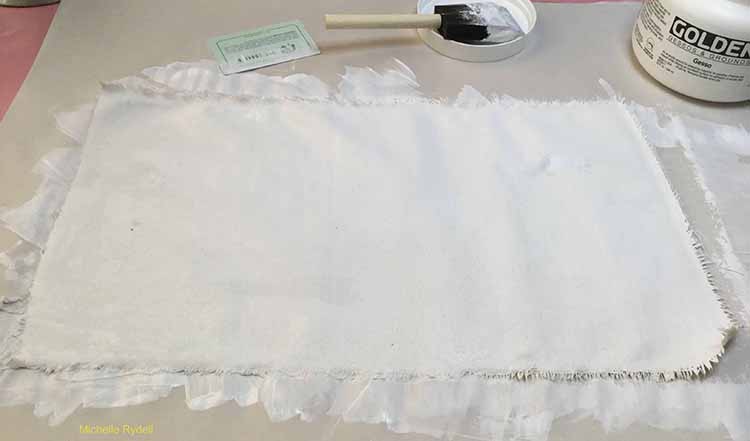
I primed the canvas on both sides with some white gesso.

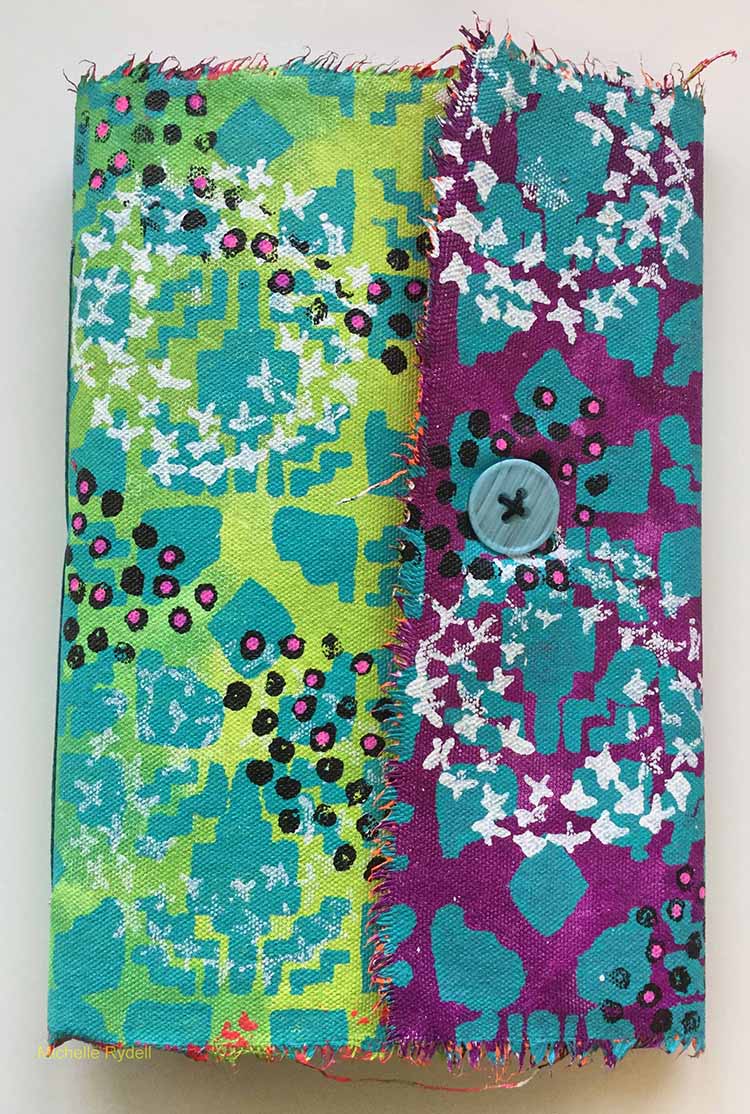
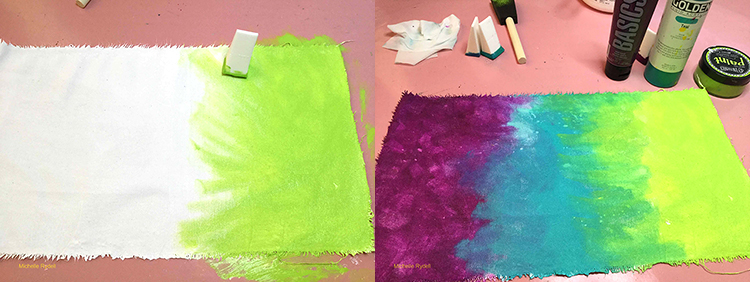
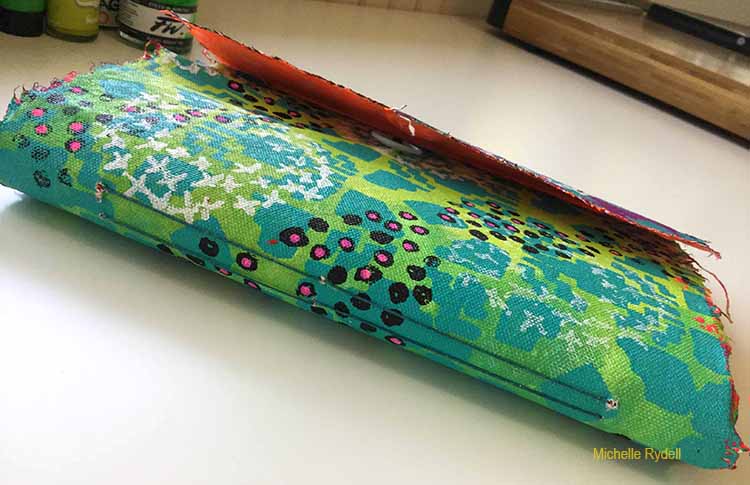
I wanted the outside of the cover to be a progression of cool colors, so I used a makeup sponge to rub on some acrylic paint in lime green, turquoise and purple.

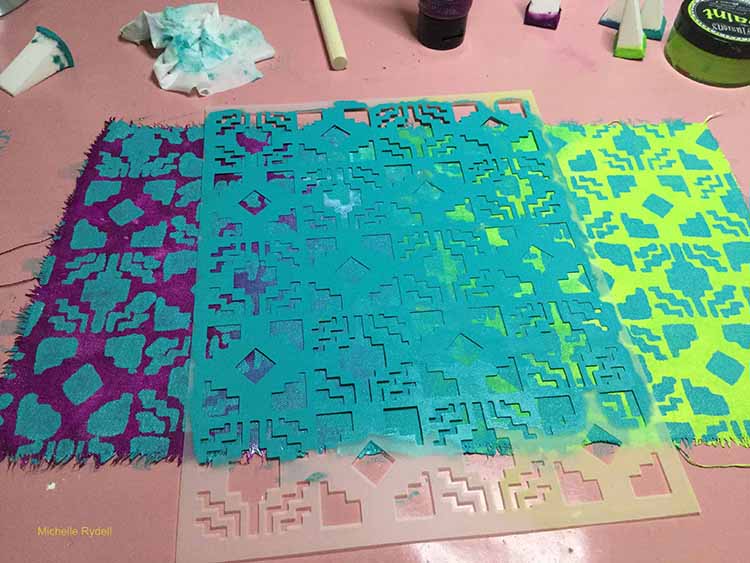
Then I sponged some teal over the whole thing with the Santa Fe stencil. I love how the blue creates a different effect depending on what color it is combined with…

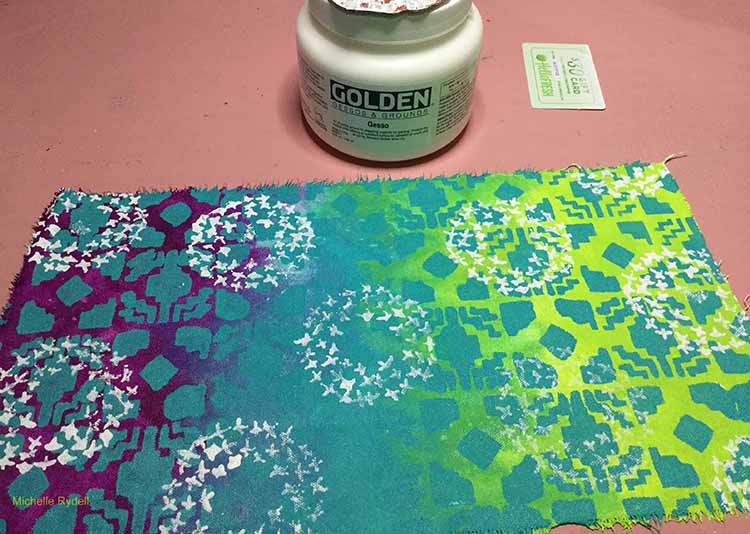
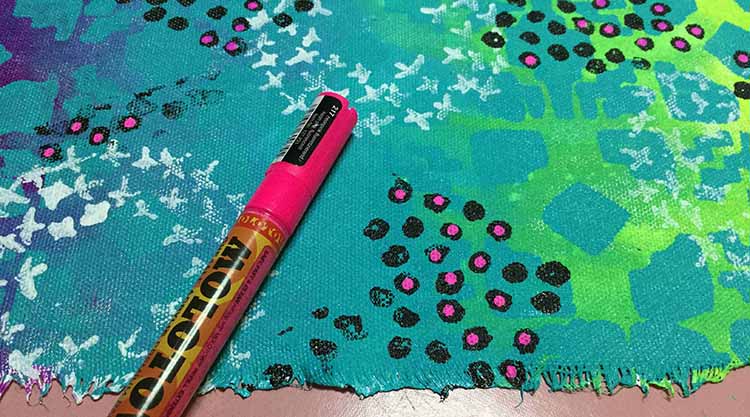
I used white gesso to stamp the Cross Circle stamp (from the Embroidery set) randomly.

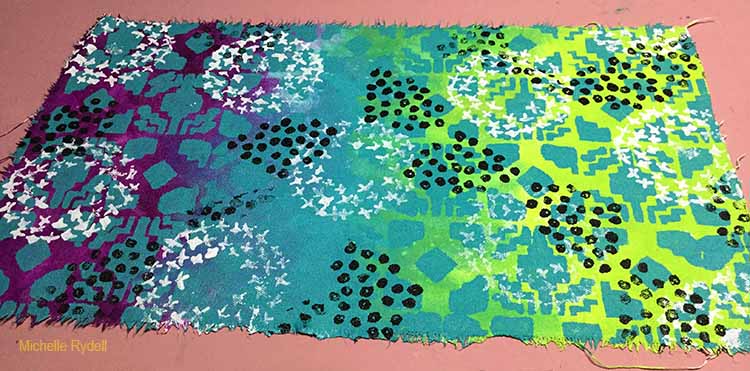
Then, I added the Grannies stamp with black for contrast.

As a final touch, a little pink was added with a paint pen to fill in some of the circles.

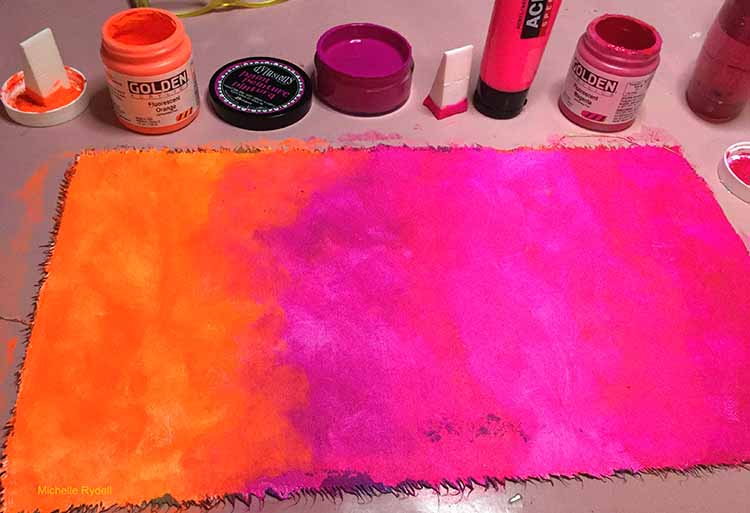
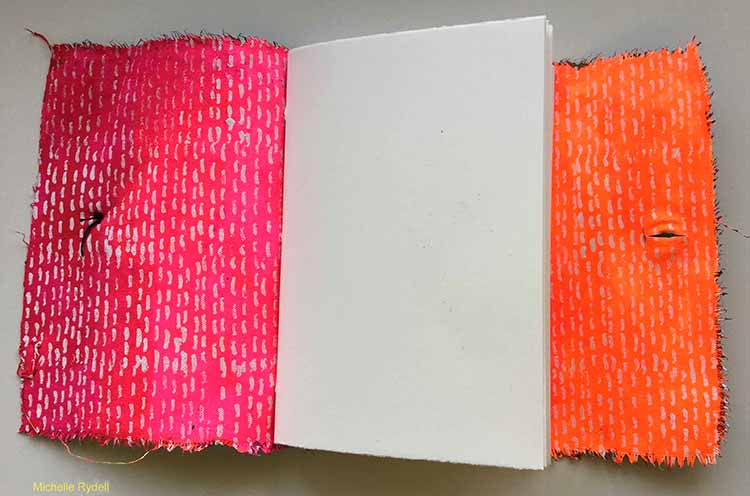
Then I flipped the canvas over to paint the inside. For high contrast I used warm colors to create a similar progression as a base.

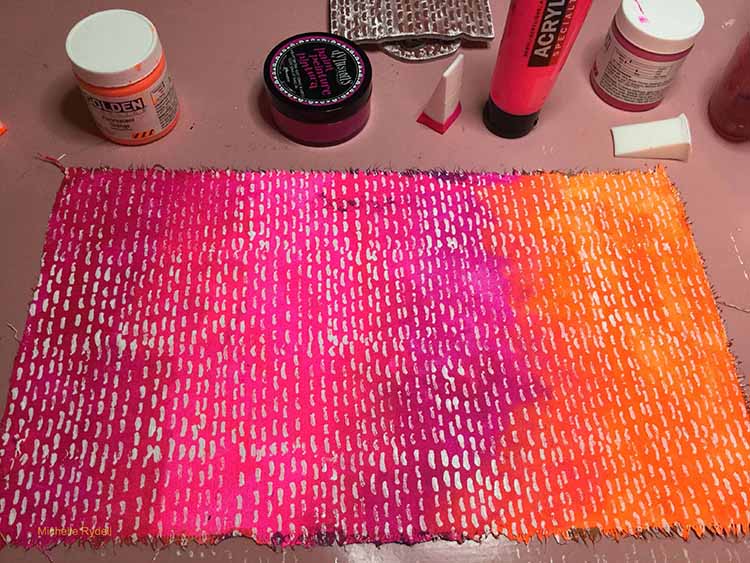
Then, used the Running stamp with white gesso to create an all-over pattern, and the cover was done!

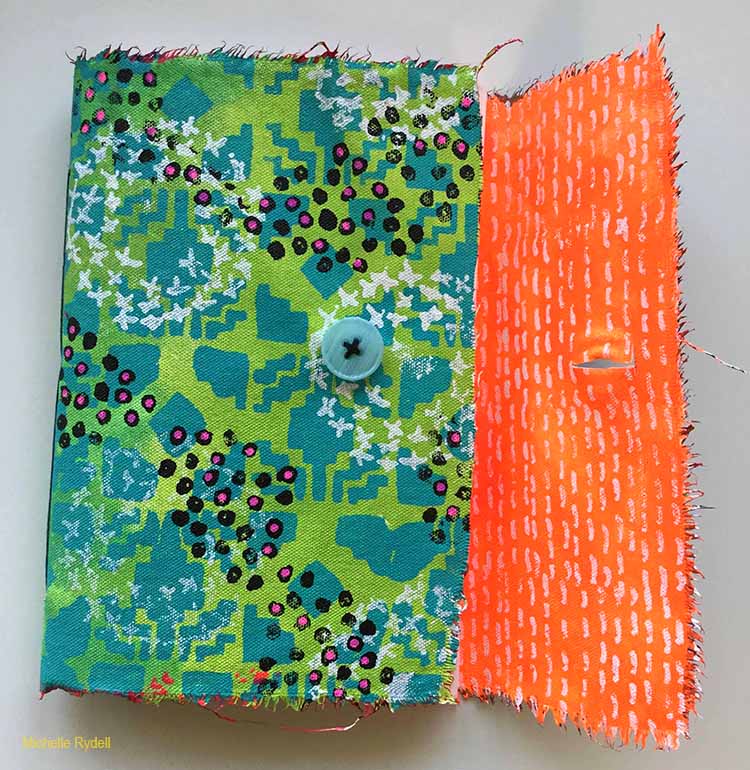
Here are some photos of the completed journal.  I made a slit in the flap and sewed a button to create a closure. I used a simple pamphlet stitch to sew in the signatures.  I hope you enjoyed this tutorial!


Thank you Michelle for sharing your project with us! In addition to a button and some thread, Michelle used the following supplies (some are affiliate links):


Play along with us too! I love to see how you interpret our monthly themes. Email me how you used my stencils and stamps with the theme and email me an image – I would love to share your projects in my “n*Spiration From Around the Globe“.
Comments (10)

  • Rita Montgomery

    |

    I love this idea. I can see doing some raw edge appliqueing or free motion quilting to the cover as well. Fantastic job. ~~rita
    Reply

    • Michelle Rydell

      |

      Ohhh, free motion quilting would be awesome! Thank you Rita!

      Reply

  • Donnalee

    |

    fabuloso!!!!!!!

    Reply

  • Julie Tucker

    |

    Wow wow wow!!! This is gorgeous! LOVING the colors and the textures!!!!!!!!!!!

    Reply

  • Travis ArtJournalGuy

    |

    Very creative! I would never have thought to do something like this, but it seems easy to do. Thanks for sharing your process with us.

    Reply

  • Sherry Canino

    |

    How beautiful and I just love all the colors !!!❤️❤️❤️

    Reply

Leave a comment