Creative Squad

Creative Squad: My Kindred Spirit – Judi Kauffman

Hello from my Creative Squad! Today we have a post from Judi Kauffman who is sharing a bunch of sweet bunny cards using my Embroidery and Cardboard rubber stamps and our theme: My Kindred Spirit – Animals are often symbols of qualities that we humans identify with, so let’s take some inspiration from them this month. Do you have an animal whose characteristics you identify with? Maybe it changes depending on your mood or what life throws. Who is your Kindred Spirit in the animal kingdom today?


A Bunch of Bunnies by Judi Kauffman

I love this month’s Creative Squad theme. We were asked to choose the animal whose spirit we most identify with and then use exclusively Nathalie’s stamps to create a project. It was easy to choose the animal: I’m a dog, a poodle, to be precise. I’ve got curly hair, I’m obedient and I enjoy a nice meal served in a bowl; I’m fairly high maintenance. But when it came time to do a project it just wouldn’t work so I had to go to my second-favorite animal – the rabbit! 

I’m not at all like a rabbit, other than being spooked by sudden, loud noises. I’m not fast on my feet, I don’t like raw veggies and I’m way too neat and private to live in an underground warren with a bunch of relatives… But I do LOVE how rabbits always seem busy, how they seem to find joy in jelly beans and Easter baskets filled with colorful eggs. And when my friends need a listener, I’m as ready as any rabbit has ever been – tuned-in and all ears.  Maybe I am part-bunny after all.

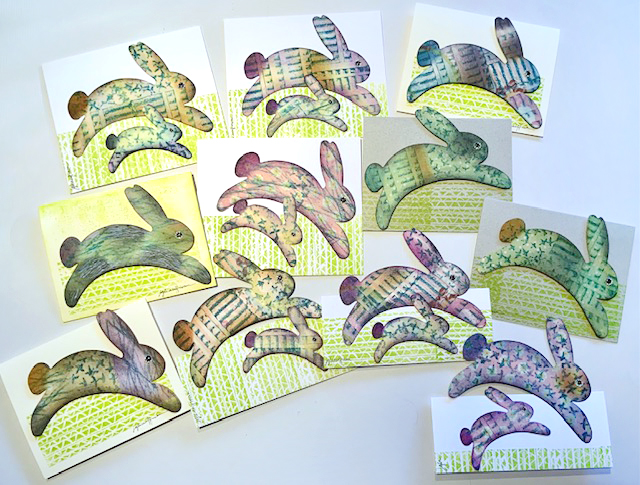
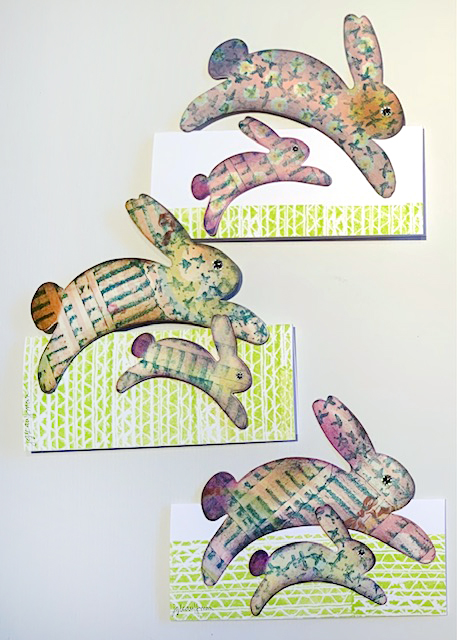
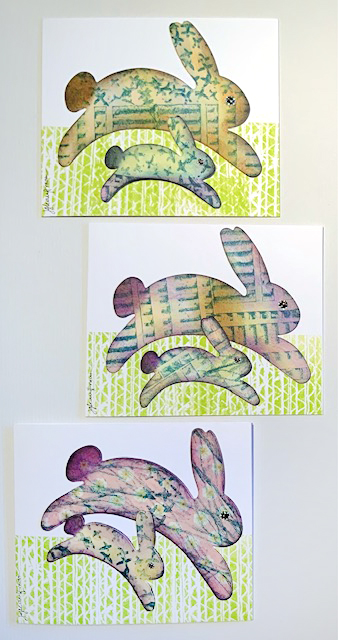
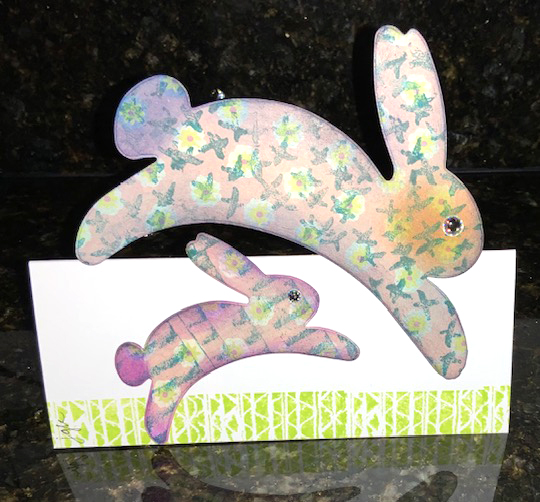
My project is a Bunch of Bunny Cards, perfect for Spring and Easter, and the ones with a pair of rabbits would even work well for Mother’s or Father’s Day. The Embroidery and Cardboard mixed media stamps I picked will totally transform your leftover scrapbook paper. I hope you’ll join me!

Instructions:

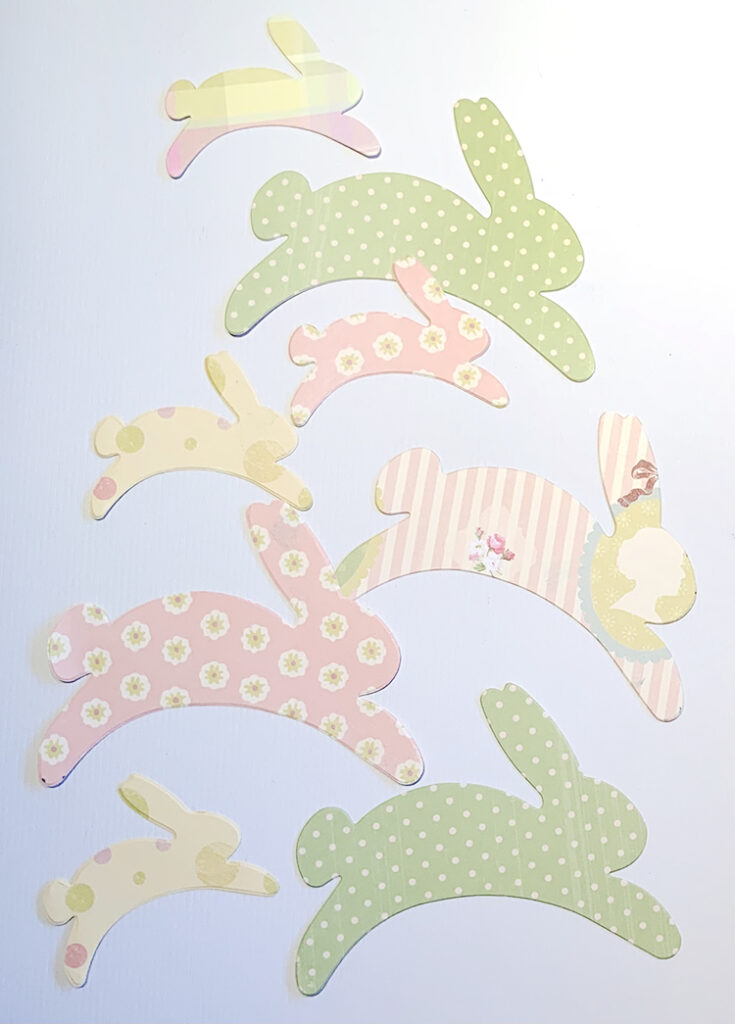
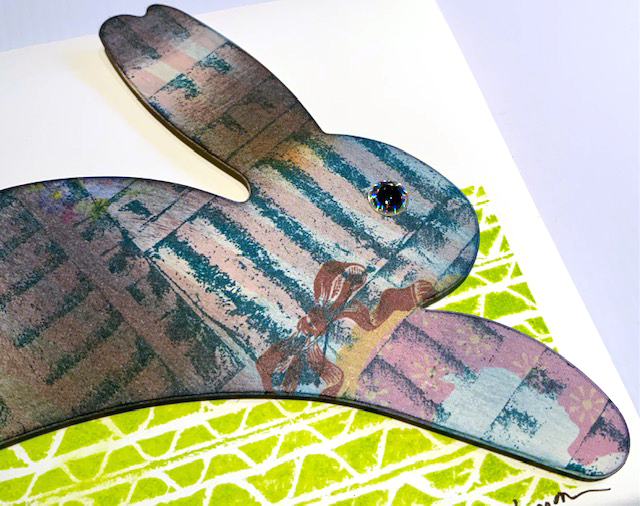
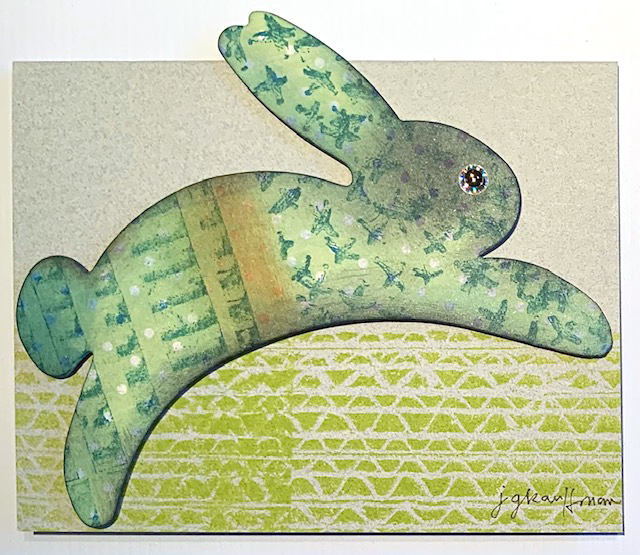
1. From spring-palette/pastel scrapbook papers die-cut, hand-cut, or machine-cut a bunch of simple bunny silhouettes in at least two sizes.

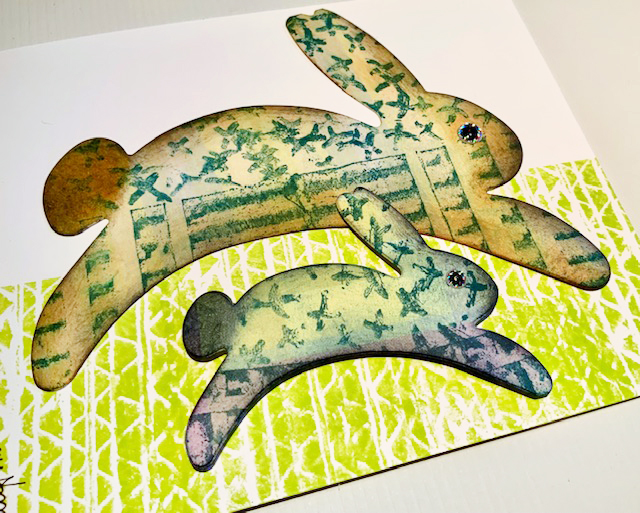
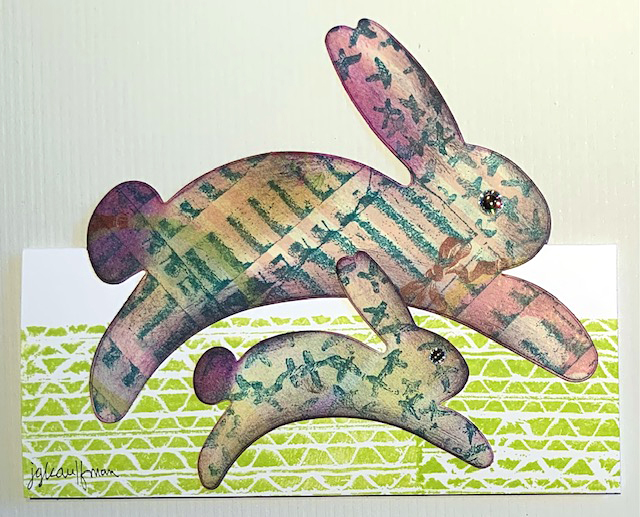
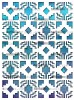
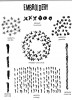
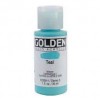
2. Using Dark Teal ink and Mixed Media stamps from Nathalie Kalbach’s “Cardboard” and “Embroidery” series/sets, cover the bunnies with random or planned patterns.

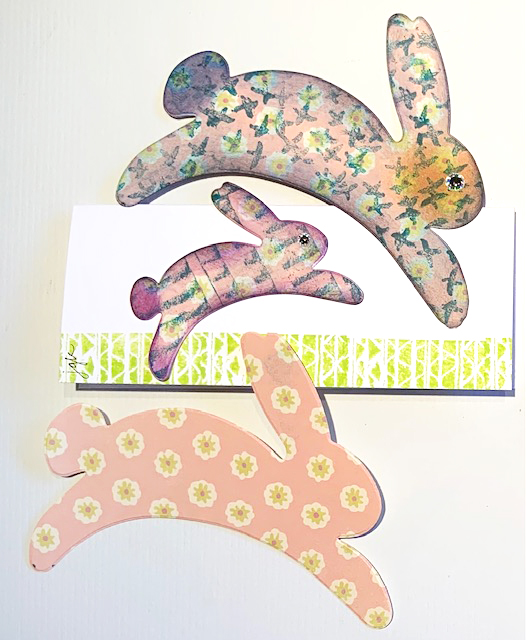
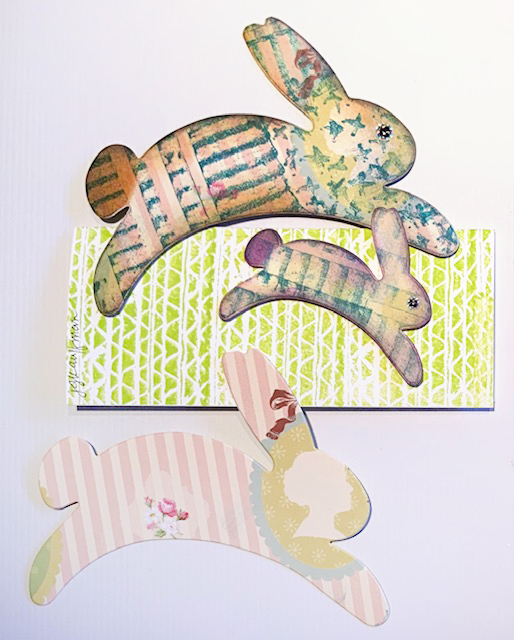
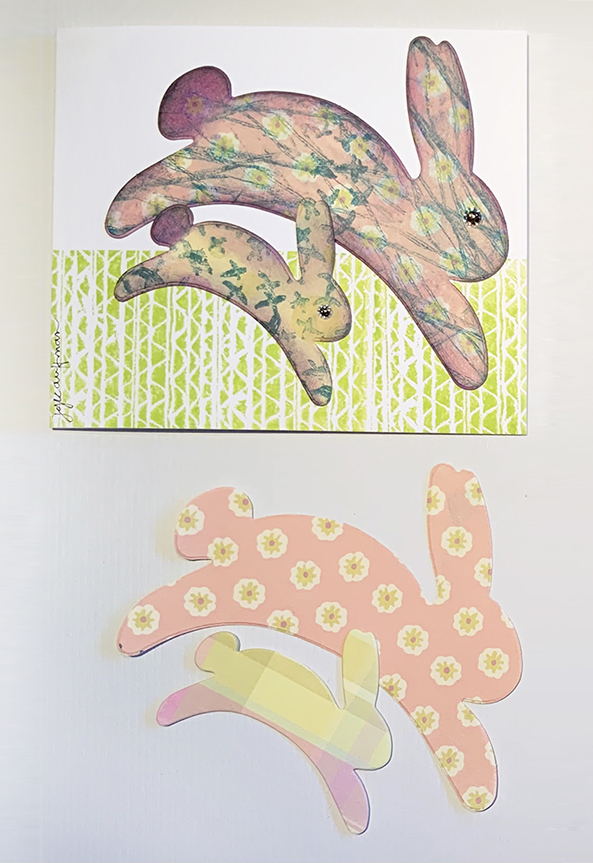
3. Using Purple, Dark Teal or Orange ink, or a combination thereof, smudge color onto the bunnies and the edges of the shapes. Make sure to darken the tail. Then add just a tad of Black ink at the edges only.

4. Add a round sticker for each bunny’s eye, or draw one! Use a white gel pen to add details to the fur if desired.

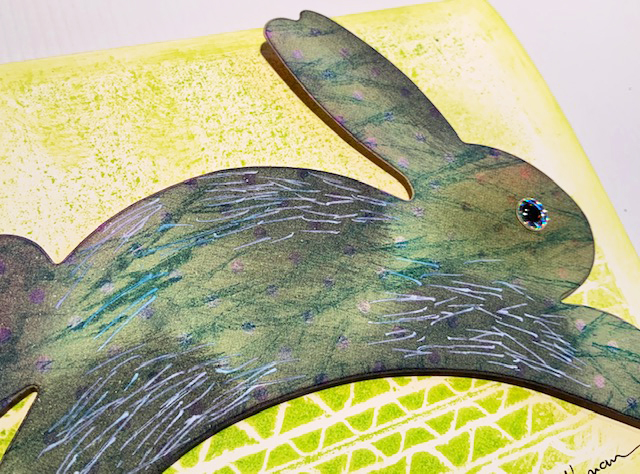
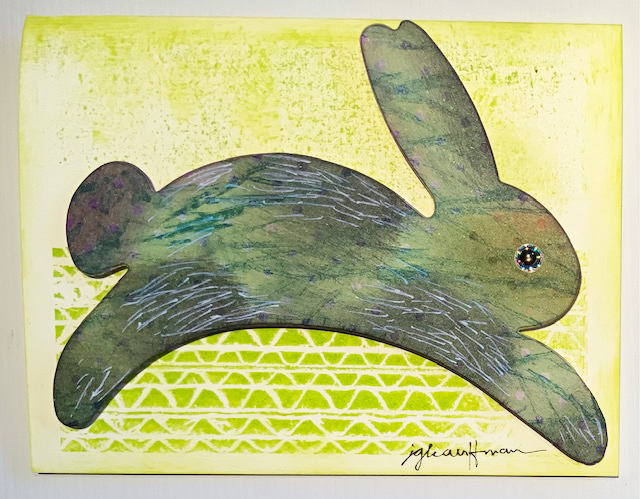
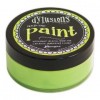
5. For the illusion of grass on all cards use Citrus Green ink to stamp Mixed Media “Tread” across the bottom portion of folded card bases. Adhere one or two bunnies to each card using double-sided adhesive tape and/or foam squares for added dimension. Refer to photos. (Be sure to sign your creations!)


Thank you Judi for sharing all these sweet bunnies with us – love the variety you created with just a few stamps and lovely spring colors!

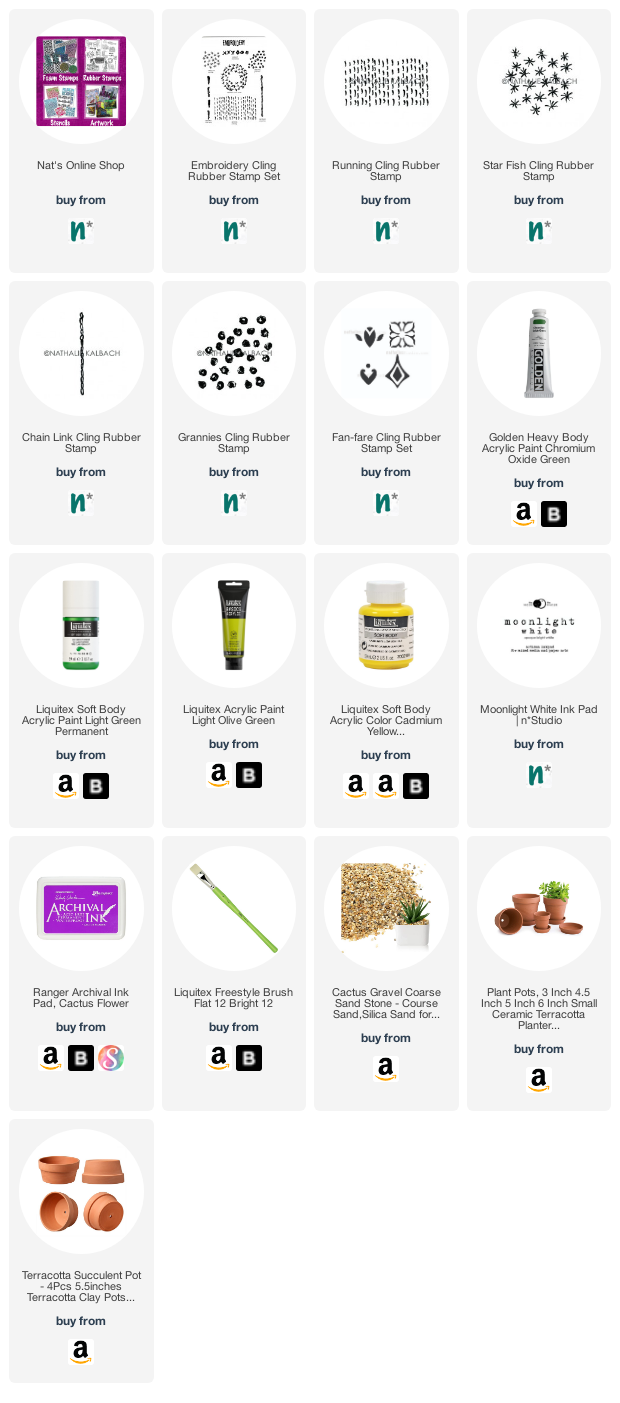
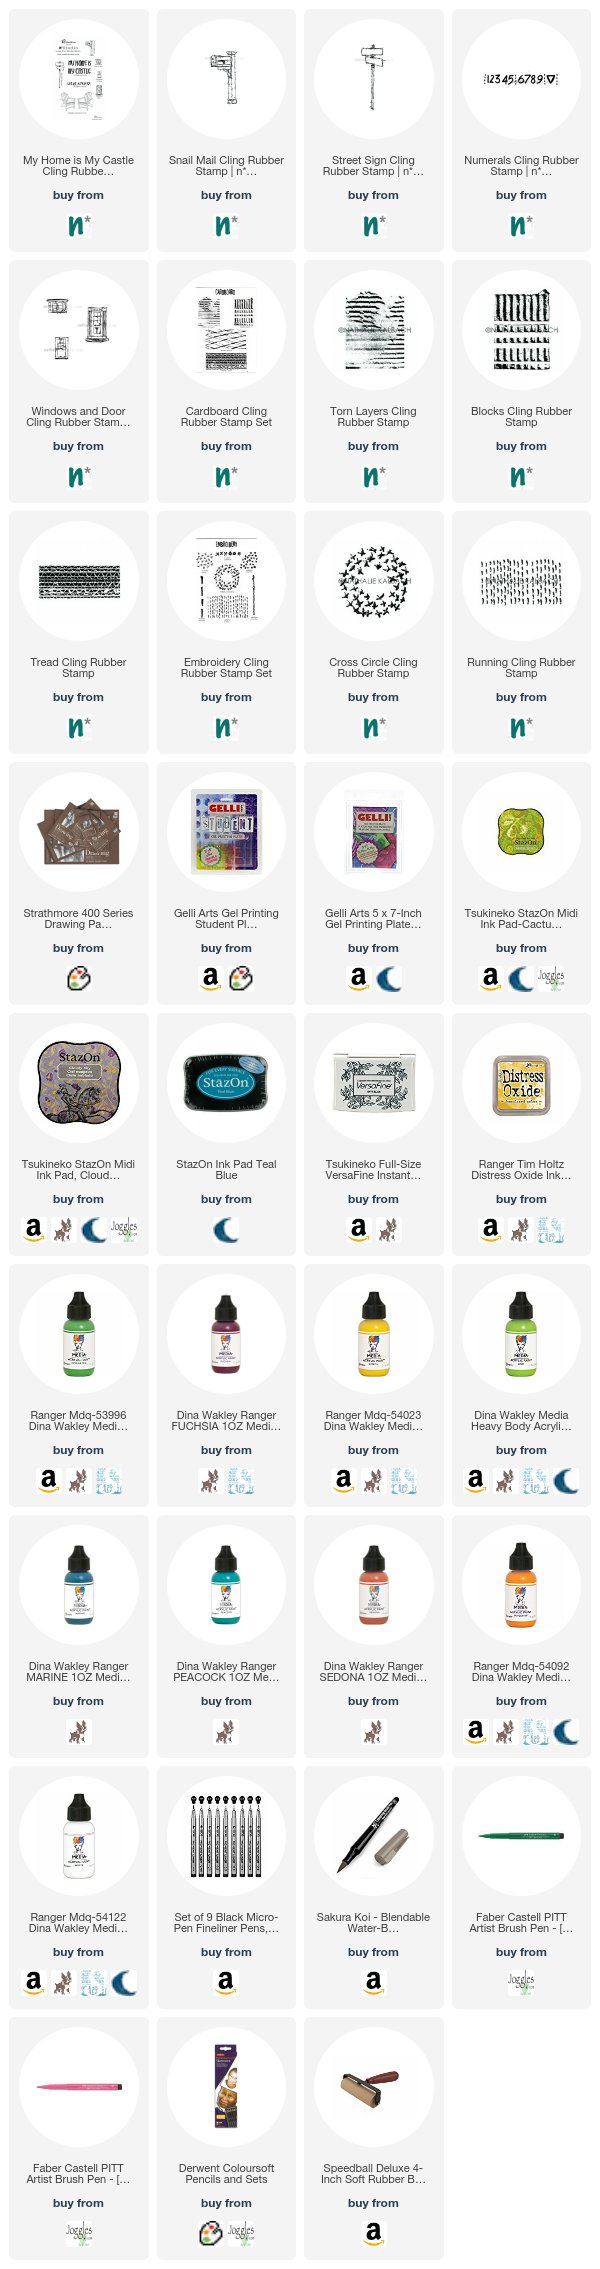
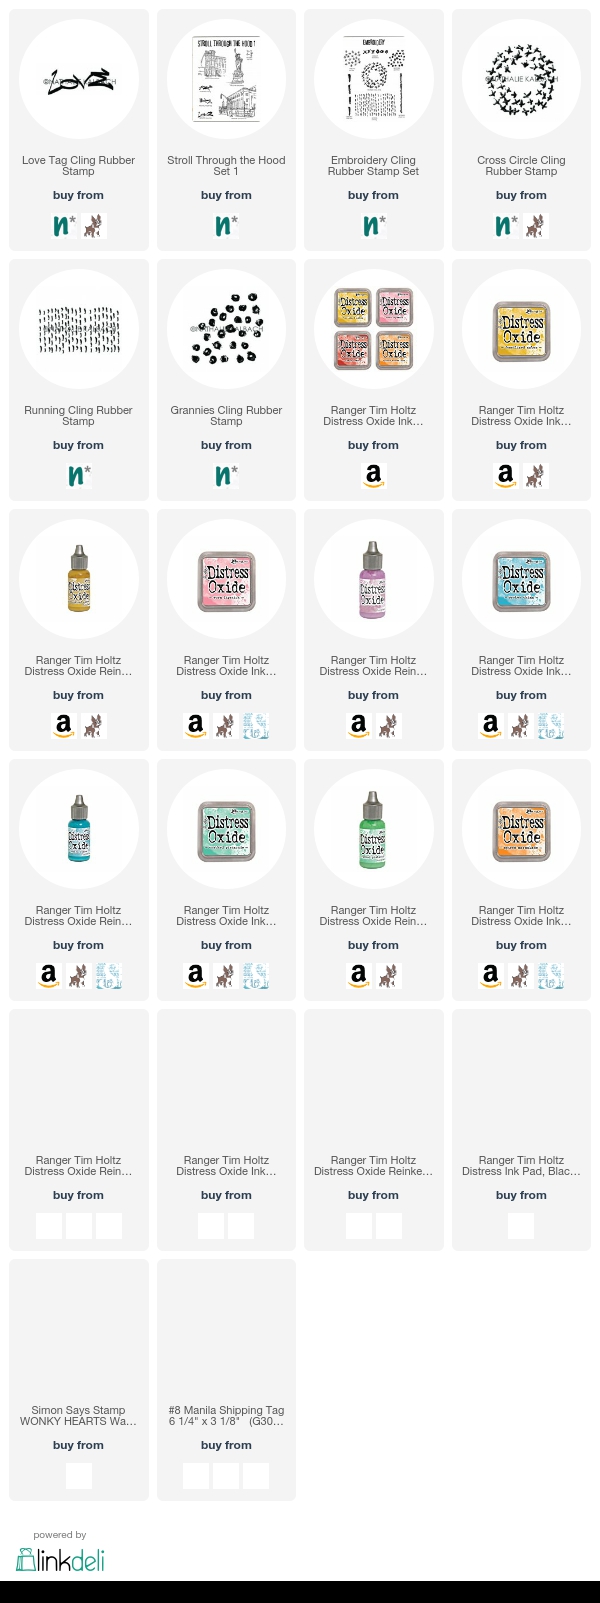
Give it a try: you can find all my Rubber Stamps in my Online Shop and here are some of the supplies Judi used:

Looking for more projects? Follow the Creative Squad on Instagram here.

Leave a comment

Faux Cactus Rock Garden – DIY Play Date

Last week Kim and I had another Play Date together to create a few Faux Cactus Rock Gardens! This was an easy project and I think the results are pretty darn cute.

I love succulents and cacti – they are plants that almost anyone can keep alive and they have such interesting, sculptural shapes. But let’s say that you really do not have a green thumb… well I’ve also been seeing a lot of faux versions too using materials that are usually hanging around and easy to get… like rocks! Yes this is a good old painted rock project – suitable for all ages and skill levels :)

Our materials were: rocks (variety of shapes), 3 colors of green acrylic paint, paintbrushes, Moonlight white opaque ink pad, my Embroidery and Fan-fare rubber stamp sets, a pink archival ink pad (Cactus Flower is a great color), gravel, and a few small terra cotta pots. We also wound up using yellow paint, old newspaper and a glue gun.

The process is pretty easy – just paint your rocks different colors of green using acrylic paint. We found that higher quality paints like Golden and Liquitex covered better and were more vibrant. Those rocks suck up the paint like a sponge.

And no matter what, you will have a green thumb when you are finished this LOL. Keep some wipes handy or wear gloves even to avoid painty fingers.

We painted a bunch of rocks, and we also made some small ones yellow for a few cactus flowers.

For the cactus spines we used Moonlight White – an opaque white ink pad – and rubber stamps from my Embroidery stamp set. The stamps that worked super well were Running, Grannies, Star Fish, and Chain Link – they really made our faux cacti look distinctive.

Here is Star Fish in action, putting on some faux cactus spines.

And my Chain Link stamp is nice for the long rocks… er cacti ;)

And here we have Grannies. Unmounted or cling rubber stamps will help you stamp on the uneven rock surface. And if you miss a spot, just go back in with more.

Here are our finished cacti! A big variety of shapes, colors, and spine styles.

For the cactus flowers we used my Fan-Fare stamp set and a pink ink pad – Archival Ink Cactus Flower is just perfect!

We glued the cactus flowers onto some of the cacti using hot glue.

To prepare the pots for the gravel, we filled them most of the way up with old newspaper. Our gravel bag was pretty small and this was an easy way to fill them up and still have enough gravel for the top.

Time to top it off with our cactus gravel.

We used both short, wide pots and regular small terra cotta pots. You could use any small pots or containers you have on hand. We found about .5 – 1″ of gravel was needed to support the rocks.

Now the fun part – arranging our little Faux Cactus Rock Gardens! You can spread things out…

…or go naturalistic with some unpainted rocks too!

Choose a variety of shapes, colors, and one with a flower to set the mini desert scene. You get the picture. Have fun with it! Get the kids involved – this is one everyone can do.

Give it a try! In addition to some old newspaper and rocks, here are the supplies we used:

Comments (2)

  • Sue Clarke

    |

    SUPER cute and I have killed cactus before.

    Reply

Leave a comment

Foam Stamplifier Challenge Prompts 11-15

Day 11 – Stencil

No surprise if you know me…I also love stencils and stencils are perfect amplifying tools for your foam stamps.

You can add paint to the solid back side of your foam stamps and then stamp through a stencil.

Lift the stencil and stamp right away again to receive a second but inverted print. You can also use foamstamps which have a more solid pattern – and stamp with the pattern side through the stencil. Another favorite of mine is to roll out a color onto the foam stamp with a more solid design and then put the stencil on top and add a different color with a cosmetic sponge on top of it.

It gives you so many more and unique possibilities with your foam stamps and for that matter also for your stencil.

Now that’s what I called amplified.


Day 12 – Pigment Ink

Love love love using my foam stamps also with pigment inks. I love how the foam creates some soft texture in combination with the inks and you can easily clean them after use with some water and a rag or a baby wipe.

Moonlight Duos by RubberMoon are a great hybrid ink and their colors are just sooo amazing. I also love using Distress Oxides and sprinkle the stamped image with water drops to lift off some of the ink with a paper towel and create even more visual texture.

So much fun and another medium you can easily use with your foam stamps.


Day 13 – Fabric

Can you say perfect relationship? Foam Stamps and Fabric love each other.

You can use acrylic paint but for fabric I want to wear or when I want to keep the fabric soft I use fabric paint. Besides using the foam stamps on a solid colored piece of fabric using it on a piece that already has a pattern is my total geek out fun.

You can use the fabric many many ways- but here…I give you my heart :)

Day 14 – Embroidery

Oomphing up your foam stamped image by adding some embroidery on top of the image is super fun! You can either just add some accents with certain embroidery stitches or fill in the actually design with satin stitches.

My Creative Squad Member Jennifer did a wonderful job creating some napkins with embroidered foam stamping and they are so beautiful. So many possibilities by combining foam stamping and embroidery.

Day 15 – Hugs & Kisses

I think the right term is stampkissing but I think Hugs & Kissing is perfectly adequate for this foam stamplifier technique. Use two different foam stamps- one that is more solid and one with a small pattern, apply different colors to each of them and then stamp them on top of each other – lift and stamp the more solid patterned foam stamp.

You can stamp off the other stamp on a different paper and get a nice color scheme. Make sure to use colors that mix well together.

I hope you enjoyed these prompts- here are the foam stamps I used for them:

In case you missed the prompt list and want to follow along – here you go:

Leave a comment

Embroidery with Stroll Rubber Stamps

This month my friend Kim and I decided to do an embroidery play date. I am loving this new hobby and it is so nice to settle into a movie at night and do a little bit of embroidery. It’s relaxing, creative, and a fun way to add a personal touch to clothing. Kim and I chose some clothing items to embroider, and went straight to my Stroll Around the Block and Stroll Through the Hood rubber stamps for our designs.

You don’t need much to pull this off: embroidery thread, needles, scissors, a hoop, and a super nifty adhesive fabric stabilizer from Sulky that dissolves in water (see the link in the supplies below). Then you just choose a rubber stamp design and stamp on the fabric stabilizer. Kim chose the Craftsman stamp from my Stroll Around the Block set. It fits right in a 6″ hoop with some room to spare.

Then she carefully peels the backing off the stabilizer, removing the bottom a little to position and stick onto her tshirt. It is important to make sure the tshirt is flat underneath with no wrinkles and do not stretch the tshirt either. Slowly peel away the backing and press the stabilizer firmly onto the fabric.

I chose my E-Train rubber stamp from the Stroll Through the Hood 2 set. It fits nicely on the shoulder of this tshirt.

I next put the embroidery hoop on, careful to not stretch or distort the fabric. It should be taut but not stretched. Because of the neck opening, I had to position the image off to one side so that the hoop could grip the fabric all around.

Kim got to use my new StazOn stamp pad that I got in Japan with the cute cat cover…

Now the fun begins, and we begin to embroider, stitching to follow the stamped designs.

I like to make a stitch, then double back and go through the stitch to make a quasi “split stitch”. I am no expert on embroidery, and the main thing here is that you don’t have to be! Just make stitches and follow the design.

I trace the outline of the E-train stamp and Kim traces the Craftsman house…

It’s fun to begin to choose colors and mix things up in the design. If you don’t like what you did, you can always gently loosen the stitches back with your needle and cut the threads out. I also found that I could trace the design with a colored pencil to help envision how a color would look.

Here are our designs, coming along.

When I finished, I loosened the hoop and slipped it off, and tore off the excess stabilizer.

Next you wash it gently under running water and the stabilizer melts away, leaving just the embroidery. Be gentle and make sure to get under the stitches if you have dense areas.

Now your piece is ready to be laundered to take any additional adhesive off.

Then you can wear your new personalized shirt :)

And of course I didn’t stop there. I had a dress with a red hem that was calling for some decoration…

I began with my Brownstone stamp from the Stroll Through the Hood 1 set.

And then the Queen Anne house from the Stroll Around the Block set…

And finally the Art Deco stamp from the Stroll Around the Block set!

Here they are on the hem of the dress:

I loved taking some clothing items and making them more interesting so I might now wear them. And the embroidery is so easy to pick up and have fun with, especially if you use the rubber stamped design on the stabilizer sheet. Give it a try! Everything you need to get started is below:


SaveSave

SaveSave

Comments (4)

  • Nancy Sapp

    |

    I LOVE, LOVE, LOVE ALL the embroidery ideas from your stamps, Nat!!! I just wish I was good at embroidering!!

    Reply

    • nathalie-kalbach

      |

      thank you so much ! I am not good at embroidery at all and this was really easy- promised!

      Reply

  • Sue Clarke

    |

    Clever…unique…love it!

    Reply

Leave a comment

Currently Digging – July 2018 AIT

Once in a while I thought I would share with you some nifty finds – like an Artist who’s work caught my eye…, some Inspiration or the what, when and where that caught my eye and got my creative juices flowing, and Tools & Techniques I am currently digging like a new way to use a material or an application that I’m taking away. Hope you enjoy this.

Here we go for this month:

HuskMitNavn – yep …not a typo. I love his artwork! He is Danish, he is from Copenhagen and I found him on Instagram and ever since I am looking forward to his posts.

They are witty, they are fun , they make me smile and they are so good!

Go and follow him on instagram!!!

Traveling is such an inspiration – recently I have been to Amsterdam and walking around, taking pictures and just embracing everything that is different from what you know inspires me. As you might know I am a big advertiser of this kind of inspiration – and …shameless reminder – LOL- I wrote a book about it ;) Artful Adventures in Mixed Media. So when I came back from my trip I made sure to start painting right away. Below is the work in progress of a painting – only the underpainting is applied.

I am excited that I went to the studio right away and cannot wait to share with you some time the finished painting. BTW- am I the only one who sometimes finds the underpainting quite striking (or is this just procrastination talking out of me- hahahaha)

Ever since I took a denim mending course last year at the Textile Institute and also released my Embroidery Stamps – I am hooked on embroidery :) It is one of my favorite things now to do in the evening.

I love that you do not need much – some fabric, some pretty embroidery thread or simple thread, some scissors (mine are foldable -best gift EVER- thanks Val!), a hoop  and a needle– bang there you go :) I am not really good at it and every person who is good in embroidery will shake their head, but who cares. I have fun and this is not something I do to have as a heirloom forever. I have a couple fun ideas planned for the next couple weeks and will show you soon – maybe I get you hooked up on this as well !

Hope you found the things I am currently digging interesting and see you soon again with some new finds!

SaveSave

Leave a comment

This Must Be the Place – Marsha Valk


Welcome to the Creative Squad! This week Marsha Valk is sharing with us her awesome technique for creating a project based on our new theme: This Must Be the Place –We’re all on a journey to somewhere or something. Sometimes we’re just making preparations for simple things like dinner or weekend plans. Other times we’re aiming for bigger goals, bigger places. Whether it’s a location or a state of mind, you’ll know when you get there. Where are you headed? Marsha is using stamps from my My Home Is My Castle set, Embroidery set, and Cardboard set. I just love watching her in action in the video below!


I don’t know where I’m heading, but I do know how I want to feel when I get there. It could easily take a lifetime to arrive because goals and places always shift. You may think that this will be the place but it might turn out it isn’t what you thought it would be once you’re there. Or you’ve grown and evolved in the meantime, and the next place is already on the horizon.

So for this month, I decided to use supplies I want to keep in my suitcase while moving forward. Because where ever I’m headed right now I’m sure I’m going to need mono printing materials, stamps, an ink pad, a pair of scissors, glue and a black fineliner.

Watch me create this page!


Thank you Marsha! Absolutely loved watching your process and seeing all those stamps being used for all kinds of visual texture! Here are some of the supplies that Marsha used:


Play along with us too: I love to see how you interpret our monthly themes. Email me how you used my stencils and stamps with the theme and email me an image – I would love to share your projects in my next  “n*Spiration From Around the Globe“.

Follow our new Creative Squad page on Instagram @NatsCreativeSquad and see even more projects from our awesome team of artists!

SaveSave

SaveSaveSaveSave

Comments (2)

  • maura

    |

    Delightful scene, Marsha! Love the bright happy colors! Maura

    Reply

    • marshavalk

      |

      Thank you Maura! It was super fun to create!

      Reply

Leave a comment

Living with Changes – Art Journal

I truly believe that living in the NYC metropolitan area is a commitment to live with changes! It is energizing and inspiring and sometimes also tiring. But that is what you signed up for – nothing for granted :)

I used this spread to play with the new acrylic paints I made in the Kremer Pigments Hands-On Acrylic class I wrote about yesterday. I really love how they turned out and how vibrant they are. I added some stamping with my Embroidery Stamps and marks with China Markers.

Here is a supply list –  – some links are affiliate links:


Wishing you a gorgeous day!

Comments (4)

Leave a comment

Free For All – Cheiron Brandon


Greetings from the Creative Squad! Today we have a bright and happy tag project from Cheiron Brandon that will be perfect for the next hostess gift you present! She’s using my Love Tag stamp from the Stroll Through the Hood 1 set and stamps from my Embroidery set, and of course, this month’s theme: Free for All! It’s time for summer vacation and relaxing so around here the Creative Squad is taking a break from themes this month. They’re just going with the flow and making a project of their choosing. It’s a Free for All!


Hi there, it’s Cheiron here with my monthly post for July using the Free for All theme. Sometimes it’s just fun to have a little creative play at your desk and not complete a finished project at all. I love trying out new inks and paints so this month I gessoed up some tags and played around with Distress Oxides. To create these tags is really simple, put the Distress Oxides onto a non-stick craft sheet, spray with water and swipe the tags through to add some color to the background and dry them with a heat tool.

I used the Cross Circle, Running, and Grannies stamps from the Embroidery set to stamp different patterns using the same color of inks that I used to make my tags. These inks stamp wonderfully with Nat’s stamps. To finish off the tags, I added a heart die cut and stamped the graffiti word LOVE from the Stroll Through the Hood 1 set on them. What to do with these tags once you are done? That is entirely up to you! I like to embellish them with some bling and tie them onto a bottle of wine when going to a friend’s house, add them to an art journal spread or simply use them as a gift topper on a package. Hope you will try making some fun tags next time you want to experiment with a new medium.


Thank you Cheiron for these beauties! Cheiron used the following supplies in her project (some are affiliate links):


Play along with us and share how you interpret our monthly themes. Email me how you used my stencils and stamps with the theme and email me an image – I would love to share your projects in my “n*Spiration From Around the Globe“.

Comments (2)

  • Shilpa

    |

    Beautiful tags, love the colors and layers! TFS Cheiron

    Reply

  • Sherry Canino

    |

    These tags are gorgeous !!! Thanks sommuch for the inspiration I so want to make some of these !!!❤️❤️❤️

    Reply

Leave a comment

Pattern Lovers – Michelle Rydell


Today we have a project from the Creative Squad! Michelle Rydell is sharing a really happy and colorful journal cover using my Santa Fe stencil and my Embroidery stamp set. This month’s theme is: Pattern Lovers Love Patterns: We admit it – sometimes we go a little crazy over cool patterns. We see them everywhere and whether it’s in the human-made stuff all around us or in the designs by Mother Nature, we love them all. So this month we’re playing with pattern and giving it the attention it deserves!


One thing I love just as much as art journaling, is making the journals to journal in!  When I heard that the theme for this month was Pattern Lovers I thought it would be perfect to do a journal cover!

I started by folding some 9 x 12” paper in half to form a 6” x 9” journal. I cut/tore a long piece of unprimed canvas 9” high to match the height of the journal.  Then I wrapped it around the papers to decide how long to make it.  I wanted enough to create a flap.

I primed the canvas on both sides with some white gesso.

I wanted the outside of the cover to be a progression of cool colors, so I used a makeup sponge to rub on some acrylic paint in lime green, turquoise and purple.

Then I sponged some teal over the whole thing with the Santa Fe stencil. I love how the blue creates a different effect depending on what color it is combined with…

I used white gesso to stamp the Cross Circle stamp (from the Embroidery set) randomly.

Then, I added the Grannies stamp with black for contrast.

As a final touch, a little pink was added with a paint pen to fill in some of the circles.

Then I flipped the canvas over to paint the inside. For high contrast I used warm colors to create a similar progression as a base.

Then, used the Running stamp with white gesso to create an all-over pattern, and the cover was done!

Here are some photos of the completed journal.  I made a slit in the flap and sewed a button to create a closure. I used a simple pamphlet stitch to sew in the signatures.  I hope you enjoyed this tutorial!


Thank you Michelle for sharing your project with us! In addition to a button and some thread, Michelle used the following supplies (some are affiliate links):


Play along with us too! I love to see how you interpret our monthly themes. Email me how you used my stencils and stamps with the theme and email me an image – I would love to share your projects in my “n*Spiration From Around the Globe“.

Comments (10)

  • Rita Montgomery

    |

    I love this idea. I can see doing some raw edge appliqueing or free motion quilting to the cover as well. Fantastic job. ~~rita

    Reply

    • Michelle Rydell

      |

      Ohhh, free motion quilting would be awesome! Thank you Rita!

      Reply

  • Donnalee

    |

    fabuloso!!!!!!!

    Reply

  • Julie Tucker

    |

    Wow wow wow!!! This is gorgeous! LOVING the colors and the textures!!!!!!!!!!!

    Reply

  • Travis ArtJournalGuy

    |

    Very creative! I would never have thought to do something like this, but it seems easy to do. Thanks for sharing your process with us.

    Reply

  • Sherry Canino

    |

    How beautiful and I just love all the colors !!!❤️❤️❤️

    Reply

Leave a comment