
Vor einigen Wochen sprachen Daphne und ich über verschiedene Techniken, die wir gerne mal ausprobieren wollten, unter anderem auch über die in ScrapbookAnswers/November 2006 aufgeführte Mamorier-Technik. Gestern dann schickte mir Daphne eine Email mit einer Frage hierzu und ganz spontan hatten wir die Idee, die Technik gleichzeitig – sozusagen als Gemeinschaftsprojekt – auszuprobieren. Wir tauschten aus, wie es grundsätzlich geht, starteten zu gleichen Zeit, mailten uns zwischendurch die Ergebnisse und hatten einen Heidenspaß. So wurde Studio DaphNat geboren ;-) !
A couple weeks ago Daphne and I talked about different techniques we would like to try, one of them the marbeling technique which was featured in Scrapbook Answers/November 2006. So yesterday I received an email from Daphne with a question about this technique and spontaneous we decided to do this as a joint venture. We talked about the how-to’s of the technique and startet at the same time, mailed in between about the experiences and had so much fun. This is how Studio DaphNat was born!
Man braucht Rasierschaum, eine flache Schale, eine Kelle oder Stück Pappe, und Acrylfarben, sowie Cardstock.
You need Shaving cream, a flat tin, a putty knife or a piece of sturdy chipboard and acrylicpaints as well as cardstock.
Dann sprühst Du in die Schale eine daumendicke Schicht Rasierschaum und streichst diese mit der Kelle glatt.
Spray thumb-thick layer of shaving cream into the tin and smooth the surface with a putty knife.

Nimm zwei oder drei Acrylfarben und tröpfel sie auf den Rasierschaum.
Take one or two acrylic paints and drizzle those onto the shaving cream.
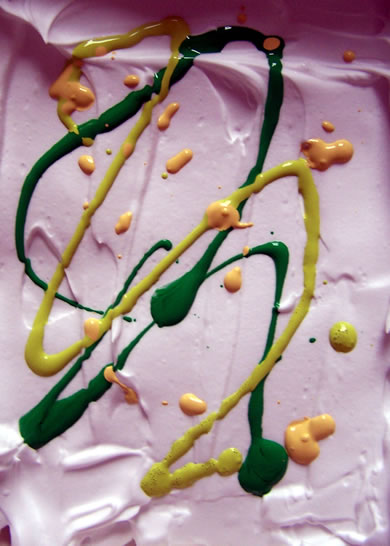
Nimm einen kleinen Pinsel/oder Schaschlikspieß und verswirle die Farben.
Take a small paint brush or tooth pick and swirl those colors.

Nimm ein Stück Cardstock und lege es vorsichtig auf den Rasierschaum. Streiche ganz vorsichtig über den Cardstock, aber drücke ihn dabei NICHT in die Masse ein.
Take a piece of Cardstock and put it onto the surface. Gently rub over the cardstock but be careful to not push the cardstock into the shaving cream.
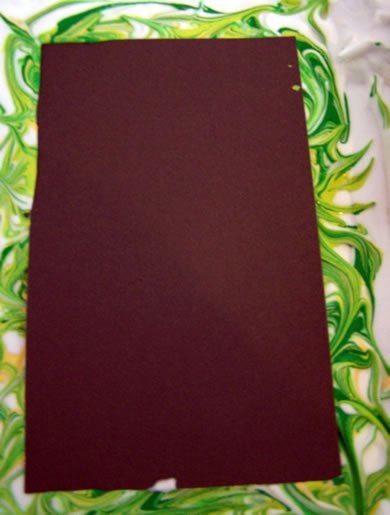
Nimm beide Hände um den Cardstock wieder abzulösen.
Take both hands to lift the cardstock.

Nimm unverzüglich die Kelle und streich den Rasierschaum ab.
Immediatley take the putty knife and scratch the shaving cream down.
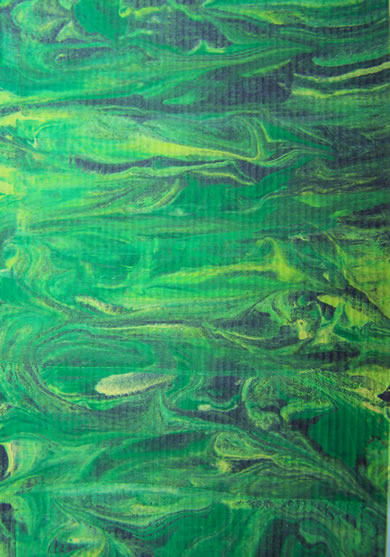
Und hier das erste Ergebnis – and here is the first Result:

Legt man gleich ein weiteres Stück Cardstock in die Schale, ist das Ergebnis nicht mehr ganz so fein, aber immer noch sehr interessant.
If you put another piece of Cardstock into the tin, the result isn’t as neat but still interesting.
Und dann war Zeit rumzuexperimentieren. Ich vermengte die Farben mit dem Rasierschaum und glättete dies dann wieder.
And then there was the time to do some experiments. I mixed the colors with the shaving cream and smoothed the surface once again.

Diesmal tröpfelte ich Color Wash von 7Gypsies auf die Masse.
This time I drizzeld Color Wash by 7Gypsies onto the shaving cream.

Ich verswirlte alles wieder wie oben, legte Cardstock drauf, nahm es runter, kratzte den Rasierschaum ab und das war das Ergebnis.
I swirled everything, layed Cardstock on top, took it down, scrapped the shaving cream off and this is the result:

Dann wollte ich wissen, wie es mit richtiger fester, unverdünnter Acrylfarbe klappt. Ihr könnt es auf dem Foto nicht so gut sehen, aber es hat sehr viel Struktur, was mir sehr gut gefällt.
When I wanted to know how it looks with sticky, undiluted acrylic paint. You can’t see it that good, but it has a lot of texture, which I like a lot.

2. Lage – second run:

Und dann hatte ich keinen Rasierschaum mehr (lies – dann hatte mein Mann keinen Rasierschaum mehr ;-) ).
And then I hadn’t had any shaving cream left (read- and then my DH had no shaving cream left ;-) ).
Aber ich wollte noch weiter rumprobieren. Ich nahm also eine Schale mit Wasser und sprutzte die Acrylfarben einfach so rein. An der Oberfläche flockte die Farbe etwas aus und ich zog ein Stück Cardstock durch – total langweilig ;-)
But I still wanted to play. So I filled a tin with Water and drizzled some acrylic paints into it. The paint flocculated a bit on the surface so I swiped a piece of cardstock through it – totally boring ;-)
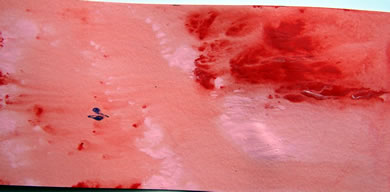
Also schüttete ich das Wasser aus, so daß auf dem Boden der Schale noch ausgeflockte Farbe vorhanden war. Hierauf legte ich dann Cardstock, drückte es an und entfernte diesen dann wieder. Ich mag das Ergebnis- nicht mamoriert, aber die Oberfläche hat was.
So I got rid of the water, until there was only flocculated paint on the bottom of the tin. I layed a piece of cardstock on top and lifted it again. I do like this result – it isn’t marbled but the surface is appealing:

Das wars von Studio DaphNat – schaut Euch mal die Experimente und Ergebnis Daphne an!
That is it from Studio DaphNat – take a look at Daphne‘s results and experiments.


D@nielle
| #
Love the whole project together, the marbling is cool and that photo, well it really doesn’t need an explanation.
Reply
Jeani
| #
Das ist absolut toll. Besonders das Foto hat es mir angetan. Sag mal, ist das echt oder eine Photomontage?
Reply
Monique
| #
Love all the bright colors! And that picture is great!!
Reply
Vicki Chrisman
| #
This is great Nat! I LOVE the fact that you are a technique junky! I did some layouts using this technique for an assignment for Scrapbook Answers,and was amazed how cool and vibrant the colors turn out! love your layout and that darling photo!!!
Reply
Mirjam
| #
Love your home made background papers… and as for your cat… ours drinks from the toiletbowl… not a nice thought… since she likes to (kiss) us too… and yes, she has always got a bowl of fresh water…..
LOVE the DAPHNAT experiments!
And oh, yeah, thanks for the nice comments on my blog!
Reply
christiane
| #
saw it in real!! yeah!! more better than here!! ;)
Reply
Daphne
| #
Great to see it on a layout :)
It is indeed really cool to make your own piece of background paper!
LOVE LOVE LOVE this photo… cats totally rule!!
Reply
Kat
| #
Wow, das sieht ja klasse aus!!! Muss unbedingt mal das Marmorieren ausprobieren!! :)
Reply
Catherine Matthews-Scanlon
| #
I just love that picture….and the marbling is way cool!
Reply
Cammeron Kaiser
| #
Ooh! Super cool technique!! Great job :)
Reply
Anja
| #
Was für ein tolles Foto ! Und sehr geniales Layout – diese Marmortechnik ist toll!
Reply
jana
| #
und wie! das passt wirklich echt gut! gehst du in serie? ;)
Reply
Marion
| #
Sehr klasse – ich finde deine Farb- und Papierwahl immer wieder fazinierend. Dir ein schönes Wochenende.
Reply
Judith
| #
Hi Nat! How are you? I simply love this lo!!! The colors are great and the marbletechnique is beautiful. But most of all I adore that picture! it made me smile, love to see that pink tongue!!! Hahahaha!
Reply
Andrea
| #
Very cool – LOVE the marbled BG and the Layout is awesome (what a cool cat – LOVE the fun twist in your title/journaling!!!)!
Reply
Daniela
| #
LOL!!! Ja, man muß sich nur zu helfen wissen… Klasse Farben und dein Papier macht sich hervoragend!
Reply