nathalie-kalbach

The Cove, the Cape and ….East Coast Vacation Part I

What a whirlwind trip and it was fun fun fun. We came in on a thursday and went to see our family in New Jersey and spent some time seeing friends too on Friday. We had a little birthday party for the kiddos which was lots of fun and then on Saturday I went to Scrappers Cove in Milltown. It was so much fun. I even had two German speaking girls in my class :) and I loved the atmosphere – I hope to come back next time I’m in the area ;)

On Sunday then we drove to Cape Cod where we had rented a nice little house. It was the perfect time to be there. Our land lord said he calls this the “Secret Season” – was the leaves are turning, the weather is still wonderful and there is almost no one there – perfect. We did beach hikings, watched sunsets and sunrises, bbq-ed, rented a tandem and managed to ride it even, did some shopping, ate lobster and saw seals in the ocean – it was AWESOME


More pictures of our vacation and the workshop in NYC with Julie to come :)

Have a gorgeous day

nat

Comments (13)

  • cat mat scanlon

    |

    Sounds wonderful! You were about 3 to 4 hour drive from me when you were on the cape!

    Reply

  • Karen Auld

    |

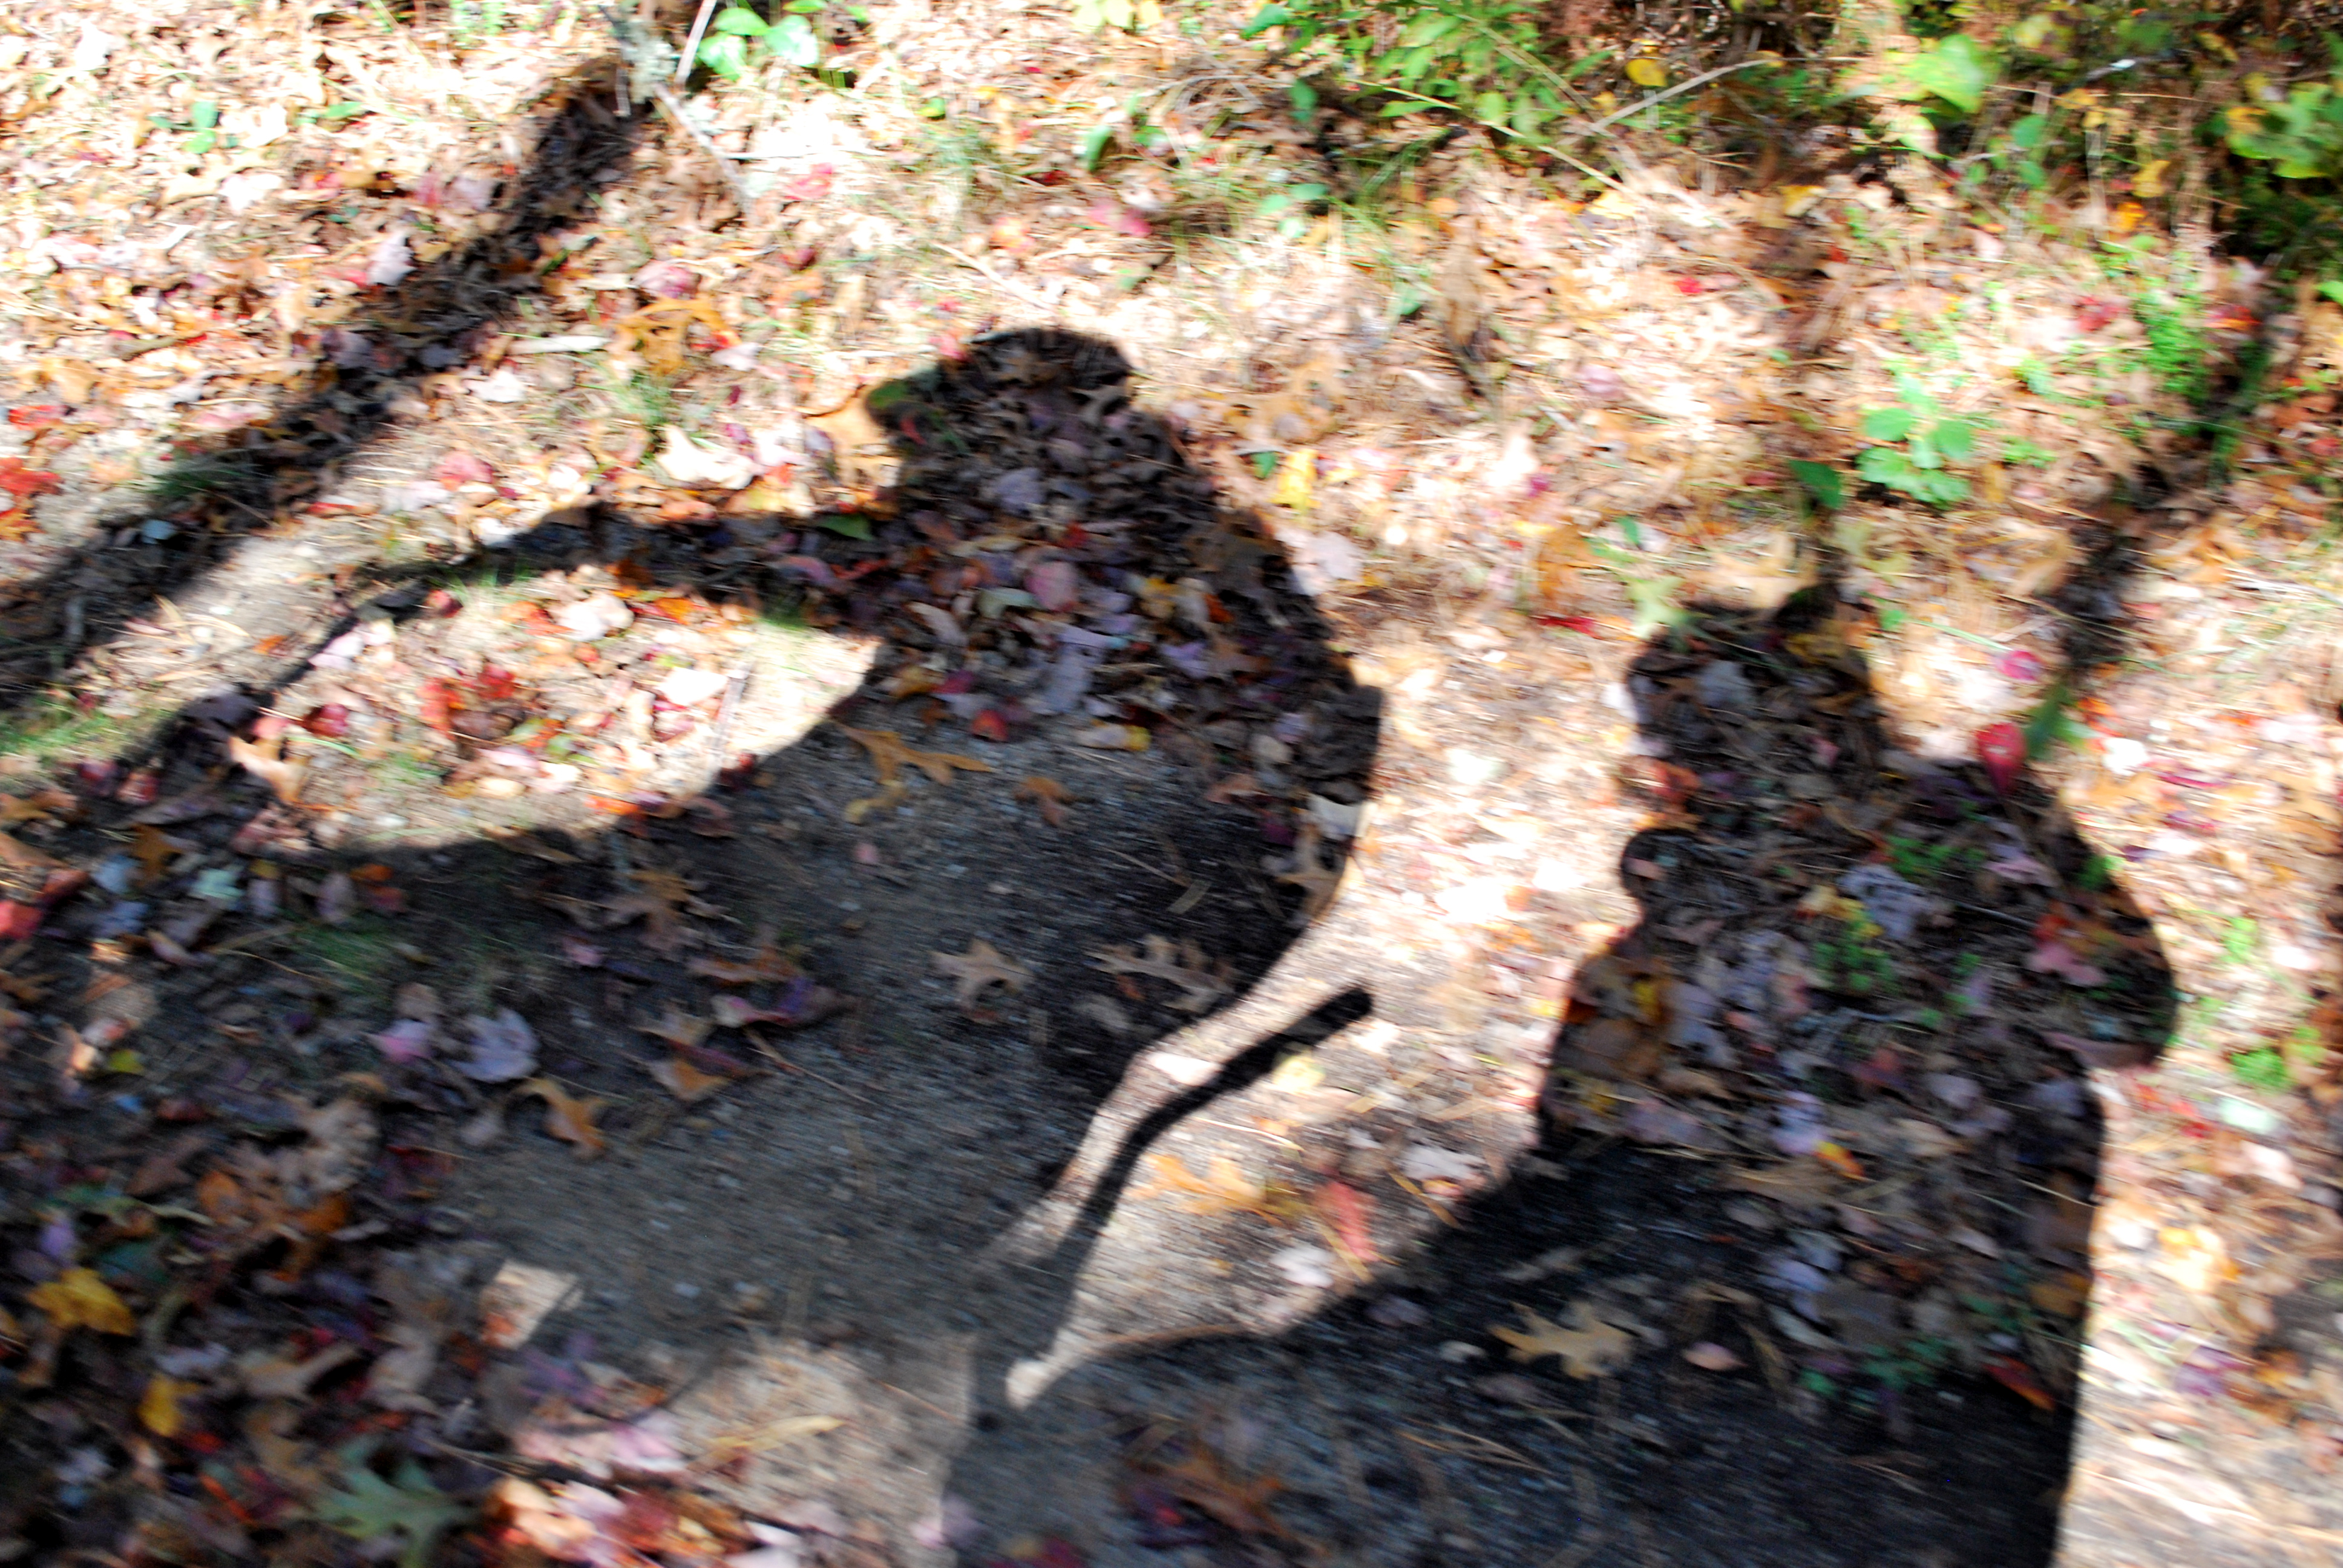
    Nice picture of you and Jim, Nat

    Reply

    • Nathalie Kalbach

      |

      Thanks karibaba- miss you and Bill already- it was just too short! We actually almost planned the Florida vacations with you- LOL- we just need to find a time when to do it ;)

      Reply

  • france papillon

    |

    i’ve been watching these with Adele’s hometown in the background… magical moment. thanks Nath!

    Reply

  • Claudi

    |

    Das sind schöne stimmungsvolle Fotos.
    Muss ja traumhaft gewesen sein.

    Reply

  • Drea

    |

    So viele stimmungsvolle Bilder! Wunderbar!
    Ganz liebe Grüße wollte ich dir mal schicken! winke!
    Deine Drea

    Reply

  • Sue Clarke

    |

    Fabulous photos as always Nat! Love the one of the sign and the beach initials (I want to see the LO for that one please). Glad you enjoyed the east coast!

    Reply

    • Nathalie Kalbach

      |

      LOL- your wish was my command- I just did one- will show soon ;)

      Reply

  • Jan Hennings

    |

    what a wonderful working vacation. wow to your beautiful photo’s..the ocean and sunset shots are truly remarkable. love the j+n in the sand and the little foot prints :)

    Reply

  • Martha Richardson

    |

    The pictures are FABULOUS! Makes me want to jump on a plane and head to the Cape.

    Reply

  • Marsha.

    |

    Wow, great pics! Looks like you had a wonderful time!

    Reply

  • Cuchy

    |

    Another place to my list of “places to be” How beautiful photos, and you look so happy.

    Reply

Leave a comment

Live – Tattered TV -Educator Style – November 2nd 2011

November 2nd at 20.00 Uhr CET, GMT +1 / 11:00am PST/ 2:00pm EST

Join Nathalie Kalbach as she creates a colorful unique fall layout! She will show you how to use all four Tattered Angels Paint Media in different but easy ways using them along with the perfectly fitting Mistables Line by Pink Paislee and some gorgeous Products by Stampendous. You will learn different techniques with the same products and the über-fun and German accent is guaranteed. Come and meet her on Tattered TV – Educator Style.

You can purchase kits at several stores listed here: http://mytatteredangels.com/Tattered-TV-W19.aspx

Here is a supply list in case you wanna play along:

Material:

Tattered Angels Supplies:

Tattered Angels Glimmer Mist:

Cranberry Zing

Riptide

Tattered Angels Glimmer Mist Chalkboard:

Charcoal

Tatttered Angels Glimmer Glam:

Organic Garden

Espresso Bean

Tattered Angels Glimmer Glaze:

Sea Kelp


Pink Paislee Supplies:

Mistables 12 x 12 Paper Pack 00511

Mistables Chipboard Alphabet 00517

Mistables Scallop Ribbons 00513

Mistables Journal Tags 00512


Stampendous Supplies:

Jumbo Peony Stamp

Treasures Glitter Kit

Jumbo Perfectly Clear Handle


Extra Supplies:

Crafting Mat (e.g., Tattered Angels)

Paper towels

Heating gun

Scissors

Cut‘n Dry Foam by Ranger or just Foam

Fan Brush small

Double Sided Tape and 3D Foam Squares

Pencil

White Signo Pen

Comments (1)

Leave a comment

Thank you – Danke – Card

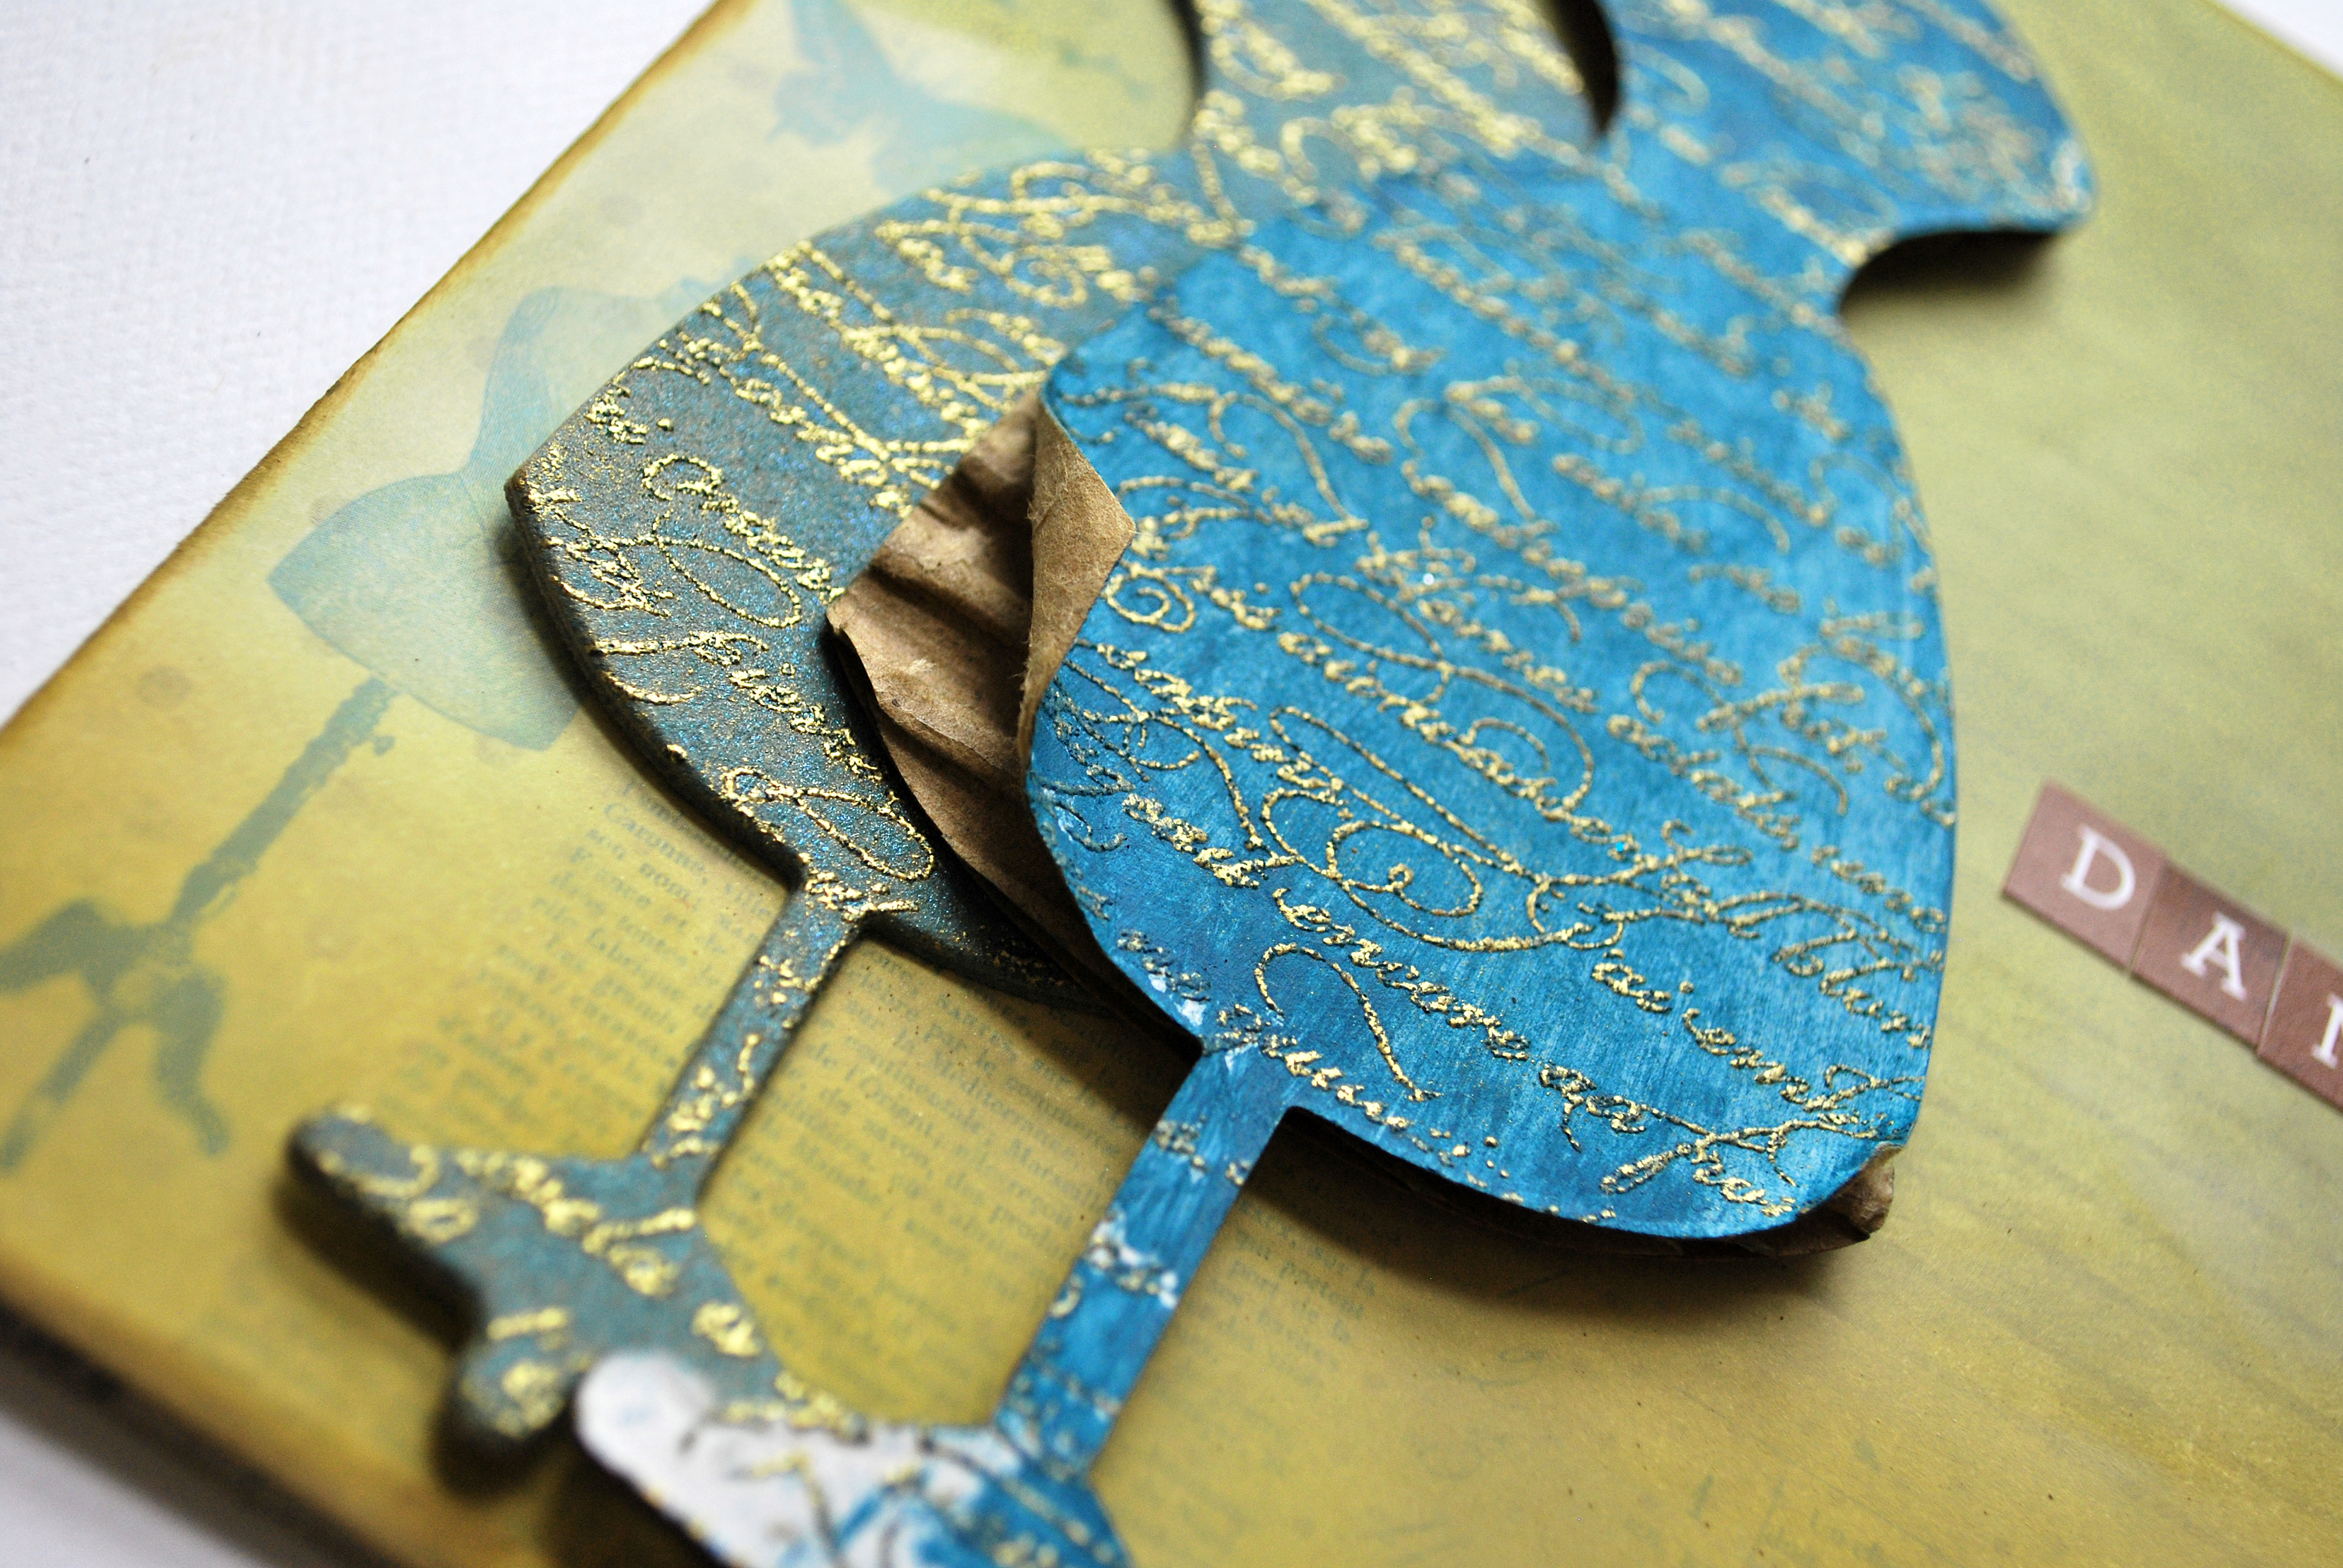
A card for a friend saying thank you for something special :)

Eine Karte für eine Freundin, die etwas Besonders für mich getan hat :)

The background paper by Pink Paislee was painted with Pan Pastels. The Basically Bare Dressforms were embossed with golden Embossing Powder and the green one was sprayed with Glimmer Mist- while I attached thinned down teal colored acrylic paint to the second one

Supplies: Pink Paislee Paper, Basically Bare Dressforms, Ranger Golden Embossing Powder, Golden Acrylic Paint, Tattered Angels Glimmer Mist, Rose Moka Sticker Letters.

Thanks for coming by today :)

Danke fürs Vorbeischauen heute :)

Products used:


Comments (4)

  • Beate

    |

    Eine wunderschöne Karte um Danke zu sagen. Der “aufgeklappten” Rocksaum ist das Tüpfelchen auf dem “i” …
    LG Beate

    Reply

  • Jan Hennings

    |

    Great card and these BB dress forms are one of my favorites!

    Reply

  • Sue Clarke

    |

    Love how you flipped the edge of the dress up!
    It makes it flow. Now maybe you can make yourself a paper dress just like it;-)

    Reply

  • Sandra Schwarz

    |

    Die sieht super aus, ich mag diese Kleiderpuppen total gern.
    LG samsch

    Reply

Leave a comment

Homedecor Canvas

Lately I have been playing on bigger Canvases – love it – giving me so much more room to play with texture…only…where to put it- LOL. The Canvas was part of an article I wrote about the Canvas Corp. Products in the Fall ScrapArtZine.

In der letzten Zeit hatte ich sehr viel Freude mit größeren Leinwänden zu spielen – ich liebe es-  es gibt mir so viel mehr Raum mich mit Textur auszutoben…nur…wo passt das noch hin – LOL. Die Leinwand ist Teil eines Artikels über die Canvas Corp Produkte.

For the background I used different kinds of coarse paint media- like gesso with sand and speckeling paste. I sprayed the background with the Limited Fall Edition Glimmer Mist by Tattered Angels.

Those awesome canvas and bulap banner pieces by Canvas Corp are so fun to play with either as Homedecor times or for an album. I used a Pink Paislee Mistable Screen on top of the canvas banners. The Letters are from Tattered Angels.

For the flower I used some yummie Prima Lace and in the middle- hard to see I placed a self made denim brad. So beautiful how all those products work together :)

 
Products used:

Comments (4)

  • Michaela

    |

    dieser Canvas gefällt mir total gut. Schon wieder eine so tolle Inspiration

    Reply

  • Jan Hennings

    |

    gorgeous and love the look of the darker cavas and flower in the center :)

    Reply

  • Sue Clarke

    |

    I too love the look of texture on the canvas but I don’t have tons of space to hang them up. I recently started to put them in the windows. I am still getting compliments on the movie theater canvas that you made for me!

    Reply

Leave a comment

Rumor has it

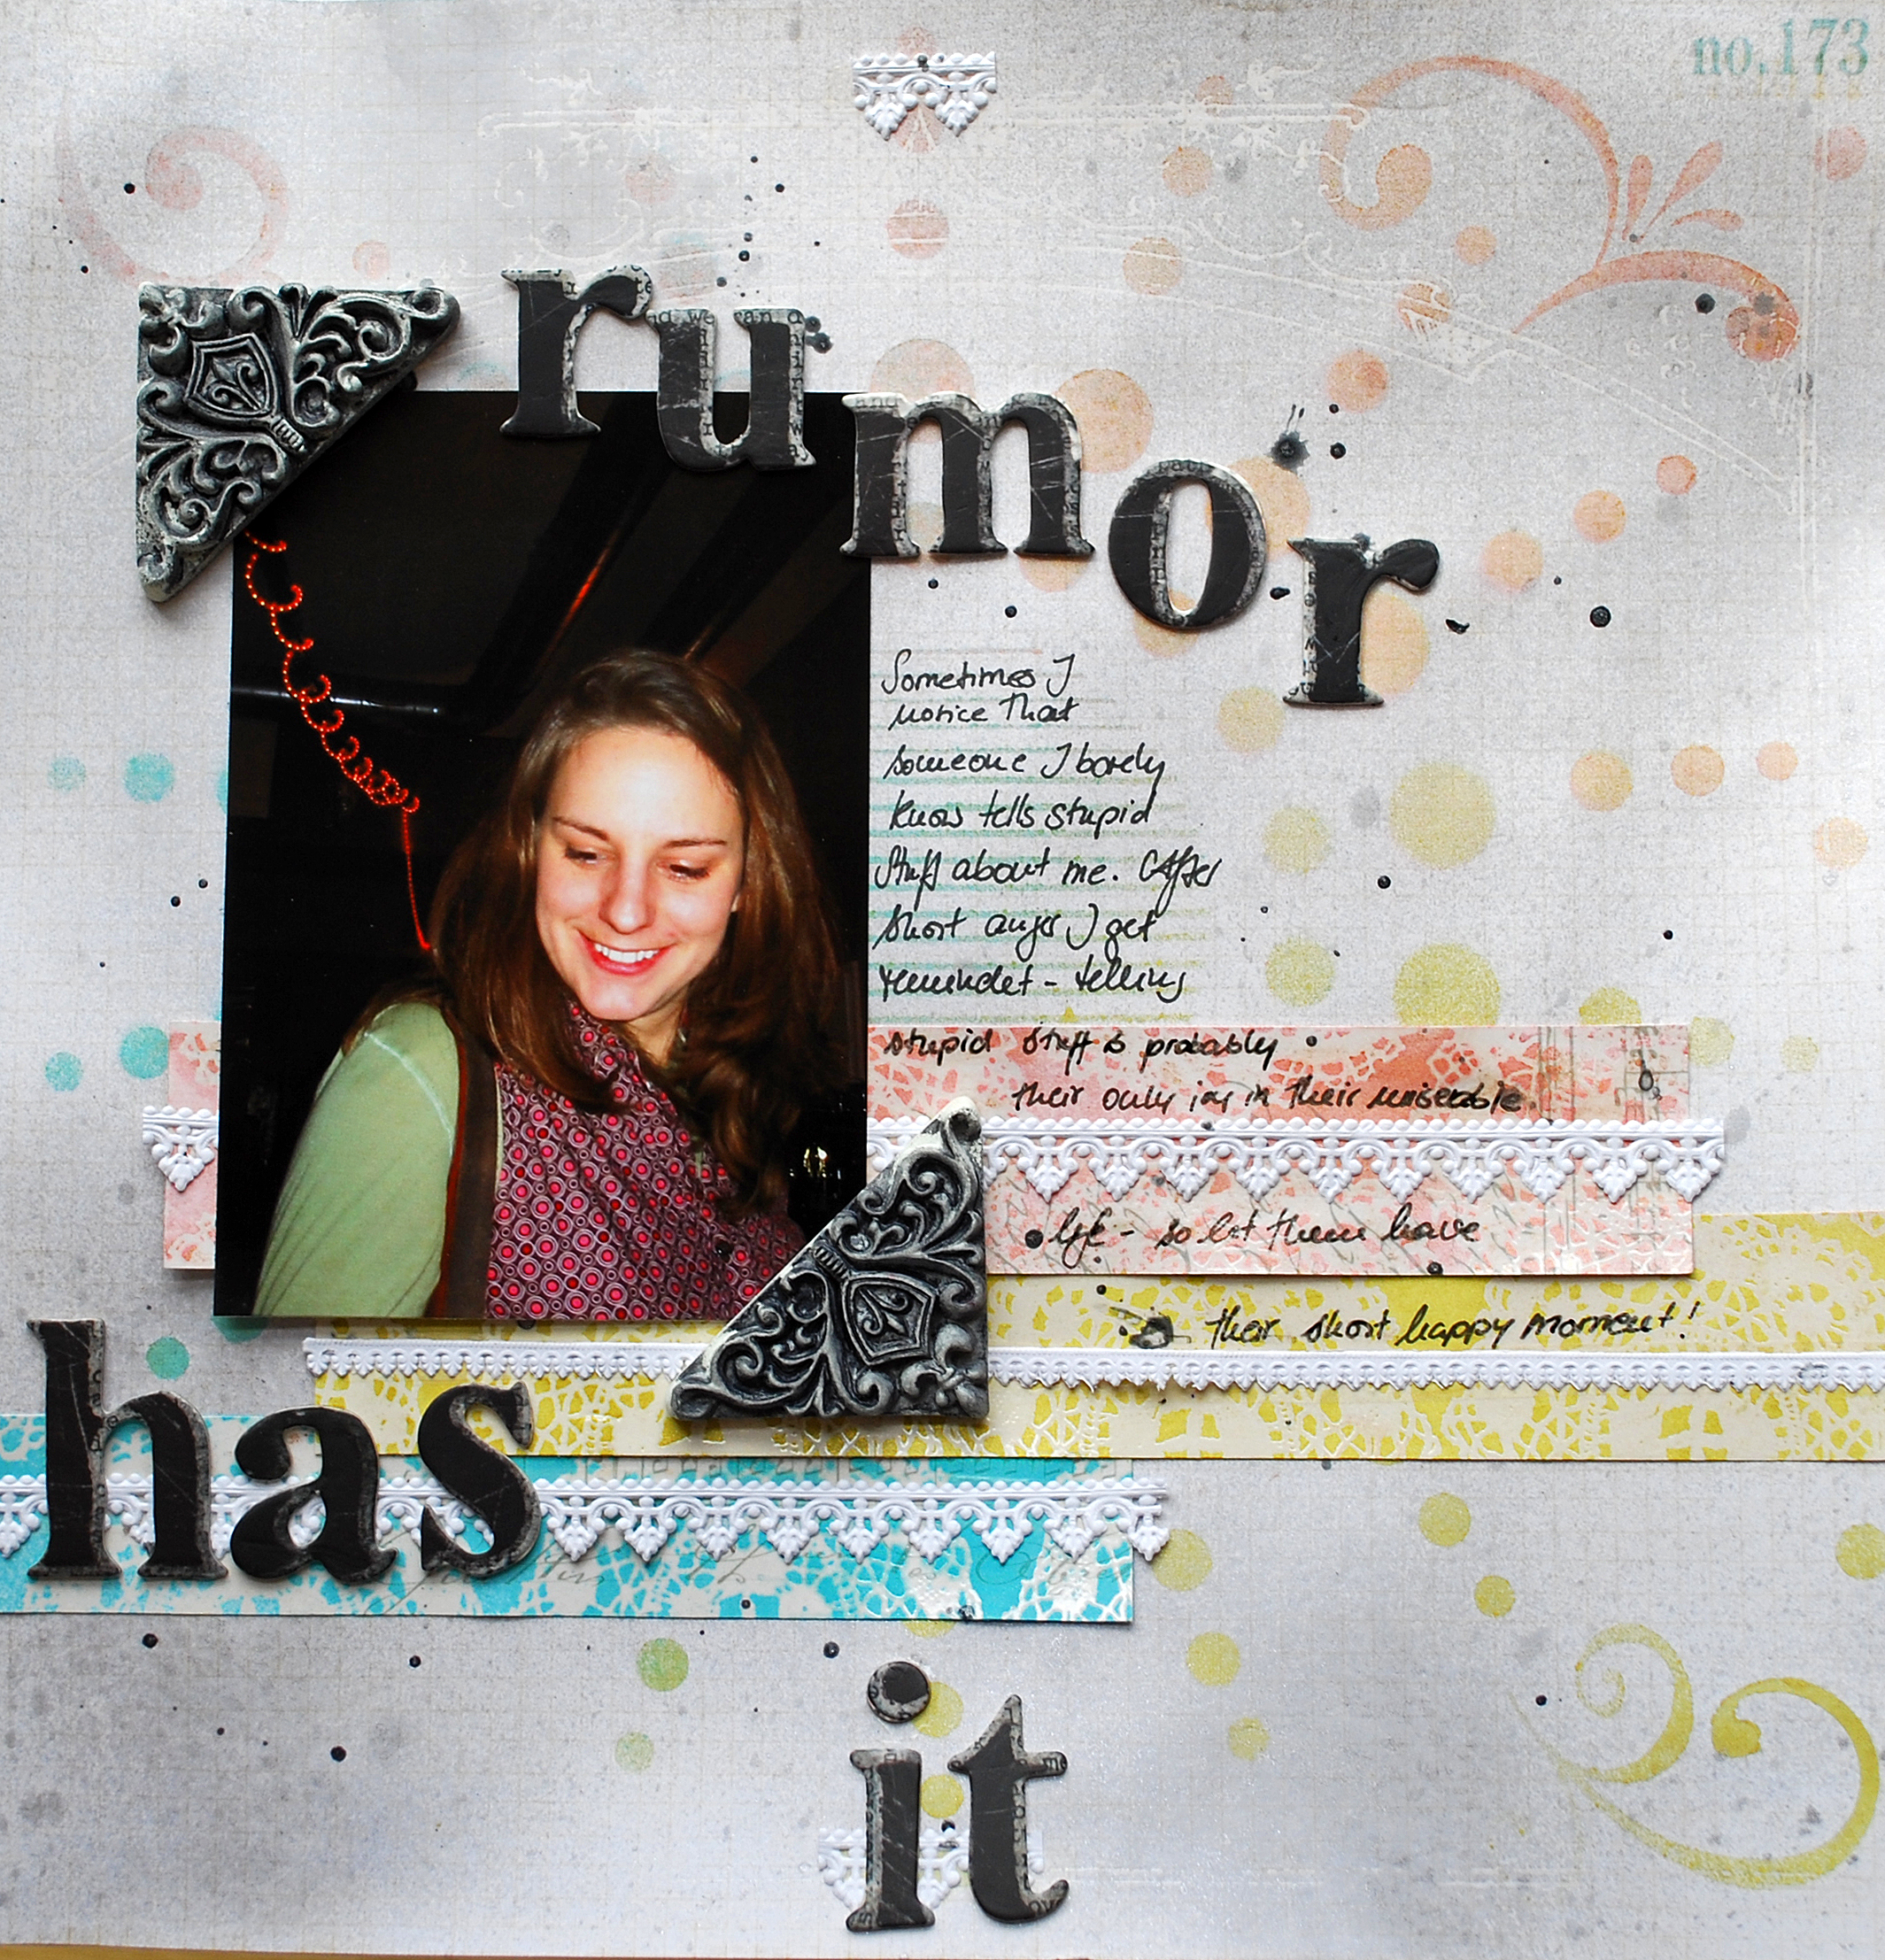
This title is actually from a song by Adele- which I love really a lot. The song also speaks to me :) The layout was published in the Fall ScrapArtZine.

Dieser Titel ist entliehen von einem Song von Adele – welchen ich wirklich sehr mag. Der Song spricht mich einfach an :) Das Layout war zu sehen in der letzten ScrapArtZine.


Journaling: Sometimes I notice that someone I barely know tells stupid stuff about me. After short anger I get reminded – telling stupid stuff is probably their only joy in their miserable life – so let them have their short happy moment!

Material: Pink Paislee Paper, Crafters Workshop Stencil, Tattered Angels Glimmer Mist, Glimmer Glaze and Chalkboard, German Scraps, Scrapbook Adhesives by 3L, Prima Marketing Letters,


Comments (4)

  • Cuchy

    |

    So true! How sweet your soft colors.

    Reply

  • Sue Clarke

    |

    Love that song as well. Great title and the journaling is serious on such a sweet page with a beautiful photo of yourself.

    Reply

  • france papillon

    |

    totally agree with the message on your page. I often find comfort in the question why it hurst me? that’s all it take to get over it! lol and such a strong message on such a sweet page! love the corners of the picture and that background is yummi!

    Reply

Leave a comment

Everything you can Imagine…

is real

(this canvas is part of the Über*Media PanPastel Workshop)

Have an amazing day :)

Comments (4)

  • marsha.

    |

    Wow, it’s awesome!!!

    Reply

  • Sue Clarke

    |

    I LOVE this LO and the saying as well!
    I think that I have that stencil at home as well…is it a TCW one Nat?

    Reply

  • Tina

    |

    Like the message and the colours. :)

    Reply

  • Tanja

    |

    Wow, was für eine Farbenpracht! LG Tanja

    Reply

Leave a comment

Don’t Mess With Me

just saying ;)

(part of the Über*Media – PanPastel Workshop)

Have a gorgeous day :)

Comments (4)

  • Tina

    |

    This picture of you is just so… cool!

    Reply

  • Kim S

    |

    Tee hee – what a fun page, and I love that picture

    Reply

  • Sue Clarke

    |

    Love it Nat!!!
    When I first read the title of this blog post I thought you were going to say that someone had “ripped off” another one of your original projects…but this was more fun! Have a great day:-)

    Reply

Leave a comment

Acrylic Canvas Flower Tutorial

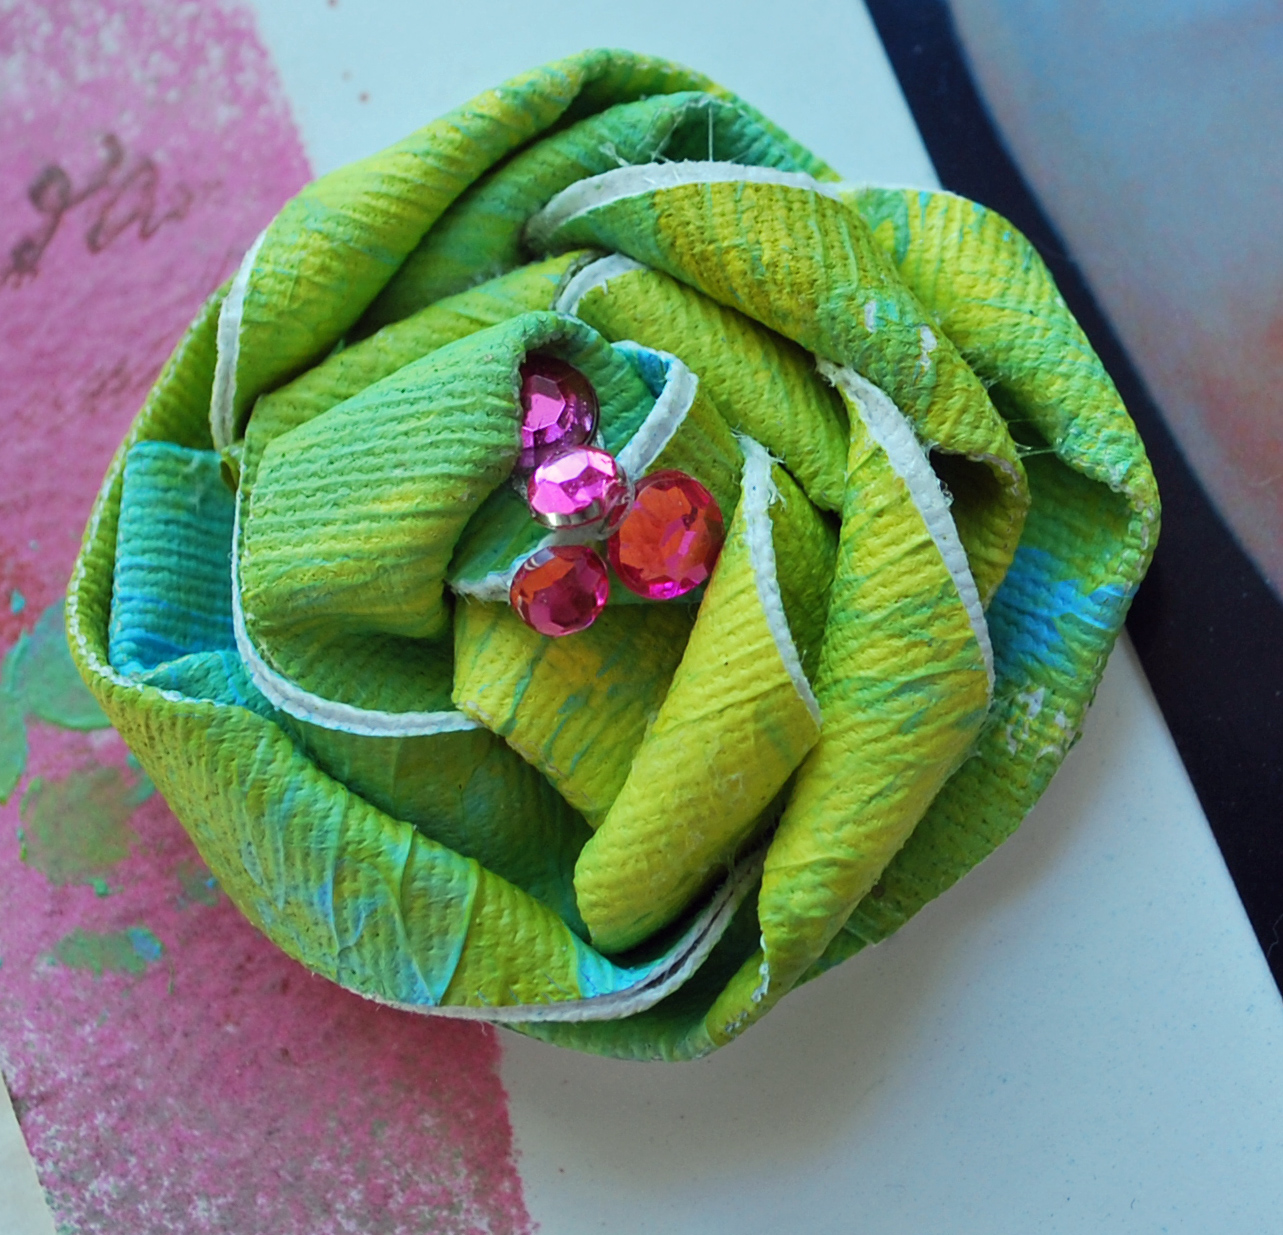
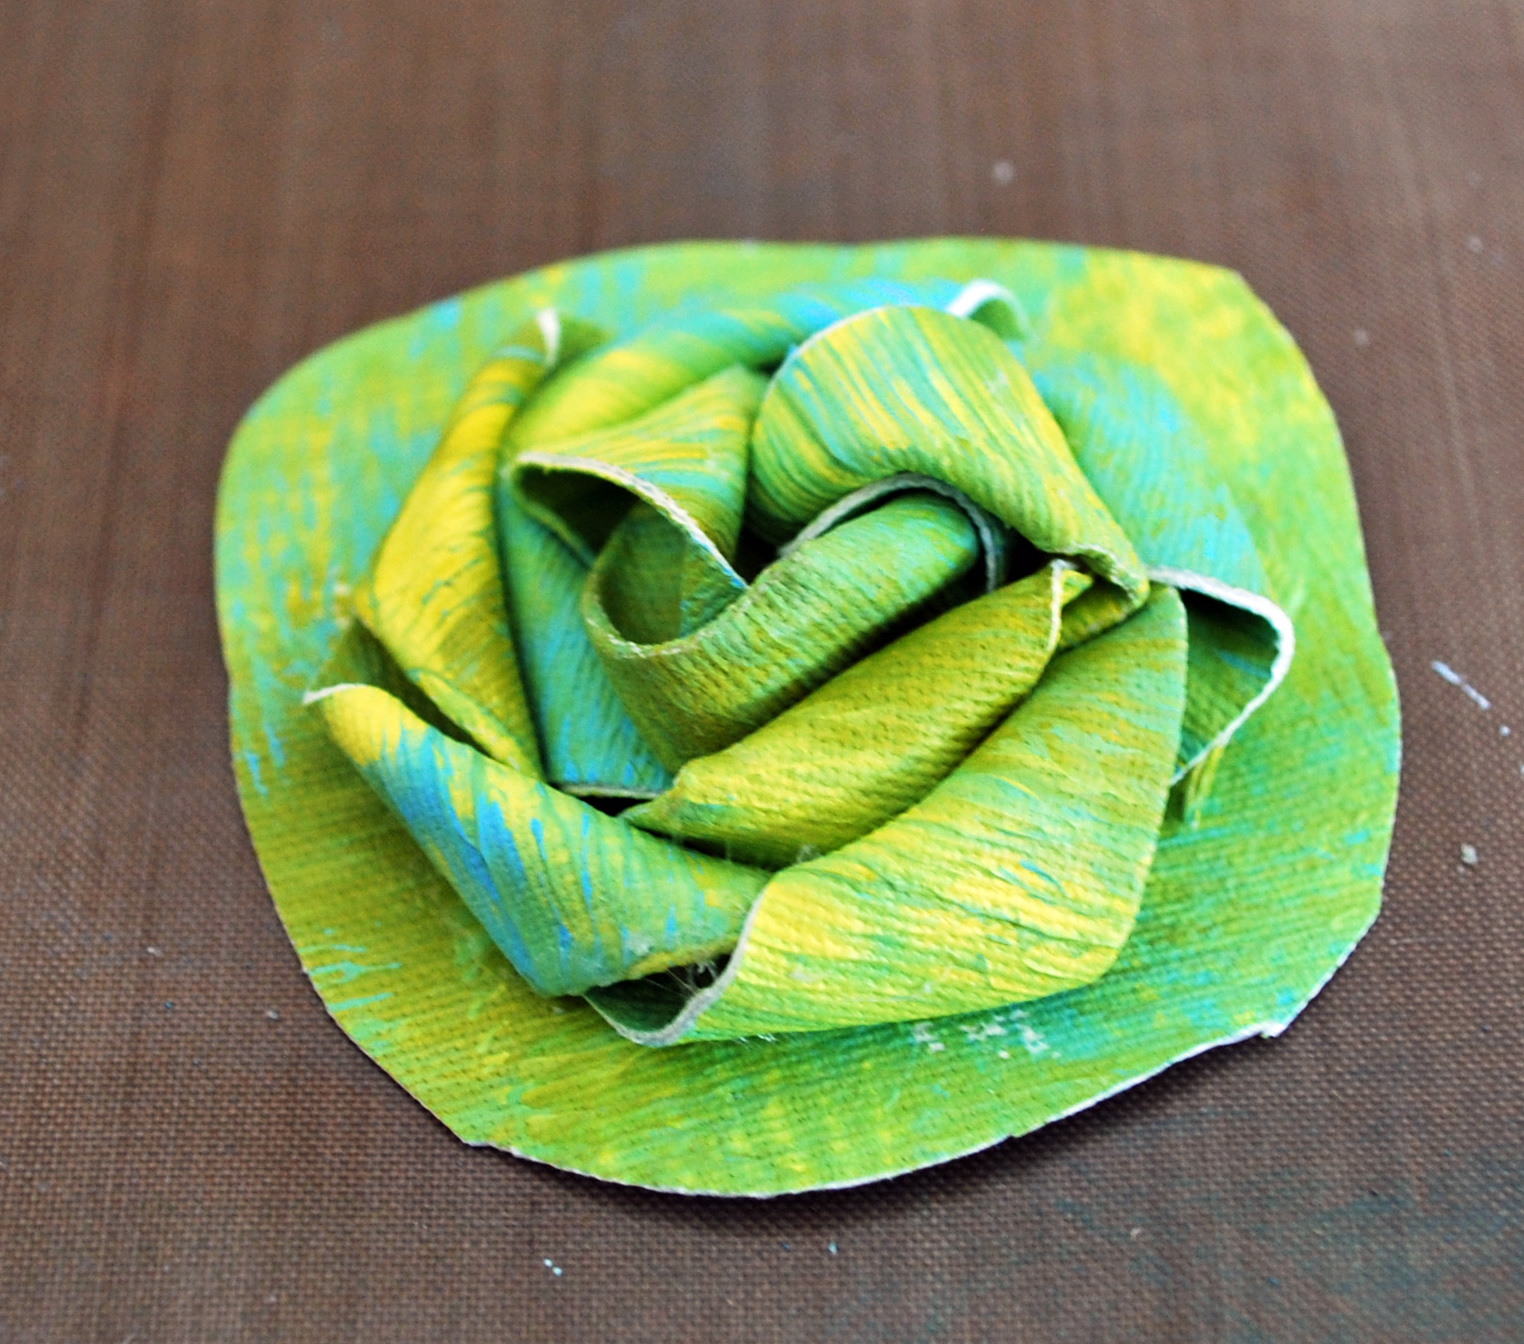
In one of my Layout-Workshops from last year I taught how to create those Acrylic Canvas Flowers and I thought I should share with you :)

In einem meiner Layout- Workshops vom letzten Jahr habe ich gezeigt, wie man diese Acryl-Farben-Leinwand-Blumen macht und ich dachte, ich zeig Euch das mal hier :)

Take a Claudine Hellmuht canvas sheet and put several drops of 2-3 different acrylic paints on it – drops’ size about a pea

Take a brayer and roll the colors out – mixing them – this gives the surface also a nice texture

Let dry- it may crinkle and roll together- that is fine- don’t worry too much about this.

After the Canvas Sheet dried cut out three circles – 2 smaller ones, one bigger one . Also cut approximately 6 stripes each 3 cm / 1.2 inch wide. Peel off the protection backing of the stripes, fold the stripes in the middle lenthwise and stick together. You now have a thin stripe with painting on each side.

Glue the end of one stripe to the middle of one of the cut out canvas circles. Press down hard and then start twisting the canvas stripe in a circle around the center froming a nice flower. Use the glue here and there to make it stick. Cut off peaking out circle piece on the edge if necessary.

Place some peals and crystals on top and place it the flowers on a layout- voila :)

Products used:


Comments (8)

  • Tesa

    |

    It´s a good idea, I´ll try. Thanks for the tutorial.
    Lo is beautiful, I like very much the background.

    Reply

  • Tina

    |

    Thanks for sharing, paint queen!

    Reply

  • Tanja

    |

    Gefährliches LO! *grins* Gefährlich schön! Find’s klasse, wie du den Holzrahmen eingesetzt hast, – ich hab mich immer gefragt, wie man sowas auf einem LO unterbringen soll…Liebe Grüße…Tanja

    Reply

  • Kim S

    |

    Yup, I definitely need a brayer too, coz I want to do one of these flowers now!

    Reply

  • Denise Morrison

    |

    what a great idea! I love making backgrounds with a brayer. Never thought of this. Going to try it with paper first, :) thanks for sharing Nat.

    Reply

  • willieburgscrapper

    |

    This is fantastic! LOVE how it looks!!! Great way to make the flower totally yours!!! LOVE that photo in the layout as well- too cute!

    Reply

  • jan1219

    |

    aww! What a sweet photo and love the flower and tutorial :)

    Reply

Leave a comment

The Cat is in the box

Do you have a cat? Well- if so you know the Cat in the box thing, right? I actually did a layout about this back in 2007 – hehehe- funny to see that my style is really different there.

Hast Du eine Katze? Falls ja- dann kennst Du die Katze-in-der-Kiste Sache, nicht wahr? Ich habe darüber sogar mal ein Layout in 2007 gemacht – hehehe- witzig zu sehen, wie mein Stil sich verändert hat. 

My Box My Castle – 2007

So having this in mind- I really love the videos by Simon’s Cat – and this one totally cracked me up again- so I’m sharing it with you- have fun :)

Dies im Hinterkopf – ich liebe ja diese Videos von Simon’s Cat – und bei diesem hier habe ich mich scheckig gelacht – ich wollte es Euch nicht vorenthalten – viel Spaß :)

[youtube=https://www.youtube.com/watch?v=EKvNqe8cKU4]

Have a wonderful day :)

Habt einen tollen Tag :)

Comments (6)

  • Tanja

    |

    Sehr lustig!
    Bei uns war es früher sogar die Katze im Joghurtbecher. Unsere Katze hat Joghurt geliebt und ihren gesamten Kopf in den Joghurtbecher gedrückt, um die Reste abzuschlecken.

    LG,

    Tanja

    Reply

    • nathalie-kalbach

      |

      hahaha auch nicht schlecht – wahrscheinlich ist der Kopf dann auch manchmal im Becher hängengeblieben?

      Reply

  • Kim S

    |

    Hahahaha – oh man I miss Niles….not that I don’t miss you, but yo have to admit he looks way cheekier and cuter in a box..tee hee

    Still loving this layout too!!

    Reply

    • nathalie-kalbach

      |

      bwaahahaha- you made me laugh – LOL _ yes he looks way cheekier and cuter in a box ;)

      Reply

  • Sue Clarke

    |

    Funny video…my puppy loves to play in the empty laundry basket.
    Wow…that LO is different from your current style. Always fun to see how our art grows. Have a beautiful day Nat!

    Reply

  • jan1219

    |

    What a sweet LO..love your kitty!

    Reply

Leave a comment