Altered Art

Altered Art with eMOTions by Cuchy

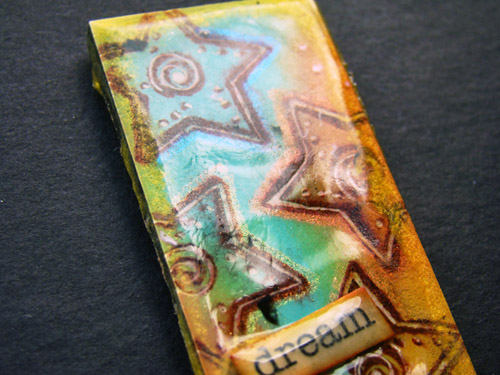
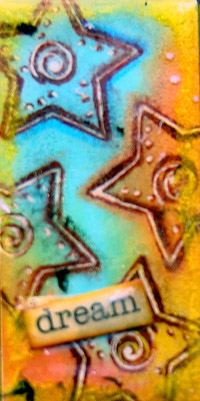
Wow – Cuchy did it again and wowed me – she send me this amazing pendant using my star stamp – my goodness I love this so much!

Wow- Cuchy hats schon wieder getan und mich umgehen – sie hat mir diesen genialen Anhänger kreiert mit meinem Stern-Stempel geschickt – mannomann – ich liebe diesen Anhänger!

*Dream Pendant by Cuchy*

Here is what she wrote:

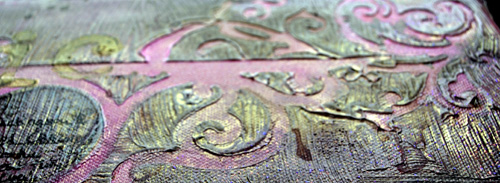
“It’s a piece of stampbord that I inked with distress inks. Then I stamped one of your stamps and scratched some of the accents. I then painted the stars edges with cosmic shimmer and gave the whole piece a coat of clear and brightz UTEE.

Das Stempelset, das sie benutzt hat – the stampset she used Rêves

Thanks for sharing Cuchy- you are an amazing artist!

Danke fürs Zeigen Cuchy – Du bist eine wahre Künstlerin!

—-

I’m also pretty stoked that ScrapArtZine has a review of my collection  in their recent issue – Summer 2010 . Majbritt created some beautiful and stunning layouts!

Ich bin zudem noch total happy, dass die ScrapArtZine einen Artikel über meine Kollektion in ihrer letzten Sommerausgabe 2010 veröffentlicht hat.Wunderschöne Layouts hat MajBritt da gezaubert!

Have a gorgeous day!

Euch einen tollen Tag!

  • Maj-Britt - maybe

    |

    Danke Süsse, dass ich mit Deinen Papieren und Folien werkeln durfte. Ich liebe sie ;-)
    … und jetzt habe ich auch die Stempel, also wird es wohl bald wieder was auf die Augen geben … *ggg*

    Reply

  • Heidi Kelley

    |

    ooh la la, that pendant is marvelous! Congrats on the review Nat, where can I get myself some of these papers??!! Bring it to the US baby!

    Reply

  • Kim Sonksen

    |

    That is indeed one AMAZING pendant and WOOT WOOT on the review

    Reply

  • Sue Clarkes

    |

    Sweet creation Cuchy!
    More good press for your beautiful line of papers.

    Reply

  • cuchy

    |

    Thanks Nat.
    It’s a little piece but funny to create.
    Congrats on that new article about your collection. Beautiful Layouts

    Reply

Leave a comment

Inspirational Fridge Magnets *Tattered Angels*

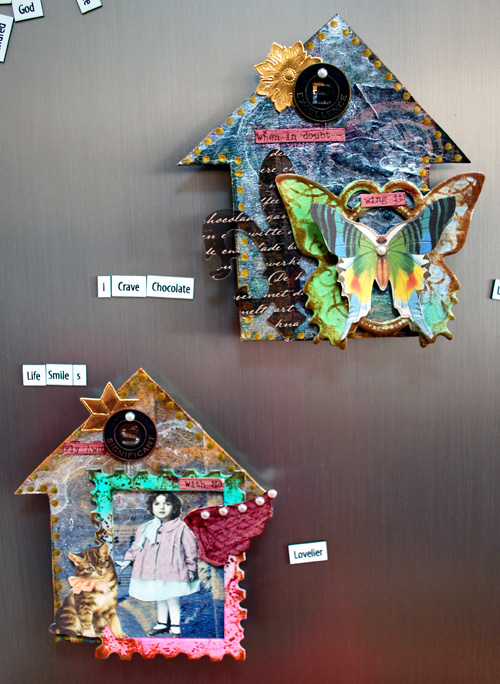
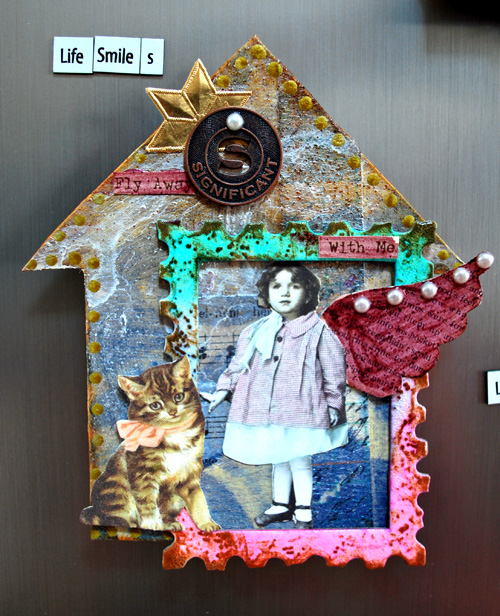
In May I was featured on the Tattered Angels Main Page with a Project of the Month and I thought I should share the tutorial with your here too :)

*Inspirational Fridge Magnets*

Supplies:
Tattered Angels:
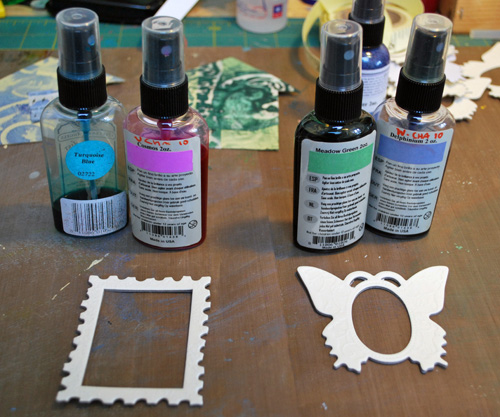
Glimmer Mist: Turquoise Blue, Cosmos, Meadow Green, Delphineum, Pearl
Chalkboard: Evergreen, Cornflower
Glimmer Glam: Golden Goddess, Chandelier, Bordeaux
Regal Glimmer Glass
Framed Fonts Butterfly and Traveler
Glimmer Screens: Elegant Emblems and Fanciful Screens

Other:
Cardboard
Crafty Secrets Fairy Sheet
7Gypsies Paper Tape
Ranger’s Crackle Paint, Sepia Archival Ink Pad and Glossy Accents
Tim Holtz Tokens
German Borders
Posca Marker
SCRAPBOOK ADHESIVES by 3L™

Magnets
half pearls- unknown
Acrylic Paint
vintage music sheets

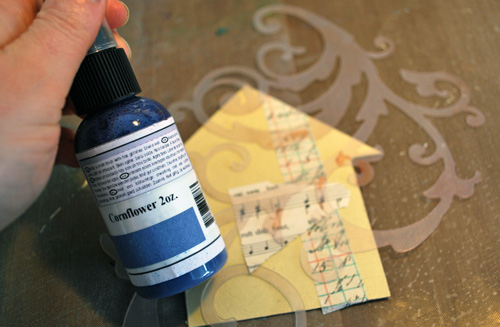
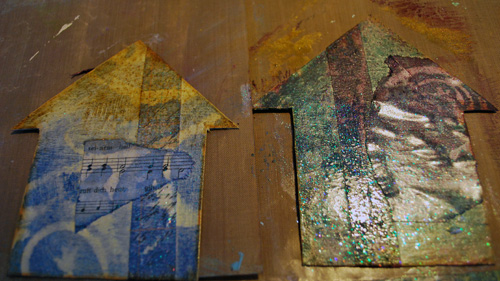
Cut out a house shape out of Cardboard. Paint with acrylic paint.

add some stripes of paper and/or tissue paper

Place a stencil over the house and start spraying with chalkboard. Set aside to dry

Take a Frame from the Frame Fonts and spray with two different Glimmer Mist Colors

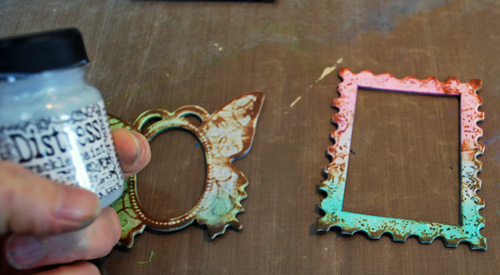
go over the frame with an archival ink pad and paint with clear crackle paint. Set aside to dry.

Paint Houses with Glimmer Glam which is also going to work as a sealer. You can use two different color – one for the roof and one for the bottom of the house.

Now take the Pearl Glimmer Mist and spray over the House – heat it up – don’t burn it with the heating gun and move the liquid around with the heating gun. Once everything is dry, spray it again and repeat. Do several times until you get a mother-of-pearl like look.

Do this until you are satisfied with the look

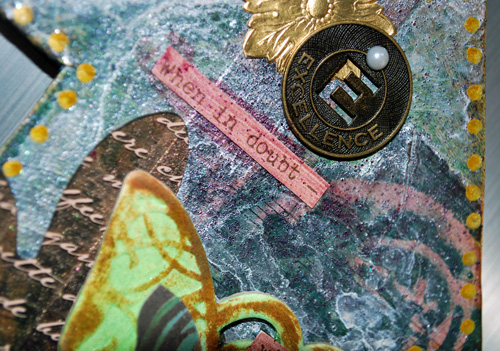
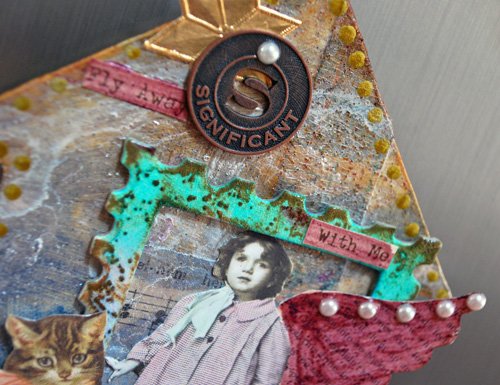
You can now dress up your houses – doodle with markers around the edges, add scraps and fairies, some nice inspirational sentences and the frames.

Attach strong magnet to the back – and take a walk to the fridge ;)

And there you go – a nice little present or to keep for yourself – an inspirational Fridge magnet.

  • charlotte ravn

    |

    Wow they are fantastic Nat! Thank you so much for the tutorial! i’m going to try this one day!
    Hugs!

    Reply

  • jenxo

    |

    these are just stunning, love seeing how you layered everything. and the pearl looks wonderful over the top…

    Reply

  • milkcan

    |

    Maybe the cutest magnets ever! Love this idea! I’m going to have to make some!

    Reply

  • Cat

    |

    These are gorgeous Nat!! LOVe them!

    Reply

  • Heidi

    |

    Love, love, love!!!

    Reply

  • Brigitte

    |

    great pieces. hmmm, i may just give this a try

    Reply

  • Kim Sonksen

    |

    I am loving it – what a wicked way to get such awesome texture

    Reply

  • Jamie Dougherty

    |

    Nat these are so awesome!!! Beautiful pieces :) Hugs Jamie

    Reply

  • Sue Clarke

    |

    Wonderful!!! This also helps me to see how I can use TA products better than I have been (just spraying tons of the glimmer mist all over). tee hee

    Reply

  • christiane

    |

    bummer, my fridge isn’t nagnetic!!
    love ’em!!! :Dm

    Reply

  • sylvia

    |

    this is really great! i’m in love with fridge magnets. i also love all the layers you use. very inspiring!!

    Reply

Leave a comment

DT Work: Tattered Angels and Pink Paislee Part I

This month Tattered Angels teamed up with Pink Paislee and I so love their products! Beautiful!

Diesen Monat haben sich Tattered Angels und Pink Paislee zusammengetan und die Produkte sind wirklich wunderschön!

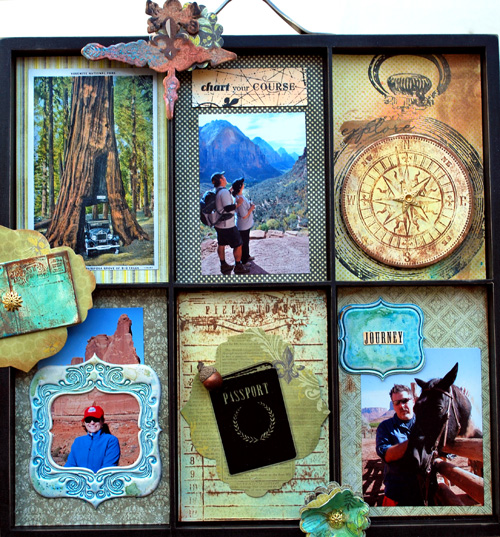
I created this Phototray for our friends Bill and Karen – I hope they like it :)

Ich habe diesen Setzkasten für unsere Freunde Bill und Karen kreiert und ich hoffe, sie mögen es :)

*Phototray*

I used the wonderful Pink Paislee Queen Bee collection and lot’s of yumme Tattered Angels Glimmer Mist, Glimmer Glam, Glimmer Glaze, Glimmer Chalkbord, Glimmer Glass and ChipTiles, Stamps etc.

Have a gorgeous day!

  • Karen

    |

    WE LOVE IT! Can’t wait to hold it in my hands! We are so proud of you and your work. With love from two of your biggest fans! Bill and Karen

    Reply

  • Cat

    |

    This is beautiful Nat! I’m sure your friends will love it!

    Reply

  • Sue Clarke

    |

    When will I be able to find glimmer/chalk(?) in the stores?
    Beautiful project which will make a wonderful gift!

    Reply

  • Kim Sonksen

    |

    They are going to LOVE it. And what awesome Mfct share TA have – Pink Paislee is fab and you have done them proud!

    Reply

  • ellen s

    |

    oh this is sooo cool!

    Reply

  • Sandra

    |

    Den mögen sie bestimmt, denn er ist KLASSE :-)

    Reply

  • Brigitte

    |

    it’s wonderful! I love it!

    Reply

  • sylvia

    |

    oh this is so cool, looks great! i LOVE pink paislee!

    Reply

  • christiane

    |

    you can be sure: they’ll love it!! :D

    Reply

Leave a comment

DT Work: Portugal Minialbum *Punky Sprouts*

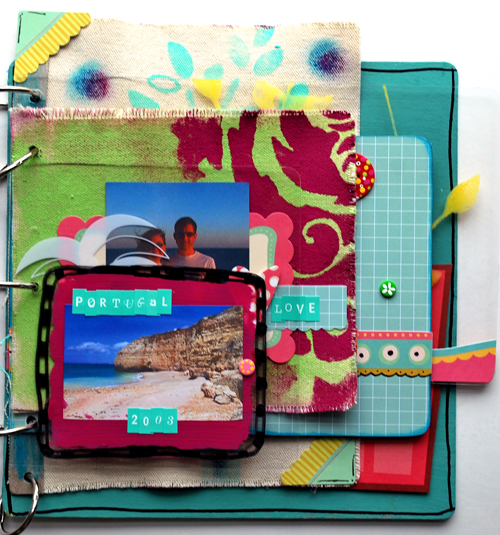
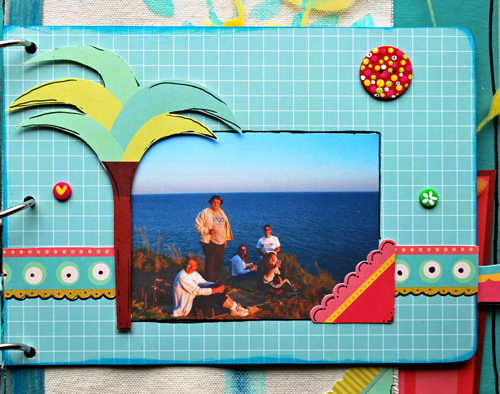
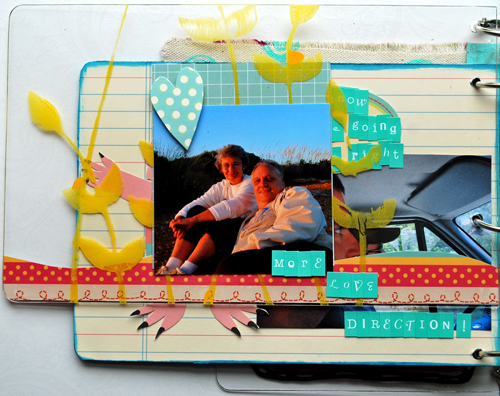
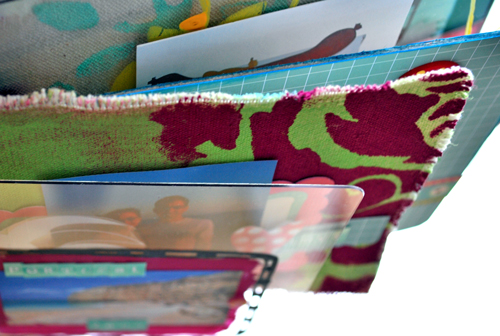
When I got my box with the Punky Sprouts albums I ohhhed and ahhhed – I love them so much. The mixture of acrylic, cardboard and canvas pages is just so devine. My first album I want to show you is the  “Rebel Sprout” and I used some pictures from a fun family trip to Portugal in 2003.

Als ich meine Kiste mit den Punky Sprouts Alben bekam,habe ich mich gar nicht mehr eingekriegt- ich finde die ja so genial. Die Mischung aus Acryl, Graupappe und Leinwandstoff ist einfach so genial. Mein erstes Album, das ich verarbeitet habe, ist das “Rebel Sprout” Album und ich habe einige Bilder von einem witzigen Familienurlaub nach Portugal in 2003 verwendet.

*Portugal 2003*

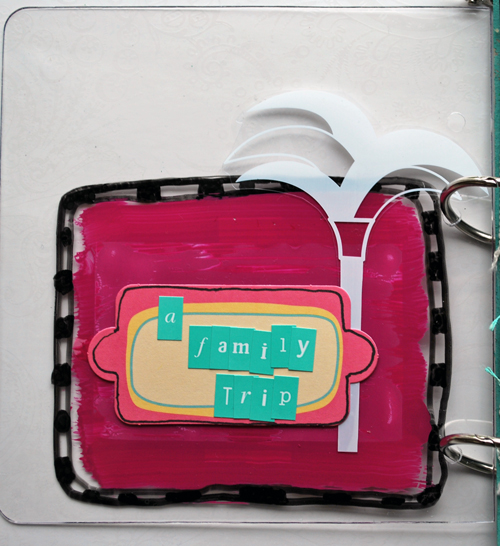
I used the Acrylic Paint to glue the title picture. I doodled around the picture with a marker, and that very same doodling shows on the back page of course.

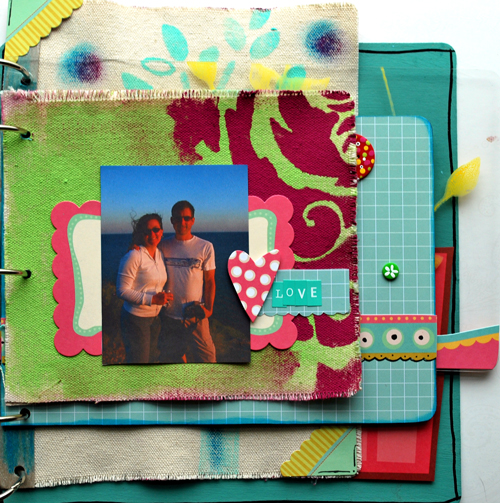
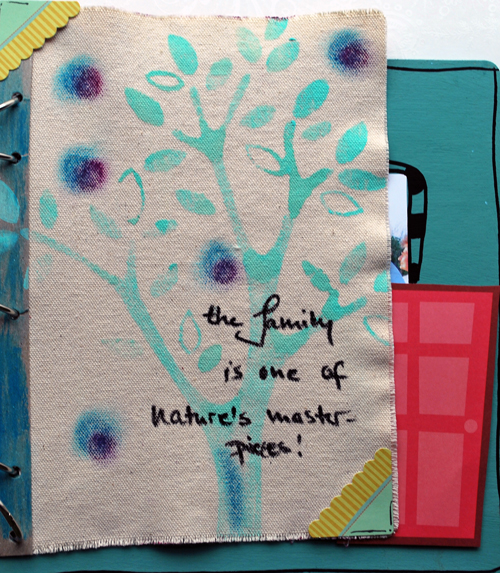
Painted and stenciled with Acrylic Paint over the first Canvas page.

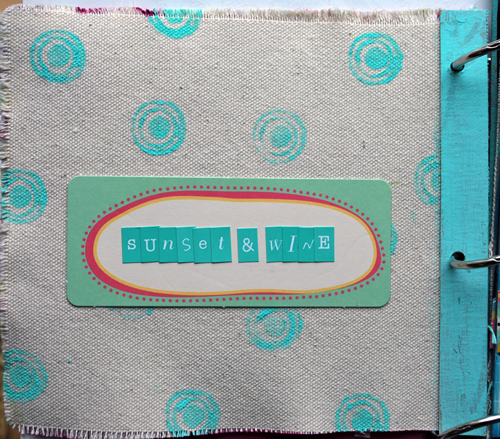
And stamped with Acrylic Paint and a foam stamp on the back side of the canvas page

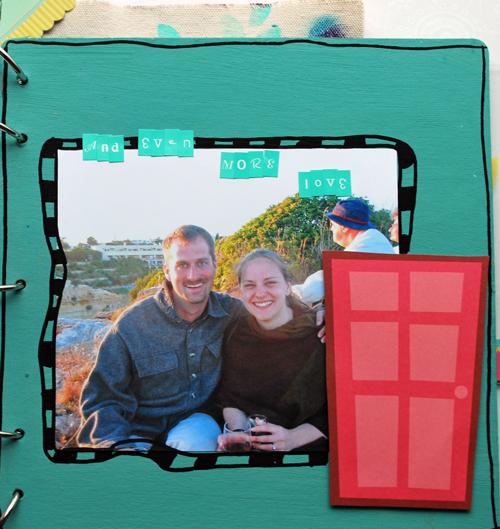
Covered up the cardboard page with the My Little Shoebox paper

Stamped with Acrylic Paint and a Foam Stamp directly onto the acrylic page.

Its called Rebel -Album – right- so you gotta flip the album sometimes too ;)

Painted the last cardboard piece with acrylic paint – love it.

Supplies: Punky Sprouts Rebel Sprout Album, MLS Paper and Mini Alpha Stickers, Eco Green Crafts Acrylic Paints and Ink Pads, Tattered Angels Stencil, Prima Foam Stamps, Fimo Buttons- unknown, SCRAPBOOK ADHESIVES by 3L™ 3D Foam Pads, Crafty Power Tape.

Love all the layers and the different sizes :)

Have a gorgeous day!

Euch einen tollen Tag!

  • christiane

    |

    this is made for you and your style!! soo cool!! :D

    Reply

  • Brooke

    |

    Hallo Nathalie :-) Das Album ist herzallerliebst und ich werde es dir nachmachen. Das steht fest! Darf ich fragen wie du die Löcher machst ? Mit einem Locher oder diesem Ösenstab (keine Ahnung wie es genau heißt,sorry) ?
    LG Brooke

    Reply

  • Sandra

    |

    Wow – herrlich farbenfroh!!!!

    Reply

  • Kim Sonksen

    |

    Now this is wicked! Those albums are made for you and I adore the different materials, techniques and shapes.
    Had to LOL at the Bratwurstbude ;)

    Reply

  • Sue Clarke

    |

    I especially like that t here are different textures to play with when creating. Nice colors for your trip Nat.

    Reply

  • Scrappi

    |

    Ein tolles Album, Nathalie! Da juckt es einem gleich in den Fingern! Fotos hätte ich ja genug hier!
    Schöne Pfingsten und liebe Grüße von Hélène/Scrappi

    Reply

Leave a comment

Imagination Canvas

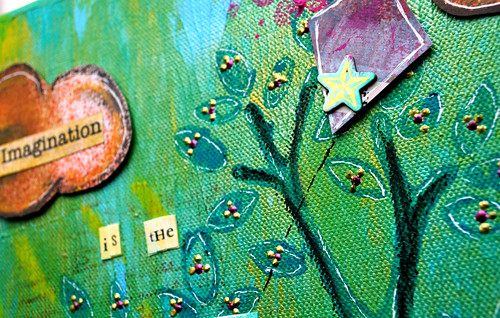
I couldn’t resist to make this canvas for Alice with her amazing and cute little kids :)

Ich konnte nicht widerstehen, diese Leinwand für Alice zu bescrappen – mit ihren süßen Kleenen :)

 *Imagination*

Imagination is the highest Kit one can fly

Supplies:

Canvas, Eco Green Craft Acrylic Paints, Tattered Angels Glimmer Mists, Glimmer Glam, Tattered Angels Chipbaord, Sultane eMOTions Papers by Nat Kalbach, Prima Foam Stamp, Ranger Dabbers, Ranger Liquid Pearls, Oil Pastells, Crackle Medium, Vintage Book Paper, White Signo Pen, SCRAPBOOK ADHESIVES by 3L™

——–

Today over on the Tattered Angels Educators blog,Vicki Chrisman  is featuring an awesome project for Tattered Angels  National Scrapbook MONTH celebration! Click on over to her blog and to the Tattered Angels blog to see what she is up to!


Educators blog: http://mytatteredangels.com/educators/

Vicki Chrisman’s Blog: http://vickichrisman.blogspot.com/

  • Cat

    |

    Love this, and the papers too ;-) I need to make some time to create with my new STASH! :-)

    Reply

  • Marlies

    |

    Aww this is just breathtaking Nat! Congrats on your own line, too! Will there be a way for us Dutchies to order directly from you?

    xxM

    Reply

  • sylvia

    |

    oh it’s lovely Nat!!

    Reply

  • Sue Clarke

    |

    Hey, I recognize that cheery paper! Beautiful creation Nat, your friend will be thrilled I’m sure.

    Reply

  • Kerstin

    |

    Ich mag diese bunten Spielereien! Die Kleenen werden’s wohl lieben. :)

    Reply

  • katja

    |

    mann ist das cool!!! gefällt mir total … bitte mach einen workshop mit mir, das ist ja so toll :-)

    Reply

Leave a comment

National Scrapbook Month – Tattered Angels – my day

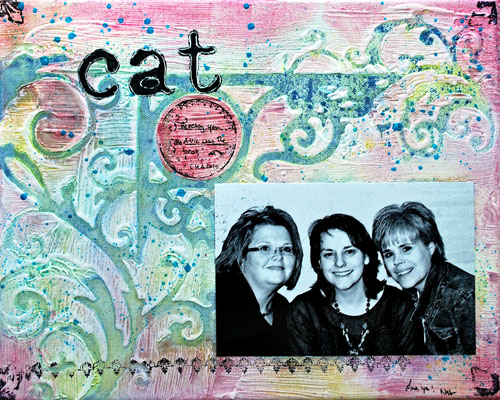
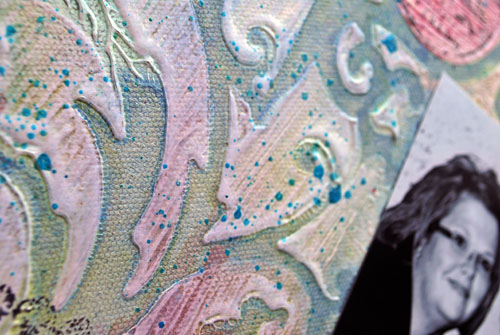
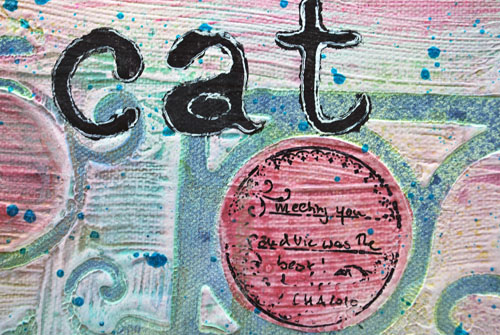
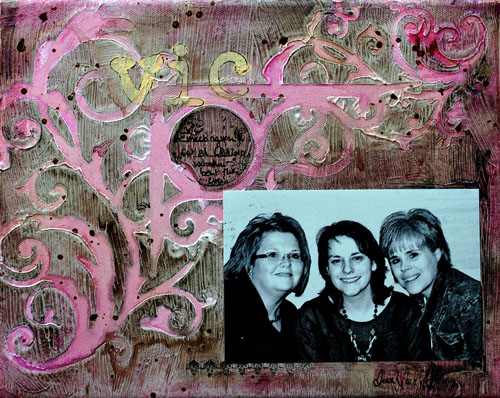
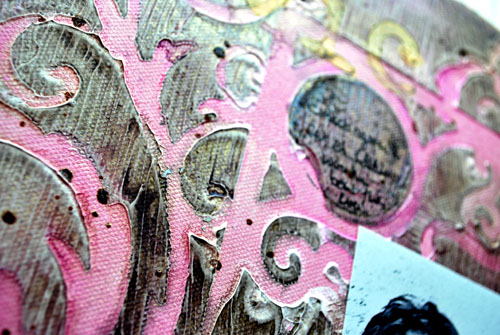
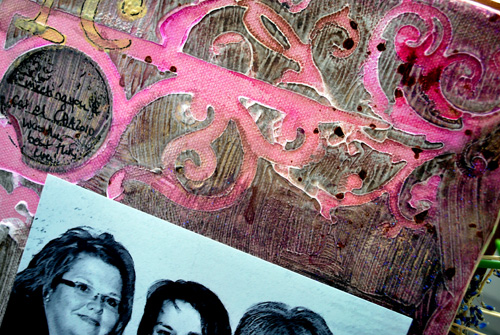
Today I  is my day on the Tattered Angels Educator Blog to share a special tutorial with you and I decided to show you how to make those Gesso Canvases I created for my friends Cat and Vic :)

Heute ist mein Tag Euch auf dem Tattered Angels Educator Blog ein spezielles Tutorial zu zeigen und ich habe beschlossen, Euch zu zeigen, wie man diese Gesso Leinwände, die ich für meine Freunde Cat und Vic gemacht habe, kreieren kann :)

Cat’s Canvas

Vic’s Canvas

Check out the Tattered Angels’ Educator blog to see how to create a Gesso Canvas.

Hüpft mal rüber auf den Tattered Angels’ Educator Blog um zu sehen, wie man so eine Gesso Leinwand kreiert.

  • christiane

    |

    ahhh, gesso!! thank you so much for the reminder!!
    love what you did here!! :D

    Reply

  • Cat

    |

    It looks so much prettier in person, I JUST LOVE it, THANK you Nat! Hope you made it home safe and sound!

    Reply

  • sylvia

    |

    great texture indeed, i should really get my hands messy with gesso again. thanks for your inspiration!!

    Reply

  • Sue Clarke

    |

    Love the texture of those!

    Reply

  • Hélène

    |

    Hallo Nathalie, ich habe mir soeben das Video zum Frühstück angeguckt. Tolle Ideen und geniale Umsetzung!
    LG Hélène/Scrappi

    Reply

Leave a comment

DT Work: From the Heart – ShadowBox

 I told you already that my sweet and supertalented friend Vicki Chrisman had the idea for this shadow box Die Cut which was then produced by AccuCut

Ich habe Euch ja schon erzählt, dass meine wunderbare und talentierte Freundin Vicki Chrisman die Idee für diesen Die Cut für eine Shadow Box hatte, die nun von AccuCut hergestellt wird.

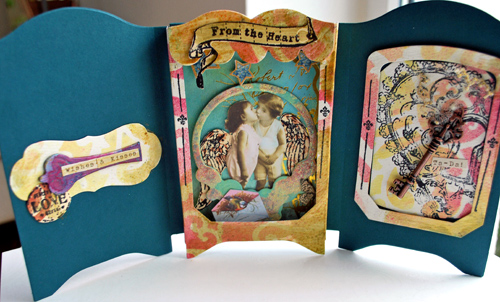
When I received another of this beauties in my Tattered Angels Designteambox I was really happy and here is my second Shadow Box :)

Als ich dann noch eine weitere dieser Teilchen in meiner Tattered Angels Designteamkiste fand, habe ich mich riesig gefreut und hier ist also meine zweite Shadow Box :)

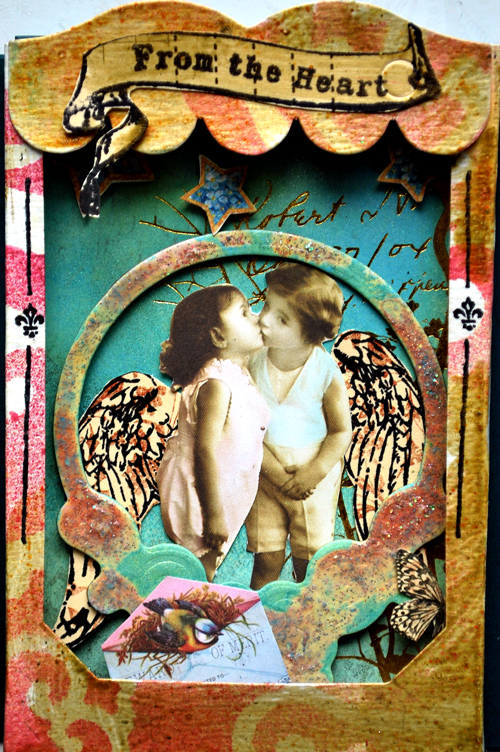
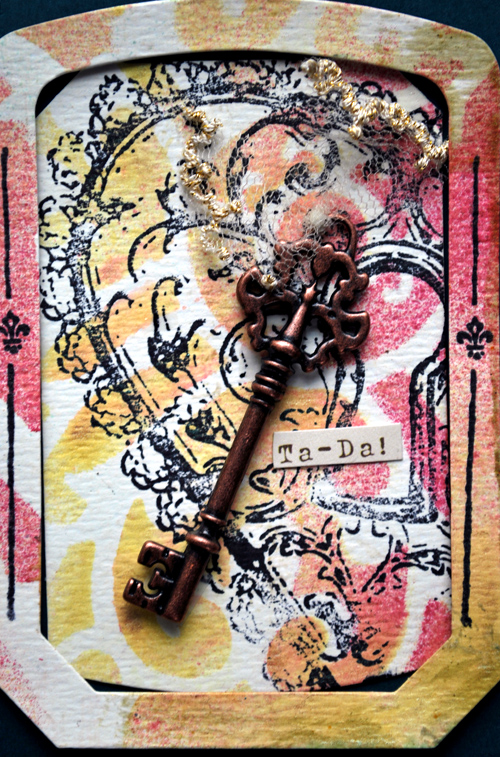
I used the Fanciful Screens over the frames and sprayed with Glimmer Mist over. I also used some Golden Glimmer Glam for a finish.

I used one of the wonderful Heidi Swapp Rockin’ Renaissance Costum Cut Outs and sprayed with Glimmer Mist and Glimmer Chalkboard. On the Nature Glimmer Chips I used some Glimmer Glam and Glimmer Mist as well. I used the stamps from the amazing Timeless Romance Stamp Set for the banner and the borders of the frame.

You see I used the heart stamp of the Timeless Romance Stampset and put one of the Copper Antique Keys on top.

——–

Today over on the Tattered Angels Educators blog, Tammy is featuring an awesome project for Tattered Angels  National Scrapbook MONTH celebration! Click on over to her blog and to the Tattered Angels blog to see what she is up to!


Educators blog: http://mytatteredangels.com/educators/

Tammy’s Blog: http://tammytutterow.com/

  • Sue

    |

    This is so pretty!

    Reply

  • christiane

    |

    love what you did with the shadow-box!! :D

    Reply

  • Tiffany

    |

    I completely agree that the middle image could be an art piece all by itself!

    Reply

  • Vicki Chrisman

    |

    OH NAT!!! This is so totally awesome! Thank you so so much for for creating such a beautiful piece with the die Nat!

    Reply

  • Kim Sonksen

    |

    Wow – what an amazing shadow box. There are s many wonderful techniques to discover

    Reply

  • Andrea MacDonald

    |

    This is absolutely stunning!

    Reply

  • TraceyT

    |

    This is just beautiful!

    Reply

  • Jen Davis

    |

    Oh my gosh! This is just STUNNING! My lss owner was debating about if she should get this die and now I know she HAS to! =) Beautiful Nat!

    Reply

  • Erika Taylor

    |

    This is a stunning piece. The colors are so vibrant and the imaging and embellishments are a perfect fit.

    Reply

  • Kerstin

    |

    Da wird einem ganz warm um’s Herz. ;)

    Reply

  • Marlene

    |

    This is so artsy beautiful!

    Reply

  • finnabair

    |

    great project – soo cute and colourful! and the key..wow!

    Reply

  • Sue Clarke

    |

    Just heavenly Nat!

    Reply

  • Hagit

    |

    Beautiful!! The middle panel can really be a picture on its own – it’s so pretty!

    Reply

Leave a comment

Life is a great big canvas…

and you should throw all the glimmer on it you can” – Nat Kalbach ;)

This is a post I had prepared for the Tattered Angels Educator Blog.

Dies ist ein Post, den ich für den Tattered Angels Educator Blog geschrieben habe.

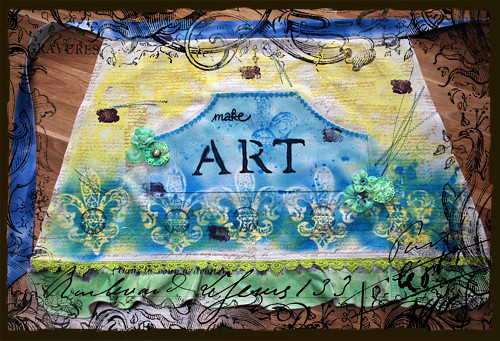
Today I thought I would start with this a Prima Canvas Apron (THIS POST USED TO HAVE ALL THE STEP BY STEP PHOTOS but unfortunetly they are all lost)

Heute wollte ich mal eine Prima Leinwand Schürze bearbeiten
Apron_giveaway

Well first I ironed it and then I stamped with some archival ink and a script stamp excluding the middle pocket and ruffle

Nun – erstmal hieß es bügeln und dann stempelte ich mit Archival Ink und einem Script Stempel, die Mitteltasche und die Rüschen auslassend.

then I used some Glimmer Mist – Lemon Zest and also in a circular motion Chalkboard – Banana Pudding – I used both mediums because I wanted to cover parts with the opaque yellow and parts of the script I wanted to shine through more

Dann habe ich Glimmer Mist – Lemon Zest  und  Chalkboard – Banana Pudding in einer Kreisbewegung verwendet.  Ich habe beide Medien genommen, weil ich teilweise mit dem mehr deckenden Chalkboard andere Effekte erzielen wollte, als mit dem durchsichtigeren Glimmer Mist.

I used a glimmer Screen – here from the Elegant Emblems Collection, hold the screen down with two brush ends and sprayed with Cornflower Chalkboard – I repeated it along the ruffle border

Hiernach nahm ich einen Glimmer Screen – hier von der Elegant Emblems Collection und hielt diesen mittels zweier Pinselenden runter und sprühte mit Cornflower Chalkboard. Das ganze habe ich dann mehrfach wiederholt.

As I had a lot of access on the screen I made a negative print on the pocket after I had sprayed and droped a bit of the chalkboard.

Da ich eine Menge Chalkboard auf dem Screen übrig hatte, habe ich diesen einfach in der Mitte der Tasche umgedreht und ein Art Negativstempel erzeugt. Außerdem habe ich noch ein paar Tropfen mit dem Chalkboard verteilt.

I used the Time Traveler Clear Stamp Collection and used the little border stamp for the pockets and later one of the journaling circle stamps for the middle of the fleur-de-lys.

Aus dem Time Traveler Clear Stamp Set habe ich dann den kleinen Border Stempel für die Umrandung der Tasche benutzt und später noch einen Kreis-Journaling Stempel für die Mitte der Fleur-De-Lys.

I sprayed the Ruffle with Evergreen Chalkboard.

Ich habe die Rüschen dann mit Evergreen Chalkbaord besprüht

then used the Exclusivley Heidi Swapp Tattered Texture Stamp Set- here the bordure and stamped a lace to the ruffle

Dann nahm ich von dem Exclusively Heidi Swapp Tattered Texture Stamp Set die Bordüre und stempelte diese auf die Rüsche.

and then I glued down some Prima Lace on top with Fabric Glue.

und sodann klebte ich mit Textil-Kleber ein wenig Prima Spitze fest.

I used a stencil alphabet and started outlining the letter first. For this I use acrylic paint markers- there are some certain brands like Uniball Posca and Molotow that do not bleed. I love those Markers! I do the markers first because I don’t want the contrast to high – and after spraying the markers blend in more.

Für meine Buchstaben nahm ich ein Stencil Alphabet und zeichnet zunächst die Buchstaben mit einem Acryl-Marker vor. Es gibt einige tolle Marken wie Uniball Posca und Molotow, die auf Stoff nicht ausbluten. Ich liebe diese Marker. Ich gehe übrigens in dieser Reihenfolge vor, weil ich den Kontrast ein wenig abdämpfen will, wenn ich später noch drübersprühe.

Now spray with Charcoal Chalkboard (say that a couple times out loud- LOL)

Nun sprühte ich drüber mit Charcoal Chalkboard (sagt das mal ein paar mal hintereinander- LOL)

So the chalkboard bleeds a bit – but I like that – everything is outlined by the marker but it still looks artsy ;)

Das Chalkboard blutet ein wenig aus , aber genauso möchte ich das ;)

Let’s get the sewing machine out and do some crazy stitching

Nun die Nähmaschine raus und ein wenig verrückt rumnähen

Spray the top string of the apron with Cornflower Chalkboard.

Das obere Band der Schürze habe ich dann noch mit Cornflower Chalkboard besprüht.

I then used another Tattered Texture Stamp and brushed some yummie Glimmer Glam – Be Positve and then stamped randomnly. You need to clean your stamp and the brush immediatley – otherwise your ruin it forever!

Hiernach nahm ich von dem Tattered Texture Stempel Set einen weiteren Stempel und bestrich diesen mit Glimmer Glam – Be Positive – und stempelte dann auf der Schürze hier und da. Bei dieser Aktion muß man den Stempel und den Pinsel sofort reinigen – sonst sind diese Utensilien auf immer ruiniert!

I then used some white acrylic paint and smeared it onto an old lid to stamp some circles around on my apron. It is a good way to tie the elements together.

Dann nahm ich ein wenig weiße Acryl-Farbe uns schmierte hier und da ein wenig auf einen alten Deckel mit dem ich Kreise auf meine Schürze stempelte. Dies ist eine gute Methode um Elemente zu verbinden.

Use some black acrylic paint and a thin brush and write :)

Dann nimm ein wenig schwarze Acrylfarbe und einen dünnen Pinsel und beginn zu schreiben :)

Take some Prima White Flowers and some yummie Glimmer Mist colors and spray

Nimm ein paar weiße Prima Stoffblumen und ein wenig Glimmer Mist und sprüh sie ein.

and then with a brush you can add some circles or other nice glimmery touches with Glimmer Glam to the flowers.

Mittels eines Pinsels können dann noch Kreise und andere glimmernde Verzierhungen mit Glimmer Glam hinzugefügt werden.

isn’t that just the yummiest- I love the Glimmer Glam- Chandalier – ahhhh!!!!

DAs ist echt das genialste- ich liebe Glimmer Glam Chandalier – ahhh!!!

So here you go – the apron is done – so fun to do it.

Sodele- da ist es -die Schürze ist fertig – und es hat soviel Spaß gemacht!

It has a bit of Alice in Wonderland- LOL

Hat irgendwie was von Alice im Wunderland -LOL

If you want to learn more about fun ways to treat canvas come and visit my upcoming Tattered Angels workshops or book them for your store.

Wenn Du mehr witzige Möglichkeiten wie man Canvas bearbeiten kann, lernen möchtest, dann besuche meine Tattered Angels Workshops oder buche mich für Deinen Laden :)

Wishing you a gorgeous day!
  • Lisa Mitchell

    |

    Love it, Nat! What a great idea, great step-by step too!
    (and I love the shoes ;)
    Big hugs from Barcelona! :D

    Reply

Leave a comment

Pendants for Scrapbook-Werkstatt

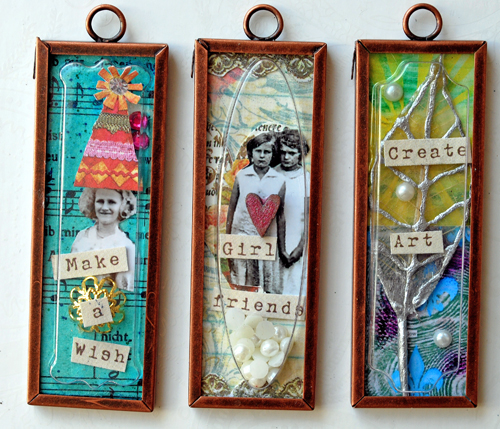
When Tina and Mireia asked me if I would like to create some pendants for their shop-blog Scrapbook-Werkstatt I didn’t hesitate, because I wanted to try those Ranger’s Inkssentials Memory Frames and Memory Capsules for a long time :)

Als Tina und Mireia mich fragte, ob ich gerne ein paar Schmuckanhänger für ihren Laden-Blog Scrapbook-Werkstatt kreieren wollte, habe ich gar nicht lang gezögert, denn ich wollte diese Ranger Inkssentials Memory Frames und Memory Capsules schon lange mal ausprobieren wollte  :)

Jewlery is such a huge trend right now and with those products you can create a unique, fun and quick project. First of all I used one of the capsules to trace a piece of background cardboard.

Schmuck ist ja sowieso ein großer Trend derweil und mit diesen beiden Produkten geht das auch noch super schnell und einfach! Zunächst habe ich eines der Capsules, die man auch wunderbar alleine wie eine Shadowbox auf Layouts benutzen könnte, ausgesucht und diese als Schablone für die Größe meiner Hintergrundpappe verwendet.

I added some old music sheets on the background paper and picked a nice Glimmer Glam by Tattered Angels Color to paint over it.

Auf die Hintergrundpappe habe ich altes Notenpapier geklebt und dies sodann mit dem bald bei der Scrapbook-Werkstatt erhältlichem Glimmer Glam von Tattered Angels bemalt.

The Glimmer Glam gives the music sheet a nice shimmer and also some extra texture.

Das Glimmer Glam gibt dem Notenpapier einen wunderschönen Schimmer und zugleich eine zusätzliche Textur!

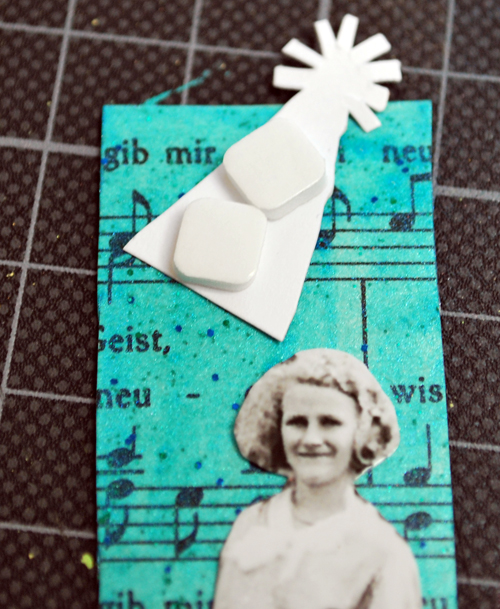
I cut my grandaunt out of an old photo and also a fun hat from a Crafty Secret’s Fairy Sheet. I mounted the hat on some Scrapbook Adhesives by 3L Foam Pads.

Aus einem alten Foto habe ich meine Großtante ausgeschnitten. Aus einem Fairy Sheet von Crafty Secrets habe ich sodann eine Kappe ausgeschnitten und auf 3D Pads montiert.

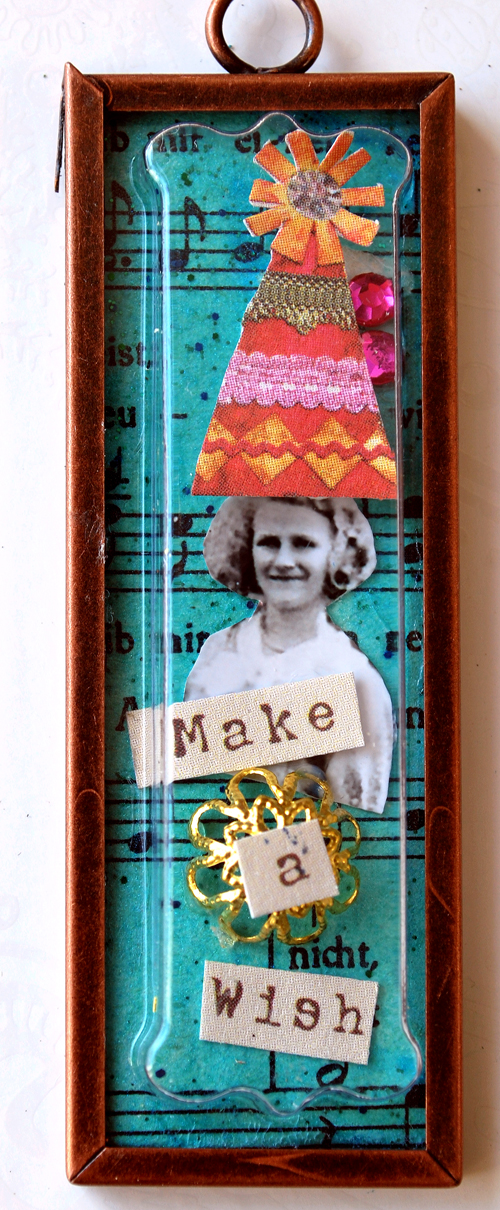
Then I glued the photo, hat, a beadapplication and other fun stuff down.

Photo, Kappe, Schmuckapplikation und Text sodann festgeklebt.

and glued down the Capsule too with some Ranger Glossy Accents

und sodann habe ich die Kapsel mit Glossy Accents  aufgeklebt.

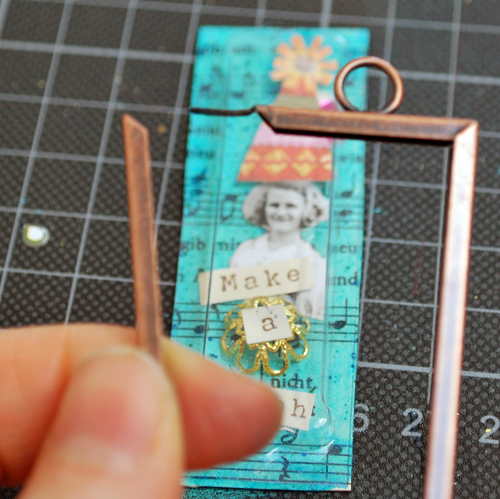
You can open the Memory Frame easily on the side and slide the project in.

Der Rahmen (Memory Frame) kann an der Seite aufgemacht werden, so das recht einfach das geschaffene Werk mit der Kapsel (Memory Capsule) reingelegt werden kann.

And here is the finished pendant.

Und hier ist der fertige Anhänger.

For this project and filled in some halfpearls.

Bei diesem Anhänger habe ich noch ein paar Halbperlen zugefügt.

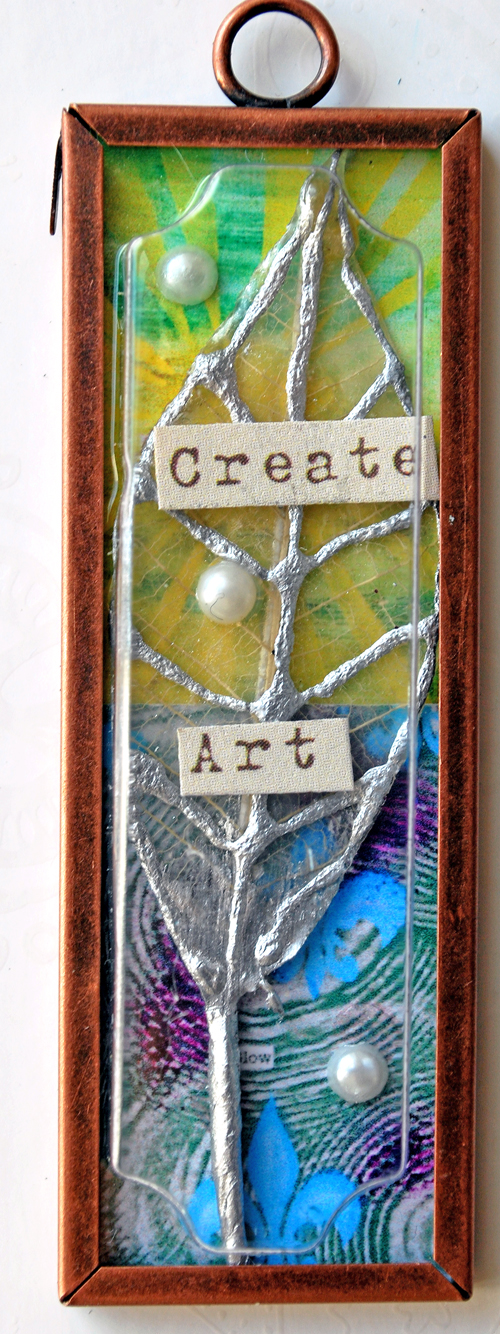
and for this pendant I chose a more colorful version by printing out two of my own Papers from the “eMOTions” collection as an Indexprint and glued it to the background paper.

und bei diesem Anhänger habe ich eine farbenfrohere Version erstellt, indem ich zwei meiner eigenen Papiere aus der Serie “eMOTions” als Indexprint ausgedruckt auf das Hintergrundpapier geklebt habe.

It was so much fun to create those pendants and I will defintely create more! Those Inkssentials are amazing as a personal gift or beautiful accent on a layout! I’m sure I will create more in the future.
Es macht soviel Spaß diese Anhänger zu kreieren und ich werde sicher noch mehr davon machen! Als ein persönliches Geschenk oder ein wunderbarer Accent auf einem Layout sind diese Inkssentials einfach der Knüller!

Comments (16)

Leave a comment