Altered Art

Oozing Paint or Why I sent a head to Toronto

It was tempting to write just “head” on the customs declaration form for my package to Bizzy B’s in Toronto…but as I was asked to alter a styrofoam head for a good cause – a silent auction at Bizzy B’s – I decided I might better not risk the opening of the package ;)

Working with styrofoam was really interesting…especially since I very much dislike the sound of styrofoam…gives me goosebumps just as getting a wooden spoon with coffee – just the thought of teeth on wood….ahhhrrrggghshahaahah – sorry- I go back to the head now …

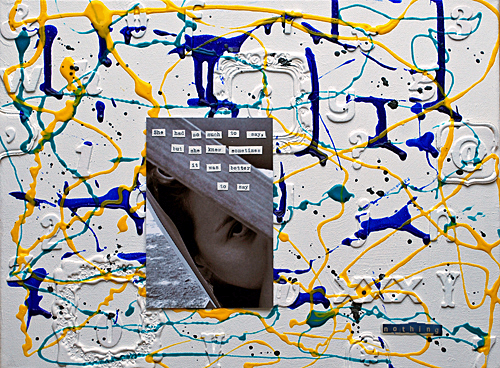
With my head I wanted to get the things that are constantly in my head out . I am thinking of words, art and colors all the time. So I had the acrylic paints spilling out of my head and the words covering up all of my face. Kind of like- Inside – OUT.

It was fun playing with it and I hope that it will raise some money for the Western Technical School’s innovative Cyber Arts Program.

It was fun – but I gotta say…LOL- there is definitely a reason why I don’t work with heads ;) This was pretty challenging for me. If you want to see the other heads that were created- check them out here.

Hope you have a gorgeous day- what are you up for?

I am taking a class today – will share soon :)

Nat


Comments (8)

  • Lisa Flaherty

    |

    Your recent post titles have been making me laugh so much! Your head looks really cool! Love the idea that it is inside out!

    Reply

  • Sue Clarke

    |

    Very cool and different Nat! I am glad that your head did not explode totally.

    Reply

  • Bev W.

    |

    Hmmmm…I think I know the feeling..lol! Very cool and interesting!

    Reply

  • Martha Richardson

    |

    Great project…have you ever been to Toronto? It is an incredible city.

    Reply

  • Gillian Pearce

    |

    What a great idea! Especially the words all over it. If I did one for myself I’d put a switch on the back for all the times I wish I could just switch my thoughts off! :-)

    Reply

Leave a comment

iDoodle…or The end of the Bee Gees in my handbag

There is three things in the world that make me splurge and not even think about if I REALLY need this…

  1. Shoes (yes- I’m one of them, full force “Oh no, those are not new, I have those forEVER, you just didn’t realize, honey!”)
  2. Art Media (it’s like a drug – needs to be tried out, can’t get enough of it, makes me happy, I get totally high on it!)
  3. Cool Bags or Safe Keeping Items (see below)

So a couple days ago I came across a video about those Papernomad bags and I was SOLD – I mean as in …purchased about 2 minutes after watching the video…as in…crazy woman…as in…this is the coolest thing in the world!

[youtube=https://www.youtube.com/watch?v=4rsqFdGhS_I]

Because let’s face it …the Apple cover for the iPad looks great but when you travel it is not the best item to protect and every time I open my hand bag there is a disco light in there and my iPad is going nuts glooming and dancing: “stayin’ alive, stayin’ alive ah ha ha ha stayin’ alive” . I have been looking  for a cover I like – and so far I didn’t find any that would make my heart sing…until…well- I told you already ;)

So four days later I received my bag and started playing…iDoodle

I mean…helloooooo- this is fun!!! Little bit of Derwent Inktense Blocks and some Dylusion Stencils, Markers, and Liquitex Spray Paint….ahhhh

So cool – I so look forward adding to it once in a while- here is the beginning of the back of the sleeve

So this marks the end of the Bee Gees in my handbag…no more disco glooming “stayin’ alive” although I will miss walking through the airport like John Travolta.

[youtube=https://www.youtube.com/watch?v=okpCx87orOA]

I am so tempted to get the laptop sleeve too…more surface…ahhhh…but oh well…it is not in the …boring brown leather pocket that holds my money ;)

(Dear family…if you read this…now is the time to get a notepad out and write this down…you know…my birthday is coming up in two months, and you probably wonder what item would make me happy ;) HINT HINT!!!)

Wishing you all a gorgeous and fun day!

Nat

Comments (10)

  • Sue Clarke

    |

    Very cool and thanks for the blast back to the 1980’s Nat!

    Reply

  • Vickie

    |

    Thank you so much for introducing us to the papernomad – so excited I just ordered one too!

    Reply

  • Birgit Kunte

    |

    … ich lach mich immer noch schlapp, *TränenabwischundwiederaufdenStuhlkletter* du bist soooo süß, echt! Die Tasche ist der Hammer, sooo coool. Arme Gibbs, sie werden dich sicherlich vermissen und ich bin sicher du bekommst dein Geburtstags-geschenk, bei diesen subtilen Tipps. Biiiiigggggg hug Birgit

    Reply

  • Riikka

    |

    What an inspring product! And gorgeous sleeve :)

    Reply

  • Lisa Flaherty

    |

    Hahahaha! Bee Gees and the John Travolta video! I can see you struttin’ through the airport! Cool doodling! You are a misting maven–my misting always looks like an accident. Lol!

    Reply

  • Bev W.

    |

    So very cool! I can see why you fell in love! Your cover looks great so far!

    Reply

  • jjsobey

    |

    That looks really cool. but I nearly spit my coffee out at the price. I realize it’s a high-tech paper, but I could make one in leather for less money – and it’s paper. Ooo- recycled leather would be cool… (now I’ve got my wheels spinning…)

    Reply

  • Jessica

    |

    you did a wonderfull job with the i-pad sleeve. Very nice.

    Reply

    • Martha Richardson

      |

      Very interesting…off to take a look…you are an ENABLER 7 you feed my “I NEED ART PRODUCTS” addiction also ;)

      Reply

Leave a comment

Crafter’s Workshop Stencil Blog Hop – Number 3

Totally stoked to join again into the Stencil Hop for Julie Fei-Fan Balzer‘s Crafter’s Workshop Templates. I guess if you follow my blog…I do not really have to tell you, how much I love them. If you don’t follow my blog…you should (just kidding ;) )

The designs are amazing and Crafter’s Workshop creates them in a high quality way that gives you a huge versatility in usage!

When Julie came out with those amazing Templates that can be layered I was almost fainting…LOL – sooo cool!!! You can use them with different acrylic paints or with spray paints or with Derwent Inktense blocks and Artbars – oh brother…endless possibilities

Today’s blog hop is focused on the Lotus Blossom Template – it is BEAUTIFUL (insert picture of me in cheerleader outfit exclaiming each of the letters while jumping up and down…oh wait…that might be a terrible picture….better proceed reading ;) )

And there it comes another fun way on how I love to use them :) – I created a Luminaria with the n*Lighten Technique

So much fun to use the n*Lighten Technique with the Stencils- they are perfect for this. So let me show you how it works.

You need for the first steps:

  • the 6×6 Lotus Blossom Crafter’s Workshop Template which was perfect for creating a Luminaria in the end.
  • 4 different colored Embossing Powders – I used the amazing WOW Embossing Powders by Suzy West – I’m just so amazed by the vibrancy of the colors- they seriously rock!
  • Pastel Paper – but I’m sure it will work also with thinner water color paper
  • Embossing Ink Pad – clear
  • Heating Gun

How To:

  1. Lay down the template and use the first image (you can also use all four and alternate later – I did this too)
  2. Dab the Embossing Ink Pad on top of the Template
  3. Make sure that you got the whole image
  4. Lift the Template
  5. Use one color of Embossing Powder and heat emboss
  6. Let cool
  7. Layer on the second image of the Template and again dab the embossing pad on top and sprinkle the second color on top
  8. Now with the second layer you have to be a bit more careful – you do not want to remelt the first layer in a way that it get’s lumpy or starts getting to melt into the second color – just watch closely the reaction
  9. and now repeat with image 3 and 4 and the other two colors of embossing powder
When you lift the paper and hold it against the light you see that  the image got translucent- the embossing powder diffused into the pastell paper and created a plastic layer. Perfect to use to create a Luminaria. Since I hadn’t had a paperback (read I couldn’t find it in my messy studio) I had to come up with something else

I draw a circle around the image that would give enough space to hold adhesive. Then I cut a letter size kraft paper sheet length wise in half. I cut circles with a craft knife out of the kraft paper that would just show the image. I adhered the Lotus Image to the back and bend the paper and glued the ends together forming a role.

And there you go – a summer luminaria- perfect in the garden or on your dinner table.

Warning: Never leave a burning candle unattended. Keep out of reach of children, playful husbands & pets. Be careful to not have the kraft paper too narrow to the candle!

Don’t miss out the others on this blog hop:

Julie Fei-Fan Balzer
http://balzerdesigns.typepad.com/balzer_designs/2012/04/stencil-hop-lotus-blossom.html

Nathalie Kalbach
http://wp.me/p1ILec-1hq you are here :)

May Flaum
http://mayflaum.com/?p=8237

Jenny Barnett Rohrs
http://www.crafttestdummies.com/?p=12271

Nat

———

My new Über*Media Online Workshop is here – Learn the whole Shebang about Acrylic Paints

———-

Supplies I used for n*Lighten Technique:


Comments (43)

  • Margaret

    |

    A lovely idea and the technique is wonderful too. Thank you for sharing this

    Reply

  • SusanHnSC

    |

    Love your idea!! and love the stencils…

    Reply

  • Cindi Walsh

    |

    Awesome! In addition to loving the template and luminaria, I can’t wait to try embossing on pastel paper! I’m going to become a follower right away!

    Reply

  • Woodie

    |

    What a clever and cool idea…will look good on my deck this summer! Thank you for sharing.

    Reply

  • Vicki Chrisman

    |

    Very Cool Nat!

    Reply

  • Melissa Smith

    |

    Beautiful. I love Julie’s stencils and seeing what everyone does with them is awesome.

    Reply

  • Mary Ellen

    |

    love THE LUMINARIA!
    Another idea is to use one of the new battery operated tea lights instead of a live flame.

    Reply

  • Miriam Prantner

    |

    This is beautiful! I love the results! What a great project!

    Reply

  • Cindi Shearer

    |

    Excellent idea, Nathalie. Thanks for sharing your creative and unusual use of this very cool new stencil. It gets me thinking out of the box in using stencils!

    Reply

  • Cat Graves

    |

    What a creative way to use julie’s beautiful stencil…I love your luminaria!!

    Reply

  • lacyquilter

    |

    Awesome project. I love Julie’s stencils.

    Reply

  • p boszko

    |

    wow…luv the lotus and your projects!

    Reply

  • B. Poteraj

    |

    You are very creative. I’m going to try that.

    Reply

  • Sharon Gullikson

    |

    I never would have thought to do that. Thanks.

    Reply

  • Peg Hewitt

    |

    Omg I looooove their templates!!!
    Your project is soooo coooool!!

    Reply

  • ladynorth

    |

    Hugs and Hi! If you put your tea candle in a drinking glass or jam jar, then you lower the risk of burning your paper: you can also wrap your luminaria paper around the jar as well. Just a thought. Blog Hop On! x LN

    Reply

  • ladynorth

    |

    HI Nathalie, not sure if you did this or not: but if you put your tea candle in a glass (drinking or jam jar) it is much safer and you can wrap the luminaria paper around it as well and not fear it burning. blessings.

    Reply

Leave a comment

n*Studio 2011 Recap – ATC Frame

When I was teaching at the Scrapbook Island in California this January, I was shown these amazing ATC Frames which are manufactured by the Japanese company Memory Palette.

You can have them standing on display or hang them too- and I love how the sliding glass protects your inside- but still makes it possible to work dimensional. Such a clever and awesome idea.

I’m so thankful that Emi and Ken were so sweet to get one from Japan and presented it to me at CHA. That was so wonderful of them!

And I took it to good use – as there is space for 12 ATC’s or of course you can just scrap mini layouts in that size – I thought of recaping my n*Studio year.

For those of you who don’t know I quit my paralegal job last year in January to do what I love full time…getting my hands inky and painty :) . It was an amazing year- but somehow I was so busy with always the next project, that I forgot to look back and celebrate some of the highlights that this first year of my n*Studio brought.

And so I finally did so by creating this ATC Frame. It was so much fun looking and thinking about the things that happened, the up- and -downs. It made me stop and say “wowsers” – especially when looking at April: Teaching Mixed Media in Norway, Greece and Australia -how did I do this? LOL – good thing that the worst of that ….nights of packing class kits, are vanishing memories. What stays is the good memory ;) This frame will definitely get a nice spot in my n*Studio.

Supplies: Memory Palette ATC Frame, White Cardstock, Eco Green Crafts Acrylic Paints, Derwent Inktense Blocks, Ranger Distress Stains and Color Wash, Heidi Swapp Color Magic Banners, 7Gypsies Tags, Hambly Screen Prints Rub Ons, Canvas, Typewriter, Scrapbook Adhesives by 3L MyStik Permanent

I hope those frames will make their way into some European Stores soon. What would you do with it, if you had one?

Have a gorgeous and creative day!

Nat

Comments (7)

Leave a comment

A friend, a good friend …or catchy tunes

This layout is actually created on an old record and was published last year in the SAZ Sketchbook .

One of the things I love to use and that inspire me, is song texts or titles and use them for my layouts. One tune that came to my mind when I saw those photos of a camping trip in 1949 of my grand aunt Margot, her husband and their best friends is “Ein Freund, ein guter Freund” a catchy song.

Actually the stories she told about this trip made me quite laugh, there is a broken car, a case of beer and being caught catching fish in a private lake, involved.

Here is the song if you wanna check it out sung by The Comedian Harmonists – it is in German ;)

[youtube=https://www.youtube.com/watch?v=35PCFQtrgJM]

The lyrics translate kind of into this

Sunny day, great day
pounding heart, like the beat of a motor
a happy goal, a happy start
and a wonderful trip;
Rome and Madrid we did.
So went life in a whirl for the three of us
by sea, by land [and]
we realized one thing..

A friend, a good friend,
that’s the nicest thing
that there is in the world.
A friend always remains a friend,
even if the entire world collapses.
So don’t even be sad,
if your sweetheart doesn’t love you anymore
A friend, a good friend,
that’s the best thing there is.

Supplies: Fancy Pants Paper, My Mind’s Eye Die Cuts; Masks and Stencil: Tim Holtz, self-made stencils; Spray: Golden Montana; Sticker: Rose Moka, Cosmo Cricket Tiny Letters; Adhesive: SCRAPBOOK ADHESIVES by 3L Crafty Power Tape and 3D Foam Pads; Old Record

Today I’m once again happy for the wonderful friends I have :)

Have a wonderful day!

—————————————

Due to popular demand and getting lot’s of emails asking about it, I decided to reopen theÜber*Media PanPastel Online Workshop earlier again. So as of now you can sign up again for this 6 week-long extensive workshop. It starts on February 5th, 2012 – you have access to the classroom till July 31st, 2012- Check it out here .

If PanPastel is not up your alley ;) but are interested in taking an inspiring and fun online workshop, you can check my Über*Media Gesso Online Workshop which starts on February 15th and is a 5 week-long extensive workshop- also access to the classroom till July 31st –Check it out here.

Nat

Comments (3)

Leave a comment

My Top Ten Projects 2011

Here are my top ten projects of this year – lot’s of canvases and shadowboxes, but I also love the first day of school project I made and the pillow. This year was a “get off the page” year I would say :)

this was a huge canvas that I did for an assignment for Tattered Angels, showing how all four paint products look like. I just love the texture here and the colors- and it was fun working on such a big scale.

This Shadow box was one of my workshops last year. I loved the depth it has and it was something out of my box theme wise for sure :)

This Banner was a lot of fun to make – I loved using a minialbum in a different way and it was fun using all those different media on different surfaces.

This printer’s tray was originally made for Stampington’s Video Features, but the stamp set I used was discontinued by the manufacturer and therefore it didn’t make the cut.  love it because it was such a fun way ot think back on all those moments in 2010 and it also had a lot of depth.

This canvas is one of my favorites because it simply expresses some feelings I had at the time. It has a lot of symbolics.

My Mixed Media Pillow that is also a class- I love this one because it was something totally different for me and it was so much fun to do it.

This one I love because it reminds me that even if people say your work looks like puke you have to continue on when you like it. It was part of my Live With Prima show last year and it was a show I received a lot of wonderful feedback for, hence my puke-y canvas ;)

This project is a favorite because it was a fun day with my god child and my friend. It is a German tradition to give a child a cone filled with useful schoolstuff and sweets on their first school day and we created this for my god child’s younger brother. We had the best day ever.

This Shadow box was created as an assignment for Tattered Angels, Pink Paislee, Walnut Hallow and Prima. It was one of my hardest task given the limited product and time but I love the color that are unusual for me and the outcome.

And this is just me…the colors, the texture and it is for me so powerful. It was part of my Über*Media PanPastel Online Class.

Are you doing more layouts or projects? Wishing you an amazing day!!!

Comments (6)

Leave a comment

Tattered TV – Christmas Frame Video & Tutorial

Thank you to all of you who joined me in the Tattered TV Class hence this busy time of the year! What an awesome international crowd we had from Germany, Switzerland, Greece, The Netherlands, Spain, Denmark, Belgium, The USA and even Australia and Singapore! You rock my world!!!

If you missed it – no worries- it is not as funny as if you have the chat included- but you can still get the picture – here you go – the recorded version AND a downloadable PDF with instructions :

Klick


So I showed you how to use all four Tattered Angels Paint Media on paper and on wood,  mix them wet and dry, use them as Embossing Agents and how to create some fun and easy Resists .

And here is the Tutorial for this as a pdf – I hope you like it :) Tattered TV Christmas Frame Tutorial

—————————————–

You might also like my 5 week long Online Class Über*Media Gesso starting January 15th, 2012 – check it out . The holiday special price is still up till December 25th, 2011.

Have a wonderful day!


Comments (4)

Leave a comment

Christmas Ornament Tag Tutorial

For the Norwegian Magazine ScrappeHuset and their Adventscalendar on the blog I created this Christmas Tag with a mini tutorial. Thank you girls for the honor of sharing my work with you!

For this tag I used an old vintage wooden sheet – I think it was part of a game as it has numbers engraved. I painted the wooden piece partly with acrylic paint and before all paint dried I sprinkled Platinum Utee on top and heated it. I attached a piece of Paper Tissue Tape and a ribbon. Then I stamped on a piece of patterned paper with a star stamp and embossing ink, sprinkled with clear utee, heated the utee and into the hot utee sprinkled soem of the platinum utee and continued heating.

I cut out the stars. I attached Cookies’n Cream and Grand Tetons Glimmer Glam on parts of the wooden plate. then I let some Stiletto Glimmer Glam run down the plate and also on the stars. I attached the ribbon, stars and Prima Rhinestones. For the Prima Resin I sprayed Tattered Angels Cornflower Daze and added some Wicked Glimmer Glaze, then attached the Resin piece and attached the Canvas Corp Twine. I painted the edges of the ornament with black acrylic paint.

Supplies: Vintage wooden sheet, Eco Green Crafts Acrylic Paints, Ranger Platinum and Clear Embossing Powder, Tattered Angels Glimmer Glam – Glaze and Chalkboard, Prima Rhinestones – Ribbons and Resin, Danyeela Patterned Paper, Rose Mokka Letter Stickers, Canvas Corp Twine

——————————

Are you ready to learn lot’s of fun techniques for using Gesso? Backgrounds, Texture, Embellishments, Manipulating Photos? You name it- you get it in my Über*Media Gesso Workshop – More Details here


Comments (3)

Leave a comment

Hoop Hoop…or Wall Decor

At Cocoa Daisy we had a crop with lot’s of challenges last weekend and one was to be inspired by hoops and do some wall art. Well – the Cocoa Daisy November Kit was perfect for using two hoops that I had laying around for quite some while and I love the simple and quick result :)

I think this might be a great gift for someone ;)


Maybe this inspires you for some fun wall art too :)

Have a gorgeous day

nat

Comments (3)

Leave a comment