Creative Squad

Say Yes to New Adventures – Gwen Lafleur

CS August Say Yes

It’s Tuesday and time for my Creative Squad to share a project with you with this month’s theme: “Say Yes to New Adventures”. Throughout the month of August, the team will use any of my n*Studio Stamps and Stencils they would like to use to interpret the theme. Here in the northern hemisphere, summer is coming to a close and it’s about time to seize the days and go on a little adventure before hibernation! With this in mind, the team will create something that celebrates the spirit of adventure.  Maybe they took a trip recently that included some unexpected twists and turns, maybe they like to live the adventurous life every day, or maybe their idea of adventure is as simple as trying a new brand of tea. Whatever they do to “live on the edge” is appropriate fodder for this one.

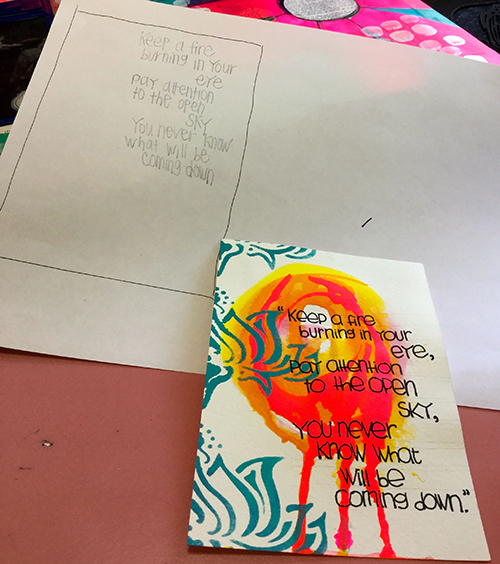
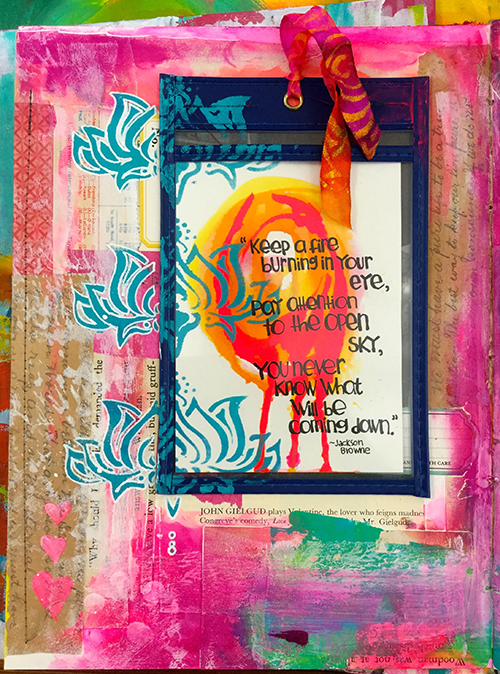
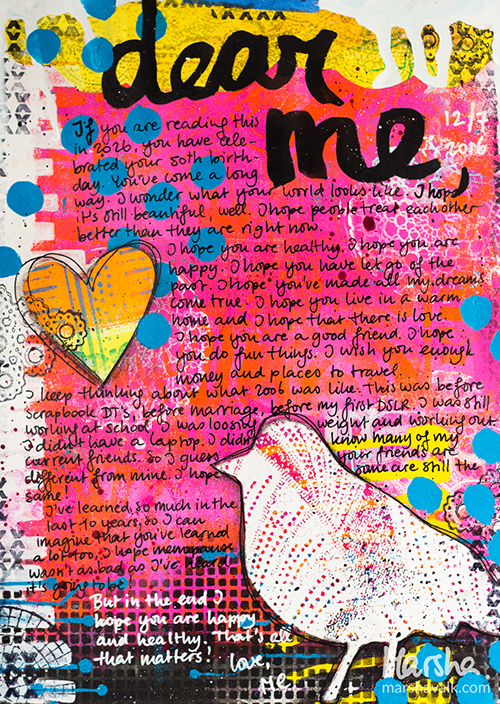
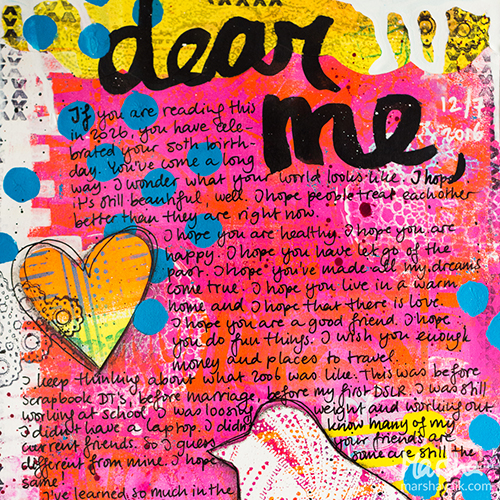
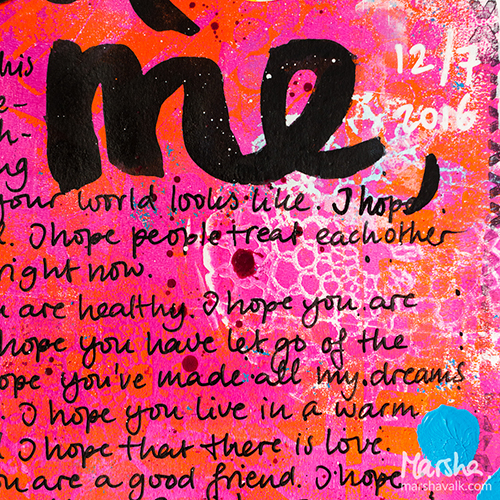
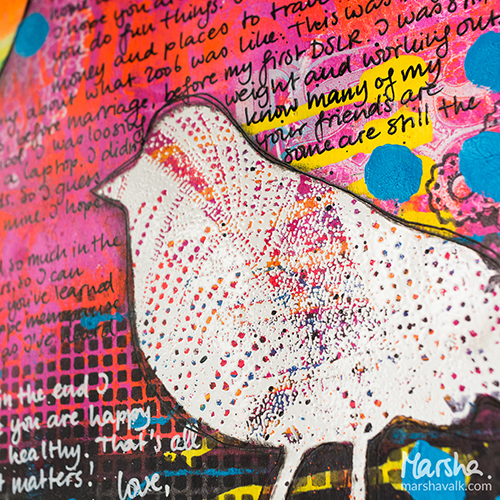
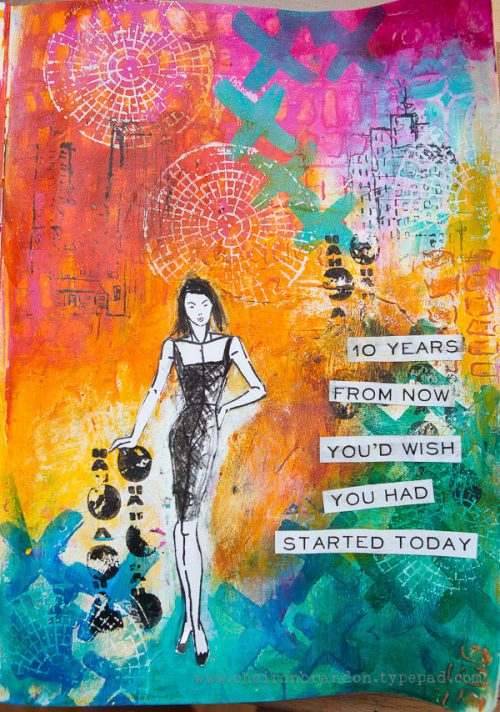
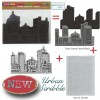
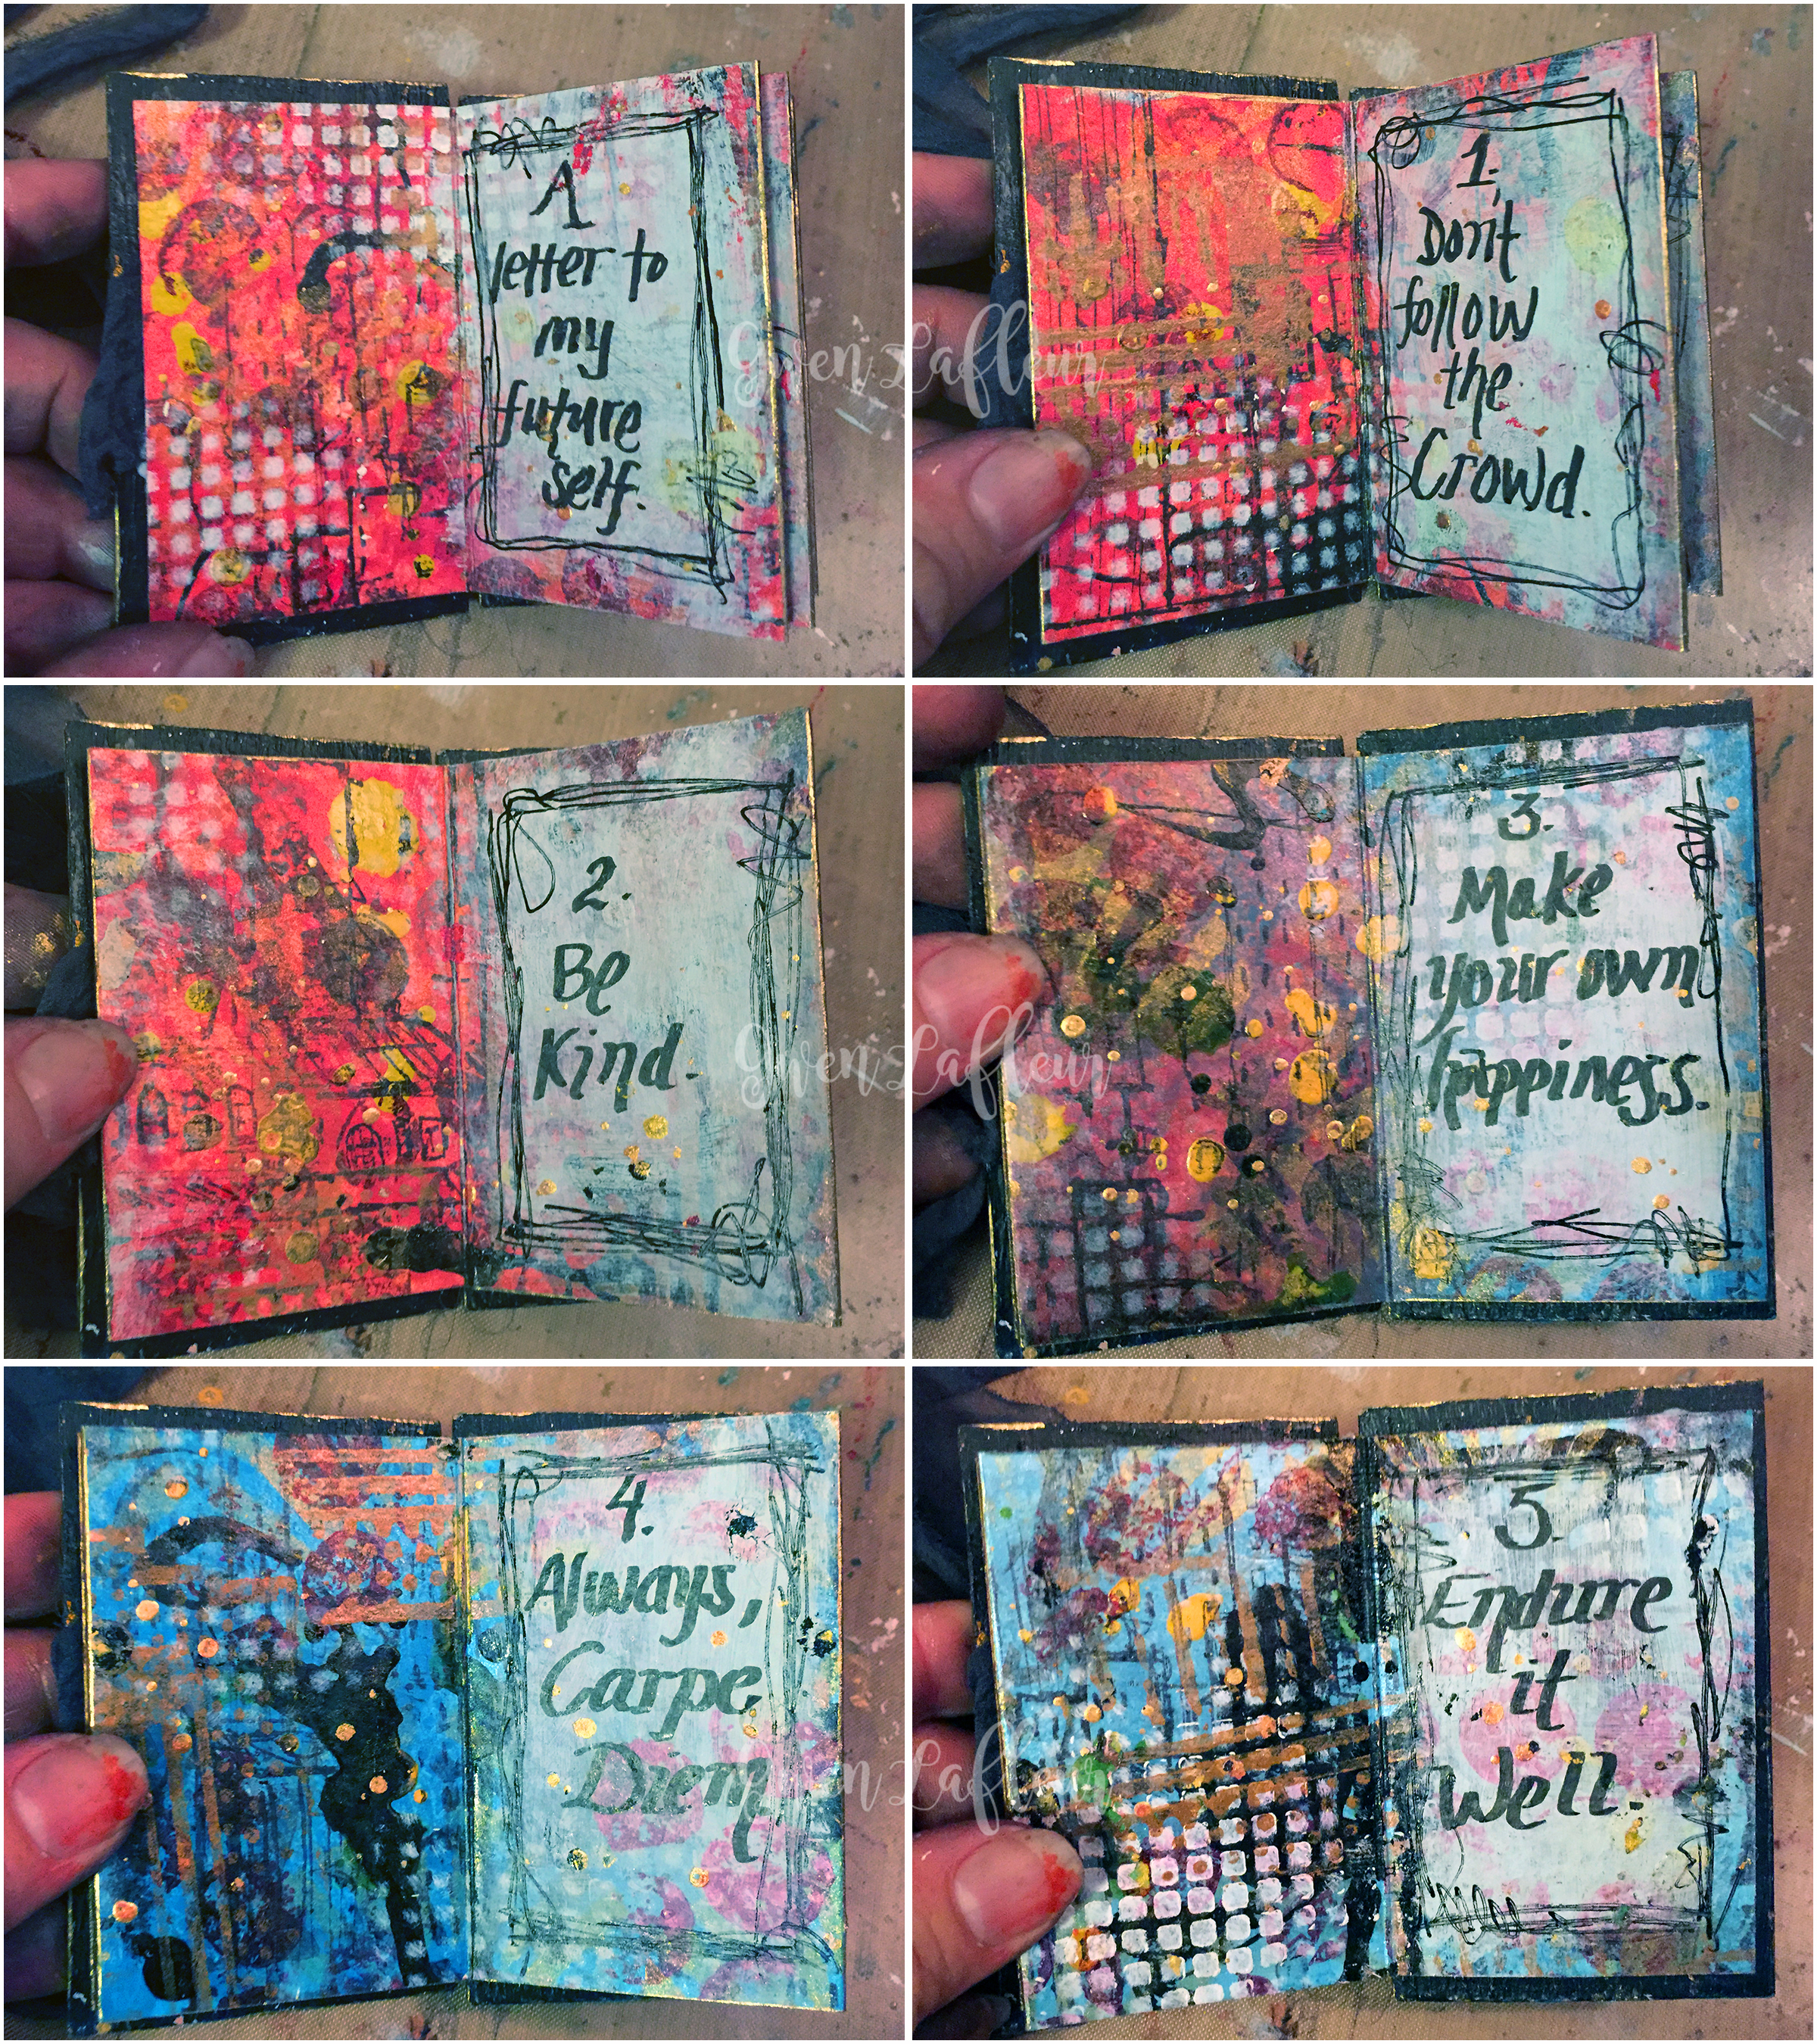
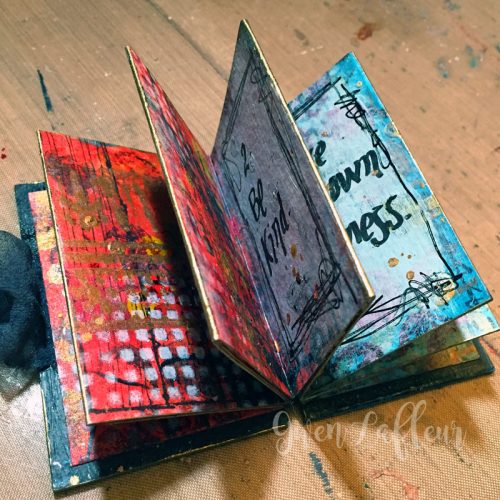
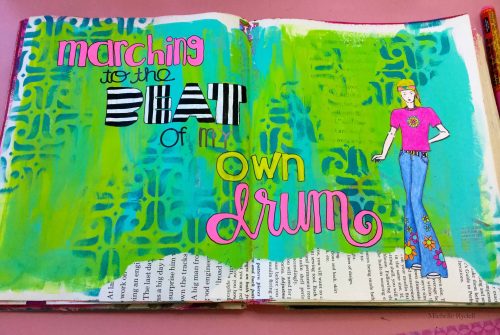
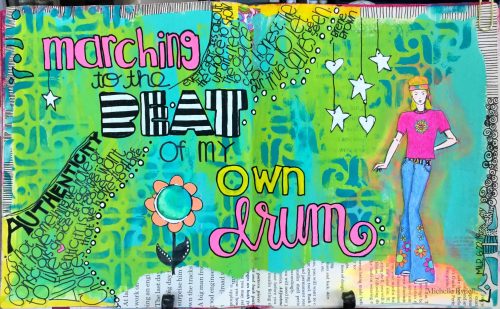
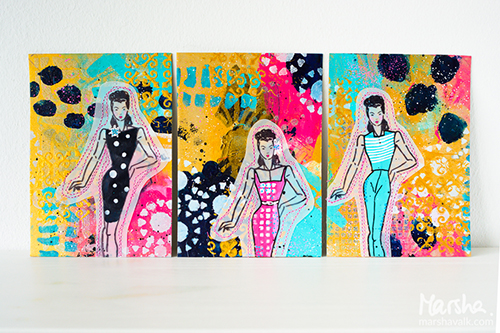
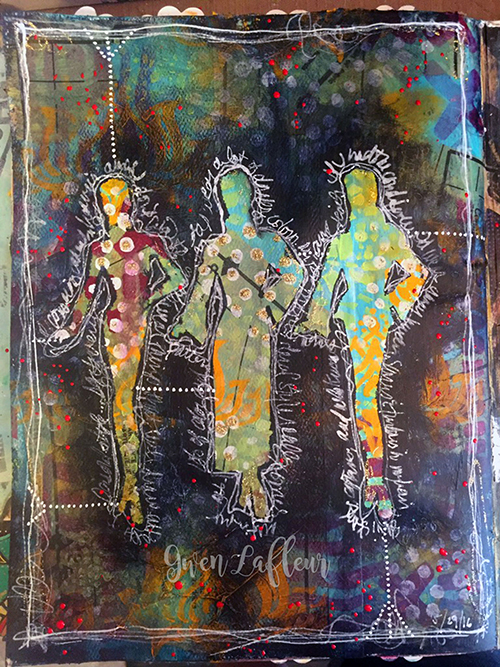
This week we bring you Gwen Lafleur‘s gorgeous art journal spread that might inspire you to journey to far-off places!

—————————————————————————————————

Gwen August Headshot

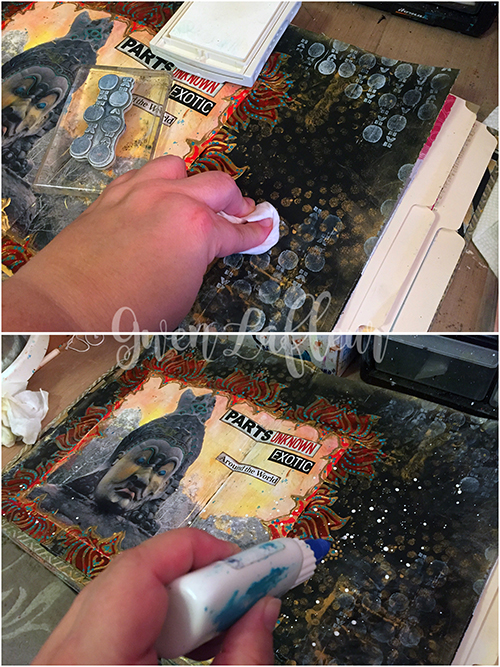
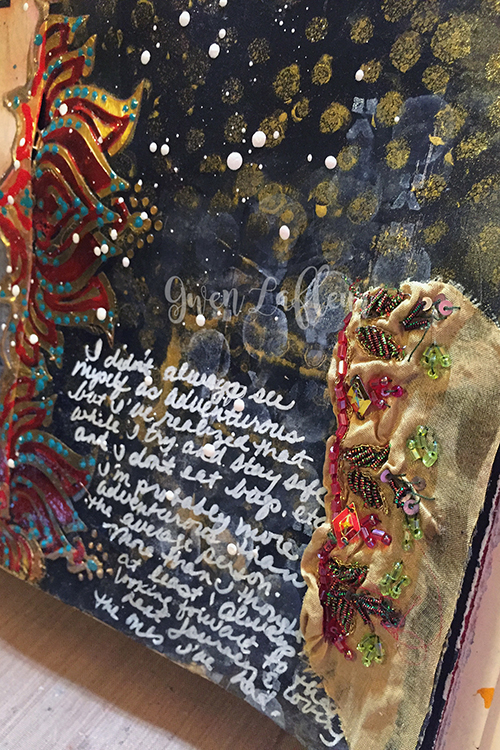
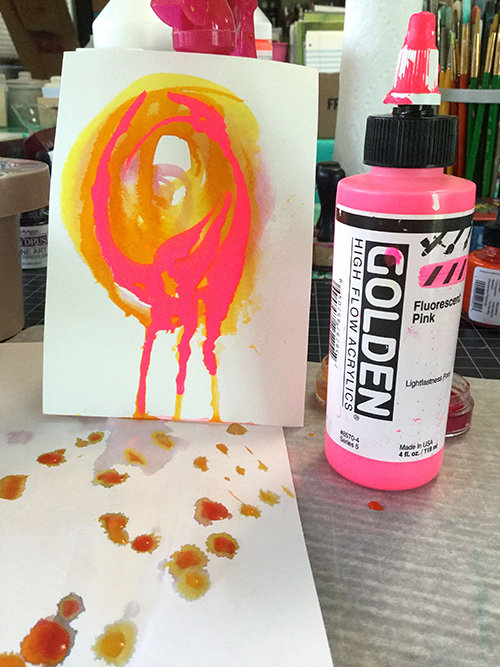
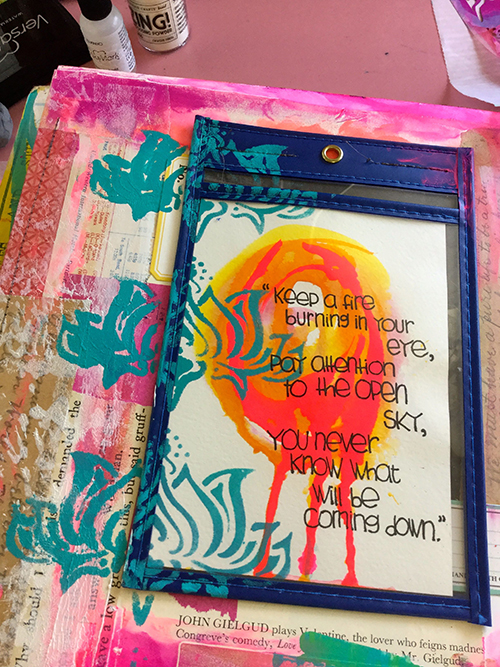
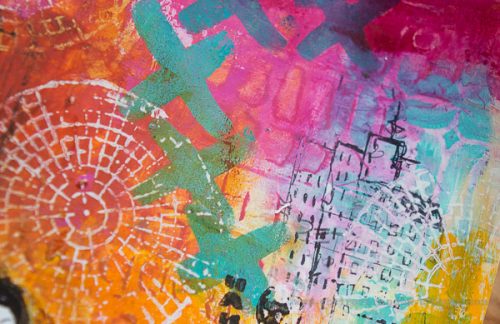
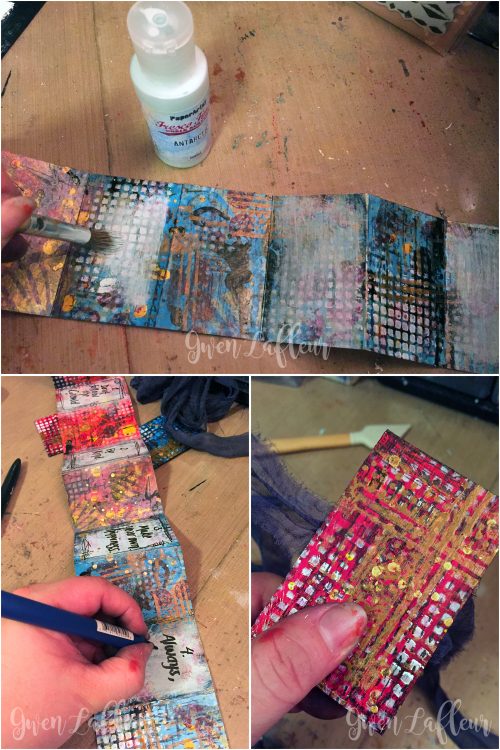
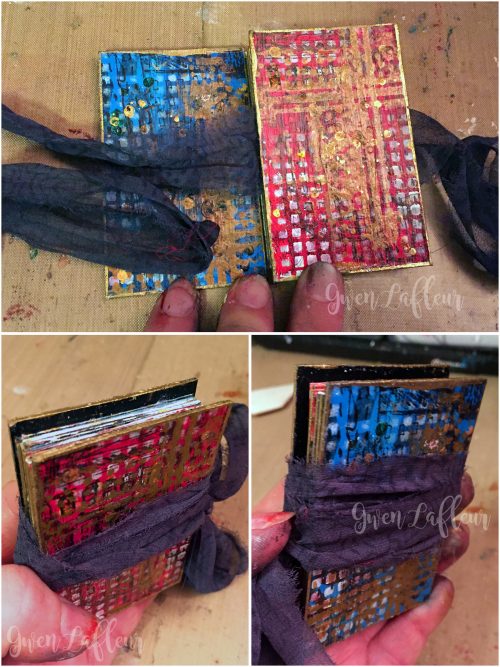
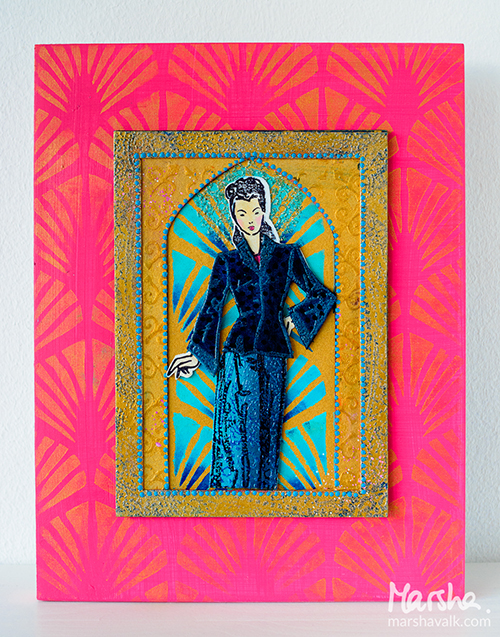
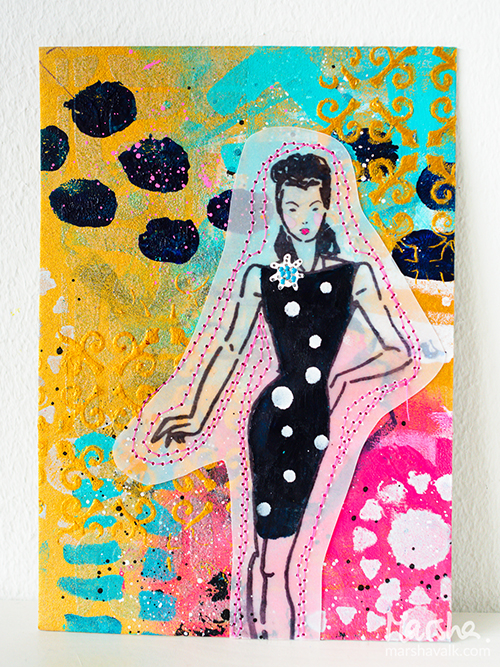
This month’s theme around new adventures might as well have been tailor made for me! For most of my life I’ve never really considered myself an adventurous person… I’m not interested in thrill seeking or eating really bizarre foods, but in the last few years I’ve realized that I’m much more adventurous than I ever thought; I love to travel and see new places, try new food, and explore new cultures. I try and take a trip every year, and pretty soon I’m taking a really big, slightly off the beaten path kind of trip that’s been in the works for about two years! Thinking about that, I really wanted to make an art journal page that would demonstrate my love of travel adventures.

Adventure Art Journal Spread - Close-up 1 - Gwen Lafleur

To start, I gesso’d the pages of my 9×12 handmade journal with black gesso and when that was dry, I took Nat’s What’s the Point? stencil and some gold spray ink and added lots of gold dots all over the background.
Adventure Art Journal Spread - Steps 1-2 - Gwen Lafleur
I had already chosen my photo for this spread – I used a picture I took in Cambodia two years ago that I altered and tinted in a class with Seth Apter. I used matte medium to adhere that firmly to the page. When that was dry, I used the Lily Wallpaper stencil along with some gold embossing paste to create a frame all around my photo. I did this in two shifts so that I didn’t mess things up trying to stencil with wet paste on the page. I love the effect I got from that! I also glued in some travel and adventure words and phrases I’d cut from a magazine to really reinforce the theme.
Adventure Art Journal Spread - Steps 3-4 - Gwen Lafleur
When all of the embossing paste was dry, I used an irRESISTible Pico Embellisher in Morocco to color in the open areas in the stenciled frame. This was a fun way to pull another color out of my photo and add some visual interest. Of course, that was followed up with dots made with dimensional fabric paint (I can’t resist the dots!) Just a side note, when I use dimensional paints (or really anything glossy,) I lightly wax the finished spread so the pages don’t stick together.
Adventure Art Journal Spread - Steps 5-6 - Gwen Lafleur
I wanted to add a few more finishing touches before doing my journaling. I used some white ink with an image from Nathalie’s Marks rubber stamp set and stamped in a few places around the page. Then I took a baby wipe and knocked the ink back a bit so that it wasn’t quite so strong and competing with the photo. I threw some clear embossing powder over it and heated since I still wanted to work on top (you need to heat set or emboss pigment inks on top of acrylic, otherwise they’ll wipe off with mediums, baby wipes, etc…) Finally, some splatters of white paint to kind of unify the whole thing. Then I just added my journaling with a white pen, glued on a few scraps of sequined fabric, and edged the page with gold ink. Voila! Finished art journal spread!
Adventure Art Journal Spread - Close-up 2 - Gwen Lafleur
I hope you enjoyed today’s project… I know I did! Now I’m off to begin my countdown for my next adventure!
Adventure Art Journal Spread - Gwen Lafleur
—————————————————————————————————

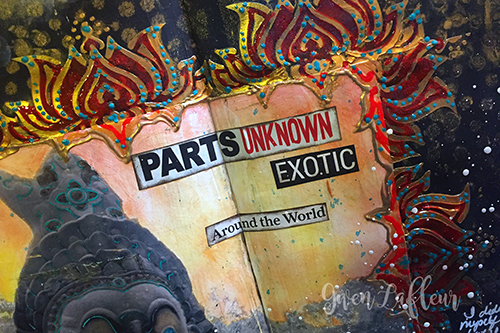
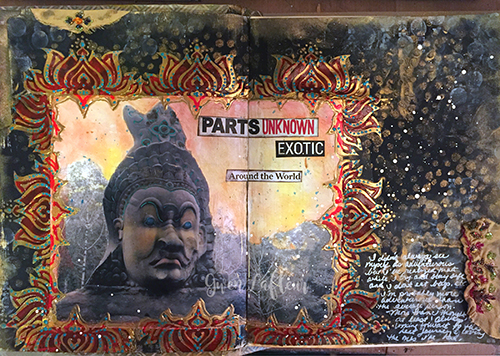
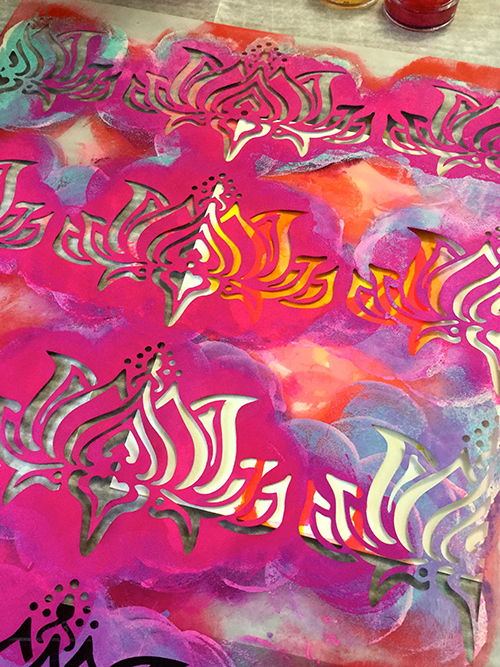
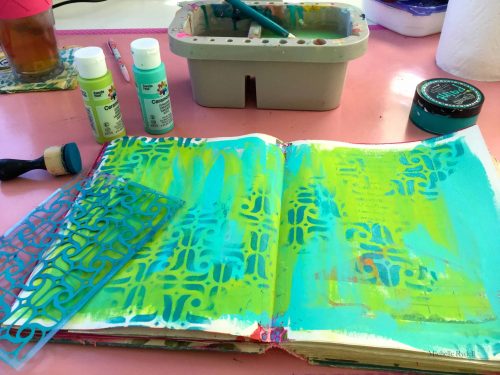
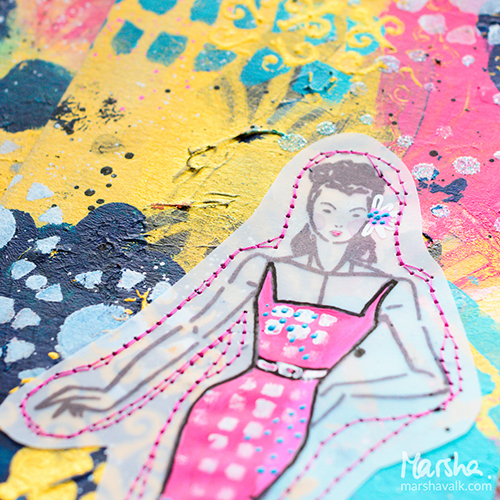
Gwen’s art journal spread is so dreamy and exotic – it really reminds me why I love traveling to new places and seeing different cultures.

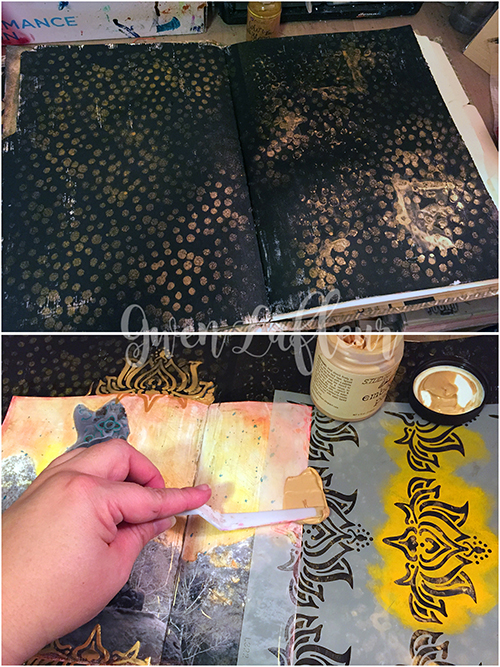
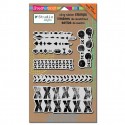
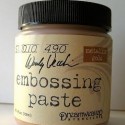
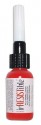
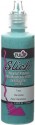
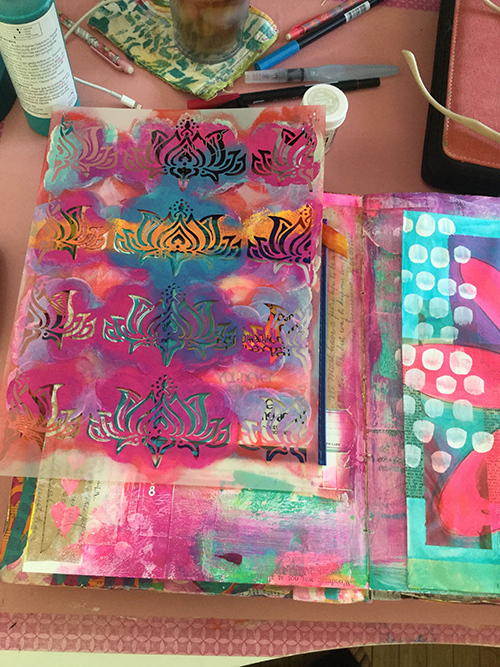
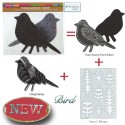
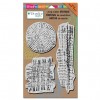
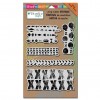
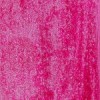
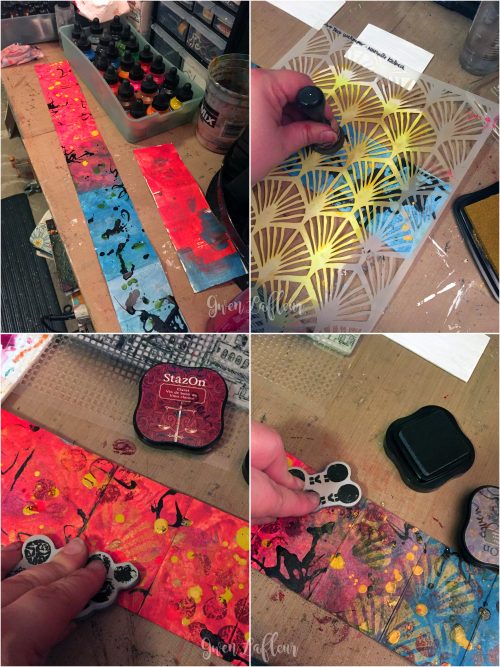
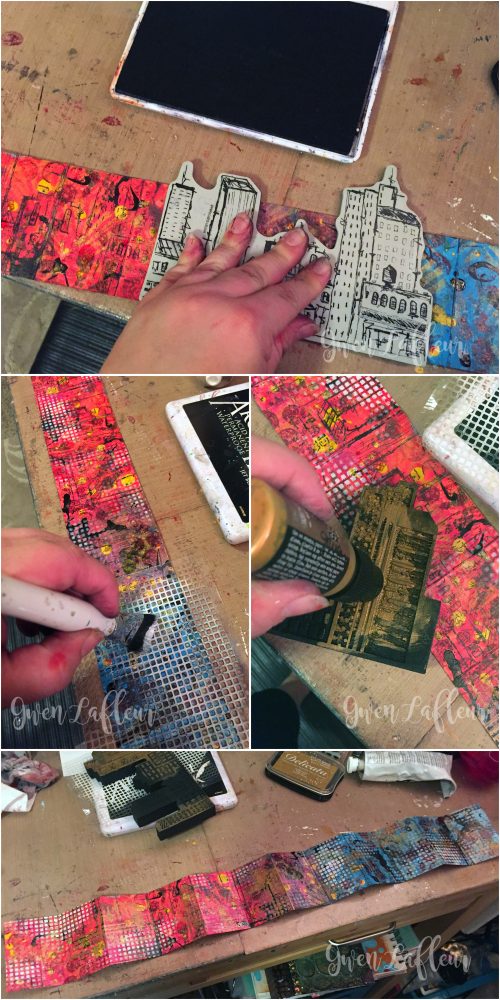
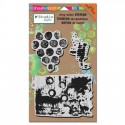
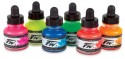
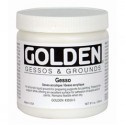
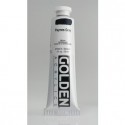
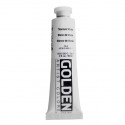
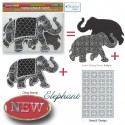
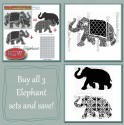
Gwen used the supplies listed below (some are affiliate links) as well as a Stampin’ Up white craft ink pad:

SuppliesCJS

Maybe you will even play along with us -I would love to see how you interpret our monthly themes. Email me how you used my stencils and stamps with the theme and email me an image – I would love to share your projects in my next “n*Spiration From Around the Globe“.

See you next Tuesday for another project from the Creative Squad!

Comments (3)

  • Anna Friesen

    |

    Gwen, amazing techniques!! You amp everything up to a new level! Does this gold embossing paste keep its sheen? I find many gold mediums are lackluster once dry.

    Reply

  • Denise Spillane

    |

    Oh Gwen, this is so wonderful. I am so enamoured with your style, so exotic and lovely! I love these stencils by Nathalie too! I bought them the mini ute I saw them in a class with Nat.

    Reply

    • gwenlafleur

      |

      Thanks Denise – I really appreciate that! Nathalie definitely has some awesome stencils, doesn’t she?

      Reply

Leave a comment

Letter to my Future Self – Michelle Rydell

CS July Letter

It’s Tuesday and time for my Creative Squad to share a project with you with this month’s theme: “Letter to my Future Self”. Throughout the month of July, the team has been using any of my n*Studio Stamps and Stencils they would like to use to interpret the theme. This month’s theme is in honor of my recent 10 year (!) blog anniversary- which we are celebrating until the end of the month! I asked the team to create something that they’d like to tell themselves in 10 years. Like a mixed media time capsule. This theme flips the “If only I knew then what I know now” sentiment up-side-down.

This week we bring you Michelle Rydell’s happy and uplifting postcard!

—————————————————————————————————

Michelle July Headshot

The theme for this month was a challenging one: Letter to my Future Self. Hmmm… I have thought many times about what I would say to my younger self if I could; what wisdom I could share that would help her on life’s journey. But what could I tell my future self? She knows everything I know, plus she has ten years more life experience!

I pictured myself in ten years – going to the mailbox and finding a postcard there, and smiling when I see it’s from me. That’s when I knew just what I wanted it to say. It’s a lyric from a Jackson Browne song called “For A Dancer.” It goes like this…

“Keep a fire burning in your eye,

and pay attention to the open sky,

You never know what will be coming down.”

I’ve loved that lyric for many years. I can’t say for sure what Jackson meant when he wrote it; but for me it means – keep your passion alive, and stay open to whatever comes your way.

First, to create the postcard I cut some heavyweight watercolor paper to approximately 4” x 6”. Then I swirled some pink and yellow watercolor onto the background…

Rydell Letter 1

I decided that wasn’t bright enough, so I added some fluorescent pink acrylic.

Rydell Letter 2

I used a blending tool to apply some teal acrylic paint thru Nat’s Lily Wallpaper stencil to add some contrast. I kept the stenciling on the left side of the page to leave room for the words on the right.

Rydell Letter 3

I did a draft of the lyric on scratch paper first, to see approximately how much room it would take up. Then I added some light pencil lines to the postcard and went to town with a black permanent ink pen.

Rydell Letter 4

I want to put this postcard on the inside front cover of my current journal. I have a pocket to put it in that will be just right. Once in the pocket, I stenciled the other half of the Lily Wallpaper motif to make it look like the pattern continues…

Rydell Letter 5

Rydell Letter 6

I took some pre-dyed ribbon and used the same Lily stencil to create a pattern with yellow paint.

Rydell Letter 7

Rydell Letter 8

And here’s the final page. I added some white outlining to the stenciling to show off the detail of the design, and added the stenciled ribbon to the grommeted hole.

Rydell Letter 9

—————————————————————————————————

Michelle’s postcard is so gorgeous with those colors and such a nice message. I love that it’s going right in the front of her art journal so she can remind her present self too!

Michelle used the supplies listed below (some are affiliate links):

SuppliesCJS

Maybe you will even play along with us -I would love to see how you interpret our monthly themes. Email me how you used my stencils and stamps with the theme and email me an image – I would love to share your projects in my next “n*Spiration From Around the Globe“.

Don’t forget that I have a Blogiversary SALE right now going on with 20% off of online workshops (like Creative Jumpstart 2016), DVDs, and select items (including all the stamps andstencils) from the n*Store online.  The sale prices are reflected in the store now.

Happy Blogiversary sale

See you next Tuesday for the another project from the Creative Squad, with a brand new theme for the month of August.

Comments (6)

  • Michelle Rydell

    |

    Thank you so much for your kind words everyone! It really means a lot to me!

    Reply

  • Marit

    |

    I really love the lyrics and the colors you used Michelle (gotta have fluorescent pink myself now!!!) Great idea, to let the pattern run on the page and the ribbon adds something ‘extra’ to the total image. Fabulous card!!!

    Reply

  • Joi @RR

    |

    Wow – so modern and so poignant Michelle. Brilliant colors. SUPER idea. Creativity at it’s best for your theme. Very special. j.

    Reply

  • Julie Tucker

    |

    Love love love this! Those lyrics are PERFECT!!!!!!!!!!!!!!!!!!!!!!!!!!

    Reply

  • Janet

    |

    I ABSOLUTELY LOVE THIS!

    Reply

  • Sue Clarke

    |

    I love the colors that you chose Michelle!
    Especially the initial swirl and added pink to make it brighter.

    Reply

Leave a comment

Letter to My Future Self – Marsha Valk

CS July Letter

It’s Tuesday and time for my Creative Squad to share a project with you with this month’s theme: “Letter to my Future Self”. Throughout the month of July, the team will use any of my n*Studio Stamps and Stencils they would like to use to interpret the theme. This month’s theme is in honor of my recent 10 year (!) blog anniversary- which we will celebrate later this month! I asked the team to create something that they’d like to tell themselves in 10 years. Like a mixed media time capsule. This theme flips the “If only I knew then what I know now” sentiment up-side-down.

This week we are happy to share with you Marsha Valk’s thoughtful letter that she drafted for her future self!

—————————————————————————————————

Marsha July Headshot

MarshaValk_nStudioSquad_LetterToMyFutureSelf-3

I had no idea on where to start, so I thought about the past 10 years first and all the good and bad things that happened. Then I thought about what could happen in the next decade. It made me kind of sad, but also hopeful. I decided to write an actual letter to find out what I wanted to say.

MarshaValk_nStudioSquad_LetterToMyFutureSelf-2

MarshaValk_nStudioSquad_LetterToMyFutureSelf-6

Once I had my hopes and wishes on paper, I put it aside and grabbed my n*Studio stamps and stencils, my Gelli Plate, a couple of paints and I started pulling prints on A4 sized paper.

MarshaValk_nStudioSquad_LetterToMyFutureSelf-4

MarshaValk_nStudioSquad_LetterToMyFutureSelf-5

The next day I chose the print I liked best as my foundation and I added collaged pieces from another print, stenciling, stamping, finger prints, charcoal pencil, acrylic marker, acrylic ink and of course my letter. I deliberately chose to work on A4 paper instead of in one of my art journals, because I want to store this letter with my recent scrapbook pages.

MarshaValk_nStudioSquad_LetterToMyFutureSelf-1

—————————————————————————————————

Marsha’s letter is a great balance of seriousness and hope.  I love how she incorporated so many different layers of stamps and stencils to get her ideas out.  Their layering effect is really cool with so many different elements working together!

Marsha used the supplies listed below (some are affiliate links):

SuppliesCJS


Maybe you will even play along with us -I would love to see how you interpret our monthly themes. Email me how you used my stencils and stamps with the theme and email me an image – I would love to share your projects in my next “n*Spiration From Around the Globe“.

See you next Tuesday for another project from the Creative Squad!

Comments (3)

  • Stampendous Stamps

    |

    Wow, Marsha! This is just gorgeous! What a colorful and bright note to your Future Self! This should definitely get your attention. Beautiful job, and great use of so many products! Thanks for sharing!

    Reply

  • Joi @RR

    |

    Very special. Thanks bunches for great inspiration. j.

    Reply

  • Michelle Rydell

    |

    Marsha I LOVE your page! What a beautiful letter you’ve written to yourself. I love what you had to say and also the bright colors and mixture of stamps and stencils. Beautiful!

    Reply

Leave a comment

Letter to My Future Self – Cheiron Brandon

CS July Letter

It’s Tuesday again and time for my Creative Squad to share a project with you with this month’s theme: “Letter to my Future Self”. Throughout the month of July, the team will use any of my n*Studio Stamps and Stencils they would like to use to interpret the theme. This month’s theme is in honor of my recent 10 year (!) blog anniversary- which we will celebrate later this month!  I asked the team to create something that they’d like to tell themselves in 10 years. Like a mixed media time capsule. This theme flips the “If only I knew then what I know now” sentiment up-side-down.

This week Cheiron Brandon shows you her amazing and colorful layered art journal page with a pretty good advice :)

—————————————————————————————————

Cheiron June Headshot

Hi everyone, Cheiron here with my monthly post. When I got the theme for this month “Letter to My Future Self” I got nervous. Was I going to have to write an actual letter? What AM I going to write that will be important to know in the next 10 years. Will this have to go in my journal for everyone to see it? Writing in a journal is not for me, I don’t like to share my thoughts in writing. For me my art journal represents a place to play and experiment with color, texture, new stamps and stencils.

cheiron- 10 years art journal 2

When I started out on this page, I decided instead to not get nervous about writing a letter and just play with some new paint colors and layers. I did think about some personal plans for the next 10 years, and what I would like to tell myself whether I achieve these things or not. I have included some imagery that represents some of the things in my plan, including starting off my page with a piece of a house blueprint. When I do think of plans for the long term like health, finances and career there is no better advice I can give myself than to get started now. So I added the quote “10 YEARS FROM NOW YOU’D WISH YOU HAD STARTED TODAY”. I think that advice rings true at any point in our lives, and I am sure it will be just as relevant if I pull this journal out again in 10 years.

cheiron- 10 years art journal_

—————————————————————————————————

I love love love the color combination in Cheiron’s art journal spread and the way how she layered and combined all stamps and stencils!

Cheiron used the supplies listed below (some are affiliate links):

SuppliesCJS


Maybe you will even play along with us -I would love to see how you interpret our monthly themes. Email me how you used my stencils and stamps with the theme and email me an image – I would love to share your projects in my next “n*Spiration From Around the Globe“.

See you next Tuesday for another project from the Creative Squad!

Comments (2)

  • Joi@RR

    |

    Oh sooo vivid and splendid Cheiron. What a great idea to use part of a house plan in the background. Your work is so INTRICATELY STUNNING and my eyes loved roaming over it to see all the different ‘Nat toys’ you incorporated! Perfect sentiment. Thank you for the inspiration. j.

    Reply

  • Michelle Rydell

    |

    Those layers and colors are gorgeous Cheiron! I love your page!

    Reply

Leave a comment

Letter to My Future Self – Gwen Lafleur

CS July Letter

It’s Tuesday again and time for my Creative Squad to share a project with you with this month’s theme: “Letter to my Future Self”. Throughout the month of July, the team will use any of my n*Studio Stamps and Stencils they would like to use to interpret the theme. This month’s theme is in honor of my recent 10 year (!) blog anniversary- which we will celebrate later this month!  I asked the team to create something that they’d like to tell themselves in 10 years. Like a mixed media time capsule. This theme flips the “If only I knew then what I know now” sentiment up-side-down.

This week we show you Gwen Lafleur‘s amazing mini book and the advice she would hope she will have followed in the next ten years !

—————————————————————————————————

Gwen July Headshot

For this month’s theme, I thought it would be fun to get creative with the “letter” part of the letter to my future self theme. I love to make books, so I decided that instead of writing a traditional letter and including it in my art journal (or regular journal,) that I would make a mini journal that would be the actual letter. I took a little time to think of my top five pieces of advice that I would hope that 10 years from now, my future self will have followed, and then created this book around them.
Letter to Future Self - Mini Art Journal Inside Pages - Gwen Lafleur
To start, I took watercolor paper and cut enough that after it was all attached, I’d have a strip that was 3″ tall by 24″ wide. I scored the paper every 2″ so that when it was done, I’d have a 2″x3″ book with 6 spreads. I pulled out some acrylic inks and just painted the background. (I did the whole thing at once instead of making each spread individually; I like the effect when you take a larger piece of art and break it down into pieces and I thought that would work well here.) I started with reds and oranges on one end and blues on the other and let them blend in the middle. Then I used more inks to add lots of blobs and splatters. I let that dry, then I used Nathalie’s Art Deco Wallpaper stencil and some gold pigment ink to start adding layers of color and pattern.
I followed that up with some stamping using designs from the Grunge and Marks stamp sets with burgundy and gray StazOn inks. I just used parts of each stamp to get some texture onto the page since I was going for an abstract look.
Letter to Future Self - Mini Art Journal Steps 1-4 - Gwen Lafleur
Next up, I grabbed the rubber stamp from the Urban Scribble set and used it with black ink. I moved it around as I went so that parts of the buildings would stamp. I liked this stamp set for this project because even though I wasn’t trying to add buildings into my design, the stamps have lots of great lines and pattern that are perfect for building up layers of texture. In the end you won’t even be able to tell what the original stamp was!
I followed that up by stippling some white paint through stencil that comes with the Urban Scribble set, then I used copper paint on the detailed side of the foam stamp – I only painted and stamped part of it because once again, I just wanted the lines. I stamped it in different directions to get some really cool effects!
Letter to Future Self - Mini Art Journal Steps 5-8 - Gwen Lafleur
Once that was done and dry, all of my background layering was done – next it was time to add the text. Since the backgrounds were so busy, I took some matte finish paint in a very light and fairly opaque color (matte makes it much easier to write on) and dry-brushed the center section on what would become the right-hand side of every spread. Once that was dry, I wrote out the advice to myself and added a scribbly frame around each section of text.
Last but not least, I made the covers. I basically followed the exact same process on these as I did to make the backgrounds – the only difference was that since I was using chipboard, I gesso’d them first. I also only added layering on one side of each cover; I painted the other sides with Payne’s Gray since they’d be covered up when I assembled the book.
Letter to Future Self - Mini Art Journal Steps 9-11 - Gwen Lafleur
I took a strip of sari yarn and laid it across the back of the front cover and glued it in place, then assembled the book. I just took my long strip (the text block) and accordion folded it and used the first and last flaps as the end papers – those got adhered to the inside of each cover. You could actually make this a 2-sided book and do each side of the paper strip, but instead I glued the back sides together so that it would function like a book with pages that turn. The sari yarn just wraps around the book when it’s closed so I can keep it secret and tucked away until future me is ready to read it.
Letter to Future Self - Mini Art Journal Covers - Gwen Lafleur
So that’s it! I hope you enjoyed today’s project and that you’re feeling inspired to find a creative way to write your own letter to your future self!

Letter-to-Future-Self---Mini-Art-Journal---Gwen-Lafleur

—————————————————————————————————

Gwen’s book is so adorable and amazing – I love this idea and I love how she used elements of all the stamps and stencils to make it create some great design elements!

Gwen used the supplies listed below (some are affiliate links) as well as aStrathmore 400 Series cold-pressed watercolor paper (6″x18″ pad), Copper Distress Paint,scrap chipboard, calligraphy pen, sari yarn (from Darn Good Yarn.):

SuppliesCJS


Maybe you will even play along with us -I would love to see how you interpret our monthly themes. Email me how you used my stencils and stamps with the theme and email me an image – I would love to share your projects in my next “n*Spiration From Around the Globe“.

See you next Tuesday for another project from the Creative Squad!

Comments (4)

  • Joi @RR

    |

    Precious and creative! j.

    Reply

  • Michelle Rydell

    |

    Wow! What a creative take on the theme! I LOVE this! So beautiful and textured! What a cute size for a journal too!

    Reply

    • gwenlafleur

      |

      Thanks… I have to admit, I had a lot of fun with this one :D I’ve been wanting to make a journal this size for a while – perfect opportunity!

      Reply

Leave a comment

My Own Drum – Michelle Rydell

CS June My Own Drum

It’s Tuesday again and time for my Creative Squad to share a project with you with this month’s theme: “My Own Drum”. Throughout the month of June, the team will use my new Fashion Dame Rubber Stamp Set to interpret the theme. This theme is all about inspiration, creativity, and personal expression. I asked my squad to create something that celebrates the power of individuality. March to the beat of your own Mixed Media drum this month!

This week we bring you an art journal spread by Michelle Rydell . Michelle created a super fun outfit for her Fashion Dame and she colorfully marches to her own drum !


—————————————————————————————————

Michelle June Headshot

When I saw Nat’s Fashion Dame stamp and stencil set, it reminded me of the happy hours I spent making paper dolls when I was a kid. I used to love to cut women out of the Penneys catalog, and make outfits for them. Did any of you do that, or was it just me?

Anyhoo, the theme for this month – “Marching to my own Drum,” gave me a chance to do that again! Here’s what I did…

  1. My goal was to create an outfit for the fashion dame that was a style that fits my personality. I stamped her onto white cardstock. Then I got out my lightbox, placed typing paper over the top, and started drawing outfits to fit. I drew three so I would have options. (I used my pinterest style board for inspiration). I sketched with pencil first, and then went over the designs with a superfine pitt pen. This could get addicting! You can see two of the three designs in the first two pictures…

RydellMarching1

RydellMarching2

2. Then I started on the background. I first painted a quick layer of blue and green (ceramcoat craft acrylics), then stenciled a darker turquoise (dylusions) over the top, with the stencil that comes with the fashion dame kit.

RydellMarching3

3. At that point, I wanted to bring the background and dame together. First step was to create a ground for her to stand on, so I tore some text paper and pasted it on.

4. Then I wrote out the title with paint pens in a variety of colors.

RydellMarching4

5. To finish it up, I added a quote by Brene Brown, and a bunch of doodles. Her outfit is colored with Prismacolor Pencils, and I made her blonde (since I’m blonde) with a paint marker. Here’s the finished page…

RydellMarching5

RydellMarching6

—————————————————————————————————

Michelle’s page makes me so happy- the awesome outfit and the colors- and my oh my her lettering- yum!

Michelle used the supplies listed below (some are affiliate links):

SuppliesCJS


Maybe you will even play along with us -I would love to see how you interpret our monthly themes. Email me how you used my stencils and stamps with the theme and email me an image – I would love to share your projects in my next “n*Spiration From Around the Globe“.

See you next Tuesday for another project from the Creative Squad!


Comments (4)

  • Tracy Welham

    |

    Fabulous! Love the colours. Creative Blessings, Tracy x

    Reply

  • Stampendous Stamps

    |

    WOW!! Oh, my, Michelle! This is absolutely fantastic!! And what a great idea! Love how your page came out and the super creative solution you came up with! This has to be one of the most versatile stamp sets ever! Gorgeous page!

    Reply

  • Sue Clarke

    |

    LOVE the way you did the BEAT!!!
    What a fun and colorful page.

    Reply

  • Julie Tucker

    |

    Love love love this! LOVING the colors and her outfit!!!!!!!!!!!!!!!

    Reply

Leave a comment

My Own Drum – Marsha Valk

CS June My Own Drum

It’s Tuesday again and time for my Creative Squad to share a project with you with this month’s theme: “My Own Drum”. Throughout the month of June, the team will use my new Fashion Dame Rubber Stamp Set to interpret the theme. This theme is all about inspiration, creativity, and personal expression. I asked my squad to create something that celebrates the power of individuality. March to the beat of your own Mixed Media drum this month!

This week we bring you TWO projects from Marsha Valk. Marsha gives us two super fun and colorful answers to the theme to inspire us today.

—————————————————————————————————

Marsha June Headshot

At first I thought this would be easy. That I could do whatever I wanted. But then I read the theme again and… I started overthinking: My Own Drum… What is my own drum? Do I have one? How does it beat? Is this the right beat? Is this the right drum?! Who do I think I am, claiming a drum for myself!

The best thing would be to just shut off my thoughts… But not before I had decided that my project had to involve a couple of things: it had to have a recycled element (preferably cardboard), colours are important to me so I wanted to choose a colour palette and of course I had to use the Fashion Dame.

Long story short, this is what I created:

MarshaValk_nSCS_MyOwnDrum_FashionDame-1

(If you want to find out more about how I created it, check my blog post for last weeks Stampendous Summer Blog Hop!)

But then I turned my thoughts back on. And I thought: this drum is fine, I can definitely march to it, but… I think my own beat is messier and free-er than this!

So I tried again, using all the messy stuff that was already there on my table. I had been mixing paint, cleaning brushes and dabbing paint off onto a sheet of grey board… And I decided to use this sheet as a base.

MarshaValk_nSCS_MyOwnDrum_FashionDame-1-4

I cut the sheet into 4″ x 6” cards. I added more (leftover) paint and gesso to the cards, using a brayer, using stencils and a cosmetic sponge or an old plastic gift card and of course using my fingers.

MarshaValk_nSCS_MyOwnDrum_FashionDame-4

I had also spilled some embossing powder and I decided to use this on the cards, applying VersaMark through stencils, sprinkling the (mixed up) powders on top, tapping off the excess powder and then heat setting it.

MarshaValk_nSCS_MyOwnDrum_FashionDame-3

This time I stamped the Fashion Dames on vellum with Archival Ink. I didn’t want to wait for it to dry, so I heat set it.

MarshaValk_nSCS_MyOwnDrum_FashionDame-5

I wanted to machine stitch the Dames to the cards, because that’s something that I used to do a lot, but hadn’t in a while.

MarshaValk_nSCS_MyOwnDrum_FashionDame-1-2

Once the Dames were stitched, I coloured them in with acrylic paint, Posca markers, Pearl Pen, Neocolor II’s and I finished the cards off with some paint marker splatters.

MarshaValk_nSCS_MyOwnDrum_FashionDame-2

—————————————————————————————————

I love Marsha’s super juicy backgrounds and that she wasn’t afraid to get her hands dirty in the process!

In addition to Talens Acrylic Paints in Deep Gold, Lamp Black, Phthalo Blue, Turquoise Green, and Quinacridone Rose, a sewing machine and thread, and an old plastic card, Marsha used the supplies listed below (some are affiliate links):

SuppliesCJS

Maybe you will even play along with us -I would love to see how you interpret our monthly themes. Email me how you used my stencils and stamps with the theme and email me an image – I would love to share your projects in my next “n*Spiration From Around the Globe“.

See you next Tuesday for another project from the Creative Squad!

Comments (4)

  • Sue Clarke

    |

    Love the stitching Marsha!

    Reply

    • Marsha.

      |

      Thank you Sue! So glad you like it!

      Reply

  • Michelle Rydell

    |

    Marsha I LOVE all of your projects! It’s so interesting the huge leap between your first project and the other three! They are all beautiful, but the last three really have your own drum in them! I love all the splatters and the stitching, and the colorful outfits!

    Reply

    • Marsha.

      |

      Thanks Michelle! Yes, I agree: the leap was interesting! I might have to do something like that again!

      Reply

Leave a comment

My Own Drum – Cheiron Brandon

CS June My Own Drum

Happy Tuesday! It’s time for my Creative Squad to share a project with you with this month’s theme: “My Own Drum”. Throughout the month of June, the team will use my new Fashion Dame Rubber Stamp Set to interpret the theme. This theme is all about inspiration, creativity, and personal expression. I asked my squad to create something that celebrates the power of individuality. March to the beat of your own Mixed Media drum this month!

This week we bring you a fun project from Cheiron Brandon. These tags are a great example of how the Fashion Dame can be “dressed”, just like a paper doll, and in this case a very fashionable one :)

—————————————————————————————————

Cheiron June Headshot

The theme of “my own drum” combined with the Fashion Dame stamps this month was perfect for me! I wasn’t sure where to go with these fun Fashion Dame stamps, but I thought about it and about my own sense of fashion. I like many different styles of clothing, and it all depends on the season, occasion and even the mood I am in that helps me decide what to wear on any given day. I used the Fashion Dames like my own personal paper dolls and gave each of them their own personality and style. I created a set of tags that I can use in my art journal, on a card, or even as a gift tag.

cheiron_fashiondame1

cheiron_fashiondame2

I created each tag with a bunch of Nathalies stamps. The first dame is wearing a golden top cut from some deco sheets, and her skirt is covered entirely with sequins. The background of the tag is stamped with a stamp from the Kaffee Klatsch set. Not an everyday look, but something totally fun!

cheiron_fashiondame3

This tag was made with a background of book paper and some painted deli paper that I stamped with the Marks cling set. I gave her a fun patterned jacket using the Grunge Cling stamp set and some denim paper.

cheiron_fashiondame4

This last dame is probably my favorite of all and if this dress existed in real life, I would totally wear it! I made the dress from painted deli paper stamped with the Marks cling stamp and gave her a belt of twine. Its very subtle, but I stamped and clear embossed some mesh in the background.

I certainly had fun playing with these Fashion Dames, and can’t wait to work them into my art journal pages!

—————————————————————————————————

I love how Cheiron dressed the Dame in her very own creations, and yes, I want that super awesome jacket and dress in my closet!

In addition to sequins, book paper, and twine, Cheiron used the supplies listed below (some are affiliate links):

SuppliesCJS

Maybe you will even play along with us -I would love to see how you interpret our monthly themes. Email me how you used my stencils and stamps with the theme and email me an image – I would love to share your projects in my next “n*Spiration From Around the Globe“.

See you next Tuesday for another project from the Creative Squad, but in the meantime, we have a Blog Hop!

STM_NatNfriendsHop_banner

You have the chance of winning one of the 3 prize packages containing all three of my foam stamp sets by leaving a comment today here on the blog and the following days on all blogs participating. Stampendous posts throughout June 13-17 every day a list of blogs participating and I have some awesome friends joining me :)


Comments (43)

  • NancyGrace Sims

    |

    I LOVED Cheiron’s ATTITUDE IS EVERYTHING here in Hillsboro, Oregon.

    Reply

  • Susan

    |

    When I was a kid I loved paper dolls. Next I started sewing so I could have my own look. Love this

    Reply

  • Tamiko McCurry

    |

    now you are a fashionista by default… such fabulous little outfits!! darling tags!

    Reply

  • TracyM #6773

    |

    ABSOLUTELY FABULOUS tags, SO GLAMOROUS, the colours, layers and textures DELIGHT, LOVE them ALL!!!
    The second I saw Fashion Dame, she won my heart, it filled it with precious memories from when I 1st saw my Mother’s dressmaking sketchbook from her studies in the late 50’s.
    Tracy from Australia

    Reply

  • Claudia Jean Nelson

    |

    You are amazing. These are great. I love them so much. Thank you for the inspiration

    Reply

  • Joela Pascoe

    |

    Wow what awesome cards

    Reply

  • Bea savellano

    |

    All three are very cool. Love the sequins…b

    Reply

  • Julie

    |

    Wow, these are so wonderful! I love each one, so unique!

    Reply

  • Joi @RR

    |

    Cheiron – I feel like I have just watched Nat’s own private Project Runway Allstars fashion show!!!! WOW – you really did Nat’s stamps up proud girl – your creations are over the moon SPLENDIDLY CHIC. Your tags are my VERY FAVORITE of all the designs I have seen of the Fashion Dames. FABULOUSLY WONDERFUL – totally eye candy – going back to enjoy another look. j.

    Reply

  • Rachel Alexander

    |

    Wow, you are such an inspirational artist, I love your new stencils and can see that they are so versatile, the imagination runs riot with ideas!

    Reply

  • Jackie Schachter

    |

    Great tags! Love the mixed media backgrounds and all the outfits. Also like how the sentiments fitted each tag.

    Reply

  • Michelle Rydell

    |

    OMG I love that sequined skirt! All of the outfits you designed are so fun Cheiron! Great way to use the stamp set!

    Reply

  • Linda Edkins Wyatt

    |

    I would soooo love to win the stamps. I make arty paper dolls and atc dolls and would love to have a set to play with!

    Reply

  • Judy B

    |

    What a great idea, treating the image like a paper doll and then dressing it up. Thanks for sharing with us.

    Reply

  • Rae

    |

    Love this – these are so cute! Great and clever ideas for sure!

    Reply

Leave a comment

My Own Drum – Gwen Lafleur

CS June My Own Drum

Happy Tuesday! It’s time for my Creative Squad to share a project with you with this month’s new theme: “My Own Drum”. Throughout the month of June, the team will use my new Fashion Dame Rubber Stamp Set to interpret the theme. This theme is all about inspiration, creativity, and personal expression. I asked my squad to create something that celebrates the power of individuality. March to the beat of your own Mixed Media drum this month!

We are kicking off with an art journal page from Gwen Lafleur. This is a super inspiring reminder to us all to do what we love, even if it means covering stuff up :)

—————————————————————————————————

Gwen June Headshot

This month’s theme, “my own drum” was perfect for me, and lots of fun to work with! I tend to be a bit of a loner – I’ll go off on my own or join up with tour groups where I don’t know anyone else and go on crazy, exotic adventures. I’m also usually one that follows what I like rather than what’s trendy in clothes (even as an 80s child in elementary school, I knew parachute pants weren’t a good idea for me. LOL.) I’m the same with music, food, and especially with my art! Don’t get me wrong… I love to see what new things other people are doing and what tools and techniques are cool. That’s how we learn, right? But more and more, it’s important for me to take whatever I learn and go in my own direction as much as possible; to be true to myself in my work, even if no one else likes it.

My-Own-Drum-Art-Journal-Page---Final---Gwen-Lafleur

For this month’s project I took those thoughts and used them to create this art journal page. I used the Fashion Dame stamp set and created three silhouettes as my focal point – in my mind, they’re three different aspects of me. There’s a bit of a double meaning to the color and pattern on this page… first, something I like to do a lot in my work that really bothers some people is to cover things up. Second, I love the idea of the inside of the silhouettes being full of pattern and bright colors while the outside is extremely subdued. I think that speaks a lot to my own personality (and the rich inner life of an introvert. Ha!)

My-Own-Drum-Art-Journal-Page---Steps-1-4---Gwen-Lafleur

To make this page, I started out by stamping with the Fashion Dame stamp set – I did different combinations of the body and clothes to get the three silhouettes. I just stamped them on copy paper and then cut them out. Next, I prepared my background. I gesso’d and painted, then I collaged on pieces from a sewing pattern (I couldn’t resist the tie to fashion!) I did some stenciling on top with some of Nathalie’s StencilGirl stencils. Once I had a nice hot mess of color and pattern, I took my three silhouettes and adhered them securely with repositionable adhesive. Next is the part that upsets some people… I took some Payne’s Gray paint and mixed it with satin glazing medium, then proceeded to paint over the entire page.

My-Own-Drum-Art-Journal-Page---Steps-5-6---Gwen-Lafleur

For the next step, I use baby wipes to push back a little of the wet paint. I wanted most of the page to be at least somewhat veiled with the darker color, especially near the silhouettes. Then I peeled off the masks / silhouettes (do this while the paint is still wet so it doesn’t seal down the edges of the mask.) I love the contrast of the areas that were masked off versus the dark background with just hints of pattern and color showing through.

My Own Drum Art Journal Page - Final 800x800 - Gwen Lafleur

To finish it off, I took a fine line painting pen and filled the well with white acrylic ink. I used this to add the journaling around the silhouettes and to put a border on the page. I added the dots with a white paint pen, then used red fluid acrylic paint mixed with airbrush medium in a fine line applicator to sprinkle some dots around the page. Voila! A finished art journal page that shows how I like to march to my own drum both in my art and in life.

—————————————————————————————————

I think it is so cool that Gwen followed her instincts with the dark overlay – this is what the  theme is all about and the results are gorgeous.

Besides the supplies listed below (some are affiliate links), Gwen also used a vintage sewing pattern and Hermafix temporary dot adhesive:

SuppliesCJS

Maybe you will even play along with us -I would love to see how you interpret our monthly themes. Email me how you used my stencils and stamps with the theme and email me an image – I would love to share your projects in my next “n*Spiration From Around the Globe“!

See you next Tuesday for another project from the Creative Squad!

Comments (10)

Leave a comment