Tutorial

Aussies Rule or Gesso-Marker-Letters-Tutorial

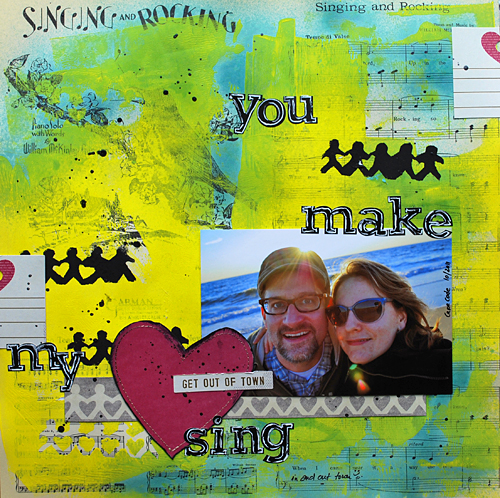
Now that’s a title- huh? LOL. I created this layout with the new Cocoa Daisy January Tea & Cupcakes Kit.

Being able to teach 18 workshops last April in Australia still makes my heart sing. It was such an amazing experience and my students were sooo fun and creative – so that is why Aussies Rule :)

In the kit are those black American Crafts Felt letters- which I love – but after creating a couple layouts with them I was a bit tired of the harsh black (this out of the mouth of someone who LOVES black- LOL).

So now changing up the color here with a marker is a bit challenging since a) the letters are felt – they love to act like a sponge making it hard to apply markers and b) they are black – even harder to get a color showing. There comes….GESSO to the rescue ;) A nice primer- that has so many versatile uses from priming backgrounds, applying texture, for embellishments, manipulating photos….ah …..crazy yummy stuff

I just took off the letters I wanted to use and put them on a Craft Mat (Teflon Sheet will do too), so that you can easly peel them off later and still use them being tacky. I used a wet brush and added the gesso with a thin layer – it cover most of the black – I didn’t want it to cover all- and I was able to get some texture worked out this way. You can of course just apply a thin even unwatered down layer. Just make sure to not add it too much into the insides of the letters.

After the Gesso dried- and that goes quick – I used two different LetraSet Promarkers . First I painted the bottom with the darker green and then the top with the lighter green. Always better to have the darker color on the bottom so it doesn’t look awkward. Peel of the letters and apply them to the layout. Voila

And there you go – you have the black a bit peaking out- but it is not as harsh anymore- the colors are fitting to the mini letters I used from the kit and I added some texture that fits the workshop I taught in Australia :) Pretty easy and although it looks like a lot of work- it is actually not- easy peasy fast -promised!

————————————————-

If you are interested in other and way more techniques and tutorials with Gesso check out my 5 week-long Über*Media Online Workshop starting January 15, 2012. More infos here

Wishing you an amazing day!!!!

huge hugs

nat

Comments (15)

  • Eniko

    |

    Aussies DO rule and I love what you did with the title! Happy Jumpstart!

    Reply

  • MicheyMoo

    |

    Perfectly apt use of these thickers on this layout from the class. I loved meeting you that day (I was in the earlier class that morning sitting with the delightful Louise) and loved the inspiration you provided in this class. I’ve been getting fabulously messy with gesso and mists ever since!! And loving the Jumpstart to 2012 too!! xx

    Reply

  • LindaBrun

    |

    Great tutorial Nat.. Now I know what to do with those brown felt thickers I bought for a special project, but can’t seem to find a new use for the until now… Hugs

    Reply

  • Riikka

    |

    That picture and the idea of painting Thickers rocked my world! Thank you so much! I was creating a page when I noticed this post and immediately thought of using the idea with a twist – I painted the letters with white crackle paint.

    Reply

  • Marilyn Peter

    |

    Wow, love this tip!! Would never of thought to use Gesso, that is one thing I forget is in my stash!! Will have to pull it out and leave it where I can see it!
    Love the letters with just a touch of black showing through, LOVE your layout!!

    Reply

  • Tana

    |

    Hi Nat!! Thanks for the tutorial, it’ s a great idea! I still love black letters but… who knows… ;) I must take a note about this tip. Have a nice day! Hugs ♥

    Reply

  • misty

    |

    I love the way those letters look!!! Awesome…thanks for sharing!

    Reply

  • Vibeke

    |

    Your letters is so cool!! The sun is lovely!!:)
    Thank you for the inspiration:)

    Hugs

    Reply

  • Linda B

    |

    Hi Nathalie, thank you for the kind comments you left at my blog today. I’m finding a lot of inspiration in the Creative Jump Start Summit 2012… thank you for putting it together.
    I would never have thought of altering Thickers in this way… a fabulous idea! What a great LO!

    Reply

  • marianne/skorpionen

    |

    ahhhh…love your new letters and just love the color combination!

    Reply

  • Carol

    |

    How creative to alter those letters to suit your layout!

    Reply

  • Sue Clarke

    |

    Like the LO and thanks for the idea of altering the letters…for some reason I think of altering many supplies but usually not those (unless they are plain chipboard).

    Reply

  • Anne Porretta

    |

    As a art scrapbooker/journalist/mixed media artist, I use gesso for so many things . . . thanks for another creative way to add to my techniques!

    Reply

  • Peggy Lee

    |

    so love this tip!!!! thanks for the great tutorial!!!
    Peggy Lee

    Reply

Leave a comment

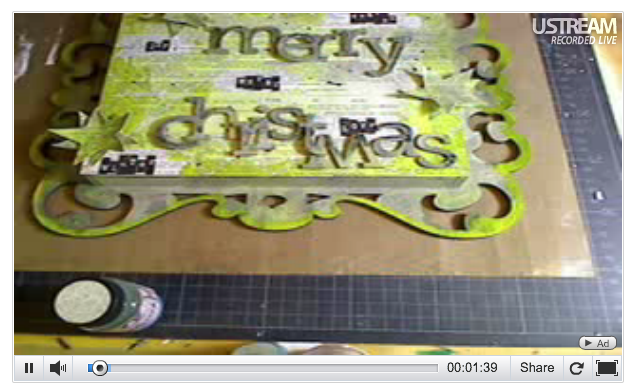
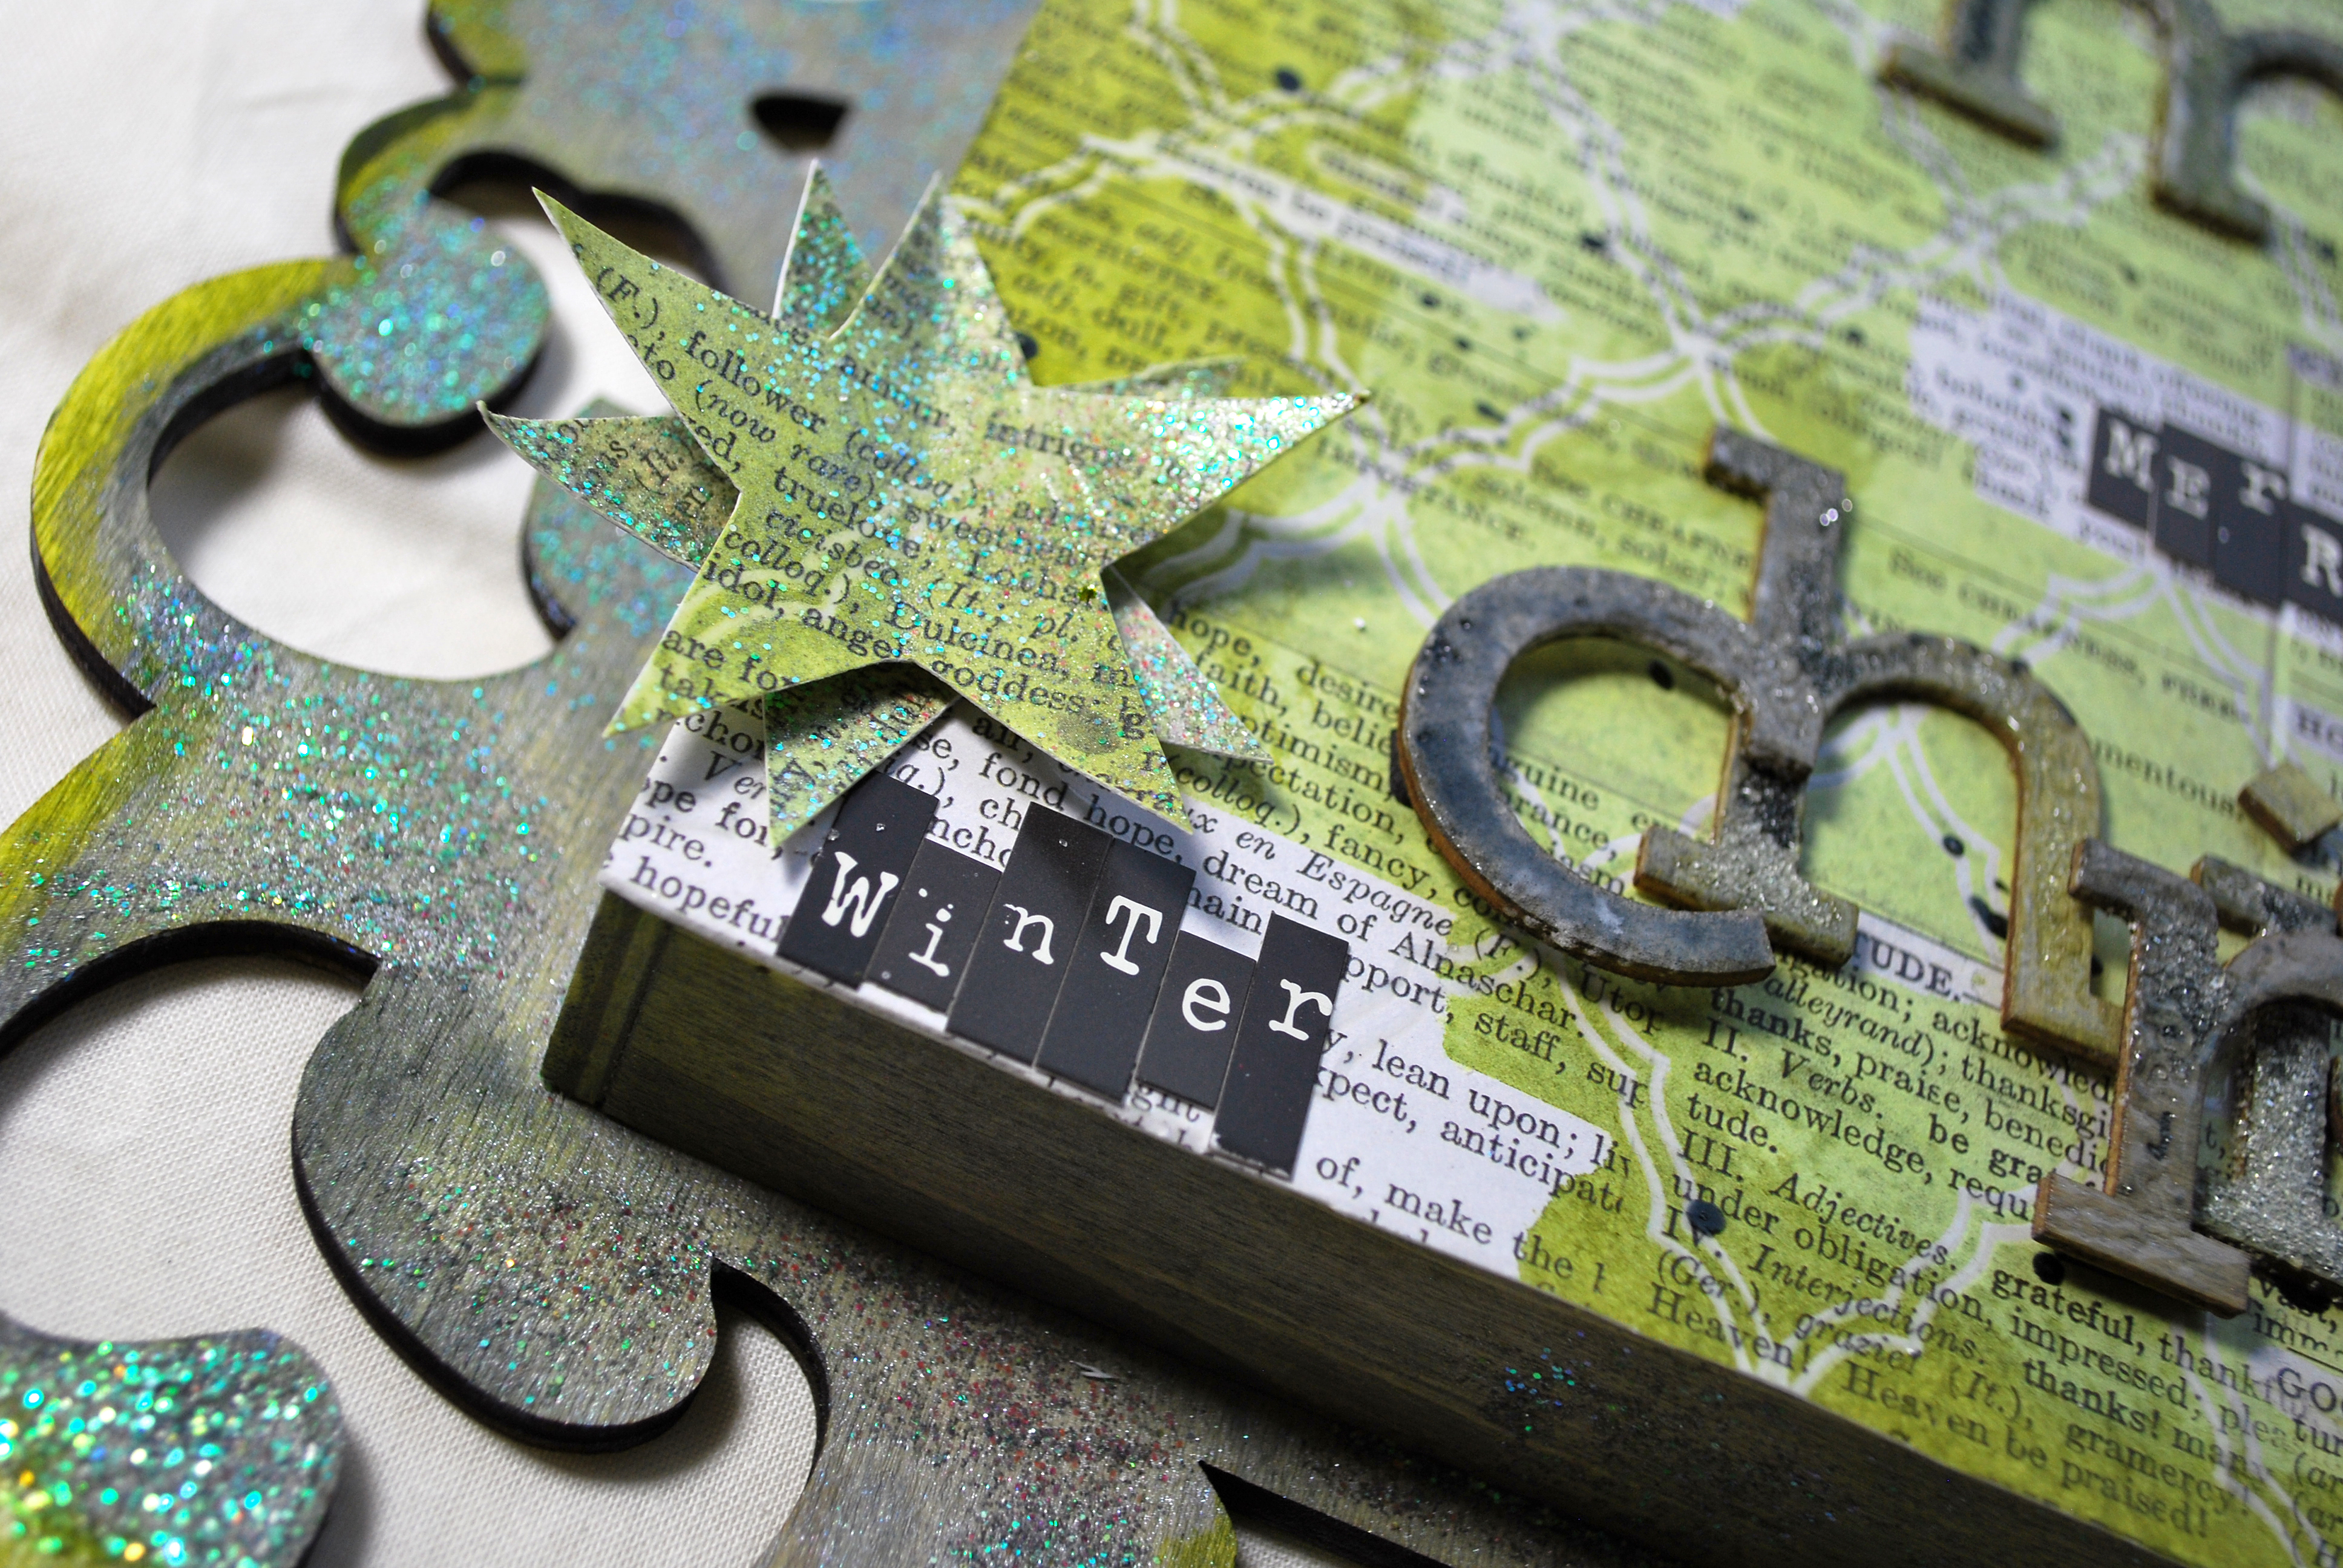
Tattered TV – Christmas Frame Video & Tutorial

Thank you to all of you who joined me in the Tattered TV Class hence this busy time of the year! What an awesome international crowd we had from Germany, Switzerland, Greece, The Netherlands, Spain, Denmark, Belgium, The USA and even Australia and Singapore! You rock my world!!!

If you missed it – no worries- it is not as funny as if you have the chat included- but you can still get the picture – here you go – the recorded version AND a downloadable PDF with instructions :

Klick


So I showed you how to use all four Tattered Angels Paint Media on paper and on wood,  mix them wet and dry, use them as Embossing Agents and how to create some fun and easy Resists .

And here is the Tutorial for this as a pdf – I hope you like it :) Tattered TV Christmas Frame Tutorial

—————————————–

You might also like my 5 week long Online Class Über*Media Gesso starting January 15th, 2012 – check it out . The holiday special price is still up till December 25th, 2011.

Have a wonderful day!


Comments (4)

  • Marjie Kemper

    |

    Loved your class, and today I am making something completely inspired by it!

    Reply

    • nathalie-kalbach

      |

      ohhh I cant wait to see it!!! you have to show me, ok??? Loves !!! nat

      Reply

  • Jan Hennings

    |

    Didn’t get to join you but LOVE, love this, Nat :) Merry Christmas :)

    Reply

Leave a comment

DIY Spool Ornaments

Everywhere you go you see now wooden spools- I love them. One store around the corner had vintage spools as ornaments- but I was simply not able to afford more than one…because wowser…when did the prizes for ornaments go that high?

And it was not for a handmade ornament…So ….off home and checking my treasure box, you know the one with the things where you always think…Oh I might better wait till I have a better idea for this because I don’t want to ruin it ? Well I have one of those. And in there…JB wooden spools that I have once in a while petted and then put back into the treasure box. I made my own super easy ornaments ….with them:

I attached some 7Gypsies Notepaper around it, then used a wire and in the loop on the bottom I hang one of those also long time treasured blings by 7Gypsies and Tim Holtz Love Tag. On the top I put the ball- which came in one of the Cocoa Daisy Kits- I do not really know which company they are from, since I don’t have the package anymore, then on top a Vintaj Bead Cap and another one the other way around on top.

Then I used Stickles and Liquid Pearls for the spools and put some of it into the top bead caps as a filling too. Super Easy – and yeah- maybe not as glamorous as the mega expensive one in the store I saw…but ….mhhh – I like it better ;)

Now off to run some errands for the holidays :) Tomorrow I will show you all the amazing ornaments that our Secret Santa Ornament Group created to send around the world – so much fun !

————–

[wpvideo YjpAQsES]

Are you ready to learn lot’s of fun techniques for using Gesso? Backgrounds, Texture, Embellishments, Manipulating Photos? You name it- you get it in my Über*Media Gesso Workshop – More Details here

Have a gorgeous day

nat


Comments (19)

  • Christiane

    |

    Ahhhh, they’re sooooo cute!!!! Love ’em!!

    Reply

  • Lisa

    |

    So gorgeous, Nat! They are so perfect!

    Reply

  • marianne/skorpionen

    |

    Ohhh…gorgeous spools! I nearly put one in the bin a couple of months ago. Can’t imagine what I was thinking. Anyway, it’s well kept in my “treasure box” for later.

    Reply

  • Marjie Kemper

    |

    Love these, Nat! Pure beauty. And thanks for the chuckle on petting them and storing them in the past. They’re much better out and about, embellished for all to see.

    Reply

    • nathalie-kalbach

      |

      LOL- next time I pet my embellishments I will remember your words- LOL
      hugs
      nat

      Reply

  • Michaela

    |

    I love the spool ornament you made!! I think I have to browse my treasure box too..

    Reply

  • Sue Clarke

    |

    Delightful ornaments Nat and now I have something to do with the Cocoa Daisy shiny crystal balls. Can’t wait to see the ornaments that folks made!

    Reply

  • BA

    |

    die sind total süss nat
    xoxo BA

    Reply

  • Jan Hennings

    |

    beautiful ornaments..love using wooden spools!

    Reply

  • Kim S

    |

    these are fabulous!

    Reply

  • Mary Bennetts

    |

    Your ornaments look very cool Nathalie, love the tags on the bottom. Wishing you a wonderful Christmas and all good things for the New Year

    Cheers
    Mary x

    Reply

    • nathalie-kalbach

      |

      I wish you a wonderful Christmas and a happy New Year too Mary!!!!
      huge hugs
      nat
      Reply

  • Geles

    |

    Los adornos son preciosos y el video GENIAL!!. Besos guapa.

    Reply

  • AnnaB

    |

    These ornaments are fabulous Nat! Love them!

    Reply

Leave a comment

3 DIY Silk Screening Ideas

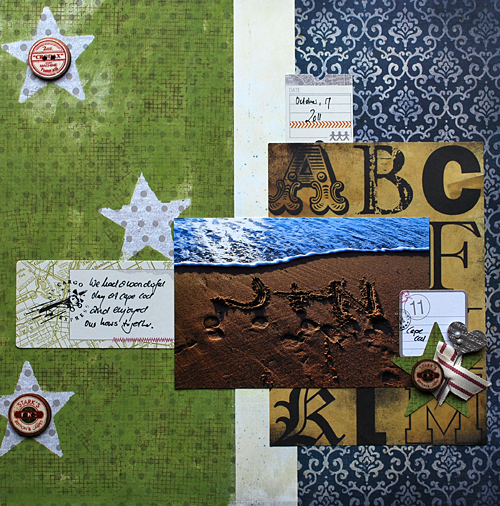
This weekend we had a crop at Cocoa Daisy and I showed three ways on how to do your own Silk Screens and I wanted to share those with you too :)

Silk Screening is such a wonderful craft – I love the look of it- the crafty selfmade look on fabric. When I see home decor or clothing created with silk screening I get instantly drawn to it. I have thought of a couple things on how to incoporate silk screening into my paper art and I thought I would share three techniques with you today, because you can do it too and you can make your own screens.

Let’s start with an easy technique – I call it

FAUX SCREEN PRINTING
One of the things that are so intriguing with the silk screening is the texture of fabric and the imperfection and we…can fake it just with some shapes and our amazing Cocoa Daisy stamps

Image

Supplies:
Shape – DieCut – Star, Circle etc.
Scrapbooking Paper from your Cocoa Daisy Kit
Non-Permanent double -sided Tape- for example MyStik Non Permanent by Scrapbook Adhesives by 3L
Cocoa Daisy Background Stamp – for example November Kit
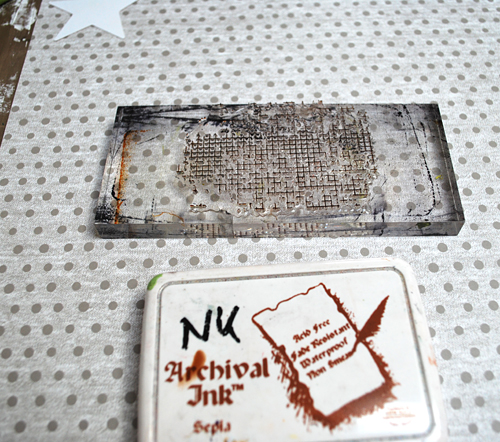
Ink Pad- for example Distress Ink or Maya Road Ink pad from October Kit
Archival Ink

Step by Step:

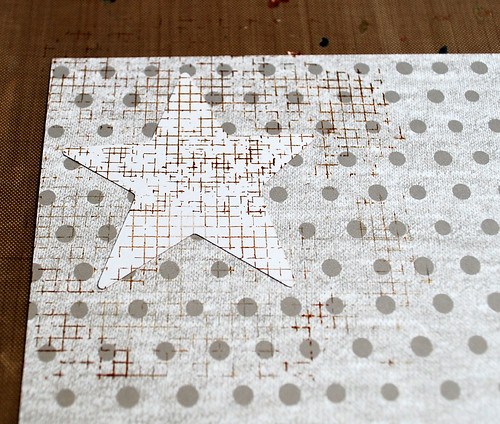
Take a piece of Scrapbooking Paper- here from the wonderful November Kit and a Die Cut Shape.
Image

Take the Cocoa Daisy Stamp and Archival Ink (permanent)

Image

Apply some non permant tape onto the shape- here the star and put it down onto the paper. Stamp over with the stamp

Image

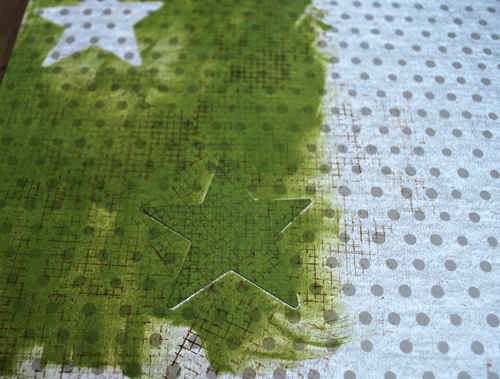
Go over with an ink pad -for example the Maya Road Ink Pad that was included in the October Kit.

Image

Take off the shape- if you have more then one then you can just use them all in one setting- but with one this is the way to go. Repeat all steps. It doesn’t matter if you stamp first or ink first.

Image

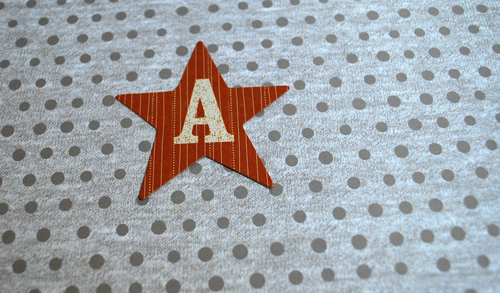
You can even use the shape you used- either with the treated side or the side you inked and stamped on as an embellishment

Image

next up is a technique that is often used on making you own T-Shirts

FREEZER PAPER SCREEN PRINTING

Image

Supplies:
Freezer Paper
Scissor
Cutting Tool
Cutting Mat
Iron
Brayer and/or Brush
Acrylic Paint
Scrapbooking Paper- for example the wonderful Amy Tan American Crafts Paper in the November Kit

Step by Step:
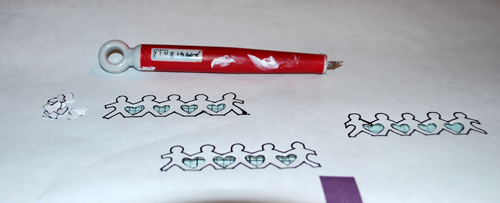
Take a paper and put some Freezer paper on top – shiny side onto the paper and the paper side up – and trace the pattern – or just make your own pattern if you want.

Image

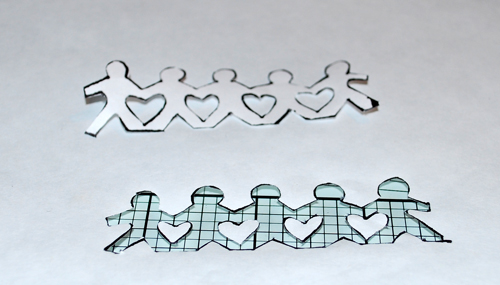
Place the Freezer paper now on a cutting mat and start cutting out the patterns. Keep the insides- here the hearts- you can use them

Image

you actually have two patters after you are done- that you can use

Image

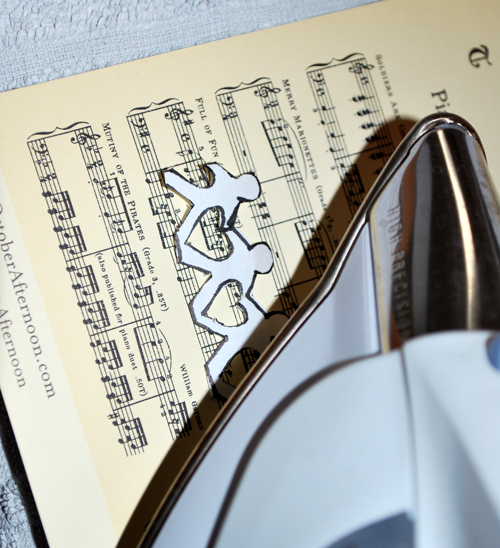
Now you can iron on the first cut out piece stencil onto the Scrapbooking Paper

Image

You can now either brayer some acrylic paint over the stencil or just dab some acrylic paint around. Let dry
Peel off the stencil and voila

Image

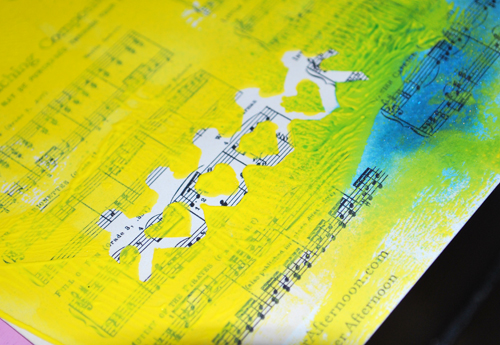
Let’s take it up a notch and put the other mask on top and iron it – you will need also the little cut out middle pieces- in this case the hearts

Image

dab over acrylic paint, let dry and lift the freezer paper – and voila you have the reverse print of the one before

It is so much fun to incorporate this technique with the actual paper you traced as you can see here- it ties the design together by repeating the pattern:

Image

Image

And last but not least I throw in a video about a technique that I have shown long time ago – so for those of you who want to get even a bit more adventureous – you can do this too

SCREEN PRINTING

Materials and tools you’ll need:
• A surface to work on–cardboard or canvas
• Paint brush
• An embroidery hoop (You can get this at most craft supply stores, but you might also
get a cheap one at one of the kid’s toy stores.)
• Acrylic paint
• A gel medium or fluid mask gel
• Sheer curtain material, such as a tulle or old silk pieces,
• An image, either a print-out or hand drawn

here is the video, which is a bit goofy and was for a competition in 2008 – so I changed a bit….not in the goofiness though- LOL:


I hope this gives you some ideas on how to incorporate some easy Silk Printing in your art work – I would love to see your projects if you try one of these techniques

Have a wonderful day

nat
Comments (5)

  • Joan Gilmore

    |

    Wonderful techniques, Nat! Love what you’re doing!

    Reply

  • Jenny Petricek

    |

    Hi Nathalie! I’m so happy to be back to visit your site, after several months of easing into full-time work again; I haven’t had the time I used to, to check out the great sites belonging to my blogging buddies.:-(

    At any rate, thanks so much for sharing these great techniques! I’ve started exoerimenting with masking lately (when I actually have the time to create art), and your freezer paper process is one I definitely need to add to my repertoire!

    Reply

  • Cynthia Lloréns

    |

    Wow!!!!!!!!!!!!Those are stunning yechniques I just love to learn news technique!!!!
    I love the way you mix so different styles.
    Thanks so muvh for sharing.You inspired a lot.
    Kisses and huges from Brazil
    Cynthia

    Reply

  • Isabel LopezDel RinconTroussel

    |

    Hi Nat!

    Awesome ideas… although, for technique #2 freezer paper is required… I don’t know if it’s easy to find in Germany… in Spain (and I’m guessing in most european countries too) not so much! I’m a quilter (freezer paper is largely used in quilting), and have friends in the US, where those rolls are so inexpensive (here, when you can find the paper, in a quilting store, of course, it’s usually sold by the sheet or by the meter and is quite pricey), but I’ve learned from Spanish friends that you can substitute freezer paper for the paper that covers the printer/copy paper stacks: the inside would be the “tacky” side you iron face down. I’m not sure I’m being very clear here, but I just wanted to share this idea for those of us who don’t have access to freezer paper (if they have access to a computer, they probably also own a printer and the paper used in it, or even work in an office where those papers are just thrown away – and where paper stacks are used much faster that at home!)

    Thanks for sharing those techniques with us… I think I’ll try them this week

    Isabel

    Reply

  • Kim S

    |

    I remember the Bambi one – loved it then as much as I love it now. The other two examples a re fabulous too!

    Reply

Leave a comment

Tattered TV – Us Layout- Video & Tutorial

Thank you to all of you who joined me from all over the world (Germany, Singapore, USA, France, Spain, Greece, The Netherlands etc.) yesterday in the Tattered TV Show – even some people joined me two times- since due to some confusion with the winter time :) Europe already changed the clocks last weekend while in America you do it next weekend, so we had all the times wrong in our newsletter. But hey…LOL…good thing I’m flexible ;)

If you missed the show- don’t worry- I recorded it – and you actually get the first version – clean hands and clean surface in the beginning included.

Here is the Video:

Klick :)

I showed how you can use Chalkboard as a stamping medium and also some different ways on how to use all four of the Tattered Angels Paint Glimmer Mist, Chalkboard, Glimmer Glaze and Glimmer Glam and did show how you can use the different specifics of those products and make it work for different techniques and how you can mix them too.


Here is the tutorial in English as a downloadable pdf NathalieKalbach tattered-tv-us-tutorial

I hope you like it :)

Until next time on Tattered TV on December 21 st, 2011 !


Nat

Comments (8)

  • Cynthia Lloréns

    |

    Nat..I just love to whatch your video tutorial, but I coud´t leave a comment in there, so I will tell you…I just love and Thanks for sharing with us !!!!
    I love to see all the details.
    Kisses and huges from Brazil
    Cynthia

    Reply

  • Maria Schmidt

    |

    Hi Nat, i´m totally inspiried after watching your video! Thanks!
    Hugs, Maria

    Reply

  • Tanja

    |

    Ich habe es leider nicht ansehen können. Aber zum Glück zeigst Du uns das Video noch mal auf dem Blog. Das Ergebnis gefällt mir!

    LG,

    Tanja

    Reply

  • Sue Clarke

    |

    Nat, you so rock those deep blues and greens and purples on this LO.
    Thanks for sharing your knowledge with us…your humble fans!

    Reply

  • AnnaB

    |

    I only managed to watch parts of the show because of Tuva, but it was so fun seeing you work in a live show like that! I’m going to check that PDF out!

    Reply

  • Marie-Anne Raeman

    |

    thanx for the tutorialpdf…
    and thanx for the great tutorialvideo
    marie-anne

    Reply

Leave a comment

Acrylic Canvas Flower Tutorial

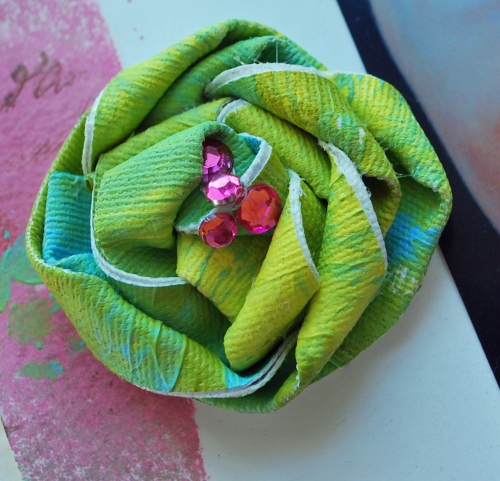
In one of my Layout-Workshops from last year I taught how to create those Acrylic Canvas Flowers and I thought I should share with you :)

In einem meiner Layout- Workshops vom letzten Jahr habe ich gezeigt, wie man diese Acryl-Farben-Leinwand-Blumen macht und ich dachte, ich zeig Euch das mal hier :)

Take a Claudine Hellmuht canvas sheet and put several drops of 2-3 different acrylic paints on it – drops’ size about a pea

Take a brayer and roll the colors out – mixing them – this gives the surface also a nice texture

Let dry- it may crinkle and roll together- that is fine- don’t worry too much about this.

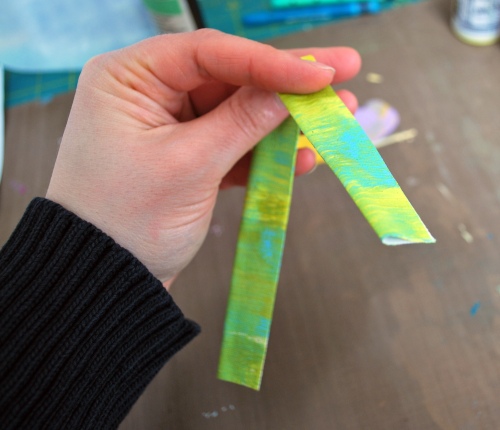
After the Canvas Sheet dried cut out three circles – 2 smaller ones, one bigger one . Also cut approximately 6 stripes each 3 cm / 1.2 inch wide. Peel off the protection backing of the stripes, fold the stripes in the middle lenthwise and stick together. You now have a thin stripe with painting on each side.

Glue the end of one stripe to the middle of one of the cut out canvas circles. Press down hard and then start twisting the canvas stripe in a circle around the center froming a nice flower. Use the glue here and there to make it stick. Cut off peaking out circle piece on the edge if necessary.

Place some peals and crystals on top and place it the flowers on a layout- voila :)

Products used:


Comments (8)

  • Tesa

    |

    It´s a good idea, I´ll try. Thanks for the tutorial.
    Lo is beautiful, I like very much the background.

    Reply

  • Tina

    |

    Thanks for sharing, paint queen!

    Reply

  • Tanja

    |

    Gefährliches LO! *grins* Gefährlich schön! Find’s klasse, wie du den Holzrahmen eingesetzt hast, – ich hab mich immer gefragt, wie man sowas auf einem LO unterbringen soll…Liebe Grüße…Tanja

    Reply

  • Kim S

    |

    Yup, I definitely need a brayer too, coz I want to do one of these flowers now!

    Reply

  • Denise Morrison

    |

    what a great idea! I love making backgrounds with a brayer. Never thought of this. Going to try it with paper first, :) thanks for sharing Nat.

    Reply

  • willieburgscrapper

    |

    This is fantastic! LOVE how it looks!!! Great way to make the flower totally yours!!! LOVE that photo in the layout as well- too cute!

    Reply

  • jan1219

    |

    aww! What a sweet photo and love the flower and tutorial :)

    Reply

Leave a comment

Prima Workshop – Romantic Grunge – Video & Tutorials

Thank you so much for all those people that joined me yesterday during my first Live With Prima Show – we had people from all over the world – Germany, Singapore, USA, Sweden, Norway, Canada, Spain, England and so much more- it was so fun! The Chat was hilarious as you can tell when you see the recorded version.

Vielen Dank an alle, die gestern mit dabei waren bei meiner ersten Live With Prima Show – wir hatten Zuschauer aus aller Welt – Deutschland, Singapore, den USA, Schweden, Norwegen, Kanada, Spanien, England – und noch viele andere – es hat so Spaß gemacht. Der Live -Chat war zum Schießen, was man wahrscheinlich auch in der aufgenommenen Version hören kann.

Klick :) 

I showed how you can create different versions of canvases using the same products and techniques. And besides some “accidents” in the background – like spraying into my “face” (I actually sprayed the part between my neck and my stomach – LOL), a falling canvas onto my head and a demanding cat – all went well- LOL

Ich habe gezeigt, wie man verschiedene Versionen einer Leinwand mit den gleichen Produkten und Techniken kreieren kann. Und außer ein paar Unfällen im Hintergrund – wie zum Beipiel das versehentliche Ansprühen meines “Gesichts” …na ja, ich konnte ja nicht laut rausschreien, dass ich mir in den Ausschnitt gesprüht hatte- LOL – und einer auf mein Kopf fallenden Leinwand, sowie einer rummeckernden Katze – lief es glaube ich ganz gut – LOL.

Here is the tutorial in English as an downloadable pdf Romantic Grunge Tutorial
– which you can print out to go along when you watch the video. It is not a whole Step by Step tutorial – but a short one that lists all you need and the main steps :)

Hier ist eine KURZ-Anleitung in Deutsch als Pdf Romantic Grunge Kurzanleitung
Die könnt ihr runterladen und ausdrucken und beim Anschauen des Videos zur Hilfe nehmen. Nicht alles ist so ausführlich erklärt wie im Video – nur die Hauptmaterialien und die Hauptschritte :) aber ich glaube das das in Verbindung klappt :)

I hope you liked it ! Have an amazing day and see you soon :)

Ich hoffe es hat Euch gefallen ! Habt einen grandiosen Tag und bis hoffentlich bald :)

Comments (7)

  • Alexandra Boehnke (Tandi01)

    |

    Hallo Nat,
    ein super Live-Workshop. Ich habe sehr viel gelernt. Hoffentlich kann ich mal an einem Workshop von dir teilnehmen. Bei der SBW im Mai konnte ich leider nicht und im November habe ich auch keine Zeit. Einfach super! Bitte mehr!
    Liebe Grüße,
    Alex

    Reply

    • nathalie-kalbach

      |

      Liebe Alex, ich freue mich, dass Du da warst! Ich würd mich freuen, Dich auch mal in Echt zu treffen! Dir noch ein schönes Wochenende und Danke für Deinen lieben Kommentar! nat

      Reply

  • Mireia

    |

    Liebe Nat,
    Tina und ich haben es wirklich genoßen!! Nat, glimmer, deine Katze, einen Glass Bayleis (für uns ;)… einfach super!!!

    Liebe Grüße,
    Mireia

    Reply

  • Katerina

    |

    It was great!!! Thank you!

    Reply

Leave a comment

Live With Prima Class – Romantic Grunge – Aug 17

International show:Germany

Romantic Grunge Canvas Class with Nathalie Kalbach

August 17th at 8:00pm CET (also 20.00 Uhr) , / 11:00am PST/ 2:00pm EST

germany

Join Nathalie as she creates a romantic, yet grungy canvas! She will show you how to build layers on the canvas, creating a lot of visual interest and texture. You will learn many techniques using a variety of Prima products such as Prima masks and canvas, with Glimmer Mist, Gel Medium and Gesso. Nat will also talk to you about how you can use the very same supplies and techniques to create completely different looks, to customize any project, such as layouts, home décor and more.

You can watch the show live on the Prima U-Stream Channel – or later recorded at any time you want. Just go here: http://www.ustream.tv/channel/primaflower In Live Session I can actually chat with you and answer questions ;)

Ihr könnt den Workshop life über den Prima U-Stream Channel anschauen – oder aber auch später als Aufzeichnung wann immer Ihr wollt. Geht einfach hierhin http://www.ustream.tv/channel/primaflower
Bei der Live Fassung kann ich mit Euch chatten und auch einmal das eine oder andere auf Deutsch sagen ;)

I would love to have  you there!!!

Ich würde mich freuen, wenn Ihr kommt !!!

Leave a comment

Guest Artist Video for Stampington & Company

I did another video for Stampington & Company.

Ich habe für den Verlag Stampington & Company  ein weiteres Video gedreht.

Stamped Flowers using an Embossing Metal Pendants Technique 

[youtube width=”480″ height=”385″][/youtube]


Have a gorgeous day!

Comments (7)

  • Cat

    |

    I watched this the other day, it was GREAT!

    Reply

  • Kerstin

    |

    Oh was für geniale Spielzeuge Du da hast! Und die Blümchen am Mantelrevers (Wintermantel braucht man ja noch) stell ich mir superschick vor.

    Reply

  • Sandra

    |

    Ist das toll!!!!!! Ich liebe deine Ideen :-)

    Reply

  • Sandie McCarthy-Roberts

    |

    Very very cute flowers! I’ll watch it when I get home. Love the look. Really creative.

    Reply

Leave a comment