Inspiriert worden Daphne und ich diesmal durch Ashely Calder’s Buch Scraptastic. Wir wollten unbedingt die Modeling Paste Technik ausprobieren und hier ist sie.
Daphne and I were inspired by Ashley Calder’s Book Scraptastic. We tried the Modeling Paste Technique and here it is.
Was Ihr braucht – What you will need
- Cardboard
- (Pinsel) Brush
- Gesso
- Modelier Paste/Modeling Paste
- Spitze/Point Stylus
- Kreide/Chalk
- optional Neocolors II
- Kosmetikschwämmchen/Eye Make Up Applicator
Zunächst braucht man einen Untergrund – am besten einen der recht fest ist – so etwas wie Graupappe oder Karton. Dieser muß zunächst mit Gesso behandelt werden, damit die doch feuchte Modellierpaste nicht durchzieht.
First of all you need a surface that is pretty sturdy- you can use cardboard or something similiar. You need to prime your surface with gesso otherwise the modeling paste will soak through.
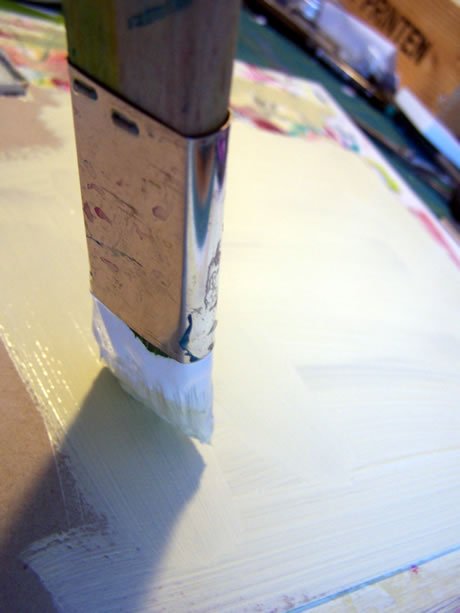
Wenn das Gesso getrocknet ist, tragt eine dünne Schicht (nicht zu dünn) Modellierpaste auf. Entweder zieht Ihr sie ganz glatt, oder aber für mehr Struktur lasst Ihr ein paar Unebenheiten. So wie ich – ich mag es lieber uneben!
After the Gesso dried, apply a thin coating of Modeling Paste. You can either do it totally smooth or leave some bulky areas for more structure. I did it with more structure- I like it better that way!

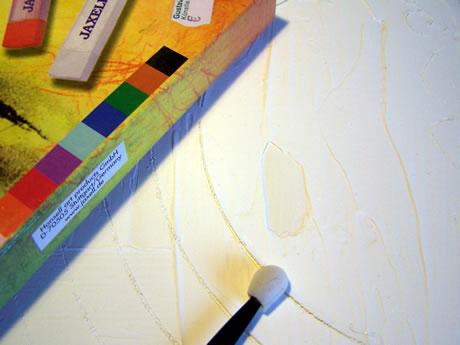
Wenn die Modellierpaste getrocknet ist, nehmen einen spitzen Gegenstand – zum Beispiel dieses Gerät für Embossing – und ritzt Formen, Buchstaben, Blumen – was immer Euch einfällt, in die Paste hinein. Seid vorsichtig, dass Ihr nicht zu fest aufdückt und dadurch dann auch den Cardboard mit einritzt.
After the Modeling Paste dried use a pointy tool to draw some shapes, letters, flowers – whatever comes to your mind – into the paste. Be careful to use not to much force as you can injure the cardboard too.

Nun könnt ihr entweder mittels Kreide und einem Kosmetikschwamm über die einzelnen Formen drüber wischen.
Now you can use chalk and an eye make up applicator to color your background.
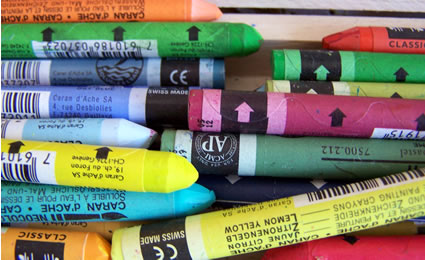
Ich habe darüber hinaus meine wasserlöslichen Wachsmalkreiden verwendet.
I also used my water soluble crayons.
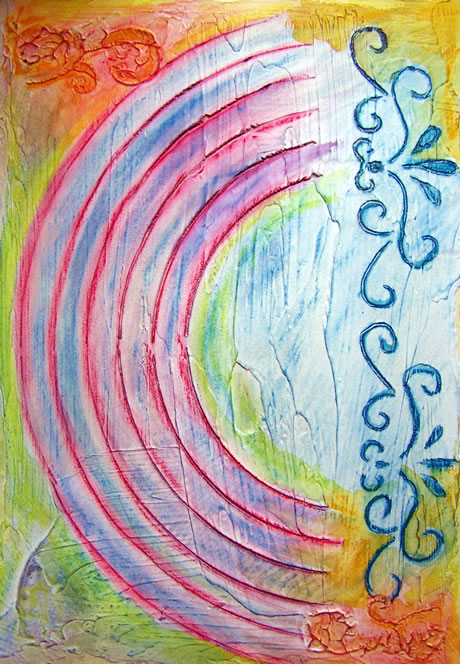
Und so sieht mein Versuch dann aus
And this is how my trial looks like
Schaut mal, was Daphne so gezaubert hat. Und bald zeigen wir Euch dann auch unsere Layouts mit unseren Versuchen.
Take a look at Daphne‘s result. And we will show you our layouts soon too.
Comments (20)
Scrapbooking Tutorials » ScrapScene
| #
[…] has a tutorial posted on how to use modeling paste. Nathalie’s result can be seen here and Daphne’s result can be seen […]
Reply
milkcan
| #
Very cool! I have that book and I love it!
Reply
merryheart2
| #
how neat!
thanks for the instructions.
Sandra
Reply
Scrapbook-Trends
| #
[…] nathalie, at 5:58 pm Layouts : Workshops | permalink | rss Letzte Woche habe Daphne und ich die Modeling Paste Technik gezeigt und natürlich wollen wir Euch auch unsere Endprodukte nicht […]
Reply
Gabriela
| #
WOW das gefällt mir!
muss gleich nochmal nachlesen wies gemacht ist…
Reply
D@nielle
| #
oooh I love your version too !
Reply
Linda Loe
| #
This is so cool girl you rock
Reply
elizabeth
| #
oh nat!
this is fabulous! i’m going to have to try this!
Reply
Vicki Chrisman
| #
I just want you to come here and have a technique day with me!!!! Teach me all these cool things! I officailly dub you QUEEEN of Techniques! You are somethun girl!
Reply
Drea
| #
Wie genial!!! Workshop angedacht????lol!
Von den Stiften muss ich mir noch mal mehr erzählen und zeigen lassen beim nächsten Treffen!!
Reply
Eeva
| #
Absolutely soo cool!!!
Reply
Amy K-P
| #
AWESOME my friend!
ABSOLUTELY AWESOME!
Reply
kerstin
| #
Großes Kino! Jetzt werd ich wohl mal diese bisher nutzlosen Chalks raukramen …
Reply
Liz
| #
absolutely stunning. you rocked this technique. can’t wait to see what the finished LO is going to look like.
Reply
christiane
| #
this is an absolutely breathtaking result!! LOOOOVE it!! :D
Reply
KimmyS
| #
Holy cow that is GREAT!!!! I love it, such a brilliant idea and I can’t wait to see how you incorporate this technique into your layouts
Reply
Zarah
| #
Wicked cool!!
Reply
Kristina
| #
Wow, that is so cool Nat. Love it!
Reply
Daphne
| #
Okay…I am afraid to post mine now haha… mine sucks this time! and yours TOTALLY ROCK
Reply
Natasja
| #
Love the result!!
Reply