Altered Art

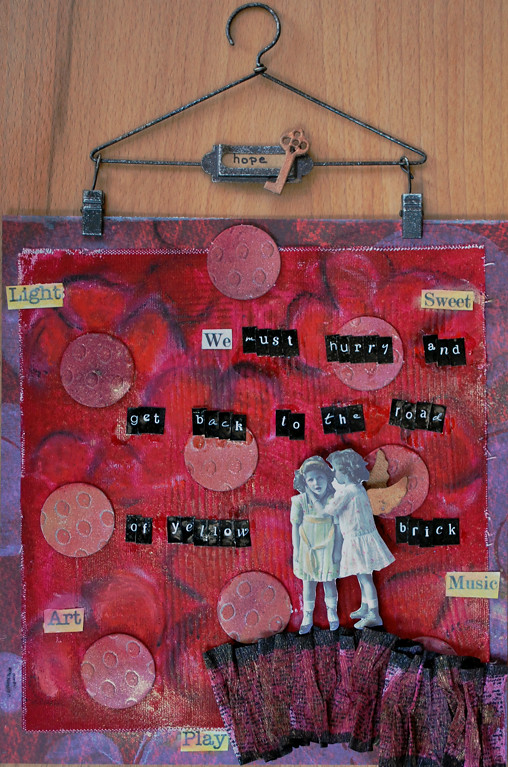
Hope Wallhanger

This wallhanger was actually inspired by the “Wizard of Oz” and the scene in the Poppy Field :)

Zu diesem Wallhanger wurde ich durch den “Zauberer von Oz” und die Szene im Mohnfeld inspiriert :)

*Hope Wallhanger*

“We must hurry and get back to the road of yellow brick” symbolizes the Key for Hope for me. The girls must hurry back to the road of art, light and music etc.

Supplies: eMOTions Paper by Nat Kalbach, Vintage Wire Hanger, Claudine Hellmuth Sticky Back Canvas, Liquitex Clear Gesso, Eco Green Crafts Acrylic Paints , Eco Green Crafts Paris Trunk Dye Inks, Oil Pastels, Tattered Angels Glimmer Mist, Ranger’s Grungeboard, Tattered Angels Crepe, My Little Shoebox Letter Stickers, Crafty Secret Fairy Sheet, SCRAPBOOK ADHESIVES by 3L™.

Techniques: I used clear gesso on the sticky back canvas and added texture to it with a comb and an old small lid. After it dried I used Eco Green Craft Acrylic Paint – thinned down and added it to several spots, after dried I used the Dye Inks. For the Grungeboard Circles I used a mixture of Dye Inks and Tattered Angels Glimmer Mist and adhered them to the canvas. I fringed the edges of the canvas and applied the piece to the eMOTions Paper, added some of the words and painted lightly poppy petals around the grungeboard circles. I sprayed the Crepe Ribbon with Glimmer Mist and ruffled it in a way that the girls mounted on Foam Pads would look as standing on it. After applying the Letters and attaching the folded grungeboard wings I sprayed over the surface again with Tattered Angels Golden Glimmer Mist to unify the look.

  • milkcan

    |

    This is so, so fabulous! Where on earth did you get that adorable hanger?

    Reply

  • Heidi Kelley

    |

    SO CUTE! Love the sentiment! And that crepe ribbon is superb. **HUGS**

    Reply

  • Karen

    |

    So cool how you used your inspiration. It’s literal, but not really. I love that!

    Reply

  • Sue Clarke

    |

    Awesome message…I love it!
    Funny that I did an art journal page today that had the characters from The Wizard of Oz on it.
    The crepe ribbon is super cool as a “carpet” to support the girls.

    Reply

  • Andrea MacDonald

    |

    I love it!

    Reply

  • sylvia

    |

    love the idea of adding texture with a comb… must try this out. lovely hanger all in all as well…. i have some leftover canvas, maybe i should give this a try…

    Reply

  • linda64

    |

    This is so beautiful. Love the colors, structure and design….
    Linda :-)

    Reply

Leave a comment

Somerset Home Publication

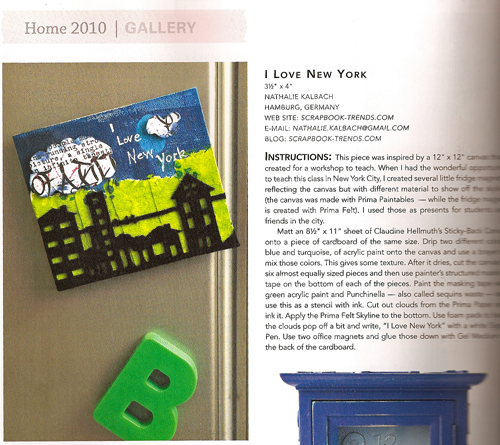
I was thrilled to surprisingly find the new issue of Somerset Home in my mailbox. My “I Love New York”-FridgeMagnet is published in there along with so many wonderful wonderful projects by other artists – this magazine is awesome!

Ich habe mich total gefreut überraschenderweise die neueste Ausgabe der Somerset Home in meinem Briefkasten zu finden. Mein “I Love New York”-Kühlschrank Magnet ist darin veröffentlicht – mit ganz vielen wunderbaren wunderbaren anderen Projekten  – dieses Magazin ist grandios!

Thanks for letting me share:)

huge hugs

  • Beth

    |

    Thanks for sharing the magnet with us Nathalie! I look forward to working with you more, maybe on next year’s edition of HOME? My pleasure to publish your work and thanks for the compliments on the magazine!

    Cheers,
    Beth

    Reply

  • christiane

    |

    yeahhh for you and huge congrats!! :D

    Reply

  • sylvia

    |

    gorgeous! this IS cool!

    Reply

  • Sue Clarke

    |

    I remember liking that magnet and I’m glad to see that they had the taste to put in in that mag…congrats Nat!

    Reply

  • Birgit Koopsen

    |

    Congrats on the pub! Glad to see you had such a great time in London! To bad you got sick! See you next week! :)

    Reply

  • Stine Maansen

    |

    Oh wow! That huge – congrats!

    and cool magnet! :-)

    Reply

  • Kim Sonksen

    |

    *squeaks* I LOVE that magnet…how wicked. And congratz on the pub!!!

    Reply

Leave a comment

Tattered Angels Glaze Resist

Tattered Angels Glaze makes for a great resist. If you apply it first and let it dry and then use Glimmer Mist or Chalkboard on top – the Glaze will resist it. So it makes for some fun techniques. Like this one.

Tattered Angels Glaze ist ein gutes Medium for Resist Techniken. Wenn man es zuerst aufträgt und trocknen läßt und dann darüber Glimmer Mist oder Chalkboard darüber sprüht – dann nimmt das Glaze die Sprühfarben nicht an. Man kann schön herumexperimentieren- so wie hier.

And here some information about the Workshop Weekend ScrapJause in Bavaria in February 2011  – The Prices and the timetables are up :)

Und hier noch ein paar Infos zum Workshop Wochenende ScrapJause in Bayern im Februar 2011- Die Preise und der Zeitplan sind gepostet :)

Have a happy week :) Euch eine tolle Woche :)

  • Stine Maansen

    |

    I need a danish retailer to fall in love with tatted angels! It´s the best company ever – love their product. Tou can only buy mists here.

    Cute tag – and FUN teq!

    Reply

  • Vicki Chrisman

    |

    Oh… such a great idea!!!

    Reply

Leave a comment

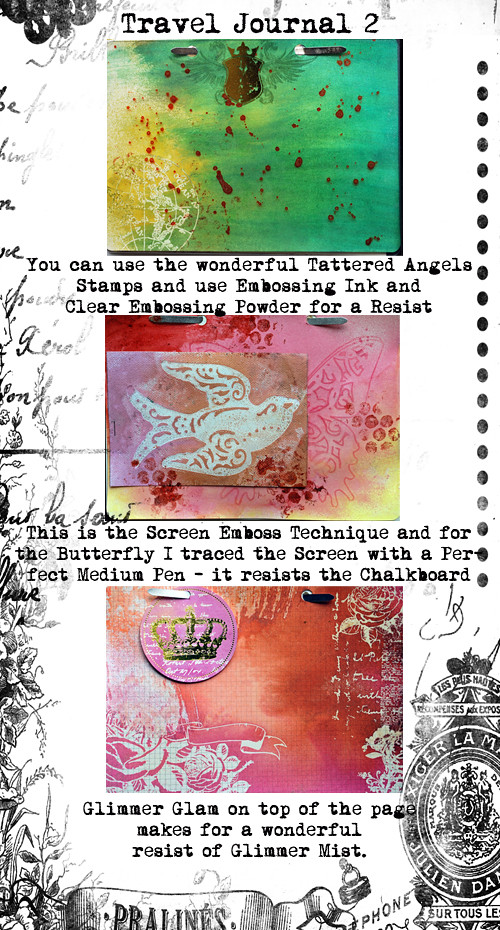
Tattered Angels Travel Journal

It will be still a long time till vacation time -but I already started my Travel Journal. I used  the awesome Tattered Angels Fastenation Folder Album- I love that you can add pages and play around so much!

Es dauert noch ein wenig bis zum Urlaub – aber ich habe bereits mit meinem Reise-Buch angefangen. Ich habe das geniale Tattered Angels Fastenation Folder Album verwendet und ich liebe es, dass man hier noch weitere Seiten hinzufügen und soviel rumspielen kann!

Have a great day :)

  • Birgit Koopsen

    |

    Gorgeous Nat!! Awesome techniques and wonderful colors!

    Reply

  • Birgit

    |

    wow Nat, das ist sooooooooooo genial!!!

    Reply

  • Mandy Collins

    |

    Fun use of colour and trims in your journal.

    Reply

  • sylvia

    |

    all these textures, gorgeous, you’re gonna have a colourful trip! love travel journals, you’ll have a blast filling this one, i’m sure!

    Reply

  • See my Crafts

    |

    oh nathalie, das sieht ja großartig aus. wunderschön. das farbzusmmenspiel und die technicken. ganz großes kino :)

    LG Felicitas

    Reply

  • Vicki Chrisman

    |

    Gorgeous Nat!

    Reply

  • chritiane

    |

    as kimmy said: me toooo!! :D

    Reply

  • Kim Sonksen

    |

    Awesome – I love the colours and the different textures

    Reply

Leave a comment

Altered Shadow Box Frame *Tattered Angels*

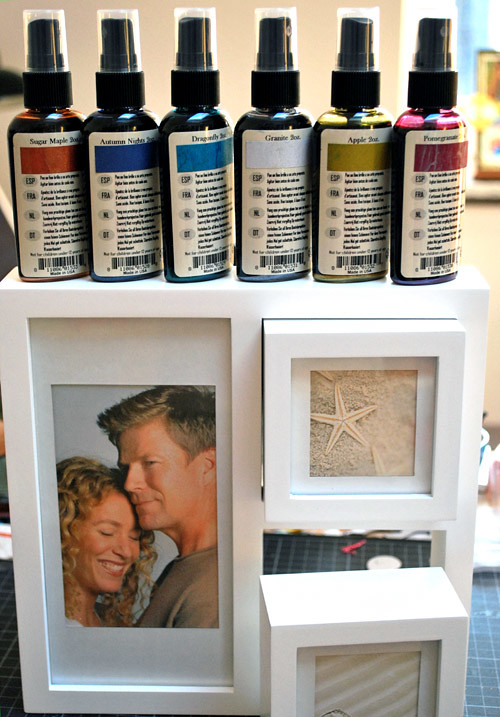
I had this frame for a while now and wanted to do someting fun with it. When I got the amazing new Fall 2010 Glimmer Mist Colors I knew I wanted to use them for a project with the frame.

I’m sure you can find something like this at a dollar store – so here is how I altered it – I hope you have fun with the video:

[youtube https://www.youtube.com/watch?v=J9T6O8qevFA&hl=de_DE&fs=1]

Here are the Supplies I used:

Tattered Angels: Glimmer Mist Fall 2010 Colors, Glimmer Glam Chandelier, Glimmer Screens, Tattered Trinket, Rockn’ Renaissance Costum Cut Outs, Tattered Traveler Clear Compact, Framed Fonts; SCRAPBOOK ADHESIVES by 3L™ Foam Pads and Crafty Power Tape, Clear Gesso, Pepples, Prism white Cardstock

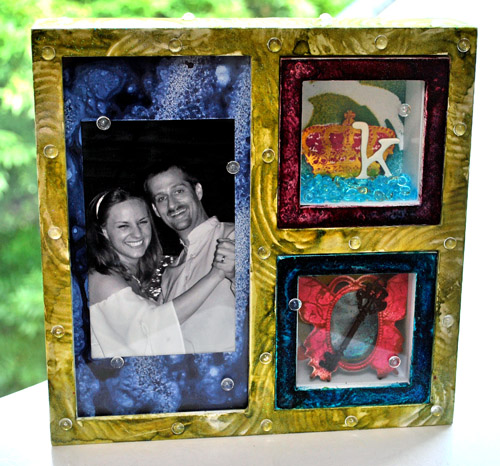
Here is the frame and some details after it’s finished:

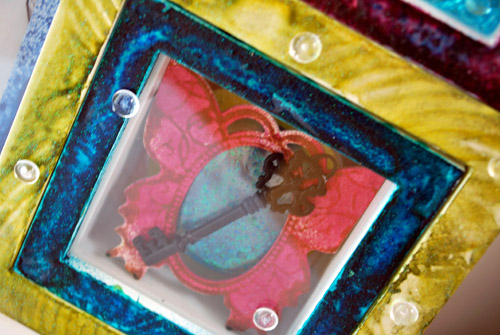
As you can see I mounted the framed font butterfly on the Compact and then attached the key on top. Inside the compact you see some Glimmer Glam- yum yum :)

I cut out the crown and mounted it on double stacked SCRAPBOOK ADHESIVES by 3L Foam Pads. I filled the Shadow Box with pebbles.

If you want to learn more fun techniques using Tattered Angels come and visit my upcoming Tattered Angels workshops or book them for your store. Here is a place where I will be teaching some of those and other fun techniques next:

September 25, SCRAPTASTIC EVENT 2010 in Belgium

Nat Kalbach

  • christiane

    |

    ahhh, thanks for the reminder!! i have to remodelling my frame i did years ago!!!
    you did a fab fab job!! :D

    Reply

  • Cat

    |

    this is VERY cool, love all the colors and dimension to this!

    Reply

  • Kim Sonksen

    |

    Totally wicked – I love that shadow box. I am totally in love with that little “k” with the glass pebbles

    Reply

  • Heidi

    |

    This was so much fun to watch!! You had an audience here… myself, my two daughters, and my mama! Beautiful work as ALWAYS!

    Reply

  • Sue Clarke

    |

    Love that smiling Nat with longer hair. Wonderful video…makes it so much easier to see how to use the glimmer mist. Seems I need to use my heat gun more. The blue pebbles add some fun movement.

    Reply

  • sylvia

    |

    oh wow! amazing! really great project. love your videos by the way :)

    Reply

  • Daphne

    |

    Great project!! As always :-)_

    Reply

Leave a comment

DT-Work: Beach Album – and new Punky Sprouts CHA Products

I so love the Punky Sprouts Minialbums – it is so much fun to work with the different media ! Here is another Beach Album I made – this time fo my sis in law:

Ich liebe die Punky Sprouts Minialben – es macht so viel Spaß mit den verschiedenen Materialien zu arbeiten! Hier noch ein Beach Album, dass ich gemacht habe- diesmal für meine Schwägerin:

*BEACH ALBUM*

Supplies: Punky Sprouts Alfalfa Sprouts Album, Graphic 45 Paper, Tattered Angels: Glimmer Mist, Glimmer Chalkboard and Glimmer Glam, Tattered Angels Screens, Stamps and Glimmer Glass, SCRAPBOOK ADHESIVES by 3L™ E-Z Runner and Crafty Power Tape

Coming out at CHA Summer 2010 are two new albums – the Sweetie Sprout and the Junk in My Trunk Album! So excited about these and can’t wait to work with them!

Sweetie Sprout

*Junk in My Trunk*

If you happen to be at the Summer CHA Show – step by their booth – it is number 2039!

Wenn Ihr bei der CHA seid im Sommer- geht mal bei diesem Stand vorbei – Es ist die Nummer 2039!

  • nancy

    |

    What an amazing mini-album…just love the masking and misting and images you put together for this!!! BRAVO work!!!

    Reply

  • Heidi

    |

    SO MUCH FUN! Lol, and we are using the same papers this week…

    Reply

  • Karen

    |

    I’m gonna buy “Junk in Trunk” just for the name. Too funny!!

    Reply

  • Sue Clarke

    |

    That is incredible Nat!
    I don’t usually do mini-albums, but the Junk in my Trunk is inspiring. Love what you did with this mini.

    Reply

  • seemycrafts

    |

    deine alben sind echt der wahnsinn, so bunt und sommerlich frisch. ich liebe deinen mixed media stil!

    LG Felicitas

    Reply

  • Kim Sonksen

    |

    Oh my, I think I need to print me off some vintage beach images. I adore that album!

    Reply

  • Michelle LaPoint Rydell

    |

    Oh Nat what fun albums! I love what you did with yours! All the different textures are awesome!

    Reply

Leave a comment

DT-Work: Easy Folders *InfoCrea*

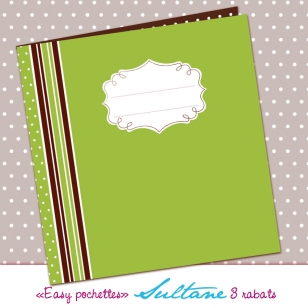
InfoCrea sent all the Designteam members those fun and practical 12×12 inch folders by Sultane and challenged us to alter them and use a closure too. I used this green one – because I love green :)

InfoCrea hat dem ganzen Designteam diese schönen und praktischen  12×12 inch -Mappen von Sultane geschickt und uns herausgefordert, diese zu verarbeiten und uns auch einen Verschluss auszudenken. Ich habe diese grüne Mappe gewählt – ich liebe Grün :)

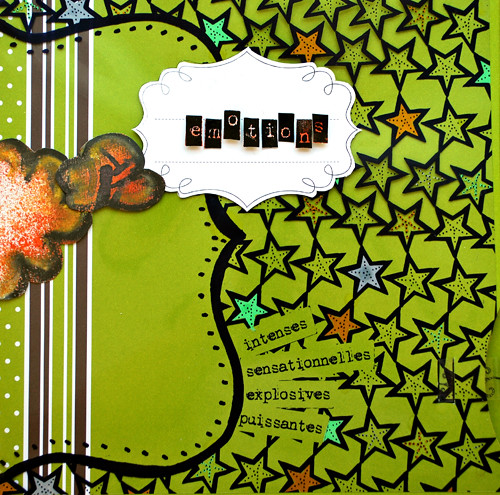
And this is how the folder looks now  – und so sieht die Mappe jetzt aus:

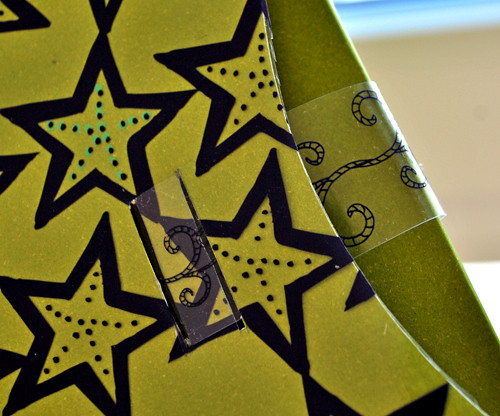
I first cut out the journaling label of the folder with a sharp cutting knife. I used the eMOTions Transparency and painted the stars from the back with Acrylic Markers and attached the transparency to the folder. I also cut out two of the clouds from the eMOTions paper and mounted one of them for dimension on foam pads. I re-attached the journaling lable to the transparency. I stamped the letters with the eMOTions letter stamp and cut them out. Some of them are mounted on SCRAPBOOK ADHESIVES by 3L™ Foam Pads.

For the Closure I used one of the small Transparency Stripes from the eMOTions collection and cut two slits into the cover of the folder. I attached the strip to the back and weaved the stripe on the front through the slits. Very easy and effective closure.

Have a wonderful day!

Euch einen schönen Tag!

  • Cheryl

    |

    I like your alterations but could you talk Sultane into printing your version so I can buy it? I’m too lazy to decorate my folders!

    Reply

  • Cat

    |

    I love this! The closure is very clever!

    Reply

  • Kim Sonksen

    |

    How clever – I love that closure and how you altered that folder. YUM

    Reply

Leave a comment

Altered: Fairy Land Tag

Something dreamy :)

Etwas verträumtes :)

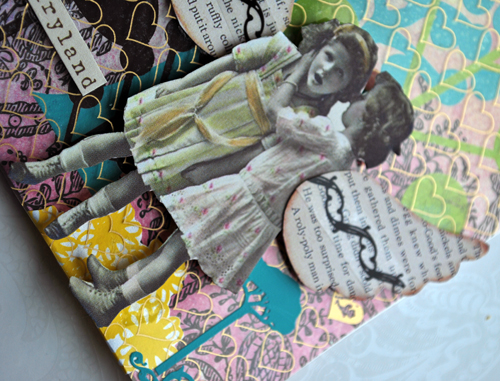
*FairyLand Tag*

Supplies: Tattered Angels Costum Cut Outs Paper Tags, Tattered Angels Glimmer Mist, Hambly Screen Prints Overlay and Rub Ons and Paper,  Crafty Secrets Fairy Sheet, Tim Holtz Hardware, Lace unknown, SCRAPBOOK ADHESIVES by 3L™

Today I have a workshops at home– I’m really looking forward to you all – and especially to my surprise guest :) It is going to be super fun!!!!

Heute habe ich meinen Workshop hier zuhause – und ich freue mich schon auf Euch alle- besonders auch auf meinen Überraschungsgast :) Wir werden viel Spaß haben !!!!

  • Heidi

    |

    ohhhh, a workshop at your home? POUT. I live too far! This is SO flippin’ cute, I love it.

    Reply

  • Cat

    |

    This is very sweet, love it! xo

    Reply

  • Andrea MacDonald

    |

    This is FABULOUS!!!!! I love everything about it!

    Reply

  • Kim Sonksen

    |

    This is one of my favourite tags from you EVAHHHH

    Reply

  • Sue Clarke

    |

    You keep making me say “WOW” Nat…sweet tag!

    Reply

  • sylvia

    |

    oh this is just gorgeous! enjoy your workshop nat and have a fantastic sunny weekend!

    Reply

Leave a comment

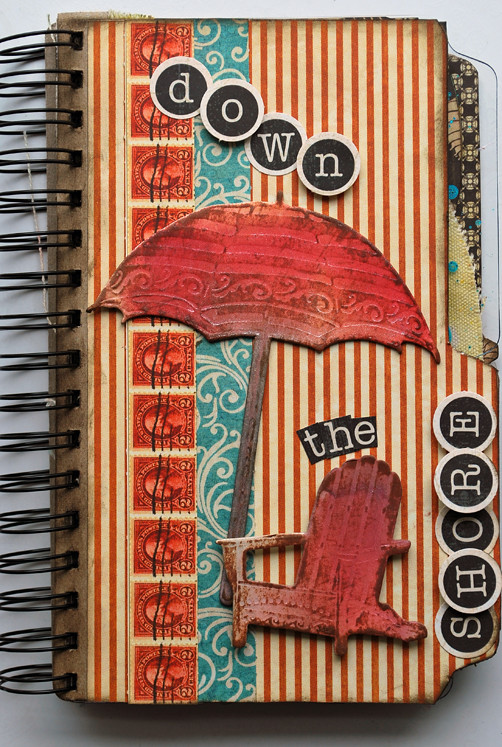
Down the Shore aka Beach Minialbum

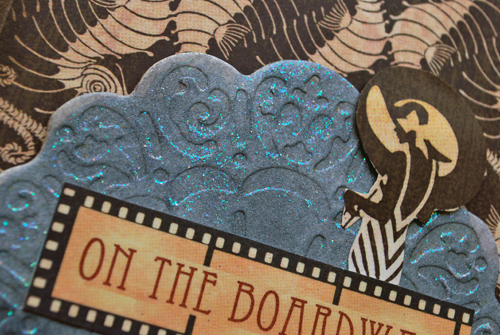
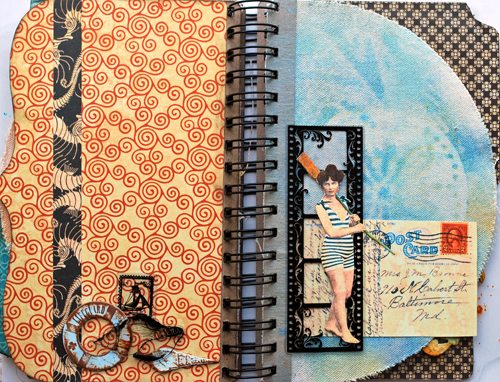
LOL – well…you know if you are married to a New Jersey Man you learn pretty fast the term “Down The Shore” . In any event  – I wanted to show you a beach album I created for my sweet niece who just turned 16 and lives in NJ and I bet…there are days she goes down the shore with her friends. So I wanted to give her an album where she could put in some fun memories of one of those trips.

Ja – das ist ja immer was mit der Übersetzung – also in New Jersey sagt man “runter zu Küste” statt “an den Strand” wenn man ans Meer fährt – wie gesagt- ist ein wenig schwierig mit der Übersetzung ;) Ich wollte ein album für meine süße Nichte machen, die gerade 16 geworden ist und halt in New Jersey lebt und ich wette, dass sie dort ein paar witzige Tage mit ihren Freunden verbringt- und da soll sie natürlich auch ein Album für ihre Erinnerungen bekommen.

All you need for the base is the Beach Bingo Board Set

Alles was Du brauchst für die Basis ist das  Beach Bingo Board Set

Don’t throw away the paper packaging included – we will use it as a spine for the book. Fold it

Nicht die Papierverpackung wegschmeißen – die werden wir als Buchrücken verwenden.

Spray it with some dark colors to cover most of the print – I used Chalkboard Chocolate and Glimmer Mist Tattered Leather

Verwende ein paar dunklere Farben zum Beispiel Hot Chocolate Chalkboard und Glimmer Mist Tattered Leather um das Gedruckte teilweise abzudecken.

I used the amazing technique Irrisistably Technique posted by Jasmine- check it out! And then sprayed with different Glimmer Mist colors and Calkboard Colors

Für die Bingo Karten habe ich die tolle Irrisistably Technique von Jasmine verwandt – schaut sie Euch an! Dann habe ich die Karten mit unterschiedlichen GlimmerMist Farben und Chalkboards besprüht.

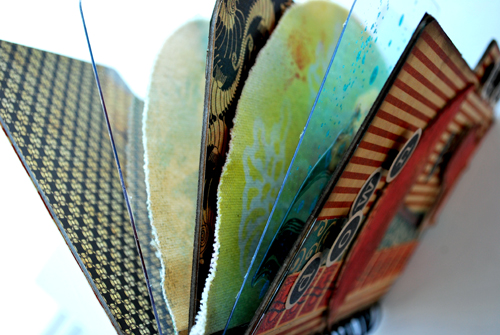
Attach the Bingo Boards to the Spine with double sided tape – you can do it a bit like a fan.

Verwende doppelseitiges Klebeband- zum Beispiel von SCRAPBOOK ADHESIVES by 3L™

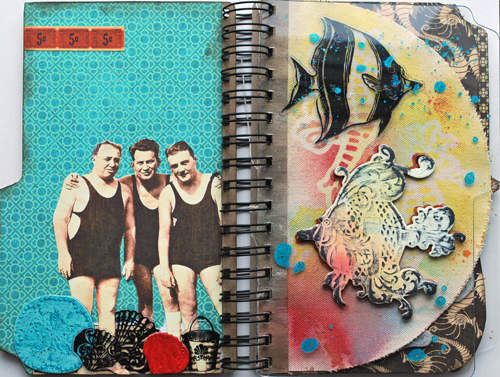
And then you can start embellishing and stamping – here I used the Journaling Stamp (I LOOOOOvvveee It!) from the Notes from the Garden Stamp set. I also attached a Seaside Sea Glass with a thread. And the clam from the Seaside Beach Glimmer Chips is just inked with Archival Ink.

Und dann kannst Du mit dem Embellishing und Stempeln beginnen.

This one is also from the Seaside Glimmer chips Collection – so yummie

There are so many options as you can imagine! Here is the book:

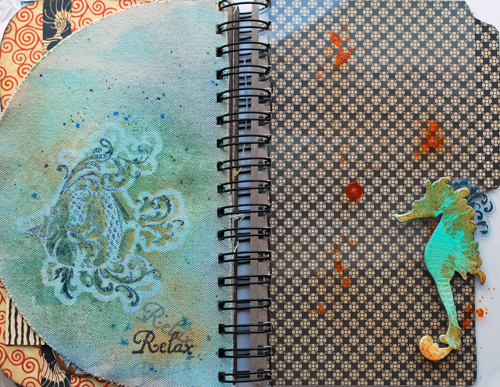
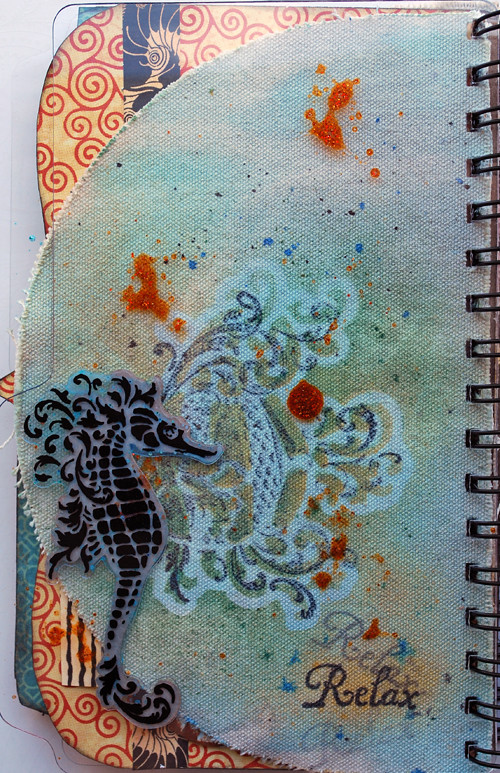
I also used the word stamps from the awesome Seaside Stamp Collection

And here I used the Under The Sea Glimmer Screens before Stamping with the Seaside Stamp and adding the Seaside Glimmer Glass – isn’t it awesome to have all those coordinating products to play with. So versatile!

There you have it- wether you say down the shore or at the beach :) you can create a simple and fun Seaside -Album :)

Und schon ist es fertig das Strand-buch :)

If you want to learn more fun techniques using Tattered Angels come and visit my upcoming Tattered Angels workshops or book them for your store. Here is a place where I will be teaching some of those and other fun techniques next:

Wenn Du mehr Techniken mit Tattered Angels Produkte  lernen willst, dann besuch doch einen meiner Tattered Angels workshops oder buch mich für Deinen Laden. Hier ist ein Ort an dem ich demnächst einige dieser und andere tolle Techniken unterrichten werde:

September 25, SCRAPTASTIC EVENT 2010 in Belgium

Have a gorgeous day!

Einen wunderschönen Tag!
  • Deb Wisker

    |

    like all of your projects…this is beautiful!!

    Reply

  • Princess

    |

    Thanks for sharing. It’s a cute mini.

    Reply

  • Kimberly

    |

    A beautiful mini book and a great tutorial. I am always looking for ways to use my Glimmer Mist! It’s really my favorite thing to create with these days.

    Reply

  • christiane

    |

    absolutely inspiring!!! love it!! :D

    Reply

  • Erika Taylor

    |

    This is absolutely STUNNING. I love the colors and the spraying. Just Gorgeous!!!

    Reply

  • Kim Sonksen

    |

    ohhhhh I would take this book anywhere “down the shore” or “at the coast” :)
    LOVE it!!!!

    Reply

  • Marlies

    |

    Ohh Nat this is just gorgeous! I love the vibrant colors! It’s dreamy!

    Reply

  • Birgit

    |

    Ich liebe dieses Strandbuch!!! Es ist ein Traum!!! Bussi

    Reply

  • Sue Clarke

    |

    Wonderful and perfect for this time of year! Such a fun gift too.

    Reply

  • Sandra

    |

    Das Album ist herrlich geworden – vielen Dank für das Tutorial :-)

    Reply

  • sylvia

    |

    oh, awesome stuff, totally love it!!

    Reply

  • Eeva

    |

    Great tutorial!!!! I need to buy myself more glimmer mist colors and also the chalks!!!

    Reply

Leave a comment