Mixed Media

Once again she wondered

….why she sticked around.

That sentence came to mind when I found this vintage photo at a flea market.

It really cracked me up and made me wonder, what this woman was thinking about when the photos was taken. Was she annoyed by the photographer? Anyway- LOL – I made the story up and this is my project for the Tattered Angels Booth using their new Product Line Plain Jane: Baseboard, Simply Sheer and Stained Glass and all of the four “old” paint products: Glimmer Mist, Glimmer Mist Chalkboard, Glimmer Glaze and Glimmer Glam

Other than the Tattered Angels Paint Media I used some awesome products of the Color Connection Companies: Prima Marketing, Pink Paislee and Canvas Corp. It was fun mixing it all.

I love working with burlap . The rawness of this material ist just so cool!

and of course I love texture :)

mixed media to the brim —-

Wishing you an amazing day!

nat


Comments (16)

  • Marjie Kemper

    |

    Love it! The frame is amazing and I love the tree and gorgeous colors on the bird.

    Reply

  • angelicastarkAngelica

    |

    Love your work, you are such an inspiration!
    I love how you use different textures… and all the wonderful colors.
    Thank you for sharing.

    Reply

  • Debbie

    |

    A great lay out that speaks volumes about the photo. What did you use to create the textured tree?

    Reply

  • Nat Kalbach

    |

    Hi Sue, yes – it is one of the Prima Frames and I sprayed it with the new Baseboard by Tattered Angels.

    Reply

    • scrappegal

      |

      OOohhh! Can’t wait to see this in the shops! Do you know when it will be for sale?

      Reply

      • Nathalie Kalbach

        |

        The New Product Line Plain Jane should be in the shops soon – in Europe I would hope for April – but I do not know yet for sure :)

        Reply

  • cheryl c

    |

    I see why you bought that vintage photo! Love it. Since they had to hold the pose for so long back then, they usually have pretty interesting faces.

    Reply

  • Miae

    |

    I’m such a fool for colors and this gorgeous piece has me suckered all over it :) !

    Reply

  • Kathy Gledsdale

    |

    Beautiful!

    Reply

  • Christina Colón

    |

    Such a beautiful piece. I love the frame and the contrasting colors. Beautifully done.

    Reply

  • scrappegal

    |

    Wow! Fantastic! I would LOVE to see how you went about making this!

    Reply

  • Sue Clarke

    |

    The story seems to fit. Wonderful “Nat” colors as well. Did you distress the frame yourself?

    Reply

  • misty

    |

    The background looks amazing…love the colors and such a cool way to present the photo!

    Reply

  • Jan Hennings

    |

    love this Nat! The picture is such a hoot :)

    Reply

Leave a comment

Bloom and be happy

Finally I can share projects I created for CHA since the show just opened :)

Here is a canvas I did for Scrapbook Adhesives by 3L – so much fun to play in a different way with adhesives:

Loved creating the background texture with the new Adhesive Sheets and Utee :)

And never forget…photo corners can be pretty versatile – and make up for great flowers.

Be happy and bloom too today :)

hugs

nat

Comments (17)

  • Sue Clarke

    |

    I’ll never look down at photo corners again. LOL

    Reply

  • Sandi

    |

    I just finished with the last of JumpStart. These are amazing women who have truly inspired me. I’m in awe of these artists from around the world who are busy creating like me. I don’t get around technically very well, so to have something so easy was wonderful for me. Love, love, love it. Thanks you so much!

    Reply

  • Lynette (NZ)

    |

    Just wanting to thank you so much for organising the creative jump starts – lots there for sure. Enjoy the rest of your 2012 :-)

    Reply

  • Therese Marx

    |

    I can’t tell you how much I loved every day in January knowing that your email would arrive with something new to inspire. Thank you so much for all your work in putting together such a varied group of people and sites. I do hope that, in the future, there might be another such event. Thanks to all of the participants; it’s been quite a ride!!

    Reply

  • Rhonda Zamora

    |

    Great use of photo corners. I love your flowers. I also want to thank you for the Creative Jump Start. I feel very inspired! I appreciate being introduced to all of your wonderfully talented friends from all over the world. I now visit thier blogs to “stay in touch”. I feel part of an exciting Worldwide community! All, except one, of your participants gave of themselves unselfishly. I am very sad it is over. Thanks, again!!

    Reply

  • corinne de france

    |

    merci pour tout ces partages ^^

    Reply

  • Jean Marmo

    |

    I want to add my thanks for this wonderful month of Jumpstarts!!! I tend to be super critical of my work and for me art is a chore sometimes. I have learned to try and let go and just do! Each of these women are amazing and I appreciate the time that went into this by you and each of them!!!!!!! THANK YOU!

    Reply

  • dawn

    |

    I just wanted to thank you soooooo much for this month. Everyday has been like Christmas for me and it helped Jump Start my year in the best way possible. PLease please do this again next year, it’s the perfect way to start a new year. You did an amazing job lining everything up and it went so smoothly. It was fun not knowing what each guest was going to do, love that it was a mix of everything. I’ve been inspired by them and even some of the readers work in the flickr.

    Thanks again !!!!!

    Reply

  • scrappegal

    |

    How lucky you are, that gets the opportunity to work with Prima, and their lovely supplies! How did that opportunety come about? Wish some day… :) Do you work full time with your hobby? The texure on your project is AWESOME!

    Reply

  • Marjie Kemper

    |

    That background looks so interesting! Love the flowers, too. Very clever, Nat!

    Reply

  • Christina Colón

    |

    Brilliant use of photo corners! I never would’ve thought to do that! Love the UTEE background too. I have some of that stuff. I guess I should whip it out and play a bit.

    Reply

  • Sandy

    |

    Great effects! I am very partial to your theme too since BLOOM! is the name of my summer business where I host art workshops, shows, presentations, etc. It seemed to fit my vision of offering a gathering place for people to grow their creativity, be happy and BLOOM!

    Reply

    • Nat Kalbach

      |

      What a wonderful name for a business your kind!!! Sounds amazing!

      Reply

  • misty

    |

    very cool!

    Reply

  • Geles

    |

    Guau!! The texture is amazing!.
    Kisses

    Reply

Leave a comment

This Picture….

will always crack me up – we laughed so much in Amsterdam doing this silly pose.

Who says working isn’t fun sometimes- LOL. A., Sharon Laakkonen, Wendy Senger and Kelly Goree doing the stop motion. All the people around us must have thought that there were several screws loose – LOL.  And that reminds me…I really want to go back to Amsterdam. It is such an awesome city.

supplies:  Studio2Mer, Rose Moka letters, SCRAPBOOK ADHESIVES by 3L E-Z Runner; Glass Pebbles by Eco Green Crafts

I wish you an amazing day today and a great weekstart!

Nat

P.S. my Über*Media Gesso workshop started yesterday but you can still sign in.


Comments (14)

  • Françoise Melzani

    |

    j’aime baucoup cette page réalisée avec la collection “Maisons de Fées” que j’ai dessinée pour Studio2mers !!!
    cela me fait plaisir de voir ce que d’autres créent avec mes papiers !
    merci

    Reply

  • Stine Maansen

    |

    Im always amazed by your ability to use lots of colors and still manages to not make it a big mess.

    Great page!

    Reply

  • france papillon

    |

    oh wow, this page really speeks to me! love the colors and the pictures and the houses and the tags and the spots and every thing about it! yummi!

    Reply

  • Kim S

    |

    The picture is so fun – but the background totally ROCKS

    Reply

  • Sue Clarke

    |

    I remember seeing that fun photo on your blog.
    Love the LO with all the Nat colors that I’ve come to love!

    Reply

  • Miae

    |

    Funny yes! And so so awesome too! This style of art is like candy to me…LOVE it!

    Reply

  • marianne/skorpionen

    |

    Totally agree with Lene, this page made me smile! Not only because of the photo but all the gorgeous colors in your page, the houses, the tags – all!!
    Hugs

    Reply

  • Lene Neby

    |

    This one made me smile ! Love the picture and the colorful background !!
    Thanks for the inspiration!

    Reply

  • marsha.

    |

    Yes, yes, yes! Come to Amsterdam!!!!

    Reply

  • Carolina Artesanías

    |

    nice page! I love this colors
    Thanks for de links in de proyect Art Journal
    from Chile
    c@

    Reply

  • Linda B

    |

    What a wonderful page… besides your funny photo, I love the houses and the line drawing… the fabulous colors. This is so terrific!!!

    Reply

Leave a comment

Aussies Rule or Gesso-Marker-Letters-Tutorial

Now that’s a title- huh? LOL. I created this layout with the new Cocoa Daisy January Tea & Cupcakes Kit.

Being able to teach 18 workshops last April in Australia still makes my heart sing. It was such an amazing experience and my students were sooo fun and creative – so that is why Aussies Rule :)

In the kit are those black American Crafts Felt letters- which I love – but after creating a couple layouts with them I was a bit tired of the harsh black (this out of the mouth of someone who LOVES black- LOL).

So now changing up the color here with a marker is a bit challenging since a) the letters are felt – they love to act like a sponge making it hard to apply markers and b) they are black – even harder to get a color showing. There comes….GESSO to the rescue ;) A nice primer- that has so many versatile uses from priming backgrounds, applying texture, for embellishments, manipulating photos….ah …..crazy yummy stuff

I just took off the letters I wanted to use and put them on a Craft Mat (Teflon Sheet will do too), so that you can easly peel them off later and still use them being tacky. I used a wet brush and added the gesso with a thin layer – it cover most of the black – I didn’t want it to cover all- and I was able to get some texture worked out this way. You can of course just apply a thin even unwatered down layer. Just make sure to not add it too much into the insides of the letters.

After the Gesso dried- and that goes quick – I used two different LetraSet Promarkers . First I painted the bottom with the darker green and then the top with the lighter green. Always better to have the darker color on the bottom so it doesn’t look awkward. Peel of the letters and apply them to the layout. Voila

And there you go – you have the black a bit peaking out- but it is not as harsh anymore- the colors are fitting to the mini letters I used from the kit and I added some texture that fits the workshop I taught in Australia :) Pretty easy and although it looks like a lot of work- it is actually not- easy peasy fast -promised!

————————————————-

If you are interested in other and way more techniques and tutorials with Gesso check out my 5 week-long Über*Media Online Workshop starting January 15, 2012. More infos here

Wishing you an amazing day!!!!

huge hugs

nat

Comments (15)

  • Eniko

    |

    Aussies DO rule and I love what you did with the title! Happy Jumpstart!

    Reply

  • MicheyMoo

    |

    Perfectly apt use of these thickers on this layout from the class. I loved meeting you that day (I was in the earlier class that morning sitting with the delightful Louise) and loved the inspiration you provided in this class. I’ve been getting fabulously messy with gesso and mists ever since!! And loving the Jumpstart to 2012 too!! xx

    Reply

  • LindaBrun

    |

    Great tutorial Nat.. Now I know what to do with those brown felt thickers I bought for a special project, but can’t seem to find a new use for the until now… Hugs

    Reply

  • Riikka

    |

    That picture and the idea of painting Thickers rocked my world! Thank you so much! I was creating a page when I noticed this post and immediately thought of using the idea with a twist – I painted the letters with white crackle paint.

    Reply

  • Marilyn Peter

    |

    Wow, love this tip!! Would never of thought to use Gesso, that is one thing I forget is in my stash!! Will have to pull it out and leave it where I can see it!
    Love the letters with just a touch of black showing through, LOVE your layout!!

    Reply

  • Tana

    |

    Hi Nat!! Thanks for the tutorial, it’ s a great idea! I still love black letters but… who knows… ;) I must take a note about this tip. Have a nice day! Hugs ♥

    Reply

  • misty

    |

    I love the way those letters look!!! Awesome…thanks for sharing!

    Reply

  • Vibeke

    |

    Your letters is so cool!! The sun is lovely!!:)
    Thank you for the inspiration:)

    Hugs

    Reply

  • Linda B

    |

    Hi Nathalie, thank you for the kind comments you left at my blog today. I’m finding a lot of inspiration in the Creative Jump Start Summit 2012… thank you for putting it together.
    I would never have thought of altering Thickers in this way… a fabulous idea! What a great LO!

    Reply

  • marianne/skorpionen

    |

    ahhhh…love your new letters and just love the color combination!

    Reply

  • Carol

    |

    How creative to alter those letters to suit your layout!

    Reply

  • Sue Clarke

    |

    Like the LO and thanks for the idea of altering the letters…for some reason I think of altering many supplies but usually not those (unless they are plain chipboard).

    Reply

  • Anne Porretta

    |

    As a art scrapbooker/journalist/mixed media artist, I use gesso for so many things . . . thanks for another creative way to add to my techniques!

    Reply

  • Peggy Lee

    |

    so love this tip!!!! thanks for the great tutorial!!!
    Peggy Lee

    Reply

Leave a comment

Words, words, words…

Words led to a fun afternoon on the first day of 2012. Words of 2012 that is. See, when Ali Edwards and others started the brilliant “pick a word for your year” idea – I told my husband about it and he loved it. For a couple of years now we talk about our words we picked for the coming year and the ones of the past year and how we accomplished it. (I’m glad that his pick for 2011 – Miles Davis – was not that successful – cause although Miles was an awesome Musician, he was a quite complicated person to deal with ;) – LOL- sorry Hon, I’m so selfish – hehehe).

So I was quite thrilled that when I picked my new Cocoa Daisy Kit  to start with a Canvas for this word, my husband asked to play along and create one too. My first reaction though ….especially my look was quite ….STUPID – kind of like those cows on those road signs – Mooo????


But hey it was so much fun – look at him going….Dab on, dab off…..


I loved it- it was fun doing this together and he …analyzing all steps of course and lacking on the multitasking thing (listening AND working ;) ) did a great job and was quite proud of his very first canvas – and very first usage of acrylic paints- he hang the canvas even :) (No show though as of his request – and you have to obey your husband , right? snigger – but, NO… seriously, you have to respect such wishes)

So here is mine

Supplies: Cocoa Daisy Kit Tea & Cupcakes, Eco Green Crafts Acrylic Paints, Old Book Pages, Gel Medium

It shows my word for 2012- transform – lot’s of meaning for me – there is lot’s of Transformation to be done ;) I also wanted to pick some other colors as usual and I have a little soft spot for orange and pink since I had used those colors on an art journal page recently and instantly started drooling …LOL

– since then I have used the color combo on a couple other projects too…so be AWARE  – heheheh

Here is the Cocoa Daisy Kit Tea & Cupcakes – love those wonderful uplifting colors. I have the main kit and the paper add-on:

“Tea & Cupcakes”

The add ons:

“Whipped Cream & Sprinkles”

“Red Velvet”

“Honey & Lemon”

The stamps for this month are so fun and playful! Cocoa Daisy has taken their stamps out of the add ons not only to reduce the cost of the add ons but also to allow their customers to purchase exactly what they want.

The tea mug stamp will be featured in the main kit.

The cupcake stamp comes as a set so you can add sprinkles in whatever color you wish!

And our instant photo frame stamps is so versatile!!

More to come with this kit :) Till then – the Creative Jump Starts starts in a couple hours- I’m pretty excited- cross fingers that the technique works and I ‘m pretty sure it will be fun and inspiring for you !!!

Huge hugs and have an awesome day

Nat

Comments (8)

  • marsha.

    |

    Way to go husband! My husband picked a word last year, but I don’t know if he has one for this year…

    Reply

  • sylvia

    |

    love that you created together with your husband, that is so cool! would never happen here though, and even if, he would kill me if i shared what he did on the blog. so i totally understand!!

    Reply

  • Lisa

    |

    Love it! So cool to see how you’ve used the CD kit, and that your hubby joined in making his own project. You’ve inspired me to start a convo with him about picking a word for the year. I bet he’d love the idea, too. Happy New Year!

    P.S. I see that Jump Start #1 is already in my Inbox, and I hopped around like a kid at Christmas! Off to check it out next. Thank you for your vision and putting such an awesome idea into motion and reality! ;)

    Reply

  • Sue Clarke

    |

    Can’t wait to get my tea mug stamp with my kit.
    SO, where is the pic of your hubby’s canvas (finished that is)?

    Reply

  • Jan Hennings

    |

    Love that you’re doing this together! What a beautiful, bright canvas!

    Reply

  • marianne/skorpionen

    |

    So much fun you must have together!! Love your DH’s canvas, the stencil was just so cool!
    Love the colors on your canvas and the butterflies as well!
    Wishing you and your family a happy new year and looking forward to the first mail soon!

    Reply

  • mandy

    |

    what a fabulous photo of your dh.. thats really precious! Love the stencil he’s using and the colours are gorgeous!
    I cant wait for my 1st email to arrive! Looking forward to it! I’m sure it will be a great success!
    Wishing you a very creative and happy twenty12!

    Reply

  • Jen

    |

    Ooh, I love the tea mug stamp!

    You should be very happy that your husband made something, even if he is too shy to have it shown – I’m very impressed. Perhaps you are onto something here… I wonder if my hubby would have a go at making something one day?

    Jen.

    Reply

Leave a comment

My Top Ten Projects 2011

Here are my top ten projects of this year – lot’s of canvases and shadowboxes, but I also love the first day of school project I made and the pillow. This year was a “get off the page” year I would say :)

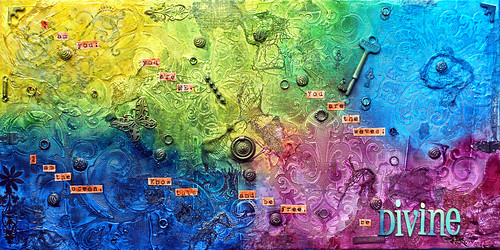
this was a huge canvas that I did for an assignment for Tattered Angels, showing how all four paint products look like. I just love the texture here and the colors- and it was fun working on such a big scale.

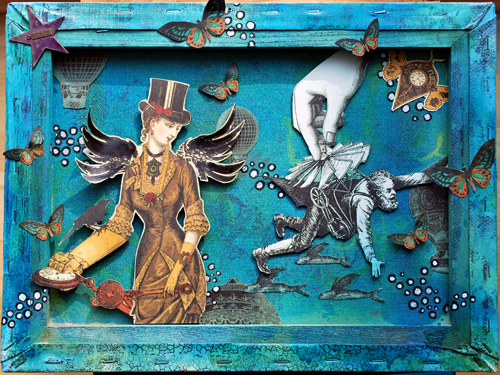
This Shadow box was one of my workshops last year. I loved the depth it has and it was something out of my box theme wise for sure :)

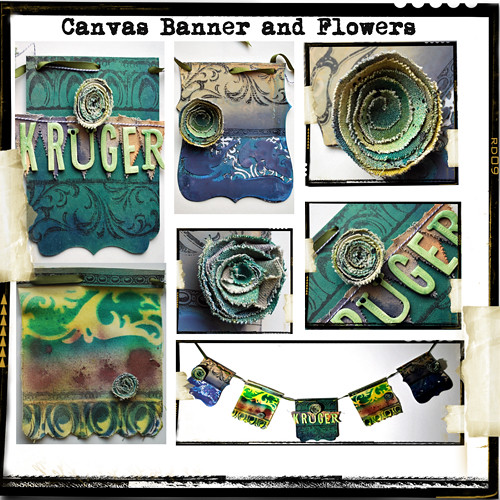
This Banner was a lot of fun to make – I loved using a minialbum in a different way and it was fun using all those different media on different surfaces.

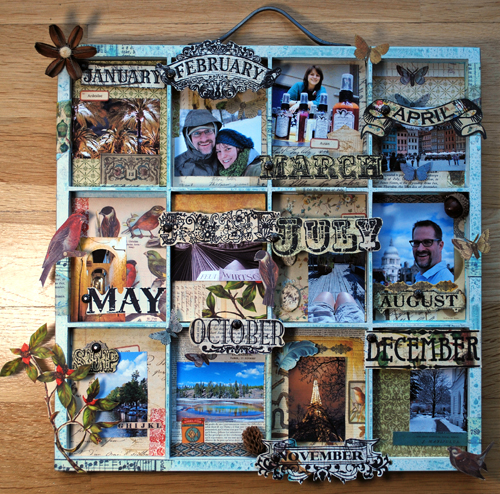
This printer’s tray was originally made for Stampington’s Video Features, but the stamp set I used was discontinued by the manufacturer and therefore it didn’t make the cut.  love it because it was such a fun way ot think back on all those moments in 2010 and it also had a lot of depth.

This canvas is one of my favorites because it simply expresses some feelings I had at the time. It has a lot of symbolics.

My Mixed Media Pillow that is also a class- I love this one because it was something totally different for me and it was so much fun to do it.

This one I love because it reminds me that even if people say your work looks like puke you have to continue on when you like it. It was part of my Live With Prima show last year and it was a show I received a lot of wonderful feedback for, hence my puke-y canvas ;)

This project is a favorite because it was a fun day with my god child and my friend. It is a German tradition to give a child a cone filled with useful schoolstuff and sweets on their first school day and we created this for my god child’s younger brother. We had the best day ever.

This Shadow box was created as an assignment for Tattered Angels, Pink Paislee, Walnut Hallow and Prima. It was one of my hardest task given the limited product and time but I love the color that are unusual for me and the outcome.

And this is just me…the colors, the texture and it is for me so powerful. It was part of my Über*Media PanPastel Online Class.

Are you doing more layouts or projects? Wishing you an amazing day!!!

Comments (6)

  • Sascha Schmidt

    |

    Liebe Nat, die Shadow box gefällt mir sehr gut. Das Dimensionale, die Farben und die Framente harmonieren ganz nach meinem Geschmack!
    GLG Sascha

    Reply

  • Marjie Kemper

    |

    Wow, these are a pleasure to see! That last one is my fave, for sure, with the stenciling and awesome colors but that ‘happy’ layout is a very close second. Will pop back tomorrow to catch up on the rest of your year-end posts… don’t want to miss anything from Ms Nat!

    Reply

  • Cynthia Lloréns

    |

    Hi sweet !!!Those are such a perfect creation!!You really did a perfect and fantstic job.
    Thank you so much for be such a great and dear friend and for all the lovely comments you have written in my blog in 2011!!!
    I wish a wonderful 2012!!.
    Big huges and kisses with much love.
    Cynthia

    Reply

  • Vibeke

    |

    You rock!! This is so cool!!!:)
    Thank you for sharing:)

    Reply

  • Sue Clarke

    |

    Love the one year at a glance shadowbox.
    Your work IS so colorful and yes, that last project just screams NAT!
    Thanks for a wonderful year of inspiration.

    Reply

  • marianne/skorpionen

    |

    So many gorgeous projects!! Love all of them but the one canvas in yellow, blue and white just “hit” me somehow.
    Been doing some art journals lately, seems like I’m in a AJ-mood now :D
    Have a fantastic day!

    Reply

Leave a comment

My Top Ten Layouts 2011

I hope you had some wonderful and fantastic days!!! We had a relaxed and magical time

Like many others at the end of the year I go back through my layouts, projects and photos and take a look at them again to pick my favorites. I realized the past years that it is such a wonderful way to remember good times and treasure work I have done :) So here we go – first the Layouts :)


It was definetly a year of emotional layouts…but when I look at this roller coaster year- it is no wonder :)

Did you post your favorite layouts 2011 ? I would love to see them :)!!!

——————

Reminder:

Sign ups for the Scrap Me Event in Vienna in March 2012 are closing on the 30th!  There were only 9 seats left last time I heard :)

Die Anmeldefrist für das Scrap Me Event in Wien im März 2012 endet am 30.12.! Mein letzter Stand ist, dass nur noch 9 Plätze frei sind :)

huge hugs

nat


Comments (10)

Leave a comment

Crafter’s Workshop Stencil Blog Hop – Numero Due

sooo thrilled to be again part of the Blog Hop for Julie Fei-Fan Balzer …I just love her wonderful release of Crafter’s Workshop’s Julie Fei-Fan Balzer Stencils. Here is my work with the featured Stencil Circles in Squares:

Glow Canvas:

Somehow the Stencil gives me an 80’s flashback- so I wanted to do something that goes with the 80s for me…colorwise and pattern wise:

I glued down some book pages to a 12 x 12 canvas, put the Circles in Squares Stencil on top and used black Gesso over it. I applied quite a lot- so it actually covered the whole stencil and not just the areas without plastic. Then I lifted the stencil and used here and there a grid tool to add some LP-like patterns to it (for those young folks like my 11 year old god son: – those vinyl round thingies you find in your parents livingroom close to the dinosaur music hifi tower – they are not frisbees…oh wait…you might not know what frisbees are either…never mind ;) )

It is a bit hard to see in the photograph – so the first layer of the dark gesso has then the structure of the Stencil here and there included.

I waited then several hours until the Gesso was ALMOST dry – when I poked my tiny sausage fingers in and ripped the rubber like gesso here and there off. I pulled it up a bit too – so that it bend upwards and created little wholes revealing the book paper underneath. Because that is the coolest part- it dries in a way that it is not totally ruining the book paper underneath. So far as I tried it only works with the Golden Black Gesso – it is a matter of thickness and binding stuff in there :)

Then I sprayed some Inchworm Chalkboard over the wholes- nice neon color….pops even more on the black and goes very well with the 80s theme- LOL

Then I mixed some yellow and red acrylic paints and created a darker shade of orange and dabbed this first over the Circles in Squares Stencils, then just red and then just to get some contrast three circles in squares- with white gesso.

Some found objects…voila- done :)

Supplies:Crafters’ Workshop Circles in Squares Stencil, 12×12 Canvas, old book paper, Eco Green Crafts Artist Medium, Golden Black Gesso, Gerstäecker White Gesso, Eco Green Crafts and Golden Acrylic Paints, Tattered Angles Inchworm Chalkboard, Found Objects, Golden Heavy Gel Medium, Heidi Swapp Chipboard Letters.

I hope you like it :)  Here is a picture of the used stencil:


check out the other ladies on this blog hop too :)

•       Leslie Ashe: http://leslieashe.blogspot.com/

•   Emily Pitts: http://emilypitts.blogspot.com/

•        Lisa Pace: http://lisapace.com/

•   Tammy Tutterow:http://tammytutterow.typepad.com/

•      Nathalie Kalbach: well you are here :) – LOL

•    Julie Fei-Fan Balzer: http://balzerdesigns.typepad.com/balzer_designs/2011/12/tcw224-circles-in-squares.html

———————————

Are you ready to learn lot’s of fun techniques for using Gesso? Backgrounds, Texture, Embellishments, Manipulating Photos? You name it- you get it : in my Über*Media Gesso Workshop – More Details here

 Nat

Comments (26)

  • lacyquilter

    |

    What a fabulous canvas! I love the piece of birch bark.

    Reply

  • Sue Lui

    |

    Cool! Love how you played with the mixed media.

    Reply

  • Sophie

    |

    wow this is just soooo beautiful!!

    Reply

  • Yuzz Yusof

    |

    absolutely amazing technique and stunning work.

    Reply

  • JoyceAnn

    |

    Ah, records and frisbees, I do remember them. Just want to know where your 8-tracks are?!
    This is such a fun piece – love the rich and bold color and textures you created.
    hugs,
    JoyceAnn

    Reply

  • Ki Kruk

    |

    Loving your canvas! I had not seen the black gesso used before so I’m really impressed and inspired by your creation! Must add black gesso to my “must have” list now!

    Reply

    • nathalie-kalbach

      |

      Black Gesso is really fun to use and I love how it makes colors pop too!

      Reply

  • Terrie -Creative Explorer

    |

    Love the mixed media use for this stencil – this is how I’d most likely use it too! Thanks for sharing!

    Reply

  • marianne/skorpionen

    |

    Love you project! And the stensil is just so cool! Have several of those stensils at home and just love them! Really loved the black gesso and red colors!
    Have to check out your Gesso workshop!

    Reply

    • nathalie-kalbach

      |

      I would love to have you in the Gesso Workshop- it is going to be fun :)

      Reply

  • Theresa Merkling

    |

    Great project! Was the light bulb green or did you colorize it? Very 80’s. Flashbacks for some of us… :) Thanks for sharing.

    Reply

    • nathalie-kalbach

      |

      The light bulb is a found from a Junk Yard in Australia- I believe it has been part of older – probably 60s christmas lights – but i’m not sure. So yes the light is already been green :)

      Reply

  • Bunnyfreak

    |

    Love the canvas. The bark piece is a cool touch.

    Reply

  • Lisa

    |

    Cool tip about peeling up the almost dry gesso to reveal the under layer! And I love the painted layering of the 12×12 size stencil with the 6×6 version. Will you add this cool canvas to your studio gallery wall? It looks awesome!

    Reply

    • nathalie-kalbach

      |

      Lisa it is already hanging – that is how organized I am right now- LOL- Julie would be proud ;)

      Reply

  • Janine

    |

    Oh wow I really like how the colors are popping!
    Greetings from Germany ;)

    Reply

  • milkcan

    |

    Very very cool! I love that you used that bark! Thanks for playing along!

    Reply

  • Marianne

    |

    I like everything about it!

    Reply

  • willieburgscrapper

    |

    LOVE the colors and textures on this canvas!!! Your writing made me laugh- I especially like those radial textures you made with the grid tool- will have to try that sometime.

    Reply

  • Paula McLane Jennings

    |

    I love all the textures you created. And I surely remember LPs and frisbees! Beautiful work!

    Reply

  • Jan Hennings

    |

    Now this sounds like a rip-roarin’ good time :)

    Reply

  • Linda Cameron

    |

    Love the painting, and the way you used the stencil. I love red on black!

    Reply

Leave a comment

Go Go Go or…Burlap Fun

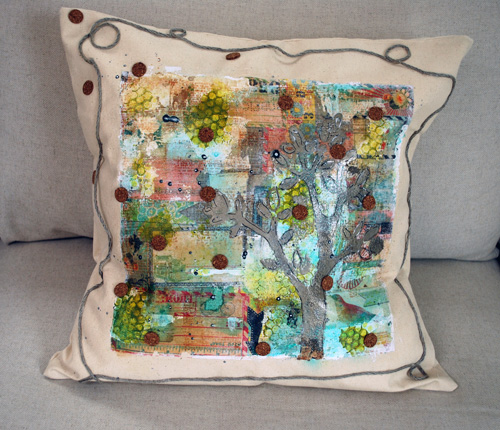
I used some of the awesome Canvas Corp Burlap and just played a bit around with different media.  just love the look and feel of burlap – raw and natural looking.

I used different structure pastes and stencils- from non course to super course molding paste. I used a huge amount of our colors – here are a few: Stiletto Glimmer Glam, Orange Crush Glimmer Glaze, Dirty MartiniGlimmer Glam, Cupid Glimmer Mist, Afraid of the Dark Glimmer Mist, Monster Mash Glimmer Mist, Icicle Blue Glimmer Mist.

A little bit splitter splatter

I love how the Glimmer Glam and Glaze seals the burlap too :)

Other Supplies: Canvas Corp Burlap Fabric, Lascaux Structure Pastes A-C, Crafter’s Workshop Templates, Prima Masks, Tattered Angels Screens, Doilies, Canvas Fabric, Vintage Lace, Graphic45 Envelope, Prima Leave, Pink Paislee Chipboard Letters

What have you done with burlap? Or do you even like burlap?

Have a great day

Nat
Comments (6)

  • Christina Colón

    |

    So pretty! I really like how you mixed color and textures.

    Reply

    • nathalie-kalbach

      |

      Thank you so much Christina! Wishing you a wonderful weekend!

      Reply

  • Lene Neby

    |

    This is so cool Nat – love all the different colors!
    And I agree with you – the burlap is so fun to work with!
    Have a nice weekend!

    hugs

    Reply

  • Martha Richardson

    |

    Love this…I just want to touch it to feel all that texture!

    Reply

  • france papillon

    |

    oh wow, this does look like fun: i can feel all the way through my screen how much you enjoyed making this! yummi yumm! what a great idea to do this on raw burlap, have to try it :)))

    Reply

    • nathalie-kalbach

      |

      Just put a craft sheet underneath – non sticky- cause it soaks all through ;)

      Reply

Leave a comment