Creative Squad

My Own Drum – Marsha Valk

CS June My Own Drum

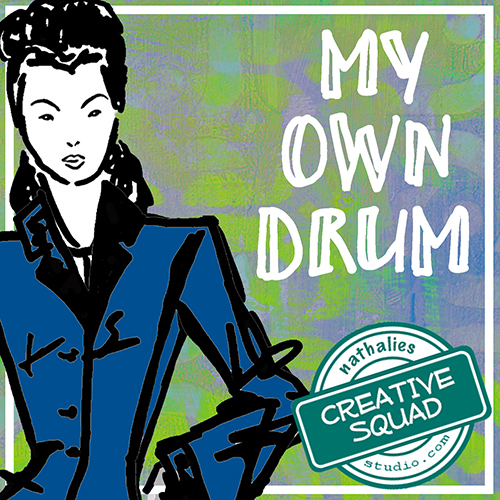
It’s Tuesday again and time for my Creative Squad to share a project with you with this month’s theme: “My Own Drum”. Throughout the month of June, the team will use my new Fashion Dame Rubber Stamp Set to interpret the theme. This theme is all about inspiration, creativity, and personal expression. I asked my squad to create something that celebrates the power of individuality. March to the beat of your own Mixed Media drum this month!

This week we bring you TWO projects from Marsha Valk. Marsha gives us two super fun and colorful answers to the theme to inspire us today.

—————————————————————————————————
Marsha June Headshot

At first I thought this would be easy. That I could do whatever I wanted. But then I read the theme again and… I started overthinking: My Own Drum… What is my own drum? Do I have one? How does it beat? Is this the right beat? Is this the right drum?! Who do I think I am, claiming a drum for myself!

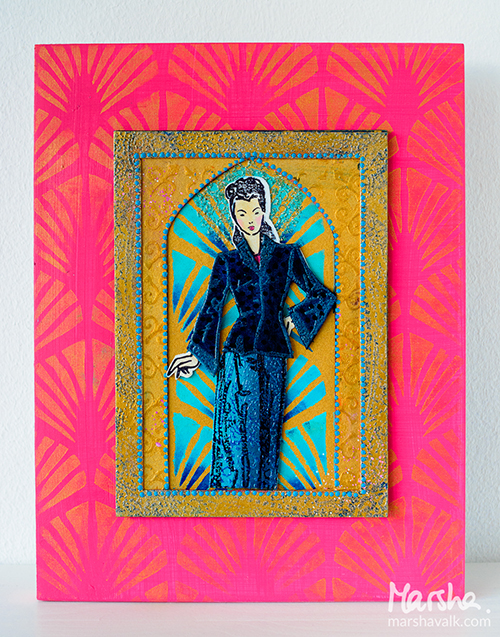
The best thing would be to just shut off my thoughts… But not before I had decided that my project had to involve a couple of things: it had to have a recycled element (preferably cardboard), colours are important to me so I wanted to choose a colour palette and of course I had to use the Fashion Dame.

Long story short, this is what I created:
MarshaValk_nSCS_MyOwnDrum_FashionDame-1

(If you want to find out more about how I created it, check my blog post for last weeks Stampendous Summer Blog Hop!)

But then I turned my thoughts back on. And I thought: this drum is fine, I can definitely march to it, but… I think my own beat is messier and free-er than this!

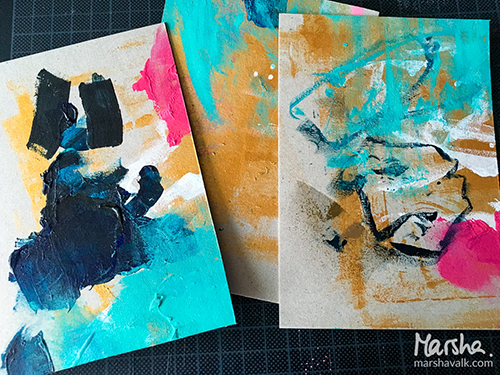
So I tried again, using all the messy stuff that was already there on my table. I had been mixing paint, cleaning brushes and dabbing paint off onto a sheet of grey board… And I decided to use this sheet as a base.
MarshaValk_nSCS_MyOwnDrum_FashionDame-1-4

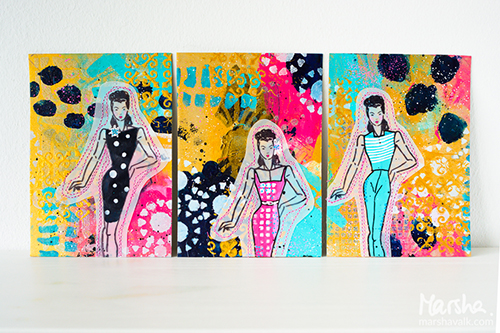
I cut the sheet into 4″ x 6” cards. I added more (leftover) paint and gesso to the cards, using a brayer, using stencils and a cosmetic sponge or an old plastic gift card and of course using my fingers.
MarshaValk_nSCS_MyOwnDrum_FashionDame-4

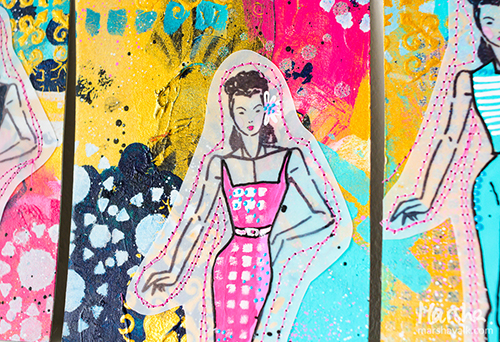
I had also spilled some embossing powder and I decided to use this on the cards, applying VersaMark through stencils, sprinkling the (mixed up) powders on top, tapping off the excess powder and then heat setting it.
MarshaValk_nSCS_MyOwnDrum_FashionDame-3

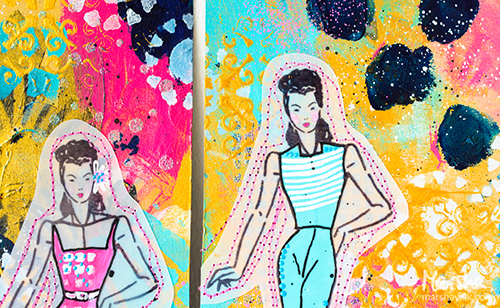
This time I stamped the Fashion Dames on vellum with Archival Ink. I didn’t want to wait for it to dry, so I heat set it.
MarshaValk_nSCS_MyOwnDrum_FashionDame-5

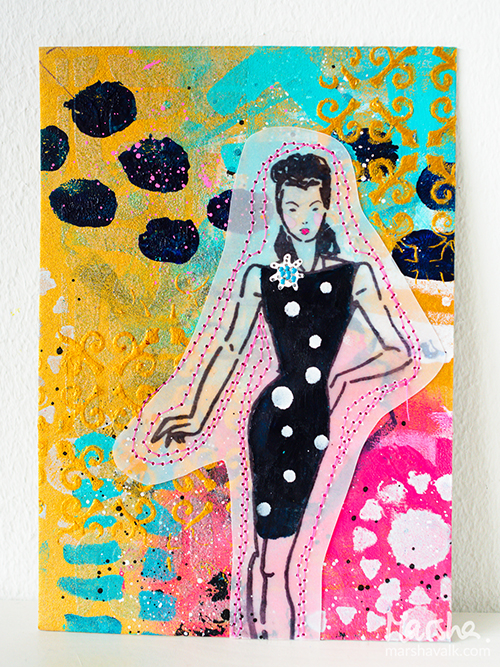
I wanted to machine stitch the Dames to the cards, because that’s something that I used to do a lot, but hadn’t in a while.
MarshaValk_nSCS_MyOwnDrum_FashionDame-1-2

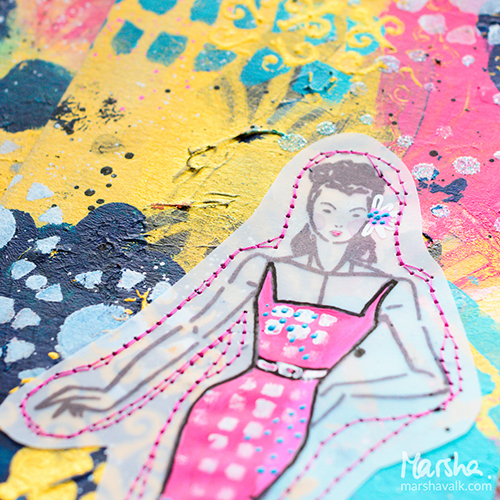
Once the Dames were stitched, I coloured them in with acrylic paint, Posca markers, Pearl Pen, Neocolor II’s and I finished the cards off with some paint marker splatters.
MarshaValk_nSCS_MyOwnDrum_FashionDame-2

—————————————————————————————————

I love Marsha’s super juicy backgrounds and that she wasn’t afraid to get her hands dirty in the process!

In addition to Talens Acrylic Paints in Deep Gold, Lamp Black, Phthalo Blue, Turquoise Green, and Quinacridone Rose, a sewing machine and thread, and an old plastic card, Marsha used the supplies listed below (some are affiliate links):
SuppliesCJS

Maybe you will even play along with us -I would love to see how you interpret our monthly themes. Email me how you used my stencils and stamps with the theme and email me an image – I would love to share your projects in my next “n*Spiration From Around the Globe“.

See you next Tuesday for another project from the Creative Squad!

Comments (4)

  • Sue Clarke

    |

    Love the stitching Marsha!

    Reply

    • Marsha.

      |

      Thank you Sue! So glad you like it!

      Reply

  • Michelle Rydell

    |

    Marsha I LOVE all of your projects! It’s so interesting the huge leap between your first project and the other three! They are all beautiful, but the last three really have your own drum in them! I love all the splatters and the stitching, and the colorful outfits!

    Reply

    • Marsha.

      |

      Thanks Michelle! Yes, I agree: the leap was interesting! I might have to do something like that again!

      Reply

Leave a comment

Be Brave Art Journal Page and Stampendous Giveaway

STM_NatNfriendsSummerHop_FBpost

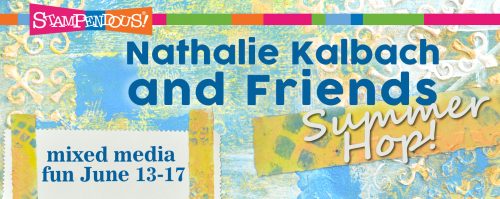
Today is the last day of the Nathalie Kalbach & Friends Stampendous Summer Hop – so much fun :)

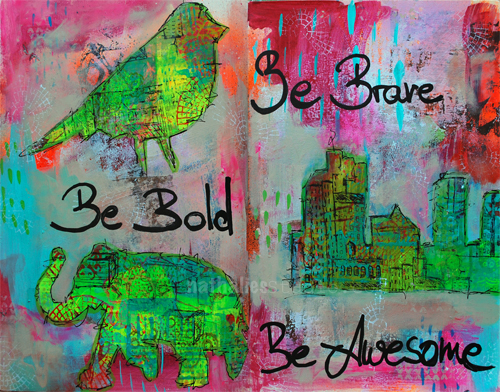
What better way to celebrate summer than with some summer colors, I thought and created this Art Journal spread with all kinds of bold summer colors and different sets of the stamps I designed for Stampendous.

BeBrave_NatKalbach01

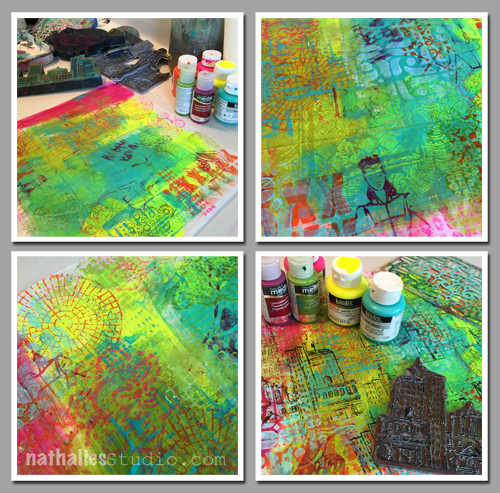
I layered some acrylic paint onto my art journal pages and set it aside for later. A list of all supplies can be found at the end of this post.

BeBrave_NatKalbach05

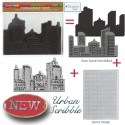
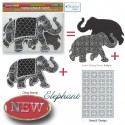
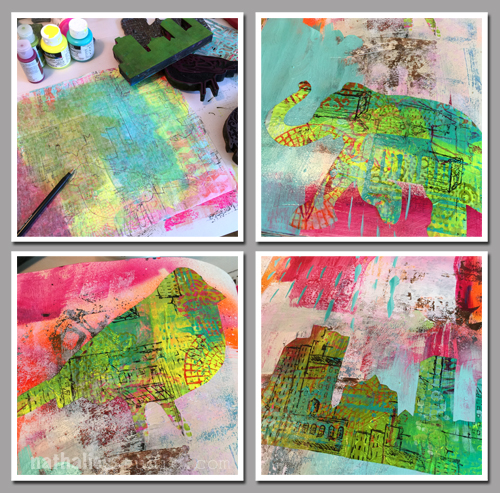
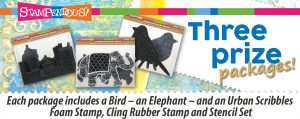
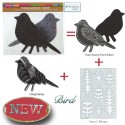
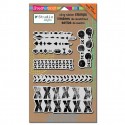
For the Bird, Elephant and Urban Scribble image I wanted to create my own patterned paper and I love to use deli paper for this because it is cheap and thin enough that you can use it to wrap up small presents, and can be used easily as collage material in your mixed media art work. I used the same colors over and over again, first adding big patches of colors to the deli paper, then stamping with acrylic paint and all kinds different Rubber and Foam Stamps. Later I layered some of the stencils which are included in my stamp sets on top to tie some areas together. Last but not least I used the Urban Scribble rubber Stamp and black archival ink and stamped randomly here and there.

BeBrave_NatKalbach06

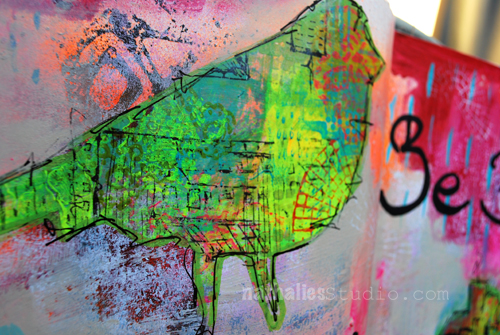
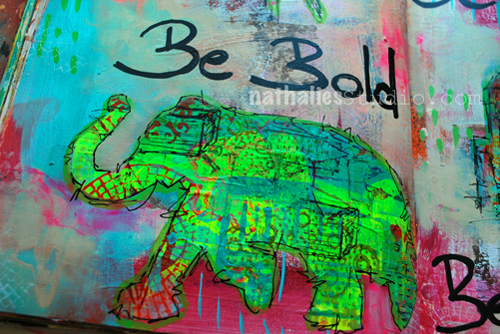
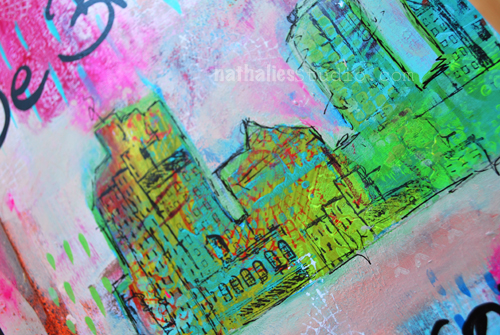
I traced the Foam Stamps onto the back of my new patterned paper and cut out an elephant, bird and the urban skyline. I glued all the cutouts down onto my earlier painted art journal spread using Matte Medium and a cosmetic sponge. Then I added a couple more marks and colors to the page and outlined the shapes in a sketchy manner. Added some Journaling- and voila :) It was a lot of fun to just play with all the different stamps. I cannot wait to make more patterned paper to use this way for wrapping paper – a good way to use up some of your left over paints and stamp off your inked stamps. Here are the details of the elements on the finished page

BeBrave_NatKalbach02

BeBrave_NatKalbach03

BeBrave_NatKalbach04

I hope you enjoyed this fun and colorful post :)

STM_NatNfriendsHop_prize

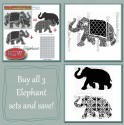
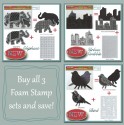
Do not forget that you can win all three of my Stamp Sets by commenting today on the blogs with projects of my stamp sets in this list from the whole week. Check out all those amazing projects my friends posted – I am blown away:

Stampendous Blog Post Monday

Pam Bray Monday

my blog – Creative Squad – Cheiron Brandon on Tuesday

Katy Leitch on Tuesday

Stampendous Blog on Tuesday

Stampendous Blog Post Wednesday

Gwen Lafleur Wednesday

my Creative Ice Breaker Wednesday

Louise Healy Wednesday

Stampendous Blog Post Thursday

Rae Missigman Thursday

Marsha Valk Thursday

Katy Leitch on Thursday

Allison Heikkila on Thursday

Mark Gould on Thursday

Stampendous Blog Post Friday

Tina Walker Friday

Pam Bray Friday

Lea Fritts Friday

Katy Leitch on Friday

Tenia Nelson on Friday

my blog- you are here :)


Have a wondeful day and good luck!!! Stampendous and I will post about the winner on our blogs next week!

Here are all supplies including the stamps I used (some are affiliate links).

SuppliesCJS


Comments (35)

  • Linsey

    |

    Oh goodness! Your art journal pages are SO gorgeous and completely inspiring!!! Thank you so much for sharing your awesome creativity and talent and for coming together to bring your fans this super cool mixed media hop!! I’m thoroughly enjoying seeing your marvelous designs come to life!!!

    Reply

  • D.Ann C

    |

    Oh, I have a serious crush on your user of neon colors!!! I have also developed a serious crush on your stamp/stencil sets this week. Can’t wait till my budget let’s me indulge in getting some!!! -FL

    Reply

  • Leadonna Fritts

    |

    I absolutely love your style of creating, Nat. Like me, you love color and it shows beautifully in your work. Your art journal pages just speak to my heart. Thank you for sharing!

    Reply

  • Janet Staples

    |

    I LOVE this! So bright while being subtle and bold! Brilliant. I’m glad I ran across this…can’t wait to see the other artists’ interpretations! Thank you so much for all of your inspiration Nat!

    Reply

  • nicole n

    |

    Love all of the bright colors and the elephant!

    Reply

  • Jackie Schachter

    |

    When I reached this page I just said to myself “wow’. Love the
    brilliant colors of the backgrounds and stamps. You and your
    designers are so talented. Have enjoyed this week’s blog
    hop – it was fun. TFS.
    Jackie, Tel Aviv, Israel

    Reply

  • Sarah P.

    |

    The journaling pages are so colorful and make a statement. I love them, they catch your eye for sure.

    Reply

  • jacqvz

    |

    So inspiring! Love the hold colors!

    Reply

Leave a comment

Creative Ice Breaker – Morning Art Journal Play Video #2

In the mornings I play in my art journal to get myself into the creative groove and break the ice – so to speak- and get ready to paint. I recorded and fast forwarded my morning ritual – and hope you enjoy it. Take it as what it is – a morning art journal play- not a tutorial ?

Creative Ice Breaker June 2016 from Nathalie Kalbach on Vimeo.

Here are the supplies I have used in my Creative Ice Breaker video above – some links are affiliate links.

SuppliesCJS

I hope you enjoyed the video ? Have a wonderful and creative day

Comments (30)

  • Teresa Godines

    |

    Love all of your great colors. TFS

    Reply

  • Deborah S

    |

    Wow what a great way to start your day kind of like stretching before your morning run. I really enjoyed your video it was very inspiring. I can’t seem to find my way into mix media. My style is to controlled and stay in the lines. I guess I just need to be brave and jump in. What do I have to lose right. OBTW you ARE the best, best colorer lol tfs!

    Reply

  • Christine Dring

    |

    Gorgeous journal page! Love your sentiment – very empowering!

    Reply

Leave a comment

My Own Drum – Cheiron Brandon

CS June My Own Drum

Happy Tuesday! It’s time for my Creative Squad to share a project with you with this month’s theme: “My Own Drum”. Throughout the month of June, the team will use my new Fashion Dame Rubber Stamp Set to interpret the theme. This theme is all about inspiration, creativity, and personal expression. I asked my squad to create something that celebrates the power of individuality. March to the beat of your own Mixed Media drum this month!

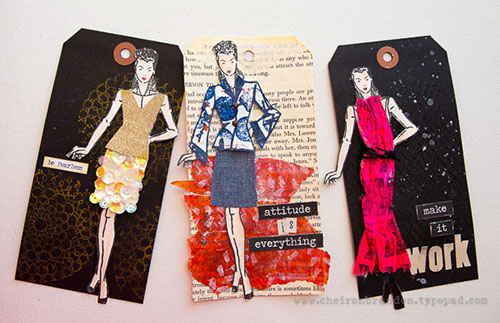
This week we bring you a fun project from Cheiron Brandon. These tags are a great example of how the Fashion Dame can be “dressed”, just like a paper doll, and in this case a very fashionable one :)

—————————————————————————————————

Cheiron June Headshot

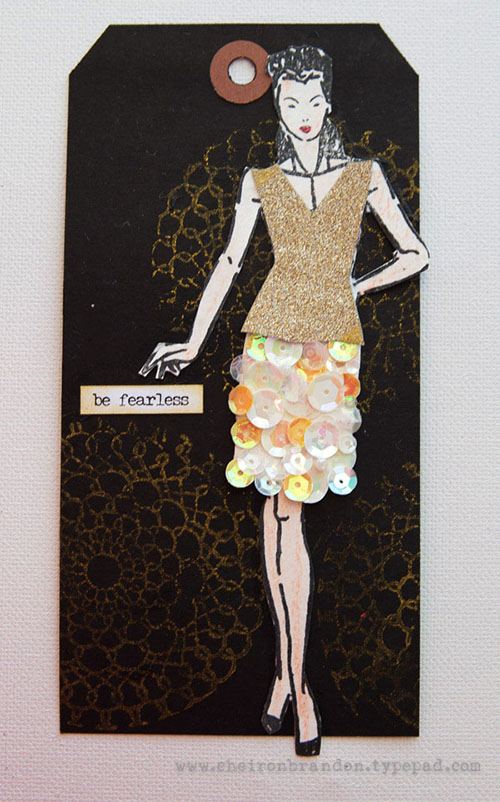
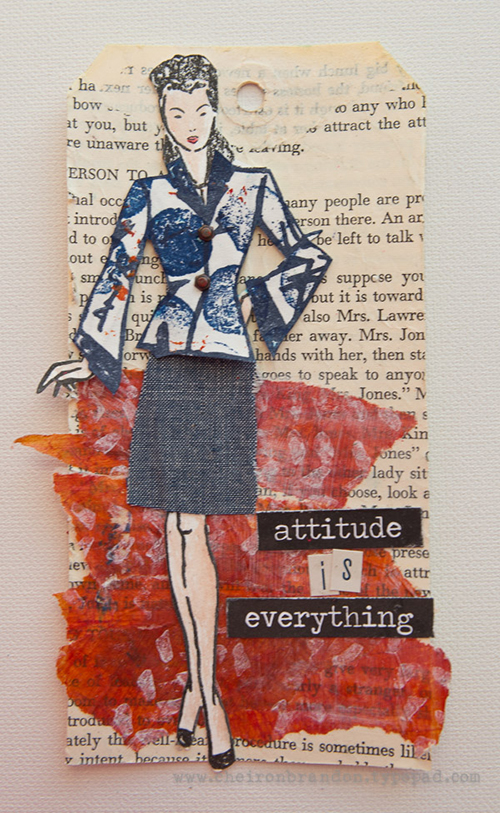
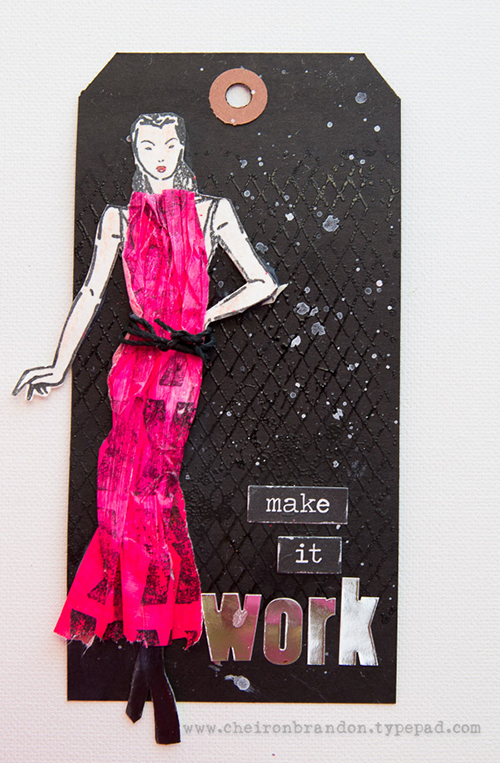
The theme of “my own drum” combined with the Fashion Dame stamps this month was perfect for me! I wasn’t sure where to go with these fun Fashion Dame stamps, but I thought about it and about my own sense of fashion. I like many different styles of clothing, and it all depends on the season, occasion and even the mood I am in that helps me decide what to wear on any given day. I used the Fashion Dames like my own personal paper dolls and gave each of them their own personality and style. I created a set of tags that I can use in my art journal, on a card, or even as a gift tag.

cheiron_fashiondame1

cheiron_fashiondame2

I created each tag with a bunch of Nathalies stamps. The first dame is wearing a golden top cut from some deco sheets, and her skirt is covered entirely with sequins. The background of the tag is stamped with a stamp from the Kaffee Klatsch set. Not an everyday look, but something totally fun!

cheiron_fashiondame3

This tag was made with a background of book paper and some painted deli paper that I stamped with the Marks cling set. I gave her a fun patterned jacket using the Grunge Cling stamp set and some denim paper.

cheiron_fashiondame4

This last dame is probably my favorite of all and if this dress existed in real life, I would totally wear it! I made the dress from painted deli paper stamped with the Marks cling stamp and gave her a belt of twine. Its very subtle, but I stamped and clear embossed some mesh in the background.

I certainly had fun playing with these Fashion Dames, and can’t wait to work them into my art journal pages!

—————————————————————————————————

I love how Cheiron dressed the Dame in her very own creations, and yes, I want that super awesome jacket and dress in my closet!

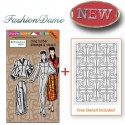
In addition to sequins, book paper, and twine, Cheiron used the supplies listed below (some are affiliate links):
SuppliesCJS

Maybe you will even play along with us -I would love to see how you interpret our monthly themes. Email me how you used my stencils and stamps with the theme and email me an image – I would love to share your projects in my next “n*Spiration From Around the Globe“.

See you next Tuesday for another project from the Creative Squad, but in the meantime, we have a Blog Hop!

STM_NatNfriendsHop_banner

You have the chance of winning one of the 3 prize packages containing all three of my foam stamp sets by leaving a comment today here on the blog and the following days on all blogs participating. Stampendous posts throughout June 13-17 every day a list of blogs participating and I have some awesome friends joining me :)


Comments (43)

  • NancyGrace Sims

    |

    I LOVED Cheiron’s ATTITUDE IS EVERYTHING here in Hillsboro, Oregon.

    Reply

  • Susan

    |

    When I was a kid I loved paper dolls. Next I started sewing so I could have my own look. Love this

    Reply

  • Tamiko McCurry

    |

    now you are a fashionista by default… such fabulous little outfits!! darling tags!

    Reply

  • TracyM #6773

    |

    ABSOLUTELY FABULOUS tags, SO GLAMOROUS, the colours, layers and textures DELIGHT, LOVE them ALL!!!
    The second I saw Fashion Dame, she won my heart, it filled it with precious memories from when I 1st saw my Mother’s dressmaking sketchbook from her studies in the late 50’s.
    Tracy from Australia

    Reply

  • Claudia Jean Nelson

    |

    You are amazing. These are great. I love them so much. Thank you for the inspiration

    Reply

  • Joela Pascoe

    |

    Wow what awesome cards

    Reply

  • Bea savellano

    |

    All three are very cool. Love the sequins…b

    Reply

  • Julie

    |

    Wow, these are so wonderful! I love each one, so unique!

    Reply

  • Joi @RR

    |

    Cheiron – I feel like I have just watched Nat’s own private Project Runway Allstars fashion show!!!! WOW – you really did Nat’s stamps up proud girl – your creations are over the moon SPLENDIDLY CHIC. Your tags are my VERY FAVORITE of all the designs I have seen of the Fashion Dames. FABULOUSLY WONDERFUL – totally eye candy – going back to enjoy another look. j.

    Reply

  • Rachel Alexander

    |

    Wow, you are such an inspirational artist, I love your new stencils and can see that they are so versatile, the imagination runs riot with ideas!

    Reply

  • Jackie Schachter

    |

    Great tags! Love the mixed media backgrounds and all the outfits. Also like how the sentiments fitted each tag.

    Reply

  • Michelle Rydell

    |

    OMG I love that sequined skirt! All of the outfits you designed are so fun Cheiron! Great way to use the stamp set!

    Reply

  • Linda Edkins Wyatt

    |

    I would soooo love to win the stamps. I make arty paper dolls and atc dolls and would love to have a set to play with!

    Reply

  • Judy B

    |

    What a great idea, treating the image like a paper doll and then dressing it up. Thanks for sharing with us.

    Reply

  • Rae

    |

    Love this – these are so cute! Great and clever ideas for sure!

    Reply

Leave a comment

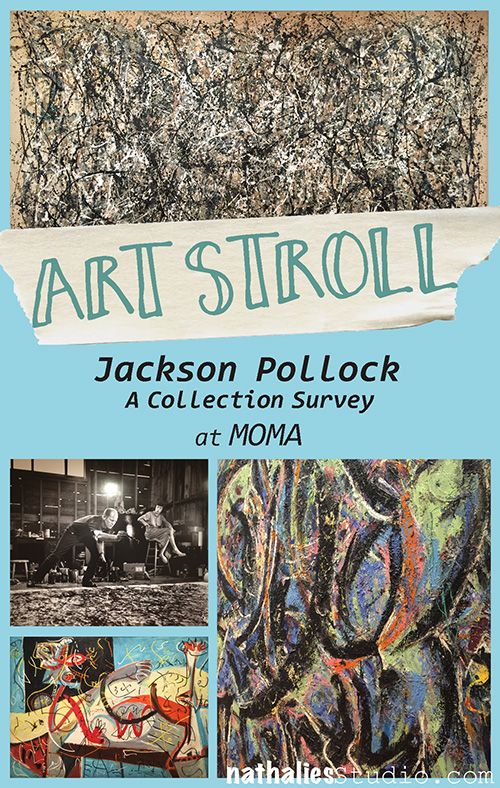
Art Stroll: Jackson Pollock – A Collection Survey at MoMA

KalbachPollock Collage

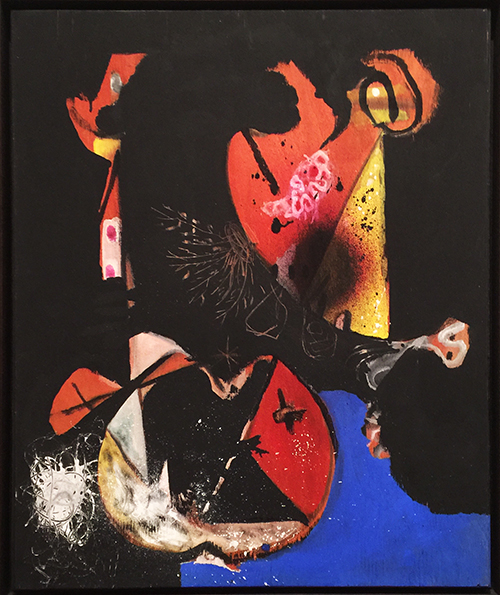
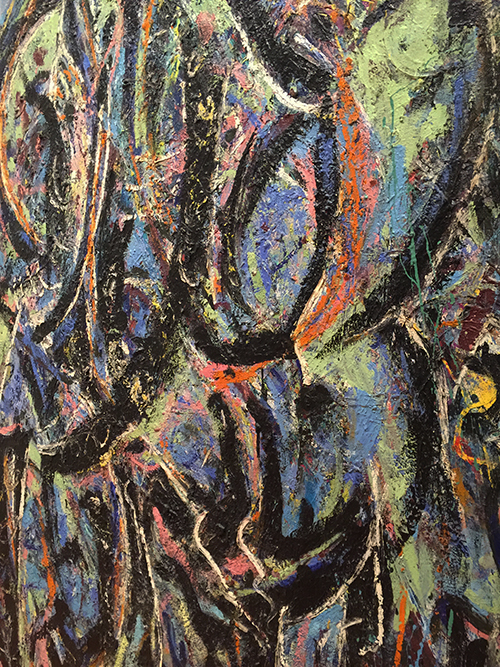
A couple months ago I went to MoMA and saw this wonderful exhibition of Jackson Pollock’s work tracking his artistic development from the 1930s, when he made loosely figurative images , to the early 1950s, when he pioneered the radical abstractions for which he is best known by pouring and dripping paint onto canvas or paper. It was a wonderful exhibition and I loved seeing the evolution but also getting an insight of how he took certain things further and further and how some of his early elements morphed into something more abstract or vanished in the end.

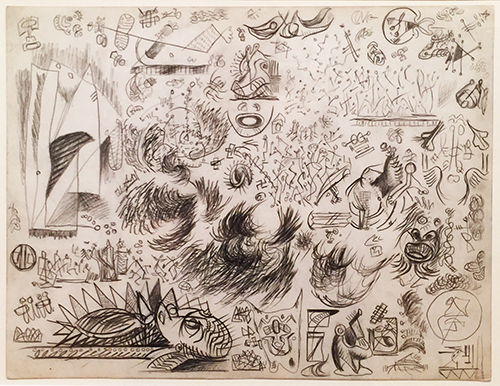
KalbachPollock01

Jackson Pollock, Untitled (Sheet of Studies), c. 1939-42, Black colored pencil on paper

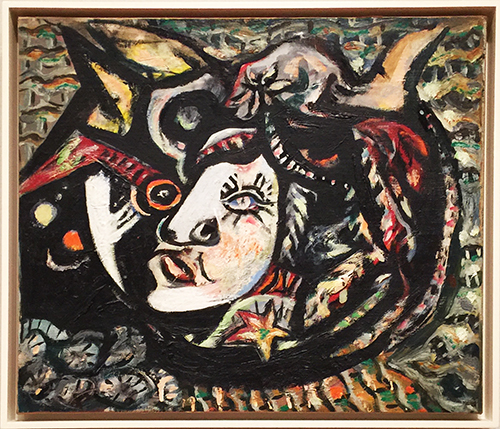
KalbachPollock02

Jackson Pollock, Mask, 1941, oil on canvas

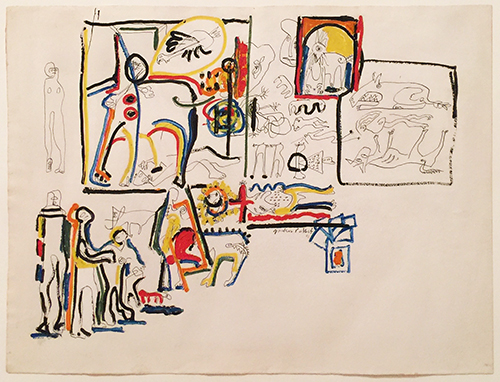
KalbachPollock08

Jackson Pollock, Untitled (Animals and Figures, 1942, Gouache and ink on paper

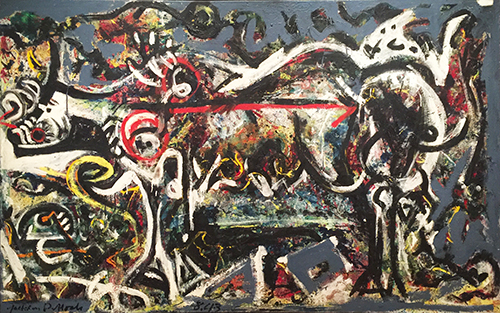
Drawing was an independent medium for Pollock – so his sheets were never studies for paintings. Yet you can see similarities to his paintings – like in the one below – The She Wolf . Vibrantly colored lines that are laid on top. Fusing two different layers was a strategy Pollock would continue to develop over the next several years.

KalbachPollock07

Jackson Pollock, The She-Wolf, 1943, oil, casein and gouache on canvas

He began covering the canvas with a layer of multicolored splatters, washes and drips and then superimposed the black outline of the wolf, whose head faces left. Finally he added thick white lines to highlight her shape and dense areas of gray-blue at the edges to bring further relief.

KalbachPollock09

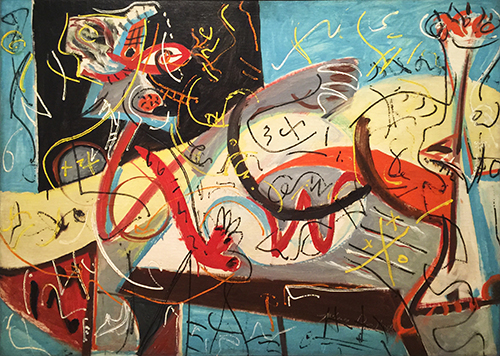
Jackson Pollock, Stenographic Figure, ca 1942, oil on linen

KalbachPollock05

KalbachPollock04

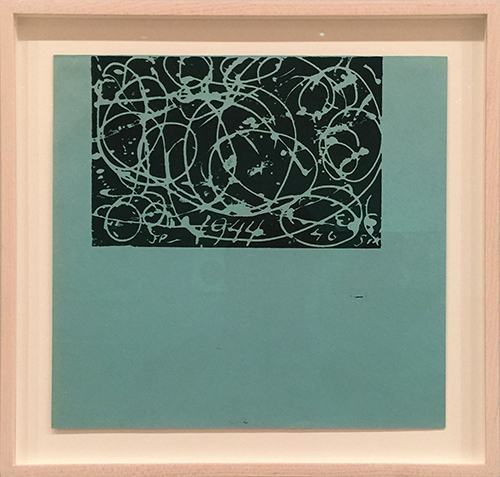
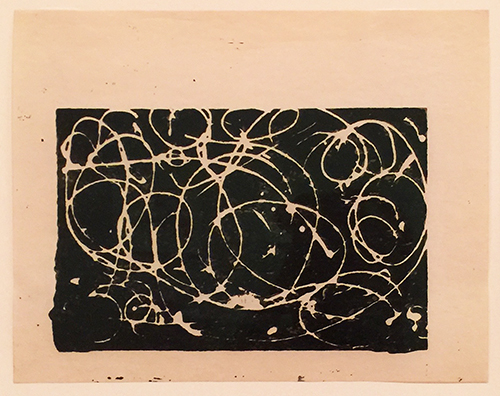
Screen prints 1943-1944 – Pollock experimented with screen printing in this time and worked briefly at a commercial silkscreen workshop in 1943. These screen prints above predate his first abstract “drip” paintings at least 2 years. Apparently Pollock and his wife artist Lee Krasner used those screen prints as greeting cards!

KalbachPollock03

Painting, ca. 1944, Gouache on plywood

KalbachPollock10

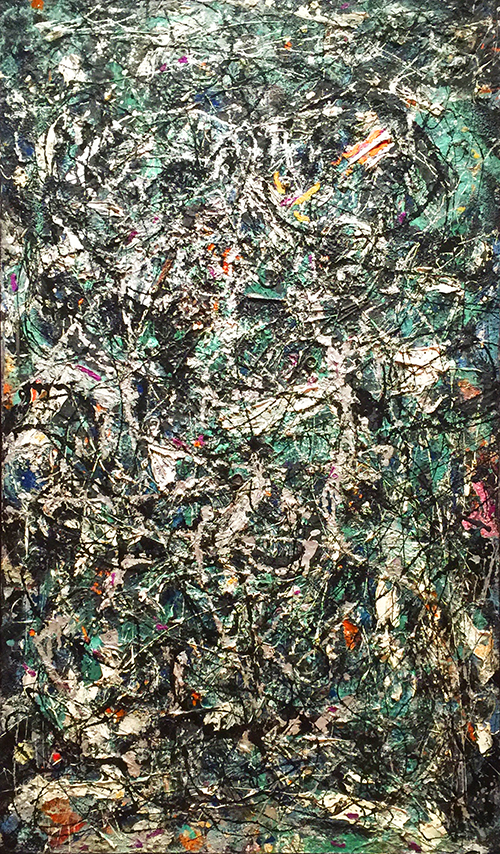
Full Fathom Five, 1947, oil on canvas with nails, tacks, buttons, key, coins, cigarettes, matches, etc.

This is one of Pollock’s first “drip” paintings. While its top layers consist of poured lines of black and shiny silver house paint, a large part of the paint’s crust was applied by brush and palette knife.

The nails, tacks, buttons etc. are all encrusted in the paint and add to the texture.

KalbachPollock11

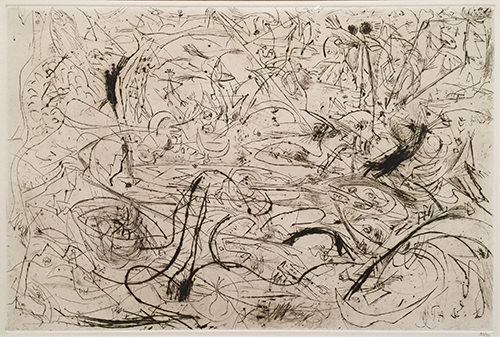
Untitled, c. 1944-45, engraving and drypoint

KalbachPollock12

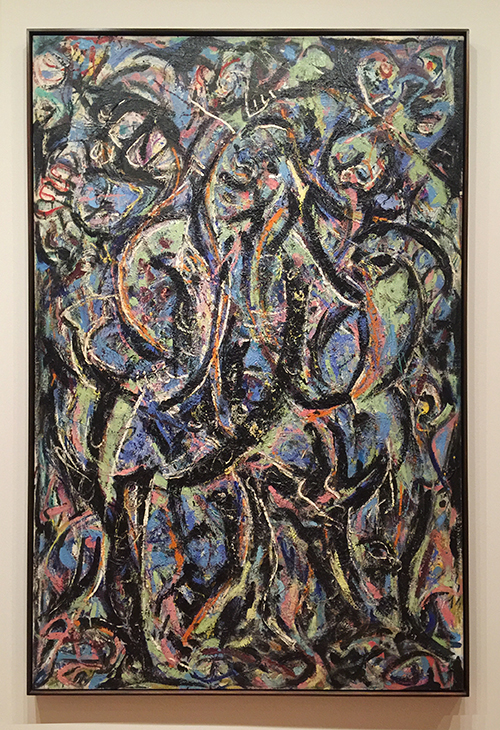
Gothic, 1944, oil on canvas

Pollock told a critic that this composition was based on Pablo Picasso’s 1907 masterpiece, Le Demoiselles d’Avignon. Just a whisper of this inspiration piece, yet …if you know it you can see it …and still it is something totally new and Pollock!

KalbachPollock13

KalbachPollock14

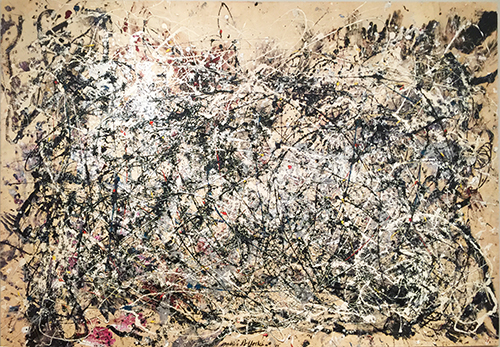
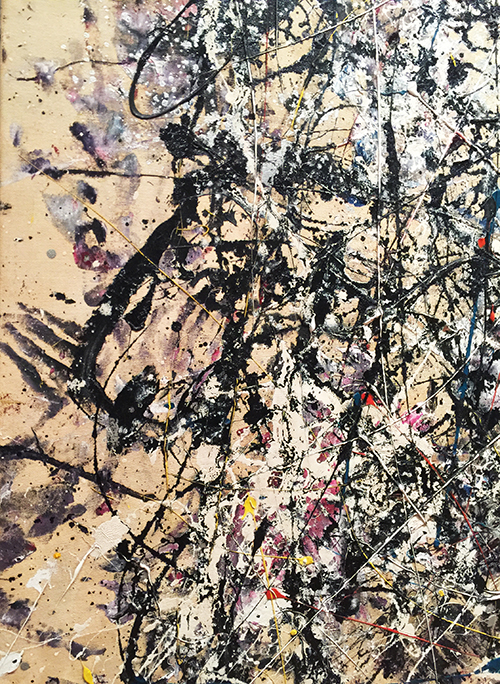
Number 1A, 1948, oil and enamel paint on canvas

KalbachPollock15

I love how you can see his fingers on the left – the hand of the artist- it makes you look for these things in all of his drip paintings.


KalbachPollock17

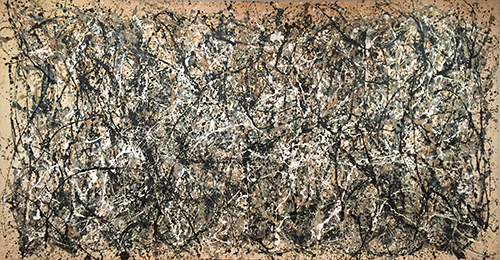
One: Number 31, 1950, Oil and enamel paint on canvas

KalbachPollock18

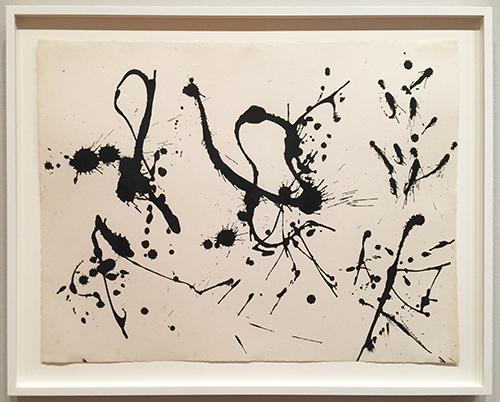
Untitled, c. 1950, ink on paper

this makes me want to fling some ink :)

KalbachPollock19

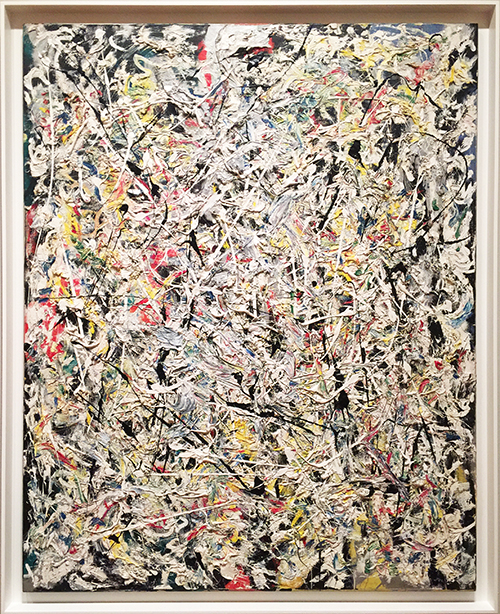
White Light, 1954, Oil, enamel and aluminum paint on canvas

This is one of Pollock’s last paintings and the only one he completed in 1954- he squeezed paint directly from a tube on the canvas – also used a brush to create subtle marbling effects by manipulating wet paint in certain areas.

It was so inspiring and wonderful – the texture and the vibrancy of the colors – and of course – do not forget the scale.

I hope you enjoyed this little stroll – until the next one.


Comments (3)

Leave a comment

Scenes from the n*Studio

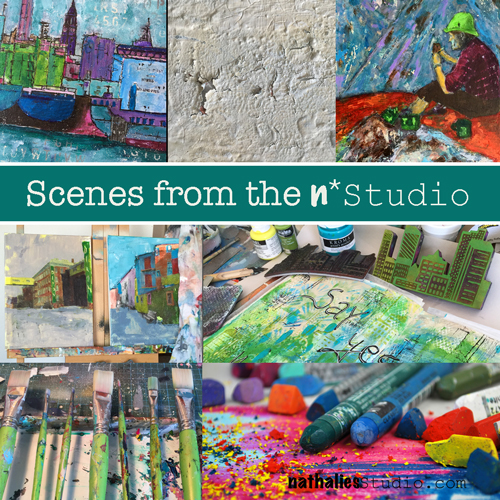
ScenesNatStudio

I cannot share everything I have been doing last month but I thought I share a little peek into my studio :)

Top Row: Hamburg Harbour Painting, Texture Play, Painting of my Uncle Walter

Middle: Working on two new paintings, working on a fast forward Creative Ice Breaker Video

Bottom Row: Cleaned brushes after a day in the studio, Art Bars and Neo Color II explosion


Also …this is coming up soon – in case you want to join us :)

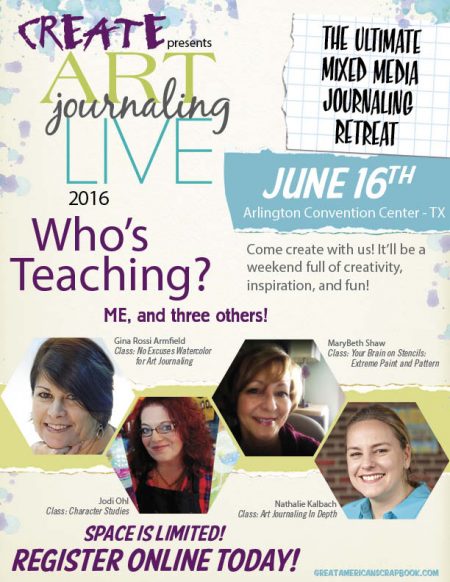
AJL_Email_2_Teachers

My part of the class is up first in the morning:

Nathalie Kalbach: Art Journaling In Depth

Learn how to add interest and an important spark to your art journal with textures and layers. Nathalie Kalbach shows how to create visual and actual texture using paint, gesso, and tools, plus techniques such as sgraffito and collage layering. Texture and layers are important design elements that are easy to produce, and they can communicate a variety of messages, emotions, thoughts, and perspectives. Let Nathalie show you how to go in depth!

Sign up here

It was so much fun last year and my co-teachers are amazing – you will love it. It is a jam packed Art Journaling workshop day! I hope to see you in Arlington Texas.

Have a gorgeous day my sweet friends!

Comments (1)

Leave a comment

My Own Drum – Gwen Lafleur

CS June My Own Drum

Happy Tuesday! It’s time for my Creative Squad to share a project with you with this month’s new theme: “My Own Drum”. Throughout the month of June, the team will use my new Fashion Dame Rubber Stamp Set to interpret the theme. This theme is all about inspiration, creativity, and personal expression. I asked my squad to create something that celebrates the power of individuality. March to the beat of your own Mixed Media drum this month!

We are kicking off with an art journal page from Gwen Lafleur. This is a super inspiring reminder to us all to do what we love, even if it means covering stuff up :)

—————————————————————————————————

Gwen June Headshot

This month’s theme, “my own drum” was perfect for me, and lots of fun to work with! I tend to be a bit of a loner – I’ll go off on my own or join up with tour groups where I don’t know anyone else and go on crazy, exotic adventures. I’m also usually one that follows what I like rather than what’s trendy in clothes (even as an 80s child in elementary school, I knew parachute pants weren’t a good idea for me. LOL.) I’m the same with music, food, and especially with my art! Don’t get me wrong… I love to see what new things other people are doing and what tools and techniques are cool. That’s how we learn, right? But more and more, it’s important for me to take whatever I learn and go in my own direction as much as possible; to be true to myself in my work, even if no one else likes it.

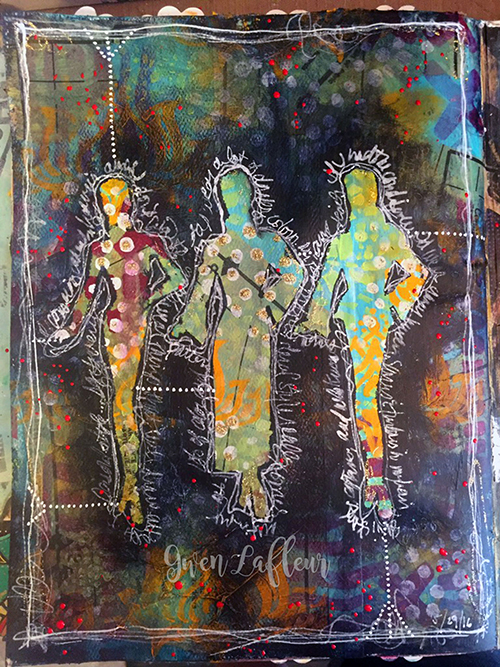
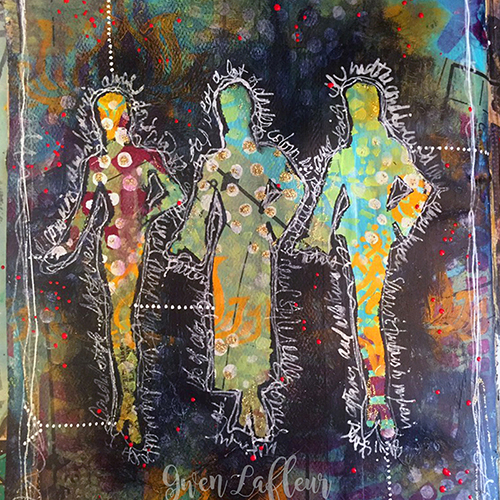
My-Own-Drum-Art-Journal-Page---Final---Gwen-Lafleur

For this month’s project I took those thoughts and used them to create this art journal page. I used the Fashion Dame stamp set and created three silhouettes as my focal point – in my mind, they’re three different aspects of me. There’s a bit of a double meaning to the color and pattern on this page… first, something I like to do a lot in my work that really bothers some people is to cover things up. Second, I love the idea of the inside of the silhouettes being full of pattern and bright colors while the outside is extremely subdued. I think that speaks a lot to my own personality (and the rich inner life of an introvert. Ha!)

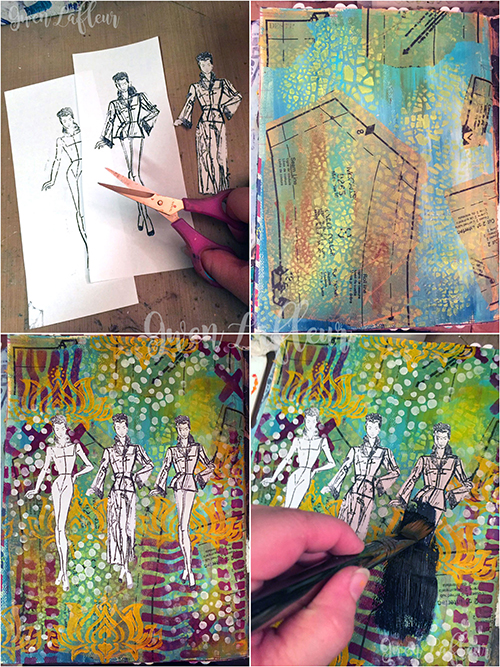
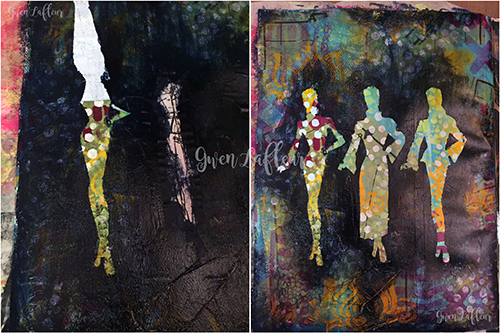
My-Own-Drum-Art-Journal-Page---Steps-1-4---Gwen-Lafleur

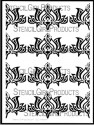
To make this page, I started out by stamping with the Fashion Dame stamp set – I did different combinations of the body and clothes to get the three silhouettes. I just stamped them on copy paper and then cut them out. Next, I prepared my background. I gesso’d and painted, then I collaged on pieces from a sewing pattern (I couldn’t resist the tie to fashion!) I did some stenciling on top with some of Nathalie’s StencilGirl stencils. Once I had a nice hot mess of color and pattern, I took my three silhouettes and adhered them securely with repositionable adhesive. Next is the part that upsets some people… I took some Payne’s Gray paint and mixed it with satin glazing medium, then proceeded to paint over the entire page.

My-Own-Drum-Art-Journal-Page---Steps-5-6---Gwen-Lafleur

For the next step, I use baby wipes to push back a little of the wet paint. I wanted most of the page to be at least somewhat veiled with the darker color, especially near the silhouettes. Then I peeled off the masks / silhouettes (do this while the paint is still wet so it doesn’t seal down the edges of the mask.) I love the contrast of the areas that were masked off versus the dark background with just hints of pattern and color showing through.

My Own Drum Art Journal Page - Final 800x800 - Gwen Lafleur

To finish it off, I took a fine line painting pen and filled the well with white acrylic ink. I used this to add the journaling around the silhouettes and to put a border on the page. I added the dots with a white paint pen, then used red fluid acrylic paint mixed with airbrush medium in a fine line applicator to sprinkle some dots around the page. Voila! A finished art journal page that shows how I like to march to my own drum both in my art and in life.

—————————————————————————————————

I think it is so cool that Gwen followed her instincts with the dark overlay – this is what the  theme is all about and the results are gorgeous.

Besides the supplies listed below (some are affiliate links), Gwen also used a vintage sewing pattern and Hermafix temporary dot adhesive:

SuppliesCJS

Maybe you will even play along with us -I would love to see how you interpret our monthly themes. Email me how you used my stencils and stamps with the theme and email me an image – I would love to share your projects in my next “n*Spiration From Around the Globe“!

See you next Tuesday for another project from the Creative Squad!

Comments (10)

Leave a comment