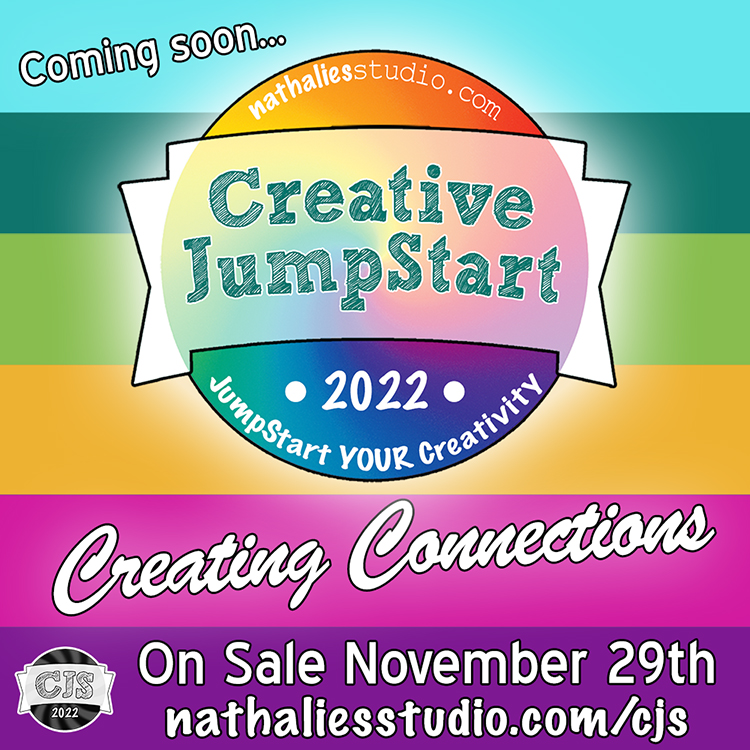
Creative JumpStart 2022 is here! Check it out now and then get ready: it officially goes on sale Monday, November 29th so mark your calendars for the ultimate online mixed media workshop!
We’re back with another fantastic lineup of your favorite artists (and some new faces too), lessons, and an online classroom to help you kick off 2022 feeling inspired, motivated, and connected!
In fact, our theme this year is Creating Connections and our artists are exploring how we connect with artmaking, our materials, our surroundings, and the people in our lives through some unique video lessons. Mixed Media topics from art journaling to collage, from mini book making to stitchery, from watercolor to gelli printing, and MORE are covered.
Check out our CJS22 Trailer video:
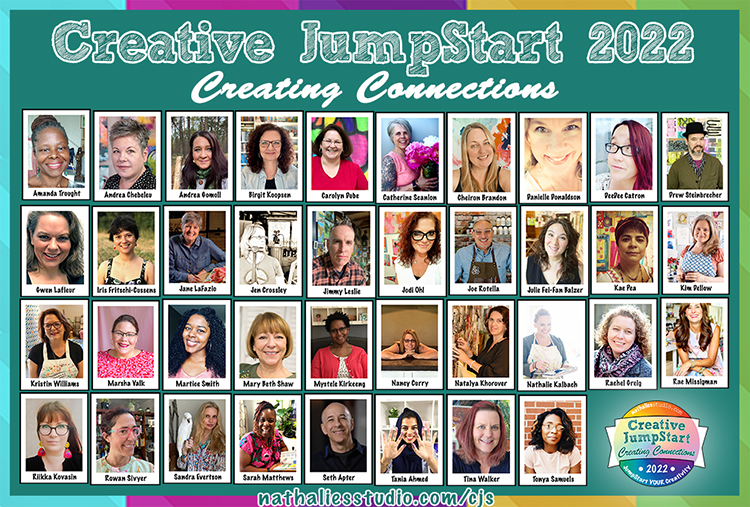
What does Creative JumpStart 2022 include? With our Creating Connections theme, we’re all about helping you CONNECT with your artmaking, your skills, and your peers this year. We’ve got 38 leading mixed media artist teachers sharing 38 downloadable video lessons and supply lists to help inspire you in 2022. We’ve got a NEW forum to help you share your experiences and artwork with other students and to seek advice and feedback from our artist teachers. We’ve got daily emails to keep you on track and to help you make the most out of the daily lessons. We’ve got LIVE webinars featuring our artist teachers and special guests, covering topics that are near and dear to the heart of any creative. And let’s not forget about those sponsor giveaways to spice things up along the way!
Who are the Artist Teachers this year? We have an amazing list of perennial favorites that I know you will recognize but we also have some new faces that are excited to bring their fresh perspective to the workshop this year.
Why is Creative JumpStart for me? Creative JumpStart is a unique online workshop with short format lessons – each video is about 10-12 min in length and designed to fit into busy modern schedules. Creative JumpStart features a variety of mixed media techniques and styles to help strengthen your existing skills and to inspire you to add some new ones too. Creative JumpStart is not just a place for learning, it is also a catalyst for creating connections within the mixed media community and the creative world beyond.
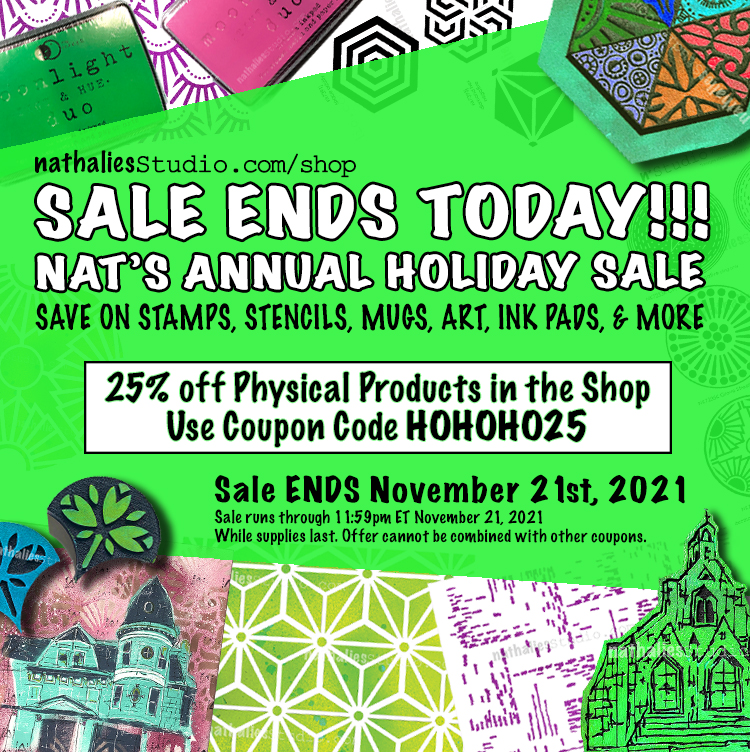
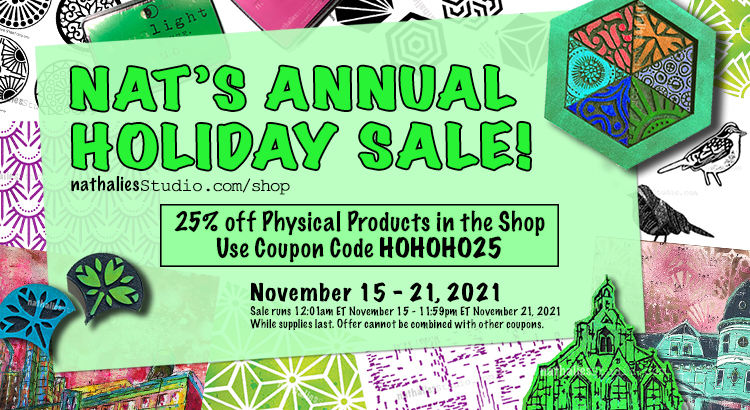
Don’t forget – my annual Holiday Sale in my Online Shop ends TODAY, Sunday November 21st at 11:59pm ET. We ran it a bit early this year to help you get a jump on holiday shopping AND in response to the difficulties with shipping.
So hurry in and shop with us through the end of the day to enjoy 25% off all physical products. Just use the coupon code HOHOHO25 when you check out.
A Look Back – let’s get into the spirit of the season and recap some of my favorite holiday posts from years past. If you’re looking for creative and crafty ideas for holiday decorating, cards, and such, this is a handy list.
A Look Back is a blog series to show you some projects and posts that you may have missed – sometimes going WAY back in the archive. I think it will be fun to revisit a few ideas that we haven’t seen for a while. I’m excited to see how a little look back might inspire something new in the future :)
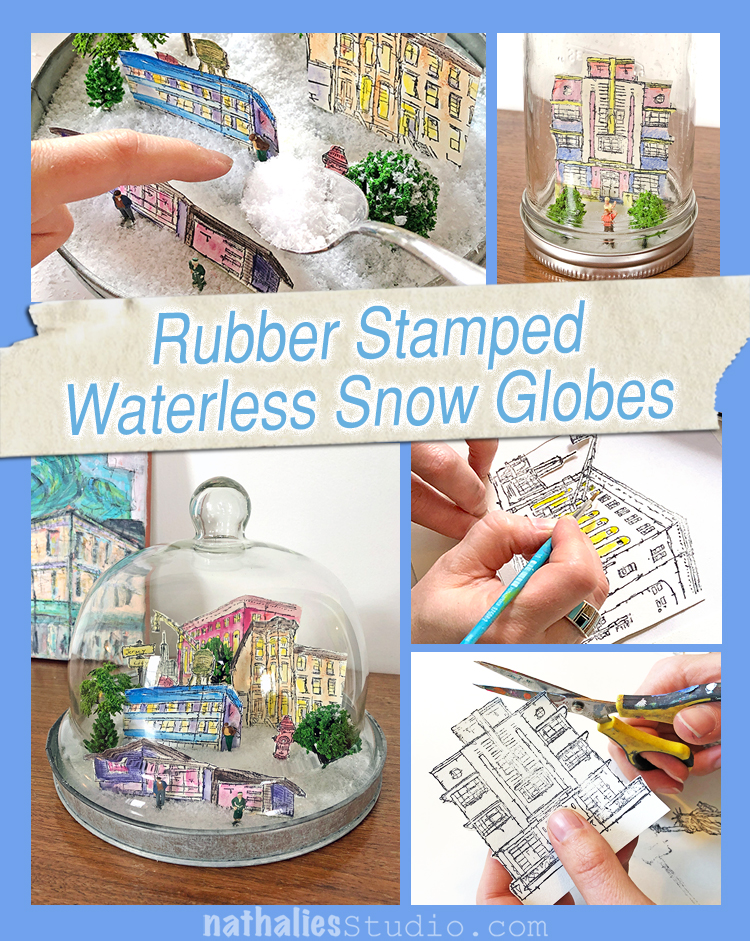
Hands down this was one of my favorite play dates ever! These rubber stamped, waterless snow globes were so fun to make and I still love displaying them each year around the holidays. We really got creative setting up the scenes with my Stroll Around the Block and Stroll Through the Hood stamps, along with some quirky miniature figures and trees. Love creating your own miniature world? This is for you!!! Here’s a link to the post.
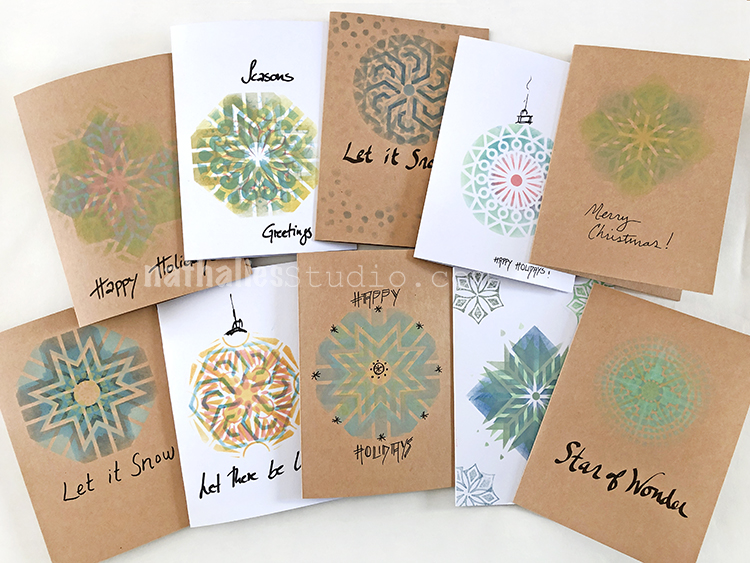
Another winner was a card making play date we did by layering my stencils with Distress Oxide inks. So satisfying to see how different patterns worked together to create snowflake-like designs. Each one was unique, each one was beautiful. Here is the post where we show you our step by step method.
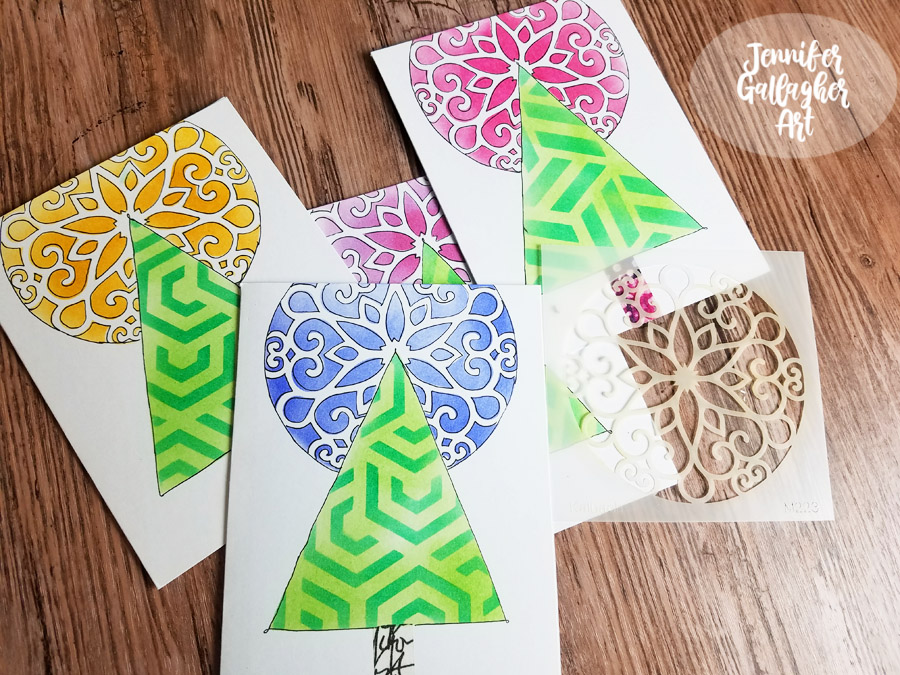
Remember these fresh looking tree cards from Creative Squad alum Jennifer Gallagher? She created trees using my Kassel and Flower Maze stencils, washi tape for the trunks, and then set them aglow with my Park Blvd stencil. I love the simple, modern look of these cards and you could really churn out a lot of variations in no time with her stencil and masking technique. Check it out.
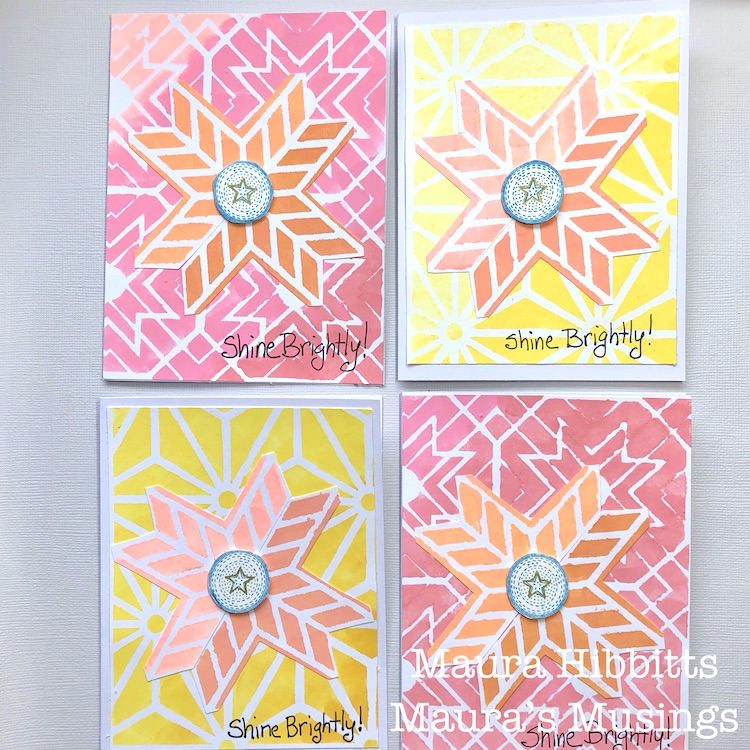
Looking for something a little different for holiday cards? Creative Squad member Maura Hibbitts shared this card project with us last year and they still catch my eye. I love her color choices and how well they work with my Star Struck, Toledo, and Santiago 4×4 stencils. And using my Small Circle Jumble rubber stamps for the center is such a nice detail. Give it a try: here is Maura’s post.
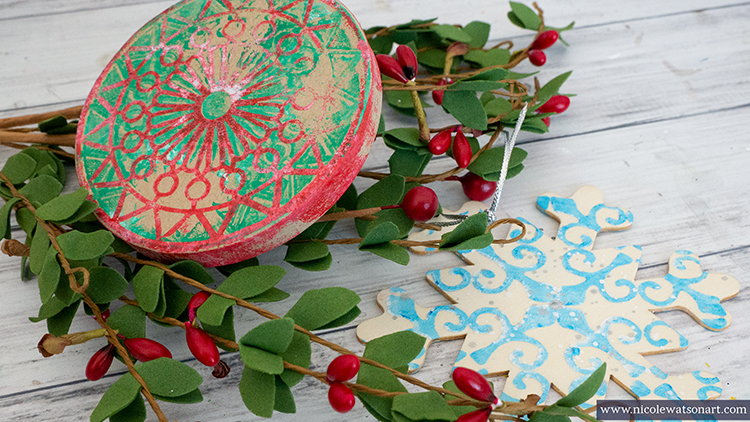
Let’s not forget the ornaments! These festive examples from Creative Squad alum Nicole Watson utilize some simple blank ornaments, acrylic paint, a gelli plate, my Valley Road stencil and my Antique Tile foam stamp. Their rustic style makes me want to cozy up with my hubby and trim a tree. Here is how to make them.
I hope you enjoyed this look back on some seasonal holiday projects using stamps and stencils and will maybe make a few of your own too. Remember that right now we have our big annual Holiday Sale in the shop so it’s a nice time to pick up a few of the stamps or stencils that you see in the above post for 25% off – just use the coupon code HOHOHO25 when you check out. The sale runs through November 21, 2021. Here is a link to the shop.
Did you catch ArtCollab this month? Sarah Matthews and I talked about gratitude and specifically called out some of the people in our lives who have helped shape our artistic journeys. You can watch a recording here and then scroll down for info on what’s next for ArtCollab.
Here is an overview:
In this episode of ArtCollab we talk about some of the people who have helped us become who we are today and most importantly we take the time to share our gratitude for these amazing people. Many along the way have been pivotal sources of inspiration, encouragement, advice, opportunity, and friendship, and all have played a big part in both our artistic (and life) journeys. Educators, artists, spouses, advocates, and personal friends are all called out in this episode and stories are shared to describe the positive impact that others can often have when it comes to shaping a life. In addition to the people, this discussion also touches upon technology as a lifeline for connections when physical interactions aren’t possible, and the resurgence of the hand written note during recent times. In the end, we show some artwork inspired by Showing Gratitude and we ask the audience for input on future ArtCollab topics.
ArtCollab is taking a little break but will return with a new episode in February 2022! Stay Tuned!!!
And if you want to catch up on previous episodes of ArtCollab, you can find recordings of this and every ArtCollab ZoomCast here in the Community tab on the website.
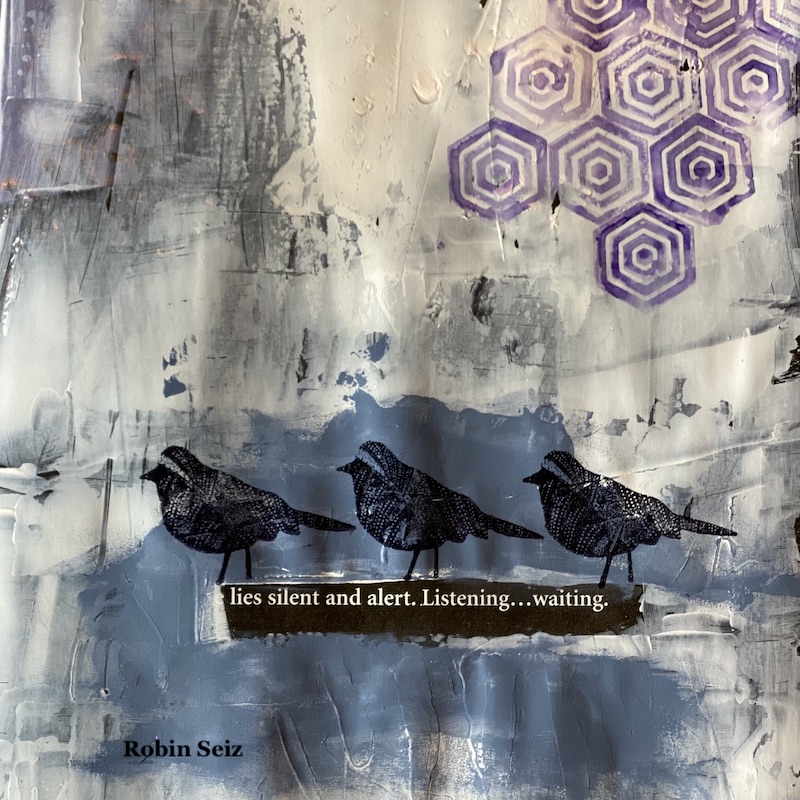
Hello from my Creative Squad! Today we have a post from Robin Seiz who is sharing her artsy gratitude with us in one of her art journals, a repurposed children’s book. She is using my Hex Set Small rubber stamps, my Crackle stencil, and my Nightingale bird stamp along with our theme: Gratitude is my Attitude – This month we are playing along with the November ArtCollab: Showing Gratitude – and specifically giving thanks to those who have helped us along the way in our artistic journey. Who was crucial in helping you become the artist you are today? Let’s give these amazing souls a shout out!
Hello everyone. I love our prompt for this month — Gratitude is my Attitude. I must say that I have so many things to be grateful for in my life that it was hard to focus my energy in one area. I love keeping my options open, but sometimes it helps to break things down into smaller, more intentional, pieces.
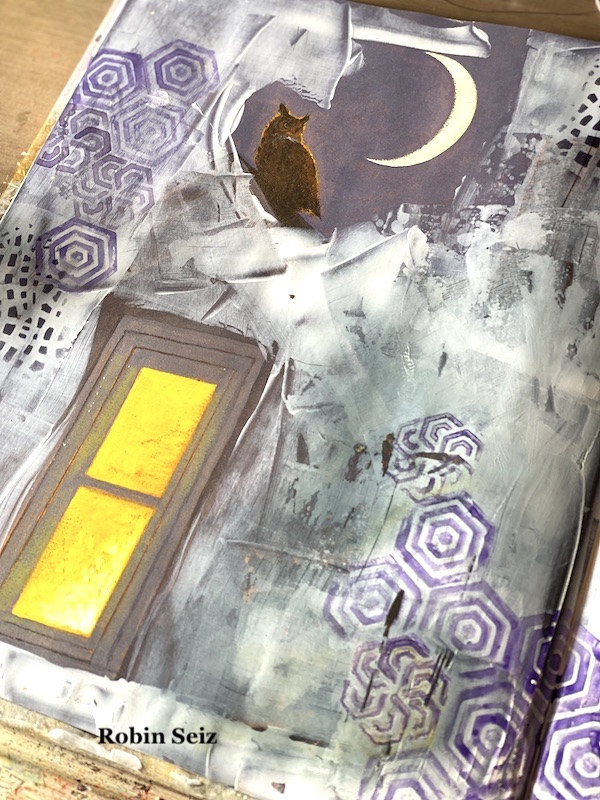
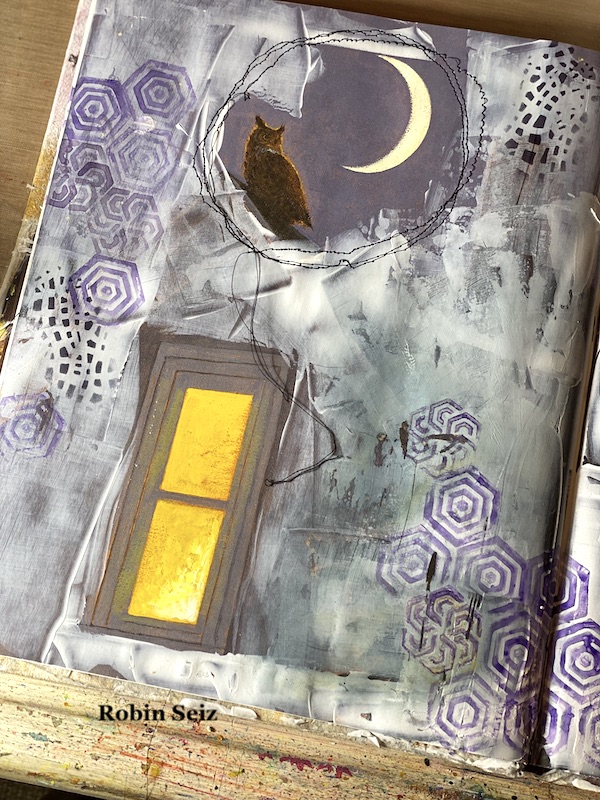
While the word Gratitude doesn’t show up anywhere on my journal pages, these two pages represent my mixed media journey while honoring those artists who have taught me and supported me along the way. They are too numerous to mention by name. My pages honor them, the process, and the gratitude I have for having the time, resources, and excitement to pursue my passion. These pages also represent what I love most about mixed media – the fluid, grungy, imperfect aspects of this kind of art.
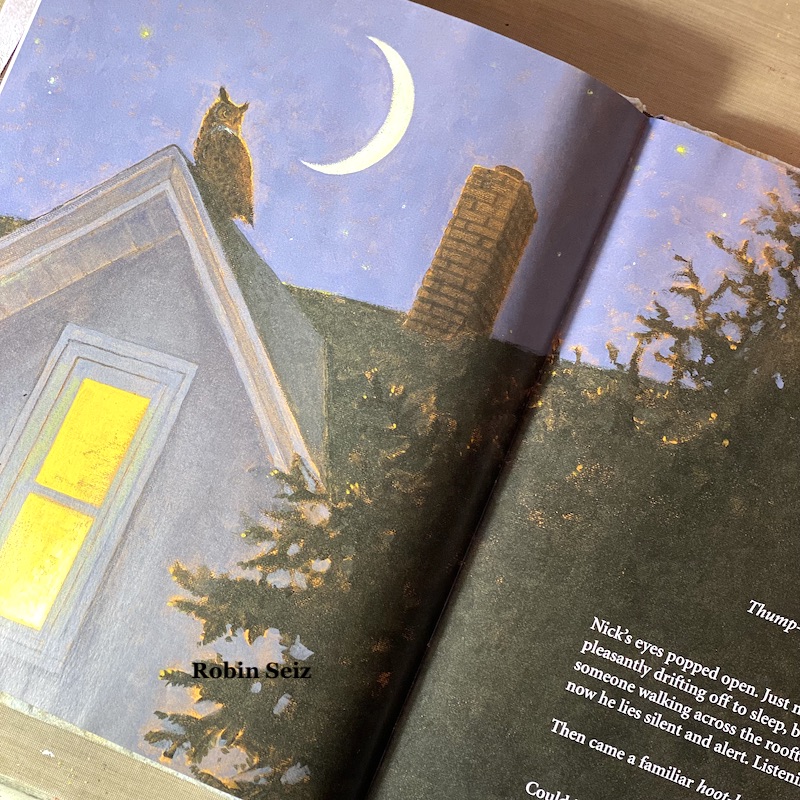
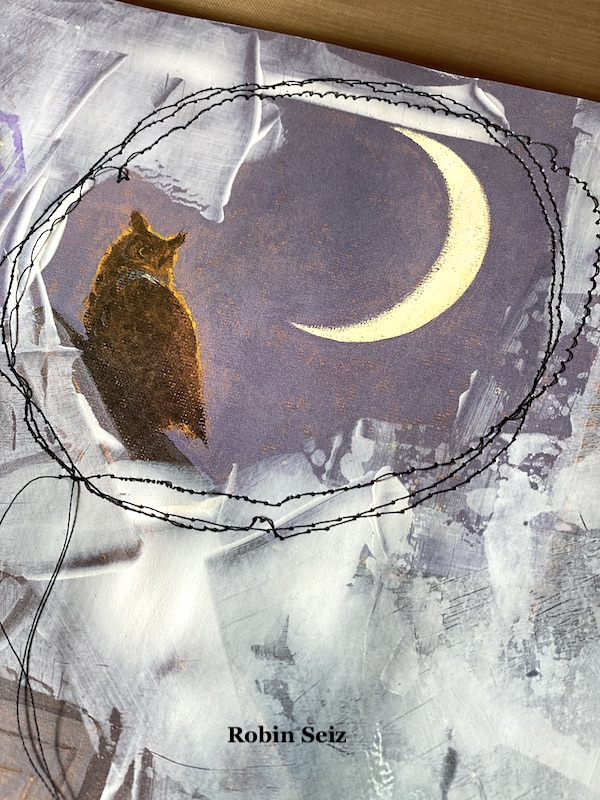
This project started with choosing a journal. I don’t do much art journaling, but when I went to pull a journal, the one that spoke to me was a journal I created for a Creative Squad blog post sometime ago. Inside the book is a beautifully illustrated story about an owl. The pictures are so lovely that I knew I wanted to incorporate some of them in my pages. I felt like this was the universe talking to me. I’m grateful for be a part of this design team and this seemed to bring it full circle.
These pages honoring my journey include some of the many materials that have become my favorites.
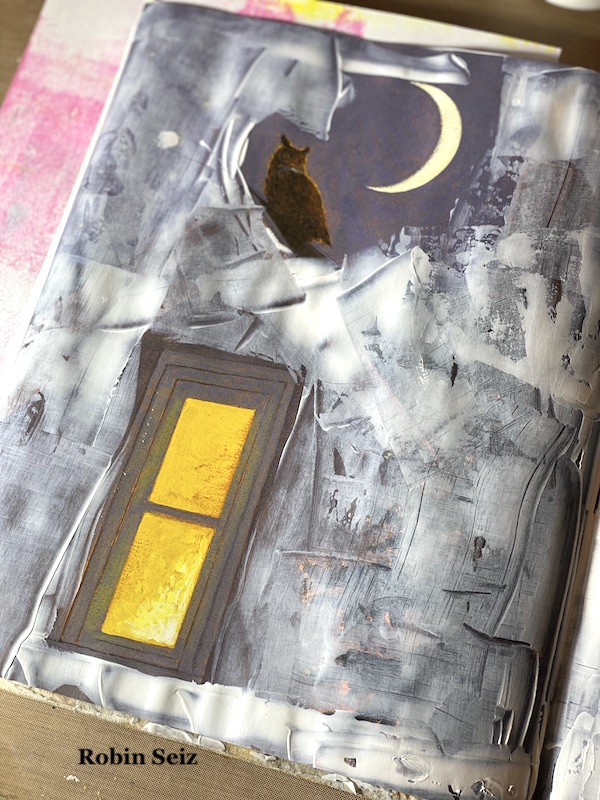
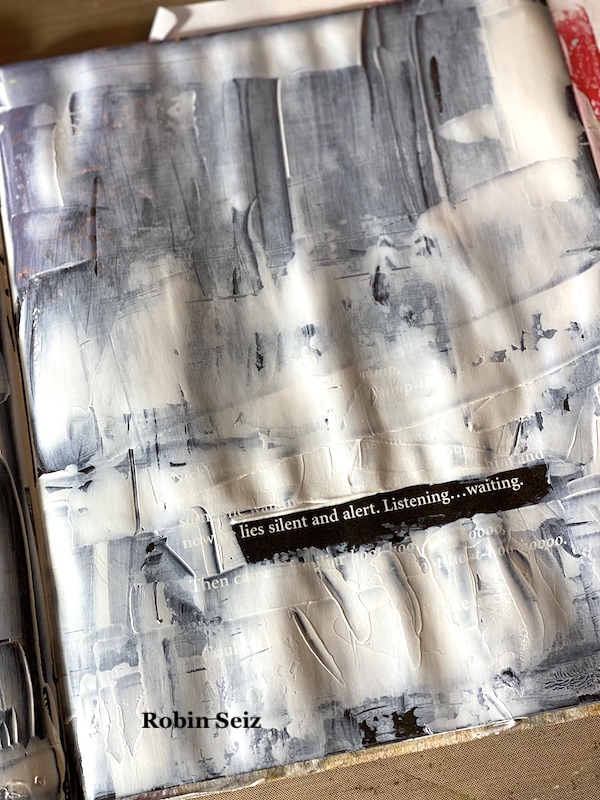
I started by covering the pages, minus the pictures and words that I wanted to use, with white gesso. I used a hotel key card to spread the gesso because I can get great coverage and create an appealing texture along the way. I also knew that I wanted some of the page color to peek through so I made some areas thin and others thick.
I have a love – hate relationship with water colors. I find them difficult to use; but honestly, I haven’t given them enough attention to really master their use. They are, however, an important part of my journey. Using this medium, was the first time I really did a study (for one month) using a mixed media product. I followed one of the artists who excels in this area and joined my first on-line community. This community has become a great sense of joy. They are incredibly supportive; I have learned a lot from them and have been given lots of opportunities beyond what I might have gotten just creating in my studio on my own. I am grateful for these artists.
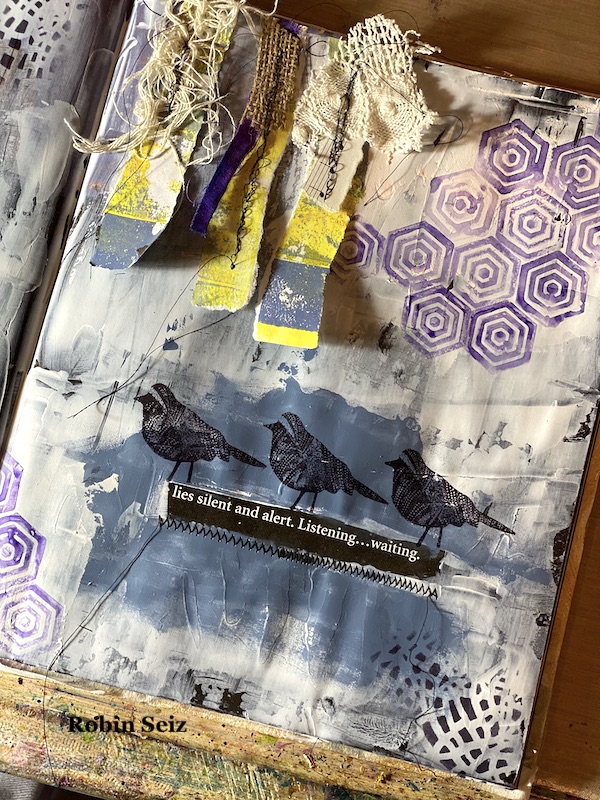
In order to use water color, I applied QOR water color grounds to the top right corner of my page. This makes it easier for the watercolor to adhere to the page. I stamped Nathalie’s Hex Set Small rubber stamp in purple. I always use odd numbers when doing this kind of work, it’s a more pleasing composition.
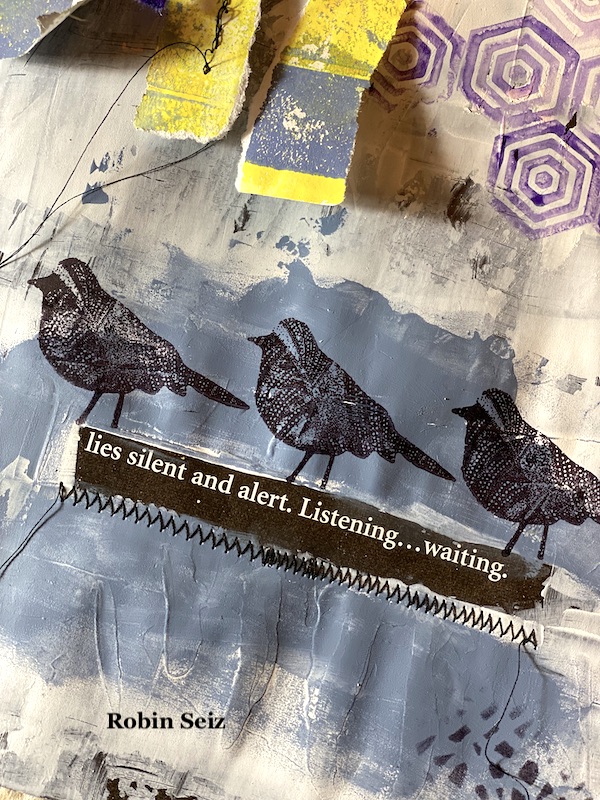
Some of the words in the middle of the right page were still visible even after I applied gesso, so I moved to acrylic paint to cover the remainder of the words that I didn’t want to see and to break up the white on the page. This also made the words that I chose to leave come to the forefront. These words resonated with me because I feel like this is what I often do — listen and wait for inspiration to come. I used Nathalie’s Nightingale bird stamp on top. They just seemed like the right stamp given there was an owl on the left page. It’s almost like he is looking at the birds. Both of these steps used rubber stamps, another early product that I used on my journey. I’m grateful for the artists who create these wonderful stamps.
Next, I moved to a combination of Gel Printing scraps and sewing. When I first started mixed media, I was really interested in sewing on paper. Over the years, I have incorporated sewing into my projects; I think it adds such a wonderful dimension to a piece. I am grateful for all the artists who I follow who use this combination and who I have learned from. The sky is the limit. It can be frustrating sometimes; my free motion sewing still needs lots of work. After sewing the pieces together, I attached these three strips with gel medium. I could have just as easily stapled them. I love gel printing and am grateful for all the encouragement I have received along the way for my prints.
The left page really didn’t need much. The window, which represents how grateful I am for the rise and fall of each new day, gives such a warm glow to the page. I applied the same hex stamp to the bottom middle and top left (again in 3’s) because it was compositionally pleasing to me.
I also used Nathalies Crackle stencil (one of my favorites) a cosmetic sponge, and Tim Holtz Archival Black ink to fill in where just a little something was needed. This ink is good for use over acrylics and gesso. Again, I have such gratitude for those artists who regularly use stencils and have taught me how to have fun experimenting with them. They are one of the most versatile tools that I use.
The final touches were free motion machine sewing around the owl and the moon to create an interesting border. And because compositionally I wanted sewing in 3 places, I sewed a zig zag for emphasis under the words on the right page.
All and all, I had a loose idea of what I wanted to represent when I started and it just came together as I went. I am most grateful for the process of creating!
Thanks so much for joining me today on my gratitude journey in mixed media. I hope you create something that honors those things for which you are most grateful. Please post your pieces on Instagram and tag me. I would love to see them. Peace to you, Robin
Thank you Robin, love how you incorporated some of those original book illustrations and text into your page – very cool effect!
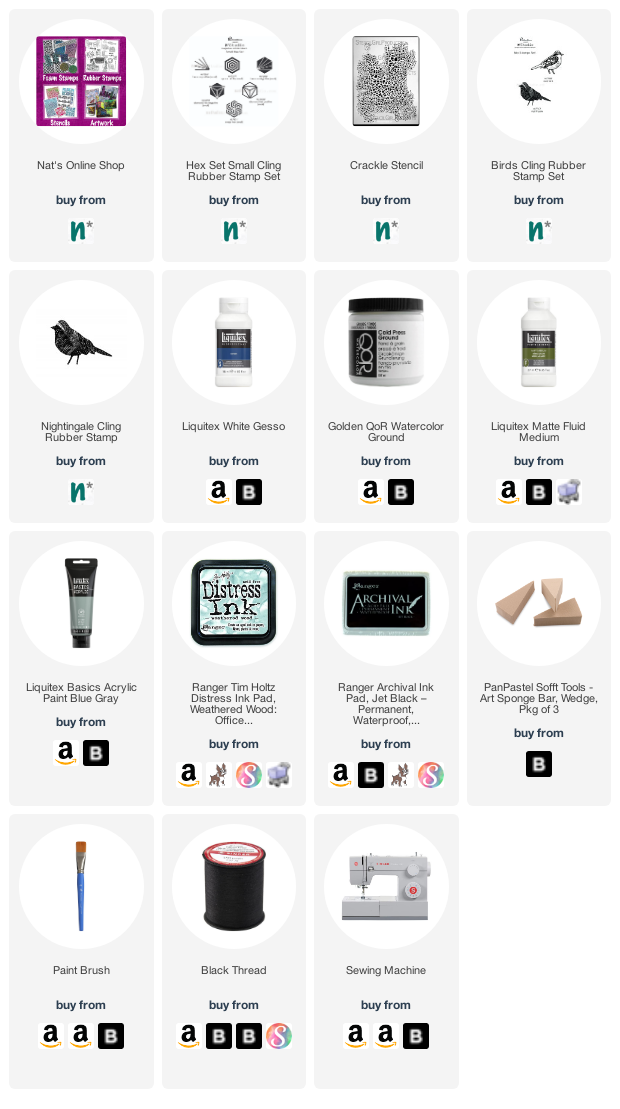
Give it a try: you can find all my Rubber Stamps and Stencils in my Online Shop and in addition to her repurposed children’s book, collage papers, and scrap fabric, here are some of the supplies Robin used:
Looking for more? Follow the Creative Squad on Instagram here.
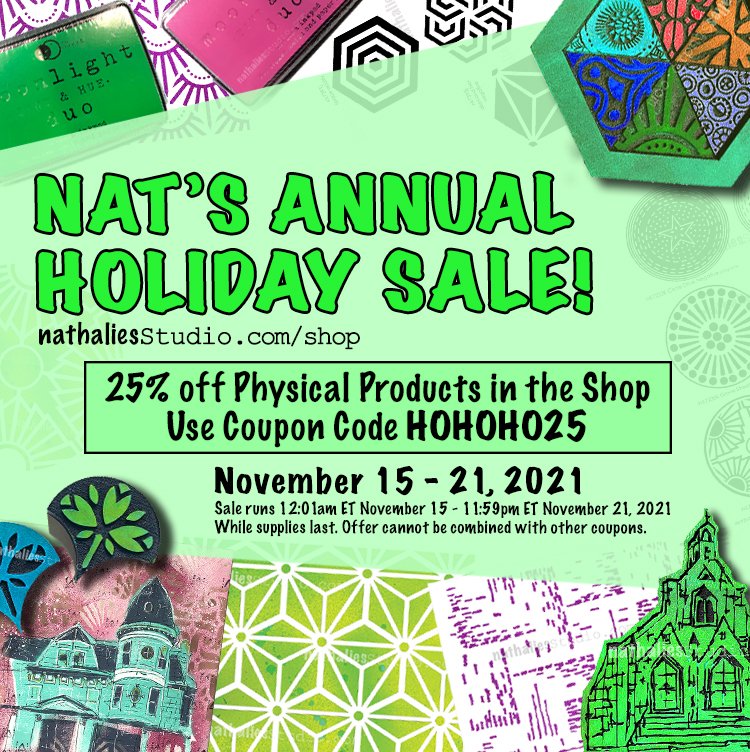
It’s time for my Annual Holiday Sale to get things started for the holidays! My BIGGEST sale of the year begins today and you can save 25% off all physical products in my online shop now through Sunday, November 21st. We are encouraging you to shop EARLY this year because we all know that shipping is a bit slower these days than usual.
What’s included in the sale? Rubber stamps, stencils, foam stamps, original paintings, mugs, giclee prints, framed collages, ink pads, cardboard models, and much more are all 25% off – just use the coupon code HOHOHO25 when you check out.
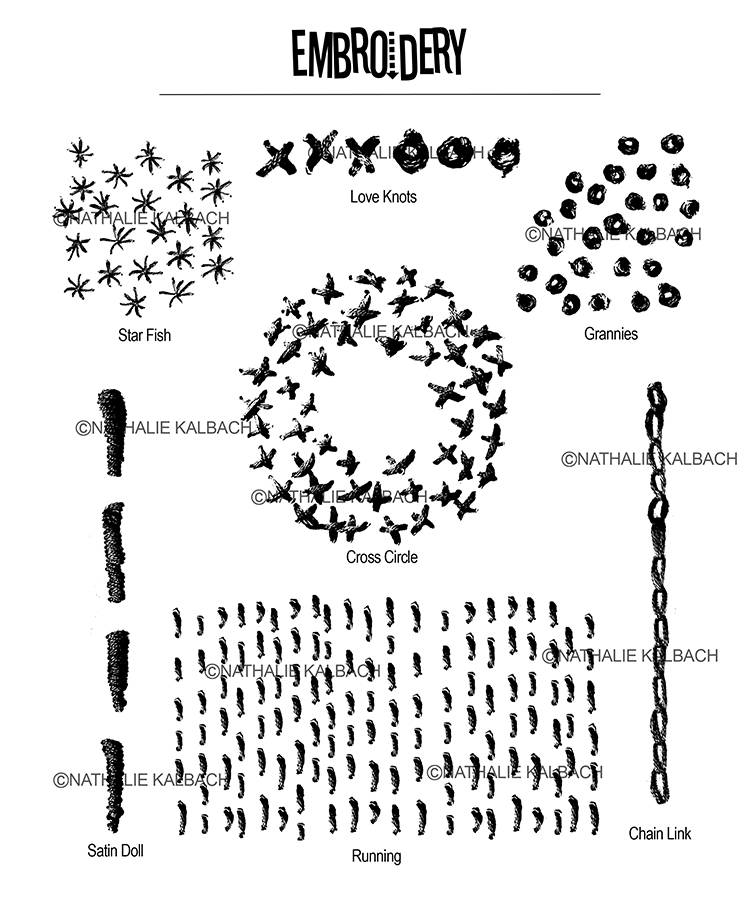
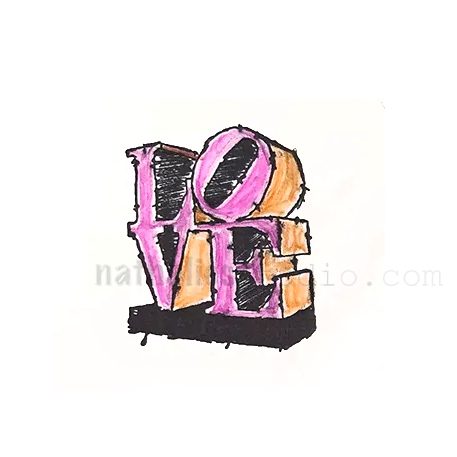
Need some ides? I’ve got Rubber Stamp sets like fan-fav Embroidery that includes a nice mix of stitch-inspired stamps. And of course how about some LOVE – if you’re feeling warm and fuzzy this time of year then that stamp pretty much sums it up :)
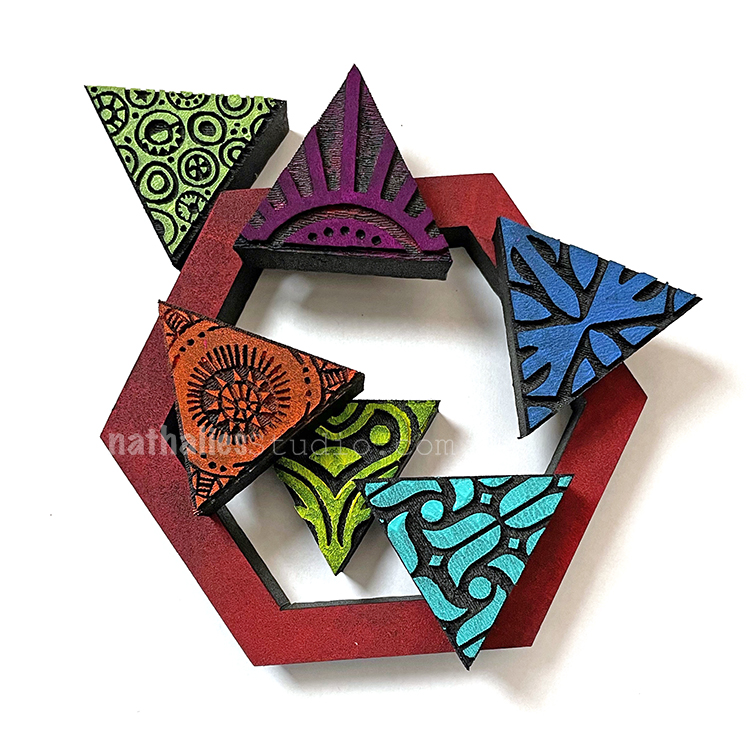
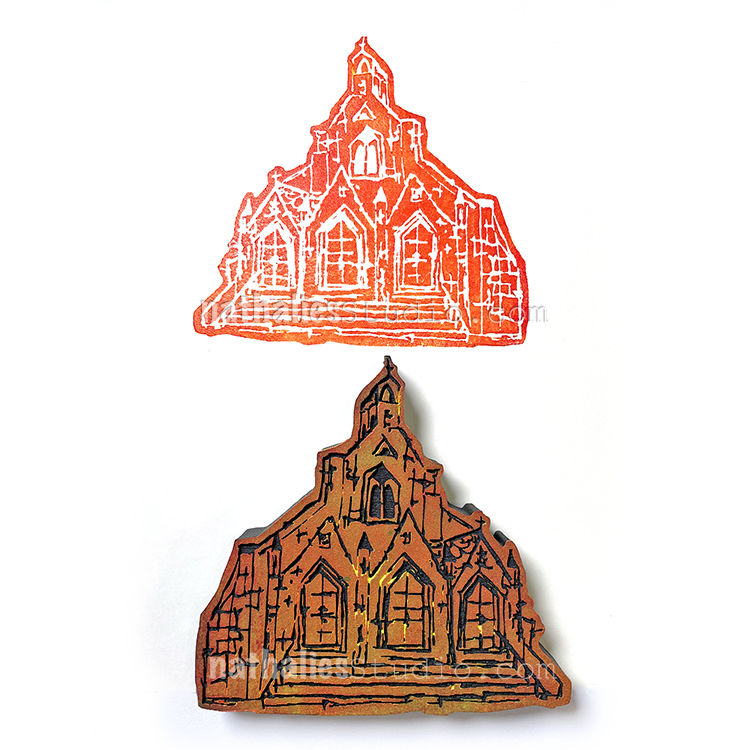
Are you digging Foam Stamps just as much as we are? The Triple Play set is super fun for making patterns and how about some of my building stamps like Church to create cards and ornaments.
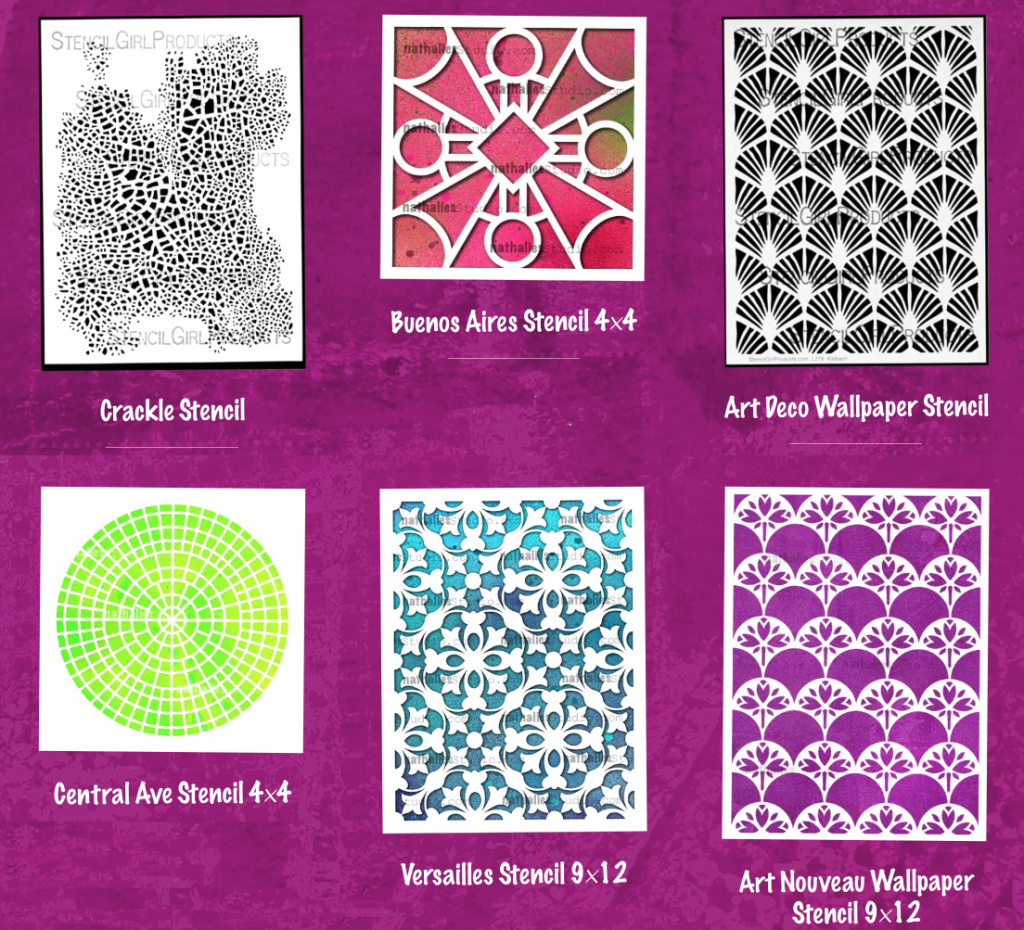
All my Stencils are part of the sale too so take a look around – there are patterns and designs that range from geometric to grungy to historical inspired motifs.
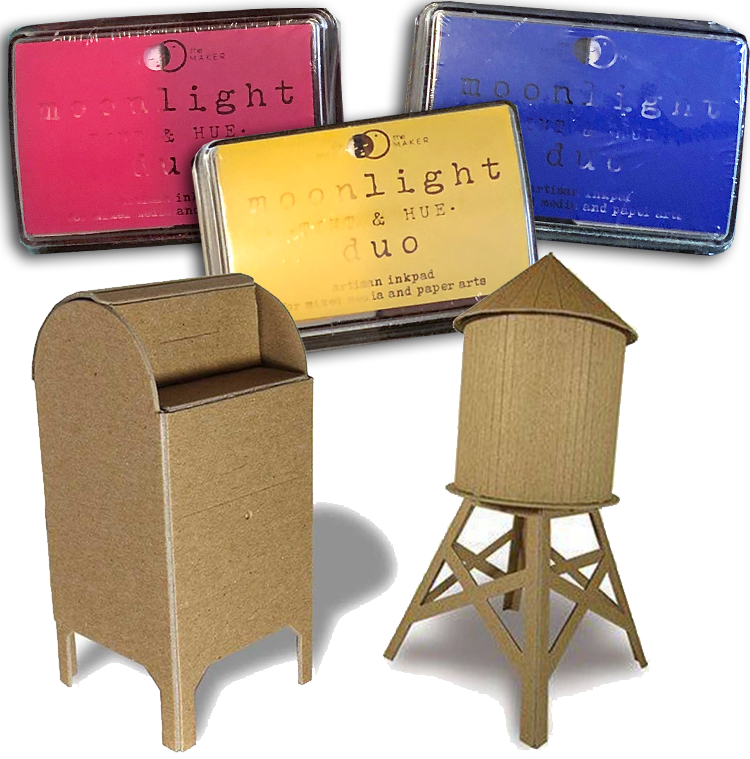
I also have a section in my shop called Favorite Art Supplies where you will find some nifty items like Moonlight Duo ink pads, Boundless Brooklyn cardboard models, and the StampBuddy. Check that stuff out HERE.
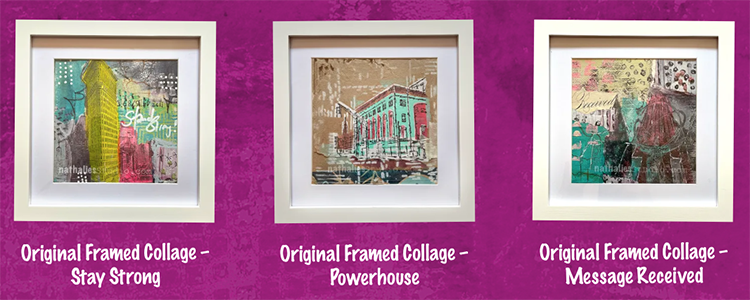
Need a unique gift idea this year for that amazing host or hostess or that family member who is hard to shop for? I have one word for you: Artwork! Whether it’s a print, a small framed collage, or an original painting, nothing is quite so special as a gift that can be hung on the wall. Check out my artwork in the shop here.
Ready to start shopping the sale? Here is a link to the Online Shop. I hope you enjoy and can check some things off your list a little early this year. The sale ends at 11:59pm ET on Sunday, November 21st. Use the coupon code HOHOHO25 and hurry hurry – items are going fast and some artwork is one-of-a-kind so when it is gone… it is gone :)
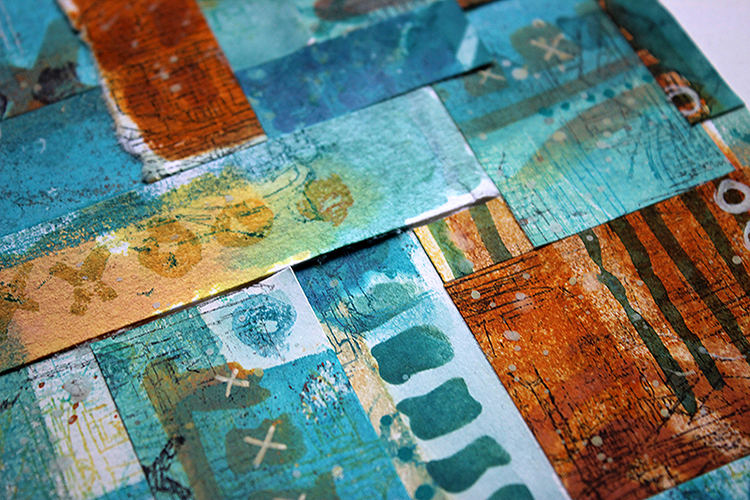
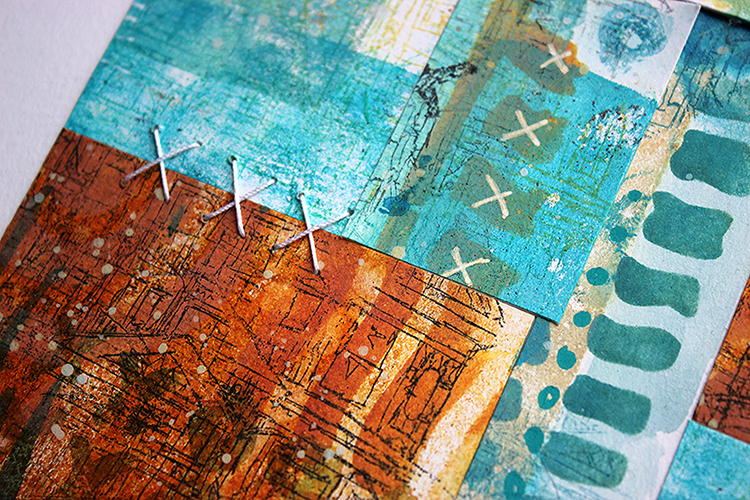
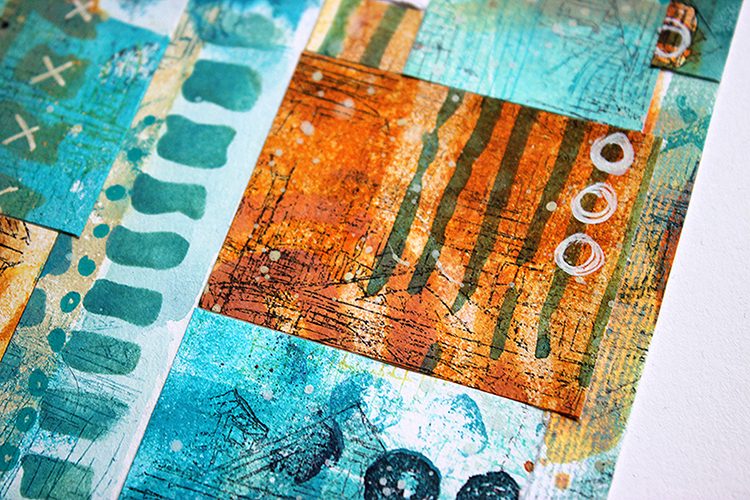
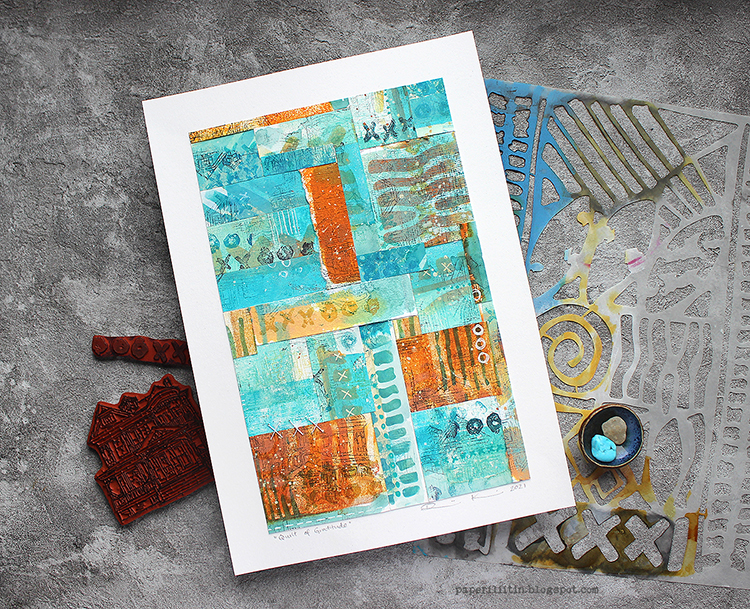
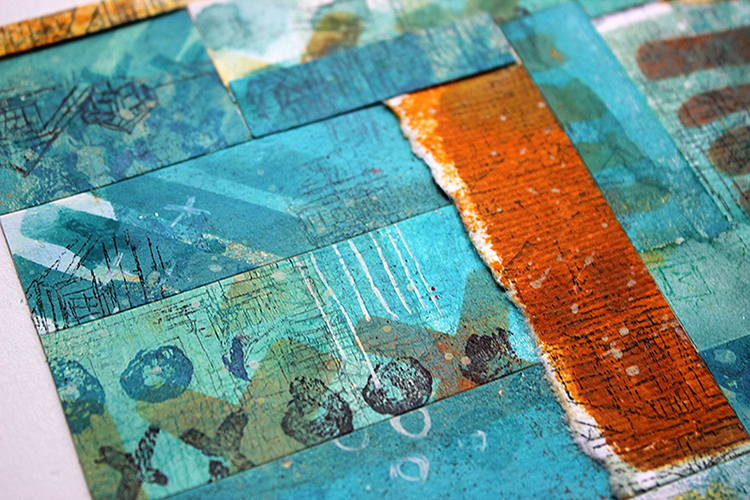
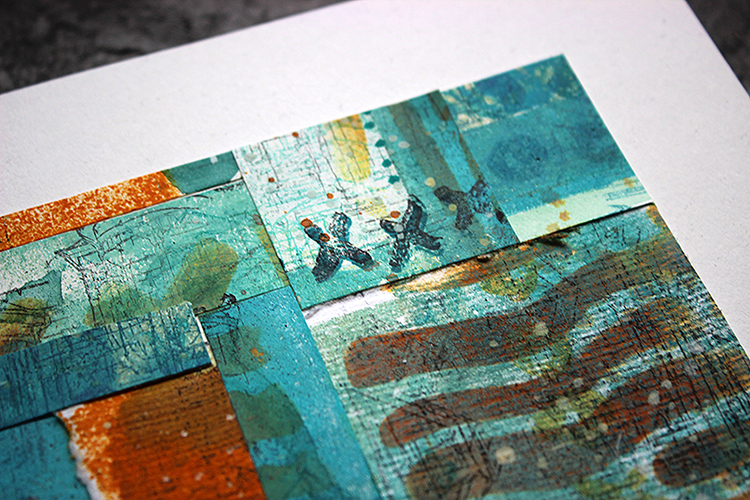
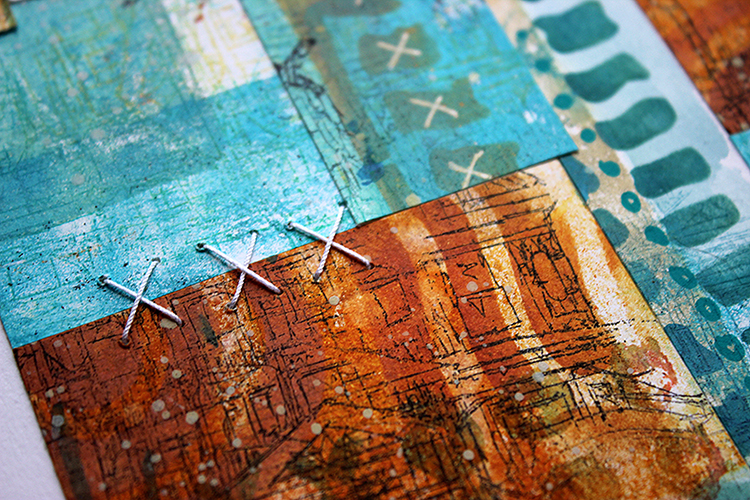
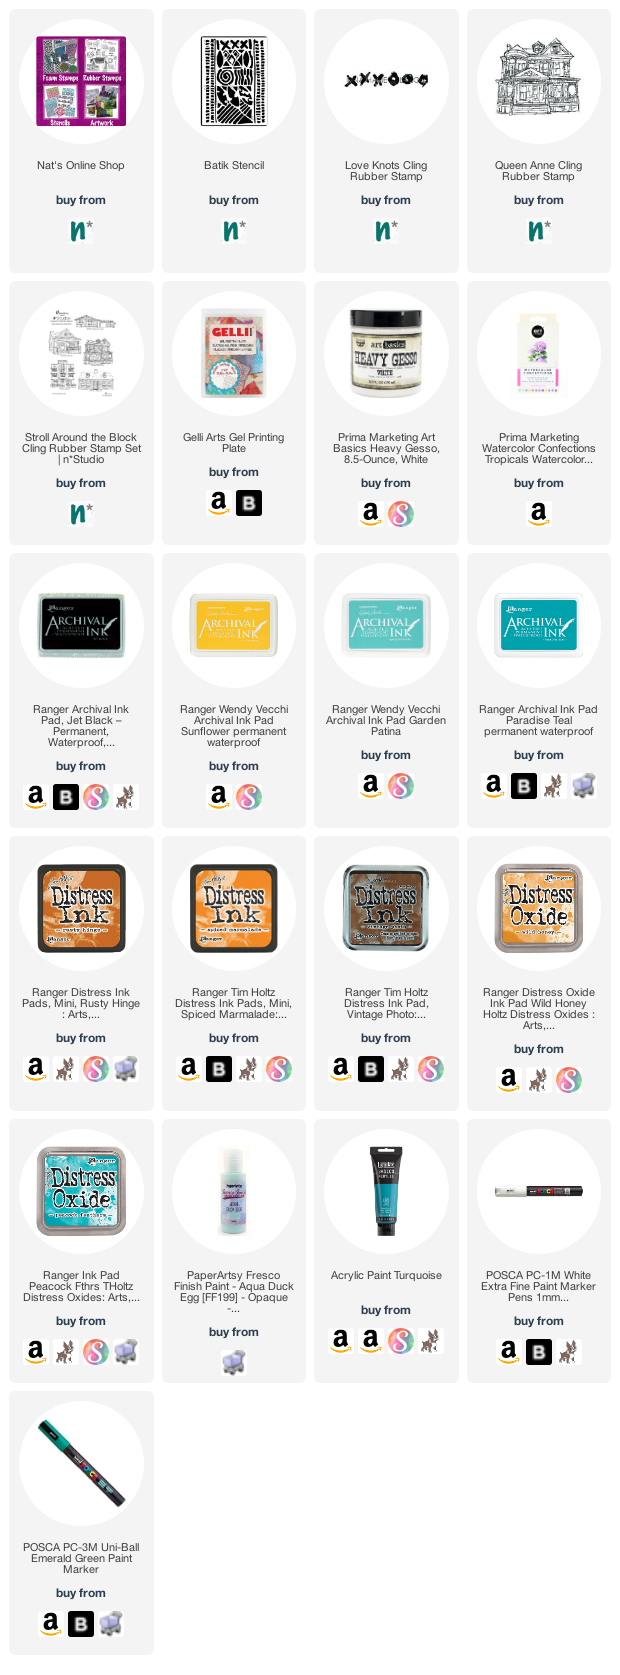
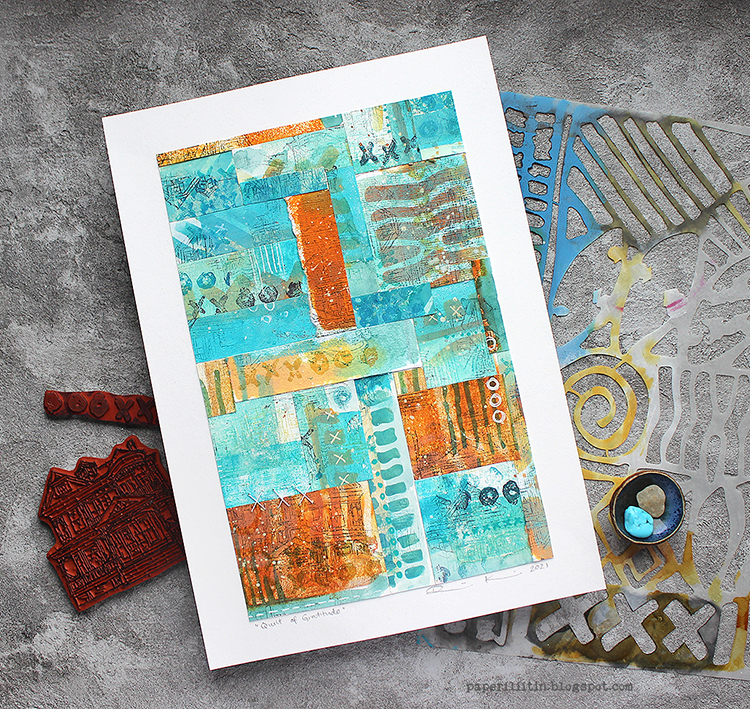
Hello from my Creative Squad! Today we have a post and video from Riikka Kovasin who is sharing her take on our new monthly theme for November and it’s all about being thankful and showing gratitude: Gratitude is my Attitude – This month we are playing along with the November ArtCollab: Showing Gratitude – and specifically giving thanks to those who have helped us along the way in our artistic journey. Who was crucial in helping you become the artist you are today? Let’s give these amazing souls a shout out! Riikka shares her gratitude with a paper quilt using my Batik stencil, Queen Anne rubber stamp and Love Knots rubber stamp.
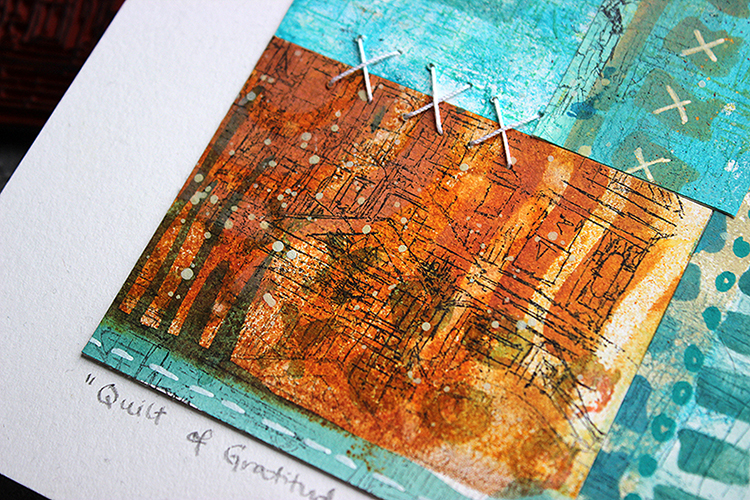
Quilt of gratitude
Hello, it’s Riikka here today to share my monthly project. This time the theme was appropriately gratitude as Thanksgiving is just some weeks away.
Gratitude is something that might be easily forgot with all the hustle going on in the world. Gratitude is something I try to show each day, but a reminder to count my blessings made me happy. For this project I was thinking about those who have led me to this place artistically. As I couldn’t possibly name just one, I started thinking about how to honor a bunch of people but still keep the piece cohesive. That made me think about networks, trees, grids and then quilts. My first idea was to dedicate a patch to each person I’m feeling grateful for, but in the end the quilt is more metaphorical than actually consisting of patches dedicated to different people. It’s meant to show that there’s many people I’m feeling grateful for and that the entity is bigger than the sum of its parts.
This piece is surprisingly flat to be my project. I usually strive for dimensional things, but this time a more restricted expression seemed to be in order. I did add something raising from the picture plane, though. There’s a couple of stitches added to the quilt. They play homage to the actual hand sewn quilts but also repeat the X pattern that can be found on the “Batik” stencil and “Love Knots” stamp I used. Some may see an X as a prohibiting sign, but to me it’s usually a combining element. The two lines gather the sides together, make a bridge, combine things. Maybe that stems from my schooling as a seamstress, where for example hemming is done using an X like stitch.
To have some texture and variation, not just that of color and pattern, I used two different papers in my make. I made the collage paper on top of regular 160g cardstock, which I often use as my starting point, but also on top of hand made paper. The soft handmade paper absorbed the colors differently and also had an uneven surface, so there’s a little variation in the piece. If you want to see how I made this project, please see the video below.
For the color palette I chose to go with my current favorite. The piece could have been almost any color, really, but I feel most at home when I’m working with teal and blue tones. But gratitude needed something more than just cool and aloof blues, it needed warmth, earthiness. For that I combined the teals and turquoises with rusty, amber tones. The contrast between the two colors makes each segment pop and keeps the piece interesting. At least I hope that it does that!
I’m grateful that you stopped by today. Thank you!
Xoxo Riikka
Thank you Riikka – such a thoughtful way to express your gratitude – in a quilt inspired project.
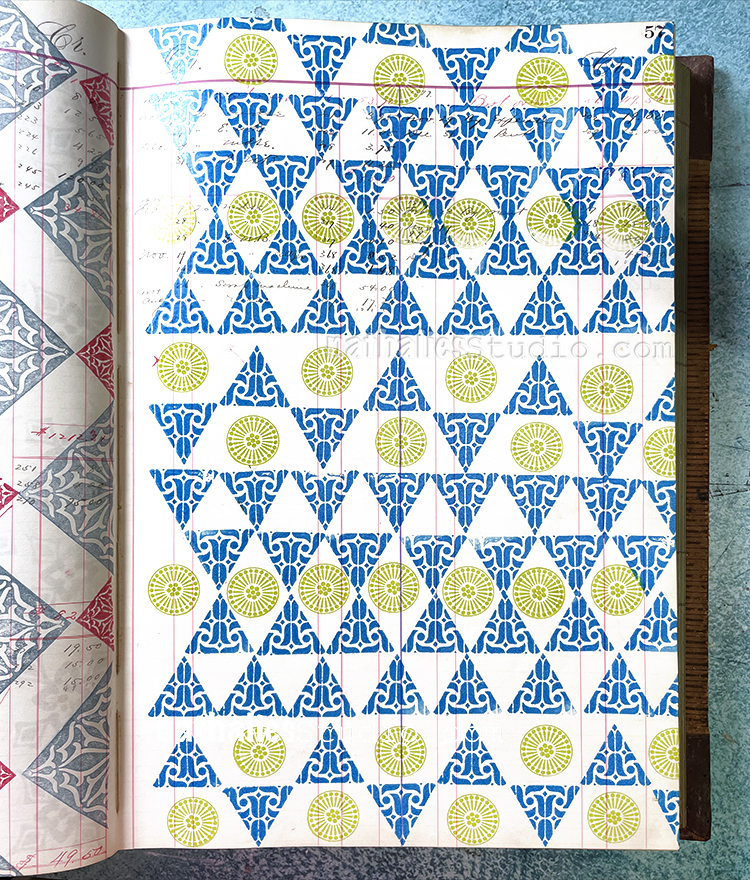
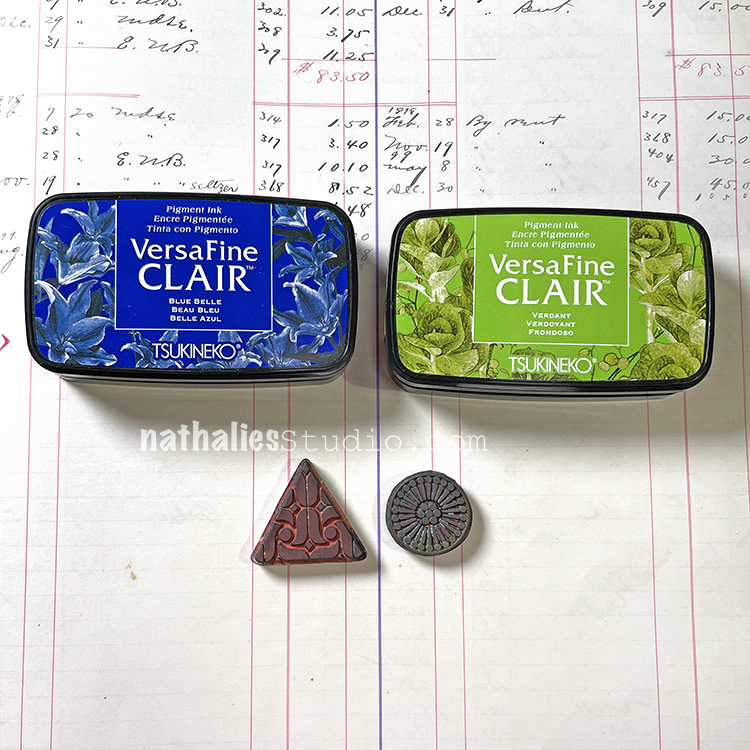
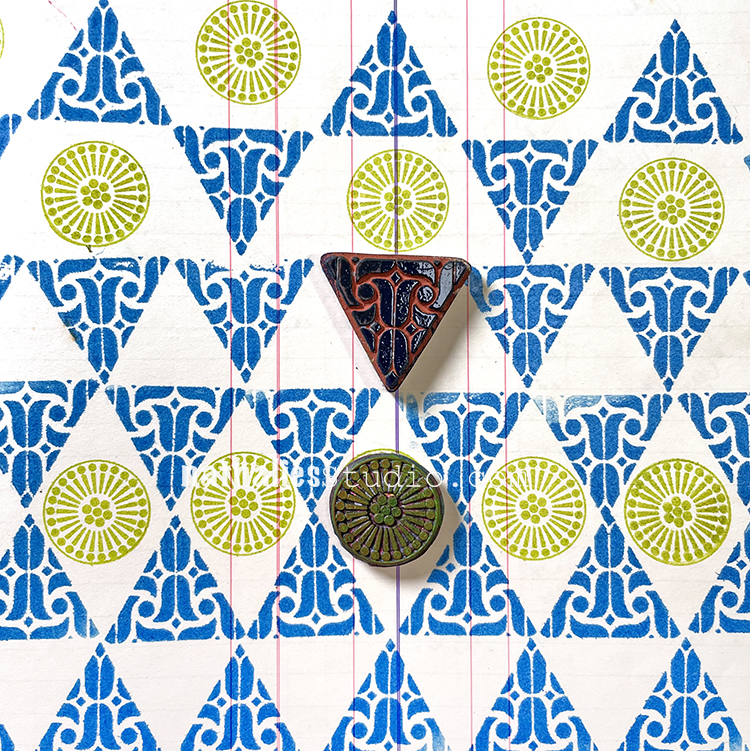
Pattern Monday time and today I’m working in my big vintage ledger and playing with just two little stamps and changing up the orientation and frequency of stamping to create a pattern that has a surprising amount of complexity. So, just one stamp from my Small Circle Jumble set and one from my Triangle Love set is being used here and I definitely wish with this one that my big vintage ledger was even BIGGER so that I could do more of the pattern for you. You will just have to use your imaginations :)
Here is another look at the finished pattern and the stamps I used:
Your turn to give it a try! Here are the supplies:
A Look Back – Today I sifted through my blog archives and pulled out some jewelry making posts from the past few years. Every once in a while my Creative Squad creates a jewelry project using my stamps and shrink film, and one time Kim and I got in on the action too during a play date. It’s a fun and nostalgic process using shrink film but also all the projects we show here are very giftable too ;) so bookmark these ideas and get creating!
A Look Back is a blog series to show you some projects and posts that you may have missed – sometimes going WAY back in the archive. I think it will be fun to revisit a few ideas that we haven’t seen for a while. I’m excited to see how a little look back might inspire something new in the future :)
First up is a play date that Kim and I did when I released my Wabi Sabi foam stamps. We stamped them with Moonlight Duo ink pads onto shrink film and then made them into post back earrings. I love how modern these are and the idea to use foam stamps in this way opens up a lot of ideas. Here is the full post with instructions.
Next up was a pendant that Creative Squad member Tania Ahmed made for one of our monthly themes. She used shrink film with my Large Circle Jumble rubber stamps, and she encased the medallion in glossy clear resin to seal the jewel. Here is a link to her post and video.
Creative Squad member Linda Edkins Wyatt was inspired to turn my Van Vorst Fan foam stamp into shrink film earrings, and I love the intricate beauty that this design lends to shrink film. Here was her post outlining the process she used to create these stunning baubles.
Before Riikka Kovasin officially joined the Creative Squad, she shared some shrink film earrings that she made using my Grove Street and Fairview Fan foam stamps. I love her use of color in these and I was quite tickled to catch her wearing them during a recent Spill your heART episode too :) Here was her original post.
I hope you enjoyed this look back on some jewelry projects using stamps and shrink film and will maybe make a few of your own too. Here are some of the supplies we used:
Comments (2)
Deb Newman
| #
Can hardly wait for next Monday to sign up. Sooooo excited. Loved the reveal zoom. Great idea.
Reply
nathalie-kalbach
| #
yeahh I am so glad you liked the reveal zoom! Thanks for coming Deb!
Reply