Creative Squad

Today is the Day – Tina Walker

cs-october-theme

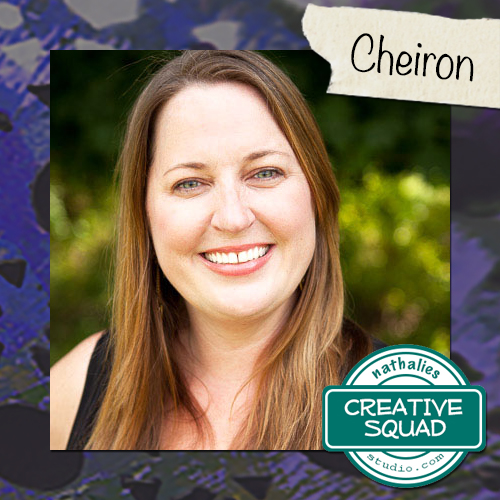
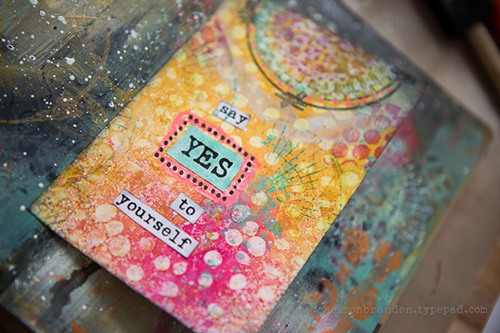
This Tuesday, Tina Walker from my Creative Squad is happy to share with you two super cool projects using Ultra Thick Embossing Enamel and inspired by this month’s theme: “Today is the Day.”  I invite you to join me and my Creative Squad to stop procrastinating and be inspired to make today the day you finally tackle that artsy thing you’ve been meaning to get to for so long.  Start that new project you’ve been planning for months.  Try out that new product you bought ages ago.  Experiment with that new technique you read about last year.  Try it!  Today is the Day!

—————————————————————————————————

tina-october-headshot

Hi!  Tina Walker here today to kick off the new month with a new Theme.  This month, our theme is ‘Today is the Day’.  As the old adage by Benjamin Franklin goes, ‘Don’t put off until tomorrow what you can do today.”

The Creative Squad was challenged to tackle an arsty thing that we’ve been meaning to do.  It could be a new project or a new technique.  I love trying new ideas and techniques so I was super excited to get started.  Let’s get to it!

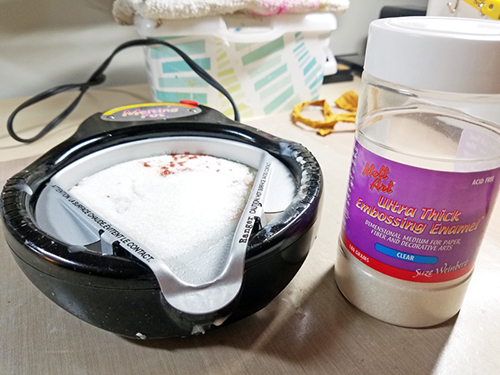
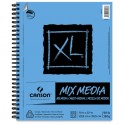
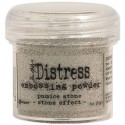
Have y’all heard about Ultra Thick Embossing Enamel (UTEE)?  It’s been around f.o.r.e.v.e.r and it’s been sitting on my shelf for YEARS just begging to be used.  I thought this month would be the perfect time to create with it! I’ve watched several videos on how to stamp into UTEE and wanted to try for myself, so the two projects I am sharing today are the result of this technique.

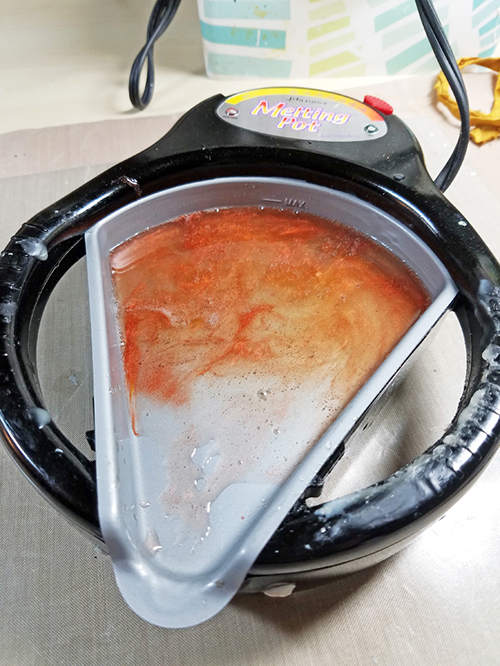
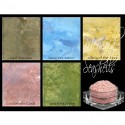
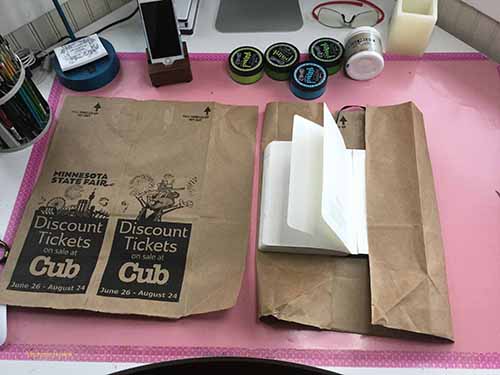
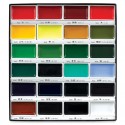
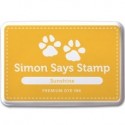
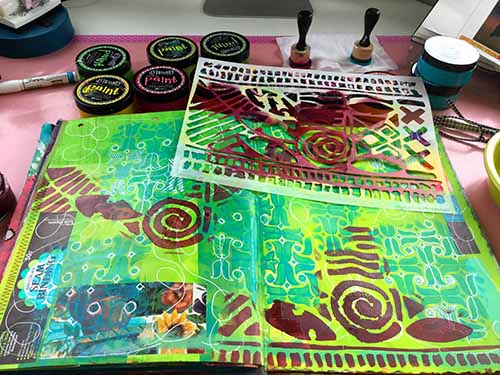
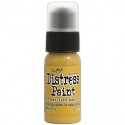
Step One: Melt UTEE per instructions.  You can either add color with embossing powder or metallic powders or use clear.

oct-tw1

oct-tw2

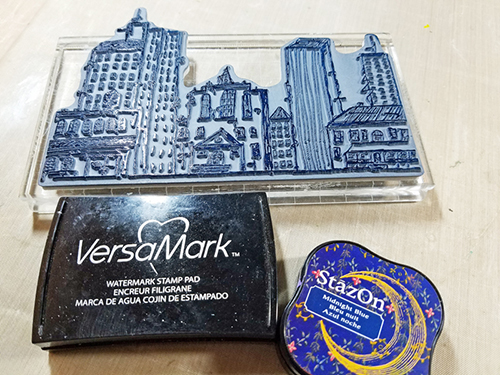
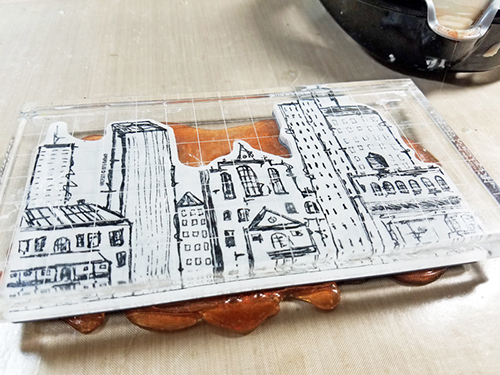
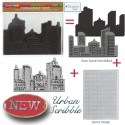
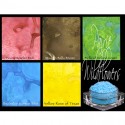
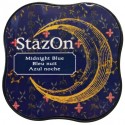
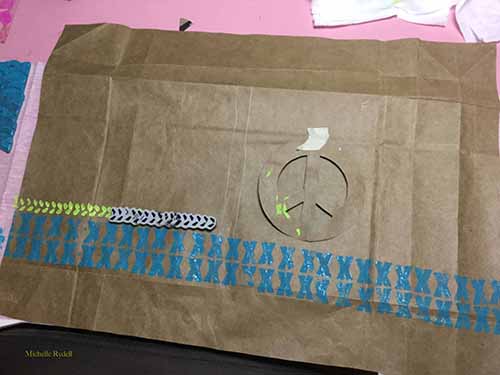
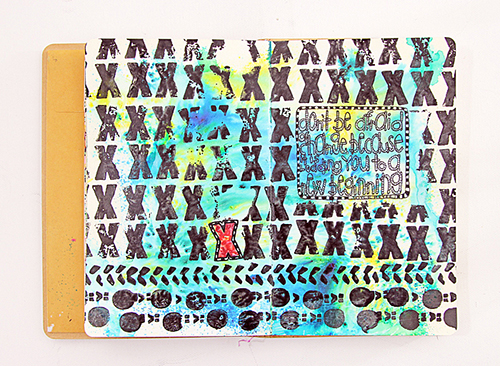
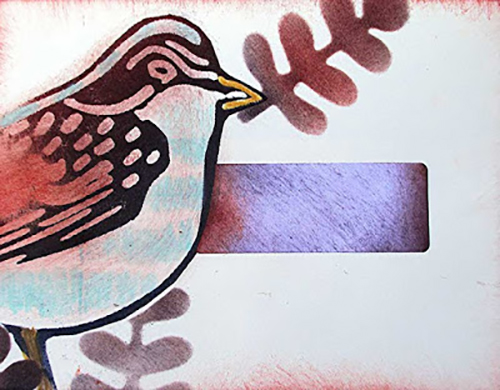
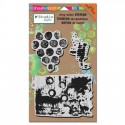
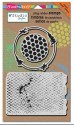
Step Two: Prep your stamp.  (Only rubber stamps can be used.  Acrylic will not work for this technique).  To create a ‘resist’, apply Versmark ink to your stamp.  You can either stamp without color or add color with Staz On Ink.  I used a colored ink with Nat’s Urban Scribble cling stamp so it would show on the UTEE.

oct-tw3

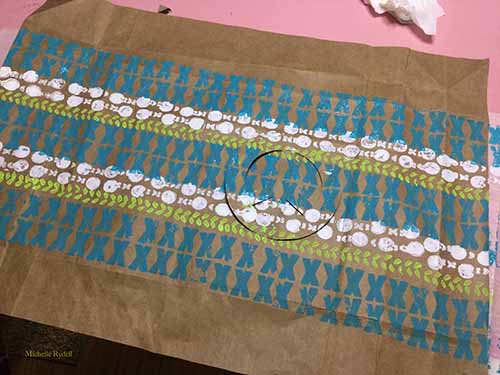
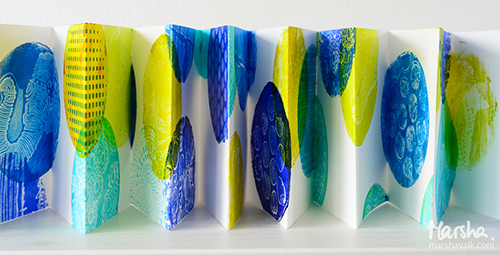
Step Three: Pour melted UTEE on heat resistant craft mat.  Immediately stamp into the melted UTEE and let sit for approx. 15 min.  Once cool, carefully remove your stamp from the UTEE.

oct-tw4

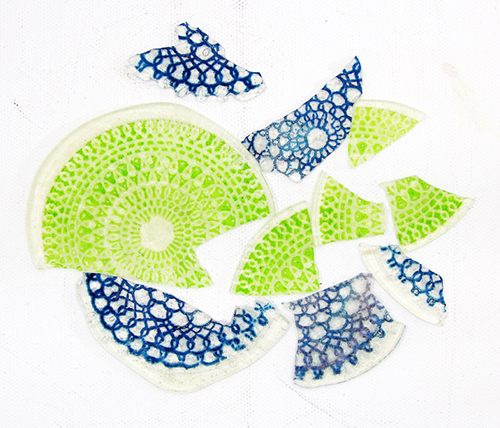
Special Note:  UTEE is very fragile and I cracked several in the process.  Using a thicker layer vs. a thin layer adds to the stability.

oct-tw5

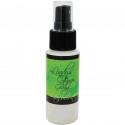
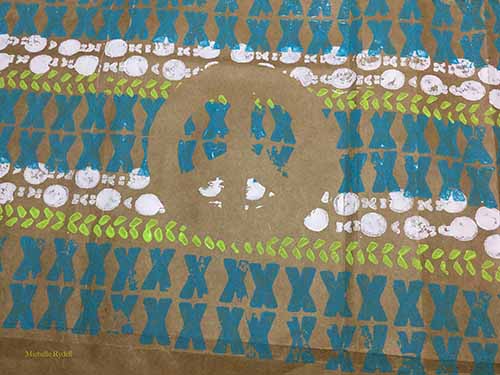
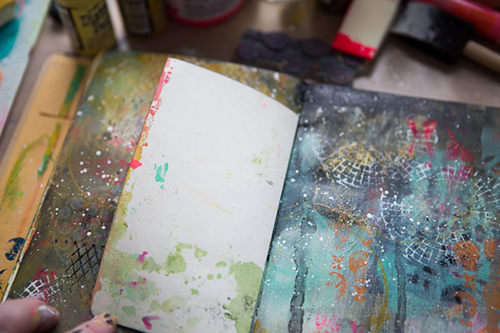
Step Four: You can use your piece *as-is* or add paint, spray, or other mediums.

oct-tw6

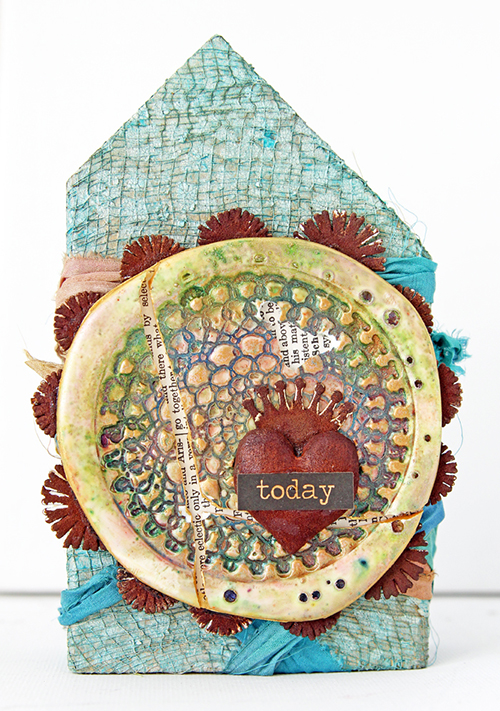
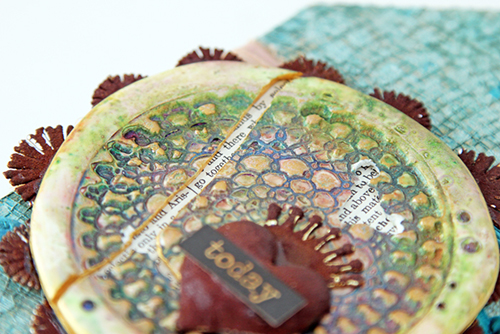
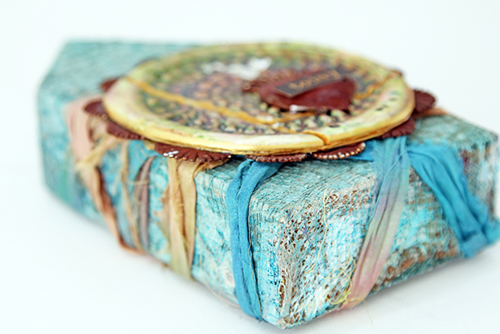
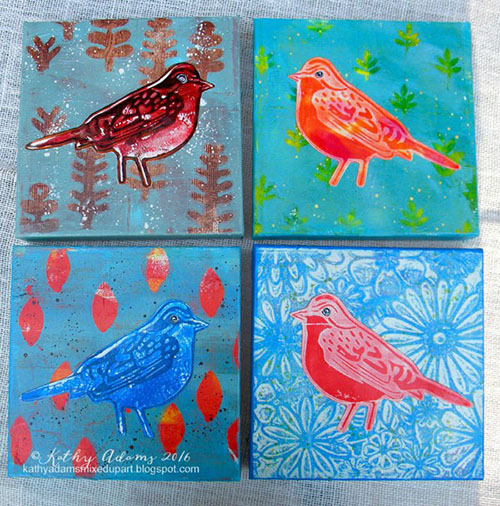
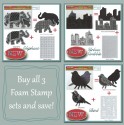
Project One – Today Wooden House

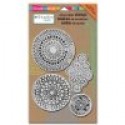
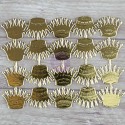
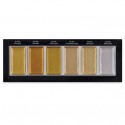
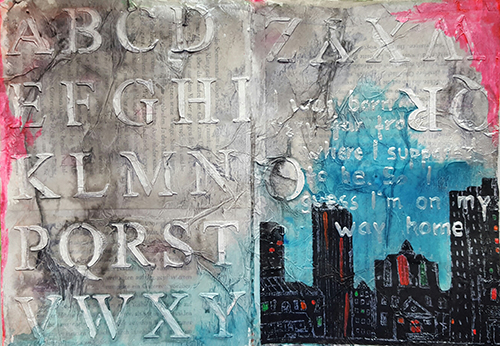
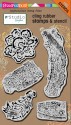
I added white embossing powder to the UTEE with Nat’s Kaffee Klatsch cling stamp.  Once cool, I colored the piece with metallic powders.  As I was ‘painting’ the piece it cracked.  L  But, instead of starting over, I continued to use the cracked piece, highlighting the cracks with dictionary paper.

oct-tw7

oct-tw8

oct-tw9

oct-tw10

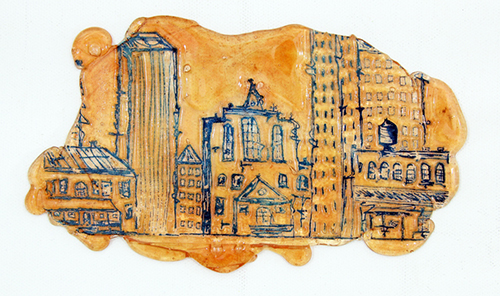
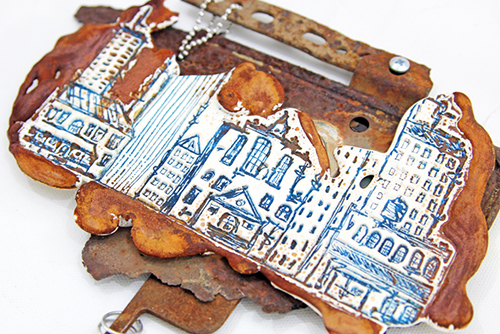
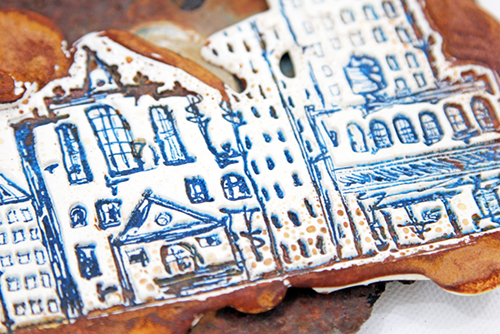
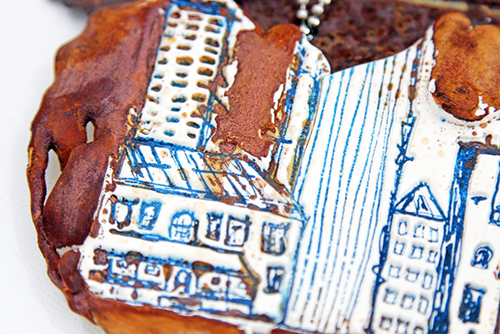
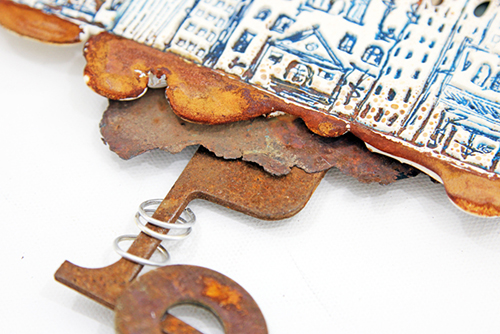
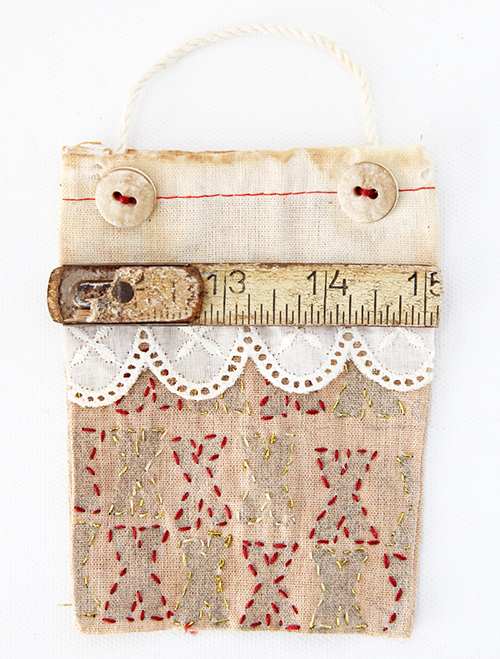
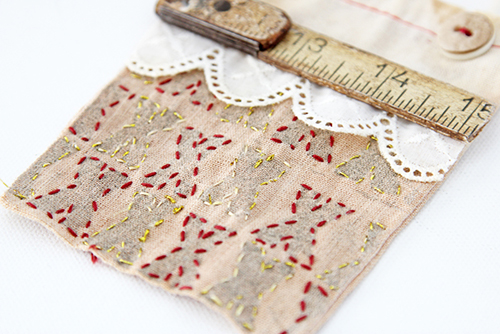
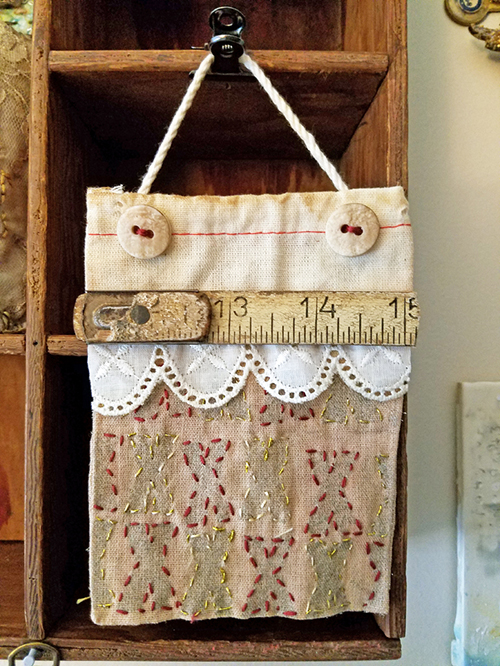
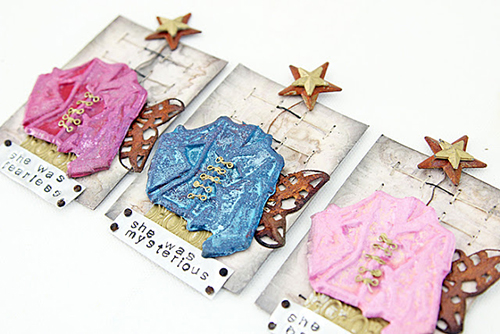
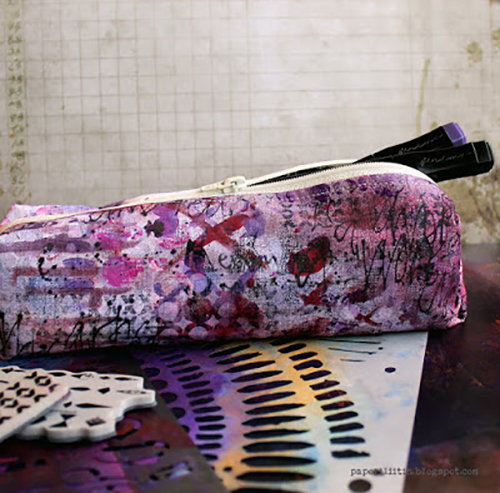
Project Two – Rusty Cityscape

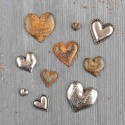
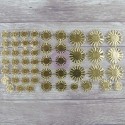
Using the same UTEE mixture, I stamped with another stamp.  Once cool, I rusted the edges of the piece to blend with the other rusty elements in the project.  Funky and unique!

oct-tw11

oct-tw12

oct-tw13

oct-tw14

oct-tw15

What new technique or product are you dying to try/use?  I’d love to hear about it!  Thank you for taking time today to take a peek at projects.  See you next month.

—————————————————————————————————

I love love love both of these projects and can’t wait to play around with the UTEE myself!

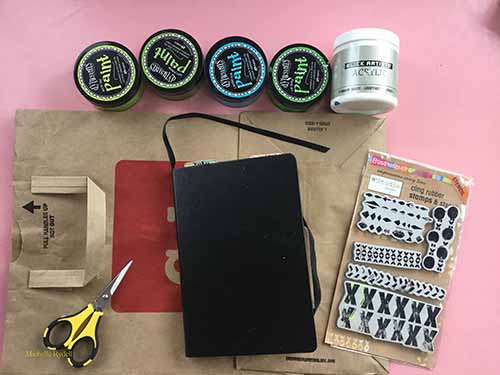
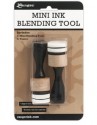
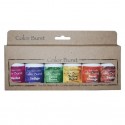
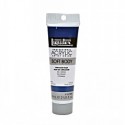
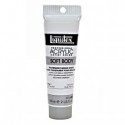
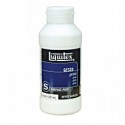
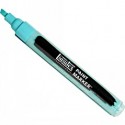
In addition to some wood, gauze, various rusty findings, Dusty Attic Rusting Powder, sari ribbon, and a sticker, Tina used the supplies listed below (some are affiliate links):

SuppliesCJS


Maybe you will even play along with us -I would love to see how you interpret our monthly themes. Email me how you used my stencils and stamps with the theme and email me an image – I would love to share your projects in my next “n*Spiration From Around the Globe“.

See you next Tuesday for another project from the Creative Squad!

Comments (2)

Leave a comment

From Small Beginnings – Michelle Rydell

CS September Theme 2

Happy Tuesday!  It’s time for my Creative Squad to share a project with you with this month’s theme: “From Small Beginnings”. Throughout the month of September, the team has been using my n*Studio Stamps to interpret the theme. The change in seasons and the childhood ritual of Back to School in September has me thinking about starting new things – new projects, learning new things, and meeting new people, and all the excitement and challenges that come with all of these “new”s. For this theme, From Small Beginnings, my Squad has thought about the process of starting something new and the very first steps they took. I asked them, how did you experience a Beginning?

So this week we have a very fun Fauxbonichi book cover from Michelle Rydell that definitely brings back those childhood memories!

—————————————————————————————————

Michelle September Headshot

Oh my gosh I had so much fun with this month’s project!  September and “Small Beginnings” made me think of going back to school as a kid, and that made me think of one of my fave things about that – making covers for my textbooks out of paper bags!  Did you do that too?

I decided to make a cover for my Fauxbonichi – and use the “Marks” stamp set to decorate it…

I gathered together the basic materials for the project…

rydell-beginnings-1

I cut the grocery bag open so it would lay flat…

rydell-beginnings-2

I placed my notebook on the grocery bag and figured out how wide I would need it to be, to cover the width of the book and folded flaps on the front and back covers, and then cut off the extra…

rydell-beginnings-3

At this point, I had to do a youtube search, so I could remember how to fold it. (it’s been awhile – ha!).  Once I got the folding done I took a white pastel pencil and lightly marked where the spine was and which part was the Front cover.  Then I took the cover off the book, and got ready for the fun part – decorating!

rydell4and5

Using a roll of masking tape as a template, I cut a peace sign out of the extra paper, and lightly taped it on the front cover to use as a mask.  Then I started stamping horizontal stripes with the various stamps in the “Marks” set…

rydell-beginnings-6

When I got to the peace sign, I stamped right over the top of it…

rydell-beginnings-7

When the stamping was done, I removed the peace sign, and this is what it looked like…

rydell-beginnings-8

The last step was to put on some finishing touches with a fine point paint marker.  I’m so happy with how it turned out!

rydell-beginnings-9

rydell-beginnings-10

rydell-beginnings-11

—————————————————————————————————

I love Michelle’s book cover – it’s such a cool idea that I haven’t thought about in a very long time and what a great place to use the stamps to make a field of pattern.

In addition to a brown grocery bag and her Fauxbonichi, Michelle used the supplies listed below (some are affiliate links):

supplies

Maybe you will even play along with us -I would love to see how you interpret our monthly themes. Email me how you used my stencils and stamps with the theme and email me an image – I would love to share your projects in my next “n*Spiration From Around the Globe“.

See you next Tuesday for another project from the Creative Squad!

Comments (5)

  • Sue Clarke

    |

    LOVE this cover Michelle and like Marit I used to cover my textbooks as well (so this post brought back some cool memories too)!

    Reply

  • Meg

    |

    This is so fun, Michelle! I completely forgot about covering books in school. I wonder if I have any pictures of the covers I made back in the day. Love your project.

    Reply

  • Marit

    |

    Oooh, I remember covering my schoolbooks (I also enjoyed it, years later, to help my son with this…!) It was the second-best thing at the beginning of the school year. (The best was ‘buying and initiating my new school-planner!)

    Reply

  • Julie Tucker

    |

    Ohhhhhhhhhh this is just FABULOUS! LOVING that peace symbol!!!!!!!!!!!!!!

    Reply

Leave a comment

From Small Beginnings – Marsha Valk

CS September Theme 2

Happy Tuesday!  It’s time for my Creative Squad to share a project with you with this month’s theme: “From Small Beginnings”. Throughout the month of September, the team will be using my n*Studio Stamps to interpret the theme. The change in seasons and the childhood ritual of Back to School in September has me thinking about starting new things – new projects, learning new things, and meeting new people, and all the excitement and challenges that come with all of these “new”s. For this theme, From Small Beginnings, my Squad will think about the process of starting something new and the very first steps they took. I’ll ask them, how did you experience a Beginning?

So this week we have a gorgeous scrapbook page from Marsha Valk, where she reminisces about her start in mixed media with stamping, embossing powders, and scrapbooking.

—————————————————————————————————

Marsha September Headshot

This theme made me think about how I started stamping. I can’t remember which stamps I bought first. I’m guessing it was a small wood mounted alphabet set.

I do know that some of the first inks I had were little Colorbox Cat’s Eyes and the first time I used embossing powder was in an Ali Edwards class. It was sooo scary and soooo amazing at the same time!!! And then, of course I had to buy the stuff for myself.

Anyway, I started to look for the mini I made in that class and I ended up looking through some of the other minis I’ve made over the years. One of the minis featured a photo of my scrapcorner in the attic in 2006 and that sparked my plan for this theme:

I wanted to scrapbook, I wanted to heat emboss and I wanted to use materials I would (or could) have had 10 or more years ago.

marshavalk_nscs_fromsmallbeginnings_details2

I started stamping on a smooth watercolour paper with embossing ink. I heat-embossed with white embossing powder.

marshavalk_nscs_fromsmallbeginnings_step1

Then I played around with Ecoline and… forgot to take further photos… Oops.

Once the Ecoline was dry I added the cardstock cluster and my photo. My title was made with two of my Dymo Label Makers. One of them is actually visible on the desk in the photos!

marshavalk_nscs_fromsmallbeginnings_details1

marshavalk_nscs_fromsmallbeginnings_details3

I also added some Scrappers Floss to the cluster with a stapler and because I used to print most of my journaling, I adhered my text in strips to the page. I finished the page with some paint marker splatters and the date.

marshavalk_nscs_fromsmallbeginnings

—————————————————————————————————

I love how Marsha took us both back in time AND behind-the-scenes with her super fun page.  And those Kaffee Klatsch and Mish Mesh stamps look amazing embossed in white against those gorgeous colors!

In addition to paper floss, a stapler, and personal photographs , Marsha used the supplies listed below (some are affiliate links):

SuppliesCJS

Maybe you will even play along with us -I would love to see how you interpret our monthly themes. Email me how you used my stencils and stamps with the theme and email me an image – I would love to share your projects in my next “n*Spiration From Around the Globe“.

See you next Tuesday for another project from the Creative Squad!

Comments (2)

  • Joi@RR

    |

    This was a fun story of your beginnings Marsha and your project is fun too! Really awesome background with the stamps. My very first stamp was Nathalie’s Fiesta stamp and would you believe I WON it – from her???!!!! I treasure it still!!! Thanks bunches for sharing. j.

    Reply

  • Mary

    |

    Beautiful. Love the technique. Thanks for sharing.
    On my list to do.

    Reply

Leave a comment

From Small Beginnings – Cheiron Brandon

CS September Theme 2

It’s Tuesday and time for my Creative Squad to share a project with you with this month’s theme: “From Small Beginnings”. Throughout the month of September, the team will be using my n*Studio Stamps to interpret the theme. The change in seasons and the childhood ritual of Back to School in September has me thinking about starting new things – new projects, learning new things, and meeting new people, and all the excitement and challenges that come with all of these “new”s. For this theme, From Small Beginnings, my Squad will think about the process of starting something new and the very first steps they took. I’ll ask them, how did you experience a Beginning?

So this week we have 3 different card designs from Cheiron Brandon to celebrate her love of cardmaking – the thing that got her started in the creative life :)

—————————————————————————————————

Cheiron September Headshot

Hi there! It’s Cheiron here with my September project. When I initially thought of the theme From Small Beginnings, I thought back to how I got started in art, crafting and art journaling as an adult. About 12 years ago, I moved back to NJ and there was a small stamp shop that opened right down the street from me. I was always interested in making things and I remember making watercolor cards in high school and putting simple messages on them. Rubber stamps opened a whole new world to me. In the past several years, I have had the opportunity to work with several stamp companies and design teams, the most recent being a part of the N*Studio squad.

I am grateful for having art, stamping and especially card making in my life. In the past 10 years I have amassed a HUGE collection of supplies, but I always find for me that the cards I love to make are the most basic. I am sharing 3 simple cards with you today, each was made with only one stamp and a sentiment or word pulled from a giant bin of stickers I still have. I made all three of these cards in under an hour and now have some happy mail to send to friends!

cheiron-simple-stamped-cards-with-n_studio

This first card is made with a stamp from the Marks stamp set. I love these X’s and stamped them in 3 different colors then went over each section with an ink blending tool with the same color. A few letter stickers, pieces of washi tape and a staple with my tiny attacher, and voila!

cheiron-miss-you-with-n_studio

The second card was even easier…a few stamped images from the Kaffee Klatsch stamp set colored in with watercolors, and a little gold splatter and one simple sentiment sticker.

cheiron-why-hello-there-with-n_studio

For the final card, I used a stamp from the Mish Mesh stamp set as a sunshine, and painted it loosely with watercolor, another sentiment and it’s good to go.

cheiron-you-make-me-happy-with-n_studio

I hope these cards remind you of why you got started with this hobby, and what initially brought you joy. I had so much fun making these quick cards and sharing them with you :)

—————————————————————————————————

I love Cheiron’s story of her “beginning” and the cards are simply beautiful.  I think everyone would like to be on her mailing list!

In addition to washi tape and various word stickers from her stash, Cheiron used the supplies listed below (some are affiliate links):

SuppliesCJS

Maybe you will even play along with us -I would love to see how you interpret our monthly themes. Email me how you used my stencils and stamps with the theme and email me an image – I would love to share your projects in my next “n*Spiration From Around the Globe“.

See you next Tuesday for another project from the Creative Squad!

Comments (2)

  • ,Mary Holshouser

    |

    Love the card with the XXXXX
    I have that stamps and will be using that
    idea.
    A pretty, colorful card.
    thanks for sharing.

    Reply

  • Brenda

    |

    These cards are so colorful. Makes me want to go make some. Did you emboss in white on the last card?

    Reply

Leave a comment

From Small Beginnings – Tina Walker

CS September Theme 2

It’s Tuesday and time for my Creative Squad to share a project with you with this month’s theme: “From Small Beginnings”. Throughout the month of September, the team will be using my n*Studio Stamps to interpret the theme. The change in seasons and the childhood ritual of Back to School in September has me thinking about starting new things – new projects, learning new things, and meeting new people, and all the excitement and challenges that come with all of these “new”s. For this theme, From Small Beginnings, my Squad will think about the process of starting something new and the very first steps they took. I’ll ask them, how did you experience a Beginning?

This week we bring you Tina Walker, our newest Creative Squad member!  Tina brings her beautiful vintage inspired style to our team and we are so excited to welcome her to the bunch.  We are also saying goodbye and thank you to our dear squad member Gwen Lafleur for the time being while she begins some new journeys in her life!

So here we have two gorgeous projects from Tina that use my Marks stamp set: an inspiring art journal page and a charming little keepsake gift bag for you to enjoy!

—————————————————————————————————

Tina September Headshot

Hi!  Tina Walker here today with my very first n*studio Creative Team post!  I am super excited and super thrilled to be part of Natalie’s Creative Squad and I have to pinch myself every day to make sure my life is real!  This month’s theme is a perfect way to celebrate my new beginning here at Nat’s and to share a bit about the beginning of my creative journey.

The theme this month is “From Small Beginnings” and that explains simply in three small words how I got to where I am today.  My creative journey began with an occasional crafty project that could be completed when I had a few spare moments in between daily family and work responsibilities.  It wasn’t something that I had to do, but more something I did as a hobby and fun activity.  As life changed (as it does) and my children grew, I found myself immersed into the scrapbook world with full force.  Scrapbooking evolved to all types of mixed media, art journaling, and DIY.  Many of my creative dreams were actually happening and creating was no longer just a hobby, but more a way of life.  I found that the more I enveloped myself in creating, the more I discovered who I was and the more it revealed who I wanted to become.  I really wanted to capture this ‘light bulb moment’ on an art journal spread, using a quote from ‘Joyce Meyer’ to say what I struggle saying in my own words.

Sept-TW1

Sept-TW2

To be honest, the graphic image created by using all ‘Xs’, with one lone red ‘X’, visually defines the feeling without words.  But I think the quote strengthens the message about how a small change can actually bring about a big beginning.

Sept-TW3

Keeping the rest of my spread simple and un-cluttered emphasizes the message even more.

Sept-TW4

Because this is a new beginning for me, I wanted to share another quick and fun project that is also a great functional way to celebrate new beginnings.

Sept-TW5

Do you know someone getting married?  Do you have a friend starting school?  Do you want to say Thank You to a special somebody?  How about creating a handmade gift bag perfect for gift cards and jewelry. Using the same ‘X’ stamp I used on my art journal spread, I stamped/heat embossed the canvas bag, adding hand-stitching to highlight the ‘X’s. You can decorate your bag with your favorite ribbons, buttons or vintage findings to make your gift even more memorable.

Sept-TW6

You can make these ahead of time and display them until they are ready for giving.  I have mine hanging from an old vintage printer drawer. Functional and decorative.  Perfect!

SEPT-TW7

Thank you for taking time today to take a peek at my inaugural projects.  I can’t wait to see you next month.

—————————————————————————————————

Tina is off to a great start with these two projects, showing us the versatility of that Marks stamp in two really creative and fun ways.

In addition to vintage ribbon, vintage buttons, and a vintage ruler, Tina used the supplies listed below (some are affiliate links):

SuppliesCJS


Maybe you will even play along with us -I would love to see how you interpret our monthly themes. Email me how you used my stencils and stamps with the theme and email me an image – I would love to share your projects in my next “n*Spiration From Around the Globe“.

See you next Tuesday for another project from the Creative Squad!

Comments (1)

  • Joi@RR

    |

    YEAH Tina – so happy to see you here with sweet Nat. Very very exciting.

    Your journal pages are so fun but I totally feel in love with your little hand stitched creation.

    What a great addition to the team – congratulations. Xj.

    Reply

Leave a comment

Say Yes to New Adventures – Michelle Rydell

CS August Say Yes

It’s Tuesday and time for my Creative Squad to share a project with you with this month’s theme: “Say Yes to New Adventures”. Throughout the month of August, the team has been using any of my n*Studio Stamps and Stencils they would like to use to interpret the theme. Here in the northern hemisphere, summer is coming to a close and it’s about time to seize the days and go on a little adventure before hibernation! With this in mind, the team has created something that celebrates the spirit of adventure.

This week we bring you Michelle Rydell and an art journal page all about her adventures with love!

—————————————————————————————————

Michelle August Headshot

As soon as I heard that the theme for this month was “Say Yes to New Adventures,” I knew I wanted to do a colorful, many-layered page, to represent the many adventures I’ve had with my hubby Michael! I also thought it would be a great opportunity to make the creation of the page an adventure in itself, by letting it develop organically, instead of having a set plan before beginning…

Here’s how it went…  I opened to a page in my journal that already had the background painted, and a few random collage elements pasted on. I set up my table with a bunch of Dylusions acrylic paints, and foam tools, and got to work…

Rydell Adventure 1

The first stencil I used was the one from the Fashion Dame set, which I applied randomly around the page with turquoise paint…

Rydell Adventure 2

And then added some white doodling with a paint pen.

Rydell Adventure 3

Next I used the Batik Stencil, with Pomegranate paint for contrast. I applied random bits of it in the “empty” spaces…

Rydell Adventure 4

I kept up the same process, adding the stencils from the following foam stamp sets: Bird (in pink), Elephant (in yellow) and then Urban Scribble (in orange), adding doodling here and there along the way…

Rydell Adventure 5

Rydell Adventure 6

At this point, I printed out a 5 x 7” photo from our wedding, and gently set it where I thought I wanted it to go, outlining with a Stabilo all pencil.

Rydell Adventure 7

I removed the photo (so as to not get it dirty) and activated the water-soluble pencil with matte medium to make a nice black frame for contrast. After that I realized the page was needing some drippage! Over to the spray station it went, and high flow paint was added along the top edge, spraying with water to increase the dripping effect.

Rydell Adventure 8

Looking at the page without the photo gave me an idea – that frame would be a perfect place to put the quote I had in mind! Busting out the stabilo pencil again, I created the journaling lines, and then used a paint pen to create the background and lettering. I stepped back and took a look… I felt like it was complete! No photo needed! Here’s how the final page turned out…

Rydell Adventure 9

—————————————————————————————————

Michelle’s art journal page was an adventure in creation and I love the outcome with all those layers and that quote.

She used the supplies listed below (some are affiliate links):

SuppliesCJS


Maybe you will even play along with us -I would love to see how you interpret our monthly themes. Email me how you used my stencils and stamps with the theme and email me an image – I would love to share your projects in my next “n*Spiration From Around the Globe“.

See you next Tuesday for another project from the Creative Squad with a brand new theme for September!

Comments (4)

  • Marit

    |

    That photo is so cute but I too love the page with the quote… just ‘knowing’ that it represents that particular photo makes it complete. Great page Michelle!

    Reply

  • Joi @RR

    |

    Well, Michelle – I just have to say that I adored your page before you added the drippings. However… I like the end result because it is unique and it makes you happy too! Love how you added the sentiment. FUN and FUNKY!!! j.

    Reply

  • Sue Clarke

    |

    Lovely page Michelle.
    Thanks for sharing your techniques.

    Reply

  • Julie Tucker

    |

    This is gorgeous! LOVING the colors and that quote!!!!!!!!!!!!!

    Reply

Leave a comment

Inspiration from Around the Globe… August!

nspiration from around

This Tuesday we’re taking a short break from our Creative Squad (they will be back next week with one last “Say Yes to New Adventures” project) to bring you some amazing projects from around the globe. As you know, my stamps and stencil designs are available for purchase online and maybe even in your local craft store, so crafters and mixed media artists and art journalers from around the world are using them. I am always excited to see how YOU use my products in your own projects. I am even more excited to share some of the beautiful and creative examples of these projects with you today. Enjoy this inspiration from around the globe!

Global Kathy Adams South Carolina

First we have a whole flock of feathered friends (yes, that’s my Bird Foam Stamp set in action) from Kathy Adams in South Carolina. Her four mini canvases are inspired by the four seasons and are super fun!

Global Andrea Braun Germany

From Andrea Braun in Germany we have a beautifully textured art journal page using my Urban Scribble Foam Stamp set.  I love how she incorporates the alphabet in low relief in this one.

Vicky Papaioannou from Greece brings us this happy and colorful art journal page featuring my Elephant Foam Stamp set.  Watch how she creates this vibrant spread and how she masters the use of my stamp set too!
Global Tina Walker Pennsylvania

Global Tina Walker PA 2

From Pennsylvania, our newest Creative Squad member Tina Walker demonstrates 2 really cool ways to use my Fashion Dame stamp set. First she casts adorable little resin jackets to use on some really sweet tags and then she puts together a fresh looking art journal page.

Global Judi Kauffman 1 Global Judi Kauffman 2

Here are a couple of envelopes by Judi Kauffman in Maryland using my Bird Foam Stamp set.  I just love how she used all the pieces in the set, including the stencil, to create these charming envelopes. Wouldn’t you love to find one of these in your mailbox?

Global Riikka Kovasin Finland

Finally is this nifty printed canvas pencil case from one of my former students, Riikka Kovasin from Finland.  She layered a bunch of designs including my Marks stamp set on this little case and the results are awesome.

Join us again next Tuesday for another great project from one of our Creative Squad members!  And in the meantime, share with me what you’ve been working on with my stamps and stencils.  I would love to feature your project in an upcoming post!

Try some of the above techniques for yourself with these n*Studio supplies:


Comments (2)

  • Joi @RR

    |

    What fun to see your FAB stamps and stencils in so many creations from around the world. Smiling big! Xj.

    Reply

  • Sue Clarke

    |

    Love love love the canvas pencil case!!!

    Reply

Leave a comment

Say Yes to New Adventures – Marsha Valk

CS August Say Yes

It’s Tuesday and time for my Creative Squad to share a project with you with this month’s theme: “Say Yes to New Adventures”. Throughout the month of August, the team will use any of my n*Studio Stamps and Stencils they would like to use to interpret the theme. Here in the northern hemisphere, summer is coming to a close and it’s about time to seize the days and go on a little adventure before hibernation! With this in mind, the team will create something that celebrates the spirit of adventure.

This week we bring you Marsha Valk and her adventure with a new tool and the gorgeous accordion book that resulted from her journey!

—————————————————————————————————

Marsha August Headshot

MarshaValk_nSCS_SayYesToNewAdventures-1

I go on new adventures all the time. I’m on new adventures as we speak. But the problem with new adventures is that it’s not always easy to talk about them. Because they’re new… and I’m only just getting used to the idea… and I don’t yet know how I feel and what I think about it.

MarshaValk_nSCS_SayYesToNewAdventures-7

MarshaValk_nSCS_SayYesToNewAdventures-6

So for this month’s theme I took a simpler approach: I wanted to use something from my stash that I hadn’t used before. I decided to go with the round mini gel printing plate. And I just started printing on a A4 sized sheets of paper: adding paint to the little plate, making marks with my n*Studio Cling Stamps and using some stencils too. The outcome was sometimes unpredictable and messier than I had hoped, but that’s what happens when you go on an adventure!

MarshaValk_nSCS_SayYesToNewAdventures-5

MarshaValk_nSCS_SayYesToNewAdventures-4

MarshaValk_nSCS_SayYesToNewAdventures-3

Once I had a couple of prints, I thought about what I wanted to do with them. I didn’t know. So I thought about how sometimes things get better when you cut them up and I started to cut each print in half.

MarshaValk_nSCS_SayYesToNewAdventures-2

Then I thought: these prints would make nice simple cards. But once I had folded them into cards I thought: or maybe this could be a mini book or mini art journal. So I decided to fold the cards up like accordions and I glued each far left panel behind the far right panel of the previous accordion card.

MarshaValk_nSCS_SayYesToNewAdventures-10

MarshaValk_nSCS_SayYesToNewAdventures-9

MarshaValk_nSCS_SayYesToNewAdventures-8

I haven’t decided if I want to keep it like this or to glue the backs together to make an actual little book. I figure that it will be easier to work on it in this state, so I decided to just embellish the front a bit more and leave the rest blank (and unglued) for now. It’s small and light, so it’s ideal to just doodle in whilst watching TV or to take with me when I have to go on a long train ride. I’m ready to take it on another new adventure!

MarshaValk_nSCS_SayYesToNewAdventures-11

—————————————————————————————————

Marsha’s accordion book is stunning.  I love the super fresh color palette she chose and her bold move to cut the prints in half and reimagine the whole thing.  And of course, look at all those stamps!

Marsha used the supplies listed below (some are affiliate links) as well as Toga Alphabet Stickers:

SuppliesCJS

Maybe you will even play along with us -I would love to see how you interpret our monthly themes. Email me how you used my stencils and stamps with the theme and email me an image – I would love to share your projects in my next “n*Spiration From Around the Globe“.

See you next Tuesday for another project from the Creative Squad!

Comments (2)

  • Joi@RR

    |

    Your new adventure is sooooo FUN Marsha. Love all the white space, all the wonderful stamps/stencils and the colors. What a great idea to put them together in such a fun way. I hope you will share your doodles when you get them finished. j.

    Reply

Leave a comment

Say Yes to New Adventures – Cheiron Brandon

CS August Say Yes

It’s Tuesday and time for my Creative Squad to share a project with you with this month’s theme: “Say Yes to New Adventures”. Throughout the month of August, the team will use any of my n*Studio Stamps and Stencils they would like to use to interpret the theme. Here in the northern hemisphere, summer is coming to a close and it’s about time to seize the days and go on a little adventure before hibernation! With this in mind, the team will create something that celebrates the spirit of adventure.

This week we bring you Cheiron Brandon and the adventure she went on to create a beautiful art journal page!

—————————————————————————————————

Cheiron August Headshot

Hi there, Cheiron here with my August project for the n*Studio Creative Squad. This month, I tried a new adventure in my art journal, and it did not come out as I planned at all, but I will show you how I got it back to something I could use :)  Here is my finished art journal page with a fold out in the center for journaling:

cheiron- august n_studio 1

It did not always look like this, I started with a much brighter page and I did not like how the writing came out at all, so I painted over it with black:

cheiron- august n_studio 5

cheiron- august n_studio 6

I added many layers to the page with lots of different stamps using Distress Paints that I applied to the stamp with a foam blending tool:

cheiron- august n_studio 7

I also had a page from another project that was an adventure gone wrong, so I cut it up and added it to the page so I could use the back for journaling:

cheiron- august n_studio 8

cheiron- august n_studio 4

cheiron- august n*studio 9

The lesson for me this month, is that every adventure whether it be small or big does not always work out, but you should just keep taking new adventures!

—————————————————————————————————

Cheiron’s art journal spread turned out beautifully with all those layers, and the adventure it took to get there was definitely worth it.

Cheiron used the supplies listed below (some are affiliate links):

SuppliesCJS

Maybe you will even play along with us -I would love to see how you interpret our monthly themes. Email me how you used my stencils and stamps with the theme and email me an image – I would love to share your projects in my next “n*Spiration From Around the Globe“.

See you next Tuesday for another project from the Creative Squad!

Comments (1)

  • Miriam Prantner

    |

    Love how it turned out and how you were able to fix what you didn’t like. Loving the contrast between the background and the insert too!

    Reply

Leave a comment