Workshops

Tutorial: Transparency Backgrounds and Embellishments

I love working with transparencies and recently I was introduced to a new and fun technique by Julia Andrus which I would love to share.

Ich liebe es mit Transparenten zu arbeiten und erst kürzlich hat mir Julia Andrus eine neue Technik mit Transparenten gezeigt, die ich gerne mit Euch teilen möchte.
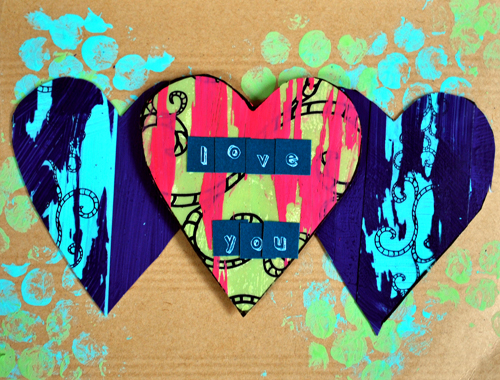
*Transparency Backgrounds and Embellishments*
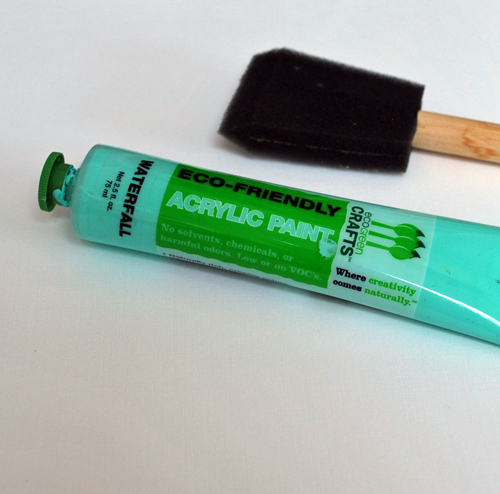
You will need a white piece of cardstock, a brush and some nice acrylic paint.

Du brauchst etwas weißen Cardstock, einen Pinsel und eine schöne Acrylfarbe.
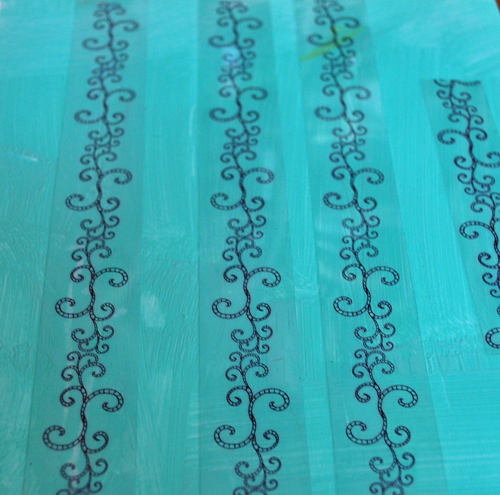
Paint cardstock and immediatley before the acrylic paint dries, stick your transparencies on top. I used the little Transparency Stripes that come from my eMOTions collection. This way the paint can serve as a glue !

Bemale den Cardstock und bevor die Farbe trocknet, drücke Deine Transparente drauf. Ich habe die kleinen Transparent-Streifen genommen, die Teil meiner eMOTions Kollektion sind. Auf diese Weise kann man die Farbe wunderbar wie Klebstoff verwenden!
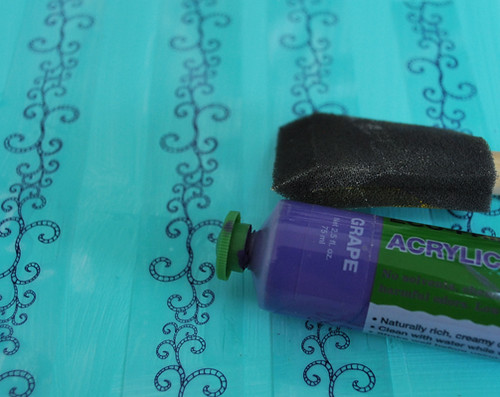
Now add a second color and apply on top of the surface.

Nun suche eine zweite Farbe heraus und bemale damit die komplette Fläche.
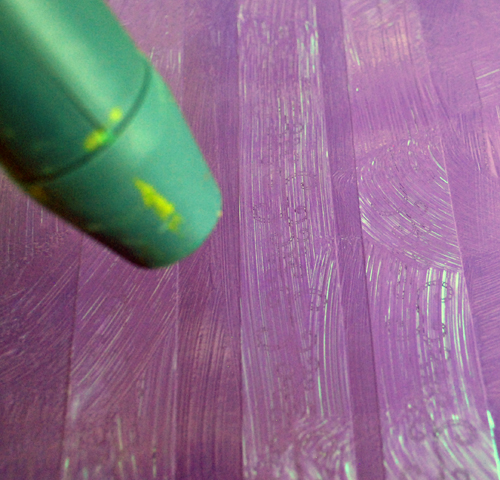
For a speedier process you can use the heat gun to dry the top paint, but be carefull to not melt the transparency.

Um eine schneller Trocknung der Farbe zu erreichen, kannst Du auch mit dem Heißluftfön arbeiten, sei aber vorsichtig, dass Du nicht das Transparent wegfunzt.
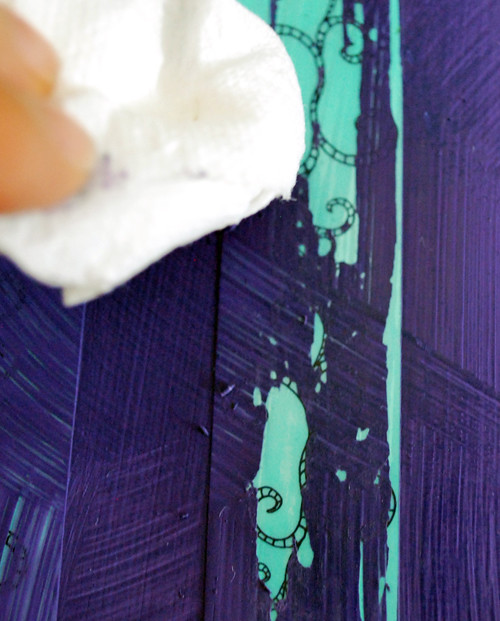
Now you can actually use a paper towel and rub off some of the painted areas on the transparencies.

Nun kannst du ein Papiertuch nehmen und einige der bemalten Stellen auf den Transparenten wegrubbeln.

The look is a nice weathered – but glossy look, revealing the pattern on the transparency as well as the color underneath.

Das schaut nun verwittert, aber immer noch scheinen durch, und zeigt dabei das Muster auf dem Transparent sowie die Farbe unter dem Transparent.
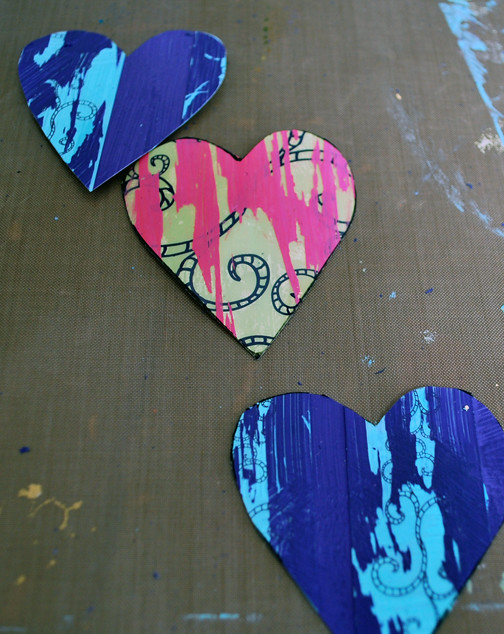
If you do not like to use this for a background of a layout you could also cut different shapes- I cut hearts and then use those as embellishments.

Wer das Ganze nicht als Hintergrund verwenden will, dann auch Formen ausschneiden  – zB. Herzen und kann diese dann als Embellishments verwenden.
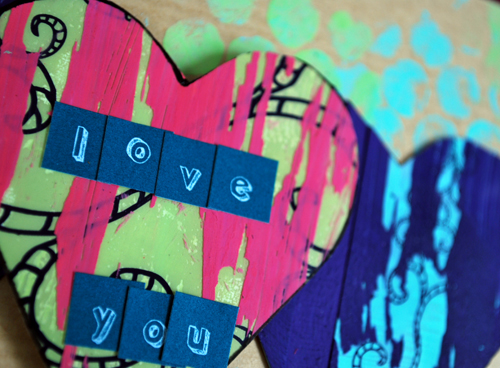
Supplies: Prism White Cardstock, Eco Green Crafts Acrylic Paints, Sultane Kraft Cardstock, Sultane Letter Stickers and Transparencies eMOTions.

I hope you like it :)

Ich hoffe Euch gefällts :)

Comments (11)

  • christiane

    |

    have to try this!! love how it turned out!! :D

    Reply

  • Schmidt Maria

    |

    Hihi! Wie geil ist das denn!? Weg funzt…ich hau mich wech! :-))) Das muss ich auf jeden Fall ausprobieren! Gfällt ma ganz guad!!!
    xo Maria

    Reply

  • Karen

    |

    Oooh! That’s fun!

    Reply

  • Scrappi

    |

    Wie genial ist das denn? Vielen Dank für die Anleitung!
    Liebe Grüße
    Hélène

    Reply

  • lynn

    |

    oooo tfs! very fun and funky!

    Reply

  • Sue Clarke

    |

    Cool, I have some transparencies to use and I think that I’ll try this!

    Reply

  • christiane

    |

    ob’s gefällt????
    YESSSSSSSSSSSSSSSSSS!!!!! :D

    Reply

  • sylvia

    |

    oh yes, i like this a lot! might give this a try later this week. thanks for sharing! :)

    Reply

  • Eeva

    |

    yeeeah! Thanks for sharing!! Now I know what I will do hopefully today if I get the time before my motherinlaw comes for a visit :)

    Reply

Leave a comment

Paper & Co Show 2010 – in France- November 2011

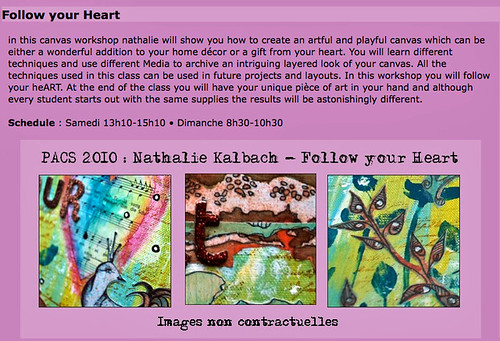
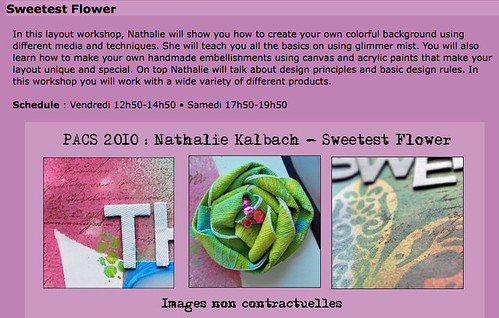
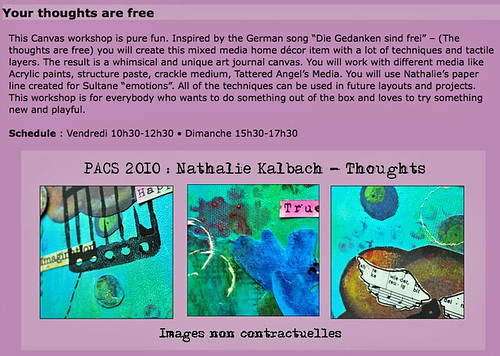
So thrilled to announce that I will be teaching at the Paper & Co Show 2010 in Buthiers, France November 26-28, 2010.

Ich freue mich so, dass ich bei der Paper & Co Show 2010 in Buthiers, Frankreich – 26-28. November 2010 Workshops gebe.

Hope to see you there :)

Ich hoffe wir sehen uns dort :)

Comments (10)

  • Karen

    |

    France! Is that a new country for the list? I can’t keep track.

    Reply

  • Kim Sonksen

    |

    Woooohoooo – France is in for a real treat!

    Reply

  • seemycrafts

    |

    wundervolle workshops, nathalie…
    schade, dass es ein bisschen zu weit weg ist.

    LG Felicitas

    Reply

  • Brigitte

    |

    Awesome! wish i could be there with you. maybe some day you will come back to NY.

    Reply

  • Sue Clarke

    |

    They sound wonderful Nat!

    Reply

  • Natasja

    |

    exciting…i ment exciting lol
    But of course I am excitED for you :)

    Reply

  • Natasja

    |

    that’s so excited!

    Reply

  • sylvia

    |

    sounds like great workshops!! won’t be able to be there though :-P

    Reply

Leave a comment

Layouts with eMOTions by Evelien and a chance to win a Workshop

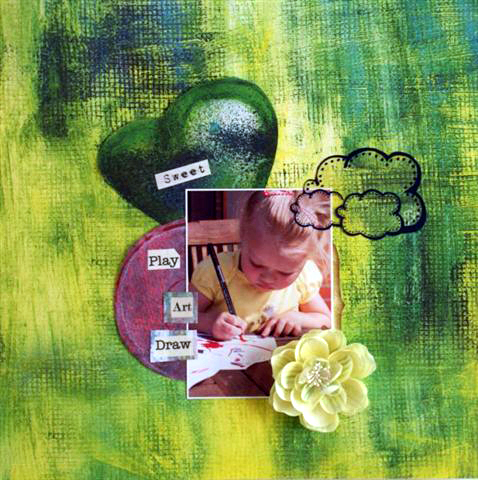
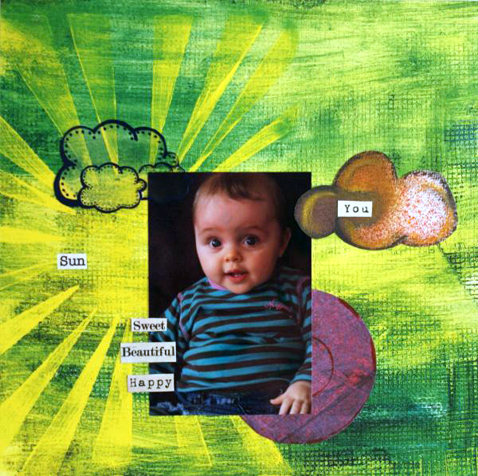
Evelien from HobbyFarm in Belgium created those amazing layouts of her two cuties with my eMOTions paper collection !

Evelien von HobbyFarm in Belgien hat diese beiden wunderschönen Layouts Ihrer zwei Süßen mit meiner eMOTions Papierkollektion kreiert!

*Draw*

*You*

Love those layouts ! Ich liebe diese Layouts!

.——–

 Hobby Farm also has a great challenge this month! Create one or more layouts using the collections ‘REVOLUTION.com’ by Birgit Koopsen or ‘Emotion’ by Nathalie Kalbach and win a free spot at one of their workshops at the Scraptastic 2010 Event in Belgium in September! You have until July 31 to e-mail your layouts to hobbyfarm@pandora.be! At the beginning of august Birgit and Nathalie will both pick a winner who will be announced on the blog!

Hobby Farm hat eine tolle Challenge diesen Monat! Kreiere ein oder mehre Layouts mit der Kollektion REVOLUTION.com von Birgit Koopsen oder mit EMOTiON von Nathalie Kalbach und gewinne einen freien Workshop bei ihnen bei dem Workshopwochenende Scraptastic 2010 in Belgien im September! Ihr könnt Eure Layouts bis zu 31. Juli an hobbyfarm@pandora.be  emailen! Anfang August werden Birgit und Nathalie beide einen Gewinner benennen, der auf dem Blog bekannt gegeben wird!

 Good luck!!!!

Viel Glück!!!

  • Karen

    |

    What a fun contest!

    Reply

  • Sue Clarke

    |

    I especially love how she used the sun paper! Fun and cute.

    Reply

  • sylvia

    |

    oh how fun! love these layouts. the range is perfect for sunny layouts like these!

    Reply

  • Evelien

    |

    thanks for sharing!

    Smiles,
    Evelien:))

    Reply

Leave a comment

Fun Workshop and Surprise Guest – Julia Andrus

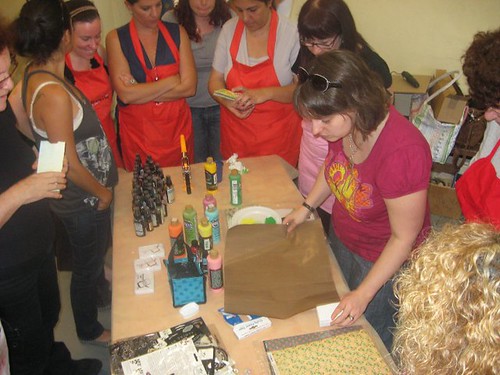
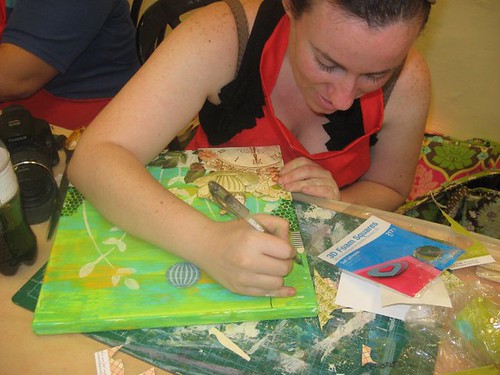
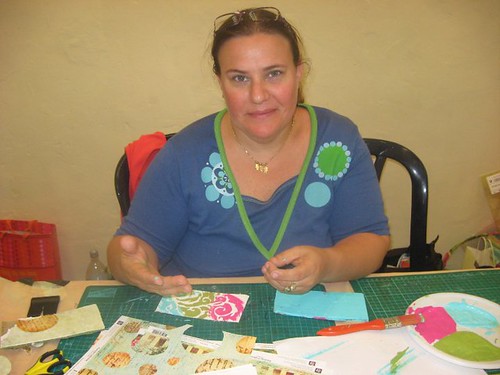
What a weekend! It was HOOOT – LOL – about 95 Fahrenheit when I had my Eternal Love Workshop in my own apartment. And it was fun. With a nice group we had a ball using paints, inks, Glimmer Mist, Alcohol Inks and all kinds of fun stuff – while melting away, eating and drinking and chatting. :)

Was für ein Wochenende! Es war HEISSS – LOL – das wisst Ihr ja – als ich meinen Eternal Love Workshop in meinen eigenen vier Wänden gab. Es es hat Spaß gemacht. Mit einer netten Runde haben wir Acrylfarben, Inks, Glimmer Mist und Alcohol Inks – ach und noch viele andere schöne Sachen verwendet – na ja -während wir dahinschmolzen, aßen, tranken und schön schnatterten :)

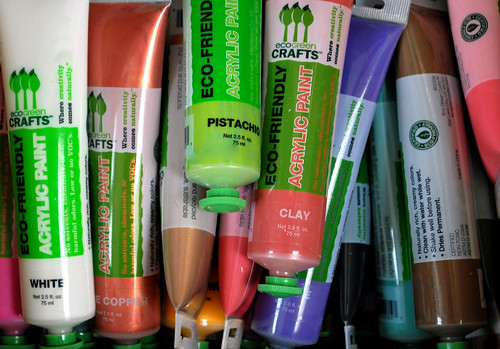
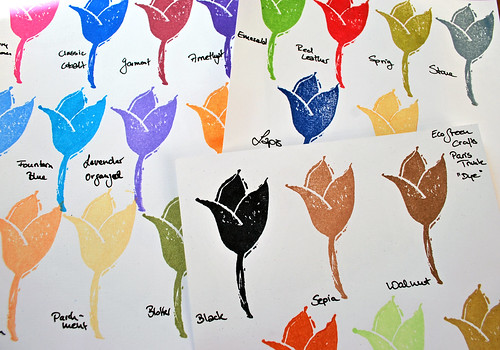
And then we had a surpise guest – Julia Andrus – an amazing women and artist – who is not a stranger in the bussiness (I just say she developed some really popular products for a different company and wrote an AMAzING book). She now co-owns a company called Eco Green Crafts which makes the coolest Acrylicpaints, Inks, Artist Media and other artist materials – ecofriendly and free of harmful substances. We all just loved the quality of the rich pigmented colors – here are the acrylic paint tubes – packed in recycled material and the dye inks – you have to see the colors and how it works in real person!

Und dann kam ein Überraschungsgast :)  – Julia Andrus -eine einzigartige Frau und Künstlerin – die keine Unbekannte in der Szene ist (Ich sag mal nur, dass sie ein paar ziemlich populäre Produkte für eine große Firma entwickelt hat und zudem auch ein wunderbares Buch geschrieben hat). Sie besitzt nun ihre eigene Firma namens Eco Green Crafts, welche die coolsten Acryl -Farben, Inks und andere Künstlermaterialien herstellt- und zwar umweltfreundlich und frei von Schadstoffen. Wir alle waren begeistert von den pigmentreichen und tollen Acrylfarben – hier sind die Tuben – aus recyceltem Verpackungsmaterial und die Dye Ink Pads und ihre Abdrücke. Ihr müßt die Farben und wie alles funktioniert in Echt sehen!

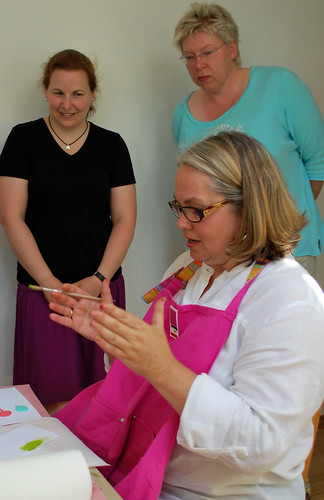
Julia did not only share her uplifting and hope raising story with us on how she survived cancer and how this made her change her lifestyle and actually choose another career path. It was simply eyeopening and touching!  – she also shared some of her techniques with us -We loved it. She was just doing one after the other in such a fun and inspiring way- I could have watched and listened to her forever!

Julia hat nicht nur ihre wirklich aufbauende und Hoffnung machende Geschichte, wie sie ihren Krebs besiegt hat und dies dazu führte, dass sie ihren Lebenstil änderte und einen anderen Weg bei der Entwicklung von Produkten einschlug, mit uns geteilt. Das war wirklich augenöffnend und sehr berührend. Sondern sie zeigte uns auch einige ihrer Techniken -wir liebten es. Sie hat einfach eine Technik nach der anderen aus dem Ärmel in einer spaßigen und inspirierenden Weise gezeigt- ich hätte ihr ewig zuschauen  und -hören können.

(danke Melanie für das Foto :) )

Thanks to everyone who came – it makes me actually once again realize what a wonderful hobby it is and how grateful I am to get to know such gorgeous people! And Thanks to Julia for sharing her short time with us in Hamburg- it was such a pleasure to meet you …and maybe not for the last time ;)

Vielen Dank an alle die da waren – es hat mir wirklich mal wieder gezeigt, was für ein tolles Hobby dies ist und wie dankbar ich bin, solch nette Menschen kennenlernen zu dürfen! Und vielen Dank an Julia, dass sie ihre kurze Zeit in Hamburg mit uns geteilt hat – es war wunderbar sie zu treffen…und wohl nicht das letzte Mal ;)

….and then the game….woowaahh

…und dann das Spiel ….wowwahh

Happy Independence Day to my American Friends :)

Einen schönen Sonntag an meine Deutschen Freunde :)

  • Vicki Chrisman

    |

    awesome post nat!
    btw.. hope you had a fantastic b-day!!

    Reply

  • milkcan

    |

    How cool! I love the idea of having workshops at home!

    Reply

  • Sue Clarke

    |

    What a great color selection!

    Reply

  • Cat

    |

    I met Julia when we were in LA for CHA, she is very sweet – though I haven’t found any of her products around here yet. Looks like your workshop was a total hit! When are you coming to the USA again, I would love to try and find some creating time with you! I’ll kick my family out and oyu can stay here a few days ;-) Although, Ian would LOVE to meet his hamburgler friend :-) Have a great week!

    Reply

  • Kerstin

    |

    Danke für einen supertollen WS, eine bewundertswerte Julia und den Spaß den wir hatten..das sind die Inseln die frau ;-) im Alltag braucht..by the way… HAPPY BIRTHDAY !!! x O

    Reply

  • sylvia

    |

    yay for ecogreen crafts!! yay for a great workshopday and YAAAAAAY for a fantastic soccer game! noch 2x gewinnen und wir sind WELTMEISTER :) :) :)
    Reply

  • Melli

    |

    Es war einfach suuuuuper. Und dass Du extra für uns so einen grandiosen Gast eingeladen hast ;) … einfach genial.

    Reply

  • christiane

    |

    also the workshops are looking hot!! :D

    Reply

Leave a comment

Down the Shore aka Beach Minialbum

LOL – well…you know if you are married to a New Jersey Man you learn pretty fast the term “Down The Shore” . In any event  – I wanted to show you a beach album I created for my sweet niece who just turned 16 and lives in NJ and I bet…there are days she goes down the shore with her friends. So I wanted to give her an album where she could put in some fun memories of one of those trips.

Ja – das ist ja immer was mit der Übersetzung – also in New Jersey sagt man “runter zu Küste” statt “an den Strand” wenn man ans Meer fährt – wie gesagt- ist ein wenig schwierig mit der Übersetzung ;) Ich wollte ein album für meine süße Nichte machen, die gerade 16 geworden ist und halt in New Jersey lebt und ich wette, dass sie dort ein paar witzige Tage mit ihren Freunden verbringt- und da soll sie natürlich auch ein Album für ihre Erinnerungen bekommen.

All you need for the base is the Beach Bingo Board Set

Alles was Du brauchst für die Basis ist das  Beach Bingo Board Set

Don’t throw away the paper packaging included – we will use it as a spine for the book. Fold it

Nicht die Papierverpackung wegschmeißen – die werden wir als Buchrücken verwenden.

Spray it with some dark colors to cover most of the print – I used Chalkboard Chocolate and Glimmer Mist Tattered Leather

Verwende ein paar dunklere Farben zum Beispiel Hot Chocolate Chalkboard und Glimmer Mist Tattered Leather um das Gedruckte teilweise abzudecken.

I used the amazing technique Irrisistably Technique posted by Jasmine- check it out! And then sprayed with different Glimmer Mist colors and Calkboard Colors

Für die Bingo Karten habe ich die tolle Irrisistably Technique von Jasmine verwandt – schaut sie Euch an! Dann habe ich die Karten mit unterschiedlichen GlimmerMist Farben und Chalkboards besprüht.

Attach the Bingo Boards to the Spine with double sided tape – you can do it a bit like a fan.

Verwende doppelseitiges Klebeband- zum Beispiel von SCRAPBOOK ADHESIVES by 3L™

And then you can start embellishing and stamping – here I used the Journaling Stamp (I LOOOOOvvveee It!) from the Notes from the Garden Stamp set. I also attached a Seaside Sea Glass with a thread. And the clam from the Seaside Beach Glimmer Chips is just inked with Archival Ink.

Und dann kannst Du mit dem Embellishing und Stempeln beginnen.

This one is also from the Seaside Glimmer chips Collection – so yummie

There are so many options as you can imagine! Here is the book:

I also used the word stamps from the awesome Seaside Stamp Collection

And here I used the Under The Sea Glimmer Screens before Stamping with the Seaside Stamp and adding the Seaside Glimmer Glass – isn’t it awesome to have all those coordinating products to play with. So versatile!

There you have it- wether you say down the shore or at the beach :) you can create a simple and fun Seaside -Album :)

Und schon ist es fertig das Strand-buch :)

If you want to learn more fun techniques using Tattered Angels come and visit my upcoming Tattered Angels workshops or book them for your store. Here is a place where I will be teaching some of those and other fun techniques next:

Wenn Du mehr Techniken mit Tattered Angels Produkte  lernen willst, dann besuch doch einen meiner Tattered Angels workshops oder buch mich für Deinen Laden. Hier ist ein Ort an dem ich demnächst einige dieser und andere tolle Techniken unterrichten werde:

September 25, SCRAPTASTIC EVENT 2010 in Belgium

Have a gorgeous day!

Einen wunderschönen Tag!

  • Deb Wisker

    |

    like all of your projects…this is beautiful!!

    Reply

  • Princess

    |

    Thanks for sharing. It’s a cute mini.

    Reply

  • Kimberly

    |

    A beautiful mini book and a great tutorial. I am always looking for ways to use my Glimmer Mist! It’s really my favorite thing to create with these days.

    Reply

  • christiane

    |

    absolutely inspiring!!! love it!! :D

    Reply

  • Erika Taylor

    |

    This is absolutely STUNNING. I love the colors and the spraying. Just Gorgeous!!!

    Reply

  • Kim Sonksen

    |

    ohhhhh I would take this book anywhere “down the shore” or “at the coast” :)
    LOVE it!!!!

    Reply

  • Marlies

    |

    Ohh Nat this is just gorgeous! I love the vibrant colors! It’s dreamy!

    Reply

  • Birgit

    |

    Ich liebe dieses Strandbuch!!! Es ist ein Traum!!! Bussi

    Reply

  • Sue Clarke

    |

    Wonderful and perfect for this time of year! Such a fun gift too.

    Reply

  • Sandra

    |

    Das Album ist herrlich geworden – vielen Dank für das Tutorial :-)

    Reply

  • sylvia

    |

    oh, awesome stuff, totally love it!!

    Reply

  • Eeva

    |

    Great tutorial!!!! I need to buy myself more glimmer mist colors and also the chalks!!!

    Reply

Leave a comment

Inspirational Fridge Magnets *Tattered Angels*

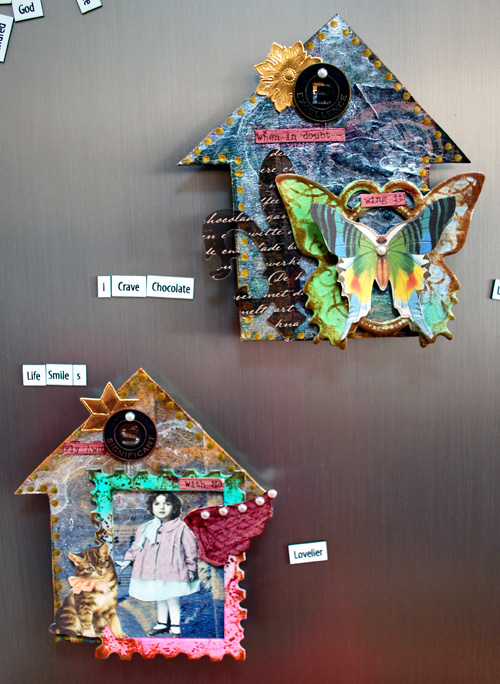
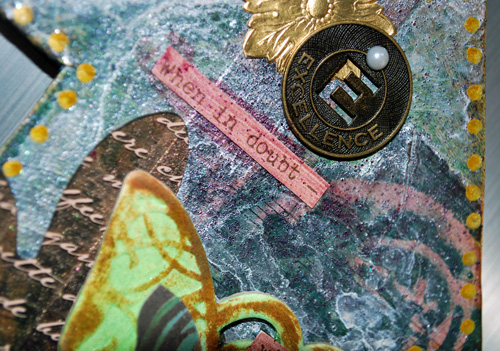
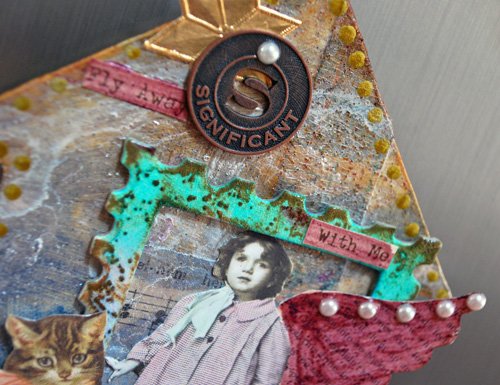
In May I was featured on the Tattered Angels Main Page with a Project of the Month and I thought I should share the tutorial with your here too :)

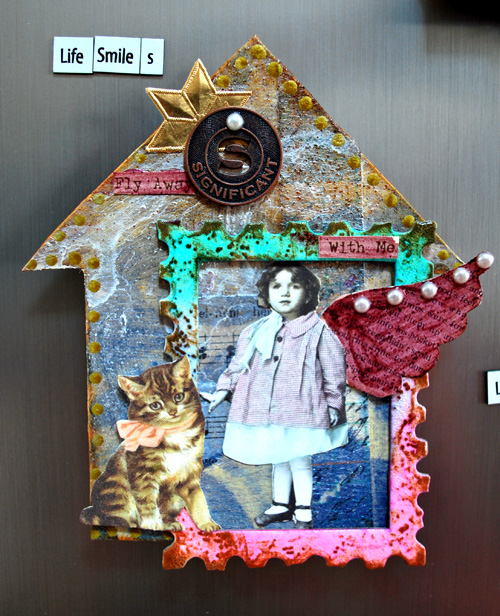
*Inspirational Fridge Magnets*

Supplies:
Tattered Angels:
Glimmer Mist: Turquoise Blue, Cosmos, Meadow Green, Delphineum, Pearl
Chalkboard: Evergreen, Cornflower
Glimmer Glam: Golden Goddess, Chandelier, Bordeaux
Regal Glimmer Glass
Framed Fonts Butterfly and Traveler
Glimmer Screens: Elegant Emblems and Fanciful Screens

Other:
Cardboard
Crafty Secrets Fairy Sheet
7Gypsies Paper Tape
Ranger’s Crackle Paint, Sepia Archival Ink Pad and Glossy Accents
Tim Holtz Tokens
German Borders
Posca Marker
SCRAPBOOK ADHESIVES by 3L™

Magnets
half pearls- unknown
Acrylic Paint
vintage music sheets

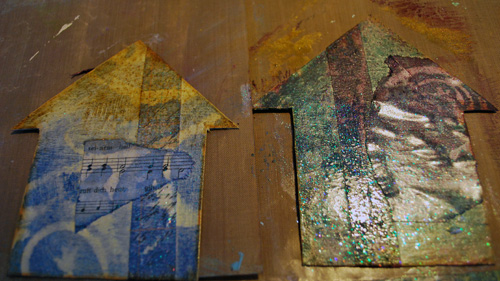
Cut out a house shape out of Cardboard. Paint with acrylic paint.

add some stripes of paper and/or tissue paper

Place a stencil over the house and start spraying with chalkboard. Set aside to dry

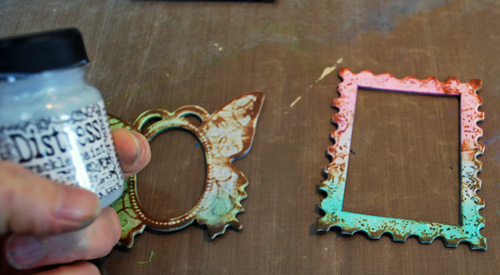
Take a Frame from the Frame Fonts and spray with two different Glimmer Mist Colors

go over the frame with an archival ink pad and paint with clear crackle paint. Set aside to dry.

Paint Houses with Glimmer Glam which is also going to work as a sealer. You can use two different color – one for the roof and one for the bottom of the house.

Now take the Pearl Glimmer Mist and spray over the House – heat it up – don’t burn it with the heating gun and move the liquid around with the heating gun. Once everything is dry, spray it again and repeat. Do several times until you get a mother-of-pearl like look.

Do this until you are satisfied with the look

You can now dress up your houses – doodle with markers around the edges, add scraps and fairies, some nice inspirational sentences and the frames.

Attach strong magnet to the back – and take a walk to the fridge ;)

And there you go – a nice little present or to keep for yourself – an inspirational Fridge magnet.

  • charlotte ravn

    |

    Wow they are fantastic Nat! Thank you so much for the tutorial! i’m going to try this one day!
    Hugs!

    Reply

  • jenxo

    |

    these are just stunning, love seeing how you layered everything. and the pearl looks wonderful over the top…

    Reply

  • milkcan

    |

    Maybe the cutest magnets ever! Love this idea! I’m going to have to make some!

    Reply

  • Cat

    |

    These are gorgeous Nat!! LOVe them!

    Reply

  • Heidi

    |

    Love, love, love!!!

    Reply

  • Brigitte

    |

    great pieces. hmmm, i may just give this a try

    Reply

  • Kim Sonksen

    |

    I am loving it – what a wicked way to get such awesome texture

    Reply

  • Jamie Dougherty

    |

    Nat these are so awesome!!! Beautiful pieces :) Hugs Jamie

    Reply

  • Sue Clarke

    |

    Wonderful!!! This also helps me to see how I can use TA products better than I have been (just spraying tons of the glimmer mist all over). tee hee

    Reply

  • christiane

    |

    bummer, my fridge isn’t nagnetic!!
    love ’em!!! :Dm

    Reply

  • sylvia

    |

    this is really great! i’m in love with fridge magnets. i also love all the layers you use. very inspiring!!

    Reply

Leave a comment

Upcoming Workshops in July – Hamburg, Germany

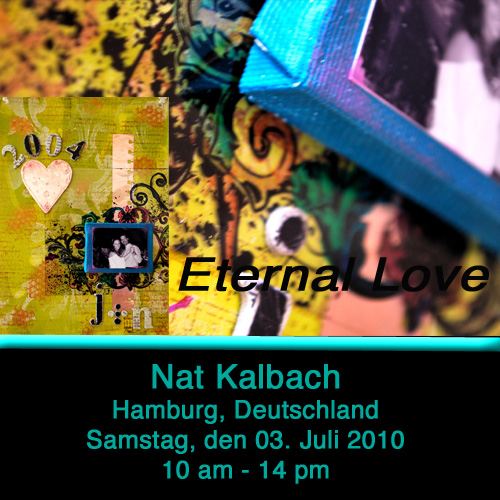
 Eternal Love – Workshop – JULY 3rd, 2010   – AUSGEBUCHT – nur noch Warteliste

Wann: 3. Juli 2010 von 10 bis 14 Uhr
Dauer: 4 Stunden
Kosten: 25 EUR
Ort: Bei mir zuhause – Adresse schicke ich nach Anmeldung

Contact: nathalie.kalbach (at) gmail.com

In diesem Prima Layout Workshop von Nat Kalbach wirst Du mit viel Spaß und inspirierenden Techniken ein Layout kreieren. Benutze ein Photo von Dir und Deinem Liebsten/Deinen Liebsten oder sogar ein Heritage Hochzeitsfoto, um eine besondere Beziehung in romantischer aber moderner Weise zu würdigen. Du wirst viel mit Prima Marketing Produkten, Alkohol Inks, Acrylfarben und Folie arbeiten und interessante Wege kennenlernen, diese Medien für ein einzigartiges Layout zu verwenden.
Die Techniken, die Du in diesem Workshop erlernen wirst, sind vielseitig und können auch in anderen, zukünftigen Projekten angewandt werden. Nat wird Dir auch zeigen, wie Du Dein Layout mit einfachen Mitteln in ein Wandbild verwandeln kannst, das einen schönen Hingucker in Deinem Heim darstellen kann!

Das Workshop Kit – Materialien und die Medien werden gestellt – mitzubringen sind nur Kleinigkeiten wie Schutzkleidung ;) und Klebstoffe – und wer mag einen Snack. Bei gutem Wetter können wir ein Päuschen auf der Dachterrasse einlegen :)

English:

In this Prima Workshop taught to you by Nathalie Kalbach, you will create a layout with a lot of fun and inspiring techniques. Use a photo of you and your loved one(s) or even a heritage wedding photo to highlight a relationship in a romantic but modern way.

You will work with Prima Marketing Products, alcohol inks, acrylic paints and foil and explore interesting ways to use those media to create an unique piece of art. These techniques can be used in future projects and are versatile. Nat will also show you how to turn your layout  easily into a wall hanging that will be a beautiful eye-catcher in your home.

All Workshop materials and media will be at the class. A list of tools and additional supplies that students have to bring will be provided shortly before the workshops.

—————

Die Zahlung wird nach Anmeldung sofort fällig. Die Zahlungsmodalitäten teile ich per Email mit. Mit Eingang der Zahlung auf meinem Konto gilt der Workshop als gebucht. Absagen sind bis zu zwei Wochen vor dem Termin kostenfrei, danach muss ich leider eine Stornogebühr in Höhe von 15 EUR in Abzug bringen.

Ich würde mich freuen Euch zu sehen!

————————————

Today over on the Tattered Angels Educators blog, Dawn Hueser is featuring an awesome project for Tattered Angels  National Scrapbook MONTH celebration! Click on over to her blog and to the Tattered Angels blog to see what she is up to!


Educators blog: http://mytatteredangels.com/educators/

Dawn Hueser’s blog:http://dawnhueser.blogspot.com/

  • Sue Clarke

    |

    Sounds like fun…wish I could come!

    Reply

  • Kim Sonksen

    |

    Wicked!!! If only I was in HH at that time.
    Anyone who is undecided about this workshop – you HAVE to go! Nat’s place is the best. So much space to create and FABULOUS roof terrace too. You would be mad to miss it

    Reply

Leave a comment

Workshops in Israel – My Punch -Photos Part I

What a great time I had in Israel teaching for MyPunch! I had so much fun, learned so much, met amazing people and enjoyed every minute!

Was für eine großartige Zeit ich in Israel mit meinen Workshops für MyPunch hatte! Ich hatte so viel Spaß, habe sehr viel gelernt, habe unglaublich wunderbare Menschen getroffen und habe jede einzelne Minute genossen!

I arrived Thursday after a bit of a hazzle- who could have known that the entire city of Hamburg would be out of taxis due to the Europan Soccer League which took place here. 25000 fans had to get back to Spain and England …it was CRAZY!!! (look at the picture here…that is what I saw from the plane too – and you get what I mean ;) ) Anyway I made it after calling four taxi companies and fighting my way through drunk and sad and happy soccer fans and a delayed flight to Munich.

Alice picked me up at the workshop and I was so happy to see her.

*All Street Signs in 3 Languages*

We drove to Tel Aviv to her place and prepared the rest of the Kits for the classes.Then we went to the Suzanne Dellal Center to set up the Classroom.

View from the class room

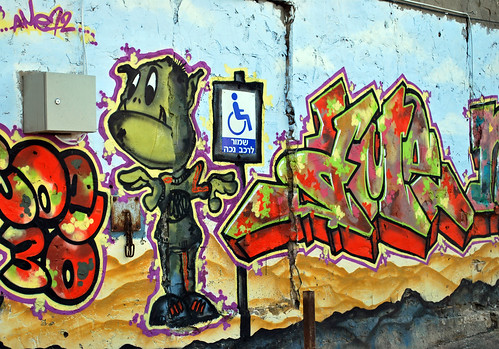
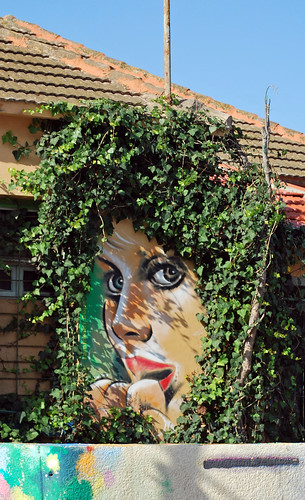
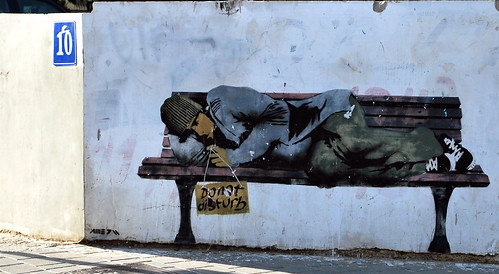
After a delicious dinner sitting outside we went to the hotel where I slept like a stone :) The next morning I walked to the workshop place – as all the streets were close off because of the Tel Aviv Marathon. I loved the walk. Just looking around and finding some interesting things…like Graffiti (you know me- I love graffiti!) :)

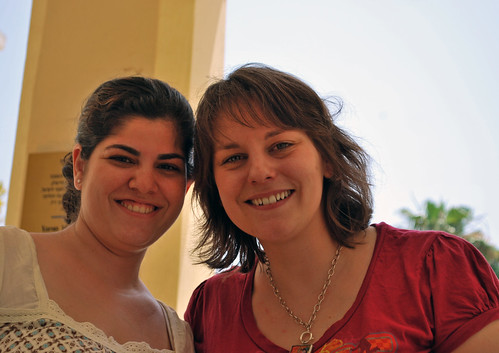
The Workshops were amazing – I was welcomed in such a warm and heartful way. I loved teaching with the groups – everybody was so amazingly creative!!! Thank you all girls for coming and making it so special! and….next time…LOL …when I say BANOT…I really mean….lischkOt – LOL

I managed to not get any paint on my clothes during demonstrating-I’m so proud of me- LOL.

The Youngest :)

But lest not forget THE BRAVEST :)

Thank you all for the great time :)

In the evening I was invited to join the Shabbat Dinner at Alice’s Parents house. I was so honored and touched to be invited. I loved meeting Alice’s family and I wish I would have been able to communicate how much I loved it to her parents in Hebrew.  Alice got me really crying when she gave me a wonderful selfmade minialbum (I will show you later – have to take picture of it) and a gorgeous beautiful necklace with a Hamsa Hand. The Hamsa Hand facing down as in my neclace protects against the evil eye.

More photos from Jerusalem etc. following soon :)

Wishing you a good day!

  • anat - crafty fairy

    |

    Nat,
    thanks for great inspirig classes.
    love your technics.
    hope to see you soon again

    Reply

  • mimms

    |

    Nat, it was so amazing taking part in all your classes. i learned so much especially with the canvas (for me it was stepping out of the box :o)) !)
    hop to see you agin in our small israel

    Reply

  • Elinor - The bravest...

    |

    Nat!! I loved watching you working with the massy paints… loved to be inspired by you and mostly- ebjoyed every single minute learning from you!!!
    You are awsome!!!

    Reply

  • Daniela

    |

    Klasse, wie du rumkommst! Klingt nach ‘ner gelungenen Veranstaltung :-)

    Reply

  • Cat

    |

    It looks beautiful there, can’t wait to see some more pictures!

    Reply

  • Fienchen

    |

    So coole Bilder ! Und es sieht so schön warm aus *neid*. Ich habe hier die Heizung wieder an *heul*.
    Toll, das du eine so gute Zeit hattest. Es sieht nach einer Menge Spaß aus.

    Reply

  • Natasja

    |

    Isn’t it great in Israel?! So fun to see so many familiar faces on your pictures!
    hugs

    Reply

  • sylvia

    |

    I’m soo happy for you! What a fantastic experience!!!

    Reply

  • Kim Sonksen

    |

    Looks like you had an amazing time! Wonderful pictures and I can’t wait to see more

    Reply

  • Einat Kessler

    |

    Hi Nat. It was great meeting you. your workshops were so much fun! Thank you.

    Reply

  • birgit koopsen

    |

    Hi Sweets! I told you it would be great!! So glad you enjoyed it. Fun to see so many familiar faces in your pictures! Happy to know you’re back home safe!!

    Reply

  • Sue Clarke

    |

    What a wonderful experience for you Nat. I especially love the graffiti of the woman with the green “hair”. You see that your art is shared with the whole world! What a gift.

    Reply

  • Debby

    |

    I’ve always loved your take with photos when you visit other places. My daughter had part of her bridal shots in front of graffiti that is pretty awesome. I thought of you when she was having her photos done with the graffiti!

    Reply

  • christiane

    |

    tolle fotos!! und warm war es da!! haste büschen sonne mitgebracht??? ;)

    Reply

  • Tina

    |

    Wow, das sieht toll aus, meine Globetrotterin! :D
    Irgendwann schaffe ich es auch nochmal zu einem WS mit dir! ;)

    Reply

  • AlexM

    |

    how cool is that! You really seem to have a blast there. Fun:)

    Reply

  • Kerstin

    |

    Bei den Einblicken in die schmaddernde Meute kommt bei mir Laune auf. :) Und die Stadtansichten sind klasse wie immer bei Dir!

    Reply

  • Sandra

    |

    Das sieht nach ner Menge Spaß aus :-))

    Reply

  • Sarah

    |

    I’m on your blog! almost a celebrity… LOL :)

    It was great! Thank you!

    Reply

  • katja

    |

    wow! das glaub ich, dass es dir da gefallen hat :-)

    Reply

  • yael yaniv

    |

    it was such fun to meet you…
    and play with paints….

    Reply

  • alice

    |

    it was great having you here!
    all the weekend was one big fun and i miss you already!

    Reply

  • Hagit

    |

    Your pictures are great! It was nice meeting you! :-))

    Reply

  • Vicki Chrisman

    |

    What fun! That is the cutest photo of you Natster! I love all the photos of your classes!

    Reply

Leave a comment

National Scrapbook Month – Tattered Angels – my day

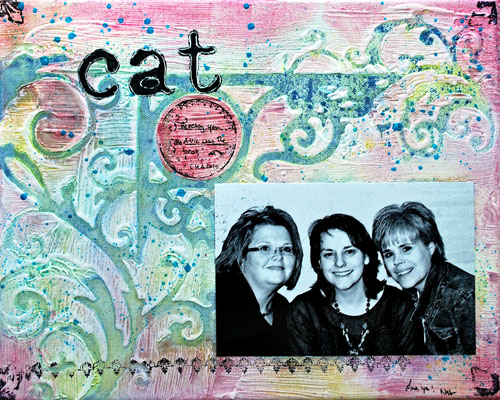
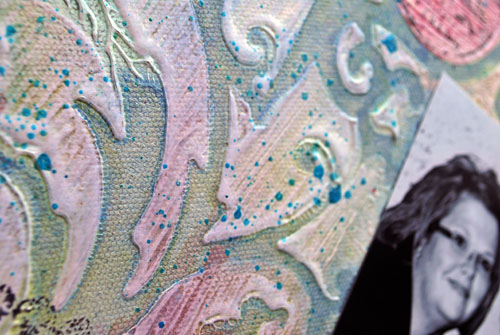
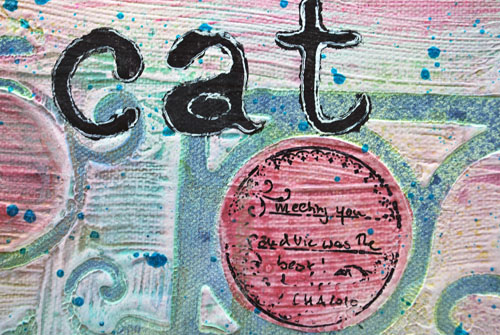
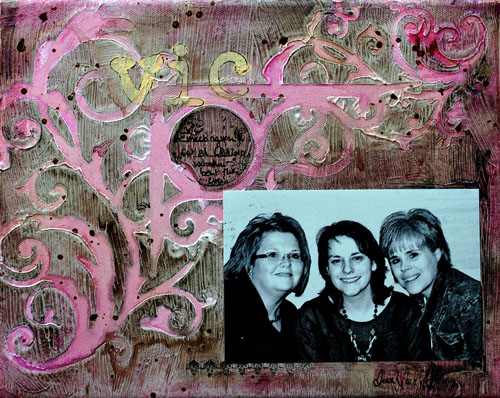
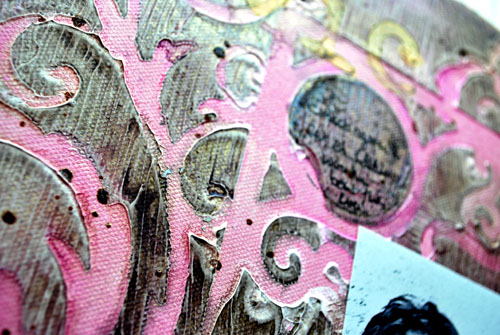
Today I  is my day on the Tattered Angels Educator Blog to share a special tutorial with you and I decided to show you how to make those Gesso Canvases I created for my friends Cat and Vic :)

Heute ist mein Tag Euch auf dem Tattered Angels Educator Blog ein spezielles Tutorial zu zeigen und ich habe beschlossen, Euch zu zeigen, wie man diese Gesso Leinwände, die ich für meine Freunde Cat und Vic gemacht habe, kreieren kann :)

Cat’s Canvas

Vic’s Canvas

Check out the Tattered Angels’ Educator blog to see how to create a Gesso Canvas.

Hüpft mal rüber auf den Tattered Angels’ Educator Blog um zu sehen, wie man so eine Gesso Leinwand kreiert.

  • christiane

    |

    ahhh, gesso!! thank you so much for the reminder!!
    love what you did here!! :D

    Reply

  • Cat

    |

    It looks so much prettier in person, I JUST LOVE it, THANK you Nat! Hope you made it home safe and sound!

    Reply

  • sylvia

    |

    great texture indeed, i should really get my hands messy with gesso again. thanks for your inspiration!!

    Reply

  • Sue Clarke

    |

    Love the texture of those!

    Reply

  • Hélène

    |

    Hallo Nathalie, ich habe mir soeben das Video zum Frühstück angeguckt. Tolle Ideen und geniale Umsetzung!
    LG Hélène/Scrappi

    Reply

Leave a comment