Upcoming Workshops in Munich, Germany- October – München Workshops

So can’t wait to come back to the Scrappies in Munich, Germany on October 19-20, 2012.

Ich freue mich riesig wieder zu Workshops bei den Scrappies in München geben zu können. Vom 19.-20. Oktober gebe ich folgende Workshops:

1. Chalk on The Wild Side – Mixed Media-Scrapbooking Minialbum Workshop – 35 EUR
In diesem Prima Mini-Album Workshop mit Nathalie Kalbach, wirst Du ein individuelles, schönes Minialbum kreieren, dass Scrapbooking mit Mixed Media verbindet. In diesem Workshop werden wir mit flüssigen Prima Kreiden und trocknem PanPastel arbeiten. In spielerischer Weise werden wir die Unterschiede dieser beiden Farbmedien herausarbeiten und eine Vielzahl von Techniken anwenden, die auch für zukünftige Projekte angewendet werden können. Stempeln, Malen, Highlighting und das Kreieren von Hintergründen, werdet
ihr nach diesem Workshop aus dem Ärmel schütteln. Du arbeitest mit unterschiedlichen Untergründen wie Leinwand, Holz, Papier und Verpackungsmaterial. Let’s go and Chalk on the Wild Side in diesem 3 Stunden langen Workshop!

2. Portrait of a Lady – Mixed Media Keilrahmen Workshop – 35 EUR
Portraitzeichnen? Überall sieht man zur Zeit gemalte Gesichter auf Mixed Media Projekten, Papieren und Schablonen. Was aber wenn man nicht so gut zeichnen kann? Macht mit bei Nathalie Kalbachs witzigen DIN A4-Keilrahmen Workshop und lerne, wie man in kürzester Zeit ein Portrait zeichnen kann. Du gestaltest ein Dekostück in Deinen Lieblingsfarben entweder für Dich oder als ein Geschenk.
In diesem Workshop zeigt Nat viele Mixed Media Techniken mit Gesso: Wie man einen Hintergrund, Textur, Stempelabdrücke, unter zur Hilfenahme von Farbmedien etc. verwendet. Lerne wie man tolle Künstlerfarbmedien in verschiedenen Ebenen aufträgt und Elemente zusammenfügt. Entdecke wie man Scrapbooking Embellishments verändert und damit dem eigenen individuellen Stil und dem eigenen Projekt anpasst. Verwende schöne Prima Papiere und Embellishments um dem Portrait je nach Gusto ladylike zu gestalten. Und das Beste? Alle die Techniken, die in diesem Workshop angewendet werden, sind wunderbar auch für andere Mixed Media und Scrapbooking-Projekte verwendbar. Komm und mach mit bei diesem 3,5 Stunden langen Workshop.
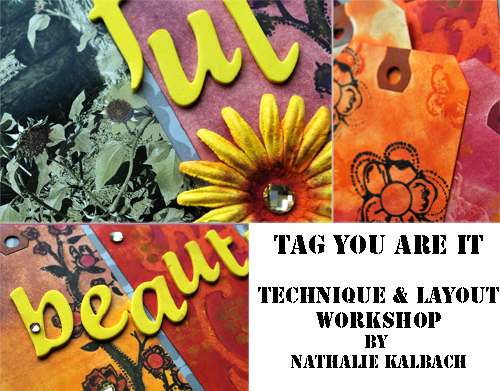
3. Tag You Are It – Technik und Layout Workshop – 35 EUR
Experimentier mit Nathalie Kalbach in diesem witzigem Technik- und Layout Workshop, um die vielen Möglichkeiten der farbenfrohen PanPastel zu entdecken.
In der 1. Hälfte des Workshops werden verschiedene Tags in Deinen Lieblingsfarben mit allerlei Techniken gestalten. Du wirst sehen wie vielseitig PanPastels für Hintergründe, Farblagen, Stenciling und mehr einsetzbar sind.
In der 2. Hälfte des Workshops werdet ihr dann noch ein Photo manipulieren und Nat zeigt euch, wie man PanPastel auch mit Scrapbooking Materialien z.B. der Firma Prima und Pink Paislee verwenden kann.
Dann werden die Lieblingstags aus der 1. Hälfte des Workshops in ein schönes, individuelles Layout eingebunden.
Nach diesem Workshop wirst Du ein weiteres tolles Farbmedium in Deine zukünftigen Scrapbooking und Mixed Media Projekte einbinden können. Kommt und macht mit in diesem 3,5 Stunden langem Workshop.

Mehr Informationen hier

Wer sich gleich anmelden möchte, kann dies natürlich gleich tun.

Hier könnt ihr euch gleich anmelden

Have an amazing and wonderful day

Comments (1)

  • mjmarmo

    |

    Looks like wonderful classes!

    Reply

Leave a comment

(Re)touching Lives Through Photos

The following video by Becci Manson made me tear up. Photos are dear to my heart. I just had this conversation with my grand-aunt Waltraud who couldn’t understand why I would redo a new photo album for my grand-aunt Margot, who just recently had to move to an elderly home. “She doesn’t care about those old photos”. I said “Yes she does, she actually asked for them!” Looking at those old photos was a big part of my visits with my aunt Margot – it is one of my fondest childhood memories. I can totally understand that for aunt Margot after being taken away from her home, those photos will give her a feeling of home and consolation.

But listen and see yourself how Becci talks about how she, together with local volunteers and a global group of colleagues recruited online, helped to restore memories after the Tsunami in Japan.

[ted id=1532]

I am touched by the willingness of Becci Manson and other volunteers to help with their skills- it amazes me and makes me remember that help, consolation and hope can have many faces! Thank you Becci Manson and the volunteers for this reminder!

“[Photos are] our memory-keepers and our histories, the last thing we would grab [in a crisis], and the first thing you’d go back to look for.” (Becci Manson)

Nat

Comments (4)

  • Sue Clarke

    |

    I always say that after my son, hubby and dog…I would grab my scrapbooks (if my house were on fire). Maybe I should just grab the computer though…it’s lighter and has most of the photos on it.

    Reply

  • Martha Richardson

    |

    OH I so agree Nat!My grandfather on my Dad’s side was a professional photographer and every once in awhile we are able to locate one of the postcards created from his work. I love that you are redoing your Aunt’s album ;)

    Reply

  • mjmarmo

    |

    What a wonderful thing! Those old photos are treasures to be cherished.

    Reply

  • Pearl Maple

    |

    Nat thank you for sharing
    Such a beautiful message of how we can use our skills to make good
    And how important our photos are, today folks take 100s of pics in a day, for those of us who have lost everything in a war or disaster, every image is precious

    Reply

Leave a comment

Second Floor Challenge #9: Embossing Powder

Are you ready to take the second floor this time? If you have no clue what I am talking about- read all about it here :) The Second Floor Challenge

So today is our 8th Second Floor Challenge: Embossing Powder

Click here to see what Julie did

Whatever that means to you or however it inspires you.  The prompt is simply meant to get you started.  The level of challenge you aim for is entirely internal and up to you

Embossing Powder- cool – I love Embossing Powder. I use it in many different ways and I love to try out all kinds of different media as embossing agents. If you have ever been at one of my life workshops you know that ;) You have used all kinds of stuff for it…Acrylic Paints was one of them. So started like this on a small tiny canvas

I spread black gesso over since I know I wanted different colored embossing powders on top of it and I hoped the black gesso would make the colors pop more.

It was like cooking …BAM! some more spicy embossing powder right into the kisser wet gesso.

Next was heating, and I had a suspicion already that this mixture would be a bit dangerous in case of the fumes…and boy was I right…yikes. I bet this is highly unhealthy and recommend almost a mask and a well ventilated area. But still I was pleased with the result.

Time to take it to the second floor – I sprayed it with water based spray paints

and BAM! sprinkled some golden embossing powder over it here and there – off heating again

Loved the results….and then used it right away for a present for a special girl

here is a close up of the Gesso-Embossing

What I learned from this challenge:

  1. I love the texture and patina aged look the embossing powder with the black gesso created. Actually to tell you the truth it makes me giddy :)
  2. this is NOT healthy! not something I would teach in a workshop. Black Gesso by Golden already has on their lable that it contains chemicals that are known to cause cancer…and embossing powder is essentially plastic, so melting it together like crazy is obviously a crazy nut case’s idea! I will wear a mask next if I do it again!
  3. I love that through the combination of those two media the heat resulted extra dimension stayed once it was dried. Pretty pretty cool.
  4. If you reheat colored gesso again and put the heat too long on it, it can loose its color at parts and gets white spots. Which in this case was cool! But something to keep in mind.
  5. I liked working on a smaller surface for this technique – first it was out of economic reasons as to not waste a huge amount of embossing powder if that technique would not work, but then it also was fun to incorporate this in a bigger project using different techniques then again.

If you’d like to leave a link showing off what you did in response to this challenge, here’s the linky list:


hugs

Nat

Comments (24)

  • scrappegal

    |

    AWESOME!!!!! :)

    Reply

  • msmathey

    |

    WOW – you are amazing – this project is awesome!

    Reply

  • marjiekemper

    |

    Thanks for experimenting and sharing… I think I’ll pass on heating up my cancer agent, lmao…. but I do appreciate seeing your beautiful results!

    Reply

    • nathalie-kalbach

      |

      hi jessica, love your post. i already visited. sorry for the linkz mistake, we changed it to the right date.

      Reply

  • Carrie

    |

    WOW! That really looks fabulous. What a shame that it’s so toxic… Well, we could just be like Michelle Ward and not worry about it. She uses all kinds of toxic stuff! Is that black gesso super thick? It looks really dimensional, which just makes the project even cooler :)

    Reply

    • nathalie-kalbach

      |

      HI Carrie, yes the black Gesso is really thick….it is like melted marshmellows- LOL .Have a wonderful day ! Nat

      Reply

  • Riikka

    |

    Oh my gosh how gorgeous is that! <3

    Reply

  • osmancm@comcast.net

    |

    I would not of thought to use black gesso. thanks for sharing your process….I really liked the results.

    Reply

  • Geles

    |

    Oh Nath, I like this work, and Cuchy is a special woman!!. Thank you for the explain it….. I don’t know if I write well. Kisses

    Reply

  • ruby t

    |

    I love these experiments and the spirit with which you and Julie do them.
    Perhaps put black gesso down, let dry and put on the clear embossing ink so the fumes will not get too bad.
    Can you also tell us about the background of the finished piece-the blue lettering and the misting technique? I know that was not part of the project but curious about the stamping of the lettering look.
    thanks

    Reply

  • Kathy Gledsdale

    |

    Really lovely!

    Reply

  • lizmaynz

    |

    I’m sorry but I just read the part where Nat tells us Black Gesso by Golden already has on their label that it contains chemicals that are known to cause cancer!
    I mean should we be worried especially those of us that use our fingers to paint with? I already get cancer in the bladder every so often and have to get that taken out each time with out endangering myself with using a product that could essentially put me at risk again. Sorry but my health is under so much stress as it is with out this added worry.

    Reply

  • Mag&scrap

    |

    Wonderful Work with these embossing powder !

    Reply

  • Cuchy

    |

    ohhhh it’s me, it’s me!!!! and you even took a risk with the fumes!! ;)
    Thank you sweetie. You made my day! Can’t wait to touch it.
    Loves

    Reply

  • SusanJane

    |

    Because of the dust and fumes I have always worked in small areas only. I guess you could tackle larger pieces by standing back and doing the same with breaks between each section. With good lighting you can tell if the powder has hardened and not have your face in it.

    Reply

  • peg

    |

    wow, that looks so cool, gonna have to give it a go.
    Thanks for the inspo :-*

    Reply

  • Sue Clarke

    |

    Please don’t inhale too many fumes while creating Nat.
    Good to see that Julie posted the same day as you did;-O
    I love the texture that you got.

    Reply

  • Mary M.

    |

    Love this technique Nat! Gotta get some black gesso and try this!

    Reply

  • Maggie M

    |

    AWESOME Nat! I’m going to definitely give this a try:)

    Reply

  • Andrene

    |

    Gorgeous!! The colors definitely pop with the black gesso and the background is divine too!!

    Reply

  • mjmarmo

    |

    How cool is that. I do not have any black gesso. I do have some embossing powders though…….MIght have to try something like this!

    Reply

  • Alicia

    |

    Muy bonito Nat!!!!!!!!!!!!!!!
    Besos

    Reply

Leave a comment

Announcing a NEW Über*Media Online Workshop

There is a new Über*Media Online Workshop coming in October and let’s see if you can guess what it is about. And to make it even more fun…if you guess it right, you might even win a spot in this new class.

So let’s see…so far we had…

Check it out here

Check it out here

Check it out here

Check it out here

mhhhh- Ok…so WHAT could be the topic of the new Über*Media Online Workshop?

So let me give you a hint on the topic with this video…. :)

[vimeo 49465967 w=400 h=300]

Did you get it? I am sure you did…

You can win a spot in this workshop by leaving a comment here on this blog post and letting me know what you think it is going to be about. Comments must be posted to this blog post until Sunday 23rd, 2012 – noon CET. I will draw one winner in the following week and also reveal the new workshop topic and sign up :)

Have a gorgeous colorful day

Nat

Comments (46)

  • Anastasia Dupont

    |

    I think the class is about watercolors….looks like fun!

    Reply

  • Cindy from Holland

    |

    Lovely video, it is too short. I think the next class will be about primary colours.

    Reply

  • Jenny Palmer

    |

    Nat
    I said ink earlier what about neocolor 2 watercolor crayons?

    Reply

  • Lisa Flaherty

    |

    Hmm. I am thrown because the colors were not mixing with each other as each was added…the magenta looked very watery, but the green seemed more viscous. Is the class about medium mixatives? Like gel medium, pouring medium, etc? As a chemistry nerd, I have to say it looks like fun!

    Reply

    • Michele Parish

      |

      i HOPE i AM NOT TOO LATE FOR THIS AWSOME GIVE AWAY. YOUR WEBSITE HELPS ME SO MUCH IN THE PROCESS OF MIXED MEDIA ART. I HAVE SOOOO MUCH TO LEARN. THANK YOU FOR THE OPPORTUNITY FOR SHOWING ME THE STEPS ON HOW TO CREATE.

      Reply

  • Ange

    |

    Hello Nat just recently found your blog and love it! I would guess: Uber media: Inktense Blocks!!!!! Thanks for the great posts and I am definitely taking some of your online classes in the very near future! Cheers!

    Reply

  • Angelika Westermann

    |

    This video is just great! My first guess was watercolor, however the colors were too intense, so inks is my more or less educated guess! I am still following the class for acrylic paints, however, naturally I would be delighted to win access to this new class as well. Thank you very much for offering this to us.
    Angelika

    Reply

  • tesa

    |

    ummm watercolors?. The video is plenty of colours. I love your über media class.

    Reply

  • Karishma

    |

    Hmmm
    Seeing acrylic paint in water…..
    Foam stamp from above
    So guessing that is what the class is about
    Would love to win a spot!
    Thanks …

    Reply

  • TeedeJee

    |

    Wait, wait, something with foam stamps too I think….. X

    Reply

  • TeedeJee

    |

    Hmmm…. difficult… My guess is something with colors. Well that was an easy one lol. And fabric!!!!! With gesso of course…… XXX

    Reply

  • Maria Schmidt

    |

    Wow! Ein geniales Video! So schön wie die Farben ineinander verlaufen! DAs können ja fast nur Spray Farben sein, oder? Also von Dylusions oder die Acrylspray Farben…. :-) Bin auf jeden Fall sehr gespannt!
    xo maria

    Reply

  • Olive

    |

    WOW! Loved the amazing video, the music sounded like the song Blue Heaven. My guess is the workshop is about acrylic inks or stamp pad reinkers. Thank you for the chance to win.

    Reply

  • Marisa

    |

    My guess would be ink…either acrylic ink or just ink in general.

    Reply

  • Sylvie

    |

    It has to be something to do with inks. Spray or bottled would be my guess. Love the video. I loved your acrylic class so bring it on.

    Reply

  • canadianrn

    |

    Über Sprays and Mists…maybe even ÜBER Dylusions??!!

    Reply

  • Jessica

    |

    I’m going to go with inks too… all I can say is that I wanted to jump into your video and swim with all those colors — they looked like beautiful undersea water scarves. Yum.

    Reply

  • Maria

    |

    I think it’s about liquid acrylic ink like liquitex or dr ph martins indian ink…I’m not sure but I’m sure that I need to know it!!!! ;) Kisses

    Reply

  • Sorken

    |

    I’m not sure what it’s called in english, but I thought about ‘marblelizing’ paper when I saw the video. But then it looked more like watersoluble colours… Hmm, hard to guess. :-)

    Reply

Leave a comment

The Whatevers #4 or Deep Down His Heart

Are you ready for the 3rd Whatevers? If you missed the what the Whatevers is all about…check it out here.

Click here to see what Cat made out of this photo and which story she tells

Click here to see what Vicki made out of this photo and which story she tells

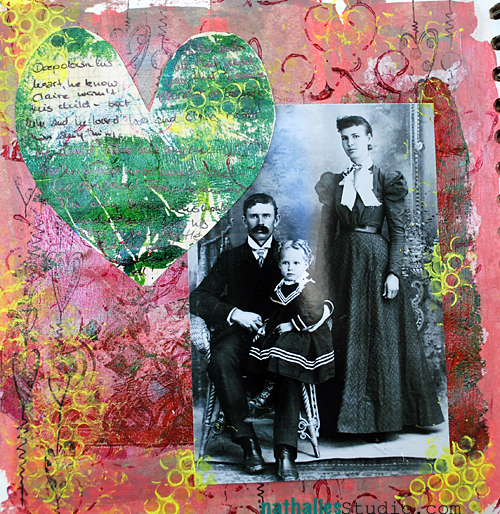
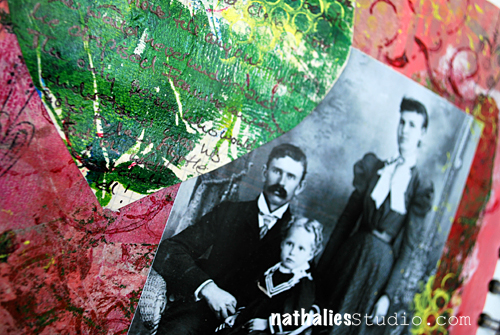
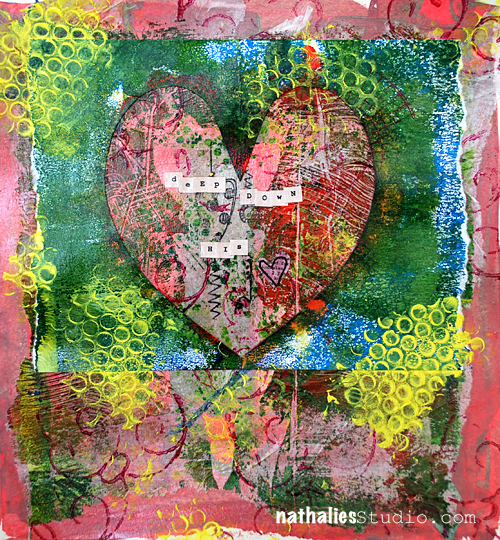
Here is my take on it

Deep Down His Heart

Deep down his heart, he knew Claire wasn’t his child – but in the end all that counted was that Francine decided to be with him. He never told her he knew and he loved her and Claire more than anything. He would never tell anyone. His brother would never understand, he already despised Francine. The only person who would understand was his sister in law Myrtle. But oh well…just don’t tell!

Hi Name: Marco –  Myrtle‘s brother in law and Maria and Mathias‘ uncle

I played a lot of mono printing this time – it was fun – I added the prints on tissue paper to my background. It is a bit wild and deep, layered…deep down ;)

I gave myself permission to do whatever with my whatever art journal- so there is a lot experimenting- and it is fun – even though I know that people will see it in the end ;)

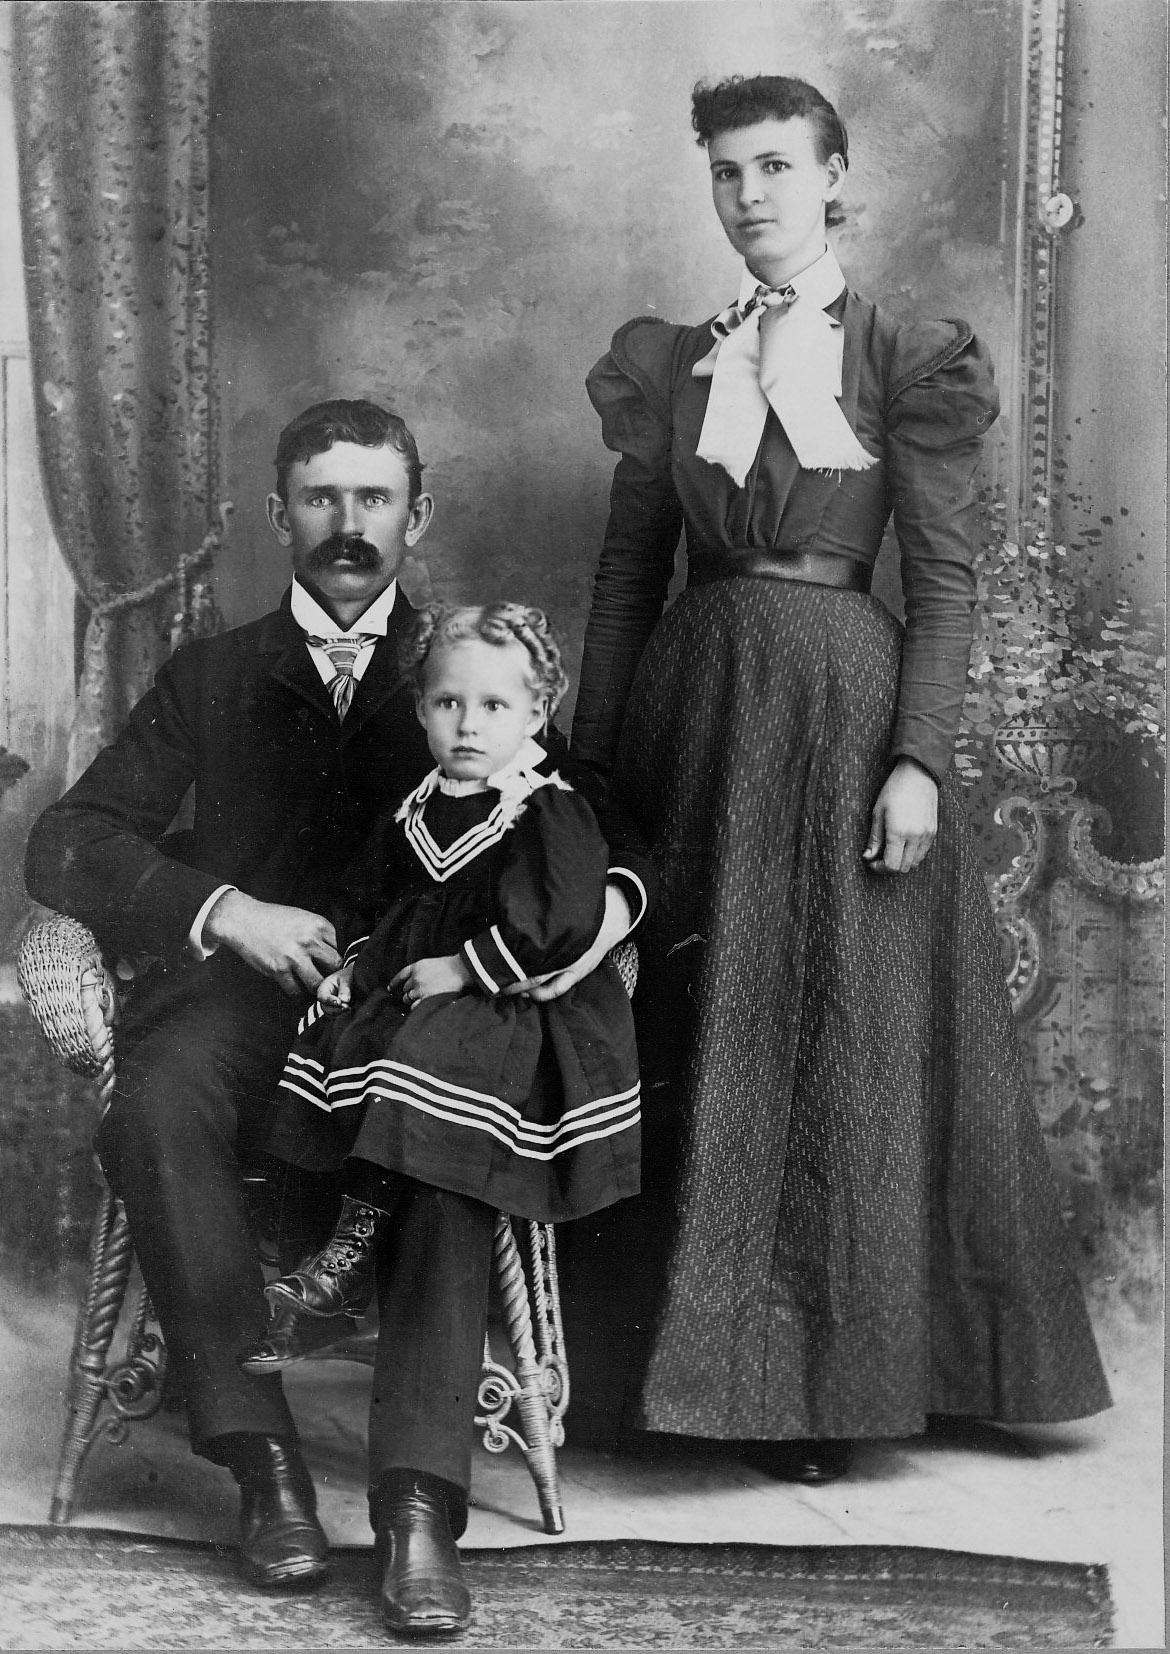
And here is the photo for you:

Here is how it works if you want to play along:

  • Vicki, Cat and I have made a one-year commitment to each other and picked twelve photos with Whatevers whom we will give a story.
  • Every month – if possible always on the 15th –  each of us will do a post with an individual story that goes along for us with the same photo.
  • If you want you can play along and we will have the photo for you – just right click on it to safe it to download and show us your version of The Whatevers.
  • There is no rules to the story itself- it can be funny, sad, uplifting, breathtaking- WHATEVER
  • There is no rules on the length or the form of the story– it can be a short sentence, an essay, a poem or a soap opera – WHATEVER
  • There is no rules on the artform you choose – it can be a scrapbook layout, an altered art project, an artjournal page – WHATEVER
  • Here is a rule though: if you take the photo you have to link back to us andshow us your story.
  • These pictures are from our personal stash and are for personal use for you only! If you want to use them for a publication whether a book or magazine in print or digital form please ask for permission!
  • If you want to participate we’ll have a linky list for each Whatever Post.
  • You can also join our The Whatevers -Facebook Page

You can grab the blinkie here if you want to add it to your sidebar

You can share your work with us by submitting here:

Nat

Comments (12)

Leave a comment

My Favorite Mixed Media Essentials: 3. Markers & Pens

I wouldn’t necessarily say that Pens and Markers come at third place- but I would say that this is what I get the most questions about “What kind of marker/pen do you use on your projects with x? And so I will talk about my favorite ones now :)

If you missed the other posts in this series – you can catch up here 

I would say these are my top seven- always go to pens and markers.

What I always keep in mind when I use pens and markers is:

  • There is a right pen or marker for every surface
  • Make sure your paint media- all media on your surface is completely dry before you start writing on it…otherwise you ruin your pen.
  • Avoid the “fat” areas – meaning those areas – that you treated with oily and waxy paint media when you use felt markers or acrylic markers in general.
  • Be careful when you use an oil based marker or pen over water-soluble surfaces. Oftentimes the medium underneath reacts and the oil based marker bleeds into it. If that is what you want…you are good to go ;)

Which pens and markers I use:

This pen is awesome – that is why I have it…well…kidding aside – LOL. This permanent marker can be used on all kinds of surfaces including glass and acrylic and CD’s. I write with it on paper, as long as it is smooth paper, otherwise it tends to bleed. I use it because I love how it writes. When I write something on a transparency– I use it- it is the best on transparencies. I use it on smooth acrylic surfaces – it works like a charm. Not so good to use on textured surfaces- you ruin your pen…and believe me…hehehehe- I tried ;)  It comes with different tip sizes and it has an eraser in the back for the slick surfaces.

This is an ink pencil and when you write with it or make marks, they are pretty prominent as the pencil itself is highly pigmented and firm. You can also use water on it and then wash the pigments out. Once it is dried…it is permanent! YES…you heard right. As I lack the impressive Julie-Fei-Fan-Balzer-handpainted-brush-title-ing – I use this pencil to highly fake this ;) I write with the pencil in a what I think artsyfartsy way my title and then use water and a small brush and just go over it so it looks more like a brush painted title. Of course…as the description has given it away already, you should not use wet media on top of it without intention…you will activate and smear your writing otherwise.

A classic white gel pen. I love how fluidly the ink comes out. It is for me the best white pen I have tried. It covers black perfectly – which means it covers all colors and it is amazing with most surfaces – unless it is the super scratchy one. Gets ruined very quick if you use it on “fat” surfaces or not “dry” surfaces. I used to be able to find refills at my local office supply store which was actually making this a bargain and made me happy for eco-friendly reasons. I need to check out where I can find them now.

This is a soft  water soluble graphite stick and I love this for sketching or mostly making marks into painted dried and wet surfaces. Well- if the surface is wet you make texture and need to clean the tip of the stick right away with a dry towel. It is paper wrapped and you can take the wrapper off as you use it.

These are my secret weapons…LOL. You could say…the Dumbledores under the Markers ;) . The Posca water based paint marker has in the size of 0.9-1.3 mm a bullet shape tip and I tend to love this as I find myself writing easily with this. I love how the paint comes flowing out and I can use it – as well as the Molotow marker on tricky surfaces…well set aside super waxy or oily surfaces of course. On acrylic paint it looks shiny – I love it! I am not a fan though of the white Posca Marker – it doesn’t cover the way I would like it.

The Molotow Marker is a bit pricier, but it can be also refilled and I would say it can be used on even trickier surfaces than the Posca Marker…you can write on the most uneven stoney surfaces with it, without ruining the tip right away and you can use it for outdoor projects too. Ahem..if you think of Molotow Graffiti Spray Paints you might get why this marker is so good with struggling surfaces ;) . The white Molotow Marker is better than the white Posca Marker.

Both markers are awesome as you can use them also on fabric and wood and they do not bleed. The colors are intense and highly pigmented, they don’t fade too quick….I love love love them. I have markers of both companies for YEARS and they are still good to go and not dried out.  If you ever want to make me happy with a present… DEAR FAMILY ….just give me a package of one of those :)

This marker is fun- I don’t have it that long but it makes me smile and I love to use it on large-scale projects to write my own title or for bigger marks. It has this very wide angled tip which makes it easy to use it for calligraphy like writing in a graffiti style ;) And hey…who can resist a marker that says: “waterproof on almost every material. recap after use and be on the run!” and is manufactured by a company called ON THE RUN.

nSupplies

I hope you liked this post- let me know what you think. Next up is ….mmh surprise ;)

huge hugs

Nat

Comments (9)

Leave a comment

Dear Oma …or Guest design for Once Upon a Sketch

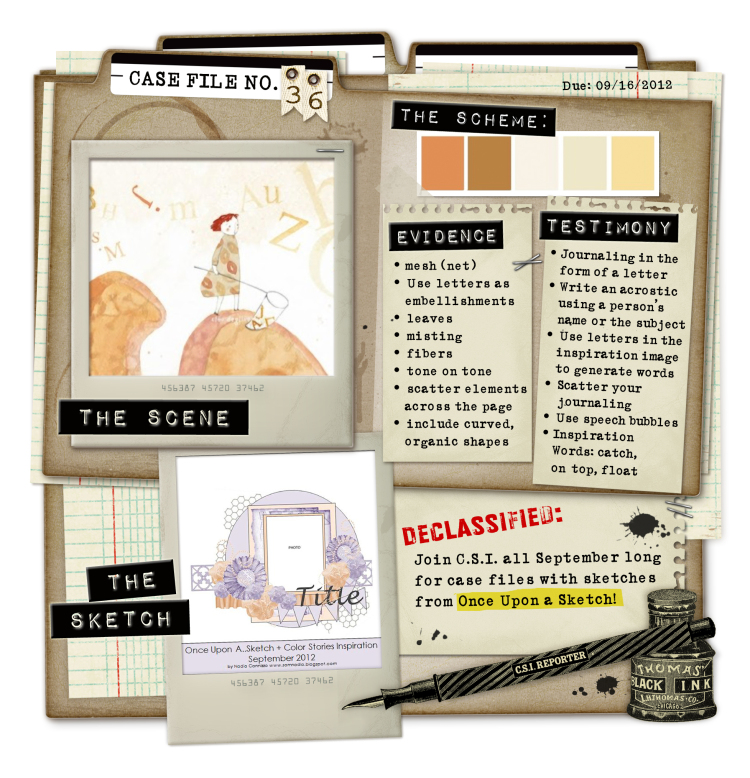
I had lot’s of fun participating as a guest designer for this months’s challenge at Once Upon A Sketch. And I tell you it was a real Challenge- LOL. Once Upon a Sketch teamed up with CSI: Colors, Stories, Inspiration this month, so not only did I have to incorporate the sketch, but also certain colors and prompts. FUN :)

For this challenge, you must use :
*the SKETCH provided – CHECK
* all the colours in the SCHEME – CHECK
* at least 2 elements from the EVIDENCE  – CHECK – I used mesh, leaves, tone on tone, scattered elements and used curved organic shapes.
* at least 1 element from the TESTIMONY! – CHECK – I journaled in form of a letter

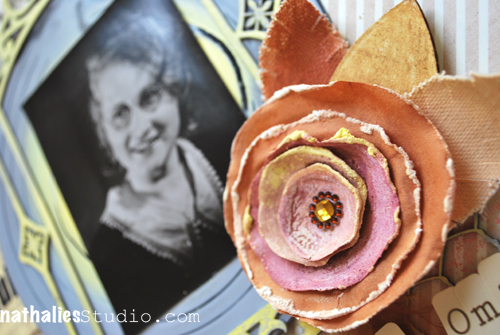
Supplies: Heidi Swapp Vintage Chic Textbook, Vinyl Single, Scrapware Frame, Dusty Attic Chicken Wire Panel, Prima Flower, Prima Say It in Chrystals, Basically Bare Chipboard and Canvas Leaves, Prima Alpha Stickers, 7Gypsies Tag, ICEResin Transparent Ribbon, Liquitex Spray Paints, Derwent Artbars, Scrapbook Adhesives by 3L 3D Foam Pads and Crafty Power Tape

Check out Once Upon a Sketch and CSI: Colors, Stories, Inspiration – they are both wonderful challenge sides that give a prompt and a way to step out of your box. These challenge blogs also offer you an awesome way to play along when you are stuck and having a problem getting Mojo to pay a visit. Plus seeing what all the design team members did with the Challenge also is pure eye candy :)

Have a rocking day!

Nat


Comments (4)

Leave a comment

Mixed Media Workshops in Rome, Italy in September

I so can’t wait to finally go back to Rome and teach there at the end of the month on September 29-30, 2012 at Timbroscrapmania.

These are the workshops:

Portrait of a Lady” Sabato 29 September 2012 at 9,30 – 

Always wanted to learn how to draw a portrait? Join Nathalie Kalbach in this fun DIN A4/Lettersized Canvas Workshop and learn how to draw a portrait in a short period of time. You create a Portrait in your favorite colors and make it a one of a kind home decor item either for yourself or as a beautiful gift.

Furthermore you will learn heaps of Mixed Media techniques with gesso like: how to create a background, add texture, stamp, paint and use it for altering.

Learn how to use fun fine art paint media, how to layer and tie elements together and explore how to change up embellishments and make them fit your unique piece of art. Use some beautiful Prima Papers and Embellishments to give the portrait a lady-like touch. And the best? All the techniques can be used easily in future Mixed Media and in Scrapbooking Projects. Come and join Nathalie and Barbara in this 3,5 long workshop.

*embellishments etc. might change for the actual workshop

Duration 3,5 hours – Price 60 euro including the kit

*********

Tag You are It” Sabato 29 Settembre 2012 ore 14,30

Join Nathalie Kalbach in this fun Technique and Layout Workshop to explore the possibillities of the colorful Paint MediaPanPastel.

In the first half of the workshop you will create different tags in your favorite colors, using all kinds of techniques how to use this versatile product: How to create backgrounds, layer colors, use stencils, different stamping techniques and more.

In the second half you will take it up a notch by manipulating your photo and how to use the PanPastels also on other Scrapbooking Products using Prima Marketing and Pink Paislee.
You will pick your favorite tags and create a beautiful, one of a kind Layout.

After this workshop you will be able to add another amazing color medium to your future Scrapbooking and Mixed Media Projects. Come and „tag along“ in this 3,5 hour long workshop.

*embellishments etc. might change for the actual workshop

Duration 3,5 hours – Price 60 euro including the kit

*********

Chalk on the Wild Side” Domenica 30 Settembre 2012 ore 9,30

In this Prima Mini Album Workshop with Nathalie Kalbach you will learn how to create a unique, wonderful Mixed Media Scrapbook Album. It intertwines both craft and art forms with beautiful and versatile Prima Products. You will use Prima Fluid Chalks and dry PanPastels. You will learn in a playful way the differences of those paint media, as well as a variety of techniques that can be easily applied to future projects. Stamping, painting, highlighting, and creating backgrounds will be no mystery to you after this workshop. You will work with a mixture of materials such as canvas surfaces, wood, and paper and packaging material. Come and join the 3-hour long fun with Nat and chalk on the wild side.

Duration 3 hours – Price 60 euro including the kit

~~~~~~~~~~

The Raw Me” Domenica 30 Settembre 2012 ore 14,30

There is something special about this rough, not flawless but still beautiful denim fabric. This makes it an amazing material for this mini album „The Raw Me“. Just like denim we are sometimes rough, not flawless but still beautiful – it is time to acknowledge that in a special book. In this Tattered Angels – Pink Paislee Workshop you will learn how to create a stunning cover with handmade embellishments and lots of techniques to make it truly unique. You will learn different Spraypaint techniques to work on your Pink Paislee Mistables inside and you can easily use those techniques in future projects at home. Come and join Nathalie Kalbach and create a meaningful, wonderful book about the everyday raw YOU.

Duration 3,5 hours – Price 60 euro including the kit

~~~~~~~~~~

The Workshops will start in via Crivellucci n. 3 Underground Stop linea A stop Colli Albani.

To subscribe please email Barbara: info@timbroscrapmania.com

object of the email “Workshop Nathalie Kalbach”

Please you have to pay in advance the 50% of the total amount. The rest you have to pay until 10 september 2012.

If you take part at all 4 Workshops you have to pay 220,00 euro instead 240,00

There are still a couple spaces free – so I hope if you live in and around Rome you will come and join us- I would love to see you!

Have a gorgeous day!

huge hugs

Nat


Comments (3)

Leave a comment